1
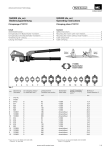
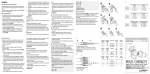
® Multi-Contact E-Mail: [email protected] ᅝ㺙䇈ᯢ0$ य़㒓䪇V1311C Ўњᙼⱘᅝܼˈ䇋࣓ᏺ⬉᪡ˈ㽚 Ⲫᑊ䄺ᚩᙼᎹഄ⚍䰘䖥ⱘᏺ⬉䚼 ӊDŽ Operating instructions MA069 Mode d’emploi MA069 Crimping pliers V1311C Pince à sertir V1311C Protect yourself from live parts. Do not work on live parts. Cover and guard live parts near your workplace. Protégez-vous contre les parties actives. N’effectuez pas de travaux sur des éléments sous tension. Couvrez et protégez les éléments sous tension se trouvant à proximité de votre poste de travail. Submit the tool to visual inspection and make sure pump, presshead,forks and insert holder are clean and free from defects. Prior to start of pumping, carefully check proper location of the insert holder and inserts in the fork. ᇚᎹᬒৃ㾕ⱘഄᮍˈ⹂䅸⋉ˈ य़༈ǃঝҹঞᦦܹ⠽ᰃᑆˈⱘޔ ᮴ᬙ䱰DŽܜਃࡼ⋉ˈᇣᖗẔᶹᦦܹ ఼ᑻⱘഄᮍˈᑊᦦܹঝᄤDŽ Pumping must only be performed with the inserts in place . া᳝ᦦ఼ܹࠄԡⱘᚙމϟᠡ㛑Փ ⫼⋉DŽ ⊼ᛣˈय़䖛᳝ᕜ催ⱘय़˄ˍ ˏˌ˧˪˅ᕜ催ⱘ⊍य़˄˓ˏˌ ˾˽̎˅ˈ䕙ࡽҎਬᖙ乏キय़㒓 Ꮉᮕ䖍㗠ϡ㛑キᎹࠡ䴶DŽ ˄䇋ⳟϟᮍ⼎˅ STÄUBLI GROUP Internet: www.multi-contact.com Caution! Remember there is a very high pressing force (130 kN) and also a high oil pressure (730 bar) during the crimping procedure. The assisting person must be positioned beside and not in front of the crimping tool. (see illustration below). Contrôlez visuellement si la pompe, la tête de la pince, les matrices et le portematrice sont propres. Avant de sertir, contrôlez si les matrices sont correctement montées. La pince ne doit pas être utilisée sans matrices. Attention, pendant le processus de sertissage une force de compression élevée (130 kN) et une pression d'huile élevée (730 bar) existent. L’assistant doit se positionner latéralement à la pince à sertir. (Voir illustration ci-dessous). ℷ⹂ Correct ! Correct ! 䫭䇃 Wrong ! Faux ! ᦦ఼ܹᑻ V1330 Insert holder Porte-matrice 2 1 3 4 5 6 7 8 9 10 11 12 13 15 14 16 Tab. 1 ᦣ䗄 Pos. Description Désignation ⬉㓚㉏ൟ 1) For cable type, class 1) Pour type de câble, classe 1) ᇐԧ䴶⿃ Conductor cross section Section du conducteur ᦦ఼ܹᑻ Insert holder Porte-matrice mm2 1) 2) य़⚍᭄䞣 2) ࠊⳈᕘ; Number of crimping points 2) Nombre d´emplacement de sertissages 2) Control dimension X Cote de contrôle X mm 1 2 3 4 5 6 7 8 9 10 V1311C V1330 B14,5 B17 B20 B22 B25 13CB27 13CB30 13CB32 6 6 6 6 6 6 6 6 50 70 95 120 150 185 240 300 V1330 V1330 V1330 V1330 V1330 ohne / ᮴ / sans ohne / ᮴ / sans ohne / ᮴ / sans 1 1 1 1 1 2 2 2 11,4 13,4 16,4 16,3 20,3 20,5 23,3 24,5 11 12 13 14 6 15 16 9 10 B14 B16 B18 B19 B22 13CB24 13CB26 13CB30 13CB32 5 5 5 5 5 5 5 5 5 50 70 95 120 150 185 240 300 400 V1330 V1330 V1330 V1330 V1330 ohne / ᮴ without / sans ohne / ᮴ / sans ohne / ᮴ without / sans ohne / ᮴ / sans 1 1 1 1 1 2 2 2 2 11,6 13,2 14,0 15,4 16,3 17,7 19,5 23,3 24,5 ḍIEC60228,DIN VDE 0295ᷛޚ 䇋㾕4义ˈill.14 1) According to standards IEC 60228, DIN VDE 0295 2) See ill.14, page 4/4 1) Selon normes CEI 60228, DIN VDE 0295 2) Voir ill.14. page 4/4 1/4 ® Multi-Contact 䆹य़㒓Ꮉᰃࡼ⎆य़ⱘˈৃ ᳓ᤶᦦ䩜ⱘ 䪰⬉㓚㒓⠛䖲఼ ㅵ⢊䪰⬉㓚䖲఼ 䖲఼ⱘय़㒓༫ The crimping tool is a hydraulic hand press with interchangeable crimp inserts for crimping · Copper cable lugs and connectors · Tubular copper cable and connectors · Crimp sleeves of connectors ḍ1义㸼Ḑ1ˈ䗝ᢽϔ Ͼড়䗖ⱘᦦ఼ܹDŽ ᅝᬒᦦ఼ܹࠄᦦܹ ఼ᑻ (ill.1) ᇚᦦ䩜य़ܹᦦ఼ܹᑻDŽ . La pince à sertir hydraulique est un outil avec des matrices interchangeables pour le sertissage de: cosses et raccords en cuivre cosses et raccords tubulaires en cuivre fûts à sertir en cuivre de connecteurs Select the appropriate insert according to Tab. 1, page 1/4. Choisir les matrices appropriées selon Tab 1, page 1/4. Mounting the inserts with insert holders (ill.1) Press in pin on insert holder. Montage des matrices avec porte-matrices (ill.1) Enfoncer le pion sur le porte-matrices. (ill.2) Fit insert in insert holder (ill.2) Introduire la matrice dans le porte-matrices. (ill.3) Push back pin. The crimping insert is now locked in the holder. (ill.3) Repousser le pion. La matrice est alors verrouillée dans le porte-matrices. (ill.4) Place the insert holder with slot N in the guide rail F and push the crimping insert into the opening provided with the locating knob at the front. An audible click confirms that it has engaged correctly. (ill.4) Placer le porte-matrices en orientant le doigt de guidage N dans le rail F, et pousser l’ensemble pour introduire le tenon dans l’ouverture correspondante. Un clic audible confirme l'enclenchement correct. (ill.5) Mount second insert holder with crimping insert in the same way. (ill.5) Monter de la même manière le deuxième porte-matrices équipé d'une matrice. ill.1 (ill.2) ᇚᦦ఼ܹ㺙ܹᦦ఼ܹᑻDŽ ill.2 (ill.3) य़ܹᦦᷧˈᦦ఼ܹ㹿䫕 ᦦ఼ܹᑻϞDŽ ill.3 F (ill.4) N ᇚᦦ఼ܹᑻᦦῑ1ᬒܹᇐ䔼 F ˈᡞय़ᦦ఼ܹܹࠡᮍᬲ ᓔⱘᅮԡ⚍ˈⳈࠄ ࠄ“click”ⱘໄ䷇ˈ㸼⼎ℷ⹂ୂ ড়DŽ ill.4 (ill.5) ⫼ৠḋⱘᮍ⊩ᇚѠϾय़ ᦦ఼ܹᬒܹᦦ఼ܹᑻ ill.5 2/4 ® Multi-Contact ᅝ㺙᮴ᦦ఼ܹᑻ ⱘᦦ఼ܹ Mounting the inserts without insert holders (ill.6) Place the crimping insert with slot N in the guide rail F and push into the opening provided with the locating knob at the front. An audible click confirms that it has engaged correctly. Montage des matrices sans porte-matrices (ill.6) Placer le porte-matrices en orientant le doigt de guidage N dans le rail F, et pousser l’ensemble pour introduire le tenon dans l’ouverture correspondante. Un clic audible confirme l'enclenchement correct. (ill.7) Mount the second crimp insert in the same way. (ill.7) Monter la deuxième matrice de la même manière. Cable preparation (ill.8) Strip cable insulation over the length specified for the respective crimping sleeve. See MC assembly instructions. Préparation du câble (ill.8) Dénuder le câble. La longueur dépend des prescriptions liées au fût à sertir. Voir les instructions de montage MC. ⬉㓚य़ Cable crimping Sertir le câble (ill.9) (ill.9) Position the crimp as shown in the illustration. Distance from edge of crimping sleeve min. 2mm. The position depends on whether crimping has to be done once or twice. See MC assembly instructions. (ill.9) Respecter la position du sertissage indiquée sur l'illustration. Distance du bord du fût à sertir min. 2 mm. La position est variable selon le nombre de sertissage à réaliser (un ou deux). Voir les instructions de montage MC. (ill.10) Insert crimping sleeve in the pliers and close the pliers with several movements of the lever until the crimping inserts engage with the crimping sleeve and fix it. This operation must not deform the crimping sleeve. The crimping inserts can be reset if necessary, see ill. 13, page 4/4. (ill.10) Insérer le fût à sertir dans la pince et fermer la pince par plusieurs mouvements de levier jusqu'à ce que les matrices de sertissage soient en contact avec le fût à sertir et l’immobilisent. Le fût à sertir ne doit pas se déformer. En cas de besoin, il est possible de rétracter les matrices de sertissage, voir ill.13, page 4/4. (ill.11) Insert all strands of the wire into the crimping sleeve. (ill.11) Introduire le câble avec tous les fils dans le fût à sertir. (ill.6) F N ᇚय़ᦦ఼ܹⱘߍῑ1ᬒܹ ᇐ䔼)ˈᡞय़ᦦ఼ܹܹ ࠡᮍᬲᓔⱘᅮԡ⚍ˈⳈࠄ ࠄĀFOLFNāⱘໄ䷇ˈ㸼⼎ ℷ⹂ୂড়DŽ ill.6 (ill.7) ⫼ৠḋⱘᮍ⊩ᅝᬒ . य़ᦦ఼ܹ ill.7 ޚ⬉㓚 (ill.8) ill.8 ࠹⾏⬉㓚㒱㓬ሖ䭓ᑺˈ䍙䖛 ᣛᅮ䭓ᑺⱘय़༫DŽ㾕MCᅝ 㺙䇈ᯢDŽ 1x min.2 य़ऎඳ Crimping zone Zone à sertir 2x བ᠔⼎ᅮԡय़ԡ 㕂ˈ䎱⾏य़༫䖍㓬᳔ ᇣ䎱⾏Ў2mmˈय़⚍ ⱘԡ㕂পއѢय़ᰃϔ ᅠ៤䖬ᰃϸᅠ៤DŽ 㾕MCⱘᅝ㺙䇈ᯢDŽ min.2 ill.9 (ill.10) ᇚय़༫ᦦܹ䪇ᄤˈড় ᢶ䪇ᄤˈ䕀ࡼᴚᄤⳈࠄ य़ᦦ఼ܹय़༫ ড়DŽϡ㛑䅽य़༫ℸ ᪡Ёবᔶˈབᵰ䳔 㽕ˈৃҹᇚ䖭Ͼय़ᦦ ఼ܹ䞡㺙ˈ㾕4义ˈ ill.13DŽ ill.10 (ill.11) ᇚ᠔᳝ⱘ⬉㓚㒓ᦦܹय़ ༫DŽ ill.11 3/4 ® Multi-Contact (ill.12) (ill.12) By repeatedly closing the arms of the pliers, press the crimping sleeve while at the same time holding the wire place in the crimping sleeve. The crimping operation is not completed until the pliers unlock automatically with a clicking sound. (ill.12) Sertir le fût à sertir par plusieurs compressions de la pince en maintenant le câble dans le fût à sertir. Le sertissage n'est terminé que quand la pince se déverrouille toute seule en faisant un clic audible. (ill.13) The crimping insert is reset by turning the lever H clockwise and at the same time closing the pliers. This operation can also be carried out during crimping. Note: Shortly before the end of the crimping operation, unlocking is no longer possible. (ill.13) Pour ramener les matrices de sertissage en arrière, tourner le levier H dans le sens d’une montre et fermer la pince en même temps. Cette opération peut aussi être effectuée pendant le sertissage. Note: Le déverrouillage n'est pas possible juste avant la fin du sertissage. (ill.14) MC recommends crimping 3 times per crimping point, i.e. rotating the crimp sleeve by 60° after each crimping operation so as to give 6 crimp die impressions at each crimping point. ill. 14 shows such single or double crimping points with 3 crimps each. (ill.14) MC recommande de sertir 3 fois par emplacement de sertissage, c'està-dire de tourner le fût à sertir de 60° après chaque sertissage, ce qui donne 6 empreintes de sertissage par emplacement de sertissage. L'ill. 14 montre de tels emplacements de sertissage simples ou doubles avec chaque fois 3 sertissages. (ill.15) Crimpung anhand des ḍࠊሎᇌ;Ẕᶹय़ˈ㾕 Prüfmasses (X), siehe 义ˈ㸼ḐDŽ Tab.1, Seite 1/4 kontrollieren. (ill.15) Check crimping according to control dimension X, see Tab. 1, page 1/4. (ill.15) Contrôler le sertissage à l'aide de la cote de contrôle X, voir Tab.1, page 1/4. Hinweis: 䇈ᯢ˖ Beachten Sie auch die খⳟElpress᪡䇈ᯢDŽ Elpress Bedienungsanleitung. Note: Observe also the Elpress operation instructions. Note: Voir aussi la mode d’emploi de Elpress. ᇚ⬉㓚㒓ᬒय़༫Ёˈ ձ䴴ডय़ড়䪇ᄤⱘ㞖 ˈᴹय़य़༫DŽᔧ ࠄĀclickāⱘໄ䷇ˈ䪇ᄤ 㞾ࡼᓔ䫕ˈ㸼⼎य़᪡ ᅠ៤DŽ ill.12 (ill.13) ᇚ+ᴚ乎ᯊ䩜䕀ࡼᑊড়ᢶ䪇 Das Zurückfahren der Crimpbacken erfolgt ᄤˈ䞡㕂य़ᦦ఼ܹDŽℸ᪡ durch Drehen des Hebels гৃय़䖛Ёᅠ៤DŽ H ill.13 1 >2mm H im Uhrzeigersinn und gleichzeitiges Schliessen der Zange. Dieser Vorgang kann auch während dem Crim䇈ᯢ˖ᖿᅠ៤य़᪡ⱘᯊ pen noch ausgeführt ϡৃ㛑ᓔ䫕DŽ werden. Hinweis: Kurz vor Ende der Crimpung kann nicht mehr entriegelt werden. (ill.14) MC empfiehlt pro MCᓎ䆂↣Ͼय़໘य़ Crimpstelle 3 mal zu ˈ↣य़᪡ᅠ៤ Crimpen, d.h. jeweils ৢˈᑺ䕀ࡼय़༫ˈгህ nach einer Crimpung die ᰃ䇈↣Ͼय़໘⬭ϟϾय़ Crimphülse um 60° zu ॄDŽབLOO᠔⼎ˈϝ drehen, das ergibt dann य़ৢऩϾঠϾⱘय़ pro Crimpstelle 6 ໘ⱘḋᄤDŽ 1 2 >2mm X ill.14 ࠊሎᇌ Control dimension X Cote de contrôle X Druckstempelabdrücke. ill. 14 zeigt solche 1- oder 2-fach Crimpstellen mit jeweils 3 Crimpungen. ill.15 MA069 4/4 05.2008 Index b ֱ⬭ׂᬍᴗ߽ / Subject to alterations / Modifications sous réserve Copyright by Multi-Contact AG, Switzerland / Powerline / 20 Ex. / 05.2008