1
STEP 4
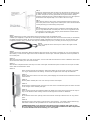
Position the swaged pole that has been into the clamps so that the top of
the bottom clamp is directly in line with the bottom join of the trampoline
leg. When the pole is correctly positioned the top and bottom clamps
should be tightened securely. Slide the black bolt cover over the exposed
thread of the bolt. Repeat steps 1-4 on each of the seven legs.
STEP 5
Add a plain top pole to each of the now fixed bottom poles by sliding one
end of the pole over the swage of the bottom poles. Care should be taken
to avoid pinching your hand during this process.
STEP 6
Place the Enclosure Net netting on the trampoline mat and align the bottom “D” ring attached with a vertical pole. There are 4 long panels and 4
short panels in the netting. The 4 larger panels should be located above
the Leg Bases of the trampoline.
STEP 7
Attach a plastic clip to each of the elastic shock cord loops to make 24 complete loops.
A ladder (not supplied) is required for the following assembly steps. Enlist the aid of a friend to assist you and steady
the ladder during these steps. Be sure to follow the ladder manufacturers instructions for use. Do not stand on the
trampoline frame to carry out these next steps as overbalancing may occur, resulting in serious injury from a fall.
STEP 8
Slide one complete shock cord loop over each of the eight vertical
frame poles.
STEP 9
Working around the trampoline attach the plastic clips of the shock cord loops to a bottom “D” ring on the Enclosure
Net netting. Continue till all eight shock cords are attached. These loops should be positioned as low as possible on
the vertical pole.
STEP 10
Slide one foam sleeve down over each of the poles. You will note that the foam sleeves come in different colours and
can be mixed to make your own colour scheme.
STEP 11
Slide another completed shock cord loop over each of the eight vertical frame poles so that it sits on top of the foam
sleeve and around the bare metal.
STEP 12
Again working around the trampoline, attach the plastic clip of the shock cord loop to a middle
“D” ring on the Enclosure Net netting. Continue till all eight shock cord loops are attached.
STEP 13
Slide a foam sleeve down over each of the poles wedging the second shock cord between the two
foam sleeves.
STEP 14
Slide a plastic molded pole cover over the top of each vertical pole.
STEP 15
Slide another completed shock cord loop over each of the vertical frame poles so that it connects
to the tongue on the molded post caps.
STEP 16
Again working around the trampoline attach the plastic clip of the shock cord loop to the top “D”
ring on the Enclosure Net netting. Continue till all eight shock cords are attached.
STEP 17
At the bottom of the door opening ensure that a shock cord loop is fitted to the “D” ring at this
point.
STEP 18
Operate the heavy duty zipper to gain access to the enclosure. The zipper is fitted with two (2)
tabs which enable it to be operated from the inside and outside of the enclosure.
CONGRATULATIONS. Your Enclosure Net should now be complete and ready for use.
We recommend a visual inspection of all the trampoline and Enclosure Net components
to ensure that the unit has no missing “or” worn parts.
7