1
ECO 5 - ECO 20 - ECO 35 - ECO 50
ELECTRONIC SPEED CONTROLLER
Installatie
Installation
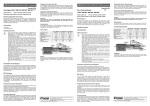
1. Soldeer de bijgeleverde 0,1µf condensators zoals
afgebeeld in Fig. 1.
1. Solder the enclosed 0,1µf capacitors onto the motor
as shown in Fig. 1.
2. Zet de snelheidsregelaar uit via de schakelaar.
2. Turn off the ESC by using the power switch.
3. Sluit de motor, accu en ontvanger aan zoals getoond
in Fig. 2. BELANGRIJK: Controleer de polariteit alvorens het geheel aan te sluiten.
3. Connect the motor, battery, and receiver as shown
in Fig. 2. IMPORTANT: Make sure the polarities match
before connecting the battery and the motor.
4. Zet de zender aan en positioneer de gashendel in
de laagste positie. Zet vervolgens de snelheidsregelaar
aan door middel van de schakelaar
4. Turn on the radio, pull down the Throttle Stick to the
lowest position, then turn on the ESC.
5. Beweeg de gashendel naar de volgas positie nadat
de LED enkele seconden heeft opgelicht.
De LED zal doven en de motor is nu gebruiksklaar. Als
de motor niet werkt, positioneer dan de gashendel naar
de laagste positie en keer het kanaal om in uw zender.
5. After the LED on the ESC has lit up for several
seconds, push the throttle stick to the highest position.
At this point, the LED will turn off and the motor will be
functional. If the motor is not functioning, pull down the
throttle stick to the lowest position and set the reverse
switch on the radio.
6. Indien de gashendel in de positie volgas staat en de
LED niet oplicht: gelieve de servo eindposities te controleren op de zender tot de LED oplicht.
6. If the throttle stick is pushed to full throttle and the
LED does not light up, then set the EPA or ATV on the
radio until the LED lights up.
Installation
1. Soudez les condensateurs 0,1µf sur le moteur. Fig. 1.
2. Eteignez le variateur en utilisant son interrupteur.
3. Branchez le moteur, l’accu et le récepteur comme indiqué à la Fig. 2. IMPORTANT: Respectez les polarités
pour le branchement de l’accu au variateur.
4. Allumez la radio, positionez le manche de gaz au
ralenti et ensuite allumez le variateur.
5. Après que la LED soit allumée pendant quelques
secondes, placez le manche de gaz en position plein
gaz. A ce moment, la LED s’éteint et le moteur est prêt
à l’utilisation. Si le moteur ne fonctionne pas, positionez
le manche de gaz au ralenti et inversez la voie de gaz
sur votre émetteur.
6. Si le manche de gaz est placé en position plein gaz
et que la LED ne s’allume pas, réglez les fonctions EPA
et/ou ATV sur votre émetteur jusqu’a ce que la LED
s’allume.
�����
�����
�����
�
���
�����
�
�������
������
�
�
��
������
������