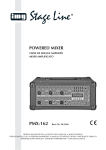
1
STEREO-MISCHVERSTÄRKER STEREO MIXING AMPLIFIER SA-440/SW Bestellnummer 25.3880 BEDIENUNGSANLEITUNG INSTRUCTION MANUAL MODE D’EMPLOI ISTRUZIONI PER L’USO MANUAL DE INSTRUCCIONES INSTRUKCJA OBSŁUGI VEILIGHEIDSVOORSCHRIFTEN SIKKERHEDSOPLYSNINGER SÄKERHETSFÖRESKRIFTER TURVALLISUUDESTA D Bevor Sie einschalten … A Wir wünschen Ihnen viel Spaß mit Ihrem neuen Gerät von MONACOR. Bitte lesen Sie diese Bedienungsanleitung vor dem Betrieb gründlich durch. Nur so lernen Sie alle Funktionsmöglichkeiten kennen, vermeiden Fehlbedienungen und schützen sich und Ihr Gerät vor eventuellen Schäden durch unsachgemäßen Gebrauch. Heben Sie die Anleitung für ein späteres Nachlesen auf. We wish you much pleasure with your new MONACOR unit. Please read these operating instructions carefully prior to operating the unit. Thus, you will get to know all functions of the unit, operating errors will be prevented, and yourself and the unit will be protected against any damage caused by improper use. Please keep the operating instructions for later use. Der deutsche Text beginnt auf der Seite 4. The English text starts on page 4. CH GB Before switching on … F Avant toute installation … B Nous vous souhaitons beaucoup de plaisir à utiliser cet appareil MONACOR. Lisez ce mode dʼemploi entièrement avant toute utilisation. Uniquement ainsi, vous pourrez apprendre lʼensemble des possibilités de fonctionnement de lʼappareil, éviter toute manipulation erronée et vous protéger, ainsi que lʼappareil, de dommages éventuels engendrés par une utilisation inadaptée. Conservez la notice pour pouvoir vous y reporter ultérieurement. Vi auguriamo buon divertimento con il vostro nuovo apparecchio di MONACOR. Leggete attentamente le istruzioni prima di mettere in funzione l'apparecchio. Solo così potete conoscere tutte le funzionalità, evitare comandi sbagliati e proteggere voi stessi e l'apparecchio da eventuali danni in seguito ad un uso improprio. Conservate le istruzioni per poterle consultare anche in futuro. La version française se trouve page 7. Il testo italiano inizia a pagina 7. CH E Antes de la utilización … I PL Le deseamos una buena utilización para su nuevo aparato MONACOR. Por favor, lea estas instrucciones de uso atentamente antes de hacer funcionar el aparato. De esta manera conocerá todas las funciones de la unidad, se prevendrán errores de operación, usted y el aparato estarán protegidos en contra de todo daño causado por un uso inadecuado. Por favor, guarde las instrucciones para una futura utilización. Prima di accendere … Przed uruchomieniem … Życzymy zadowolenia z nowego produktu MONACOR. Dzięki tej instrukcji obsługi będą państwo w stanie poznać wszystkie funkcje tego urządzenia. Stosując się do instrukcji unikną państwo błędów i ewentualnego uszkodzenia urządzenia na skutek nieprawidłowego użytkowania. Prosimy zachować instrukcję. Tekst polski zaczyna się na stronie 10. El texto en español empieza en la página 10. NL Voor u inschakelt … B Wij wensen u veel plezier met uw nieuwe apparaat van MONACOR. Lees de veiligheidsvoorschriften grondig door, alvorens het apparaat in gebruik te nemen. Zo behoedt u zichzelf en het apparaat voor eventuele schade door ondeskundig gebruik. Bewaar de handleiding voor latere raadpleging. DK Før du tænder … God fornøjelse med dit nye MONACOR produkt. Læs venligst sikkerhedsanvisningen nøje, før du tager produktet i brug. Dette hjælper dig med at beskytte produktet mod ukorrekt ibrugtagning. Gem venligst denne betjeningsvejledning til senere brug. Du finder sikkerhedsanvisningen på side 13. De veiligheidsvoorschriften vindt u op pagina 13. S 2 Innan du slår på enheten … FIN Ennen kytkemistä … Vi önskar dig mycket glädje med din nya MONACOR produkt. Läs igenom säkerhetsföreskrifterna noga innan enheten tas i bruk. Detta kan förhindra att problem eller fara för dig eller enheten uppstår vid användning. Spara instruktionerna för framtida användning. Toivomme Sinulle paljon miellyttäviä hetkiä uuden MONACOR laitteen kanssa. Ennen laitteen käyttöä pyydämme Sinua huolellisesti tutustumaan turvallisuusohjeisiin. Näin vältyt vahingoilta, joita virheellinen laitteen käyttö saattaa aiheuttaa. Ole hyvä ja säilytä käyttöohjeet myöhempää tarvetta varten. Säkerhetsföreskrifterna återfinns på sidan 13. Turvallisuusohjeet löytyvät sivulta 13. 1 2 VOICE1 VOICE 2 LOW -10 POWER 0 3 4 MID +10 MIN. -10 +10 -10 0 6 AMP OUTPUT LEVEL 2 +10 10 5 MUTE -10 L MAX R R +10 MUSIC INPUT -10 +10 10 -10 +10 L MAX R L L VOICE INPUT 1 2 1 R R MUSIC 2 CLIP CLIP LOW HIGH -10 0 8 2 HIGH +10 -10 SA-440/SW MIXER/AMPLIFIER 10 0 R +10 0 9 MUSIC INPUT 2 L 10 11 12 13 16 17 18 19 20 21 22 23 24 14 LEFT T2AL 15 10 10 SPEAKER 4-8Ω RIGHT LEVEL 1 MIN. MID 7 REC OUTPUT L MUSIC 1 LOW HIGH 1 25 230 V~ / 50 Hz 26 D GB F I E PL 27 Anschlussbeispiel Example for connection Exemple de connexion Esempio di collegamento Ejemplo para conexión Przykład połączeń 3 D A Auf der ausklappbaren Seite 3 finden Sie alle beschriebenen Bedienelemente und Anschlüsse. CH 1 Übersicht der Bedienelemente und Anschlüsse 1.2 Rückseite 2 Hinweise für den sicheren Gebrauch 15 Schraubklemmen MUTE (vom Gerät abziehbar) für den Anschluss eines Schalters/Tasters zum Stummschalten der Ausgänge AMP OUTPUT (17 und 18) und der Lautsprecherausgänge (25) Das Gerät entspricht allen erforderlichen Richtlinien der EU und ist deshalb mit gekennzeichnet. 16 Pegelregler LEVEL 2 für den Ausgang AMP OUTPUT 2 (17) 1 Montagewinkel zum Einbau des Geräts in ein Rack (482 mm/19″) 17 und 18 Summenausgänge AMP OUTPUT 1 und 2 für den Anschluss von Endverstärkern bzw. anderer Geräte mit Line-Eingangspegel, z. B. Mischpult 2 Übersteuerungsanzeigen CLIP (linker Kanal/ rechter Kanal) für die interne Endstufe 19 Pegelregler LEVEL 1 für die interne Endstufe und den Ausgang AMP OUTPUT 1 (18) 3 Betriebsanzeige 20 Aufnahmeausgang REC OUTPUT für den Anschluss an den Eingang eines Aufnahmegeräts 1.1 Front 4 Ein-/Ausschalter POWER 5 Lautstärkeregler für den Mikrofonkanal VOICE 1 6 3fach-Klangregelung VOICE 1 für den Mikrofonkanal 7 Lautstärkeregler für den Mikrofonkanal VOICE 2 8 3fach-Klangregelung VOICE 2 für den Mikrofonkanal 9 Lautstärkeregler für den Stereo-Kanal MUSIC 1 10 2fach-Klangregelung, gemeinsam für beide Stereo-Kanäle MUSIC 1 und MUSIC 2 Hinweis: Die Regler LEVEL (16, 19) haben keinen Einfluss auf den Pegel des Aufnahmesignals. 21 und 22 Stereo-Eingänge MUSIC INPUT 1 und 2 für den Anschluss von Audio-Geräten mit Line-Ausgangspegel z. B. CD- oder DVD-Player, Tapedeck, Tuner 11 Lautstärkeregler für den Stereo-Kanal MUSIC 2 25 Anschlussklemmen SPEAKER für die Lautsprecherboxen (Impedanz min. 4 Ω) 12 Stereo-Line-Eingang MUSIC INPUT 2, alternativ zum gleichnamigen Eingang auf der Rückseite verwendbar ( Position 21) 26 Halterung für die Netzsicherung; eine durchgebrannte Sicherung nur durch eine gleichen Typs ersetzen 13 Buchse für den Anschluss eines Stereo-Kopfhörers zum Abhören des Ausgangssignals; beim Anschluss werden die Ausgänge AMP OUTPUT (17 und 18) und die Lautsprecherausgänge (25) stumm geschaltet 27 Netzkabel zum Anschluss an eine Steckdose (230 V~/50 Hz) 14 Lautstärkeregler für den Kopfhörer All operating elements and connections described can be found on the fold-out page 3. 1 Operating Elements and Connections 1.1 Front panel 1 Mounting brackets to install the amplifier into a rack (482 mm/19″) 2 Overload LEDs CLIP (left channel/right channel) for the internal power amplifier 3 POWER LED 4 POWER switch 5 Volume control for the microphone channel VOICE 1 6 3-way equalizer for the microphone channel VOICE 1 7 Volume control for the microphone channel VOICE 2 8 3-way equalizer for the microphone channel VOICE 2 9 Volume control for the stereo channel MUSIC 1 10 2-way equalizer, for both stereo channels MUSIC 1 and MUSIC 2 together 11 Volume control for the stereo channel MUSIC 2 12 Stereo line input MUSIC INPUT 2, to be used as an alternative to the corresponding input on the rear panel ( item 21) 13 Jack for connection of stereo headphones to monitor the output signal; when you connect headphones to this jack, the outputs AMP OUTPUT (17 and 18) and the speaker outputs (25) are muted Note: The controls LEVEL (16, 19) have no effect on the level of the headphone signal. 14 Volume control for the headphones 4 Beachten Sie auch unbedingt die folgenden Punkte: G Das Gerät ist nur zur Verwendung im Innenbereich geeignet. Schützen Sie es vor Tropf- und Spritzwasser, hoher Luftfeuchtigkeit und Hitze (zulässiger Einsatztemperaturbereich 0 – 40 °C). G Stellen Sie keine mit Flüssigkeit gefüllten Gefäße, z. B. Trinkgläser, auf das Gerät. G Die in dem Gerät entstehende Wärme muss durch Luftzirkulation abgegeben werden. Decken Sie darum die Lüftungsöffnungen am Gehäuse nicht ab. G Nehmen Sie das Gerät nicht in Betrieb und ziehen Sie sofort den Netzstecker aus der Steckdose: 1. wenn sichtbare Schäden am Gerät oder am Netzkabel vorhanden sind, 2. wenn nach einem Sturz oder Ähnlichem der Verdacht auf einen Defekt besteht, 3. wenn Funktionsstörungen auftreten. Geben Sie das Gerät in jedem Fall zur Reparatur in eine Fachwerkstatt. G Ein beschädigtes Netzkabel darf nur durch eine Fachwerkstatt ersetzt werden. G Ziehen Sie den Netzstecker nie am Kabel aus der Steckdose, fassen Sie immer am Stecker an! G Verwenden Sie zum Säubern nur ein trockenes weiches Tuch, niemals Chemikalien oder Wasser. G Wird das Gerät zweckentfremdet, nicht richtig angeschlossen, falsch bedient oder nicht fachge- 23 und 24 Mono-Eingänge VOICE INPUT 1 und 2 zum Anschluss von Mikrofonen Hinweis: Die Regler LEVEL (16, 19) haben keinen Einfluss auf den Pegel des Kopfhörersignals. GB WARNUNG Das Gerät wird mit lebensgefährlicher Netzspannung versorgt. Nehmen Sie deshalb niemals selbst Eingriffe am Gerät vor und stecken Sie nichts durch die Lüftungsöffnungen! Es besteht die Gefahr eines elektrischen Schlages. 1.2 Rear panel 2 Safety Notes 15 Screw terminals MUTE (disconnectable from the amplifier) for connection of a switch/momentary pushbutton to mute the outputs AMP OUTPUT (17 and 18) and the speaker outputs (25) 16 Level control LEVEL 2 for the output AMP OUTPUT 2 (17) 17 and 18 Master outputs AMP OUTPUT 1 and 2 to connect power amplifiers or other units with line input level, e. g. mixer 19 Level control LEVEL 1 for the internal power amplifier and the output AMP OUTPUT 1 (18) 20 Recording output REC OUTPUT to connect the input of a recorder This unit corresponds to all relevant directives of the EU and is therefore marked with . Note: The controls LEVEL (16, 19) have no effect on the level of the recording signal. 21 and 22 Stereo inputs MUSIC INPUT 1 and 2 to connect audio units with line output level, e. g. CD player or DVD player, tape deck, tuner 23 and 24 Mono inputs VOICE INPUT 1 and 2 to connect microphones 25 Terminals SPEAKER for the speaker systems (minimum impedance 4 Ω) 26 Support for the mains fuse; replace a blown fuse by one of the same type only 27 Mains cable for connection to a socket (230 V~/ 50 Hz) WARNING The unit uses dangerous mains voltage. Leave servicing to skilled personnel only and do not insert anything into the air vents! Inexpert handling of the unit may result in electric shock. Please observe the following items in any case: G The unit is suitable for indoor use only. Protect it against dripping water and splash water, high air humidity and heat (admissible ambient temperature range 0 – 40 °C). G Do not place any vessel filled with liquid on the unit, e. g. a drinking glass. G The heat generated inside the unit must be dissipated by air circulation; never cover the air vents of the housing. G Do not operate the unit and immediately disconnect the mains plug from the socket 1. if the unit or the mains cable is visibly damaged, 2. if a defect might have occurred after the unit was dropped or suffered a similar accident, 3. if malfunctions occur. In any case the unit must be repaired by skilled personnel. G A damaged mains cable must be replaced by skilled personnel only. G Never pull the mains cable to disconnect the mains plug from the socket, always seize the plug. G For cleaning only use a dry, soft cloth; never use water or chemicals. G No guarantee claims for the unit and no liability for any resulting personal damage or material damage will be accepted if the unit is used for other purposes than originally intended, if it is not correctly connected or operated, or if it is not repaired in an expert way. recht repariert, kann keine Garantie für das Gerät und keine Haftung für daraus resultierende Sachoder Personenschäden übernommen werden. Soll das Gerät endgültig aus dem Betrieb genommen werden, übergeben Sie es zur umweltgerechten Entsorgung einem örtlichen Recyclingbetrieb. nötigt. Dabei sollte jedoch ober- und unterhalb des Verstärkers zusätzlich Platz frei bleiben, damit eine ausreichende Belüftung sichergestellt ist. Bei unzureichendem Wärmeabfluss in das Rack über dem Verstärker eine Lüftereinheit einsetzen. Andernfalls kommt es im Rack zu einem Hitzestau, wodurch nicht nur der Verstärker, sondern auch weitere Geräte im Rack beschädigt werden können. 3 Einsatzmöglichkeiten 5 Anschlüsse herstellen Dieser Stereo-Mischverstärker ist universell einsetzbar. Er bietet die Möglichkeit, bis zu zwei AudioGeräte mit Line-Ausgangspegel (z. B. CD- oder DVD-Player, Tapedeck) und bis zu zwei Mikrofone anzuschließen und ihre Signale auf zwei Summenausgänge zu mischen. Außerdem ist ein zusätzlicher Aufnahmeausgang und ein regelbarer Kopfhörerausgang vorhanden. Die beiden Summenausgänge und die Lautsprecherausgänge lassen sich über einen optionalen Fernschalter stumm schalten. Die Stummschaltung wird auch bei Anschluss eines Kopfhörers aktiviert. Vor dem Anschließen von Geräten oder Ändern bestehender Anschlüsse sollten der Verstärker und die verwendeten Geräte ausgeschaltet sein. 4 Aufstellung Mit den zwei beiliegenden Montagewinkeln lässt sich der Verstärker in ein Rack für Geräte mit einer Breite von 482 mm (19″) einbauen. Er kann aber auch ohne Winkel als Tischgerät verwendet werden. In jedem Fall muss Luft ungehindert durch alle Lüftungsöffnungen strömen können, damit eine ausreichende Kühlung gewährleistet ist. 1) Die Tonquellen an die Eingänge anschließen: – Mikrofone an die 6,3-mm-Klinkenbuchsen VOICE INPUT 1 (24) und VOICE INPUT 2 (23), – Stereo-Geräte mit Line-Ausgangspegel (z. B. CD- oder DVD-Player, Tapedeck, Tuner) an die Cinch-Buchsen MUSIC INPUT 1 (22) und MUSIC INPUT 2 (21): weiße Buchse L = linker Kanal, rote Buchse R = rechter Kanal Anstelle des rückseitigen Eingangs MUSIC INPUT 2 kann auch der gleichnamige frontseitige Eingang (12) verwendet werden. 2) Die Lautsprecherboxen an die Klemmen SPEAKER (25) anschließen (RIGHT = rechter Kanal, LEFT = linker Kanal). Die Impedanz der Lautsprecher darf 4 Ω nicht unterschreiten, anderenfalls kann der Verstärker beschädigt werden. Beim Anschluss jeweils die gekennzeichnete Ader der Lautsprecherleitung mit der roten Klemme verbinden, so dass keine Verpolung und Signalauslöschungen auftreten. Die Winkel (1) vorn an der rechten und linken Seite mit jeweils drei Schrauben befestigen. Im Rack wird eine Höhe von 1 HE (Höheneinheit) = 44,45 mm be- 3) Zwei zusätzliche Endverstärker oder andere Geräte mit Line-Eingangspegel (z. B. Mischpult, Effektgerät) lassen sich jeweils an die Cinch-Buchsen der Ausgänge AMP OUTPUT 1 (18) und AMP OUTPUT 2 (17) anschließen. G 4 Setting Up 4.1 Rackeinbau Important for U. K. Customers! The wires in the mains lead are coloured in accordance with the following code: green/yellow = earth, blue = neutral, brown = live As the colours of the wires in the mains lead of this appliance may not correspond with the coloured markings identifying the terminals in your plug, proceed as follows: 1. The wire which is coloured green and yellow must be connected to the terminal in the plug which is marked with the letter E or by the earth symbol , or coloured green or green and yellow. 2. The wire which is coloured blue must be connected to the terminal which is marked with the letter N or coloured black. 3. The wire which is coloured brown must be connected to the terminal which is marked with the letter L or coloured red. Via the two mounting brackets provided, the amplifier can be installed into a rack for units of a width of 482 mm (19″); however, it can also be used as a desktop unit without brackets. Always provide free air circulation through all air vents to ensure sufficient cooling. 4.1 Rack installation Attach the brackets (1) to the left and right sides of the front panel via three screws each. In the rack, a height of 1 rack space (44.45 mm) is required. Provide additional space above and below the amplifier to ensure sufficient ventilation. If the heat dissipation is insufficient, install a ventilation unit into the rack above the amplifier; otherwise heat will accumulate in the rack and may not only damage the amplifier but also other units in the rack. Warning – This appliance must be earthed. 5 Connections If the unit is to be put out of operation definitively, take it to a local recycling plant for a disposal which is not harmful to the environment. 3 Applications This stereo mixing amplifier is suitable for universal applications. It allows to connect up to two audio units with line output level (e. g. CD player or DVD player, tape deck) and up to two microphones and to mix their signals to two master outputs. It is also equipped with an additional recording output and an adjustable headphone output. An optional remote control switch can be used to mute the two master outputs and the speaker outputs. The muting feature is also activated when you connect headphones. Prior to making or changing any connections, switch off the amplifier and the units used. 1) Connect the audio sources to the inputs: – microphones to the 6.3 mm jacks VOICE INPUT 1 (24) and VOICE INPUT 2 (23) – stereo units with line output level (e. g. CD player or DVD player, tape deck, tuner) to the RCA jacks MUSIC INPUT 1 (22) and MUSIC INPUT 2 (21): white jack = left channel, red jack R = right channel Instead of the input MUSIC INPUT 2 on the rear panel, the corresponding input (12) on the front panel can also be used. 2) Connect the speaker systems to the terminals SPEAKER (25) [RIGHT = right channel, LEFT = left channel]. The impedance of the speakers must not fall below 4 Ω; otherwise you may dam- 4) Ein Aufnahmegerät kann an die Cinch-Buchsen REC OUTPUT (20) angeschlossen werden und ein Stereo-Kopfhörer (Impedanz min. 32 Ω) zum Abhören des Ausgangssignals an die 6,3-mmKlinkenbuchse (13). Einstellungen der Pegelregler LEVEL (16 und 19) haben keinen Einfluss auf das Ausgangssignal am Aufnahme- und am Kopfhörerausgang. Beim Anschluss eines Kopfhörers werden die Ausgänge AMP OUTPUT (17 und 18) und die Lautsprecherausgänge (25) stumm geschaltet. Die Stummschaltung lässt sich auch über einen an den Schraubklemmen MUTE (15) angeschlossenen Schalter oder Taster aktivieren. Zur besseren Handhabung können die Klemmen vom Gerät abgezogen und nach dem Festschrauben der Leitung für den Schalter einfach wieder aufgesteckt werden. D A CH 5) Zuletzt den Stecker des Netzkabels (27) in eine Steckdose (230 V~/50 Hz) stecken. 6 Bedienung VORSICHT Stellen Sie die Lautstärke der Audioanlage und des Kopfhörers nie sehr hoch ein. Hohe Lautstärken können auf Dauer das Gehör schädigen! Das Ohr gewöhnt sich an hohe Lautstärken und empfindet sie nach einiger Zeit als nicht mehr so hoch. Darum erhöhen Sie eine hohe Lautstärke nach der Gewöhnung nicht weiter. 1) Als Grundeinstellung vor der ersten Inbetriebnahme die Pegelregler LEVEL (16 und 19) bis zum Anschlag nach links drehen. Dazu einen kleinen Schraubendreher verwenden. 2) Zur Vermeidung von lauten Schaltgeräuschen den Endverstärker in einer Audioanlage immer age the amplifier. When you connect the speakers, always connect the marked core of the speaker cable to the red terminal to prevent reverse polarity and signal cancellation. GB 3) It is possible to connect two additional power amplifiers or other units with line input level (e. g. mixer, effect unit) each to the RCA jacks of the outputs AMP OUTPUT 1 (18) and AMP OUTPUT 2 (17). 4) It is possible to connect a recorder to the RCA jacks REC OUTPUT (20) and stereo headphones (minimum impedance 32 Ω) to monitor the output signal to the 6.3 mm jack (13). Adjustments of the controls LEVEL (16 and 19) have no effect on the output signal at the recording output and the headphone output. When you connect headphones, the outputs AMP OUTPUT (17 and 18) and the speakers outputs (25) are muted. The muting feature is also activated via a switch or momentary pushbutton connected to the screw terminals MUTE (15). To facilitate handling, disconnect the terminals from the unit and reconnect them after screwing on the cable for the switch. 5) Finally connect the plug of the mains cable (27) to a socket (230 V~/50 Hz). 6 Operation CAUTION Never adjust the audio system and the headphones to a very high volume. Permanent high volumes may damage your hearing! Your ear will get accustomed to high volumes which do not seem to be that high after some time. Therefore, do not further increase a high volume after getting used to it. 5 D A CH nach allen anderen Geräten einschalten und ihn nach dem Betrieb als erstes Gerät wieder ausschalten. Den Verstärker mit dem Ein-/Ausschalter POWER (4) einschalten, die Betriebsanzeige (3) leuchtet. und/oder der Signalpegel für das Gerät am Ausgang AMP OUTPUT 1 zu niedrig ist. Der Regler LEVEL 2 (16) dient zur Pegelanhebung des Summensignals, das am Ausgang AMP OUTPUT 2 (17) zur Verfügung steht. Ist der Pegel zu niedrig für das hier angeschlossene Gerät, den Regler entsprechend aufdrehen. 5) Der Regler LEVEL 1 (19) dient zur Pegelanhebung für das Summensignal, das auf die interne Endstufe gegeben wird und am Ausgang AMP OUTPUT 1 (18) zur Verfügung steht. Den Regler entsprechend aufdrehen, wenn selbst bei einer hoch eingestellten Lautstärke die Wiedergabe über die angeschlossenen Lautsprecher zu leise Ausgangsleistung Sinusleistung an 4 Ω: . . . . 2 × 50 W Sinusleistung an 8 Ω: . . . . 2 × 30 W Maximale Leistung: . . . . . . 2 × 100 W 2 Mikrofoneingänge (VOICE) Empfindlichkeit/Impedanz: 1,3 mV/600 Ω Anschluss: . . . . . . . . . . . . . 6,3-mm-Klinke, sym. 2 Line-Eingänge (MUSIC) Empfindlichkeit/Impedanz: 125 mV/10 kΩ Anschluss: . . . . . . . . . . . . . Cinch, Links/Rechts 2 Summenausgänge (AMP): Nennpegel/Impedanz: . . . 1 – 3 V/100 Ω Anschluss: . . . . . . . . . . . . . Cinch, Links/Rechts 1 Aufnahmeausgang (REC): Nennpegel/Impedanz: . . . 1 V/100 Ω Anschluss: . . . . . . . . . . . . . Cinch, Links/Rechts 1 Kopfhörerausgang ( ) Impedanz/Leistung: . . . . . ≥ 32 Ω/2 × 24 mW Anschluss: . . . . . . . . . . . . . 6,3-mm-Klinke, stereo Frequenzbereich: . . . . . . . . 20 – 20 000 Hz Klirrfaktor: . . . . . . . . . . . . . . 0,05 % Störabstand: . . . . . . . . . . . . > 60 dB Klangregler Tiefen: . . . . . . . . . . . . . . . . ±12 dB/30 Hz Mitten (nur VOICE): . . . . . ±12 dB/1 kHz Höhen: . . . . . . . . . . . . . . . ±12 dB/12 kHz Stromversorgung: . . . . . . . . 230 V~/50 Hz Leistungsaufnahme: . . . . . . 220 VA Einsatztemperatur: . . . . . . . 0 – 40 °C Maße (inkl. Montagewinkel): 482 × 52 × 275 mm (B × H × T), 1 HE Gewicht: . . . . . . . . . . . . . . . 3,5 kg Diese Bedienungsanleitung ist urheberrechtlich für MONACOR ® INTERNATIONAL GmbH & Co. KG geschützt. Eine Reproduktion für eigene kommerzielle Zwecke – auch auszugsweise – ist untersagt. Änderungen vorbehalten. 3) Mit den jeweiligen Lautstärkereglern das gewünschte Lautstärkeverhältnis der Tonquellen einstellen: – Regler VOICE 1 (5) für das Mikrofon am Eingang VOICE INPUT 1 (24) – Regler VOICE 2 (7) für das Mikrofon am Eingang VOICE INPUT 2 (23) – Regler MUSIC 1 (9) für das Gerät am Eingang MUSIC INPUT 1 (22) – Regler MUSIC 2 (11) für das Gerät am Eingang MUSIC INPUT 2 (12 bzw. 21) 6) Bei Übersteuerung der Endstufe leuchten die LEDs CLIP (2), jeweils für den linken und den rechten Kanal. In diesem Fall den Regler LEVEL 1 (19) und/oder zu weit aufgedrehte Lautstärkeregler der Eingangskanäle entsprechend zurückdrehen. 7) Den Lautstärkeregler (14) für den Kopfhörerausgang (13) wie gewünscht aufdrehen. Über den Kopfhörer ist das von den Reglern LEVEL (16 und 19) unbeeinflusste Ausgangssignal zu hören. Die Regler nicht benutzter Kanäle stets ganz nach links auf „0“ drehen. 4) Die Kanäle VOICE 1 und VOICE 2 sind jeweils mit einer 3fach-Klangregelung (6 und 8) ausgestattet, die Kanäle MUSIC 1 und MUSIC 2 verfügen über eine gemeinsame 2fach-Klangregelung (10). Die Frequenzbereiche (LOW = Bässe, MID = Mitten, HIGH = Höhen) können mit den jeweiligen Reglern um max. 12 dB angehoben und abgesenkt werden. GB 1) As a basic setting, prior to initial operation, set the controls LEVEL (16 and 19) to the left stop. Turn them with a small screwdriver. 2) To prevent loud switching noise, always switch on all other units of the audio system before switching on the power amplifier; after operation, switch off the power amplifier first. Switch on the amplifier with the POWER switch (4); the POWER LED (3) lights up. 3) Use the corresponding volume controls to adjust the desired volume ratio of the audio sources: – control VOICE 1 (5) for the microphone at the input VOICE INPUT 1 (24) – control VOICE 2 (7) for the microphone at the input VOICE INPUT 2 (23) – control MUSIC 1 (9) for the unit at the input MUSIC INPUT 1 (22) the unit at the output AMP OUTPUT 1 is too low, turn up the control as required. The control LEVEL 2 (16) is used to boost the level of the master signal present at the output AMP OUTPUT 2 (17). If the level is too low for the unit connected to this output, turn up the control as required. 6) In case of overload of the amplifier, the LEDs CLIP (2) light up for the right channel and the left channel each. In this case, turn back the control LEVEL 1 (19) as required and/or turn back any volume controls of the input channels that have been set too high. 7) Turn up the volume control (14) for the headphone output (13) as desired. The headphones reproduce the output signal unaffected by the controls LEVEL (16 and 19). – control MUSIC 2 (11) for the unit at the input MUSIC INPUT 2 (12 or 21) Always set the controls of channels that are not used to the left stop to „0“. 4) The channels VOICE 1 and VOICE 2 are equipped with a 3-way equalizer (6 and 8) each; the channels MUSIC 1 and MUSIC 2 have a joint 2-way equalizer (10). To boost or attenuate the frequency ranges (LOW, MID, HIGH) by up to 12 dB, turn the corresponding controls. 5) The control LEVEL 1 (19) is used to boost the level of the master signal fed to the internal power amplifier and present at the output AMP OUTPUT 1 (18). If the reproduction via the speakers connected is too low even though a high volume has been adjusted and/or if the signal level for All rights reserved by MONACOR ® INTERNATIONAL GmbH & Co. KG. No part of this instruction manual may be reproduced in any form or by any means for any commercial use. 6 7 Technische Daten 7 Specifications Output power RMS power at 4 Ω: . . . . . . 2 × 50 W RMS power at 8 Ω: . . . . . . 2 × 30 W Maximum power: . . . . . . . . 2 × 100 W 2 microphone inputs (VOICE) Sensitivity/impedance: . . . 1.3 mV/600 Ω Connection: . . . . . . . . . . . . 6.3 mm jack, bal. 2 line inputs (MUSIC) Sensitivity/impedance: . . . 125 mV/10 kΩ Connection: . . . . . . . . . . . . RCA, Left/Right 2 master outputs (AMP) Rated level/impedance: . . 1 – 3 V/100 Ω Connection: . . . . . . . . . . . . RCA, Left/Right 1 recording output (REC) Rated level/impedance: . . 1 V/100 Ω Connection: . . . . . . . . . . . . RCA, Left/Right 1 headphone output ( ) Impedance/power:: . . . . . . ≥ 32 Ω/2 × 24 mW Connection: . . . . . . . . . . . . 6.3 mm jack, stereo Frequency range: . . . . . . . . 20 – 20 000 Hz THD: . . . . . . . . . . . . . . . . . . 0.05 % S/N ratio: . . . . . . . . . . . . . . > 60 dB Equalizer LOW: . . . . . . . . . . . . . . . . . ±12 dB/30 Hz MID (VOICE only): . . . . . . ±12 dB/1 kHz HIGH: . . . . . . . . . . . . . . . . ±12 dB/12 kHz Power supply: . . . . . . . . . . . 230 V~/50 Hz Power consumption: . . . . . . 220 VA Ambient temperature: . . . . . 0 – 40 °C Dimensions (incl. mounting brackets): . . 482 x 52 x 275 mm (W × H × D), 1 rack space Weight: . . . . . . . . . . . . . . . . 3.5 kg Subject to technical modification. Vous trouverez sur la page 3, dépliable, les éléments et branchements décrits. 1.2 Face arrière 2 Conseils dʼutilisation et de sécurité. Lʼappareil répond à toutes les directives nécessaires de lʼUnion européenne et porte donc le symbole . 1 Eléments et branchements 15 Bornes à vis MUTE (démontables de lʼappareil) pour brancher un interrupteur / bouton poussoir pour couper le son des sorties AMP OUTPUT (17 et 18) et des sorties haut-parleurs (25) 1.1 Face avant 16 Réglage de niveau LEVEL 2 pour la sortie AMP OUTPUT 2 (17) 1 Etriers de montage pour installer lʼappareil dans un rack 482 mm / 19″ 2 LEDs CLIP témoin dʼécrêtage (canal gauche / canal droit) pour lʼamplificateur de puissance interne 3 Témoin de fonctionnement 4 Interrupteur POWER Marche /Arrêt 5 Réglage de volume pour le canal micro VOICE 1 6 Egaliseur 3 voies pour le canal micro VOICE 1 7 Réglage de volume pour le canal micro VOICE 2 8 Egaliseur 3 voies pour le canal micro VOICE 2 9 Réglage de volume pour le canal stéréo MUSIC 1 10 Egaliseur 2 voies, ensemble pour les deux canaux stéréo MUSIC 1 et MUSIC 2 11 Réglage de volume pour le canal stéréo MUSIC 2 12 Entrée ligne stéréo MUSIC INPUT 2, utilisable à la place de lʼentrée de même nom sur la face arrière ( position 21) 13 Prise pour brancher un casque stéréo pour écouter le signal de sortie ; lorsquʼelle est branchée, le son des sorties AMP OUTPUT (17 et 18) et des sorties haut-parleurs (25) est coupé Remarque : Les réglages LEVEL (16, 19) nʼont pas dʼinfluence sur le niveau du signal du casque. 14 Réglage de volume pour le casque A pagina 3, se aperta completamente, vedrete tutti gli elementi di comando e i collegamenti descritti. 1 Elementi di comando e collegamenti 1.1 Pannello frontale 1 Angoli di montaggio per il montaggio dellʼapparecchio in un rack (482 mm / 19″) 2 Spie di sovrapilotaggio CLIP (canale sinistro / canale destro) per il finale interno 3 Spia di funzionamento 4 Interruttore on / off POWER 5 Regolatore volume per il canale microfono VOICE 1 6 Regolazione toni con 3 frequenze diverse per il canale microfono VOICE 1 7 Regolatore volume per il canale microfono VOICE 2 8 Regolazione toni con 3 frequenze diverse per il canale microfono VOICE 2 9 Regolatore volume per il canale stereo MUSIC 1 10 Regolazione toni con 2 frequenze diverse, in comune per i due canali stereo MUSIC 1 e MUSIC 2 11 Regolatore volume per il canale stereo MUSIC 2 12 Ingresso stereo Line MUSIC INPUT 2, utilizzabile in alternativa allʼingresso omonimo sul retro ( posizione 21) 13 Presa per il collegamento di una cuffia stereo per ascoltare il segnale dʼuscita; in caso di collegamento, le uscite AMP OUTPUT (17 e 18) e le uscite per altoparlanti (25) sono messe in muto Nota: I regolatori LEVEL (16, 19) non influenzano il livello del segnale nella cuffia. 14 Regolatore volume per la cuffia 17 et 18 Sorties master AMP OUTPUT 1 et 2 pour brancher des amplificateurs de puissance ou autres appareils avec niveau dʼentrée ligne, par exemple table de mixage 19 Réglage de niveau LEVEL 1 pour lʼamplificateur de puissance interne et la sortie AMP OUTPUT 1 (18) 20 Sortie enregistrement REC OUTPUT pour brancher à lʼentrée dʼun enregistreur Remarque : Les réglages LEVEL (16, 19) nʼont pas dʼinfluence sur le niveau du signal dʼenregistrement. 22 et 22 Entrées stéréo MUSIC INPUT 1 et 2 pour brancher des appareils audio avec niveau de sortie ligne, par exemple lecteur CD ou DVD, tape deck, tuner 23 et 24 Entrées mono VOICE INPUT 1 et 2 pour brancher des microphones 25 Bornes de branchement SPEAKER pour les enceintes (impédance minimale 4 Ω) 26 Porte-fusible : tout fusible fondu doit être impérativement remplacé par un fusible de même type 27 Cordon secteur à relier à une prise secteur 230 V~ / 50 HZ Respectez scrupuleusement les points suivants : G Lʼappareil nʼest conçu que pour une utilisation en intérieur. Protégez-le des éclaboussures, de tout type de projections dʼeau, dʼune humidité élevée de lʼair et de la chaleur (plage de température de fonctionnement admissible 0 – 40 °C). G En aucun cas, vous ne devez poser dʼobjet contenant du liquide ou un verre sur lʼappareil. G La chaleur dégagée par lʼappareil doit être évacuée par une circulation dʼair correcte. Nʼobstruez pas les ouïes de ventilation du boîtier. G Ne faites pas fonctionner lʼappareil et débranchez le cordon secteur immédiatement dans les cas suivants : 1. lʼappareil ou le cordon secteur présente des dommages visibles. 2. après une chute ou accident similaire, vous avez un doute sur lʼétat de lʼappareil. 3. des dysfonctionnements apparaissent. Dans tous les cas, les dommages doivent être réparés par un technicien spécialisé. G Tout cordon secteur endommagé doit être remplacé par un technicien habilité. G Ne débranchez jamais lʼappareil en tirant sur le cordon secteur ; retirez toujours le cordon secteur en tirant la fiche. 2 Avvertenze di sicurezza 15 Morsetti a vite MUTE (staccabili dallʼapparecchio) per il collegamento di un interruttore / pulsante per la funzione muto delle uscite AMP OUTPUT (17 e 18) e delle uscite per altoparlanti (25) Lʼapparecchio è conforme a tutte le direttive richieste dellʼUE e pertanto porta la sigla . 17 e 18 Uscite delle somme AMP OUTPUT 1 e 2 per il collegamento di amplificatori finali oppure di altri apparecchi con ingresso Line, p. es. mixer 19 Regolatore livello LEVEL 1 per il finale interno e per lʼuscita AMP OUTPUT 1 (18) Si devono osservare assolutamente anche i seguenti punti: G Lʼapparecchio è previsto solo per lʼuso allʼinterno di locali. Proteggerlo dallʼacqua gocciolante e dagli spruzzi dʼacqua, da alta umidità dellʼaria e dal calore (temperatura dʼimpiego ammessa fra 0 e 40 °C). G Non depositare sullʼapparecchio dei contenitori riempiti di liquidi, p. es. bicchieri. G Devʼessere garantita la libera circolazione dellʼaria per dissipare il calore che viene prodotto allʼinterno dellʼapparecchio. Non coprire in nessun modo le fessure dʼaerazione del contenitore. G Non mettere in funzione lʼapparecchio e staccare subito la spina rete se: 1. lʼapparecchio o il cavo rete presentano dei danni visibili 2. dopo una caduta o dopo eventi simili sussiste il sospetto di un difetto; 3. lʼapparecchio non funziona correttamente. Per la riparazione rivolgersi sempre ad unʼofficina competente. G Il cavo rete, se danneggiato, deve essere sostituito solo da un laboratorio specializzato. G Staccare il cavo rete afferrando la spina, senza tirare il cavo. Nota: I regolatori LEVEL (16, 19) non influenzano il livello del segnale di registrazione. 23 e 24 Ingressi mono VOICE INPUT 1 e 2 per il collegamento di microfoni I AVVERTIMENTO Lʼapparecchio funziona con pericolosa tensione di rete. Non intervenire mai personalmente al suo interno e non inserire niente nelle fessure dʼaerazione! Esiste il pericolo di una scarica elettrica. 20 Uscita registrazione REC OUTPUT per il collegamento con lʼingresso di un registratore 21 e 22 Ingressi stereo MUSIC INPUT 1 e 2 per il collegamento di apparecchi audio con uscita Line, p. es. lettori CD o DVD, tapedeck, tuner B CH AVERTISSEMENT Lʼappareil est alimenté par une tension dangereuse. Ne touchez jamais lʼintérieur de lʼappareil et ne faites rien tomber dans les ouïes de ventilation car, en cas de mauvaise manipulation, vous pouvez subir une décharge électrique. 1.2 Pannello posteriore 16 Regolatore livello LEVEL 2 per lʼuscita AMP OUTPUT 2 (17) F 25 Morsetti SPEAKER per le casse acustiche (impedenza min. 4 Ω) 26 Portafusibile; sostituire un fusibile difettoso sempre con uno dello stesso tipo 27 Cavo per il collegamento con una presa di rete (230 V~ / 50 Hz) 7 F G B CH G Pour le nettoyage, utilisez uniquement un chiffon sec et doux, en aucun cas de produits chimiques ou dʼeau. Nous déclinons toute responsabilité en cas de dommages corporels ou matériels résultants si lʼappareil est utilisé dans un but autre que celui pour lequel il a été conçu, sʼil nʼest pas correctement branché, utilisé ou réparé par une personne habilitée ; en outre, la garantie deviendrait caduque. Lorsque lʼappareil est définitivement retiré du service, vous devez le déposer dans une usine de recyclage de proximité pour contribuer à son élimination non polluante. 4.1 Montage en rack Fixez les étriers (1) à lʼavant sur le côté droit et le côté gauche avec trois vis respectivement. Dans le rack, une hauteur de 1 unité = 44,45 mm est nécessaire. Il faut laisser assez de place au-dessus et audessous de lʼamplificateur pour assurer une ventilation suffisante. En cas de dissipation de chaleur insuffisante, insérez dans le rack au-dessus de lʼamplificateur, une unité de ventilation. Sinon, il y a accumulation de chaleur dans le rack, ce qui peut endommager non seulement lʼamplificateur mais aussi les autres appareils placés dans le rack. 5 Branchements 3 Possibilités dʼutilisation Cet amplificateur mixeur stéréo est prévu pour une utilisation universelle. Il permet de relier jusquʼà deux appareils audio avec niveau de sortie ligne (par exemple lecteur CD, lecteur DVD, tape deck) et deux microphones au plus et de mixer leurs signaux sur deux sorties master. Il dispose en plus dʼune sortie dʼenregistrement supplémentaire et dʼune sortie casque réglable. Le son des deux sorties master et des sorties haut-parleurs peut être coupé via un interrupteur à distance optionnel. La coupure du son est également activée lorsquʼun casque est branché. 4 Positionnement Lʼamplificateur peut être intégré dans un rack pour appareils avec une largeur de 482 mm (19″) via les deux étriers de montage livrés. Il peut également être utilisé directement sur une table sans les étriers. Dans chaque cas, lʼair doit pouvoir circuler librement via les ouïes de ventilation afin dʼassurer un refroidissement suffisant. I G G Per la pulizia usare solo un panno morbido, asciutto; non impiegare in nessun caso acqua o prodotti chimici. Nel caso dʼuso improprio, di collegamenti sbagliati, dʼimpiego scorretto o di riparazione non a regola dʼarte dellʼapparecchio, non si assume nessuna responsabilità per eventuali danni consequenziali a persone o a cose e non si assume nessuna garanzia per lʼapparecchio. Se si desidera eliminare lʼapparecchio definitivamente, consegnarlo per lo smaltimento ad unʼistituzione locale per il riciclaggio. Avant dʼeffectuer les branchements ou de modifier les branchements existants, veillez à éteindre lʼamplificateur et les appareils utilisés. 1) Reliez les sources audio aux entrées : – microphones aux prises jack 6,35 VOICE INPUT 1 (24) et VOICE INPUT 2 (23) – appareils stéréo avec niveau de sortie ligne (par exemple lecteur CD, lecteur DVD, tape deck, tuner) aux prises RCA MUSIC INPUT 1 (22) et MUSIC INPUT 2 (21) : prise blanche L = canal gauche, prise rouge R = canal droit A la place de lʼentrée MUSIC INPUT 2 sur la face arrière, on peut utiliser lʼentrée (12) portant le même nom sur la face avant. 2) Reliez les enceintes aux bornes SPEAKER (25) (RIGHT = canal droit, LEFT = canal gauche). Lʼimpédance des haut-parleurs ne doit pas être inférieure à 4 Ω sinon lʼamplificateur pourrait être endommagé. Lors du branchement, reliez respectivement le conducteur repéré du câble hautparleur à la borne rouge afin dʼéviter toute inversion de polarité et élimination du signal. 3) Il est possible de relier deux amplificateurs supplémentaires ou dʼautres appareils avec 4.1 Montaggio in un rack Fissare gli angoli (1) sul davanti, sul lato destro e sinistro, ogni volta con tre viti. Nel rack è richiesta 1 U (unità dʼaltezza) = 44,45 mm. Comunque, sotto e sopra lʼamplificatore dovrebbe rimanere dello spazio supplementare per garantire un raffreddamento sufficiente. In caso di dissipazione insufficiente del calore, conviene montare un ventilatore sopra lʼamplificatore. Altrimenti, nel rack può prodursi un accumulo di calore che può danneggiare non solo lʼamplificatore ma anche altri apparecchi sistemati nel rack. 5 Effettuare i collegamenti 3 Possibilità dʼimpiego Questo amplificatore mixer stereo è previsto per impieghi universali. Offre la possibilità di collegare fino a due apparecchi audio con uscita Line (p. es. lettori CD o DVD, tapedeck) e fino a due microfoni, miscelando le loro segnali su due uscite delle somme dei segnali. Inoltre sono presenti unʼuscita supplementare per la registrazione e unʼuscita regolabile per una cuffia. Le due uscite delle somme e le uscite per gli altoparlanti, possono essere messe in muto con un telecomando opzionale. La funzione muto viene attivata collegando una cuffia. 4 Collocazione Con lʼaiuto dei due angoli di montaggio in dotazione è possibile montare lʼamplificatore in un rack per apparecchi della larghezza di 482 mm (19″). Tuttavia può essere usato anche senza gli angoli come apparecchio da tavolo. In ogni caso, lʼaria deve poter circolare liberamente attraverso tutte le fessure dʼaerazione per garantire un raffreddamento sufficiente. 8 Prima di collegare degli apparecchi o di modificare dei collegamenti esistenti, lʼamplificatore e gli apparecchi impiegati dovrebbero essere spenti. 1) Collegare le sorgenti audio con gli ingressi: – microfoni con le prese jack 6,3 mm VOICE INPUT 1 (24) e VOICE INPUT 2 (23), – apparecchi stereo con uscita Line (p. es. lettori CD o DVD, tapedeck, tuner) con le prese RCA MUSIC INPUT 1 (22) e MUSIC INPUT 2 (21): presa bianca L = canale sinistro, presa rossa R = canale destro Al posto dellʼingresso sul retro MUSIC INPUT 2 si può usare lʼingresso omonimo sul pannello frontale (12). niveau dʼentrée ligne (par exemple table de mixage, appareil à effets) respectivement aux prises RCA des sorties AMP OUTPUT 1 (18) et AMP OUTPUT 2 (17). 4) On peut relier un enregistreur aux prises RCA REC OUTPUT (20) et un casque stéréo (impédance minimale 32 Ω) pour écouter le signal de sortie, à la prise jack 6,35 (13). Les réglages de niveau LEVEL (16 et 19) nʼont pas dʼinfluence sur le signal de sortie à la sortie enregistrement et à la sortie casque. Lorsque vous branchez un casque, le son des sorties AMP OUTPUT (17 et 18) et des sorties haut-parleurs (25) est coupé. La coupure du son est également activée via un interrupteur ou bouton poussoir relié aux bornes à vis MUTE (15). Pour une meilleure maniabilité, les bornes peuvent être retirées de lʼappareil et replacées une fois le câble pour lʼinterrupteur vissé. 5) Reliez enfin la fiche du cordon secteur (27) à une prise secteur 230 V~ / 50 Hz. 6 Utilisation ATTENTION Ne réglez pas le volume de lʼinstallation audio et du casque trop fort. Un volume trop élevé peut, à long terme, générer des troubles de lʼaudition. Lʼoreille sʼhabitue à des volumes élevés et ne les perçoit plus comme tels au bout dʼun certain temps. Nous vous conseillons donc de régler le volume et de ne plus le modifier. 1) Comme réglage de base avant la première utilisation, tournez les réglages de niveau LEVEL (16 et 19) vers la gauche, jusquʼà la butée. Utilisez un petit tournevis. 2) Pour éviter tout bruit fort à lʼallumage, allumez toujours lʼamplificateur de puissance dans une effetti) possono essere collegati con le prese RCA delle uscite AMP OUTPUT 1 (18) e AMP OUTPUT 2 (17). 4) Un registratore può essere collegato con le prese RCA REC OUTPUT (20), e un cuffia stereo (impedenza min. 32 Ω) per lʼascolto del segnale dʼuscita con la presa jack 6,3 mm (13). Le impostazioni dei regolatori di livello LEVEL (16 e 19) non hanno nessuna influenza sul segnale dʼuscita alle uscite registrazione e cuffia. Collegando una cuffia, le uscite AMP OUTPUT (17 e 18) e le uscite per altoparlanti (25) sono messe in muto. La funzione muto può essere attivata anche per mezzo di un interruttore o pulsante collegato con i morsetti MUTE (15). Per maggiore comodità, i morsetti possono essere sfilate dallʼapparecchio, e dopo aver avvitato i conduttori dellʼinterruttore, i morsetti si rimettono semplicemente. 5) Alla fine inserire la spina del cavo (27) in una presa di rete (230 V~ / 50 Hz). 6 Funzionamento ATTENZIONE Mai tenere molto alto il volume dellʼimpianto audio e della cuffia. A lungo andare, il volume eccessivo può procurare danni allʼudito! Lʼorecchio si abitua agli alti volumi e dopo un certo tempo non se ne rende più conto. Perciò non aumentare il volume successivamente. 2) Collegare le casse acustiche con i morsetti SPEAKER (25) (RIGHT = canale destro, LEFT = canale sinistro). Lʼimpedenza degli altoparlanti non deve essere inferiore a 4 Ω, altrimenti, lʼamplificatore può subire dei danni. Durante il collegamento collegare il conduttore contrassegnato con il morsetto rosso in modo da escludere una polarità sbagliata e delle cancellazioni di segnali. 1) Come impostazione base, prima della prima messa in funzione girare i regolatori dei livelli LEVEL (16 e 19) tutto a sinistra, fino allʼarresto, usando un piccolo cacciavite. 3) Due amplificatori supplementari o altri apparecchi con ingresso Line (p. es. mixer, unità per 2) Per evitare forti rumori di commutazione, accendere lʼamplificatore finale in un impianto audio installation audio après tous les autres appareils et après le fonctionnement, éteignez-le en premier. Allumez lʼamplificateur avec lʼinterrupteur POWER (4), le témoin de fonctionnement (3) brille. 3) Avec chaque réglage de volume, réglez le rapport de volume souhaité des sources audio : – réglage VOICE 1 (5) pour le micro à lʼentrée VOICE INPUT 1 (24) – réglage VOICE 2 (7) pour le micro à lʼentrée VOICE INPUT 2 (23) – réglage MUSIC 1 (9) pour lʼappareil à lʼentrée MUSIC INPUT 1 (22) – réglage MUSIC 2 (11) pour lʼappareil à lʼentrée MUSIC INPUT 2 (12 ou 21) Tournez à gauche sur “0” les réglages des canaux inutilisés. 4) Les canaux VOICE 1 et VOICE 2 sont chacun équipés dʼun égaliseur 3 voies (6 et 8), les canaux MUSIC 1 et MUSIC 2 disposent dʼun égaliseur commun 2 voies (10). Les bandes passantes (LOW = graves, MID = médiums, HIGH = aigus) peuvent être augmentées ou diminués de 12 dB au plus avec leur réglage respectif. 5) Le réglage LEVEL 1 (19) sert à augmenter le niveau pour le signal master appliqué à lʼamplificateur de puissance interne et disponible à la sortie AMP OUTPUT 1 (18). Tournez le réglage en conséquence lorsque, même pour un volume élevé, la restitution via les haut-parleurs reliés est trop faible et / ou le niveau du signal pour lʼappareil à la sortie AMP OUTPUT 1 est trop bas. Le réglage LEVEL 2 (16) sert pour augmenter le niveau du signal master disponible à la sortie AMP OUTPUT 2 (17). Si le niveau est trop faible pour lʼappareil relié ici, augmentez le réglage en conséquence. 6) En cas de surcharge de lʼamplificateur de puissance, les LEDs CLIP (2) brillent respectivement pour le canal gauche et le canal droit. Dans ce cas, tournez le réglage LEVEL 1 (19) et / ou les réglages de volume des canaux dʼentrée trop poussés, en conséquence vers la gauche pour diminuer. 7) Tournez le réglage de volume (14) pour la sortie casque (13) comme souhaité. Via le casque, le signal de sortie non influencé par les réglages LEVEL (16 et 19) est audible. 7 Caractéristiques techniques Puissance de sortie Puissance RMS sous 4 Ω : . . Puissance RMS sous 8 Ω : . . Puissance maximale : . . . . . 2 entrées micro (VOICE) Sensibilité / Impédance : . . . . Branchement : . . . . . . . . . . . 2 entrées ligne (MUSIC) Sensibilité / Impédance : . . . . Branchement : . . . . . . . . . . . 2 sorties master (AMP) : Niveau nominal / Impédance : Branchement : . . . . . . . . . . . 1 sortie enregistrement (REC) Niveau nominal / Impédance : Branchement : . . . . . . . . . . . 1 sortie casque ( ) Impédance / Puissance : . . . . Branchement : . . . . . . . . . . . Bande passante : . . . . . . . . . . Taux de distorsion : . . . . . . . . Rapport signal / bruit : . . . . . . . Egaliseur Graves : . . . . . . . . . . . . . . . . Médiums (uniquement VOICE) : . . . . . Aigus . . . . . . . . . . . . . . . . . . Alimentation : . . . . . . . . . . . . . Consommation : . . . . . . . . . . . Température fonc. : . . . . . . . . Dimensions (avec étriers de montage) : . . 2 × 50 W 2 × 30 W 2 × 100 W F B CH 1,3 mV/ 600 Ω jack 6,35, sym. 125 mV/ 10 kΩ RCA, gauche /droit 1 – 3 V/ 100 Ω RCA, gauche / droit 1 V/ 100 Ω RCA, gauche /droit ≥ 32 Ω /2 × 24 mW jack 6,35, stéréo 20 – 20 000 Hz 0,05 % > 60 dB ±12 dB /30 Hz ±12 dB /1 kHz ±12 dB /12 kHz 230 V~ /50 Hz 220 VA 0 – 40 °C 482 × 52 × 275 mm (L × H × P), 1 U Poids : . . . . . . . . . . . . . . . . . . 3,5 kg Notice dʼutilisation protégée par le copyright de MONACOR ® INTERNATIONAL GmbH & Co. KG. Toute reproduction même partielle à des fins commerciales est interdite. sempre dopo tutti gli altri apparecchi, e dopo lʼuso spegnerlo sempre per primo. Accendere lʼamplificatore con lʼinterruttore on / off POWER (4), si accende la spia di funzionamento (3). 3) Con i relativi regolatori di volume, impostare il rapporto desiderato per il volume delle sorgenti audio: – regolatore VOICE 1 (5) per il microfono allʼingresso VOICE INPUT 1 (24) – regolatore VOICE 2 (7) per il microfono allʼingresso VOICE INPUT 2 (23) – regolatore MUSIC 1 (9) per lʼapparecchio allʼingresso MUSIC INPUT 1 (22) – regolatore MUSIC 2 (11) per lʼapparecchio allʼingresso MUSIC INPUT 2 (12 o 21) Girare tutto a sinistra, sullo “0”, i regolatori del canali non utilizzati. gati è troppo debole e / o se il livello del segnale è troppo basso per lʼapparecchio allʼuscita AMP OUTPUT 1. Il regolatore LEVEL 2 (16) serve per aumentare il livello per il segnale delle somme che è disponibile allʼuscita AMP OUTPUT 2 (17). Se il livello è troppo basso per lʼapparecchio collegato qui, aprire il regolatore in corrispondenza. 6) In caso di sovrapilotaggio del finale i LED CLIP (2) si accendono, uno per il canale sinistro e uno per il canale destro. In questo caso chiudere in corrispondenza il regolatore LEVEL 1 (19) e / o i regolatori del volume dei canali dʼingresso aperti troppo. 7) Aprire il regolatore volume (14) per lʼuscita cuffia (13) come desiderato. Tramite la cuffia si sente il segnale dʼuscita non influenzato dai regolatori LEVEL (16 e 19). 4) I canali VOICE 1 e VOICE 2 sono equipaggiati con una regolazione toni a 3 frequenze diverse (6 e 8), i canali MUSIC 1 e MUSIC 2 dispongono invece di una regolazione toni a 2 frequenze diverse (10). Con i relativi regolatori, le gamme di frequenze (LOW = bassi, MID = medi, HIGH = alti) possono essere aumentate e abbassate di 12 dB max. 5) Il regolatore LEVEL 1 (19) serve per aumentare il livello per il segnale delle somme che viene portato sul finale interno e che è disponibile allʼuscita AMP OUTPUT 1 (18). Aprire il regolatore in corrispondenza se anche con un volume impostato alto la riproduzione tramite gli altoparlanti colle- Tout droit de modification réservé. 7 Dati tecnici Potenza allʼuscita Potenza efficace con 4 Ω: . . . Potenza efficace con 8 Ω: . . . Potenza massima: . . . . . . . . 2 Ingressi microfoni (VOICE) Sensibilità / Impedenza: . . . . . Contatto: . . . . . . . . . . . . . . . . 2 Ingressi Line (MUSIC) Sensibilità / Impedenza: . . . . . Contatto: . . . . . . . . . . . . . . . . 2 Uscite delle somme (AMP): Livello nominale / Impedenza: Contatto: . . . . . . . . . . . . . . . . 1 Uscita registrazione (REC): Livello nominale / Impedenza: Contatto: . . . . . . . . . . . . . . . . 1 Uscita cuffia ( ) Impedenza / Potenza: . . . . . . Contatto: . . . . . . . . . . . . . . . . Gamma di frequenze: . . . . . . . Fattore di distorsione: . . . . . . . Rapporto S / R: . . . . . . . . . . . . Regolatori toni bassi: . . . . . . . . . . . . . . . . . . medi (solo VOICE): . . . . . . . alti: . . . . . . . . . . . . . . . . . . . . Alimentazione: . . . . . . . . . . . . Potenza assorbita: . . . . . . . . . Temperatura dʼesercizio: . . . . Dimensioni (con angoli di montaggio): . . . I 2 × 50 W 2 × 30 W 2 × 100 W 1,3 mV/ 600 Ω jack 6,3 mm, bil. 125 mV/ 10 kΩ RCA, sinistra / destra 1 – 3 V/ 100 Ω RCA, sinistra / destra 1 V/ 100 Ω RCA, sinistra / destra ≥ 32 Ω / 2 × 24 mW jack 6,3 mm, stereo 20 – 20 000 Hz 0,05 % > 60 dB ±12 dB / 30 Hz ±12 dB / 1 kHz ±12 dB / 12 kHz 230 V~ / 50 Hz 220 VA 0 – 40 °C 482 × 52 × 275 mm (l × h × p), 1 U Peso: . . . . . . . . . . . . . . . . . . . 3,5 kg La MONACOR ® INTERNATIONAL GmbH & Co. KG si riserva ogni diritto di elaborazione in qualsiasi forma delle presenti istruzioni per lʼuso. La riproduzione – anche parziale – per propri scopi commerciali è vietata. Con riserva di modifiche tecniche. 9 E Todos los elementos de funcionamiento y las conexiones que se describen pueden encontrarse en la página 3 desplegable. cian las salidas AMP OUTPUT (17 y 18) y las salidas de altavoz (25) Nota: Los controles LEVEL (16, 19) no tienen efecto en el nivel de la señal de auriculares. 14 Control de volumen para los auriculares 1 Elementos de Funcionamiento y Conexiones 1.1 Panel frontal 1 Soportes de montaje para instalar el amplificador en un rack (482 mm / 19″) 2 LEDs CLIP de sobrecarga (canal izquierdo / canal derecho) para el amplificador interno 3 LED POWER 4 Interruptor POWER 5 Control de volumen para el canal de micrófono VOICE 1 6 Ecualizador de 3 vías para el canal de micrófono VOICE 1 7 Control de volumen para el canal de micrófono VOICE 2 8 Ecualizador de 3 vías para el canal de micrófono VOICE 2 9 Control de volumen para el canal estéreo MUSIC 1 10 Ecualizador de 2 vías, para ambos canales estéreo MUSIC 1 y MUSIC 2 juntos 11 Control de volumen para el canal estéreo MUSIC 2 12 Entrada de línea estéreo MUSIC INPUT 2, para utilizarse como alternativa a la entrada correspondiente en el panel posterior ( punto 21) 13 Toma para la conexión de auriculares estéreo para monitorizar la señal de salida; cuando conecta unos auriculares a esta toma, se silen- PL Proszę otworzyć niniejszą instrukcję na stronie 3. Pokazano tam rozkład elementów operacyjnych i złączy. 1 Elementy operacyjne i połączeniowe 1.1 Panel przedni 1 Uchwyty do montażu wzmacniacza w racku (482 mm / 19″) 2 Diodowe wskaźniki przesterowania CLIP (lewy kanał / prawy kanał) dla wbudowanego wzmacniacza 3 Dioda zasilania POWER 4 Włącznik POWER 5 Regulator głośności dla kanału mikrofonowego VOICE 1 6 3-punktowy korektor dla kanału mikrofonowego VOICE 1 7 Regulator głośności dla kanału mikrofonowego VOICE 2 8 3-punktowy korektor dla kanału mikrofonowego VOICE 2 9 Regulator głośności dla kanału stereo MUSIC 1 10 2-punktowy korektor, wspólny dla obu kanałów stereo MUSIC 1 oraz MUSIC 2 11 Regulator głośności dla kanału stereo MUSIC 2 12 Wejście liniowe stereo MUSIC INPUT 2, jako alternatywne dla wejścia na tylnym panelu ( punkt 21) 13 Gniazdo do podłączania słuchawek stereo, do odsłuchu sygnału wyjściowego; po podłączeniu słuchawek do tego gniazda, wyjścia AMP OUTPUT (17 i 18) oraz wyjścia głośnikowe (25) zostają wyciszone Uwaga: Ustawienie regulatorów LEVEL (16, 19) nie ma wpływu na poziom sygnału na wyjściu słuchawkowym. 14 Regulator głośności dla wyjścia słuchawkowego 10 1.2 Panel posterior 15 Terminales de tornillo MUTE (desconectables del amplificador) para la conexión de un interruptor / pulsador para silenciar las salidas AMP OUTPUT (17 y 18) y las salidas de altavoz (25) 2 Notas de Seguridad Este aparato cumple con todas las directivas relevantes de la UE y por lo tanto está marcado con el símbolo . ADVERTENCIA El aparato utiliza un voltaje peligroso. Deje el mantenimiento para el personal cualificado y no inserte nunca nada en las rejillas de ventilación. El manejo inexperto del aparato puede provocar una descarga. 16 Control de nivel LEVEL 2 para la salida AMP OUTPUT 2 (17) Preste atención a los siguientes puntos bajo cualquier circunstancia: 17 y 18 Salidas Master AMP OUTPUT 1 y 2 para conectar amplificadores u otros aparatos con nivel de entrada de línea, p. ej. un mezclador G El aparato está adecuado sólo para utilizarlo en interiores. Protéjalo de goteos y salpicaduras, elevada humedad del aire y calor (temperatura ambiente admisible: 0 – 40 ºC). 19 Control de nivel LEVEL 1 para el amplificador interno y la salida AMP OUTPUT 1 (18) G No coloque ningún recipiente con líquido encima del aparato, p. ej. un vaso. 20 Salida de grabación REC OUTPUT para conectar la entrada de un grabador G El calor generado dentro del aparato tiene que disiparse mediante la circulación del aire; no tape nunca las rejillas de la carcasa. G No utilice el aparato y desconecte inmediatamente la toma de corriente del enchufe si: 1. El aparato o el cable de corriente están visiblemente dañados. 2. El aparato ha sufrido daños después de una caída o accidente similar. 3. No funciona correctamente. Sólo el personal cualificado puede reparar el aparato bajo cualquier circunstancia. 25 Terminales SPEAKER para los recintos (impedancia mínima: 4 Ω) G Un cable de corriente dañado sólo puede repararse por el personal cualificado. 26 Soporte para el fusible de corriente; cambie un fusible fundido sólo por otro del mismo tipo G No tire nunca del cable de corriente para desconectarlo de la toma, tire siempre del enchufe. 27 Cable de corriente para conectar a una toma (230 V~ / 50 Hz) G Utilice sólo un paño suave y seco para la limpieza; no utilice nunca ni productos químicos ni agua. 1.2 Panel tylny 2 Środki bezpieczeństwa 15 Terminal śrubowe MUTE (odłączany od wzmacniacza) do podłączania zewnętrznego przełącznika / przełącznika chwilowego wyciszającego wyjścia AMP OUTPUT (17 i 18) oraz wyjścia głośnikowe (25) 16 Regulator poziomu LEVEL 2 dla wyjścia AMP OUTPUT 2 (17) 17 i 18 Wyjścia master AMP OUTPUT 1 i 2 do podłączania zewnętrznego wzmacniacza lub innych urządzeń z wejściem liniowym, np. miksera 19 Regulator poziomu LEVEL 1 dla wbudowanego wzmacniacza oraz wyjścia AMP OUTPUT 1 (18) 20 Wyjście nagrywania REC OUTPUT do podłączania rejestratora Urządzenie spełnia wszystkie wymagania norm UE i dlatego posiada oznaczenie symbolem . Nota: Los controles LEVEL (16, 19) no tienen efecto en el nivel de la señal de grabación. 21 y 22 Entradas estéreo MUSIC INPUT 1 y 2 para conectar aparatos de audio con nivel de salida de línea, p. ej. lector CD o lector DVD, pletina, sintonizador 23 y 24 Entradas mono VOICE INPUT 1 y 2 para conectar micrófonos UWAGA Urządzenie zasilane jest wysokim napięciem. Jego naprawą powinien zajmować się tylko przeszkolony personel. Nie wolno wkładać niczego do otworów wentylacyjnych. Może to spowodować porażenie prądem elektrycznym. Należy przestrzegać poniższych zasad: G Urządzenie przeznaczone jest do użytku tylko wewnątrz pomieszczeń. Należy chronić je przed wodą i wilgocią oraz wysoką temperaturą (dopuszczalny zakres wynosi 0 – 40 ºC). Uwaga: Ustawienie regulatorów LEVEL (16, 19) nie ma wpływu na poziom sygnału na wyjściu nagrywania. G Nie wolno stawiać na urządzeniu żadnych pojemników z cieczą np.: szklanek. 21 i 22 Wejścia stereo MUSIC INPUT 1 i 2 do podłączania urządzeń audio z wyjściem liniowym, np. odtwarzacza CD lub DVD, tunera 23 i 24 Wejścia mono VOICE INPUT 1 i 2 do podłączania mikrofonów 25 Terminale SPEAKER do podłączania głośników (impedancja 4 Ω minimum) 26 Pokrywa bezpiecznika; Spalony bezpiecznik wymieniać na nowy o identycznych parametrach. 27 Kabel zasilający do łączenia z gniazdkiem sieciowym (230 V~ / 50 Hz) G Ciepło wytwarzane podczas pracy urządzenia musi być odprowadzane przez otwory wentylacyjne. W związku z tym nie wolno ich nigdy zasłaniać. G Nie wolno używać oraz należy natychmiast odłączyć urządzenie od zasilania jeżeli: 1. widoczne są jakiekolwiek uszkodzenia urządzenia lub kabla zasilającego, 2. urządzenie upadło lub uległo podobnemu wypadkowi, który mógł spowodować jego uszkodzenie, 3. urządzenie działa nieprawidłowo. W każdym z powyższych przypadków urządzenie musi zostać poddane naprawie przez odpowiednio wyszkolony personel. G Wymianę uszkodzonego należy zlecić specjaliście. G Nie wolno odłączać urządzenia z gniazda sieciowego ciągnąc za kabel zasilający, należy zawsze chwytać za wtyczkę. kabla zasilającego G No podrá reclamarse garantía o responsabilidad alguna por cualquier daño personal o material resultante si el aparato se utiliza para otros fines diferentes a los originalmente concebidos, si no se conecta o se utiliza adecuadamente o no se repara por expertos. Si va a poner el aparato definitivamente fuera de servicio, llévelo a la planta de reciclaje más cercana para que su eliminación no sea perjudicial para el medioambiente. 3 Aplicaciones Este amplificador mezclador estéreo está adecuado para todo tipo de aplicaciones. Permite conectar hasta dos aparatos de audio con nivel de salida de línea (p. ej. lector CD o lector DVD, pletina) y hasta dos micrófonos y mezclar sus señales en dos salidas Master. También está equipado con una salida de grabación adicional y una salida de auriculares ajustable. Se puede utilizar un interruptor de control remoto opcional para silenciar las dos salidas Master y las salidas de altavoz. La función de silenciamiento también se activará cuando conecte los auriculares. 4 Configuración Mediante los dos soportes de montaje entregados, el amplificador se puede instalar en un rack para aparatos con una profundidad de 482 mm (19″); sin embargo, también se puede utilizar como aparato de sobremesa sin soportes. Procure siempre una circulación libre del aire por las rejillas para asegurar un enfriamiento suficiente. (44,45 mm). Procure espacio adicional encima y bajo el amplificador para asegurar una ventilación suficiente. Si la disipación de calor es insuficiente, instale un ventilador en el rack, sobre el amplificador; de lo contrario el calor se acumulará en el rack y podría no sólo dañar el amplificador sino también el resto de los aparatos del rack. 5 Conexiones Antes de hacer o modificar cualquier conexión, desconecte el amplificador y los aparatos que hay que conectar. 1) Conecte las fuentes de audio a las entradas: – Micrófonos a los jacks 6,3 mm VOICE INPUT 1 (24) y VOICE INPUT 2 (23) – Aparatos estéreo con nivel de salida de línea (p. ej. lector CD o lector DVD, pletina, sintonizador) a las tomas RCA MUSIC INPUT 1 (22) y MUSIC INPUT 2 (21): toma blanca L = canal izquierdo, toma roja R = canal derecho En vez de la entrada MUSIC INPUT 2 en el panel posterior, también puede utilizarse la entrada correspondiente (12) en el panel frontal. 2) Conecte los recintos a los terminales SPEAKER (25) [RIGHT = canal derecho, LEFT = canal izquierdo]. La impedancia de los altavoces no puede ser inferior a 4 Ω; de lo contrario podría dañar el amplificador. Cuando conecte los altavoces, conecte siempre el hilo marcado del cable de altavoz al terminal rojo para prevenir inversiones de polaridad y pérdidas de señal. Sujete los soportes (1) en la parte izquierda y derecha del panel frontal mediante tres tornillos en cada lado. En el rack se necesita 1 unidad de rack 3) Existe la posibilidad de conectar dos amplificadores u otros aparatos con nivel de entrada de línea adicionales (p. ej. mezclador, aparato de efectos), uno a cada una de las tomas RCA de las salidas AMP OUTPUT 1 (18) y AMP OUTPUT 2 (17). G 4.1 Montaż w racku 4.1 Instalación rack G Do czyszczenia obudowy należy używać tylko suchej, miękkiej ściereczki. Nie wolno używać wody lub innych środków chemicznych. Dostawca oraz producent nie ponoszą odpowiedzialności za ewentualnie wynikłe szkody materialne lub uszczerbki na zdrowiu, jeśli urządzenie było używane niezgodnie z przeznaczeniem, zostało niepoprawnie zainstalowane lub obsługiwane oraz było poddawane naprawom przez nieautoryzowany personel. Jeśli urządzenie nie będzie już nigdy więcej używane, wskazane jest przekazanie go do miejsca utylizacji odpadów, aby zostało zniszczone bez szkody dla środowiska. 3 Zastosowanie Niniejszy wzmacniacz miksujący stereo przeznaczony jest do uniwersalnych zastosowań. Pozwala na podłączenie do dwóch urządzeń audio z wyjściem liniowym (np. odtwarzaczy CD lub DVD, tunera) i do dwóch mikrofonów, oraz na zmiksowanie sygnałów na dwa wyjścia master. Wyposażony jest ponadto wyjście nagrywania oraz regulowane wyjście słuchawkowe. Możliwe jest także podłączenie zewnętrznego przełącznika do wyciszania obu wyjść master oraz wyjść głośnikowych. Wyciszanie następuje także po podłączeniu słuchawek. 4 Przygotowanie do pracy Dzięki dołączonym uchwytom, wzmacniacz może być montowany w racku (482 mm / 19″), ale może pracować również jako urządzenie wolnostojące. W każdym przypadku należy zapewnić mu wystarczającą ilość miejsca wokół otworów wentylacyjnych pozwalającą na swobodną cyrkulację powietrza. Przykręcić uchwyty (1) do lewej i prawej ścianki wzmacniacza, za pomocą trzech śrub każdy. Urządzenie zajmuje przestrzeń 1 U (44,45 mm). Należy zapewnić dodatkową przestrzeń nad wzmacniaczem, w celu odpowiedniej wentylacji. W przypadku niedostatecznej wentylacji należy dodatkowo zamontować w stojaku wentylatory. W przeciwnym razie, ciepło generowane przez wzmacniacz może spowodować uszkodzenie nie tylko wzmacniacza, ale i innych urządzeń w stojaku. 5 Podłączanie Wszelkich połączeń należy dokonywać przy wyłączonym wzmacniaczu! 1) Źródła sygnału należy podłączać do wejść: – mikrofony do gniazd 6,3 mm VOICE INPUT 1 (24) oraz VOICE INPUT 2 (23) – urządzenia stereo z wyjściem liniowym (np. odtwarzacze CD lub DVD, tuner) do gniazd RCA MUSIC INPUT 1 (22) oraz MUSIC INPUT 2 (21): białe gniazdo L = lewy kanał, czerwone gniazdo R = prawy kanał Zamiast wejścia MUSIC INPUT 2 na tylnym panelu, można wykorzystać wejście (12) na przednim panelu. 2) Głośniki należy podłączać do terminali SPEAKER (25) [RIGHT = prawy kanał, LEFT = lewy kanał]. Wypadkowa impedancja podłączonych głośników nie może spaść poniżej 4 Ω; w przeciwnym razie wzmacniacz ulegnie uszkodzeniu. Przy podłączaniu głośników należy pamiętać o konieczności jednakowej polaryzacji na wszystkich głośnikach, np. podłączać zawsze oznaczoną żyłę do czerwonego terminala. 3) Do wzmacniacza można podłączyć dwa zewnętrzne wzmacniacze lub inne urządzenia z wejściem liniowym (np. mikser, urządzenie 4) Existe también la posibilidad de conectar un grabador a las tomas RCA REC OUTPUT (20) y unos auriculares estéreo (impedancia mínima 32 Ω) para monitorizar la señal de salida en el jack 6,3 mm (13). Los ajustes de los controles LEVEL (16 a 19) no tienen efecto en la señal de salida de la salida de grabación y de la salida de auriculares. Cuando conecte los auriculares, se silenciarán las salidas AMP OUTPUT (17 y 18) y las salidas de altavoz (25). La función de silenciamiento también se puede activar mediante un interruptor o pulsador conectado a los terminales de tornillo MUTE (15). Para facilitar el manejo, desconecte los terminales del aparato y reconéctelos después de atornillar el cable para el interruptor. 5) Finalmente conecte el conector del cable de corriente (27) a un enchufe (230 V~ / 50 Hz). E 6 Funcionamiento PRECAUCIÓN No ajuste nunca el sistema de audio y los auriculares en un volumen muy elevado. Los volúmenes altos permanentes pueden dañar su oído. Su oído se acostumbrará a los volúmenes altos que no lo parecen tanto después de un rato. Por lo tanto, no aumente un volumen alto después de acostumbrarse a él. 1) Como ajuste básico, antes del funcionamiento inicial, ponga los controles de nivel LEVEL (16 y 19) en el tope izquierdo. Gírelos con un pequeño destornillador. 2) Para prevenir el ruido de conexión, conecte siempre los demás aparatos antes de conectar el amplificador; después del funcionamiento, desconéctelo en primer lugar. efektowe), wykorzystując gniazda RCA na wyjściach AMP OUTPUT 1 (18) i AMP OUTPUT 2 (17). PL 4) Do wzmacniacza można podłączyć także rejestrator do gniazd RCA REC OUTPUT (20) oraz słuchawki stereo (impedancja 32 Ω minimum) monitorujące sygnał wyjściowy, do gniazda 6,3 mm (13). Ustawienie regulatorów LEVEL (16, 19) nie ma wpływu na poziom sygnału na wyjściu nagrywania oraz na wyjściu słuchawkowym. Po podłączeniu słuchawek, wyjścia AMP OUTPUT (17 i 18) oraz wyjścia głośnikowe (25) zostają wyciszone. Funkcję wyciszania można również aktywować zdalnie, za pomocą przełącznika lub przełącznika chwilowego podłączonego do terminali MUTE (15). Dla ułatwienia, terminale można odłączyć od wzmacniacza na czas podłączania. 5) Na końcu, podłączyć kabel zasilający (27) do gniazdka sieciowego (230 V~ / 50 Hz). 6 Obsługa UWAGA Nigdy nie ustawiać bardzo dużej głośności wzmacniacza! Stały, bardzo wysoki poziom dźwięku może uszkodzić narząd słuchu. Ucho ludzkie adaptuje się do wysokiego poziomu dźwięku, który po pewnym czasie nie jest już odbierany jako wysoki. Dlatego nie wolno przekraczać raz już ustawionego maksymalnego poziomu głośności. 1) Przed pierwszym włączeniem wzmacniacza, ustawić regulatory LEVEL (16 i 19) maksymalnie w lewo. Do ich regulacji wykorzystać mały śrubokręt. 11 E Conecte el amplificador con el interruptor POWER (4); se ilumina el LED POWER (3). 6) En caso de sobrecarga en el amplificador, los LEDs CLIP (2) se iluminan en el canal derecho y en canal izquierdo. En este caso, retroceda el control LEVEL 1 (19) cuanto sea necesario y/o retroceda cual control de volumen de los canales de entrada que esté demasiado elevado. 7) Avance el control de volumen (14) para la salida de auriculares (13) como desee. Los auriculares reproducen la señal de salida no afectada por los controles LEVEL (16 y 19). 5) El control LEVEL 1 (19) se utiliza para ampliar el nivel de la señal Master enviada al amplificador interno y presente en la salida AMP OUTPUT 1 (18). Si la reproducción mediante los altavoces conectados es muy baja incluso si se ha ajustado un volumen elevado y/ o si el nivel de señal del aparato en la salida AMP OUTPUT 1 es muy bajo, aumente el control cuanto sea necesario. El control LEVEL 2 (16) se utiliza para ampliar el nivel de la señal Master presente en la salida AMP OUTPUT 2 (17). Si el nivel es muy bajo para el aparato conectado en esta salida, aumente el control cuanto sea necesario. Potencia de salida Potencia RMS a 4 Ω: . . . . . 2 × 50 W Potencia RMS a 8 Ω: . . . . . 2 × 30 W Potencia máxima: . . . . . . . 2 × 100 W 2 entradas de micrófono (VOICE) Sensibilidad / impedancia: . 1,3 mV/ 600 Ω Conexión: . . . . . . . . . . . . . Jack 6,3 mm, sim. 2 entradas de línea (MUSIC) Sensibilidad / impedancia: . 125 mV/ 10 kΩ Conexión: . . . . . . . . . . . . . RCA, Iz. / Der. 2 salidas Master (AMP) Nivel nominal / impedancia: 1 – 3 V/ 100 Ω Conexión: . . . . . . . . . . . . . RCA, Iz. / Der. 1 salida de grabación (REC) Nivel nominal / impedancia: 1 V/ 100 Ω Conexión: . . . . . . . . . . . . . RCA, Iz. / Der. 1 salida de auriculares ( ) Impedancia / potencia: . . . . ≥ 32 Ω/2 × 24 mW Conexión: . . . . . . . . . . . . . Jack 6,3 mm, estéreo Banda pasante: . . . . . . . . . . 20 – 20 000 Hz THD: . . . . . . . . . . . . . . . . . . 0,05 % Relación sonido/ruido: . . . . > 60 dB Ecualizador LOW: . . . . . . . . . . . . . . . . . ±12 dB / 30 Hz MID (sólo VOICE): . . . . . . ±12 dB / 1 kHz HIGH: . . . . . . . . . . . . . . . . ±12 dB / 12 kHz Alimentación: . . . . . . . . . . . 230 V~ / 50 Hz Consumo: . . . . . . . . . . . . . . 220 VA Temperatura ambiente: . . . . 0 – 40 °C Dimensiones (incl. Soportes de montaje): 482 × 52 × 275 mm 1U Peso: . . . . . . . . . . . . . . . . . . 3,5 kg Manual de instrucciones protegido por el copyright de MONACOR ® INTERNATIONAL GmbH & Co. KG. Toda reproducción mismo parcial con fines comerciales está prohibida. Sujeto a modificaciones técnicas. 3) Utilice los controles de volumen correspondientes para ajustar el nivel de volumen de las fuentes de audio: – control VOICE 1 (5) para el micrófono en la entrada VOICE INPUT 1 (24) – control VOICE 2 (7) para el micrófono en la entrada VOICE INPUT 2 (23) – control MUSIC 1 (9) para el aparato en la entrada MUSIC INPUT 1 (22) – control MUSIC 2 (11) para el aparato en la entrada MUSIC INPUT 2 (12 ó 21) Ponga siempre los controles de los canales que no se van a utilizar en el tope izquierdo “0”. 4) Los canales VOICE 1 y VOICE 2 están equipados con un ecualizador de 3 vías (6 y 8) cada uno; los canales MUSIC 1 y MUSIC 2 tienen un ecualizador de 2 vías conjunto (10). Para ampliar o atenuar los rangos de frecuencias (LOW = frecuencias graves, MID = frecuencias medias, HIGH = frecuencias agudas) hasta en 12 dB, gire los controles correspondientes. PL 2) Aby uniknąć trzasku w głośnikach, należy włączać wzmacniacz na końcu, po wszystkich źródłach sygnału, natomiast wyłączać jako pierwszy. Włączyć wzmacniacz włącznikiem POWER (4); zapali się dioda POWER (3). 3) Za pomocą regulatorów zmiksować sygnały audio z poszczególnych wejść: – regulatorem VOICE 1 (5) sygnał z wejścia mikrofonowego VOICE INPUT 1 (24) – regulatorem VOICE 2 (7) sygnał z wejścia mikrofonowego VOICE INPUT 2 (23) – regulatorem MUSIC 1 (9) sygnał z wejścia MUSIC INPUT 1 (22) – regulatorem MUSIC 2 (11) sygnał z wejścia MUSIC INPUT 2 (12 lub 21) Regulatory niewykorzystywanych wejść należy skręcić na “0”. 4) Kanały VOICE 1 i VOICE 2 wyposażone są w 3-punktowe korektory (6 i 8); natomiast kanały MUSIC 1 i MUSIC 2 posiadają wspólny 2-punktowy korektor (10). Poszczególne regulatory pozwalają na podbicie lub wytłumienie pasm częstotliwości (LOW = niskie tony, MID = średnie tony, HIGH = wysokie tony) o max 12 dB. 5) Regulator LEVEL 1 (19) służy do ustawiania poziomu sygnału master, podawanego na wbudowany wzmacniacz oraz na wyjście AMP OUTPUT 1 (18). Pozwala on na podbicie głośności w przypadku, gdy mimo ustawienia wysokiej głośności, sygnał w głośnikach lub na wyjściu AMP OUTPUT 1 jest zbyt słaby. Regulator LEVEL 2 (16) służy do ustawiania poziomu sygnału master na wyjściu AMP OUTPUT 2 (17). Pozwala on na podbicie głośności w przypadku, gdy sygnał jest zbyt słaby. 6) W przypadku przesterowania wzmacniacza, zapalają się diody CLIP (2) na prawym i lewym kanale. W tym przypadku, należy skręcić regulator LEVEL 1 (19) i / lub regulatory głośności na odpowiednich wejściach. 7) Ustawić żądaną głośność na wyjściu słuchawkowym (13), za pomocą regulatora (14). Na wyjściu słuchawkowym dostępny jest sygnał wyjściowy, niezależny od ustawienia regulatorów LEVEL (16 i 19). Instrukcje obsługi są chronione prawem copyright for MONACOR ® INTERNATIONAL GmbH & Co. KG. Przetwarzanie całości lub części instrukcji dla osobistych korzyści finansowych jest zabronione. 12 7 Especificaciones 7 Specyfikacja Moc wyjściowa Moc RMS przy 4 Ω: . . . . . . 2 × 50 W Moc RMS przy 8 Ω: . . . . . . 2 × 30 W Moc maksymalna: . . . . . . . 2 × 100 W 2 wejścia mikrofonowe (VOICE) Czułość / impedancja: . . . . . 1,3 mV/ 600 Ω Złącza: . . . . . . . . . . . . . . . gniazdo 6,3 mm, sym. 2 wejścia liniowe (MUSIC) Czułość / impedancja: . . . . . 125 mV/ 10 kΩ Złącza: . . . . . . . . . . . . . . . RCA, Lewy / Prawy 2 wyjścia master (AMP) Poziom / impedancja: . . . . . 1 – 3 V/ 100 Ω Złącza: . . . . . . . . . . . . . . . RCA, Lewy / Prawy 1 wyjście nagrywania (REC) Poziom / impedancja: . . . . . 1 V/ 100 Ω Złącza: . . . . . . . . . . . . . . . RCA, Lewy / Prawy 1 wyjście słuchawkowe ( ) Impedancja / moc: . . . . . . . ≥ 32 Ω/2 × 24 mW Złącze: . . . . . . . . . . . . . . . gniazdo 6,3 mm, stereo Pasmo przenoszenia: . . . . . 20 – 20 000 Hz THD: . . . . . . . . . . . . . . . . . . 0,05 % Stosunek S / N: . . . . . . . . . . . > 60 dB Korektor barwy LOW: . . . . . . . . . . . . . . . . . ±12 dB / 30 Hz MID (tylko VOICE): . . . . . . ±12 dB / 1 kHz HIGH: . . . . . . . . . . . . . . . . ±12 dB / 12 kHz Zasilanie: . . . . . . . . . . . . . . . 230 V~ / 50 Hz Pobór mocy: . . . . . . . . . . . . 220 VA Zakres temperatur: . . . . . . . 0 – 40 °C Wymiary (z uchwytami): . . . 482 × 52 × 275 mm (S × W × D), 1 U Waga: . . . . . . . . . . . . . . . . . 3,5 kg Z zastrzeżeniem możliwości zmian. Lees aandachtig de onderstaande veiligheidsvoorschriften, alvorens het apparaat in gebruik te nemen. Voor meer informatie over de bediening van het apparaat raadpleegt u de anderstalige handleidingen. G G Veiligheidsvoorschriften Dit apparaat is in overeenstemming met alle vereiste EU-Richtlijnen en is daarom met gekenmerkt. G WAARSCHUWING De netspanning van het apparaat is levensgevaarlijk. Open het apparaat niet, en zorg dat u niets in de ventilatieopeningen steekt! U loopt het risico van een elektrische schok. Let eveneens op het volgende: G Het apparaat is enkel geschikt voor gebruik binnenshuis. Vermijd druip- en spatwater, uitzonderlijk warme plaatsen en plaatsen met een hoge voch- G G Læs nedenstående sikkerhedsoplysninger opmærksomt igennem før ibrugtagning af enheden. Bortset fra sikkerhedsoplysningerne henvises til den engelske tekst. G Vigtige sikkerhedsoplysninger G G Denne enhed overholder alle nødvendige EU-direktiver og er som følge deraf mærket . ADVARSEL Enheden benytter livsfarlig netspænding. Udfør aldrig nogen form for modifikationer på produktet og indfør aldrig genstande i ventilationshullerne, da du dermed risikere at få elektrisk stød. Vær altid opmærksom på følgende: G Enheden er kun beregnet til indendørs brug. Beskyt den mod vanddråber og -stænk, høj luftfugtighed og varme (tilladt omgivelsestemperatur 0 – 40 °C). G Ge akt på säkerhetsinformationen innan enheten tas i bruk. Skulle ytterliggare information behövas kan den återfinnas i Manualen för andra språk. G Säkerhetsföreskrifter Enheten uppfyller samtliga Eu-direktiv och har därför försetts med symbolen . G G G VARNING Enheten använder farlig nätspänning. Gör inga modifieringar i enheten eller stoppa föremål i ventilhålen. Risk för elskador föreligger. G tigheid (toegestaan omgevingstemperatuurbereik: 0 – 40 °C). Plaats geen bekers met vloeistof zoals drinkglazen etc. op het apparaat. De warmte die in het apparaat ontstaat, moet door ventilatie worden afgevoerd. Dek daarom de ventilatieopeningen van de behuizing niet af. Schakel het apparaat niet in resp. trek onmiddellijk de stekker uit het stopcontact: 1. wanneer het apparaat of het netsnoer zichtbaar beschadigd is, 2. wanneer er een defect zou kunnen optreden nadat het apparaat bijvoorbeeld is gevallen, 3. wanneer het apparaat slecht functioneert. Het apparaat moet in elk geval hersteld worden door een gekwalificeerd vakman. Een beschadigd netsnoer mag alleen in een werkplaats worden vervangen. Trek de stekker nooit met het snoer uit het stopcontact, maar met de stekker zelf. G Undgå at placere væskefyldte genstande, som f. eks. glas, ovenpå enheden. Varmen, der udvikles i enheden, skal kunne slippe ud ved hjælp af luftcirkulation. Enhedens ventilationshuller må derfor aldrig tildækkes. Tag ikke enheden i brug eller tag straks stikket ud af stikkontakten i følgende tilfælde: 1. hvis der er synlig skade på enheden eller netkablet. 2. hvis der kan være opstået skade, efter at enheden er tabt eller lignende. 3. hvis der forekommer fejlfunktion. Enheden skal altid repareres af autoriseret personel. Et beskadiget netkabel må kun repareres af autoriseret personel. Tag aldrig stikket ud af stikkontakten ved at trække i kablet, tag fat i selve stikket. G Der bør aldrig skrues meget højt op for lydsystemets og hovedtelefonens lydniveau. Et permanent højt lydniveau kan skade menneskers hørelse! Det menneskelige øre vænner sig til et højt lydniveau, og efter nogen tid opfattes dette lydniveau ikke som højt. Undlad derfor at øge volumen efter tilvænning. G Til rengøring må kun benyttes en tør, blød klud; der må under ingen omstændigheder benyttes kemikalier eller vand. G Hvis enheden benyttes til andre formål, end den oprindeligt er beregnet til, hvis den ikke er korrekt tilsluttet, hvis den betjenes forkert, eller hvis den ikke repareres af autoriseret personel, omfattes eventuelle skader ikke af garantien. Placera inte föremål innehållande vätskor, t. ex. dricksglas, på enheten. Värmen som alstras vid användning leds bort genom självcirkulering. Täck därför aldrig över enheten eller ställ den så att luftcirkuleringen försämras. Använd inte enheten eller ta omedelbart kontakten ur eluttaget om något av följande fel uppstår: 1. Enheten eller elsladden har synliga skador. 2. Enheten är skadad av fall e. d. 3. Enheten har andra felfunktioner. Enheten skall alltid lagas på verkstad av utbildad personal. En skadad elsladd skall bytas på verkstad. Drag aldrig ut kontakten genom att dra i sladden utan ta tag i kontaktkroppen. Justera aldrig ljudsystemet och hörlurarna till en väldigt hög ljudnivå. Permanent höga volymer kan Ge ovillkorligen även akt på följande: G Enheten är endast avsedd för inomhusbruk. Skydda enheten mot vätskor, hög luftfuktighet och hög värme (tillåten omgivningstemperatur 0 – 40 °C). G Ole hyvä ja huomioi joka tapauksessa seuraavat turvallisuuteen liittyvät seikat ennen laitteen käyttöä. Laitteen toiminnasta saa lisätietoa tarvittaessa tämän laitteen muunkielisistä käyttöohjeista. G Laitteessa kehittyvä lämpö poistetaan ilmanvaihdolla. Tämän vuoksi laitteen tuuletusaukkoja ei saa peittää. G Irrota virtajohto pistorasiasta, äläkä käynnistä laitetta, jos: 1. laitteessa tai virtajohdossa on havaittava vaurio 2. putoaminen tai muu vastaava vahinko on saattanut aiheuttaa vaurion 3. laitteessa esiintyy toimintahäiriöitä Kaikissa näissä tapauksissa laite tulee huollattaa valtuutetussa huollossa. G Turvallisuudesta Tämä laite täyttää kaikki siihen kohdistuvat EU-direktiivit ja sille on myönnetty hyväksyntä. VAROITUS Laite toimii hengenvaarallisella jännitteellä. Älä koskaan tee mitään muutoksia laitteeseen taikka asenna mitään ilmanvaihto aukkoihin, koska siitä saattaa seurata sähköisku. G Vioittuneen verkkojohdon saa vaihtaa vain siihen oikeutettu sahkoasentaja. G Älä koskaan irrota virtajohtoa pistorasiasta johdosta vetämällä. G Älä koskaan säädä audiolaitteiston eikä myöskään kuulokkeiden äänitasoa huippulukemille. Jatkuva kova äänenvoimakkuus vaurioittaa kuuloasi! Ihmiskorva tottuu koviin äänenvoimakkuuksiin, jotka eivät tunnu hetken kuluttua enää niin kovailta. Älä Huomioi seuraavat seikat: G Tämä laite soveltuu vain sisätilakäyttöön. Suojele laitetta kosteudelta, vedeltä ja kuumuudelta (sallittu ympäröivä lämpötila 0 – 40 °C). G Älä sijoita laitteen päälle mitään nestettä sisältävää, kuten vesilasia tms. Stel het volume van de geluidsinstallatie en dat van de hoofdtelefoon nooit zeer hoog in. Langdurige blootstelling aan hoge volumes kan het gehoor beschadigen! Het gehoor raakt aangepast aan hoge volumes die na een tijdje niet meer zo hoog lijken. Verhoog daarom het volume niet nog meer, nadat u er gewoon aan bent geraakt. G Verwijder het stof met een droge, zachte doek. Gebruik zeker geen water of chemicaliën. G In geval van ongeoorloofd of verkeerd gebruik, verkeerde aansluiting, foutieve bediening of van herstelling door een niet-gekwalificeerd persoon vervalt de garantie en de verantwoordelijkheid voor hieruit resulterende materiële of lichamelijke schade. NL B Wanneer het apparaat definitief uit bedrijf wordt genomen, bezorg het dan voor milieuvriendelijke verwerking aan een plaatselijk recyclagebedrijf. DK Hvis enheden skal tages ud af drift for bestandigt, skal den bringes til en lokal genbrugsstation for bortskaffelse. ge upphov till hörselskador! Örat vänjer sig vid höga volymer vilken efter ett tag inte längre verkar så hög. Därför bör man ej ytterligare höja volymen efter att man vant sig. G Rengör endast med en mjuk och torr trasa, använd aldrig kemikalier eller vatten vid rengöring. G Om enheten används på annat sätt än som avses, om den inte kopplas in ordentligt, om den används på fel sätt eller inte repareras av auktoriserad personal upphör alla garantier att gäll. I dessa fall tas inget ansvar för uppkommen skada på person eller materiel. S Om enheten skall kasseras bör den lämnas till återvinning. lisää äänenvoimakkuutta sen vuoksi, että olet jo tottunut siihen. G Käytä puhdistamiseen pelkästään kuivaa, pehmeää kangasta. Älä käytä kemikaaleja tai vettä. G Laitteen takuu raukeaa, eikä valmistaja, maahantuoja tai myyjä ota vastuuta mahdollisista välittömistä tai välillisistä vahingoista, jos laitetta on käytetty muuhun kuin alkuperäiseen käyttötarkoitukseen, laitetta on taitamattomasti käytetty tai kytketty tai jos laitetta on huollettu muussa kuin valtuutetussa huollossa. FIN Huolehdi laitteen kierrättämisestä, kun laite lopullisesti poistetaan käytöstä. 13 ® MONACOR INTERNATIONAL GmbH & Co. KG • Zum Falsch 36 • 28307 Bremen • Germany A-1229.99.01.04.2011 Copyright © by MONACOR INTERNATIONAL. All rights reserved.