1
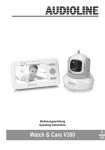
Watch
& Care
V131
Bedienungsanleitung
User Guide
Mode d’emploi
ÜBERSICHT
1
7
2
9
3
8
4
DC 6V
5
6
1
2
3
4
5
6
7
8
9
Nachtlicht
Lichtsensor
Objektiv
Antenne
Mikrofon
Power-LED
Ein-/Ausschalter ON/OFF
Anschluss für Netzteil
Temperatursensor
GERÄT IN BETRIEB NEHMEN
Sender anschließen und ausrichten
Achtung: Stellen Sie den Sender mit einem Mindestabstand von 1 m zu anderen elektronischen
Geräten auf, da es sonst zu gegenseitigen Störungen kommen kann. Richten Sie das Oberteil des
Senders auf das zu überwachende Baby bzw. Objekt aus. Überprüfen Sie, ob das Baby bzw. Objekt
auf dem Empfänger angezeigt wird.
Betrieb mit Batterien
(nicht im Lieferumfang enthalten)
Öffnen Sie das Batteriefach
auf der Unterseite des Senders
mit einem kleinen Schraubendreher. Setzen Sie die Batterien polungsrichtig ein. Folgen Sie dazu
den Abbildungen im Batteriefach.
Schließen Sie das Batteriefach
wieder.
Der Sender wird mit 4 AAA Alkaline Batterien
(nicht im Lieferumfang enthalten) betrieben. Der
Sender hat keine Ladefunktion. Setzen Sie die
Batterien zuerst ein, bevor Sie das Netzteil anschließen.
1
GERÄT IN BETRIEB NEHMEN
Bei geringer Batterieleistung blinkt die Power-LED
langsam. Die Batterien müssen ausgewechselt werden.
Netzsteckdose
DC 6V
Betrieb mit Netzteil
Schließen Sie den Sender wie auf der Skizze abgebildet an. Verwenden Sie aus Sicherheitsgründen nur
das mitgelieferte Netzteil.
Detaillierte Informationen zur Bedienung sowie
Sicherheits- und Entsorgungshinweise entnehmen Sie bitte der Bedienungsanleitung zu Ihrem
Amplicomms Watch&Care V130/132.
2
GERÄT IN BETRIEB NEHMEN
Registrierung des Senders (Kameraeinheit)
Zum Betrieb an Ihrem Amplicomms Watch&Care
V130/132 müssen Sie den Sender (Kameraeinheit)
anmelden:
1 Sender ausschalten (Schalter auf Position OFF).
Falls erforderlich, die Batterien aus dem Sender
für einige Sekunden entfernen.
2 Schalten Sie den Empfänger ein.
3 Drücken und halten Sie die Taste
erscheint.
4 Wählen Sie mit
[C1] ... [C4].
, bis [C1]
die gewünschte Kamera
5 Drücken Sie die Taste
kurz. Die Link-LED flackert für ca. 10 s. Während dieser Zeit müssen Sie
die Schritte 6 und 7 durchführen.
6 Schalten Sie den Sender ein (Schalter auf Position
ON).
7 Drücken Sie kurz auf die Anmeldetaste auf der Rückseite des Senders. Nach kurzer Zeit wird bei
erfolgreicher Verbindung im Display das vom Objektiv erfasste Bild
angezeigt.
Schlägt die Anmeldung fehl, erscheint „Out of Range“ im Display.
3
AT A GLANCE
1
7
2
9
3
4
8
DC 6V
5
6
1
2
3
4
5
6
7
8
9
4
Night light
Light sensor
Camera lens
Antenna
Microphone
Power LED
ON/OFF switch
Socket for power adapter plug
Temperature sensor
Helpline UK 0844 800 6503
(See Watch&Care V130/132 user guide for costs and hours of operation)
PUTTING THE UNIT INTO OPERATION
Connecting and aligning the transmitter
Attention: Position the transmitter with a minimum distance of 1 m to other electronic devices,
otherwise there is a risk of mutual disturbance.
Point the upper section of the transmitter towards the baby or object you want to monitor.
Check that the baby or object is suitably displayed on the receiver.
Operating with batteries (not supplied)
Use a small screwdriver to
open the transmitter’s battery compartment on the underside. Insert
the batteries, paying attention to
correct polarity. Refer to the diagrams in the battery compartment.
Close the battery compartment again.
The transmitter is operated by means of 4 AAA
Alkaline batteries (not contained in the material
supplied). The transmitter cannot be charged. Insert the batteries before connecting the power
adapter plug.
Helpline UK 0844 800 6503
(See Watch&Care V130/132 user guide for costs and hours of operation)
5
PUTTING THE UNIT INTO OPERATION
In the case of a low battery charge, the Power LED
flashes slowly. The batteries must be replaced.
Mains power outlet
DC 6V
Operating with a power adapter plug
Connect the transmitter as illustrated in the diagram.
For safety reasons, only use the power adapter plug
supplied.
Detailed information for using the transmitter
(camera) and instructions for safety and disposal
you find in the user guide of your Amplicomms
Watch&Care V130/132.
6
Helpline UK 0844 800 6503
(See Watch&Care V130/132 user guide for costs and hours of operation)
PUTTING THE UNIT INTO OPERATION
Registration
For operation you will have to register your transmitter (camera) to your Amplicomms Watch&Care
V130/132:
1 Switch the transmitter off (switch set to OFF). Remove the batteries of the receiver for a few seconds if necessary.
2 Switch the receiver on.
3 Press and hold down the button
appears in the display.
until [C1]
4 Use the
buttons to select the desired camera [C1] ... [C4].
5 Press the
button briefly. The Link LED flickers for approx. 10 seconds. During this time,
you must perform steps 6 and 7.
6 Switch the transmitter on (switch set to ON).
7 Press the registration key on the
back side of the transmitter. After a
short time the video from the
transmitter will appear on the
screen if the registration was successful. If the registration failed,
“Out of Range“ appears on the
screen.
Helpline UK 0844 800 6503
(See Watch&Care V130/132 user guide for costs and hours of operation)
7
APERÇU
1
7
2
9
3
5
DC 6V
4
8
6
1
2
3
4
5
6
7
8
9
8
Veilleuse
Capteur de lumière
Objectif
Antenne
Microphone
LED énergie
Bouton ON/OFF
Raccordement pour bloc d'alimentation
Capteur de température
METTRE L’APPAREIL EN SERVICE
Raccorder et orienter l’émetteur
Attention : placez l’émetteur au minimum à 1 m
de distance des autres appareils électroniques
pour éviter des perturbations mutuelles. Orientez
la partie supérieure de l’émetteur vers le bébé ou
l’objet à surveiller. Vérifiez que le bébé ou l’objet
apparaît sur le récepteur.
Fonctionnement sur piles
(non incluses dans la livraison)
Ouvrez le compartiment
pour piles situé dans la partie inférieure de l’émetteur avec un
petit tournevis. Insérez les piles
en respectant la bonne polarité.
Suivez à cet effet les illustrations
du compartiment pour piles. Refermez le compartiment pour piles.
L’émetteur est alimenté avec 4 piles alcalines AAA
(non incluses dans la livraison). L’émetteur ne
possède pas de fonction de chargement. Insérez
d’abord les piles avant de raccorder le bloc d’alimentation.
9
METTRE L’APPAREIL EN SERVICE
Quand la puissance des piles est faible, la LED énergie clignote lentement. Il faut remplacer les piles.
Prise secteur
DC 6V
Fonctionnement avec bloc d’alimentation
Raccordez l’émetteur comme illustré sur le croquis.
Pour des raisons de sécurité, n’utilisez que le bloc
d’alimentation livré.
Vous trouverez des informations détaillées sur
l’utilisation ainsi que des indications relatives à la
sécurité et à l’élimination des déchets dans le
mode d’emploi de votre Amplicomms
Watch&Care V130/132.
10
METTRE L’APPAREIL EN SERVICE
Enregistrement de l’émetteur (unité caméra)
Vous devez enregistrer l’émetteur (unité caméra)
pour qu’il fonctionne sur votre Amplicomms
Watch&Care V130/132 :
1 Eteindre l’émetteur (bouton en position OFF). Si
nécessaire, retirer les piles de l’émetteur pendant
quelques secondes.
2 Allumez le récepteur.
3 Appuyez et tenez la touche
ce que [C1] apparaisse.
appuyée jusqu’à
4 Sélectionnez ensuite la caméra souhaitée [C1] ...
[C4] avec
.
5 Appuyez brièvement sur la touche
. La LED
liaison scintille pendant env. 10 s. Il faut exécuter
les étapes 6 et 7 pendant ce temps.
6 Allumez l’émetteur (bouton en position ON).
7 Appuyez brièvement sur la touche
d’enregistrement au dos de l’émetteur. Après que la connexion est
réussie, l’image saisie par l’objectif
s’affiche sur l’écran après un temps
court.
Si l’enregistrement a échoué, « Out
of Range » apparaît sur l’écran.
11
12
GERÄT IN BETRIEB NEHMEN
13
4 250711 991890
Audioline GmbH, D-41460 Neuss
12/2013 – Edition 1.1