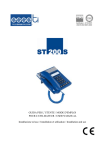
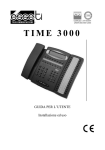
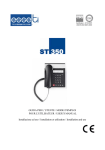
1
GUIDA PER L’UTENTE /
MODE D'EMPLOI POUR L'UTILISATEUR /
USER’S MANUAL
Installazione ed uso / Instalación y Uso
Installation et utilisation / Installation and use
SOMMARIO / SOMMAIRE /
CONTENTS
ITALIANO.............................................................................................................. 7
CONVENZIONI TIPOGRAFICHE..................................................................... 8
AVVERTENZE GENERALI PER L'INSTALLATORE................................... 9
NOTE GENERALI ................................................................................................... 9
REALIZZAZIONE DELL'IMPIANTO ........................................................................ 10
RACCOMANDAZIONI............................................................................................ 10
DESCRIZIONE.................................................................................................... 12
FUNZIONI OFFERTE .............................................................................................. 12
INSTALLAZIONE............................................................................................... 14
COLLEGAMENTI .................................................................................................. 14
SOSTITUZIONE BATTERIE .................................................................................... 15
PROGRAMMAZIONE DEL TIPO DI CENTRALE E DELL’ATTACCO INTERNO .............. 15
Procedura di programmazione....................................................................... 16
PROGRAMMAZIONI GENERALI DEL TELEFONO ..................................................... 18
Programmazione data e ora........................................................................... 19
Programmazione prefisso locale.................................................................... 19
Programmazione codice impegno linea ......................................................... 20
Programmazione luminosità .......................................................................... 20
Tempo di Flash............................................................................................... 21
Programmazione funzione anti-intrusione ..................................................... 21
Selezione decadica/multifrequenza ................................................................ 21
Regolazione del volume della suoneria .......................................................... 21
Regolazione del volume del vivavoce ............................................................. 22
FUNZIONAMENTO DEL TELEFONO ........................................................... 23
Tasti................................................................................................................ 23
Indicazioni dei LED........................................................................................ 24
Display ........................................................................................................... 25
Effettuare una chiamata ................................................................................. 26
Ricevere una chiamata ................................................................................... 26
Terminare una chiamata ................................................................................ 26
Mettere in attesa una chiamata (telefono collegato ad un centralino
telefonico)....................................................................................................... 27
Mettere in attesa una chiamata (telefono collegato alla linea urbana) ......... 27
Ripetizione dell’ultimo numero selezionato ................................................... 28
Richiamata su occupato ................................................................................. 28
Pausa.............................................................................................................. 29
Selezione rapida “two touch” da memoria .................................................... 29
Visualizzazione dei numeri di telefono delle chiamate ricevute ..................... 30
Funzione VIP.................................................................................................. 31
Visualizzazione delle chiamate effettuate ....................................................... 31
Funzione Non Disturbare ............................................................................... 32
DICHIARAZIONE DI CONFORMITÀ CE .................................................................. 32
USO PER CUI IL DISPOSITIVO È DESTINATO. ......................................................... 33
FRANÇAIS ........................................................................................................... 34
CONVENTIONS TYPOGRAPHIQUES ........................................................... 35
REMARQUES GENERALES POUR L’INSTALLATEUR............................ 36
NOTES GENERALES ............................................................................................. 36
REALISATION DE L’INSTALLATION ..................................................................... 37
RECOMMANDATIONS .......................................................................................... 37
DESCRIPTION .................................................................................................... 39
FONCTIONS ......................................................................................................... 39
INSTALLATION ................................................................................................. 41
BRANCHEMNT ..................................................................................................... 41
BATTERIES .......................................................................................................... 42
PROGRAMMER LE TYPE DE PABX ET DE BROCHE D’INTERNE ............................. 42
Procédure de programmation ........................................................................ 43
PROGRAMMATIONS GENERALES DE L’APPAREIL ................................................. 45
Programmer la date et l'heure ....................................................................... 46
Programmer l'indicatif local .......................................................................... 46
Programmer le code d’engagement de la ligne externe ................................. 47
Programmer la luminosité.............................................................................. 47
Temps de flash................................................................................................ 48
Fonction Anti-intrusion .................................................................................. 48
Sélection décimale/multifréquence ................................................................. 48
Réglage niveau sonnerie ................................................................................ 49
Réglage du volume du mains libre ................................................................. 49
FONCTIONNEMENT DE L'APPAREIL ......................................................... 50
Touches .......................................................................................................... 50
Indications des témoins .................................................................................. 51
Ecran .............................................................................................................. 52
Effectuer un appel .......................................................................................... 53
Recevoir un appel........................................................................................... 53
Terminer un appel .......................................................................................... 53
Mettre un appel en attente (téléphone branché à un PABX) ......................... 53
Mettre un appel en attente (téléphone branché à la ligne externe) ............... 54
Répéter le dernier numéro sélectionné........................................................... 55
Resélection automatique sur occupé .............................................................. 55
Pause .............................................................................................................. 55
Mémoire sélection abrégée « two touch » ...................................................... 56
Afficher les numéros d'abonnés des appels entrants ...................................... 57
Fonction VIP .................................................................................................. 58
Vérifier les appels sortants............................................................................. 58
Fonction Ne pas déranger .............................................................................. 58
DECLARATION DE CONFORMITE CE .................................................................... 59
USAGE POUR LEQUEL L'APPAREIL EST DESTINE. .................................................. 60
ENGLISH.............................................................................................................. 61
EDITING CRITERIA.......................................................................................... 62
GENERAL INSTRUCTIONS FOR THE INSTALLER .................................. 63
GENERAL NOTES ................................................................................................. 63
MAKING THE INSTALLATION ............................................................................... 64
WARNINGS .......................................................................................................... 64
DESCRIPTION .................................................................................................... 65
FEATURES AND FUNCTIONS ................................................................................ 65
INSTALLATION ................................................................................................. 67
CONNECTIONS ..................................................................................................... 67
BATTERIES .......................................................................................................... 68
PROGRAMMING THE EXCHANGE TYPE AND EXTENSION NUMBER ........................ 68
Programming procedure ................................................................................ 69
TELEPHONE GENERAL PROGRAMMING ................................................................ 71
Set date and time ............................................................................................ 71
Set area code .................................................................................................. 72
Set the line engagement code ......................................................................... 72
Set brightness ................................................................................................. 73
Flash time....................................................................................................... 73
Set Anti-intruision function ............................................................................ 73
Tone/Pulse dialing.......................................................................................... 74
Setting ringer level ......................................................................................... 74
Setting the hands free level............................................................................. 74
TELEPHONE OPERATION.............................................................................. 75
Keys ................................................................................................................ 75
LED indications.............................................................................................. 76
Display ........................................................................................................... 77
Placing a call ................................................................................................. 78
Receiving a call .............................................................................................. 78
Ending a call .................................................................................................. 78
Putting a call on hold (Telephone connected to PABX) ................................. 78
Putting a call on hold (Telephone connected to the external line) ................. 79
Last number redial ......................................................................................... 80
Recall on busy ................................................................................................ 80
Pause .............................................................................................................. 80
Two touch memory dialing ............................................................................. 81
Review the incoming call numbers ................................................................. 82
VIP function.................................................................................................... 82
Outgoing calls checking ................................................................................. 83
Do Not Disturb function ................................................................................. 83
CE CONFORMITY DECLARATION ......................................................................... 84
DESIGNED USE OF THE DEVICE. ........................................................................... 84
ITALIANO
Grazie per aver scelto un prodotto Esse-ti
Questo prodotto è stato progettato appositamente
per facilitare l'Utente nelle attività telefoniche
quotidiane ed è stato costruito a regola d'arte
utilizzando materiali adatti a renderlo affidabile
nel tempo.
I prodotti Esse-ti vengono tutti sottoposti a
specifici ed approfonditi test in laboratorio, in
modo da offrire all'Utente quante più garanzie
possibili.
La responsabilità per vizi derivanti dall'uso del prodotto, fa carico all'Utente. La Esse-ti
è responsabile esclusivamente dei difetti ai sensi e nei limiti del D.P.R. 24/05/1988 n.
224 (attuazione della direttiva CEE n. 85/374 relativa al ravvicinamento delle
disposizioni legislative, regolamentari e amministrative degli Stati membri in materia di
responsabilità per danno da prodotti difettosi, ai sensi dell'art. 15 della legge 16 aprile
1987, n. 183).
La Esse-ti si riserva il diritto di modificare in qualsiasi momento e senza
preavviso le caratteristiche dei propri prodotti.
CONVENZIONI TIPOGRAFICHE
Per semplificare la lettura e la comprensione del manuale da parte dell’utente
sono stati utilizzati nel testo diversi stili, ognuno dei quali ha un significato
logico preciso.
La tabella seguente presenta un esempio degli stili utilizzati (a sinistra) in
corrispondenza del significato logico loro attribuito (a destra).
Esempio
Significato
TITOLO DI
CAPITOLO
Stile applicato al titolo di ogni capitolo. Ogni
nuovo capitolo inizia a pagina nuova.
TITOLO PRIMARIO
Titolo Secondario
Titolo Terziario
Stile usato per indicare i titoli di ampie sezioni
all’interno dei capitoli, come i vari titoli
principali del capitolo.
Stile che sta ad indicare il titolo di uno
specifico paragrafo all’interno del titolo
primario.
Questo stile viene utilizzato solo nel caso in
cui sia necessario suddividere ulteriormente il
paragrafo specifico.
Esempio
Stile che definisce un esempio.
Nota
Così si presentano le specificazioni relative al
testo: prestare attenzione.
Attenzione
Testo normale
¾
Operazione da effettuare
La presenza di questo stile indica che
potrebbero esserci rischi per le cose o le
persone, quindi essere molto cauti.
Stile definito per la normale stesura del testo.
Stile che indica l’esatta sequenza di operazioni
necessarie ad effettuare una programmazione
o a richiamare un servizio.
AVVERTENZE GENERALI PER
L'INSTALLATORE
NOTE GENERALI
Prestare attenzione alle avvertenze contenute in questa sezione in quanto
forniscono importanti indicazioni relative ad una corretta e sicura installazione,
all'uso e alla manutenzione del prodotto.
• L'apparecchio deve essere destinato ESCLUSIVAMENTE all'uso per il
quale è stato progettato. La Esse-ti non può essere considerata responsabile
per eventuali danni derivanti da impieghi impropri.
• Premesso che il prodotto è stato progettato nel rispetto delle norme vigenti,
l'installazione dovrà avvenire all'interno di impianti conformi anch'essi alle
norme vigenti.
• Prima di collegare il prodotto alla rete elettrica accertarsi che la tensione di
linea corrisponda a quella indicata nell'etichetta apposta sul prodotto stesso.
• Prima di effettuare qualsiasi intervento all'interno o all'esterno del prodotto
(pulizia, manutenzione, ecc.) scollegare l'apparecchiatura dalla rete di
alimentazione.
• E' opportuno prevedere a monte del prodotto un appropriato interruttore di
sezionamento e protezione, in modo da interrompere l'alimentazione in caso
di guasto.
• Per qualsiasi intervento di riparazione rivolgersi esclusivamente ad un
centro assistenza tecnico autorizzato.
• Installare il prodotto in un locale aerato e tenere conto delle fessure di
aerazione, che non andranno mai e in nessun caso ostruite.
• Prestare attenzione ai simboli indicanti un fulmine con freccia all'interno di
un triangolo: indicano la presenza di tensioni pericolose
• Prestare attenzione ai simboli indicanti un punto esclamativo all'interno di
un triangolo: indicano di procedere con la massima attenzione poiché
sussistono situazioni di potenziale pericolo o addirittura di morte
• Fare riferimento al paragrafo "Caratteristiche Tecniche" per avere
informazioni riguardanti le condizioni di utilizzo del prodotto
• Non accostare il prodotto ad altre apparecchiature elettriche o elettroniche
che non siano state progettate per essere abbinate ad esso
• Non installare il prodotto in ambienti potenzialmente esplosivi
• Assicurarsi che il prodotto sia installato come prescritto
• Collegare all'impianto le apposite protezioni relative alla linea di
alimentazione e quelle relative alle linee telefoniche
• Non introdurre oggetti, liquidi o polveri né usare spray all'interno del
prodotto
• Non aprire la carcassa del prodotto, in quanto all'interno non sono presenti
parti manutenibili dall'Utente. In caso di necessità rivolgersi ad un centro
assistenza autorizzato
• In caso di fughe di gas nell'ambiente non utilizzare il telefono per segnalare
l'emergenza
• In caso di necessità di sostituzione delle batterie, provvedere al corretto
smaltimento e non gettare tra i rifiuti ordinari
• Gli elementi dell'imballaggio (sacchetti di plastica, polistirolo espanso, ecc.)
non devono essere lasciati alla portata dei bambini in quanto potenziali fonti
di pericolo
REALIZZAZIONE DELL'IMPIANTO
La realizzazione di impianti telefonici interni dovrebbe essere effettuata da
personale specializzato
Non sono consentiti l'installazione e l'allacciamento alla rete di
telecomunicazione di terminali telefonici non conformi alle norme vigenti.
RACCOMANDAZIONI
Le principali cause di disturbi sulle linee telefoniche e sulle reti di
alimentazione elettrica (che possono provocare malfunzionamenti e
danneggiamenti al prodotto) sono attribuiti a:
• contatti accidentali con linee a tensioni più elevate (corto circuito)
• accoppiamenti elettromagnetici con altri conduttori posti nelle vicinanze
• brusche variazioni di carico, specie per le linee elettriche di alimentazione
(motori elettrici ecc.)
• perturbazioni transitorie generate da eventi atmosferici (fulmini)
Le protezioni per linee telefoniche vanno inserite non solo sulle linee urbane,
ma anche sulle linee derivate con un percorso esterno al fabbricato o linee alle
quali siano connessi apparecchi con alimentazione di rete, come fax, modem,
segreterie, cordless, ecc.
La protezione per linee di alimentazione deve essere collegata all'ingresso della
linea di alimentazione elettrica del prodotto.
Il morsetto di terra delle protezioni, per ottenere un efficace funzionamento dei
dispositivi, deve essere collegato a una presa di terra efficiente.
DESCRIZIONE
Fly View Operator è un telefono di sistema che può essere collegato a tutte le
centrali telefoniche Esse-ti (serie K).
I LED di colore rosso e verde posti sulla destra permettono di visualizzare lo
stato delle linee urbane e degli interni, forniscono informazioni circa il modo di
funzionamento della centrale (giorno o notte) e l’eventuale attivazione del
servizio di deviazione di chiamata.
Il display a cristalli liquidi consente, con tutte le centrali Esse-ti
opportunamente configurate ed equipaggiate, la visualizzazione del numero del
chiamante.
FUNZIONI OFFERTE
•
•
•
•
•
•
•
•
•
•
•
•
•
•
•
•
Visualizzazione dell’identificativo del chiamante con tutte le centrali
telefoniche Esse-ti
Vivavoce
10 LED per la visualizzazione dello stato delle linee urbane
1 LED per l’indicazione del modo giorno/notte/temporaneo
1 LED indicante lo stato del servizio di deviazione di chiamata
24 LED per la visualizzazione dello stato degli interni
Display a cristalli liquidi di grandi dimensioni (16 cifre)
Ricezione di chiamate in Paging (se il servizio è fornito dal centralino
telefonico)
Preselezione e visualizzazione del numero telefonico da chiamare
Memorizzazione delle ultime 69 chiamate ricevute, con possibilità di
richiamata
Richiamata su occupato
Memorizzazione delle ultime 20 chiamate effettuate e della loro durata
Programmazione di 59 numeri “VIP”
10 posizioni di memoria di selezione rapida a “due tasti”(ciascuna fino a
16 cifre)
Non disturbare
Funzione Anti-intrusione
•
•
•
•
•
•
•
Timer e orologio
Suoneria regolabile a tre livelli
Musica di attesa
Regolazione del contrasto del display a 8 livelli
Tasti Ripetizione Ultimo Numero, Pausa, Flash
Commutatore per selezione Decadica/Multifrequenza
Tempo di flash 100 ms non programmabile
INSTALLAZIONE
COLLEGAMENTI
Il telefono può funzionare in due modi diversi, a due o a quattro fili. Nel
funzionamento a due fili esso si comporta come un normale telefono BCA. Nel
collegamento a quattro fili i LED sono funzionanti.
¾ Installare 2 batterie AA da 1.5V.
¾ Collegare il telefono alla presa telefonica fornita a corredo (A) mediante
il cavo fornito (B).
A:
B:
Presa telefonica aperta
Cavo di tipo rovesciato fornito a corredo
¾ Realizzare il collegamento della presa telefonica fornita a corredo alla
centrale mediante un cavo a 2 coppie secondo lo schema seguente:
Contatto presa
1
2
3
4
Morsetto centrale
Segnalazione –
Morsetti numerati
Segnalazione +
I contatti 2 e 3 della presa (fonia) devono essere collegati al morsetto numerato
della centrale corrispondente al numero di interno da collegare; non occorre
rispettare nessuna polarità.
I contatti 1 e 4 (linea dati) devono essere collegati ai morsetti di segnalazione
della centrale. Fare riferimento al manuale della centrale stessa. Occorre
rispettare la polarità indicata in tabella. Se i cavi vengono collegati per errore
con la polarità invertita non si accendono né il LED del telefono né quelli degli
eventuali altri telefoni FlyViewOperator o Time3000 collegati al centralino.
Attenzione
Per il corretto funzionamento utilizzare, per il
collegamento del telefono alla presa telefonica, solo
il cavo telefonico fornito a corredo (che è di tipo
incrociato)
SOSTITUZIONE BATTERIE
Le batterie sono alloggiate nell’apposito vano posto al di sotto del telefono.
Quando è necessario sostiuirle utilizzare delle batterie di tipo AA 1,5V.
Al fine di non perdere tutte le programmazioni effettuate sul telefono è
consigliato sostituirle prima che si scarichino del tutto.
Al momento della sostituzione per evitare che l’orologio si fermi e che sia
necessario riprogrammare l’ora è sufficiente seguire questa procedura:
¾ Sollevare il microtelefono in modo che l’alimentazione sia fornita
direttamente dalla linea telefonica.
¾ Sostiutire le batterie.
¾ Riagganciare il microtelefono.
PROGRAMMAZIONE DEL TIPO DI CENTRALE E
DELL’ATTACCO INTERNO
Consente di programmare:
• il tipo di centrale alla quale il telefono è collegato
• l’attacco interno a cui il telefono è collegato
ATTENZIONE:
Entrambe le programmazioni sono obbligatorie per
il corretto funzionamento del telefono.
A tale scopo vengono utilizzati i LED:
• LED VERDI per la programmazione del tipo di centrale
• LED ROSSI per la programmazione dell’attacco interno
L1 L2 L3 L4
L5 L6 L7 L8
L9 L10
LED 13
..............
..............
LED 1
LED 2
LED 12
PROGR
LED 24
Procedura di programmazione
¾ Rimuovere il cartoncino per accedere al pulsante centrale di
programmazione (indicato con PROGR in figura).
¾ Premere il pulsante per 2 secondi.
Rilasciando il pulsante si accendono i LED indicanti l’attuale programmazione:
LED VERDE indicante il tipo di centrale secondo la tabella seguente:
LED
CENTRALE
L1
PolarisPlus/Fox70
L2
SmilePlus/Fox90
L3
CT624
L4
L5
L6
L7
Europa280A K / Europa280B K
Europa160 K/ CT126
TA28K
CT312K
CT416K
e LED ROSSO indicante l’attacco interno.
Il telefono inizia a questo punto la scansione orizzontale dei LED VERDI L1L7, relativi al tipo di centrale.
¾ Quando si accende il LED relativo alla centrale di interesse (in base alla
tabella precedente) premere brevemente il pulsante di programmazione.
Inizia la scansione verticale dei LED rossi. Il LED 1 corrisponde ad attacco
interno pari a 1, il LED 2 ad attacco interno pari a 2 e così via. Attenersi alle
istruzioni seguenti per determinare l’attacco di interno da programmare:
GUIDA ALLA SCELTA DELL’ATTACCO DI INTERNO PER CENTRALI
EUROPA, TA28, CT312 E CT416:
L’attacco interno è il numero PROGRESSIVO relativo all’interno a cui il
telefono è collegato. Ad esempio per l’interno 41 l’attacco interno è 1,… per
l’interno 49 l’attacco interno è 9, per l’interno 51 l’attacco interno è 10 etc...
GUIDA ALLA SCELTA DELL’ATTACCO DI INTERNO PER CENTRALI
POLARISPLUS, SMILEPLUS, FOX70, FOX90, CT624
L’attacco interno è un numero compreso fra 1 e 8, a seconda della posizione
dell’interno nella relativa scheda derivati. Ad esempio per il quarto interno di
ciascuna scheda derivati l’attacco interno è pari a 4.
¾ Quando si accende il LED corrispondente all’attacco interno da
assegnare al telefono (determinato in base alle istruzioni precedenti)
premere di nuovo brevemente il pulsante di programmazione.
La programmazione è conclusa ed il telefono torna nello stato di riposo.
Nota: Se si preme il pulsante di programmazione per più di 2
secondi il telefono effettua una scansione veloce di tutti i
LED. In questa fase non è possibile programmare il telefono.
Premere brevemente il pulsante di programmazione per
tornare nello stato di riposo.
Nota: Per uscire dalla programmazione prima del termine senza
modificare i parametri che erano impostati premere il
pulsante di programmazione per circa 2 secondi.
Esempio:
•
•
Centrale CT416K
Attacco di interno 8 (corrispondente all’interno 48)
¾ Premere il pulsante di programmazione per circa 2 secondi.
Si accendono il LED VERDE ed il LED ROSSO relativi alla programmazione
attuale.
¾ Attendere l’inizio della scansione dei LED VERDI. Quando si accende il
LED L7 premere brevemente il pulsante di programmazione.
¾ Inizia la scansione verticale dei LED ROSSI. Quando si accende l’ottavo
LED ROSSO premere di nuovo brevemente il pulsante di
programmazione.
PROGRAMMAZIONI GENERALI DEL TELEFONO
Queste programmazioni consentono di impostare alcuni parametri generali del
telefono.
¾ Assicurarsi che il telefono sia in modo stand-by.
¾ Per accedere alle programmazioni premere il tasto “SET”;
¾ Premere i tasti “UP” o “DOWN” per scorrere le cinque diverse
programmazioni numerate da 1 a 5:
1
2
3
4
5
Data e ora “date”
Prefisso Locale “code”
Codice Impegno Linea “pcode”
Luminosità “lcd”
Tempo Flash “flash”;
¾ Premere il tasto “SET” per entrare nel tipo di programmazione
selezionata.
Appare l’impostazione corrente e lampeggia il parametro modificabile;
usare i tasti “UP” o “DOWN” per scorrere le varie opzioni o inserire un
valore usando i tasti numerici (premere sempre un numero di cifre pari a
quelle che lampeggiano). Nel caso di più parametri da impostare,
premendo il tasto “ SET” si memorizza quello attuale e si passa al
successivo parametro, evidenziato in lampeggio;
¾ Premere il tasto “DELETE” per uscire immediatamente dalla
programmazione.
Nota: Dopo aver eseguito una programmazione si passa
automaticamente alla successiva; se entro 10 secondi non
viene premuto alcun tasto si esce.
Programmazione data e ora
¾ Premere il tasto “SET”, “SET 1 DATE ” è evidenziato sul display.
¾ Premere nuovamente il tasto “SET” per confermare. Il display visualizza
“20??”.
¾ Premere i tasti “UP” o “DOWN” per programmare l’anno (“Year”).
¾ Premere nuovamente il tasto “SET”. “Month” lampeggia nel display.
¾ Premere i tasti “UP” o “DOWN” per programmare il mese (“Month”).
¾ La stessa procedura viene utilizzata per programmare Giorno, Ora e
Minuti.
Programmazione prefisso locale
Dopo la programmazione “Data e ora” viene visualizzata sul display per dieci
secondi la scritta “SET 2 CODE”. Se entro questi dieci secondi non si preme
alcun tasto, occorre ripremere il tasto “ SET” ed i tasti “UP” o “DOWN” sino a
selezionare la scritta “SET 2 CODE”.
¾ Premere il tasto “SET” per confermare. Il display visualizza “Code 0----”
per indicare che è possibile programmare il prefisso locale.
¾ Premere il tasto “SET”. Il primo “-” lampeggia nel display.
¾ Inserire il prefisso locale, ad es. 0755.
Quando tramite i tasti “UP”/ “DOWN” e “REDIAL” si chiama un numero
presente nella lista delle chiamate ricevute questa programmazione elimina la
composizione del prefisso locale eventualmente presente nel numero.
Esempio: prefisso locale:0755 e numero chiamata ricevuta:
07551234567. In fase di richiamata il telefono compone soltanto
1234567.
Programmazione codice impegno linea
Dopo la programmazione “Prefisso Locale” viene visualizzata sul display per
dieci secondi la scritta “SET 3 PCODE”. Se entro questi dieci secondi non si
preme alcun tasto, occorre ripremere il tasto “SET” ed i tasti “UP” o “DOWN”
sino a selezionare la scritta “SET 3 PCODE”.
¾ Premere il tasto “SET” per confermare. Il display visualizza “-” per
indicare che è possibile programmare il codice di impegno linea.
¾ Premere i tasti “UP” o “DOWN” per programmare il codice. I valori
ammessi sono tutte le cifre da 1 al 9, * e #.
¾ Premere il tasto “SET” per confermare.
Il codice di impegno linea è utile quando il telefono è collegato ad un centralino
telefonico e serve a definire la cifra di impegno linea urbana prevista dal
proprio PABX.
Tale codice, seguito da una pausa, viene selezionato automaticamente quando
tramite i tasti “UP”/ “DOWN” e “REDIAL” si chiama un numero presente
nella lista delle chiamate ricevute.
Nota: Se il codice di impegno linea che si vuole utilizzare è lo “0”
non usare questa programmazione, è sufficiente infatti, dopo
aver visualizzato il numero da chiamare, tenere premuto il
tasto “REDIAL” per 2 secondi.(Vedi paragrafo:”Per
chiamare il numero visualizzato”pag. 30)
Programmazione luminosità
Dopo la programmazione “codice impegno linea” viene visualizzata sul display
per dieci secondi la scritta “SET 4 LCD”. Se entro questi dieci secondi non si
preme alcun tasto, occorre ripremere il tasto “SET” ed i tasti “UP” o “DOWN”
sino a selezionare la scritta “SET 4 LCD”.
¾ Premere il tasto “SET” per confermare. Il display visualizza “LCD X”.
¾ Premere il tasto “UP” o “DOWN” per selezionare la luminosità (1, 2, 3, 4,
5, 6,7,8).
¾ Premere nuovamente il tasto “SET” per confermare la selezione.
Tempo di Flash
Quando si preme il tasto FLASH per mettere una conversazione in attesa o per
trasferire la chiamata ad un altro interno il telefono invia alla centrale un
impulso di rilascio linea. Il tempo di FLASH è la durata di tale impulso. Il
valore del tempo di flash del telefono FlyViewOperator è impostato di fabbrica
a 100 ms e non è programmabile.
Nota: La programmazione del tempo di Flash effettuata tramite il
menù non ha alcun effetto.
Programmazione funzione anti-intrusione
La funzione anti-intrusione impedisce l’utilizzo di un eventuale telefono
collegato in parallelo al telefono FlyViewOperator.
Quando essa è attiva il telefono FlyViewOperator genera un segnale di
interferenza che impedisce al telefono in parallelo di ascoltare una
conversazione in corso o di utilizzare la linea in uscita.
¾ Tenere premuto il tasto “DOWN” per 2 secondi. Il display visualizza
“STEAL OFF”.
¾ Premere i tasti “UP” o “DOWN” per selezionare “ON” e attivare la
funzione oppure “OFF” e disattivarla.
¾ Premere il tasto “SET” per confermare.
Selezione decadica/multifrequenza
Il commutatore posto sul lato superiore del telefono (indicato con TONE
PULSE) consente di impostare il tipo di selezione dei numeri telefonici:
• Posizione TONE: selezione in multifrequenza
• Posizione PULSE: selezione decadica.
Si consiglia di lasciare il commutatore nella posizione TONE (impostazione di
fabbrica).
Regolazione del volume della suoneria
Per regolare il volume della suoneria settare il commutatore RING posto sul
lato superiore del telefono in posizione OFF (suoneria disabilitata), LO
(suoneria media) o HI (suoneria alta).
Regolazione del volume del vivavoce
Utilizzare il regolatore di volume presente sul lato destro del telefono al di sotto
del campo lampade.
FUNZIONAMENTO DEL TELEFONO
Tasti
Di seguito vengono elencate le funzioni dei singoli tasti:
TASTO
FUNZIONE
DELETE
Uscire dalla programmazione corrente; cancellare le cifre
errate inserite in fase di selezione di numeri telefonici;
cancellare un numero dalla lista delle chiamate ricevute o
effettuate
UP
Scorrere i menù di programmazione; impostare valori in
programmazione; scorrere la lista delle chiamate ricevute
DOWN
Scorrere i menù di programmazione; impostare valori in
programmazione; scorrere la lista delle chiamate ricevute;
attivare la funzione Anti-intrusione
OUT CHECK
Visualizzare i numeri telefonici delle chiamate effettuate
SET
Entrare in programmazione; confermare un valore immesso
in programmazione
STORE
Memorizzare un numero in memoria
VIP
Programmare il numero telefonico visualizzato (dalla lista
delle chiamate ricevute o effettuate o durante l’arrivo di
una chiamata) come “VIP”; impostare la funzione Non
Disturbare
RECALL
Chiamare un numero della memoria
HOLD
Spegnere il microfono del microtelefono durante una
conversazione facendo ascoltare all’interlocutore una
musica
PAUSE
Inserire una pausa di 3,6 secondi durante la composizione o
la memorizzazione di un numero telefonico
FLASH
Mettere in attesa una conversazione (ad esempio per
trasferirla a un altro interno)
REDIAL
Richiamare l’ultimo numero telefonico chiamato; chiamare
un numero dalle liste delle chiamate effettuate e ricevute;
richiamare su occupato
SPEAKER
Effettuare una chiamata o rispondere in modalità viva-voce
Indicazioni dei LED
I LED VERDI E ROSSI posti a destra forniscono alcune indicazioni sullo stato
della centrale:
L1 L2 L3 L4
L5 L6 L7 L8
LED
VERDI L1-L10
L9 L10
LED 12
LED 13
..............
..............
LED 1
LED 2
LED 24
VERDE
PROGR
VERDE
LED ROSSI 1-24
SIGNIFICATO
Stato delle linee urbane
Modo
Giorno/Notte/Temporan
eo
Stato
del
servizio
“Deviazione
di
chiamata”
Stato degli interni
LED Linee Urbane e LED Interni
Stato del LED
Significato
Spento
La Linea o l’Interno sono liberi
Acceso
La Linea o l’Interno sono
occupati in una conversazione
Il LED lampeggia
La Linea o l’Interno stanno
lentamente
componendo un numero
telefonico (solo PolarisPlus,
SmilePlus, Fox70, Fox90, CT624)
Il LED lampeggia
C’è una chiamata entrante sulla
velocemente
Linea Urbana o l’Interno sta
squillando
Il LED è acceso con
La linea urbana corrispondente al
brevi spegnimenti
LED è in parcheggio
LED Modo Giorno/Notte/Temporaneo.
Stato del LED
Spento
Acceso
Lampeggio
Significato
Modo Giorno
Modo Notte
Modo Temporaneo (solo
PolarisPlus, Fox70, SmilePlus,
Fox90, CT624)
LED del servizio “Deviazione di chiamata”
Stato del LED
Spento
Acceso
Significato
“Deviazione di chiamata” non
attiva
“Deviazione di chiamata” attiva
Display
Le 3 righe del display a cristalli liquidi forniscono le seguenti informazioni:
La prima riga indica:
• Data e ora correnti.
• Icona nuova chiamata (NEW), se presente.
• Icona chiamata ripetuta (REP), se presente.
• Icona numero VIP (VIP).
• Numero delle chiamate presenti nella lista delle chiamate ricevute (IN),
alla destra della riga.
• Data e ora di una chiamata ricevuta, se è stato premuto il tasto “UP”
oppure il tasto “DOWN”.
• Numero delle chiamate presenti nella lista delle chiamate effettuate
(OUT), se è stato premuto il tasto “OUT CHECK”
• Durata di una chiamata effettuata, se è stato premuto il tasto “OUT
CHECK”.
La seconda riga indica:
• Giorno della settimana
• Icona non disturbare (icona con campana sbarrata)
La terza riga ha la funzione seguente:
• Visualizza l’anno quando il telefono è a riposo.
• Visualizza il numero del chiamante nel caso ci sia una nuova chiamata
senza risposta.
• Visualizza il numero di telefono uscente quando viene selezionato un
numero di telefono.
• Visualizza il numero di telefono di una chiamata ricevuta, se è stato
premuto il tasto “UP” oppure il tasto “DOWN”.
• Visualizza il numero di telefono di una chiamata effettuata, se è stato
premuto il tasto “OUT CHECK”.
• Visualizza lo stato di programmazione durante la programmazione stessa.
Effettuare una chiamata
¾ Sollevare il microtelefono o premere il tasto “SPEAKER”. Il led “IN USE”
si accende e si sente il tono di invito alla selezione.
¾ Selezionare il numero di telefono desiderato.
Oppure
¾ Con il microtelefono abbassato digitare il numero di telefono e poi
premere il tasto “REDIAL”. La chiamata viene effettuata in modalità vivavoce. È possibile passare in modalità microtelefono sollevando il
microtelefono stesso.
Ricevere una chiamata
Il telefono sta suonando. Per rispondere alla chiamata:
¾ Sollevare il microtelefono o premere il tasto SPEAKER. Il led IN USE si
accende.
Terminare una chiamata
Una volta completata la chiamata
¾ Riagganciare il microtelefono o premere il tasto “SPEAKER” se si sta
utilizzando il vivavoce.
Mettere in attesa una chiamata (telefono collegato
ad un centralino telefonico)
¾ Durante la conversazione premere il tasto Flash. La chiamata viene
messa in attesa. L’utente esterno sente dei toni o la musica di attesa, a
seconda delle impostazioni e delle caratteristiche del centralino a cui il
FlyViewOperator è collegato.
Attenzione
Non utilizzare il tasto HOLD per mettere in attesa
la chiamata. Questo tasto ha la sola funzione di
spegnere temporaneamente il microfono del
microtelefono facendo ascoltare all’interlocutore
una musica, ma non è possibile trasferire la
chiamata a un altro interno o accedere ai servizi del
centralino. Inoltre una doppia pressione del tasto
HOLD provoca l’abbattimento della chiamata.
Mettere in attesa una chiamata (telefono collegato
alla linea urbana)
Quando il telefono FlyViewOperator è collegato alla linea telefonica (e non ad
un centralino) il tasto per mettere in attesa una chiamata è il tasto “HOLD”.
In modalità vivavoce:
¾ Premere il tasto “HOLD” per disattivare il microfono dell’unità base.
La linea esterna viene messa in attesa (musica d’attesa) e l’utente remoto
non può ascoltare la vostra conversazione.
¾ Premere il tasto “SPEAKER” per tornare alla conversazione normale.
oppure
¾ Sollevare il microtelefono per tornare alla conversazione normale.
Attenzione
Se, mentre la chiamata è in attesa, si preme
nuovamente il tasto “HOLD” la chiamata viene
abbattuta.
In modalità microtelefono:
¾ Premere il tasto “HOLD” per disattivare il microfono del microtelefono.
La linea esterna viene messa in attesa (musica d’attesa) e l’utente remoto non
può ascoltare la vostra conversazione.
Si può riagganciare il microtelefono.
¾ Per tornare alla conversazione normale premere il tasto “HOLD” se non
si è riposta la cornetta altrimenti sollevare la cornetta.
oppure
¾ Premere il tasto “SPEAKER” per tornare alla conversazione normale.
Attenzione
Se, mentre la chiamata è in attesa, si preme
nuovamente il tasto “HOLD” la chiamata viene
abbattuta.
Ripetizione dell’ultimo numero selezionato
La funzione permette di richiamare automaticamente l’ultimo numero chiamato
(fino a 48 cifre).
¾ Premere il tasto “REDIAL”.
oppure
¾ Sollevare il microtelefono o premere il tasto “SPEAKER”.
¾ Attendere il tono di invito alla selezione.
¾ Premere il tasto “REDIAL”. Il telefono comporrà automaticamente
l’ultimo numero chiamato.
Richiamata su occupato
In modalità vivavoce se il numero chiamato è occupato è possibile utilizzare la
funzione di richiamata.
¾ Premere il tasto “SPEAKER” e comporre il numero telefonico.
¾ Se si riceve il segnale di occupato premere il tasto “REDIAL”.
Il telefono provvederà a richiamare il numero continuamente fino a che esso
non risulti libero (max 32 tentativi).
Per interrompere il ciclo di richiamata:
¾ Premere un tasto qualunque.
Pausa
In alcuni casi può essere necessario inserire una pausa durante la selezione di
un numero telefonico o durante la memorizzazione del numero stesso in una
delle posizioni di memoria disponibili. Premendo il tasto Pause viene inserita
una pausa di 3,6 secondi. Se si inserisce la pausa durante la memorizzazione di
un numero essa occupa una delle cifre disponibili per ciascuna posizione della
memoria.
Selezione rapida “two touch” da memoria
È possibile memorizzare e richiamare fino a 10 numeri telefonici (ciascuno
composto di massimo 16 cifre).
Memorizzazione di un numero di telefono
¾ Assicurarsi che il telefono sia in modo stand-by.
¾ Digitare il numero di telefono da memorizzare.
¾ Premere il tasto “STORE”.
¾ Premere il tasto corrispondente alla posizione della memoria (cifre da 0
a 9) in cui si vuole memorizzare il numero di telefono.
¾ Per memorizzare altri numeri di telefono o per modificare i numeri
esistenti in memoria ripetere le fasi precedenti.
Nota: Il numero massimo di cifre che si possono memorizzare per
ciascun numero di telefono è 16. Nel caso in cui il numero
memorizzato sia composto da più di 16 cifre, solo le prime 16
cifre saranno memorizzate.
Visualizzare un numero di telefono memorizzato
¾ Premere il tasto “RECALL” e premere il tasto corrispondente alla
posizione di memoria (cifre da 0 a 9).
Sul display viene visualizzato il numero memorizzato.
Chiamare un numero di telefono memorizzato
¾ Sollevare il microtelefono o premere il tasto SPEAKER.
¾ Premere il tasto “RECALL”.
¾ Premere il tasto corrispondente alla posizione in memoria (cifre da 0 a 9)
del numero da chiamare. Il numero memorizzato viene composto
automaticamente.
oppure
¾ Premere il tasto “RECALL”.
¾ Premere il tasto corrispondente alla posizione di memoria (cifre da 0 a
9).
¾ Premere il tasto “REDIAL”.
Modifica di un numero di telefono memorizzato
¾ Seguire le fasi descritte nella procedura “Memorizzazione di un Numero
di Telefono”.
¾ Il nuovo numero di telefono sostituisce automaticamente quello
memorizzato in precedenza.
Visualizzazione dei numeri di telefono delle
chiamate ricevute
Il telefono memorizza le ultime 69 chiamate ricevute. Per visualizzare i numeri
telefonici premere i tasti “UP” o “DOWN”.
Per ogni numero vengono visualizzate la data e l’ora di arrivo e le eventuali
icone VIP e REP.
Per cancellare il numero visualizzato
¾ Un numero visualizzato può essere cancellato premendo una volta il
tasto “DELETE”.
¾ I numeri di telefono di tutte le chiamate ricevute possono essere
cancellati premendo il tasto “DELETE” per 3 secondi.
Nota: Per cancellare i numeri VIP seguire la relativa procedura.
Per chiamare il numero visualizzato
¾ Premere il tasto “REDIAL”.
Nota: Se si preme il tasto “REDIAL” per 2 secondi viene aggiunto
uno “0” prima del numero di telefono selezionato. In tal
modo la chiamata viene inoltrata correttamente attraverso un
eventuale centralino.
Nota: Se è stata effettuata la programmazione del codice di
impegno linea tale codice viene aggiunto automaticamente
all’inizio del numero da chiamare.
¾ Il telefono effettua la chiamata in modalità viva-voce. Per passare in
modalità microtelefono sollevare il microtelefono stesso.
Funzione VIP
Per evitare che un numero venga cancellato dalla lista delle chiamate ricevute
inavvertitamente o perché sostituito dai numeri di chiamate successive si può
contrassegnarlo con la sigla VIP.
¾ Premere il tasto “VIP” al momento dell’arrivo di una chiamata o dopo
averla selezionata dalla lista delle chiamate ricevute.
Il numero viene contrassegnato con l’icona VIP.
Per cancellare un numero VIP:
¾ Richiamare il numero sul display e premere il tasto “VIP”.
L’icona VIP scompare.
¾ Premere il tasto “DELETE”.
Visualizzazione delle chiamate effettuate
Il telefono memorizza i numeri (ciascuno composto di massimo 18 cifre) delle
ultime 20 chiamate effettuate insieme alla durata della conversazione. Quando i
numeri sono più di 20, l’ultimo numero sostituisce il primo.
• I numeri di telefono delle chiamate effettuate possono essere visualizzati, a
partire dal più recente, premendo ripetutamente il tasto “Out Check”.
• Premendo il tasto “REDIAL” il numero di telefono selezionato viene
richiamato.
• Premendo il tasto “DELETE” il numero di telefono selezionato viene
cancellato.
• Premendo il tasto “DELETE” per 3 secondi i numeri di telefono di tutte le
chiamate effettuate memorizzati vengono cancellati.
Nota: Vengono memorizzate soltanto le telefonate di durata
superiore ai 10 secondi..
Funzione Non Disturbare
La funzione Non Disturbare disabilita la suoneria del telefono. L’arrivo di una
chiamata è segnalato soltanto dal Led Ring.
Il servizio si attiva impostando un timer della durata compresa tra 1 minuto e
24 ore, allo scadere di questo tempo automaticamente il servizio si disabilita.
Attivazione:
¾ Assicurarsi che il telefono sia in modo stand-by.
¾ Premere per 2 secondi il tasto VIP. Il display visualizza “00-00”.
¾ Premere i tasti “UP” o “DOWN” per programmare le ore.
¾ Premere il tasto SET per passare alla programmazione dei minuti.
¾ Premere i tasti “UP” o “DOWN” per programmare i minuti.
¾ Premere nuovamente il tasto “SET” per confermare.
L’icona Non Disturbare appare sul display.
Il servizio si disattiva automaticamente allo scadere del timer oppure per
disattivarlo:
¾ Premere per 2 secondi il tasto VIP. Il display visualizza il tempo rimasto.
¾ Premere i tasti “UP” o “DOWN” per riportare il timer a “00-00”.
¾ Premere il tasto “SET” per confermare.
L’icona Non Disturbare scompare.
DICHIARAZIONE DI CONFORMITÀ CE
La società Esse-ti S.r.l. con sede in Zona Ind. Squartabue, I-62019 Recanati
(MC), Italia, dichiara che il presente dispositivo è conforme alle seguenti
norme:
• EN50082-1, EN55022
(Compatibilità elettromagnetica)
• EN41003, EN60950
(Sicurezza elettrica)
E soddisfa i requisiti della Direttiva 1999/5/CE del parlamento Europeo e del
Consiglio del 9 marzo 1999 riguardante le apparecchiature radio, le
apparecchiature terminali di telecomunicazioni e il reciproco riconoscimento
della loro conformità.
La conformità a questi requisiti è espressa mediante la marcatura
USO PER CUI IL DISPOSITIVO È DESTINATO.
Il presente dispositivo è stato progettato per essere usato in connessione alle reti
PSTN.
FRANÇAIS
Félicitations et merci d'avoir choisi un
appareil Esse-Ti
Ce produit a été expressément conçu pour
faciliter les opérations quotidiennes de
l'Utilisateur et il a été fabriqué dans les règles de
l'art, en utilisant des matériels adaptés à conférer
une excellente fiabilité dans le temps.
Les produits Esse-Ti sont tous soumis en
laboratoire à des tests spécifiques de fiabilité et
de fonctionnel afin d'offrir à l'Utilisateur toutes
les plus amples garanties.
La responsabilité envers des vices résultants de l'usage du produit est du ressort de
l'Utilisateur. Esse-Ti est responsable exclusivement des défauts aux sens et dans les
limites du D.P.R. 24/05/1988 n° 224 (actuation de la Directive CEE n° 85/374 relative
au rapprochement des dispositions législatives, réglementaires et administratives des
Etats membres en matière de responsabilité pour dommages suite à des produits
défectueux, aux sens de l'art. 15 de la loi n° 183 du 16 avril 1987).
Esse-Ti se réserve le droit de modifier à tous moments et sans préavis les caractéristiques de
ses produits.
CONVENTIONS TYPOGRAPHIQUES
Pour simplifier la lecture et la compréhension du mode d'emploi de la part de
l'utilisateur, on a utilisé dans le texte des styles différents ayant chacun une
précise signification logique.
Le tableau plus bas illustre un exemple des styles utilisés (à gauche) en
correspondance de la signification logique qui leur est attribuée (à droite).
Exemple
Description
TITRE DE
CHAPITRE
Style appliqué au titre de chaque chapitre.
Chaque nouveau chapitre commence sur une
nouvelle page.
TITRE PRIMAIRE
Titre Secondaire
Titre Tertiaire
Exemple
Style définissant un exemple.
Note
Attention
Texte normal
¾
Style utilisé pour indiquer des titres
comprenant de vastes sections à l'interne des
chapitres, tels que les divers titres principaux
du chapitre.
Style indiquant le titre d'un paragraphe
spécifique à l'interne d'un titre primaire.
On utilise ce style uniquement s'il faut
ultérieurement subdiviser le paragraphe
spécifique.
Opérations à effectuer
Les spécifications relatives au texte sont
présentées sous cette forme : les lire
attentivement.
La présence de ce style indique qu'il pourrait y
avoir un risque pour les personnes ou les
choses et qu'il faut donc procéder avec
beaucoup d'attention.
Style définit pour la rédaction normale du
texte.
Style indiquant l'exacte séquence des
opérations qu'il faut effectuer pour une
programmation ou pour rappeler un service.
REMARQUES GENERALES POUR
L’INSTALLATEUR
NOTES GENERALES
Lire attentivement les remarques listées dans cette section car elles fournissent
des indications importantes relativement à l’installation, à l'usage et à l'entretien
corrects et fiables de l’appareil.
• L'appareil doit être destiné EXCLUSIVEMENT à l'usage pour lequel il a
été conçu. Esse-Ti décline toutes responsabilités envers des dommages
résultants d'usages incorrects.
• L’appareil ayant été conçu dans le respect des normes en vigueur, son
installation doit s'effectuer dans des installations également conformes aux
normes en vigueur.
• Avant de connecter l'appareil au secteur, vérifier que la tension de ligne
correspond à celle indiquée sur l'étiquette apposée sur l’appareil.
• Avant de procéder à une intervention à l'intérieur ou à l'extérieur de
l'appareil (nettoyage, entretien, etc.), il faut déconnecter l'appareil de la
prise secteur.
• On conseille de prévoir un disjoncteur, en amont de l'appareil, de manière à
interrompre l'alimentation en cas de panne.
• Pour toute intervention de réparation, s'adresser exclusivement à un Centre
d'assistance technique agréé.
• Installer l'appareil dans un milieu aéré, en tenant compte des fentes
d'aération qui ne doivent en aucun cas être obstruées.
• Attention aux symboles indiquant un éclair avec une flèche à l’intérieur
d’un triangle car ils signalent la présence de tensions dangereuses.
• Attention aux symboles indiquant un point d’exclamation à l’intérieur d’un
triangle car ils signalent qu’il faut procéder très attentivement du fait que
des situations potentiellement dangereuses, voire mortelles, subsistent.
• Consulter le paragraphe "Caractéristiques Techniques" illustrant les
informations détaillées relatives aux conditions d’utilisation de l’appareil.
• Ne jamais installer l’appareil à côté d’autres appareils électriques ou
électroniques qui n’ont pas été conçus pour lui être reliés.
• Ne jamais installer l’appareil dans des milieux potentiellement explosifs.
• Vérifier que l’appareil a été installé conformément aux indications listées.
• Connecter à l’installation les protections prévues pour la ligne
d’alimentation et pour les lignes téléphoniques.
• Ne jamais introduire des objets ou des produits en poudre, ni renverser des
liquides, ni utiliser des sprays à l’intérieur de l’appareil.
• Ne jamais ouvrir l’appareil car ce dernier ne contient aucun élément du
ressort de l’Utilisateur. Si nécessaire, s’adresser à un Centre d’assistance
agréé.
• En cas de fuites de gaz dans le milieu, il ne faut pas utiliser ce téléphone
pour signaler le danger.
• Si les batteries doivent être remplacées, ne pas jeter celles épuisées dans
l'environnement, mais bien les écouler dans les rebuts prévus à cet effet.
• Les éléments du conditionnement (sacs en plastique, polystyrène expansé,
etc.) peuvent être potentiellement dangereux, les garder donc hors portée
des enfants.
REALISATION DE L’INSTALLATION
La réalisation des installations téléphoniques doit être effectuée par du
personnel spécialisé.
Il est interdit d’installer et de connecter aux réseaux de télécommunications des
terminaux téléphoniques non conformes à la normalisation en vigueur.
RECOMMANDATIONS
Les motifs principaux de dérangements des lignes téléphoniques et des réseaux
d’alimentation électrique (qui peuvent provoquer des fonctionnements
incorrects, voire l’endommagement de l’appareil) peuvent être attribués à :
• Contacts accidentels avec des lignes ayant des tensions plus élevées (courtcircuit).
• Couplages électromagnétiques avec d’autres conducteurs installés dans le
voisinage.
• Brusques variations de charge, surtout pour les lignes électriques
d’alimentation (moteurs électriques, etc.).
• Dérangements provisoires provoqués par des événements atmosphériques
(éclairs).
Les protections pour les lignes téléphoniques ne doivent pas être installées
uniquement sur les lignes externes, mais également sur les lignes dérivées ayant
un parcours à l’externe du bâtiment ou sur les lignes auxquelles ont été
connectés des appareils avec alimentation secteur tels que fax, modem,
répondeur, téléphone mobile, etc.
La protection pour les lignes d’alimentation secteur doit être connectée à
l’entrée de la ligne d’alimentation électrique de l’appareil.
Il faut connecter la borne de protection de la terre à une efficace installation de
la terre afin que les dispositifs fonctionnent correctement.
DESCRIPTION
Fly View Operator est un appareil de système qui peut être branché à tous les
PABX Esse-ti (série K).
Les témoins rouges et verts disposés sur la droite permettent de visualiser la
situation des lignes externes et des internes ; ils fournissent également des
informations relativement au mode de fonctionnement du PABX (jour ou nuit),
ainsi que l’éventuelle activation du service de transfert des appels.
L’afficheur à cristaux liquides permet, sur tous les PABX Esse-ti configurés et
équipés à cet effet, d’afficher le numéro d’abonné de l’appelant.
FONCTIONS
•
•
•
•
•
•
•
•
•
•
•
•
•
•
•
•
•
Affichage de l’identité de l’appelant sur tous les PABX Esse-ti.
Sélection et réponse à mains libres.
10 témoins pour l’affichage de l’état des lignes externes
1 témoin indiquant le mode jour/nuit/temporaire
1 témoin indiquant l’état du service “Renvoi d’appel”
24 témoins pour la visualisation de l’état des internes
Ecran de grandes dimensions à cristaux liquides (16 chiffres).
Système FSK/DTMF, mémoire avec 69 appels, fonction de rappel et rappel
automatique interurbain.
Présélection et affichage du numéro d'abonné à appeler.
Resélection automatique sur occupé.
Affichage et resélection des 20 derniers numéros appelés, avec durée de la
conversation.
Programmation de 59 numéros VIP.
Activer/Désactiver la Sonnerie
10 positions de mémoire sélection abrégée «two touch» (chacune jusqu'à
16 chiffres).
Ne pas déranger
Fonction Anti-intrusion.
Temporisateur et horloge.
•
•
•
•
•
•
Sonnerie réglable sur 3 niveaux.
Musique d’attente.
8 niveaux de réglage du contraste de l'écran.
Bouton de fonction Resélection/Rappel/Pause/Flash.
Délai de flash 100 ms pas programmable.
Commutateur pour sélection Décimale/Multifréquence.
INSTALLATION
BRANCHEMNT
L’appareil peut fonctionner de deux manières différentes : à deux ou à quatre
fils. Avec un branchement à deux fils, le fonctionnement de l’appareil est celui
d’un téléphone normal BCA, tandis qu’avec le branchement à quatre fils, les
témoins fonctionnent.
¾ Installer 2 piles AA de 1.5V.
¾ Insérer la prise du câble téléphonique fourni dans le connecteur du
téléphone prévu à cet effet et brancher l’autre extrémité à la broche
téléphonique fournie.
A:
B:
Connecteur ouvert
Câble du type renversé
Plug 6/4
Pin 1
Pin 2
Pin 3
Pin 4
Ligne
données Broches
internes
Ligne
données +
Les contacts 2 et 3 de la prise (phonie) doivent être branchés à la borne
numérotée du PABX correspondante au numéro de l’interne à brancher :
aucune nécessité de respecter une polarité quelconque.
Les contacts 1 et 4 (ligne données) doivent être branchés aux bornes de
signalisation du PABX. Pour ce faire, voir le mode d’emploi du PABX
possédé. Il faut nécessairement respecter la polarité indiquée dans le tableau. Si
par erreur les câbles sont branchés avec la polarité invertie, ni les témoins de
l’appareil, ni ceux des éventuels appareils FlyViewOperator ou Time3000
branchés au PABX, ne s’allument.
Attention
Lors de la connexion du poste, utiliser le câble
Plug/Plug fourni.
BATTERIES
Les batteries sont logées dans l’emplacement prévu sous l’appareil. Lorsque
vous devez les remplacer, utilisez des batteries du type AA 1,5V. Pour
empêcher la perte des programmations personnelles auxquelles vous avez
procédé sur l’appareil, on conseille de les remplacer avant qu’elles ne soient
totalement épuisées. Lors du remplacement des batteries, pour éviter que
l’horloge ne s’arrête et devoir donc reprogrammer l’heure, procédez comme
suit :
¾ Décrocher le combiné de sorte que l'alimentation soit fournie
directement par la ligne téléphonique.
¾ Remplacer les batteries.
¾ Raccrocher le combiné.
PROGRAMMER LE TYPE DE PABX ET DE BROCHE
D’INTERNE
Permet de programmer :
• le type de PABX auquel le téléphone est branché
• la broche d’interne
ATTENTION :
Les deux programmations sont obligatoires pour
que l’appareil fonctionne correctement.
Pour ce faire, on utilise :
• TEMOINS VERTS pour la programmation du type de PABX
• TEMOINS ROUGES pour la programmation de la broche d’interne
L1 L2 L3 L4
L5 L6 L7 L8
L9 L10
LED 1
LED 2
..............
..............
LED 13
LED 12
PROGR
LED 24
Procédure de programmation
¾ Enlever le carton pour accéder au bouton-poussoir central de
programmation (indiqué sous PROGR dans la figure).
¾ Garder enfoncé le bouton-poussoir pendant 2 secondes.
En relâchant le bouton-poussoir, les témoins indiquant la programmation en
cours s’allument : TEMOIN VERT indiquant le type de PABX :
TEMOIN
L1
L2
L3
PABX
PolarisPlus/Fox70
SmilePlus/Fox90
CT624
L4
L5
L6
L7
Europa280A K / Europa280B K /
Europa160 K/ CT126
TA28K
CT312K
CT416K
et TEMOIN ROUGE indiquant la broche d’interne :
Ensuite l’appareil active la recherche par le biais du balayage horizontal des
témoins L1-L7 relatifs au type de PABX.
¾ Lorsque le témoin correspondant au type de PABX désiré s’allume,
appuyer brièvement sur le bouton-poussoir de programmation
Ensuite, c’est le balayage vertical des témoins rouges qui commence. Le témoin
1 correspond à la broche d’interne 1, le témoin 2 à la broche d’interne 2 et ainsi
de suite. Suivre les guides suivantes pour choisir la broche d’interne :
GUIDE AU CHOIX DE LA BROCHE D’INTERNE POUR LES PABX
EUROPA, TA28, CT312 ET CT416:
La broche d’interne correspond au numéro PROGRESSIF relatif à l’interne
auquel l’appareil est branché. Par exemple, pour l’interne 41, la broche
d’interne correspondante est la 1,… pour l’interne 49, c’est la 9, pour l’interne
51, c’est la broche d’interne 10 et ainsi de suite.
GUIDE AU CHOIX DE LA BROCHE D’INTERNE POUR LES PABX
POLARISPLUS, SMILEPLUS, FOX70, FOX90, CT624
La broche d’interne correspond à un numéro compris dans la plage 1 - 8, selon
la position de l’interne sur la carte des dérivés. Par exemple, pour le quatrième
interne de la carte des dérivés, la broche d’interne correspondante est la 4.
¾ Lorsque le témoin correspondant à la broche d’interne à affecter à
l’appareil s’allume, appuyer de nouveau brièvement sur le boutonpoussoir de programmation
La programmation est terminée et l’appareil se rétablit à l’état de repos.
Note : Si le bouton-poussoir de programmation est enfoncé pendant
plus de 2 secondes, l’appareil procède à un balayage rapide
de tous les témoins. Cette phase ne permet pas de
programmer l’appareil. Appuyer brièvement sur le bouton-
poussoir de programmation pour rétablir l’appareil en état
de repos.
Note : Pour quitter la programmation avant la fin de la procédure,
sans modifier les paramètres, appuyer pendant environ 2
secondes sur le bouton-poussoir.
Exemple :
•
•
PABX CT416K
Broche d’interne 8 (correspondante à l’interne 48)
¾ Garder enfoncé le bouton-poussoir pendant environ 2 secondes.
¾ Attendre l’activation du balayage des témoins verts. Lorsque le témoin
L7 s’allume, appuyer sur le bouton-poussoir de programmation
¾ L’appareil procède maintenant au balayage vertical des témoins rouges.
Lorsque le huitième TEMOIN ROUGE s’allume, appuyer de nouveau sur
le bouton-poussoir de programmation.
PROGRAMMATIONS GENERALES DE L’APPAREIL
Vérifier que l'appareil est en mode stand-by.
¾ Pour accéder aux programmations, appuyer sur le bouton “SET”;
¾ Appuyer sur les boutons “UP” ou “DOWN” pour défiler les cinq
programmations différentes numérotées de 1 à 5:
1
2
3
Date et heure “date”
Indicatif local “code”
Code d’engagement de la ligne externe “pcode”
4
5
Luminosité “lcd”
Temps de Flash “flash”
¾ Appuyer sur le bouton “SET” pour programmer celle sélectionnée.
La programmation en cours est affichée et le paramètre que l’on peut
modifier clignote à l’écran ; appuyer sur les boutons “UP” ou “DOWN”
pour défiler les options ou insérer une valeur à l’aide des boutons
numériques (insérer toujours un nombre de chiffres égal à celles qui
clignotent). Pour programmer plusieurs paramètres lors d’une même
session, il suffit d’appuyer sur le bouton “SET” pour mémoriser celui en
édition et passer ainsi au successif, qui commence ainsi à clignoter à
l’écran;
¾ Appuyer sur le bouton “DELETE” pour quitter immédiatement la
programmation.
Note: Après avoir effectué une programmation, on passe
automatiquement à la successive ; si aucun bouton n’est
appuyé dans les 10 secondes suivantes, on quitte la
programmation.
Programmer la date et l'heure
¾ Appuyer sur le bouton “SET”, l'écran affiche le message suivant : “SET 1
DATE ”.
¾ Appuyer de nouveau sur le bouton “SET” pour confirmer. L'écran affiche
“20??”.
¾ Appuyer sur les boutons “UP” ou “DOWN” pour programmer l'année
(“Year”).
¾ Appuyer de nouveau sur le bouton “SET”. Le message “Month” clignote
à l'écran.
¾ Appuyer sur les boutons “UP” ou “DOWN” pour programmer le mois
(“Month”).
¾ On procède de même pour programmer la Date, l'Heure et les Minutes.
Programmer l'indicatif local
Après la programmation “Date et heure” le message “SET 2 CODE” est affiché
à l'écran pour 10 secondes. Si aucun bouton n’est appuyé dans les 10 secondes
suivantes, il faut appuyer sur le bouton “SET” et les “UP” ou “DOWN” lorque
le message “SET 2 CODE” est affiché.
¾ Appuyer sur le bouton “SET”, l'écran affiche le message “Code 1----”
pour indiquer que l'on peut programmer le indicatif local.
¾ Appuyer sur le bouton “SET”. Le premier “-” clignote à l'écran.
¾ Saisir l'indicatif local, par ex. 0755
Lorsque vous appelez un numéro d’abonné présent dans la liste des appels
reçus en appuyant sur les boutons ¨UP¨/¨DOWN¨ et ¨REDIAL¨, avec cette
programmation, le téléphone ne compose pas le préfixe local, éventuellement
présent dans le nombre.
Exemple: préfixe local:0755 et nombre appel reçu : 07551234567.
Dans le rappel le téléphone compose 1234567.
Programmer le code d’engagement de la ligne
externe
Après la programmation “Indidicatif local” le message “SET 3 PCODE” est
affiché à l’écran pour 10 secondes. Si aucun bouton n’est appuyé dans les 10
secondes suivantes, il faut appuyer sur le bouton “SET” et les “UP” ou
“DOWN” lorque le message “SET 3 PCODE” est affiché.
¾ Appuyer sur le bouton “SET”, pour confirmer. L'écran affiche “-” pour
indiquer que l'on peut programmer le code d’engagement de la ligne
externe.
¾ Appuyer sur les boutons “UP” ou “DOWN” pour programmer le code.
(Chiffres admis : 1 ~ 9, * et #).
¾ Appuyer sur le bouton “SET”, pour confirmer.
Le code d’engagement de la ligne externe est utile lorsque le téléphone est
branché à un PABX. Avec cette programmation on définit, sur l’appareil, le
chiffre pour l’engagement de la ligne externe de son PABX.
Ce code, suivi d’une pause, est automatiquement sélectionné lorsque vous
appelez un numéro d’abonné présent dans la liste des appels reçus en appuyant
sur les boutons ¨UP¨/¨DOWN¨ et ¨REDIAL¨.
Note: Ne pas utiliser cette programmation si le code d’engagement
de la ligne est “0”.C’ est suffisant appuyer sur le bouton
“REDIAL” pour 2 secondes après avoir composé le numéro
d'abonné désiré . (Voir pag :57)
Programmer la luminosité
Après la programmation “Code d’engagement de la ligne externe” le message
“SET 4 LCD” est affiché à l'écran pour 10 secondes. Si aucun bouton n’est
appuyé dans les 10 secondes suivantes, il faut appuyer sur le bouton “SET” et
les “UP” ou “DOWN” lorque le message “SET 4 LCD ” est affiché.
¾ Appuyer sur le bouton “SET ” pour confirmer. L'écran affiche “LCD X”.
¾ Appuyer sur les boutons “UP” ou “DOWN” pour sélectionner X (1, 2, 3,
4, 5, 6, 7, 8).
¾ Appuyer de nouveau sur le bouton “SET” pour confirmer la sélection.
Temps de flash
Lorsque l’on appuie sur le bouton-poussoir FLASH pour mettre une
conversation en attente, l’appareil adresse au PABX une impulsion de coupure
de ligne. Le temps de FLASH correspond justement à la durée de cette
impulsion. La valeur du temps de flash de l’appareil FlyViewOperator
programmé en usine est 100 ms et elle n’est pas programmable.
Note: La programmation du temps flash effectuée par le menu du
téléphone n'a aucun effet.
Fonction Anti-intrusion
La fonction anti-intrusion empêche l’utilisation d’un éventuel appareil connecté
en parallèle à l’appareil FlyViewOperator. Lorsque cette fonction est activée,
l’appareil FlyViewOperator génère un signal d’interférence qui empêche à
l’appareil installé en parallèle d’écouter une conversation en cours ou d’utiliser
la ligne sortante.
¾ Appuyer sur le bouton “DOWN” pour 2 secondes. L'écran affiche “STEAL
OFF”.
¾ Appuyer sur les boutons “UP” ou “DOWN” pour activer (ON) ou
désactiver (OFF) la fonction.
¾ Appuyer sur le bouton “SET ” pour confirmer.
Sélection décimale/multifréquence
• Le commutateur TONE PULSE permet de choisir le type de numérotation :
• Commutateur sur TONE : numérotation multifréquence
• Commutateur sur PULSE : numérotation décimale
Il vaut mieux de ne pas changer la position d’usine (TONE).
Réglage niveau sonnerie
Pour choisir le niveau de la sonnerie régler le commutateur RING sur OFF
(desactivé) ou LO (moyen) ou HI (haut).
Réglage du volume du mains libre
Utiliser le régulateur de volume présent sous le côté droit du téléphone .
FONCTIONNEMENT DE L'APPAREIL
Touches
TOUCHE
DELETE
UP
DOWN
OUT CHECK
SET
STORE
VIP
RECALL
HOLD
PAUSE
FLASH
REDIAL
SPEAKER
FONCTION
Quitter la programmation; annuler une saisie incorrecte
d’un numéro de téléphone; supprimer un numéro de la
liste des appels entrant ou sortant
Défiler les cinq programmations; saisir les valeurs de
programmation; défiler la liste des appels entrant
Défiler les cinq programmations; saisir les valeurs de
programmation; défiler la liste des appels entrant;
activer la fonction Anti-intrusion funzione
Afficher les numéros des appels sortant
Accéder aux programmations; confirmer une valeur
saisie
mémoriser un numéro
Programmer le numéro affinché (de la liste des appels
entrant ou sortant ou pendant un appel entrant) comme
“VIP”; activer la fonction Ne pas déranger
Appeler un numéro mémorisé;
Eteindre le microphone du combiné pendant une
conversation
Insérer une pause de 3,6 secondes pendant la
numérotation ou la mémorisation d’un numéro
Mettre une conversation en attente
Rappeler le dernier numéro appelé; appeler un numéro
de la liste des appels entrant ou sortant ; activer la
resélection automatique sur occupé
Faire un appel ou répondre à un appel en mains-libres
Indications des témoins
Les témoins de droite fournissent certaines indications relatives à l’état du
PABX :
Témoin
VERTS
L1-L10
L1 L2 L3 L4
L5 L6 L7 L8
L9 L10
LED 12
LED 13
..............
..............
LED 1
LED 2
VERT
Mode
Jour/Nuit/Temporaire
VERT
Programmation du
service “ Renvoi
d’appel ”
Etat des internes
PROGR
LED 24
Indication
Etat des lignes externes
TEMOINS
ROUGES
1-24
Témoins des Lignes Externes et Témoins des Internes
Etat des Témoins
Indication
Eteint
Ligne ou Interne libres
Allumé
Ligne ou Interne engagés dans
une conversation
Clignotement lent
Ligne ou Interne en phase de
sélection d’un numéro d’abonné
(uniquement PolarisPlus,
SmilePlus, Fox70, Fox90, CT624)
Clignotement rapide
Appel entrant sur la Ligne
Externe ou sonnerie sur l’Interne
Allumé mais s’éteignant
Ligne externe mise en garde
brièvement
Témoin Mode Jour/Nuit/Temporaire.
Etat du Témoin
Eteint
Allumé
Clignotant
Indication
Jour
Nuit
Temporaire (uniquement
PolarisPlus, Fox70, SmilePlus,
Fox90, CT624)
Témoin “ Renvoi d’appel”
Etat du Témoin
Allumé
Allumé
Indication
“ Renvoi d’appel ” désactivé
“ Renvoi d’appel ” activé
Ecran
L'écran à cristaux liquides affiche trois lignes.
La première ligne indique :
• Date et heure courantes
• Icône de nouvel appel (NEW)
• Icône appel répété (REP)
• Icône numéros VIP (VIP)
• Nombre des appels présents dans la liste des appels reçus (IN), à la droite
de la ligne
• Date et heure d’un appel reçu, après avoir appuyé sur le bouton “UP” ou
“DOWN”
• Nombre des appels présents dans la liste des appels sortants (OUT), après
avoir appuyé sur le bouton “OUT CHECK”
• Durée d'un appel effectué, après avoir appuyé sur le bouton “OUT
CHECK”
La seconde ligne indique :
• Jour de la semaine
• Icône ne pas déranger
La troisième ligne a les fonctions suivantes :
• Afficher l'année lorsque le combiné est raccroché
• Afficher le numéro en cas de nouvel appel
• Afficher le numéro d’abonné sortant lorsque l'on sélectionne un numéro
• Afficher le numéro d’abonné d’un appel reçu, après avoir appuyé sur le
bouton “UP” ou “DOWN”
• Afficher le numéro d’un appel effectué, après avoir appuyé sur le bouton
“OUT CHECK”
• Afficher l’état de la programmation lorque l’appareil est utilisé pour des
fonctions différentes.
Effectuer un appel
¾ Décrocher le combiné ou appuyer sur le bouton SPEAKER. Le témoin IN
USE s'allume et on entend la tonalité d'invitation à la sélection.
¾ Composer le numéro d'abonné désiré.
Ou
¾ En mode stand-by, composer d'abord le numéro d'abonné et ensuite
appuyer sur le bouton “REDIAL”.
Recevoir un appel
¾ Décrocher le combiné ou appuyer sur le bouton SPEAKER. Le témoin IN
USE s'allume.
¾ Engager la conversation.
Terminer un appel
Lorsque la conversation est terminée, raccrocher le combiné, si l'on l'utilise, sur
l'unité de base ou appuyer sur le bouton SPEAKER si l'on utilise la fonction à
mains libres.
Mettre un appel en attente (téléphone branché à
un PABX)
¾ Pendant la conversation appuyer sur le bouton FLASH. L’appel a été mis
en attente. L’abonné externe entend des tonalités ou la musique
d’attente, en fonction des programmations et des caractéristiques du
PABX auquel le FlyViewOperator est branché.
Attention
Ne pas utiliser le bouton-poussoir HOLD pour
mettre l’appel en attente. La seule fonction de ce
bouton-poussoir est celle de couper
temporairement le microphone de l’appareil en
reproduisant une musique pour l’interlocuteur ; il
est absolument impossible de transférer un appel
ou d’accéder aux services du PABX. En autre une
double pression du bouton HOLD cause la coupure
de la ligne.
Mettre un appel en attente (téléphone branché à
la ligne externe)
Lorsque le téléphone FlyViewOperator est branché à la ligne téléphonique il
faut utiliser le bouton “HOLD” pour mettre un appel en attente.
En modalité mains libres:
¾ Appuyer sur le bouton “HOLD” pour couper temporairement le
microphone de la base.
L’appel a été mis en attente. L’abonné externe entend la musique d’attente.
¾ Appuyer sur le bouton “SPEAKER” pour reprendre la conversation.
ou
¾ Décrocher le combiné pour reprendre la conversation.
Attention
Pendant l’état d’attente ne pas appuyer sur le
bouton HOLD parce que cela provoquera la
coupure de la ligne.
En modalité combiné:
¾ Appuyer sur le bouton “HOLD” pour couper le microphone du combiné.
L’appel a été mis en attente. L’abonné externe entend la musique d’attente.
On peut raccrocher.
¾ Si le combiné n’est pas raccroché, appuyer sur le bouton “HOLD”, sinon,
le décrocher pour reprendre la conversation.
ou
¾ Appuyer sur le bouton “SPEAKER” pour reprendre la conversation.
Attention
Pendant l’état d’attente ne pas appuyer sur le
bouton HOLD parce que cela provoquera la
coupure de la ligne.
Répéter le dernier numéro sélectionné
On utilise la fonction de répétition du dernier numéro sélectionné pour rappeler
le dernier numéro appelé (jusqu'à 48 chiffres).
¾ Appuyer sur le bouton REDIAL.
ou
¾ Décrocher le combiné ou appuyer sur le bouton SPEAKER de l'unité de
base.
¾ Attendre la tonalité d'invitation à la sélection.
¾ Appuyer sur le bouton REDIAL. L’appareil sélectionne automatiquement
le dernier numéro appelé.
Resélection automatique sur occupé
En mode mains libres, on peut utiliser la fonction de rappel si le numéro
d’abonné appelé est occupé.
¾ Appuyer sur le bouton “SPEAKER” et composer le numéro d'abonné
désiré.
¾ Si on entend la tonalité d’occupé appuyer sur le bouton “REDIAL”.
L’appareil procédera à rappeler continuellement, tant qu’il ne résultera libre
(max. 32 tentatives), le numéro d’abonné préalablement occupé.
Pour interrompre le cycle de rappels, procédez comme suit :
¾ Appuyer sur un bouton quelconque.
Pause
Dans certains cas, comme par exemple avec un PABX ou service interurbain, il
faut insérer une pause dans la séquence de sélection. Appuyer sur le bouton
PAUSE pour insérer un retard de 3,6 secondes entre les numéros sélectionnés.
Les pauses peuvent être programmées dans la mémoire. Chaque pause de 3,6
secondes occupe une position des 16 chiffres disponibles pour chacune des
positions dans la mémoire.
Mémoire sélection abrégée « two touch »
On peut mémoriser et rappeler jusqu'à 10 numéros d'abonnés (max. 16 chiffes
chacun).
Mémoriser un numéro d'abonné
¾ Vérifier que l'appareil est en mode stand-by.
¾ Composer le numéro d’abonné que l’on veut mémoriser.
¾ Appuyer sur le bouton “STORE”.
¾ Appuyer sur le bouton correspondant à la position dans la mémoire
(adresses : 0~9) sous laquelle on veut mémoriser le numéro d'abonné.
¾ Pour mémoriser d'autres numéros d'abonnés ou pour modifier des
numéros existants dans la mémoire, répéter les phases des postes de 1
à 5.
Notes: Le nombre maximum de chiffres que l'on peut mémoriser
pour chaque numéro d'abonné est 16. Si le numéro mémorisé
est composé de plus de 16 chiffres, uniquement les 16
premiers chiffres seront mémorisés.
Afficher un numéro d'abonné mémorisé
¾ Appuyer sur le bouton “RECALL”.
¾ Appuyer sur le bouton correspondant à la position dans la mémoire
(0~9).
L’écran affiche le numéro mémorisé.
Rappeler un numéro d’abonne mémorisé
¾ Décrocher le combiné ou appuyer sur le bouton SPEAKER.
¾ Appuyer sur le bouton “RECALL”
¾ Appuyer sur le bouton correspondant à la position dans la mémoire
(0~9). Du numéro que l’on veut appeler.
Le numéro mémorisé est automatiquement sélectionne.
Ou
¾ Appuyer sur le bouton “RECALL”
¾ Appuyer sur le bouton correspondant à la position dans la mémoire
(0~9).
¾ Appuyer sur le bouton “REDIAL”
Modifier un numéro d'abonné mémorisé
¾ Procéder comme détaillé dans la procédure “Mémoriser un Numéro
d'Abonné”.
¾ Le nouveau numéro remplace automatiquement celui précédemment
mémorisé.
Afficher les numéros d'abonnés des appels
entrants
Le FlyViewOperator peut mémoriser jusqu’à 69 appels entrants. On peut
afficher les numéros d'abonnés des appels entrants en appuyant sur les boutons
“UP” ou “DOWN”. L’écran affiche en outre, pour chaque appel, la date,
l’heure et les éventuelles icônes VIP et REP.
Pour supprimer un numéro affiché
¾ Pour supprimer un numéro affiché, il suffit d'appuyer une fois sur le
bouton “DELETE”.
¾ On supprime tous les numéros des appels entrants en appuyant pendant
3 secondes sur le bouton “DELETE”.
Note : Pour supprimer les numéros VIP suivre la relative procédure.
Rappel
¾ Appuyer sur le bouton “REDIAL”
Note : Si l’on appuie 2 secondes sur le button “REDIAL”, le “0”
sera ajouté avant le numéro sélectionné et les appels seront
correctement transmis à travers un éventuel PABX.
Note: Si on a fait la programmation du code d’engagement de la
ligne externe tel code sera ajoutée automatiquement au début
du nombre à appeler.
¾ L’appareil effectue l’appel à mains libres. Pour passer en mode combiné,
il faut décrocher le combiné même.
Fonction VIP
Pour éviter qu’un numéro d’abonné soit supprimé de la liste des appels reçus,
soit par erreur, soit parce que remplacé par des numéros d’appels successifs, il
suffit de l’identifier par le sigle VIP.
¾ Appuyer sur le bouton “VIP” à l'instant de l'arrivée d'un appel ou après
avoir sélectionné un appel de la liste des appels reçus.
Le nombre est marqué par l’icône VIP.
Pour supprimer un numéro VIP:
¾ Afficher le numéro sur l’écran et appuyer sur le bouton “VIP”.
L’icône VIP disparaît.
¾ Appuyer sur le bouton “DELETE”.
Vérifier les appels sortants
On peut mémoriser (au maximum 18 chiffres) au maximum 20 numéros
d'abonnés d'appels sortants, ainsi que la durée de la conversation. Lorsque le
nombre de numéros dépasse 20, le dernier numéro composé remplace le
premier dans la liste.
• On affiche les numéros d'abonnés des appels sortants en appuyant sur le
bouton “Out Check”. En appuyant plusieurs fois sur le bouton “Out
Check” les numéros d’abonnés des appels sortants seront affichés à l’écran
à partir du plus récent.
• On rappelle le numéro d'abonné sélectionné en appuyant sur le bouton
“REDIAL”.
• On supprime le numéro d'abonné sélectionné en appuyant sur le bouton
“DELETE”.
• Si l'on appuie pendant 3 secondes sur le bouton “DELETE”, on efface tous
les numéros d'abonnés des appels sortants.
Note On mémorise seulement les appels de durée supérieure à 10
seconds.
Fonction Ne pas déranger
La fonction Ne pas Déranger désactive la sonnerie de l’appareil. L’arrivée d’un
appel est signalée uniquement par l’allumage du témoin Ring.
On active ce service en programmant un temporisateur dont la durée doit être
comprise dans une plage de 1 minute à 24 heures ; lorsque le délai programmé
est échu, le service est automatiquement désactivé.
Activation :
¾ Vérifier que l'appareil est en mode stand-by.
¾ Appuyer sur le bouton “VIP” pour 2 secondes. L’écran affiche “00-00”.
¾ Appuyer sur les boutons “UP” ou “DOWN” pour programmer les heures.
¾ Appuyer sur le bouton “SET” pour passer à la programmation des
minutes.
¾ Appuyer sur les boutons “UP” ou “DOWN” pour programmer les minutes.
¾ Appuyer de nouveau sur le bouton “SET” pour confirmer.
L’écran affiche l’icône Ne pas déranger.
Le service est automatique désactivé lorsque le délai du temporisateur échoit
ou, pour le désactiver préalablement, procédez comme suit :
¾ Appuyer sur le bouton “VIP” pour 2 secondes. L’écran affiche le temps
qui reste.
¾ Appuyer sur les boutons “UP” ou “DOWN” pour mettre à zero (“00-00”)
le temporisateur.
¾ Appuyer sur le bouton “SET” pour confirmer.
L’icône Ne pas déranger disparaît.
DECLARATION DE CONFORMITE CE
La société Esse-ti s.r.l., sise à Zona Ind. Squartabue, I-62019 Recanati (MC),
Italie, déclare que le présent appareil est conforme aux normes :
• EN50082-1, EN55022
(Compatibilité électromagnétique)
• EN41003, EN60950
(Sécurité électrique)
Cet appareil est conforme en outre à la Directive 1999/5/CE du Parlement
Européen et du Conseil du 9 mars 1999 relative aux appareils radio, terminaux
de communication et la réciproque reconnaissance de leur conformité.
La conformité aux susdites normes est exprimée par le biais du marquage
USAGE POUR LEQUEL L'APPAREIL EST DESTINE.
Le présent appareil a été conçu pour être utilisé en connexion aux réseaux
PSTN.
ENGLISH
Thank you for choosing an Esse-ti product
This product has been especially designed for
easy operation. It has been manufactured with
perfect workmanship using suitable materials for
long-lasting performance.
All Esse-ti products are subjected to extensive
reliability and operational testing in our
laboratories in order to provide total guarantee
for the user.
The User shall be responsible for defects arising from the use of the product. Esse-ti
shall only be responsible for defects according to and within the limitations set by the
Presidential Decree dated 24/05/1988 no. 224 (fulfilling the EEC directive no. 85/374 on
the harmonisation of statutory and administrative regulations of the Member States on
the liability for damages arising from defective products under art. 15 of Law no. 183 of
16 April 1987).
Esse-ti reserves the right to modify the characteristics of the products at any time
without prior notice.
EDITING CRITERIA
This paragraph describes the editing criteria followed in this manual, together
with their meaning for easier user’s reference. The following table shows the
printing styles on the left and their meaning on the right column.
Example
CHAPTER
TITLE
Style used for the title of chapters. A new
chapter begins on a new page.
PRIMARY TITLE
Style used for the title of large sections in a
chapter, such as the main titles of the chapter.
Secondary Title
Style used for the title of a specific paragraph
in the primary title.
Tertiary Title
Style used for additional sections in a specific
paragraph
Example
Style used for examples.
Note
Style used for explicatory notes: pay attention!
Warning
Normal text
¾
62
Meaning
Operation to be carried out
Style used to indicate possible risks for
individuals and properties: caution!
Style used for normal text.
Style used to indicate the sequence of
operations that must be carried out for
programming or service implementation.
EDITING CRITERIA
GENERAL INSTRUCTIONS FOR THE
INSTALLER
GENERAL NOTES
•
•
•
•
•
•
•
•
•
•
•
•
•
•
Carefully read the notes contained in this section as they provide important
information on the correct safe installation, use and maintenance of the
product.
The product must be EXCLUSIVELY used for the purpose it was designed
for. Esse-ti shall not be responsible for damages arising from improper use.
The product has been designed in compliance with the regulations in force
and must be installed in system that comply with the provisions of law.
Before connecting the product to the electric mains, make sure that the line
voltage corresponds to the value indicated on the product label.
Always disconnect the product from the power supply mains before
carrying out any operation either inside or outside the product (cleaning,
maintenance, etc.).
A protective cut-out switch must be installed upstream in order to interrupt
power supply in case of fault.
Always refer to an authorised assistance centre for repair.
Install the product in a well-ventilated place, making sure not to obstruct
the ventilation slots.
Beware of symbols showing lightening with arrow inside a triangle since
they indicate the presence of dangerous voltage.
Beware of symbols showing an exclamation mark inside a triangle since
they indicate potentially dangerous or even lethal situations that require
utmost attention.
For information on how to use the product see the paragraph "Technical
Features".
Do not use the product in association with other electric or electronic
devices that were not especially designed to be used with it.
Do not install the product in potentially explosive environments.
Make sure that the product has been installed as required.
GENERAL INSTRUCTIONS FOR THE INSTALLER
63
•
•
•
•
•
•
Connect the protections for the power supply and telephone lines to the
installation.
Do not introduce objects, liquids or powders inside the product. Do not use
sprays inside the product.
Do not open the product case since it does not contain any user-serviceable
parts. If necessary, contact an authorised assistance centre.
In case of gas leaks in the environment do not use the telephone to make an
emergency call.
When replacing the batteries, arrange for suitable disposal with similar
waste.
Packing components (such as plastic bags, foam polystyrene, etc.) must be
kept out of the reach of children because potentially dangerous.
MAKING THE INSTALLATION
Internal telephone installations must be carried out by specialised personnel.
The installation and connection of telephone terminals to the
telecommunications network that do not comply with the regulations in force is
not permitted.
WARNINGS
The main causes of interference on telephone lines and power supply mains
(that may result in malfunctioning or damages to the product) are:
• accidental contacts with lines with higher voltage (short circuit)
• electromagnetic association with other conductors located nearby
• sudden load variations, especially for power supply lines (electric motors,
etc.)
• temporary interference caused by weather conditions (lightening)
Protections for telephones lines must be inserted not only on external, but also
on extension lines outside the building or lines connected to devices that are
powered from the mains (i.e. fax, modem, answering machine, cordless
telephone, etc.).
The protection for power supply lines must be connected to the input of the
product power line.
The earth terminal of the protections must be connected to a working earth
system to ensure the correct operation of the devices.
64
GENERAL INSTRUCTIONS FOR THE INSTALLER
DESCRIPTION
Fly View Operator is a phone system developed for Esse-ti telephone switches
(K series).
The red and green LED’s on the right-hand side show the status of external
lines and extensions and give information on the operation mode (day or night)
and the activation status of the call divert function.
In case of suitably equipped and programmed Esse-ti telephone switches, the
LCD displays the calling user number.
FEATURES AND FUNCTIONS
•
•
•
•
•
•
•
•
•
•
•
•
•
•
•
•
•
•
•
•
Caller ID visualization with all Esse-ti exchanges
Hand-free dialing and answering.
10 LED’s for external line status visualization
1 LED for day/nigh/weekend mode indication
1 LED for follow-me indication
24 LED for extension status visualization
Super large LCD display (16 digit).
FSK/DTMF dual system, 69 call memories, call back and auto longdistance call back.
Pre-dialing and editing of a number to be dialed.
Last 20 dialed number and conversation time review.
Last 20 dialed number redial.
Recall on Busy.
59 VIP numbers program.
10 two touch memories(each to 16 digits).
Do not disturb function.
Anti-intrusion function.
Timer and clock.
3 steps ringer level selectable.
Music on HOLD.
8 steps LCD contrast adjustment.
DESCRIPTION
65
•
•
•
66
Flash time 100 ms (not programmable).
REDIAL/Pause/Flash function keys.
Tone/Pulse Switch.
DESCRIPTION
INSTALLATION
CONNECTIONS
The phone can operate in two different modes, i.e. two- or four-wire mode. In
the two-wire operation mode the phone operates as a standard phone; in the
four-wire operation mode the LED's are in service.
¾ Install two AA 1.5V batteries.
¾ Insert the telephone cable into the corresponding socket, introduce the
cable into the channel and connect the other end to the telephone
socket.
A:
Open
socket
B:
Inverted cable
Connect the telephone socket to the PABX according to the following table:
Plug 6/4
Pin 1
Pin 2
Pin 3
Pin 4
Data line –
Extension
number
Data line +
Pins 2 and 3 (voice) must be connected to the telephone switch numbered
terminal that corresponds to the extension number to be connected. No polarity
must be complied with.
Pins 1 and 4 (data line) must be connected to the switch signalling terminals.
For more information please refer to the telephone switch instruction manual.
The polarity shown in the table must be complied with. If, by mistake, wires are
INSTALLATION
67
connected with inverted polarity, the phone LED's and the LED's of any other
FlyViewOperator phones will not turn on.
Warning
To connect the telephone use the plug/plug cable
supplied.
BATTERIES
The batteries are located in the battery compartment under the telephone. When
necessary, replace them with AA 1.5V batteries.
We recommend to replace the batteries before they die completely in order not
to lose the telephone programming data.
Before replacing the batteries, follow this procedure to prevent the clock from
stopping and avoid having to set the time again:
¾ Pick up the handset so the telephone is fed from the telephone line.
¾ Replace the batteries.
¾ Hang up the handset.
PROGRAMMING THE EXCHANGE TYPE AND
EXTENSION NUMBER
You can program:
• the type of exchange connected to the telephone
• the extension number
Programming is carried out with:
• GREEN LED’s (exchange type)
• RED LED’s (extension number)
68
INSTALLATION
Warning
Both programming operations are mandatory for
correct operation.
L1 L2 L3 L4
L5 L6 L7 L8
L9 L10
LED 13
..............
..............
LED 1
LED 2
LED 12
PROGR
LED 24
Programming procedure
¾ Remove the cardboard protection to access the central programming
button (shown as PROGR in the figure).
¾ Press and hold the button pressed for 2 seconds.
When you release the button, the LED's turn on to indicate current
programming: GREEN LED for exchange type:
LED
L1
L2
L3
L4
L5
INSTALLATION
EXCHANGE
PolarisPlus/Fox70
SmilePlus/Fox90
CT624
Europa280A K/ Europa280B K
Europa160 K / CT126
TA28K
69
L6
L7
CT312K
CT416K
and RED LED for extension number.
The telephone starts scanning the L1-L7 LED’s horizontally for the exchange
type.
¾ When the LED of the desired exchange turns on, press the programming
button shortly.
The telephone starts scanning the red LED's vertically. LED 1 corresponds to
extension number 1, LED 2 to extension number 2, etc. Please see the
following guides for correctly choosing the extension number:
GUIDE FOR THE SELECTION OF THE EXTENSION NUMBER FOR
EUROPA, TA28, CT312 AND CT416:
The extension number is the PROGRESSIVE number of the extension
connected to the telephone. For example, the number of extension for extension
41 is 1, for extension 49 is 9, for extension 51 is 10, etc...
GUIDE FOR THE SELECTION OF THE EXTENSION NUMBER FOR
POLARISPLUS, SMILEPLUS, FOX70, FOX90, CT624
The extension number is a number from 1 to 8 according to the position of the
extension in the extension board. For example, the extension number of the
fourth extension of the extension board is 4.
¾ When the LED of the extension number you want to assign to the
telephone turns on, press the programming button shortly.
Programming is completed and the telephone returns to the idle state.
Note: If you press the programming button for more than 2 seconds,
the telephone rapidly scans all LED’s. The telephone cannot
be programmed in this phase. Press the programming button
shortly to return to the idle state.
Note: To exit programming without saving the modifications press
the programming button for about 2 seconds.
Example:
•
70
Exchange type: CT416K
INSTALLATION
•
Extension number: 8 (corresponding to extension 48)
¾ Press the button for about 2 seconds.
¾ Wait until the green LED’s start scanning. Press the programming button
when LED L7 turns on.
¾ The red LED’s start scanning. Press the programming button when the
eighth RED LED turns on.
TELEPHONE GENERAL PROGRAMMING
Be sure that the phone is in standby mode.
¾ Press “SET” to access the programming mode;
¾ Press “UP” or “DOWN” to scroll through the five programming modes
(from 1 to 5):
1
2
3
4
5
Date and time “date”
Area code “code”
line engagement code “pcode”
Brightness “lcd”
Flash time “flash”
¾ Press “SET” to set the selected programming mode.
The display shows the current setting and the modifiable parameter
starts flashing. Use “UP” or “DOWN” to scroll through the different
options or enter a value with the numerical buttons (enter a value for
each flashing digit). To set more than one parameter, press “SET” to
save the current parameter. The next parameter starts flashing;
¾ Press “DELETE” to exit the programming mode.
Note: When the setting is completed, the next parameter appears on
the display. The programming mode is exited if no key is
pressed within 10 seconds.
Set date and time
¾ Be sure that the phone is in standby mode.
INSTALLATION
71
¾ Press “SET” key, “ set 1 DATE ” glints.
¾ Press “SET” again to confirm. “20??” is displayed.
¾ Press “UP” or “DOWN” keys to set “Year”
¾ Press “SET” key again. “Month” glints.
¾ Press “UP” or “DOWN” keys to set “Month”.
¾ To set Date, Hour and Minute in the same way.
Set area code
After the “Data and time” programmation “SET 2 CODE” on the display for
ten seconds is displayed. In case you do not push any key within these ten
seconds, you have to push again the “SET” key and the “UP” or “DOWN” ones
till “SET 2 CODE” is displayed.
¾ Press “SET” key. “Code 0----” appears indicating that the area code can
be set now.
¾ Press “SET” key. The first “-” glints.
¾ To key in the area code, ie. 0755
With this program, when you call a number from the list of incoming calls with
the “UP”/ “DOWN” and “REDIAL” keys, the phone doesn’t dial the local area
code if it is present in the number.
Example:
local area code:0755 and incoming call number:
07551234567. During recall the telephone dials 1234567 only.
Set the line engagement code
After the “Area Code” programmation “SET 3 PCODE” on the display for ten
seconds is displayed. In case you do not push any key within these ten seconds,
you have to push again the “SET” key and the “UP” or “DOWN” ones till
“SET 3 PCODE” is displayed.
¾ Press “SET” key to confirm. “-“ appears to indicate that line engagement
code can be set now.
¾ Press “UP” or “DOWN” keys to set the digit. (1~9, *, # code)
¾ Press “SET” key to confirm.
72
INSTALLATION
The line engagement code is useful when the telephone is connected to a PABX
and is used to set the engagement code for the external line in the PABX.
This code, followed by a pause, is automatically dialled when you call a
number from the list of incoming calls with the “UP”/ “DOWN” and
“REDIAL” keys.
Note: This programming is not necessary if you want to set “0” as
line engagement code. Simply hold the “REDIAL” key
pressed for two seconds after the number you want to call is
displayed. (See page 82 )
Set brightness
After the “Set IP mode” programmation “SET 4 LCD” on the display for ten
seconds is displayed. In case you do not push any key within these ten seconds,
you have to push again the “SET” key and the “UP” or “DOWN” ones till
“SET 4 LCD” is displayed.
¾ Press “SET” key to confirm. “LCD X” is displayed.
¾ X (1, 2, 3, 4, 5, 6, 7, 8) is selected with “UP” or “DOWN” key.
¾ Press “SET” key again to confirm the setting.
Flash time
The phone sends a line disengagement impulse to the telephone switch when
the FLASH key is pressed to put the call on hold. The FLASH time indicates
the impulse duration. The FlyViewOperator flash time default value is 100 mx
and is not programmable.
Note: The set of flash time made through the menù does not have
some effect.
Set Anti-intruision function
The anti-intrusion function prevents from using another telephone connected in
parallel to the FlyViewOperator telephone.
When this function is active, the FlyViewOperator telephone generates an
interference signal that prevents the telephone connected in parallel from
listening to the conversation or use the line for external calls.
INSTALLATION
73
¾ Press the “DOWN” key for 2 second. Display shows “STEAL OFF”
message.
¾ Press the “UP” or “DOWN” keys to select “ON” to enable function or
“OFF” to disable function.
¾ Press “SET” Key to confirm.
Tone/Pulse dialing
The TONE PULSE switch allows to choose the dialing mode:
• TONE sets DTMF dialing
• PULSE sets pulse dialing
It is recommended not to change the TONE default position.
Setting ringer level
To choose the ringer level set the base unit’s RING switch to OFF (disabled) or
LO (medium) or HI (high).
Setting the hands free level
The volume control is under the right side of telephone.
74
INSTALLATION
TELEPHONE OPERATION
Keys
KEY
DELETE
UP
DOWN
OUT CHECK
SET
STORE
VIP
RECALL
HOLD
PAUSE
FLASH
REDIAL
SPEAKER
FUNCTION
Exit the programming mode; cancel a wrong digit;
delete a number from the incoming and outgoing calls
list
Scroll through the programming modes; set the values;
scroll through the list of incoming calls
Scroll through the programming modes; set the values;
scroll through the list of incoming calls; enable Antiintrusion function
Rewiew the outgoing calls
Access the programming mode; confirm a value
Store a number into memory
Set a number (out of the incoming and outgoing calls
list, or during an incoming call) as “VIP”; enable a Not
Disturb function
Recall a number out of the memory
Switch the microphone off during a conversation
Insert a pause (3,6 seconds ) while dialing or storing a
number
Put a conversation on hold
Redial the last dialed number; dial a number out of the
incoming or outgoing calls list; recall on busy
Place a call or answer in handsfree mode
TELEPHONE OPERATION
75
LED indications
The LED’s on the right-hand side provide information on the exchange status:
L1 L2 L3 L4
L5 L6 L7 L8
LED 1
LED 2
LED
..............
..............
L9 L10
LED 12
LED
GREEN
L1-L10
GREEN
GREEN
RED 1-24
MEANING
External line status
Day/Night/Weekend
mode
Follow-me activation
Extension status
LED 2
External Lines LED and Extension LED
LED status
Meaning
Off
Free line or extension
On
Conversation over line or
extension
Slow blinking
Number dialing over line or
extension (PolarisPlus, SmilePlus,
Fox70, Fox90, CT624 only)
Rapid blinking
Incoming call over external line
or ringing extension
On with fast turn-off
Parked external line
76
TELEPHONE OPERATION
Day/Nigh/Weekend LED.
LED status
Off
On
Blinking
Meaning
Day
Night
Weekend (PolarisPlus,
Fox70, SmilePlus, Fox90,
CT624 only)
LED status
Off
On
Meaning
“Follow-me” not active
“Follow-me” active
Follow—me LED”
Display
First you have to apply for the service of caller ID from the local PTT.
There are three lines in the LCD.
The first line indicates:
• Date and Time current.
• New call icon (NEW).
• Repeated call icon (REP).
• VIP icon (VIP).
• Number of new calls (IN), in the right hand of the line.
• The arriving date and time of a call, if you press the “UP” or “DOWN”
key.
• Number of calls on the outgoing calls list (OUT), if you press the “OUT
CHECK” key.
• Outgoing call length, if you press the “OUT CHECK” key.
The second line indicates:
• Day of the week
• Do not disturb Icon.
The function of the third line:
TELEPHONE OPERATION
77
• Year is displayed when the phone is on-hooked.
• The number is displayed when there is a new call.
• The outgoing number is displayed when a phone number is dialed.
• The number of an incoming call is diplayed, if you press the “UP” or
“DOWN” key.
• The number of an outgoing call is displayed, if you press the “OUT
CHECK” key.
• Different setting status is displayed when the phone is being set for
various function.
Placing a call
¾ Pick up the handset or press SPEAKER button on the base unit, the IN
USE LED light and a dial tone will be heard.
¾ Dial the desired phone number.
Or
¾ In standby mode, input the telephone number first, then press “REDIAL”
button.
Receiving a call
¾ Pick up the handset or press SPEAKER button on the base unit, the IN
USE LED lights.
¾ Start conversation.
Ending a call
Upon completion of a call, you can hang up by returning the handset back to its
cradle on the base unit if you are using the handset or press SPEAKER button if
you are using speakerphone.
Putting a call on hold (Telephone connected to
PABX)
¾ Press the FLASH key during conversation. The call has now been put on
hold The external user receives waiting music or tones, according to the
telephone switch features and settings.
78
TELEPHONE OPERATION
Warning!
Do not use the HOLD key to put the call on hold.
The only function of the HOLD key is to turn off
the handset microphone momentarily (the external
user receives waiting music). However, the operator
cannot forward the call to another extension or
access the telephone switch services. Moreover,
the call is cleared if you press the HOLD key
twice.
Putting a call on hold (Telephone connected to
the external line)
When the FlyViewOperator telephone is connected to the telephone line (and
not to a PABX), you can put a call on hold by pressing the “HOLD” key.
Handfree mode:
¾ Press HOLD button, the microphone will turn off and the outside line will
still be retained just listening to music, so the other party cannot hear
your side of conversation.
¾ Press “SPEAKER” key to go back to normal conversation.
or
¾ Pick up the handset to go back to normal conversation.
Warning!
The call is cleared if you press the HOLD key
when the call is on hold.
Handset mode:
¾ Press “HOLD” button, the handset microphone will turn off and the
outside line will still be retained just listening to music, so the other
party cannot hear your side of conversation. You may replace the
handset.
¾
If the handset is not replaced press “HOLD” key, otherwise pick up it to
go back to normal conversation.
TELEPHONE OPERATION
79
or
¾ Press the “SPEAKER” key to go back to the normal conversation.
Warning!
The call is cleared if you press the HOLD key
when the call is on hold.
Last number redial
The last number redial feature may be used to dial the last number called (up to
48 digits).
¾ Press the “REDIAL” button.
or
¾ Pick up the handset or press the SPEAKER button on the base unit.
¾ Listen for a dial tone.
¾ Press the “REDIAL” button. The unit will automatically redial the last
phone number you called.
Recall on busy
In handsfree mode, if the called number is busy, you can use the recall function.
¾ Press “SPEAKER” key and dial the desired phone number.
¾ If you hear the busy tone press “REDIAL” key.
The telephone will keep on calling the number until it is free (max. 32
attempts).
To interrupt the recall cycle:
¾ Press any key.
Pause
In some cases, such as PABX or long distance service, a pause may be needed
in the dialing sequence. Pressing the PAUSE button inserts a 3.6 seconds delay
between dialed numbers. Pauses may be programmed into the memory. Each
3.6 seconds pause occupies one digit of the available 16 digits per memory
location.
80
TELEPHONE OPERATION
Two touch memory dialing
You can store and recall up to 10 two touch telephone numbers (up to 16 digits
each).
Storing Telephone Numbers into Memory
¾ Be sure that the phone is in standby mode.
¾ Dial the phone number you want to store.
¾ Press the “STORE” button.
¾ Press a memory location (addresses: 0~9) where you want to store the
number.
¾ To store more phone numbers or modify existing numbers in memory,
repeat previous steps.
Note: The maximum number of digits that can be stored for each
phone number is 16 digits. If stored numbers are longer than
16 digits, only the first 16 digits will be stored into the
selected memory location.
Review a stored telephone number
¾ Press the “RECALL” key and press the memory location (0~9 button) on
the keypad for the number you have stored.
The stored number will be showed.
Dialing a Number from Memory
¾ Pick up the handset or press SPEAKER to off-hook the unit.
¾ Press the “RECALL” button.
¾ Press the memory location (0~9 button) on the keypad for the number
you have stored. The stored number will be dialed automatically.
Or
¾ Press the “RECALL” button.
¾ Press the memory location (0~9 button) on the keypad for the number
you have stored.
¾ Press the “REDIAL” button.
TELEPHONE OPERATION
81
Changing Stored Phone Numbers
¾ Follow the steps described in “Storing Telephone Numbers into
Memory.”
¾ The new phone number will automatically replace the previous one.
Review the incoming call numbers
The FlyViewOperator stores the last 69 incoming calls. Numbers for
incoming calls can be reviewed by pressing “UP” or “DOWN” keys.
The date, incoming time and VIP and REP icons, if any, are displayed for
each number.
To cancel a reviewed number
¾ A reviewed number can be canceled when “DELETE” key is pressed
once.
¾ All incoming call numbers are cancelled when “DELETE” key is being
pressed for 3 seconds.
Note: To delete the VIP numbers follow the relative instructions.
Call back
¾ Press “REDIAL” key.
Note: If you press “REDIAL” key for 2 seconds a “0” is added
before the selected number and the call is sent successfully
through the PABX.
Note: If the line engagement code is programmed, this code is
automatically added before the number to call.
¾ The phone makes the call in hands-free mode. Lift the handset to switch
to the handset mode.
VIP function
You can identify a number as VIP if you want to avoid deleting it from the list
of incoming calls by mistake or if you do not want to replace it with the
numbers of the following calls.
¾ Press the “VIP” key when you receive a call or after you select it from
the list of incoming calls.
The number is marked with a “VIP” icon.
82
TELEPHONE OPERATION
To delete a VIP number:
¾ Rewiev the number on display and press the “VIP” key.
The VIP icon disappears.
¾ Press the “DELETE” key.
Outgoing calls checking
Maximum 20 out going phone numbers (maximum 18 digits) together with
their duration are stored. When the number exceeds 20, the last one shall take
the place of the first one.
• The out going numbers can be reviewed by pressing “Out Check” Key. By
pressing repeatedly the “Out Check” key the out going numbers will be
reviewed starting from the most recent.
• When “REDIAL” is pressed, the selected number is dialed out.
• When “DELETE” key is pressed, the selected number is cancelled.
• When “DELETE” key is being pressed for 3 seconds, all stored outgoing
numbers are cancelled.
Note: Only calls longer than 10 seconds are saved.
Do Not Disturb function
The Do Not Disturb function will mute the telephone ring. An incoming call is
signalled only by the Ring Led.
The service is activated when you set a timer ranging from 1 minute to 24
hours, and is automatically deactivated when the timer elapses.
Activation:
¾ Be sure that the phone is in standby mode.
¾ Press the “VIP” button for 2 seconds. The display shows “00-00”.
¾ Press the “UP” and “DOWN” button to set hours.
¾ Press “SET” button.
¾ Press the “UP” or “DOWN” button to set minutes.
¾ Press the “SET” button to confirm.
Do Not Disturb icon appears on display.
The service is automatically deactivated when the timer elapses. To
deactivate the service:
TELEPHONE OPERATION
83
¾ Press the “VIP” button for 2 seconds. The display shows the remained
time.
¾ Press the “UP” or “DOWN” button to reset the timer (00-00).
¾ Press the “SET” button to confirm.
Do Not Disturb icon disappears.
CE CONFORMITY DECLARATION
Esse-ti s.r.l., with registered seat in Zona Ind. Squartabue, I-62019 Recanati
(MC), Italy, hereby declares that this device complies with the following
standards:
• EN50082-1, EN55022
(Electromagnetic compatibility)
• EN41003, EN60950
(Electric safety)
and also with the requirements of the 1999/5/CE Directive issued by the
European Parliament and by the Council on 9 March 1999 on radio sets,
telecommunication terminals and the mutual acknowledgement of their
conformity.
Compliance with the above requirements is shown with
DESIGNED USE OF THE DEVICE.
This device has been designed for use over PSTN networks
84
TELEPHONE OPERATION
FlyViewOperator
09/05/2006
Esse-ti S.r.l.
Zona Ind.le Squartabue
62019 Recanati (MC)
ITALY
Tel: ++39 071 7506066-7506105
Fax: ++39 071 7506057
www.esse-ti.com
[email protected]