1
USER’S MANUAL
Installation and use
Thank you for choosing an Esse-ti product
This product has been especially designed for
easy operation. It has been manufactured with
perfect workmanship using suitable materials for
long-lasting performance.
All Esse-ti products are subjected to extensive
reliability and operational testing in our
laboratories in order to provide total guarantee
for the user.
The User shall be responsible for defects arising from the use of the product.
Esse-ti shall only be responsible for defects according to and within the
limitations set by the Presidential Decree dated 24/05/1988 no. 224 (fulfilling
the EEC directive no. 85/374 on the harmonisation of statutory and
administrative regulations of the Member States on the liability for damages
arising from defective products under art. 15 of Law no. 183 of 16 April 1987).
Esse-ti reserves the right to modify the characteristics of the products at any
time without prior notice.
TABLE OF CONTENTS
EDITING CRITERIA.............................................................................................................6
GENERAL INSTRUCTIONS FOR THE INSTALLER ........................................................8
General Notes.....................................................................................................................8
Making the Installation.......................................................................................................9
INSTALLATION .................................................................................................................10
Handset connection ..........................................................................................................10
headset connection ...........................................................................................................10
Telephone line connection ...............................................................................................11
Extension position and switchboard model programming................................................11
Regulating display contrast ..............................................................................................12
Cards ................................................................................................................................12
FUNCTIONAL DESCRIPTION ..........................................................................................14
VISUAL INFORMATION...................................................................................................16
Display information..........................................................................................................16
Symbol description ..........................................................................................................................16
Messages when telephone is idle.....................................................................................................16
Messages when telephone rings.......................................................................................................17
Message during number dial............................................................................................................17
Message during conversation ..........................................................................................................18
LED light information......................................................................................................18
KEYS....................................................................................................................................20
Customisable group keys (2) ............................................................................................20
Telephone keypad group (3).............................................................................................22
Navigation menu group keys (4) ......................................................................................22
Switchboard services group keys (6)................................................................................23
Telephone line operation group keys (5)..........................................................................23
Dss group keys (7)............................................................................................................24
DESCRIPTION OF MENU FUNCTIONS ..........................................................................25
Menu access .....................................................................................................................26
Calls list............................................................................................................................26
Phonebook........................................................................................................................27
List....................................................................................................................................................27
New contact......................................................................................................................................27
Options .............................................................................................................................................28
Settings.............................................................................................................................29
Date and time (Europa160-280, CT126, TA28 only) ......................................................................29
Contrast ............................................................................................................................................29
Select PBX model ............................................................................................................................29
Extension position............................................................................................................................30
Outgoing calls ..................................................................................................................................30
Buttons programming ......................................................................................................................31
Change unblock code.......................................................................................................................32
Audio................................................................................................................................................32
Localize ............................................................................................................................................33
Change logo .....................................................................................................................................34
Restore defaults................................................................................................................................34
Functions ..........................................................................................................................35
Hotel (CT624Hotel, SmilePLUS, FOX90 only)...............................................................37
Check-in ...........................................................................................................................................37
Billing...............................................................................................................................................38
Booths ..............................................................................................................................................38
Prints ................................................................................................................................................38
Alarm clock......................................................................................................................................40
Credit................................................................................................................................................40
Room state........................................................................................................................................41
Check-out .........................................................................................................................................41
Version .............................................................................................................................41
Phone lock........................................................................................................................42
ANSWER AND CALL ........................................................................................................43
Mode of use (handset, headset, handsfree).......................................................................43
Answering calls ................................................................................................................44
Making calls .....................................................................................................................44
Normal mode....................................................................................................................................44
Advanced mode................................................................................................................................45
Direct dial call ..................................................................................................................45
Speed dial calls to the 10 contacts index numbers ...........................................................45
Last number redial............................................................................................................46
Redial a number from the calls list...................................................................................46
Redial a number from the phonebook ..............................................................................47
Redial a number from the phonebook without selecting a line.......................................................47
Redial a number from the phonebook, with line selection..............................................................47
Redial a number from the switchboard phonebook ..........................................................47
Listening volume..............................................................................................................48
Microphone deactivation..................................................................................................48
Call hold...........................................................................................................................48
Call unhold .......................................................................................................................49
Alarms from extensions (CT624 HOTEL, SMILE PLUS, FOX 90) .................................50
Missed wake-up................................................................................................................50
Initial situation .................................................................................................................................50
Reset.................................................................................................................................................50
Rescue call .......................................................................................................................51
Initial situation .................................................................................................................................51
Reset from the room telephone ........................................................................................................51
Reset from the manager telephone...................................................................................................51
TELEPHONE SERVICES ...................................................................................................53
Intercom connection.........................................................................................................53
Opening ports 1 and 2 ......................................................................................................53
Pager amplifier .................................................................................................................54
Room monitor ..................................................................................................................54
Alarm clock......................................................................................................................55
Do not disturb...................................................................................................................56
R-pulse over the trunk line ...............................................................................................56
Boss-Secretary..................................................................................................................56
Call forwarding on no answer ..........................................................................................57
Call forwarding on busy ...................................................................................................58
Follow me.........................................................................................................................59
Cancel all call forwarding ................................................................................................60
Three-way conference ......................................................................................................60
Automatic ring back .........................................................................................................60
Call intrude.......................................................................................................................61
Call pick-up......................................................................................................................62
Selective call pick-up .......................................................................................................62
Call return ........................................................................................................................62
Trunk line selection..........................................................................................................62
Call parking......................................................................................................................63
Paging...............................................................................................................................63
Trunk-trunk conversation .................................................................................................64
Check-in ...........................................................................................................................64
Check-out .........................................................................................................................64
Room state........................................................................................................................64
Prints ................................................................................................................................65
Booth................................................................................................................................65
Credit................................................................................................................................65
Listen to messages in the voice mail unit ........................................................................66
GSM credit .......................................................................................................................66
SERVICE TABLE................................................................................................................67
QUICK KEY USER GUIDE ................................................................................................68
Technical specifications .......................................................................................................69
Emergency functioning ....................................................................................................69
CE CONFORMITY DECLARATION ............................................................................69
Designed use of the device ..............................................................................................................69
Warning............................................................................................................................70
EDITING CRITERIA
This paragraph describes the editing criteria followed in this manual, together
with their meaning for easier user’s reference. The following table shows the
printing styles on the left and their meaning on the right column.
Example
CHAPTER
TITLE
Meaning
Style used for the title of chapters. A new
chapter begins on a new page.
PRIMARY TITLE
Style used for the title of large sections in a
chapter, such as the main titles of the chapter.
Secondary Title
Style used for the title of a specific paragraph
in the primary title.
Tertiary Title
Style used for additional sections in a specific
paragraph
Example
Style used for examples.
Note
Style used for explicatory notes: pay attention!
Warning
Normal text
¾
Page 6
Operation to be carried out
Style used to indicate possible risks for
individuals and properties: caution!
Style used for normal text.
Style used to indicate the sequence of
operations that must be carried out for
programming or service implementation.
EDITING CRITERIA
Apart from these styles, this manual also includes illustrative images and
symbols used to represent the operations to be carried out in a schematic way:
Symbol
Meaning
,
,
,
,
,
,
,
,
,
,
,
, on the telephone keypad.
Press the key that corresponds to the symbol
.
Indicates a telephone key: this symbol is
used in programming to indicate the entries
made by the operator.
Lift the handset from the Administrator
extension (or activate the handsfree mode) to
engage the line.
Lift the handset (or activate the
handsfree mode) to engage the line.
Replace the handset (or deactivate the
handsfree mode) to clear the line.
A|B
A [B]
EDITING CRITERIA
The vertical bar indicates that the possible
entry values are ‘A’ or ‘B’.
The square brackets indicate optional code
parts that can be omitted.
Press the key that corresponds to the symbol
on the telephone keypad.
Page 7
GENERAL INSTRUCTIONS FOR THE
INSTALLER
GENERAL NOTES
•
•
•
•
•
•
•
•
•
•
•
•
•
•
•
Carefully read the notes contained in this section as they provide important
information on the correct safe installation, use and maintenance of the
product.
The product must be EXCLUSIVELY used for the purpose it was designed
for. Esse-ti shall not be responsible for damages arising from improper use.
The product has been designed in compliance with the regulations in force and
must be installed in system that comply with the provisions of law.
Always refer to an authorised assistance centre for repair.
Install the product in a well-ventilated place, making sure not to obstruct the
ventilation slots.
Beware of symbols showing lightening with arrow inside a triangle since they
indicate the presence of dangerous voltage.
Beware of symbols showing an exclamation mark inside a triangle since they
indicate potentially dangerous or even lethal situations that require utmost
attention.
For information on how to use the product see the paragraph "Technical
Features".
Do not use the product in association with other electric or electronic devices
that were not especially designed to be used with it.
Do not install the product in potentially explosive environments.
Make sure that the product has been installed as required.
Do not introduce objects, liquids or powders inside the product. Do not use
sprays inside the product.
Do not open the product case since it does not contain any user-serviceable
parts. If necessary, contact an authorised assistance centre.
In case of gas leaks in the environment do not use the telephone to make an
emergency call.
When replacing the batteries, arrange for suitable disposal with similar waste.
Packing components (such as plastic bags, foam polystyrene, etc.) must be
kept out of the reach of children because potentially dangerous.
Page 8
GENERAL INSTRUCTIONS FOR THE INSTALLER
MAKING THE INSTALLATION
Internal telephone installations must be carried out by specialised personnel.
The installation and connection of telephone terminals to the
telecommunications network that do not comply with the regulations in force is
not permitted.
GENERAL INSTRUCTIONS FOR THE INSTALLER
Page 9
INSTALLATION
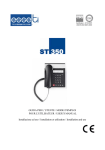
PERSONAL PHONE is a telephone system developed to be used with all EsseTi telephone switchboards.
PERSONAL PHONE can be used by means of a USB port and the
PERSONAL PHONE SUITE directly from a personal computer.
The connection to the switchboard must be carried out by means of a four-wire
telephone cable, as described in the following paragraphs. When the telephone
is connected to four wires, the entire system’s telephone activity is visualised.
Without a power source, the telephone acts as a normal BCA.
PERSONAL PHONE is ready for use as soon as the following simple
operations have been carried out.
HANDSET CONNECTION
Insert the spiral cable plug with the short end in the handset socket.
Insert the other plug into the smallest socket on the button of the telephone as
indicated with the
icon. Check that the plug is properly attached and that
the flat part of the cable is inserted into the correct channel.
HEADSET CONNECTION
A headset can be connected as an alternative to the handset.
Insert the headset plug into the smallest socket on the bottom of the telephone,
indicated with the icon.
Check that the plug is properly attached and that the flat part of the cable is
inserted in the correct channel. The handset must be inserted, however, in its
corresponding base. Press the
line.
Page 10
key to engage and disengage the phone
INSTALLATION
TELEPHONE LINE CONNECTION
Insert the telephone cable plug into the LINE socket on the bottom of the
telephone, insert the cable into the correct channel and connect the other end
to the telephone socket.
A:
B:
Open telephone socket
Inverted type cable
Plug 6/4
Pin 1
Pin 2
Pin 3
Pin 4
Data line –
Internal
connection
Data line +
EXTENSION POSITION AND SWITCHBOARD MODEL
PROGRAMMING
These parameters must be programmed
for proper telephone operation.
Switchboard model programming: allows the user to set the switchboard model
which the telephone is connected to.
Extension position programming: allows the user to set which port the
telephone switchboard is connected to.
INSTALLATION
Page 11
Select “Settings->Select PBX model” from the menu and choose the type of
switchboard to which the telephone is connected from the list (see page 29).
The extension position programming screen will now be automatically
accessed. Enter the extension position number to which the telephone will be
associated (see page 30).
REGULATING DISPLAY CONTRAST
Allows display contrast adjustment. Select “Settings->Contrast” (see page 29)
from the menu. The telephone display must be adequately illuminated for best
legibility.
CARDS
This telephone kit includes small cards to be positioned in the spaces at the
bottom of the display and on the DSS.
The DSS card must be correctly filled in, while the other card is to be chosen
according to the connected telephone switchboard.
Europa 160-280, Europa STAR, TA28:
Leonardo:
CT312:
Page 12
INSTALLATION
CT416:
CT624:
CT624 Hotel, Smile PLUS, FOX 90:
Polaris PLUS, FOX 70:
INSTALLATION
Page 13
FUNCTIONAL DESCRIPTION
Front view
Back view
Page 14
FUNCTIONAL DESCRIPTION
Functional elements
Front view
1) Display
Back view
: handset plug
2) Customisable keys
LINE: telephone line plug
3) Telephone keypad
USB: computer socket
4) Navigation menu
DSS: not utilised
5) Telephone line operations
PROG/EXP: not utilised
6) Telephone switchboard services
7) DSS
From this point on, reference to the above numbering will be made
to identify the relative key/LED groups. For example, when
speaking of a group of 16 upper keys (those arranged on two
lines), reference will be made to “Group 2 keys”.
FUNCTIONAL DESCRIPTION
Page 15
VISUAL INFORMATION
The PERSONAL PHONE telephone offers an entire series of visual
information which allows at-a-glance switchboard status. This information is
indicated by means of the display and with the LED lights which correspond to
the keys.
DISPLAY INFORMATION
The symbols and messages which can appear on the LCD display are described
below.
The developed signals displayed (data, caller ID or CLI, etc.) are
not visualised if the PERSONAL PHONE telephone is
connected to a non-“K” switchboard.
Symbol description
Call forwarding
Night programme active
Alarm clock
Day programme active
PC connection
Microphone off
Pricing
Ringer off
Telephone locked
Handsfree active
Voicemail messages
Voicemail unit active
Messages when telephone is idle
21 Jun 2007 10:25
2 missed calls
Page 16
1st line: date and time
Message available only with Polaris PLUS,
Smile PLUS, FOX 70, FOX 90, CT624,
Leonardo switchboards and “K”-type
switchboards equipped with a clock
2nd line: message according to the following
priorities:
• System advisory message;
VISUAL INFORMATION
• Missed calls;
• General system message;
• Customisable logo (in textual format).
Messages when telephone rings
21/Jul/2005 10:25
John Smith
21/Jul/2005 10:25
+390717505226
21/Jul/2005 10:25
<<< CALL >>>
21/Jul/2005 10:25
James Black
21/Jul/2005 10:25
Extension: 02
21/Jul/2005 10:25
<<< CALL >>>
Outside calls:
1st line: date and time
2nd line: caller ID (CLI) (based on the local
phone line and the switchboard):
• Alphanumeric ID from the
switchboard;
• Alphanumeric ID associating the
telephone contacts index with the ID
number from the switchboard;
• ID number from the switchboard;
• “<<< CALL >>>” message in the
absence of any ID.
Inside calls:
1st line: date and time
2nd line: caller ID (CLI):
• Alphanumeric ID (available only with
Polaris PLUS, Smile PLUS, FOX 70,
FOX 90, CT624 and Leonardo
switchboards);
• “ <<< CALL>>>” message
(available with all other
switchboards).
Message during number dial
21/Jul/2005 10:25
0711234567
VISUAL INFORMATION
1st line: date and time
2 nd line: number dialled
Page 17
Message during conversation
01.23
7:19
Peter Brown
€
01.23
7:19
0711234567
€
1st line: call cost and remaining credit, call
length, € icon.
2nd line: number dialled:
• Alphanumeric ID associating the
telephone contacts index with the
number dialed;
• Numeric or alphanumeric ID from the
switchboard;
• Number dialed.
LED LIGHT INFORMATION
The PERSONAL PHONE is equipped with 48 LEDs:
-16 are associated with the customisable keys situated under the display;
-32 are associated with the DSS customisable keys.
LED illumination depends on the activity of its corresponding key.
The LEDs corresponding to keys L1...Lx were set to indicate outside line
status, while the LEDs corresponding to the DSS keys were set to indicate
inside line status as described in the following table:
LED Status
Off
On
Slow flashing
Fast flashing
On with brief switch-offs
Meaning
Free receiver
Receiver in conversation
Receiver busy
Ring
Parked call
Example:
If the LED corresponding to key L1 is permanently lit, it means that that
line is busy and therefore it is not possible to use it until it is free. When
the line is free, the corresponding LED switches off, signalling that the
line can now be used.
If the keys are reprogrammed and associated with other functions, their
corresponding LEDs follow this new programming and their respective tasks.
Page 18
VISUAL INFORMATION
If the total number of external or internal line numbers is less than the keys
provided, the remaining LEDs will remain switched off until the relative keys
are programmed for use.
The LEDs corresponding to keys M1...Mx and to the function keys will light
up for approximately four seconds to signal that their keys have been pressed.
If the PERSONAL PHONE shall be connected to a non-“K”
switchboard, the LED lights may differ from the abovedetailed definitions (for example, no flashing may occur).
VISUAL INFORMATION
Page 19
KEYS
Description of the set functions assigned to keys, depending on their
switchboard type. Users can however programme keys according to their own
needs.
Group numbering definitions are described in the chapter:
“FUNCTIONAL DESCRIPTION” (page. 14).
CUSTOMISABLE GROUP KEYS (2)
These keys permit the user to make calls or request switchboard services.
The functions associated with each key are programmable and depend on the
switchboard to which the telephone is connected. If the key corresponds to a
switchboard service, instructions for use will be visualised on the display when
it is pressed.
It is possible associate one of the following functions to each key:
Extension: sends a call to another extension;
Trunk line: engages the outside line;
Direct dial: dials a number or a code;
Card ID: sends a call to a card;
Phonebook contact: sends a call to a number in the telephone
phonebook;
PBX function: requests one of the services offered by the switchboard.
Default functions are indicated on the card inserted in the space provided
between the two rows of keys:
L1...L10
M1...M6
Page 20
External line keys. Allows the outside line to be
used for dialling, or the resumption of a line after
call parking. These are freely programmable.
Programmable keys. The manufacturer has set
these keys to empty.
KEYS
Enable/Disable the Call forwarding on no answer
function, the Call forwarding on busy function and
the Follow me function.
Enable/Disable the Do not disturb function.
DO NOT DISTURB
AUTOMATIC RING BACK Reserve an extension or a trunk line engaged.
Enable/Disable the Boss-secretary function.
BOSS-SECRETARY
Starts the three-way conference.
3-WAY CONFERENCE
Permits an extension to intrude into a conversation
CALL INTRUDE
on another busy extension on another line.
Permits the user to answer an outside call from a
CALL PICK-UP
different extension.
Allows the user to listen in on an area where
ROOM MONITOR
another telephone has been positioned.
Permits the user to answer a direct call from a
SELECTIVE CALL PICK-UP
different extension.
Permits the connection of two local lines via an
TRUNK-TRUNK
operator.
CONVERSATION
LISTEN TO MESSAGES IN
Permits the user to listen to voice mail messages.
THE VOICE MAIL UNIT
Permits the user to visualise remaining SIM card
GSM CREDIT
credit.
Enable outside calls in a room.
CHECK IN
Disable outside calls in a room.
CHECK OUT
Displays the room state.
ROOM STATE
Permits the system administrator to execute
PRINTS
different types of printouts.
Permits the system administrator to manage the
BOOTH
booths.
CALL FORWARDING
KEYS
Page 21
TELEPHONE KEYPAD GROUP (3)
The basic function of these keys is to dial telephone numbers.
When the Phonebook
key has been pressed for 2 seconds, phone keys 0 to
9 relate to the rapid dialling of 10 set contacts index numbers (“0” indicates the
10th position).
In writing alphanumeric texts, the repeated pressing of a key permits a choice
of desired letter or number. Pressing the * key allows letter entry mode (Ab,
AB, ab). Extended pressing of the * key permits cursor modification and
therefore entry and modification method selection. Once all data has been
entered, press OK for confirmation, or else press CANC to delete the entry.
NAVIGATION MENU GROUP KEYS (4)
These keys consent navigation within the menu.
(scrolling key) Moves the display onto the preceding line or cancels
the last text entered.
Permits access to the Incoming Calls Log.
(confirmation key / menu) Permits access to the Menu, confirms data
or selection.
(delete key) Cancels or goes back.
(scrolling key) Moves the display onto the next line or moves cursor
position ahead during alphanumeric text entry.
Permits access to the Outgoing Calls Log.
The navigation menu mechanism is “hierarchical”: it moves access from one
position to another sub-category or goes back up to the preceding category.
Page 22
KEYS
SWITCHBOARD SERVICES GROUP KEYS (6)
These keys permit activation of switchboard services.
Opens port 1.
Opens port 2.
Connects to the intercom position.
AMP
PAG
PBX
Connects with the external amplifier
(for switchboards offering this service).
Parks the local phone line in conversation. Extended
pressing of this key causes line status display.
Advises the switchboard to make a call in paging
mode (for switchboards offering this service)
Retrieves a number from the switchboard contacts
index.
Allows access to the telephone contacts index.
Extended pressing of this key permits access to the
speed dial menu.
Sets the alarm clock function.
(for switchboards offering this service).
TELEPHONE LINE OPERATION GROUP KEYS (5)
Switches off ringer. Press this key again to switch
ringer back on.
Extended pressing of this key permits access to the
“Ring volume” menu.
Disconnects the microphone from the line. Press this
key again to re-activate the microphone.
Consents volume adjustment for telephone calls in
progress.
Extended pressing of this key permits access to the
“Audio” menu.
Engages the phone line with the telephone headset.
Press this key again to disengage the line.
RP
KEYS
Repeats the last number dialled.
Page 23
L
R
Disengages the line for approximately 0.5 seconds
and then engages it again.
Puts a conversation on hold (for example to transfer
the call to another extension).
Permits access to the Missed Calls Log.
Engages the line with handsfree.
again to disengage.
Press this key
DSS GROUP KEYS (7)
The DSS module, equipped with 32 keys and their corresponding LEDs, allows
all types of quick selection and consents at-a-glance telephone system activity
monitoring.
The manufacturer has set this group for making direct inside calls and to
visualise its status.
The DSS module buttons are, however, programmable for the rapid
implementation of many types of selections or to request available switchboard
services.
Page 24
KEYS
DESCRIPTION OF MENU FUNCTIONS
All the functions accessible via the guided display menu are described below.
Visualisation and programming are possible with the microphone
either off (if the connection is 4-wired) or on.
Calls list
Phonebook
Settings
Function (depending on the
PBX model)
DESCRIPTION OF MENU FUNCTIONS
All
Incoming
Outgoing
Missed
List
New contact
Options
Date and Time (Europa160,
Europa280, CT126, TA28 only)
Contrast
Select PBX model
Extension position
Outgoing calls
Buttons programming
Change unlock code
Audio
Localize
Change logo
Restore defaults
Call return
Do not disturb
R-pulse over the trunk line
Call forwarding
Three-way conference
Automatic ring back
Trunk-trunk conversation
Selective pick up
Page 25
Hotel (CT624 Hotel, Smile
PLUS, FOX 90 only)
Call pick up
Call intrude
Room monitor
Boss/Secretary
Credit
GSM credit
Listen to messages in the voice mail
unit
Prints
Time band
Check-in
Billing
Booths
Prints
Alarm clock
Credit
Room state
Check-out
Version
Phone lock
MENU ACCESS
¾ Press the menu key to access the menu.
CALLS LIST
The last 20 calls (made, answered, not answered) are memorised in the Calls list.
¾ Select Calls list and press OK.
¾ Select:
-All to visualise all calls;
-Incoming to visualise all answered incoming calls;
-Outgoing to visualise all calls made;
-Missed to visualise all unanswered incoming calls.
Page 26
DESCRIPTION OF MENU FUNCTIONS
¾ Press OK to confirm.
¾ Utilise the scroll keys to search through the selected list.
The number/name, date and time will be displayed for each call.
¾ Select a call and press OK.
¾ The new menu will be displayed. Select:
-Call to call the number;
-Save to save the number in the telephone contacts index;
-Delete single to delete the call;
-Delete all to cancel the entire list.
¾ Press OK to confirm and follow display instructions.
To call a phone number shown on the display, simply lift the handset or press
the handsfree, headset or any line key.
PHONEBOOK
It is possible to memorise up to 80 names/telephone numbers in the phonebook.
¾ Select Phonebook and press OK.
List
Allows visualisation of the complete list of memorised names/numbers. All
contacts can be called, modified or deleted.
¾ Select List and press OK.
¾ Utilise the scroll keys to search the log to find the desired contact.
The display will show the selected name and telephone number alternately.
¾ Press OK.
¾ Select:
-Call to call a contact;
-Modify to modify the contact;
-Delete single to cancel the contact.
¾ Press OK to confirm and follow display instructions.
New contact
Permits the addition of new contacts into the phonebook.
DESCRIPTION OF MENU FUNCTIONS
Page 27
¾ Select New contact and press OK.
¾ Enter the telephone number and press OK.
¾ Enter the corresponding name (alphanumeric entry mode) and press
OK.
¾ Utilise the scroll keys to select the ring tone to be associated with that
contact and press OK.
The telephone number entered does NOT have to be preceded by any
telephone switchboard access digits.
Options
Speed dial
Permits the association of numeric keypad keys 0~9 with 10 numbers in the
phonebook for speed dialling.
¾ Select Options and press OK.
¾ Select Speed dial and press OK.
¾ Utilise the scroll keys to select the desired key, then press OK.
The phonebook will be shown on the display.
¾ Utilise the scroll keys to select the contact to be associated to that
number, then press OK.
This same menu can be rapidly accessed by the extended pressing of the
Phonebook
key.
Memory state
Permits visualisation of contacts status.
¾ Select Options and press OK.
¾ Select Memory status and press OK.
The display will show: XX % free, YY/80.
XX = percent of phonebook space free.
YY = number of phonebook positions free.
80 = total memory positions available in the phonebook.
Delete all the contacts
Permits to erase all contacts of phonebook.
¾ Select Options and press OK.
¾ Select Delete all the contacts and press OK.
Page 28
DESCRIPTION OF MENU FUNCTIONS
¾ Press OK to confirm and follow display instructions.
SETTINGS
¾ Select Settings and press OK.
Date and time (Europa160-280, CT126, TA28 only)
The Europa160, Europa280, CT126 and TA28 switchboards are not equipped
with an internal clock. The following programming allows telephone clock
setting.
¾ Select Date and time and press OK.
¾ Enter the day (two digits), the month (two digits) and the year (four
digits).
¾ Enter the hour (two digits) and minutes (two digits).
¾ Press the OK key to confirm.
As the PERSONAL PHONE is not equipped with batteries, the clock
will work as long as the telephone is connected to the
switchboard and the switchboard is powered.
Contrast
Permits display contrast regulation. There are 14 available levels.
¾ Select Contrast and press OK.
¾ Utilise the scroll keys to increase or decrease contrast.
¾ Press OK to confirm, press CANC to cancel.
Select PBX model
Permits setting of the type of switchboard the telephone is connected to. This
parameter must be programmed in order for proper PERSONAL PHONE
functioning.
¾ Select Select PBX model and press OK.
¾ Select the switchboard model:
Europa160, Europa280, CT126
DESCRIPTION OF MENU FUNCTIONS
Page 29
EuropaSTAR
Leonardo
CT312
CT416
CT624
CT624 Hotel
PolarisPLUS, FOX70
SmilePLUS, FOX90
TA28.
¾ Press OK to confirm.
The display automatically visualises the Extension position setting.
Extension position
Permits the setting of which switchboard port the telephone is connected to.
This parameter must be programmed in order for proper PERSONAL PHONE
functioning.
¾ Select Extension position and press OK.
¾ Enter the Extension position number (1..N) and press OK.
For switchboards up to CT416, enter an INCREASING number
associated to the extension the telephone is connected to. For
example, for extension 41, enter 1…for extension 49 enter 9,
for extension 51 enter 10, etc.
For the CT624, Polaris, Smile and FOX switchboards, enter a
number between 1 and 8 according to the connection on the
Extension board to which the telephone is connected. Or else,
enter an INCREASING number associated with the extension
the telephone is connected to. For example, for extension 401
enter 1,…for extension 409 enter 9, for extension 411 enter
11, etc.
Outgoing calls
Trunk line seize
Permits activation of the automatic access function to the external line for
numbers memorised in the telephone. If said function is active, the telephone
automatically enters the “seizure digit” (i.e. 0) before the number memorised in
Page 30
DESCRIPTION OF MENU FUNCTIONS
the phonebook or before numbers present in the incoming calls list or when
using the RP key.
Thanks to this option, it is therefore unnecessary to enter the “seizure digit”
when memorising phone numbers, nor is it necessary to open an outside line
before making a call.
¾ Select Outgoing calls and press OK.
¾ Select Trunk line seize and press OK.
¾ Select Yes to activate the function or No to deactivate it, then press
OK.
Seizure digit
Permits entry of digit for access to external line.
¾ Select Outgoing calls and press OK.
¾ Select Seizure digit and press OK.
¾ Enter the switchboard external line access digit.
¾ Press OK to confirm.
Buttons programming
Permits programming of Group 2 keys and of Group 7 keys (DSS).
¾ Select Buttons programming and press OK.
“Press a button” will be shown on the display.
¾ Press the key to be programmed.
“Modify?” will be shown on the display.
¾ Press OK to programme the key or CANC to exit.
¾ Utilising the scroll keys, select the desired option:
-Extension;
-Trunk line;
-Direct dial;
-Card ID;
-Phonebook contact;
-PBX function;
-None.
¾ Press OK to confirm.
¾ Enter, respectively, an extension position, an external line number, a
direct number (or a switchboard programming code), a card index or
DESCRIPTION OF MENU FUNCTIONS
Page 31
select a number from the phonebook or one of the available switchboard
services.
The data to be entered varies depending on the model of switchboard selected.
¾ Press OK to confirm.
With the “Direct dial” or “Phonebook number” options, the LEDs
corresponding to the buttons will briefly light up when the
key is pressed, and then the key will remain switched off; for
all others, the LEDs display the status of the option selected.
When the “Direct dial” option is selected, if the number to be
memorised is a telephone number, it is necessary to also
enter the digit for access to external line.
It is possible to enter into buttons programming mode simply by
keeping the key to be programmed pressed until the display
reads “Modify?”
Change unblock code
Permits modification of the code blocking the telephone.
¾ Select Change unlock code and press OK.
¾ Enter the current code (4 digits) and press OK.
¾ Enter the new code (4 digits) and press OK.
¾ Enter the new code again and press OK.
The code preset by the manufacturer is 0000.
Audio
Permits handset, handsfree, and ringer volume adjustment and allows ring tone
selection. Also permits keypad dialling tone enabling or disabling.
¾ Select Audio and press OK.
Adjust volume
¾ Utilising the scroll keys, select the desired option:
-Handset volume;
-Handsfree volume;
-Ring volume.
¾ Press OK.
¾ Utilise the scroll keys to increase or decrease volume.
Page 32
DESCRIPTION OF MENU FUNCTIONS
¾ Press OK to confirm, press CANC to cancel.
Ring tone
¾ Select Ring tone and press OK.
¾ Utilise the scroll keys to select the desired ring tone.
¾ Press OK to confirm, press CANC to cancel.
Keypad tones
¾ Select Keypad tones and press OK.
¾ Select No if no tones are desired during dialling.
¾ Press OK to confirm, press CANC to cancel.
Localize
Permits the setting of language, date and time format and the date separator
character.
¾ Select Localize and press OK.
Language
¾ Select Language and press OK.
¾ Utilise the scroll keys to select the desired language.
¾ Press OK to confirm, press CANC to cancel.
Date format
¾ Select Date format and press OK.
¾ Utilise the scroll keys to select the desired format.
¾ Press OK to confirm, press CANC to cancel.
Time format
¾ Select Time format and press OK.
¾ Utilise the scroll keys to select the desired format.
¾ Press OK to confirm, press CANC to cancel.
Date separator
¾ Select Date separator and press OK.
¾ Utilise the scroll keys to select the desired character.
¾ Press OK to confirm, press CANC to cancel.
DESCRIPTION OF MENU FUNCTIONS
Page 33
Change logo
Permits the setting of the message visualised on the bottom line of the display
when the telephone is idle.
¾
Select Change logo and press OK.
¾
Enter the message text (max 40 letters/numbers) and press OK.
Restore defaults
Automatically resets all manufacturer settings for ringer type and volume and
handsfree and handset volume. Also permits language, PBX model and
extension position resetting.
¾
Select Restore defaults and press OK.
“Are you sure?” will be shown on the display.
Page 34
¾
Press OK to confirm or press CANC to cancel.
¾
Utilise the scroll keys to select the desired language and press OK.
¾
Utilise the scroll keys to select the desired PBX model and press
OK.
¾
Enter the extension position and press OK.
DESCRIPTION OF MENU FUNCTIONS
FUNCTIONS
Permits requests for available switchboard services. Some of these services can
be requested by default via the customisable Group keys.
¾ Select Function and press OK.
¾ Utilise the scroll keys to select the service desired and press OK.
¾ Follow the display instructions as necessary.
Europa160, Europa280,
CT126, EuropaSTAR
Leonardo
CT312, CT416
DESCRIPTION OF MENU FUNCTIONS
Room monitor
Do not disturb
R-pulse over the trunk line
Call forwarding
Boss/Secretary
Three-way conference
Automatic ring back
Call intrude
Call pick up
Time band
Call return
Do not disturb
R-pulse over the trunk line
Call forwarding
Three-way conference
Automatic ring back
Trunk-trunk conversation
Selective call pick up
Call pick up
Listen to mess. in the voice mail unit
GSM credit
Time band
Room monitor
Do not disturb
R-pulse over the trunk line
Call forwarding
Boss/Secretary
Three-way conference
Automatic ring back
Call intrude
Page 35
CT-624
CT-624 Hotel
PolarisPLUS, FOX70
Page 36
Selective call pick up
Call pick up
Time band
Call return
Do not disturb
R-pulse over the trunk line
Call forwarding
Three-way conference
Automatic ring back
Trunk-trunk conversation
Selective call pick up
Call pick up
Prints
Listen to mess. in the voice mail unit
Time band
Call return
Do not disturb
R-pulse over the trunk line
Call forwarding
Three-way conference
Automatic ring back
Trunk-trunk conversation
Selective call pick up
Call pick up
Listen to mess. in the voice mail unit
Time band
Call return
Do not disturb
R-pulse over the trunk line
Call forwarding
Three-way conference
Automatic ring back
Trunk-trunk conversation
Selective call pick up
Call pick up
Prints
Time band
DESCRIPTION OF MENU FUNCTIONS
SmilePLUS, FOX90
TA28
Call return
Do not disturb
R-pulse over the trunk line
Call forwarding
Three-way conference
Automatic ring back
Trunk-trunk conversation
Selective call pick up
Call pick up
Time band
Room monitor
Do not disturb
Call forwarding
Boss/Secretary
Three-way conference
Automatic ring back
Call intrude
Call pick up
Time band
HOTEL (CT624HOTEL, SMILEPLUS, FOX90
ONLY)
Permits access to hotel services.
Room numbers must be entered without the initial ‘4’.
¾ Select Hotel and press OK.
Check-in
Permits enabling of outgoing calls to a room.
¾ Select Check-in and press OK.
¾ Utilise the scroll keys to select the type of check-in to be set (0..3) and
press OK.
¾ Enter the number of room to be set for operation and press OK to
confirm.
DESCRIPTION OF MENU FUNCTIONS
Page 37
Acknowledgment of the operation will be heard via the loudspeaker:
a confirming tone indicates a positive outcome whereas an
acoustic deterrent device indicates that the operation has not
been successful.
If check-in is carried out when the room is free (check-out status),
all room debits and the telephone activity log will be
cancelled automatically.
Billing
Permits total visualisation of the costs debited to a room.
¾ Select Billing and press OK.
¾ Enter the room number and press OK.
The room costs will be shown on the display.
Booths
Permits access to activation, deactivation and phone box cost display functions.
¾ Select Booths and press OK.
¾ Utilising the scroll keys, select the desired option:
-Enable;
-Show billing;
-Disable.
¾ Press OK.
¾ Enter the phone box number (1...4) and press OK.
Enable
Enables the phone box to execute external calls.
Show billing
Permits visualisation of the total costs corresponding to the phone box.
Disable
Disables the phone box from executing external calls.
Prints
Permits diverse types of printouts.
¾ Select Prints and press OK.
Page 38
DESCRIPTION OF MENU FUNCTIONS
In case of switchboards Smile PLUS and FOX 90, all printouts
available from this menu are active only if the P.O. Smile
PLUS or ST800-S consoles are not connected.
The available functions are as listed below:
Cancel
Allows the cancelation of any printing in progress.
¾ Select Cancel and press OK.
ALL logs
Permits printing of the entire switchboard buffer memory.
¾ Select ALL logs and press OK.
ALL daily logs
Permits printing of switchboard buffer memory contents from a single specified
day.
¾ Select ALL daily logs and press OK.
¾ Enter the date of the day to be printed, in the DDMMYYYY format
(DD=day – 2 digits, MM=month – 2 digits, YYYY=year – 4 digits) and
press OK.
ALL room logs
Permits printing of the designated room extensions.
¾ Select ALL room logs and press OK.
EXT daily logs
Permits printing of all telephone activity of a selected room on a given day.
¾ Select EXT daily logs and press OK.
¾ Enter the date of the day to be printed (in the DDMMYYYY format) and
press OK.
¾ Enter the room number of the room log to be printed and press OK.
EXT details
Permits printing of a room’s telephone activity in detail.
¾ Select EXT details and press OK.
¾ Enter the room number of the room log to be printed and press OK.
EXT billing
Permits printing of the total expense of a given room without printing the
details of the telephone activity.
¾ Select EXT billing and press OK.
DESCRIPTION OF MENU FUNCTIONS
Page 39
¾ Enter the room number of the room costs to be printed and press OK.
Alarm clock
Permits the setting of a room’s alarm clock.
¾ Select Alarm clock and press OK.
If the room is connected with a PERSONAL PHONE or a Time
3000S telephone, alarm clock active status will be indicated
icon.
on the display with the
Single
Sets an alarm for a single day (rings one single time).
¾ Select Single and press OK.
¾ Enter the room number where the alarm clock is to be set and press OK.
¾ Enter the alarm time in the HHMM format (HH=hour – 2 digits,
MM=minutes– 2 digits) and press OK.
Recurrent
Sets an alarm for each day (rings every day at the same time).
¾ Select Recurrent and press OK.
¾ Enter the room number where the alarm clock is to be set and press OK.
¾ Enter the alarm time in the HHMM format (HH=hour – 2 digits,
MM=minutes– 2 digits) and press OK.
Disable
Cancels any alarm clock settings.
¾ Select Disable and press OK.
¾ Enter the room number where the alarm clock is to be set and press OK.
Credit
Permits the visualisation or setting of pre-paid room credit.
¾ Select Credit and press OK.
Show
Displays the relative amount for a room (or the remaining credit if on pre-paid
mode).
¾ Select Show and press OK.
¾ Enter the room number information is wanted for and press OK.
Page 40
DESCRIPTION OF MENU FUNCTIONS
Add
Adds money to a pre-paid room credit.
¾ Select Add and press OK.
¾ Enter the number of the room to receive the added credit and press OK.
¾ Enter the amount to be added (press * to insert a comma).
¾ Press OK.
Room state
Permits visualisation of the information relative to a room: occupied/free,
cleaned/not cleaned, extension in use/free.
¾ Select Room state and press OK.
¾ Enter the room number information is wanted for and press OK.
Check-out
Permits the disabling of outgoing room calls.
¾ Select Check-out and press OK.
¾ Enter the number of the room undergoing check-out and press OK.
A message on the room telephone display will ask if a printout of the
room telephone log is desired.
¾ Select YES if a printout of the telephone log is desired or NO if a
printout is not desired.
¾ Press OK to confirm, press CANC to cancel.
In case of switchboards Smile PLUS and FOX 90, the telephone log
printout function will be in effect only if the switchboard
buffer is active and in the absence of the P.O. Smile PLUS or
ST800-S consoles.
VERSION
Displays the telephone software version.
¾ Select Version and press OK.
DESCRIPTION OF MENU FUNCTIONS
Page 41
PHONE LOCK
Permits the blocking of outgoing telephone use to anyone who does not know
the unblock code.
¾ Select Phone lock and press OK.
¾ Enter the code to block the telephone (preset manufacturer code 0000)
and press OK.
If the password entered is valid, the telephone changes its status from blocked
to unblocked.
The telephone’s blocked status is indicated by the
icon on the display.
We recommend that you take note of the password;
contact the installer if it is lost.
Unblocking the telephone
When the telephone is blocked, no signal will be heard when the handset is
lifted and the message “Unblock code” is displayed when any number keys are
pressed.
¾ Enter the unblock code and press OK.
Page 42
DESCRIPTION OF MENU FUNCTIONS
ANSWER AND CALL
The modalities for answering incoming phone calls, the different modes for
selecting a local line and using handsfree are outlined below.
To place any type of telephone call, the telephone must be unblocked
(
icon off).
MODE OF USE (HANDSET, HEADSET, HANDSFREE)
A:
B:
C:
D:
Idle telephone status
Handset conversation status
Handsfree conversation status
Handset conversation and amplified listening status
Handsfree key pressed
Handset closing
Handset opening
The preceding diagram demonstrates how to pass from one mode of use to
another.
The available modes of use are:
• Free
ANSWER AND CALL
Page 43
•
•
•
Handset/Telephone headset
Handsfree
Amplified listening
Remember that use of the telephone headset is equivalent to handset
use, with the difference that it is necessary to press the
key to activate and deactivate the headset.
ANSWERING CALLS
The presence of an incoming call is indicated by ringer tones and by messages
visualised on the display. The type of ringer indicates the type of call (internal,
external, intercom, etc.),
¾ Lift the handset, activate the handsfree or activate the telephone
headset.
Press the
key to deactivate (and reactivate) the ringer. The
switching on of the corresponding icon indicates that the
ringer has been deactivated.
MAKING CALLS
Normal mode
It is possible to send numbers on the telephone line for all types of operations:
inside, outside calls or service requests.
¾ Lift the handset, activate handsfree or the telephone headset.
¾ Dial the number.
After approximately 15 seconds after the last digit is dialled, the
display will begin showing the time passed and, if available,
icon will
the cost of the telephone call in progress (the
light up).
Page 44
ANSWER AND CALL
Press the RP key to pause.
Advanced mode
Permits the user to dial the number to be called when the handset is then lifted.
¾ Dial the number.
¾ Lift the handset, activate the handsfree or the telephone headset.
In case of erred dialling, it is possible in this mode to correct the
number selected, cancel the dialled digits with the
redial.
key and
Press the RP key to pause.
DIRECT DIAL CALL
Sends a call by simply pressing a direct dial key. The direct dial keys are the 16
keys under the display and the DSS keys, if programmed as “Direct dial.”
¾ Press a direct dial key.
The line becomes automatically engaged in handsfree if the user
presses the direct dial key without lifting the handset.
Pressing a second direct dial key will automatically generate a flash
before the user dials a new number.
SPEED DIAL CALLS TO THE 10 CONTACTS INDEX
NUMBERS
Make a call pressing the
key (2 sec.) and the key (0~9) associated with the
phonebook number programmed: “Speed dial” (see page 28).
¾ Keep pressing the Phonebook
key.
The “Speed dial” menu will be shown on the display.
¾ Press the key (0~9) associated with the contacts index number to be
called.
ANSWER AND CALL
Page 45
The line becomes automatically engaged in handsfree if the user
presses the direct dial key without lifting the handset.
LAST NUMBER REDIAL
Repeat the last number dialled.
¾ Press the RP key.
The line becomes automatically engaged in handsfree if the user
presses the direct dial key without lifting the handset.
If the automatic access function to the external line is active, it is not
necessary to select an external line manually before pressing
the RP key, even if the previous call line was selected
manually.
If the automatic access function to the external line is deactivated,
the RP key will only repeat those digits shown on the display;
therefore, if the previous call line was selected manually, it is
necessary to access the line manually and then press the RP
key.
REDIAL A NUMBER FROM THE CALLS LIST
Permits the user to redial numbers present in the outgoing, incoming and
missed calls lists.
¾ Press the ,
and R keys to visualise, respectively, the incoming,
outgoing or lost calls log.
¾ Utilise the scroll keys to select the number to be redialed.
¾ Press OK.
“Call” will be shown on the display.
¾ Press OK to confirm.
Page 46
ANSWER AND CALL
REDIAL A NUMBER FROM THE PHONEBOOK
Permits the automatic dialling of telephone numbers memorised in the
phonebook.
Redial a number from the phonebook without
selecting a line
¾ Press the Phonebook
key.
¾ Select the name of the person to be called utilising the alphanumeric
keypad or the scroll keys.
¾ Press OK two times.
Redial a number from the phonebook, with line
selection
Permits the selection of the line on which to carry out the phone call.
¾
Press the Phonebook
key.
¾ Select the name of the person to be called utilising the alphanumeric
keypad or the scroll keys.
¾ Press the key corresponding to the line to be utilised for the call.
REDIAL A NUMBER FROM THE SWITCHBOARD
PHONEBOOK
Permits automatic dialling of telephone numbers previously memorised in the
switchboard phonebook.
¾ Press the PBX key.
¾ Dial the digits indicating the position of the number in the phonebook (2
or 3 digits based on the switchboard being utilised; consult the related
manual).
¾ Press OK.
ANSWER AND CALL
Page 47
LISTENING VOLUME
This procedure allows the user to temporarily regulate listening volume.
Variations in volume depend on the function mode in which the telephone is
being used; therefore, if the telephone is in handsfree mode, the handsfree
volume will be regulated and so on for all other modes.
¾ Press the volume
volume level.
key and use the scroll keys to change the
This function is active only when the line is in use.
The volume changes made in this mode are only temporary. The
volume level will return to the menu default volume for the
next call.
MICROPHONE DEACTIVATION
Permits deactivation of the microphone during a conversation.
¾ Press the deactivate microphone key to change its status from active to
inactive.
This function is active only when the line is in use.
The
symbol on the display indicates that the microphone has
been deactivated.
CALL HOLD
Permits the user to put the caller on hold and then carry out a new function.
¾ Press the R (flash) key.
This function is active only when the line is in use.
Page 48
ANSWER AND CALL
CALL UNHOLD
Permits the telephone line to be reopened without having to hang up the
handset.
¾ Press the L key.
This function is active only when the line is in use.
The line will be closed for approximately 0.5 seconds before being
reopened.
ANSWER AND CALL
Page 49
ALARMS FROM EXTENSIONS
(CT624 HOTEL, SMILE PLUS, FOX 90)
An alarm from extension to system manager is generated in case of anomalous
situations that request the operator’s intervention (such as rescue call or missed
wake-up).
MISSED WAKE-UP
This alarm is activated by the wake-up function in case of no reply from the
extension.
Initial situation
The extension rings for a wake-up call.
The wake-up call is not answered within 2 minutes.
The manager telephone rings. The message “WARNING -2” appears on the
display followed by the number of the extension that has generated the signal.
The alarm tone is sent in case of conversation in progress.
Reset
¾ Lift the handset or press the flash key if a conversation is in progress.
¾ Dial 355.
The message on the display is deleted.
An automatic call is sent to the extension that has not answered to the wake-up
call. Two situations are possible based on the status of the room telephone.
The room telephone is free
The room telephone rings.
The user answers the call to talk with the operator.
If not, the operator must check the situation out.
The room telephone is busy
The operator must check the situation out.
Simultaneous wake-up calls are queued and sent in chronological
order at the end of each wake-up call procedure.
Page 50
Alarms from extensions
(CT624 HOTEL, SMILE PLUS, FOX 90)
The list of wake-up calls can be displayed by printing the traffic
documentation of the manager extension.
RESCUE CALL
This function can be activated only from the extensions provided with help call
socket to inform the manager extension that the help button has been pressed.
Initial situation
The help button is pressed.
The manager telephone rings.
The message “WARNING-1” appears on the display followed by the number
of the extension that has generated the signal.
The alarm tone is sent in case of conversation in progress.
¾ Lift the handset to interrupt ringing. If a conversation is in progress,
place the call on hold to interrupt the alarm tone.
The complete cycle is activated again if the reset is not executed
within 30 seconds.
The reset can be executed either from the room or the manager,
according to programming.
Reset from the room telephone
¾ Lift the handset of the telephone connected to the socket that has
originated the help call.
¾ Dial 355.
The message on the display of the manager telephone is deleted.
Reset from the manager telephone
¾ Lift the handset or press the flash key if a conversation is in progress.
¾ Dial 355.
The message on the display is deleted.
An automatic call is sent to the extension that has made the help call. Two
situations are possible based on the status of the room telephone.
Alarms from extensions
(CT624 HOTEL, SMILE PLUS, FOX 90)
Page 51
The room telephone is free
The room telephone rings.
The user answers the call to talk with the operator.
If not, the operator must check the situation out.
The room telephone is busy
The operator must check the situation out.
The reset mode is programmed during installation. Reset from the
room is set by default to guarantee the actual intervention of
the hotel staff.
Simultaneous help calls are queued and sent in chronological order
at the end of each help call procedure.
The list of help calls can be displayed by printing the traffic
documentation of the administrator telephone.
Page 52
Alarms from extensions
(CT624 HOTEL, SMILE PLUS, FOX 90)
TELEPHONE SERVICES
All Esse-Ti switchboard services accessible on the PERSONAL PHONE keys
as set by the manufacturer or programmed by the user are described below,
with notes describing which switchboards are equipped with said service.
During a key programming phase, not all services present in the
switchboards are indicated in the switchboard “Function”
menu. It is possible, however, to associate said services with
a key by memorising the code.
INTERCOM CONNECTION
Europa 160
9
Europa 280/Star
9
TA 28
9
CT 312
9
CT 416
9
Leonardo
9
CT624
9
Polaris+
9
Smile+
9
Establishes a conversation with the external intercom system in switchboards
equipped with intercom boards.
If the line being called is in use, the caller will be put into hold
status.
¾ Press the Intercom
key.
¾ Carry out the intercom conversation.
¾ Hang up the handset.
If the line was in use, the telephone will ring.
¾ Lift the handset to return to the interrupted conversation.
OPENING PORTS 1 AND 2
Europa 160
9
Europa 280/Star
9
TA 28
9
CT 312
9
CT 416
9
Leonardo
9
CT624
9
Polaris+
9
Smile+
9
Opens port 1 or port 2.
If the line being called is in conversation, the caller will be put into
hold status.
TELEPHONE SERVICES
Page 53
¾ Press the
key (or the
key).
¾ Wait for the confirmation tone and hang up.
If the line was in use, the telephone will ring.
¾ Lift the handset to return to the interrupted conversation.
PAGER AMPLIFIER
Europa 160
Europa 280/Star
TA 28
CT 312
9
CT 416
9
Leonardo
9
CT624
9
Polaris+
9
Smile+
9
Permits an announcement to be made on the external amplifier connected to the
telephone switchboard.
If the line being called is in use, the caller will be put into hold
status.
¾ Press the AMP key.
¾ Make the announcement.
¾ Hang up the handset.
If the line was in use, the telephone will ring.
Lift the handset to return to the interrupted conversation.
ROOM MONITOR
Europa 160
9
Europa 280/Star
9
TA 28
9
CT 312
9
CT 416
9
Leonardo
CT624
Polaris+
Smile+
Allows the user to listen in on an area where another telephone has been
positioned.
Presetting the telephone in the room to be checked:
¾ Press the ROOM MONITOR key.
“Preset?” will be shown on the display.
¾ Press OK.
After the confirmation tone, “Ready” will be shown on the display.
Page 54
TELEPHONE SERVICES
Operations to perform from the control position:
¾ Press the ROOM MONITOR key.
“Preset?” will be shown on the display.
¾ Utilise the scroll keys to select Enable and press OK to confirm.
“Select extension” will be shown on the display.
¾ Enter the extension desired and press OK to confirm.
“Activated” will be shown on the display.
ALARM CLOCK
Europa 160
Europa 280/Star
9 (B/Star)
TA 28
CT 312
9
CT 416
9
Leonardo
9
CT624
9
Polaris+
9
Smile+
9
With this function, it is possible to set an alarm clock to a given hour from the
telephone switchboard. It is possible to set a single or daily alarm clock.
To set the alarm schedule:
¾ Press the
key.
¾ Utilise the scroll keys to select Single or Recurrent and press OK.
¾ Enter the hour desired for the alarm clock call.
¾ Press OK to confirm.
The
symbol on the display indicates that the alarm function has
been activated.
The Europa 280B and Star switchboards are only equipped with the
single alarm clock function.
To cancel the alarm:
¾ Press the
key.
¾ Utilise the scroll keys to select Disable and press OK.
The
symbol will then be removed from the display.
TELEPHONE SERVICES
Page 55
DO NOT DISTURB
Europa 160
9
Europa 280/Star
9
TA 28
9
CT 312
9
CT 416
9
Leonardo
9
CT624
9
Polaris+
9
Smile+
9
Polaris+
9
Smile+
9
Deactivates incoming calls on a selected telephone.
To set the Do not disturb function:
¾ Press the DO NOT DISTURB key.
“Enable” will be shown on the display.
¾ Press OK to confirm.
To cancel the Do not disturb function:
¾ Press the DO NOT DISTURB key.
¾ Utilise the scroll keys to select Disable and press OK.
R-PULSE OVER THE TRUNK LINE
Europa 160
9
Europa 280/Star
9
TA 28
CT 312
9
CT 416
9
Leonardo
9
CT624
9
Permits the user to send an outside line flash to access supplementary services
offered by the line administrator.
This function is active only when the line is in use.
¾ Press the R-PULSE OVER THE TRUNK LINE key.
BOSS-SECRETARY
Europa 160
9
Europa 280/Star
9
TA 28
9
CT 312
9
CT 416
9
Leonardo
CT624
Polaris+
Smile+
This service allows calls directed to the “Boss” extension be forwarded to the
“Secretary” extension for call screening. The “Secretary” extension is the only
extension which can call the “Boss” extension.
To activate the Boss-Secretary function:
From the “Boss” extension:
¾ Press the BOSS-SECRETARY key.
Page 56
TELEPHONE SERVICES
“Enable” will be shown on the display.
¾ Press OK to confirm.
¾ Enter the secretary extension number and press OK.
¾ After a continuous tone of approximately 4 seconds, enter * to confirm.
The
icon will be displayed on the extension where the service was
activated (“Boss” extension).
To deactivate the Boss-Secretary service:
¾ Press the BOSS-SECRETARY key.
¾ Utilise the scroll keys to select Disable and press OK.
¾ After a continuous tone of approximately 4 seconds, enter * to confirm.
CALL FORWARDING ON NO ANSWER
Europa 160
9
Europa 280/Star
9
TA 28
9
CT 312
9
CT 416
9
Leonardo
9
CT624
9
Polaris+
9
Smile+
9
Forwards incoming outside calls to another extension if the call is not answered
within a preset time.
To activate this service:
¾ Press CALL FORWARDING.
“On no answer” will be shown on the display.
¾ Press OK to confirm.
“Enable” will be shown on the display.
¾ Press OK to confirm.
¾ Enter the extension number where calls should be forwarded and press
OK.
The
symbol on the display indicates that the Call Forwarding
function has been activated (CT624, Polaris, Smile and FOX
switchboards only).
To deactivate this service:
The deactivation of the Call forward on no answer service is differentiated
according to which switchboard the PERSONAL PHONE is connected to.
TELEPHONE SERVICES
Page 57
CT312 and CT416 switchboards:
¾ Press the CALL FORWARDING key.
“On no answer” will be shown on the display.
¾ Press OK to confirm
“Enable” will be shown on the display.
¾ Press OK to confirm.
¾ Enter the user’s extension number and press OK.
Other switchboards:
¾ Press the CALL FORWARDING key.
“On no answer” will be shown on the display.
¾ Press OK to confirm
“Enable” will be shown on the display.
¾ Utilise the scroll keys to select Disable and press OK.
CALL FORWARDING ON BUSY
Europa 160
Europa 280/Star
TA 28
CT 312
CT 416
Leonardo
9
CT624
9
Polaris+
9
Smile+
9
Forwards incoming calls to another telephone if the extension is busy.
To activate this service:
¾ Press the CALL FORWARDING key.
“On no answer” will be shown on the display.
¾ Utilise the scroll keys to select On busy and press OK.
“Enable” will be shown on the display.
¾ Press OK to confirm.
¾ Enter the extension number where calls should be forwarded.
¾ Press OK to confirm.
The
Page 58
symbol on the display indicates that the Call Forwarding
function has been activated.
TELEPHONE SERVICES
To deactivate this service:
¾ Press the CALL FORWARDING key.
“On no answer” will be shown on the display.
¾ Utilise the scroll keys to select On busy and press OK
“Enable” will be shown on the display.
¾ Utilise the scroll keys to select Disable and press OK.
FOLLOW ME
Europa 160
9
Europa 280/Star
9
TA 28
9
CT 312
9
CT 416
9
Leonardo
9
CT624
9
Polaris+
9
Smile+
9
Forwards all incoming calls to another telephone.
To activate this service:
¾ Press CALL FORWARDING.
“On no answer” will be shown on the display.
¾ Utilise the scroll keys to select Follow me and press OK.
“Enable” will be shown on the display.
¾ Press OK to confirm.
¾ Enter the extension number to which all calls should be forwarded.
¾ Press OK to confirm.
The
symbol on the display indicates that the Call Forwarding
function has been activated.
To deactivate this service:
The deactivation of the Follow me service is differentiated according to which
switchboard the PERSONAL PHONE is connected to.
CT312 and CT416 switchboards:
¾ Press the CALL FORWARDING key.
“On no answer” will be shown on the display.
¾ Utilise the scroll keys to select Follow me and press OK.
“Enable” will be shown on the display.
¾ Press OK to confirm.
TELEPHONE SERVICES
Page 59
¾ Enter the user’s extension number.
¾ Press OK to confirm.
Other switchboards:
¾ Press the CALL FORWARDING key.
“On no answer” will be shown on the display.
¾ Utilise the scroll keys to select Follow me and press OK.
“Enable” will be shown on the display.
¾ Utilise the scroll keys to select Disable and press OK.
CANCEL ALL CALL FORWARDING
Europa 160
Europa 280/Star
TA 28
CT 312
CT 416
Leonardo
9
CT624
9
Polaris+
9
Smile+
9
Permits the cancellation of all call forwarding set on an extension.
¾ Press the CALL FORWARDING key.
“On no answer” will be shown on the display.
¾ Utilise the scroll keys to select Disable and press OK.
THREE-WAY CONFERENCE
Europa 160
9
Europa 280/Star
9
TA 28
9
CT 312
9
CT 416
9
Leonardo
9
CT624
9
Polaris+
9
Smile+
9
Permits simultaneous conversations among three separate speakers.
This function must be used when a conversation is in progress while the third
speaker is on hold.
¾ Press the THREE-WAY CONFERENCE key.
AUTOMATIC RING BACK
Europa 160
9
Page 60
Europa 280/Star
9
TA 28
9
CT 312
9
CT 416
9
Leonardo
9
CT624
9
Polaris+
9
Smile+
9
TELEPHONE SERVICES
When an extension dialled is busy or to access a busy outside line, activating
this service generates a call as soon as that monitored line is free.
To activate this service:
Europa, TA28, CT312 and CT416 switchboards:
¾ Upon hearing a busy tone, press the AUTOMATIC RING BACK key.
“Done” will be shown on the display.
Leonardo, CT624, Polaris PLUS and Smile PLUS switchboards:
¾ Upon hearing a busy tone, press the AUTOMATIC RING BACK key.
“Enable” will be shown on the display.
¾ Press OK to confirm.
To deactivate this service:
Europa, TA28, CT312 and CT416 switchboards:
It is not possible to disable the service.
Leonardo, CT624, Polaris PLUS and Smile PLUS switchboards:
¾ Press the AUTOMATIC RING BACK key.
“Enable” will be shown on the display.
¾ Utilise the scroll keys to select Disable and press OK.
CALL INTRUDE
Europa 160
9
Europa 280/Star
9
TA 28
9
CT 312
9
CT 416
9
Leonardo
CT624
Polaris+
Smile+
Permits an extension to intrude into a conversation on another busy extension on
another line.
Initial situation: the extension being called is busy in another conversation.
¾ After having received a busy tone on the extension being called, press
the CALL INTRUDE key.
TELEPHONE SERVICES
Page 61
CALL PICK-UP
Europa 160
9
Europa 280/Star
9
TA 28
9
CT 312
9
CT 416
9
Leonardo
9
CT624
9
Polaris+
9
Smile+
9
Polaris+
9
Smile+
9
Permits the user to answer an outside call from a different extension.
¾ Press the CALL PICK-UP key.
SELECTIVE CALL PICK-UP
Europa 160
Europa 280/Star
TA 28
CT 312
CT 416
Leonardo
9
CT624
9
Permits the user to answer a direct call from a different extension.
¾ Press the SELECTIVE CALL PICK-UP key.
¾ Dial the number of the extension to be intercepted.
¾ Press OK to confirm.
CALL RETURN
Europa 160
Europa 280/Star
TA 28
CT 312
CT 416
Leonardo
9
CT624
9
Polaris+
9
Smile+
9
CT624
9
Polaris+
9
Smile+
9
Permits the user to dial the last extension which called.
¾ Press the CALL RETURN key.
TRUNK LINE SELECTION
Europa 160
Europa 280/Star
9
TA 28
CT 312
9
CT 416
9
Leonardo
9
Permits the user to choose the outside line on which the conversation shall be
carried out.
¾ Press the key corresponding to the desired line (buttons L1 – L10
depending on the preset switchboard or any key programmes).
Page 62
TELEPHONE SERVICES
CALL PARKING
Europa 160
9
Europa 280/Star
9
TA 28
9
CT 312
9
CT 416
9
Leonardo
9
CT624
9
Polaris+
9
Smile+
9
Allows the temporary interruption of a conversation with an outside caller, to
be started up again later from the same extension or from another telephone.
Trunk line parking
This function is available when an outside line conversation is in use.
¾ Press the
key to park the call.
Call parking status is indicated by its corresponding flashing LED.
Resume the call parked
Europa and TA28 switchboards:
¾ Lift the handset, activate the handsfree or the telephone headset.
¾
Press the
key.
CT312 and CT416 switchboards:
¾ Keep the
key pressed.
The parked call will be indicated on the display with the letter P.
¾ Enter the number of the desired line (1~4).
Leonardo, CT624, Polaris PLUS and Smile PLUS switchboards:
¾ Press one of the L1 – L10 buttons to resume on the desired line.
PAGING
Europa 160
Europa 280/Star
TA 28
CT 312
CT 416
9
Leonardo
9
CT624
9
Polaris+
9
Smile+
9
Allows the user to call an extension equipped with a system telephone
(PERSONAL PHONE, Time3000 etc.) directly with handsfree.
¾ Press the PAG key.
¾ Enter the extension number to be paged.
¾ Press OK to confirm.
TELEPHONE SERVICES
Page 63
TRUNK-TRUNK CONVERSATION
Europa 160
Europa 280/Star
TA 28
CT 312
CT 416
Leonardo
9
CT624
9
Polaris+
9
Smile+
9
CT624
Hotel
Polaris+
Smile+
9
Permits the connection of two local lines via an operator.
¾ Press the TRUNK-TRUNK CONVERSATION key.
CHECK-IN
Europa 160
Europa 280/Star
TA 28
CT 312
CT 416
Leonardo
Permits the internal system administrator to enable outside calls in a room.
¾ Press the CHECK-IN key.
¾ Follow the instructions on the display.
CHECK-OUT
Europa 160
Europa 280/Star
TA 28
CT 312
CT 416
Leonardo
CT624
Hotel
Polaris+
Smile+
9
Permits the internal system administrator to disable outside calls in a room.
¾ Press the CHECK-OUT key.
¾ Follow the instructions on the display.
ROOM STATE
Europa 160
Europa 280/Star
TA 28
CT 312
CT 416
Leonardo
CT624
Hotel
Polaris+
Smile+
9
Permits the internal system administrator to visualise room status information.
¾ Press the ROOM STATE key.
¾ Enter the room number for which information is desired.
¾ Press OK to confirm.
Page 64
TELEPHONE SERVICES
PRINTS
Europa 160
Europa 280/Star
TA 28
CT 312
CT 416
Leonardo
CT624
Hotel
Polaris+
9
Smile+
9
Permits the internal system administrator to execute different types of printouts.
In case of switchboards Smile PLUS and FOX 90, all available
printouts are active only if the P.O. Smile PLUS or ST800-S
consoles are not connected.
¾ Press the PRINTS key.
¾ Select the type of printout desired and press OK.
Cancel printing
Permits the internal system administrator to cancel printing in progress.
¾ Press the PRINTS key.
“Cancel” will be shown on the display.
¾ Press OK to confirm.
BOOTH
Europa 160
Europa 280/Star
TA 28
CT 312
CT 416
Leonardo
CT624
Hotel
Polaris+
Smile+
9
Permits the internal system administrator to access activation, deactivation and
cost visualisation functions related to phone boxes.
¾ Press the BOOTH key.
¾ Follow the instructions on the display.
CREDIT
Europa 160
Europa 280/Star
TA 28
CT 312
CT 416
Leonardo
CT624
Hotel
Polaris+
Smile+
9
Permits the internal system administrator to visualise and add credit to
extensions.
¾ Press the CREDIT key.
TELEPHONE SERVICES
Page 65
¾ Follow the instructions on the display.
LISTEN TO MESSAGES IN THE VOICE MAIL UNIT
Europa 160
Europa 280/Star
TA 28
CT 312
CT 416
Leonardo
9
CT624
9
Polaris+
Smile+
Permits the user to listen to voice mail messages.
¾ Press the LISTEN TO MESSAGES IN THE VOICE MAIL UNIT key.
¾ Enter the password and press OK.
GSM CREDIT
Europa 160
Europa 280/Star
TA 28
CT 312
CT 416
Leonardo
9
CT624
Polaris+
Smile+
Permits the user to visualise remaining SIM card credit.
¾ Press the GSM CREDIT key.
Page 66
TELEPHONE SERVICES
SERVICE TABLE
The following table shows the services that can be accessed from the telephone
according to the type of switchboard.
Europa
TA 28
CT 312
CT 416
Leonardo
CT624
Polaris+
Smile+
Intercom connection
9
9
9
9
9
9
9
9
Ports 1
9
9
9
9
9
9
9
9
Ports 2
9
9
9
9
9
9
9
9
9
9
9
9
9
9
9
Amplifier
Room monitor
Alarm clock
9
9
280B/Star
9
9
9
9
9
9
9
9
9
9
9
9
9
9
9
9
9
9
9
9
Do not disturb
9
R-pulse over trunk line
9
Boss-Secretary
9
9
9
9
Call forw. on no answer
9
9
9
9
Call forwarding on busy
9
9
9
9
9
9
9
9
9
9
9
9
9
9
9
9
9
9
9
9
Three-way conference
9
9
9
9
9
9
9
9
Automatic ring back
9
9
9
9
9
9
9
9
Call intrude
9
9
9
9
Call pick-up
9
9
9
9
9
9
9
9
9
9
9
9
Follow me
Cancel all call forw.
Selective call pick-up
9
9
9
9
9
9
9
9
9
9
9
9
9
9
9
9
9
9
9
Call return
Trunk line selection
Call parking
Paging
9
280/Star
9
9
9
Check-in
Hotel
9
Check-out
Hotel
9
Room state
Hotel
Prints
Hotel
Booth
Hotel
9
Hotel
9
Credit
Trunk-trunk conversat.
9
9
Listen to messages in the
voice mail unit
9
9
GSM credit
9
SERVICE TABLE
9
9
9
Page 67
9
9
QUICK KEY USER GUIDE
Programme a key
Press the key to be programmed for 2
seconds and follow the instructions
on the display.
Access the outgoing calls log
Press the
key.
Access the incoming calls log
Press the
key.
Access the missed calls log
Press the R key.
Access the “Speed dial” menu Press the
key for 2 seconds.
Access the “Ringer volume”
menu
Press the
key for 2 seconds.
Access the “Audio” menu
Press the
Press the
key for 2 seconds.
key for 2 seconds.
Legend:
LINE FREE
Visualise outside line status
LINE BUSY
R
H
P
Page 68
INCOMING CALLS
CALL ON HOLD
PARKED CALL
QUICK KEY USER GUIDE
TECHNICAL SPECIFICATIONS
Dimensions .........................................................................235 x 220 x 120 mm.
Weight ........................................................................................................918 g.
EMERGENCY FUNCTIONING
In case of power cut and connection to a PABX extension with emergency
functioning, the telephone works as a normal BCA. For this kind of working it
is sufficient to connect the two internal wires.
CE CONFORMITY DECLARATION
Esse-ti s.r.l., with registered seat in Zona Ind. Squartabue, I-62019 Recanati
(MC), Italy, hereby declares that this device complies with the following
standards:
• EN50082-1, EN55022
(Electromagnetic compatibility)
• EN41003, EN60950
(Electric safety)
and also with the requirements of the 1999/5/CE Directive issued by the
European Parliament and by the Council on 9 March 1999 on radio sets,
telecommunication terminals and the mutual acknowledgement of their
conformity.
Compliance with the above requirements is shown with
Designed use of the device
This device has been designed for use in connection with PSTN.
Technical specifications
Page 69
WARNING
This appliance is marked according to the European directive 2002/96/EC on
Waste Electrical and Electronic Equipment (WEEE).
The symbol (above) appears on this product. It indicates that the product
should not be disposed of as unsorted household waste, but by means of
separate collection.
Electrical and electronic equipment may contain pollutants having a negative
impact on both the environment and the human health. The WEEE should be
therefore returned to the local collection points, in order to ensure proper
treatment, or it should be returned to the reseller upon the purchase of an
equivalent product.
Esse-ti srl wishes to inform its customers that the unauthorized treatment of
WEEE is punished by the law and harmful to the environment and the human
health.
Page 70
Technical specifications
Personal Phone
17/07/2008
71