1
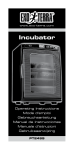
Incubator
Operating Instructions
Mode d’emploi
Gebrauchsanleitung
Manual de Instrucciones
Manuale d’istruzioni
Gebruiksaanwijzing
PT2499
ESPAÑOL31
ITALIANO40
NEDERLANDS49
2
Read instructions thoroughly prior to installation and operation.
Incubator
PT2499
IMPORTANT SAFETY INSTRUCTIONS
WARNING: To guard against injury, basic precautions should be
observed, including the following:
ENGLISH
FRANÇAIS
•Accurate cooling and heating combination to
prevent egg loss caused by extreme temperature
fluctuations
•Ideal for hibernation
•Great for climate controlled transportation
of reptiles and amphibians (for instance; newly
acquired animals)
•Carrying Handle and Car Adaptor (12V)
included
•Digital Temperature Control – adjustable
incubation temperature, allows you to provide the
correct incubation temperature for every species.
•Bright LED digital display for easy
temperature readout
•Interior light switch located on the front
panel (on/off) to easily monitor the eggs, without
disturbing the incubation process
•Power Switch located on the front panel , on/
off switch allows you to turn the unit off and
on in between incubation
•Dual slide-out shelves, to maximize
incubation space
•Removable tray to regulate humidity levels
•Very quiet operation
DEUTSCH
DEUTSCH22
Thank you for purchasing the Exo Terra® Reptile Incubator. Please
read this operation manual carefully before use and operate
according to the instructions provided for maximum safety and
performance. We recommend that you keep this manual handy for
future reference.
ESPAÑOL
FRANÇAIS12
Operating
Instructions
ITALIANO
ENGLISH3
Incubator
NEDERLANDS
INDEX
SAVE THESE INSTRUCTIONS.
Initial Set-up and operation
This will need to be performed BEFORE placing eggs in the
incubator!
1. Place the Incubator on a flat, even surface.
2. Make sure that the Incubator does not receive direct sunlight
(overheating) or drafts (undercooling). Ideal operating
environment is an ambient room temperature of 18°-22°C (65°72°F).
3. Check if the AC/DC switch on the back of the device is set on
AC, then connect the plug to the wall receptacle. Push the on/
off button located on the front panel of the Incubator to switch
on the device. The unit will begin working and the LED digital
display will show the current temperature inside the unit.
ENGLISH
FRANÇAIS
DEUTSCH
4. Interior Light: if desired press the light switch on the front control
panel to turn the interior light on or off.
5. Set the preferred incubation temperature, ranging from 15° to
40°C (59° to 104°F) depending on the species, using the ‘up
arrow’ or ‘down arrow’ buttons located on the front panel. The
‘up arrow’ button increases the temperature, the ’down arrow”
button will decrease the temperature. While using the up/down
buttons, the LED digital display will show the temperature of
the setting. Once the desired setting is made, the LED display
will blink twice and then return to “normal” display, showing the
current temperature inside the unit. The unit will automatically
switch to heating or cooling mode based on the set incubation
temperature. WARNING: Although the Incubator may be set as
low as 2°C (35°F) or as high as 60°C (140°F), these extreme
settings are not recommended.
6. Fill the water tray with regular tap water (do not use HOT water).
The water in the slide out tray in the bottom of the unit
will add humidity to the environment to prevent
rapid desiccation of the incubation medium.
Keep this tray filled with water throughout
the incubation period! Since evaporation
depends on the temperature, it is
advisable to check the water-level
on a daily basis. Place a
deeper container with
water in the
incubator if
daily checks
are not possible.
7. Now place appropriate
egg incubating containers (size depending on the species,
egg-size and amount of eggs), holding moistened egg incubation
medium of your choice (at this stage do not yet place eggs in the
incubator!), in the incubator (please read notes on preparation of
the incubation medium and incubation of reptile eggs below).
ESPAÑOL
and all the important notices on the product before using.
Failure to do so may result in personal injury or damage to the
product. DANGER - To avoid possible electrical shock, special
care should be taken since water is/ may be employed in the
use of this product. For each of the following situations, do not
attempt repairs yourself; return the product to an authorized
service facility for service if it is still under warranty or discard
the product. Do not operate the appliance if it has a damaged
electrical cord or plug, or if it is malfunctioning or if it is dropped
or damaged in any manner. The power supply cord for this unit is
detachable and can be replaced if damaged. Replace supply cord
only with original Exo Terra® replacement part.
2. To avoid injury, do not contact moving or hot parts.
3. CAUTION - Always unplug or disconnect the appliance from
the outlet before putting on or taking off parts and while the
equipment is being installed, maintained or handled. Never yank
the cord to pull the plug from outlet. Grasp the plug and pull to
disconnect. Always unplug an appliance from an outlet when not
in use. Never lift this product by the cord.
4. This appliance is not intended for use by persons (including
children) with reduced physical sensory or mental capabilities,
or lack of experience or knowledge, unless they have been
given supervision or instruction concerning use of the appliance
by a person responsible for their safety. Children should be
supervised to ensure that they do not play with the appliance.
5. The use of attachments not recommended or sold by the
appliance manufacturer may cause an unsafe condition.
6. Do not install or store the appliance where it will be exposed to
temperatures below freezing. Do not expose the unit to direct sunlight.
7. Ensure that the appliance is placed on a flat, even surface.
Monitor the product regularly. Do not leave the product
unattended for extended periods.
8. If an extension cord is necessary, ensure the connection is
watertight and dust proof. A cord with a proper rating should be
used. A cord rated for less amperes or watts than the appliance
rating may overheat. Care should be taken to arrange the cord so
that it will not be tripped over or pulled. The connection should
be carried out by a qualified electrical installer.
9. Indoor Household Use Only. Not for commercial use.
10.Do Not attempt to open rear of appliance. No User serviceable parts
inside. Refer all repairs to a qualified electrician or HVAC specialist.
ITALIANO
4
READ AND FOLLOW ALL SAFETY INSTRUCTIONS
NEDERLANDS
1.
AC/DC Switch: There is a AC/
DC switch located on the back
of the unit. Always check if this switch is in the correct position: AC
when connecting to a 220-240V, 50Hz wall receptacle, DC when
connecting to a cigarette lighter / Aux Power Socket.
WARNING: The LED digital display is for reference only, and
does NOT reflect the temperature in the actual egg incubating
container!
IMPORTANT
The temperature display and the setting is an approximate value
and does not 100% represent the actual temperature inside the
unit as the sensor is not directly placed in the incubation area. The
difference between the actual temperature in the incubation area
and the reading on the display depends on the ambient temperature
in the room where the unit is placed. These differences can also vary
depending on the set temperature, the higher the set temperature,
the bigger the variance. Please note that there is also a temperature
variation between the top and the bottom of the unit, with the
digital readout reflecting the uppermost temperature. Monitor this
temperature over a period of 24 hours with a separate thermometer
(optional) to ensure the unit is set and working properly. It is also
recommended to check the temperature at each location of the
ENGLISH
FRANÇAIS
DEUTSCH
MUTE
ESPAÑOL
NORMAL
Preparation of the egg-incubating medium
1. Choose an appropriate egg incubating container. Various
container types can be used, ranging from deli cups to all kinds
of plastic containers, depending on the clutch and the size of
the eggs.
2. Make sure the egg incubating container has 1 or 2 small
ventilation holes (1-2mm or pencil tip size), not more, since
excessive ventilation will increase desiccation of the incubation
medium and eggs.
3. Choose your preferred incubation medium: for instance
vermiculite or perlite. Both incubation mediums are handled in a
similar way, only the moisture/medium ratio is different:
a. Vermiculite has a 1/1 moisture to incubation medium ratio
based on weight (not volume).
b. Perlite has a 0,8/1 moisture to incubation medium ratio based
on weight (not volume).
4. Place your egg-incubating container on a digital kitchen/food
scale to accurately measure the amount of water that needs to
be added to the incubation medium. Push the “tare” button, so
the scale will reset to “0”, so you only measure the weight of the
medium that will be added.
5. Fill the container with incubation medium up to 1/2 or 2/3 of
the height of the container while leaving the container on the
scale. Now read the weight and add the same weight of water
as described above: 1/1 for vermiculite, 0,8/1 for perlite. For
instance: if the scale shows 100 gr, simply add 100 gr (or 100
ml) of water in case of vermiculite, or 80 gr (or 80 ml) of water
in case of perlite. Use bottled water or tap water treated with
Aquatize (PT1976)
6. Shake the egg incubating container, to evenly distribute
the water.
7. Open the container, spread the incubation medium evenly, then
push some indentations in the incubation medium with your
thumb so that the eggs will fit in it covering 50% of the egg. This
will prevent the eggs from rolling around and at the same time,
the contact with the moistened incubation medium will allow the
egg to absorb moisture when needed. The upper part of the egg
is not covered and will assure that the egg can “breath”. In case
the eggs stick together in a clutch, make a cavity that will secure
the complete clutch, with the upper part (50%) reaching out of of
the incubation medium.
8. Close the lid of the container and make sure there is ample
space between the eggs and the lid.
9. Weigh the egg-incubation container including moistened
incubation medium, eggs and lid, and mark down the weight on
ITALIANO
6
Mute Switch: There is a mute/
normal switch located on the back
of the unit. Please note that when
this is switched to mute mode,
the speed of the fan will reduce.
The incubator will operate more
quietly, but there will be less air
circulation inside the unit. Please
use this feature only for temporary
quiet operation. When in mute
mode the incubator will not be
able to maintain the set incubation
temperature during high ambient
temperature fluctuations.
incubating eggs. Temperature deviations shown on the display
and the actual setting are normal. This is due to the functioning
of the device as it switches with a delay of +/- 2°C(3.6°F.) At a
setting of 32°C the device will start heating when the temperature
falls to 30°C or 86°F on the display, and starts cooling when the
temperature reaches 34°C or 93.2°F. When using closed boxes or
deli cups, the breeding substrate in it will not vary more then 0.2°C,
ensuring a constant incubation temperature.
Always have the unit operating for at least 24 hours to monitor
temperatures before placing the eggs inside of the incubator.
Regular temperature checks are required with a separate calibrated
thermometer as WE DO NOT ACCEPT ANY claims for loss of eggs or
animals due to the malfunctioning of the unit.
NEDERLANDS
8. Place one or more analog or digital thermometers (for instance
PT2472 Digital Thermometer or PT2470 Thermo-Hygrometer)
at the exact spot of the incubating containers (or even in the
incubating container) to check the correct temperature at the
egg incubation site.
9. Close the Incubator door, and let the unit run for about 24 hours,
than check the temperature at the egg incubating containers.
The temperature shown on the LED digital display may differ
(up to 5°) from the actual incubation temperature measured at
the egg incubation container. If the temperature, measured at
the egg incubating containers is (for instance) 2°C below the
desired temperature, than use the UP button and increase the
temperature shown on the LED display with 2°. Run the unit for
a couple of hours and check temperature at the egg incubating
containers once more. Repeat until desired temperature at the
egg incubating containers is stable.
10.Place eggs in the egg incubating containers (Please read notes
on preparation of the incubation medium and incubation of
reptile eggs below).
8
Aquatic Turtles
Chrysemys picta * 25-30°C / 77-86°F
Clemmys guttata * 27-30°C / 80-86°F
Emys orbicularis * 28-30°C / 82-86°F
Graptemys pseudogeographica & kohnii * 28-32°C / 82-90°F
Trachemys scripta elegans * 28-30°C / 82-86°F
Kinosternon bauri * 25-30°C / 77-86°F
Sternotherus odoratus * 25-30°C / 77-86°F
Semi-Terrestrial Turtles
Cuora amboinensis * 24-28°C / 75-82°F
Rhinoclemmys pulcherrima * 28-32°C / 82-90°F
Terrapene carolina & ornata * 28-30°C / 82-86°F
Tortoises
Agrionemys horsfieldii * 27-30°C / 80-86°F
Geochelone carbonaria & denticulata * 25-30°C / 77-86°F
Geochelone elegans * 26-30°C / 79-86°F
Geochelone pardalis * 28-30°C / 82-86°F
Geochelone radiata * 28-32°C / 82-90°F
Geochelone sulcata * 28-32°C / 82-90°F
Malacochersus tornieri * 27-30°C / 80-86°F
Testudo graeca * 28-31°C / 82-88°F
Testudo hermanni * 28-31°C / 82-88°F
Testudo kleinmanni * 28-31°C / 82-88°F
Lizards
Acanthosaura armata * 22-25°C / 72-77°F
Agama aculeata * 28°C / 82°F
Agama agama * 28-30°C / 82-86°F
Laudakia stellio * 26-28°C / 79-82°F
Leiolepis guttata * 28-30°C / 82-86°F
Physignathus cocincinus & lesueuri * 26-30°C / 79-86°F
Pogona henrylawsoni * 28-30°C / 82-86°F
Pogona vitticeps * 28-30°C / 82-86°F
Uromastyx spec. * 28-32°C / 82-90°F
Xenagama spec. * 28-30°C / 82-86°F
Bradypodion fischeri * 22-25°C / 72-77°F
Chamaeleo calyptratus * 27-30°C / 80-86°F
Chamaeleo dilepis * 28-30°C / 82-86°F
IMPORTANT: for more specific information, or for information on
species not mentioned in this instruction manual, please read
specialized literature on the incubation of reptile eggs.
Technical Specifications
Power Consumption:
DC Power: Cool Mode 55W, Warm Mode 55W
AC Power: Cool Mode 60W, Warm Mode 60W
Features Operation:
Operating Voltage: 12V DC and 220-240V, 50Hz AC designed for
use in home or car use.
For AC (home) use: Plug one end into back of unit, other end into
wall socket.
For DC (car) use: Plug one end into back of unit, other end into the
vehicle’s cigarette lighter / Aux Power Socket.
Interior Dimensions: ca. 27cm x 23cm x 37cm or 10.5” x 9” x
14.5” (WxDxH)
Outer Dimensions: ca. 35cm x 42,5cm x 48cm or 14” x 16.5” x
19” (WxDxH)
ENGLISH
FRANÇAIS
DEUTSCH
IMPORTANT: The following is a list of AVERAGE incubation
temperatures, and is intended as a guide ONLY. For more
specific information, or for information on species not
mentioned in this instruction manual, please read specialized
literature on the incubation of reptile eggs. We do not accept
liability for any loss of eggs or livestock.
ESPAÑOL
Average Incubation Temperatures of popular Reptile Species
ITALIANO
IMPORTANT: Please research what temperatures and substrates
are preferred for incubation of the specific species.
Furcifer lateralis * 24°-26 / 75-79°F
Furcifer pardalis * 26-28°C / 79-82°F
Coleonyx spec. * 28-30°C / 82-86°F
Eublepharis macularius * 26-30°C / 79-86°F
Gekko gecko * 26-30°C / 79-86°F
Hemidactylus spec. * 26-28°C / 79-82°F
Hemitheconyx caudicinctus * 28-30°C / 82-86°F
Lygodactylus spec. * 26-28°C / 79-82°F
Nephrurus spec. * 26-28°C / 79-82°F
Pachydactylus spec. * 26-28°C / 79-82°F
Paroedura spec. * 26-28°C / 79-82°F
Phelsuma spec. * 25-30°C / 77-86°F
Nephrurus spec. * 27-29°C / 80-84°F
Rhacodactylus spec. * 26-29°C / 79-84°F
Teratoscincus spec. * 28-30°C / 82-86°F
Uroplatus spec. * 28°C / 82°F
Anolis carolinensis & sagrei * 27-30°C / 80-86°F
Basiliscus spec. * 27-30°C / 80-86°F
Crotaphytus spec. * 28-30°C / 82-86°F
Dipsosaurus dorsalis * 28-32°C / 82-90°F
Iguana iguana * 28-30°C / 82-86°F
Lacerta viridis & trilineata * 28-30°C / 82-86°F
Takydromus spec. * 26°C / 79°F
Timon lepidus * 28-30°C / 82-86°F
Eumeces schneideri * 28-30°C / 82-86°F
Riopa fernandi * 28°C / 82°F
Ameiva spec. 28°C / 82°F
Tupinambis spec. * 28-30°C / 82-86°F
Varanus spec. * 28-30°C / 82-86°F
Snakes
Morelia viridis * 28-32°C / 82-90°F
Python molurus * 30°C / 86°F
Python regius * 28-32°C / 82-90°F
Pantherophis spec. * 26-29°C / 79-84°F
Lampropeltis spec. * 26-29°C / 79-84°F
Elaphe spec. * 25-29°C / 77-84°F
NEDERLANDS
the lid, together with the date the eggs are laid, and the species
name.
10.Place the egg-incubation container in the Incubator.
11.Check the weight of the egg-incubation container on regular
intervals (weekly), and add moisture if necessary (to match the
weight marked on the lid). If adding water, use bottled water or
tap water treated with Aquatize (PT1976), and make sure that no
water is spilled over the eggs! Spread the water evenly along the
sides of the container and in-between the eggs.
SERVICE
If you have any problem or question about the operation of this
product, please consult your Exo Terra specialist retailer in the first
instance. Most problems can be resolved in store, but in the likely
event it cannot, please return the unit with a valid proof of purchase
to the retailer for a replacement under the two year warranty. When
you call (e-mail or write) our Customer Service Department, please
have all relevant information such as model number and/or part
numbers available, as well as the nature of the problem:
For general information on our whole product range, explore our
websites at: www.exo-terra.com or www.hagen.com.
Distributed by:
Canada: Rolf C. Hagen Inc., Montreal, QC H9X 0A2
U.S.A.: Rolf C. Hagen (U.S.A.) Corp., Mansfield MA. 02048
U.K.: Rolf C. Hagen (U.K.) Ltd. Castleford, W. Yorkshire WF10 5QH
Germany: HAGEN Deutschland GmbH & Co. KG Lehmweg 99-105,
25488 Holm
Hagen France S.A. PARISUD 4 – Bd. Jean Monnet, F-77388 Combs
la Ville.
ENGLISH
FRANÇAIS
DEUTSCH
Spain:
Rolf C Hagen España, S.A. Avda de Beniparrell 11 y 13, P.I. L’Alteró,
46060 Silla (Valencia)
mail to: [email protected]
Customer Service and Authorized Warranty Repair Service:
U.K.:
Rolf C. Hagen (UK) Ltd.
California Dr. Whitwood Industrial Estate
Castleford, West Yorkshire WF10 5QH
mail to: http://faq.hagencrm.com/?uk
NEDERLANDS
10
GUARANTEE
This guarantee is limited to the Incubator only. The Incubator is
guaranteed for defects in material or workmanship for a period of
2 years from date of purchase. The guarantee is valid with proof of
purchase only. The guarantee does not cover consequential loss or
damage of or to animate or inanimate objects. This guarantee is valid
only under normal operating conditions for which the Incubator is
intended. This guarantee will not apply to any Incubator subjected
to unreasonable use, improper installation, negligence. tampering or
abuse of the unit. This guarantee does not affect your statutory rights.
The guarantee is limited to repair or replacement of the unit only,
WE DO NOT ACCEPT ANY claims for loss of eggs or animals due
to the malfunctioning of the unit!
Germany:
HAGEN Deutschland GmbH & Co. KG Lehmweg 99-105, 25488 Holm
Service-Hotline: (0 18 01) 424344 (Ortstarif / T-Com)
Montag – Freitag von 9:00 – 17:00 Uhr
mail to: [email protected]
ESPAÑOL
RECYCLING
This item bears the selective sorting symbol for waste
electronic and electrical equipment (WEEE). This means
that the product must be handled pursuant to European
Directive 2002/96/EC in order to be recycled or
dismantled to minimize it’s impact on the environment.
For further information please contact your local or regional
Authorities. Electronic products not included in the selective sorting
process are potentially dangerous for the environment and human
health due to the presence of hazardous substances.
France :
Hagen France S.A. PARISUD 4 – Bd. Jean Monnet, F-77388 Combs
la Ville.
Service à la clientèle: (+33) 01-64881418
Du lundi au jeudi : 9H00-12H30 et 13H30 –17H00. Le vendredi :
9H00-12H30
mail to: [email protected]
ITALIANO
Maintenance and Cleaning
• Accumulated dust will impede the air flow and affect the cooling
and warming capability of the unit.
• Disconnect power supply before cleaning
• Use clean slightly wet cloth and neutral detergents to clean- strong
chemicals may damage plastic parts.
• Do not immerse in water
• For dirt on ventilator, use a vacuum cleaner or soft brush to remove
dust, then wipe with damp cloth.
AVERTISSEMENT : Pour éviter toute blessure, il faut observer des
précautions élémentaires de sécurité, notamment celles qui suivent..
12
FRANÇAIS
sur l’appareil. Manquer à ces précautions peut entraîner des
blessures ou des dommages à l’appareil. DANGER – Pour éviter
tout risque d’électrocution, une attention spéciale doit être portée
puisque de l’eau est utilisée ou peut l’être avec cet appareil. Dans
chacune des situations suivantes, ne pas essayer de réparer
l’appareil soi-même; le retourner plutôt à un service de réparations
autorisé s’il est encore sous garantie ou le jeter. Ne pas faire
fonctionner un appareil dont la fiche ou le cordon est endommagé,
qui ne fonctionne pas correctement ou qui est tombé ou a été
endommagé d’une quelconque manière. Le cordon d’alimentation
de cet appareil est détachable.
2. Pour éviter toute blessure, ne toucher aucune pièce mobile
ni chaude.
3. ATTENTION - Toujours débrancher l’appareil de l’alimentation
électrique avant d’insérer ou de retirer des pièces et pendant que
l’équipement est installé, entretenu ou manipulé. Ne jamais tirer
sur le cordon d’alimentation pour débrancher l’appareil, mais
plutôt prendre la fiche entre les doigts et tirer. Toujours débrancher
l’appareil d’une prise de courant quand il n’est pas utilisé. Ne
jamais soulever cet appareil par le cordon d’alimentation.
4. Cet appareil ne doit pas être utilisé par des personnes (y compris
des enfants) aux capacités physiques, sensorielles ou mentales
réduites, ou qui manquent d’expérience et de connaissance à moins
qu’elles soient placées sous la supervision d’une personne chargée
de leur sécurité ou qu’elles en aient reçu les directives nécessaires
à l’utilisation de cet appareil. Toujours surveiller les enfants pour les
empêcher de jouer avec cet appareil.
5. L’emploi de fixations ni recommandées ni vendues par le fabricant
de l’appareil peut être source de situations dangereuses.
6. Ne pas installer ni ranger l’appareil où il sera exposé à des
températures sous le point de congélation. Ne pas exposer
l’appareil à la lumière directe du soleil.
7. S’assurer que l’appareil est placé sur une surface plate.
Le surveiller régulièrement. Ne pas laisser l’appareil sans
surveillance pendant des périodes prolongées.
8. Si une rallonge électrique est nécessaire, s’assurer que la
connexion est étanche et à l’abri de la poussière. Vérifier
qu’elle est d’un calibre suffisant. Un cordon électrique de moins
d’ampères ou de watts que l’appareil peut surchauffer. Des
précautions doivent être prises afin d’éviter qu’on tire la rallonge
ou qu’on trébuche dessus. Le raccordement doit être effectué par
un électricien qualifié.
9. Pour usage domestique et à l’intérieur seulement. Ne doit pas
servir à un usage commercial.
10.Ne pas essayer d’ouvrir l’arrière de l’appareil. Aucune pièce à
l’intérieur ne peut être réparée par l’utilisateur. Confier toutes
les réparations à un électricien qualifié ou à un spécialiste du
chauffage, de la ventilation et du conditionnement d’air.
DEUTSCH
•Réglages précis des fonctions de
refroidissement et de chauffage permettant de
prévenir la perte d’œufs occasionnée par de trop
importantes variations de température.
•Idéal pour l’hibernation.
•Convient tout à fait à la régulation climatique
pour le transport des reptiles et des
amphibiens (lors de l’acquisition d’un nouvel
animal, par exemple).
•Poignée de transport et adaptateur (12 V) pour
l’auto compris.
•Contrôle numérique de la température –
permet de régler la température d’incubation en
fonction des espèces.
•Affichage numérique à DEL lumineux facilitant
la lecture de la température.
•Interrupteur d’éclairage intérieur placé sur le
panneau de devant (On/Off) afin de faciliter la
surveillance des œufs et de ne pas interrompre le
processus d’incubation.
•Interrupteur d’alimentation placé sur le
panneau avant permettant de mettre en marche
ou d’arrêter l’incubateur en périodes de non
incubation.
•Utilisation maximale de l’espace d’incubation
grâce aux deux tablettes coulissantes.
•Plateau amovible servant à la régulation des
taux d’humidité.
•Fonctionnement très peu bruyant.
1. LIRE ET RESPECTER TOUTES LES CONSIGNES DE
SÉCURITÉ avant usage et tous les avis importants apparaissant
ESPAÑOL
Nous vous remercions d’avoir acheté l’Incubateur Exo Terra® pour
reptiles. Veuillez lire le présent mode d’emploi soigneusement avant
d’utiliser et de faire fonctionner l’appareil selon les instructions
fournies pour le maximum de sécurité et de rendement. Nous vous
recommandons de garder ce mode d’emploi à portée de la main pour
référence future.
ENGLISH
MESURES DE SÉCURITÉ IMPORTANTES
ITALIANO
Notice d’utilisation
Lire complètement le mode d’emploi préalablement à
l’installation et à la mise en marche.
NEDERLANDS
Incubator
CONSERVER CES INSTRUCTIONS.
NORMAL
MUTE
Interrupteur CA/CC : Un interrupteur CA/CC est situé à l’arrière de
l’appareil. Toujours s’assurer de la bonne position de cet interrupteur :
qu’il soit effectivement placé en position CA (courant alternatif) lorsque
l’interrupteur est raccordé à une prise murale de 50 Hz, 220-240 V; en
position CC (courant continu) lorsqu’il est branché à un allume-cigarette
ou à une prise de courant auxiliaire.
AVERTISSEMENT : L’affichage numérique à DEL n’est pas une
référence absolue, EN AUCUN CAS indique-t-il la température du
récipient même qui contient les œufs!
FRANÇAIS
DEUTSCH
ESPAÑOL
Interrupteur en mode silencieux :
un interrupteur en mode silencieux/
normal est situé à l’arrière de l’appareil.
Noter que quand il est en mode
silencieux, la vitesse du ventilateur
diminuera. L’incubateur fonctionnera
plus silencieusement qu’à l’ordinaire,
mais il y aura moins de circulation d’air
dans l’appareil. N’utiliser ce mode que
pour un fonctionnement silencieux
temporaire. Lorsqu’il fonctionne en
mode silencieux, l’incubateur ne peut
maintenir la température d’incubation
réglée pendant des fluctuations
importantes de la température ambiante.
ITALIANO
même) pour s’assurer que la température d’incubation est
adéquate.
9. Fermer la porte de l’incubateur et laisser celui-ci fonctionner
pendant une période de 24 heures, puis vérifier la température
des contenants d’œufs. La température sur l’afficheur à DEL peut
représenter un écart de 5º par rapport à la température réelle
d’incubation prise dans le contenant des œufs. Si cette dernière
est, par exemple, de 2° de moins que la température souhaitée,
utiliser alors le bouton UP pour l’augmenter et celle-ci apparaît
alors sur l’indicateur lumineux à DEL. Faire fonctionner l’appareil
pendant quelques heures et vérifier la température des contenants
d’incubation des œufs une fois de plus. Répéter jusqu’à ce que la
température désirée des contenants soit stable.
10.Mettre les œufs dans les récipients des œufs (prière de lire les
notes ci-dessous relatives au substrat d’incubation et à l’incubation
comme telle des œufs de reptiles).
NEDERLANDS
14
1. Mettre l’incubateur sur une surface plane.
2. S’assurer que l’incubateur n’est ni exposé aux rayons directs
du soleil (risque de surchauffe) ni aux courants d’air (risque de
refroidissement). L’environnement idéal pour faire fonctionner
l’appareil est une température ambiante de 18-22 °C (65-72 °F).
3. S’assurer que l’interrupteur CA/CC sur la partie arrière de l’appareil
est placé en position CA avant d’effectuer le branchement à la prise
murale. Appuyer sur le bouton On/Off sur le devant de l’incubateur
pour le faire fonctionner. L’appareil commencera alors à fonctionner
et l’indicateur lumineux à DEL affichera la température à l’intérieur.
4. Lampe intérieure : appuyer sur l’interrupteur de la lampe sur le
panneau de contrôle avant pour allumer ou éteindre la lampe
intérieure.
5. Utiliser les boutons avec des flèches situées sur le panneau avant
pour régler la température d’incubation qui, selon la température
requise pour chaque espèce, peut être établie de 15 à 40 ºC
(de 59 à 104 ºF). Le bouton avec une flèche vers le haut permet
d’accroître la température; celui avec la flèche vers le bas, de la
réduire. Pendant que vous réglez la température à la hausse ou à
la baisse, l’affichage numérique à DEL indiquera celle-ci. Une fois
le réglage effectué, l’affichage à DEL clignotera deux fois avant
de revenir à l’affichage « normal », c’est-à-dire l’affichage de la
température réelle de l’intérieur de l’incubateur. L’appareil passera
automatiquement du mode chauffage au mode refroidissement
selon la température réglée pour l’incubation. AVERTISSEMENT –
Bien que l’incubateur puisse être réglé à une température aussi
basse que 2 °C (36 °F) ou aussi élevée que 60 °C (140 °F), ce
type de réglage n’est pas recommandé.
6. Remplir le plateau à eau en utilisant de l’eau du
robinet (ne pas employer d’eau CHAUDE). L’eau
contenue dans le plateau coulissant au fond
de l’incubateur procurera l’humidité qu’il
faut pour empêcher le dessèchement
du milieu d’incubation. Garder
ce plateau rempli d’eau
tout au long
de la période
d’incubation.
Comme
l’évaporation dépend de
la température, il est conseillé de
vérifier le niveau d’eau quotidiennement. S’il n’est pas possible de
le vérifier chaque jour, placer alors un contenant pour l’eau plus
profond que le plateau dans l’incubateur.
7. Mettre les porte-œufs appropriés (selon les diverses espèces,
la grosseur de leurs œufs et le nombre) dans l’incubateur en y
plaçant la membrane d’incubation humide de votre choix (ne pas
encore mettre les œufs dans l’incubateur (prière de lire les notes
ci-dessous relatives à la préparation du substrat d’incubation et à
l’incubation comme telle des œufs de reptiles).
8. Placer au moins un thermomètre numérique (le PT2472, par
exemple, ou encore le thermo-hygromètre numérique PT2470) à
l’endroit précis où sont placés les porte-œufs (sinon à l’intérieur
ENGLISH
Opérations préalables relatives à l’installation
L’installation doit être effectuée AVANT de placer les œufs dans
l’incubateur!
Préparation du substrat pour l’incubation des œufs
1. Choisir un contenant approprié à l’incubation des œufs. Différents
types peuvent être utilisés qu’il s’agisse de tasses ou de toutes
sortes de contenants en plastique, selon la nichée et la taille des
œufs.
2. S’assurer que le contenant servant à l’incubation des œufs est muni
d’un ou deux petits trous de ventilation (1-2 mm ou de la dimension
de la pointe d’un crayon), pas plus, parce qu’une ventilation
excessive augmentera le dessèchement du substrat et des œufs.
3. Choisir le substrat d’incubation préféré : par exemple de la
vermiculite ou de la perlite. Les deux substrats utilisés pour
l’incubation sont manipulés de la même façon; seule la proportion
humidité/substrat est différente :
A. La vermiculite a une proportion 1/1 d’humidité à substrat
d’incubation basée sur le poids (et non sur le volume).
B. La perlite a une proportion 0,8/1 d’humidité à substrat d’incubation
basée sur le poids (et non sur le volume).
4. Déposer le contenant servant à l’incubation des œufs sur une
balance numérique de cuisine pour aliments afin de mesurer avec
précision la quantité d’eau devant être ajoutée au substrat servant à
l’incubation. Appuyer sur le bouton Tare, pour que la balance soit à
0; ainsi, on ne mesure que le poids du substrat qui sera ajouté.
5. Remplir le contenant avec le substrat d’incubation jusqu’à 1/2 ou
2/3 de la hauteur du contenant tout en le laissant sur la balance.
Lire le poids et ajouter le même poids d’eau tel qu’il est décrit
ci-dessus : 1/1 pour la vermiculite et 0,8/1 pour la perlite.
Par exemple : si la balance indique 100 g, ajouter simplement 100 g
(ou 100 ml) d’eau dans le cas de la vermiculite, ou 80 g (ou 80 ml)
d’eau dans le cas de la perlite. Employer de l’eau embouteillée ou
IMPORTANT : Faire une recherche sur les températures et les
substrats préférés pour l’incubation d’espèces particulières.
Températures d’incubation moyennes d’espèces de reptiles
populaires
IMPORTANT : La liste suivante fournit des températures
d’incubation MOYENNES et sert de guide SEULEMENT. Pour des
renseignements spécifiques ou pour des renseignements sur des
espèces non mentionnées dans ce mode d’emploi, prière de lire de
la documentation spécialisée sur l’incubation d’œufs de reptiles.
Nous n’acceptons aucune responsabilité pour la perte d’œufs ou
d’animaux.
Tortues aquatiques
Chrysemys picta * 25-30 °C / 77-86 °F
Clemmys guttata * 27-30 °C / 80-86 °F
Emys orbicularis * 28-30° C / 82-86 °F
Graptemys pseudogeographica et kohnii * 28-32 °C / 82-90 °F
Trachemys scripta elegans * 28-30 °C / 82-86 °F
Kinosternon bauri * 25-30 °C / 77-86 °F
Sternotherus odoratus * 25-30 °C / 77-86 °F
Tortues semi-terrestres
Cuora amboinensis * 24-28 °C / 75-82 °F
Rhinoclemmys pulcherrima * 28-32 °C / 82-90 °F
Terrapene carolina et ornata * 28-30 °C / 82-86 °F
ENGLISH
FRANÇAIS
DEUTSCH
ESPAÑOL
16
ITALIANO
Toujours faire fonctionner l’incubateur pendant au moins 24 heures
afin de surveiller la température avant d’y déposer les œufs. Il faut
examiner les variations de température régulièrement au moyen d’un
thermomètre étalonné distinct, car NOUS N’ACCEPTONS AUCUNE
réclamation relative à la perte d’œufs ou d’animaux qui pourrait être due
au mauvais fonctionnement de l’appareil.
de l’eau du robinet traitée avec Aquatize (PT1976).
6. Agiter le contenant servant à l’incubation des œufs, pour distribuer
l’eau uniformément.
7. Ouvrir le contenant, répartir le substrat d’incubation de façon égale;
faire ensuite des creux dans le substrat d’incubation avec le pouce
pour y déposer les œufs afin de les couvrir à 50 %. Cela empêchera
les œufs de rouler, et en même temps, le contact avec le substrat
d’incubation humecté permettra à l’œuf d’absorber l’humidité au
besoin. La partie supérieure de l’œuf n’est pas couverte et assurera
que l’œuf peut « respirer ». Au cas où les œufs collent ensemble
dans une nichée, faire une cavité qui renforcera la nichée complète,
la partie supérieure de l’œuf (50 %) étant à l’extérieur du substrat
d’incubation
8. Fermer le couvercle du contenant et vérifier qu’il y a suffisamment
d’espace entre les œufs et le couvercle.
9. Peser le contenant servant à l’incubation des œufs, y compris le
substrat d’incubation humecté, les œufs et le couvercle, et marquer
le poids sur le couvercle en plus de la date à laquelle les œufs y ont
été déposés et le nom des espèces.
10.Déposer le contenant destiné à l’incubation des œufs dans
l’incubateur.
11.Vérifier le poids du contenant destiné à l’incubation des œufs à
intervalles réguliers (chaque semaine), et ajouter de l’humidité
au besoin (pour que le poids corresponde à celui marqué sur le
couvercle). Quand on ajoute de l’eau, se servir d’eau embouteillée
ou d’eau du robinet traitée avec Aquatize (PT1976), et s’assurer qu’il
n’y a pas d’eau renversée sur les œufs! Répartir l’eau uniformément
le long des côtés du contenant et entre les œufs.
NEDERLANDS
Important
Le détecteur thermique n’étant pas placé directement dans la zone
d’incubation, son réglage, et l’affichage donc, de la température est
approximatif et ne constitue pas une valeur absolue. L’écart entre
la température réelle de la zone d’incubation et celle de l’affichage
dépend de la température ambiante où l’incubateur est installé. D’autres
considérations sont à prendre en compte; ainsi, plus la température
réglée est haute, plus l’écart sera prononcé. Veuillez noter qu’il y a
également un écart de température entre le haut et le bas de l’appareil;
l’indicateur numérique affiche celle du haut. Observer les variations de
température pendant 24 heures avec un thermomètre séparé (facultatif)
pour s’assurer que l’appareil est réglé et fonctionne correctement. Il est
également recommandé de vérifier la température à chaque endroit où
il y a des œufs en incubation. Ceci parce que le détecteur thermique de
l’appareil actionne ce dernier lorsqu’il se produit un écart de 2 °C
(3,6 °F). Ainsi, si l’appareil est réglé à 32 °C, il se mettra à chauffer
quand la température atteindra 30 °C (86 °F) sur l’afficheur, et
commencera à refroidir quand la température atteindra 34 °C (93,2
°F). L’utilisation de boîtes ou de contenants fermés pour la reproduction
limite les écarts de température à 0,2 °C, assurant ainsi une
température d’incubation constante.
Dimensions intérieures :
environ l. 27 x P. 23 x H. 37 cm (10 ½ x 9 x 14 ½ po).
Dimensions extérieures :
environ l. 35 x P. 42,5 x H. 48 cm (14 x 16 ½ x 19 po)
Entretien et nettoyage
• L’accumulation de poussière entravera la circulation d’air et
modifiera la capacité de refroidissement et de chauffage de
l’appareil.
• Débrancher avant de nettoyer.
• Utiliser un linge légèrement mouillé et des détergents neutres
pour nettoyer - des produits chimiques concentrés peuvent
endommager les pièces en plastique.
• Ne pas immerger.
• Pour la saleté sur le ventilateur, employer un aspirateur ou une
brosse douce pour enlever la poussière et essuyer ensuite avec
un linge humide.
RECYCLAGE
Cet article porte le symbole de la collecte sélective des
déchets d’équipements électriques et électroniques
(DEEE), ce qui signifie qu’on doit l’éliminer
conformément à la directive européenne 2002/96/
EC soit en le recyclant, soit en le désassemblant, de
façon à minimiser ses répercussions sur l’environnement. Pour plus
d’information, contactez les autorités locales ou régionales. Les
produits électroniques non compris dans le processus de collecte
sélective sont potentiellement dangereux pour l’environnement et la
santé humaine en raison de la présence de substances dangereuses.
FRANÇAIS
DEUTSCH
Caractéristiques relatives au fonctionnement :
Voltage de fonctionnement : CC 12 V et CA 220-240 V, courant
alternatif de 50 Hz, conçus pour utilisation dans la maison ou l’auto.
Pour CA (maison) : brancher une extrémité à l’arrière de l’appareil
et l’autre extrémité dans la prise murale.
Pour CC (auto) : brancher une extrémité à l’arrière de l’appareil et
l’autre extrémité dans l’allume-cigarette du véhicule ou à une prise
de courant auxiliaire.
ESPAÑOL
Caractéristiques techniques
Consommation d’énergie :
Courant continu : mode refroidissement 55 W, mode chauffage
55 W.
Courant alternatif : mode refroidissement 60 W, mode chauffage
60 W.
ITALIANO
IMPORTANT : Pour des renseignements spécifiques ou pour
des renseignements sur des espèces non mentionnées dans ce
mode d’emploi, prière de lire de la documentation spécialisée
sur l’incubation d’œufs de reptiles.
ENGLISH
Lampropeltis spec. * 26-29 °C / 79-84 °F
Elaphe spec. * 25-29 °C / 77-84 °F
NEDERLANDS
18
Tortues terrestres
Agrionemys horsfieldii * 27-30 °C / 80-86 °F
Geochelone carbonaria et denticulata * 25-30 °C / 77-86 °F
Geochelone elegans * 26-30 °C / 79-86 °F
Geochelone pardalis * 28-30 °C / 82-86 °F
Geochelone radiata * 28-32 °C / 82-90 °F
Geochelone sulcata * 28-32 °C / 82-90 °F
Malacochersus tornieri * 27-30 °C / 80-86 °F
Testudo graeca * 28-31 °C / 82-88 °F
Testudo hermanni * 28-31 °C / 82-88 °F
Testudo kleinmanni * 28-31 °C / 82-88 °F
Lézards
Acanthosaura armata * 22-25 °C / 72-77 °F
Agama aculeata * 28 °C / 82 °F
Agama agama * 28-30 °C / 82-86 °F
Laudakia stellio * 26-28 °C / 79-82 °F
Leiolepis guttata * 28-30 °C / 82-86 °F
Physignathus cocincinus et lesueuri * 26-30 °C / 79-86 °F
Pogona henrylawsoni * 28-30 °C / 82-86 °F
Pogona vitticeps * 28-30 °C / 82-86 °F
Uromastyx spec. * 28-32°C / 82-90°F
Xenagama spec. * 28-30°C / 82-86°F
Bradypodion fischeri * 22-25 °C / 72-77 °F
Chamaeleo calyptratus * 27-30 °C / 80-86 °F
Chamaeleo dilepis * 28-30 °C / 82-86°F
Furcifer lateralis * 24-26 °C / 75-79 °F
Furcifer pardalis * 26-28 °C / 79-82 °F
Coleonyx spec. * 28-30 °C / 82-86 °F
Eublepharis macularius * 26-30 °C / 79-86 °F
Gekko gecko * 26-30 °C / 79-86 °F
Hemidactylus spec. * 26-28 °C / 79-82 °F
Hemitheconyx caudicinctus * 28-30 °C / 82-86 °F
Lygodactylus spec. * 26-28 °C / 79-82 °F
Nephrurus spec. * 26-28 °C / 79-82 °F
Pachydactylus spec. * 26-28 °C / 79-82 °F
Paroedura spec. * 26-28 °C / 79-82 °F
Phelsuma spec. * 25-30 °C / 77-86 °F
Nephrurus spec. * 27-29 °C / 80-84 °F
Rhacodactylus spec. * 26-29 °C / 79-84 °F
Teratoscincus spec. * 28-30 °C / 82-86 °F
Uroplatus spec. * 28 °C / 82 °F
Anolis carolinensis et sagrei * 27-30 °C / 80-86 °F
Basiliscus spec. * 27-30 °C / 80-86 °F
Crotaphytus spec. * 28-30 °C / 82-86 °F
Dipsosaurus dorsalis * 28-32 °C / 82-90 °F
Iguana iguana * 28-30 °C / 82-86 °F
Lacerta viridis et trilineata * 28-30 °C / 82-86 °F
Takydromus spec. * 26 °C / 79 °F
Timon lepidus * 28-30 °C / 82-86 °F
Eumeces schneideri * 28-30 °C / 82-86 °F
Riopa fernandi * 28 °C / 82 °F
Ameiva spec. 28 °C / 82 °F
Tupinambis spec. * 28-30 °C / 82-86 °F
Varanus spec. * 28-30 °C / 82-86 °F
Serpents
Morelia viridis * 28-32 °C / 82-90 °F
Python molurus * 30 °C / 86 °F
Python regius * 28-32 °C / 82-90 °F
Pantherophis spec. * 26-29 °C / 79-84 °F
ENGLISH
FRANÇAIS
DEUTSCH
ESPAÑOL
Service à la clientèle et Service de réparations autorisé sous
garantie :
R.-U. :
Rolf C. Hagen (UK) Ltd.
California Dr. Whitwood Industrial Estate
Castleford, West Yorkshire WF10 5QH
Envoyer un message électronique à : http://faq.hagencrm.com/?uk
France :
Hagen France S.A. PARISUD 4 – Bd. Jean Monnet, F-77388 Combs
la Ville.
Service à la clientèle: (+33) 01-64881418
Du lundi au jeudi, de 9 h à 12 h 30 et de 13 h 30 à 17 h. Le vendredi,
de 9 h à 12 h 30
Envoyer un message électronique à :
[email protected]
Allemagne :
HAGEN Deutschland GmbH & Co. KG Lehmweg 99-105, 25488 Holm
Service-Hotline: (0 18 01) 424344 (Ortstarif / T-Com)
Montag – Freitag von 9:00 – 17:00 Uhr
Envoyer un message électronique à :
[email protected]
Espagne :
Rolf C Hagen España, S.A. Avda de Beniparrell 11 y 13, P.I. L’Alteró,
46060 Silla (Valencia)
Envoyer un message électronique à : [email protected]
Distribué par :
Canada : Rolf C. Hagen inc., Montréal QC H9X 0A2
É.-U. : Rolf C. Hagen (U.S.A.) Corp., Mansfield, MA. 02048
R.-U. : Rolf C. Hagen (U.K.) Ltd. Castleford, W. Yorkshire WF10 5QH
Allemagne : HAGEN Deutschland GmbH & Co. KG Lehmweg 99-105,
25488 Holm
France : Hagen France S.A. PARISUD 4 – Bd. Jean Monnet, F-77388
Combs la Ville.
ITALIANO
20
SERVICE
Si vous avez des problèmes ou des questions se rapportant au
fonctionnement de cet appareil, veuillez d’abord vous adresser
à votre détaillent spécialiste Exo Terra. Bien que la plupart des
problèmes puissent rapidement être réglés en vous rendant chez
votre détaillant, il peut arriver que ce ne soit pas le cas; veuillez
alors lui retourner l’appareil accompagné de la preuve d’achat pour
remplacer celui-ci dans le délai de deux ans prévu dans la garantie.
Lorsque vous téléphonez (envoyez un courriel ou écrivez) ayez à
portée de la main tous les renseignements pertinents comme le
numéro de modèle ou le numéro des pièces et tâchez de décrire la
nature du problème.
Pour de l’information générale sur notre gamme complète de
produits, visitez nos sites Web au www.exo-terra.com ou au
www.hagen.com.
NEDERLANDS
GARANTIE
Cette garantie est limitée à l’incubateur seulement. L’incubateur
est garanti contre tout défaut de matériaux et de fabrication pour
une période de deux ans à partir de la date d’achat. La garantie est
valide uniquement avec une preuve d’achat. La garantie ne couvre
pas les dommages à des êtres animés ou inanimés ni leur perte
consécutive. Cette garantie est valide seulement dans des conditions
normales de fonctionnement pour lesquelles l’incubateur a été
conçu. La garantie exclut tout incubateur qui aurait fait l’objet d’un
usage excessif, d’une installation incorrecte, de négligence ou d’une
quelconque modification. Cette garantie ne porte pas atteinte à vos
droits prévus par la loi.
La garantie est limitée à la réparation ou au remplacement de l’unité
seulement, et NOUS N’ACCEPTONS AUCUNE réclamation relative à
la perte d’œufs ou d’animaux qui pourrait être due à son mauvais
fonctionnement.
22
2.
3.
4.
5.
6.
7.
8.
Die folgenden Anweisungen vor der Inbetriebnahme sorgfältig durchlesen.
9.
FRANÇAIS
•Exakte Abstimmung von Kühlung und
Erwärmung zur Vermeidung des Verlusts von
Eiern durch extreme Temperaturschwankungen.
•Ideal für die Überwinterung geeignet
•Hervorragende Klimaregelung für den
Transport von Reptilien und Amphibien (z. B. neu
erworbener Tiere)
•Tragegriff und Autoadapter (12 V) im
Lieferumfang enthalten
•Digitale Regelung der Inkubationstemperatur
zur Einstellung der richtigen
Inkubationstemperatur für jede Gattung
•Helles digitales LED-Display zum einfachen
Ablesen der Temperatur
•Schalter für Innenbeleuchtung an der
Vorderseite (Ein/Aus) ermöglicht die Überprüfung
der Eier ohne Störung der Inkubation
•Betriebsschalter an der Vorderseite zum Ein-/
Ausschalten des Geräts
•Zwei herausziehbare Brutschalen zur
Maximierung des Inkubationsplatzes
• Herausziehbare Wanne für die
Feuchtigkeitsregelung
• Extrem geräuscharmer Betrieb
sowie alle wichtigen Hinweise auf dem Gerät vor Gebrauch.
Eine Nichteinhaltung kann Verletzungen und Geräteschäden
nach sich ziehen. VORSICHT – Zur Vermeidung eines möglichen
elektrischen Schlags sollten Sie besonders vorsichtig sein,
weil bei der Benutzung dieses Gerätes Wasser verwendet wird/
werden kann. In allen nachfolgend aufgeführten Fällen ist
keine Reparatur in Eigenregie zu versuchen. Das Gerät ist zur
Reparatur an einen autorisierten Kundendienst zurückzugeben
oder, falls die Gewährleistungsfrist abgelaufen ist, zu entsorgen.
Das Gerät darf nicht verwendet werden, wenn das Netzkabel
oder der Netzstecker beschädigt ist, eine Betriebsstörung
aufgetreten ist oder das Gerät heruntergefallen oder auf
irgendeine Weise beschädigt wurde. Das Netzkabel kann vom
Gerät abgezogen werden.
Zur Vermeidung von Verletzungen keine beweglichen oder heißen
Komponenten berühren.
VORSICHT – Vor dem Aus- und Einbau von Teilen und
während der Installation, Wartung oder anderen Arbeiten mit dem
Gerät immer den Netzstecker ziehen. Hierfür nie am Netzkabel
ziehen, sondern den Netzstecker umfassen und herausziehen.
Wenn das Gerät nicht verwendet wird, immer den Netzstecker
ziehen. Das Gerät zum Anheben nie am Netzkabel anfassen.
Das Gerät ist nicht für den Gebrauch durch Personen
(einschließlich Kinder) mit eingeschränkten körperlichen,
sensorischen oder geistigen Fähigkeiten oder durch Personen
mit wenig Erfahrung im Umgang mit technischen Geräten
vorgesehen, außer wenn diese Personen entsprechende
Bedienungsanweisungen erhalten oder sie unter Aufsicht
einer Person stehen, die für ihre Sicherheit verantwortlich ist.
Kinder sollten stets beaufsichtigt werden, damit sie nicht mit
dem Gerät herumspielen.
Die Verwendung nicht vom Hersteller des Geräts empfohlener
oder vertriebener Zusatzkomponenten kann zu Sicherheitsrisiken
führen.
Das Gerät nicht bei Temperaturen unter 0 Grad lagern oder
betreiben. Das Gerät keiner direkten Sonneneinstrahlung
aussetzen.
Das Gerät auf einer flachen, ebenen Fläche aufstellen und
regelmäßig überprüfen. Das Gerät nicht über einen längeren
Zeitraum unbeaufsichtigt lassen.
Ist ein Verlängerungskabel erforderlich, sicherstellen, dass
die Verbindung wasser- und staubdicht ist. Nur Kabel mit
der geeigneten Auslegung verwenden. Ist das Kabel auf eine
geringere Stromstärke oder Leistungsaufnahme ausgelegt als
das Gerät, kann dies zu einer Überhitzung des Geräts führen.
Das Kabel so verlegen, dass es keine Stolpergefahr bildet und
nicht versehentlich herausgezogen werden kann. Der Anschluss
ist von einem qualifizierten Elektriker durchzuführen.
Das Gerät ist nur für die Verwendung in Privathaushalten
vorgesehen und darf nicht im Freien verwendet werden. Es ist
nicht für den kommerziellen Gebrauch vorgesehen.
DEUTSCH
Vielen Dank für den Kauf des Exo Terra Inkubators für Reptilien. Diese
Gebrauchsanleitung ist vor Inbetriebnahme des Inkubators sorgfältig
durchzulesen. Eine Verwendung des Inkubators unter Befolgung der
vorliegenden Anleitung gewährleistet das höchste Maß an Sicherheit
und Leistung. Es empfiehlt sich, diese Anleitung zur künftigen
Konsultation einfach zugänglich aufzubewahren.
®
LESEN UND BEFOLGEN SIE ALLE SICHERHEITSHINWEISE
ESPAÑOL
1.
ITALIANO
ACHTUNG – Zum Schutz vor Verletzungen sind die nachfolgend
aufgeführten grundlegenden Sicherheitsvorkehrungen zu beachten.
NEDERLANDS
Gebrauchsanleitung
ENGLISH
WICHTIGE SICHERHEITSHINWEISE
Incubator
Stummbetrieb: An der
Geräterückseite befindet sich ein
Stummschalter. Wenn das Gerät
hiermit auf Stummbetrieb geschaltet
wird, wird die Geschwindigkeit des
Lüfters verringert. Der Inkubator
läuft dann geräuschärmer,
es zirkuliert jedoch weniger
Luft im Gerät. Diese Funktion
sollte nur zeitweise verwendet
werden. Im Stummbetrieb kann
die Inkubationstemperatur
bei hohen Schwankungen der
Umgebungstemperatur nicht stabil
gehalten werden.
NORMAL
MUTE
DEUTSCH
zur Vorbereitung des Brutsubstrats sowie zur Inkubation von
Reptilieneiern sind weiter unten zu finden.)
8. Mindestens ein analoges oder digitales Thermometer (z. B.
digitales Thermometer PT2472 oder Thermometer/Hygrometer
PT2470) direkt neben (oder sogar in) die Brutbehälter platzieren,
damit eine exakte Temperaturmessung an der Brutposition
möglich ist.
9. Die Tür des Inkubators schließen, das Gerät ca. 24 Stunden
im Betrieb lassen und anschließend die Temperatur an den
Brutbehältern prüfen. Die auf dem LED-Display angezeigte
Temperatur kann um bis zu 5 °C von der an den Brutbehältern
gemessenen Temperatur abweichen. Liegt die an den
Brutbehältern gemessene Temperatur beispielsweise 2 °C unter
der gewünschten Temperatur, die am LED-Display angezeigte
Temperatur mithilfe der Taste „UP“ um 2 °C erhöhen. Das
Gerät ca. zwei Stunden im Betrieb lassen und die Temperatur
an den Brutbehältern dann erneut prüfen. Diesen Vorgang
so oft wiederholen, bis die gewünschte Temperatur an den
Brutbehältern stabil ist.
10.Die Eier in die Brutbehälter legen (bitte lesen Sie die Hinweise
zur Vorbereitung des Brutsubstrats und zur Inkubation von
Reptilieneiern weiter unten).
ESPAÑOL
24
1. Den Inkubator auf einer flachen, ebenen Unterlage aufstellen.
2. Sicherstellen, dass der Inkubator weder direkter
Sonneneinstrahlung (Überhitzungsgefahr) noch Zugluft
(Unterkühlungsgefahr) ausgesetzt ist. Ein ideales Betriebsumfeld
ist bei einer Raumtemperatur von 18 bis 22 °C gegeben.
3. Sicherstellen, dass der Schalter „AC/DC“ an der
Geräterückseite auf „AC“ steht, und dann den Netzstecker in
die Steckdose stecken. Den Inkubator am Betriebsschalter
an der Gerätevorderseite einschalten. Der Inkubator ist nun
in Betrieb. Auf dem digitalen LED-Display wird die aktuelle
Innenraumtemperatur angezeigt.
4. Innenbeleuchtung: Die Innenbeleuchtung kann nach Bedarf über
den zugehörigen Schalter an der Gerätevorderseite ein- und
ausgeschaltet werden.
5. Die gewünschte Inkubationstemperatur je nach Gattung mithilfe
der Pfeiltasten „UP“ bzw. „DOWN“ auf einen Wert zwischen
15 und 40 °C einstellen. Mithilfe der Taste „UP“ wird die
Temperatur erhöht, mithilfe der Taste „DOWN“ wird sie gesenkt.
Während der Einstellung der Temperatur wird die aktuelle
Temperatureinstellung auf dem LED-Display angezeigt. Nach
dem Einstellen der gewünschten Temperatur blinkt das LEDDisplay zweimal auf und kehrt dann zur Normalanzeige, d. h.
der Anzeige der aktuellen Temperatur im Gerät, zurück. Je nach
eingestellter Temperatur tritt das Gerät nun automatisch in den
Heiz- oder Kühlbetrieb. ACHTUNG: Die Temperatur kann zwar
auf Extremwerte bis 2 °C bzw. 60 °C eingestellt werden,
dies wird jedoch nicht empfohlen.
6. Die Wasserwanne mit normalem
Leitungswasser befüllen (KEIN heißes
Wasser verwenden). Das Wasser in
der ausziehbaren Wanne unten
im Gerät sorgt für eine höhere
Luftfeuchtigkeit, sodass das
Brutsubstrat nicht
austrocknet.
Die Wanne
muss während
der gesamten
Inkubationszeit
mit Wasser gefüllt sein!
Da der Grad der Verdunstung je nach eingestellter Temperatur
schwankt, ist es ratsam, den Wasserstand täglich zu überprüfen.
Sind keine täglichen Prüfungen möglich, einen tiefen Behälter
mit Wasser in den Inkubator stellen.
7. Die geeigneten Brutbehälter (Größe abhängig von der Gattung
sowie von Größe und Zahl der Eier) mit dem befeuchteten
Brutsubstrat in den Inkubator stellen. Zu diesem Zeitpunkt
werden die Eier noch nicht in den Inkubator gelegt. (Hinweise
ITALIANO
Einrichtung und inbetriebnahme
Diese Schritte sind auszuführen, BEVOR Eier in den Inkubator gelegt
werden!
NEDERLANDS
BEWAHREN SIE DIESE ANLEITUNG AUF
FRANÇAIS
ENGLISH
10.Die hintere Abdeckung nicht öffnen. Unter dieser Abdeckung
befinden sich keine Komponenten, die gewartet werden können.
Sämtliche Reparaturen dürfen nur von einem qualifizierten
Elektriker oder Klimaanlagen-Techniker durchgeführt werden.
Vorbereitung Des Brutsubstrats
1. Einen geeigneten Brutbehälter auswählen. Es können je nach
Gelege und Größe der Eier diverse Behälter aus Kunststoff
verwendet werden.
2. Der Brutbehälter muss 1 oder 2 kleine Löcher (1-2 mm/
Bleistiftspitzengröße) zur Belüftung aufweisen, jedoch nicht
mehr, da bei einer übermäßigen Belüftung Brutsubstrat und Eier
austrocknen.
3. Das bevorzugte Brutsubstrat (Vermiculite oder Perlite)
auswählen. Beide Substrate werden ähnlich eingesetzt, erfordern
jedoch ein unterschiedliches Feuchtigkeitsverhältnis:
A. Vermiculite erfordert ein Verhältnis von 1:1 (basierend auf dem
Gewicht, nicht auf dem Volumen).
B. Perlite erfordert ein Verhältnis von 0,8:1 (basierend auf dem
Gewicht, nicht auf dem Volumen).
4. Den Brutbehälter zur Berechnung der exakten Wassermenge,
WICHTIG: Die für die jeweilige Gattung geeignete Temperatur
und das geeignete Substrat in Erfahrung bringen.
Durchschnittliche Bruttemperaturen für beliebte Reptiliengattungen
WICHTIG: Im Folgenden sind lediglich die
DURCHSCHNITTSTEMPERATUREN aufgeführt. Diese sind
AUSSCHLIESSLICH als LEITFADEN zu verstehen. Detaillierte
Informationen und Daten zu hier nicht aufgeführten Gattungen sind
der Fachliteratur zu entnehmen. Bei Verlust von Eiern oder Tieren
wird keinerlei Haftung übernommen.
Wasserschildkröten
Chrysemys picta * 25-30 °C
Clemmys guttata * 27-30 °C
Emys orbicularis * 28-30 °C
Graptemys pseudogeographica & kohnii * 28-32 °C
Trachemys scripta elegans * 28-30 °C
Kinosternon bauri * 25-30 °C
Sternotherus odoratus * 25-30 °C
ENGLISH
FRANÇAIS
DEUTSCH
ESPAÑOL
26
Wichtig
Die Temperaturanzeige und -einstellung sind ungefähre Werte,
die die tatsächliche Temperatur im Inkubationsbereich nicht
exakt wiedergeben, da der Sensor sich nicht in diesem Bereich
befindet. Der Unterschied zwischen tatsächlicher Temperatur im
Inkubationsbereich und auf dem Display angezeigter Temperatur
hängt von der umgebenden Raumtemperatur ab. Zudem hat die
Temperatureinstellung selbst Auswirkungen: Je höher diese ist,
umso größer ist der Temperaturunterschied. Außerdem unterscheidet
sich die Temperatur im oberen Gerätebereich von der im unteren
Bereich, wobei die Digitalanzeige die Temperatur im oberen Bereich
wiedergibt. Diese Temperatur mit einem zusätzlichen Thermometer
(optional) über einen Zeitraum von 24 Stunden überwachen, um
sicherzustellen, dass das Gerät ordnungsgemäß eingestellt ist und
funktioniert. Es wird zudem empfohlen, die Temperatur an jeder
Brutschale zu überwachen. Eine Differenz zwischen der angezeigten
Temperatur und der tatsächlichen Temperatur ist normal. Sie ergibt
sich aus der Funktionsweise des Geräts, das mit einer Verzögerung
von +/- 2 °C arbeitet. Bei einer eingestellten Temperatur von 32
°C beginnt der Heizbetrieb, sobald die Temperatur auf dem Display
unter 30 °C sinkt und der Kühlbetrieb, wenn die Temperatur auf
34 °C steigt. Bei der Benutzung geschlossener Dosen wird die
Temperatur im Brutsubstrat maximal um 0,2 °C variieren, was eine
konstante Bruttemperatur gewährleistet.
Vor dem Bestücken des Inkubators mit Eiern das Gerät immer 24
Stunden lang in Betrieb lassen und die Temperatur überprüfen.
Eine regelmäßige Prüfung der Temperatur mit einem separaten
kalibrierten Thermometer ist erforderlich. DER HERSTELLER
ÜBERNIMMT KEINERLEI HAFTUNG FÜR EIER ODER TIERE im Falle
einer Fehlfunktion des Geräts.
ITALIANO
ACHTUNG: Das LED-Display dient lediglich als Referenz. Es zeigt
NICHT die tatsächliche Temperatur im Brutbehälter an!
die dem Substrat hinzugefügt werden muss, auf eine digitale
Haushaltswaage stellen. Die Waage auf 0 rücksetzen, sodass nur
das Gewicht des hinzuzufügenden Substrats gemessen wird.
5. Den Behälter zur Hälfte oder zu zwei Dritteln mit Substrat
befüllen. Das Gewicht ablesen und entsprechend dem o. a.
Verhältnis die richtige Wassermenge hinzufügen: 1:1 bei
Vermiculite und 0,8:1 bei Perlite. Beispiel: Wiegt das Substrat
100 g, bei Verwendung von Vermiculite 100 ml Wasser und bei
Verwendung von Perlite 80 ml Wasser hinzufügen. Tafelwasser
oder mit Aquatize (PT1976) behandeltes Leitungswasser
verwenden.
6. Den Brutbehälter schütteln, um das Wasser gleichmäßig zu
verteilen.
7. Den Behälter öffnen, das Substrat glätten und dann mit dem
Daumen Mulden zur Aufnahme der Eier hineindrücken (die Eier
müssen zur Hälfte vom Substrat abgedeckt sein). Dadurch wird
verhindert, dass die Eier im Behälter herumrollen, außerdem
sorgt der Kontakt mit dem Brutsubstrat dafür, dass die Eier nach
Bedarf Feuchtigkeit absorbieren können. Der obere Teil der
Eier wird nicht bedeckt, sodass das Ei atmen kann. Kleben die
Eier eines Geleges zusammen, eine Mulde zur Aufnahme des
gesamten Geleges formen, wobei die obere Hälfte des Geleges
aus dem Brutsubstrat herausragen muss.
8. Den Behälter verschließen. Zwischen Deckel und Eiern muss
genügend Abstand sein.
9. Den Behälter samt Inhalt wiegen und das Gewicht, das
Legedatum und den Namen der Gattung auf dem Deckel
vermerken.
10.Den Brutbehälter in den Inkubator setzen.
11.Das Gewicht des Brutbehälters regelmäßig (einmal wöchentlich)
prüfen und nach Bedarf so viel Wasser hinzugeben, dass das auf
dem Deckel vermerkte Gewicht beibehalten wird. Tafelwasser
oder mit Aquatize (PT1976) behandeltes Leitungswasser
verwenden und darauf achten, dass kein Wasser auf den Eiern
verschüttet wird! Das Wasser gleichmäßig seitlich und zwischen
den Eiern verteilen.
NEDERLANDS
AC/DC-Schalter: An der Geräterückseite befindet sich ein AC/
DC-Schalter. Unbedingt darauf achten, dass dieser in der richtigen
Stellung ist: Bei Anschluss an einer Wandsteckdose (220-240
V, 50 Hz) ist „AC“ die richtige Stellung, bei Anschluss an einem
Zigarettenanzünder bzw. einer Bordsteckdose muss der Schalter
auf „DC“ stehen.
ENGLISH
Schlangen
Morelia viridis * 28-32 °C
Python molurus * 30 °C
Python regius * 28-32 °C
Pantherophis spec. * 26-29 °C
Lampropeltis spec. * 26-29 °C
Elaphe spec. * 25-29 °C
RECYCLING:
Dieses Produkt trägt das Symbol für die getrennte
Entsorgung von elektrischen und elektronischen Artikeln
(WEEE). Das bedeutet, dass diese Produkte gemäß
der europäischen Richtlinie 2002/96/EC recycelt oder
demontiert werden müssen, um Umweltschäden zu
minimieren. Weitere Informationen hierzu können bei den örtlichen
Behörden eingeholt werden. Elektronische Produkte, die nicht der
Abfalltrennung unterzogen werden, sind potenziell gefährlich für
die Umwelt und für die menschliche Gesundheit, da sie gefährliche
Substanzen enthalten können.
GEWÄHRLEISTUNG
Diese Gewährleistung bezieht sich ausschließlich auf den
Inkubator. Für den Inkubator wird eine Gewährleistung auf
Material- und Verarbeitungsfehler von 2 Jahren ab Kaufdatum
gewährt. Die Gewährleistung gilt nur bei Vorlage eines Kaufbelegs.
Die Gewährleistung deckt keine direkten oder Folgeschäden
DEUTSCH
Wartung und Reinigung
• Bei einer Ansammlung von Staub wird die Luftzirkulation und
damit die Kühl-/Heizleistung des Geräts beeinträchtigt.
• Vor der Reinigung den Netzstecker ziehen.
• Mit einem feuchten Tuch und einem neutralen Reinigungsmittel
reinigen. Starke Chemikalien können die Kunststoffteile
beschädigen.
• Nicht in Wasser eintauchen.
• Staub auf dem Lüfter mit einem Staubsauger oder einer weichen
Bürste entfernen und den Lüfter dann feucht abwischen.
ESPAÑOL
Abmessungen innen: ca. 27 x 23 x 37 cm (B x T x H)
Abmessungen außen: ca. 35 x 42,5 x 48 cm (B x T x H)
ITALIANO
Technische Daten
Leistungsaufnahme:
Gleichstrom: Kühlbetrieb 55 W, Heizbetrieb 55 W
Wechselstrom: Kühlbetrieb 60 W, Heizbetrieb 60 W.
Betrieb:
Betriebsspannung: 12 V Gleichstrom und 220-240 V, 50 Hz
Wechselstrom (zum Einsatz im Auto oder im Haushalt)
Einsatz im Haushalt (Wechselstrom): Netzkabel am Gerät und an
einer Steckdose anschließen.
Einsatz im Auto (Gleichstrom): Netzkabel am Gerät und dem
Zigarettenanzünder bzw. einer Bordsteckdose anschließen.
FRANÇAIS
WICHTIG: Detaillierte Informationen und Daten zu hier nicht
aufgeführten Gattungen sind der Fachliteratur zu entnehmen.
NEDERLANDS
28
Sumpfschildkröten
Cuora amboinensis * 24-28 °C
Rhinoclemmys pulcherrima * 28-32 °C
Terrapene carolina & ornata * 28-30 °C
Landschildkröten
Agrionemys horsfieldii * 27-30 °C
Geochelone carbonaria & denticulata * 25-30 °C
Geochelone elegans * 26-30 °C
Geochelone pardalis * 28-30°C
Geochelone radiata * 28-32 °C
Geochelone sulcata * 28-32 °C
Malacochersus tornieri * 27-30 °C
Testudo graeca * 28-31 °C
Testudo hermanni * 28-31 °C
Testudo kleinmanni * 28-31 °C
Echsen
Acanthosaura armata * 22-25 °C
Agama aculeata * 28 °C
Agama agama * 28-30 °C
Laudakia stellio * 26-28 °C
Leiolepis guttata * 28-30 °C
Physignathus cocincinus & lesueuri * 26-30 °C
Pogona henrylawsoni * 28-30 °C
Pogona vitticeps * 28-30 °C
Uromastyx spec. * 28-32 °C
Xenagama spec. * 28-30 °C
Bradypodion fischeri * 22-25 °C
Chamaeleo calyptratus * 27-30 °C
Chamaeleo dilepis * 28-30 °C
Furcifer lateralis * 24-26 °C
Furcifer pardalis * 26-28 °C
Coleonyx spec. * 28-30 °C
Eublepharis macularius * 26-30 °C
Gekko gecko * 26-30 °C
Hemidactylus spec. * 26-28 °C
Hemitheconyx caudicinctus * 28-30 °C
Lygodactylus spec. * 26-28 °C
Nephrurus spec. * 26-28 °C
Pachydactylus spec. * 26-28 °C
Paroedura spec. * 26-28 °C
Phelsuma spec. * 25-30 °C
Nephrurus spec. * 27-29 °C
Rhacodactylus spec. * 26-29 °C
Teratoscincus spec. * 28-30 °C
Uroplatus spec. * 28 °C
Anolis carolinensis & sagrei * 27-30 °C
Basiliscus spec. * 27-30 °C
Crotaphytus spec. * 28-30 °C
Dipsosaurus dorsalis * 28-32 °C
Iguana iguana * 28-30 °C
Lacerta viridis & trilineata * 28-30 °C
Takydromus spec. * 26 °C
Timon lepidus * 28-30 °C
Eumeces schneideri * 28-30 °C
Riopa fernandi * 28 °C
Ameiva spec. 28 °C
Tupinambis spec. * 28-30 °C
Varanus spec. * 28-30 °C
30
Frankreich:
Hagen France S.A. PARISUD 4 – Bd. Jean Monnet, F-77388 Combs
la Ville.
Service à la clientèle: (+33) 01-64881418
Du lundi au jeudi : 9H00-12H30 et 13H30 –17H00. Le vendredi :
9H00-12H30
[email protected]
Deutschland:
HAGEN Deutschland GmbH & Co. KG Lehmweg 99-105, 25488 Holm
Service-Hotline: (0 18 01) 424344 (Ortstarif / T-Com)
Montag – Freitag von 9:00 – 17:00 Uhr
[email protected]
Spanien:
Rolf C Hagen España, S.A. Avda de Beniparrell 11 y 13, P.I. L’Alteró,
46060 Silla (Valencia)
[email protected]
Weitere Informationen über unser gesamtes Produktsortiment
erhalten Sie auf: www.exo-terra.com oder www.hagen.com.
Vertrieb durch:
Kanada: Rolf C. Hagen Inc., Montreal, QC H9X 0A2
U.S.A.: Rolf C. Hagen (U.S.A.) Corp., Mansfield MA. 02048
Vereinigtes Königreich: Rolf C. Hagen (U.K.) Ltd. Castleford, W.
Yorkshire WF10 5QH
Deutschland: HAGEN Deutschland GmbH & Co. KG Lehmweg 99-105,
25488 Holm
Frankreich: Hagen France S.A. PARISUD 4 – Bd. Jean Monnet,
F-77388 Combs la Ville.
Lea cuidadosamente las instrucciones antes de la instalación
y operación.
ENGLISH
FRANÇAIS
•Combinación precisa de refrigeración y
calefacción para evitar la pérdida de huevos
causada por fluctuaciones extremas de
temperatura
•Ideal para la hibernación
•Ideal para transporte con clima controlado de
reptiles y anfibios (por ejemplo, animales recién
adquiridos)
•Mango de transporte y adaptador para coche
(12V) incluido
•Control Digital de Temperatura – temperatura
de incubación ajustable, le permite proporcionar
la temperatura de incubación correcta para cada
•Brillante pantalla LED digital para una lectura
fácil de la temperatura
•Interruptor de luz interior situado en el panel
frontal (on/ off) para controlar fácilmente los
huevos, sin perturbar el proceso de incubación
•Interruptor de encendido situado en el panel
frontal, el interruptor de on/off le permite apagar
y encender la unidad en el medio de incubación
•Dos estantes deslizables, para maximizar el
espacio de incubación
•Bandeja extraíble para regular los niveles de
humedad
•Funcionamiento muy silencioso
DEUTSCH
Vereinigtes Königreich:
Rolf C. Hagen (UK) Ltd.
California Dr. Whitwood Industrial Estate
Castleford, West Yorkshire WF10 5QH
http://faq.hagencrm.com/?uk
Gracias por la compra de la Exo Terra® Reptile Incubator. Por favor,
lea este manual de instrucciones cuidadosamente antes de usar
y operar de acuerdo a las instrucciones proporcionadas para la
máxima seguridad y rendimiento. Le recomendamos que mantenga
este manual a mano para referencia futura.
ESPAÑOL
Kontaktieren Sie unseren Kundenservice:
Instrucciones
de Operación
ITALIANO
Kundendienst
Falls dieses Produkt fehlerhaft sein sollte, geben Sie es zusammen
mit dem Kaufnachweis entweder an Ihren örtlichen Zoofachhändler
oder senden Sie es mit im Voraus bezahlten Versandkosten an:
HAGEN Deutschland GmbH & Co. KG
Lehmweg 99-105
25488 Holm
Incubator
NEDERLANDS
an Lebewesen oder Objekten ab. Sie hat nur bei einer
bestimmungsgemäßen Verwendung des Inkubators Gültigkeit.
Bei unzweckmäßiger Verwendung, fehlerhafter Installation,
Nachlässigkeit oder Manipulation des Inkubators verliert die
Gewährleistung ihre Gültigkeit. Diese Gewährleistung berührt
keinerlei gesetzliche Ansprüche.
32
GUARDE ESTAS INSTRUCCIONES.
Instalación inicial y funcionamiento
¡Esto tendrá que realizarse antes de colocar los huevos en la
incubadora!
ENGLISH
FRANÇAIS
y todos los avisos importantes sobre el producto antes de usarlo.
El no hacerlo puede resultar en lesiones personales o daños
en el producto. PELIGRO - Para evitar posibles descargas
eléctricas, se debe tener especial cuidado, ya que el agua es
o puede ser empleada en el uso de este producto. Para cada
una de las siguientes situaciones, no intente repararlo usted
mismo, devuelva el producto a un centro de servicio autorizado
si aún está en garantía o desechar el producto. No utilice el
aparato si tiene dañado el cable o el enchufe, o si no funciona
correctamente o si se ha caído o dañado de alguna manera. El
cable de alimentación para esta unidad es desmontable.
2. Para evitar lesiones, no toque partes calientes o móviles.
3. PRECAUCIÓN - Siempre desenchufe o desconecte el
aparato de la toma de corriente antes de poner o quitar
piezas, y mientras el equipo está siendo instalado, mantenido
o manipulado. Nunca tire del cable para sacar el enchufe de
la toma de corriente. Tome el enchufe y tire para desconectar.
Siempre desenchufe el aparato de la toma de corriente cuando
no esté en uso. Nunca levante este producto por el cable.
4. Este aparato no está diseñado para ser utilizado por personas
(incluidos niños) con discapacidades físicas sensoriales o
mentales, o con falta de experiencia o conocimiento, a menos
que hayan sido supervisados o instruidos acerca del uso del
aparato por una persona responsable de su seguridad. Los niños
deben ser supervisados para asegurarse de que no jueguen con
el aparato.
5. El uso de accesorios no recomendados o no vendidos por el
fabricante del aparato puede ser peligroso.
6. No instale ni guarde el aparato donde pueda estar expuesto a
temperaturas bajo cero. No exponga la unidad a la luz solar
directa.
7. Asegúrese de que el aparato se coloca sobre una superficie plana
y uniforme. Controlar periódicamente el producto. No dejar el
producto desatendido durante largos períodos de tiempo.
8. Si se necesita un cable de extensión, asegúrese que la conexión
es impermeable y a prueba de polvo. Un cable con una
clasificación adecuada debe ser utilizado. Un cable clasificado
para menos amperios o vatios que el aparato puede causar
sobrecalentamiento. Se debe tener cuidado de colocar el cable
para que no se tropiece ni se tire de él. La conexión debe ser
realizada por un instalador electricista cualificado.
9. Sólo para uso doméstico en interiores. No es para uso comercial.
10. No intente abrir la parte trasera del aparato. No hay piezas útiles
para el usuario en el interior. Consulte todas las reparaciones a
un electricista calificado o especialista de HVAC.
DEUTSCH
LEA Y SIGA TODAS LAS INSTRUCCIONES DE SEGURIDAD
ESPAÑOL
1.
1. Coloque la Incubadora en una superficie plana y uniforme.
2. Asegúrese de que la incubadora no reciba luz directa del sol
(sobrecalentamiento) o corrientes de aire (demasiado frío).
Entorno de trabajo ideal es una temperatura ambiente de 18°-22°
C (65°-72° F).
3. Compruebe si el interruptor de AC / DC en la parte posterior del
dispositivo se encuentra en AC, conectar el enchufe a la toma de
pared. Presione el botón ON / OFF situado en el panel frontal de la
incubadora para encender el dispositivo. La unidad comenzará a
funcionar y la pantalla digital LED muestra la temperatura actual
dentro de la unidad.
4. Luz interior: si se desea pulsar el interruptor de la luz en el panel
de control frontal para encender o apagar la luz interior.
5. Ajuste la temperatura de incubación que desee, que van desde
15° a 40° C (59° a 104° F) dependiendo de la especie, a través
de los botones “flecha hacia arriba” o “flecha abajo” situados
en el panel frontal. La ‘flecha arriba’ aumenta la temperatura,
la “flecha abajo” reducirá la temperatura. Durante el uso de los
botones de arriba / abajo, la pantalla digital LED mostrará la
temperatura dentro de la incubadora. Una vez que se ajuste la
temperatura deseada, la pantalla LED parpadeará dos veces y
volverá a la “normalidad”, la pantalla mostrará la temperatura
actual dentro de la unidad. La unidad cambiará automáticamente
al modo de calefacción o de refrigeración basado en la
temperatura de incubación que haya fijado. ADVERTENCIA: A
pesar de que la Incubadora puede establecer temperaturas
tan bajas como 2° C (35° F) o tan altas como 60° C (140° F),
estos valores extremos no son recomendables.
6. Llene la bandeja con agua del grifo (NO utilizar
agua caliente). El agua en la bandeja
corredera en la parte inferior de la unidad
añadirá humedad al medio ambiente
para evitar la desecación rápida del
medio de incubación. ¡Mantenga
esta bandeja llena de agua
durante todo el
período de
incubación!
Dado que la
evaporación
depende de la
temperatura, es aconsejable para comprobar el nivel del agua
a diario. Colocar un recipiente más profundo con agua en la
incubadora, si los controles diarios no son posibles.
7. Ahora coloque un envase adecuado para los huevos en incubación
(el tamaño depende de la especie, tamaño del huevo y la cantidad
de huevos), contenedor de su elección que humedezca los huevos
(¡en esta etapa todavía no colocar los huevos en la incubadora!),
en la incubadora (Por favor, leer las notas sobre la preparación del
medio de incubación e incubación de huevos de reptil más abajo).
8. Coloque uno o varios termómetros analógicos o digitales (por
ejemplo, el termómetro digital PT2472 o el Termo-Higrómetro
PT2470) en el punto exacto de los contenedores de incubación
(o incluso en el recipiente de incubación) para comprobar la
temperatura correcta en el lugar de incubación de los huevos.
9. Cierre la puerta de la incubadora, y deje que la unidad funcione
durante aproximadamente 24 horas, a comprobar la temperatura
de incubación en los contenedores de los huevos. La temperatura
se muestra en la pantalla digital de LED puede diferir (hasta 5 °)
ITALIANO
ADVERTENCIA: Para evitar lesiones, deben tomarse precauciones
básicas de seguridad, incluyendo las siguientes:
NEDERLANDS
IMPORTANTES INSTRUCCIONES DE SEGURIDAD
NORMAL
MUTE
ADVERTENCIA: La pantalla digital LED es sólo de referencia, y
¡no refleja la temperatura real en el recipiente de incubación
de huevo!
IMPORTANTE
La visualización y el ajuste de la temperatura es un valor aproximado
y no representa el 100% de la temperatura real dentro de la unidad
ya que el sensor no está colocado directamente en el área de
ENGLISH
FRANÇAIS
DEUTSCH
Preparación del medio de incubación
1. Elija un contenedor de incubación para huevos adecuado. Varios
tipos de contenedores se pueden utilizar, desde tazas frías a todo
tipo de recipientes de plástico, dependiendo de la nidada y el
tamaño de los huevos.
2. Asegúrese de que el contenedor para incubar tiene 1 o 2
pequeños orificios de ventilación (1-2mm o del tamaño de
la punta de un lápiz), no más, ya que la ventilación excesiva
aumentará la desecación del medio de incubación y los huevos.
3. Elija el medio de incubación que prefiera: de vermiculita o perlita,
por ejemplo. Ambos medios de incubación se manejan de manera
similar, sólo la relación de humedad / medio es diferente:
A. La vermiculita tiene una relación humedad/medio de 1/1 basado
en el peso (no volumen).
B. La perlita tiene una relación humedad/medio de 0,8 / 1 basado en
el peso (no volumen).
4. Coloque el contenedor de incubación en una balanza digital de
cocina/comida para medir con precisión la cantidad de agua
que debe ser añadida al medio de incubación. Presione el botón
“Tare”, por lo que la escala se repondrá a “0”, de modo que sólo
se mida el peso del medio que se añadirá.
5. Llenar el recipiente con medio de incubación hasta 1/2 o 2/3
de la altura del recipiente, dejando el contenedor en la balanza.
Ahora lea el peso y añada el peso de agua como se ha descrito
anteriormente: 1/1 para vermiculita, 0,8/1 para perlita. Por
ejemplo: si la escala muestra 100gr, simplemente añada 100gr
(o 100 ml) de agua en caso de vermiculita, o 80gr (o 80 ml) de
agua en caso de perlita. Use agua embotellada o agua del grifo
tratada con Aquatize (PT1976)
6. Agitar el recipiente de incubación de huevos, para distribuir
uniformemente el agua.
ESPAÑOL
Botón Mute: Hay un interruptor de
silencio / normal en la parte posterior
de la unidad. Tenga en cuenta que
cuando éste está en modo de silencio,
la velocidad del ventilador se reduce.
La incubadora funcionará más
silenciosamente, pero habrá menos
circulación de aire dentro de la unidad.
Por favor, use esta función sólo para
un funcionamiento silencioso temporal.
Cuando está en modo de silencio de la
incubadora no será capaz de mantener
la temperatura de incubación durante
conjunto altas fluctuaciones de
temperatura ambiente.
Botón AC / DC : Hay un interruptor de AC / DC situado en la parte
posterior de la unidad. Compruebe siempre que el interruptor está en
la posición correcta: CA cuando se conecta a una toma de corriente
de 220-240V, 50Hz, DC cuando se conecta al encendedor de
cigarrillos / Toma de corriente auxiliar.
ITALIANO
34
NEDERLANDS
de la temperatura de incubación real medida en el recipiente de
incubación de huevos. Si la temperature medida en el recipiente
de incubación para los huevos es (por ejemplo) 2 ° C por debajo
de la temperatura deseada, utilice el botón ARRIBA y aumentar
la temperatura en 2 °que se muestra en la pantalla LED. Haga
funcionar la unidad durante un par de horas y comprobar la
temperatura en los contenedores de incubación de los huevos,
una vez más. Repita hasta que la temperatura deseada en el
huevo contenedores incubación es estable.
10. Coloque los huevos a incubar en los recipientes (Por favor, lea las
notas sobre la preparación del medio de incubación e incubación
de huevos de reptil más abajo).
incubación. La diferencia entre la temperatura real en el área de
incubación y la lectura en la pantalla depende de la temperatura
ambiente en la habitación donde se coloca la unidad. Estas
diferencias también pueden variar dependiendo de la temperatura,
mientras mayor es la temperatura, mayor es la varianza. Tenga en
cuenta que también hay una variación de temperatura entre la parte
superior y la parte inferior de la unidad, con la lectura digital se
refleja la temperatura más alta. Monitorear esta temperatura durante
un período de 24 horas con un termómetro (opcional) para garantizar
la unidad está configurada y funciona correctamente. También
se recomienda comprobar la temperatura en cada ubicación
de los huevos en incubación. Las desviaciones de temperatura
entre las quese muestran en la pantalla y la configuración real
son normales. Esto es debido al funcionamiento del dispositivo,
ya que se cambia con un retraso de +/- 2° C (3,6° F). En un
entorno de 32° C, el dispositivo iniciará el calentamiento cuando la
temperatura descienda a 30° C o 86° F en la pantalla, y comenzará
el enfriamiento cuando la temperatura alcance 34° C o 93,2° C.
Cuando se utilizan cajas cerradas o tazas frías, el sustrato de cría
no variará más de 0,2° C, lo que garantiza una temperatura de
incubación constante.
Siempre tenga a la unidad en funcionamiento durante al menos
24 horas para controlar las temperaturas antes de colocar los
huevos en el interior de la incubadora. Los controles periódicos
de temperatura se requieren con un termómetro calibrado ya que
NO ACEPTAMOS ninguna reclamación por pérdida de huevos o
animales debido al mal funcionamiento de la unidad.
Temperaturas de incubación promedio de especies de reptiles
populares
IMPORTANTE: La siguiente es una lista de las temperaturas
PROMEDIO de incubación, y está pensado SOLO como una
guía. Para obtener información más específica, o para obtener
información sobre las especies no mencionadas en este manual
de instrucciones, por favor lea literatura especializada en la
incubación de huevos de reptil. No aceptamos responsabilidad
por cualquier pérdida de huevos o animales vivos.
Tortugas Acuáticas
Chrysemys picta * 25-30°C / 77-86°F
Clemmys guttata * 27-30°C / 80-86°F
Emys orbicularis * 28-30°C / 82-86°F
Graptemys pseudogeographica & kohnii * 28-32°C / 82-90°F
Trachemys scripta elegans * 28-30°C / 82-86°F
Kinosternon bauri * 25-30°C / 77-86°F
Sternotherus odoratus * 25-30°C / 77-86°F
Tortugas Semi-Terrestres
Cuora amboinensis * 24-28°C / 75-82°F
Rhinoclemmys pulcherrima * 28-32°C / 82-90°F
Terrapene carolina & ornata * 28-30°C / 82-86°F
Tortugas Terrestres
Agrionemys horsfieldii * 27-30°C / 80-86°F
Geochelone carbonaria & denticulata * 25-30°C / 77-86°F
Geochelone elegans * 26-30°C / 79-86°F
Geochelone pardalis * 28-30°C / 82-86°F
IMPORTANTE: Para obtener información más específica, o
para obtener información sobre las especies no mencionadas
ENGLISH
FRANÇAIS
DEUTSCH
ESPAÑOL
IMPORTANTE: Por favor, investigue las temperaturas y los
sustratos adecuados para la incubación de las especies
específicas
ITALIANO
36
Geochelone radiata * 28-32°C / 82-90°F
Geochelone sulcata * 28-32°C / 82-90°F
Malacochersus tornieri * 27-30°C / 80-86°F
Testudo graeca * 28-31°C / 82-88°F
Testudo hermanni * 28-31°C / 82-88°F
Testudo kleinmanni * 28-31°C / 82-88°F
Lagartos
Acanthosaura armata * 22-25°C / 72-77°F
Agama aculeata * 28°C / 82°F
Agama agama * 28-30°C / 82-86°F
Laudakia stellio * 26-28°C / 79-82°F
Leiolepis guttata * 28-30°C / 82-86°F
Physignathus cocincinus & lesueuri * 26-30°C / 79-86°F
Pogona henrylawsoni * 28-30°C / 82-86°F
Pogona vitticeps * 28-30°C / 82-86°F
Uromastyx spec. * 28-32°C / 82-90°F
Xenagama spec. * 28-30°C / 82-86°F
Bradypodion fischeri * 22-25°C / 72-77°F
Chamaeleo calyptratus * 27-30°C / 80-86°F
Chamaeleo dilepis * 28-30°C / 82-86°F
Furcifer lateralis * 24°-26 / 75-79°F
Furcifer pardalis * 26-28°C / 79-82°F
Coleonyx spec. * 28-30°C / 82-86°F
Eublepharis macularius * 26-30°C / 79-86°F
Gekko gecko * 26-30°C / 79-86°F
Hemidactylus spec. * 26-28°C / 79-82°F
Hemitheconyx caudicinctus * 28-30°C / 82-86°F
Lygodactylus spec. * 26-28°C / 79-82°F
Nephrurus spec. * 26-28°C / 79-82°F
Pachydactylus spec. * 26-28°C / 79-82°F
Paroedura spec. * 26-28°C / 79-82°F
Phelsuma spec. * 25-30°C / 77-86°F
Nephrurus spec. * 27-29°C / 80-84°F
Rhacodactylus spec. * 26-29°C / 79-84°F
Teratoscincus spec. * 28-30°C / 82-86°F
Uroplatus spec. * 28°C / 82°F
Anolis carolinensis & sagrei * 27-30°C / 80-86°F
Basiliscus spec. * 27-30°C / 80-86°F
Crotaphytus spec. * 28-30°C / 82-86°F
Dipsosaurus dorsalis * 28-32°C / 82-90°F
Iguana iguana * 28-30°C / 82-86°F
Lacerta viridis & trilineata * 28-30°C / 82-86°F
Takydromus spec. * 26°C / 79°F
Timon lepidus * 28-30°C / 82-86°F
Eumeces schneideri * 28-30°C / 82-86°F
Riopa fernandi * 28°C / 82°F
Ameiva spec. 28°C / 82°F
Tupinambis spec. * 28-30°C / 82-86°F
Varanus spec. * 28-30°C / 82-86°F
Serpientes
Morelia viridis * 28-32°C / 82-90°F
Python molurus * 30°C / 86°F
Python regius * 28-32°C / 82-90°F
Pantherophis spec. * 26-29°C / 79-84°F
Lampropeltis spec. * 26-29°C / 79-84°F
Elaphe spec. * 25-29°C / 77-84°F
NEDERLANDS
7. Abrir el envase, extender el medio de incubación de manera
uniforme, haga algunas marcas en el medio de incubación con el
dedo pulgar para que los huevos se ajusten en el mismo hueco y
cubra el 50% del huevo. Esto evitará que los huevos se muevan
y al mismo tiempo, el contacto con el medio de incubación
humedecido permitirá que el huevo absorba la humedad cuando
sea necesario. La parte superior del huevo no debe estar cubierto
y se asegurará de que el huevo pueda “respirar”. En caso de
una nidada de huevos, hacer una cavidad que se asegure la
nidada completa, con la parte superior de los huevos (50%)
sobresaliendo del medio de incubación.
8. Cierre la tapa del contenedor y asegúrese de que hay un amplio
espacio entre el huevo y la tapa.
9. Pesar el envase de incubación incluyendo el medio de incubación
humedecido, los huevos y la tapa, y marque el peso en la tapa,
junto con la fecha de puesta de los huevos, y el nombre de la
especie.
10. Coloque el contenedor de huevos en la incubadora.
11. Compruebe el peso del recipiente de incubación de huevos
a intervalos regulares (cada semana), y añada agua para la
humedad si es necesario (para que coincida con el peso
marcado en la tapa). Si añade agua, usar agua embotellada
o agua del grifo tratada con Aquatize (PT1976), y ¡asegúrese
de que el agua no se derrama sobre los huevos! Distribuya el
agua uniformemente a los lados del recipiente y en el medio
de los huevos.
38
Mantenimiento y limpieza
• La acumulación de polvo impedirá el flujo de aire y afectará la
capacidad de refrigeración y calefacción de la unidad.
• Desconecte el suministro eléctrico antes de limpiar
• Utilice un paño limpio ligeramente húmedo y detergente neutro
para limpiar-fuertes productos químicos pueden dañar las piezas
de plástico.
• No sumerja en el agua
• Para la suciedad en el ventilador, use una aspiradora o un cepillo
suave para eliminar el polvo, luego limpie con un paño húmedo.
RECICLAJE
Este artículo lleva el símbolo de recogida selectiva de
residuos de aparatos eléctricos y electrónicos (RAEE).
Esto significa que el producto debe ser manipulado de
conformidad con la Directiva Europea 2002/96/CE con
el fin de ser reciclado o desmantelado para minimizar
su impacto sobre el medio ambiente. Para más información póngase
en contacto con las autoridades locales o regionales. Los productos
electrónicos no incluidos en el proceso de recogida selectiva son
potencialmente peligrosos para el medio ambiente y la salud
humana debido a la presencia de sustancias peligrosas.
GARANTÍA
Esta garantía se limita a la Incubadora solamente. La Incubadora
tiene una garantía de defectos de material o mano de obra por un
período de 2 años desde la fecha de compra. La garantía es válida
con el comprobante de compra. La garantía no cubre pérdidas
o daños de objetos animados o inanimados. Esta garantía es
válida sólo bajo condiciones normales de operación para la que la
incubadora se pretende. Esta garantía no se aplicará a cualquier
incubadora sometido a un uso indebido, instalación incorrecta,
negligencia, manipulación indebida o abuso de la unidad. Esta
garantía no afecta sus derechos legales. La garantía se limita a la
Para obtener información general sobre nuestra completa gama
de productos, explorar nuestros sitios web en:
www.exo-terra.com o www.hagen.com.
Distribuido por:
Canadá: Rolf C. Hagen Inc., Montreal, QC H9X 0A2
Estados Unidos de América: Rolf C. Hagen (U.S.A.) Corp., Mansfield
MA. 02048
R.U.: Rolf C. Hagen (U.K.) Ltd. Castleford, W. Yorkshire WF10 5QH
Alemania: HAGEN Deutschland GmbH & Co. KG Lehmweg 99-105,
25488 Holm
Francia: Hagen France S.A. PARISUD 4 – Bd. Jean Monnet, F-77388
Combs la Ville.
ENGLISH
FRANÇAIS
DEUTSCH
Dimensiones interiores: ca. 27cm x 23cm x 37cm o 10.5” x 9” x
14.5” (Ancho x Profundo x Alto)
Dimensiones exteriores: ca. 35cm x 42,5cm x 48cm o 14” x 16.5”
x 19” (Ancho x Profundo x Alto)
ESPAÑOL
Características de funcionamiento:
Voltaje en funcionamiento: 12V DC y 220-240V, 50Hz AC diseñado
para su uso en casa o en el automóvil.
Para uso AC (casa): Conecte un extremo en la parte posterior de la
unidad, otro extremo en el enchufe de la pared.
Para uso DC (automóvil): Conecte un extremo en la parte posterior
de la unidad, al otro extremo en el encendedor del vehículo / Toma
de corriente auxiliar.
Servicio
Si usted tiene cualquier problema o pregunta sobre el
funcionamiento de este producto, por favor consulte a su distribuidor
especializado de Exo Terra, en primera instancia. La mayoría de
los problemas se pueden resolver en la tienda, pero en el caso
improbable de que no se pueda, por favor regrese la unidad con
un comprobante de compra válido a la tienda para obtener un
reemplazo bajo la garantía de dos años. Cuando usted llame (e-mail
o escriba) a nuestro Departamento de Servicio al Cliente, por
favor tenga toda la información pertinente, tales como número de
modelo y/o número de piezas disponibles, así como la naturaleza
del problema:
Servicio al Cliente y Servicio Técnico Autorizado de reparación de
garantía:
R.U.:
Rolf C. Hagen (UK) Ltd.
California Dr. Whitwood Industrial Estate
Castleford, West Yorkshire WF10 5QH
mail to: http://faq.hagencrm.com/?uk
Francia:
Hagen France S.A. PARISUD 4 – Bd. Jean Monnet, F-77388 Combs
la Ville.
Service à la clientèle: (+33) 01-64881418
Du lundi au jeudi : 9H00-12H30 et 13H30 –17H00. Le vendredi :
9H00-12H30
mail to: [email protected]
Alemania:
HAGEN Deutschland GmbH & Co. KG Lehmweg 99-105, 25488 Holm
Service-Hotline: (0 18 01) 424344 (Ortstarif / T-Com)
Montag – Freitag von 9:00 – 17:00 Uhr
mail to: [email protected]
España:
Rolf C Hagen España, S.A. Avda de Beniparrell 11 y 13, P.I. L’Alteró,
46060 Silla (Valencia)
mail to: [email protected]
ITALIANO
Especificaciones técnicas
Consumo de energía:
DC: refrigeración 55W, calefacción 55W
AC: refrigeración 60W, calefacción 60W
reparación o el reemplazo de la única unidad, ¡NO ACEPTAMOS
ninguna reclamación por pérdida de huevos o animales debido
al mal funcionamiento de la unidad!
NEDERLANDS
en este manual de instrucciones, por favor lea la literatura
especializada en la incubación de huevos de reptil.
40
FRANÇAIS
•Combinazione accurata di raffreddamento
e riscaldamento per prevenire la perdita di
uova causata dalle variazioni estreme della
temperatura.
•Ideale per l’ibernazione
•Ottimo per il trasporto climatizzato di rettili
ed anfibi (per esempio: animali recentemente
acquisiti)
•Impugnatura e Adattatore per macchina (12V)
inclusi
•Controllo digitale della temperatura – la
temperatura d’incubazione regolabile
permette di scegliere la corretta temperatura
d’incubazione per ogni specie.
•Schermo digitale chiaro a LED per una facile
lettura della temperatura
•Interruttore di luce interna sul pannello
frontale (on/off) per monitorare facilmente
le uova senza disturbare il processo
d’incubazione
•Interruttore della corrente sul pannello
frontale, l’interruttore on/off permette
di attivare e disattivare l’unità durante
l’incubazione
•Doppie assi scorrevoli per massimizzare lo
spazio per l’incubazione
•Contenitore rimovibile per regolare il tasso
d’umidità
•Modalità molto silenziosa
1. LEGGERE E SEGUIRE TUTTE LE ISTRUZIONI DI SICUREZZA e
tutte le avvertenze relative al prodotto prima del suo utilizzo. La
non osservanza di tali istruzioni potrebbe provocare ferite alle
persone or danni al prodotto.
2. Per evitare le ferite, non toccare gli elementi caldi o in
movimento.
3. ATTENZIONE – Sconnettere sempre o staccare il dispositivo
dalla presa prima di aggiungere o togliere delle parti e mentre il
dispositivo è installato, mantenuto o maneggiato. Non tirare mai
il cordone per rimuovere la spina dalla presa. Afferrare la spina
e tirare per sconnetterla. Sconnettere sempre il dispositivo dalla
presa se non è usato. Mai alzare questo dispositivo dal cordone.
4. L’uso di questo dispositivo non è stato pensato per persone
(bimbi inclusi) che abbiano delle capacità sensoriali, fisiche o
mentali limitate o che non dispongono dell’esperienza o delle
conoscenze necessarie,… salvo se una persona responsabile
della loro sicurezza li abbia controllate o gli abbia dato delle
istruzioni su come usare il dispositivo. I bimbi vanno controllati
per assicurarsi che non giochino con il dispositivo.
5. L’uso di accessori non raccomandati o venduti dal produttore del
dispositivo può creare una situazione insicura.
6. Non installare o immagazzinare il dispositivo in luoghi dove
potrebbe essere esposto al tempo o a temperature sotto zero.
L’uso di accessori non raccomandati o venduti dal produttore del
dispositivo può creare una situazione insicura.
7. Assicurarsi che l’unità sia posizionata su una superficie piana
ed uniforme. Controllare l’unità periodicamente. Non lasciarla
inutilizzata per lunghi periodi.
8. Se è necessaria una prolunga, assicurarsi che la connessione sia
impermeabile e a tenuta di polvere. Va usato un cordone di tipo
adatto. Un cordone con una classe di ampere o di watt minore
della classe del dispositivo può provocare il surriscaldamento.
Bisogna mettere il cordone in modo che non faccia inciampare
nessuno o non venga tirato via. La connessione deve essere
realizzata da un elettricista qualificato.
9. Solo per uso domestico interno. Non per uso commerciale.
10.Non provare ad aprire il retro del dispositivo. Non contiene
elementi riparabili dall’utente. Contattare un elettricista
qualificato o specialista HVAC per ogni riparazione.
DEUTSCH
Grazie per aver acquistato l’incubatrice Exo Terra per rettili. Vi preghiamo
di leggere attentamente queste modalità d’uso prima dell’uso e di
seguire le istruzioni date per ottenere la massima sicurezza e le massime
prestazioni. Raccomandiamo di conservare questo manuale per una futura
consultazione.
®
ESPAÑOL
ATTENZIONE: Per prevenire le ferite è necessario osservare delle
precauzioni di sicurezza basilari, incluse le seguenti.
ITALIANO
IMPORTANTI ISTRUZIONI DI SICUREZZA
CONSERVARE QUESTE ISTRUZIONI
Installazione iniziale funzionamento
PRIMA DI mettere le uova nell’incubatrice, bisogna procedere in
questo modo!
1. Mettere l’incubatrice su una superficie piatta, uniforme.
2. Assicurarsi che l’incubatrice non sia sottoposta alla luce diretta
del sole (surriscaldamento) o a delle correnti d’aria (ipotermia).
L’ambiente di funzionamento ideale è una camera a temperatura
ambiente di 18°-22°C (65°-72°F).
3. Controllare se l’interruttore AC/DC dietro al dispositivo è stato
NEDERLANDS
Manuale
d’istruzioni
ENGLISH
Leggere attentamente le istruzioni prima dell’istallazione e
dell’operazione.
Incubator
42
7.
8.
9.
FRANÇAIS
ENGLISH
NORMAL
DEUTSCH
Interruttore del silenziatore: Dietro
all’unità si trova un interruttore
modalità silenziatore/modalità normale.
Se l’interruttore è messo nel modo
silenziatore, la velocità del ventilatore
verrà diminuita. L’incubatrice funzionerà
in un modo più silenzioso ma ci sarà una
minore circolazione d’aria nell’unità. Si è
pregati di usare questa modalità solo per
brevi periodi silenziosi. Nella modalità
silenziosa, l’incubatrice non sarà in
grado di mantenere la temperatura
d’incubazione impostata nel corso di forti
variazioni di temperatura.
MUTE
Interruttore AC/DC: Dietro all’unità si trova un interruttore AC/DC.
Controllare sempre se questo interruttore sia nella posizione corretta:
AC per connessioni ad un connettore nella parete a 220-240V, 50Hz ,
DC per connessioni ad un accendisigari / Attacco Aux Power.
ATTENZIONE: Lo schermo digitale led è solo per riferimento
e NON riflette la temperatura nell’attuale contenitore
d’incubazione delle uova!
Importante
L’indicazione della temperatura e l’impostazione sono dei valori
approssimativi e non rappresentano al 100% la temperatura
del momento all’interno dell’unità, non essendo posto il sensore
direttamente nell’area d’incubazione. La differenza fra la
temperatura del momento nell’area d’incubazione e la lettura del
display dipende dalla temperatura ambientale nella stanza dove
l’unità è installata. Queste differenze possono anche variare secondo
la temperatura impostata: più alta è la temperatura impostata,
più importante sarà la variazione. Osservazione: esiste anche una
variazione della temperatura fra la parte superiore dell’unità e quella
ESPAÑOL
6.
funzionare l’unità per qualche ora e controllare un’altra volta la
temperatura dei contenitori d’incubazione delle uova. Ripetere
finché la temperatura desiderata dei contenitori d’incubazione
delle uova sia stabile.
10.Mettere le uova nei contenitori d’incubazione delle uova (Si è
pregati di leggere le osservazioni qui sotto sulla preparazione del
mezzo d’incubazione e sull’incubazione delle uova di rettili).
ITALIANO
5.
NEDERLANDS
4.
messo su AC, poi connettere la spina al connettore nella parete.
Premere l’interruttore on/off sul panello frontale dell’incubatrice
per attivare il dispositivo. Il dispositivo inizierà a funzionare e lo
schermo digitale a led mostrerà la temperatura attuale all’interno
del dispositivo.
Luce interna: se necessario, premere l’interruttore della luce sul
pannello di controllo frontale per accendere o spegnere la luce
interna.
Impostare la temperatura d’incubazione desiderata da 15°
a 40°C (59° a 104°F) secondo la specie, usando i pulsanti
‘freccia in alto’ o ‘freccia in basso’ sul pannello frontale. Il
pulsante ‘freccia in alto’ aumenta la temperatura, il pulsante
‘freccia in basso’ diminuisce la temperatura. Usando il pulsante
‘freccia in basso/alto’ lo schermo digitale a led indicherà la
temperatura dell’impostazione. Fatta l’impostazione desiderata,
lo schermo a led lampeggerà due volte per tornare poi allo
schermo “normale” mostrando la temperatura attuale all’interno
del dispositivo. L’unità cambierà automaticamente il modo di
riscaldamento o di raffreddamento in base alla temperatura
d’incubazione impostata. ATTENZIONE: Anche se l’incubatrice
può essere impostata a 2°C (35°F) o a 60°C (140°F), queste
impostazioni estreme non sono raccomandate.
Riempire il contenitore d’acqua con acqua normale del
rubinetto (non usare l’acqua CALDA). L’acqua
nel contenitore scorrevole sul fondo dell’unità
aggiungerà l’umidità all’ambiente per
evitare una rapida disseccazione del
mezzo d’incubazione. Tenere questo
contenitore pieno d’acqua
durante il periodo
d’incubazione.
Siccome
l’evaporazione
dipende dalla
temperatura, è
consigliabile controllare il livello dell’acqua ogni giorno. Mettere
un contenitore più profondo pieno d’acqua se non è possibile
verificare l’acqua ogni giorno.
Mettere gli appositi contenitori d’incubazione delle uova (la
grandezza dipende dalla specie, dalla grandezza e dal numero
di uova) con il mezzo d’incubazione che è stato scelto e bagnato
nell’incubatrice (a questo punto non mettere ancora le uova
nell’incubatrice!). (Si è pregati di leggere le osservazioni qui sotto
sulla preparazione del mezzo d’incubazione e sull’incubazione
delle uova di rettili).
Mettere uno o più termometri analogici o digitali (per esempio
PT2472 Digital Thermometer o PT2470 Thermo-Hygrometer)
allo stesso posto dei contenitori d’incubazione (o anche nel
contenitore d’incubazione) per controllare la temperatura
corretta del sito per l’incubazione delle uova.
Chiudere la porta dell’incubatrice e far funzionare l’unità per
circa 24 ore, poi controllare la temperatura dei contenitori per
l’incubazione delle uova. La temperatura mostrata sullo schermo
a led digitale può essere diversa (fino a 5°) dalla temperatura
d’incubazione attualmente misurata presso il contenitore
d’incubazione delle uova. Se la temperatura, misurata presso
i contenitori d’incubazione delle uova è (per esempio) 2°C
sotto la temperatura desiderata, bisogna usare il pulsante UP
e aumentare la temperatura indicata sullo schermo led 2°. Far
44
IMPORTANTE: Si consiglia di ricercare quali temperature
e substrati sono più adatti per l’incubazione della specie
specifica.
Temperature medie d’incubazione di specie di rettili popolari
IMPORTANTE: L’elenco seguente è un elenco di temperature
MEDIE d’incubazione e serve UNICAMENTE da guida. Per
informazioni più specifiche o per informazioni su una specie
non menzionata in questo manuale, si consiglia di leggere la
letteratura specializzata sull’incubazione delle uova di rettili.
Non si accetta alcuna responsabilità per qualsiasi perdita di
uova o animali
Tartarughe acquatiche
Chrysemys picta * 25-30°C / 77-86°F
Clemmys guttata * 27-30°C / 80-86°F
Emys orbicularis * 28-30°C / 82-86°F
Graptemys pseudogeographica & kohnii * 28-32°C / 82-90°F
Trachemys scripta elegans * 28-30°C / 82-86°F
Kinosternon bauri * 25-30°C / 77-86°F
Sternotherus odoratus * 25-30°C / 77-86°F
Tartarughe semi-terrestri
Cuora amboinensis * 24-28°C / 75-82°F
Rhinoclemmys pulcherrima * 28-32°C / 82-90°F
Terrapene carolina & ornata * 28-30°C / 82-86°F
Testuggini
Agrionemys horsfieldii * 27-30°C / 80-86°F
Geochelone carbonaria & denticulata * 25-30°C / 77-86°F
Geochelone elegans * 26-30°C / 79-86°F
Geochelone pardalis * 28-30°C / 82-86°F
Geochelone radiata * 28-32°C / 82-90°F
Geochelone sulcata * 28-32°C / 82-90°F
Malacochersus tornieri * 27-30°C / 80-86°F
Testudo graeca * 28-31°C / 82-88°F
Testudo hermanni * 28-31°C / 82-88°F
ENGLISH
FRANÇAIS
DEUTSCH
Preparazione del mezzo d’incubazione delle uova
1. Scegliere un contenitore d’incubazione delle uova adatto. Si
possono usare diversi tipi di contenitori dai cappucci ad ogni tipo
di contenitore di plastica secondo la covata e la grandezza delle
uova.
2. Assicurarsi che il contenitore d’incubazione delle uova abbia
1 o 2 piccoli buchi di ventilazione (1-2mm o della grandezza
della punta di una matita), non di più altrimenti la ventilazione
eccessiva aumenterà la disseccazione del mezzo d’incubazione
e delle uova.
3. Scegliere il mezzo d’incubazione preferito: per esempio la
vermiculite o la perlite. I due mezzi d’incubazione funzionano in
modo simile, solo la proporzione umidità/mezzo è diversa.
A. La vermiculite ha una proporzione 1/1 umidità/mezzo
d’incubazione basata sul peso (non volume).
B. La perlite ha una proporzione 0,8/1 umidità/mezzo d’incubazione
basata sul peso (non volume).
4. Mettere il contenitore d’incubazione delle uova su una bilancia
digitale per cucina/cibo per misurare esattamente la quantità
d’acqua che va aggiunta al mezzo d’incubazione. Premere il
tasto “tara” per azzerare la bilancia a “0” per misurare solo il
peso del mezzo che sarà aggiunto.
5. Riempire il contenitore con il mezzo d’incubazione fino a 1/2
o 2/3 dell’altezza del contenitore lasciando il contenitore sulla
bilancia. Leggere ora il peso e lo stesso peso d’acqua come
descritto qui sopra: 1/1 per la vermiculite, 0,8/1 per la perlite. Per
esempio: se la bilancia indica 100g, aggiungere semplicemente
100 g (o 100 ml) d’acqua in caso di vermiculite o 80 g (o 80 ml)
d’acqua in caso di perlite. Usare l’acqua di bottiglia o l’acqua del
rubinetto trattata con Aquatize (PT1976).
6. Muovere il contenitore d’incubazione delle uova per distribuire
l’acqua uniformemente.
7. Aprire il contenitore, distribuire uniformemente il mezzo
d’incubazione, poi fare qualche intaccatura nel mezzo
d’incubazione con il pollice per far in modo che le uova ci stiano,
ESPAÑOL
Far funzionare sempre l’unità per 24 ore per controllare le
temperature prima di mettere le uova nell’incubatrice. Bisogna
controllare regolarmente la temperatura con un termometro calibrato
separato, dal momento che NON ACCETTIAMO NESSUNA richiesta di
risarcimento per la perdita di uova o di animali a causa del cattivo
funzionamento dell’unità.
ITALIANO
Le differenze di temperatura mostrate sul display e l’impostazione
del momento sono normali. Questo è dovuto al funzionamento del
dispositivo che varia con una differenza di +/- 2°C (3.6°F). A 32°C
impostati, il dispositivo inizia a riscaldarsi quando la temperatura
scende a 30°C o 86°F sul display, e si raffredderà quando la
temperatura arriverà a 34°C o 93.2°F. In caso di uso di scatole
chiuse o di deli cups, il substrato d’incubazione che contiene non
varierà di più di 0.2°C, assicurando una temperatura d’incubazione
costante.
coprendo 50% dell’uovo. Questo eviterà che le uova rotolino e
contemporaneamente il contatto con il mezzo d’incubazione
bagnato permetterà all’uovo di assorbire l’umidità se necessario.
La parte superiore dell’uovo non è coperta e garantirà che l’uovo
potrà “respirare”. Se le uova stanno insieme nel nido, fare una
cavità per proteggere l’intero nido con la parte superiore (il 50%)
fuori dal mezzo d’incubazione.
8. Chiudere il coperchio del contenitore e assicurarsi che c’è un
ampio spazio fra le uova ed il coperchio.
9. Pesare il contenitore dell’incubazione delle uova all’inclusione
del mezzo d’incubazione, delle uova e del coperchio e scrivere
il peso sul coperchio insieme alla data in cui le uova sono state
deposte e il nome della specie.
10.Mettere il contenitore dell’incubazione delle uova
nell’incubatrice.
11.Controllare il peso del contenitore dell’incubazione delle uova
ad intervalli regolari (ogni settimana) e aggiungere l’umidità
se necessario (per eguagliare il peso scritto sul coperchio). Se
si aggiunge l’acqua, usare l’acqua di bottiglia o l’acqua del
rubinetto trattata con Aquatize (PT1976) ed assicurarsi che non
si versi l’acqua sopra le uova! Distribuire l’acqua uniformemente
ai lati del contenitore e fra le uova.
NEDERLANDS
inferiore, dove il risultato digitale riflette la temperatura più alta.
Controllare questa temperatura per un periodo di 24 ore con un
termometro separato (opzionale) per assicurarsi che l’unità sia stata
impostata e funzioni correttamente. Si consiglia anche di verificare la
temperatura in ogni luogo delle uova in incubazione.
IMPORTANTE: Per informazioni più specifiche o per informazioni
su una specie non menzionata in questo manuale, si consiglia
di leggere la letteratura specializzata sull’incubazione delle
uova di rettili.
Manutenzione e pulizia
• La polvere accumulata impedirà il flusso d’aria e influenzerà la
capacità di raffreddamento e di riscaldamento dell’unità.
• Staccare la corrente elettrica prima di pulire.
• Usare uno straccio leggermente umido e detergenti neutri per
pulire – i prodotti chimici concentrati possono danneggiare le parti
di plastica.
• Non immergere nell’acqua.
• Per togliere la sporcizia sul ventilatore, usare l’aspirapolvere o una
spazzola morbida per rimuovere la polvere, poi strofinare con uno
straccio umido.
Riciclaggio
Questo dispositivo porta il simbolo della raccolta differenziata per i rifiuti elettronici e i dispositivi elettrici
(WEEE). Significa che il prodotto deve essere smaltito
secondo la direttiva europea 2002/96/EC per essere
riciclato o smantellato per minimizzare il suo impatto
sull’ambiente. Per ulteriori informazioni bisogna contattare le autorità
locali o regionali. I prodotti elettronici non inclusi nel processo di
raccolta differenziata sono potenzialmente pericolosi per l’ambiente e
per la salute umana a causa della presenza di sostanze nocive.
Garanzia
Questa garanzia è limitata alla sola incubatrice. L’incubatrice è
garantita per difetti del materiale o di fabbricazione per un periodo di
2 anni dalla data d’acquisto. La garanzia è valida solo se è presentata
la prova dell’acquisto. La garanzia non copre qualunque perdita o
danno di o da parte di oggetti animati o inanimati. Questa garanzia
vale solo per condizioni d’uso normale per cui l’incubatrice è intesa.
Questa garanzia non sarà valida per incubatrici che siano state
soggette ad un uso improprio, l’installazione impropria, la negligenza,
la compressione o l’abuso dell’unità. Questa garanzia non influenza i
vostri diritti legali.
La garanzia è limitata alla riparazione o alla sostituzione della sola
FRANÇAIS
Dimensioni interne: ca. 27cm x 23cm x 37cm o 10.5” x 9” x 14.5”
(L x Prof x A)
Dimensioni esterne: ca. 35cm x 42,5cm x 48cm o 14” x 16.5” x
19” (L x Prof x A)
DEUTSCH
Voltaggio di funzionamento: 12V DC e 220-240V, 50Hz AC
designato per uso domestico o per uso in automobile.
Per uso AC (domestico): Inserire un’estremità nel retro dell’unità,
l’altra estremità nell’attacco della parete.
Per uso DC (auto): Inserire un’estremità nel retro dell’unità, l’altra
estremità nell’accendisigari della macchina /Attacco Aux Power.
ESPAÑOL
Caratteristiche di funzionamento:
ITALIANO
Consumo energetico:
Corrente DC: Raffreddamento 55W, riscaldamento 55W
Corrente AC: Raffreddamento 60W, riscaldamento 60W.
ENGLISH
Specifiche tecniche
NEDERLANDS
46
Testudo kleinmanni * 28-31°C / 82-88°F
Lucertole
Acanthosaura armata * 22-25°C / 72-77°F
Agama aculeata * 28°C / 82°F
Agama agama * 28-30°C / 82-86°F
Laudakia stellio * 26-28°C / 79-82°F
Leiolepis guttata * 28-30°C / 82-86°F
Physignathus cocincinus & lesueuri * 26-30°C / 79-86°F
Pogona henrylawsoni * 28-30°C / 82-86°F
Pogona vitticeps * 28-30°C / 82-86°F
Uromastyx spec. * 28-32°C / 82-90°F
Xenagama spec. * 28-30°C / 82-86°F
Bradypodion fischeri * 22-25°C / 72-77°F
Chamaeleo calyptratus * 27-30°C / 80-86°F
Chamaeleo dilepis * 28-30°C / 82-86°F
Furcifer lateralis * 24°-26 / 75-79°F
Furcifer pardalis * 26-28°C / 79-82°F
Coleonyx spec. * 28-30°C / 82-86°F
Eublepharis macularius * 26-30°C / 79-86°F
Gekko gecko * 26-30°C / 79-86°F
Hemidactylus spec. * 26-28°C / 79-82°F
Hemitheconyx caudicinctus * 28-30°C / 82-86°F
Lygodactylus spec. * 26-28°C / 79-82°F
Nephrurus spec. * 26-28°C / 79-82°F
Pachydactylus spec. * 26-28°C / 79-82°F
Paroedura spec. * 26-28°C / 79-82°F
Phelsuma spec. * 25-30°C / 77-86°F
Nephrurus spec. * 27-29°C / 80-84°F
Rhacodactylus spec. * 26-29°C / 79-84°F
Teratoscincus spec. * 28-30°C / 82-86°F
Uroplatus spec. * 28°C / 82°F
Anolis carolinensis & sagrei * 27-30°C / 80-86°F
Basiliscus spec. * 27-30°C / 80-86°F
Crotaphytus spec. * 28-30°C / 82-86°F
Dipsosaurus dorsalis * 28-32°C / 82-90°F
Iguana iguana * 28-30°C / 82-86°F
Lacerta viridis & trilineata * 28-30°C / 82-86°F
Takydromus spec. * 26°C / 79°F
Timon lepidus * 28-30°C / 82-86°F
Eumeces schneideri * 28-30°C / 82-86°F
Riopa fernandi * 28°C / 82°F
Ameiva spec. 28°C / 82°F
Tupinambis spec. * 28-30°C / 82-86°F
Varanus spec. * 28-30°C / 82-86°F
Serpenti
Morelia viridis * 28-32°C / 82-90°F
Python molurus * 30°C / 86°F
Python regius * 28-32°C / 82-90°F
Pantherophis spec. * 26-29°C / 79-84°F
Lampropeltis spec. * 26-29°C / 79-84°F
Elaphe spec. * 25-29°C / 77-84°F
48
Germania :
HAGEN Deutschland GmbH & Co. KG Lehmweg 99-105, 25488 Holm
Service-Hotline: (0 18 01) 424344 (Ortstarif / T-Com)
Dal lunedì al venerdì – dalle 9 alle 17.
inviare una e-mail a: [email protected]
Spagna :
Rolf C Hagen España, S.A. Avda de Beniparrell 11 y 13, P.I. L’Alteró,
46060 Silla (Valencia)
inviare una e-mail a: [email protected]
Per ottenere delle informazioni generali sull’intera gamma di
prodotti, consultare i nostri siti a: www.exo-terra.com o www.
hagen.com.
Distribuito da:
Canada : Rolf C. Hagen Inc., Montreal, QC H9X 0A2
Stati Uniti : Rolf C. Hagen (U.S.A.) Corp., Mansfield MA. 02048
Regno Unito : Rolf C. Hagen (U.K.) Ltd. Castleford, W. Yorkshire WF10
5QH
Germania: HAGEN Deutschland GmbH & Co. KG Lehmweg 99-105,
25488 Holm
Francia : Hagen France S.A. PARISUD 4 – Bd. Jean Monnet, F-77388
Combs la Ville
Lees de handleiding aandachtig voor de installatie en
de ingebruikname van het toestel.
ENGLISH
FRANÇAIS
DEUTSCH
Francia :
Hagen France S.A. PARISUD 4 – Bd. Jean Monnet, F-77388 Combs
la Ville.
Service à la clientèle: (+33) 01-64881418
Dal lunedì al giovedi – dalle 9 alle 12.30 e dalle 13.30 alle 17
Il venerdì : dalle 9 alle 12.30
inviare una e-mail a: [email protected]
• Accurate combinatie van koeling en
verwarming om verlies van eieren veroorzaakt
door extreme temperatuurschommelingen te
voorkomen
• Ideaal voor overwintering
• Perfect voor klimaatstabiel transport van
reptielen en amfibieën (bijvoorbeeld: pas
aangeschafte dieren)
• Draagbeugel en auto-adapter (12V) ingesloten
• Digitale Temperatuur Controle – aanpasbare
broedtemperatuur laat je toe de correcte
broedtemperatuur in te stellen voor elke soort.
• Heldere LED display voor het gemakkelijk
aflezen van de temperatuur
• Een binnenverlichtingsschakelaar bevindt
zich aan de voorzijde (aan/uit) en laat toe
het broedproces op te volgen zonder het te
verstoren.
• De aan- en uitschakelaar bevindt zich aan
de voorzijde, dit laat u toe de stroom te
onderbreken tussen de broedperiodes in.
• Twee aanpasbare schuifladen om de
broedruimte maximaal te benutten.
• Uitneembaar waterbakje om de
luchtvochtigheid op peil te houden
• Geruisloze werking
ESPAÑOL
Regno Unito:
Rolf C. Hagen (UK) Ltd.
California Dr. Whitwood Industrial Estate
Castleford, West Yorkshire WF10 5QH
inviare una e-mail a: http://faq.hagencrm.com/?uk
Bedankt voor het aankopen van de Exo Terra® Reptile Incubator.
Lees deze handleiding aandachtig alvorens het toestel in gebruik te
nemen, en handel volgens de instructies om een maximale veiligheid
en rendement te garanderen. Wij bevelen u aan deze handleiding bij
de hand te houden om later te kunnen raadplegen.
ITALIANO
Incubator
Gebruiksaanwijzing
Servizio
In caso di problemi o domande sull’utilizzo di questo prodotto,
consultare in primo luogo il rivenditore specializzato Exo Terra. La
maggior parte dei problemi può essere risolta facilmente in negozio,
ma nel caso improbabile in cui ciò fosse impossibile, bisogna spedire
l’unità al rivenditore con una prova d’acquisto valida per la sostituzione
con la garanzia che vale due anni. Quando si chiama (si scrive o si invia
una e-mail) il Nostro Servizio di Assistenza al Cliente, cerca di fornire
tutte le informazioni importanti, quali il numero del modello e/o i numeri
delle parti disponibili, così come la natura del problema:
Servizio di Assistenza al Cliente e servizio autorizzato di riparazione
garantita:
NEDERLANDS
unità, NON SI ACCETTA NESSUNA rivendicazione per la perdita di
uova o di animale causata dal funzionamento non corretto dell’unità!
BEWAAR DEZE INSTRUCTIES
ENGLISH
FRANÇAIS
DEUTSCH
1. Plaats de Incubator op een horizontaal en even oppervlak.
2. Verzeker u ervan dat er geen direct zonlicht (oververhitting)
of tocht (onderkoeling) op de Incubator valt. De ideale
omgevingstemperatuur voor een goede werking is 18°-22°C
(65°-72°F).
3. Controleer eerst of de AC/DC knop op de achterzijde van het toestel
op AC staat, en steek dan pas de stekker in het stopcontact. Druk
op de aan/uit schakelaar, op de voorzijde van de Incubator, om
het toestel in te schakelen. Het apparaat zal in werking treden en
de digitale LED display zal de actuele temperatuur binnenin het
toestel weergeven.
4. Binnenverlichting: druk wanneer gewenst op de lichtschakelaar
van het controlepaneel om de binnenverlichting aan of uit te
schakelen.
5. Stel de gewenste broedtemperatuur in, van 15° tot 40°C (59° tot
104°F) afhankelijk van de diersoort, door gebruik te maken van de
knoppen met opwaartse of neerwaartse pijl op het voorpaneel. De
knop met de opwaartse pijl verhoogt de temperatuur, de knop met
de neerwaartse pijl zal de temperatuur verlagen. Gedurende het
gebruik van de op/neer knoppen zal de LED display de ingestelde
temperatuur weergeven. Eenmaal de gewenste instelling is
gebeurd zal de LED display tweemaal knipperen en terugkeren
naar de normale display die de actuele temperatuur binnenin
het toestel weergeeft. Het toestel zal automatisch overschakelen
naar verwarmen of koelen afhankelijk van de gevraagde
broedtemperatuur. WAARSCHUWING: Alhoewel de Incubator
kan ingesteld worden op een minimum van 2°C (35°F)
of een maximum van 60°C (140°F) worden deze extreme
instellingen niet aangeraden.
6. Vul de lade onderaan het toestel met kraanwater
(gebruik GEEN WARM water). Het water
in de uitschuifbare lade onderaan zal
de luchtvochtigheid op peil houden
en een snelle uitdroging van
het incubatiemedium
voorkomen.
Houd deze lade
gevuld met
water gedurende
de volledige
incubatieperiode! Aangezien de mate van verdamping afhangt van
de temperatuur, is het aangeraden om de waterstand dagelijks
te controleren. Plaats een dieper waterbakje indien dagelijkse
controle niet mogelijk is.
7. Plaats nu bakjes, geschikt om de eieren te incuberen (grootte
afhankelijk van de soort, grootte van het ei en aantal eieren), met
een vochtig incubatiemedium naar keuze in de incubator (plaats
op dit moment nog geen eieren in de incubator) (Lees alstublieft
de informatie over de voorbereiding van het incubatiemedium en
het incuberen van de reptieleneieren onderaan).
8. Leg één of meerdere analoge of digitale thermometers (bijvoorbeeld
PT2472 Digital Thermometer of PT2470 Thermo-Hygrometer) op
de exacte plaats van het incubatiebakje (of zelfs in het bakje) om
de correcte temperatuur van de incubatieplaats te controleren.
9. Sluit de deur van de incubator en laat het apparaat gedurende
ESPAÑOL
Basisinstellingen en werking
Dit dient te worden uitgevoerd ALVORENS de eieren in de
incubator te plaatsen!
ITALIANO
50
OPGELET: Teneinde kwetsuren te voorkomen, moeten de
basisveiligheidsvoorschriften in acht genomen worden zoals:
1. LEES EN VOLG DE VEILIGHEIDSVOORSCHRIFTEN
en al de belangrijke voorschriften vermeld op het product
voor de ingebruikname. Het niet naleven ervan kan leiden tot
kwetsuren en beschadiging van het apparaat. GEVAAR – Om
elektrocutie te vermijden, dient men uiterst voorzichtig te zijn,
gezien de mogelijke aanwezigheid van water. Bij elk van de
volgende situaties, het toestel niet zelf proberen te herstellen,
maar het terugsturen naar een erkende hersteldienst of het uit
gebruik nemen. Het toestel niet in gebruik stellen als het snoer
of de stekker beschadigd zijn, bij een slechte werking van het
toestel, bij val of bij eender welke vorm van beschadiging. Het
stroomsnoer voor dit apparaat is afneembaar.
2. Om verwondingen te vermijden geen bewegende of verhitte
onderdelen aanraken.
3. OPGELET - Het toestel steeds ontkoppelen alvorens
onderdelen weg te nemen of te vervangen en tijdens een
installatie, reiniging of verplaatsing van het toestel. Nooit de
stekker uittrekken door middel van het snoer. Neem de stekker
vast om te ontkoppelen. Het toestel steeds ontkoppelen van het
net indien het niet in gebruik is. Nooit het toestel door middel van
het snoer opheffen of verplaatsen.
4. Dit toestel is niet voorzien voor gebruik door personen (inclusief
kinderen) met verminderde fysieke of mentale bekwaamheden,
met gebrek aan ervaring of kennis, tenzij een persoon die
verantwoordelijk is voor hun veiligheid hen begeleidt en informeert
aangaande het gebruik van dit toestel. Bij kinderen moet toezicht
gehouden worden opdat zij niet met het toestel spelen.
5. Het gebruik van onderdelen of hulpstukken die niet aangeraden of
verkocht zijn door de fabrikant van het toestel kan onveilig zijn
voor de gebruiker.
6. Het toestel niet opbergen of installeren waar het blootgesteld is aan
weersomstandigheden en temperaturen onder het vriespunt. Niet
blootstellen aan direct zonlicht.
7. Verzeker er u van dat het toestel is geïnstalleerd op een vlakke
egale ondergrond. Controleer het toestel regelmatig. Laat het
toestel niet onbewaakt achter voor een langere periode.
8. Indien er een verlengsnoer nodig is, ga dan na of de verbinding
stofvrij en waterbestendig is. Een snoer met dezelfde
eigenschappen als het originele dient te worden gebruikt.
Een snoer dat enkel toegelaten is voor een lager vermogen
(ampère en/of wattage) dan het vermogen van het toestel,
kan oververhitten. Let erop dat het snoer zo bevestigd wordt,
dat er niet kan over gestruikeld worden of aan getrokken.
Het aanbrengen van deze verbinding dient door een erkende
elektricien te gebeuren.
9. Enkel voor gebruik binnenshuis. Niet voor commercieel gebruik.
10. Probeer de achterzijde van het apparaat niet te openen. Er
bevinden zich geen vervangbare delen in het product. Alle
reparaties dienen door een erkende elektricien te gebeuren.
NEDERLANDS
BELANGRIJKE VEILIGHEIDSVOORSCHRIFTEN
MUTE
AC/DC Schakelaar: Er staat een AC/DC schakelaar op de achterzijde
van het toestel. Controleer altijd of deze in de juiste positie staat:
AC wanneer aangesloten op een 220-240V, 50Hz stopcontact, DC
wanneer aangesloten op een sigarenaansteker/Aux Power Socket.
WAARSCHUWING: De digitale LED display is enkel ter
referentie, en geeft NIET de exacte temperatuur weer bij de
incubatiebakjes!
Belangrijk
De temperatuurweergave en – instelling is een benaderde waarde
en geeft niet altijd 100% weer wat de werkelijke temperatuur
in het toestel is daar de warmtesensor zich niet exact op de
1.Kies een geschikt bakje voor het incuberen van de eieren.
Verschillende soorten bakjes kunnen worden gebruikt afhankelijk
van het aantal en de grootte van de eieren.
2. Zorg ervoor dat het bakje één of twee ventilatiegaten heeft
(1-2 mm of de grootte van een potloodpunt), niet meer of
groter gezien overdreven ventilatie het uitdrogen van het
incubatiemedium en de eieren zal bespoedigen.
3. Kies het gewenste incubatiemedium: bijvoorbeeld vermiculiet of
perliet. Beide incubatiemedia worden gebruikt op een gelijkaardige
manier, enkel de verhouding vocht/medium verschilt:
A. Vermiculiet heeft een verhouding van 1/1 vocht/incubatiemedium
volgens gewicht (niet volume).
B. Perliet heeft een 0,8/1 verhouding van vocht tot incubatiemedium
volgens gewicht (niet volume).
4. Plaats het incubatiebakje op een digitale keukenweegschaal om de
hoeveelheid water die moet worden toegevoegd precies te bepalen.
Duw op de “tare” knop zodat de weegschaal zich reset naar “0” en
enkel het gewicht van het toegevoegde medium wordt bepaald.
5. Laat het bakje staan op de weegschaal en vul het met
incubatiemedium tot op 1/2 of 2/3 van de hoogte van het bakje.
Lees het gewicht af en voeg het gewicht aan water toe zoals
hierboven beschreven: 1/1 voor vermiculiet, 0,8/1 for perliet.
Bijvoorbeeld: indien de weegschaal 100 gr aangeeft, voeg in het
geval van vermiculiet eenvoudigweg 100 gr (of 100 ml) water
toe, of in het geval van perliet 80 gr (of 80 ml) water. Gebruik
flessenwater of kraantjeswater behandeld met Aquatize (PT1976)
6. Schud het incubatiebakje zodat het water zich evenredig verdeelt.
7. Open het incubatiebakje, verdeel het incubatiemedium evenredig
ENGLISH
FRANÇAIS
DEUTSCH
ESPAÑOL
NORMAL
Voorbereiden van het incubatiemedium
ITALIANO
Mute Schakelaar: Er staat een mute/
normal schakelaar op de achterzijde
van het toestel. Hou er rekening mee
dat wanneer deze schakelaar op de
mute-stand staat, de snelheid van
de ventilator zal verminderen. De
broedmachine zal geruislozer werken
maar de luchtcirculatie zal eveneens
afnemen in het toestel. Gebruik
zodoende deze stand slechts voor
een beperkte geluidarme periode. In
deze mute-stand zal de broedmachine
niet in staat zijn de ingestelde
broedtemperatuur te behouden bij
grote temperatuurschommelingen.
NEDERLANDS
52
ongeveer 24 uur in werking, controleer dan de temperatuur bij de
incubatiebakjes. De temperatuur die wordt weergegeven op de
digitale LED display kan verschillen (tot 5°C) van de werkelijke
incubatietemperatuur. Als de temperatuur, gemeten bij de
incubatiebakjes, (bijvoorbeeld) 2°C lager ligt dan de gewenste
temperatuur, verhoog dan de temperatuur weergegeven op the
LED display met twee graden. Laat het toestel gedurende enkele
uren werken en controleer de temperatuur bij de incubatiebakjes
opnieuw. Herhaal deze procedure tot de gewenste temperatuur bij
de incubatiebakjes stabiel blijft.
10. Plaats de eieren in de incubatiebakjes (Lees alstublieft de
informatie over het voorbereiden van het incubatiemedium en het
incuberen van de reptieleneieren onderaan).
broedplaats bevind. Het verschil tussen de reële temperatuur in
het toestel en de weergave op het display zijn afhankelijk van de
omgevingstemperatuur in de ruimte waar het toestel is geplaatst.
Deze verschillen kunnen eveneens variëren afhankelijk van de
ingestelde temperatuur: hoe hoger de ingestelde temperatuur, hoe
groter de schommeling. Hou er rekening mee dat de temperatuur
ook verschilt bovenaan en onderaan in het toestel, waarbij op
de digitale display de temperatuur van het bovenste punt in het
toestel af te lezen is. Controleer de temperatuur gedurende een
tijdspanne van 24 uur met een afzonderlijke thermometer (optioneel)
om er zeker van te zijn dat de incubator juist werd ingesteld en
naar behoren functioneert. Het is eveneens aangeraden om de
temperatuur te meten in de directe omgeving van de uit te broeden
eieren. Afwijkingen tussen de temperatuurweergave op het display
en de reële instelling zijn normaal. Deze worden veroorzaakt door
de werking van het apparaat, aangezien dit met een vertraging van
+ / – 2°C (3.6°F) overschakelt. Bij een instelling van 32°C zal het
toestel opwarmen wanneer de temperatuur op het display daalt
tot 30°C (86°F), en koelen wanneer deze stijgt tot 34°C (93.2°F).
Bij het gebruik van gesloten dozen of plastic bakjes met deksel zal
het broedsubstraat binnenin niet meer dan 0.2°C schommelen,
hetgeen een constante incubatietemperatuur verzekert. Laat de
incubator altijd vooraf gedurende een tijdspanne van tenminste 24
uur functioneren alvorens de eieren in de incubator te plaatsen.
Regelmatig nazicht van de temperatuur met een afzonderlijke
gekalibreerde thermometer is vereist, gezien we GEEN ENKELE
schuldvordering aanvaarden inzake het verlies van eieren of dieren
als resultaat van een storing binnen het toestel.
Gemiddelde incubatietemperaturen van populaire reptielensoorten
BELANGRIJK: Volgende is een lijst met gemiddelde incubatietemperaturen en is enkel bedoeld als leidraad. Voor specifieke
informatie, of voor informatie over soorten die niet worden
vermeld in deze handleiding, raadpleeg gespecialiseerde
literatuur over de incubatie van reptieleneieren. Wij aanvaarden
geen aansprakelijkheid van welke aard ook voor het verlies van
eieren of dieren.
Aquatic Turtles
Chrysemys picta * 25-30°C / 77-86°F
Clemmys guttata * 27-30°C / 80-86°F
Emys orbicularis * 28-30°C / 82-86°F
Graptemys pseudogeographica & kohnii * 28-32°C / 82-90°F
Trachemys scripta elegans * 28-30°C / 82-86°F
Kinosternon bauri * 25-30°C / 77-86°F
Sternotherus odoratus * 25-30°C / 77-86°F
Semi-Terrestrial Turtles
Cuora amboinensis * 24-28°C / 75-82°F
Rhinoclemmys pulcherrima * 28-32°C / 82-90°F
Terrapene carolina & ornata * 28-30°C / 82-86°F
Tortoises
Agrionemys horsfieldii * 27-30°C / 80-86°F
Geochelone carbonaria & denticulata * 25-30°C / 77-86°F
Geochelone elegans * 26-30°C / 79-86°F
Geochelone pardalis * 28-30°C / 82-86°F
Geochelone radiata * 28-32°C / 82-90°F
Geochelone sulcata * 28-32°C / 82-90°F
BELANGRIJK: Voor specifieke informatie, of voor informatie
over soorten die niet worden vermeld in deze handleiding,
raadpleeg gespecialiseerde literatuur over de incubatie van
reptieleneieren.
ENGLISH
FRANÇAIS
DEUTSCH
ESPAÑOL
54
ITALIANO
BELANGRIJK: Zoek op welke temperatuur en substraat het
meest geschikt zijn voor het incuberen van de eieren van de
betreffende soort.
Malacochersus tornieri * 27-30°C / 80-86°F
Testudo graeca * 28-31°C / 82-88°F
Testudo hermanni * 28-31°C / 82-88°F
Testudo kleinmanni * 28-31°C / 82-88°F
Lizards
Acanthosaura armata * 22-25°C / 72-77°F
Agama aculeata * 28°C / 82°F
Agama agama * 28-30°C / 82-86°F
Laudakia stellio * 26-28°C / 79-82°F
Leiolepis guttata * 28-30°C / 82-86°F
Physignathus cocincinus & lesueuri * 26-30°C / 79-86°F
Pogona henrylawsoni * 28-30°C / 82-86°F
Pogona vitticeps * 28-30°C / 82-86°F
Uromastyx spec. * 28-32°C / 82-90°F
Xenagama spec. * 28-30°C / 82-86°F
Bradypodion fischeri * 22-25°C / 72-77°F
Chamaeleo calyptratus * 27-30°C / 80-86°F
Chamaeleo dilepis * 28-30°C / 82-86°F
Furcifer lateralis * 24°-26 / 75-79°F
Furcifer pardalis * 26-28°C / 79-82°F
Coleonyx spec. * 28-30°C / 82-86°F
Eublepharis macularius * 26-30°C / 79-86°F
Gekko gecko * 26-30°C / 79-86°F
Hemidactylus spec. * 26-28°C / 79-82°F
Hemitheconyx caudicinctus * 28-30°C / 82-86°F
Lygodactylus spec. * 26-28°C / 79-82°F
Nephrurus spec. * 26-28°C / 79-82°F
Pachydactylus spec. * 26-28°C / 79-82°F
Paroedura spec. * 26-28°C / 79-82°F
Phelsuma spec. * 25-30°C / 77-86°F
Nephrurus spec. * 27-29°C / 80-84°F
Rhacodactylus spec. * 26-29°C / 79-84°F
Teratoscincus spec. * 28-30°C / 82-86°F
Uroplatus spec. * 28°C / 82°F
Anolis carolinensis & sagrei * 27-30°C / 80-86°F
Basiliscus spec. * 27-30°C / 80-86°F
Crotaphytus spec. * 28-30°C / 82-86°F
Dipsosaurus dorsalis * 28-32°C / 82-90°F
Iguana iguana * 28-30°C / 82-86°F
Lacerta viridis & trilineata * 28-30°C / 82-86°F
Takydromus spec. * 26°C / 79°F
Timon lepidus * 28-30°C / 82-86°F
Eumeces schneideri * 28-30°C / 82-86°F
Riopa fernandi * 28°C / 82°F
Ameiva spec. 28°C / 82°F
Tupinambis spec. * 28-30°C / 82-86°F
Varanus spec. * 28-30°C / 82-86°F
Snakes
Morelia viridis * 28-32°C / 82-90°F
Python molurus * 30°C / 86°F
Python regius * 28-32°C / 82-90°F
Pantherophis spec. * 26-29°C / 79-84°F
Lampropeltis spec. * 26-29°C / 79-84°F
Elaphe spec. * 25-29°C / 77-84°F
NEDERLANDS
en duw er met de duim enkele inkepingen in zodat de eieren
tot aan de helft in het medium liggen. Dit zal verhinderen dat de
eieren van hun plaats rollen en tegelijkertijd zorgt het ervoor dat
door het contact met het vochtige medium de eieren water kunnen
absorberen wanneer nodig. Het bovenste gedeelte van het ei is
niet bedekt en zorgt ervoor dat het ei kan “ademen”. Maak, indien
de eieren samenkleven in een cluster, een inkeping die groot
genoeg is om het onderste gedeelte van de cluster te omsluiten en
zorgen ervoor dat 50% van de cluster boven het incubatiemedium
uitsteekt (om ervoor te zorgen dat de gehele cluster kan ademen).
8. Sluit het deksel van het bakje en zorg ervoor dat er voldoende
afstand is tussen de eieren en het deksel.
9. Weeg het incubatiebakje inclusief medium, eieren en deksel en
noteer het gewicht op het deksel, samen met de legdatum en de
naam van de soort.
10. Plaats het incubatiebakje in de Incubator.
11. Controleer het gewicht van het incubatiebakje op regelmatige
tijdstippen (wekelijks) en voeg water toe indien noodzakelijk
(zodat het gewicht overeenstemt met het gewicht genoteerd op
het deksel). Gebruik flessenwater of kraanwater behandeld met
Aquatize (PT1976) als er vocht moet toegevoegd worden en zorg
ervoor dat er geen water op de eieren wordt gemorst! Verdeel het
water in gelijkmatig langs de zijden van het incubatiebakje en
tussen de eieren (niet op de eieren).
56
RECYCLAGE
Dit product draagt het symbool voor selectief sorteren
van afval van elektrische uitrustingen en elektronica
(WEEE). Dit betekent dat het product moet behandeld
worden overeenkomstig de Europese Richtlijn 2002/96/
EC teneinde gerecycleerd of ontmanteld te worden om
de impact op het milieu te minimaliseren. Voor meer informatie
gelieve uw lokale of regionale overheid te raadplegen. Elektronische
producten die niet selectief gesorteerd worden, zijn potentieel
gevaarlijk voor het milieu en de gezondheid van de mens omwille
van de aanwezigheid van gevaarlijke stoffen.
WAARBORG
De waarborg is beperkt tot de incubator zelf. De incubator is
gewaarborgd voor defecten in materiaal of fabricage voor een
periode van 2 jaar beginnend vanaf de aankoopdatum. De waarborg
is slechts geldig bij voorlegging van het aankoopbewijs. De waarborg
dekt niet het eventuele verlies of de beschadiging van levende of
niet-levende objecten. De waarborg telt enkel bij oordeelkundig
gebruik en gebruik waarvoor het toestel bedoeld is. De waarborg
is niet van toepassing in geval van onoordeelkundig gebruik,
foutieve installatie, nalatigheid, geknoei of misbruik van het toestel.
Deze waarborg tast uw wettelijke rechten niet aan. De waarborg
is beperkt tot herstel of vervangen van het toestel zelf, WIJ
Frankrijk:
Hagen France S.A. PARISUD 4 – Bd. Jean Monnet,
F-77388 Combs la Ville.
Service à la clientèle: (+33) 01-64881418
Du lundi au jeudi : 9H00-12H30 et 13H30 –17H00.
Le vendredi : 9H00-12H30
mail naar: [email protected]
Duitsland:
HAGEN Deutschland GmbH & Co. KG Lehmweg 99-105, 25488 Holm
Service-Hotline: (0 18 01) 424344 (Ortstarif / T-Com)
Montag – Freitag von 9:00 – 17:00 Uhr
mail naar: [email protected]
Spanje:
Rolf C Hagen España, S.A. Avda de Beniparrell 11 y 13, P.I. L’Alteró,
46060 Silla (Valencia)
mail naar: [email protected]
Voor algemene informatie over ons volledige gamma aan
producten, bezoek onze website op: www.exo-terra.com of
www.hagen.com.
Verdeeld door:
Canada: Rolf C. Hagen Inc., Montreal, QC H9X 0A2
V.S.A.: Rolf C. Hagen (U.S.A.) Corp., Mansfield MA. 02048
V.K.: Rolf C. Hagen (U.K.) Ltd. Castleford, W. Yorkshire WF10 5QH
Duitsland: HAGEN Deutschland GmbH & Co. KG Lehmweg 99-105,
25488 Holm
Frankrijk: Hagen France S.A. PARISUD 4 – Bd. Jean Monnet, F-77388
Combs la Ville.
ENGLISH
FRANÇAIS
V.K.:
Rolf C. Hagen (UK) Ltd.
California Dr. Whitwood Industrial Estate
Castleford, West Yorkshire WF10 5QH
mail naar: http://faq.hagencrm.com/?uk
DEUTSCH
Onderhoud en reiniging
• Opgehoopt stof kan de luchtstroom hinderen en de verwarmingsen koelcapaciteit van het toestel verminderen.
• Schakel de stroom uit voor het reinigen
• Gebruik een propere, licht vochtige doek en een neutraal detergent
om het te reinigen. Sterke chemicaliën kunnen de kunststofdelen
beschadigen.
• Niet onderdompelen in water
• Om het vuil en stof op de ventilator te verwijderen, gebruik een
stofzuiger of een zachte borstel, daarna schoonvegen met een
vochtige doek.
Contacteer onze klantendienst:
ESPAÑOL
Binnenafmetingen: ca. 27cm x 23cm x 37cm of 10.5” x 9” x 14.5”
(BxDxH)
Buitenafmetingen: ca. 35cm x 42,5cm x 48cm of 14” x 16.5” x
19” (BxDxH)
Service
Indien u enige problemen of vragen heeft aangaande het gebruik
van dit product, contacteer alstublieft in eerste instantie uw Exo
Terra® gespecialiseerde kleinhandelaar. De meeste problemen
kunnen in de winkel gemakkelijk opgelost worden. In het
onwaarschijnlijke geval dat dit niet mogelijk is, bezorg het toestel
terug met een geldig aankoopbewijs voor vervanging onder de
twee jaar garantie. Wanneer u telefoneert (e-mailt of schrijft)
vermeld dan al de noodzakelijke informatie zoals modelnummer
en/of onderdeelnummers evenals de aard van het probleem in uw
correspondentie.
ITALIANO
Kenmerken:
Voltage: 12V DC en 220-240V, 50Hz AC ontworpen voor
huishoudelijk gebruik of in de auto.
Voor AC gebruik (huishoudelijk): Sluit één uiteinde aan op de
achterzijde van het toestel en het andere uiteinde in het stopcontact.
Voor DC gebruik (in de wagen): Sluit één uiteinde aan op
de achterzijde van het toestel en het andere uiteinde in de
sigarenaansteker of Aux Stopcontact van uw wagen.
AANVAARDEN GEEN ENKELE schuldvordering voor verlies van
eieren of dieren als gevolg van een slecht functioneren van
het toestel.
NEDERLANDS
Technische Eigenschappen
Energieverbruik:
DC Power: in de koelmodus 55W, in de verwarmingsmodus 55W
AC Power: in de koelmodus 60W, in de verwarmingsmodus 60W
58
60
(Rev. 07/12 EU)
Printed in China