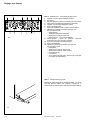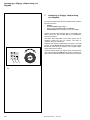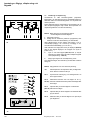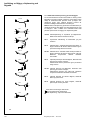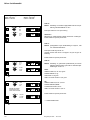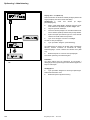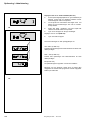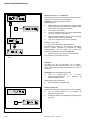
1
geodyna 4300 Bruksanvisning Operation manual Mode d’emploi PV-Hjulbalanseringsmaskin Car wheel balancer Equilibreuse de roues v.t. Hofmann Werkstatt-Technik Innehåll • Säkerhetsföreskrifter, funktion Innehåll Sida 1. Säkerhetsföreskrifter och Funktion . . . . . . . . . . . . . . . . . 2 2. Installation av maskinen . . . . . . . . . . . . . . . . . . . . . . . . . . 8 3. Elektrisk anslutning . . . . . . . . . . . . . . . . . . . . . . . . . . . . . 10 4. Reglage och display . . . . . . . . . . . . . . . . . . . . . . . . . . . . 12 5. Att slå på maskinen . . . . . . . . . . . . . . . . . . . . . . . . . . . . . 16 6. Att montera upp ett hjul på maskinen . . . . . . . . . . . . . . 20 7. Inmatning av fälgtyp, viktplacering och fälgmått . . . . . . . . . . . . . . . . . . . . . . . . . . . . . . . . . . . . . 26 8. Balansering av hjulet . . . . . . . . . . . . . . . . . . . . . . . . . . . . 52 9. Viktsplit – att dölja vikterna bakom ekrarna . . . . . . . . . 60 10. Val av funktionssätt . . . . . . . . . . . . . . . . . . . . . . . . . . . . . 66 11. Felkoder . . . . . . . . . . . . . . . . . . . . . . . . . . . . . . . . . . . . . 80 12. Optimering/viktminimering . . . . . . . . . . . . . . . . . . . . . . . 92 13. Kundkalibrering . . . . . . . . . . . . . . . . . . . . . . . . . . . . . . . 114 14. Underhåll . . . . . . . . . . . . . . . . . . . . . . . . . . . . . . . . . . . . . 116 15. Tekniska Data . . . . . . . . . . . . . . . . . . . . . . . . . . . . . . . . . 116 16. Elschema . . . . . . . . . . . . . . . . . . . . . . . . . . . . . . . . . . . . 118 1. Säkerhetsföreskrifter och funktion 1.1 Tips till läsaren av denna bruksanvisning Några speciella symboler och markeringar har använts i denna manual för att göra det lättare för läsaren att följa med i beskrivningarna: visar var läsaren skall utföra något Säkerhetsföreskrifter visas med grå bakgrund. denna pilformen visar var man skall titta denna pil visar rörelseriktning 1.2 Användningsområde Denna stationära balanseringsmaskin är avsedd för statisk och dynamisk balansering av bil– och lätta lastbilshjul som väger upp till 70 kg samt har en maximal diameter av 950 mm. Dessutom kan man med denna maskin optimera däckets placering på fälgen så att hjulet blir så runt som möjligt och har så lite obalans som möjligt. Denna funktion kallas Optimering och kan användas för att lösa en del svårare problem med hjulen, på extra känsliga bilar till exempel. 2 BA geodyna 4300 – 9512 150 Contents • Safety rules and function Contents Table des matières • Consignes de sécurité et fonctionnement Page Table des matières Page 1. Safety rules and function . . . . . . . . . . . . . . . . . . . . . . . . . 3 1. Consignes de sécurité et fonctionnement . . . . . . . . . . . 3 2. Installation of the machine . . . . . . . . . . . . . . . . . . . . . . . . 9 2. Mise en place de la machine . . . . . . . . . . . . . . . . . . . . . . 9 3. Electrical connection . . . . . . . . . . . . . . . . . . . . . . . . . . . . 11 3. Branchement électrique . . . . . . . . . . . . . . . . . . . . . . . . . 11 4. Controls and displays . . . . . . . . . . . . . . . . . . . . . . . . . . . 13 4. Commandes et afficheurs . . . . . . . . . . . . . . . . . . . . . . . . 13 5. Switching on the machine . . . . . . . . . . . . . . . . . . . . . . . . 17 5. Mise en circuit de la machine . . . . . . . . . . . . . . . . . . . . . 17 6. Clamping the wheel . . . . . . . . . . . . . . . . . . . . . . . . . . . . . 21 6. Serrage de roue . . . . . . . . . . . . . . . . . . . . . . . . . . . . . . . . 21 7. Entry of wheel type, balancing mode and wheel size . . . . . . . . . . . . . . . . . . . . . . . . . . . . . . . . . . . . . 27 7. Entrée du type de roue, du mode d’équilibrage et des dimensions de roue . . . . . . . . . . . . . . . . . . . . . . . 27 8. Balancing the wheel . . . . . . . . . . . . . . . . . . . . . . . . . . . . . 53 8. Equilibrage de roue . . . . . . . . . . . . . . . . . . . . . . . . . . . . . 53 9. Behind-the-spokes placement . . . . . . . . . . . . . . . . . . . . 61 9. Positionnement derrière les rayons . . . . . . . . . . . . . . . . 61 10. Changing the modes of operation . . . . . . . . . . . . . . . . . 67 10. Sélection du mode de fonctionnement . . . . . . . . . . . . . 67 11. Error codes . . . . . . . . . . . . . . . . . . . . . . . . . . . . . . . . . . . . 81 11. Codes d’erreur . . . . . . . . . . . . . . . . . . . . . . . . . . . . . . . . . 81 12. Optimisation / weight minimisation . . . . . . . . . . . . . . . . 93 12. Optimisation / minimisation des masses . . . . . . . . . . . 93 13. Readjustment by the operator . . . . . . . . . . . . . . . . . . . 115 13. Etalonnage par l’opérateur . . . . . . . . . . . . . . . . . . . . . 115 14. Maintenance . . . . . . . . . . . . . . . . . . . . . . . . . . . . . . . . . . 117 14. Entretien . . . . . . . . . . . . . . . . . . . . . . . . . . . . . . . . . . . . . 117 15. Technical data . . . . . . . . . . . . . . . . . . . . . . . . . . . . . . . . . 117 15. Données techniques . . . . . . . . . . . . . . . . . . . . . . . . . . . 117 16. Electrical diagram . . . . . . . . . . . . . . . . . . . . . . . . . . . . . 118 16. Schéma des connexions électriques . . . . . . . . . . . . . 118 1. Safety rules and function 1. 1.1 Special hints for the reader Consignes de sécurité et fonctionnement A few special features were used in this manual to facilitate reading and understanding of pictures and written instructions: 1.1 Conseils pour l’utilisateur signals the operator where to act. Safety rules are highlighted in grey. 1.2 Indices utilisés dans ce mode d’emploi pour faciliter la lecture et la compréhension des illustrations et des instructions écrites: signale à l’opérateur où il doit agir. Les consignes de sécurité sont écrites sur fond gris. Arrow showing where to look Flèche indiquant un point d’intérêt Arrow showing the direction to move Flèche indiquant la direction du mouvement Scope of application The off-the-vehicle wheel balancer is designed for static and/or dynamic balancing of car and light-truck wheels weighing up to 70 kg and having an overall diameter of 950 mm. In addition to conventional balancing operations, irregular running conditions of the wheel caused by geometric deformations of the rims and/or tyres, hence unsmooth ride, can be identified, improved or, if possible, even eliminated. By exact adjustment of the two wheel components relative to each other optimum wheel running conditions or at least balance weight minimisation can be achieved. Operation manual geodyna 4300 – 9512 150 1.2 Domaine d’application L’équilibreuse de roues démontées est conçue pour l’équilibrage dynamique et/ou statique des roues de voitures particulières et de camionnettes d’un poids maximal de 70 kg et d’un diamètre de maximal 950 mm. Outre l’équilibrage conventionnel d’une roue, elle permet aussi d’identifier, d’améliorer ou même d’éliminer une marche irrégulière des roues causée par des imperfections géométriques de jante et/ou de pneu. Une stabilité de marche optimale ou tout au moins une minimisation des masses d’équilibrage est atteinte par un ajustement précis des deux éléments de la roue l’un par rapport à l’autre. Mode d’emploi geodyna 4300 – 9512 150 3 Säkerhetsföreskrifter och funktion Bild 1 översiktsbild Framifrån 1 Display, knappsats och viktfack 2 Hjulskydd 3 Mätarm för avståndet maskin–fälg 4 Axellås via fotpedal 2 bakifrån 5 Huvudbrytare, kraftförsörjning och smältsäkringar 1 3 1.3 Allmänna säkerhetsföreskrifter Endast personal som har tillräcklig kunskap om handhavande av maskinen skall tillåtas använda den. Otillåtna ändringar och modifieringar av maskinen fritar HOFMANN från allt ansvar för eventuell skada på person och utrustning som sker som resultat av detta. Maskinen får ej användas till andra ändamål än de som beskrivs i denna bruksanvisning. Inga säkerhetsanordningar får avlägsnas eller modifieras. I allmänhet måste allt arbete på det elektriska systemet utföras av behörig elektriker och i enlighet med gällande nationella regler och föreskrifter. 4 Generellt sett kan arbete med teknisk utrustning innebära att man utsätts för oförutsedda risker. Användaren skall agera på ett förnuftigt sätt så att dessa potentiellt skadliga situationer inte uppstår. Med detta i beaktande skall följande saker särskilt iakttas: Använd endast passande tillbehör och utrustning. 5 Bär passande skyddsklädsel och använd övrig skyddsutrustning (te.x. skyddsglasögon, hörselskydd och skor med stålhätta). Följ alla instruktioner som tillhandahålls från maskintillverkaren och fälg/däcktillverkarna vid balansering För övriga säkerhetsinstruktioner, se de individuella kapitlen i denna anvisning . 1 4 BA geodyna 4300 – 9512 150 Safety rules and function Fig. 1 View wheel balancer Consignes de sécurité et fonctionnement Fig. 1 Vue d’ensemble de l’équilibreuse de roue Front view 1 Display, key pad, and weight box 2 Wheel guard 3 Gauge arm for distance rim/machine and rim diameter 4 Pedal for main shaft lock Vue d’avant 1 Clavier à touches, afficheurs et compartiments à masses 2 Carter de roue 3 Pige de mesure pour l’écart jante/machine et diamètre de jante 4 Pédale de blocage de l’arbre principal Rear view 5 Mains switch and power supply Vue d’arrière 5 Interrupteur secteur et branchement secteur 1.3 1.3 General safety rules Consignes générales de sécurité Only properly trained and authorised personnel shall be allowed to operate the wheel balancer. La manipulation de cette machine est exclusivement réservée à un personnel dûment formé et autorisé. The machine must not be used except for the scope of application and in the way specified in this manual. La machine doit être utilisée uniquement pour le domaine d’application prévu et manipulée selon ce mode d’emploi. Unauthorised changes and modifications to the machine relieve the manufacturerer from any liability for damages and injuries that might result therefrom. Toute transformation et modification non-autorisées de la machine relève le fabricant de toute responsabilité pour d’éventuels dommages et blessures pouvant en résulter. On no account should safety features be removed or made inoperative. En particulier les dispositifs de sécurité ne doivent être ni enlevés ni mis hors service. In general any work on the electrical system such as fitting of a plug or changing of connections, if necessary, must be carried out by a qualified electrician in line with relevant national standards and the regulations of the local power station. Toute intervention concernant le système électrique, tel montage d’une fiche ou changement de connexions, doit systématiquement être effectuée par un électricien qualifié, suivant les normes nationales relatives et les instructions données par la compagnie d’électricité locale. It should be noted that working with technical equipment may involve an unforeseeable acceptable risk. Therefore the operator should eliminate such dangers in advance by proper and wise behaviour. The following special points should be observed: Use technical equipment for its specified scope of application only. Always use suitable and proper equipment and tools. Follow the instructions, notes and technical data of the machine manufacturer or manufacturer of the wheels to be balanced. Wear suitable protective clothing and accessories (e. g. goggles, safety shoes, helmet). For further safety rules to be observed, please refer to the individual chapters. En règle générale, il faut prendre en considération le fait que des risques imprévisibles peuvent subsister lors de l’utilisation d’équipements techniques. L’utilisateur devrait éliminer ces risques d’emblée en adoptant un comportement prudent et approprié. Règles à observer tout particulièrement: N’utiliser l’équipement technique que pour le domaine d’application prévu. Utiliser toujours des machines, équipements et outils appropriés. Observer les spécifications, les conseils et les données techniques prédéfinies par le constructeur de la machine ou des véhicules à contrôler. Porter des vêtements de protection et utiliser les moyens de protection appropriés (ex: lunettes et casque de protection, chaussures de sécurité). Pour les consignes de sécurité supplémentaires à observer pour le fonctionnement, consulter les chapitres correspondants. Operation manual geodyna 4300 – 9512 150 Mode d’emploi geodyna 4300 – 9512 150 5 Säkerhetsföreskrifter och funktion 1.4 Funktion Display och knappsats Displayen och knappsatsen är placerade på den ergonomiskt utformade frontpanelen. Avståndsmätarm Avståndet mellan maskinen och fälgkanten samt fälgdiameter läses in i maskinen automatiskt genom att man drar ut mätarmen och håller den mot fälgkanten. Det är också möjligt att mata in det manuellt på samma sätt som för fälgbredden och fälgdiametern. Vid fastsättning av klistervikter med mätarmen hjälper denna till att exakt mäta in viktplaceringsläget. Fälgbredd inmatas via knappsatsen samtidigt som hjulet snurras. Viktprogram Man kan får obalansvärdena omräknade på olika sätt beroende på vilken fälgtyp som skall balanceras, plåtfälg, alufälg, lätt lastbilsfälg, PAX eller motorcykelfälg. Obalansmätningen Alla mätvärden samlas in och lagras med det automatiska balanseringsprogrammet. När mätningen är klar bromsas hjulet ned till stillastående automatiskt. Obalansens storlek och läge visas separat för vänster och höger viktläge i displayen samtidigt.. Pedal för låsning av axeln Maskinen har en pedal för att spärra axeln, detta kan vara bra när man skall hålla hjulet i läget “klockan 12” och montera vikterna på hjulet. Denna bromspedal är endast avsedd för att hålla kvar en axel som står stilla, den får absolut inte användas till att bromsa ned ett roterande hjul till stillastående. Lagring av fälgdata i minnesplatser Det finns minnesplatser i maskinen för att lagra fälgdata som används ofta, detta kan spara tid som det annars skulle ta att programmera in uppgifterna varje gång. Det finns plats att lagra upp till 4 olika profiler. Felkoder Om något fel uppstår i maskinen finns det en självdiagnosfunktion som genom olika felkoder kan berätta vad som inte fungerar korrekt. (se § 11. Felkoder). Kundkalibrering Om det krävs flera mätningar för att balansera ett hjul på grund av att viktstorlekarna och vikternas placering måste justeras upprepade gånger, beror detta oftast på att maskinen inte mäter obalansen korrekt. I dessa fall kan användaren själv kalibrera maskinen genom ett självkalibreringsprogram. (se § 13 kundkalibrering). Hjulskydd Maskinen är utrustad med hjulskydd, vilket äer obligtoriskt enligt normer från EU. Obalansmätning kan endast utföras om hjulskyddet är nedfällt Elektroniken i maskinen programmeras via kod C13 så att maskinen startar automatiskt när hjulskyddet fälls ned. 6 BA geodyna 4300 – 9512 150 Safety rules and function 1.4 Description of function Consignes de sécurité et fonctionnement 1.4 Fonctionnement Display and key pad The display and key pad are arranged on the ergonomic front panel. Clavier et afficheurs Le clavier et les afficheurs sont regroupés en une unité placée ergonomiquement sur la machine. Gauge arm for distance and rim diameter Entry of rim diameter and distance between left correction plane and machine is by means of an integrated gauge arm or also via the key pad. In the latter case the relative function key is held pressed while the wheel is rotated to choose the desired inputs and enter them by releasing the function key. Pige de mesure pour l’écart et diamètre de jante Le diamètre de la jante et l’écart entre le plan de correction gauche et la machine sont introduits par l’intermédiaire d’une pige de mesure intégrée ou au moyen du clavier. En cas d’introduction au moyen du clavier, les valeurs souhaitées sont sélectionné quand on tourne la roue, la touche de fonction étant appuyée, pour ensuite être entrées en relâcher la touche,. When fitting adhesive weights with the weight holder, the machine will support the operator in relocating the correction position. En positionnant des masses adhésives avec le porte-masse, la machine aide l’opérateur à retrouver le plan de correction. Rim width is entered via the menu keys and rotation of the wheel. La largeur de la jante est toujours entrée par l’intermédiaire du clavier et en tournant la roue. Balancing mode Readings in different balancing modes (weight position on the rim) can be given on the display, depending on the type of wheel to be balanced (car, light-truck, motorcycle, PAX, steel or alloy rim). Modes d’équilibrage Selon le positionnement des masses sur la jante, l’affichage de balourd peut être sélectionné en fonction du type de roue à équilibrer (voiture tourisme, camionnette, moto, PAX, roue en acier ou en alliage léger). Measuring run and measured values All measurements are taken and stored in one run during the automatic program. On completion of measurement the machine stops automatically and the wheel is slowed down to standstill. Amounts and locations of unbalance are read out separately for each correction plane. Lancée de mesure et valeurs mesurées Toutes les mesures sont effectuées et mises en mémoire en une seule lancée de mesure automatique. La mesure terminée, la machine s’arrête automatiquement et la roue est freinée jusqu’à l’immobilisation. Les valeurs mesurées de grandeur et de position du balourd sont affichées séparément sur les afficheurs correspondants pour chaque plan de correction. Main shaft lock The machines have a pedal-operated main shaft lock which is used to retain the wheel in the correction position so that the balance weights can be fitted. This lock is designed only to facilitate orientation of the wheel and must not be used for braking the main shaft. Blocage de l’arbre principal Les machines sont équipées d’un système de blocage de l’arbre principal à commande par pédale utilisé pour maintenir la roue en position de correction pour permettre de fixer les masses d’équilibrage. Store wheel profiles Wheel profiles permit the storage of values for wheels that are balanced frequently in order to save having to enter the wheel data etc. each time. It is possible to store up to 4 wheel profiles. Mémoriser des profils de roue Les profils de roue permettent de mémoriser les paramètres des roues équilibrées très souvent. Il est possible de mémoriser jusqu’à 4 profils de roue. Error codes Errors in operation or failures in the electronic or mechanical system are signalled via respective error codes (see § 11. Error codes). Codes d’erreurs Toute erreur de manipulation ou tout défaut des systèmes électroniques ou mécaniques sont signalés par des messages d’erreur correspondants (voir § 11. Codes d’erreur). Readjustment by the operator If several measuring runs are necessary to balance a wheel because balance weight size and position have to be adjusted repeatedly, this is often due to insufficient measurement accuracy. In such case the operator has the possibility of readjusting the machine (see § 13. Readjustment by the operator). Etalonnage par l’opérateur S’il faut effectuer plusieurs lancées de mesures afin d’équilibrer une roue, en particulier pour corriger la grandeur et la position de la masse d’équilibrage, ce phénomène sera, dans la plupart des cas, dû à un manque de précision des mesures. Dans ce cas de figure, l’opérateur pourra procéder à un étalonnage (voir § 13. Etalonnage par l’opérateur). Wheel guard A wheel guard with electric interlocking is mandatory for the European Union and is part of the standard equipment. The measuring run may only be started with closed guard. The electronic unit can be programmed via code C13 so that measurement is started by closing of the guard. Carter de roue Dans l’Union Européenne, la loi impose un carter de roue à verrouillage électrique. Ce carter fait partie intégrante de notre équipement standard. La lancée de mesure ne doit être initialisée qu’après la fermeture de ce carter. L’unité électronique peut être programmée moyennant le code C13, de sorte qu’une lancée de mesure soit initialisée à la fermeture du carter. Operation manual geodyna 4300 – 9512 150 Mode d’emploi geodyna 4300 – 9512 150 7 Installation av maskinen 2. 523 190 Installation av maskinen När man väljer installationsplats måste man ta hänsyn till arbetsmiljö och liknande. 49 180 Denna balanseringsmaskin kan installeras på valfritt fast underlag som även är plant. Se till att underlaget klarar belastningen av maskinen, se kapitel 15, tekniska data, för uppgifter om vikt och mått. 736 2 3 ÄÄÄÄ ÄÄÄÄÄ ÄÄÄÄ ÄÄÄ ÄÄ ÄÄ 1 SW 13 4 5 6 8 ÄÄÄÄÄÄ ÄÄÄÄÄÄ ÄÄÄÄÄÄ ÄÄÄÄÄÄ ÄÄÄÄÄÄ ÄÄÄÄÄÄ ÄÄÄÄÄÄ ÄÄÄÄÄÄ ÄÄÄÄÄÄ 2 Det går att bulta fast maskinen i golvet även om det inte är nödvändigt i de flesta fall. För detta ändamål finns tre hål (Bild 2). Använd M10 ankarbult eller liknande. Bild 2 visar de inbördes måtten mellan hålen. Det enda riktiga skälet till att bulta fast den i golvet är om man regelbundet måste balansera mycket tunga hjul, annars kan det vara en nackdel att bulta eftersom om golvet inte är perfekt plant kan man spänna maskinens chassi snett. Utifall detta sker måste en ny grundkalibrering göras på maskinen och detta är inget som omfattas av garantin. Maskinen levereras på pall med en wellpappkartong som skydd. 2.1 Uppackning av maskinen När man packar upp maskinen är det en fördel om två personer hjälps åt. Då blir det enklare att hantera den varsamt OBSERVERA! Det är absolut förbjudet att lyfta och/eller bära maskinen i dess axel eller nav. Detta är skadligt för maskinen och kan resultera i ett trasigt vibrationssystem. Denna typ av skada omfattas ej av fabriksgarantin. Tips När man tar av maskinen från pallen är det viktigt att inte fotpedalen eller dess fäste skadas. Skär av emballagebanden (Bild 3, Pos. 1), och lyft av kartongen(Bild 3, Pos. 2). Lossa de tre bultarna från pallen (med 13mm nyckel) (Bild 4, Pil). Lyft sedan maskinen (ej i balansaxeln) och vrid den 180 grader på pallen (Bild 4). Ställ ner ena sidan av maskinen på golvet (Bild 5). Tippa upp maskinen på kan och drag bort pallen, sätt sedan ned masken helt på golvet (Bild 6). ÉÉÉÉÉÉÉÉÉÉ ÄÄ ÄÄ ÄÄ ÉÉÉÉÉÉÉÉÉÉ Ä ÄÄ ÄÄ ÉÉÉÉÉÉÉÉÉÉ Ä ÄÄ ÄÄ ÉÉÉÉÉÉÉÉÉÉ BA geodyna 4300 – 9512 150 Installation of the machine 2. Installation of the machine Mise en place de la machine 2. Mise en place de la machine When choosing the site, Health and Safety at Work regulations and the regulations on working environment should be taken into account. Pour le choix du site, observer la réglementation en matière de sécurité sur le lieu de travail. The wheel balancer can be installed on any firm and level ground. For the weight and space requirement of the machines refer to § 15., Technical data. For installation on an upper floor, observe permissible load capacity of the floor. L’équilibreuse peut être mise en place sur n’importe quel sol ferme et plan. Pour le poids et l’encombrement des machines, voir § 15., Données techniques. Si elle doit être installée à l’étage, observer la capacité de charge maximale admissible du plancher. It is recommended, though not absolutely necessary, that the machine be secured to the floor. For this purpose three holes (Fig. 2) are provided in the base of the machine by which the latter is fixed on the floor with anchor bolts M10 or suitable dowels. Fig. 2 shows the centre-to-centre distance of the holes. Make sure that the machine has a stable position, i.e. that it is supported on three seatings. If not, ensure three-point contact on ground by inserting appropriate spacers between the floor and machine base. Une fixation de la machine au sol est recommandée mais pas impérative. Trois trous de fixation (Fig. 2) sont prévus à cet effet dans le socle de la machine, par lesquels l’équilibreuse peut être fixée au sol moyennant des boulons d’ancrage M10 ou des chevilles. La Fig. 2 montre la distance de centre à centre des trous de fixation. Veiller à ce que la machine repose parfaitement sur les trois points d’appui. Sinon, insérer des cales d’appui sous la machine pour assurer une stabilité parfaite sur trois points. For ease of transport the wheel balancer is disassembled into the following units and provided with special packing (on pallets): – Machine – Wheel guard Pour le transport, l’équilibreuse est démontée en sous-ensembles et emballée dans une caisse spéciale sur palette. – Machine – Carter de roue 2.1 2.1 Unpacking the machine Déballage de la machine The machine should be unpacked by two persons. Le déballage de la machine devrait être effectué par deux personnes. Note Remarque When unpacking the machine make sure that the pedal fitted on the machine base and the whole pedal assembly is not damaged. Lors du déballage de la machine, veiller à ce que la pédale placée au pied de la machine et le mécanisme de cette pédale ne soient pas endommagés. Cut the strips of the packing (Fig. 3, item 1), lift off the packing, and set aside the wheel guard and the small parts packed in the separate small box (Fig. 3, item 2). Unscrew the three hexagon screws (width across flats 13) which hold the machine on the pallet (Fig. 4, arrow). Couper les feuillards pour cercler l’emballage (Fig. 3, pos. 1), enlever la housse d’emballage vers le haut et mettre de côté le carter de roue et les pièces jointes dans le petit carton (Fig. 3, pos. 2). Lift the machine by tube of the vibratory system and wheel guard arbor and turn around by 180 degrees on the pallet (Fig. 4). Dévisser les écrous hexagonaux (cote sur plats 13) par lesquels la machine est fixée sur la palette (Fig. 4, flèche). Soulever la machine par le tuyau de l’ensemble vibratoire et l’arbre du carter de roue et la tourner de 180° sur la palette (Fig. 4). Basculer alors la machine latéralement sur le sol (Fig. 5). Enlever la palette de dessous la machine et déposer la machine doucement sur le sol (Fig. 6). Then lower one side of the machine laterally on the floor (Fig. 5). Remove the pallet from underneath the machine and gently lower the entire machine onto the floor (Fig. 6). Operation manual geodyna 4300 – 9512 150 Mode d’emploi geodyna 4300 – 9512 150 9 Installation av maskin 1 2.2 Montering av hjulskydd (Bild 7) Sätt fast hjulskyddet(Bild 7, Pos. 1) på axeln (Bild 7, Pos. 2) och passa in hålet i axeln med motsvarande hål i hjulskyddet Sätt in skruven M10 (Bild 7, Pos. 3) med brickan (Bild 7, Pos. 4) underifrån, skruva fast muttern(Bild 7, Pos. 5). Hjulskyddet styr följande funktioner 2 5 – Obalansmätningen startar när hjulskyddet fälls ned (kod C13). – Hjulet bromsas när hjulskyddet öppnas efter obalans– mätningen (kod C5). Dessa inställningar kan ändras antingen permanent när maskinen är påslagen genom ändring av koder (se § 10. val av funktionssätt). 4 3 7 3. Elanslutning Arbete i elektrisk utrustning skall utföras av behörig personal i enlighet med gällande regler och föreskrifter. Standardutrustning och drivmotor till geodyna 4300 är avsedd för anslutning till nät med 1/N/PE eller 2/PE 200–240 Volt, 50/60 Hz. Maskinens anslutningskabel levereras med skyddsjordad stickkontakt av standardtyp. Säkring måste finnas i elförsörjningen innan maskinen. Tröga säkringar 6–16 A eller tröga automatsäkringar ska användas. Se också innehållsförteckningen under Kapitel 16, Elscheman. Det mest aktuella elschemat finns alltid i en ficka inuti maskinhöljet. 10 BA geodyna 4300 – 9512 150 Installation of the machine Mise en place de la machine 2.2 Mounting the wheel guard (Fig. 7) 2.2 Montage du carter de roue (Fig. 7) Slide the wheel guard (Fig. 7, item 1) on the arbor (Fig. 7, item 2) and raise it until the fastening holes of wheel guard and wheel guard arbor coincide. Insert the M10 setscrew (Fig. 7, item 3) with washer (Fig. 7, item 4) from below, and tighten the hexagon nut (Fig. 7, item 5) and washer. Enficher le carter de roue (Fig. 7, pos. 1) sur l’arbre dudit carter (Fig. 7, pos. 2) et tourner jusqu’à ce que les trous de fixation du carter de roue et de l’arbre dudit carter coïncident. Enficher la vis de fixation M10 (Fig. 7, pos. 3) et la rondelle (Fig. 7, pos. 4) de bas en haut, bien serrer l’écrou hexagonal (Fig. 7, pos. 5) et la rondelle. The wheel guard influences the following modes of operation: Le carter de roue influant les modes de fonctionnement suivants: – The measuring run is started by closing the wheel guard (code C13). – La lancée de mesure est démarrée par la fermeture du carter de roue (code C13). – The wheel is braked on lifting the wheel guard during a measuring run (code C5). – La roue est freinée si le carter de roue est soulevé pendant une lancée de mesure (code C5). These modes of operation can be changed either permanently, or only as long as the machine is switched on, by means of codes (see § 10. Changing modes of operation). Ces modes de fonctionnement peuvent être modifiés par codes soit en permanence soit tant que la machine est branchée (voir § 10. Changement de mode de fonctionnement). 3. 3. Electrical connection Branchement électrique In general any work on the electrical system such as fitting of a plug or changing of connections, if necessary, must be carried out by a qualified electrician in line with relevant national standards and the regulations of the local power station. Toute intervention concernant le système électrique, tel montage d’une fiche ou changement de connexions, doit systématiquement être effectuée par un électricien qualifié, suivant les normes nationales relatives et les instructions données par la compagnie d’électricité locale. Standardutrustning och drivmotor till geodyna 980 är avsedd för anslutning till nät med 1/N/PE eller 2/PE 200–240 Volt, 50/60 Hz. L’équipement électrique standard et le moteur d’entraînement d’équilibreuse sont conçus pour le branchement sur un secteur 1/N/PE ou 2/PE AC 50/60 Hz, 200–240 V. Maskinens anslutningskabel levereras med skyddsjordad stickkontakt av standardtyp. Le câble de raccordement de la machine est équipé d’une fiche à contacts de protection (norme européenne CEE 7/ VII). Säkring måste finnas i elförsörjningen innan maskinen. Tröga säkringar 6–16 A eller tröga automatsäkringar ska användas La protection secteur est à la charge du client et doit être effectuée devant le connecteur enfichable par des fusibles à action retardée de 6–16 A ou par des coupe-circuits automatiques à action retardée. Se också innehållsförteckningen under § 16, Elscheman. Det mest aktuella elschemat finns alltid i en ficka inuti maskinhöljet. Le schéma des connexions électriques se trouve au § 16. Schéma des connexions électriques. De plus, un schéma des connexions électriques se trouve dans une enveloppe fixée sous le couvercle du bâti de la machine. Operation manual geodyna 4300 – 9512 150 Mode d’emploi geodyna 4300 – 9512 150 11 Reglage och display 4. 1 2 3 Reglage och display Bild 8 4 1 2 Start Stop 3 4 8 START-knapp Start av obalansmätningen. STOPP-knapp – Avbryter mätningen. – Tar bort en felkod. – Om knappen används för att stoppa inmatningen av ett nytt arbetssätt, väljs det nya automatiskt bort och det gamla bibehålls. Tangentbord med tryckknappar (se Bild 9). Display (se också Bild 10). Bild 9 1 2 1 2 3 g oz C 4 5 6 Översikt Detaljerad bild över knappsatsen OP-knapp – Start av optimeringsmätning. – I opto–ride programmet: Inmatning av ventilläget. Precisions– knapp – Används för att tillfälligt välja visning av viktstorlek 1 grams intervall ( endast när knappen hålls intryckt). – Displayen visar resterande obalans under tröskelvärdet för mindre obalans: Så länge som knappen trycks in visas den exakta vikten under satt tröskelvärde. – För visning av standardbalansering när balanseringssätt Alu 1 till 5 är vald skall precisions– knappen tryckas in och därefter funktionsknappen. Båda knapparna skall hållas intryckta. Obalansen visas då i standardbalanseringsläget och dess fälgsymbol visas på displayen. – I OP och Un–programmen används denna knapp för växlingar mellan olika valmöjligheter. 3 C-knappen – Visar intryckt: Ändrar viktmätningssätt (avläsning i gram eller OZ) När maskinen skall ändra mätmetod ställ in kod C 3. – Lång intryckning: För att spara inställt värde. 4 Funktionsknapp Hjultyp Hjultypen ställs in genom att trycka in knappen samtidigt som hjulet vrides tills vald hjultyp visas. När knappen släpps, lagras värdet. 5 Funktionsknapp Balanseringsmetod (Alu–knapp) Önskad ballanseringsmetod väljs genom att knappen hålls intryckt samtidigt som hjulet vrides. När vald balanseringsmetod visas, släpps knappen och värdet lagras. 6 Funktionsknapp för att välja mätning med dynamisk eller statisk mätmetod (S/D–Knapp) 7 Funktionsknappar för fälgmått Avståndet maskin– fälg, fälgdiameter och fälgbredd. 7 9 12 BA geodyna 4300 – 9512 150 Controls and displays 4. Controls and displays Fig. 8 1 2 3 4 2 3 Overview START key Start a measuring run STOP key – Interrupt the measuring run. – Delete an error code – If input of a mode of operation is completed with the STOP key, the new state is deselected automatically and the former state is re-established. Key pad with function keys (see Fig. 9) Display (see Fig. 10) Fig. 9 1 Commandes et afficheurs Detailed view of key pad with function keys OP key – Start an optimisation run. – In the opto-ride program: enter valve position. Precision key – Show amount reading with higher resolution: 1 gramme instead of 5 grammes or 0.05 oz instead of 0.25 oz (only for as long as the key is pressed) – Display residual wheel unbalance below the threshold for suppression of minor unbalance readings: As long as the key is pressed the suppression of minor unbalance readings is switched off and the actual unbalance in the wheel is read out. – Display unbalance for standard balancing mode: if balancing mode Alu 1 to Alu 5 is selected, press and hold the precision key and then press the function key for balancing mode. The unbalance readings switch over to those for standard balancing mode and the relative rim symbol appears. – In the OP and Un programs the precision key serves as change-over key. C key – Pressed briefly: Switches over the weight unit for unbalance readings (grammes or ounces). When the machine is switched on the weight unit set with code C3 is active. – Pressed longer: Switches to changing modes of operation. 4 Function key for wheel type The desired wheel type is chosen by keeping this key pressed and rotating the wheel. When the key is released, the input is stored. 5 Function key for balancing mode (Alu key) The desired balancing mode is chosen by keeping this key pressed and rotating the wheel. When the key is released, the input is stored. 6 Function key to select display of dynamic or static unbalance (S/D key). 7 Function keys for rim width, rim diameter and distance rim/machine. Operation manual geodyna 4300 – 9512 150 4. Commandes et afficheurs Fig. 8 1 2 3 4 Vue d’ensemble Touche START Initialiser une lancée de mesure Touche STOP – Interrompre la lancée de mesure. – Effacer un code d’erreur affiché – Si l’entrée d’un mode de fonctionnement est achevée par la touche STOP, le nouvel état est annulé automatiquement et l’état préalable est rétabli. Clavier avec touches de fonction (voir Fig. 9) Afficheurs (voir Fig. 10) Fig. 9 Clavier avec touches de fonction 1 Touche OP – Initialiser une lancée d’optimisation. – Dans le programme d’optimisation: mémoriser la position de la valve. 2 Touche de précision – Afficher grandeur de balourd avec une résolution plus élevée: 1 g au lieu de 5 g ou 0,05 oz au lieu de 0,25 oz (seulement tant que la touche est maintenue appuyée). – Afficher le balourd résiduel en-deça de la valeur-seuil pour la suppression des faibles balourds: Tant que la touche est maintenue appuyée, la suppression de faibles balourds est déactivée et le balourd réellement existant est affiché. – Afficher le balourd pour mode d’équilibrage standard: Si un mode d’équilibrage de Alu 1 à Alu 5 est sélectionné, appuyer sur la touche de précision et la maintenir appuyée, pour ensuite appuyer sur la touche de fonction pour mode d’équilibrage. La grandeur du balourd et le symbole de jante pour mode d’équilibrage standard sont alors affichés. – Dans les programmes OP et Un, la touche de précision sert de commutateur. 3 Touche C – Si on appuie brièvement: Commutation de l’unité d’affichage de grandeur de balourd (en grammes ou onces). L’unité de masse sélectionnée par le code C3 est utilisée quand on branche la machine. – Si on appuie longuement: Commutation au mode de sélection des modes de fonctionnement. 4 Touche de fonction pour type de roue Le type de roue souhaité est sélectionné en appuyant sur cette touche et en tournant la roue simultanément. Quand on relâche la touche, l’entrée est mise en mémoire. 5 Touche de fonction pour mode d’équilibrage (touche Alu) Le mode d’équilibrage souhaité est sélectionné en appuyant sur cette touche et en tournant la roue simultanément. Quand on relâche la touche, l’entrée est memorisé. 6 Touche de fonction pour commuter entre affichage du balourd statique et dynamique (touche S/D). 7 Touches de fonction pour largeur et diamètre de jante et écart entre machine et jante. Mode d’emploi geodyna 4300 – 9512 150 13 Reglage och display 1 2 3 4 2 5 Bild 10 Displayfönster – visar alla tillgängliga tecken 1 2 3 4 5 6 7 8 12 10 11 10 9 8 7 6 Lägespil, visar det vänstra viktlägets position OK-visning Optimeringssymbol, visas när optimering rekommenderas Fälgsymbol med tillgängliga viktplaceringsalternativ Lägespil, visar det högra viktlägets position Symbol för fälgidameter Symbol för avståndet mellan maskin–vänster fälgkant Siffervisning (tresiffrig) för obalans på höger sida Här visas bland annat: – Fälgdiametern – Avståndsmåttet (alltid i millimeter) – Obalansens storlek för höger sida – Olika funktions– och eventuella felkoder 9 START-Symbol – Visas när maskinen uppmanar användaren att trycka på START–knappen 10 Symbol för genomförd navkompensering 11 Symbol för fälgbredd 12 Siffervisning (tresiffrig) för obalans på höger sida Här visas bland annat: – Fälgbredden – Obalansens storlek för vänster sida – Obalansens storlek för statisk obalans – Informationstexter – C-Funktioner – Val av viktplaceringsprogram i klartext (när mantrycker in knappen för viktplacering) Bild 11 Pedal för låsning av axeln Pedalen får endast användas för att låsa fast hjulet, t.ex när en vikt skall placeras lodrätt över hjulaxeln. Pedalen får ej användas för att bromsa hjulet under eller efter balansmätning. 11 14 BA geodyna 4300 – 9512 150 Controls and displays Commandes et afficheurs Fig. 10 Display panel – display and operator prompts for various operations Fig. 10 Panneau d’affichage – afficheurs et symboles de guidage pour les différentes opérations 1 2 3 4 5 6 7 8 Direction indicator of left correction plane OK indicators of left and right correction planes OP symbol – request to carry out an optimisation run Rim symbol and possible weight fitting positions Direction indicator of right correction plane Symbol of rim diameter Symbol for distance machine / left correction plane Digital display (three digits) of right correction plane to show – rim diameter – distance rim / machine (always in mm) – amount of unbalance of right correction plane – state of modes of operation or preset limit values 9 Symbol for START key – is shown when measuring run is to be started using the START key 10 Symbol of completed compensation run 11 Symbol of rim width 12 Digital display (three digits) of left correction plane to show – rim width – amount of unbalance of left correction plane – amount of static unbalance – error codes – C codes – balancing mode in plain language (upon operation of Alu key) and during acceleration up to the measuring run. 1 2 3 Fig. 11 Pedal of main shaft lock Fig. 11 Pédale de dispositif de blocage de l’arbre principal The main shaft is locked when the pedal is depressed. This will facilitate tightening or untightening of the clamping nut, as well as retaining the wheel in correction position for correct fitting of the balance weights. L’arbre principal est bloqué quand la pédale est actionnée. Cela permet de serrer ou de desserrer l’écrou de serrage plus facilement et de maintenir la roue en position de correction pour une mise en place correcte des masses d’équilibrage. This lock is designed only to facilitate orientation of the wheel and must not be used for braking the main shaft. Ce système de blocage n’est qu’une aide de positionnement et ne doit pas être utilisé pour freiner l’arbre principal. Operation manual geodyna 4300 – 9512 150 Indicateur de direction du plan de correction gauche Indicateurs OK des plans de correction gauche et droit Symbole OP – invitation à effectuer une lancée d’optimisation 4 Symbole de jante et positions possibles de fixation des masses 5 Indicateur de direction du plan de correction droit 6 Symbole du diamètre de jante 7 Symbole d’écart entre machine et plan de correction gauche 8 Afficheur numérique (à trois chiffres) du plan de correction droit avec affichage de: – diamètre de jante – écart jante / machine (toujours en mm) – grandeur de balourd du plan de correction droit – états des modes de fonctionnement ou valeurs limite préréglées 9 Symbole de la touche START – s’allume quand la lancée de mesure doit être initialisée moyennant la touche START 10 Symbole de lancée de compensation achevée 11 Symbole de largeur de jante 12 Afficheur numérique (à trois chiffres) du plan de correction gauche avec affichage de: – largeur de jante – grandeur du balourd du plan de correction gauche – grandeur du balourd statique – codes d’erreur – fonctions C – mode d’équilibrage en langage clair (la touche Alu étant actionnée) et pendant la phase d’accélération pour la lancée de mesure. Mode d’emploi geodyna 4300 – 9512 150 15 Att slå på maskinen 5. Att slå på maskinen När man slår på maskinen med knappen (Bild 12, Pos. 1) genomför elektroniken en självtest. När denna självtest är slutförd utan att något fel påträffats spelar maskinen upp en tre–tons ljudsignal, sedan visas helt kort mjukvaruversionen och OK i displayen. Därefter visas de förinställda standardfälgsdimensionerna på höger och vänster sida. Under det att maskinen genomför dessa självtester får man inte röra maskinen överhuvudtaget eller utsätta den för några vibrationer. 1 Standardinställningar när maskinen slås på Elektroniken är programmerad på följande sätt: 12 – Fälgtyp 1 (Personbilshjul med mått i tum, Bredd 6,5 och diameter 15,0) – Inmatning av fälgstorlek i tum (inch) – Obalansen visas avrundad till närmaste 5 gram – Avrundning av mindre obalanser (under 4,5g) till noll – Automatisk inbromsning av hjulet när hjulskyddet öppnas – Ingen navkompensering – Start av mätning genom att trycka på START–knappen Eventuella felkoder vid påslag Om en felkod visas vid påslag skall man först och främst anteckna detta på ett papper och sedan bekräfta genom att trycka på STOP–knappen. Om inga fler felkoder visas spelar maskinen en tre–tons ljudsignal. Följande felkoder kan visas vid påslag (litet urval): E900 – Bild 13 Okänd maskinmodell. E901 – Bild 14 Maskinen är inte grundkaliberad. 13 E89 – Bild 15 En tryckknapp har fastnat. 14 Ta reda på vilken knapp som fastnat och åtgärda felet. Kontakta service om felet kvarstår. 15 16 BA geodyna 4300 – 9512 150 Switching on the machine 5. Switching on the machine When switched on by the mains switch (Fig. 12, item 1) the electronic unit performs a number of self-tests. On successful completion of these tests a melodious three-tone signal is given. OK is read out on the displays, and the code number of the program version is briefly viewed on the display; then both displays show wheel dimensions which were entered before and are still stored in the electronic memory. As long as the machine is carrying out the self-tests, no inputs and no other operations whatsoever must be made. During this starting phase the machine must not be subjected to even the slightest vibration. Mise en circuit de la machine 5. Mise en circuit de la machine Après la mise en circuit de la machine moyennant l’interrupteur secteur (Fig. 12, pos. 1), l’unité électronique exécute un certain nombre d’autocontrôles. Quand ces derniers sont achevés, un signal mélodieux se fait entendre, OK apparaît sur les afficheurs et le code de la version du programme actuel est visualisé brièvement sur l’afficheur. Puis les deux afficheurs affichent les dimensions de roue qui ont été entrées auparavant et qui sont encore mémorisées. Pendant que la machine exécute les autocontrôles, aucune entrée ni aucune opération quelconque ne doit être effectuée. Pendant cette phase de mise en circuit, la machine ne doit pas être soumise à la moindre vibration. Status at switching on Etat à la mise en circuit The electronic unit is factory-adjusted to the following modes of operation, which are available after switching on: L’unité électronique est programmée par le fabricant de façon que les modes de fonctionnement suivants soient disponibles après la mise en circuit: – wheel type 1 (car wheel with nominal dimensions in inches, width 6.5 and diameter 15.0) – entry of rim data in inches – display of amount of unbalance in 5-g increments – suppression of minor unbalance readings (limit set to 3.5 g) – automatic braking of wheel when guard is opened during the measuring run – compensation of adaptor unbalance switched off – start of measuring run by START key only – type de roue 1 (roue de voiture tourisme avec dimensions nominales en pouces, largeur 6,5 et diamètre 15,0) – entrée des dimensions de jante en pouces (inch) – affichage du balourd en échelons de 5 g – suppression de l’affichage de faibles balourds (limite réglée à 3,5 g) – freinage automatique de la roue si on ouvre le carter pendant la lancée de mesure – compensation du balourd du moyen de serrage débranché – lancée de la mesure seulement par la touche START Error codes at power on Messages d’erreur lors de la mise en circuit If an error code occurs it must be acknowledged by pressing the STOP key. No audible signal is given. Si un message d’erreur est affiché, le confirmer en appuyant sur la touche STOP. Les trois signaux acoustiques ne retentissent pas. The following malfunction codes may occur at power–on: Les erreurs suivantes du fonctionnement peuvent survenir lors de la mise en circuit: E900 – Fig. 13 E900 – Fig. 13 Unknown machine model. Le modèle de machine mémorisé n’est pas connu. E901 – Fig. 14 E901 – Fig. 14 The machine is not calibrated. La machine n’a pas été étalonnée. E89 – Fig. 15 E89 – Fig. 15 A key is jammed at power–on. Une touche s’est coincée avant de la mise en circuit. Find and release the jammed key, call service if necessary. Operation manual geodyna 4300 – 9512 150 Chercher la touche et la débloquer ; le cas échéant, appeler le service après–vente. Mode d’emploi geodyna 4300 – 9512 150 17 Att slå på maskinen H82 – Bild 16 16 Maskinen har utsatts för skakningar medan den har startat upp (till exempel genom att ta i axeln eller rulla hjulet). Felkoden visas under 3 sekunder, och sedan startar självtesten om igen (max. 10 gånger) om den inte avbryts med STOP–knappen. E3 – Bild 17 Avståndsmätarmen ligger inte i sitt hemmaläge. 17 Lägg mätarmen i sitt hemmaläge och gå vidare genom att trycka på STOP–knappen. E92 – Bild 18 Avståndsmätarmen var vid andra försöket fortfarande inte i sitt hemmaläge. Vänta 5 sekunder eller gå vidare med STOP–knappen. 18 E145 – Bild 19 Innehållet i de båda permanenta minnesbankerna är olika (men innehåller båda giltiga data). Kontakta service. 19 Allvarliga felkoder Självtestprogrammet har upptäckt ett fel av något slag och visar koden för felet i displayen. Felkoder är uppbyggda av en bokstav och två eller tre siffror C10 800 – Bild 20 Nätspänningen är under 170 volt. Balansering är möjligt så länge motorn orkar driva hjulet i korrekt mäthastighet. Det finns en risk för att de inställda fälgdimensionerna tappas ur minnet. Kontrollera spänningen i vägguttaget. Om det krävs kan en transformator (Mat.-Nr. 6705 902) användas för att ge maskinen mellan 200–240 volt. 20 C10 801 – Bild 21 Nätspänningen är över 265 volt. Elektroniken i maskinen riskerar att skadas! 21 Om det krävs kan en transformator (Mat.-Nr. 6705 902) användas för att ge maskinen mellan 200–240 volt. C10 804 – Bild 22 Nätspänningen är över 275 volt. Elektroniken i maskinen riskerar att skadas! Om maskinen används trots att denna felkod visas gäller inte maskinens fabriksgaranti vid skada. Slå av maskinen! Kontrollera spänningen i vägguttaget. Om det krävs kan en transformator (Mat.-Nr. 6705 902) användas för att ge maskinen mellan 200–240 volt. 22 18 BA geodyna 4300 – 9512 150 Switching on the machine Mise en circuit de la machine H82 – Fig. 17 H82 – Fig. 17 The self–test was disturbed (e.g. by rotating the wheel). The message is displayed for 3 seconds, after which the measurement is repeated (max. 10 times), or aborted by pressing the STOP key. Défaut pendant l’auto–contrôle (p. ex. parce que la roue a été tournée). Le message est affiché pendant 3 secondes, après cela, la mesure se répète (10 fois maximum), ou bien abandonner en appuyant sur la touche STOP. E3 – Fig. 17 E3 – Fig. 17 Gauge arm for distance and rim diameter is not in home position. La pige de mesure pour écart et diamètre de jante n‘est pas en position de repos. Move gauge arm to its home position. Press the STOP key. Mettre la pige de mesure en position de repos. Appuyer sur la touche STOP. E92 – Fig. 18 E92 – Fig. 18 During the second attempt the gauge arm for distance and rim diameter was still not in the home position. The gauge arm is rendered inoperative. La pige de mesure de l’écart et diamètre de jante n’a pas atteint sa position de repos même lors du 2e essai. Ladite pige est déconnectée. Wait 3 seconds, or press the STOP key to continue. Attendre 3 secondes, ou appuyer sur la touche STOP pour continuer. E145 – Fig. 19 E145 – Fig. 19 The contents of both permanent memories are different (but both contain valid data). Les contenus des deux mémoires permanentes sont différents, lesdites mémoires contenant tout de même des données valables. Fatal error codes Messages d’erreurs fatales The self–test program has detected an error and displays a alphanumeric code consisting of six digits and/or letters. Le programme d’auto–contrôle a détecté une erreur et affiche un code à 6 chiffres et/ou lettres. C10 800 – Fig. 20 C10 800 – Fig. 20 Line voltage under 170 V. Balancing is feasible if the motor can drive the main shaft to the measuring speed. Wheel data may be lost. Tension de secteur inférieure à 170 V. Equilibrage possible si le moteur peut entraîner l’arbre principal jusqu’à la vitesse de mesure. Des données de roue peuvent être perdues. Bring the line voltage to within a range of 200 – 230 – 240 Volts with an input transformer (ref. 6705 902). Amener la tension de secteur dans la plage de 200 – 230 – 240 V à l’aide du transformateur d’entrée (réf. 6705 902). C10 801 – Fig. 21 Line voltage over 265 V. Damage to the electronic unit of the machine is likely! Bring the line voltage to within a range of 200 – 230 – 240 Volts with an input transformer (ref. 6705 902). C10 801 – Fig. 21 Tension de secteur supérieure à 265 V. L’unité électronique de la machine est en danger! C10 804 – Fig. 22 Line voltage over 275 V. Damage to the electronic unit of the machine is likely! Turn off mains switch! Any damage resulting from repeated occurrence of this error code is not covered by the guarantee. Bring the line voltage to within a range of 200 – 230 – 240 Volts with an input transformer (ref. 6705 902). C10 804 – Fig. 22 Tension de secteur supérieure à 275 V. L’unité électronique de la machine est en danger! Déclencher l’interrupteur secteur! Tout endommagement causé alors que ce message est à nouveau affiché n’est pas couvert par la garantie. Operation manual geodyna 4300 – 9512 150 Amener la tension de secteur dans la plage de 200 – 230 – 240 V à l’aide du transformateur d’entrée (réf. 6705 902). Amener la tension de secteur dans la plage de 200 – 230 – 240 V à l’aide du transformateur d’entrée (réf. 6705 902). Mode d’emploi geodyna 4300 – 9512 150 19 Att montera upp ett hjul på maskinen 6. Att montera upp ett hjul på maskinen Många fordonstillverkare anger i sin tekniska dokumentation hur de avser att hjulen skall centreras vid balansering. Det kan handla om centrering på bulthålen eller med centrumkona. Använd alltid det rekommenderade sättet att spänna fast hjulen, välj bland tillbehörsnaven i Hofmanns kompletta program för att skräddarsy din samling av nav. Tips Endast nav som är gjorda för denna maskin får användas. På grund av den tekniska utvecklingen kan det inträffa att gamla nav som är avsedda att passa på äldre Hofmann–maskiner inte längre passar på denna maskin. Nav som går att montera på maskinen kan som regel också användas. För ytterligare information om tillbehörsnav och hur man använder dessa hänvisas till eventuell dokumentation som kan medfölja dessa. 6.1 Montering av det medföljande konnavet Under transporten är konnavet ej monterat utan skickas separat i en kartong som medföljer maskinen. 2 1 För att kunna balansera ett hjul i balanseringsmaskinen krävs att man har ett passande nav på axeln. Detta nav måste vara utan defekter och så rent som möjligt, för att det slutliga balanseringsresultatet skall bli så bra som möljigt. Kom ihåg! –med ett defekt nav på maskinen är det lika bra att låta bli att balansera hjulet. 3 Bild 23 Montering av konnav 23.1 1 2 23.1 Konnavet MZV–4 är avsett för att centrera med en centrumkona i fälgens hål. 23.2 Universialnaven (även kallade “fransknav”) USV och SCA är främst avsedda för fälgar som saknar centrumhål och där man måste spänna upp i bulthålen. 3 1 2 3 Huvudaxelns koniska fattning Navkropp Monteringsbult (insexbult för 14 mm nyckel) Innan montering av nav skall den koniska änden Bild 23, Pos. 1) på huvudaxeln och motsvarande del på navet rengöras noggrant. Sätt fast navet på maskinens axel (Bild 23, Pos. 2) och se till att styrbulten på axeln passas in i urtaget på navet. Sätt fast navet på maskinens axel (Bild 23, Pos. 3). 23.2 23 20 BA geodyna 4300 – 9512 150 Clamping the wheel 6. Clamping the wheel Serrage de roue 6. Serrage de roue In their technical documentation many motor-vehicle manufacturers specify the kind of wheel mounting on the vehicle (centre bore, or stud location). The required clamping and centring means have to be selected among the different versions available. Dans leur documentation technique, de nombreux fabricants d’automobiles précisent le mode de fixation des roues sur le véhicule (centrage par trou central ou par boulons). Les moyens de serrage et de centrage doivent être choisis en conséquence parmi les différentes versions disponibles. Note Remarque Please note that only such clamping and centring means that fit properly on the machine and are designed for use on it are used. In order to keep pace with technical progress, machines or clamping and centring means might undergo design revisions so that newer versions of clamping and centring means may not be compatible with existing machines, or older versions not compatible with new machines. Veiller à n’utiliser que les moyens de serrage et de centrage qui sont conçus et prévus pour la machine. Vu le progrès technologique constant dans le domaine des machines et des moyens de serrage et de centrage, il se peut que les anciens moyens de serrage et de centrage ne puissent plus être utilisés sur une nouvelle machine ou que les nouveaux moyens de serrage et de centrage ne puissent pas être utilisés sur les machines existantes. The application and handling of the proper clamping and centring means is described in the literature given separately for each device (survey on clamping means, operation manuals for the different clamping means). 6.1 Fitting the wheel adaptor on the main shaft To facilitate transport, the wheel adaptor is supplied detached from the balancer. It is inside the machine packing and has to be mounted by the user on site. To clamp a wheel on the balancer an appropriate clamping adaptor has to be fitted on the main shaft. Only correctly mounted, mechanically perfect and clean clamping means are capable of ensuring maximum balancing accuracy. Pour les moyens de serrage et de centrage corrects, leur application et leur manipulation, consulter la littérature disponible pour chaque moyen de serrage et de centrage (synoptique des moyens de serrage, modes d’emploi des différents moyens de serrage). 6.1 Montage du moyen de serrage et de centrage sur l’arbre principal Pour faciliter le transport, le moyen de serrage des roues n’est pas encore monté sur la machine à sa livraison. Il y est joint et doit être monté sur place par l’utilisateur. Pour pouvoir serrer une roue sur la machine, un moyen de serrage approprié doit être fixé sur l’arbre principal. Seuls les moyens de serrage correctement fixés, mécaniquement impeccables et propres sont à même d’assurer une précision d’équilibrage maximum. Fig. 23 Fitting the wheel adaptor Fig. 23 Montage du moyen de serrage 23.1 MZV-4 cone adaptor for rims with centre bore location, or at least sufficiently accurate centre bore. Various accessories are available for this wheel adaptor. 23.1 Cône de serrage MZV-4 pour les jantes à centrage par trou central, ou au moins avec un trou central suffisamment exact. Il existe divers accessoires pour ce moyen de serrage. 23.2 USV and SCA universal adaptors for closed rims, or for stud hole located rims. Various accessories are available for this wheel adaptor. 23.2 Moyens de serrage universel USV et SCA pour les jantes fermées ou les jantes à centrage par boulons. Il existe divers accessoires pour ces moyens de serrage. 1 2 3 Cone of the main shaft Basic body of the wheel adaptor Fastening screw (width across flats 14 mm) Before fitting the wheel adaptor clean the cone of the main shaft (Fig. 23, item 1) and the inner cone of the wheel adaptor. Slide the wheel adaptor onto the cone of the main shaft so that the head of the hexagon socket head cap screw attached to the end of the cone engages with one of the recesses in the basic body of the adaptor (Fig. 23, item 2). Tighten the wheel adaptor using the fastening screw (Fig. 23, item 3). Operation manual geodyna 4300 – 9512 150 1 2 3 Cône de l’arbre principal Corps de base du moyen de serrage Vis de fixation à six pans creux (cote sur plats 14 mm) Avant de fixer le moyen de serrage de la roue, nettoyer le cône de l’arbre principal (Fig. 23, pos. 1) et le cône intérieur du moyen de serrage. Faire glisser le moyen de serrage sur le cône de l’arbre principal de sorte que la tête de la vis à tête cylindrique insérée au fond du cône s’engage dans un des évidements dans le corps de base (Fig. 23, pos. 2). Serrer le moyen de serrage moyennant la vis de fixation (Fig. 23, pos. 3). Mode d’emploi geodyna 4300 – 9512 150 21 Att montera upp ett hjul på maskinen 6.2 Navkompensering Alla uppspänningsanordningar är balanserade inom en viss tolerans när de lämnar fabriken. För att kompensera för eventuell restobalans i navet rekommenderas det (främst för tillbehörsnav, inte i första hand originalnavet) att man utför en elektrisk nollställning av maskinens axel inklusive nav. Denna kompensering gör man i sådant fall varje gång maskinen slås på och när man byter nav på maskinen. Kompenseringen finns kvar i minnet tills att man, endera slår av maskinen, påbörjar en optimering eller tar bort kompenseringen med koden här nedan igen (se § 10, funktionskoder) Tryck på och håll ned C–knappen (Fig 9, Pos. 3). Snurra sedan hjulet framåt sakta tills det står C 4 på displayen. Släpp sedan upp knappen. När kompenseringen är färdig (tar dubbelt så lång tid som vanlig mätning) står det C4 på vänstra, och ”1” på högra sidan av displayen (Bild 10, Pos. 10). Symbolen för navkompensering visas också längst ner i mitten av displayen. När man byter nav på maskinen: Slå av/på maskinen och gör om navkompenseringen. eller Ta bort kod C 4 genom att först trycka in C–knappen och rulla axeln till “C4”. Släpp sedan upp C–knappen och tryck på precisionsknappen (Bild 9, Pos. 2) och snurra hjulet bakåt tills det står ”0” på displayens högra sida. 6.3 Fastspänning av fälg (PV & lätt last) Notera Läs av fälgbredden på fälgen innan den spänns fast i maskinen (såvida inte en separat fälgbreddsmätare finns, tillbehör). Vid fastdragning av hjulet får man inte bruka våld på navratten. Det betyder att man inte ska slå på den med en slägga till exempel. ÉÉÉ ÉÉÉ ÉÉÉ ÉÉÉ ÉÉÉ ÉÉÉ ÉÉÉ 1 2 Innan fastspänning skall man se till att navets uppspänningsyta och fälgens baksida är ren. Hjälp till att lyfta upp fälgen på konan vid fastspänning för att uppnå bästa möjliga centrering. Bild 24 Konnav för centrering på fälgars centrumhål 1 2 3 Centreringskona Fälg Tryckkåpa med snabbnavsratt 3 24 22 BA geodyna 4300 – 9512 150 Clamping the wheel 6.2 Performing a compensation run Serrage de roue 6.2 Exécution d’une lancée de compensation All clamping and centring means are balanced in our works to within a certain tolerance. Tous les moyens de serrage et de centrage sont équilibrés par le fabricant dans une certaine tolérance admissible. To compensate for any residual unbalance that might be left in the clamping means, it is recommended that an electrical compensation run be performed (also see § 10. – „Changing modes of operation“). This mode cannot be transferred into the permanent memory. Afin de compenser d’éventuels balourds résiduels dans le moyen de serrage, il est recommandé d’effectuer une lancée de compensation électrique (voir également § 10., sélection des modes de fonctionnement). Ce mode ne peut pas être transféré dans la mémoire permanente. This mode of operation is retained until deleted via code C4, by starting an optimisation run or readjustment, or by switching off the machine. Ce mode de fonctionnement est efficace jusqu’à ce qu’il soit effacé moyennant le code C4, qu’une lancée d’optimisation ou un étalonnage soit initialisé ou la machine débranchée. Press and hold the C key (Fig. 9, item 3) and rotate the main shaft to set C4 in the display. Press the START key. Appuyer sur la touche C (Fig. 9, pos. 3), la maintenir appuyée et tourner l’arbre principal pour régler C4 sur l’afficheur. Appuyer sur la touche START. The compensation run takes longer than a regular measuring run. Once the compensation run is completed, C4 is read out in the left display, 1 is read out in the right display, and the symbol for compensation (Fig. 10, item 10) appears in the middle. When another clamping means is used: Repeat the compensation run La lancée de compensation dure plus longtemps qu’une lancée de mesure. La lancée de compensation achevée, C4 est affiché sur l’affichage gauche, 1 est affiché sur l’afficheur droit ainsi que le symbole de compensation (Fig. 10, pos. 10) au milieu. Si un autre moyen de serrage est utilisé: or cancel compensation by pressing and holding the precision key (Fig. 9, item 2) and rotating the wheel. répéter la lancée de compensation ou In the right display, 0 is read out. appuyer sur la touche de précision (Fig. 9, pos. 2) et la maintenir appuyée et tourner la roue supprimant ainsi la compensation. Sur l’afficheur droit, 0 est affiché. 6.3 6.3 Clamping car and light-truck wheels Serrage de roue (voitures tourisme et camionnettes) Remarques Notes Before clamping the wheel read the rim width from the rim or tyre. If the rim diameter is not to be determined using the gauge arm for distance and diameter but entered manually, also read the rim diameter prior to clamping the wheel. When using cone adaptors, the clamping nut should never be tightened using a hammer or similar object. Before clamping the wheel make sure the contact surfaces on wheel adaptor and rim are free from dirt and grease. Clamp the wheel depending on the adaptor used, making sure that it is exactly centred and securely clamped. Fig. 24 Cone adaptor to clamp centre bore located wheels 1 2 3 Cone Rim Clamping head with clamping nut Operation manual geodyna 4300 – 9512 150 Lire la largeur de jante sur la jante ou sur le pneu avant de serrer la roue. Si le diamètre de jante ne doit pas être saisi par l’intermédiaire de la pige de mesure pour l’écart et diamètre, mais est entré manuellement, lire le diamètre de jante également avant de serrer la roue. En cas d’utilisation d’un cône de centrage par trou central, ne jamais serrer l’écrou de serrage à l’aide d’un marteau ou d’un outil semblable. Avant le serrage d’une roue, veiller à ce que les surfaces de contact du corps de base du moyen de serrage et de la jante soient exemptes de graisse et propres. Serrer la roue en fonction du moyen de serrage utilisé, en veillant à ce qu’elle soit exactement centrée et suffisamment serrée. Fig. 24 Cône de serrage pour roues centrées par le trou central 1 2 3 Cône Jante Tête de serrage avec écrou de serrage Mode d’emploi geodyna 4300 – 9512 150 23 Att montera upp ett hjul på maskinen 1 2 3 Bild 25 Universialnav för uppspänning av fälgar som saknar hål i dess centrum. Det är även möjligt att använda detta nav till fälgar med centrumhål (men inte särskilt praktiskt). 1 2 3 4 5 Fälgar med centrumhål (centrumcentrering) Snabbmuttrar Centreringsring för fälgar med centrumhål Centreringsring för slutna fälgar med centreringsfläns Slutna fälgar utan centrumhål 4 5 25 24 BA geodyna 4300 – 9512 150 Clamping the wheel Serrage de roue Fig. 25 Universal clamping adaptor for clamping stud hole located wheels or wheels with closed rim. This clamping adaptor is also capable of clamping centre bore located wheels when suitable centring rings (optional extra) are used. Fig. 25 Moyen de serrage universel pour les roues à jante fermée ou les roues centrées par des boulons. Ce moyen se prête également pour les roues centrées par trou central si les anneaux de centrage appropriés (accessoires) sont utilisés. 1 2 3 4 5 1 2 3 Rim with centre bore (centre bore location) Quick-clamping nut Centring ring for centre bore located wheels Centring ring for closed rims with centring recess Closed rim 4 5 Operation manual geodyna 4300 – 9512 150 Jante à trou central (serrage par trou central) Ecrou à serrage rapide Anneau de centrage pour les jantes centrées par trou central Anneau de centrage pour jantes fermées à assise de centrage Jante fermée Mode d’emploi geodyna 4300 – 9512 150 25 Inmatning av fälgtyp, viktplacering och fälgmått 7. Inmatning av fälgtyp, viktplacering och fälgmått För att kunna bestämma obalansens storlek behöver maskinen följande information: – Fälgtyp – Önskad viktplacering på fälgen – Fälgens mått (nominell bredd und diameter) – Avståndsmått mellan maskinen och vänster viktläge Fälgens bredd står oftast på fälgen (På en standardfälg i tum eller mm, på ett TD– eller TRX–hjul alltid i mm.). Fälgdiametern står oftast på däcket. Kontrollera alltid fälgbredden innan hjulet spänns fast på maskinen (måttet står ofta runt centrum, som täcks av navratten när hjulet är fastspänt). Fälgbredd och diameter inställs genom att trycka in och hålla knappen intryckt (Bild 26, Pos. 2) samtidigt som hjulet roteras tills önskat värde visas på displayen. När knappen släpps lagras värdet till nytt inmatas. – 1 2 + Avståndet mellan maskin och fälg kan göras med mätarmen eller också med knappen (Bild 26, Pos. 1 och 3) samtidigt som hjulet roteras Inställt värde sparas i maskinen tills nytt inmatas. 3 26 26 BA geodyna 4300 – 9512 150 Entry of wheel type, balancing mode and wheel size 7. Entry of wheel type, balancing mode and wheel size Entrée du type de roue, du mode d’équilibrage et des dimensions de roue 7. Entrée du type de roue, du mode d’équilibrage et des dimensions de roue For determination of unbalance the following inputs have to be made: – wheel type – balancing mode (weight fitting position on rim) – wheel size (nominal width and nominal diameter) – distance between machine and left correction plane Pour déterminer le balourd, les entrées suivantes sont nécessaires: – type de roue à traiter – mode d’équilibrage (position des masses sur la jante) – dimensions de la roue (largeur et diamètre nominaux) – écart entre la machine et le plan de correction gauche The wheel dimensions to be entered are usually given on the rim (in inches or mm on standard wheels, in mm on TD or TRX wheels). Rim diameter is also given on the tyre. Les dimensions de roue à entrer sont la plupart du temps inscrites sur la jante (pour roue standard en pouces ou en mm, pour roue TD et TRX en mm). Le diamètre de la jante est porté sur le pneu. It is useful to find out rim size before the wheel is clamped on the machine. Rim width is entered by pressing and holding the relative function key (Fig. 26, item 2) and rotating the wheel until the desired value is read out. On releasing the function key the input is retained until another input is made. The distance between left correction plane/machine and the rim diameter are usually entered using the integrated gauge arm, but may also be entered by pressing and holding the relative function keys (Fig. 26, items 1 and 3) and rotating the wheel until the desired values are read out. On releasing the function key the input is retained until another input is made. Operation manual geodyna 4300 – 9512 150 Pour des raisons pratiques, déchiffrer les dimensions de la jante avant de serrer la roue. L’entrée de la largeur de jante est effectuée en appuyant sur la touche de fonction relative (Fig. 26, pos. 2) en la maintenant appuyée et en tournant la roue, jusqu’à ce que la valeur souhaitée apparaisse sur l’affichage. Quand on relâche la touche de fonction, la valeur est entrée et mémorisée jusqu’à la prochaine entrée. L’entrée de l’écart entre le plan de correction gauche/la machine et le diamètre s’effectue en règle générale au moyen de la pige de mesure intégrée ; elle peut aussi s’effectuer en appuyant sur les touches de fonction relatives (Fig. 26, pos. 1 et 3), en les maintenant appuyées et en tournant la roue, jusqu’à ce que les valeurs souhaitées apparaissent sur l’affichage. Quand on relâche la touche de fonction, la valeur est entrée et mémorisée jusqu’à la prochaine entrée. Mode d’emploi geodyna 4300 – 9512 150 27 Inmatning av fälgtyp, viktplacering och fälgmått 1 inch inch 7.1 Inställning av hjultyp Håll knappen (Bild 27, Pos. F) intryckt och snurra hjulet tills valt hjultyp (Symbol Bild 27, Pos. 1 till 5 är visad). Släpp knappen så snart vald fälgtyp har visats. Vald hjultyp är lagrad i maskinen tills ny har inmatats eller tills kod C0 visas på displayen. 2 mm mm 3 F mm – + Bild 27 Hjultyp – symboler som visas på displayen 1 Standardfälg – storlek i tum. Display: Fälgsymbol visas – mått i tum. Möjlighet att välja någon av viktplaceringssätten Alu 1 till Alu 5. 2 Standardfälg – Storlek i mm – TD- eller TRX-fälg. Display: Fälgsymbol är visad – Mätmetod i mm Möjlighet finns att välja någon av viktplaceringssätten, Alu 1 till Alu 5. 3 Tyngdpunktsmitt för balanseringsvikter. Display: Ingen fälgsymbol visas, endast mått i mm. Det går ej att välja viktplaceringssätt. Olika diameter kan väljas för avståndsplan vänster och höger. Om precisionsknappen är uppsläppt mindre än 1 sekund efter första intryckningen för val av första diametern, väljs det andra avståndet när knappen åter trycks in. 4 Lätt lastbilshjiul med rak enkel fälg (t.ex. 14.0/15.0 osv.). Tröskelvärdet för mindre oballans är automatiskt fördubblat när denna typ väljs och avläst värde blir 10 g respektive 2 g. Display: Fälgsymbol med dubbla streck till vänster och enkelt till höger på fäljkanten Mått i tum. Viktplaceringsläge går ej att välja. 5 Lätt lastbilshjul med 15° – avsmalnande fälg. Mått i tum (t.ex. 16,5/17,5 osv). Tröskelvärdet för mindre obalans (fördubblas automatiskt) när denna typ väljs och avläst värde blir 10g respektive 2 g. Display: Fälgsymbol med två streck på båda sidor visas. Mått i tum. Det är möjligt att välja viktplaceringsläge Nor eller Alu 1. mm 4 inch inch 5 inch inch 27 28 BA geodyna 4300 – 9512 150 Entry of wheel type, balancing mode and wheel size Entrée du type de roue, du mode d’équilibrage et des dimensions de roue 7.1 Input of wheel type 7.1 Entrée du type de roue Press and hold the function key for wheel type (Fig. 27, item F) and rotate the wheel to set the desired wheel type (symbols – Fig. 27, items 1 to 5 are read out). Release the function key as soon as the desired symbol is read out. Appuyer sur la touche de fonction pour type de roue (Fig. 27, pos. F), la maintenir appuyée et tourner la roue pour régler le type de roue désiré (symboles – Fig. 27, pos. 1 à 5 sont affichées). Relâcher la touche de fonction dès que le symbole désiré est affiché. The chosen wheel type is retained until another type is chosen or until code C0 is carried out. Le type de roue sélectionné est mémorisé jusqu’à ce qu’un autre type soit sélectionné ou le code C0 effectué. Fig. 27 Wheel types – symbols shown on the display Fig. 27 Types de roue – symboles d’affichage 1 Standard wheel – nominal data in inches. Display: Rim symbol is viewed – unit of measure is inch. It is possible to choose either of the balancing modes nor., Alu 1 to Alu 5. 1 Roue standard – données nominales en pouces (inch). Affichage: symbole de jante affiché – l’unité de mesure est inch (pouces). Il est possible de choisir entre les modes d’équilibrage nor., Alu 1 à Alu 5. 2 Standard wheel – nominal data in mm – TD or TRX wheel. Display: Rim symbol is viewed – unit of measure is mm. It is possible to choose either of the balancing modes nor., Alu 1 to Alu 5. 2 Roue standard – données nominales en mm – roue TD ou TRX Affichage: symbole de jante affiché – l’unité de mesure est mm. Il est possible de choisir entre les modes d’équilibrage nor., Alu 1 à Alu 5. 3 Actual data on centre of gravity of the balance weights. Display: No rim symbol is viewed, only mm. It is not possible to choose a balancing mode. Different diameters can be entered for the left and right correction plane. If the relative function key is released for less than a second after entering the first diameter and then pressed again, the diameter for the second correction plane can be entered. 3 Valeurs réelles par rapport au centre de gravité des masses de compensation. Affichage: seulement en mm, pas de symbole de jante, pas de sélection de mode d’équilibrage. Des diamètres différents l’un de l’autre peuvent être entrés pour les plans de correction gauche et droit. Si, après l’entrée du premier diamètre, on relâche la touche de fonction correspondante pendant moins d’une seconde, on peut entrer le diamètre pour le deuxième plan de correction. 4 Light-truck wheel with flat base rim – nominal data in inches, rim diameter given in inch in integers (e.g. 14.0 / 15.0 etc.). The threshold value for suppression of minor unbalances is automatically doubled when this type is chosen and the resolution of the amount reading set to 10 g and 2 g respectively. Display: Rim symbol with double stroke above the left and single stroke above the right rim flange – unit of measure is inch. It is not possible to choose a balancing mode. 4 Roue de camionnette avec jante à base plate – données nominales en pouces, diamètre de jante en pouces en nombres entiers (ex: 14,0 / 15,0, etc.). La valeur limite pour la suppression de l’affichage de moindres balourds est doublée automatiquement quand ce type est choisi et la résolution de l’affichage de la grandeur du balourd est réduit à 10 g ou 2 g respectivement. Affichage: Symbole de jante avec double trait sur le rebord de jante gauche et un seul trait sur le rebord droit – l’unité de mesure est inch (pouces). 5 Roue de camionnette avec jante à base creuse seat 15° – données nominales en pouces, diamètre de jante en pouces en nombres finissant par ,5 (ex: 16,5 / 17,5, etc.). La valeur limite pour la suppression de l’affichage des faibles balourds est doublée automatiquement quand ce type est choisi et la résolution de l’affichage de la grandeur du balourd est réduit à 10g ou 2 g respectivement. Affichage: Symbole de jante avec double trait sur les rebords de jante gauche et droit – l’unité de mesure est inch. Il est possible de choisir entre les modes d’équilibrage nor. et Alu 1. 5 Light-truck wheel with 15° taper rim – nominal data in inches, rim diameter given in inch in .5 numbers (e.g. 16.5 / 17.5). The threshold value for suppression of minor unbalances is automatically doubled when this type is chosen and the resolution of the amount reading set to 10 g and 2 g respectively. Display: Rim symbol with double stroke above the left and above the right rim flange – unit of measure is inch. It is possible to choose either balancing mode nor. or Alu 1. Operation manual geodyna 4300 – 9512 150 Mode d’emploi geodyna 4300 – 9512 150 29 Inmatning av fälgtyp, viktplacering och fälgmått 7.2 Användandet av olika balanseringsvikter (Clipsvikter, klistervikter), och dess placering på en standardfälg resulterar i skillnader mellan de inmatade fälgmåtten och de platser där vikterna placeras. 1 2 2 1 Dessa skillnader ändras automatiskt (av automatiken) när de olika viktplaceringslägena väljs. Därför skall hjulstorlek och viktplaceringssätt ses i ett nära sammanhang. 2 1 2 1 2 2 Inställning av viktplacering. 2 Bild 28 Möjlig placering av balanseringsvikterna – normal fälgdata/ ändrade fälgdata 1 2 Fälgmåtten matas in Verklig data för obalansen (vikternas tyngdpunkter) som maskinen använder vid bestämning av viktstorleken. Olika viktplaceringar är bara möjliga med hjultyp 1 och 2, “standardhjul” (Fälgtyp., Alu 1 till Alu 5) och fälgtyp 5 “15° avsmalnande lätt lastbilsfälg” (nor. och Alu 1). 28 Vald mätmetod och fälgsymbol visas på displayen (Bild 29) eller på den digitala displayen när knappen Alu trycks in (avläst. Alu 1). Tryck in och håll knappen (Bild 29, Pos. 1) intryckt samtidigt som hjulet roteras till önskat viktplaceringssätt visas (Viktplacering – Bild 29). Släpp upp knappen när rätt viktplacering visas. Den valda placeringen finns kvar tills ny inmatas eller maskinen stängs av. Bild 29 Fälgsymboler som visar vikternas placering. nor. 1 Alu 1 + Alu 3 (Alu 3P) Alu 4 Alu 1 Symmetrische Anbringung von Klebegewichten an den Felgenschultern Alu 3 Clipsvikt sätts på vänster fälgkant och klistervikt (Alu 3P) sätts dolt inuti fälgen. Alu 5 inch Standardplacerin där clipsvikter sätts på fälgkanten. Visas alltid när maskinen slås på. Alu 2 Klistervikter–Placeras dolt inuti fälgen för att ej Alu 2P) störa det estetiska utseendet på aluminiumfälgar eller PAX–fälgar. Alu 2 (Alu 2P) – nor. Alu 4 Clipsvikt sätts på vänster fälgkant och klistervikt sätts på yttre kanten. Alu 5 Klistervikt sätts på vänster fälgkant och clipsvikt på yttre fälgkanten. inch 29 30 BA geodyna 4300 – 9512 150 Entry of wheel type, balancing mode and wheel size 7.2 Input of balancing modes The use of different types of balance weights (balance clips, adhesive weights) on a standard (alloy) wheel and the resulting different fitting positions of the weights on the rim produce differences between the nominal rim data which have been entered and the actual correction dimensions. These differences are automatically taken into account when the respective balancing mode is selected. For this reason the wheel size (correction data) and the balancing mode are always to be seen in close context. Entrée du type de roue, du mode d’équilibrage et des dimensions de roue 7.2 Entrée du mode d’équilibrage La possibilité d’utilisation de différents types de masses d’équilibrage (masses à ressort, masses adhésives) pour une roue standard (en alliage léger) et les différentes positions de fixation sur la jante ont pour conséquence des différences entre les dimensions de jante nominales qui ont été entrées et les dimensions de correction effectives. Ces différences sont prises en considération pour déterminer les valeurs de balourd pour le mode d’équilibrage choisi. Pour cette raison, il faut toujours considérer les dimensions de roue (dimensions de correction) et le mode d’équilibrage dans un rapport étroit. Fig. 28 Possible fitting positions of the balance weights – nominal rim data / actual correction data Fig. 28 Position de fixation des masses – dimensions de jante nominales / dimensions de correction effectives 1 2 Nominal rim dimensions to be entered Actual correction data (centre of gravity of weights) which are used for determination of unbalance The input of different balancing modes is only possible with wheel types 1 and 2, that is with ’standard wheels’ (nor., Alu 1 to Alu 5) and with wheel type 5 ’15° taper light-truck rim’ (nor. and Alu 1). 1 2 The mode chosen is read out on the display, showing the relative rim symbol (Fig. 29), or on the digital displays when the Alu key is pressed (reading e.g. Alu 1). Le mode sélectionné est affiché sur l’afficheur, signalant le symbole de jante relatif (Fig. 29) ou sur les afficheurs numériques quand la touche Alu est appuyée (ex: Alu 1). Press and hold the Alu key (Fig. 29, item 1) and rotate the wheel to set the desired balancing mode (weight fitting positions – Fig. 29). Release the Alu key as soon as the desired mode is read out. Dimensions de jante nominales qui sont entrées Dimensions de correction effectives (centre de gravité des masses) utilisées pour la détermination du balourd L’entrée de différents modes d’équilibrage n’est possible que pour les types de roue 1 et 2, donc les ‘roues standard’ (nor., Alu 1 à Alu 5) et le type de roue 5 ‘jante de camionnette à base creuse seat 15° (nor. et Alu 1). Appuyer sur la touche Alu (Fig. 29, pos. 1), la maintenir appuyée et tourner la roue pour régler le mode d’équilibrage désiré (position de fixation des masses, symbole de jante – Fig. 29). Relâcher la touche Alu dès que le symbole désiré est affiché. The chosen balancing mode is retained until another mode is chosen, or until the machine is turned off. Le mode d’équilibrage sélectionné est mémorisé jusqu’à ce qu’un autre mode soit sélectionné ou que la machine soit débranchée. Fig. 29 Rim symbols showing weight fitting position Fig. 29 Symboles de jante montrant les positions de fixation des masses nor. Standard balancing mode where balance clips are attached to the rim flanges – always set when the machine is turned on nor. Mode d’équilibrage standard où les masses à ressort sont fixées sur les rebords de jante – toujours réglé quand la machine est mise en circuit Alu 1 Symmetric fitting of adhesive weights to the bead seats Alu 1 Fixation symétrique de masses adhésives sur les assises du pneu Alu 2 Adhesive weights – hidden adhesive weight attached (Alu 2P) in the rim disc so as not to impair the decorative appearance of alloy wheels or to balance PAX wheels Alu 3 Balance clip fitted on left rim flange, adhesive weight (Alu 3P) attached in hidden position in the rim disc Alu 4 Alu 5 Alu 2 Masses adhésives – masse adhésive cachée fixée (Alu 2P) dans le disque de jante pour ne pas nuire à l’aspect extérieur décoratif des jantes en alliage léger ou pour équilibrer les roues PAX Alu 3 Masse à ressort sur le rebord gauche de la jante, (Alu 3P) masse adhésive fixée dans le disque de jante Balance clip fitted on left rim flange, adhesive weight attached to right bead seat Alu 4 Masse à ressort sur le rebord gauche de la jante, masse adhésive fixée sur l’assise droite du pneu Balance clip fitted on right rim flange, adhesive weight attached to left bead seat Alu 5 Masse à ressort sur le rebord droit de la jante, masse adhésive fixée sur l’assise gauche du pneu Operation manual geodyna 4300 – 9512 150 Mode d’emploi geodyna 4300 – 9512 150 31 Inmatning av fälgtyp, viktplacering och fälgmått 7.3 Inställning av fälgmått för standardplacering av vikter Om flera hjul av samma typ skall balanseras behövs endast en inställning för första hjulet göras. Maskinen lagrar inställningen till nytt har inmatats. 7.3.1 Inställning av fälgbredd Viktigt Fälgbredden skall alltid matas in. När fälgbredd inmatas kan mätvärdena optimeras så att de frammätta värdena blir korrekta. Inställning av fälgbredd Normalt finns fälgbredden ( åtminstone för plåtfälg, ibland på alu–fälgar) inpressad i plåten någonstans i centrum av fälgen. Om fälgen saknar måttangivelse använd fälgbreddsmätaren enligt (Bild 30 – Mat.-Nr. 2900 007, ingår ej, extra tillbehör). 30 Bild 31 Inmätning av fälgbredd (normalmått i tum/mm) För att ställa in fälgbredden tryck in knappen (Bild 31, Pos. 1) och håll den intryckt. Snurra hjulet och släpp knappen när fälgbredden visas på displayen. Fälgbredden visas till obalansvärdet visas. När måttinställningarna är klara kan obalansmätningen börja. C . 1 – inch + 31 32 BA geodyna 4300 – 9512 150 Entry of wheel type, balancing mode and wheel size 7.3 Input of wheel dimensions for the standard balancing mode Entrée du type de roue, du mode d’équilibrage et des dimensions de roue 7.3 Entrée des dimensions de roue pour l’équilibrage standard If several wheels of the same wheel type and with identical nominal wheel size are balanced in succession, it is only necessary to enter the data for the first wheel. It will remain stored until new entries are made. Si plusieurs roues du même type et de valeurs nominales identiques sont équilibrées, les dimensions de la roue ne doivent être entrées que pour la première roue. Les entrées restent mémorisées jusqu’à ce qu’une nouvelle entrée soit effectuée. 7.3.1 Determination and input of rim width 7.3.1 Déterminer et entrer la largeur de la jante Important Remarque importante Input of rim width is always necessary. The OK indication and recommendation for optimisation, as well as the optimisation procedure itself, will only be accurate if the rim width has been correctly entered. La largeur de la jante doit toujours être entrée. L’affichage OK, l’invitation à effectuer une lancée d’optimisation, ainsi que son exécution, ne fonctionnent exactement que si la largeur de la jante a été entrée correctement. Manual input of rim width Entré manuelle de largeur de la jante If rim width is not given on the rim, it can be measured on standard rims using the optional rim width callipers (Fig. 30 –Ref. no. 2900007). Si on ne peut pas reconnaître la largeur de la jante, cette dernière, s’il s’agit d’une jante standard, peut être palpée avec un palpeur de largeur de jante qui est disponible en option (Fig. 30 – No. de référence 2900007). Fig. 31 Input of rim width (nominal size in inch / mm) Fig. 31 Entrée de largeur de jante (valeur nominale pouce/mm) To enter the rim width, press and hold the relative function key (Fig. 35, item 1). Rotate the wheel while the key is pressed in order to set the required dimension on the display, and then release the key. Pour entrer la largeur de la jante, appuyer sur la touche de fonction correspondante (Fig. 31, pos. 1) et la maintenir appuyée. La touche étant appuyée, régler la valeur souhaitée sur l’affichage en tournant la roue et relâcher la touche. The rim width will be shown until the unbalance values are displayed. La largeur de jante reste affichée jusqu’à l’affichage des valeurs de balourd. On completion of the input the measuring run can be started. Operation manual geodyna 4300 – 9512 150 Quand l’introduction des valeurs est achevée, la lancée de mesure peut être initialisée. Mode d’emploi geodyna 4300 – 9512 150 33 Inställning av fälgtyp, viktplacering och fälgmått 7.3.2 Mätarmshuvudets placering på olika fälgtyper För att mäta obalansen korrekt med endast en mätning måste fälgmåtten vara rätt inmatade i maskinen. Det är därför också viktigt att mätarmshuvudet placeras exakt på fälgen som displayens figurer visar. Felaktig placering kommer att resultera i felaktiga obalansvärden vid mätningen. normal Bild 32 Visar korrekt placering (med eller utan klistervikter) av mätarmshuvudet på olika fälgar med olika viktplaceringar. Det är antingen 1 eller 2 ställen som mätarmshuvudet skall placeras på beroende av fälgtyp och viktplaceringssätt. Alu 1 15,5 15,5 normal Standardplacering av clipsvikter på fälgkanterna. Bilden visas alltid när maskinen slås på. Alu 2 15,5 Alu 1 Symmetrisk fastsättning av klistervikter på yttre kanterna. Alu 2 Klistrade vikter – Klistrade vikter dolda på insidan av fälgen. Platserna där vikterna skall monteras är givna på förhand enligt skissen till vänster. 7,5 MZV Alu 2 P Alu 2P Klistrade vikter – Klistrade vikter dolda på insidan av fälgen. Platserna där vikterna placeras kan väljs fritt. Maskinen kompenserar därefter viktmåttet automatiskt. Alu 3 Alu 3 7,5 Clipsvikt placerad på vänster fälgkant, klistervikt dold placering på insidan av fälgen; Platserna där vikterna placeras är givna på förhand enligt skissen. Alu 3P Clipsvikt placerad på fälgkanten, klistervikt dold placering på insidan av fälgen; Klisterviktens placering kan väljas fritt. Maskinen kompenserar därefter viktmåttet automatiskt. MZV Alu 3 P Alu 4 Alu 4 Clipsvikt placerad på vänster fälgkant, klistervikt fästes på yttre kanten. Alu 5 Clipsvikt plaserad på höger fälgkant, klistervikt placerad på vänster yttre kant. 15,5 Alu 5 Punkt där man anbringar mäthuvudet Fast inprogrammerad viktplacering Valfri viktplacering, väljs med mäthuvudet 15,5 32 34 BA geodyna 4300 – 9512 150 Entry of wheel type, balancing mode and wheel size Entrée du type de roue, du mode d’équilibrage et des dimensions de roue 7.3.2 Gauge head application on various wheel types 7.3.2 Positions de palpage sur les divers types de roue In order to be able to determine unbalance in a single measuring run, the rim dimensions have to be entered correctly. Therefore proceed with utmost care and as is shown in the Figures when applying the gauge head on the rim in the desired weight fitting position. Incorrect application will result in deviations of measured values and consequently inaccurate results of the balancing run. Afin de déterminer le balourd si possible en une seule lancée de mesure, il est nécessaire d’entrer correctement les dimensions de jante. C’est pourquoi il faut effectuer le palpage avec le plus grand soin, avec la tête de pige sur le contour de la jante ou à l’emplacement prévu pour la masse, suivant les illustrations. Des divergences de dimensions mènent à des divergences de valeurs mesurées et donc à un résultat d’équilibrage imprécis. Fig. 32 shows correct application (with and without adhesive weight) of the gauge head on various rims and for various weight fitting positions. There are either one, or two positions where the gauge head has to be applied, function of wheel type and balancing mode. La Fig. 32 indique les positions de palpage correctes (sans ou avec masses adhésives) de la tête de pige sur les différentes jantes et pour divers modes d’équilibrage. Suivant le type de roue ou le mode d’équilibrage, une ou deux positions doivent être palpées. normal Standard balancing mode where balance clips are attached to the rim flanges – always set when the machine is turned on normal Mode d’équilibrage standard où les masses à ressort sont fixées sur les rebords de jante – toujours activé quand la machine est mise en circuit Alu 1 Symmetric fitting of adhesive weights to the bead seats Alu 1 Fixation symétrique de masses adhésives sur les assises du pneu Alu 2 Adhesive weights – adhesive weight on bead seat, hidden adhesive weight attached in the rim disc: the correction planes for the adhesive weights are determined automatically by the machine Alu 2 Masses adhésives – Masse adhésive sur l’assise du pneu, masse adhésive cachée dans le disque de jante; pendant l’équilibrage, les plans de correction pour ces masses sont déterminés par la machine Alu 2P Adhesive weights – adhesive weight on bead seat, hidden adhesive weight attached in the rim disc; the correction planes for the adhesive weights can be determined exactly Alu 2P Masses adhésives – Masse adhésive sur l’assise du pneu, masse adhésive cachée fixée dans le disque de jante; les plans de correction pour les masses adhésives peuvent être palpés exactement Alu 3 Alu 3 Balance clip fitted on left rim flange, adhesive weight attached in hidden position in the rim disc; the correction plane for the adhesive weight is determined automatically by the machine Masse à ressort sur le rebord gauche de la jante, masse adhésive fixée dans le disque de la jante; pendant l’équilibrage, le plan de correction pour la masse adhésive est déterminé par la machine Alu 3P Balance clip fitted on left rim flange, adhesive weight attached in hidden position in the rim disc the correction plane for the adhesive weight can be determined exactly Alu 3P Masse à ressort sur le rebord gauche de la jante, masse adhésive fixée dans le disque de la jante; le plan de correction pour la masse adhésive peut être palpé exactement Alu 4 Balance clip fitted on left rim flange, adhesive weight attached to right bead seat Alu 4 Masse à ressort sur le rebord gauche de la jante, masse adhésive fixée sur l’assise droite du pneu Alu 5 Balance clip fitted on right rim flange, adhesive weight attached to left bead seat Alu 5 Masse à ressort sur le rebord droit de la jante, masse adhésive fixée sur l’assise gauche du pneu Point of application of gauge arm Given weight position Point of appliction of gauge arm = weight position Operation manual geodyna 4300 – 9512 150 Point de palpage Position de placement donnée de la masse d’équilibrage Point de palpage = position de placement Mode d’emploi geodyna 4300 – 9512 150 35 Inställning av fälgtyp, viktplacering och fälgmått 7.3.3 Inställning av avstånd fälg/maskin För viktbalanseringssätt nor, Alu 1, Alu 2, Alu 3, Alu 4 och Alu 5 bestäms viktplaceringarna med hjälp av de mått man matar in i maskinen. 3 Bild 33 Mätarm för avståndsmätning fälg/maskin. 1 2 2 3 4 Måttskala med avståndsmått i mm och skala med 2 mm delning Mätarm med mäthuvud Mäthuvud Avläsningskant för avståndsmått Avståndet mellan maskin och fälg samt fälgens diameter inmäts vanligtvis automatiskt genom att använda mätarmen. Inmatningen kan också göras manuellt genom att hålla in menyknappen samtidigt som hjulet roteras. När inmätt mått, avstånd resp. diameter visas släpps menyknappen och värdet blir inmatat i maskinen. AP1 1 Automatisk mätning av avstånd fälg / maskin 4 Dra ut mätarmen (Bild 33, Pos. 2) För mäthuvudet mot fälghornet (Bild 33, Pos. 3) som Bild 33 visar och håll kvar den. En ljudsignal hörs när avståndet registrerats i maskinen. För tillbaka mätarmen till viloläget. Med intryckning av funktionsknappen kan avståndet återigen visas på displayen. Manuell inmatning av avstånd fälg / maskin Om den automatiska mätningen av avståndet fälg / maskin inte är möjlig (felkod E 92), kan avståndet inmatas manuellt för viktplaceringssätt normal, Alu 1, Alu 2, Alu 3, Alu 4 och Alu 5. 33 Varning: Vid viktplaceringsätt Alu 2P och Alu 3P, manuell inmatning av avstånd fälg/maskin blir inte obalansmätningen korrekt. Dra ut mätarmen (Bild 33, Pos. 2) och placera mäthuvudet (Bild 33, Pos. 3) på fälgkanten som Bild 33 visar och håll den kvar. Läs av måttet (Bild 33, Pos. 4) som visas på skalan. För tillbaka mätarmen till viloläget. Tryck och håll in knappen för avståndsmätning (Bild 34, Pos. 1). C . inch mm 1 – + 34 36 BA geodyna 4300 – 9512 150 Entry of wheel type, balancing mode and wheel size Entrée du type de roue, du mode d’équilibrage et des dimensions de roue 7.3.3 Determination of distance and diameter 7.3.3 Déterminer l’écart et diamètre de jante For the balancing modes nor., Alu 1, Alu 2, Alu 3, Alu 4 and Alu 5 the correction dimensions are derived from the nominal dimensions by subtraction or addition of mean correction values. Pour les modes d’équilibrage nor., Alu 1, Alu 2, Alu 3, Alu 4 et Alu 5, les valeurs d’équilibrage sont dérivées par déduction ou addition de valeurs de correction moyennes des valeurs nominales. Fig. 33 Gauge for distance and rim diameter Fig. 33 Pige de mesure pour écart et diamètre de jante 1 1 2 3 4 Scale for distance, mm only – scale with 2 mm graduations Gauge arm with gauge head Gauge head Reference edge for distance reading 2 3 4 Echelle graduée pour valeur d’écart, seulement en mm – avec graduation de 2 mm Pige de mesure avec tête de pige Tête de pige Rebord de lecture pour valeur d’écart The distance between left correction plane and machine and the rim diameter are usually entered automatically using the integrated gauge arm, but may also be entered by pressing and holding the menu keys for rim diameter and distance and rotating the wheel until the desired value is read out. L’entrée de la valeur d’écart entre le plan de correction gauche et la machine, ainsi que du diamètre de jante, s’effectue en règle générale à l’aide de la pige de mesure par reprise automatique des valeurs mesurées; elle peut aussi s’effectuer en appuyant sur les touches de fonction pour diamètre de jante et écart, en les maintenant appuyées et en tournant la roue, jusqu’à ce que la valeur souhaitée soit affichée. Automatic determination of distance and diameter Determination automatique de l’écart et du diamètre Pull the gauge arm for distance and diameter (Fig. 33, item 2) out of the cabinet, apply the gauge head (Fig. 33, item 3) on the rim flange as shown in Fig. 33, and hold in that position. Retirer la pige de mesure pour l’écart et diamètre (Fig. 33, pos. 2) du bâti et approcher la tête de pige (Fig. 33, pos. 3) du rebord de la jante comme illustré à la Fig. 33 ; maintenir la pige dans cette position. Within short an audible signal confirms that distance and rim diameter have been stored automatically. Après quelques secondes, un signal acoustique confirme que l’écart et le diamètre ont été mémorisés automatiquement. Re-place the gauge arm in its home position. Remettre la pige en position de repos. Upon operation of the relative function key the distance and the diameter can be read out once again. Les valeurs d’écart et du diamètre de jante peuvent être affichées à nouveau en appuyant sur la touche de fonction correspondante. Manual input of distance rim/machine Entrée manuelle de l’écart If automatic determination of the distance rim/machine is not possible (error code E92), the distance can be determined manually in balancing modes normal, Alu 1, Alu 2, Alu 3, Alu 4 and Alu 5. S’il est impossible de relever automatiquement la valeur de l’écart (message d’erreur E92), les modes d’équilibrage normal, Alu 1, Alu 2, Alu 3, Alu 4 et Alu 5 permettent de le déterminer manuellement. Attention: In balancing modes Alu 2P and Alu 3P manual input of the distance rim/machine will produce an incorrect measurement result. Attention: Dans les modes d’équilibrage Alu 2P et Alu 3P, l’entrée manuelle de l’écart falsifie le résultat de la mesure. Pull the gauge arm (Fig. 33, item 2) out of the cabinet, apply the gauge head (Fig. 33, item 3) on the rim flange as shown in Fig. 33 and hold in that position. Read and note down the distance shown on the scale (Fig. 33, item 4). Return the gauge arm to its home position. Press and hold the function key for distance (Fig. 34, item 1). Operation manual geodyna 4300 – 9512 150 Retirer la pige de mesure (Fig. 33, pos. 2) du bâti et approcher la tête de pige (Fig. 33, pos. 3) du rebord de la jante comme illustré à la Fig. 33. Lire la valeur d’écart de l’échelle (Fig. 33, pos. 4) et la noter. Reposer la de pige de mesure en position de repos. Appuyer sur la touche de fonction pour la valeur d’écart (Fig. 34, pos. 1) et la maintenir appuyée. Mode d’emploi geodyna 4300 – 9512 150 37 Inmatning av fälgtyp, viktplacering och fälgmått Symbolen för avstånd visas på displayen. Håll knappen intryckt medan hjulet snurras sakta till dess det avlästa värdet visas på displayen. Släpp upp knappen när rätt avstånd visats. Med intryckning av funktionsknappen kan avståndet återigen visas på displayen. 7.3.4 Inmatning av fälgdiameter C 1 . – . inch + Manuell inställning av fälgdiameter inch Avläs fälgen diameter på däcket eller fälgen. För att mata in fälgdiametern, tryck in funktionsknappen (Bild 35, Pos. 1) och håll den intryckt. Snurra hjulet till rätt värde för diametern kan avläsas på displayen och släpp upp knappen. Diametern visas på displayen till måttet för obalansen matas in. 35 38 BA geodyna 4300 – 9512 150 Entry of wheel type, balancing mode and wheel size Entrée du type de roue, du mode d’équilibrage et des dimensions de roue The symbols for distance and mm are viewed on the display. Les symboles pour écart et mm sont affichés. Holding the key pressed, rotate the wheel to enter the distance previously indicated on the scale. Quand la touche est appuyée, tourner la roue pour entrer la valeur d’écart relevée auparavant. Release the function key after making the input. Après l’entrée, relâcher la touche de fonction. By pressing the relative function key the distance can be viewed once again. La valeur d’écart peut être affichée à nouveau en appuyant sur la touche de fonction correspondante. 7.3.4 Determination and input of wheel diameter 7.3.4 Déterminer et entrer le diamètre de la jante Manual input of diameter Entrée manuelle diamètre de jante Read and note the wheel diameter on the rim or tyre. To enter the wheel diameter, press and hold the function key (Fig. 35, item 1). Relever le diamètre de la jante sur la jante ou sur le pneu et le noter. Pour l’entrée du diamètre de la jante, appuyer sur la touche de fonction (Fig. 35, pos. 1) et la maintenir appuyée. La touche étant appuyée, entrer la valeur précédemment notée pour le diamètre en tournant la roue. Après l’introduction, relâcher la touche de fonction. Le diamètre de la jante reste affiché jusqu’à l’affichage des valeurs de balourd. Rotate the wheel while the key is pressed in order to enter the previously noted diameter. Having made the input release the function key. The diameter reading will be shown until the unbalance values are displayed. Operation manual geodyna 4300 – 9512 150 Mode d’emploi geodyna 4300 – 9512 150 39 Inmatning av fälgtyp, viktplacering och fälgmått 7.3.5 Inmätning av position för dolda vikter (Alu 2P) Observera C inch inch Ta reda på fälgbredden och mata in den i maskinen före bestämningen av viktplaceringarna. Bild 36 Avläsning av exakt viktplacering 1 – + a AP1 1 a b c d Alu–knapp Välj balanseringssätt Alu 2P Inmätning Inmätningsläge AP1 Inmätningsläge AP2 För att välja mätmetod (Bild 36, Pos. 1) tryck in Alu – knappen och håll den intryckt. Rotera hjulet tills mätmetod Alu 2P visas på displayen (Bild 36a –Vänstra viktsymbolen visas på displayen så länge knappen är intryckt).–Släpp knappen så snart vald balanseringssätt visas. För att fastställa position för placeringsläge AP1 drag ut mätarmen och placera mäthuvudet där mitten av vikten skall skall placeras Bild 36b, Pos. AP1 och håll den kvar där till en ljudsignal hörs. AP2 Symbolen för den yttre vikten visas på displayen (Bild 36c). b Placera mäthuvudet där mitten av den andra vikten AP 2 skall placeras och håll den där. Symbolen för den inre vikten visas på displayen (Bild 36d). För tillbaka mätarmen till viloläget. Starta mätningen. c d 36 40 BA geodyna 4300 – 9512 150 Entry of wheel type, balancing mode and wheel size Entrée du type de roue, du mode d’équilibrage et des dimensions de roue 7.3.5 Determining the position of the hidden weights (Alu 2P) 7.3.5 Déterminer la position des masses d’équilibragecachées (Alu 2P) Note Remarque Enter rim width before determining the position of the weights. Avant de déterminer la position des masses d’équilibrage, entrer la largeur de la jante. Fig. 36 Scanning of the exact correction dimensions Fig. 36 Palpage des valeurs d’équilibrage exactes 1 a b c d 1 a b c d Alu key Selection of balancing mode Alu 2P Measurement procedure Application position AP1 Application position AP2 Touche Alu Sélection du mode d’équilibrage Alu 2P Processus de palpage de dimension Point de palpage AP1 Point de palpage AP2 To set the desired balancing mode press and hold the Alu key (Fig. 36, item 1). Pour la sélection du mode d’équilibrage, appuyer sur la touche Alu (Fig. 36, pos. 1) et la maintenir appuyée. Holding the key pressed rotate the wheel until mode Alu 2P is shown (Fig. 36a – the left weight symbol is displayed as long as the key is pressed). Release the Alu key as soon as the desired balancing mode is read out. La touche étant appuyée, tourner la roue jusqu’à ce que le mode d’équilibrage Alu 2P soit affiché (Fig. 36a – le symbole de masse gauche est affiché tant que la touche est appuyée). Si le positionnement souhaité est affiché, relâcher la touche Alu. Recommendation Conseil Clamp an adhesive weight in the weight holder of the gauge head with the cover film of the weight being in top position prior to scanning the correction dimensions. Coincer une masse adhésive avec film de protection vers le haut dans le porte–masse de la tête de pige avant la palpage des valeurs d’équilibrage. To determine the gauge application position AP1, pull the gauge arm for distance and diameter out of the cabinet, apply the gauge head on the rim in the centre of the intended weight fitting position as shown in Fig. 36b, item AP1 and hold in that position. The symbol for the outer weight is viewed on the display (Fig. 36c). Approach the gauge head to application position AP2 and hold in that position. The symbol for the inner weight is viewed on the display (Fig. 36d). An audible signal is given when the distance has been stored. Return the gauge arm for distance and diameter to its home position. Start the measuring run. Operation manual geodyna 4300 – 9512 150 Pour déterminer le point de palpage AP1, retirer la pige de mesure du batî de la machine et reposer la tête de pige sur la jante au centre de la position prévue pour la fixation des masses (cf. à cet effet Fig. 36b, pos. AP1); maintenir la tête dans cette position. Il sera affiché le symbole de la masse d’équilibrage extérieure (Fig. 36c). Approcher la tête de pige au point de palpage AP2 et la maintenir dans cette position. Il sera affiché le symbole de la masse d’équilibrage intérieure (Fig. 36d). Dès qu’un signal acoustique retentit, la valeur de l’écart a été mémorisée. Remettre la pige de mesure en position de repos. Démarrer la lancée de mesure. Mode d’emploi geodyna 4300 – 9512 150 41 Inmatning av fälgtyp, viktplacering och fälgmått Montering av balansvikter 1 2 3 4 5 Om nödvändigt rotera hjulet till exakt position för det vänstra viktläget. När rätt position intas visas de två posisionspilarna (se § NO TAG Mätning). Tryck ned pedalen för att låsa fast hjulet. Välj en klistervikt för placering AP1 enligt den storlek som indikerats. Drag ut mätarmen (Bild 37, Pos. 1) och drag den fjäderbelastade brickan (Bild 37, Pos. 2) inåt. Placera vikten (Bild 37, Pos. 3) mellan brickorna med klisterytan uppåt, mitt mellan brickorna symmetriskt mot pilen(Bild 37, Pos. 4). Pressa vikten mot fälgen med hjälp av klacken. För mäthuvudet till position AP1. 37 Displayen visar ett siffertal som minskar allt eftersom mäthuvudet närmar sig den rätta viktplaceringen. När vikten placeras inom ett siffervärde på 0 ±1 mm ljuder en tonsignal som bekräftar att vikten är på korrekt plats. Lås fast hjulet med fotpedalen. Tag bort skyddsfolien från vikten och för mäthuvudet med vikten till avsedd plats i fälgen och pressa fast den (Bild 37, Pos. 5). För tillbaka mätarmen till viloläget. Tryck därefter fast vikten mot fälgen ordentligt för hand . Upprepa förfarandet enligt ovan för att montera den andra vikten i position AP2. 42 BA geodyna 4300 – 9512 150 Entry of wheel type, balancing mode and wheel size Entrée du type de roue, du mode d’équilibrage et des dimensions de roue Fitting of balance weights Fixation des masses d’équilibrage Select an adhesive weight for AP1 of the indicated size and adjust it to the wheel radius by bending. Clean the fitting position before attaching the adhesive weights. Choisir la masse adhésive destinée au point AP1 conformément à l’affichage et la fléchir pour l’adapter au rayon de la roue. Raise the gauge arm (Fig. 37, item 1) and pull the holding ring of the gauge head (Fig. 37, item 2) inwards. Avant de fixer les masses adhésives, nettoyer l’emplacement de fixation. Basculer la pige de mesure (Fig. 37, pos. 1) en haut et tirer l’anneau porte–masse (Fig. 37, pos. 2) vers l’intérieur. Mettre la masse adhésive (Fig. 37, pos. 3) dans la tête d’équilibrage de manière à ce qu’elle soit symétrique à la flèche et que la pellicule de protection soit visible d’en haut (Fig. 37, pos. 4). Presser la masse adhésive fermement contre la tête et enlever la pellicule de protection de ladite masse. Tirer la pige de mesure vers le point de palpage AP1. Insert the adhesive weight (Fig. 37, item 3) into the head with the protective foil facing upwards symmetrically relative to the arrow (Fig. 37, item 4). Press the adhesive weight firmly against the head and remove the protective foil from the weight. Pull the gauge arm towards application position AP1. The display shows the dimension for the first distance, which decreases as the gauge is approached. At 0 ±1 an audible signal is given to show that AP1 has been reached. Il sera affiché la valeur du premier écart qui se réduira au fur et à mesure que la pige s’approche. Une fois 0 1 atteint, un signal acoustique retentit pour confirmer qu’AP1 est atteint. Press the pedal of the main shaft lock to hold the wheel in this position. Appuyer sur la pédale de blocage pour bloquer la roue dans cette position. Swing the gauge arm out towards the rim and press the weight firmly against the rim using the ejector (Fig. 37, item 5). Basculer la pige de mesure vers l’extérieur contre la jante et presser la masse fermement contre la jante à l’aide de l’éjecteur (Fig. 37, pos. 5). Swing the gauge arm in and return it to its home position. Basculer la pige de mesure vers l’intérieur et la remettre en position de repos. Firmly press the adhesive weight on the rim by hand. Presser la masse adhésive à la main encore une fois fermement contre la jante, et ce sur toute la surface de contact. Fit the second adhesive weight for AP2 in the same manner. Operation manual geodyna 4300 – 9512 150 Fixer la masse adhésive destinée à AP2 de la même manière. Mode d’emploi geodyna 4300 – 9512 150 43 Inmätning av fälgtyp, viktplacering och fälgmått 7.3.6 Bestämning av fastsättningpunkter för dolda vikter (Alu 3P) C Observera inch inch 1 Fastställ fälgbredd och mata in den i maskinen före bestämning av viktplaceringen. Bild 38 Avläsning av exakt viktplacering – + a AP1 1 a b c d ALU–knapp Välj balanseringssät Alu 3P Inmätning Inmätningsläge AP1 Inmätningsläge AP2 För att välja viktplaceringssätt, tryck in Alu–knappen (Bild 38, Pos. 1) och håll den intryckt. Vrid hjulet tills viktplaceringssätt Alu 3P visas (Bild 38a – den vänstra viktsymbolen visas så länge knappen hålls intrykt). Släpp upp knappen så fort rätt balanseringssätt visas. AP2 Tips!: Det kan vara bra att placera en liten klistervikt med skyddsfolien kvar, i hållaren på mätarmen, innan man ska läsa in viktlägena. Då ser man bättre hur vikterna kommer att hamna. b För att fastställa positionen för den första vikten AP1 dra ut mätarmen och placera mäthuvudet mot fälgkanten Bild 38b, Pos. AP1 och håll den där. Symbolen för den yttre vilkten visas på displayen (Bild 38c). För nu mätarmen och placera mäthuvudet i position för viktplaceringspunkt AP2 och håll den där. Symbolen för den yttre vilkten visas på displayen (Bild 38d).En ljudsignal hörs när värdena har lagrats i maskinen. c För tillbaka mätarmen till viloläget. Starta obalansmätningen. d 38 44 BA geodyna 4300 – 9512 150 Entry of wheel type, balancing mode and wheel size Entrée du type de roue, du mode d’équilibrage et des dimensions de roue 7.3.6 Determing the position of the hidden weights (Alu 3P) 7.3.6 Déterminer la position des masses cachées (Alu 3P) Note Remarque Enter rim width before determining the position of the weights. Avant de déterminer la position des masses d’équilibrage, entrer la largeur de la jante. Fig. 38 Scanning and input of the exact correction dimensions Fig. 38 Palpage et entrée des valeurs d’équilibrage exactes 1 a b c d Alu key Selection of balancing mode Alu 3P Measurement procedure Application position AP1 Application position AP2 1 a b c d Touche Alu Sélection du mode d’équilibrage Alu 3P Processus de palpage de dimension Point de palpage AP1 Point de palpage AP2 To set the desired balancing mode press and hold the Alu key (Fig. 38, item 1). Pour la sélection du mode d’équilibrage, appuyer sur la touche Alu (Fig. 38, pos. 1) et la maintenir appuyée. Holding the key pressed rotate the wheel until mode Alu 3P is shown (Fig. 38a – the left weight symbol is displayed as long as the key is pressed). Release the Alu key as soon as the desired balancing mode is read out. La touche étant appuyée, tourner la roue jusqu’à ce que le mode d’équilibrage Alu 3P soit affiché (Fig. 38a – le symbole de masse gauche est affiché tant que la touche est appuyée). Si le positionnement souhaité est affiché, relâcher la touche Alu. Recommendation Conseil Clamp an adhesive weight in the weight holder of the gauge head with the cover film of the weight being in top position prior to scanning the correction dimensions. Coincer une masse adhésive avec film de protection vers le haut dans le porte–masse de la tête de pige avant la palpage des valeurs d’équilibrage. To determine the gauge application position AP1, pull the gauge arm for distance and diameter out of the cabinet, apply the gauge head on the rim in the centre of the intended weight fitting position as shown in Fig. 38b, item AP1 and hold in that position. The symbol for the outer weight is viewed on the display (Fig. 38c). Approach the gauge head to application position AP2 and hold in that position. The symbol for the inner weight is viewed on the display (Fig. 38d). An audible signal is given when the distance has been stored. Return the gauge arm for distance and diameter to its home position. Start the measuring run. Operation manual geodyna 4300 – 9512 150 Pour déterminer le point de palpage AP1, retirer la pige de mesure du batî et reposer la tête de pige sur la jante au centre de la position prévue pour la fixation des masses (cf. à cet effet Fig. 38b, pos. AP1) ; maintenir la tête dans cette position. Il sera affiché le symbole de la masse d’équilibrage extérieure (Fig. 38c). Approcher la tête de pige au point de palpage AP2 et la maintenir dans cette position. Il sera affiché le symbole de la masse d’équilibrage intérieure (Fig. 38d). Dès qu’un signal acoustique retentit, la valeur de l’écart a été mémorisée. Remettre la pige de mesure en position de repos. Démarrer la lancée de mesure. Mode d’emploi geodyna 4300 – 9512 150 45 Inmatning av fälgtyp, viktplacering och fälgmått Vikten för AP1 en clipsvikt som placeras lodrätt upp från hjulaxeln På samma sätt som när man monterar vikter i viktläge NOR. Mätarmen användes ej för detta viktläge. 1 2 3 Klistervikten för AP2 fastsätts enligt följande: 4 39 5 Rotera hjulet till “klockan 12–läget” för det vänstra viktläget. När hjulet är i rätt position visas de två pilspetsarna mitt emot varandra( se § 8.1 Balansering). Lås fast hjulet med pedalen i detta läget. Rengör fälgen där klistervikten skall placeras. Plocka fram den vikt som anges och pressa den för hand mot det ställe den skall placeras. Då blir den lätt böjd och får samma form som fälgens insida. Tag sedan bort skyddsfolien från klistervikten. Dra fram mätarmen (Bild 39, Pos. 1) och dra brickan t inåt för att öppna klämman (Bild 39, Pos. 2). Placera vikten (Bild 39, Pos. 3) mitt mellan brickorna med klisterytan uppåt (Bild 39, Pos. 4). Lika mycket av vikten skall sticka ut på båda sidorna om pilen. För mäthuvudet med vikten till AP2. Displayen visar ett siffertal som minskar allt eftersom mäthuvudet närmar sig den rätta viktplaceringen för att när vikten placeras inom ett siffervärde på 0 ±1 en tonsignal ljuder som bekräftar att vikten placeras på plats AP2. 46 Lås fast hjulet med fotpedalen. För mäthuvudet mot den plats där vikten skall sitta samt pressa fast den med klacken (Bild 39, Pos. 5). För tillbaks mätarmen till vilkoläget. Tryck därefter fast vikten för hand. BA geodyna 4300 – 9512 150 Entry of wheel type, balancing mode and wheel size Entrée du type de roue, du mode d’équilibrage et des dimensions de roue Fitting of balance weights Fixation des masses d’équilibrage The weight for AP1 is a balance clip and is attached perpendicular to the main shaft after indexing the wheel, as in balancing mode nor. The gauge arm stays in its home position. Au point AP1 est fixée une masse à ressort exactement comme dans le mode équilibrage nor., et ce en direction perpendiculaire par rapport à l’arbre principal et après avoir tourné la roue suivant l’orientation choisie. Pendant cette opération, la pige de mesure reste en position de repos. The adhesive weight for AP2 is fitted as described below: La masse adhésive destinée au point AP2 est fixée comme suit : Select an adhesive weight of the indicated size and adjust it to the wheel radius by bending. Choisir la masse adhésive conformément à l’affichage et la fléchir pour l’adapter au rayon de la roue. Clean the fitting position before attaching the adhesive weights. Avant de fixer les masses adhésives, nettoyer l’emplacement de fixation. Raise the gauge arm (Fig. 39, item 1) and pull the holding ring of the gauge head (Fig. 39, item 2) inwards. Basculer la pige de mesure (Fig. 39, pos. 1) en haut et tirer l’anneau porte–masse (Fig. 39, pos. 2) vers l’intérieur. Insert the adhesive weight (Fig. 39, item 3) into the head with the protective foil facing upwards symmetrically relative to the arrow (Fig. 39, item 4). Press the adhesive weight firmly against the head and remove the protective foil from the weight. Mettre la masse adhésive (Fig. 39, pos. 3) dans la tête d’équilibrage de manière à ce qu’elle soit symétrique à la flèche et que la pellicule de protection soit visible d’en haut (Fig. 39, pos. 4). Presser la masse adhésive fermement contre la tête et enlever la pellicule de protection de ladite masse. Tirer la pige de mesure vers le point de palpage AP2. Pull the gauge arm towards application position AP2. The display shows the dimension for the first distance, which decreases as the gauge is approached. At 0 ±1 an audible signal is given to show that AP2 has been reached. Il sera affiché la valeur du premier écart qui se réduira au fur et à mesure que la pige s’approche. Une fois 0 1 atteint, un signal acoustique retentit pour confirmer qu’AP2 est atteint. Press the pedal of the main shaft lock to hold the wheel in this position. Appuyer sur la pédale de blocage pour bloquer la roue dans cette position. Swing the gauge arm out towards the rim and press the weight firmly against the rim using the ejector (Fig. 39, item 5). Basculer la pige de mesure vers l’extérieur contre la jante et presser la masse fermement contre la jante à l’aide de l’éjecteur (Fig. 39, pos. 5). Swing the gauge arm in and return it to its home position. Basculer la pige de mesure vers l’intérieur et la remettre en position de repos. Firmly press the adhesive weight on the rim by hand. Presser la masse adhésive à la main encore une fois fermement contre l’appui, et ce sur toute la surface de contact. Operation manual geodyna 4300 – 9512 150 Mode d’emploi geodyna 4300 – 9512 150 47 Inmatning av fälgtyp, viktplacering och fälgmått 7.3.7 Specialmätning (Hjultyp 3) Om ingen av de förprogrammerade balanseringssätten kan användas(t.ex. specalhjul eller andra slags rotorer eller fläktar), använd hjultyp 3. Gör inmätningen av fälgmåtten direkt på fälgen (Tyngdpunktsmitt på vikterna där de kan placeras) enligt (Bild 40). Tryck in funktionsknapparna (Bild 40, Pos. 1 – 3) och rotera hjulet och mata in i maskinen respektive värde i mm. Släpp respektive knapp när värdet registrerats. 7.3.8 Inställning av statisk obalans på displayen (T.ex. smala hjul) För hjul som endast skall balanseras statiskt (mindre än 3,5”), skall endast fälgdiametern inmatas. För att göra det möjligt för maskinen att starta mätningen kan en godtycklig fälgbredd mellan 1“ och 13,8“ matas in. x 0 Inmätta värden är för standardhjul. – + Tryck in funktionsknapparna (Diameter/bredd) och rotera hjulet för att inmata respektive data. Släpp knapparna när respektive mätvärde är registrerat. För korrektionsdiameter och möjlighet att utföra korrektion av statisk obalans se bild 50. 1 2 3 7.3.9 Spara hjulprofil 40 Hjul av samma typ som balanseras ofta och för att man ej skall behöva mata in hjuldata för varje tillfälle kan speciella hjuldata lagras i maskinen. Denna funktion är specielt användbar för verkstäder där många olika mekaniker jobbar mot samma maskin samtidigt. Detta gör att sparade värden för en fälgtyp alltid används vilket ger tillförlitlighet med hög kvallité vid varje balansering. Det är möjligt att spara upp till 4 hjulprofiler med kod C18 och välja tidigare sparade profiler med kod C17 (Se § 10 Ändrade balanseringssätt). Följande värden är sparade: 48 – Nominella hjuldimensioner – Värden satta med mätarmen – Viktlägen – Hjultyp – Position för förflyttning BA geodyna 4300 – 9512 150 Entry of wheel type, balancing mode and wheel size Entrée du type de roue, du mode d’équilibrage et des dimensions de roue 7.3.7 Inputs for special balancing operations (wheel type 3) 7.3.7 Entrée des valeurs d’équilibrage dans des cas spéciaux (type de roue 3) If none of the programmable balancing modes can be used (e.g. with special wheels) choose wheel type 3. Measure the distance and the actual correction dimensions (centre of gravity of balance weight to be fitted) directly on the wheel (Fig. 40). Si on ne peut pas utiliser de mode d’équilibrage programmable (ex: roues spéciales), sélectionner le type de roue 3. Press and hold the relative function key (Fig. 40, item 1 – 3) and rotate the wheel to set the respective values. Mesurer la valeur d’écart et les valeurs d’équilibrage effectives (centre de gravité de masse) directement à partir de la roue à équilibrer (Fig. 40). Appuyer la touche de fonction correspondante (Fig. 40, pos. 1 – 3), la maintenir appuyée et régler la valeur respective en tournant la roue. Si la valeur souhaitée est affichée, relâcher la touche de fonction. Release the function key as soon as the desired value is read out. 7.3.8 Input for display of static unbalance (e.g. with small wheels) 7.3.8 Entrée de dimension pour l’affichage du balourd statique (ex: pour des roues étroites) For wheels which should only be balanced statically (width less than 3.5”), only the correction diameter has to be entered. To enable the machine to start, an arbitrary width between 1“ and 13.8“ has to be entered as well. Pour les roues qui devraient être équilibrées statiquement (largeur moins de 3,5”), seul le diamètre d’équilibrage est entré. Pour que la machine démarre, une valeur quelconque entre 1“ et 13,8“ doit être entrée également pour la largeur. Input is made as for standard wheels. L’entrée des dimensions s’effectue tout comme pour les roues standard. Press and hold the relative function key (diameter/width) and rotate the wheel to set the respective values. Release the function key as soon as the desired value is read out. For correction diameters and possibilities of static unbalance correction, please refer to Fig. 50. Appuyer la touche de fonction correspondante (diamètre/largeur), la maintenir appuyée et régler la dimension souhaitée en tournant la roue. Si la dimension souhaitée est affichée, relâcher la touche de fonction. Les diamètres et les possibilités d’équilibrage du balourd statique sont montrés à la Fig. 50. 7.3.9 Store wheel profiles 7.3.9 Mémoriser les profils de roue Wheel profiles permit the storage of values for wheels that for example are balanced frequently so that the wheel data need not be entered again and again. This function is particularly useful for workshops that carry out series fitting of tyre/rim assemblies or frequently handle the same wheel types (e.g. workshops that offer rims for retrofitting). The once–only storage of the wheel data in the profiles guarantees that the same correction planes are always used, in particular for alloy wheels, thus providing consistent balance quality. Les profils de roue permettent de mémoriser les paramètres des roues équilibrées par exemple très souvent. Alors on n’a plus besoin d’entrer à chaque fois les données de ladite roue et autres paramètres. Cette fonctionnalité est utilisée en particulier par les entreprises qui montent des ensembles montés, ou bien pour toutes les roues fréquemment manipulées en entreprise (p. ex. si l’entreprise propose des jantes en équipement alternatif). La mémorisation unique des paramètres de la roue sous ” profil ” garantit que seront toujours utilisés les mêmes plans de compensation, notamment pour les jantes en alliage léger, assurant ainsi une qualité constante de l’équilibrage. It is possible to store up to 4 wheel profiles via code C18 and to select previously stored profiles via code C17 (see § 10. Changing modes of operation). – Nominal wheel dimensions Il est possible de mémoriser jusqu’à 4 profils de roue en entrant le code C18 et de choisir un profil de roue mémorisé avant en entrant le code C17 (voir § 10. Sélection du mode de fonctionnement). – Values measured with the gauge arm Les valeurs suivants sont mémorisés: – Weight positions – Dimensions nominales de la roue – Wheel type – Valeurs mesurées par la pige – Positions for relocation – Positions des masses d’équilibrage – Type de roue – Positions à retrouver The following values are stored: Operation manual geodyna 4300 – 9512 150 Mode d’emploi geodyna 4300 – 9512 150 49 Inmatning av fälgtyp, viktplacering och fälgmått 7.3.10 Ändring av inmatade data efter mätning Om felaktiga data/eller felaktig hjultyp eller balanseringssätt används vid mätningen, ändra data genom att trycka in funktionsknapp (Bild 9, Pos. 2). Maskinen registrerar de nya värdena utan att man behöver göra om hela mätningen. 7.4 Om fälgen är skadad Om det upptäcks att hjulet är skevt eller däcket är felmonterat på fälgen skall hjulet ej balanseras Att kontrollera om hjulet är skevt eller däcket är felmonterat på fälgen när skyddshuv används. Maskinen är konstruerad så att hjulet bromsas automatiskt när skyddshuven öppnas (kod C5 visar 1). Observation av hjulet rullande kan endast ske om värdet är satt till 0 (hjulet bromsas ej när skyddshuven öppnas). Om funktionen är satt till ”0”. Kontrollera att maskinens axel inte är blockerad, genom att snurra på den. Om man ska stå och observera ett hjul på nära håll rekommenderas det att man använder skyddsglasögon och tätt åtsittande klädsel. 50 Om hjulet är fastsatt på maskinen för att konstatera om hjulet är skevt eller däcket är felmonteraa. Tryck på START–knappen eller stäng skyddshuven om den funktionen är aktiverad – före den aktuella mätningen. När hjulet sedan kommit upp i varv, Öppnas skyddshuven för att kontrollera om hjulet är skadat. BA geodyna 4300 – 9512 150 Entry of wheel type, balancing mode and wheel size Entrée du type de roue, du mode d’équilibrage et des dimensions de roue 7.3.10 Correction of inputs after measurement 7.3.10 Correction ultérieure de dimensions entrées If incorrect data and/or an incorrect wheel type or balancing mode were entered for a measuring run, enter the correct dimensions, wheel type or balancing mode, and press the precision key (Fig. 9, item 2). Upon operation of the precision key the electronic unit accepts the new input, processes it and then reads out the correspondingly corrected measured data without need to repeat the measuring run. 7.4 Observation of radial and lateral run-out of the wheel Si, après une lancée de mesure, on constate que des dimensions nominales de jante ou/et des critères de mesure erronés (type de roue, position des masses) ont été entrés, entrer les dimensions nominales de jante ou les critères de mesure corrects et appuyer sur la touche de précision (Fig. 9, pos. 2). Quand on appuie sur la touche de précision, l’unité électronique reprend la nouvelle entrée, la traite et indique ensuite les valeurs mesurées correctes sans que l’on n’aie besoin d’effectuer une nouvelle lancée de mesure. 7.4 Observation du faux-rond et du voilage de la roue The check for radial and lateral run-out is recommended prior to the actual measuring run as with a wheel showing considerable run-out the tyre might be incorrectly fitted on the rim and, therefore, the wheel should not be balanced at all. Un contrôle du faux-rond et du voilage est recommandé avant la lancée de mesure. Si une roue présente en effet un faux-rond et un voilage importants, c’est que le pneu n’a éventuellement pas été monté correctement sur la jante et que la roue ne devrait donc pas être équilibrée. Check for radial and lateral run-out Contrôle du faux-rond et du voilage When supplied from our works the machine is programmed such that the wheel is braked automatically when the wheel guard is raised (code C5 set to 1). La machine est fournie programmée de sorte que la roue soit freinée automatiquement quand le carter de roue est levé (code C5 réglé à 1). Observation of the wheel is only possible when this mode of operation is set to 0 (no braking of wheel by raising of wheel guard). L’observation de la roue n’est possible qu’au cas où ce mode de fonctionnement serait réglé à 0 (pas de freinage de la roue par levage du carter de roue). If the mode is set to 0: Si ce mode de fonctionnement est réglé à 0: The wheel rotates when the wheel guard is open. Make sure that the wheel is not blocked by tools or the like. Wear safety goggles and tightly fitting working clothes. If the wheel clamped on the balancer is to be checked for visible radial and/or lateral run-out, start a run by pressing the START key or by closing the wheel guard if this mode is chosen – prior to the actual measuring run. Then raise the wheel guard and observe the wheel for radial and lateral run out while it slows down. Operation manual geodyna 4300 – 9512 150 La roue tourne quand le carter est ouvert. S’assurer que la roue ne soit pas bloquée par un outil ou de pareil. Porter des lunettes de protection et des vêtements de travail pas trop larges. Si la roue serrée sur l’équilibreuse doit passer une inspection visuelle pour la détermination de faux-rond et/ou de voilage, initier une lancée en appuyant sur la touche START ou par la fermeture du carter de roue si ce mode est choisi – avant la lancée de mesure propre. Puis lever le carter de roue et observer la roue en décélération si elle présente du faux-rond ou du voilage. Mode d’emploi geodyna 4300 – 9512 150 51 Balansering av hjulet 8. Balansering av hjul Utför följande: 41 – Om nödvändigt gör en kalibrering (se § 6.2). – Sätt fast hjulet korrekt (se § 6.3). – Fastställ hjultyp (se § 7.1). – Välj balanseringssätt (se § 7.2). – För in fälgmått och distansmått (se § 7.3). Om flera hjul av samma sort (identiska fälgar) skall balanseras behövs bara första hjulets data inmatas. Värdena finns därefter lagrde i maskinen tills nytt data matas in. Om hjulet som skall balanseras är väldigt smalt (t.ex. motorcykelhjul), mäts endast statisk obalans (se § 8.4). 42 1 2 2 1 8.1 Mätning Starta mätningen genom att trycka in START–knappen eller stänga skyddshuven om sådan används. Om maskinen inte startar och en felkod visas på displayen, (se Under accelerationsfasen av mätningen visas vald balanseringtyp på displayen (Bild 41). Under mätningen visas två streck på var sin sida av fälgsymbolen (Bild 42). Mätningen stoppas automatiskt. Värdena för obalans visas på displayen (Bild 43, Pos. 2) och hjulet bromsas till stillastående. När hjulet stannat visas på displayen åt vilket håll hjulet skall vridas genom respektive pil för att fastställa var obalansen sitter på fälgen (Bild 43, Pos. 1). 43 Vrid hjulet i pilens riktning (Bild 43, Pos. 1). När hjulet har vridits till rätt position, pekar pilarnas spetsar mot varandra (Bild 44, Pos. 2). Sätt fast balansvikten på fälgen exakt lodrätt över axeln (Bild 44, Pos. 3) i enlighet med viktvärdet som visas (Bild 44, Pos. 1). 1 2 För rätt fastsättning av balansvikterna se 45, 47 och 50. Bild 44 Exempel på det som visas på displayen för högra viktobalansvärdet 1 2 3 25 Exakt position – endast pilarna visas Aviktmått på obalansen läget där vikten skall placeras 3 44 52 BA geodyna 4300 – 9512 150 Balancing the wheels 8. Balancing the wheel Equilibrage de roue 8. Equilibrage de roue Preparations: Préparatifs: – Compensation run carried out, if necessary (see § 6.2). – – Wheel correctly clamped (see § 6.3). Lancée de compensation effectuée, si nécessaire (voir § 7.1). – Wheel type chosen (see § 7.1). – Serrage correct de la roue (voir § 6.3). – Balancing mode chosen (see § 7.2). – Sélection du type de roue souhaité (voir § 7.1). – Sélection du mode d’équilibrage souhaité (voir § 7.2). – Entrée de l’écart et des dimensions de jante, (voir § 7.3). – Distance and rim dimensions entered (see § 7.3). If several wheels of the same wheel type (identical nominal rim dimensions) are balanced in succession, it is only necessary to enter the data for the first wheel. The inputs will remain stored until new data is entered. If the wheels to be balanced are rather small (e. g. motorcycle wheels), only static unbalance is measured and corrected (see § 8.4). Si plusieurs roues du même type (dimensions nominales de jante identiques) sont équilibrées l’une après l’autre, il suffit d’entrer les données de la première roue. Elles restent en mémoire jusqu’à l’entrée de nouvelles données. Si les roues à équilibrer sont assez étroites (p. ex. roues de moto), seul le balourd statique est mesuré et équilibré (voir § 8.4). 8.1 Measurement 8.1 Mesure Start the measuring run (by pressing the START key or closing the guard, depending on adjustment). Lancer la mesure par actionnement de la touche START ou par fermeture du carter de roue suivant la programmation. If the machine does not start and an error code is given in the display, see § 11. Error codes. Si la machine ne démarre pas et qu’un code d’erreur est affiché, voir § 11. Codes d’erreur. During the acceleration phase for the measuring run the selected balancing mode is displayed (Fig. 41). Pendant la phase d’accélération pour la lancée de mesure, le mode d’équilibrage est affiché (Fig. 41). During measurement one middle segment is read out on each of the digital displays (Fig. 42). Pendant la lancée de mesure, seul un segment du milieu de chaque afficheur numérique est allumé (Fig. 42). After measurement the machine stops automatically, the amounts of unbalance are read out on the digital displays (Fig. 43, item 2) and the wheel is braked down to standstill. When the wheel has stopped the direction towards the correction position (location of unbalance) is viewed on the direction indicator (Fig. 43, item 1) associated with the relative correction plane. La mesure terminée, la machine s’arrête automatiquement, les grandeurs du balourd sont affichées sur les afficheurs numériques (Fig. 43, pos. 2) et la roue est freinée jusqu’à l’immobilisation. Quand la roue est arrêtée, les directions d’orientation correspondantes (position du balourd) sont affichées sur les indicateurs de direction pour les plans de correction respectifs (Fig. 43, pos. 1). Index the wheel into correction position following the direction indicated (Fig. 43, item 1). Tourner la roue dans la direction respectivement indiquée par l’indicateur de direction (Fig. 43, pos. 1). On reaching the respective correction position only the two arrow-heads are visible (Fig. 44, item 2). Quand la position de correction respective est atteinte, seules les deux pointes de flèche (Fig. 44, pos. 2) s’allument. In this position attach a balance weight in the correction position at the top of the rim, exactly perpendicular to the main shaft (Fig. 44, item 3) in accordance with the chosen balancing mode and the amount of unbalance (Fig. 44, item 1). Dans cette position, fixer la masse d’équilibrage sur la jante, exactement perpendiculairement à et au-dessus de l’arbre principal (Fig. 44, pos. 3), en fonction du mode d’équilibrage sélectionné et de la grandeur du balourd (Fig. 44, pos. 1). For correct fitting of the balance weights see Fig. 45, 47 and 50. Pour la position correcte des masses d’équilibrage, consulter les Fig. 45, 47 et 50. Fig. 44 Example of display and correction of the righthand correction plane Fig. 44 Exemple d’affichage et de correction du plan de correction droit 1 2 1 2 3 Display of amount of unbalance Display of correction position – only the arrow-heads light up Position of balance weight on rim Operation manual geodyna 4300 – 9512 150 3 Affichage de la grandeur du balourd Affichage de la position de correction – seules les pointes de flèche s’allument Position de la masse d’équilibrage sur la jante Mode d’emploi geodyna 4300 – 9512 150 53 Balansering av hjulet 8.2 Exakt fastsättning av vikterna Fastsättning av vikterna för balanseringsätten nor., Alu 1, Alu 2, Alu 3, Alu 4 och Alu 5 visas i detta kapitel. Fastsättning av vikterna för Alu 2P och Alu 3P beskrivs i § 7.3.5 och 7.3.6. 8.2.1 Fastsättning av clipsvikter 45 Om det är nödvändigt, justera in hjulets läge så att båda pilspetsarnat pekar mot varann och är lika stora(Bild 44, Pos. 2). Lås fast hjulet med fotpedalen. Placera clipsvikten på fäljkanten exakt lodrätt över hjulaxeln (Bild 45). Efter balanseringen kontrollera obalansen igen (se § 8.3). Viktminimering och optimering kan utföras efteråt (Se § 12). 8.2.2 Fastsättning av klistervikter med hjälp av mätarmen Observera Om felkod H20, visas på displayen när mätarmen placeras mot fälgen visas ej korrektionvärdet (se § 11. fekoder). 1 2 3 4 46 Förklaring; Antingen uppstod ett fel när mätarmen placeras på fälgen eller också kan kilstervikter ej användas med mätarmsmetoden Se § 8.2.3. 5 Om det är nödvändigt, justera in hjulets läge så att båda pilspetsarnat pekar mot varann och är lika stora( (Bild 44, Pos. 2). Lås fast hjulet med fotpedalen. Rengör fälgen där vikten skall placeras. Välj ut en klistervikt med rätt vikt enl displayen samt pressa den mot fäljen för rätt böjning. För fram mätarmen(Bild 46, Pos. 1) och drag ut brickan (Bild 46, Pos. 2) inåt. Placera klistervikten (Bild 46, Pos. 3)på mäthuvudet med foliesidan uppåt så att vikten hamnar symetriskt mot pilen (Bild 46, Pos. 4). Håll fast vikten på mäthuvudet skyddsfolien avlägsnas från vikten. För mätarmen mot den tidigare inlästa platsen för vikten. samtidigt som Displayen visar ett siffertal som minskar allt eftersom mäthuvudet närmar sig den rätta viktplaceringen. När vikten placeras inom ett siffervärde på 0 ±1 mm ljuder en tonsignal som bekräftar att vikten placeras rätt. 54 BA geodyna 4300 – 9512 150 Balancing the wheel 8.2 Fitting the balance weights correctly Equilibrage de roue 8.2 Fixation correcte des masses d’équilibrage Fitting of balancing weights for the balancing modes nor., Alu 1, Alu 2, Alu 3, Alu 4, and Alu 5 is specified and illustrated in this paragraph. La fixation des masses d’équilibrage pour les modes d’équilibrage nor., Alu 1, Alu 2, Alu 3, Alu 4 et Alu 5 est décrite et illustrée dans cette chapitre. Fitting of balance weights for the balancing modes Alu 2P and Alu 3P is specified and illustrated in paragraphs 7.3.5 and 7.3.6 La fixation des masses d’équlibrage pour les modes d’équilibrage Alu 2P et Alu 3P est décrite et illustrée dans les chapitres 7.3.5 et 7.3.6. 8.2.1 How to fit balance clips 8.2.1 Fixation de masses à ressort If necessary, index the wheel to the exact correction position in the righthand correction plane. On reaching the correction position only the two arrow-heads light up (Fig. 44, item 2). Si nécessaire, orienter la roue exactement dans la position de correction du plan de correction droit. Quand cette position est atteinte, seules les deux pointes de flèche s’allument (Fig. 44, pos. 2). Press the pedal of the main shaft lock to hold the wheel in this position. Appuyer sur la pédale de blocage pour bloquer la roue dans cette position. Attach the balance clip in the correction position at the rim flange exactly perpendicular to and above the main shaft (Fig. 45). After balancing carry out a check run (see § 8.3). Fixer la masse à ressort dans la position de correction respective sur le rebord de la jante, et ce sensiblement perpendiculaire à et au–dessus de l’arbre principal. (Fig. 45). Après l’équilibrage, effectuer une lancée de vérification (voir § 8.3). Weight minimisation or optimisation can be carried out afterwards (see §12. Optimisation/Weight minimisation). 8.2.2 How to fit adhesive weights using the gauge head Note If an error code H20 is read out when the gauge arm is approached to the rim, there are no data for re-locating the correction plane (see §11. Error codes). This means that either an error was made in applying the gauge arm, or the adhesive weight cannot be fitted on the rim using the gauge head. In this case refer to § 8.2.3. If necessary, index the wheel to the exact correction position in the left correction plane. On reaching the correction position only the two arrow-heads light up (Fig. 44, item 2). Ensuite, on peut effectuer une minimisation des masses ou une optimisation de stabilité de marche (voir § 12. Optimisation / Minimisation des masses). 8.2.2 Fixation de masses adhésives à l’aide de la tête de pige Remarque Si un code d’erreur H20 est affiché quand on approche la pige de mesure de la jante, c’est qu’il n’existe pas de données pour retrouver le plan de correction (voir § 11. Codes d’erreur). Soit une erreur a été commise au cours du palpage des dimensions, soit la masse adhésive ne doit pas être fixée sur la jante au moyen de la tête de pige. Dans ce cas, observer le § 8.2.3. Press the pedal of the main shaft lock to hold the wheel in this position. Si nécessaire, orienter la roue exactement dans la position de correction du plan de correction gauche. Quand cette position est atteinte, seules les deux pointes de flèche s’allument (Fig. 44, pos. 2). Clean the fitting position before attaching the adhesive weights. Appuyer sur la pédale de blocage pour bloquer la roue dans cette position. Select an adhesive weight of the indicated size and adjust it to the wheel radius by bending. Avant de fixer les masses adhésives, nettoyer l’emplacement de fixation. Raise the gauge arm (Fig. 46, item 1) and pull the holding ring of the gauge head (Fig. 46, item 2) inwards. Choisir la masse adhésive destinée conformément à l’affichage et la fléchir pour l’adapter au rayon de la roue. Insert the adhesive weight (Fig. 46, item 3) into the head with the protective foil facing upwards symmetrically relative to the arrow (Fig. 46, item 4). Basculer la pige de mesure (Fig. 46, pos. 1) en haut et tirer l’anneau porte-masse (Fig. 46, pos. 2) vers l’intérieur. Press the adhesive weight firmly against the head and remove the protective foil from the weight. Mettre la masse adhésive (Fig. 46, pos. 3) dans la tête d’équilibrage symétriquement à la flèche et que la pellicule de protection soit visible d’en haut (Fig. 46, pos. 4). Pull the gauge arm towards application position. Presser la masse adhésive fermement contre la tête et enlever la pellicule de protection de ladite masse. Tirer la pige de mesure vers le point de palpage. The display shows the dimension for the first distance, which decreases as the gauge is approached. At 0 ±1 an audible signal is given to show that the correction plane has been reached. Operation manual geodyna 4300 – 9512 150 Il sera affiché la valeur du premier écart qui se réduira au fur et à mesure que la pige s’approche. Une fois 0 1 atteint, un signal acoustique confirme que le plan de correction est atteint.· Mode d’emploi geodyna 4300 – 9512 150 55 Balansering av hjulet Pressa fast klistervikten hårt på fälgen klacken(Bild 46, Pos. 5). För tillbaka mätarmen till viloläget. Tryck fast vikten för hand. med 8.2.3 Fastsättning av klistervikter med förinställd vikt 15,5 15,5 Om inmätning ej kan ske med mätarmen och fälgdimension inmatats med funktionsknapparna samtidigt som hjulet roterats: 7,5 Fäst klistervikterna på de fastställda platserna enligt den valda balanseringsmetoden(Bild 47). Var noga med placeringen. Om kontrollmätning visar att en liten obalans återstår kommer ej OK att visas på displayensom, vilket innebär att en av vikterna kan behöva flyttas en liten bit. 47 OK 48 OK 8.3 Kontrollmätning När balansvikterna är placerade på fälgen görs en kontrollmätning. Tryck på START-knappen eller stäng Skyddshuven, om sådan används. Om kontrollmätningen visar att hjulet är perfekt balanserat visar båda digitala mätvärdena 0 och displayen visar OK (Bild 48). Observera Om de båda viktvärdena som precenteras på displayen är 0 medan “OK” ej visas är den dynamiska toleransen under gränsen (Gränsvärdet 4,5 gram) Däremot är den statiska obalansen fortfarande över gränsvärdet. Denna obalans kan kontrolleras och balanseras bort(kan behövas för extremt känsliga bilar) genom att trycka in funktionsknappen (Bild 9, Pos. 2) montera den extra vikten såsom en statisk vikt bör placeras. 8.4 Statisk obalans Vanligtvis skall hjulet balanseras dynamiskt, alltså i två plan för viktplacering. Om det hjul som skall balanseras är mycket smalt (t.ex. motorcykelhjul), skall endast statisk obalans utföras. För att visa statisk obalans tryck in funktionsknappen (S/D-knappen; Bild 9, Pos. 6). Värdet på obalansen visas på displayen till vänster om. fälgsymbolen. Pilarnas riktning till positionen där vikten skall placeras visar åt samma håll (Bild 49). 49 56 För inställning av möjlig viktplacering för statisk obalans visas i Bild 50. BA geodyna 4300 – 9512 150 Balancing the wheel Equilibrage des roue Swing the gauge arm out towards the rim and press the weight firmly against the rim using the ejector (Fig. 46, item 5). Basculer la pige de mesure vers l’extérieur contre la jante et presser la masse fermement contre la jante à l’aide de l’éjecteur (Fig. 46, pos. 5). Swing the gauge arm in and return it to its home position. Firmly press the adhesive weight on the rim by hand. Basculer la pige de mesure vers l’intérieur et la remettre en position de repos. Presser la masse adhésive à la main encore une fois fermement contre la jante, et ce sur toute la surface de contact. 8.2.3 How to fit adhesive weights based on given dimensions 8.2.3 Fixation de masses adhésives selon indication de dimensions If the correction positions are not accessible with the gauge arm and the rim dimensions have been entered using the function keys and rotating the wheel: S’il est impossible de palper les positions de correction et si les dimensions de jante ont été entrées par l’intermédiaire des touches de fonction et en tournant la roue: Fit adhesive weights in the given positions according to the balancing mode. Make sure to observe the given positioning dimensions (Fig. 47). Dimensional tolerances result in slight deviations of the measured values so that the weight may need to be repositioned after the check run. In this case an OK indication is not displayed after the check run. Fixer les masses adhésives dans les positions données suivant le mode d’équlibrage tout en respectant impérativement les dimensions de positionnement données (Fig. 47). Les écarts dimensionnels donnent lieu à de faibles écarts de mesure, de sorte qu’il puisse être nécessaire de changer la position de la masse après la lancée de verification. Dans ce cas, il n’y a pas d’affichage ” OK ” après la lancée de verification. 8.3 Check run 8.3 Lancée de vérification When the balance weights are fitted start a check run. Quand les masses d’équilibrage sont fixées, effectuer une lancée de vérification. On completion of the check run when the wheel is perfectly balanced, both digital displays show 0 and the OK indicators come up (Fig. 48). Note If both amount readings are 0, but there is no OK reading, dynamic unbalances below the tolerance limit (suppression preset to 3.5 g) add to a static unbalance above the tolerance limit. These residual unbalances are read out upon operation of the precision key (Fig. 9, item 2) and should then be balanced. 8.4 Static unbalance Quand la lancée de vérification est terminée et la roue parfaitement équilibrée, les deux afficheurs numériques indiquent 0 et les indicateurs OK placés au-dessus de l’afficheur de grandeur s’allument (Fig. 48). Remarque Si les deux afficheurs de grandeur indiquent 0, mais s’il n’y a pas d’affichage OK, les balourds dynamiques inférieurs à la limite de tolérance (suppression préréglée à 3,5 g) s’additionnent à un balourd statique supérieur à la limite de tolérance. Ces balourds résiduels sont affichés par actionnement de la touche de précision (Fig. 9, pos. 2) et peuvent encore être équilibrés. 8.4 Balourd statique In general the wheels should be balanced dynamically, that is in two correction planes. En règle générale, les roues doivent être équilibrées dynamiquement, c’est-à-dire en deux plans de correction. If the wheels to be balanced are rather small (e. g. motorcycle wheels), only static unbalance should be measured and corrected. Si les roues à équilibrer sont assez étroites (ex: roues de moto), seul le balourd statique doit être mesuré et équilibré. To display static unbalance press the function key to select the display of dynamic or static unbalance (S/D key; Fig. 9, item 6). The amount of unbalance is then read out at the left digital display. The direction to be indexed and the correction position are indicated simultaneously by both direction indicators (Fig. 49). For correction diameter and possibilities of correction of static unbalance see Fig. 50. Operation manual geodyna 4300 – 9512 150 Pour l’affichage du balourd statique, appuyer sur la touche de fonction pour commuter entre affichage du balourd statique et dynamique (touche S/D ; Fig. 9, pos. 6). La grandeur du balourd n’est affichée que sur l’afficheur numérique gauche. Le sens d’orientation et la position de correction sont affichés simultanément sur les deux indicateurs de direction (Fig. 49). Pour les diamètres et les possibilités de correction du balourd statique, consulter la Fig. 50. Mode d’emploi geodyna 4300 – 9512 150 57 Balansering av hjulet Rekommendation för fastsättning av balansvikter vid statisk balansering Viktplaceringen vid statisk obalans är densamma som vid dynamisk obalans. Vid olika viktplacerigssätt där viktplaceringen ej kan fastställas (Alu 2, Alu 3, Alu 4 och Alu 5), är viktplaceringen inprogrammerad i maskinen. 50.1 Det är inte alltid möjligt att mäta in korrekt statisk obalans till en exakt positon på fälgen. Observera följande rekommendation (Bild 50). Vid stor statisk obalans (t.ex 30 g) dela obalansen i två lika stora vikter samt placera dom på var sin fälgkant med hänsyn tagen till mätmetod (Bild 50.1). Vid liten obalans placera vikterna som (Bild 50.2 och 50.3).visar. Den dynamiska obalansen blir därigenom försumbar. 50.2 Tips Bilderna Bilder 50.1 – 50.3 visar var vikterna kan placeras. 50.3 När klistrade vikter används, eller när båda typerna är blandade fortsätt mätningen på analogt sätt enligt vald balanserings– metod. För balansreringssätt Alu 2 och Alu 3 fästs vikterna i dold läge på insidan av fälgen om mätmetoden för statisk obalans så visar (Bild 50.4). 50.4 50 58 BA geodyna 4300 – 9512 150 Balancing the wheel Equilibrage des roue Recommendations for fitting balance weights for static unbalance correction Conseils pour la fixation des masses en cas d’équilibrage statique The correction diameter of static unbalance is usually the same as the one of dynamic unbalance. With various balancing modes where the weights are not fitted on identical correction diameters (Alu 2, Alu 3, Alu 4 and Alu 5), the correction diameter for static unbalance is programmed in the machine. Le diamètre de correction du balourd statique est normalement le même que pour le balourd dynamique. Dans certains modes d’équilibrage où les masses ne sont pas fixées sur le même diamètre de correction (Alu 2, Alu 3, Alu 4 et Alu 5), le diamètre de correction pour le balourd statique est programmé. As it is not always possible to correct static unbalance in the ideal rim position, the following recommendations for correction (Fig. 50) should be observed. Comme il n’est pas toujours possible de corriger le balourd statique dans une position de correction idéale, les conseils suivants devraient être observés pour la correction du balourd (Fig. 50). With large static unbalance (e.g. 30 g) divide the unbalance into two fairly equal parts and correct it at both sides of the wheel, considering the chosen balancing mode (Fig. 50.1). With small static unbalance fit the balance weight either in the outer or inner correction plane (Fig. 50.2 and 50.3). The dynamic unbalance created thereby is negligible. En cas de balourd statique élevé (ex: 30 g), diviser le balourd en deux parties à peu près égales et les corriger sur les deux côtés de la roue, en fonction du mode d’équilibrage sélectionné (position de fixation – Fig. 50.1). En cas de balourd statique moins élevé, fixer une masse d’équilibrage soit sur le plan intérieur, soit sur le plan extérieur de la roue (Fig. 50.2 et 50.3). Le balourd dynamique ainsi produit est négligeable. Note Remarque Figures 50.1 – 50.3 illustrate how balance clips can be fitted. When adhesive weights are used, or both types are mixed, proceed analogously depending on balancing mode. Les figures 50.1 – 50.3 montrent la fixation d’une masse à ressort. Pour les masses adhésives ou une combinaison des deux types de masses, procéder par analogie en fonction du mode d’équilibrage. For balancing modes Alu 2 and Alu 3 fit a balance weight in hidden position inside the rim; in this case the correction diameter for static unbalance correction lies inside the rim (Fig. 50.4). Operation manual geodyna 4300 – 9512 150 En cas des modes d’équilibrage Alu 2 et Alu 3, fixer une masse d’équilibrage en position cachée à l’intérieur de la jante; dans ce cas, le diamètre de correction du balourd statique se trouve à l’intérieur de la jante (Fig. 50.4). Mode d’emploi geodyna 4300 – 9512 150 59 Viktsplit – att dölja vikterna bakom ekrarna 9. 15g 5g 20g Viktsplit – att dölja vikterna bakom ekrarna. När ekrade fälgar (Mjukt rundad ytterkant–fälg) balanseras, utförs viktplaceringen bakom ekrarna – metoden kallas viktsplit I stället för att placera vikten synlig mellan ekrarna, delas vikterna upp i två delar där varje viktdel placeras dold bakom resp närliggande eker (Bild 51). Efter första obalansmätningen beräknar elektroniken i maskinen automatiskt viktplaceringen bakom ekrarna vilket sedan visas på displayen. Mätningsförfarandet beskrivs nedan. 51 9.1 Arbetsgång Viktsplitplacering aktiveras i maskinen automatiskt vid mätmetod Alu 2, Alu 2P och Alu 3, Alu 3P (dold viktplacering) och kan alltid väljas. C 1 – + 9.2 Val av balanseringsmetod (viktplaceringsläge), val Inmatning av uppgifter för viktsplit sker när fälgens normala data (bredd och diameter) har programmerats in i maskinen. Tryck in funktionsknappen (Bild 52, Pos. 1) och håll den intryckt. Snurra hjulet och välj balanseringssätt Alu 2, Alu 2P eller Alu 3, Alu 3P (viktplaceringsläge – Bild 52). Släpp sedan upp knappen. Tryck omgående in samma knapp och håll den nedtryckt. Alu 2, Alu 2P Alu 3, Alu 3P 52 Se Bild 53 med “HSP” (på engelska: Hidden Spoke Placement) Sedan matar man in det antal ekrar som fälgen har. Snurra hjulet för att programmera in antal ekrar (Bild 52, Pos. 1) i exemplet på bilden 58 är 12 ekrar inprogrammerat. Släpp upp knappen när rätt antal ekrar visas till höger på displayen (Bild 53). Om viktplaceingarna enligt Alu 2p eller Alu 3p har valts använder man därefter mätarmen och läser in de platser där man vill placera klistervikterna på. 53 60 BA geodyna 4300 – 9512 150 Behind-the-spokes placement 9. Behind-the-spokes placement When spoked wheels (SOFTLINE rims) are balanced, the behind-the-spokes placement mode (also called split weight mode) allows balance weights which would have to be fitted between two spokes according to the measured unbalance (hence would be visible from outside) to be placed in hidden position behind two spokes adjacent to the unbalance location (see example, Fig. 51). After a measuring run the electronic unit automatically calculates the positions behind the spokes and reads the relative balance weight locations on the display panel. The operating steps for the behind-the-spokes placement mode are described and illustrated below. Positionnement derrière les rayons 9. Le mode de positionnement derrière les rayons permet, pour les roues à rayons (jante SOFTLINE), de positionner les masses d’équilibrage qui, sinon, devraient être positionnées dans un espacement entre les rayons – donc visibles –, précisément derrière les deux rayons voisins de la position prévue – donc invisibles de l’extérieur (p. ex. Fig. 51). L’unité électronique calcule automatiquement après la lancée de mesure le positionnement derrière les rayons et affiche sur le panneau d’affichage la position de correction correspondante. La façon de procéder et l’exécution du positionnement derrière les rayons sont décrites et indiquées ci-dessous. 9.1 9.1 How to proceed Behind-the-spokes placement is activated automatically in Alu 2, Alu 2P and Alu 3, Alu 3P balancing modes (hidden balance weight) and can be selected there whenever required. Choice of balancing mode (weight fitting position), choice of behind-the-spokes placement mode and input of wheel data The behind-the-spokes placement mode is chosen starting from reading “Wheel data”: Press and hold the function key for balancing mode (Fig. 52, item 1). Rotate the wheel to set balancing mode Alu 2, Alu 2P, Alu 3, or Alu 3P (weight fitting positions – Fig. 52). Release the key. Press again the function key for balancing mode. Façon de procéder Le positionnement derrière les rayons est automatiquement activé dans les modes d’équilibrage Alu 2, Alu 2P et Alu 3, Alu 3P (masse d’équilibrage cachée) et peut être sélectionné si cela est souhaité. 9.2 9.2 Positionnement derrière les rayons Sélection de mode d’équilibrage (position de mise en place), sélection du mode pour positionnement derrière les rayons et entrée des données de roue Le positionnement derrière les rayons est sélectionné à partir de l’affichage “Données de roue”: Appuyer sur la touche de fonction pour mode d’équilibrage (Fig. 52, pos. 1) et la maintenir appuyée. Tourner la roue pour régler le mode d’équilibrage Alu 2, Alu 2P, Alu 3 ou Alu 3P (position sur le symbole de jante – Fig. 52). Relâcher la touche. Appuyer sur la touche de fonction pour mode d’équilibrage encore une fois. Next comes Fig. 53 with HSP for behind-the-spokes placement (German: HinterSpeichenPlatzierung) and with the selected number of spokes. Il sera affiché la Fig. 53 avec l’indication ” HSP ” (= sigles allemands de ce mode d’équilibrage) et avec le nombre de rayons pré–sélectionné. The number of spokes can be chosen between 3 and 12. Le nombre de rayons de la roue peut être sélectionné entre 3 et 12. Press and hold the function key for balancing mode (Fig. 52, item 1). Rotate the wheel to set the number of spokes of the wheel (Fig. 53). Operation manual geodyna 4300 – 9512 150 Appuyer sur la touche de fonction pour mode d’équilibrage (Fig. 52, pos. 1) et la maintenir appuyée. Tourner la roue pour régler le nombre de rayons de la roue (Fig. 53). Mode d’emploi geodyna 4300 – 9512 150 61 Viktsplit–Att dölja vikterna bakom ekrarna 9.3 Ändring av inmätt obalans Stäng skyddshuven eller tryck på START–knappen Mätningen startar. Under mätningen visar displayen 2 streck på var sida om fälgsymbolen(Bild 54). Efter mätningen stannar hjulet automatiskt. Bild 55. 54 Displayen visar obalans på två ställen och pilarna visar riktnigen till respektive viktplacering. Placering av vikterna på fälgens vänstra sida Rengör fälgytan där vikterna skall placeras. Fäst klistervikterna på fälgens vänstra sida som beskrivs i § 8.2. 55 Fastsättning av dolda vikter Vrid hjulet i pilens riktning tills en eker står lodrätt upp från hjulaxeln (Bild 56, Pil). Tryck in funktionknappen (Bild 52, Pos. 1) Uppdelning av den tidigare visade vikten sker och displayen visas nytt viktvärde och riktning till den eker där vikten skall placeras (Bild 57), i exemplet 15 g. Den lilla pilen som indikeras till vänster på Bild 57 visar kortaste riktningen till placeringen av den andra klistervikten. 56 Om nödvändigt, lås fast hjulet med fotpedalen vid första mätläget. Rengör fälgytan där vikten skall placeras. Fäst den första vikten på fälgen ( i exemplet 15 g), Bild 57). Rotera sedan hjulet enligt den lilla pilen till vänster Den andra vikten samt riktningen till denna visas då på displayen med aktuellt viktstorlek angivet (Bild 58), I exemplet 5 g. Placera den andra vikten bakom nästa eker på samma sätt. 57 58 62 BA geodyna 4300 – 9512 150 Behind-the-spokes placement Positionnement derrière les rayons 9.3 Correction of measured unbalance 9.3 Equilibrage du balourd mesuré Close the wheel guard or press the START key. The measuring run is carried out. Fermer le carter de roue ou appuyer sur la touche START. La lancée de mesure est effectuée. During measurement one middle segment is read out on each of the digital displays (Fig. 54). Pendant la lancée de mesure, seul un segment du milieu de chaque afficheur numérique est allumé (Fig. 54). After measurement the machine stops automatically, the wheel is braked down to standstill and the display is as shown in Fig. 55. La mesure terminée, la machine s’arrête automatiquement et la roue est freinée jusqu’à l’immobilisation et la Fig. 55 est affichée. This shows the unbalance measured in each correction plane and the respective direction towards the correction position on the direction indicator associated with the relative correction plane. L’affichage indique le balourd mesuré pour chaque plan de correction et la direction d’orientation correspondante sur les afficheurs de direction respectifs. How to fit adhesive weights on the left side of the rim disc Clean the fitting position before attaching the adhesive weights. Fit adhesive weights on the left side of the rim disc as described in § 8.2. Placer la masse adhésive sur le côté gauche du disque de jante Avant de fixer les masses adhésives, nettoyer l’emplacement de fixation. Placer la masse adhésive sur le côté gauche du disque de jante, suivant la description du § 8.2. Fixation d’une masse adhesive cachée How to fit a hidden adhesive weight Rotate the wheel so that a spoke is centred relative to and above the main shaft (Fig. 56, arrow). In this position press the function key for balancing mode (Fig. 52, item 1). The divided amount of unbalance of the behind-thespokes placement is read out for the first adhesive weight in the right correction plane (Fig. 57); in the example 15 g. Tourner la roue, de sorte qu’un rayon soit situé directement au milieu au-dessus de l’arbre principal (Fig. 56, flèche). Dans cette position, appuyer sur la touche de fonction pour mode d’équilibrage (Fig. 52, pos. 1). La grandeur du balourd divisée du mode de positionnement derrière les rayons est affichée pour la première masse adhesive cachée du plan de correction droit (Fig. 57); 15 g dans cet exemple. Remarque Note The small arrow on the left-hand side in Fig. 57 indicates the shortest way to index the position of the other adhesive weight. Le petit flèche à gauche dans la Fig. 57 indique comment tourner la roue pour l’orienter dans la position de l’autre masse cachée le plus vite possible. If necessary, index the wheel to the exact position for correction in the first correction position and hold the wheel in this position with the main shaft lock. Clean the fitting position before attaching the adhesive weights. Si nécessaire, orienter la roue conformément à la paire de flèches à droite jusqu’à la première position de correction et la bloquer en appuyant sur la pédale de blocage. Fit a suitable weight in the correct fitting position (in the example 15 g, Fig. 57). The divided amount of unbalance of the behind-thespokes placement is read out for the second adhesive weight in the right correction plane (Fig. 58); in the example 5 g. Avant de fixer les masses adhésives, nettoyer l’emplacement de fixation. Fixer la masse d’équilibrage appropriée (15 g dans l’ exemple en Fig. 57). La grandeur du balourd divisée du mode de positionnement derrière les rayons est affichée pour la deuxième masse cachée du plan de correction droit (Fig. 58); 5 g dans cet exemple. Fixer la deuxième masse d’équilibrage derrière le rayon de la même manière. Fit the second weight behind the spoke in the same way. Operation manual geodyna 4300 – 9512 150 Mode d’emploi geodyna 4300 – 9512 150 63 Viktsplit–Att dölja vikterna bakom ekrarna Att återvända till mätning av obalans vänster och höger viktlägen (Bild 55): Tryck in funktionsknappen (Bild 52, Pos. 1) Obalansvärdet för vänster och höger sida visas. Programet för splitvikt–placering är fortfarande aktivt så länge någon av balanseringsmetoderna Alu 2, Alu 2P eller Alu 3, Alu 3P är inställd. Att ändra maskinen konventionell mätning: från splitvikt–mätning till Tryck in funktionsknappen för balanseringsätt och håll den intryckt. Snurra hjulet och välj något annat balanseringssätt än Alu 2, Alu 2P eller Alu 3, Alu 3P. Eller Vid inläsning av hjuldata, tryck in funktionsknappen för balanseringssätt och mata in antal ekrar till “0” . Observera Vid obalansmätning med viktsplit–metoden där man ej har matat in ekerläget för uppdelning ännu (Bild 55, exempel 20 gram) görs balanseringen exakt som vid konventionell mätning. Obalansmätningen är endast uppdelad i två vikter när ekerläget har matats in (Bild 56). Detta tillåter även hjul utan ekrar att bli balanserade med viksplit–metoden utan att maskinen måste ställas in för balansering utan viktsplit. Samma situation uppträder vid optimerad mätmetod Om optimering är vald vid mätmetod viktsplit rekommenderas att optimeringen utläses först. Den resulterande viktuppdelningen för obalans utläses efter optimeringen automatiskt i två viktplaceringslägen när splitvikt–balansering används efter optimeringsmätningen. Därför är det inte nödvändigt att återgå till konventionell mätning. 64 BA geodyna 4300 – 9512 150 Behind-the-spokes placement Positionnement derrière les rayons To return to the undivided reading of unbalance for left and right correction plane (Fig. 55): Pour retourner à l’affichage de la grandeur du balourd pas répartie des plans de correction gauche et droit (Fig. 55): Briefly press the function key for balancing mode (Fig. 52, item 1). The unbalances for left and right correction plane are read out. The behind-the-spokes placement mode is still active as long as Alu 2, Alu 2P, Alu 3 or Alu 3P are set. To leave the behind-the-spokes placement mode and reset the electronic unit to the conventional balancing mode: Press and hold the function key for balancing mode. Rotate the wheel to set a balancing mode other than Alu 2, Alu 2P or Alu 3, Alu 3P. Pour quitter le mode de positionnement derrière les rayons et commuter l’unité électronique au mode d’équilibrage conventionnel: or Appuyer brièvement sur la touche de fonction pour mode d’équilibrage (Fig. 52, pos. 1). Les balourds des plans de correction gauche et droit sont affichés. Le positionnement derrière les rayons sera encore active, tant que Alu 2, Alu 2P, Alu 3 ou Alu 3P est active. In the reading “Wheel data” press twice the function key for balancing mode and set number of spokes to 0. Appuyer sur la touche de fonction pour mode d’équilibrage. Tourner la roue pour régler un mode d’équilibrage autre que Alu 2, Alu 2P ou Alu 3, Alu 3P. ou Dans l’affichage “Données de roues”, appuyer deux fois sur la touche de fonction pour mode d’équilibrage et régler le nombre de rayons de la roue à 0. Notes Remarques The unbalance reading of the behind-the-spokes placement mode, which is not yet subdivided for two fitting positions (Fig. 55, example 20 g) is identical with the unbalance reading of the conventional balancing mode. The unbalance reading is only subdivided on two fitting positions when the spoke position is stored (Fig. 56). This feature allows wheels without spokes to be balanced in the behind-the-spokes placement mode without returning to the conventional balancing mode. Si la valeur mesurée dans le mode de positionnement derrière les rayons n’a pas encore été divisée entre les deux positions de fixation des masses (20 g dans l’exemple détaillé à la Fig. 55), elle correspond exactement à celle mesurée dans le mode d’équilibrage normal. Cette division se fera uniquement au moment de la mémorisation de la position des rayons (Fig. 56). Il est donc possible d’effectuer de temps en temps un équilibrage de roues sans rayons dans ce mode d’équilibrage, sans être obligé de repasser au mode d’équilibrage normal. The same situation occurs in the optimisation mode. If optimisation is desired in conjunction with the behind-thespokes placement mode, it is recommended that optimisation be carried out first. The residual unbalance read out after optimisation is subdivided automatically to two fitting positions when the behind-thespokes placement mode is chosen after the optimisation run so that there is no need to carry out another measuring run. Operation manual geodyna 4300 – 9512 150 Il en est de même pour l’optimisation de la stabilité de marche. S’il est prévu d’effectuer non seulement un positionnement derrière les rayons, mais également une optimisation de la stabilité de marche, il convient de procéder d’abord à l’optimisation. Une fois terminée ladite optimisation, tout balourd résiduel éventuellement affiché sera automatiquement divisé entre deux positions de fixation des masses dès que le mode de positionnement derrière les rayons est sélectionné et sans qu’il soit nécessaire de faire une nouvelle lancée de mesure. Mode d’emploi geodyna 4300 – 9512 150 65 Val av funktionssätt 10. Val av funktionssätt Vid normala mätningar behövs ej någon ändring av fabrikens förinställda inställningar av maskinen. I speciella fall eller när det är nödvändigt kan detta utföras genom att ändra i maskinens funktionskoder. Inställning av funktionssätt (Bild 59 – Exempel kod C2) – + C – + auf 2 to 2 à2 auf 1 to 1 à1 C2 0 C2 Snurra hjulet och ställ in vald kod (t.ex 2) på displayen. Släpp upp knappen så snart önskad kod visas. C, och kod–nummer 2 visas till vänster på displayen. Högra sidan på displayen visar värdet för koden. “0” vilket betyder “från”. Stop C Tryck in C–knappen och håll den intryckt. Senast inmatade C–kod visas. 1 Om den önskade koden redan finns på displayen : Tryck in C–knappen för att återgå till normalvärdet (Bild 60) eller också tryck in STOPP–knappen för att avbryta. Om vald kod skall ändras: Funktionsweise Code 59 Zustand State Etat Tryck in funktionsknappen och håll den intryckt. Snurra hjulet och ställ in önskad kod (t.ex. 1) på displayen. Vissa koder har förinställda värden. Släpp upp knappen när vald kod visas. Tryck in C–knappen för att spara det nya värdet och komma tillbak till mätningsläget (Bild 60) eller tryck in STOPP–knappen för att avbryta. Avbryta inställningen och återgå utan ändring. Tryck in STOPP–knappen. Den nya koden lagras i maskinen till den slås av eller ny inmatas. Den nya inställningen kan sparas permanent med koden C10 vilket innebär att maskinen lagrat värdet även om den stängs av, eller till nytt värde inmatats. Koden för C4 navkompensering, kan ej ändras permanent. Möjliga ändringar och nödvändiga inmatningar beskrivs på efterföljande sidor. 60 66 BA geodyna 4300 – 9512 150 Changing modes of operation Sélection du mode de fonctionnement 10. Changing modes of operation 10. Sélection du mode de fonctionnement Normal operation usually does not require any modification of the factory-adjusted modes of operation or their factory-adjusted state. In special cases, or if the need arises, different modes of operation or states may be changed by entry of a code. Pour le fonctionnement normal, il n’est généralement pas nécessaire de changer les modes de fonctionnement ou leur état programmé par le fabricant. Ceci peut s’effectuer cependant dans des cas spéciaux ou suivant les besoins, par l’entrée de codes correspondants. Inputs and readings when a mode of operation is changed (Fig. 59 – example code C2) Entrée et affichage pour le changement d’un mode de fonctionnement (Fig. 59 – exemple code C2) Press and hold the C key. Appuyer sur la touche C, la maintenir appuyée. The C code that was last set is displayed. Le dernier code C réglé est affiché. Rotate the wheel to set the desired code (e. g. 2) in the display. Tourner la roue pour régler le code désiré (p. ex. 2) sur l’afficheur. Release the C key when the desired code is read out. Quand le code souhaité est obtenu, relâcher la touche C. C and code number 2 are read out in the left digital display. The right digital display shows the present state of this code, e. g. 0 for switched off. L’afficheur numérique gauche affiche C avec le code 2. L’afficheur numérique droit affiche l’état actuel, p. ex. 0 pour débranché. If the desired state is already read out: Si l’état souhaité est déjà affiché: Press the C key to return to the basic reading (Fig. 60), or abort by pressing STOP. Appuyer tout simplement sur la touche C pour repasser à l’affichage de base (Fig. 60), ou bien abandonner en appuyant sur STOP. If the desired state has to be set: Si l’état souhaité doit être réglé: Press and hold the precision key. Rotate the wheel to set the desired state (e. g. 1) in the display. For some codes a given value can be set. Release the precision key when the desired code or value is read out. Appuyer sur la touche de précision et la maintenir appuyée. Tourner la roue pour régler l’état souhaité (p. ex. 1) dans l’afficheur. Pour certains codes, une valeur donnée peut aussi être orientée sur l’afficheur. Press the C key to acknowledge the input and to return to the basic reading (Fig. 60), or abort by pressing STOP. Si le code ou la valeur souhaités sont affichés, relâcher la touche de précision. Appuyer sur la touche C pour confirmer l’entrée et repasser à l’affichage de base (Fig. 60), ou bien abandonner en appuyant sur STOP. Quit the C code or abort and return to normal working mode: Press the STOP key Sortir du code C ou abandonner et retourner au régime de travail: Appuyer sur la touche STOP. Having completed the input of mode of operation it will remain stored until the machine is switched off with the main switch, or until a new input is made. Le changement du mode de fonctionnement ainsi terminé reste mémorisé jusqu’à l’arrêt de la machine moyennant l’interrupteur principal ou jusqu’à ce qu’une nouvelle entrée soit effectuée. The changed modes can also be stored permanently with code C10, so that they are not cancelled when the machine is switched off but are retained in a permanent memory for future use until a new input is made and stored. Code C4 Compensation of clamping means cannot be stored in the permanent memory. Les modes de fonctionnement modifiés peuvent également être enregistrés dans la mémoire permanente en introduisant le code C10, pour qu’ils ne soient pas annulés dès que la machine s’arrête, mais qu’ils soient retenus dans la mémoire permanente pour chaque nouveau branchement de la machine, jusqu’à ce qu’une modification soit effectuée. Le code C4 Compensation du moyen de serrage ne peut pas être enregistré dans la mémoire permanente. The possible changes of codes and the necessary inputs are described in the following. Trouver ci-dessous les changements possibles des codes et les entrées nécessaires. Operation manual geodyna 4300 – 9512 150 Mode d’emploi geodyna 4300 – 9512 150 67 Val av funktionssätt Inmatning:kod/läge Input: code/state Entrée: code/état Visning: kod/läge Display: code/state Lecture: code/état Kod C0 0 C0 C – + till 1 to 1 à1 C0 1 Bild 61 nställning av fabriksinställda värden (se § 5.) 0* = Ingen funktion 1 Valt värde inmatat Siffran visas under ett kort tag) = Inställda värdet kan inprogrammeras permanent. C Kod C1 61 Bild 62 – + C – + till 1 to 1 à1 C1 till 0 to 0 à0 C1 till 1 to 1 à1 C1 Inmatning av avrundning till närmaste 5 gram 0* = 5 gram (0,25 oz) intervall på obalansvisningen 1 1 gram(0,05 oz) intervall på obalansvisningen = 0 Inställda värdet kan inprogrammeras permanent. C – + 1 C 62 Kod C2 Bild 63 Dämpning av minsta avlästa obalansvärdet 0 – + C – + till 2 to 2 à2 C2 till 0 to 0 à0 C2 till 1 to 1 à1 C2 1* = + Dämpning från Dämpning till Inställda värden kan sparas permanent. 0 När dämpningen är aktiverad visas 0 gram på displayen så snart den verkliga obalansen är mindre än det inställda tröskelvärdet (Kod C8). C – = 1 * = Fabriksinställt C 63 68 BA geodyna 4300 – 9512 150 Changing modes of operation Sélection du mode de fonctionnement Code C0 Code C0 Fig. 61 Setting the factory-adjusted modes of operation (see § 5.) Fig. 61 Rétablir les modes de fonctionnement programmés par le fabricant(voir § 5.) 0* = No action 0* = Aucune action 1 Set default values (state 1 is only shown briefly) 1 Etablir les valeurs programmées par le fabricant (l’état 1 n’est affiché que brièvement) = = The selected mode of operation can be transferred to the permanent memory. Le mode de fonctionnement choisi peut être transféré à la mémoire permanente. Code C1 Code C1 Fig. 62 Selecting the resolution of unbalance readings in 1 or 5 g, or 0.05 or 0.25 oz increments Fig. 62 Choix des échelons pour l’affichage du balourd de 1 ou 5 g, ou 0,05 ou 0,25 oz 0* = 5 g (0.25 oz) increments 0* = Echelons de 5 g (0,25 oz) 1 1 g (0.05 oz) increments 1 Echelons de 1 g (0,05 oz) = = The selected mode of operation can be transferred to the permanent memory. Le mode de fonctionnement choisi peut être transféré à la mémoire permanente. Code C2 Code C2 Fig. 63 Selecting suppression of minor unbalance readings Fig. 63 Sélection de la suppression de faibles balourds 0 = Suppression off 0 = Suppression déclenchée 1* = Suppression on 1* = Suppression enclenchée The selected mode of operation can be transferred to the permanent memory. Le mode de fonctionnement choisi peut être transféré à la mémoire permanente. * = Factory adjusted mode * = Programmé par le fabricant Operation manual geodyna 4300 – 9512 150 Mode d’emploi geodyna 4300 – 9512 150 69 Val av funktionskod Visning: kod/läge Display: code/state Lecture: code/état Inmatning: kod/läge Input: code/state Entrée: code/état Kod C3 – + C – + Till 3 to 3 à3 C3 till 0 to 0 à0 C3 Bild 64 Inställning av viktsort gram eller oz. Utförs när maskinen är påslagen. 0 C – + till 1 to 1 à1 C3 0* = Avläsning i gram 1 Avläsning i oz = Inställda värden kan lagras permanet. 1 C 64 Code C4 Bild 65 Elektrisk navkompensation av resterande obalans. – + C till 4 to 4 à4 C4 0 C4 1 Start Efter navkompensering Compensation run completed Lancée de compensation terminée Efter borttagning av navkomp. After the mesuring run Après la lancée de mesure – + auf 0 to 0 à0 Används när man har monterat ett tillbehörsnav och vill ta bort Återställning till 0 tar bort navkompenseringen. Kompensationen tas också bort genom omkalibrering, optimering eller när maskinen stängs av. (koden kan ej sparas i permanenta minnet). 0 = Kompensationen från 1 = Kompensationen till 0 = Borttagning av kompensationen efter avslutad balansering med tillbehörsnavet. Kod C5 C4 0 Bild 66 Bromsning av hjul när skyddshuven öppnas under mätningen 65 0 – + C – + till 5 to 5 à5 Kontrollera att maskinens axel inte är blockerad, genom att snurra på den. Om man ska stå och observera ett hjul på nära håll rekommenderas det att man använder skyddsglasögon och tätt åtsittande klädsel. C5 till 0 to 0 à0 C5 till 1 to 1 à1 C5 = Ingen bromsning 0 1* = Bromsning Inställt värde kan sparas permanent. C – + 1 * = Fabriksinställt C 66 70 BA geodyna 4300 – 9512 150 Changing modes of operation Sélection du mode de fonctionnement Code C3 Code C3 Fig. 64 Selecting unbalance readings in grammes or ounces, active when the machine is switched on Fig. 64 Sélection de l’affichage du balourd (grammes ou onces) qui est active quand on branche la machine 0* = Readings in grammes 0* = Affichage en grammes 1 = Readings in ounces 1 Affichage en onces = The selected mode of operation can be transferred to the permanent memory. Le mode de fonctionnement choisi peut être transféré à la mémoire permanente. Code C4 Code C4 Fig. 65 Electrical compensation of residual unbalance, if any, in the clamping means Fig. 65 Compensation électrique d’un éventuel balourd résiduel dans le moyen de serrage Measurement with increased precision (this mode cannot be transferred into the permanent memory). Compensation has to be cancelled and carried out once again when the clamping means is exchanged. Resetting the status to 0 cancels the compensation of adaptor unbalance. The compensation is cancelled by calibration, or readjustment of the machine, by optimisation, or when the machine is turned off. Mesure à précision élevée (ce mode ne peut pas être enregistré dans la mémoire permanente). La compensation doit être annulée puis effectuée à nouveau après le changement des moyens de serrage. En remettant l’état à 0, la compensation du balourd du dispositif de serrage est annulée. La compensation est annulée par un étalonnage (à l’usine, ou par l’opérateur), une lancée d’optimisation, ou quand la machine est déclenchée. 0 = Carry out compensation 0 = Effectuer la compensation 1 = Compensation completed 1 = Compensation achevée 0 = Compensation after the mesuring run switched off again 0 = Compensation après la lancée de mesure à nouveau dé branchée Code C5 Code C5 Fig. 66 Braking of the wheel when the (optional) wheel guard is opened during the measuring run Fig. 66 Freinage automatique de la roue par ouverture du carter de roue (fourni en option) pendant la lancée de mesure 0 0 = No braking The wheel rotates when the wheel guard is open. Make sure that the wheel is not blocked by a tool or similar item. Wear safety goggles and tightly fitting working clothes. 1* = Braking = Pas de freinage La roue tourne alors que le carter est ouvert. S’assurer que la roue ne soit pas bloquée par un outil ou autre chose. Porter des lunettes de protection et des vêtements de travail pas trop larges. 1* = Freinage The selected mode of operation can be transferred to the permanent memory. Le mode de fonctionnement choisi peut être transféré à la mémoire permanente. * = Factory adjusted mode * = Programmé par le fabricant Operation manual geodyna 4300 – 9512 150 Mode d’emploi geodyna 4300 – 9512 150 71 Val av funktionssätt Inmatning: kod/läge Display: code/state Lecture: code/état Inmatning: kod/läge Input: code/state Entrée: code/état Kod C6 – + till 6 to 6 à6 C – + till 7 to 7 à7 Bild 67 Inställning av varvtal är möjligt mellan 5 till 25 varv per mätning Fabriksinställt till 10 varv* C6 C6 Exempel: ändra till 7 varv per mätning. 7 Observera Minskning av antalet mätvarv sänker precisionen i mätningen. Inställt värde kan sparas permanent. C 67 Kod C7 Bild 68 Ljudsignalens volym. Skalindelning av volymen , 0 till 100. Fabriksinställt till 50* Exempel: Inställ volymen till 60. Volymen ändras inte förrän C–knappen intrycks in igen för kvittering. Inställt värde kan sparas permanent. Kod C8 – + C – + till 7 to 7 à7 C7 till 60 to 60 à 60 C7 Bild 69 Inställning av gränsvärde (tröskelvärde) för minsta mätbara obalans avläst i gram eller oz. Enheten följer inställningen under C 3. 60 Gram: Ställbart mellan 3,5 och 20,0 gram. Fabriksinställt till 4,5 gr. C Gränsvärde 3,50 gram. 68 Ställ in ett annat värde ex. 5,50 gram. – + C till 8 to 8 à8 OZ: Ställbart mellan 0,25 och 2,00 oz. Fabriksinställt till 0,25 oz. C8 Tröskelvärde satt till 0,25 oz. Aktuellt gränsvärde Present limit value Valeur limite actuelle – + C8 3.50 Ställ in ett annat värde ex. 0,50 oz. Inställt värde kan sparas permanent. till 5,50 to 5.50 à 5,50 C8 5.50 * = Fabriksinställt värde C 69 72 BA geodyna 4300 – 9512 150 Changing modes of operation Sélection du mode de fonctionnement Code C6 Code C6 Fig. 67 Number of revolutions per measuring run 5 to 25 revolutions possible, factory–set to 10* Fig. 67 Nombre de tours par lancée de mesure 5 à 25 tours possibles reglée dans nos usines à 10* Example: change to 7 revolutions per measuring run Exemple: changer à 7 tours par lancée de mesure Note Remarque Reducing the number of measurement revolutions will reduce the accuracy of measurement. The selected mode of operation can be transferred to the permanent memory. Une réduction du nombre de tours de mesure fait baisser la précision de mesure. Le mode de fonctionnement choisi peut être transféré à la mémoire permanente. Code C7 Code C7 Fig. 68 Volume of audible signals Scale of volume 0 to 100 (low – high), factory-adjusted to 50* Fig. 68 Intensité sonore Echelle de l’intensité de 0 à 100 (faible – fort), réglée à 50 dans nos usines* Example: set volume to 60 Exemple: régler l’intensité à 60 The volume is not changed before the C key is pressed for quitting the mode. L’intensité n’est changée qu’avant que la touche C soit appuyée pour quitter ce mode. The selected mode of operation can be transferred to the permanent memory. Le mode de fonctionnement choisi peut être transféré à la mémoire permanente. Code C8 Code C8 Fig. 69 Selecting the limit (threshold) value for suppression of minor unbalance readings in grammes, or ounces. The unit (gms or oz) depends on the settings made under C3. Fig. 69 Choix de la limite pour la suppression de faibles balourds, en grammes ou onces. L’unité de mesure (g ou oz) dépend des entrées faites avec C3. Grammes: Grammes: Range 3.50 to 20.0 g Factory-adjusted to 3.5 g Gamme 3,50 à 20,0 g Réglée dans nos usines à 3,5 g Read out limit, e. g. 3.50 g Lire la limite, p. ex. 3,50 g Select another limit, e. g. 5.50 g Choisir une autre limite, p. ex. 5,50 g Ounces: Range 0.25 to 2.00 oz Factory-adjusted to 0.25 oz Onces: Gamme 0,25 à 2,00 oz Réglée dans nos usines à 0,25 oz Read out limit, e. g. 0.25 oz Lire la limite, p. ex. 0,25 oz Select another limit, e. g. 0.50 oz Choisir une autre limite, p. ex. 0,50 oz The selected mode of operation can be transferred to the permanent memory. Le mode de fonctionnement choisi peut être transféré à la mémoire permanente. * = Factory adjusted mode * = Programmé par le fabricant Operation manual geodyna 4300 – 9512 150 Mode d’emploi geodyna 4300 – 9512 150 73 Val av funktionssätt Visning: kod/läge Display: code/state Lecture: code/état Inmatning: kod/läge Input: code/state Entrée: code/état Kod C10 Bild 70 Spara en vald inställning permanenta minnet – + C – + till 10 to 10 à 10 C10 till 1 to 1 à1 C10 0* = 1 = 1 C STOP Tillbaka till balanseringk Back to working mode Repasser au mode normal XXX XXX Ej sparat Data sparad permanent När värden sparas permanent hörs en tre–tons ljudsignal. Om ett värde som sparats permanent skall ändras, ta fram aktuellt värde ( “till eller från” ) för funktionen och ändra det. Sparasedan med kod 10 i det permanenta minnet ( ej möjligt för kod 4). kod C12 70 Bild 71 Avläsning av antal utförda balanseringar – + C – + C12 till 1 to 1 à1 C12 1 222 123 C STOP Exempel: 222.123 balansmätningar genomförda hittills. till 12 to 12 à 12 Tillbaka till balansering Back to working mode Repasser au mode normal Genom att trycka in funktionsknappen och hålla den intryck kan följande avläsningar göras: XXX XXX 1= 2= 3= 4= 5= Totalt utförda balansmätningar Antal mätningar där resultatet var OK Antal optimeringar eller viktminimeringar Antal mätningar i service–läge Antal mätningar sedan sista kalibreringen Varje fullbordad mätning lagras i maskinen. Maximalt antal är 999.999 mätningar., därefter 0–ställs räkneverket. Informationen är främst användbar för statistik. När maskinen ej används, månatlig användning (årsanvändning) osv. Mätningarna adderas i maskinen under mätning till det permanenta minnet. Räknaren kan inte nollställas. 71 Kod C13 Bild 72 Start av balansmätning när skyddhuven stängs – + C – + 0* = Start med START–knappen till 13 to 13 à 13 C13 till 0 to 0 à0 C13 1 0 = Start med skyddshuven Inställt värde kan sparas permanent. * = Fabriksinställt C – + till 1 to 1 à1 C13 1 C 72 74 BA geodyna 4300 – 9512 150 Changing modes of operation Sélection du mode de fonctionnement Code C10 Code C10 Fig. 70 Storing the selected modes of operation in the permanent memory Fig. 70 Enregistrement dans la mémoire permanente des modes de fonctionnement choisi 0* = No storage 0* = Pas de mémorisation 1 Data are stored in the permanent memory 1 = Store in the permanent memory – a three-tone signal is given to acknowledge acceptance. = Données sont stockées dans mémoire permanente Enregistrer dans la mémoire permanente – un signal sonore à trois tons retentit pour confirmer l’enregistrement. If the mode stored in the permanent memory is to be changed, enter the desired state (e. g. on or off) for the mode in question and transfer it via code C10 into the permanent memory (not possible for code C4). Si le mode enregistré dans la mémoire permanente doit être changé, entrer l’état désiré (p. ex. branché ou débranché) du mode en question et le transférer dans la mémoire permanente en entrant le code C10 (ne pas possible pour le code C4). Code C12 Code C12 Fig. 71 Readings of numbers of measuring runs Fig. 71 Affichage des nombres de lancées de mesure Example: 222,123 measuring runs so far performed Exemple: 222.123 lancées de mesure déjà effectuées By pressing the precision key an turning the wheel the following counters can be displayed: En appuyant sur la touche de précision et en tournant la roue, les compteurs suivants peuvent être affichés : 1 = Total number of measuring runs 2 = Number of measuring runs where balance quality was considered OK 3 = Number of optimisations or minimisations 4 = Number of measuring runs in service mode 5 = Number of measuring runs since the last calibration 1 = Nb. de toutes les lancées de mesure effectuées 2 = Nb. des lancées de mesure dont la qualité d’équilibrage a été jugée OK 3 = Nb. d’optimisations ou de minimisations 4 = Nb. de lancées de mesure en mode de service 5 = Nb. de lancées de mesure depuis le dernier étalonnage Every measuring run actually completed is stored. Maximum count is 999,999 runs. Once this number is reached, the counter is reset to zero. The information is primarily useful for statistical purposes, e. g. to obtain evidence of load intervals of parts when defective, or of monthly (yearly) use of the machine, etc. The measuring runs performed while the machine is on are transferred into the permanent memory and added when it is switched off. The counter cannot be reset or changed. Chaque lancée de mesure terminée sera mise en mémoire. Le compte maxi est de 999.999 lancées de mesure. Une fois ce nombre atteint, le compteur est remis à zéro. Ce renseignement intéresse surtout pour les buts statistiques, pour savoir, p. ex., les intervalles de sollicitation des pièces défectueuses, ou l’utilisation de la machine par mois ou par an, etc. Les lancées de mesure qui sont accomplies pendant que la machine est branchée, sont transférées dans la mémoire permanente et additionnées lorsqu’elle est débranchée. Le compteur ne peut pas être remis ou modifié. Code C13 Code C13 Fig. 72 Starting the mesuring run by closing of (optional) wheel guard Fig. 72 Entamer la lancée de mesure par fermeture du carter de roue (fourni en option) 0* = Start via START key 0* = Lancée par la touche START 1 Start via wheel guard 1 Lancée par fermeture du carter de roue = = The selected mode of operation can be transferred to the permanent memory. Le mode de fonctionnement choisi peut être transféré à la mémoire permanente. * = Factory adjusted mode * = Programmé par le fabricant Operation manual geodyna 4300 – 9512 150 Mode d’emploi geodyna 4300 – 9512 150 75 Val av funktionssätt Kod C14 Omkalibrering av maskinen av användaren. Visning: kod/Läge Display: code/state Lecture: code/état Inmatning: kod/läge Input: code/state Entrée: code/état Se kapitel §13, omkalibrering av användaren. Kod C17 Bild 73 Välj tidigare sparad hjulprofil – + C – + 1 till 17 to 17 à 17 C17 till 3 to 3 à3 C17 = Hjulprofil vald Tryck in C–knappen för att spara vald profil. Den tidigare sparade profilen raderas. 3 C 73 Följande information är tillgänglig (om tillgängliga): – Nominella fälgdimensioner – Värden inmätta med mätarmen. – Viktlägen – Fälgtyp – ev.viktsplit se också kod C18. Kod C18 Bild 74 Spara hjulprofil – + C – C 74 + Tryck in funktionsknappen och snurra hjulet tills numret på den valda hjulprofilen visas. till 17 to 17 à 17 till 3 to 3 à3 Det är möjligt att spara upp till 4 hjulprofiler. C17 1 = Vald profil är sparad så snart C–knappen trycks in. Följande värden (om tillgängliga) är sparade): C17 3 – Nominell fälgdimension – Värde mätt med mätarmen – Vikternas position – Fälgtyp – ev. viktsplit Se också kod C17. 76 BA geodyna 4300 – 9512 150 Changing modes of operation Sélection du mode de fonctionnement Code C14 Code C14 Readjustment of the machine by the operator Etalonnage de la machine par l’opérateur See § 13. Readjustment by the operator. Voir § 13. Etalonnage par l’opérateur. Code C17 Code C17 Fig. 73 Select previously stored wheel profile Fig. 73 Choisir un profil de roue mémorisé avant Press on precision key and turn the wheel until the number of the desired wheel profile is read out, e g. Appuyer sur la touche de précision et tourner la roue jusqu’à ce que le numéro du profil de roue soit affiché, p. ex. 3 = Wheel profile no. 3 selected 3 = Profil de roue no. 3 choisi Press the C key to load a stored wheel profile. This replaces the previously valid settings. Appuyer sur la touche C pour charger un profil de roue mémorisé. Les valeurs actuellement réglées sont alors remplacées. The following information is available (if applicable): L’information suivante est disponible (pourvu qu’elle existe): – Nominal wheel dimensions – Dimensions nominales de la roue – Values measured with the gauge arm – Valeurs mesurées par la pige – Weight positions – Positions des masses d’équilibrage – Wheel type – Type de roue – Positions for relocation – Positions à retrouver See also C18 Cf. également C18 Code C18 Code C18 Fig. 74 Store wheel profile Fig. 74 Mémoriser un profil de roue Press on precision key and turn the wheel until the number of the desired wheel profile is read out. Appuyer sur la touche de précision et tourner la roue jusqu’à ce que le numéro du profil de roue soit affiché. It is possible to store up to 4 wheel profiles, e. g.: Il est possible de mémoriser jusqu’à 4 profils de roue, par ex.: 3 = Present settings are stored as wheel profile No. 3 as soon as the C key is pressed. 3 = Les valeurs réglées actuellement sont mémorisées comme profil de roue No. 3 dès que la touche C est appuyée. The following information is stored (if applicable): L’information suivante est mémorisé (pourvu qu’elle existent) : – Nominal wheel dimensions – Dimensions nominales de la roue – Values measured with the gauge arm – Valeurs mesurées par la pige de mesure – Weight positions – Positions des masses d’équilibrage – Wheel type – Type de roue – Positions for relocation – Positions à retrouver See also C17 Operation manual geodyna 4300 – 9512 150 Cf. également C17 Mode d’emploi geodyna 4300 – 9512 150 77 Val av funktionssätt Inmatning: kod/Inmatning Input: code/state Entrée: code/état Visning: kod/läge Display: code/state Lecture: code/état Kod C21 – + C till 21 to 21 à 21 Bild 75 Visning av programversion och modellnummer C21 Programversion 1.22 för 4300. 1 STOP Tillbaka till balansering Back to working mode Repasser au mode normal 22 4 300 XXX XXX Släpp C–knappen för presentation av programversion. Tryck in presisionsknappen modellnummer . för avläsning av 75 Kod C28 Bild 76 Visning utav de 10 sparade fel–koderna samt nollställning av minnet. – + C – till 28 to 28 à 28 C28 + 300 7 810 De 10 sist sparade olika felkoderna sparas alltid i “fel”–minnet så att användaren kan ta fram dom för att t.ex fastställa driftstörningar Den senaste fel–koden är lagrad i minnesplats 1 och tidigare felkoder längre bak i minnet. Välj en av de 10 felkoderna. Tryck in OP–knappen för att visa felet på displayen ( till vänster ) och numret på felkoden (till höger). Ex. felkod på minnesplats 7 har förekommit 4 ggr. Tryck in C–knappen för 2:ra steget. 4 C – + till 1 to 1 à1 C28 1 0 = Minnet nollställs ej 1 = Minnet nollställs C 76 78 BA geodyna 4300 – 9512 150 Changing modes of operation Sélection du mode de fonctionnement Code C21 Code C21 Fig. 75 Display of program version and model number Fig. 75 Lecture du numéro de la version du programme et de la machine Example: Programme version 1.22 for 4300 Exemple: Version du programme no. 1.22 pour 4300 Release C–key to display program version. Appuyer sur la touche de précision pour afficher la version du programme. Press on precision key to display model number. Relâcher la touche C pour afficher le numéro de la machine. Code C28 Code C28 Fig. 76 Select one of the 10 stored error codes and clear the error memory Fig. 76 Choix d’un des 10 codes d’erreur et mise à zéro de la mémoire à erreurs The last 10 different error codes are written to the error memory so that they can be called up and reported by the operator of the wheel balancer, e.g. for remote diagnosis of malfunctions. The most recent error code is written to memory location 1 and the previous error codes are shifted to the higher memory locations. Les 10 derniers codes qui portent sur différentes erreurs dans le fonctionnement sont stockés dans la mémoire à erreurs, ce qui permet de les consulter à distance et de les transférer, p. ex. en cas de télé–diagnostic par l’entreprise qui exploite l’équilibreuse. Le code le plus récent est prioritaire (1), les codes antérieurs sont relégués à des places moins prioritaires. Select one of the 10 malfunction code messages. Choisir l’un des 10 codes de la mémoire à erreurs. Press the OP key to display the memory location (left) and number of incidents (right), e.g. error code on memory location 7 occurred 4 times Appuyer sur la touche OP pour afficher le numéro de place (à gauche) et la fréquence (à droite), par ex. code d’erreur de la place no. 7 s’est présenté 4 fois. Press the C key for the 2nd step. Appuyer sur la touche C pour réaliser la 2e opération. Press and hold precision key and rotate the wheel to set the desired state: Appuyer sur la touche de précision et la maintenir appuyer et tourner la roue pour régler l’état souhaité: 0 = Do not clear the error memory 0 = Mémoire à erreurs n’est pas remise à zéro 1 = Clear error memory 1 = Remettre à zéro mémoire à erreurs Operation manual geodyna 4300 – 9512 150 Mode d’emploi geodyna 4300 – 9512 150 79 Felkoder 11. Felkoder Handhavandefel Varnin Allvarlig felkod – Felkod E – Felkod H – 300 eller C10 E1 – Bild 77 Fälgmått är felaktigt inmatade eller ej kompletta. Felkoden visas, mata in data en gång till. 77 E2 – Bild 78 Skyddshuven ej stängd. 78 E3 – Bild 79 Distansarmen ej återförd till viloläget. 79 E5 – Bild 80 Den mätta obalansen vid kompensering överskriden. ( Navet har för stor obalans). 80 Tryck in STOPP–knappen. Kontrollera navet, gör om mätningen. E6 – Bild 81 Kalibreringsvikten ej monterad. 81 Tryck på STOPP–knappen. Montera vikten. Gör om mätningen. E7 – Bild 82 Med denna fälgyp är det inte möjligt att välja viktplacering. Om nödvändigt, byt fälgtyp. E8 – Bild 83 82 Ventilpositionen matades inte in i elektroniken (felkoden uppkommer endast vid optimering eller viktminskning). Positionera ventilen exakt mitt över axeln och tryck in OP–knappen. 83 80 BA geodyna 4300 – 9512 150 Error codes Codes d’erreur 11. Error codes Errors in operation Warnings Fatal error code 11. Codes d’erreur – Error code E – Error code H – 300 or C10 Erreur de manipulation Remarque Message d’erreur – Message E – Message H – 300 ou C10 E1 – Fig. 77 E1 – Fig. 77 Rim dimensions were entered incorrectly, or incompletely. Entrée incomplète ou fausse des dimensions de jante. When the error code is read out, enter data once again. Quand le code d’erreur est affiché, répéter l’entrée correctement. E2 – Fig. 78 E2 – Fig. 78 Wheel guard is not closed. Le carter de roue n’est pas fermé. E3 – Fig. 79 E3 – Fig. 79 Gauge arm for distance and rim diameter is not in home position. La pige de mesure pour écart et diamètre de jante n’est pas en position de repos. E5 – Fig. 80 E5 – Fig. 80 Range of electrical compensation exceeded (wheel adaptor has unacceptable unbalance). La gamme de compensation électrique est dépassée (balourd inadmissible du moyen de serrage). Press STOP key. Appuyer sur la touche STOP. Check wheel adaptor, repeat compensation run. Contrôler le moyen de serrage, répéter la lancée de compensation. E6 – Fig. 81 E6 – Fig. 81 The calibration weight was not fitted for readjustment. La masse d’étalonnage n’a pas été fixée pour l’étalonnage. Press STOP key. Appuyer sur la touche STOP. Repeat readjustment. Répéter l’étalonnage. E7 – Fig. 82 E7 – Fig. 82 With this wheel type it is not possible to choose a balancing mode. Pour ce type de roue, il n’est pas possible de choisir un mode d’equilibrage. If necessary, choose another wheel type. Si nécessaire, choisir un autre type de roue E8 – Fig. 83 E8 – Fig. 83 Valve position was not entered in electronic unit (error code only in optimisation or minimisation programs). La position de la valve n’a pas été entrée (code d’erreur seulement en programmes d’optimisation/minimisation). Position valve exactly perpendicular to and above main shaft and press the OP key. Operation manual geodyna 4300 – 9512 150 Positionner la valve exactement perpendiculaire sur et au-dessus de l’arbre principal et appuyer sur la touche OP. Mode d’emploi geodyna 4300 – 9512 150 81 Felkoder E9 – Bild 84 Optimeringen / viktminskningen utfördes felaktigt. 84 1. 2. 3. 4. 5. 6. Hjulet monterades inte perfekt på axeln varje gång. Däcket var dåligt centrerat på fälgen minst en gång. Ventilpositionen matades in felaktigt minst en gång. Fel kritmarkering (enkel eller dubbel ) användes som referens minst en gång Hjulet har flyttats på axeln under mätningen (plötsligt start/stopp). Fel hjuldimensioner matades in Repetera optimeringen. E15 – Bild 85 Kalibreringsdata ligger utanför tillåtna värden. Detta är endast en varning. Tryck på C–knappen för att flytta kalbreringen till permanenta minnet, eller avbryt med STOPP. 85 Använd endast orginalnavet vid kalibrering. Maskinen kan behöva grundkalibrering (kontakta servicetekniker för rådgivning) . E16 – Bild 86 Kalibreringsvikten monterades av misstag redan vid första mätomgången. Skruva ur vikten ur navet och starta om mätningen. 86 E17 – Bild 87 Hjulet slirar på navet. Navratten är inte nog hårt åtdragen. Maskinens axel roterar för snabbt och elektroniken avbryter därför balanseringen. Dra fast hjulet riktigt, eller om det inte fungerar, håll inne START–knappen en liten stund extra vid igångkörningen. 87 82 BA geodyna 4300 – 9512 150 Error codes Codes d’erreur E9 – Fig. 84 E9 – Fig. 84 Optimisation/minimisation was carried out incorrectly. Exécution incorrecte de la lancée d’optimisation/minimisation. 1. 1. 2. 3. 4. 5. 6. Wheel was not exactly centred on clamping means during every run. Tyre was eccentric relative to rim for at least one time. Valve position was incorrectly indexed for at least one time, and entered incorrectly. Wrong mark (single or double mark) was used for reference when readjusting the tyre. Wheel got out of place on the clamping means during the measuring run (sudden start or stop, or the like). Wrong wheel dimensions were entered. Repeat the optimisation procedure. 2. 3. 4. 5. 6. La roue n’était pas centrée exactement sur le moyen de serrage pendant les lancées. Le pneu était excentrique par rapport à la jante au moins une fois pendant les lancées. La valve était positionnée incorrectement au moins une fois, et la fausse position était entrée. Le pneu tourné sur la jante, un repère non correct (repère simple ou double) servait de référence. La roue s’était déplacée sur le moyen de serrage pendant la lancée (démarrage ou freinage trop brusque). Les dimensions de roue entrées étaient incorrectes. Répéter tout le procédé d’optimisation. E15 – Fig. 85 E15 – Fig. 85 Corrective term of readjustment is out of range. Le terme correctif d’étalonnage est hors de la gamme prévue. During readjustment values were determined which exceed, or fall short of, the given adjustment value. The error code is a warning only, press the C key to transfer the corrective terms into the permanent memory. Pendant l’étalonnage, des valeurs étaient déterminées qui dépassent, ou restent inférieures à la valeur d’étalonnage donnée. Ce code d’erreur n’est qu’un avertissement, appuyer sur la touche C pour transférer les termes correctifs dans la mémoire permanente. Use clamping means supplied with the machine, or have basic calibration carried out (service). Utiliser le moyen de serrage fourni avec la machine, ou faire un étalonnage de base (service). E16 – Fig. 86 E16 – Fig. 86 During the first readjustment run by the operator the calibration weight was fitted by mistake. Pendant la première lancée d’étalonnage par l’opérateur, la masse d’étalonnage a été fixée par erreur. Unscrew the calibration weight and start the measuring run again. Dévisser la masse d’étalonnage et répéter la lancée de mesure. E17 – Fig. 87 E17 – Fig. 87 Wheel slips on clamping means. The clamping nut is not well tightened, the main shaft accelerates too quickly. The machine will stop. La roue glisse sur le moyen de serrage. L’écrou de serrage n’est pas bien serré, l’arbre principal accélère trop vite. La machine s’arrête. Firmly tighten the clamping nut, or in special cases press the START key a little bit longer. Operation manual geodyna 4300 – 9512 150 Serrer l’écrou de serrage fermement ou, dans des cas spéciaux, appuyer un peu plus longtemps sur la touche START. Mode d’emploi geodyna 4300 – 9512 150 83 Felkoder E83 – Bild 88 Vibrationer utifrån har under mätningen stört maskinen och alla mätvärden är värdelösa. Mätningen har avbrutits. Repetera mätningen. 88 E88 – Bild 89 Hastigheten på axeln har överskridit gränsvärdet. 89 E89 – Bild 90 En funktionsknapp har fastnat i intryckt läge. Konstatera vilken knapp som fastnat. Utför service om nödvändigt. 90 E92 – Bild 91 Mätarmen fungerar ej. Kontakta serviceorganisationen för rådgivning. Så länge armen ej fungerar, mata in avstånd– och fälgdimensioner med funktionsknapparna samtidigt som hjulet snurras (se § 7.3.3). 91 84 BA geodyna 4300 – 9512 150 Error codes Codes d’erreur E83 – Fig. 88 E83 – Fig. 88 During a measuring run the measured data have been made useless under the effect of outside pulses (e. g. vibrations) and measurement was interrupted. Pendant une lancée de mesure, les données mesurées sont devenues inutilisables par suite des impulsions extérieures (p. ex. vibrations) et la mesure a été interrompue. Repeat the measuring run. Répéter la lancée de mesure. E88 – Fig. 89 E88 – Fig. 89 The rotating speed of the main shaft exceeds the safety limit. La vitesse de l’arbre principal dépasse la plage de sécurité. E89 – Fig. 90 E89 – Fig. 90 A key is jammed at power–on. Une touche s’est coincée avant de la mise en marche. Find and release the jammed key, call service if necessary. Chercher la touche et la débloquer ; le cas échéant, appeler le service. E92 – Fig. 91 E92 – Fig. 91 Gauge arm for distance and rim diameter is defective. La pige de mesure pour écart et diamètre de jante est défectueuse. Call service. As long as the gauge arm is defective, enter distance and nominal rim dimensions by pressing the function keys and rotating the wheel (§ 7.3.3). Operation manual geodyna 4300 – 9512 150 Faire appel au service après-vente. Entretemps, entrer l’écart et les dimensions nominales de jante au moyen de la touche de fonction correspondante et en tournant la roue (§ 7.3.3). Mode d’emploi geodyna 4300 – 9512 150 85 Felkoder H0 – Bild 92 Hjulets beskaffenhet omöjliggör balansmätning. 92 H1 – Bild 93 Fortsatt balansmätning rekommenders inte, men kan utföras . 93 H2 – Bild 94 Viktmimimering rekommenderas. Optimering kan uppnås utan påtaglig förbättring. 94 H3 – Bild 95 Optimering inte rekommenderad. 95 H20 – Bild 96 Viktplaceringen kan inte göras med mätarmen. Mät fram viktplaceringen och övergå till dynamisk obalansmätning. 96 H21 – Bild 97 Den klistrade vikten placeras på fel ställe med mätarmen. Fastställ exakt läge “klockan 12” för den klistrade vikten. 97 86 BA geodyna 4300 – 9512 150 Error codes Codes d’erreur H0 – Fig. 92 H0 – Fig. 92 Wheel running conditions cannot be improved by optimisation. Impossible d’améliorer la stabilité de marche de la roue au moyen d’une optimisation. H1 – Fig. 93 H1 – Fig. 93 Further optimisation not recommended but feasible. Déconseillé de continuer l’optimisation qui reste pourtant possible. H2 – Fig. 94 H2 – Fig. 94 Weight minimisation is recommended, optimisation can achieve no further improvement. Recommandé de minimiser la masse; continuer à optimiser n’apporte pas d’amélioration. H3 – Fig. 95 H3 – Fig. 95 Optimisation not recommanded. Optimisation non recommandée. H20 – Fig. 96 H20 – Fig. 96 Correction plane cannot be re-located with the gauge arm for distance and rim diameter. Le plan de correction ne peut pas être retrouvé avec la pige de mesure pour écart et diamètre de jante. Measure the correction plane and switch to dynamic unbalance reading. Mesurer le plan de correction et vérifier que le balourd dynamique soit affiché. H21 – Bild 97 H21 – Fig. 97 The indexed position is not the one for the correction plane in which the adhesive weight is to be fitted with the gauge arm. La position d’orientation ne correspond pas au plan de correction sur lequel la masse adhésive doit être placée à l’aide de la pige de mesure. Index the correct position for this correction plane prior to fitting the adhesive weight. Operation manual geodyna 4300 – 9512 150 Pour placer la masse adhésive, orienter le plan de correction adéquat. Mode d’emploi geodyna 4300 – 9512 150 87 Felkoder H80 – Bild 98 Inställning kan ej utföras efter grundkalibrering. Inställning av operatören är inte genomförbar 98 Tryck in STOPP–knappen. Felkoden tas bort. Utför service för kalibrering av maskinen. H82 – Bild 99 Självtesten blev störd (Hjulet rubbades). 99 Meddelandet visas i 3 sekunder efter det mätningen repeterats (max 10 ggr), eller borttages med stopp–knappen. H90 – Bild 100 Hjulet accelererade eller retarderade för långsamt under mätningen. Om inte axeln uppnått önskad hastighet, kontrollera axellåsningen, eller om hjulelts vikt är ovanligt hög. I detta fall: 100 Låssa axellåsningen. Förvissa dig om att axeln kan rotera fritt med hjulet monterat. Snurra hjulet för hand och tryck in START–knappen. Om felkod indikeras: utför service. H91 – Bild 101 Hastighetsvariationer under mätningen. Kontrollera hjulaxelns låsning. Lossa axelns hjullåsning. Förvissa diig om att axeln med fastsatt hjul kan snurra fritt. Gör om mätningen. 101 88 BA geodyna 4300 – 9512 150 Error codes Codes d’erreur H80 – Fig. 98 H80 – Fig. 98 Readjustment feature not foreseen during basic calibration. Consequently readjustment by the operator is not possible. Un étalonnage par l’opérateur n’a pas été prévu dans l’étalonnage de base. Par conséquent, l’étalonnage par l’opérateur n’est pas possible. Press on STOP key, error code is deleted. Call service for calibration of the machine. Appuyer sur la touche STOP, le code d’erreur est annulé. Appeler le service pour l’étalonnage. H82 – Fig. 99 H82 – Fig. 99 The self–test was disturbed (e.g. by rotating the wheel). Défaut pendant l’auto–contrôle (p. ex. parce que la roue a été tournée). The message is displayed for 3 seconds, after which the measurement is repeated (max. 10 times), or aborted by pressing the STOP key. Le message est affiché pendant 3 secondes, après cela, la mesure se répète (10 fois maximum), ou bien abandonner en appuyant sur la touche STOP. H90 – Fig. 100 H90 – Fig. 100 The wheel was accelerated too slowly or decelerated too slowly after a measuring run. If the main shaft does not reach the required speed, check whether the wheel shaft lock is actuated or whether the weight of the wheel is excessive.In this case: Release main shaft lock. Make sure that the shaft with clamped wheel can rotate freely. Turn the wheel by hand and then press on START key. If the error cannot be remedied: call service. L’accélération de la roue a été trop lente, ou bien la roue a été freinée trop lentement après un cycle de mesure. Si l’arbre principal n’atteint pas une vitesse suffisante, vérifier si le frein a été actionné ou si la masse de la roue est trop grande.Dans un tel cas: Desserrer la pédale de blocage. S’assurer que l’arbre portant la roue serrée peut tourner librement. Lancer la roue à la main, puis appuyer sur la touche START. Si l’erreur ne peut pas être éliminée: faire appel au service après-vente. H91 – Fig. 101 H91 – Fig. 101 Speed variations during measuring run. The main shaft lock may be operated. Release main shaft lock. Make sure that the shaft with clamped wheel can rotate freely. Repeat the measuring run. Operation manual geodyna 4300 – 9512 150 Variations de vitesse pendant la lancée de mesure. La pédale de blocage est éventuellement actionnée. Desserrer la pédale de blocage. S’assurer que l’arbre portant la roue serrée peut tourner librement. Répéter la lancée de mesure. Mode d’emploi geodyna 4300 – 9512 150 89 Felkoder Allvarliga felkoder Displayen visar en alphanumerisk kod bestående av sex siffror / eller meddelande, 300XXX. Felet startar maskinens självtest. När maskinen slås på och följande meddelande visas, C10XXX . Om nödvändigt, kontakta servicetekniker för rådgivning. 300 800 eller C10 800 – Bild 102 Om nätspänningen är under 170 volt. Balanseringen är möjlig om hjulet kan uppnå rätt hastighet. Hjuldata kan däremot försvinna. Se till att nätspänningen är inom toleransen 200 – 230 – 240 Volt. Om nödvändigt, koppla in en transformator som finns tillgänglig enl följande. (Mat.-Nr. 6705 902). 102 300 801 oder C10 801 – Bild 103 Nätspänningen är över 265 V. vilket sannolikt är skadligt för elektroniken. Se till att nätspänningen är inom toleransen 200 – 230 – 240 Volt. Om nödvändigt, koppla in en transformator som finns tillgänglig enl följande. (Mat.-Nr. 6705 902). 103 300 804 oder C10 804 – Bild 104 Nätspänning över 275 V. vilket sannolikt är skadligt för elektroniken. Stäng av maskinen. Alla skador på maskinen till följd av detta fel, ingår ej i garantin. 104 Se till att nätspänningen är mellan 200 – 230 – 240 Volt. Om nödvändigt koppla in en transformator som finns tillgänglig enl följande (Mat.-Nr. 6705 902). Felmeddelande som indikeras med ljudsignal Felmeddelande kan också indikeras med en ljudsignal. Servicetekniker kan lokalisera och eliminera felet genom att lyssna till vilken ton/toner som låter (lång/kort) och pausens längd. 90 Stäng av maskinen. Kalla på lokal service för rådgivning. BA geodyna 4300 – 9512 150 Error codes Codes d’erreur Fatal error codes Messages d’erreurs fatales The display shows an alphanumeric code consisting of six digits and/or letters. When messages are read out starting 300XXX the error occurred during the internal operational check, if it is C10XXX it occurred during the self-test after the machine was switched on. L’afficheur affiche un code à 6 chiffres et/ou lettres. S’il y a des messages commençant par 300XXX, l’erreur se présentait pendant le contrôle de fonctionnement interne, s’il s’agit d’un message C10XXX, l’erreur se présentait pendant l’autocontrôle à la mise en circuit. If necessary, call service. Si nécessaire, appeler le service après–vente. 300 800 or C10 800 – Fig. 102 300 800 ou C10 800 – Fig. 102 Line voltage under 170 V. Balancing is feasible if the motor can drive the main shaft to the measuring speed. Wheel data may be lost. Tension de secteur inférieure à 170 V. Equilibrage possible si le moteur peut entraîner l’arbre principal jusqu’à la vitesse de mesure. Des données de roue peuvent être perdues. Bring the line voltage to within a range of 200 – 230 – 240 Volts with an input transformer (ref. 6705 902). Amener la tension de secteur dans la plage de 200 – 230 – 240 V à l’aide du transformateur d’entrée (réf. 6705 902). 300 801 or C10 801 – Fig. 103 Line voltage over 265 V. Damage to the electronic unit of the machine is likely! Bring the line voltage to within a range of 200 – 230 – 240 Volts with an input transformer (ref. 6705 902). 300 801 ou C10 801 – Fig. 103 Tension de secteur supérieure à 265 V. L’unité électronique de la machine est en danger! Amener la tension de secteur dans la plage de 200 – 230 – 240 V à l’aide du transformateur d’entrée (réf. 6705 902). 300 804 or C10 804 – Fig. 104 Line voltage over 275 V. Damage to the electronic unit of the machine is likely! Turn off mains switch. Any damage resulting from repeated occurrence of this error code is not covered by the guarantee. Bring the line voltage to within a range of 200 – 230 – 240 Volts with an input transformer (ref. 6705 902). 300 804 ou C10 804 – Fig. 104 Tension de secteur supérieure à 275 V. L’unité électronique de la machine est en danger! Déclencher l’interrupteur secteur. Tout endommagement causé alors que ce message est à nouveau affiché n’est pas couvert par la garantie. Amener la tension de secteur dans la plage de 200 – 230 – 240 V à l’aide du transformateur d’entrée (réf. 6705 902). Error messages by means of acoustic signals Error messages can also be indicated by means of acoustic signals. The service technician can locate and eliminate the corresponding error by means of the number of tones, their frequency and duration (long/short) and the length of the pauses. Switch off the machine. Call service. Operation manual geodyna 4300 – 9512 150 Messages d’erreur par signaux acoustiques Les erreurs peuvent également être signalées par des tonalités acoustiques. Le technicien de service pourra identifier les erreurs de par le nombre de signaux, leur fréquence et leur durée (longue/courte) pour ensuite y remédier. Débrancher la machine. Appeler le service après–vente. Mode d’emploi geodyna 4300 – 9512 150 91 Optimering / viktminimering 12. Optimering / viktminimering 12.1 Allmänt Opto–ride–programmet används för att förbättra hjulets uppförande på vägen (rundheten och mängden balanseringsvikter m.m.). Maskinen mäter först fälgens obalans utan något däck montrat. Maskinens konstruktörer har sedan gjort antagandet att fälgens tyngsta punkt också är också är fälgens “högsta” punkt (toppen på fälgens “äggform”). Sedan mäts däcket för att bestämma däckets tyngsta punkt. Ojämn viktfördelning i däck beror ofta på ojämt fördelad gummimängd. Det kan också bero på att gummit är olika mjukt runt om. När maskinen har tagit reda på däckets och fälgens beskaffenhet ger den instruktioner hur däcket skall placeras för att få ett hjul som ger maximalt jämn gång på vägen. Dessutom ser maskinen till att vikterna som skall användas blir så små som möjligt. Ett alternativ till optimering är att göra viktminimering. Då koncentrerar maskinen sig på att vikterna som skall placeras blir så små som möjligt. Detta progranm tar kortare tid eftersom man hoppar över mätningen av fäljen utan däck monterat. 12.2 Allmän instruktion för optimering / minimerings–programmen Eventuell kompensering för obalans i navet ( Kod C4 ) som gjorts innan, tas automatiskt bort när OP–knappen ( Bild 106 pos 1) trycks ned för att börja en optimering eller viktminimering. Programmet kan när som helst avbrytas genom att trycka på STOPP–knappen. Endera för att avsluta programmet eller för att tillfälligt balancera ett hjul på vanligt sätt. Om programmet avbryts är det bara att trycka på OP–knappen och C–knappen i följd för att fortsätta den avbrutna optimeringen på samma ställe som förut. Alla mätdata finns fortfarande lagrade. Efter att ha avbrutit med STOPP–knappen visar displayen den obalans som mättes in vid sista balanseringen. Om en pågående balansering (hjulet snurrar) måste avbrytas av säkerhetsskäl, kommer maskinen att gå ett steg bakåt i programmet. Optimering / viktminimeringen kan sedan fortsätta genom att trycka in OP–knappen ( se även längre fram i anvisningarna). Mätning genom optimering / viktminimerins–programmet kan endast utföras med START–knappen, ej genom att starta mätningen genom stängning av skyddshuven. 92 BA geodyna 4300 – 9512 150 Optimisation/ Weight minimisation Optimisation / Minimisation des masses 12. Optimisation/ Weight minimisation 12. Optimisation / Minimisation des masses 12.1 General 12.1 Généralités Opto-ride, the optimisation program, is an improvement of the matching procedure. L’optimisation de la stabilité de marche est une forme plus élaborée du procédé dit “matching”. Tyre and rim are exactly adjusted relative to each other on the basis of unbalance test results. In general this involves reduction of lateral and radial run-out and of radial and lateral force variation, if any, as well as reduction of balance weight size, hence optimisation of wheel running conditions on the whole. Au cours du processus d’optimisation, la jante et le pneu sont adaptés l’un à l’autre sur la base de diverses mesures de balourd. En règle générale, le voilage et le faux-rond ainsi que des variations des forces radiales et latérales éventuellement existants sont diminués, optimisant ainsi la stabilité de marche de la roue. La masse nécessaire pour équilibrer la roue (masse d’équilibrage) peut en outre être réduite. If optimisation is not desired, it is possible to achieve weight minimisation (so-called matching). This is for instance possible when there is no deformation of the rim, but where unsmooth ride is only due to non-uniform mass distribution in the tyre. In this case the unbalance present in the rim can be adjusted relative to the unbalance present in the tyre so that the unbalances compensate for each other and the smallest possible balance weight can be determined. Si une optimisation n’est pas souhaitée, il est possible d’obtenir une minimisation des masses (appelée “matching”). Ceci est par exemple possible si la jante ne présente pas de déformations, donc si une instabilité de marche ne résulte que d’une distribution irrégulière des masses du pneu. Dans ce cas, le balourd de la jante peut être positionnée par rapport au balourd du pneu de telle sorte que les balourds se compensent mutuellement et que la masse d’équilibrage la plus petite possible soit calculée pour l’équilibrage. 12.2 General instructions for the optimisation/ weight minimisation programs 12.2 Conseils de manipulation pour l’optimisation de stabilité de marche/minimisation des masses During tyre changing operations, as required for optimisation/ minimisation, the wheel balancer can be used as a conventional wheel balancer by another operator. L’équilibreuse de roue peut être utilisée par un autre opérateur en tant qu’équilibreuse normale pendant les travaux de montage de pneu qui sont nécessaires pour l’optimisation de stabilité de marche/minimisation des masses. For this purpose, interrupt the optimisation/minimisation program by pressing the STOP key. The electronic unit will store the current program step, the rim dimensions and all measurements taken so far. To continue with the optimisation/minimisation program, press the OP and C keys in succession. The program then continues at the step where it was interrupted, using the initial data inputs and measured data. If a measuring run is interrupted by operation of the STOP key (e. g. poor clamping of wheel or in case of emergency) the machine will switch back to the previous program step. Optimisation/minimisation is then continued simply by entering the valve position of the wheel once more with the OP key. After interruption by operation of the STOP key the readings refer to the unbalance of the latest measuring run. To start the optimisation/minimisation program anew after an interruption, it is only necessary to press the OP key. During optimisation/minimisation a measuring run always has to be started with the START key. The mode of operation “Starting the measuring run by closing of the wheel guard” is not operative in this case. Compensation of unbalance of the wheel adaptor is cancelled by starting an optimisation or minimisation run. Pour ce faire, interrompre l’optimisation de stabilité de marche/ minimisation des masses en appuyant sur la touche STOP. L’unité électronique mémorise le pas de programme actuel, les dimensions de jante et toutes les valeurs mesurées jusqu’à présent. Pour poursuivre l’optimisation/minimisation, appuyer successivement les touches OP et C. Cela réactive un pas de programme quitté auparavant avec les valeurs mesurées et les dimensions réglées correspondantes et l’optimisation/ minimisation peut être poursuivie. Si une lancée de mesure est interrompue à l’aide de la touche STOP (p. ex. mauvais serrage de roue ou cas d’urgence), la machine repasse au pas de programme précédent. Après que la position de la valve du pneu ait êté à nouveau vérifiée, l’optimisation de stabilité de marche/minimisation des masses peut être poursuivie. Après une interruption à l’aide de la touche STOP, les valeurs de balourd de la dernière lancée de mesure sont affichées. Si l’optimisation de stabilité de marche/minimisation des masses doit être recommencée après une interruption, appuyer seulement sur la touche OP. Pendant l’optimisation de stabilité de marche/minimisation des masses, une lancée de mesure doit toujours être entamée à l’aide de la touche START. Le mode de fonctionnement “Entamer la lancée de mesure par fermeture du carter de roue” n’est pas activé. Le démarrage de l’optimisation de stabilité de marche/minimisation des masses supprime toute compensation du balourd du moyen de serrage. Operation manual geodyna 4300 – 9512 150 Mode d’emploi geodyna 4300 – 9512 150 93 Optimering / viktminimering 12.3 Opto–ride programmet Avsnittet för användning av optimerings–programmet (kod OP) och för viktminimerings–programmet (Kod Un) beskrivs nedan och där det är möjligt, illustrerat med bilder. Det är viktigt att se på bilderna samtidigt som instruktionen läses. (Exempel: OP.6,se Bild 113). Optimering Optimerings–programmet aktiveras automatiskt efter balansmätningen genom att symbolen för OP visas om obalansen i vänster och/eller höger viktläge och/eller den statiska obalansen är större än 30 gram (Bild 105). 105 Om optimering visas, kontrollera att alla fälgdimensioner är rätt inmatade. Att göra ändringar senare är inte möjlig. 1 2 g Demontera däcket från fälgen och montera fälgen tom på maskinen för optimerings–mätning. Tryck in OP–knappen(Bild 106, Pos. 1). oz C Displayen visar OP 1 (Bild 107). Observera: När däcket monterats på fälgen och ventilsymbolen visas på fälgsymbolen måste ventilläget inmatas i maskinen genom att OP–knappen trycks in samtidigt som ventilen står i exakt lodrätt läge över hjulaxeln. Ställ in fälgen så att ventilen står exakt lodrätt över hjulaxeln. Tryck in OP–knappen (Bild 106, Pos. 1) för att lagra ventilläget. OP 2 visas på displayen (Bild 108). Felaktigt värde kan ändras genom ny mätning. 106 Viktminimering Om endast viktminimering (utan kompenseringsmätning av fälg utan däck ) visas utför följande: Montera fast hjulet. Tryck in OP–knappen (Bild 106, Pos. 1). OP 1. visas (Bild 107). 107 Tryck in precisionsknappen (Bild 106, Pos. 2) för att gå över till viktminimeringsprogrammet. Un 3. visas (se § 12.4, Bild 118).när mätningen fortsätter Nivån OP 2. kan hoppas över. Fortsätt programmet genom att trycka in funktionsknappen. Displayen visar Un.4 (se § 12.4, Bild 119), där fortsatt instruktion finns. Ventilläget som inmatats vid OP.1 finns lagrat. START 108 94 BA geodyna 4300 – 9512 150 Optimisation/ Weight minimisation Optimisation / Minimisation des masses 12.3 Opto-ride program 12.3 Programme d’optimisation The sequence of operations for the optimisation program (code OP) and for the minimisation program (code Un) is described below, with the possible readings illustrated in the figures. Ci-dessous, la séquence des opérations pour le programme d’optimisation (code OP) et le programme de minimisation (code Un) est décrite, les affichages possibles étant illustrés dans les figures respectives. We advise you to choose the figure showing the readings you have and then to proceed in line with the instructions given (e. g. reading OP.6, see Fig. 113). Suivant l’affichage, se concentrer sur la figure correspondante et procéder suivant les instructions données (ex: affichage OP.6, voir Fig. 113). Optimisation Effectuer une optimisation de stabilité de marche Use of the optimisation program is recommended automatically after a measuring run by viewing the OP symbol if the unbalance in left and/or right correction planes and/or static unbalance is greater than 30 g (Fig. 105). L’optimisation est recommandée automatiquement après une lancée de mesure par l’affichage du symbole OP, au cas où le balourd des plans de correction gauche et/ou droit et/ou le balourd statique serait supérieur à 30 g (Fig. 105). If optimisation is desired, check whether all rim dimension inputs are correct. Si l’optimisation est souhaitée, vérifier encore une fois si les dimensions de jante ont été entrées correctement. Subsequent correction is not possible. Une correction ultérieure n’est plus possible. Demount the tyre and clamp the rim for the compensation run. Démonter le pneu et serrer la jante pour effectuer une lancée de compensation. Depress the OP key (Fig. 106, item 1). Appuyer sur la touche OP (Fig. 106, pos. 1). Reading OP.1 (Fig. 107) comes up. Note that after all readings in which the valve symbol is shown at the rim contour the OP key must be pressed to enter the valve position (exactly perpendicular to and above the main shaft) after the tyre has been displaced on the rim. Readjust the rim such that the valve is exactly perpendicular to and above the main shaft. Depress the OP key (Fig. 106, item 1) to enter the valve position. Reading OP.2 (Fig. 108) comes up. An incorrect valve position input can be corrected by repeating this step. L’affichage OP.1 (Fig. 107) apparaît alors. Noter qu’après tous les affichages où le symbole de valve est montré près de la jante, la touche OP doit être appuyée pour entrer la position de valve (exactement perpendiculaire à et audessus de l’arbre principal) après le déplacement du pneu sur la jante. Tourner la jante jusqu’à ce que la valve soit exactement perpendiculaire à et au-dessus de l’arbre principal. Appuyer sur la touche OP (Fig. 106, pos. 1) pour mettre la position de la valve en mémoire. L’affichage OP.2 (Fig. 108) apparaît alors. Une fausse entrée de la position de la valve peut être corrigée en répétant cette opération. Weight minimisation (matching) Minimisation des masses (matching) If no optimisation, but only weight minimisation (i.e. without compensation run of the rim without tyre) is desired, proceed as follows: Si ce n’est pas l’optimisation, mais seulement la minimisation des masses qui doit être effectuée (donc sans lancée de compensation de la jante sans pneu), procéder comme suit: Clamp the tyre/rim assembly. Serrer l’ensemble pneu/jante. Depress the OP key (Fig. 106, item 1). Appuyer sur la touche OP (Fig. 106, pos. 1). Reading OP.1 – Fig. 107 comes up. L’affichage OP.1 (Fig. 107) apparaît alors. Depress the precision key (Fig. 106, item 2) to switch over to the minimisation program. Appuyer sur la touche de précision (Fig. 106, pos. 2) pour commuter au programme de minimisation. The reading goes to Un.3 (see § 12.4, Fig. 118) where you proceed with the program. L’affichage Un.3 apparaît alors (voir § 12.4, Fig. 118). Poursuivre alors le déroulement du programme de minimisation. At level OP.2 the compensation run can still be omitted. Again, proceed with the program by depressing the precision key. As a result the reading goes to Un.4 (see § 12.4, Fig. 119) where you continue. The valve position input of OP.1 remains entered. Operation manual geodyna 4300 – 9512 150 Même au niveau de l’affichage OP.2, la lancée de compensation peut être omise. Poursuivre dans le programme en appuyant sur la touche de précision. L’affichage passe alors à Un.4 (voir § 12.4, Fig. 119). Poursuivre alors dans le programme de minimisation. La position de valve de OP.1 reste entrée. Mode d’emploi geodyna 4300 – 9512 150 95 Optimering / viktminimering Fortsättning av Ooptimeringsprogrammet Tryck in START–knappen (Bild 108) för att starta mätningen av fälgen utan däck. Efter mätningen visas OP. 3 (Bild 109). Montera däcket på fälgen samt pumpa in rätt lufttryck i däcket (se nedan). 109 Observera Vid montering demontering (däcksbyte) av däck skall alltid däckmonteringsfett användas. Varje gång ett däck har monterats skall detta pumpas upp till (ca. 3,5 bar) högre tryck än det nominella, Släpp sedan ut luften så att rätt lufttryck finns i däcket när balanseringen startar. START Sätt fast däcket på maskinen. Ställ hjulet så att ventilen är lodrätt över hjulaxeln. Tryck in OP–knappen för att lagra ventilläget. Displayen visar OP. 4 (Bild 110). Tryck in START–knappen. Efter mätningen visas en av två möjliga avläsningar: 110 OP.5 – H 1 (se Bild 111) Fortsatt optimering rekommenderas ej men är ändå möjlig. OP.5 – Referens markering (se Bild 112) Fortsätt OP-Programmet. Avläsning OP.5 – H 1 (Bild 111) Om OP.5 – H 1 visas rekomenderar maskinen att avbryta mätningen. I detta läge indikeras data som kan överskrida mätgränserna för optimeringsprogrammet. I alla fall är det möjligt att fortsätta mätningen så hjulets rullförmåga förbättras (för extra känsliga bilar). 111 Optimeringen fortsätter Fortsätt enl OP.5 – referensmarkering (se nästa sida). Ta bort optimeringen. 96 Tryck in STOPP–knappen för att återgå till balanseringsprogram som överenstämmer med avläsningen. BA geodyna 4300 – 9512 150 Optimisation/ Weight minimisation Optimisation / Minimisation des masses How to continue the OP program Comment poursuivre dans le programme OP Press the START key (Fig. 108) to start the compensation run of rim without tyre. Appuyer sur la touche START (Fig. 108) pour initialiser la lancée de compensation de la jante sans pneu. After the measuring run the reading is OP.3 (Fig. 109). Après la lancée de mesure, OP.3 (Fig. 109) est affiché. Mount the tyre and inflate correctly (see note below). Monter le pneu et le gonfler correctement (voir la remarque ci-dessous). Note Remarque For mounting, demounting (tyre changer), readjustment or turning over of the tyre on the rim always apply a sufficient quantity of tyre lubricant on tyre beads, rim flanges and bead seats. Each time the tyre has been readjusted relative to the rim, inflate tyre to overpressure (approx. 3.5 bar) and then deflate to correct tyre pressure. Make sure the mounting guide rib of the tyre is correctly seated. Pour le montage, le démontage (machine de montage de pneus), le déplacement ou le renversement du pneu sur la jante, appliquer toujours une quantité suffisante de lubrifiant sur les talons du pneu, les rebords de jante et les assises du pneu. Chaque fois que la position du pneu a été modifiée par rapport à la jante, gonfler le pneu à une surpression d’environ 3,5 bars, puis le dégonfler à la pression de service. Veiller à ce que le filet de centrage soit en position correcte. Clamp the tyre/rim assembly on the balancer. Readjust such that the valve is exactly perpendicular to and above the main shaft. Press the OP key to enter the valve position. Reading OP.4 (Fig. 110) comes up). Press the START key. Serrer l’ensemble pneu/jante sur la machine. Tourner jusqu’à ce que la valve soit exactement perpendiculaire à et au-dessus de l’arbre principal. Appuyer sur la touche OP pour entrer la position de la valve. L’affichage OP.4 (Fig. 110) apparaît alors. Appuyer sur la touche START. The measuring run is carried out. After the measuring run two readings are possible: La lancée de mesure est effectuée. Après la lancée de mesure, deux affichages sont possibles: OP.5 – H 1 (see Fig. 111) Further optimisation is not recommended, but possible. OP.5 – H 1 (voir Fig. 111) Il n’est pas recommandé, mais possible, de continuer l’optimisation. OP.5 – reference mark (see Fig. 112) Continue with the OP program. OP.5 – Repère (voir Fig. 112) Continuer le programme OP. Reading OP.5 – H 1 (Fig. 111) Affichage OP.5 – H 1 (Fig.111) If OP.5 – H 1 is read out further optimisation is not recommended. In this case the measured data does not exceed the limit for recommendation of the optimisation program. However, it is possible to continue optimisation so as to improve wheel running conditions even below the limit value (critical vehicle). Si OP.5 – H 1 est affiché, il n’est en général pas recommandé de continuer l’optimisation, car les valeurs mesurées ne dépassent pas les limites fixées pour que l’optimisation soit recommandée. Il est cependant possible de continuer l’optimisation pour améliorer les conditions de marche du véhicule, même audessous de la valeur limite (véhicule critique). To continue optimisation: Pour poursuivre l’optimisation: Proceed as specified for reading OP.5 – reference mark (see Fig. 111). Poursuivre selon la description pour l’affichage OP.5 – Repère (voir Fig. 111). To abort optimisation: Pour interrompre l’optimisation: Press the STOP key to return to the balancing program and balance the wheel according to the readings. Operation manual geodyna 4300 – 9512 150 Appuyer sur la touche STOP pour repasser au programme d’équilibrage et équilibrer la roue suivant l’affichage. Mode d’emploi geodyna 4300 – 9512 150 97 Optimering / viktminimering Avläsning OP.5 – Referensmarkering (Bild 112) 112 Efter mätningen markera med ett kritstreck på däckets utsida när hjulets balanseringsläge står exakt lodrätt över hjulaxeln. Clinchlossa däcket från fälgen och vrid däcket så att ventilen hamnar mitt för kritmärket. Pumpa däcket. Sätt fast hjulet på maskinen så att ventilen läge står exakt lodrätt över hjulaxeln. Tryck in OP–knappen för att lagra ventilläget. OP.6 visas på displayen (Bild 113). START Tryck in START–knappen. Efter mätningen så kan en av fyra följande alternativ visas i displayen. === – OP.7 (se bild 114) Fortsätt OP–programmet. Rekommenderas att man vänder däcket på fälgen (byter rullriktning). OP.7 – === (se Bild 115) Fortsätt OP–programmet. Rekommenderas att montera om däcket på fälgen. H 0 (se Bild 116) Optimala värden har uppnåtts och kan inte förbättras. H 2 (se Bild 117) Hjulbalanseringen kan ej förbättra hjulet rullningsegenskaper. Dock är det möjligt att justera in däckets läge på fälgen för att uppnå en avsevärd viktminskning av balanseringsviktera utan att försämra hjulets egenskaper. 113 98 Beroende vilken avläsning som visas finns det ett flertal möjliga lösningar för balansering i programmet. Dessa möjligheter beskrivs i texten som följer. BA geodyna 4300 – 9512 150 Optimisation/ Weight minimisation Optimisation / Minimisation des masses Reading OP.5 – reference mark (Fig. 112) Affichage OP.5 – repère (Fig. 112) After the measuring run index the wheel following the position reading and provide a crayon mark on the right side of the tyre exactly perpendicular to and above the main shaft. Après la lancée de mesure, orienter la roue suivant l’affichage de direction et tracer un repère à la craie exactement perpendiculaire à et au-dessus de l’arbre principal du côté droit du pneu. Readjust the tyre on the rim such that the tyre mark coincides with the valve. Tourner le pneu sur la jante jusqu’à ce que le repère sur le pneu coïncide avec la valve. Clamp the tyre/rim assembly on the balancer and readjust such that the valve is exactly perpendicular to and above the main shaft. Serrer l’ensemble pneu/jante sur la machine et le tourner jusqu’à ce que la valve soit exactement perpendiculaire à et au-dessus de l’arbre principal. Press the OP key to enter the valve position. Appuyer sur la touche OP pour entrer la position de la valve. Reading OP.6 (Fig. 113) comes up. L’affichage OP.6 (Fig. 113) apparaît alors. Press the START key. Appuyer sur la touche START. After the measuring run four readings are possible: Après la lancée de mesure, quatre affichages sont possibles: === – OP.7 (see Fig. 114) Proceed with the OP program. It is recommended that the tyre be turned over on the rim. === – OP.7 (voir Fig. 114) Poursuivre le programme OP. Il est recommandé de renverser le pneu par rapport à la jante. OP.7 – === (see Fig. 115) Proceed with the OP program. It is recommended that the tyre be readjusted on the rim. OP.7 – === (voir Fig. 115) Poursuivre le programme OP. Il est recommandé de tourner le pneu sur la jante. H 0 (see Fig. 116) Optimum condition has been achieved and cannot be improved. H 0 (voir Fig. 116) La condition optimale est déjà atteinte et ne peut pas être améliorée. H 2 (see Fig. 117) Wheel running conditions cannot be improved. However, it is possible to readjust the tyre relative to the rim to obtain a quite considerable minimisation of balance weights (i.e. smaller weights) without having an adverse effect on wheel running conditions. H 2 (voir Fig. 117) La condition de marche ne peut pas être améliorée. Il est cependant possible d’ajuster le pneu à la jante pour atteindre une minimisation considérable des masses d’équilibrage (donc de plus petites masses), sans avoir un effet négatif sur la condition de marche. Depending on the readings, there are several possibilities for proceeding with the program. These possibilities are described below. En fonction des affichages, il existe plusieurs possibilités de poursuivre le programme. Ces possibilités sont indiquées cidessous. Operation manual geodyna 4300 – 9512 150 Mode d’emploi geodyna 4300 – 9512 150 99 Optimering / viktminimering Display, === – OP.7 (Bild 114) Det rekommenderas att vända däcket på fälgen (strecken på vänstra sidan av displayen “vandrar” runt). Valmöjlighet 1: Vänd däcket på fälgen ( standard program) Ställ in hjulet enl markeringspilen som visas på vänster sida och markera med två kritstreck på vänster sida av däcket exakt i lodrätt läge över hjulaxeln. Ta bort hjulet från maskinen. Lossa däcket från fälgen och vänd det så att dubbelsträcken kommer mitt för luftventilen. Pumpa däcket. Sätt fast däcket på maskinen och vrid det så att ventilen står exakt lodrätt över hjulaxeln. Tryck in OP–knappen för att lagra ventilläget i maskinen. OP.8. visas på displayen. STOP Tryck på START–knappen (kontrollmätning). Om mätningen är korrekt utförd följ nedanstående instruktioner. Maskinen återgår till balanseringsläget som valts före optimeringen och den dynamiska obalansen visas fortfarande till vänser på hjulet (Bild 114). START Balansera hjulet enl instruktionen. Därmed är både optimering och balansering utförd. Felkod E 9 114 Om felkod E9 visas har åtminstone ett fel begåtts i arbetsgången (se § 11 felkoder ) Avbryt optimeringen med STOPP–knappen och börja om från början. Valmöjlighet 2: Inte vända däcket på fälgen. Ibland är det inte praktiskt genomförbart att vända över ett däck på fälgen, eftersom det även påverkar resten av hjuluppsättningen, om däcken har en bestämd rull–riktning. Tryck in precisionsknappen Resultastet visas omvänt Nu visas OP.7 – = = = (se Bild 115) eller H0 (se Bild 116) eller H2 (se Bild 117). För att återvända till === – OP.7 (Vänd på däcket) Tryck åter in precisions–knappen. Valmöjlighet 3: Borttagning av optimeringsprogramet Tryck på STOPP–knappen för att avsluta programmet. Displayen visar resterande obalans. 100 Balansera hjulet enligt visning på displayen. BA geodyna 4300 – 9512 150 Optimisation/ Weight minimisation Optimisation / Minimisation des masses Reading === – OP.7 (Fig. 114) Affichage === – OP.7 (Fig. 114) Recommendation to turn tyre over on the rim (the left display segments are rotating). Recommandation de renverser la roue sur la jante (les traits de l’affichage gauche tournent) Choice 1 Turn tyre over on the rim (standard program) Sélection 1 Renverser le pneu sur la jante (programme standard) Index the wheel following the left direction indicator and provide a double mark on left side of the tyre exactly perpendicular to and above the main shaft. Remove the wheel from the machine. Turn the tyre over on the rim and readjust until the double mark coincides with the valve. Clamp the tyre/rim assembly on the balancer and readjust such that the valve is exactly perpendicular to and above the main shaft. Press the START key (check run). If the optimisation run has been carried out correctly following the above sequence of operations, the balancer will return to the balancing mode selected before optimisation and read out the dynamic unbalance still left in the wheel (Fig. 114). Tourner la roue conformément à l’affichage gauche du sens d’orientation et tracer un double repère sur le côté gauche du pneu, ledit repère devant se trouver sensiblement perpendiculaire en dessous de l’arbre principal. Enlever la roue de la machine. Renverser le pneu sur la jante et le tourner jusqu’à ce que le repère double coïncide avec la valve. Serrer l’ensemble pneu/jante sur la machine et le tourner jusqu’à ce que la valve soit exactement perpendiculaire à et au-dessus de l’arbre principal. Appuyer sur la touche OP pour entrer la position de la valve. Press the OP key to enter the valve position. Reading OP.8 comes up. Balance the wheel according to the readings. Hence both optimisation and balancing are accomplished. L’affichage OP.8 apparaît alors. Appuyer sur la touche START (lancée de contrôle). Si l’optimisation a été correctement effectuée suivant la séquence de programme, la machine repasse, après la lancée de contrôle, au mode d’équilibrage qui était sélectionné avant l’initialisation de la lancée d’optimisation et le balourd dynamique résiduel de la roue est affiché (Fig. 114). Effectuer l’équilibrage de la roue suivant les affichages. L’optimisation est ainsi achevée et l’équilibrage de la roue effectué. Reading of error code E9 Affichage du code d’erreur E9 If E9 is read out, at least one error was made with respect to the sequence of operations when performing optimisation (see § 11. Error codes). Abort the optimisation program by pressing the STOP key and, if desired, start optimisation once again. Si E9 est affiché, c’est qu’il y a eu au moins une erreur relative à la séquence de programme lors de la procédure d’optimisation (voir § 11. codes d’erreur). Quitter le programme d’optimisation en appuyant sur la touche STOP et, si cela est souhaité, relancer l’optimisation. Choice 2: Do not turn tyre over on the rim Sélection 2: Ne pas renverser le pneu sur la jante Press the precision key. Appuyer sur la touche de précision. The result is then converted. Reading is OP.7 – = = = (see Fig. 115) or H0 (see Fig. 116) or H2 (see Fig. 117). Le résultat est alors recalculé. L’affichage OP.7 – = = = (voir Fig. 115) ou H0 (voir Fig. 116) ou H2 (voir Fig. 117) apparaît alors. To return to === – OP.7 (turning over the tyre), press the precision key once again. Pour passer à === –OP.7 (renverser le pneu) appuyer à nouveau sur la touche de précision. Choice 3: Abort optimisation Sélection 3: Interruption d’optimisation de stabilité de marche Press the STOP key to return from the optimisation to the balancing program. Appuyer sur la touche STOP afin de repasser du programme OP au programme d’équilibrage. The unbalance present in the wheel is read out. Le balourd de la roue est alors affiché. Balance the wheel according to the readings. Operation manual geodyna 4300 – 9512 150 Effectuer l’équilibrage de la roue suivant les affichages. Mode d’emploi geodyna 4300 – 9512 150 101 Optimering / viktminimering Display OP.7 – === (Bild 115) Rekommendation att vända över däcket på fälgen (strecken till höger på display–strecken är tända hela tiden). Valmöjlighet 1: (Standardprogram) STOP Vänd över däcket på fälgen Ställ in hjulet enligt höger displaypil. Rita två streck exakt lodrätt över hjulaxeln på däckets högra sida Tag bort hjulet från maskinen. Vänd över däcket på fälgen och vrid tills kritmärkena är mitt för ventilen (fastän på motsatt sida). Pumpa däcket. Spänn fast hjulet på maskinen igen och snurra det tills ventilen står exakt lodrätt över hjulaxeln. Tryck in OP–knappen och mata in ventilläget Det står nu OP.8 på displayen. START Tryck på START–knappen (kontrollmätning). Om optimeringen har utförts på rätt sätt enligt ovanstående sekvens, kommer maskinen att återvända till vanligt balanseringsläge och den obalans som återstår visas. (Bild 115). Balansera hjulet enl. vad som visas på displayen. Nu är både optimering och balansering klar. Felkod E 9 115 Om denna felkod visas har åtminstone ett fel begåtts i arbetsgången Avbryt optimeringen med STOPP–knappen och börja om från början. Valmöjlighet 2 Tryck på START–knappen för att avbryta optimeringen Resterande obalansen visas. 102 Balansera hjulet enligt denna visning. BA geodyna 4300 – 9512 150 Optimisation/ Weight minimisation Optimisation / Minimisation des masses Reading OP.7 – === (Fig. 115) Affichage OP.7 – === (Fig. 115) Recommendation to readjust tyre on the rim (the right display segments light up permanently). Recommandation de tourner la roue sur la jante (les traits de l’affichage droit restent allumés) Choice 1: Readjust tyre on the rim (standard program) Sélection 1: Tourner le pneu sur la jante (programme standard) Index the wheel following the right direction indicator and provide a double mark on right side of the tyre exactly perpendicular to and above the main shaft. Remove the wheel from the machine. Readjust the tyre on the rim until the double mark coincides with the valve. Clamp the tyre/rim assembly on the balancer and readjust such that the valve is exactly perpendicular to and above the main shaft. Press the START key (check run). If the optimisation run has been carried out correctly following the above sequence of operations, the balancer will return to the balancing mode selected before optimisation and read out the dynamic unbalance still left in the wheel (Fig. 115). Orienter la roue suivant l’indicateur de direction à droite et tracer un repère double exactement perpendiculaire à et au-dessus de l’arbre principal du côté droit du pneu. Enlever la roue de la machine. Tourner le pneu sur la jante et le tourner jusqu’à ce que le repère double coïncide avec la valve. Serrer l’ensemble pneu/jante sur la machine et le tourner jusqu’à ce que la valve soit exactement perpendiculaire à et au-dessus de l’arbre principal. Appuyer sur la touche OP pour entrer la position de la valve. Press the OP key to enter the valve position. Reading OP.8 comes up. Balance the wheel according to the readings. Hence both optimisation and balancing are accomplished. L’affichage OP.8 apparaît alors. Appuyer sur la touche START (lancée de contrôle). Si l’optimisation a été correctement effectuée suivant la séquence de programme, la machine repasse, après la lancée de contrôle, au mode d’équilibrage qui était sélectionné avant l’initialisation de la lancée d’optimisation et le balourd dynamique résiduel de la roue est affiché (Fig. 115). Effectuer l’équilibrage de la roue suivant les affichages. L’optimisation est ainsi achevée et l’équilibrage de la roue effectué. Reading of error code E9 Affichage du code d’erreur E9 If E9 is read out, at least one error was made with respect to the sequence of operations when performing optimisation (see § 11. Error codes). Abort the optimisation program by pressing the STOP key and, if desired, start optimisation once again. Si E9 est affiché, c’est qu’il y a eu au moins une erreur relative à la séquence de programme lors de la procédure d’optimisation (voir § 11. Codes d’erreur). Quitter le programme d’optimisation en appuyant sur la touche STOP et, si cela est souhaité, relancer l’optimisation. Choice 2 Sélection 2 Press the STOP key to return from the optimisation to the balancing program. Appuyer sur la touche STOP afin de repasser du programme OP au programme d’équilibrage. The unbalance present in the wheel is read out. Le balourd de la roue est alors affiché. Balance the wheel according to the readings. Operation manual geodyna 4300 – 9512 150 Effectuer l’équilibrage de la roue suivant les affichages. Mode d’emploi geodyna 4300 – 9512 150 103 Optimering /viktminimering Display H 0 (Bild 116) Tryck på STOPP–knappen för att lämna optimeringsprogramet återgå till det normala balanseringsläget. Displayen visar resterande obalans. Optimerad mätning har utförts och kan ej förbättras. STOP 116 Display H 2 (Bild 117) Hjulets uppförande på vägen ( kompensering för orundheter i däck och fälg ) kan inte förbättras. Det är ändå möjligt att uppnå en minskning av viktstorlekarna utan att det får negativ inverkan på hjulets uppförande på vägen. Detta görs med viktminimeringsprogrammet ( displayen visar Un ). Valmöjlihet 1: Fortsätt med viktminimering Tryck in precisisons–knappen. Displayen visar === – Un.7 (Bild 123) eller Un.7 – === (Bild 124). STOP Valmöjlighet 2: Lämna optimeringprogrammet 117 Tryck på STOPP–knappen balanseringsprogram. och återvänd Obalansen visas på displayen. 104 Balansera hjulet enligt vad som displayen visar. BA geodyna 4300 – 9512 150 till Optimisation/ Weight minimisation Optimisation / Minimisation des masses Reading H 0 (Fig. 116) Affichage H 0 (Fig. 116) Press the STOP key to leave the OP program and return to the balancing program. The unbalance present in the wheel is read out. Balance the wheel according to the readings. Le balourd existant est alors affiché. Optimum condition has been achieved and cannot be improved. Appuyer sur la touche STOP pour repasser au programme d’équilibrage et équilibrer la roue suivant les affichages. Effectuer l’équilibrage de la roue suivant les affichages. L’état optimal de la roue est déjà atteint et ne peut pas être amélioré. Reading H 2 (Fig. 117) Affichage H 2 (Fig. 117) Wheel running conditions cannot be improved. However, it is possible to achieve weight minimisation (readings with code Un.). La condition de marche ne peut pas être améliorée. Il est cependant possible d’atteindre encore une minimisation des masses d’équilibrage (affichage avec code Un). Choice 1: Continue with weight minimisation Sélection 1: Effectuer la minimisation des masses Press the precision key to continue in the program. As a result readings are === – Un.7 (Fig.123) or Un.7 – === (Fig. 124). Appuyer sur la touche de précision afin de poursuivre dans le programme. L’affichage === – Un.7 (Fig.123) ou Un.7 – === (Fig. 124) apparaît alors. Choice 2: Abort optimisation Sélection 2: Interruption d’optimisation de stabilité de marche Press the STOP key to leave the OP program and return to the balancing program. Appuyer sur la touche STOP afin de repasser au programme d’équilibrage. The unbalance present in the wheel is read out. Le balourd existant est alors affiché. Balance the wheel according to the readings. Operation manual geodyna 4300 – 9512 150 Effectuer l’équilibrage de la roue suivant les affichages. Mode d’emploi geodyna 4300 – 9512 150 105 Optimering / viktminimering 12.4 Viktminimeringsprogram Om viktminskningsprogrammet valdes genom att precisison– knappen trycktes in (avläst Un.3 – Bild 118), fortsätt enligt nedan. 118 Sätt fast hjulet på maskinen. Vrid hjulet så att ventilen hamnar i exakt lodrätt läge över hjulaxeln. Tryck in OP–knappen för att mata in ventilläget. Om displayen visar Un.4 (Bild119). START Tryck på START–knappen. Mätningen utförs. Därefter ges två olika möjligheter: Un.5 – H 1 (se Bild 120) Vidare minimering rekommenderas inte, men kan utföras. Un.5 – Referensmärke (se Bild 121) Fortsätt med Un–programmet. 119 Avläsning Un.5 – H 1 (Bild 120) 120 Om OP.5 – H 1 visas rekomenderar maskinen att avbryta mätningen. I detta läge indikeras data som kan överskrida mätgränserna för optimeringsprogrammet. I vilket fall som helst är det möjligt att fortsätta mätningen så hjulets rullförmåga kan förbättras något (för extra känsliga bilar). Fortsatt viktminimering: För att fortsätta UN–programmet, se texten för Un 5 på nästa sida. –Referensmärke. Avbryta minimeringen: 106 Tryck in START–knappen och balansera hjulet på vanligt sätt. BA geodyna 4300 – 9512 150 Optimisation/ Weight minimisation Optimisation / Minimisation des masses 12.4 Minimisation program 12.4 Programme de minimisation If the compensation run of the rim without tyre was omitted and the precision key was pressed to go directly into the minimisation program (reading Un.3 – Fig. 118), proceed as follows. Si la lancée de compensation de la jante sans pneu a été omise et si la touche de précision a été appuyée pour passer directement au programme de minimisation (affichage Un.3 – Fig. 118), poursuivre comme suit: Clamp the tyre/rim assembly on the balancer. Readjust such that the valve is exactly perpendicular to and above the main shaft. Serrer l’ensemble pneu/jante sur la machine. Tourner jusqu’à ce que la valve soit exactement perpendiculaire à et au-dessus de l’arbre principal. Appuyer sur la touche OP pour entrer la position de la valve. Press the OP key to enter the valve position. Reading Un.4 comes up (Fig. 119). Press the START key. L’affichage Un.4 (Fig. 119) apparaît alors. The measuring run is carried out. After the measuring run two readings are possible: Un.5 – H 1 (see Fig. 120) Further minimisation is not recommended, but possible. Un.5 – reference mark (see Fig. 121) Continue with the Un program. Appuyer sur la touche START. La lancée de mesure est initialisée. Après la lancée de mesure, deux affichages sont possibles: Un.5 – H 1 (voir Fig. 120) Il n’est pas recommandé mais possible de continuer la minimisation. Un.5 – repère (voir Fig. 121) Poursuivre le programme Un. Reading Un.5 – H 1 (Fig. 120) Affichage Un.5 – H 1 (Fig.120) If Un.5 – H 1 is read out further minimisation is not recommended. In this case, the measured data does not exceed the given limit values. However, it is possible to continue minimisation so as to achieve an improvement, if only slight (critical vehicle). Si Un.5 – H 1 est affiché, il n’est en général pas recommandé de continuer la miminisation, car les valeurs mesurées ne dépassent pas les limites fixées. Il est cependant possible de continuer la minimisation pour obtenir une amélioration, même audessous de la valeur limite (véhicule critique). To continue with the minimisation program: Continuer la minimisation: Proceed as specified for reading Un.5 – reference mark (see next page). Poursuivre selon la description pour l’affichage Un.5 – repère (voir page suivante). To abort minimisation: Interrompre la minimisation: Press the STOP key to return to the balancing program and balance the wheel according to the readings. Operation manual geodyna 4300 – 9512 150 Appuyer sur la touche STOP pour repasser au programme d’équilibrage et équilibrer la roue suivant l’affichage. Mode d’emploi geodyna 4300 – 9512 150 107 Optimering / viktminimering Displayen visar Un.5 – Referensmärke (Bild 121) 121 Snurra hjulet enligt lägespilarna och gör ett kritstreck på däckets högra sida när viktpilarna indikerar att det önskade läget är exakt över hjulaxeln. Ta ned hjulet och lossa däcket från fälgen samt vrid däcket så att kritmarkeringen står mitt för ventilen. Pumpa däcket. Spänn fast hjulet i maskinen och snurra hjulet tills ventilen står exakt lodrätt över hjulaxeln. Tryck in OP–knappen för att lagra ventilläget. Displayen visar nu Un.6 (Bild 122). Tryck in START–knappen. START Den andra mätningen av däck på fälg påbörjas nu: === – Un.7 (se bild 123) Fortsätt med optimeringen Det rekommenderas att vända över däcket på fälgen. Un.7 – === (se bild 124) Fortsätt med optimeringen Det rekommenderas att vrida däcket på fälgen H 0 (se bild 125) Det optimala läget har uppnåtts och kan inte förbättras. Beroende på vad displayen visade finns ett flertal olika möjligheter att fortsätta med programmet. Dessa möjligheter beskrivs på nästa sida. 122 108 BA geodyna 4300 – 9512 150 Optimisation/ Weight minimisation Optimisation / Minimisation des masses Reading Un.5 – reference mark (Fig. 121) Affichage Un.5 – repère (Fig. 121) After the measuring run index the wheel following the position reading and provide a crayon mark on the right side of the tyre exactly perpendicular to and above the main shaft. Après la lancée de mesure, orienter la roue suivant l’affichage de direction et tracer un repère à la craie exactement perpendiculaire à et au-dessus de l’arbre principal du côté droit du pneu. Readjust the tyre on the rim such that the tyre mark coincides with the valve. Tourner le pneu sur la jante jusqu’à ce que le repère sur le pneu coïncide avec la valve. Clamp the tyre/rim assembly on the balancer and readjust such that the valve is exactly perpendicular to and above the main shaft. Serrer l’ensemble pneu/jante sur la machine et le tourner jusqu’à ce que la valve soit exactement perpendiculaire à et au-dessus de l’arbre principal. Press the OP key to enter the valve position. Appuyer sur la touche OP pour entrer la position de la valve. Reading Un.6 (Fig. 122) comes up. Press the START key. L’affichage Un.6 (Fig. 122) apparaît alors. Appuyer sur la touche START. The second measuring run of the tyre/rim assembly is started. After the measuring run three readings are possible: La deuxième lancée de mesure est initialisée. Après la lancée de mesure, trois affichages sont possibles: === – Un.7 (see Fig. 123) Proceed with the Un program. It is recommended that the tyre be turned over on the rim. === – Un.7 (voir Fig. 123) Poursuivre le programme Un. Il est recommandé de renverser le pneu sur la jante. Un.7 – === (see Fig. 124) Proceed with the Un program. It is recommended that the tyre be adjusted on the rim. Un.7 – === (voir Fig. 124) Poursuivre le programme Un. Il est recommandé de tourner le pneu sur la jante. H 0 (see Fig. 125) Optimum condition has been achieved and cannot be improved. H 0 (voir Fig. 125) La condition optimale est déjà atteinte et ne peut pas être améliorée. Depending on the readings, there are several possibilities for proceeding with the program. These possibilities are described below. Suivant les affichages, diverses possibilités existent de poursuivre le programme. Ces possibilités sont indiquées ci-dessous. Operation manual geodyna 4300 – 9512 150 Mode d’emploi geodyna 4300 – 9512 150 109 Optimering / viktminimering Displayen visar === – Un.7 (Bild 123) Rekommendation att vända över däcket på fälgen. (vänstra displaystrecken roterar). Valmöjlighet 11: Vänd över däcket på fälgen (Standardprogram) STOP Ställ in hjulet enl markeringspilen som visas på vänster sida och markera med två kritstreck på vänster sida av däcket exakt i lodrätt läge över hjulaxeln. Ta ned hjulet från maskinen. Vänd över däcket på fälgen och vrid det tills kritmärket står mitt för ventilen. Pumpa däcket. Spänn fast hjulet i maskinen igen och och snurra det tills ventilen står exakt lodrätt över hjulaxeln. Tryck in OP–knappen för att mata in ventilläget. Displayen visar nu Un.8. START Tryck in START–knappen (Kontrollmätning). Om vikminimeringen utförts på korrekt sätt kommer maskinen att återgå till normalt balanseringsläge som hade valts innan viktminimeringen samt visa den kvarvarande dynamiska obalansen som finns på hjulet (Bild 123). Balansera hjulet enligt viktangivelserna på displayen. När detta är klart har både viktminimering och balansering utav hjulet utförts Felkod E 9 123 Om felkod E9 visas har åtminstone ett fel begåtts i arbetsgången när viktminimering utförts ( se § 11 felkoder) Avbryt viktminimeringen med STOPP–knappen och börja om från början. Valmöjlighet 2: Vänd inte däcket på fälgen Tryck in precisionsknappen. Resutatet blir att symbolen konverteras och visar nu Un.7 – = = = (se Bild 124) eller H0 (se Bild 125). För att återgå till === – Un.7 (vänd däcket) Tryck in precisionsknappen igen. Valmöjlighet 3 Tryck in STOPP–knappen för att återvända från till balanseringsprogrammet. Obalansvärdet visas på displayen. 110 Obalansvärdet visas på displayen. BA geodyna 4300 – 9512 150 Optimisation/ Weight minimisation Optimisation / Minimisation des masses Reading === – Un.7 (Fig. 123) Affichage === – Un .7 (Fig. 123) Recommendation to turn tyre over on the rim (the left display segments are rotating). Recommandation de renverser la roue sur la jante (les traits de l’affichage gauche tournent) Choice 1: Turn tyre over on the rim (standard program) Sélection 1: Renverser le pneu sur la jante (programme standard) Index the wheel following the left direction indicator and provide a double mark on the left side of the tyre exactly perpendicular to and above the main shaft. Remove the wheel from the machine. Turn the tyre over on the rim and readjust until the double mark coincides with the valve. Clamp the tyre/rim assembly on the machine and readjust such that the valve is exactly perpendicular to and above the main shaft. Press the START key (check run). If the minimisation run has been carried out correctly following the above sequence of operations, the balancer will return to the balancing mode selected before minimisation and read out the dynamic unbalance still left in the wheel (Fig. 123). Tourner la roue conformément à l’affichage gauche du sens d’orientation et tracer un double repère sur le côté gauche du pneu, ledit repère devant se trouver sensiblement perpendiculaire en dessous de l’arbre principal. Enlever la roue de la machine. Renverser le pneu sur la jante et le tourner jusqu’à ce que le repère double coïncide avec la valve. Serrer l’ensemble pneu/jante sur la machine et le tourner jusqu’à ce que la valve soit exactement perpendiculaire à et au-dessus de l’arbre principal. Appuyer sur la touche OP pour entrer la position de la valve. Press the OP key to enter the valve position. Reading Un.8 comes up. Balance the wheel according to the readings. Hence both minimisation and balancing are accomplished. L’affichage Un.8 apparaît alors. Appuyer sur la touche START (lancée de contrôle). Si l’optimisation a été correctement effectuée suivant la séquence de programme, la machine repasse, après la lancée de contrôle, au mode d’équilibrage qui était sélectionné avant l’initialisation de la lancée de minimisation et le balourd dynamique résiduel de la roue est affiché (Fig. 123). Effectuer l’équilibrage de la roue suivant les affichages. La minimisation est ainsi achevée et l’équilibrage de la roue effectué. Reading of error code E9 Affichage du code d’erreur E9 If E9 is read out, at least one error was made with respect to the sequence of operations when performing minimisation (see § 11. Error codes). Abort the minimisation program by pressing the STOP key and, if desired, start minimisation once again. Si E9 est affiché, c’est qu’il y a eu au moins une erreur relative à la séquence de programme lors de la procédure de minimisation (voir § 11. Codes d’erreur). Quitter le programme de minimisation en appuyant sur la touche STOP et, si cela est souhaité, relancer la minimisation. Choice 2: Do not turn tyre over on the rim Sélection 2: Ne pas renverser le pneu sur la jante Press the precision key. The result is then converted. Reading is Un.7 – = = = (see Fig. 124) or H0 (see Fig. 125). To return to === – Un.7 (turning over the tyre), press the precision key once again. Appuyer sur la touche de précision. Le résultat est alors recalculé. L’affichage Un.7 – = = = (voir Fig. 124) ou H0 (voir Fig. 125) apparaît alors. Pour passer à === – Un.7 (renverser le pneu), appuyer à nouveau sur la touche de précision. Choice 3 Press the STOP key to return from the minimisation to the balancing program. Sélection 3 The unbalance present in the wheel is read out. Balance the wheel according to the readings. Operation manual geodyna 4300 – 9512 150 Appuyer sur la touche STOP afin de repasser du programme de minimisation au programme d’équilibrage. Le balourd de la roue est alors affiché. Effectuer l’équilibrage de la roue suivant les affichages. Mode d’emploi geodyna 4300 – 9512 150 111 Optimering/Viktminimering Displayen visar Un.7 – === (Bild 124) Rekommendation att vända över däcket på fälgen. (Strecken i högra delen av displayen är konstant tända). Valmöjlihet 1: Vänd över däcket på fälgen (Standardprogram) Ställ in hjulet enl markeringspilen som visas på höger sida och markera med två kritstreck på höger sida av däcket exakt i lodrätt läge över hjulaxeln. Ta ned hjulet från maskinen. Vänd över däcket på fälgen och vrid det tills kritmärket står mitt för ventilen. Pumpa däcket. Spänn fast hjulet i maskinen igen och och snurra det tills ventilen står exakt lodrätt över hjulaxeln. Tryck in OP–knappen för att mata in ventilläget. STOP START Displayen visar nu Un.8. Tryck in START–knappen (Kontrollmätning). Om minimeringen utförts på rätt sätt enligt ovanstående sekvens, kommer maskinen att återvända till vanligt balanseringsläge och den obalans som återstår visas fortfarande på displayens vänstra sida (Bild 124). Balansera hjulet enligt vad som visas på displayen. Nu är optimering och balansering utförd. 124 Felkod E 9 Om felkod E9 visas har åtminstone ett fel begåtts i arbetsgången när viktminimering utförts ( se § 11 felkoder) Avbryt viktminimeringen med STOPP–knappen och börja om från början. Valmöjlighet 2: Vänd inte däcket på fälgen Tryck in STOPP–knappen för att lämna viktminimeringsprogrammet och återvända till balanseringsprogrammet. Obalansvärdet visas på displayen. Balansera hjulet enligt avläsningen. Felkod H 0 (Bild 125) Optimering av mätningen har genomförts och kan ej förbättras ryck på STOPP–knappen för att återvända till balanseringsprogrammet. Resterande obalans visas. Balansera hjulet enligt denna anvisning. STOP 125 112 BA geodyna 4300 – 9512 150 Optimisation/ Weight minimisation Optimisation / Minimisation des masses Reading Un.7 – === (Fig. 124) Affichage Un .7 – === (Fig. 124) Recommendation to readjust tyre on the rim (the right display segments light up permanently). Recommandation de tourner le pneu sur la jante (les traits de l’affichage droit restent allumés) Choice 1: Readjust tyre on the rim (standard program) Sélection 1: Tourner le pneu sur la jante (standard program) Index the wheel following the right direction indicator and provide a double mark on right side of the tyre exactly perpendicular to and above the main shaft. Orienter la roue suivant l’indicateur de direction à droite et tracer un repère double exactement perpendiculaire à et au-dessus de l’arbre principal du côté droit du pneu. Remove the wheel from the machine. Enlever la roue de la machine. Readjust the tyre on the rim until the double mark coincides with the valve. Tourner le pneu sur la jante et le tourner jusqu’à ce que le repère double coïncide avec la valve. Clamp the tyre/rim assembly on the machine and readjust such that the valve is exactly perpendicular to and above the main shaft. Serrer l’ensemble pneu/jante sur la machine et le tourner jusqu’à ce que la valve soit exactement perpendiculaire à et au-dessus de l’arbre principal. Press the OP key to enter the valve position. Appuyer sur la touche OP pour entrer la position de la valve. Reading Un.8 comes up. Press the START key (check run). If the minimisation run has been carried out correctly following the above sequence of operations, the balancer will return to the balancing mode selected before minimisation and read out the dynamic unbalance still left in the wheel (Fig. 124). Balance the wheel according to the readings Hence both minimisation and balancing are accomplished. L’affichage Un.8 apparaît alors. Appuyer sur la touche START (lancée de contrôle). Si la minimisation a été correctement effectuée suivant la séquence de programme, la machine repasse, après la lancée de contrôle, au mode d’équilibrage qui était sélectionné avant l’initialisation de la lancée de minimisation et le balourd dynamique résiduel de la roue est affiché (Fig. 124). Effectuer l’équilibrage de la roue suivant les affichages. La minimisation est ainsi achevée et l’équilibrage de la roue effectué. Reading of error code E9 Affichage du code d’erreur E9 If E9 is read out, at least one error was made with respect to the sequence of operations when performing minimisation (see § 11. Error codes). Abort the minimisation program by pressing the STOP key and, if desired, start minimisation once again. Si E9 est affiché, c’est qu’il y a eu au moins une erreur relative à la séquence de programme lors de la procédure de minimisation (voir § 11. Codes d’erreur). Quitter le programme de minimisation en appuyant sur la touche STOP et, si cela est souhaité, relancer la minimisation. Choice 2: Do not readjust tyre on the rim Sélection 2: Ne pas tourner le pneu sur la jante Press the STOP key to return from the minimisation to the balancing program. Appuyer sur la touche STOP afin de repasser du programme de minimisation au programme d’équilibrage. The unbalance present in the wheel is read out. Le balourd de la roue est alors affiché. Balance the wheel according to the readings. Effectuer l’équilibrage de la roue suivant les affichages. Reading H 0 (Fig. 125) Affichage H 0 (voir Fig. 125) Optimum condition has been achieved and cannot be improved. La condition optimale est déjà atteinte et ne peut pas être améliorée. Press the STOP key to return to the balancing program and balance the wheel according to the readings. Operation manual geodyna 4300 – 9512 150 Appuyer sur la touche STOP pour repasser au programme d’équilibrage et équilibrer la roue suivant les affichages. Mode d’emploi geodyna 4300 – 9512 150 113 Kundkalibrering 13. Kundkalibrering Om ett flertal mätomgångar krävs för att få ett bra resultat beroende på att viktstorlek och position måste justeras efter första mätningen, är orsaken ofta bristande mätnoggranhet. I sådana fall har användaren en möjlighet att kalibrera maskinen på nytt. En kalibreringsvikt, ref 6418426 –, levereras med maskinen för sådana ändamål ( Den skall sitta nedstucken i ett hål uppe på En kalibreringsmätning balansmätning. tar längre tid än en vanlig Eventuell navkompensering tas bort vid kalibreringen. 126 – + Viktigt: Vid kundkalibrering måste maskinens originalnav vara monterat på maskinen. Arbetsgång (kod C14) Endast navkroppen utan hjul, kona eller navratt skall finnas på maskinens axel. Tryck in C–Knappen. Basvärdet C – visas efter cirka 1 sekund(Bild 126). Vrid axeln (Framåt – bakåt), tills kod 14 visas (Bild 127). Tryck in C–knappen och håll den inne. Siffran 1 och START visas nu (Bild 128). 127 Stäng skyddshuven (om maskinen är utrustad med sådan) och tryck in START–knappen för att starta första kalibreringsomgången (Det tar dubbelt så lång tid som vanligt att göra mätningen). När första mätningen gjorts visas siffran 2 och START (Bild 129). START 128 Skruva i kalibreringsvikten i det gängade hålet i navets anläggningsyta (Bild 130). Tryck på START–knappen för att starta den andra kalibreringen med kalibreringsvikten monterad. När den andra mätningen är genomförd är den elektriska kompenseringen lagrad permanent i maskinen. När mätningen är färdig och kompenseringen sparad hörs en ljudsignal som bekräftar resultatet. Maskinen är nu klar för obalansmätning och grundinställningen visas på displayen (Bild 126). START Glöm ej att skruva bort kalibreringsvikten från navet. 129 130 114 BA geodyna 4300 – 9512 150 Readjustment by the operator Etalonnage par l’opérateur 13. Readjustment by the operator 13. Etalonnage par l’opérateur If several measuring runs are necessary to balance a wheel because balance weight size and position have to be readjusted repeatedly, this is often due to insufficient measurement accuracy. Si plusieurs lancées de mesure sont nécessaires pour équilibrer une roue parce que la grandeur et la position des masses d’équilibrage doivent être corrigées plusieurs fois, cela est très souvent dû à une insuffisance de précision de mesure. In such case the operator has the possibility of readjusting the machine. Dans ce cas, l’opérateur a la possibilité de rajuster la machine. For readjustment by the operator a calibration weight is supplied with the machine (ref. no. 6418 416 – kept on the right at the back of the weight box). Pour l’étalonnage, une masse-étalon (réf. 6418 416 ) est fournie avec la machine (gardée à droite à l’arrière sur les compartiments à masses). A calibration run takes longer than a regular measuring run. La lancée d’étalonnage dure plus longtemps qu’une lancée de mesure ordinaire. Electrical compensation of adaptor unbalance, if carried out, will be cancelled by readjustment. Si une compensation électrique du balourd du moyen de serrage a été effectuée, elle sera annulée par l’étalonnage. Important: Readjustment must be carried out using the clamping adaptor supplied with the machine from our works. Important: L’étalonnage doit se faire en utilisant le moyen de serrage fourni avec la machine de nos usines. Readjustment (Code C14) Etalonnage (Code C14) Make sure no wheel or other clamping means is clamped on the machine. Veiller à ce que pas de roue ou autres moyens de serrage soit serré sur la machine. Press and hold the C key. Appuyer sur la touche C et la maintenir appuyée. The basic reading C –– is read out (Fig. 126). L’affichage de base C –– est affiché (Fig. 126). Rotate the main shaft (positive – negative direction) until code 14 is read out (Fig. 127). Tourner l’arbre principal (sens positif – négatif) jusqu’à ce que le code 14 soit affiché (Fig. 127). Release the C key. Relâcher la touche C. 1. and START are read out (Fig. 128). 1. et START sont alors affichés (Fig. 128). Close the wheel guard, and press the START key to carry out a first readjustment run (long measuring run – to detect residual unbalances, if any). Fermer le carter de roue, appuyer sur la touche START et effectuer la première lancée d’étalonnage (lancée de mesure longue – détection d’un éventuel balourd résiduel). On completion of the first run 2. and START are read out (Fig. 129). La première lancée d’étalonnage terminée, 2. et START sont alors affichés (Fig. 129). Screw the calibration weight into the threaded bore provided for this purpose in the basic body of the wheel adaptor (Fig. 130). Visser alors la masse-étalon dans le trou taraudé prévu à cet effet dans le corps de base du moyen de serrage (Fig. 130). Press the START key to carry out a second readjustment run with the calibration weight fitted on the adaptor (to detect the correction values). Appuyer sur la touche START et effectuer une deuxième lancée d’étalonnage (avec la masse-étalon – détermination des valeurs de correction). On completion of the second run the electronic unit processes the data determined in the calibration runs and enters them into the permanent memory. On completion of the processing operation a three-tone signal is given and readjustment is completed. The machine is now operative and the basic readings come back (Fig. 126). Once readjustment is completed, be sure to remove the calibration weight from the wheel adaptor and put it back in its designated place. Operation manual geodyna 4300 – 9512 150 L’unité électronique traite les données déterminées dans les lancées d’étalonnage et les enregistre dans la mémoire permanente. Le traitement terminé, un signal mélodieux retentit et l’étalonnage est terminé. La machine est alors en ordre de marche et l’affichage de base apparaît (Fig. 126). Une fois l’étalonnage achevé, dévisser la masse-étalon du corps de base du moyen de serrage et la replacer au bon endroit. Mode d’emploi geodyna 4300 – 9512 150 115 Tekniska data 14. Underhåll Maskinen behöver nästa inget underhåll. Axelkullagren är livstidssmorda och förseglade. Om felaktigheter ej kan åtgärdas av användaren (felkoder som ej beskrivs under § 11 felkoder) måste servicetekniiker från Hoffman kontaktas för rådgivning. Särskild uppmärksamhet skall ges till maskinaxelns koniska ände och navet. Balanseringsresultatet beror i hög grad på dessa delars skick. Därför skall dessa delar hållas perfekt rena och fria från fett. Om maskinen skall förvaras en längre tid bestryks navets och maskinaxeln ytor med en rostskyddande olja. 14.1 Serviceorganisation Tool Trade AB Granmodalsgatan 29 852 38 Sundsvall Telefon: 060 – 151416 Telefax: 060 – 171516 15. Tekniska data Maskindimensioner Maskinens höjd med hjulskyddet öppet Maskinens vikt se bild 131 1763 mm 93 kg 530 Elförsörjning 1/N/PE AC 50/60 Hz, 200–240 V eller 2/PE AC 50/60 Hz, 200–240 V Motorns effektförbrukning 0,12 kW Balanseringsfart (varvtal) 200 min–1 Mättid 3 sec Största viktstorlek 400 g Mätnoggranhet, viktstorlek 1 alt 5 g Mätnoggranhet viktläge 0,7 Grad Arbetstemperatur 0–45 5C Tilllåten relativ luftfuktighet 5–95 % vid 40 5C Ljudnivå 70 dB (A) 1175,3 Arbetsområde Avstånd maskin – fälg Fälgbredd Fälgdiameter Max hjuldiameter Max hjulbredd. Max hjulvikt. Bild 131 Maskinens mått 1213,2 131 116 BA geodyna 4300 – 9512 150 0–300 mm 1–20 tum 8–24 tum 950 mm 530 mm 70 kg Maintenance • Technical Data Entretien • Données techniques 14. Maintenance 14. Entretien The wheel balancer requires almost no maintenance. The bearings are greased for life and sealed. The drive belt does not require particular checks. If defects occur which cannot be eliminated by the user (error codes not mentioned under § 11. – Error codes), contact the after-sales service. L’équilibreuse n’a presque pas besoin d’entretien. Les roulements sont graissés à vie et rendus étanches. La courroie d’entraînement n’a pas besoin de contrôles ultérieurs. En cas de perturbation éventuelle qui ne peut pas être éliminée par l’opérateur (messages d’erreur pas mentionné au § 11.), appeler le service après-vente. Particular attention should be paid to the cone of the shaft and the clamping means. Balance quality depends considerably on their condition. Therefore they should be kept clean. If not in use they should be lightly lubricated with non-corrosive oil and stored under appropriate conditions. Seuls le cône de l’arbre principal et les moyens de serrage demandent un entretien particulier. Ils doivent être nettoyés régulièrement et graissés légèrement avec une huile neutre quand ils ne sont pas utilisés, leur état ayant une influence considérable sur la précision d’équilibrage. 14.1 After-sales service 14.1 Service après-vente In Germany: En Allemagne: Snap-on Deutschland Holding GmbH Geschäftsbereich Hofmann Werkstatt-Technik Werner-von-Siemens-Straße 2 64319 Pfungstadt Telephone: Fax: Snap-on Deutschland Holding GmbH Geschäftsbereich Hofmann Werkstatt-Technik Werner-von-Siemens-Straße 2 64319 Pfungstadt ++49 6157 12-491 or -254 ++49 6157 12 484 Téléphone: Télécopie: ++49 6157 12-491 ou -254 ++49 6157 12 484 Abroad please contact your local agent. A l’ètranger, veuillez vous mettre en contact avec votre agence sur place. 15. Technical Data Machine dimensions Height of machine with wheel guard open Weight of machine 15. Données techniques see Fig. 131 1763 mm 93 kg Dimensions de la machine Hauteur de machine, carter ouvert Poids de machine voir Fig. 131 1763 mm 93 kg Power supply 1/N/PE AC 50/60 Hz, 200–240 V or 2/PE AC 50/60 Hz, 200–240 V Motor rating 0.12 kW Balancing speed 225 rpm (50 Hz) Measuring time 3 sec Max. unbalance reading 400 g (14 oz) Resolution of amount reading 1 / 5 g or 0.05 / 0.25 oz Resolution of position reading 0.7 deg. Working temperature 0–45 °C Relative humidity 5–95 % at 40 °C Noise level 70 dB (A) 1/N/PE AC 50/60 Hz, 200–240 V ou 2/PE AC 50/60 Hz, 200–240 V Puissance moteur 0,12 kW Vitesse d’équilibrage 200 tr/min (50 Hz) Temps de mesure 3 sec Affichage de balourd maxi 400 g (14 onces) Résolution affichage grandeur 1 / 5 g bzw. 0,05 / 0,25 oz Résolution affichage position 0,7 degrés Température de fonctionnement 0–45 °C Humidité relative 5–95 % à 40 °C Niveau sonore 70 dB (A) Working range Rayon de fonctionnement Distance rim – machine Rim width Rim diameter Overall wheel diameter Overall wheel width Max. wheel weight Fig. 131 Machine dimensions Operation manual geodyna 4300 – 9512 150 0–300 mm 1–20 inches 8–24 inches 950 mm 530 mm 70 kg Branchement électrique Ecart jante – machine Largeur jante Diamètre jante Diamètre de roue hors tout Largeur roue hors tout Poids roue maxi 0–300 mm 1–20 8–24 950 mm 530 mm 70 kg Fig. 131 Dimensions de machine Mode d’emploi geodyna 4300 – 9512 150 117 X2 1 2 3 4 5 6 R 213 0R BA geodyna 4300 – 9512 150 EEPROM 4k x 8bit Vcc CH-A Signal Processing Circuitry CH-B 1 2 3 4 5 6 7 8 9 10 Optoelektronikplatine Opto electronic board 6726387 A3 1 2 3 4 W4 1 2 3 4 5 6 7 8 9 1 0 X10 X3 X11 X9 Abstand offset B4 B5 X8 CCW Durchmesser diameter CW CCW X7 X8.1 W12 B6 optional 1 2 3 X13 B3 B2 B8 Inkrementalgeber Hauptwelle Incremental encoder main shaft hinten Temperatur- vorn front rear sensor Temperature Meßwandler Unwucht sensor Unbalance transducers 6717253 B1 J 4402110 Radschutzschalter X13.1 S3 Wheel guard switch 1 2 X43 Vcc (+5V) Verlängerungsleitung Radschutz Wheelguard extension wire 6792044 W5 1 2 3 4 5 6 7 8 9 10 1 2 3 R93 4 5 K7 X42 Achtung: Brücke X46 während Isolationswiderstands- (500V=) und Hochspannungstests (1000V~) entfernen ! Attention: Remove jumper X46 during Insulation Resistance (500VDC) and High Voltage (1000VAC) tests ! X46: + + Vcc (+5V) K2: Vorwärtslauf Forward run K3: Rückwärtslauf Reverse run K4: Drehmoment-Kondensator CT Torque capacitor CT K7: Felgenschüsselbeleuchtung Inner rim side lighting green Vcc Vcc (+5V) H2 Power interface board 6726390 A2 Powerinterfaceplatine X30 MPWM (motor pwm signal) K2M (relais K2) K3M (relais K3) K4M (relais K4) QtTErr (quit trip error) TErr (trip error) EMB1 (PWM-output) EMB2 (fast switch-off) LAMP NC AUX3 AUX4 TEMP2 (temperature sensor) FREQ-LINE MUX-CHA MUX-CHB VREF (+4.5V) VOLTAGE-LINE ANALOG-IN1 ANALOG-IN2 ANALOG-IN3 AGND WHEELGUARD ASS PEDAL-S2 PEDAL-S1 NC NC NC NC DGND Vcc (+5V) DGND Vcc (+5V) POT STOP (STOP-key/wheel guard) AUDIO (speaker) STATUS1 (status port expander/PFI) I²C SCL (serial clock) I²C SDA (serial data) Verlängerungsleitung Breitenabtastung Extension wire 3D-Sape 6792074 W12: Breite / width - Tasteinrichtung / gauges Potentiometer mit Kabel potentiometer with connection wire 6792070 Potentiometer (10k) m. Kabel Potentiometer (10K) CW 6792037 CW CCW X6 X1 Kabel serielle Schnittstelle Connection wire serial interface 6792043 W7 1 2 3 4 5 6 7 8 9 10 NC NC RxD (receive data) RTS (request to send) TxD (transmit data) CTS (clear to send) NC NC GND 1 2 3 4 5 D13: nur für Software-update erforderlich 6 D13 EPROM 256k x 16bit for Software update only 3553526 7 8 9 10 Vcc (+5V) V ref (+4,5V) 11 FLASH Reset Sub-Voltage12 256k x 16bit circuit Regulator 13 Vcc (+5V) V ref 14 Reset AGND (+4,5V) 15 Quarz 16 10 MHz RAM 17 CPU 2 x 128k x 8bit 18 19 H1 20 red 21 Error Driver 22 stereo RefRS232E 23 analog to digital signal converter 24 25 26 analog 27 interface 28 Vcc 29 (+5V) 30 31 Driver 32 I/O - Interface I/O- Interface - power interface / digital 33 - opto electronic display / AWP EEPROM 34 4k x 8bit 35 36 37 W4: VREF 38 Verbindungsleitung Schwinger (4,5V) 39 Vibratory system harness 40 6792035 1 1 1 1 1 1 1 1 2 3 4 5 6 7 8 9 0 1 2 3 4 5 6 1 2 3 4 1 2 3 4 1 2 3 4 Controller board 6731443 A1 Controllerplatine 1 1 1 1 1 1 2 3 4 5 6 7 8 9 0 1 2 3 4 Vcc (+5V) Stop Anzeige- und Bedieneinheit Display and keyboard unit 6705832 Verbindungsltg. Anzeige- und Bedieneinheit Ribbon cable display and keyboard unit W3 6791983 Feinsicherung Miniature fuse 3350211 1,25AM F7 Vcc (+5V) Embedded PC X14 1 2 X12 Vcc (+5V) 1 2 3 4 5 6 7 8 9 10 POT STOP (STOP-key) AUDIO (speaker) STATUS1 I²C SCL (serial clock) I²C SDA (serial data) A6 AUX.1 (channel X power clamp) AUX.2 (channel Y power clamp) I²C SDA (serial data) I²C SCL (serial clock) LED-CURRENT Vcc (+5V) CH-A (channel A optoelectronic) NC CH-B (channel B optoelectronic) DGND BAL right - (unbalance signal right) BAL right + (unbalance signal right) TEMP1 (temperature sensor) AGND BAL left - (unbalance signal left) BAL left + (unbalance signal left) 118 lead 1 (+5V) -micro switch wheel guardlead 2 (low side) -micro switch wheel guard- Start 2 1 M1 3 2 V403 V404 1 L1 2 F3 3,2AT 3,2AT F4 Line in N 3 Erdung Maschinengehäuse Grounding cabinet GNYE Feinsicherung Miniature fuse 3350320 F3, F4: GNYE X41.1 Motor-Kondensator Torque capacitor 3762020 CT (20µF) Motor-Kondensator Motor capacitor 3762019 CO (10µF) Electronikbox kpl. Electronic box full assemblied 6705946 Warnhinweis: Arbeitsspannung an X41 200-240V~ Attention: working voltage at X41 200-240VAC X41: X41 F5 Netzfilter Mains filter GNYE 4 Motor 6792046 M1 1 3 V401 IGBT - Drive V402 LD3 LD4 LD2 LD1 EMIFilter Motorsteuerung Motor control unit X46 red Überstrom Overcurrent H1 K2 K3 K4 + Netzteil Power supply 2 3 2 L1 115V 1 Cy Cy Cx F1 5AT L 230V Eingang Netzwechselspannung 50/60 Hz Mains Input AC 50/60 Hz Netzkabel Mains cord 4206141 W1 0V 3 1 fuse 3350322 NetzeingangsModul Power-entrymodule 3950036 A10 Vorschalttransformator Step- up transformer 4501082 T2 optional Kabel NetzeingangsModul Cable power entry module 6792040 W2 N1 5AT F2 Feinsicherung Miniature N 16. Elschema 16. Electrical diagram 16. Schéma des connexions électriques Anteckningar Notes Operation manual geodyna 4300 – 9512 150 Mode d’emploi geodyna 4300 – 9512 150 119