1
Anleitung_WH_2000_I_SPK7:_
k
20.03.2012
13:21 Uhr
Seite 1
Originalbetriebsanleitung
Wandheizgerät
t Original operating instructions
Wall Heater
p Mode d’emploi d’origine
Chauffage mural
C Istruzioni per l’uso originali
Generatore di aria calda parete
�
Art.-Nr.: 23.385.03
I.-Nr.: 11011
WH
2000 I
Anleitung_WH_2000_I_SPK7:_
1
1
20.03.2012
2 3 4 5
13:21 Uhr
Seite 2
13
67 8
14
3
7
4
8
12
ABC
ED
9
3
2
H
11
4
2
10
F
H
Anleitung_WH_2000_I_SPK7:_
20.03.2012
13:21 Uhr
Seite 3
D
Achtung!
Beim Benutzen von Geräten müssen einige
Sicherheitsvorkehrungen eingehalten werden, um
Verletzungen und Schäden zu verhindern. Lesen Sie
diese Bedienungsanleitung / Sicherheitshinweise
deshalb sorgfältig durch. Bewahren Sie diese gut auf,
damit Ihnen die Informationen jederzeit zur
Verfügung stehen. Falls Sie das Gerät an andere
Personen übergeben sollten, händigen Sie diese
Bedienungsanleitung / Sicherheitshinweise bitte mit
aus. Wir übernehmen keine Haftung für Unfälle oder
Schäden, die durch Nichtbeachten dieser Anleitung
und den Sicherheitshinweisen entstehen.
1. Sicherheitshinweise
앬
앬
앬
앬
앬
앬
앬
앬
앬
앬
앬
앬
앬
앬
앬
Vor der Inbetriebnahme die Bedienungsanleitung
unbedingt beachten! Das Gerät darf nur wie darin
beschrieben verwendet werden. Jede andere
Verwendung ist unzulässig.
Anleitung gut aufbewahren und ggf. an Dritte
weiter geben.
Überprüfen Sie, ob das Gerät in einem einwandfreien Zustand geliefert wurde. Bei eventuellen
Beschädigungen Gerät nicht anschließen.
Gerät ist nur zur Erwärmung der Raumluft in
geschlossenen Räumen geeignet.
Nicht für gewerbliche Zwecke geeignet.
Netzleitung bei Betrieb nicht über heiße Geräteteile führen.
Gerät nie öffnen und Spannung führende Teile
berühren – Lebensgefahr!
Gerät niemals in der Nähe von Feuchträumen
oder Nasszellen (Badewanne, Dusche,
Schwimmbad etc.) aufstellen. Bedienelemente
dürfen von einer sich unter der Dusche, mit
Flüssigkeit gefüllten Gefäß oder in der
Badewanne befindlichen Person nicht berührt
werden können.
Niemals Gerät mit nassen Händen bedienen .
Gerät so aufstellen, dass der Netzstecker jederzeit zugänglich ist.
Ist das Gerät längere Zeit außer Betrieb, Netzstecker ziehen!
Gerät darf nicht in Räumen in denen feuergefährliche Stoffe (z.B. Lösungsmittel usw.) oder
Gase verwendet oder gelagert werden betrieben
werden.
Leicht entflammbare Stoffe oder Gase vom Gerät
fernhalten.
Nicht in feuergefährdeten Räumen (z.B. Holzschuppen) betreiben.
Heizgerät nur mit vollständig ausgerollter Netzleitung betreiben.
앬
앬
앬
앬
앬
앬
앬
앬
앬
앬
앬
앬
앬
앬
Halten Sie zwischen der Luftauslassöffnung und
Gegenständen (z.B. Vorhängen), Wänden und
anderen Baulichkeiten einen Mindestabstand
von 100 cm ein. Der seitliche Abstand zu
Gegenständen oder Wänden muss 25cm
betragen.
Nicht geeignet zur Installation an festverlegten
Elektroleitungen.
Keine Fremdkörper in Geräteöffnungen einführen
– Gefahr von Stromschlag und Gerätebeschädigung.
Kinder und Personen unter Medikamenten- oder
Alkoholeinfluss sind vom Gerät fernzuhalten.
Wartungsarbeiten und Reparaturen dürfen nur
vom autorisierten Fachpersonal ausgeführt
werden.
Vor jedem Betrieb ist das Gerät insbesondere
das Netzkabel auf Beschädigungen zu prüfen.
Bei Beschädigungen wenden Sie sich an einen
Elektrofachmann oder den in Ihrem Land
zuständigen Kundendienst (in Deutschland ISC
GmbH).
Eine Waagerechte, ortsfeste Wandmontage in
einer Höhe von mindestens 1,8 m über dem
Fußboden ist vorgeschrieben.
Eine Deckenmontage ist unzulässig.
Wasser oder andere Flüssigkeiten dürfen
niemals auf oder in das Gerät gelangen –
Lebensgefahr!
Das Heizgerät nicht im Badezimmer verwenden.
Das Gerät nur an eine geerdete Netzsteckdose
anschließen.
Gerät nicht unmittelbar über oder unter einer
Steckdose installieren.
Achtung! Gerät nicht abdecken - Brandgefahr!
Beachten Sie das Symbol auf dem Gerät (Abb.
4).
Dieses Gerät ist nicht dafür bestimmt, durch Personen (einschließlich Kinder) mit eingeschränkten physischen, sensorischen oder geistigen
Fähigkeiten oder mangels Erfahrung und/oder
mangels Wissen benutzt zu werden, es sei denn,
sie werden durch eine für ihre Sicherheit zuständige Person beaufsichtigt oder erhielten von ihr
Anweisungen, wie das Gerät zu benutzen ist.
Kinder sollten beaufsichtigt werden, um sicherzustellen, dass sie nicht mit dem Gerät spielen.
WARNUNG
Lesen Sie alle Sicherheitshinweise und
Anweisungen. Versäumnisse bei der Einhaltung der
Sicherheitshinweise und Anweisungen können
elektrischen Schlag, Brand und/oder schwere
Verletzungen verursachen zur Folge haben.
Bewahren Sie alle Sicherheitshinweise und
Anweisungen für die Zukunft auf.
3
Anleitung_WH_2000_I_SPK7:_
20.03.2012
13:21 Uhr
Seite 4
D
2. Gerätebeschreibung (Abb. 1/2)
4. Bestimmungsgemäße Verwendung
1
2
3
4
5
6
7
8
9
10
11
12
13
14
Das Gerät ist nur als Zusatzheizung in trockenen,
geschlossenen Räumen bestimmt.
Lufteinlass
IR-Empfangsdiode
Taste Automatische Lamellenverstellung (Swing)
Taste Solltemperatureinstellung
Anzeige Temperatur
Anzeige eingestellte Ausschaltzeit (Timer)
Taste Heizleistungseinstellung
Taste Ein- / Standby
Luftauslasslamellen
Hauptschalter Ein- / Aus
Aufbewahrungsfach für Fernbedienung
IR-Fernbedienung (FB)
FB-Taste Ausschaltzeit einstellen (Timer)
FB-Taste Ionisator Ein- / Aus
Es darf nur an senkrechten Wänden montiert werden.
Das Gerät ist nicht zum Trocknen von Handtüchern
und Textilien geeignet.
Das Gerät darf nur nach seiner Bestimmung verwendet werden. Jede weitere darüber hinausgehende
Verwendung ist nicht bestimmungsgemäß. Für daraus hervorgerufene Schäden oder Verletzungen
aller Art haftet der Benutzer/Bediener und nicht der
Hersteller.
Anzeigesymbole am Gerätedisplay
A = Automatische Lamellenverstellung (Swing)
B = Ionisator
C = Gebläse
D = Geringe Heizleistung
E = Hohe Heizleistung
Bitte beachten Sie, dass unsere Geräte bestimmungsgemäß nicht für den gewerblichen, handwerklichen oder industriellen Einsatz konstruiert wurden.
Wir übernehmen keine Gewährleistung, wenn das
Gerät in Gewerbe-, Handwerks- oder Industriebetrieben sowie bei gleichzusetzenden Tätigkeiten eingesetzt wird.
3. Lieferumfang
5. Technische Daten
앬
앬
앬
앬
앬
Öffnen Sie die Verpackung und nehmen Sie das
Gerät vorsichtig aus der Verpackung.
Entfernen Sie das Verpackungsmaterial sowie
Verpackungs-/ und Transportsicherungen (falls
vorhanden).
Überprüfen Sie, ob der Lieferumfang vollständig
ist.
Kontrollieren Sie das Gerät und die Zubehörteile
auf Transportschäden.
Bewahren Sie die Verpackung nach Möglichkeit
bis zum Ablauf der Garantiezeit auf.
ACHTUNG
Gerät und Verpackungsmaterial sind kein
Kinderspielzeug! Kinder dürfen nicht mit
Kunststoffbeuteln, Folien und Kleinteilen spielen!
Es besteht Verschluckungs- und
Erstickungsgefahr!
앬
앬
앬
앬
4
Wandheizer
Fernbedienung (befindet sich im
Aufbewahrungsfach)
2 St. Schrauben und 2 St. Dübel
Originalbedienungsanleitung
Nennspannung:
Heizleistung:
220-240 V ~ 50 Hz
2000 W (1000 W / 2000 W)
Zeitschaltuhr:
Negative Ionen:
Schutzart:
1-8 Stunden
≥ 3x10⁶ n/cm3
IPX0
6. Vor Inbetriebnahme
Beachten Sie die unter Punkt 1 aufgeführten
Sicherheitshinweise.
Achtung! Stellen Sie sicher, dass sich im Bereich der
Bohrlöcher keine elektrischen Leitungen oder andere
Installationen (z.B. Wasserrohre) befinden.
Achten Sie auf festen, waagerechten Sitz des
Gerätes an der Wand. Es ist darauf zu achten, dass
an der Gerätevorderseite ein Abstand vom min. 100
cm zu Gegenständen einzuhalten ist.
Leicht entzündliche Gegenstände dürfen nicht mit der
Heißluft angeblasen werden, 1 m Abstand ist einzuhalten.
Verwenden Sie nur geeignetes Befestigungsmaterial.
Die mitgelieferten Dübel und Schrauben sind geeignet für: Beton, Naturstein im dichtem Gefüge,
Vollziegel, Kalksand-Vollstein, Vollstein aus Leichtbeton und Porenbeton (Gasbeton).
Anleitung_WH_2000_I_SPK7:_
20.03.2012
13:21 Uhr
Seite 5
D
앬
앬
앬
Die Position der Bohrlöcher (Ø 8 mm, Höhe ab
Fußboden min. 200 cm) zum Einhängen des
Gerätes an der Wand markieren.
Hinweis: Die Bohrlöcher liegen waagrecht 470
mm auseinander.
Anschließend Löcher in die Wand bohren, Dübel
einsetzen und Schrauben eindrehen. Der
Abstand zwischen Schraubenkopf und Wand
sollte ca. 3 mm betragen.
Führen Sie die Netzleitung an dem dafür
vorgesehenen Loch (F) an der Geräteoberseite
aus und hängen Sie den Wandheizer (H) in die
Schrauben an der Wand ein. Schieben Sie den
Wandheizer nach links bis zum Anschlag und
ziehen Sie ihn nach unten bis zum Anschlag. Der
Heizer ist jetzt an der Wand montiert.
Verbrauchte Batterien sind ordnungsgemäß zu
entsorgen.
7.1.1 Kaltluftbetrieb (Gebläse)
Drücken Sie die Ein- / Aus Taste (8). Das Gerät
schaltet ein und arbeitet im Kaltluftbetrieb (keine
Heizleistung). Wird die Taste noch einmal gedrückt
schaltet das Gebläse aus.
7.1.2 Heizbetrieb
1000 W: Drücken Sie die Ein- / Aus Taste (8) und
danach die Heizung - Taste (7). Das Gerät heizt
mit kleiner Heizstufe. Wird die Ein- / Aus Taste
gedrückt schaltet das Gerät aus.
앬
2000 W: Drücken Sie die Ein- / Aus Taste (8) und
danach die Heizung - Taste (7) zweimal. Das
Gerät heizt mit hoher Heizstufe. Wird die Ein- /
Aus Taste gedrückt schaltet das Gerät aus.
앬
7. Bedienung
앬
Achtung! Vor Inbetriebnahme überprüfen, ob die
vorhandene Spannung mit der angegebenen
Spannung auf dem Datenschild übereinstimmt.
Beachten Sie die unter Punkt 1 angeführten
Sicherheitshinweise.
Bei Erstinbetriebnahme oder nach längerer Betriebspause kann es zu einer kurzzeitigen Geruchsbildung
kommen. Dies ist kein Fehler.
Mit dem Hauptschalter Ein/Aus (Abb. 3 / Pos. 7) wird
das Gerät vollständig vom Stromnetz getrennt.
Schalten Sie als Erstes den Hauptschalter ein bzw.
als Letztes aus wenn Sie das Gerät nicht mehr benötigen.
7.1 Funktionsschalter (Abb. 3):
Alle Funktionen außer der
Raumsolltemperatureinstellung und dem Ionisator
können sowohl mit den Drucktastern auf dem
Gerät als auch mit der Fernbedienung geschaltet
werden. Die Fernbedienung befindet sich im
Aufbewahrungsfach an der rechten
Gehäuseseite. Schieben Sie den Deckel nach
unten und entnehmen Sie die Fernbedienung.
앬
Die eingeschalteten Funktionen erscheinen im
Gerätedisplay. Außerdem wird die Temperatur an
dem im Gerät integrierten Temperaturfühler
(Gerätetemperatur) angezeigt.
앬
Nach ausschalten des Gerätes durch die Ein- /
Aus Taste (8) läuft der Ventilator zur Abkühlung
des Heizelements noch einige Zeit nach. Dabei
blinkt das Symbol für „Gebläse“ am
Gerätedisplay.
Für die Fernbedienung sind 2 St. Batterien Typ
„AAA“ zu verwenden. Beachten Sie beim
Batteriewechsel unbedingt die richtige Polarität.
앬
7.1.3 “Swing” Funktion der Luftauslasslamellen
Stellen Sie den Kaltluftbetrieb oder Heizbetrieb wie
oben beschrieben ein. Drücken Sie die „Swing“ Taste (3).
Die „Swing“ - Funktion der Luftauslasslamellen, bei
der diese sich elektrisch betrieben nach oben und
unten schwenken, wird eingeschaltet.
Um die „Swing“ - Funktion auszuschalten und das
Gerät in eine bestimmte Richtung blasen zu lassen
drücken Sie erneut die „Swing“ - Taste (3).
7.1.4 Ausschaltzeit – Timer (nur über
Fernbedienung möglich)
Stellen Sie, wie oben beschrieben, den Kaltluftbetrieb
oder Heizbetrieb ein. Drücken Sie auf der
Fernbedienung die Timer - Taste (13). Das Gerät
arbeitet mit Zeitvorwahl und schaltet sich nach 1 h
selbstständig ab. Durch wiederholtes Drücken der
Timer - Taste (13) kann die Ausschaltzeit
stundenweise von 1 h – 8 h eingestellt werden. Die
eingestellte Ausschaltzeit erscheint am Display. Zum
Ausschalten der Zeitvorwahl drücken Sie nach der „8
h“ Einstellung noch einmal die Timer - Taste (13) oder
schalten das Gerät mit der Ein- Aus Taste (8)
komplett aus.
7.1.5 Solltemperatur einstellen (nur im
Heizbetrieb möglich)
Sobald das Gerät im Heizbetrieb ist, kann an der
Fernbedienung mit der Taste (4) eine Solltemperatur
(Temperatur an dem im Gerät integrierten
Temperaturfühler) im Bereich von 15°C – 36°C
eingestellt werden. Im LED Display blinkt kurzzeitig
die eingestellte Solltemperatur (Werkseinstellung
30°C) und anschließend erscheint wieder die aktuell
vom integrierten Temperaturfühler gemessene
Temperatur. Jeder Druck der Taste (4) erhöht die
5
Anleitung_WH_2000_I_SPK7:_
20.03.2012
13:21 Uhr
Seite 6
D
7.1.6 Ionisator (nur über Fernbedienung
möglich)
Der Ionisator wird an der Fernbedienung mit der
Taste (14) ein- und ausgeschaltet.
9.3 Ersatzteilbestellung
Bei der Ersatzteilbestellung sollten folgende
Angaben gemacht werden:
Typ des Gerätes
Artikelnummer des Gerätes
Ident-Nummer des Gerätes
Ersatzteil-Nummer des erforderlichen Ersatzteils
Aktuelle Preise und Infos finden Sie unter
www.isc-gmbh.info
8. Überhitzungsschutz
10. Lagerung
Bei übermäßiger Erwärmung schalten sich die
Heizung und anschließend das Gerät automatisch
ab.
Ist dies der Fall, Gerät ausschalten, Netzstecker
ziehen und einige Minuten abkühlen lassen. Nach
Beseitigung der Ursache (z.B. abgedecktes
Luftgitter) kann das Gerät wieder eingeschaltet
werden. Sollte es zum wiederholten Ansprechen des
Überhitzungsschutzes kommen, wenden Sie sich
bitte an Ihren Kundendienst (in Deutschland ISC
GmbH).
Lagern Sie das Gerät und dessen Zubehör an einem
dunklen, trockenen und frostfreiem sowie für Kinder
unzugänglichem Ort. Die optimale Lagertemperatur
liegt zwischen 5 und 30 ˚C. Bewahren Sie das
Elektrowerkzeug in der Originalverpackung auf.
Solltemperatur um 1°C. Bei überschreiten der
Solltemperatur um ca. 2°C schaltet die Heizung aus,
bei unterschreiten der Solltemperatur um ca. 2°C
schaltet die Heizung wieder ein.
9. Reinigung, Wartung und
Ersatzteilbestellung
Wartungs- und Reparaturarbeiten ausschließlich von
einer Elektrowerkstatt oder der
ISC GmbH durchführen lassen.
Die Netzleitung muss regelmäßig auf Defekte oder
Beschädigungen geprüft werden. Eine beschädigte
Netzleitung darf nur vom Elektrofachmann oder der
ISC GmbH unter Berücksichtigung der einschlägigen
Bestimmungen ausgetauscht
werden.
Achtung: Vor Reinigung Netzstecker ziehen Gefahr des elektrischen Schlags.
9.1 Reinigung
앬
Zur Reinigung des Gehäuses ein leicht feuchtes
Tuch verwenden.
9.2 Wartung
앬
Im Geräteinneren befinden sich keine weiteren
zu wartenden Teile.
6
11. Entsorgung und Wiederverwertung
Das Gerät befindet sich in einer Verpackung um
Transportschäden zu verhindern. Diese Verpackung
ist Rohstoff und ist somit wieder verwendbar oder
kann dem Rohstoffkreislauf zurückgeführt werden.
Das Gerät und dessen Zubehör bestehen aus verschiedenen Materialien, wie z.B. Metall und Kunststoffe. Führen Sie defekte Bauteile der Sondermüllentsorgung zu. Fragen Sie im Fachgeschäft oder in
der Gemeindeverwaltung nach!
Anleitung_WH_2000_I_SPK7:_
20.03.2012
13:21 Uhr
Seite 7
GB
Important!
When using the equipment, a few safety precautions
must be observed to avoid injuries and damage.
Please read the complete operating instructions and
safety regulations with due care. Keep this manual in
a safe place, so that the information is available at all
times. If you give the equipment to any other person,
hand over these operating instructions and safety
regulations as well. We cannot accept any liability for
damage or accidents which arise due to a failure to
follow these instructions and the safety instructions.
앬
앬
앬
앬
앬
1. Safety information
앬
앬
앬
앬
앬
앬
앬
앬
앬
앬
앬
앬
앬
앬
앬
앬
Read the operating instructions before using the
appliance for the first time. The appliance may
only be used as described therein. All other
usages are not permitted.
Keep the instructions in a safe place and give
them to third parties if necessary.
Check that the appliance has been delivered in
perfect condition. If it has suffered any damage, do
not connect the appliance to the power supply.
Use the appliance only to heat room air in
enclosed rooms.
Not suitable for commercial purposes.
Do not lay the mains cable over hot parts of the
appliance during operation.
Never open the appliance or touch live parts –
danger of death!
Do not place the appliance near wet rooms or wet
areas (bathroom, shower room, swimming pool,
etc.). It must not be possible for the control
elements to be touched by a person in a shower, a
vessel filled with liquid or the bathtub.
Never use the appliance with wet hands.
Position the appliance in such a way that the
mains plug is accessible at all times.
If the appliance is not used for a lengthy period of
time, disconnect it from the mains supply.
Do not use the appliance in rooms in which
inflammable materials (for example solvents, etc.)
or gases are used or stored.
Keep highly inflammable substances and gases
away from the appliance.
Do not use in areas where there is a fire risk (for
example wooden sheds).
Only use the heater with its mains lead fully
extended.
Keep a minimum distance of 100 cm between the
air outlet opening and any objects (e.g. curtains),
walls and other structural elements. There must be
a clearance of 25 cm between the side of the
equipment and any objects or walls.
앬
앬
앬
앬
앬
앬
앬
앬
Not suitable for installation on permanently
installed electrical cables.
Do not insert any foreign objects in the appliance’s
openings.
- Danger of electric shock and damage to the
appliance.
Keep children and people on medication or under
the influence of alcohol away from the appliance.
Maintenance and repair work may only be carried
out by authorized trained personnel.
Check the appliance, particularly the mains lead,
for signs of damage every time before use. If the
appliance is damaged, please contact an
electrician or the customer-service center
responsible for your country (ISC GmbH in
Germany).
The appliance must be fitted to the wall in a
horizontal and stationary position and at least
1.8m above the floor.
The appliance may not be fitted to the ceiling.
Ensure that no water or other liquids seep onto or
into the appliance – danger of death!
Do not use the heater in a bathroom.
Connect the device to an earthed socket outlet
only!
Do not position the appliance directly above or
below a socket.
Never cover the heater as this can lead to a buildup of heat and cause damage to the appliance or
fire (fig. 4).
This appliance is not intended for use by persons
(including children) with reduced physical, sensory
or mental capabilities, or lack of experience and
knowledge, unless they have been given
supervision or instruction concerning use of the
appliance by a person responsible for their safety.
Children should be supervised to ensure that they
do not play with the appliance.
CAUTION!
Read all safety regulations and instructions.
Any errors made in following the safety regulations
and instructions may result in an electric shock, fire
and/or serious injury.
Keep all safety regulations and instructions in a
safe place for future use.
7
Anleitung_WH_2000_I_SPK7:_
20.03.2012
13:21 Uhr
Seite 8
GB
2. Layout (Fig. 1/2)
4. Intended use
1
2
3
4
5
6
7
8
9
10
11
12
13
14
The equipment is designed exclusively for use as an
additional heater in dry, closed rooms.
Air inlet
IR receiver diode
Button for automatic slat adjustment (swing)
Button for setting the desired temperature
Temperature indicator
Indicator for the selected OFF time (timer)
Button for setting the heat output
On/Standby button
Air outlet slats
On / Off main switch
Compartment for the remote control
IR remote control (RC)
RC button for setting the OFF time (timer)
RC button for ionizer On/Off
Symbols used on the equipment display
A = Automatic slat adjustment (swing)
B = Ionizer
C = Fan
D = Low heat output
E = High heat output
3. Items supplied
앬
앬
앬
앬
앬
Open the packaging and take out the equipment
with care.
Remove the packaging material and any
packaging and/or transportation braces (if
present).
Check to see if all the items are supplied.
Inspect the equipment and accessories for
transport damage.
If possible, keep the packaging until the end of
the guarantee period.
IMPORTANT
The equipment and packaging material are not
toys. Do not let children play with plastic bags,
plastic sheets and small parts. There is a risk of
choking and suffocating!
앬
앬
앬
앬
Wall heater
Remote control (is in the storage compartment)
2 screws and 2 dowels
Original operating instructions
The equipment is allowed to be mounted only on
vertical walls. The equipment is not suitable for drying
towels and textiles.
The machine is to be used only for its prescribed
purpose. Any other use is deemed to be a case of
misuse. The user / operator and not the
manufacturer will be liable for any damage or injuries
of any kind caused as a result of this.
Please note that our equipment has not been
designed for use in commercial, trade or industrial
applications. Our warranty will be voided if the
machine is used in commercial, trade or industrial
businesses or for equivalent purposes.
5. Technical data:
Rated voltage:
Output:
Timer:
Negative ions:
1 to 8 hours
≥ 3x10⁶ n/cm3
Protection type:
IPX0
6. Before starting the equipment
Read the safety instructions in section 1.
Important! Make sure that there are no electric
cables or other installations (for example water
pipes) near the drill holes. Ensure that the appliance
is firmly and horizontally fitted to the wall. You must
always ensure that a distance of at least 100 cm is
kept between the front side of the heater and other
objects.
Do not let hot air blow onto combustible objects; it is
imperative to observe a distance of 1 m.
Use only suitable fastening material. The supplied
dowels and screws are suitable for the following:
Concrete, natural stone with a dense structure, solid
brick, solid limestone bricks, solid lightweight
concrete bricks and aerated concrete.
앬
8
220-240 V ~ 50 Hz
2000 W (1000 W / 2000 W)
Mark the position of the drilled holes (diameter
8 mm, height from the floor at least 200 cm) for
mounting the equipment on the wall.
Anleitung_WH_2000_I_SPK7:_
20.03.2012
13:21 Uhr
Seite 9
GB
앬
앬
Note: The drill holes are arranged 500 in apart
horizontally.
Then drill the holes in the wall, insert the dowels
and drive in the screws. The distance between the
screw head and the wall should be approx. 3 mm.
Pass the power cable out through the hole (F) at
the rear of the equipment and hang the wall heater
(H) on the screws in the wall. Push the wall heater
to the left as far as the stop and pull it down as far
as the stop. The heater is now mounted on the
wall.
7. Operation
앬
Important. Before using the equipment for the first
time, check that the voltage supply is the same as
the voltage details set out on the rating plate.
Read the safety regulations in section 1.
When the equipment is used for the first time or after
a long period of rest it may emit an odor for a short
time. This is not a fault.
The ON/OFF main switch (Fig. 2 / Item 10) is used to
disconnect the equipment completely from the mains
supply. Switch the main switch to ON first of all or to
OFF last of all when you no longer need the
equipment.
7.1 Function switch (Fig. 1)
앬
All functions apart from the desired room
temperature setting and the ionizer can be set
using the pushbuttons on the equipment as well
as with the remote control. The remote control is
in the storage compartment on the right-hand
side of the housing. Slide the lid down and take
out the remote control.
앬
The activated functions appear in the display on
the equipment. Also, the temperature at the
temperature sensor integrated in the equipment
(i.e. the equipment temperature) is indicated.
앬
After the equipment has been switched off with
the On/Off button (8), the fan will continue to run
for a while in order to cool the heating element.
During this time the “fan” symbol on the
equipment display will blink.
The remote control runs on 2 batteries type “AAA“.
Make sure that the poles are not reversed when you
change the batteries. Used batteries must be
disposed of properly.
7.1.1 Cool blow mode
Press the On / Off button (8). The equipment will
come on and work in cool blow mode (no heat
output). If you press the button again, the equipment
will switch off.
7.1.2 Heating mode
앬
1000 W: Press the On / Off button (8) and then
the heating button (7). The equipment will heat at
the low setting. If you press the On/Off button
again, the equipment will be switched off.
앬
2000 W: Press the On / Off button (8) and then
the heating button (7) twice. The equipment will
heat at the high setting. If you press the On/Off
button again, the equipment will switch off.
7.1.3 “Swing” function of the air outlet slats
Set the cool blow mode or heating mode as
described above. Press the “swing” button (3).
The “swing” function of the air outlet slats is activated,
enabling the slats to be swung up and down
electrically.
To switch off the “swing” function and have the
equipment blow in one specific direction, press the
“swing” button (3) again.
7.1.4 OFF timer (possible only via the remote
control)
Set the cool blow mode or heating mode as
described above. Press the timer button (13) on the
remote control. The equipment will work with time
preselection and will shut down automatically after 1
hour. The Off time can be set in hours for a period
from 1 to 8 hours by repeatedly pressing the timer
button (13). The set OFF time will appear on the
display. To turn off the time preselection, press the
time button (13) once more after selecting the 8 hours
period, or turn off the device with the On/Off button
(8).
7.1.5 Setting the desired temperature (possible
only in heating mode)
As soon as the equipment is in heating mode, a
desired temperature (temperature at the temperature
sensor integrated in the equipment) in the range from
15°C to 36°C can be set on the remote control using
button (4). The set desired temperature (factory
setting 30°C) blinks briefly in the display, followed
again by the temperature measured by the integrated
temperature sensor. Each press of the button (4)
increases the desired temperature by 1°C. If the
temperature rises above the desired temperature by
approx. 2°C, the heater will switch off; if the
temperature drops below the desired temperature by
approx. 2°C, the heater will switch on again.
9
Anleitung_WH_2000_I_SPK7:_
20.03.2012
13:21 Uhr
Seite 10
GB
7.1.6 Ionizer (possible only with the remote
control)
The ionizer is switched on and off with the button (14)
on the remote control.
10. Storage
8. Overheating guard
Store the equipment and accessories out of children’s
reach in a dark and dry place at above freezing
temperature. The ideal storage temperature is
between 5 and 30 °C. Store the electric tool in its
original packaging.
In case of excessive heating, the heating function
and then the equipment will shut down automatically.
11. Disposal and recycling
In case of excessive heating, the heating function
shuts down automatically. If this occurs, turn off the
appliance, disconnect the mains plug and wait a few
minutes for the appliance to cool. After eliminating
the cause (e.g. a covered air grille), the appliance
can be switched on again. If the overheating guard
triggers repeatedly, please contact your customer
service center (in Germany ISC GmbH).
9. Cleaning, maintenance and ordering
of spare parts
Maintenance and repair work may only be carried
out by an electrical servicing contractor or your
customer service center.
Check the mains lead at regular intervals for signs
of defects or damage. A damaged mains lead may
only be replaced by an electrician or ISC GmbH in
compliance with the relevant regulations.
Important: Disconnect the mains lead before
cleaning – danger of electric shock.
9.1 Cleaning
앬 Use a damp cloth to clean the casing.
9.2 Servicing
앬 There are no parts inside the equipment which
require additional maintenance.
9.3 Ordering replacement parts
Please quote the following data when ordering
replacement parts:
앬 Type of machine
앬 Article number of the machine
앬 Identification number of the machine
앬 Replacement part number of the part required
For our latest prices and information please go to
www.isc-gmbh.info
10
The equipment is supplied in packaging to prevent it
from being damaged in transit. The raw materials in
this packaging can be reused or recycled. The
equipment and its accessories are made of various
types of material, such as metal and plastic. Defective
components must be disposed of as special waste.
Ask your dealer or your local council.
Anleitung_WH_2000_I_SPK7:_
20.03.2012
13:21 Uhr
Seite 11
F
Attention !
Lors de l’utilisation d’appareils, il faut respecter
certaines mesures de sécurité afin d’éviter des
blessures et dommages. Veuillez donc lire
attentivement ce mode d’emploi/ces consignes de
sécurité. Veillez à le conserver en bon état pour
pouvoir accéder aux informations à tout moment. Si
l’appareil doit être remis à d’autres personnes, veillez
à leur remettre aussi ce mode d’emploi/ces
consignes de sécurité. Nous déclinons toute
responsabilité pour les accidents et dommages dus
au non-respect de ce mode d’emploi et des
consignes de sécurité.
1. Consignes de sécurité
앬
앬
앬
앬
앬
앬
앬
앬
앬
앬
앬
앬
앬
Avant la mise en service, prenez absolument
connaissance du mode d’emploi ! L’appareil doit
uniquement être utilisé comme décrit ici ! Toute
autre application est interdite.
Conservez bien ces instructions et donnez-les à
un tiers en cas de besoin.
Contrôlez si l’appareil a bien été livré dans un état
irréprochable. En cas d’endommagement
quelconque, ne connectez pas appareil au
secteur.
L’appareil convient uniquement au réchauffement
de l’air ambiant dans une pièce fermée.
Ne convient pas à l’emploi industriel.
Ne faites pas passer le câble réseau pendant le
fonctionnement au-dessus de pièces brûlantes de
l’appareil.
N’ouvrez jamais l’appareil et ne touchez pas non
plus les pièces conductrices de tension – Danger
de mort !
N’implantez jamais l’appareil à proximité de salles
humides ou de locaux humides (salles de bains,
douches, piscines etc.). Les organes de
commande ne doivent pas être touchés par une
personne se trouvant sous la douche ou dans la
baignoire ou encore tenant un récipient rempli de
liquide.
Ne manipulez jamais l’appareil avec les mains
mouillées.
Disposez l’appareil de manière à toujours avoir
accès à la fiche secteur.
Si l’appareil reste hors circuit pendant une période
prolongée, retirez la fiche secteur !
Cet appareil convient uniquement à l’emploi sous
surveillance.
Cet appareil ne doit pas être mis en service dans
des salles dans lesquelles des substances
dangereuses (par ex. des solvants) ou des gaz
sont utilisés ou entreposés.
앬
앬
앬
앬
앬
앬
앬
앬
앬
앬
앬
앬
앬
앬
앬
앬
앬
Maintenez à distance de l’appareil les matières ou
gaz inflammables.
Ne le mettez pas en service dans des salles à
risque d’incendie (par ex. où il y a des copeaux de
bois).
Mettez l’appareil de chauffage en service
uniquement avec le câble secteur complètement
déroulé.
Maintenez un écart minimum de 100 cm entre
l’orifice d’évacuation d’air et les objets (par ex.
rideaux), les murs et autres constructions. L’écart
latéral par rapport à des objets ou des murs doit
être de 25 cm.
Non approprié pour le raccordement à des lignes
électriques posées fixement.
N’introduisez aucun corps étranger par les
ouvertures de l’appareil
- Risque de décharge électrique et
d’endommagement de l’appareil.
Les enfants et personnes sous influence de
médicaments ou d’alcool doivent être gardées à
l’écart de l’appareil.
Les travaux de maintenance et les réparations
doivent uniquement être effectuées par un
personnel spécialisé autorisé.
Avant chaque mise en marche, il faut vérifier si
l’appareil, plus particulièrement le câble secteur,
est endommagé. En cas d’endommagement,
adressez-vous à un(e) électricien(ne) ou au
service après vente compétent de votre pays (en
Allemagne ISC GmbH).
Un montage mural fixe en position horizontale est
préconisé. Il doit être effectué à une hauteur d’au
moins 1,8 m au-dessus du sol.
Il est interdit de monter l’appareil au plafond.
L’eau ou d’autres liquides ne doivent jamais couler
sur ou dans l’appareil – danger de mort !
N’utilisez pas l’appareil de chauffage dans une
salle de bain.
Raccordez l’appareil uniquement à une prise de
courant reliée à terre.
N’installez pas l’appareil juste au-dessus ou audessous d’une prise de courant.
Ne recouvrez jamais le chauffeur, cela peut
entraîner une surchauffe et donc des dommages
de l’appareil, voire un incendie (fig. 4).
This appliance is not intended for use by persons
(including children) with reduced physical, sensory
or mental capabilities, or lack of experience and
knowledge, unless they have been given
supervision or instruction concerning use of the
appliance by a person responsible for their safety.
Children should be supervised to ensure that they
do not play with the appliance.
11
Anleitung_WH_2000_I_SPK7:_
20.03.2012
13:21 Uhr
Seite 12
F
AVERTISSEMENT !
Veuillez lire toutes les consignes de sécurité et
instructions.
Tout non-respect des consignes de sécurité et
instructions peut provoquer une décharge électrique,
un incendie et/ou des blessures graves.
Conservez toutes les consignes de sécurité et
instructions pour une consultation ultérieure.
ATTENTION
L’appareil et le matériel d’emballage ne sont pas
des jouets ! Il est interdit de laisser des enfants
jouer avec des sacs et des films en plastique et
avec des pièces de petite taille. Ils risquent de
les avaler et de s’étouffer !
2. Description de l’appareil (fig. 1/2)
1
2
3
4
5
6
7
8
9
10
11
12
13
14
Entrée d’air
Diode infrarouge réceptrice
Touche réglage automatique des lamelles
(swing)
Touche réglage de la température de consigne
Affichage température
Affichage du temps d’arrêt programmé (timer)
Touche réglage de la puissance de chauffe
Touche marche/standby
Lamelles de sortie d’air
Interrupteur principal marche/arrêt
Compartiment pour la télécommande
Télécommande infrarouge (télécommande)
Touche de la télécommande pour régler le temps
d’arrêt (timer)
Touche de la télécommande marche/arrêt
ionisateur
Affichage des symboles sur le cadran de
l’appareil
A = réglage automatique des lamelles (swing)
B = ionisateur
C = ventilateur
D = puissance de chauffe faible
E = puissance de chauffe élevée
Chauffage mural
Télécommande (dans son compartiment)
2 vis et 2 chevilles
Mode d’emploi d’origine
4. Utilisation conforme à l’affectation
L’appareil est uniquement conçu pour servir de
chauffage supplémentaire dans des endroits secs et
fermés.
Monter le chauffage uniquement sur des murs
verticaux. L’appareil ne convient pas au séchage de
serviettes et textiles.
La machine doit exclusivement être employée
conformément à son affectation. Chaque utilisation
allant au-delà de cette affectation est considérée
comme non conforme. Pour les dommages en
résultant ou les blessures de tout genre, le
producteur décline toute responsabilité et
l’opérateur/l’exploitant est responsable.
Veillez au fait que nos appareils, conformément à
leur affectation, n’ont pas été construits, pour être
utilisés dans un environnement professionnel,
industriel ou artisanal. Nous déclinons toute
responsabilité si l’appareil est utilisé
professionnellement, artisanalement ou dans des
sociétés industrielles, tout comme pour toute activité
équivalente.
3. Contenu de la livraison
12
Ouvrez l’emballage et sortez l’appareil de
l’emballage avec précaution.
Retirez le matériel d’emballage tout comme les
sécurités d’emballage et de transport (s’il y en a).
Vérifiez si la livraison est bien complète.
Contrôlez si l’appareil et les accessoires n’ont
pas été endommagés par le transport.
Conservez l’emballage autant que possible
jusqu’à la fin de la période de garantie.
5 . Caractéristiques techniques :
Tension nominale :
220-240 V ~ 50 Hz
Puissance de chauffage:
2000 W (1000 W / 2000 W)
Minuterie :
Ions négatifs :
Type de protection :
1 à 8 heures
≥ 3x10⁶ n/cm3
IPX0
Anleitung_WH_2000_I_SPK7:_
20.03.2012
13:21 Uhr
Seite 13
F
6. Avant la mise en service
Respectez les consignes de sécurité indiquée au
repère 1.
Attention ! Assurez-vous qu’aucun câble ni aucune
installation ne se trouve dans la zone des forures (p.
ex. des conduits d’eau. Veillez à bien fixer l’appareil
au mur en position horizontale. Il faut veiller à
maintenir un écart de min. 100 cm des objets par
rapport à la face de l’appareil.
Ne pas exposer les objets très inflammables à l’air
chaud, gardez 1 m d’écart.
Utilisez exclusivement le matériel de fixation
adéquat. Les chevilles et vis jointes conviennent : au
béton, à la pierre naturelle à grainure fine, à la brique
pleine, à la brique pleine sillico-calcaire, à la brique
pleine en béton léger et au béton cellulaire (bétongaz).
Marquez la position des trous (Ø 8mm, hauteur à
partir du plancher mini. 200 cm) pour accrocher
l’appareil à la paroi.
Remarque : Les trous sont espacés de 470 mm à
l’horizontale.
Ensuite, percez des trous dans le mur, insérez les
chevilles et vissez les vis. L’écart entre la tête de la
vis et le mur doit être d’env. 3 mm.
Faites passer le câble réseau dans le trou (F)
prévu à cet effet sur la partie supérieur de l’appareil
et accrochez le chauffage mural (H) aux vis fixées
dans le mur. Poussez le chauffage mural vers la
gauche jusqu’à la butée et tirez-le vers le bas
jusqu’à la butée. Le chauffage est maintenant fixé
au mur.
7. Commande
Attention ! Contrôlez, avant la mise en service, si
la tension présente correspond bien à celle
indiquée sur la plaque de données de l’appareil.
Veuillez respecter les consignes de sécurité du point
1. Lors de la première mise en service ou après un
arrêt prolongé de l’appareil, il est possible qu’une
odeur se dégage brièvement. Ceci n’est pas une
défaillance.
L’interrupteur principal marche/arrêt (fig. 2 / pos. 10)
sépare complètement l’appareil du réseau électrique.
Connectez en premier l’interrupteur et déconnectezle en dernier lorsque vous n’avez plus besoin de
l’appareil.
7.1 Interrupteur de fonction (fig. 1) :
Mises à part les fonctions réglage de la
température de consigne de la pièce et
ionisateur, toutes les fonctions peuvent être
activées à la fois à l’aide des touches sur
l’appareil et à l’aide de la télécommande. La
télécommande se trouve dans son compartiment
sur le côté droit du boîtier. Poussez le couvercle
vers le bas et retirez la télécommande.
Les fonctions activées apparaissent sur le cadran
de l’appareil. En outre, la température de la
sonde de température (température de l’appareil)
intégrée dans l’appareil s’affiche également.
Après l’arrêt de l’appareil à l’aide de la touche
marche/arrêt (8), le ventilateur continue encore à
fonctionner pendant quelques instants afin de
refroidir l’élément chauffant. Pendant ce temps, le
symbole « ventilateur » clignote sur l’affichage de
l’appareil.
Utilisez deux piles de type “AAA” pour la
télécommande. Respectez absolument la polarité en
changeant de piles. Les piles usées doivent être
éliminées dans les règles de l’art.
7.1.1 Fonction air froid (ventilateur)
Appuyez sur la touche marche/arrêt (8). L’appareil
s’allume et fonctionne en mode air froid (pas de
chauffage). Lorsqu’on appuie une deuxième fois sur
la touche, le ventilateur s’éteint.
7.1.2 Fonction chauffage
1000 W: appuyez sur la touche marche/arrêt (8)
et ensuite sur la touche chauffage (7). L’appareil
chauffe à la puissance de chauffe faible.
Lorsqu’on appuie sur la touche marche/arrêt,
l’appareil s’éteint.
2000 W: appuyez sur la touche marche/arrêt (8)
et ensuite deux fois sur la touche chauffage (7).
L’appareil chauffe à la puissance de chauffe
élevée. Lorsque l’on appuie sur la touche
marche/arrêt, l’appareil s’éteint.
7.1.3 Fonction « swing » des lamelles de sortie
d’air
Programmez l’appareil sur la fonction air froid ou
chauffage comme décrit ci-dessus. Appuyez sur la
touche « swing » (3).
La fonction « swing » des lamelles de sortie d’air se
met en marche. Les lamelles sont alors entraînées
électriquement vers le haut et vers le bas.
Pour désactiver la fonction « swing » et faire souffler
l’appareil dans une direction déterminée, appuyez
une nouvelle fois sur la touche « swing » (3).
13
Anleitung_WH_2000_I_SPK7:_
20.03.2012
13:21 Uhr
Seite 14
F
7.1.4 Temps d’arrêt – timer (réglage possible
uniquement par la télécommande)
Programmez l’appareil sur la fonction air froid ou
chauffage comme décrit ci-dessus. Appuyez sur la
touche timer de la télécommande (13). L’appareil
fonctionne avec la présélection du temps et s’éteint
automatiquement 1 heure après. En appuyant à
nouveau sur la touche timer (13), le temps d’arrêt
peut être réglé de 1 h – 8 h. Le temps d’arrêt
programmé apparaît sur le cadran. Pour désactiver la
présélection du temps, appuyez après le réglage « 8
h » à nouveau sur la touche timer (13) ou éteignez
l’appareil à l’aide de la touche marche/arrêt (8).
7.1.5 Réglage de la température de consigne
(possible uniquement en mode chauffage)
Dés que l’appareil est en mode chauffage, on peut
programmer une température de consigne
(température de la sonde de température intégrée
dans l’appareil) incluse dans une étendue de 15 °C –
36 °C à l’aide de la touche (4) de la télécommande.
Sur le cadran LED, la température de consigne
programmée clignote brièvement (réglage d’usine
30 °C), puis la température actuelle mesurée par la
sonde de température intégrée apparaît de nouveau.
A chaque pression de la touche (4), on augmente la
température de consigne de 1 °C. Lorsque la
température de la pièce est supérieure de 2 °C à la
température de consigne, le chauffage s’éteint,
lorsque la température de la pièce est inférieure de
2 °C à la température de consigne, le chauffage
s’allume à nouveau.
7.1.6 Ionisateur (réglage possible uniquement
par la télécommande)
L’ionisateur s’active et se désactive à l’aide de la
touche (14) de la télécommande.
8. Protection contre la surchauffe
En cas de réchauffement excessif, le chauffage et
ensuite l’appareil se mettent automatiquement hors
circuit.
En cas de réchauffement trop important, le chauffage
de l’appareil se met automatiquement hors circuit. Si
c’est le cas, mettez l’appareil hors circuit, tirez la
fiche de contact et laissez refroidir quelques minutes.
Après élimination de l’origine (par ex. grille d’aération
recouverte) l’appareil peut être mis à nouveau en
circuit. Si la protection contre la surchauffe se
déclenche une nouvelle fois, veuillez contacter votre
service après vente (en Allemagne ISC GmbH).
14
9. Nettoyage, maintenance et
commande de pièces détachées
Avant d’entammer des travaux de nettoyage et de
maintenance, l’appareil doit être mis hors circuit,
déconnecté du réseau de courant et refroidi.
Faites effectuer les travaux de maintenance et de
réparation exclusivement par un atelier de travaux
électriques dûment autorisé ou par l’entreprise
ISC GmbH.
Enlevez les impuretés dues à la poussière avec
un aspirateur.
9.1 Nettoyage
Pour nettoyer le boîtier, utilisez un chiffon
légèrement humide.
9.2 Maintenance
Aucune pièce à l’intérieur de l’appareil n’a besoin
de maintenance.
9.3 Commande de pièces de rechange
Pour les commandes de pièces de rechange,
veuillez indiquer les références suivantes:
앬 Type de l’appareil
앬 No. d’article de l’appareil
앬 No. d’identification de l’appareil
앬 No. de pièce de rechange de la pièce requise
Vous trouverez les prix et informations actuelles à
l’adresse www.isc-gmbh.info
10. Stockage
Entreposez l’appareil et ses accessoires dans un
endroit sombre, au sec et à l’abri du gel qui doit être
inaccessible aux enfants. La température de
stockage optimale est comprise entre +5 et +30 °C.
Conservez l’outil électrique dans l’emballage
d’origine.
Anleitung_WH_2000_I_SPK7:_
20.03.2012
13:21 Uhr
Seite 15
F
11. Mise au rebut et recyclage
L’appareil se trouve dans un emballage permettant
d’éviter les dommages dus au transport. Cet
emballage est une matière première et peut donc être
réutilisé ultérieurement ou être réintroduit dans le
circuit des matières premières. L’appareil et ses
accessoires sont en matériaux divers, comme par ex.
des métaux et matières plastiques. Eliminez les
composants défectueux dans les systèmes
d’élimination des déchets spéciaux. Renseignezvous dans un commerce spécialisé ou auprès de
l’administration de votre commune !
15
Anleitung_WH_2000_I_SPK7:_
20.03.2012
13:21 Uhr
Seite 16
I
Attenzione!
Nell’usare gli apparecchi si devono rispettare diverse
avvertenze di sicurezza per evitare lesioni e danni.
Quindi leggete attentamente queste istruzioni per
l’uso/le avvertenze di sicurezza. Conservate bene le
informazioni per averle a disposizione in qualsiasi
momento. Se date l’apparecchio ad altre persone,
consegnate queste istruzioni per l’uso/le avvertenze
di sicurezza insieme all’apparecchio. Non ci
assumiamo alcuna responsabilità per incidenti o
danni causati dal mancato rispetto di queste
istruzioni e delle avvertenze di sicurezza.
앬
앬
앬
앬
앬
1. Avvertenze di sicurezza
앬
앬
앬
앬
앬
앬
앬
앬
앬
앬
앬
앬
앬
앬
앬
Prima della messa in esercizio rispettare
assolutamente le istruzioni per l’uso!
L’apparecchio deve essere usato solo come
descritto nelle istruzioni. Ogni altro utilizzo non è
consentito.
Conservate bene le istruzioni e consegnatele
eventualmente ai terzi
Controllate se l’apparecchio sia stato consegnato
in perfetto stato. In caso di eventuali danni non
collegare l’apparecchio alla presa di corrente.
L’apparecchio è adatto soltanto per il
riscaldamento dell’aria dell’ambiente in locali
chiusi
Non adatto per l’uso professionale.
Non fate passare il cavo di alimentazione su parti
dell’apparecchio che diventano calde durante il
funzionamento.
Non aprite mai l’apparecchio e non toccate parti
che conducono la corrente – Pericolo di morte!
Non posizionate mai l’apparecchio vicino a locali
umidi o bagnati (bagno, doccia, piscina, ecc.). Gli
elementi di comando non devono poter essere
toccati da una persona che si trovi sotto la doccia,
nella vasca da bagno o in una vasca piena di
liquido.
Non usate mai l’apparecchio con le mani bagnate.
Posizionate l’apparecchio in modo che la spina sia
sempre accessibile.
Staccate la spina dalla presa di corrente se
l’apparecchio non viene usato per un tempo
piuttosto lungo!
Soltanto per un esercizio controllato.
L’apparecchio non deve venire usato in ambienti
nei quali si usano o si tengono sostanze (ad es.
solventi, ecc.) o gas infiammabili.
Tenete lontani dall’apparecchio sostanze o gas
facilmente infiammabili.
Non usate l’apparecchio in locali con pericolo di
incendio (per es. rimesse in legno).
16
앬
앬
앬
앬
앬
앬
앬
앬
앬
앬
Usate il radiatore solo con il cavo di alimentazione
completamente srotolato.
Tenete una distanza minima di 100 cm fra
l’apertura di uscita dell’aria e gli oggetti (per es.
tende), pareti e altri elementi costruttivi. Lo spazio
laterale dagli oggetti o dalle pareti deve essere di
25 cm.
L’apparecchio non è adatto per l’installazione su
cavi elettrici fissi.
Non inserite corpi estranei nelle aperture
dell’apparecchio.
Pericolo di scossa elettrica e di danni
all’apparecchio.
I bambini e le persone sotto l’influsso di medicinali
o alcol devono essere tenuti lontani
dall’apparecchio.
I lavori di manutenzione e le riparazioni devono
essere eseguiti solo da personale specializzato
autorizzato.
Prima di ogni impiego si deve verificare che
l’apparecchio, in particolare il cavo di
alimentazione, non sia danneggiato. In caso di
anomalie rivolgetevi ad un elettricista specializzato
o al servizio di assistenza clienti responsabile per
il vostro paese (In Germania ISC GmbH).
Il montaggio deve essere eseguito a parete in
posizione fissa ed orizzontale ad un’altezza di
almeno 1,8 m dall pavimento.
Il montaggio al soffitto non è consentito.
Acqua o altri liquidi non deve mai venire a contatto
con l’apparecchio o penetrare al suo interno –
Pericolo di morte!
Non utilizzate l’apparecchio in bagno.
Collegate l’apparecchio solo ad una presa di
corrente messa a terra.
Non montate l’apparecchio direttamente al di
sopra o al di sotto di una presa di corrente.
Non coprite mai il convettore, poiché potrebbero
svilupparsi un ristagno di calore e quindi ne
potrebbero derivare danni all’apparecchio o
incendi (fig. 4).
Cet appareil ne convient pas aux personnes (y
compris les enfants) qui en raison de leurs
capacités physiques, sensorielles ou
intellectuelles ou leur manque d’expérience et/ou
de connaissances ne peuvent pas l’utiliser de
manière sûre, à moins d’être surveillées et de
recevoir les instructions relatives à l’utilisation de
l’appareil par une personne responsable de leur
sécurité. Surveillez les enfants pour vous assurer
qu’ils ne jouent pas avec l’appareil.
Anleitung_WH_2000_I_SPK7:_
20.03.2012
13:21 Uhr
Seite 17
I
AVVERTIMENTO!
Leggete tutte le avvertenze di sicurezza e le
istruzioni.
Dimenticanze nel rispetto delle avvertenze di
sicurezza e delle istruzioni possono causare scosse
elettriche, incendi e/o gravi lesioni.
Conservate tutte le avvertenze e le istruzioni per
eventuali necessità future.
2. Descrizione dell’apparecchio
(Fig. 1/2)
1
2
3
4
5
6
7
8
9
10
11
12
13
14
Entrata dell’aria
Diodo del ricevitore a infrarossi
Tasto regolazione automatica lamelle (Swing)
Tasto regolazione temperatura nominale
Indicatore temperatura
Indicatore tempo di disinserimento impostato
(timer)
Tasto regolazione potenza di riscaldamento
Tasto ON / stand-by
Lamelle di uscita aria
Tasto principale ON / OFF
Vano di conservazione per telecomando
Telecomando a infrarossi
Tasto telecomando impostazione tempo di
disinserimento (timer)
Tasto telecomando ionizzatore ON / OFF
Simboli indicatori sul display dell’apparecchio
A = Regolazione automatica lamelle (Swing)
B = Ionizzatore
C = Ventola
D = Potenza di riscaldamento bassa
E = Potenza di riscaldamento alta
3. Elementi forniti
앬
앬
앬
앬
앬
Aprite l’imballaggio e togliete con cautela
l’apparecchio dalla confezione.
Togliete il materiale d’imballaggio e anche i fermi
di trasporto / imballaggio (se presenti).
Controllate che siano presenti tutti gli elementi
forniti.
Verificate che l’apparecchio e gli accessori non
presentino danni dovuti al trasporto.
Se possibile, conservate l’imballaggio fino alla
scadenza della garanzia.
ATTENZIONE
L’apparecchio e il materiale d’imballaggio non
sono giocattoli! I bambini non devono giocare
con sacchetti di plastica, film e piccoli pezzi!
Sussiste il pericolo di ingerimento e
soffocamento!
앬
앬
앬
앬
Termoventilatore da parete
Telecomando (si trova nel vano di
conservazione)
2 viti e 2 tasselli
Istruzioni per l’uso originali
4. Utilizzo proprio
L’apparecchio è concepito per il riscaldamento
supplementare di ambienti asciutti e chiusi.
Deve essere montato solo su pareti verticali.
L’apparecchio non è adatto per asciugare
asciugamani e tessuti.
L’apparecchio deve venire usato solamente per lo
scopo a cui è destinato. Ogni altro tipo di uso che
esuli da quello previsto non è un uso conforme.
L’utilizzatore/l’operatore, e non il costruttore, è
responsabile dei danni e delle lesioni di ogni tipo che
ne risultino.
Tenete presente che i nostri apparecchi non sono
stati costruiti per l’impiego professionale, artigianale
o industriale. Non ci assumiamo alcuna garanzia
quando l’apparecchio viene usato in imprese
commerciali, artigianali o industriali, o in attività
equivalenti.
5. Caratteristiche tecniche
Tensione nominale:
Potenzialità calorifera:
Timer:
Ioni negativi:
Tipo di protezione:
220-240 V ~ 50 Hz
2000 W (1000 W / 2000 W)
1 – 8 ore
≥ 3x10⁶ n/cm3
IPX0
17
Anleitung_WH_2000_I_SPK7:_
20.03.2012
13:21 Uhr
Seite 18
I
6. Prima della messa in esercizio
Osservate le avvertenze di sicurezza descritte al
punto 1.
Attenzione! Accertatevi che nella zona dei fori non ci
siano cavi elettrici o altre installazioni (per es.
tubazioni dell’acqua). Fate attenzione che
l’apparecchio sia ben fissato alla parete in posizione
orizzontale. Fate attenzione che non ci siano oggetti
ad una distanza inferiore a 100 cm dalla parte
anteriore dell’apparecchio.
Il getto di aria calda non deve essere diretto verso
oggetti facilmente infiammabili, tenere una distanza
di 1 m.
Usate solo materiale di fissaggio adeguato. I tasselli
e le vite forniti sono adatti per: calcestruzzo, pietra
naturale dalla struttura compatta, mattoni pieni,
mattoni pieni di arenaria calcarea, mattoni pieni di
calcestruzzo leggero e calcestruzzo cellulare
(poroso).
Contrassegnate la posizione dei fori (Ø 8mm,
altezza dal pavimento min. 200 cm) necessari per
agganciare l’apparecchio alla parete.
Avvertenza: la distanza orizzontale fra i fori è 470
mm.
Poi eseguite i fori nella parete, inserite i tasselli e
avvitate le viti. La distanza tra la testa della vite e la
parete deve essere di ca. 3 mm.
Fatte passare il cavo di alimentazione dall’apposito
foro (F) sulla parte superiore dell’apparecchio e
agganciate il termoventilatore (H) alle viti sulla
parete. Spostate il termoventilatore da parete verso
sinistra fino alla battuta e tiratelo verso il basso fino
alla battuta. Il termoventilatore è ora montato alla
parete.
7. Utilizzo
Attenzione! Prima della messa in esercizio
verificate che la tensione disponibile corrisponda
alla tensione indicata sulla targhetta di
identificazione.
Osservate le avvertenze di sicurezza descritte al
punto 1.
Durante la prima messa in esercizio o dopo una
prolungata pausa di esercizio è possibile percepire
brevemente un odore. Non si tratta di un’anomalia.
Con l’interruttore principale ON/OFF (Fig. 2 / Pos.
10) l’apparecchio viene completamente scollegato
dalla rete elettrica. Inserite l’interruttore principale per
primo e disinseritelo per ultimo quando avete finito di
utilizzare l’apparecchio.
18
7.1 Selettore di funzione (Fig. 1)
앬
Tutte le funzioni, esclusa l’impostazione della
temperatura nominale dell’ambiente e dello
ionizzatore, possono venire comandate sia con i
tasti sull’apparecchio che con il telecomando. Il
telecomando si trova nel vano di conservazione
sul lato destro dell‘involucro. Spingete il
coperchio verso il basso e prendete il
telecomando.
앬
Le funzioni inserite appaiono sul display
dell’apparecchio. Viene inoltre indicata la
temperatura rilevata dalla sonda di temperatura
(temperatura dell’apparecchio) integrata
nell’apparecchio.
앬
Dopo il disinserimento dell’apparecchio tramite il
tasto ON / OFF (8) il ventilatore continua a
funzionare ancora per un po’ per raffreddare
l’elemento riscaldante, mentre il simbolo per
“Ventola” lampeggia sul display dell’apparecchio.
Per il telecomando si devono utilizzare 2 batterie di
tipo „AAA“. Nel sostituire le batterie rispettate
assolutamente la giusta polarità. Le batterie usate
devono essere smaltite in modo regolare.
7.1.1 Funzionamento ad aria fredda (ventola)
Premete il tasto ON / OFF (8). L’apparecchio si attiva
con il funzionamento ad aria fredda (senza potenza di
riscaldamento). Se viene premuto ancora una volta il
tasto la ventola si disinserisce.
7.1.2 Funzionamento ad aria calda
앬
1000 W: premete il tasto ON / OFF (8) e poi il
tasto riscaldamento (7). L’apparecchio riscalda
ad un livello di riscaldamento basso. Se viene
premuto il tasto ON / OFF l’apparecchio si
disinserisce.
앬
2000 W: premete il tasto ON / OFF (8) e poi il
tasto riscaldamento (7) due volte. L’apparecchio
riscalda ad un livello di riscaldamento alto. Se
viene premuto il tasto ON/OFF l’apparecchio si
disinserisce.
7.1.3 Funzione “Swing“ delle lamelle di uscita
dell’aria
Impostate il funzionamento ad aria fredda o il
funzionamento ad aria calda come sopra descritto.
Premete il tasto “Swing” (3).
Viene attivata la funzione “Swing” delle lamelle di
uscita dell’aria che muove elettricamente le lamelle
verso l’alto e verso il basso.
Per disattivare la funzione “Swing” e fare sì che
l’apparecchio soffi in una determinata direzione
premete di nuovo il tasto “Swing” (3).
Anleitung_WH_2000_I_SPK7:_
20.03.2012
13:21 Uhr
Seite 19
I
7.1.4 Timer per tempo di disinserimento
(possibile solo tramite telecomando)
Impostate il funzionamento ad aria fredda o il
funzionamento ad aria calda come sopra descritto.
Premete sul telecomando il tasto timer (13).
L’apparecchio funziona con la preselezione tempo e
si disinserisce automaticamente dopo 1 h. Premendo
più volte il tasto timer (13) si può impostare il tempo di
disinserimento da 1 h a 8 h. Il tempo di disinserimento
impostato appare sul display. Per disinserire la
preselezione tempo premete dopo l’impostazione “8
h” ancora una volta il tasto timer (13) o disinserite
l’apparecchio con il tasto ON / OFF (8).
7.1.5 Impostazione temperatura nominale
(possibile solo l’esercizio di riscaldamento)
Non appena l’apparecchio è in esercizio di
riscaldamento è possibile impostare una temperatura
nominale (temperatura sulla sonda di temperatura
integrata nell’apparecchio) nel range di 15°C – 36°C
con il tasto (4). La temperatura nominale impostata
lampeggia brevemente sul display a LED
(impostazione di fabbrica 30°C) e poi appare di
nuovo la temperatura attualmente misurata dalla
sonda di temperatura integrata. Ogni volta che viene
premuto il tasto (4) la temperatura nominale aumenta
di 1°C. Se la temperatura nominale viene superata di
ca. 2°C il riscaldamento si disinserisce e si inserisce
di nuovo quando la temperatura misurata è sotto la
temperatura nominale di ca. 2°C.
7.1.6 Ionizzatore (possibile solo tramite
telecomando)
Lo ionizzatore viene inserito e disinserito con il tasto
(14) del telecomando.
8. Protezione dal surriscaldamento
In caso di riscaldamento eccessivo, la funzione di
riscaldamento e poi l’apparecchio si disinseriscono
automaticamente.
9. Pulizia, manutenzione e ordinazione
dei pezzi di ricambio
Far eseguire i lavori di manutenzione e di
riparazione esclusivamente da un officina elettrica
autorizzata o dalla ISC GmbH.
Si deve controllare regolarmente che il cavo di
alimentazione non presenti difetti o danni. Un
cavo di alimentazione danneggiato deve venire
sostituito soltanto da un elettricista specializzato o
dalla ISC GmbH, rispettando le disposizioni in vigore.
9.1 Pulizia
Per la pulizia del rivestimento usare un panno
leggermente umido.
9.2 Manutenzione
All’interno dell’apparecchio non si trovano altre
parti che richiedano manutenzione.
9.3 Commissione dei pezzi di ricambio
Volendo commissionare dei pezzi di ricambio, si
dovrebbe dichiarare quanto segue:
앬 modello dell’apparecchio
앬 numero dell’articolo dell’apparecchio
앬 numero d’ident. dell’apparecchio
앬 numero del pezzo di ricambio del ricambio
necessitato.
Per i prezzi e le informazioni attuali si veda
www.isc-gmbh.info
10. Conservazione
Conservate l’apparecchio e i suoi accessori in un
luogo buio, asciutto, al riparo dal gelo e non
accessibile ai bambini. La temperatura ottimale per la
conservazione è compresa tra i 5 e i 30 °C.
Conservate l’elettroutensile nell’imballaggio originale.
11. Smaltimento e riciclaggio
In caso di riscaldamento eccessivo, il sistema di
riscaldamento dell’apparecchio si disinserisce
automaticamente. In questo caso, disinserite
l’apparecchio, staccate la spina dalla presa di
corrente e lasciate raffreddare per qualche minuto.
Dopo aver eliminato la causa (per es. grata dell’aria
coperta) l’apparecchio può essere reinserito. Se la
protezione dal surriscaldamento dovesse intervenire
ripetutamente, rivolgetevi al vostro servizio di
assistenza clienti (in Germania alla ISC GmbH).
L’apparecchio si trova in un imballaggio per evitare i
danni dovuti al trasporto. Questo imballaggio
rappresenta una materia prima e può perciò essere
utilizzato di nuovo o riciclato. L’apparecchio e i suoi
accessori sono fatti di materiali diversi, per es.
metallo e plastica. Consegnate i pezzi difettosi allo
smaltimento di rifiuti speciali. Per informazioni
rivolgetevi a un negozio specializzato o
all’amministrazione comunale!
19
Anleitung_WH_2000_I_SPK7:_
20.03.2012
13:21 Uhr
Seite 20
ISC GmbH · Eschenstraße 6 · D-94405 Landau/Isar
Konformitätserklärung
k erklärt folgende Konformität gemäß EU-Richtlinie und
Normen für Artikel
t explains the following conformity according to EU
directives and norms for the following product
p déclare la conformité suivante selon la directive CE et les
normes concernant l’article
C dichiara la seguente conformità secondo la direttiva UE e
le norme per l’articolo
N verklaart de volgende overeenstemming conform EU
richtlijn en normen voor het product
m declara la siguiente conformidad a tenor de la directiva y
normas de la UE para el artículo
O declara a seguinte conformidade, de acordo com a
directiva CE e normas para o artigo
l attesterer følgende overensstemmelse i medfør af
EU-direktiv samt standarder for artikel
U förklarar följande överensstämmelse enl. EU-direktiv och
standarder för artikeln
q vakuuttaa, että tuote täyttää EU-direktiivin ja standardien
vaatimukset
. tõendab toote vastavust EL direktiivile ja standarditele
j vydává následující prohlášení o shodě podle směrnice
EU a norem pro výrobek
X potrjuje sledečo skladnost s smernico EU in standardi za
izdelek
W vydáva nasledujúce prehlásenie o zhode podľa smernice
EÚ a noriem pre výrobok
A a cikkekhez az EU-irányvonal és Normák szerint a
következő konformitást jelenti ki
P deklaruje zgodność wymienionego poniżej artykułu z
następującymi normami na podstawie dyrektywy WE.
e декларира съответното съответствие съгласно
Директива на ЕС и норми за артикул
H paskaidro šādu atbilstību ES direktīvai un standartiem
G apibūdina šį atitikimą EU reikalavimams ir prekės
normoms
Q declară următoarea conformitate conform directivei UE
şi normelor pentru articolul
z δηλώνει την ακόλουθη συμμόρφωση σύμφωνα με την
Οδηγία ΕΚ και τα πρότυπα για το προϊόν
B potvrđuje sljedeću usklađenost prema smjernicama EU
i normama za artikl
f potvrđuje sljedeću usklađenost prema smjernicama EU
i normama za artikl
4 potvrđuje sledeću usklađenost prema smernicama EZ i
normama za artikal
T следующим удостоверяется, что следующие
продукты соответствуют директивам и нормам ЕС
1 проголошує про зазначену нижче відповідність
виробу директивам та стандартам ЄС на виріб
5 ја изјавува следната сообрзност согласно
ЕУ-директивата и нормите за артикли
Z Ürünü ile ilgili AB direktifleri ve normları gereğince
aşağıda açıklanan uygunluğu belirtir
L erklærer følgende samsvar i henhold til EU-direktivet
og standarder for artikkel
E Lýsir uppfyllingu EU-reglna og annarra staðla vöru
Wandheizgerät WH 2000 I (Einhell)
87/404/EC_2009/105/EC
2005/32/EC_2009/125/EC
x
Notified Body:
Notified Body No.:
Reg. No.:
2006/95/EC
2006/28/EC
x
2004/108/EC
2000/14/EC_2005/88/EC
Annex V
Annex VI
2004/22/EC
1999/5/EC
97/23/EC
90/396/EC_2009/142/EC
x
2006/42/EC
Annex IV
Noise: measured LWA = dB (A); guaranteed LWA = dB (A)
P = KW; L/Ø = cm
Notified Body:
89/686/EC_96/58/EC
2004/26/EC
2011/65/EC
Emission No.:
Standard references:
EN 60335-1; EN 60335-2-30; EN 62233; EN 55014-1;
EN 55014-2; EN 61000-3-2; EN 61000-3-3
Landau/Isar, den 09.02.2012
First CE: 2012
Art.-No.: 23.385.03 I.-No.: 11011
Subject to change without notice
20
Weichselgartner/General-Manager
Liu/Product-Management
Archive-File/Record: NAPR004679
Documents registrar: Landauer Josef
Wiesenweg 22, D-94405 Landau/Isar
Anleitung_WH_2000_I_SPK7:_
20.03.2012
13:21 Uhr
Seite 21
k Nur für EU-Länder
Werfen Sie Elektrowerkzeuge nicht in den Hausmüll!
Gemäß europäischer Richtlinie 2002/96/EG über Elektro- und Elektronik-Altgeräte und Umsetzung in
nationales Recht müssen verbrauchte Elektrowerkzeuge getrennt gesammelt werden und einer
umweltgerechten Wiederverwertung zugeführt werden.
Recycling-Alternative zur Rücksendeaufforderung:
Der Eigentümer des Elektrogerätes ist alternativ anstelle Rücksendung zur Mitwirkung bei der sachgerechten Verwertung im Falle der Eigentumsaufgabe verpflichtet. Das Altgerät kann hierfür auch einer
Rücknahmestelle überlassen werden, die eine Beseitigung im Sinne der nationalen Kreislaufwirtschaftsund Abfallgesetze durchführt. Nicht betroffen sind den Altgeräten beigefügte Zubehörteile und Hilfsmittel
ohne Elektrobestandteile.
t For EU countries only
Never place any electric tools in your household refuse.
To comply with European Directive 2002/96/EC concerning old electric and electronic equipment and its
implementation in national laws, old electric tools have to be separated from other waste and disposed of
in an environment-friendly fashion, e.g. by taking to a recycling depot.
Recycling alternative to the demand to return electrical devices:
As an alternative to returning the electrical device, the owner is obliged to cooperate in ensuring that the
device is properly recycled if ownership is relinquished. This can also be done by handing over the used
device to a returns center, which will dispose of it in accordance with national commercial and industrial
waste management legislation. This does not apply to the accessories and auxiliary equipment without
any electrical components which are included with the used device.
p Uniquement pour les pays de l'Union Européenne
Ne jetez pas les outils électriques dans les ordures ménagères.
Selon la norme européenne 2002/96/CE relative aux appareils électriques et systèmes électroniques
usés et selon son application dans le droit national, les outils électriques usés doivent être récoltés à
part et apportés à un recyclage respectueux de l'environnement.
Possibilité de recyclage en alternative à la demande de renvoi :
Le propriétaire de l’appareil électrique est obligé, en guise d’alternative à un envoi en retour, à contribuer
à un recyclage effectué dans les règles de l’art en cas de cessation de la propriété. L’ancien appareil
peut être remis à un point de collecte dans ce but. Cet organisme devra l’éliminer dans le sens de la Loi
sur le cycle des matières et les déchets. Ne sont pas concernés les accessoires et ressources fournies
sans composants électroniques.
21
Anleitung_WH_2000_I_SPK7:_
20.03.2012
13:21 Uhr
Seite 22
C Solo per paesi membri dell'UE
Non gettate gli utensili elettrici nei rifiuti domestici.
Secondo la Direttiva europea 2002/96/CE sui rifiuti di apparecchiature elettriche ed elettroniche e
l'applicazione nel diritto nazionale gli elettroutensili usati devono venire raccolti separatamente e smaltiti
in modo ecologico.
Alternativa di riciclaggio alla richiesta di restituzione
Il proprietario dell’apparecchio elettrico è tenuto in alternativa, invece della restituzione, a collaborare in
modo che lo smaltimento venga eseguito correttamente in caso ceda l’apparecchio. L’apparecchio
vecchio può anche venire consegnato ad un centro di raccolta che provvede poi allo smaltimento
secondo le norme nazionali sul riciclaggio e sui rifiuti. Non ne sono interessati gli accessori e i mezzi
ausiliari senza elementi elettrici forniti insieme ai vecchi apparecchi.
22
Anleitung_WH_2000_I_SPK7:_
20.03.2012
13:21 Uhr
Seite 23
Der Nachdruck oder sonstige Vervielfältigung von Dokumentation und
Begleitpapieren der Produkte, auch auszugsweise ist nur mit ausdrücklicher Zustimmung der ISC GmbH zulässig.
The reprinting or reproduction by any other means, in whole or in part,
of documentation and papers accompanying products is permitted only
with the express consent of ISC GmbH.
La réimpression ou une autre reproduction de la documentation et des
documents d’accompagnement des produits, même incomplète, n’est
autorisée qu’avec l’agrément exprès de l’entreprise ISC GmbH.
La ristampa o l’ulteriore riproduzione, anche parziale, della
documentazione o dei documenti d’accompagnamento dei prodotti è
consentita solo con l’esplicita autorizzazione da parte della ISC GmbH.
Technische Änderungen vorbehalten
Technical changes subject to change
Sous réserve de modifications
Con riserva di apportare modifiche tecniche
23
Anleitung_WH_2000_I_SPK7:_
20.03.2012
13:21 Uhr
Seite 24
t GUARANTEE CERTIFICATE
Dear Customer,
All of our products undergo strict quality checks to ensure that they reach you in perfect condition. In the unlikely
event that your device develops a fault, please contact our service department at the address shown on this
guarantee card. Of course, if you would prefer to call us then we are also happy to offer our assistance under
the service number printed below. Please note the following terms under which guarantee claims can be made:
1. These guarantee terms cover additional guarantee rights and do not affect your statutory warranty rights.
We do not charge you for this guarantee.
2. Our guarantee only covers problems caused by material or manufacturing defects, and it is restricted to the
rectification of these defects or replacement of the device. Please note that our devices have not been
designed for use in commercial, trade or industrial applications. Consequently, the guarantee is invalidated
if the equipment is used in commercial, trade or industrial applications or for other equivalent activities. The
following are also excluded from our guarantee: compensation for transport damage, damage caused by
failure to comply with the installation/assembly instructions or damage caused by unprofessional
installation, failure to comply with the operating instructions (e.g. connection to the wrong mains voltage or
current type), misuse or inappropriate use (such as overloading of the device or use of non-approved tools
or accessories), failure to comply with the maintenance and safety regulations, ingress of foreign bodies
into the device (e.g. sand, stones or dust), effects of force or external influences (e.g. damage caused by
the device being dropped) and normal wear resulting from proper operation of the device. This applies in
particular to rechargeable batteries for which we nevertheless issue a guarantee period of 12 months.
The guarantee is rendered null and void if any attempt is made to tamper with the device.
3. The guarantee is valid for a period of 2 years starting from the purchase date of the device. Guarantee
claims should be submitted before the end of the guarantee period within two weeks of the defect being
noticed. No guarantee claims will be accepted after the end of the guarantee period. The original guarantee
period remains applicable to the device even if repairs are carried out or parts are replaced. In such cases,
the work performed or parts fitted will not result in an extension of the guarantee period, and no new
guarantee will become active for the work performed or parts fitted. This also applies when an on-site
service is used.
4. In order to assert your guarantee claim, please send your defective device postage-free to the address
shown below. Please enclose either the original or a copy of your sales receipt or another dated proof of
purchase. Please keep your sales receipt in a safe place, as it is your proof of purchase. It would help us if
you could describe the nature of the problem in as much detail as possible. If the defect is covered by our
guarantee then your device will either be repaired immediately and returned to you, or we will send you a
new device.
Of course, we are also happy offer a chargeable repair service for any defects which are not covered by the
scope of this guarantee or for units which are no longer covered. To take advantage of this service, please send
the device to our service address.
24
Anleitung_WH_2000_I_SPK7:_
20.03.2012
13:21 Uhr
Seite 25
p BULLETIN DE GARANTIE
Chère Cliente, Cher Client,
Nos produits sont soumis à un contrôle de qualité très strict. Si cet appareil devait toutefois ne pas fonctionner
impeccablement, nous en serions désolés. Dans un tel cas, nous vous prions de bien vouloir prendre contact
avec notre service après-vente à l‘adresse indiquée sur le bulletin de garantie. Nous restons également
volontiers à votre disposition au numéro de téléphone de service indiqué plus bas. Pour faire valoir une
demande de garantie, ce qui suit est valable :
1. Les conditions de garantie règlent les prestations de garantie supplémentaires. Vos droits de garantie
légaux ne sont en rien altérés par la garantie présente. Notre prestation de garantie est gratuite.
2. La prestation de garantie s’applique exclusivement aux défauts occasionnés par des vices de fabrication ou
de matériau et est limitée à l’élimination de ces défauts ou encore au remplacement de l’appareil. Veillez au
fait que nos appareils, conformément à leur affectation, n’ont pas été construits pour être utilisés dans un
environnement professionnel, industriel ou artisanal. Un contrat de garantie ne peut avoir lieu dès lors que
l’appareil est utilisé à des activités dans des entreprises professionnelles, artisanales ou industrielles ou
toute autre activité du même genre. Sont également exclus de notre garantie : les prestations de
substitution de dommages dus aux transports, les dommages occasionnés par le non-respect des
instructions de montage ou en raison d’une installation non conforme, du non-respect du mode d’emploi
(comme par exemple le raccordement à une mauvaise tension réseau ou à un mauvais type de courant),
les applications abusives ou non conformes (comme par exemple une surcharge de l’appareil ou encore
l’emploi d’accessoires non homologués), le non-respect des prescriptions de maintenance et de sécurité,
l’infiltration de corps étrangers dans l’appareil (comme par exemple du sable, des pierres ou de la
poussière), l’emploi de la force ou l’influence extérieure (comme par exemple les dommages dus à une
chute), ainsi que l’usure normale conforme à l’utilisation. Ceci est particulièrement valable pour les
accumulateurs pour lesquels nous offrons toutefois une période de garantie de 12 mois.
Le droit à la garantie disparaît dès lors que des interventions ont lieu sur l’appareil.
3. Le délai de garantie s’élève à 2 ans et commence à la date de l’achat de l’appareil. Les demandes de
garanties doivent être présentées avant écoulement du délai de garantie, dans les deux semaines suivant
le moment auquel le défaut a été reconnu. Toute reconnaissance de demande de garantie après
écoulement du délai de garantie est exclue. La réparation ou l’échange de l’appareil n’entraîne nullement
une prolongation de la durée de garantie. Elle ne fait pas non plus commencer un nouveau délai de
garantie, en raison de cette prestation, pour l’appareil ou pour toute autre pièce de rechange intégrée. Ceci
est également valable lorsqu’un service après-vente sur place a été consulté.
4. Pour faire reconnaître votre demande de garantie, veuillez nous envoyer l’appareil défectueux franco de
port à l’adresse indiquée ci-dessous. Ajoutez à l’envoi l’original du bon d’achat ou de tout autre preuve de
l’achat datée. Veuillez donc toujours bien conserver le bon d’achat en guise de preuve ! Décrivez la raison
de la réclamation le plus précisément possible. Si le défaut de l’appareil est compris dans notre prestation
de garantie, nous vous retournerons sans délai un appareil réparé ou encore un nouveau.
Bien entendu, nous sommes prêts également à réparer les appareils défectueux contre remboursement des
frais, dès lors que l’appareil n’est plus ou pas garanti. Pour ce faire, veuillez envoyer l’appareil à notre adresse
de service après-vente.
25
Anleitung_WH_2000_I_SPK7:_
20.03.2012
13:21 Uhr
Seite 26
C CERTIFICATO DI GARANZIA
Gentili clienti,
i nostri prodotti sono soggetti ad un rigido controllo di qualità. Se l’apparecchio non dovesse tuttavia funzionare
correttamente, ci scusiamo e vi preghiamo di rivolgervi al nostro servizio di assistenza clienti all’indirizzo
indicato in questa scheda di garanzia. Siamo a vostra disposizione anche telefonicamente al numero del
servizio assistenza sotto indicato. Per la rivendicazione dei diritti di garanzia vale quanto segue:
1. Queste condizioni di garanzia regolano ulteriori prestazioni di garanzia. La presente garanzia non tocca i
vostri diritti al ricorso di garanzia previsti dalla legge. Le nostre prestazioni di garanzia sono per voi gratuite.
2. La prestazione di garanzia riguarda esclusivamente le anomalie riconducibili a difetti del materiale o di
produzione ed è limitata all’eliminazione di queste anomalie o alla sostituzione dell’apparecchio. Tenete
presente che i nostri apparecchi non sono stati costruiti per l’impiego professionale, artigianale o
industriale. Un contratto di garanzia non viene concluso quando l’apparecchio viene usato in imprese
commerciali, artigianali o industriali, o con attività equivalenti. Dalla nostra garanzia sono escluse inoltre le
prestazioni di risarcimento per danni dovuti al trasporto o danni causati dalla mancata osservanza delle
istruzioni per il montaggio o per installazione non corretta, dalla mancata osservanza delle istruzioni per
l’uso (come per es. collegamento a tensione di rete o tipo di corrente non corretto), dall’uso improprio o
illecito (come per es. sovraccarico dell’apparecchio o utilizzo di utensili o accessori non consentiti), dalla
mancata osservanza delle norme di sicurezza e di manutenzione, dalla penetrazione di corpi estranei
nell’apparecchio (come per es. sabbia, pietre o polvere), dall’impiego della forza o dall’influsso esterno
(come per es. danni dovuti a caduta) e dall’usura normale e dovuta all’impiego. Ciò vale particolarmente per
batterie, per esse concediamo tuttavia 12 mesi di garanzia
Il diritti di garanzia decadono quando sono già effettuati interventi sull’apparecchio.
3. Il periodo di garanzia è 2 anni e inizia alla data d’acquisto dell’apparecchio. I diritti di garanzia devono
essere fatti valere prima della scadenza del periodo di garanzia, entro due settimane dopo avere accertato
il difetto. È esclusa la rivendicazione di diritti di garanzia dopo la scadenza del relativo periodo. La
riparazione o la sostituzione dell’apparecchio non comporta una proroga del periodo di garanzia e con
questa prestazione per l’apparecchio o per pezzi di ricambio eventualmente installati non inizia un nuovo
periodo di garanzia. Questo vale anche nel caso si ricorra ad un servizio sul posto.
4. Per la rivendicazione dei vostri diritti di garanzia inviate l’apparecchio difettoso franco di porto all’indirizzo
sotto indicato. Allegate lo scontrino di cassa in originale o un’altra prova d’acquisto che riporti la data.
Conservate bene perciò lo scontrino di cassa come prova! Indicate il motivo di reclamo nel modo più
dettagliato possibile. Se il difetto dell’apparecchio rientra nella nostra prestazione di garanzia, ricevete
l’apparecchio riparato o un apparecchio nuovo a stretto giro di posta.
Naturalmente effettuiamo a pagamento anche riparazioni sull’apparecchio che non rientrano o non rientrano più
nella garanzia. A tale scopo inviate l’apparecchio all’indirizzo del servizio assistenza.
26
Anleitung_WH_2000_I_SPK7:_
20.03.2012
13:21 Uhr
Seite 27
k GARANTIEURKUNDE
Sehr geehrte Kundin, sehr geehrter Kunde,
unsere Produkte unterliegen einer strengen Qualitätskontrolle. Sollte dieses Gerät dennoch einmal nicht einwandfrei funktionieren, bedauern wir dies sehr und bitten Sie, sich an unseren Servicedienst unter der auf dieser Garantiekarte angegebenen Adresse zu wenden. Gern stehen wir Ihnen auch telefonisch über die unten
angegebene Servicerufnummer zur Verfügung. Für die Geltendmachung von Garantieansprüchen gilt Folgendes:
1. Diese Garantiebedingungen regeln zusätzliche Garantieleistungen. Ihre gesetzlichen Gewährleistungsansprüche werden von dieser Garantie nicht berührt. Unsere Garantieleistung ist für Sie kostenlos.
2. Die Garantieleistung erstreckt sich ausschließlich auf Mängel, die auf Material- oder Herstellungsfehler zurückzuführen sind und ist auf die Behebung dieser Mängel bzw. den Austausch des Gerätes beschränkt.
Bitte beachten Sie, dass unsere Geräte bestimmungsgemäß nicht für den gewerblichen, handwerklichen
oder industriellen Einsatz konstruiert wurden. Ein Garantievertrag kommt daher nicht zustande, wenn das
Gerät in Gewerbe-, Handwerks- oder Industriebetrieben sowie bei gleichzusetzenden Tätigkeiten eingesetzt wird.
Von unserer Garantie sind ferner Ersatzleistungen für Transportschäden, Schäden durch Nichtbeachtung
der Montageanleitung oder aufgrund nicht fachgerechter Installation, Nichtbeachtung der Gebrauchsanleitung (wie durch z.B. Anschluss an eine falsche Netzspannung oder Stromart), missbräuchliche oder unsachgemäße Anwendungen (wie z.B. Überlastung des Gerätes oder Verwendung von nicht zugelassenen
Einsatzwerkzeugen oder Zubehör), Nichtbeachtung der Wartungs- und Sicherheitsbestimmungen, Eindringen von Fremdkörpern in das Gerät (wie z.B. Sand, Steine oder Staub), Gewaltanwendung oder
Fremdeinwirkungen (wie z. B. Schäden durch Herunterfallen) sowie durch verwendungsgemäßen, üblichen
Verschleiß ausgeschlossen. Dies gilt insbesondere für Akkus, auf die wir dennoch eine Garantiezeit von
12 Monaten gewähren
Der Garantieanspruch erlischt, wenn an dem Gerät bereits Eingriffe vorgenommen wurden.
3. Die Garantiezeit beträgt 2 Jahre und beginnt mit dem Kaufdatum des Gerätes. Garantieansprüche sind vor
Ablauf der Garantiezeit innerhalb von zwei Wochen, nachdem Sie den Defekt erkannt haben, geltend zu
machen. Die Geltendmachung von Garantieansprüchen nach Ablauf der Garantiezeit ist ausgeschlossen.
Die Reparatur oder der Austausch des Gerätes führt weder zu einer Verlängerung der Garantiezeit noch
wird eine neue Garantiezeit durch diese Leistung für das Gerät oder für etwaige eingebaute Ersatzteile in
Gang gesetzt. Dies gilt auch bei Einsatz eines Vor-Ort-Services.
4. Für die Geltendmachung Ihres Garantieanspruches übersenden Sie bitte das defekte Gerät portofrei an die
unten angegebene Adresse. Fügen Sie den Verkaufsbeleg im Original oder einen sonstigen datierten Kaufnachweis bei. Bitte bewahren Sie deshalb den Kassenbon als Nachweis gut auf! Beschreiben Sie uns bitte
den Reklamationsgrund möglichst genau. Ist der Defekt des Gerätes von unserer Garantieleistung erfasst,
erhalten Sie umgehend ein repariertes oder neues Gerät zurück.
Selbstverständlich beheben wir gegen Erstattung der Kosten auch gerne Defekte am Gerät, die vom Garantieumfang nicht oder nicht mehr erfasst sind. Dazu senden Sie das Gerät bitte an unsere Serviceadresse.
iSC GmbH • Eschenstraße 6 • 94405 Landau/Isar (Deutschland)
Telefon: +49 [0] 180 5 120 509 • Telefax +49 [0] 180 5 835 830 (Festnetzpreis: 14 ct/min, Mobilfunkpreise maximal: 42 ct/min)
Außerhalb Deutschlands fallen stattdessen Gebühren für ein reguläres Gespräch ins dt. Festnetz an.
E-Mail: [email protected] • Internet: www.isc-gmbh.info
27
Seite 28
13:21 Uhr
20.03.2012
Anleitung_WH_2000_I_SPK7:_
�
Service Hotline: 01805 120 509 · www.isc-gmbh.info · Mo-Fr. 8:00-18:00 Uhr
Retouren-Nr. iSC:
(Festnetzpreis: 14 ct/min, Mobilfunkpreise maximal: 42 ct/min; Außerhalb Deutschlands fallen stattdessen Gebühren für ein reguläres Gespräch ins dt. Festnetz an.)
Name:
�
Mobil:
I.-Nr.:
Telefon:
Ort
Art.-Nr.:
Straße / Nr.:
PLZ
Welcher Fehler ist aufgetreten (genaue Angabe):
�
Garantie:
JA
NEIN
Kaufbeleg-Nr. / Datum:
Sehr geehrte Kundin, sehr geehrter Kunde,
bitte beschreiben Sie uns die von Ihnen festgestellte Fehlfunktion Ihres Gerätes als Grund Ihrer Beanstandung möglichst genau. Dadurch können wir
für Sie Ihre Reklamation schneller bearbeiten und Ihnen schneller helfen. Eine zu ungenaue Beschreibung mit Begriffen wie „Gerät funktioniert nicht“
oder „Gerät defekt“ verzögert hingegen die Bearbeitung erheblich.
�
� Service Hotline kontaktieren oder bei iSC-Webadresse anmelden - es wird Ihnen eine Retourennummer zugeteilt l � Ihre Anschrift eintragen l � Fehlerbeschreibung
und Art.-Nr. und I.-Nr. angeben l � Garantiefall JA/NEIN ankreuzen sowie Kaufbeleg-Nr. und Datum angeben und eine Kopie des Kaufbeleges beilegen
EH 03/2012 (01)


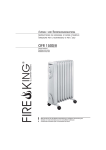


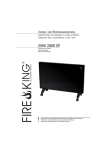
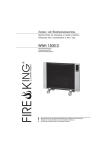
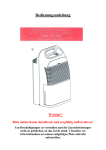
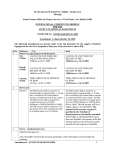
![[82053] Beiblatt Nr. 1 al Bollettino n. 50 del 11/12/2012](http://vs1.manualzilla.com/store/data/006108041_1-4984e004c5eda774f92d6b6253f4e4ab-150x150.png)