1
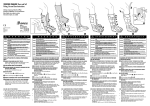
Sowohl das Wickel-Modell als auch
das überziehbare Modell haben
Befestigungsgurte. Diese sollten gut
festgezogen werden, wobei mit den beiden
Gurten am Knie angefangen werden soll.
EINSTELLUNGSANLEITUNG
ISTRUZIONI PER LA REGOLAZIONE
S
IO
15
N
15
30
0
N
SI O N
•
•
•
Unterschenkel
Die Gelenkeinstellungen sind mit den folgenden Gradeinstellungen
bezeichnet;
Extensions-Einstellung: 0°, 10°, 30°, 50°, 70°, 90° & 110°
Flexions-Einstellung: 0°, 10°, 30°, 50°, 70°, 90° & 110°
Zum Ändern der Einstellung zunächst Gelenkabdeckung, wie in
der Abbildung dargestellt, öffnen. Stifte dann für den Ober- und
Unterschenkel in die gewünschte Flexions- bzw. Extensionseinstellung
bringen. Wenn die richtige Einstellung erreicht ist, Gelenkabdeckung
schließen. Die mediale (innere) und laterale (äußere) Gelenkeinstellung
müssen identisch sein.
HINWEIS: Die Schiene übt Druck auf weiches Gewebe aus, daher
wird für die Extensions-Stopps eine Einstellung empfohlen, die um
mindestens 10 Grad größer ist als die gewünschte Obergrenze (wenn
Sie zum Beispiel eine Extensions-Obergrenze von 10 Grad wünschen,
sollte der Extensions-Stopp bei 20 Grad angebracht werden).
Wenn die Stütze mit Salzwasser oder Schmutz in Kontakt kommt, gründlich mit Süßwasser abspülen und an der Luft trocknen.
Ein trockenes Schmiermittel, wie z. B. Teflon-Spray, kann gelegentlich zum Schmieren des Gelenks verwendet werden. Keine nassen Schmiermittel verwenden.
Das Gelenk kann zum leichteren Reinigen der Schale und der Gurte entfernt werden.
Die Seitenstangen können über und unter dem Gelenk gleichermaßen gebogen und dem Bein angepaßt werden.
Schale, Gurte und Gelenk gelegentlich auf übermäßige Abnutzung überprüfen.
Vergewissern Sie sich, daß alle Schrauben fest angezogen und alle Stopps richtig angebracht wurden.
EX
TEN
SI O N
I
FLEX
N
E XIO
90
60
30
FL
0
15
Flexion
TIPS ZUR VERWENDUNG UND PFLEGE IHRER KNIESCHIENE:
•
•
Flessione
FULL
RANGE
N
90
60
30
ON
30
60
90
N
IO
FLEX
30
60
90
HINWEIS: Die Schiene übt Druck auf weiches Gewebe aus, daher
wird für den Extensions-Stopp eine Einstellung empfohlen, die um
mindestens 10 Grad größer ist als die gewünschte Obergrenze (wenn
Sie zum Beispiel eine Extensions-Obergrenze von 10 Grad wünschen,
sollte der Extensions-Stopp bei 20 Grad angebracht werden).
Extension
TEN
30
60
90
FULL
RANGE
E XIO
FL
After exposure to salt water or dirt, thoroughly rinse the brace with fresh water and allow to air dry.
A dry lubricant, such as teflon spray, may be used on the hinge occasionally. Do not use wet lubricants.
The hinge assemblies may be removed to allow easier washing of the sleeve and straps.
The side bars may be bent to accommodate individual legs. Bend in equal amounts above and below the hinge.
Periodically inspect the sleeve, straps and hinges for excessive wear. Be sure all screws are tight and stops in place.
Zum Ändern der Stopps zunächst die Schraube - wie dargestellt
- vollständig entfernen. Dann den Stopp entfernen. Neuen Stopp
einfügen, mit den Löchern auf dem Gelenk ausrichten, Schraube dann
wieder einfügen. Mit einem Kreuzschlitzschraubenzieher Schrauben fest
in das dafür vorgesehene Gewinde einschrauben. Sowohl der mediale
(innere) als auch der laterale (äußere) Gelenkstopp müssen dieselbe
Winkeleinstellung aufweisen.
EX
E XIO
ON
0
15
NOTE: Due to soft tissue compression, we recommend the
use of extension stops at least 10° greater than the desired
limit. (e.g., if you desire a 10° extension limit, use the 20°
extension stop).
Extensions-Stopps: 0°, 10°, 20°, 30° & 40°
Flexions-Stopps: 45°, 60°, 75° & 90°
(Keine Flexions-Stopps werden bei der Lieferung eingebaut)
30
60
90
E X T E N SI
To change the settings, first, open the hinge cover as shown.
Then, move the pins to the desired extension and/or flexion
settings for both the upper and lower leg. When satisfied,
close the hinge cover. Both medial (inside) and lateral
(outside) hinge settings must be identical in degree.
Sowohl die Flexions- als auch die Extensions-Stopps werden mit der
Schiene mitgeliefert. Die Stütze wird mit einem bereits installiertem 10
Grad-Extensions-Stopp geliefert. Die Stopps sind mit den folgenden
Gradbezeichnungen versehen;
FL
90
60
30
F
FULL
RANGE
N
ON
0
15
O
L E XI
E X T E N SI
Extension settings: 0°, 10°, 30°, 50°, 70°, 90° & 110°
Flexion settings: 0°, 10°, 30°, 50°, 70°, 90° & 110°
90
60
30
0
15
The hinge settings are labeled in degrees as follows;
ON
Lower Leg
Flexion
0
15
90
60
30
15
Flexion
Parte superiore della gamba
Fermi per flessione
E X T E N SI
T
EX
N
15
90
60
0
15
N
EX T E
T
EX
N
15
EX T E
IO
0
30
60
90
S
0
30
60
90
ON
15
0
0
15
TIPS ON USE AND CARE OF YOUR KNEE BRACE:
•
•
•
•
•
FLEXI
N
15
0
Flexion
15
0
90
60
30
15
0
NOTE: Due to soft tissue compression, we recommend the
use of extension stops at least 10° greater than the desired
limit. (e.g., if you desire a 10° extension limit, use the 20°
extension stop).
SI O N
EXIO
Estensione
Fermi per estensione
15
0
15
0
To change the stops, first, completely remove the screw as
shown. Then remove the stop. Insert the new stop, align with
the holes in the hinge, then reinsert the screw. Using a Phillips
head screw driver, ensure that the screws are seated in the
recess and completely tightened. Both medial (inside) and
lateral (outside) hinge stops must be identical in degree.
TEN
90
60
30
90
60
30
Extension Stops: 0°, 10°, 20°, 30° & 40°
Flexion Stops: 45°, 60°, 75° & 90°
(no flexion stops are installed upon shipment)
EX
FL
Oberschenkel
Extension
Flexions-Stopps:
Upper Leg
Extension
Extension
90
60
30
ON
Both flexion and extension stops are supplied with the brace.
The brace comes with a 10° extension stop already installed.
The stops are labeled in degrees as follows;
ON
FULL
RANGE
ON
Extensions-Stopps:
0
15
60
90
ON
ON
SI
FLEXI
N
FLEXI
N
SI
SI
N
EXIO
EXIO
30
60
90
60
90
FULL
RANGE
30
N
N
E
FL
ISTRUZIONI PER LA REGOLAZIONE
Cerniera policentrica con perni
E
30
Entrambi i supporti, a fascia e a calza, hanno
cinturini che si possono stringere. I cinturini devono
essere stretti saldamente, incomin-ciando con i due
più vicine al ginocchio.
15
30
FL
60
90
Il supporto da infilare si
applica tirandolo su con la
finestra della rotula cen-trata
sopra il ginocchio.
Cerniera policentrica con fermi
E
15
30
FULL
RANGE
Il supporto a fascia si applica con le
chiusure sulla parte anteriore della gamba
e la finestra per la rotula centrata sopra il
ginocchio. Fissare saldamente le chiusure.
Polyzentrisches Gelenk mit Stiften
15
30
60
90
(a fascia)
15
Polycentric hinge with pins
SHORTRUNNER
(a fascia)
N
EINSTELLUNGSANLEITUNG
ROADRUNNER
ISTRUZIONI PER L’APPLICAZIONE DEL SUPPORTO DEL GINOCCHIO:
Bei der überziehbaren Schiene wird
die Schiene über das Knie gezogen,
wobei die Kniescheibenöffnung in der
Mitte über dem Knie angelegt wird.
Polyzentrisches Gelenk mit Stopps
(da infilare)
EX T E
Bei der Wickel-Schiene ist der Verschluß
an der Vorderseite angebracht, und die
Kniescheibenöffnung wird in der Mitte über
dem Knie angelegt. Verschlüsse gut festziehen.
SHORTRUNNER
T
EX
Both the wrap-on and pull-on braces
have tightening straps. The straps
should be tightened firmly, starting with
the two straps closest to the knee.
ADJUSTMENT INSTRUCTIONS
Flexion stops:
(da infilare)
Wickel-Modell
60
90
Extension stops:
ROADRUNNER
SHORTRUNNER
Wickel-Modell
ANWENDUNGSANLEITUNG FÜR KNIESCHIENEN:
The slip-on brace is applied
by pulling the brace on with
the kneecap cutout centered
over the knee.
Polycentric hinge with stops
ROADRUNNER
30
APPLICATION INSTRUCTIONS FOR KNEE BRACES:
ADJUSTMENT INSTRUCTIONS
SHORTRUNNER
Wrap-On
90
60
ROADRUNNER
SHORTRUNNER
Wrap-On
90
60
30
ROADRUNNER
N
SHORTRUNNER
The wrap-on brace is applied with
the closures in the front of the leg and
the kneecap cutout centered over the
knee. Secure the closures firmly.
SUPPORTI PER GINOCCHIO ROADRUNNER
ROADRUNNER-KNIESCHIENEN
ROADRUNNER KNEE BRACES
ROADRUNNER
ATTENZIONE:
ATTENZIONE:
VENDITA CONSENTITA SOLO SU AUTORIZZAZIONE MEDICA.
NON UTILIZZARE SU PIU DI UN PAZIENTE.
SE DURANTE L’USO SI ACCUSA UN AUMENTO DI DOLORE, GONFIORE, O QUALUNQUE ALTRA REAZIONI AVVERSA, CONSULTARE IMMEDIATAMENTE IL PROPRIO OPERATORE SANITARIO.
LEGGERE ATTENTAMENTE ISTRUZIONI E AVVERTIMENTI PRIMA DELL’USO.
NON PREVIENE NÉ RIDUCE OGNI LESIONE. PARTE ESSENZIALE DI UN PROGRAMMA TERAPEUTICO COMPLETO SONO ANCHE UNA RIABILITAZIONE ADEGUATA E LA MODIFICA DELLE ATTIVITA SVOLTE.
15
WARNUNG:
WARNUNG:
ATTENZIONE:
ATTENZIONE:
ATTENZIONE:
LAUT GESETZ DARF DIESES GERÄT NUR VON EINEM ARZT ODER AUF ANWEISUNG EINES ARZTES VERKAUFT WERDEN.
DARF NUR VON EINEM PATIENTEN VERWENDET WERDEN.
WENN BEI DER VERWENDUNG STARKE SCHMERZEN, SCHWELLUNGEN ODER ANDERE NEBENWIRKUNGEN AUFTRETEN, KONSULTIEREN SIE BITTE SOFORT IHREN ARZT.
LESEN SIE VOR DER VERWENDUNG DIE ANWEISUNGEN UND VORSICHTSMASSNAHMEN SORGFÄLTIG DURCH.
DIESES GERÄT KANN NICHT ALLE VERLETZUNGEN VERHINDERN ODER LINDERN. ENTSPRECHENDE REHABILITATION UND AKTIVITÄTSEINSCHRÄNKUNG SIND EIN WICHTIGER BESTANDTEIL EINER SICHEREN BEHANDLUNG.
IO
VORSICHT:
VORSICHT:
VORSICHT:
0
WARNING:
WARNING:
FEDERAL LAW RESTRICTS THIS DEVICE TO SALE BY OR ON THE ORDER OF A LICENSED HEALTH CARE PRACTITIONER.
FOR SINGLE PATIENT USE ONLY.
IF YOU EXPERIENCE INCREASED PAIN, SWELLING, OR ANY ADVERSE REACTIONS WHILE USING THIS PRODUCT, IMMEDIATELY CONSULT YOUR MEDICAL PROFESSIONAL.
CAREFULLY READ USE INSTRUCTIONS AND WARNINGS PRIOR TO OPERATION.
THIS DEVICE WILL NOT PREVENT OR REDUCE ALL INJURIES. PROPER REHABILITATION AND ACTIVITY MODIFICATION ARE ALSO AN ESSENTIAL PART OF A SAFE TREATMENT PROGRAM
S
CAUTION:
CAUTION:
CAUTION:
Flessione
Con il supporto vengono forniti i fermi sia per la flessione che per
l’estensione. Il supporto è dotato dei fermi di estensione a 10° già installati.I
fermi sono muniti di etichetta con la dicitura in gradi di questo tipo:
Le regolazioni della cerniera sono contrassegnate in gradi come segue:
Fermi di estensione: 0°, 10°, 20°, 30°, e 40°
Fermi di flessione: 45°, 60° , 75° e 90°
regolazioni di estensione: 0°, 10°, 30°, 50°, 70°, 90° e 110°
regolazioni di flessioni; 0°, 10°, 30°, 50°, 70°, 90° e 110°
(I fermi non sono installati al momento della spedizione).
Per modificare la posizione dei fermi, anzitutto estrarre completamente
la vite come illustrato. Poi rimuovere il fermo. Inserire il nuovo
fermo, allinearlo con i fori della cerniera, poi inserire di nuovo la
vite. Mediante un cacciavite a croce, assicurarsi che la vite sia ben
posizionata e serrata nel suo ricettacolo. Sia il fermo mediale (interno)
che quello laterale (esterno) devono avere una gradazione identica.
Per cambiare la regolazione, prima aprire la copertura della cerniera
come illustrato. Quindi spostare i perni alla regolazione di estensione
e/o di flessione desiderata sia per la parte superiore che inferiore della
gamba. Dopo aver completato la regolazione, chiudere la copertura
della cerniera. Le graduazioni di entrambe le cerniere sia mediale
(interna) che laterale (esterna) debbono essere identiche in gradi.
NOTA: a causa della compressione dei tessuti molli, si raccomanda
l’uso di fermi di estensione di almeno 10° superiori al limite
desiderato. (Per es., se si desidera un limite di estensione di 10°,
usare fermi di estensione di 20°).
Estensione
Parte inferiore della gamba
NOTA: a causa della compressione dei tessuti molli, si raccomanda
l’uso di fermi di estensione di almeno 10° superiori al limite
desiderato (Per es., se si desidera un limite di estensione di 10°, usare
fermi di estensione di 20°).
SUGGERIMENTI PER L'USO E LA CURA DEL SUPPORTO DEL GINOCCHIO
•
•
•
•
•
Dopo un’esposizione ad acqua salata o sporcizia, lavare accuratamente il supporto con acqua dolce ed lasciar asciugare all’aria.
Occasionalmente si può usare sulle cerniere un lubrificante asciutto, come un aerosol al teflon. Non usare lubrificanti liquidi.
Le parti della cerniera possono essere rimosse per permettere un più facile lavaggio della manica e dei cinturini.
Le barre laterali possono essere piegate, come illustrato nella figura 1 per adattarle alle gambe individualmente. Piegare in misura uguale al di sopra, al di sotto e su ogni lato della cerniera.
Ispezionare periodicamente la manica, i cinturini e le cerniere per verificare che non siano eccessivamente logorati. Assicurarsi che le viti siano serrate e i fermi siano a posto.