1
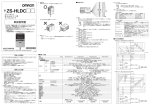
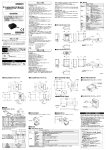
形 茶 (1) 電源 青 (2) GND 赤 (3) OUT0 緑 (4) OUT1 黒 (5) OUT2 桃 (6) OUT3 灰 (7) OUT4 同軸(黒) (8) アナログ出力 シールド (9) アナログ GND 黄 (10) INO 水色 (11) IN1 紫 (12) IN2 白 (13) IN3 橙 ■外部入出力 3. 設置方向 放熱を良くするため、次の方向のみで設置してください。 ZG-WDC□□ スマートセンサ 形 ZG-WDS□□□用 センサコントローラ (10)IN0(バンクA入力) (11)IN1(バンクB入力) バンクを切替える時に使用します。 A、Bの組合せでバンク番号を指定します。 (12)IN2(LD-OFF 入力) ON状態にするとレーザ点灯が停止、 OFF状態にするとレーザ点灯開始します。 (13)IN3(ZERO-RESET 入力) ゼロリセットの実行・解除を行います。 (14)IN4(TRIG入力) 外部トリガ入力。計測タイミングを規定します。 (14)IN4 (1) 電源 DC24V(±10%)の電源を接続します。PNP タイプの場合は、アナログ出力 以外の入出力コモン端子になります。 次のような方向では設置しないでください。 取扱説明書 ・ 電圧は高電圧が発生しないように対策 ( 安全超低電圧回路 )され ている直流電源装置から供給してください。 ・ 電源は他の機器とは独立して配線してください。同一配線あるいは 同一ダクトにすると誘導を受け、誤動作あるいは破損の原因となり ます。 このたびは、本製品をお買い上げいただきまして、まことにありがと うございます。ご使用に際しては、次の内容をお守りください。 ・電気の知識を有する専門家が扱ってください。 ・この取扱説明書をよくお読みになり、十分にご理解のうえ、正しく ご使用ください。 ・この取扱説明書はいつでも参照できるように大切に保管ください。 4. 清掃について ・ シンナー、ベンゼン、アセトン、灯油類は装置表面を溶かしますので避けてくだ さい。 ・ 小さなゴミや埃は柔らかい布(レンズクリーナなど)にアルコールを少量含ませて 丁寧に拭き取ってください。呼気で吹き飛ばしたり強く拭くことは傷の原因になりま すので避けてください。 5. 万一、異常を感じた時はすぐに使用を中止し電源を切った上で当社支店・営業 所までご相談ください。 (2)GND 電源用 0V 接続線です。NPN タイプの場合、アナログ出力以外の入出力コモ ン端子となります。 (3)OUT0(ALL-PASS 出力) 判定結果(ALL-PASS)を出力します。 (4)OUT1(NG 出力) 判定結果(NG)を出力します。 (5)OUT2(ERROR 出力) エラーが発生した場合に ONします。 (6)OUT3(ENABLE 出力) TRIG 入力が可能な期間に ONします。 (7)OUT4(GATE 出力) 外部装置が計測結果を取込む為のタイミング通知出力です。 (8) アナログ出力 計測の結果に応じた電流または電圧値を出力します。 (9) アナログ GND アナログ出力用0V接続線です。 * 9 9 7 5 1 1 3 - 9 E * © OMRON Corporation 2006-2008 All Rights Reserved. 項目 入出力タイプ ヘッド接続台数 画像入力周期 最小表示単位 表示範囲 液晶モニタ 表示 LED アナログ出力 使用上の注意 製品が動作不能、誤動作、または性能・機器への悪影響を防ぐため、以下の事を 守ってください。 1. 下記の設置場所では使用しないでください。 ・直射日光のあたる場所や暖房器具のそば ・湿度が高く結露する恐れのある場所 ・湿度変化が急激な場所 ・凍結するような寒冷な場所 ・腐食および可燃性ガスが発生する場所 ・本体に直接振動や衝撃が加わる場所 ・ホコリや金属粉などがたまる場所 ・化学薬品や水、油などが本体にかかる場所 ・強磁界、強電界の場所 ・強い外乱光 ( レーザ光、アーク溶接光など ) や強い電磁波が発生している 場所 2. 電源および配線について ・ 電源の逆接続および交流電源への接続はしないでください。 ・ オープンコレクタ出力は、負荷を短絡させないでください。 ・ センサヘッドとセンサコントローラ間のコードの延長には、別売りの延長ケー ブルを使用します。延長ケーブルの種類によって全長が異なります。 長距離延長コード形 ZG-XC□□CR:全長3m、8m、15m、25m (センサ ヘッドのコード部分含まず)デジタルイコライザ形:ZG-XEQ とデジタル イコライザ接続ケーブル形:ZG-XC02D が必要。 ・ 高圧線、動力線と当製品の配線は別配線としてください。同一配線ある いは同一ダクトにすると誘導を受け、誤動作あるいは破損の原因になるこ とがあります。 ・ 市販のスイッチングレギュレータを使用する場合は、FG(フレームグランド) 端子を接地してください。 ・ 電源ラインにサージがある場合、使用環境に応じてサージアブソーバを接 続しご使用ください。 ・ センサヘッドの着脱は、必ずセンサコントローラの電源を切った状態で行っ てください。電源 ON のまま行うと故障の原因になります。 ・ センサヘッドとセンサコントローラは、指定の組み合わせでご使用ください。 茶 DC24V 負荷 入出力信号線 外部 I/F シリアル I/O 主な機能 定格 耐環境性 材質 コード長 質量 付属品 赤 OUT0 緑 OUT1 黒 OUT2 桃 OUT3 灰 OUT4 青 GND(0V) 黄 IN0 負荷 負荷 負荷 負荷 DC24V ■定格 / 性能 以下に示すような項目は安全を確保する上で必要なことですので、必ず守ってくださ い。 1. 引火性、爆発性ガスの環境では使用しないでください。 2. この製品は分解したり、修理、改造をしないでください。 3. ロック機構のあるものは必ずロックしていることを確認してからご使用ください。 4. 定格電圧を超える電圧や交流電源を使用しないでください。 5. 負荷は定格以下でご使用ください。 6. 廃棄するときは、産業廃棄物として処理してください。 7. 原子力や人命に関わる装置などの安全回路には使用しないでください。 ・NPN タイプ(形 ZG-WDC11/WDC11A) ・通常の GND とは分離して接地してください。 ・アナログ出力を使用しない場合でも、必ず接地してください。 (1/2) 安全上の要点 ■入出力段回路図 判定出力 (ALL-PASS/ NG/ERROR) トリガ補助出力 (ENABLE/ GATE) レーザ停止入力 (LD-OFF) ゼロリセット入力 (ZERO) 計測トリガ入力 (TRIG) バンク切替入力 (BANKA,B) USB2.0 RS-232C 設定登録数 感度調整機能 計測項目(アイテム) トリガモード 電源電圧 消費電流 絶縁抵抗 耐電圧 周囲温度 周囲湿度 保護構造 振動(耐久) 衝撃(耐久) 形 ZG-WDC11/WDC11A 形 ZG-WDC41/WDC41A NPN タイプ PNP タイプ 1 台 / コントローラ 16ms (高精度)、8ms (標準)、5ms (高速) 10nm −999.99999∼999.99999 1.8 インチ TFT カラーLCD (557×234p i x) ・タスクごと判定表示灯(表示色:オレンジ) :T1、 T2、 T3、 T4 ・レーザ表示灯(表示色:グリーン) :LD ON ・ゼロリセット表示灯(表示色:グリーン) :ZERO ・トリガ表示灯(表示色:グリーン) :TR IG 電圧・電流の2通りから選択(下面スライドスイッチにて切替) ・電圧出力時:−10∼+10V 出力インピーダンス:40Ω ・電流出力時:4∼20mA 最大負荷抵抗:300Ω NPNオープンコレクタ DC30V、50mA max 残留電圧 1.2V以下 PNPオープンコレクタ 50mA max 残留電圧 1.2V以下 ON時:0V短絡または 1.5V以下 OFF時:開放(漏れ電流 0.1mA以下) ON時:電流電圧短絡または電流電圧 -1.5V以下 OFF時:開放(漏れ電流 0.1mA以下) 1ポート、 FULLSPEED [12Mbps]、MINI-B 1ポート、最大115200bps 16 バンク マルチ / オート / 固定 高さ/2 点段差 /3 点段差 / エッジ位置 / エッジ幅 / 傾き / 断面積(最大 8 項目同時計測可能) 外部トリガ / 連続 DC21.6 ∼ 26.4V (リップル成分含む) 0.8A以下 リード線一括とコントローラケース間:20Ω (250Vメガにて) リード線一括とコントローラケース間:AC1000V 50/60Hz 1mi n 動作時:0∼+50℃ 保存時:−15 ∼+60℃ (ただし氷結・結露しないこと) 動作時・保存時:35∼85%RH (ただし結露しないこと) I P20(I EC60529) 振動周波数:10∼150Hz 片振幅:0.35mm 加速度:50m/s 150m/s2 6方向 各 3 回(上下・左右・前後) 筐体:ポリカーボネート(PC)、コード被覆部:耐熱塩化ビニール 2m 約300g (コード部含む)(梱包状態:約450g) 形 ZG-WDC□1:フェライトコア大 (1個 )、取扱説明書 ( 本書 ) 形 ZG-WDC□1A:フェライトコア大 (1個 )、フェライトコア小 (2個 )、 取扱説明書 ( 本書 )、設定用ソフトウェア (CD-ROM) 内 部 回 路 水色 IN1 紫 IN2 白 IN3 橙 IN4 電流出力 4 ∼ 20mA 電流/電圧出力 切替スイッチ 40Ω 同軸(黒) アナログ出力 シールド アナログ GND 電圧出力 ±10V 負荷 電流出力:300Ω以下 電圧出力:10kΩ以上 ・PNP タイプ(形 ZG-WDC41/WDC41A) 茶 DC24V 赤 OUT0 緑 OUT1 黒 OUT2 桃 OUT3 灰 OUT4 負荷 負荷 負荷 DC 24V 負荷 負荷 内 部 回 路 青 GND(0V) 黄 IN0 IN1 水色 紫 IN2 白 IN3 橙 IN4 電流出力 4 ∼ 20mA 電流/電圧出力 切替スイッチ 40Ω 同軸(黒) アナログ出力 シールド アナログ GND 電圧出力 ±10V 負荷 電流出力:300Ω以下 電圧出力:10kΩ以上 ■フェライトコアの装着 ■外形寸法図 (5) 操作キー 計測条件など設定するための操作キーです。 センサコントローラの入出力コードに、フェライ トコア ( 付属品)を装着してください。 (単位:mm) 3.1 23.7 PLEASE SELECT LANGUAGE ENG JPN (8) 液晶モニタ センサヘッドから取込んだプロファイルデータや設定メニューなどを表示します。 35.5 (10)LD ON LED レーザ投光時に点灯、レーザ非投光時に消灯します。 LEFT key (11)ZERO-RESET LED ゼロリセット設定有効時に点灯、無効時に消灯します。 10.8 13 10 (13) 連結部(未使用) コントローラの両側面にあります。 32.9 (14)RS-232C コネクタ プログラマブルコントローラ、プログラマブルターミナルまたはパソコンと接続するために、 RS-232C ケーブルを接続します。 RS-232C ケーブルは、必ず以下の専用品をご使用ください。専用品以外のケーブ ルを使用した場合、 誤動作や故障の原因となります。 35mm 幅の DIN レールにワンタッチで取付ける方法について説明します。 [ プログラマブルコントローラもしくはプログラマブルターミナル接続用 ] 形 ZS-XPT2 [ パソコン接続用 ] 形 ZS-XRS2 ①コネクタ側のツメを DIN レールに引っかけ ます。 コネクタ側のツメ ②入出力コード側のフックがロックされるまで DINレールに押し込みます。 “カチッ” と音がするまで押し込んでください。 SET key (12)TRIG LED TRIG信号入力中に点灯、それ以外の期間に消灯します。 24.2 エンドプレート(別売) 形 PFP-M MENU key RIGHT key 18 DIN レール(別売) 形 PFP-100N(1m) 形 PFP-50N(0.5m) 形 PFP-100N2(1m) ■DIN レールの取付け 3.9 φ11.7 ■取付方法 (9) センサヘッド接続コネクタ センサヘッド(専用品)を接続します。 4.3 90 注:ケーブルは2ターンして取付けてください。 27.9 フェライ トコア インシュロック 製品開梱後、初回電源投入時に限り、メッセージ切替え画面が自動的に表示さ れます。左右キーで[ENG( 英語 )]もしくは[JPN( 日本語 )]を選択し、SET キーで決定してください。 起動すると、選択内容が反映されます。 なお、2回目以降の電源投入時に本言語選択メニューを起動したい場合には、 MENUキーを押しながら電源を投入してください。 (7) モード切替スイッチ 操作モードを切替えます。 FUN:計測条件・各種機能を設定するときに選択します。 ADJ :判定しきい値の調整をするときに選択します。 RUN:通常計測するときに選択します。 52.5 60 (6) メニュー切替スイッチ 設定メニューを切替えます。 STD:標準メニュー。計測で必要な最低限の項目を設定するときに選択します。 EXP:エキスパートメニュー。より詳細な設定をするときに選択します。 ■表示言語の切替え方法 ■各部の名称と機能 (15) 電圧/電流切替スイッチ 電圧出力と電流出力を選択します。 このスイッチの操作は、必ず電源を切った状態で行ってください。 また電源投入前に「リニア出力線 ( 同軸 )-リニア GND 線」の接続負荷が、 設定状態 ( 電圧または電流出力 ) の定格 ( 入出力段回路図を参照 ) を 満足することを必ず確認してください。 コントローラが故障する恐れがあります。 (10) LD ON LED (11) ZERO-RESET LED 入出力コード側の フック (12) TRIG LED (9)センサヘッド接続コネクタ 連結してご使用される場合は、DIN レールにはあらかじめエンドプレ ート(別売 形 PFP-M)を取付けてください。 コネクタ側のツメをレールにかけて取付けてください。入出力コード 側のフックをレールにかけて取付けると取付け強度が低下します。 (1)T1 LED (2)T2 LED (3)T3 LED (4)T4 LED (5)操作キー (6)メニュー切替えスイッチ ■DIN レールの取外し (16) 入出力コード 電源および同期センサやプログラマブルコントローラなどの外部装置と接続。 (8)液晶モニタ (17)USBポート パソコンと接続するために、 USBケーブルを接続します。コネクタタイプ:MINI-B (7)モード切替えスイッチ (13)連結部 センサコントローラを DIN レールから取外す方法について説明します。 (14)RS-232Cコネクタ (17)USBポート ①センサコントローラの入出力コード側のフック を下に引きます。 (15)電圧/電流切替スイッチ (16)入出力コード ご使用に際してのご承諾事項 ①安全を確保する目的で直接的または間接的に人体を検出する用途に、 本製品を使用し ないでください。同用途には、 当社センサカタログに掲載している安全センサをご使用く ださい。 ②下記用途に使用される場合、 当社営業担当者までご相談のうえ仕様書などによりご確 認いただくとともに、 定格・性能に対し余裕を持った使い方や、 万一故障があっても危険 を最小にする安全回路などの安全対策を講じてください。 a)屋外の用途、 潜在的な化学的汚染あるいは電気的妨害を被る用途 またはカタログ、 取扱説明書等に記載のない条件や環境での使用 b)原子力制御設備、 焼却設備、 鉄道・航空・車両設備、 医用機械、 娯楽機械、 安全装置、 および行政機関や個別業界の規制に従う設備 c)人命や財産に危険が及びうるシステム・機械・装置 d)ガス、 水道、 電気の供給システムや24時間連続運転システムなどの 高い信頼性が必要な設備 e)その他、 上記 a) ∼ d) に準ずる、 高度な安全性が必要とされる用途 *上記は適合用途の条件の一部です。当社のベスト、 総合カタログ・データシート等最新版 のカタログ、 マニュアルに記載の保証・免責事項の内容をよく読んでご使用ください。 インダストリアルオートメーションビジネスカンパニー ●お問い合わせ先 ②入出力コード側から持ち上げて、DIN レー ルから外します。 カスタマサポートセンタ 入出力コード側の フック フリーコール 01 2 0 - 9 19 - 0 6 6 携帯電話・PHSなどではご利用いただけませんので、 その場合は下記電話番号へおかけください。 電話 (1)T1 LED TASK1/TASK5の判定結果が「OK」の場合に点灯、 「NG」「エラー」「TASK未 登録」の場合に消灯します。 (2)T2 LED TASK2/TASK6の判定結果が「OK」の場合に点灯、 「NG」「エラー」「TASK未 登録」の場合に消灯します。 (3)T3 LED TASK3/TASK7の判定結果が「OK」の場合に点灯、 「NG」「エラー」「TASK未 登録」の場合に消灯します。 (4)T4 LED TASK4/TASK8の判定結果が「OK」の場合に点灯、 「NG」「エラー」「TASK未 登録」の 場合に消灯します。 055-982-5015 (通話料がかかります) 〔技術のお問い合わせ時間〕 ■営業時間:8:00∼21:00 ■営 業 日:365日 ■上記フリ−コ−ル以外のセンシング機器の技術窓口: 電話 055-982-5002 (通話料がかかります) 〔営業のお問い合わせ時間〕 ■営業時間:9:00∼12:00/13:00∼17:30 (土・日・祝祭日は休業) ■営 業 日:土・日・祝祭日/春期・夏期・年末年始休暇を除く センサコントローラ形 ZG-Wシリ−ズの詳細な機能および操作に関しては別冊(別 売り)のユーザーズマニュアル(カタログ番号 SCHE-736A)を用意していますので、 お取引き商社にお問い合わせください。 なお、ユーザーズマニュアルは下記よりダウンロード(無料)も可能です。 http://www.fa.omron.co.jp/ ●FAXによるお問い合わせは下記をご利用ください。 カスタマサポートセンタ お客様相談室 FAX 055-982-5051 ●その他のお問い合わせ先 納期・価格・修理・サンプル・仕様書は貴社のお取引先、 または貴社担当オムロン営業員にご相談ください。 q 2 0 0 9 年 1 0月 3. Orientation when Installing the Sensor Controller To improve heat radiation, install the Sensor Controller only in the orientation show below. ■External I/O Correct Model ZG-WDC□□ Smart Sensor Sensor Controller for ZG-WDS□□□ Do not install the Sensor Controller in the following orientations. INSTRUCTION SHEET Incorrect Manufacturer: Omron Corporation, Shiokoji Horikawa, Shimogyo-ku, Kyoto 600-8530 JAPAN Ayabe Factory 3-2 Narutani, Nakayama-cho, Ayabe-shi, Kyoto 623-0105 JAPAN ・ Supply power from a DC power supply unit that has a countermeasure (safety ultra-low voltage circuit) built-in for preventing high voltages from occurring. ・ Wire the power supply separately from other devices. Wiring them together or placing them in the same duct may cause induction, resulting in malfunction or damage. 4. Cleaning ・ Do not use paint thinner, benzene, acetone or kerosene to clean the Sensor Controller. Doing so will melt the surface of the Sensor Controller. ・ Use commercially available alcohol. The following notice applies only to products that carry the CE mark: Notice: This is a class A product. In residential areas it may cause radio interference, in which case the user may be required to take adequate measures to reduce interference. (1) Power supply (2) GND (3) OUT0 (4) OUT1 (5) OUT2 (6) OUT3 (7) OUT4 (8) Analog output (9) Analog GND (10) IN0 (11) IN1 (12) IN2 (13) IN3 (14) IN4 (1) Power supply This connects the 24 V DC (±10%) power supply. When using a Sensor Controller with a PNP output, the power supply terminal is also the common I/O terminal for all I/O except for the Analog output. Incorrect Thank you for selecting OMRON product. This sheet primarily describes precautions required in installing and operating the product. Before operating the product, read the sheet thoroughly to acquire sufficient knowledge of the product. For your convenience, keep the sheet at your disposal. TRACEABILITY INFORMATION: Representative in EU: Omron Europe B.V. Wegalaan 67-69 2132 JD Hoofddorp, The Netherlands Brown Blue Red Green Black Pink Gray Co-axial (black) Shield Yellow Light blue Purple White Orange (2) GND The GND terminal is the 0V power supply terminal. When using a Sensor Controller with an NPN output, the GND terminal is also the common I/O terminal for all I/O except for the Analog output. (3) OUT0 (ALL PASS output) This outputs judgment results (ALL PASS). (4) OUT1 (NG output) This outputs judgment results (NG). (5) OUT2 (ERROR output) This turns on when an error is generated. (6) OUT3 (ENABLE output) This turns ON when the sensor is ready for TRIG input. (7) OUT4 (GATE output) This turns ON when the measurement data can be aquired. (8) Analog output The Analog output outputs a current or voltage in accordance with the measured value. (9) Analog GND The Analog GND terminal is the 0V terminal for the Analog output. ・This ground wire must be grounded separately from the other ground wires. ・Always ground the Analog output terminal even when Analog output is not used. (10) IN0 (BANK A) Bank switching input A. (11) IN1 (BANK B) Bank switching input B. (12) IN2 (LD-OFF) Laser ON/OFF switch input. If this signal is set on,the laser will stop emission. (13) IN3 (ZERO-RESET) Zero reset input. (14) IN4 (TRIG) External Trigger input. ■I/O circuit diagrams ・NPN type (ZG-WDC11/WDC11A) Load Red * 9 9 7 5 1 1 3 - 9 E * (2/2) PRECAUTIONS FOR SAFE USE Please observe the following precautions for safe use of the product: 1. Do not use the product in environments where it can be exposed to inflammable/explosive gas. 2. Do not disassemble, repair or modify this product. 3. Be sure to make sure that locking mechanisms are locked before use. 4. The supply voltage must be within the rated range. 5. Use the power supply within the rated load. 6. Dispose of this product as industrial waste. Item Output method No. of mounted Sensors Measurement time Unit of minimum display Range of display Display LCD monitor LED monitor Analog output PRECAUTIONS FOR CORRECT USE 1. Do not install the product in locations subjected to the following conditions: ・ Direct sunlight or near heaters ・ Condensation caused by high humidity ・ Sudden changes in humidity ・ Cold conditions that may cause freezing ・ Presence of corrosive or flammable gases ・ Direct vibration or shock ・ Build-up of dust or metal chips ・ Spraying by organic solvents, water, oil or other liquids ・ Strong magnetic or electric field ・ Reflection of intense light (such as other laser beams or electric arc-welding machines) 2. Power Supply and Wiring ・ Reverse connection of power supply is not allowed. Connection to AC power supply is also not allowed. ・ Open-collector outputs should not be short-circuited. ・ Use the Extension Cable for extending the cable between the Sensor Head and Sensor Controller. The total length differs according to the Extension cable. Extension Cable ZG-XC□□CR: length 25m/15m/8m/3m *Optional ZG-XEQ(Digital Equalizer) and ZG-XC02D(Conversion Cable) are necessary. ・ High-voltage lines and power lines must be wired separately from this product. Wiring them together or placing them in the same duct may cause induction, resulting in malfunction or damage. ・ When using a commercially available switching regulator, make sure that the FG (Frame Ground) terminal is grounded. ・ If surge currents are present in the power lines, connect surge absorbers that suit the operating environment. ・ Before connecting/disconnecting the Sensor Head, make sure that the Sensor Controller is turned OFF. The Sensor Controller may break down if it is connected or disconnected while the power is ON. ・ Use only the specified combinations of Sensor Head and Sensor Controller. Model Output External I/F Input Serial I/O Functions Judgement output (ALL-PASS/NG/ERROR) Trigger assistance output (ENABLE/GATE) Laser off input(LD-OFF) Zero reset input(ZERO-RESET) Trigger input (TRIG) Bank setting input(BANK A/BANK B) USB2.0 RS-232C Bank selection Sensitivity adjustment Measurement items Trigger mode Power supply voltage Current consumption Dialectic strength Ambient temperature Ambient humidity Degree of protection Vibration resistance (destructive) Shock resistance (destructive) Materials Cord length Weight Accessories ZG-WDC11/WDC11A ZG-WDC41/WDC41A NPN PNP 1 per Sensor Controller 5ms/8ms/16ms 10nm -999.99999~999.99999 TFT1.8-inch Color LCD (display dots:557234pix) ・Judgement result indicator (color:orange):T1/T2/T3/T4 ・Laser on indicator (color:green):LD ON ・Zero reset indicator (color:green):ZERO-RESET ・Trigger indicator (color:green):TRIG Selectable from 2types voltage/current output (selected by side switch on base) ・At voltage output:-10 to +10V,output impedance:40ǡ ・At current output:4 to 20mA,max.load resistance:300ǡ OUT0 OUT1 Black OUT2 Pink OUT3 Gray OUT4 Blue GND (0V) Yellow IN0 Light blue IN1 Purple IN2 White IN3 PNP open-collector,50mA max., Residual voltage:1.2V max. ON:Short-circuited with 0V terminal or 1.5V or less OFF:Open (leakage current:0.1mA max.) ON:Supply voltage short-circuited or within supply voltage -1.5V max. OFF:Open (leakage current:0.1mA max.) 1 port,FULL-SPEED[max.12Mbps],MINI-B 1 port,max. 115200bps 16banks per Sensor Controller MULTI/AUTO/FIXED HEIGHT/2PTS/3PTS/EDGE/WIDTH/ANGLE/AREA/CALC(Simultaneous measurement is possible by max 8 items.) External trigger/Continuous 21.6V DC to 26.4V DC(including ripple) 0.8A max. Across all lead wires and controller case,1000VAC,50/60Hz,1min Operating:0 to 50℃,Storage:-15 to 60℃ (with no icing or condensation) Operating and storage:35% to 85% RH (with no condensation) IEC60529,IP20 Destruction:10 to 150Hz,0.35-mm single amplitude,10 times each X,Y,and Z directions for 8min Destruction:150m/s 2 ,3 times each 6 directions(up/down,left/right,forward/backward) Polycarbonate 2m Approx.300g(including cord) Instruction sheet(this paper),Ferrite core(1) Load Load Load Orange Current output 4 to 20mA Current/voltage output switch 40Ω Co-axial (black) Analog output Load Current output: 300 Ω or lower Voltage output: 10 kΩ or higher Voltage output ±10V Shield NPN open-collector,30VDC,50mA max., Residual voltage:1.2V max. Load Green 24 V DC Internal circuit ■Specifications Analog GND ・PNP type (ZG-WDC41/WDC41A) Brown 24 V DC Red OUT0 Green OUT1 Black OUT2 Load Load Pink OUT3 Gray OUT4 Load 24 V DC Load Load Blue Internal circuit © OMRON Corporation 2006-2008 All Rights Reserved. 24 V DC Brown Yellow GND(0V) IN0 Light blue IN1 Purple IN2 White IN3 Orange Current output 4 to 20mA Current/voltage output switch 40Ω Co-axial (black) Analog output Shield Analog GND Load Current output: 300 Ω or lower Voltage output: 10 kΩ or higher Voltage output ±10V ■Attaching the ferrite core ■Dimensions Attach the ferrite core (provided with the Sensor Controller) to the I/O cable of the Sensor Controller. (unit: mm) (7) Mode selector switch This switch selects the operating mode. FUN : Select this mode when setting measurement conditions. ADJ : Select this mode when adjusting the judgement threshold value. RUN : Select this mode when performing measurement. Output is performed only when the RUN mode is currently selected. 52.5 3.1 60 23.7 35.5 (9) Sensor Head connector This connector connects the Sensor Head. 4.3 3.9 10.8 RIGHT key LEFT key 32.9 24.2 (15) Voltage/current switch The Voltage/Current switch selects between voltage output and current output. End plate (sold separately) PFP-M Before operating this switch, make sure that the Sensor Controller is turned OFF. Also, make sure that the load connected to "Analog output wire (co-axial) - Analog GND wire" satisfies the rating (see I/O circuit diagram) of the set state (voltage or current output) before turning the Sensor Controller ON. Otherwise, the Sensor Controller may be damaged. ① Hook the hook on the connector end onto the DIN track. Hook on connector end (16)I/O cable The I/O cable connects the Sensor Controller to the power supply and external devices, such as sync sensors or programmable controllers. ■Part Names and Functions Hook on I/O cable end (10) LD ON indicator (17)USB port Connect the USB cable to the USB port to connect to a personal computer. (11) ZERO-RESET indicator (12) TRIG indicator (9)Sensor Head connector When Sensor Controllers are used gang-mounted, attach the End Plate (sold separately PFP-M) on the DIN track beforehand. Always hook the hook on the connector end on the DIN track first. Hooking the I/O cable end on the DIN track first may impair the mounting strength of the DIN track attachment. ■Removing the DIN track (1)T1 indicator (2)T2 indicator (3)T3 indicator (4)T4 indicator (5)Control keys (6)Menu selector switch (7)Mode selector switch (14)RS-232C connector (17)USB port THE PRODUCTS CONTAINED IN THIS SHEET ARE NOT SAFETY RATED. THEY ARE NOT DESIGNED OR RATED FOR ENSURING SAFETY OF PERSONS, AND SHOULD NOT BE RELIED UPON AS A SAFETY COMPONENT OR PROTECTIVE DEVICE FOR SUCH PURPOSES. Please refer to separate catalogs for OMRON's safety rated products. Take all necessary steps to determine the suitability of the product for the systems, machines, and equipment with which it will be used. Know and observe all prohibitions of use applicable to this product. (13)Coupler Pull the hook on the I/O cable end of the Sensor Controller downwards. Suitability for Use OMRON shall not be responsible for conformity with any standards, codes, or regulations that apply to the combination of the products in the customer's application or use of the product. (8)LCD monitor The following describes how to remove the Sensor Controller from the DIN track. (15)Voltage/current switch (16)I/O cable Lift up the Sensor Controller from the I/O cable, and remove it from the DIN track. SET key (14) RS-232C connector Connect the RS-232C cable when you are connecting the Sensor Controller to a PLC or a personal computer. The following describes how to attach the 35 mm wide DIN track by quick, easy operation. ② MENU key JPN (13) Coupler not used. DIN track (sold separately) PFP-100N (1 m) PFP-50N (0.5 m) PFP-100N2 (1 m) ① ENG (12) TRIG indicator The TRIG indicator lights while inputting the trigger signal. 13 10 Push the Sensor Controller down onto the DIN track until the hook on the I/O cable side is locked. Push down until you hear it snap into place. PLEASE SELECT LANGUAGE (11)ZERO-RESET indicator The ZERO-RESET indicator lights when the zero reset function is enabled. ■Mounting ② *If you want to start language selection menu since the second times,Please turn on power while pushing the menu key. (10) LD ON indicator The LD ON indicator lights while the Sensor Head is emitting a laser beam. 18 ■Installing the DIN track ■How to Switch the Display Language to English Only when power supply first time is turned on,The language switch menu is automatically displayed.Please select[ENG(English)] or [JPN(Japanese)] with a right and left key,and decide it with the SET key. The content of the selection is reflected when starting. (8) LCD monitor The LCD monitor displays setup menus and images captured from the sensor head. 27.9 90 *Please two turns and install the cable. dia11.7 (6) Menu selector switch This switch selects the setup menu. STD : Standard menu.Select this mode when setting the minimum require items for measurement. EXP : Expert menu.Select this mode when making a more detailed setup. NEVER USE THE PRODUCTS FOR AN APPLICATION INVOLVING SERIOUS RISK TO LIFE OR PROPERTY WITHOUT ENSURING THAT THE SYSTEM AS A WHOLE HAS BEEN DESIGNED TO ADDRESS THE RISKS, AND THAT THE OMRON PRODUCT IS PROPERLY RATED AND INSTALLED FOR THE INTENDED USE WITHIN THE OVERALL EQUIPMENT OR SYSTEM. See also Product catalog for Warranty and Limitation of Liability. Hook on I/O cable end (1) T1 indicator The T1 indicator lights When the judgement result of TASK1/TASK5 is [OK]. (2) T2 indicator The T2 indicator lights When the judgement result of TASK2/TASK6 is [OK]. (3) T3 indicator The T3 indicator lights When the judgement result of TASK3/TASK7 is [OK]. (4) T4 indicator The T4 indicator lights When the judgement result of TASK4/TASK8 is [OK]. (5) Control keys The Control keys are for setting measurement conditions and information. EUROPE OMRON EUROPE B.V. Sensor Business Unit Carl-Benz Str.4, D-71154 Nufringen Germany Phone:49-7032-811-0 Fax: 49-7032-811-199 NORTH AMERICA OMRON ELECTRONICS LLC One Commerce Drive Schaumburg,IL 60173-5302 U.S.A. Phone:1-847-843-7900 Fax : 1-847-843-7787 ASIA-PACIFIC OMRON ASIA PACIFIC PTE. LTD. No. 438A Alexandra Road #05-05-08(Lobby 2), Alexandra Technopark, Singapore 119967 Phone : 65-6835-3011 Fax :65-6835-2711 CHINA OMRON(CHINA) CO., LTD. Room 2211, Bank of China Tower, 200 Yin Cheng Zhong Road, PuDong New Area, Shanghai, 200120, China Phone : 86-21-5037-2222 Fax :86-21-5037-2200 OMRON Corporation o OCT, 2009