1
※組立てる前にこの説明書を良くお読みになり十分に理解してください。
Before commencing assembly, please read these instructions thoroughly!
R
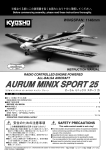
WINGSPAN: 1000mm
THE FINEST RADIO CONTROL MODELS
For Advanced Flyers.
上級者向
組立/取扱説明書
INSTRUCTION MANUAL
RADIO CONTROLLED .15 ENGINE POWERED
F-86F セーバー
DUCTED FAN AIRCRAFT
目 次 INDEX
2
●キットの他にそろえる物
REQUIRED FOR OPERATION
●組立て前の注意
BEFORE YOU BEGIN
●本体の組立て
ASSEMBLY
●スペアパーツ
SPARE PARTS
●取扱いの注意
OPERATING YOUR MODEL SAFELY
安全のための注意事項
この無線操縦模型は玩具ではありません!
●この商品は高い性能を発揮するように設計されています。
組立てに不慣れな方は、模型を良く知っている人にアド
バイスを受け確実に組立ててください。
●小さい部品があるので、組立て作業は、幼児の手がとど
かない所で必ず行ってください。
●動かして楽しむ場所は万一の事故を考えて、安全を確認
してから責任をもってお楽しみください。
●組立てた後も、説明書がいつでも見られるように大切に
保管してください。
2
3~14
15
16
SAFETY PRECAUTIONS
This radio control model is not a toy!
●First-time builders should seek the advice of experienced modellers
before commencing assembly and if they do not fully understand
any part of the construction.
●Assemble this kit only in places out of children’s reach!
●Take enough safety precautions prior to operating this model.
You are responsible for this model’s assembly and safe operation!
●Always keep this instruction manual ready at hand for quick
reference, even after completing the assembly.
※製品改良のため、予告なく仕様を変更する場合があります。 SPECIFICATIONS ARE SUBJECT TO CHANGE WITHOUT NOTICE.
© 2001 KYOSHO/禁無断転載複製
No. 11086
キットの他にそろえる物(別購入品) REQUIRED FOR OPERATION (Purchase separately!)
2 燃料、始動用具
Required for engine starting:
下記商品のメーカー、サイズ等は、販売店とご相談
ください。
■グロー燃料 (ニトロ30%)
No.73801
プロスペックフュール レーシング
Glow engine fuel only.
注意 CAUTION: For details concerning the equipment listed below
(size, maker, etc.), check with your hobby shop.
1
ガソリンや灯油は使用禁止
4チャンネル以上の飛行機用無線操縦機(プロポ)セット
(4サーボ:ミニサーボ x 4 )と電池
A 4 Channel radio with 4 mini servos is required. L
MODE
E
ENGIN
FUEL
警告
WARNING: Normal gasoline
cannot be used
with glow engines.
■ワンタッチプラグヒートセット
One-touch Plug Heater Set
■燃料ポンプ
Fuel Bottle
■プラグレンチ
Plug Wrench
空用(飛行機用)のプロポセット(4チャンネル以上)を必
ず使用してください。(空用以外使用禁止)
警告 CAUTION: Only use a minimum 4 channel transmitter, configured
for aircraft!
(No other radio may be used!)
3 接着剤
Glue
■飛行機用4チャンネル以上プロポ
A minimum 4 channel transmitter,
configured for aircraft.
■瞬間接着剤
Instant Glue
■エポキシ接着剤 (30分硬化型)
Epoxy Glue (30 minutes type)
Epoxy A
Epoxy B
■延長コード…1本
1 x Extension Lead
4 その他
Others
■シリコンチューブ
■スポンジシート
Vibration Protection Sponge Silicone Tube
*プロポの取扱い方は、プロポに付属の説明書を参考にしてください。
Ensure you read and understand the instructions included with your radio.
■単3乾電池…12本
(送信機・受信機用)
12 AA-size Batteries
AA
AA
5 さらに用意すると良いもの
Other equipment for enhancing airplane operation & performance
AA
■燃料フィルター
Fuel Filter
組立に必要な工具(別購入品) TOOLS REQUIRED (Purchase separately!)
■カッターナイフ
Sharp Hobby Knife
■+ドライバー(大、中、小)
Phillips Screwdriver (L, M, S)
■ラジオペンチ
Needle Nose Pliers
■+ドライバー(小)
Phillips Screwdriver (s)
■キリ
Awl
■ハサミ
Scissors
■ヤスリ(丸棒)
File (round)
55mm以内
■ニッパー
Wire Cutters
■ドリル
Drill
組立て前の注意 BEFORE YOU BEGIN
組立てる前に説明書を良く読んで、おおよその構造を理解してから組立てに入ってください。
1 Read through the manual before you begin, so you will have an overall idea of what to do.
2
キットの内容をお確かめください。万一不良、不足がありましたら、お買い求めの販売店にご相談いただくか、
当社「ユーザー相談室」までご連絡ください。
Check all parts. If you find any defective or missing parts, contact your local dealer or our Kyosho Distributor.
●重要な注意事項があるマークです。
必ずお読みください。
Do not overlook this symbol!
説明書に使われているマーク
3 Symbols used throughout this instruction manual, comprise:
エポキシ接着剤で接着する。
Apply epoxy glue.
瞬間接着剤で接着する。
Apply instant glue
(CA glue, super glue).
2mm
2mmの穴をあける(例)。
Drill holes with the specified
diameter (here: 2mm).
余分をカットする。
Cut off excess.
可動するように組立てる。
Ensure smooth non-binding
movement while assembling.
斜線部 をカットする。
Cut off shaded portion.
完成機に張ってあるフィルムは、温度や湿度など気候 条
件が工場組立の時から変化すると、多少タルミが出 るこ
とがあります。飛行には、さしつかえありません が、ア
イロンをあてると タルミ がとれます。
The pre-covered film on ARF kits may wrin-kle due to
variations of temperature. Smooth out as explained right.
2
Warning!
別購入品
Must be purchased
separately!
左右同じように組立てる。
Assemble left and right sides
the same way.
注意して組立てる所。
Pay close attention here!
あて布をしたアイロンを低温であて、
必要に応じて温度を上げてゆく。
温度を上げすぎるとフイルムが溶ける
ので注意する
あて布
with cover (cloth)
低温
low setting
Use an iron covered with a cloth!
Start at low setting. Increase the set-ting if necessary. If it is too high, you
may damage the film.
1
主翼
Main Wing
低粘度瞬間接着剤をヒンジに
しみこませ確実に接着する。
Install the hinges completely
before applying instant glue.
主翼とエルロンの中心を合わせる。
Align the centre of the main
wing with the aileron.
2
8㎜
主翼
Main Wing
向きに注意。
Note the direction.
8㎜
線に合わせてカット。
Cut it in accordance
with the line.
上
Top
上反角翼端で32mm
Dihedral 32mm at wing tip.
すき間があく場合はエポキシで埋める。
Warning!
Fill the gap with epoxy.
Securely glue together. If it comes off
during flights, you may lose control of
your airplane, resulting in an accident !
32mm
3
主翼
Main Wing
確実に接着する。
飛行中にはずれると操縦不可能に
なり事故につながります。
フィルのみ。
ホーンチップ( L )
Horn Chip ( L )
Only cut the film.
Do not cut into the wood.
裏側
Bottom Side
ホーンチップ( L )
Horn Chip ( L )
3.1mm
2
フィルムのみ。
Only cut the film.
Do not cut into the wood.
注意して組立てる所。
Pay close attention here!
をカットする。
Cut off shaded portion.
瞬間接着剤で接着する。
Apply instant glue
(CA glue, super glue).
エポキシ接着剤で接着する。
Apply epoxy glue.
可動するように組立てる。
Ensure smooth non-binding
movement while assembling.
左右同じように組立てる。
Assemble left and right sides
the same way.
2mm
2mmの穴をあける(例)。
Drill holes with the specified
diameter (here: 2mm).
●重要な注意事項があるマークです。
必ずお読みください。
Do not disregard this symbol!
Warning!
3
4
カットした残りの1本はP.8
主翼
Main Wing
Use the rest of wire in step
で使用。
.
プロポに付属
のビス。
Included with the
radio set.
エルロンサーボ
Aileron Servo
5
主翼
Main Wing
35mm
35mm
5mm
4mm
Warning!
確実に接着する。
飛行中にはずれると操縦不可能に
なり事故につながります。
If it comes off during flights, you may
lose control of your airplane, resulting
in an accident !
約 8mm
Approx. 8mm
6
メインギア
Main Landing Gear
3 x 4mm セットビス
Set Screw
3 x 4mm
2mm
2
ストッパー
Stopper
2.6 x 8mm
カラー
Collar
ストッパー
Stopper
2
カラー
Collar
2
2.6 x 8mm TPビス
TP Screw
8
フィルムのみ。
Cut away only film.
4
注意して組立てる所。
Pay close attention here!
をカットする。
Cut off shaded portion.
エポキシ接着剤で接着する。
Apply epoxy glue.
左右同じように組立てる。
Assemble left and right sides
the same way.
余分をカットする。
Cut off excess.
2mm
2mmの穴をあける(例)。
Drill holes with the specified
diameter (here: 2mm).
●重要な注意事項があるマークです。
必ずお読みください。
Do not disregard this symbol!
Warning!
7
胴体
Fuselage
5㎜
下
Bottom
20㎜
110㎜
前
Front
前
Front
上
Top
8
6.0mm
ファンケース
Fan Case
3 x 14mm TPビス
TP Screw
9
3 x 14mm
TP Screw
4
胴体
Fuselage
少し下げる。
Lower this side.
まっすぐ下げる。
Initially insert the
fan case as shown
in the picture.
をカットする。
Cut off shaded portion.
エポキシ接着剤で接着する。
Apply epoxy glue.
番号の順に組立てる。
Assemble in the specified order.
2mm
少し上げる。
Raise this side.
左右同じように組立てる。
Assemble left and right sides
the same way.
2mmの穴をあける(例)。
Drill holes with the specified
diameter (here: 2mm).
5
10
胴体
Fuselage
線が上
The line is on the top.
この位置に合わせる。
Align it with the back
edge of the wing saddle.
38mm
11
38mm
胴体&主翼
Fuselage & Main wing
3 x20mm
3x 20mm ビス
Screw
3mm
3 x 20mm ビス
Screw
3mm ワッシャー
Washer
2
3mm ワッシャー
Washer
2
4.5mm
3mm マウントナット
Blind Nut
3mmマウントナット
Blind Nut
2
4.5mm
70mm
6mm
ヤスリで穴を広げて合わせる。 5mm
Enlarge holes with a file if it is needed.
12
胴体
Fuselage
3 x 14mm TPビス
TP Screw
4
3 x 14mm
TP Screw
エンジンハッチの角に合わせる。
ベニヤガイド
Plywood Guide ファンケース
Fan Case
上下あり。
These parts can not be reversed.
2mm
2mmの穴をあける(例)。
Drill holes with the specified
diameter (here: 2mm).
エポキシ接着剤で接着する。
Apply epoxy glue.
6
胴枠
Trunk Frame
(横から見た図)
Side view
Align with the
corner of engine
hatch.
13
パイピング
Piping
5㎜
PPパイプの先端を斜めにカットすると
後ろに出しやすい。
Cut the tip of pipe as illustrated to
allow smooth insertion.
PPパイプ(太)とアルミパイプを
各長さにカットする。
12㎜
20㎜
後ろ
Back
後ろに出す寸法。
Figures on the
picture are the
length of the PP
pipe coming out.
Cut PP pipe (thick) and aluminum
pipe as following length.
5㎜
PPパイプ(太) 240mm×2
PP pipe (thick)
PPパイプ(太) 205mm×2
PP pipe (thick)
アルミパイプ 232mm×2
Aluminum pipe
12㎜
20㎜
ラダー用/PPパイプ(240mm)
For Rudder/PP pipe
燃料パイプ/アルミ(232mm)
Fuel pipe/Aluminum pipe
エレベーター用/PPパイプ(205mm)
For Elevater/PP pipe
Warning!
パイプと前後の胴枠を
正しく位置決めしたら、
ぐるり回りを接着。
Place PP pipe and aluminum
pipe in their correct positions
and glue trunk frame on the
fuselage.
エンコン用/PPパイプ(205mm)
For Throttle/PP pipe
燃料パイプ/アルミ(232mm)
Fuel pipe/Aluminum pipe
ラダー用/PPパイプ(240mm)
For Rudder/PP pipe
14
胴体
Fuselage
周囲をエポキシ接着剤で
充填する。
Attach with epoxy all around
the perimeter.
15
エンジン
Engine
3mm
3 x 20mm キャップスクリュー
Cap screw
3mm
4
3mm スプリングワッシャー
Spring Washer
3mm ワッシャー
Washer
3mm
4
4
3mm
ナイロンナット
Nylon Nut
取り外す。
Remove it.
4
3 x 20mm
注意して組立てる所。
Pay close attention here!
をカットする。
Cut off shaded portion.
エポキシ接着剤で接着する。
Apply epoxy glue.
番号の順に組立てる。
Assemble in the specified order.
余分をカットする。
Cut off excess.
●重要な注意事項があるマークです。
必ずお読みください。
Do not disregard this symbol!
Warning!
7
16
エンジン
Engine
2.6 x 8mm
2.6 x 8mm
TPビス
TP Screw
2.6 x 12mm
1
ビス
Screw
2
2.6 x 12mm ビス
Screw
17
エンジン/マフラー
Engine/Muffler
ビス
Screw
2.6 x 22mm
セットビス
3 x 15mm
Screw
後ろから見て約45゜
に取付。
Position the muffler so that
the 3x5mm screw is 45 degrees
to the engine.
2
1
約45゜
3 x 15mm
2.6 x 22mm
ナイロンストラップ
Nylon strike lap
18
胴体
Fuselage
3 x 14mm
3mm
TPビス
TP Screw
3mm ワッシャー
Washer
3mm
3mm
4
ゴムブッシュ
Rubber Bush
1
ナイロンナット
Nylon Nut
1
ゴムブッシュ
Rubber Bush
エンジンに合わせて穴を開ける。
1
6mm
Drill a hole for engine slow speed
adjustment.
5mm
500mm
3 x 14mm
の残りを利用
Use the rest of wire.
注意して組立てる所。
Pay close attention here!
2mm
8
2mmの穴をあける(例)。
Drill holes with the specified
diameter (here: 2mm).
をカットする。
Cut off shaded portion.
10mm
90mm
19
胴体
Fuselage
Warning!
3 x 25mm キャップスクリュー
Cap Screw
7mm
確実にナットを締める。
飛行中にはずれると操縦不可
能になり事故につながります。
1
ドライブナット
Drive Nut
7 mm ワッシャー
Washer
Tighten the nut securely.
If it comes off during flights,
you may lose control of your
airplane, resulting in an accident !
1
3 x 25mm
ドライブナットがきつい
場合は、ファンのバリを
とってください。
If Drive Nut is too tight to
insert, remove excess
part inside of the hole.
ドライブナット
Drive Nut
1
20
胴体
Fuselage
ストッパー
Stopper
3 x 4mm
ノーズギアホーン
Nose Landing Gear Horn
向きに注意。
Note the direction.
1
3 x 4mm セットビス
Set Screw
1mmあける。
1mm
3mm
4
ストッパー
Stopper
ノーズギアホーン
Nose Gear Horn
3
カラー
Collar
1
3 x 4mm
ストッパー
Stopper
21
燃料タンク
Fuel Tank
カラー
Collar
3 x 25mm
3 x 25mm TPビス
TP Screw
1
完成図 Completed
12mm
完成図を参考に
曲げる。
Bend as shown
here.
注意して組立てる所。
Pay close attention here!
エポキシ接着剤で接着する。
Apply epoxy glue.
可動するように組立てる。
Ensure smooth non-binding
movement while assembling.
向きを確認してしめ込む。
After confirming
the direc-tion (see
front view of fuel
tank), insert and
tighten the screw.
マフラープレッシャーへ
キャブへ
給油口へ
5mm
●重要な注意事項があるマークです。
必ずお読みください。
Do not disregard this symbol!
Warning!
9
22
胴体
Fuselage
60mm
70mm
60mm
マジックファスナーは半分にカットして使う。
Cut the velcro in half before installing.
マジックファスナー
Velcro
7mm
10mm
23
胴体
Fuselage
250mm
3 x 10mm ビス
Screw
12mm
3 x 10mm
3mm
17mm
1
3mm ナイロンナット
Nylon Nut
IN
3mm
ニードル延長
Needle Extension
1
3mm ワッシャー
Washer
3mm
OUT
キャブレターへ
To the carburetor
1
シリコンチューブ
Silicone Tube
IN
OUT
(キャブへ)
下から見た図
View from the bottom
(給油口へ)
(マフラープレッシャーへ)
給油口 Lubrication Mouth
24
水平尾翼
Horizontal Tail
マフラープレッシャー
To Muffler Pressure
ホーンチップ( S )
Horn Chip (S )
Warning!
ホーンチップ
Horn chip
低粘度瞬間接着剤をヒンジに
しみこませ確実に接着する。
Install the hinges completely
before applying instant glue.
2
16mm
2mm
2mm
10
注意して組立てる所。
Pay close attention here!
をカットする。
Cut off shaded portion.
左右同じように組立てる。
Assemble left and right sides
the same way.
瞬間接着剤で接着する。
Apply instant glue
(CA glue, super glue).
2mmの穴をあける(例)。
Drill holes with the specified
diameter (here: 2mm).
エポキシ接着剤で接着する。
Apply epoxy glue.
可動するように組立てる。
Ensure smooth non-binding
movement while assembling.
別購入品
Must be purchased separately!
●重要な注意事項があるマークです。
必ずお読みください。
Do not disregard this symbol!
Warning!
25
水平尾翼
Horizontal Tail (Stabiliser)
フィルム面をカット。
Cut away only the film.
2.6 x 12mm
1.5mm
2.6 x 12mm TPビス
TP Screw
4
12mm
2.6 x 12mm
Warning!
確実に接着する。
飛行中にはずれると操縦不可能に
なり事故につながります。
Securely glue together. If it comes
off during flights, you may lose control
of your airplane, resulting in an accident !
26
A=A'
水平尾翼上反角
Confirm A = A’
A
垂直尾翼
Vertical Tail (Rudder)
A'
Warning!
低粘度瞬間接着剤をヒンジに
しみこませ確実に接着する。
Install the hinges completely
before applying instant glue.
27
垂直尾翼
Vertical Tail (Rudder)
B=B'
P.14 で使う。
Use this part in step
.
注意して組立てる所。
Pay close attention here!
可動するように組立てる。
Ensure smooth non-binding
movement while assembling.
エポキシ接着剤で接着する。
Apply epoxy glue.
をカットする。
Cut off shaded portion.
B
2mm
2mmの穴をあける(例)。
Drill holes with the specified
diameter (here: 2mm).
瞬間接着剤で接着する。
Apply instant glue
(CA glue, super glue).
B'
●重要な注意事項があるマークです。
必ずお読みください。
Do not disregard this symbol!
Warning!
11
28
ラダーリンケージ
Rudder Linkage
3 x 30mm ビス
Screw
1
3mm ナット
Nut
2
3mm ワッシャー
Washer
2mm
5㎜
2
ホーンチップ ( L )
Horn chip ( L )
15mm
2
ペンチでつぶす。
70mm
PPパイプ(細)
PP Pipe ( thin) 30mm
29
3.1mm
9㎜
ワイヤー
Wire
Crimp this part with a pliers.
2 x 6㎜パイプ
Pipe
30mm
ラダーサーボ
Rudder Servo
プロポに付属のビス
Included with the radio set.
ラダー用ミニサーボ
Rudder Mini Servo
3mmベニヤスペーサー
3mm Plywood
30
ペンチでつぶす。
ラダーリンケージ
Rudder Linkage
Crimp this part with a pliers.
ラダーから
From Rudder
リンケージストッパー
Linkage Stopper
2 x 6㎜パイプ
Pipe
1
3 x 4mm セットビス
Set Screw
2mm ワッシャー
Washer
中心に取り付ける。
Install it in the center.
1
1
2mm
2mm ナット
Nut
2mm
1
ロッドアジャスター
Rod Adjuster
別購入品
Must be purchased separately!
エポキシ接着剤で接着する。
Apply epoxy glue.
12
3 x 4mm
2mm
2mmの穴をあける(例)。
Drill holes with the specified
diameter (here: 2mm).
左右同じように組立てる。
Assemble left and right sides
the same way.
余分をカットする。
Cut off excess.
31
エレベーターリンケージ
Elevator Linkage
ロッド振れ止め
2mm
Support block for elevator rod.
Warning!
確実にハンダする。
飛行中にはずれると操縦不能に
なり事故につながります。
Make sure to solder securely.
If not properly solderd, a faliure
in flight may occur.
エレベーターロッド
Elevator Rod
ホーン合わせてカット。
ハンダ
Solder
Cut off shaded portion.
15㎜
30mm
6㎜
3mmバルサ
斜めにカット。
Cut off shaded portion.
32
エレベーター/スロットルサーボ
Elevator/Throttle Servo
エレベーター用ミニサーボ
Elevator Mini Servo
前
Front
3 x 4mm
リンケージストッパー
Linkage Stopper
2
3 x 4mm セットビス
Set Screw
2mm
エレベーターロッド
Elevator Rod
2mm
2
2mm ワッシャー
Washer
2
2mm ナット
Nut
エンコンロッド
Throttle Rod
2
プロポに付属
のビス。
Included with the
radio set.
エンコン用ミニサーボ
Throttle Mini Servo
エンコンロッド
Throttle Rod
横に曲げる。
Bend
20mm
できるだけ内側
に寄せる。
Place Servos close.
曲げる。
Bend
33
エンコン用
ミニサーボへ
To Throttle
Mini Servo
受信機・バッテリー
Receiver/Battery
スイッチ
Switch
飛行中にはずれない様に、確実に固定する。
Install carefuly the receiver and battery pack to
ensure that they will not move during flights.
ゴムバンド等で止める。
Secure foam padding with
rubber bands or tape as required.
受信機
Receiver
受信機電源
Receiver Power Supply
受信機
Receiver
できるだけ前に固定。
受信機電源
Receiver Power Supply
注意して組立てる所。
Pay close attention here!
エポキシ接着剤で接着する。
Apply epoxy glue.
Place as far forward
as possible.
スポンジ
Foam Protection
2mm
をカットする。
Cut off shaded portion.
別購入品
Must be purchased separately!
2mmの穴をあける(例)。
Drill holes with the specified
diameter (here: 2mm).
番号の順に組立てる。
Assemble in the specified order.
●重要な注意事項があるマークです。
必ずお読みください。
Do not disregard this symbol!
Warning!
13
34
胴体
Fuselage
2x6mm
2mm
2x6mm
2 x 6mm TPビス
TP Screw
11
デカール
Decals
2mm
下穴
1mm
35
重心位置/舵角調整
C of G position/ Adjustment
Warning!
Pilot holes
各主翼を確実にネジ止めする。
飛行中にはずれると操縦不能になり事故につながります。
Ensure all screws are securely tightened before flight.
図の様に各舵が動くように調整する。
この調整幅は普通の飛行に適した舵角ですので楽しみ方に
よって調整は変更してください。
重心位置
CG
Adjust the travel of each control surface to the values in the
diagrams. These values fit general flight capabilities.
Readjust according to your needs and flight level.
ラダー RUDDER
185 mm(前縁から)
16mm
測定位置
Position for
left diagram.
16mm
(from wing leading edge)
重心のチェックをする前に飛行はしない。
Check C of G position before flying.
図の位置に重心が来るように受信機とバッテリーを前後に
移動して重心位置を合わせる。
If necessary, re-position receiver and battery to get correct
C of G.
エレベーター ELEVATOR
10mm
10mm
測定位置
Position for
left diagram.
エルロン AILERON
185 mm
5mm
5mm
測定位置
Position for
left diagram.
●この機体は、経験者を対象にしていますので、無線操縦飛行機が初めてという方は、調整等を経験者のアドバイスを受けながら確実に組立ててくだ
さい。中途半端な組上がりの機体を飛ばすのは大変危険です。
Warning! ●無線操縦飛行機が初めてという方には、単独飛行はできませんので、必ず経験者の指導を受けてください。
●この機体は、2サイクルの15エンジン用に設計されていますのでこれ以上のエンジンを使用し、過激な飛行をおこなうと破損するだけでなく、大変
危険ですので絶対におやめください。
●This aircraft has been designed for intermediate to experienced level flyers. First time pilots should seek the advice of more experienced flyers during
construction and for initial flights. ●Initially, less experienced pilots should only fly with an experienced pilot, until they become more proficient. ●This
aircraft is designed to be powered by either a 2 stroke .15 size engine. Installation of engines other than those specified could to lead to a serious accident
and/or damage to property.
回転したファンがファンケースにすれてあたる場合は、サンドペーパーでファンの
オーバーチョークの時は、リコイルスターターが重くなります。無理に引かないで
バリをとってください。
プラグを外してからシリンダー内の燃料を出して、再スタートしてください。
If the rotating fan contact the case, remove excess part with sandpaper.
Recoil starter becomes heavy at the time of overcoat choke. Take out fuel inside
the cylinder, and start again after you remove a plug without pulling it forcefully.
注意して組立てる所。
Pay close attention here!
エポキシ接着剤で接着する。
Apply epoxy glue.
14
をカットする。
Cut off shaded portion.
2mm
2mmの穴をあける(例)。
Drill holes with the specified
diameter (here: 2mm).
●重要な注意事項があるマークです。
必ずお読みください。
Do not disregard this symbol!
Warning!
36
デカール
Decals
付属のデカールは、パッケージを参考に貼って下さい。
For the correct placement of decals, please refer to the box top
and illustrations below.
(反対側 )
(反対側 )
(反対側 )
(反対側 )
(反対側 )
(反対側 )
(反対側 )
(反対側 )
(反対側 )
(反対側 )
(反対側 )
スペアパーツ
品番
No.
DF101
パーツ名
Part Names
ダクテッドファン
Ducted Fan Set
ダクテッドファンブレード
DF101-1 Ducted Fan Blade
ダクテッドファンケース
DF101-2 Ducted Fan Case
DF101-3 マウントセット
Mount Set
ドライブナットセット
DF101-4
Drive Nut Set
DF102 燃料タンクセット
Fuel Tank
90050 スーパーチューンドサイレンサー
Super Tuned Silencer
内容
Quantity
x1
SPARE PARTS
★発送
★定価 手数料
4500
200
(一律)
1000
x1
1500
x1
1000
x1
1200
x1
1000
x1
6500
(反対側 )
(反対側 )
★: FOR JAPANESE MARKET ONLY.
品番
No.
パーツ名
Part Names
キャノピー
11086-01 Canopy
11086-02 ランディングギヤセット
Landing Gear Set
11086-03 デカール
Decal
蛍光ストラップ(M)ピンク
1701KP Tie Strap (M) LF.Pink
1701KY 蛍光ストラップ(M)イエロー
Tie Strap (M) LF.Yellow
92525 耐熱マフラージョイントパイプ
Muffler Joint Pipe
96321 プッシュチョークボタン
Push Choke Button
内容
Quantity
x1
★発送
★定価 手数料
1000
200
(一律)
x1 Set
1000
x1 Set
2000
250
250
x1
1000
450
パーツに関するお問い合わせは、ユーザー相談室まで。
パ−ツの価格には、消費税は含まれておりません。また、定価、発送手数
料、消費税は平成 13 年 5 月 1 日現在のもので、法規改正、運賃改定、
諸事情などにともない変更になりますのでご了承ください。
15
F-86F SABRE 快適飛行のコツ !!
R
SQS .15 エンジン ダクテッドファン スケールジェットプレーン
F-86F セーバー
No.11086 キット価格 ¥49,000
好評発売中のGPダクテッドプレー
ンF-86Fセーバーですが、従来のプ
ロペラ機と同じように飛行させよ
うとして一部に飛ばしにくい人が
いるようです。GPダクテッドファ
ン機を快適に楽しむためにはちょ
っとしたコツが必要となります。
以下の飛行のコツをお読みになり
チャレンジしてください。
※F-86Fセーバーは、上級者向けの機体で飛行にはコツがいります。
離陸滑走中、機速が乗らないうちに無理にエレベーターのアップで機体を浮かそうとし、うまく離陸出来ない人が多いよう
です。この飛行機は、プロペラ機と同じ感覚でのエレベーターアップの操作は、離陸滑走後の上昇速度の低下を招きます。
平坦な滑走路で機速が乗るまで我慢して直線滑走後、滑らかにエレベーターを操作してください。
滑 走 路
一般のプロペラ機と違って長く(60∼70m)平坦な離陸滑走距離が必要となります。
また滑走路面は、なるべくスムーズに機体が走る飛行場を選び、かつ凸凹の無いコースを滑走させてください。
燃 料
今まで当社でテストした中で一番のお薦めの燃料は、
KYOSOHO PRO SPEC FUEL レーシング 30% (No.73801 ¥3,600)です。
重心位置
本機の重心位置は、主翼中央部前縁から185mmに合わせてください。これより前にすれば飛行は安定しますが、離陸
や着陸時に速度が速くなり、操縦しにくくなります。また、これより後ろにすると安定感が薄れ操縦が難しくなるでしょう。
頭上げ現象
一般のプロペラ機の場合、機速が乗らなくてもプロペラの後流がエレベーターやラダーに当たって、ある程度コントロ
ールはききますが、ダクテッドファン機の場合 プロペラの後流はありませんので、機体の離陸速度に応じて舵が効き
始めます。もし、トリムアップで飛ばしてた場合、離陸時に頭上げを起しやすくなりますので、滑走して機体が浮いた
瞬間、すぐにエレベーターで頭上げを抑え、ダウンをあてる気持ちで離陸させてください。一度、上空で、トリム調整
を終えれば、離陸した瞬間の頭上げは防げるでしょう。
ノーズギヤ
出来るだけ機体が平行になるように、ノーズギヤの上部カラーに2∼3mm入るように取り付け、調整してください。
エアーインテーク
空気の取り入れは、多いほうがよいのですが、胴体上部にこ
れ以上穴を空けても効き目は期待出来ません。ただ、下面の
ノーズギヤの両サイドに長方形の穴(80×20mm)くらいの穴
を2箇所くらい空けるとよいでしょう。ただし、ほこりや砂
利の吸い込みには十分注意してください。
20mm
80mm
© 2001 KYOSHO/禁無断転載複製
PRINTED IN JAPAN
警告
Warning!
ケガや事故等、危険防止のため必ずお守りください。
Always do observe the following in order to prevent accidents!
飛 行 前
Before Flying
飛 行
Flying
京商の無線操縦模型は、高い性能
を発揮するように設計されており
ますので、飛行場所は万一を考え
て十分に安全であることを確認し
てから楽しんでください。
Before flying your airplane, ensure
the airfield is spacious enough.
Always fly it outdoors in safe areas
with no debris or obstacles!
強風や、横風での飛行はしない。
Do not fly your airplane when there
is a strong wind or a lateral wind.
プロポの取扱方は、プロポの説明
書をご覧ください。
For handling the radio properly,
refer to its instruction manual.
スピンナー・プロペラのゆるみを
チェック。
Ensure the spinner and propeller are
securely attached.
同じバンド(電波帯)の同時飛行
は出来ません。近くで無線操縦模
型を楽しんでいる人がいたらバン
ドを確認してください。
If your airplane begins to operate by
itself, there is another transmitter on
your frequency. Immediately stop
your airplane; otherwise you may
lose control of it which will result in
accidents.
〇
飛 行 後
After Flying
×
Fully extend
the transmitter
antenna.
送信機のスイッチを入れる。
Switch on the transmitter.
ON
風
WIND
飛行後のエンジンは、高温になっ
ているのでヤケドに注意。
After each flight, the engine is very
hot. Beware of getting burned!
×
プロペラが回転中の機体には絶対
に見物の人を近付けないでください。
Do not allow watching people to get
too close to a rotating propeller.
スティックを動かして各舵が調整
通り動くかチェック。
By moving the control sticks, ensure
all control surfaces moves as per
your adjustments.
受信機のスイッチを OFF に。
Switch off the receiver.
By moving the throttle control
stick, ensure the carburetor opens
and closes without effort.
スロットルをスローにしてから、
スターターをスピンナーに押し当
ててエンジンをかける。
For starting the engine, apply low
throttle and hold the engine starter
against the spinner.
OFF
送信機のスイッチを OFF に。
Switch off the transmitter.
OFF
OFF
傷ついたプロペラ、変形したスピ
ンナーは使用しないでください。
Immediately disuse defective propellers as well as deformed spinners.
プロポの電池が弱くなったものは、
新しいものと交換してください。
If the dry batteries in the radio are
flat, replace them with fresh ones.
ON
残った燃料を抜き取り缶にもどす。
Draw out the remaining fuel from the
fuel tank and fill it back into the can.
まわりにいる人の上では飛行させ
ないでください。
Do not fly your airplane above people
standing around.
ニードルを調整する。
Adjust the needle.
ON
主翼が正しく取付けられているか
確認。
Ensure the wings are securely
attached.
エンジンの調整は必ず後ろから行
なってください。前、横からは大
変危険ですので絶対に行なわない
でください。
Adjust the engine always from behind,
but never from infront or the sides as
a rotating propeller may badly injure
you!
スロットルトリムを下げてエンジ
ンをストップさせる。
Bring your airplane to a halt by
lowering the throttle trim.
燃料を入れる。
Fill the fuel tank.
ON
受信機のスイッチを入れる。
Switch on the receiver.
〇
安 全 上 の 注 意
Cautions for Safety
機体を風上に向けて、着陸させる。
Always land your airplane into the
wind.
スロットルスティックを動かして、
エンジンキャブレターがスムーズ
に開閉するかチェック。
送信機のアンテナを
最後までのばす。
OFF
FLIGHT MANUAL
飛行手順の注意
油で汚れた機体をきれいにする。
Wipe away any fuel deposits or dirt.
空の燃料缶は火中に投げ入れない
でください、非常に危険です。
Never throw burning, gleaming or
smouldering things into fuel cans,
even if these happen to be empty.
This will result in serious injury!
機体を風上に向けて、手投げ又は
離陸させる。
Hand-launch your airplane into the
wind to make it take off.
風
WIND
オプションパーツは純正パーツ以
外使用しない。
Only use KYOSHO genuine parts!
京商株式会社 〒243-0034 神奈川県厚木市船子153
メーカー指定の純正部品を使用して
安全にR/Cを楽しみましょう。
●ユーザー相談室直通 TEL.046-229-4115
お問い合わせは:月曜∼金曜(祝祭日を除く) 10:00∼18:00
62150106-3
PRINTED IN CHINA