1
PRU Series BGA Prism Unit Operating Instructions
1.
Unpack the product from the box and confirm the following:
(1) Main Body
(2) LED Light Adjustment Box
(3) AC Adaptor (100V – 240V)
(4) Cleaning Cloth
(1)
2.
(2)
(4)
Plug one end of the AC Adapter cord into the LED Light Adjustment Box and plug the AC Adapter into
a power source.
3.
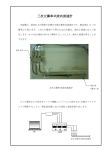
Place the BGA Prism Unit over a circuit board by expanding the pantograph of the BGA
Prism to the size of the BGA package.
4. Move the entire object under any microscope, magnifying glass, loupe, or video
microscope and observe the ball soldering condition.
5. Turn the Back Light Adjust Knob to adjust the intensity of the prism light so that the
background of the ball soldering appears clearly.
(Side View)
6.
Clean the View Window and Prism surface with the Cleaning Cloth shipped with the
product.
Micro Square Co., Ltd.
6F. 3rd TAKABLDG.3-13-15
Sagamiono, Sagamihara,
Kanagawa Pref., Japan 228-0803
Note: Do not touch the View Window or the Prism
Tel: 81-42-705-5501
with your hands. The oil on your hand may
Fax: 81-42-705-5503
cause the image to blur.
http://www.microsq.com/english/
目視検査用プリズムユニット取扱説明書
PRU シリーズ書
1.
製品を梱包箱から取り出し、確認してください。
(1) 本体
(2) LED 調光ボックス
(3) AC アダプター (100V – 240V)
(4) クリーニング布
(1)
(2)
(4)
2.
AC アダプターの一方を LED 調光ボックスに、もう一方を電源に差し込んでください。
3.
本体を IC ボードの BGA にのせ、パンタグラフを広げパッケージのサイズに合わせてください。
4. 本体と IC ボードを顕微鏡、拡大鏡、ルーペ、あるいはビデオマイクロスコープの下に
置いておいて観察してください。
5. BGA 内部が暗い場合は LED 調光ボックスの輝度調整ノブを回して明るさを調整してください。
ハンダボールの半田状態が楽に観察できます。
(側面図)
6.
ビューウィンドウまたはプリズムが汚れたら同梱のクリーニング布で汚れをふき取っ
てください。
マイクロ・スクェア株式会社
〒228-0803
神奈川県相模原市相模大野
3-13-15 第3タカビル6階
注意:ビューウィンドウやプリズムを直接手で触らな
Tel : 042-705-5501(代表)
いでください。手に付いている油により画像が
Fax : 042-705-5503
ぼけることがあります。
http://www.microsq.com