1
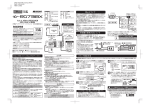
DATA : RG731BX_manual_Rev.A
DATE : 2013.04.18
PRINT : SANEI
7ch 2.4GHz RECEIVER
DMSS 2.4GHz 7ch 受信機
( 同軸アンテナタイプ・シリアルバス・双方向通信対応 )
取扱説明書
このたびは、JR製品をお買い上げいただき、
まことにありがとうございます。
本製品を正しく安全にご使用いただくため
にも、取扱説明書を必ずお読みください。
※DMSS方式製品はDSMJ方式製品との互換性はありません。
【TLロゴについて】
JRテレメトリーシステム
(双方向通信)に対応した
製品にのみ記載します。
特 徴
・FHSS方式により、混変調及び相互変調妨害を受けにくい高感度受信機。
・機体のバッテリー残量などの情報をフィードバック可能なテレメトリ
ーシステム搭載。
・同軸アンテナ+リモートアンテナにより、安心且つ確実な通信を実現。
・LEDの点灯により受信状況が確認可能。
・送信機でのフェイルセーフ設定に対応。
・XBus対応で、多チャンネル化も可能。
受信機規格
品 番 RG731BX
通信方式 7チャンネルDMSS方式
重 量 15g
寸 法 14.5×25.5×47.5㎜
定格電圧 4.8V
動作電圧 4.5-8.5V
備 考 同軸アンテナタイプ
(アンテナ/同軸) 30/120㎜
接 続 図
リモートアンテナ規格
品 番 RA01T
通信方式 DMSS方式
重 量 4g
寸 法 5×27×28㎜
備 考 内蔵アンテナタイプ
センサー(別売)
SENSOR
センサーの接続について
センサーを接続するには
[BIND・BATT・SENS]端子に
Yハーネス(別売)を接続
してください。
※センサーはバインドを
する必要はありません。
受信機用電池
(別売)
Yハーネス
(別売)
スイッチハーネス
(別売)
RG831B 受信機
安全にご使用いただくために必ずお守りください。
■はじめにお読みください。
XBus対応製品
※XBus ポートは送信機の
設定が必要です。
コネクタ拡大図
コネクタの向きに
十分注意して差し
込んでください。
使用者もしくは第三者への危害・財産への損害を未然に防止するため、
必ずお守りいただくことを次のように表示します。
この表示欄の内容は、「使用者もしくは
第三者が死亡または重症を負う危険が
切迫して生じることが想定されます。」
この表示欄の内容は、「使用者もしくは
第三者が死亡または重症を負う可能性
が生じることが想定されます。」
この表示欄の内容は、「使用者もしくは
第三者が傷害を負う可能性または物的
損害が発生する可能性が想定されます。」
リモートアンテナ
従来サーボ
操縦不能となり危険です。
雨の日の飛行は、送受信機内部に水が入り誤動作の原因となりますのでおやめください。
●2.4GHzシステムを安全にご使用頂くための基本的な注意事項
①2.4GHzはラジコン専用の周波数ではありません。
この周波数帯は電子レンジ、無線LAN、
デジタルコードレス電話、オーディオ、ゲーム機や携帯電話のBluetooth、VICSなど近距離
通信に利用されるISM(産業・科学・医療)バンドと共用されているため、都市部では2.4GHz
システムの操縦レスポンスが低下する可能性があります。また、アマチュア無線、移動識別
用構内無線にも使用されているため、
これらの影響を注意して使用してください。なお、既
設の無線局に有害な電波干渉を与えた場合は、速やかに電波の発射を停止し、干渉回避
対策を実施してください。
②走行場・飛行場では、送受信機に影響を与える可能性のある機器の使用は最小限にし、
事前に安全性を確認するようにしてください。また施設の管理者の指示に従ってください。
③同一走行場・飛行場では、同時に使用する2.4GHzプロポの台数は15台以内にしてくださ
い。同時に使用される2.4GHzプロポの台数が判るように施設の管理ボード等を利用してく
ださい。
④建物や鉄塔・樹木などの後ろを走行や飛行させ、電波の到達方向を遮へいすると、操縦レ
スポンスが低下したり操縦不能になる場合があります。常に目視で確認できる範囲で走行
や飛行をしてください。
⑤日本国内では、電波法に基づく技術基準適合証明試験を受け、認証番号を記載した認証
ラベルが外から見える場所に貼られているプロポが使用できます。ラベルを剥がしたり汚し
たりしないでください。
⑥海外からの輸入品等の場合で、上記認証ラベルが貼られていないプロポの使用は電波
法違反になり罰せられることがあります。
⑦(財)日本ラジコン電波安全協会は、ラジコン運用を安全に行って頂くための啓発を行って
います。同協会の名称の入った認証ラベルが貼られているプロポをご使用ください。
お守りいただく内容を、
次の表示
で区分し説明します。
この表示で「義務事項」を
説明します。 この表示で「禁止事項」を
説明します。 受信機の使用方法について
■受信機のアンテナの取り扱いについて
構 成
● RG731BX / 受信機本体 ● RA01T / リモートアンテナ
● RGケーブル 150 ● バインドプラグ ● 取扱説明書(本書) XBusについて
XBus システムは従来ラジコンで使用されていた PWM 信
号による制御ではなく、XBus 対応製品とのシリアルデー
タ通信方式を採用しています。操作信号は全てのチャンネ
ルが含まれており、其々の機器が自分に割り当てられた
データを選択し動作します。
XBus 対応製品を接続する前に XB1-CPR 等でチャンネルの
割り当てを設定しないと動作しません。
従来の機器を直接接続しないでください。故障の原因とな
ります。
別電源用ハブを使用すると右図の様に電源を分けることが
できます。
※XBus ポートを使用する場合は、送信機の設定が必要で
す。従来の DMSS 送信機の対応についてはホームページで
案内いたします。
発熱、発火、感電怪我をすることがあります。
分解、改造をしないでください。
エンジンやモーター(電動模型の場合)が不意に高回転となり危険です。
電源スイッチをオンにする時は送信機のスロットルスティックを最スロー(エンジン、モーターの回
転が最低回転の位置)にし、送信機の電源スイッチ、次に受信機の電源スイッチの順にオンにして
下さい。
また、電源をオフにする時は逆に受信機、送信機の順にオフにしてください。
怪我をする事があります。
エンジン(モーター)調整は必ず後ろから動作中の動力に細心の注意をはらって行うようにして下さ
い。送信機のスロットルハイでエンジンをかけることは危険ですのでおやめください。
必ずリモートアンテナを接続し使用してください。外すとバイン
ドできないことがあります。また、電波の受信及び送信機にデ
ータ送信を行いますのでテレメトリーデータが表示されません。
誤動作の原因となります。
送受信機は、精密な電子機器です。強い衝撃を与えたり、投げつけたりしないでください。
操縦不能となる可能性が有り危険です。
飛行中動きが鈍いと感じたらすぐ着陸してバッテリー残量サーボ等の点検を行ってください。
以下の場所での飛行は操縦不能や事故の可能性があり危険ですのでおやめ下さい。
・トランシーバー妨害のある時。 ・車やオートバイの走っている付近。
・高圧線・ビル・土手の近く、山間部等。 ・民家や建造物付近、及び人の近く。
・FMやTV放送局、船舶無線等の無線設備の近く。
突然、誤動作を起こす可能性が有り危険です。
受信機、サーボ等が水没し完全に乾燥後、正常に動作する場合、サーボの調子が悪くなり、あとで正常
な状態に復帰した場合でも、そのまま使用せず、弊社へ点検依頼をしてください。
●送受信機のバッテリー残量はあるか。
●燃料タンクの燃料漏れにより受信機やサーボ等に燃料がかかってないか。
また、
燃料は
入っているか。
●機体の振動ノイズの原因となる、
リンケージ類が機体や胴体に当たったりしていないか
さらに、
機体を固定した状態でエンジン
(モーター)
をハイにして、
各舵を動かし完全に動
作するかどうか確認して振動テストを行って下さい。
初飛行は距離を離さず、
安全な場所
を選び上空を数分テストフライトして異常の無いことを確認して下さい。
■修理、
アフターサービスに関するお問い合わせ
【日本遠隔制御株式会社 ラジコンサービス課】
お問い合せ TEL:06(6732)0200
● 受付時間/9:00∼13:00・14:00∼17:30(土・日・祝日及び当社休日を除く)
HUB
ポート出力
接 続例
BATTRY
HUB
XB1-HB6 等
XB1-HB5 等
(2ch)
XBus対応サーボ
(6ch)
XBus対応サーボ
(3ch)
XBus対応サーボ
(4ch)
XBus対応サーボ
(5ch)
XBus対応サーボ
コンバータ XB1-CV1 等
(1ch)
通常サーボ
受信機のアンテナは出来るだけ直線状になる様に搭載してください。絶対に
切ったり、折り曲げたりしないように搭載してください。
また、カーボンや金属物からできるだけ離して搭載してください。
(10mm以上推奨 )
アン テナ 部 折り曲 げ 厳 禁
先端のアンテナ部分(30mm)は真直ぐな状態で設置してくだ
さい。折り曲げてしまうと、安定した受信ができなくなります。
RX
※機体外部に出した
アンテナが破損し
ないように、
ご注意く
ださい。
受信感度【高】
電波遮へい素材の機体表面
RX
バインド設定方法
■送信機と通信を行うためには、必ずバインド(ペアリング)をしなくてはいけません。
ここではバインドの設定方法を説明します。
はじめに、
リモートアンテナが受信機にしっかり接続されてい
1 る事をご確認いただき、
「バインドプラグ」
と
「満充電された
バッテリー」を用意します。
受信機とリモートアンテナのLEDが点灯に変われば、バイン
4 ド完了です。
バインドプラグを抜いた後、送受信機の電源を
切ってください。
※LEDが点滅のまま
の場合、最初から
やり直してください。
★リモートアンテナは双方向通信
において、受信機のデータ送信を
行っています。搭載方法や搭載位
置にご注意ください。
LED点灯箇所
受信機のバインド端子に、バインドプラグを差し、空チャンネル
最後にサーボを接続し、通信ができていることをご確認くだ
2(AUXチャンネルなど)
にバッテリーを接続すると、受信機とリモ
5
さい。なお、距離テストを行う場合は、送信機の発信出力を
ートアンテナのLEDが点滅を始めます。
(バインド待機状態)
バッテリーは
空チャンネル
に接続します。
バインド端子
バインド
プラグ
3 送信機のシステム設定モード内にある[BIND]の設定画面を表
示します。 [BIND]にカーソルを合わせダイヤルを押しバイン
ドモードにします。 ※下図は「XG14」の表示画面です。
飛行前に安全のために次のような点検を行って下さい。
RX
カーボンや金属などの遮へい素材に直接アンテナ
を貼り付けた場合、設置した面の受信感度は著しく
電波遮へい素材フレーム
低下します。
受信感度
受信感度【高】
同素材に設置する際は、できる限りアンテナを素材
【低】
から離すか、機体自体が電波遮へい素材の場合は、
アンテナを外に出すようにしてください。
各アンテナが平行ではなく、垂直になるように設置
します。なお、確実に安定した通信を行うためには
受信感度【高】
各アンテナを30mm以上 離して設置することを推奨
します。
故障の原因となります。
他社製品(サーボ、ジャイロ等)を組み合わせて使用しないでください。
※別電源対応ハブを使用すること
により電源を分けることが可能
BATTRY
[XG14の場合]
バインド画面
バインドがうまくいかない場合、以下のことをご確認ください。
・送受信機のバッテリー残量は十分ありますか。
・リモートアンテナはしっかり接続されていますか。
・送信機と受信機の距離が近づきすぎていませんか。
・金属製の机や台の上では、バインドできない場合があります。
下げた状態で、機体より
【約 40m】離れ、機体の周りを移動
し、
どの方向からでも動作することをご確認ください。
※送信機の発信出力を下
機体と約40m
げる操作方法については、
送信機の取扱説明書をお
読みください。
離れてテスト
バインド後は必ずフェイルセーフを設定してください。
バインド後は送信機のフェイルセーフ機能を使って,
フェイルセーフ
を設定し、
フェイルセーフが正しく動作することをご確認ください。
http://www.jrpropo.co.jp/jpn/support/
修理・アフターサービス・製品に関するお問い合わせ等に関する情報をご案内しています。
日本遠隔制御株式会社
〒577-0809 東大阪市永和2-2-12
TEL:06-6732-0201
NEM-C81A(2013.05)
DATA : NEM-C81A_RG731BX_En_manual.ai
DATE : 2013.05.13
PRINT : SANEI
7ch 2.4GHz RECEIVER
DMSS 2.4GHz 7ch Receiver
( Coaxial antenna, serial XBus and telemetry)
Operation Manual
Thank you for purchasing this JR product.
To allow correct and safe use of this
product, please read this operation
manual.
*The DMSS system is not compatible with DSM-2 nor DSM-J systems.
[About the TL Logo]
This logo is only included on
products that support the JR
Telemetry System (bi-directional
communications).
Features
・With DMSS, cross modulation is restricted. This high sensitivity
receiver is not easily affected by inter-modulation interference.
・The telemetry system is capable of feeding back information
such as receiver battery voltage.
・Due to the use of both coaxial antenna and a remote antenna,
secure and precise communication is assured
・It is possible to confirm receiver operation by way of LED's.
・Supports transmitter setting of fail safe.
Receiver Specs
Remote Antenna Specs
Product Number:
Receiving System:
Weight:
Dimensions:
Operating Voltage:
Remarks:
Product Number:
Receiving System:
Weight:
Dimensions:
Remarks:
RG731BX
7 Channel DMSS System
15g
14.5×25.5×47.5㎜
4.5-8.5V
Coaxial antenna
(Antenna/Coaxial) 30/120mm
Connection
Diagram
Sensor
(sold separately)
SENSOR
Receiver Battery
(sold separately)
RA01T
DMSS System
4g
5×27×28㎜
Built-in Antenna Type
Sensor Connections
When connecting sensors,
use a Y-Harness(sold separately)
connected to the
[BIND/BATT/SENS] terminal.
* It is not necessary to
carry out binding for the
sensor.
Y-Harness
(sold separately)
Switch Harness
(sold separately)
When inserting the
connectors, take note
of the correct direction.
Configuration
Conventional servo
(sold separately)
Remote antenna
●Basic precautions for safe operation
(1) The 2.4GHz band is not a frequency exclusively for use with RC aircraft.
The band is part of the IMS (industry, science, and medical care)
frequency allocation, which is widely used for short-distance
transmissions such as microwave ovens, wireless LAN, digital cordless
phones, gaming devices, etc. Because of signal congestion, the
response of any 2.4GHz system may be reduced in urban areas. In the
event of any interference, immediately cease operation and attempt
to identify the interference source.
(2) At race tracks and airfields minimize the use of devices that operate
on the 2.4GHz band. Be sure to perform an adequate range check
before commencing operation.
(3) Always maintain line of sight with the aircraft as 2.4GHz signals may
be blocked by buildings, trees, etc. Always fly the aircraft where it can
be visually observed.
In order to prevent injury to the operator or third parties
(or damage to property), please observe the following
DANGER!
Not following this advice carries high risk of death or serious
injury to the user or third parties.
● Do not use this product in the rain as water may cause electronic
devices to malfunction.
● This product carries a risk of injury due to heat, fire, and electric shock.
● Never disassemble or modify this product.
● When turning on the receiver, the engine (or motor) can start rotating
at high speed, causing injury.
● Before turning on, always set the transmitter throttle stick to the
lowest speed position. Turn on the transmitter first then the receiver.
To shut down, switch off the receiver first and then the transmitter.
The all new X-Bus system uses JR's own serial bus data instead of PWM
(Pulse Wide Modulation) to communicate with X-Bus products such as
servos. Control signals are sent in a serial manner to all channels, with
individual servos recognizing their own data from receiver. Non X-Bus
servos can still be used in conjunction with a channel decoder (e.g.
XB1-CPR), or plugged directly into the receiver (avoiding the X-Bus port).
Never plug any non X-Bus device into the X-Bus system as a failure is
sure to occur. On large models, our optional X-Bus power hub allows
servos to receive a separate power supply.
Our new X-Bus receiver is also able to be plugged directly into
compatible helicopter FBL units, allowing a single connection between
the receiver and FBL unit.
Method of use and installation of receiver
RX
XB1-HB6
wiring example
CAUTION!
Not following this advice may cause injury to the user or third party
(or cause damage to property).
Before use, check the following:
●Is there enough battery voltage for both the transmitter and receiver?
●Is there any fuel spillage on the receiver, servos, etc. that was caused by
leakage from the fuel tank? Is there enough fuel?
●Check that no linkage interferes with the aircraft body. Conduct a
vibration test by restraining the model and setting the engine (or
motor) to full power whilst keeping your hands well clear of the
propeller. Check that each control surface moves correctly. For the
initial flights of a new model always fly in a safe place, avoid flying at
great distance, and keep the model close to the landing area for several
minutes until you are fully confident that the receiver is operating
correctly.
■If you have further questions, please contact your local dealer
or JR distributor in your country.
(2ch)
XBusCompatible servo
(6ch)
XBusCompatible servo
(3ch)
XBusCompatible servo
(4ch)
XBusCompatible servo
(5ch)
XBusCompatible servo
XB1-CV
(1ch)
Decoder
Conventional Servo
The antenna tip should always be fixed in a straight position.
The antenna tip should never be bent or cut. Be sure to position the
antenna as far from carbon materials or metal pieces as practical. These
may block RF signals.
DO NOT bend the antenna tip!
Be sure to always install a remote antenna. Without this, binding will not be possible.
In addition, because the remote antenna acts as the transmitter for the telemetry
system, no telemetry data will be received when no remote antenna is connected.
The antenna (the last 30mm of the coax) should be
installed so it is perfectly straight. If bent, signal
strength will be compromised.
In the situation where the antenna has been attached directly to a
shielding material such as carbon or metal, the receiving sensitivity of
Carbon frame
the installed antenna surface will be considerably reduced.
Receiving
When the antenna is to be installed on this kind of shielding material, Receiving
Sensitivity
either separate the antenna as far as possible from the material, or in Sensitivity
(Low)
(High)
the case where the radio wave shielding material is the aircraft body
itself project the antenna outside the aircraft body.
In the case where there are coaxial antennas in the remote antenna,
the faces of each antenna should be installed so that they are at right
angles to each other, rather than being parallel.
Note that in order to allow certain and stable communications to be
Receiving Sensitivity
carried out, it is recommended that each antenna should be installed
(High)
with a separation of 30mm or more.
WARNING!
Not following this advice may result in death or serious injury to
the user or third parties.
● Do not use this receiver in combination with other manufacturers
products such as servos, gyros etc.
● Never allow the receiver to receive a strong impact as the electronic
components in the receiver are susceptible to damage.
● If degraded servo movement is detected, stop operating immediately.
Identify the source of the problem before further operation (check
battery voltage, etc).
● Do not use the product in the following locations, as there will be a
risk of an out-of-control condition or accident:
• Where interference exists. • Where there is traffic passing nearby.
• Near high-tension electric lines, buildings, or in mountainous areas, etc.
• Near houses or people.
• Near radio or TV transmitters
● If the receiver becomes submerged in water, it may appear to operate
normally after being fully dried. However, it may malfunction at a later
time. Do not continue to use the product ‒ contact your JR distributor
to arrange an inspection.
BATTERY
XB1-HB5
Output Port
Close up of the connector
RG731BX Receiver
Servos can be operated from a separate power
supply by using the optional 'X-Bus power hub'.
BATTERY
■Remote receivers
XBus system products
●RG731BX Receiver Main Unit ●RA01T Remote Antenna
●RG Cable 150 ●Bind Plug ●Operation Manual (this document) To allow safe use, be certain to observe the following points.
X-Bus system
* Take care not to damage
the antennas projecting
from the aircraft body.
RX
Receiving Sensitivity
(High)
Aircraft body surface made from
shielding material
RX
Method of Binding
■ In order to establish communications with the transmitter, binding (pairing) must be carried out.
First confirm that the remote antenna is securely connected to
When the LEDs of the receiver and the remote antenna stop
the receiver, then prepare the included binding plug and a fully
blinking, the bind process is complete. After removing the
charged battery.
bind plug, switch off the power for the transmitter and receiver.
* In the case where the LEDs continue to
★The remote antenna performs
flash instead of changing to continuous
the role of the transmitter for the
lighting, repeat the procedure over
telemetry system. Although it is
again from the beginning.
possible to use the receiver without
the remote antenna , the receiving
sensitivity will be reduced and the
LED locations
telemetry function can not be used.
Lastly, connect the servos and confirm that communications have
been established. Note that when carrying out range testing, after
Insert the bind plug into the receiver's "bind port" and plug the
setting the transmitter to the reduced power output condition maintain a
battery into a spare channel (such as AUX1).
distance of approximately 40m from
The receiver and remote antenna shall start flashing their LED's,
Approximately 40m away
the aircraft and move around it to
showing they are ready to bind.
confirm that operation can be carried from the aircraft
out from all directions.
1
4
5
2
Connect the
battery to any
spare channel.
Bind Terminal
Bind
Plug
* Regarding the operation method for
reducing the transmitter power output,
please read the transmitter operation
manual.
Range Test
In the situation where binding is unsuccessful, confirm the following
3
Bring up the [BIND] Setting Screen in the transmitter (in the system
menu). * The figure below shows a XG14/XG8 screen shot.
XG8 bind menu
・Is the remaining battery power of the transmitter and receiver adequate?
・Are the remote antennas securely connected?
・Is the distance between the transmitter and receiver too close?
・When the procedure is carried out on the top of a desk or bench that is
made from metal, binding may not be successful.
About the [DMSS] Fail Safe
The fail safe is set using the Fail Safe function in the transmitter.