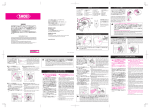
Download X-TWELVE
Transcript
内装の着脱(Q.R.I.P. システム)
Removable Inner Parts(Q.R.I.P. System)
ベンチレーションシステム
Ventilation System
5
カタログ請求および販売についてのお問い合わせは、
下記〈本社・国内営業部〉まで、
製品についてのお問い合わせは、最寄りの販売店もしくは
〈茨城工場内 顧客サービス課〉
〒 300-0525 茨城県稲敷市羽賀 1793 TEL 029-892-3617
E-mail:[email protected] までご連絡ください。
取扱説明書
このたびは SHOEI ヘルメットをお買い上げいただき、まことにありが
とうございます。この製品の機能および注意事項を十分にご理解いただ
き、より安全に快適なモーターサイクルライフを送っていただくために、
ご使用まえに本取扱説明書を必ず最後までお読みください。
本取扱説明書は、読み終わったあとも大切に保管してください。なお、
本取扱説明書を紛失したときは、弊社までご請求ください。
Instructions for use
Thank you for purchasing this SHOEI helmet. Please read this
manual carefully before use and keep it for future reference. This
manual contains valuable information to help you understand the
functions of the product and the instructions for use in order for you
to enjoy a safety and comfortable motorcycle life. Your SHOEI
dealer can provide a replacement if it is lost.
6
7 8
9
10
1
2
12
3
13
4
本社・国内営業部
〒 110-0005 東京都台東区上野 5-8-5 CP10 ビル 7F
TEL 03-5688-5180 FAX 03-3837-8245
HEAD OFFICE
7TH FLOOR, CP10 BLDG., 5-8-5 UENO, TAITO-KU, TOKYO JAPAN
〒110-0005 PHONE 03-5688-5170 FAX 03-3837-8245
閉/
www.shoei.com
CLO
SE
開/
閉/
OPE
N
フロントエアインテーク/ Front Air Intake
閉/
開/
X-TWELVE 167
クイック リリース セルフ アジャスティング システム
Quick Release Self Adjusting(Q.R.S.A.)System
Q.R.S.A. システムは、シールドの簡単確実な脱着をはじめ、シールドベースがダブルアク
ションで動くことで、全閉時のシールドと窓ゴムの密着性を格段に高めました。
In addition to easy and appropriate removing and fixing, Q.R.S.A. system improved close
contact of shield / visor and window beading when fully closed by double actions of base plate.
プリセットレバー機構およびシールドロック機構
Preset Lever and Shield / Visor Lock Mechanism
A
標準ポジション
Standard Position
B
プリセット開
Preset Open
プリセットオープニング機構は、シールドの最小限の
開きにより、効果的に導入された走行風が、シールドの
曇りを除去・防止するという、SHOEI独自の機構です。
標準ポジション(図A)よりレバーを下げる(図B)こと
により簡単に行えます。また、レバーを上げる(図 C)
ことにより、シールドがロックされ、走行時や転倒時な
どに不意なシールドの開放を防ぎます。特に高速走行
時はシールドロックポジションにすることを推奨します。
※レバーが下がった状態(図 B)でシールドを閉じた
場合、プリセットオープニング機構は解除されず、シー
ルドは微開状態のままとなります。レバーの位置を
標準ポジション(図 A)に戻さないとシールドは密
閉しませんのでご注意ください。
※万が一のときは、シールドを強く押し上げることで、シー
ルドロック状態からでもシールドを開けることができます。
Preset opening mechanism is SHOEI's own
mechanism to avoid or eliminate fogging of a shield /
visor using riding wind which is absorbed effectively
by minimum opening of a shield / visor.
You can do it easily by lowering a lever as per Drawing
B from standard position indicated in Drawing A. When
a lever is lifted as per Drawing C, a shield / visor is
locked to avoid sudden opening during ride or in fall. It
シールドロック
Shield / Visor Lock is strongly recommended to keep a shield / visor in a
locked position especially during high speed riding.
*If you close a shield / visor keeping a lever in a downward position as per Drawing B,
the preset opening mechanism is not released and a shield / visor will remain opened
slightly. A shield / visor will not be in close contact with a window beading unless a lever
is lifted to standard position as per Drawing A.
*In an accident, a shield / visor may be opened even while locked if tried strongly.
C
1.
2.
3.
4.
5.
6.
7.
8.
9.
10.
11.
12.
13.
11
SE
CLO
サイトレーション・システム
窓ゴム
ブレスガード
ロアエアインテーク
フロントエアインテーク
エアスクープ 3
衝撃吸収ライナー
サイドエアアウトレット
シェル
トップエアアウトレット
エアロエッジスポイラー 2
リアエアアウトレット
ネックアウトレット
3Dフルサポートインナー 4
3D Full Support Inner 4
センターパッド
Center Pad
1. Anti-Condensation Shield /
Visor Ventilation System
2. Window Beading
3. Breath Guard
4. Lower Air Intake
5. Front Air Intake
6. Air Scoop 3
7. Impact Absorbing Liner
8. Side Air Outlet
9. Shell
10. Top Air Outlet
11. Aero Edge Spoiler 2
12. Rear Air Outlet
13. Neck Outlet
チークパッド(右)
Cheek Pad (Right)
開/
OPE
N
エアスクープ 3/Air Scoop 3
閉/ CLOSE
閉/CLOSE
N
OPE
チンストラップカバー(右)
Chinstrap Cover (Right)
開/ OPEN
開/OPEN
Printed in Japan 20110601
シールドの取り外し方と取り付け方
How to Remove and Fix Shield / Visor
1
フック
Hook
トリガー
Trigger
フックレール
Hook Rail
2
〈シールドの取り外し方〉
1. シールドを全開の状態(図 1)にしてください。
2. トリガーを下に引きロックを解除し、フックをフックレールから矢印方向
(図2)に外して取ります。取り外しは、反対側も同じ要領で行ってください。
How to Remove Shield / Visor
1. Open a shield / visor to fully opened position as per Drawing 1.
2. Pull down a trigger to unlock and remove hooks from hook rails to a direction
shown in Drawing 2. Do in the same manner for the other side.
〈シールドの取り付け方〉
3. シールドを全開位置状態に合わせ、フック
をフックレールに差し込みます(図 3)。
4. シールドの矢印付近(図 4)を上からカチッ
とロックされるまで押し、しっかりとはめ込
んでください。反対側も同じ要領で行ってく
ださい。フックやギアが確実にロックされて
いない状態でのご使用は、シールドが外れる
場合がありますのでよく確認してください。
How to Fix Shield / Visor
3. Place a shield / visor in full open position
and insert hooks into hook rails as per
Drawing 3.
4. Push area indicated by a circle in Drawing 4
firmly until you hear it clicks. Do in the same
manner for the other side. Make sure that
hooks and gears are locked firmly.
Otherwise, a shield / visor may come off.
トップエアアウトレット/ Top Air Outlet
フックレール
Hook Rail
フック
Hook
3
シールド
Shield /
Visor
フック
Hook
ギア
Gear
4
チンストラップカバー(左)
Chinstrap Cover (Left)
ロアエアインテーク/ Lower Air Intake
シールドおよびシールドベースの取り扱い上のご注意
Important Notice for Handling Shield / Visor and Base Plate
シールド
Shield /
Visor
チークパッド(左)
Cheek Pad (Left)
CLO
SE
●シールドベースをクリーニングしたり、あるいは新規にシールドベースを交換した場合、シールドを
閉め、シールドと窓ゴムとの密着を確認してください。隙間がある場合、風の巻き込みや風切り音の
原因となるため、シールドが窓ゴムに密着するようにシールドベースの位置を調整してください。
●プリセットオープニング機構使用時は、走行風を導入するためシールドと窓ゴムとの間に隙
間ができます。シールド周りの風切り音が気になる場合は、プリセットレバーの位置を標準
ポジションに戻し、シールドを窓ゴムに密着させてください。
●スクリューの締め付けなどを行う際は、ビットサイズ(No.2)のプラスドライバーを垂直に当
てて、ていねいに回してください。サイズの合わないドライバーや電動ドライバーを使用した
り、スクリューをななめに締め付けたりすると、ネジ頭を破損する場合がありますので、十分
注意して回してください。スクリューを交換する場合は、必ず純正部品(アルミニウム製)を
ご使用ください。スクリューを強く締めすぎるとスクリューが破損する場合がありますので、
ご注意ください(推奨締め付けトルク:80cN・m/約8kgf・cm)。
●シールドが曇った状態で走行しないでください。視界が妨げられ大変危険です。シールドが
曇りやすいコンディションでは、ロアエアインテークを開けるか、プリセットレバーを使っ
てシールドを微開状態にするなどし、ヘルメット内をよく換気してください。
● Pinlock R fog-free sheetは、シート自体が湿気を吸収することにより高い曇り止め効果を発
揮します。しかし、低温多湿などの曇りやすい条
件下でヘルメット内が密閉された状態が続くと、
ビット
水蒸気でシートが飽和状態となり、にじみや曇り
サイズ
が発生することがあります。この場合も、ロアエ
(No.2)
アインテークを開けたり、プリセットレバーでシー
Size
ルドを微開したりして、ヘルメット内をよく換気
(No.2)
してください。Pinlock R fog-free sheetの取り
扱い方法につきましては、シートに同梱されてい
る取扱説明書をご覧ください。
●Close a shield / visor and make sure that a shield / visor is in close contact with a window beading
after cleaning or replacement of a shield / visor base. If there is a gap in between, adjust a position
of the base plate and eliminate a gap because it may cause roll-in of riding wind or noise.
●While using preset opening mechanism, there is a gap between a shield / visor and a window
beading to absorb fresh air. If the noise around a shield / visor is disturbing, lift a lever to
standard position and make a shield / visor in close contact with a window beading.
●For tightening screws, apply No.2 size Phillips head screwdriver vertically and rotate it carefully. If
improper sized screwdriver or electric screwdriver is used, a screw head may be broken. Use a
genuine screw made of aluminum for replacement. If a screw is tightened too much, it may be
broken. (Recommended torque: 80 cN・m or about 8 kgf・cm)
●Never ride with a fogged shield / visor, as it may interrupt vision. Under the condition where a
shield / visor may fog easily, absorb fresh air into a helmet by opening a lower air intake or
opening a shield / visor slightly using a preset opening mechanism.
●Pinlock R fog-free lens absorbs moisture inside a helmet and prevents fogging of a shield /
visor. However, it may fog if the lens is saturated with moisture inside a helmet under such a
condition as low temperature or high humidity long time. In such a case, make inside of a
helmet well ventilated by opening a lower air intake or opening a shield / visor slightly using a
preset opening mechanism. Read instructions enclosed in a bag of a lens to know how to
handle a Pinlock R fog-free lens.
内装の交換について
Replacement of the Inner Parts
当製品はセンターパッド、チークパッド(左右)、チンストラップカバー(左右)
を取り外して洗うことができます。内装の名称と図を参照して、着脱を確実に行っ
てください。
Center pad, cheek pads and chinstrap covers of both sides can be removed for
washing in this model. Remove or install firmly referring to the names and
drawings of the inner parts.
内装を交換する場合は、下記表を参照のうえ、正しいサイズのものをお求めください。
When you replace the inner parts, be sure to select the proper size for your helmet.
製品サイズ
Helmet Size
XS
S
M
L
XL
XXL
センターパッド
Center Pad
XS9
S9
M9
L9
XL9
XXL9
チークパッド
Cheek Pad
緩く
For Loose Fit
31
標準
Standard
35
きつく
For Tight Fit
39
●チークパッドは全サイズ共用パーツです。頬部を緩くしたい場合はチークパッド31、
きつくしたい場合はチークパッド 39に交換します(共にオプションパーツ)。
●センターパッドは各製品サイズで異なります。ご購入の際、お手持ちのヘルメット
のサイズをご確認ください。
●Cheek pad is common for all helmet sizes. When you like to make cheek portion
loose, change to the cheek pad 31, and when you like to make it tight, change to
the cheek pad 39 while both are optional.
●Center pad differs for each helmet size. When you replace, please select the proper
size of the center pad for your helmet.
※内装は必ずすべて装着してご使用ください。
* Make sure that all the inner parts are equipped before use.
内装の取り外し方と取り付け方
Removing and Installing the Inner Parts
■センターパッドの取り付け方
■ Installing the Center Pad
7
■チークパッドの取り外し方
■ Removing the Cheek Pads
8
ホック
Snap
Unsnap 3 points and
pull out cheek pad
of both sides.
プレート
Plate
E.Q.R.S.(エマージェンシークイッ
クリリースシステム)とは、万が一
の事故の際、救護者がライダーから
ヘルメットを脱がせやすくするため
に、チークパッドを容易に取り外す
ことができる機構です。
前部プレートは、片側サイド(図7参照)から反対側にかけてブラケットの隙間(図
8 矢印部分参照)に滑り込ませるように入れます。
チークパッドブラケット
Cheek Pad Bracket
次に、チークパッド
下部のプレート(A)
( B )部 分 を チ ー ク
パッドブラケット
から引き抜きます
(チークパッドは左
右同じ要領で取り
外します)。
(A)
プレート
Plate
Then, pull out (A) (B)
portion of plate in a
bottom of a cheek
pad from cheek pad
brackets. (Do both
sides in the same
manner.)
プレート
Plate
チークパッドブラケット
Cheek Pad Bracket
(B)
A
Slide and insert front plate into a gap of bracket from one side to another as
indicated in Drawings 7 and 8.
9
3
ブラケット
Bracket
引き剥がすように
ホックを3か所外し、
左右のチークパッド
を取り外します。
1
2
E.Q.R.S.(エマージェンシークイックリリースシステム)
E.Q.R.S.(Emergency Quick Release System)
プレート
Plate
センターパッド前頭部のプレー
トが、図 9 の状態になっている
ことを確認してください。
Be sure that the plate of the
center pad is secured as
shown in Drawing 9.
次に後頭部の2か所のホックを、
カチッと音がするまではめ込
みます。
10
B
エマージェンシータブ
Emergency Tab
Snap 2 points into place in the
rear of the center pad.
C
ホック
Snap
センターパッドは後頭部から
取り外します。センターパッド
ブラケットからホックを 2 か所
外します。
Remove the center pad from a
rear head to a front portion.
Unsnap 2 points at center pad
brackets.
5
プレート
Plate
センターパッドの前頭部は、
図 5 のようにプレートの近くを
持って引き抜きます。
Pull out a front portion of the
center pad holding a plate as
per Drawing 5.
■チークパッドの取り付け方
■ Installing the Cheek Pads
D
Before installing the cheek pad, be sure
that all 3 snaps are located in proper
positions as per drawing. Otherwise,
they may not fit properly.
11
チークパッドブラケット
Cheek Pad Bracket
6
チンストラップカバー
Chinstrap Cover
ホック
Snap
チンストラップカバーを取り外すには、チー
クパッドを取り外してからチンストラップ
カバーのホックを外し、チンストラップから
引き抜きます(左右同じ要領で取り外します)
。
To remove a chinstrap cover, remove
the cheek pad first, release a snap and
strip the cover from the chinstrap. (Do
both sides in the same manner.)
チンストラップカバーは左右で形状が異な
りますので、取り付けの際は、左図を参照
し左右を確かめてからチンストラップに通し、
カチッと音がするまでホックをはめ込みます。
チンストラップカバー(右) チンストラップカバー(左) A cover differs right and left. To install,
Chinstrap Cover
Chinstrap Cover
identify right and left referring to a
(Right)
(Left)
drawing first. Then, pass the chinstrap
through and snap until you hear it clicks.
プレート
Plate
ボス
Boss
(A)
12
チークパッドブラケット
Cheek Pad Bracket
エマージェンシータブ
Emergency Tab
■チンストラップカバーの取り外し方と取り付け方
■ Removing and Installing the Chinstrap Covers
チンストラップ
Chinstrap
●Breath guard prevents fogging of the shield / visor cause by breath. It must be
inserted into a gap (A) between a shell and an impact absorbing liner as per
drawing.
E.Q.R.S. (Emergency Quick Release
System) is a mechanism for emergency
personnel to remove the cheek pads.
緊急時にチークパッドを外すには、
最初にチンストラップをほどくか切
断し、つまみ部分(図 A)を持って、
図 B のようにエマージェンシータブ
を引き出します(※チンカーテンが
装着されている場合は、エマージェ
ンシータブを引き出すまえにチンカー
テンを取り外してください)。
To remove a cheek pad in an
emergency, cut or undo a chinstrap
first, then, pinch a lever part shown
in Drawing A and pull out an
emergency tab as per Drawing B.
(*If a chin curtain is installed, it must
be removed before pulling out the
emergency tab.)
(A)
●チンカーテンはヘルメットの顎まわりの風の巻き込みを防ぎます。取り付けは、
まずプレートの中央とヘルメット先端部の中央を合わせ、シェルと衝撃吸収
ライナーの隙間(B)に差し込んだあと、両サイドのプレートを差し込んでい
きます。取り外しは、先にチンカーテンの中央部分のプレートを引き起こして
抜き、両サイドを抜き取ります。
●Chin curtain prevents rolling-in of wind around chin. To install, adjust a center
of plate to a center of the helmet's front end and insert it into a gap (B)
between a shell and an impact absorbing liner, and then, insert plates of both
sides. In order to remove, pull out plate of a center portion of the chin curtain,
and then, pull out plates of both sides.
(B)
■センターパッドの取り外し方
■ Removing the Center Pad
センターパッドブラケット
Center Pad Bracket
●ブレスガードは呼吸によるシールドの曇りを防ぎます。図のようにシェルと
衝撃吸収ライナーの隙間(A)に差し込みます。
次に、ヘルメットを押さえながら、
図 C で示された方向にエマージェン
シータブを引っ張ります。
ホック
Snap
13
ボス
Boss
(B)
プレート
Plate
取り付けるときは、必ず最初にチークパッ
ドの左右を確認してください。まずプレー
ト後端部から先に、チークパッドブラケッ
トのボスに(A)部分が入るようにプレー
トをシェルと衝撃吸収ライナーの隙間
に差し込みます(図 11)。プレートを前
頭部に向かって差し込んでいき、図 12
のようにプレート(B)部分も同様に差
し込みます(チークパッドは左右同じ要
領で取り付けます)。
Identify right and left at first. Insert rear
end of plate into a gap between a shell
and an impact absorbing liner and make
sure that portion (A) is placed into boss
of cheek pad bracket as per Drawing 11.
Insert plate to direction of a front portion
and insert (B) portion of plate also in the
same manner as per Drawing 12. (Do
both sides in the same manner.)
プレートを差し込んだあと、エマージェ
ンシータブをチークパッドのプレートと
シェルの隙間に押し込み、図 13 のよう
につまみ部分のみが見える状態にします。
After plate is inserted, insert an
emergency tab into a gap between a shell
and the plate of a cheek pad, leaving a
lever part outside as per Drawing 13.
14
ホック
Snap
1
3
2
最後に、図14のようにチンストラップを
パッドのくぼみに通し、1 → 2 → 3 の
順にホックをはめ込みます。ホックは、パッ
ド側からホックの上部分を強く押し、カチッ
と音がするまで3か所をはめ込みます。
Then, pass the chinstrap through the
hollow portion of the cheek pad and
snap the pad at all 3 points in the order
of 1 to 3 as per Drawing 14. Press the
head of the snap from the pad side until
you hear it clicks.
After that, hold a helmet firmly and
pull the emergency tab to a
direction as indicated in Drawing C.
エマージェンシータブを引っ張るこ
とでチークパッドのホックが外れ、
ライダーがヘルメットを被った状態
のまま、ヘルメット下部からパッド
を引き抜くことができます。
チークパッドを取り付けるまえに 3 か所
のホックが図の位置にあることを確認
してください。正しい位置でない場合、ホッ
クがはまらないことがあります。
4
標準装備の機能パーツの取り付け方
Installing Standard Accessories
Pulling the emergency tab will release snaps and allow a cheek pad to be pulled
out through a bottom of a helmet while a helmet is still on rider's head.
反対側のチークパッドも同じように外します。
Do in the same manner to remove a cheek pad of the other side.
チークパッドを外すときは、必ずヘルメットをしっかりと押さえ、ライダーの頭
部を動かさないよう注意してください。
When removing cheek pads, make sure to hold a helmet firmly and pay full
attention not to move rider's head.
〈ご注意〉
1.ヘルメットからチークパッドを引き抜くとき、片方の手で必ずヘルメットを固定
してください。
2.走行中は絶対に使用しないでください。
3.必ず専用のチークパッドを使用してください。専用の部品以外を取り付けたりし
ないでください。
4.ヘルメットにチンカーテンが装着されている状態のときは、チンカーテンを取り
外してからエマージェンシータブを操作してください。
5.普段、メンテナンスなどの目的でチークパッドを取り外すときには使用しないで
ください。
Warning
1.
2.
3.
4.
Make sure to hold the helmet firmly by your hand when pulling out cheek pads.
Never pull the emergency tab while riding.
Use genuine SHOEI cheek pads only and never use non-SHOEI parts.
If a chin curtain is installed in the helmet, remove the chin curtain before handling
the emergency tab.
5. Do not use Emergency Quick Release System when removing a cheek pad
for maintenance.
このステッカーをヘルメットから剥がさないでください。
Never peel these stickers from a helmet.
※ヘルメットを持ち運ぶときなどに、パーツ部分を持たないでください。パーツ
が外れたり、破損したりする場合があります。
*Don't hold parts portions when carrying a helmet. Otherwise, parts may
be dislocated or broken.
内装の取り扱いに関するご注意
Keys to Handling the Inner Parts
1.ホックのはめ込み、取り外しはなるべくホック部の近くを持ち、ていねいに行っ
てください。ホックはカチッと音がするまできちんと取り付けてください。
2.内装を洗う場合は手洗いか、洗濯機をご使用の場合はネットに入れるなどして、
ていねいに洗ってください。洗濯の際は水を使用し、乾いた布で水を拭き取っ
てから陰干ししてください。強くしぼると、プレート部分を破損する場合があ
りますので、ご注意ください。衝撃吸収ライナー(内装を取り除いたあとの中
の発泡スチロール)は、水または水で薄めた中性洗剤で湿らせた布で拭いてく
ださい。パーツを破損する恐れがありますので、ベンジン、シンナー、ガソリ
ン、ガラスクリーナー、その他の溶剤は絶対に使用しないでください。
1. When installing or removing the inner parts, hold near a snap and handle with
care. Press a head of the snap firmly until you hear it clicks.
2. When you wash the inner parts, wash by hand, or put them in a washing net in
case of machine wash. Use water only for washing, wipe with dry cloth and dry
in the shade. Do not squeeze tightly, or pay full attention in case of spin dry, as
rough treatment will break a plate portion of the inner parts. Wipe the impact
absorbing liner (polystyrene foam under the pads) with a cloth moistened by
water or a solution of neutral detergent in water. Never use benzine, thinner,
petrol or any kind of harsh cleaner, as they may damage the parts.
ご注意
WARNING
1.ご使用のまえに、シールド左右のギアとフックが確実にロックされているか、
必ず確認してください。
2.シールドやベンチレーションパーツ等の汚れは、水で薄めた中性洗剤で洗い、
水でよくすすいでから柔らかい布で拭いてください。パーツを破損する恐れ
がありますので、ベンジン、シンナー、ガソリン、ガラスクリーナー、その他
の溶剤は絶対に使用しないでください。
3.内装は必ずすべて装着して、ご使用ください。
1. Before wearing the helmet, make sure that gears and hooks of both sides of
the shield / visor are locked firmly.
2. Clean a shield / visor or ventilation parts with a solution of neutral detergent
and water, rinse well and dry with a soft cloth. Never use benzine, thinner,
petrol or any kind of harsh cleaner, as they may damage the parts.
3. Make sure that all the inner parts are equipped before you use the helmet!


