1
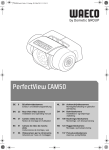
Function description of the monitors
Front (see . E)
1 On /standby switch (
= ON,
= Standby)
2 Control lamp lights up when the monitor is switched on
3 Brightness setting
4 Contrast setting
5 Volume control for laterally integrated loudspeaker
6 Camera selection switch; toggle between camera 1 and camera 2
(accessories)
7 Brightness toggle ‘day/night’
= DAY,
= NIGHT, the monitor slightly darkens.
Rear (see . E)
8 5 pole plug connector (port) for camera 1
9 5 pole plug connector (port) for camera 2 (accessory)
10 Video output (e.g. to connect a video recorder)
11 Audio output
12 Connection for external loudspeaker
13 Selector switch for camera 1 and 2 to display the image on the
monitor either „normal“ or „inverted“
14 Fuse (2A)
15 Voltage supply connection
16 Monitor holder
17 Knurled screws
Installing the monitor
Warning! Choose the monitor position such that it cannot cause
injury to the driver or passengers under any circumstances
(sudden braking, road accident).
Ensure that the monitor does not impair the driver’s vision in any
way (see . F 1).
General installation instructions!
Observe the following points before fitting the monitor:
– Screw the monitor holder onto the monitor.
– Test position the monitor using the fitted holder.
– When choosing the monitor position, ensure that it can be clearly
viewed by the driver (no obstructions) (see . F 2 and F 3).
– Ensure that the installation site is level.
– Before finally installing check whether there is sufficient space
underneath the selected installation site for fitting the washers and
nuts.
42