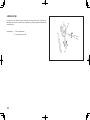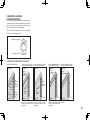
1
WICHTIGE SICHERHEITSHINWEISE Beim Gebrauch eines Elektrogeräts sind grundlegende Sicherheitsvorkehrungen zu beachten, darunter auch die folgenden. Lesen Sie sämtliche Anweisungen vor dem Gebrauch dieser Nähmaschine. ACHTUNG - zur Vermeidung von elektrischen Schlägen: 1. “Lassen Sie die Nähmaschine nie unbeaufsichtigt, wenn sie mit dem Stromnetz verbunden ist. Ziehen Sie stets den Stecker unmittelbar nach dem Gebrauch sowie vor jeder Reinigung aus der Steckdose aus.” WARNUNG - zur Vermeidung von Brandwunden, Bränden, elektrischen Schlägen oder Personenschäden: 1. “Die Maschine darf nicht als Spielzeug verwendet werden. Höchste Aufmerksamkeit ist notwendig, wenn die Nähmaschine von Kindern oder in Anwesenheit von Kindern benutzt wird.” 2. “Dieses Gerät ist nicht für die Nutzung durch Personen (einschließlich Kinder) mit stark reduzierten physischen, sensorischen oder geistigen Fähigkeiten oder Mangel an Erfahrung und Wissen, es sei denn, sie Überwachung oder Belehrung über die Verwendung des Geräts durch eine verantwortliche Person für ihre Sicherheit gegeben wurden. Kinder sollten beaufsichtigt werden, um sicherzustellen, dass sie nicht mit dem Gerät spielen.” 3. “Die Maschine darf nur zu den in diesem Handbuch beschriebenen Zwecken verwendet werden. Verwenden Sie nur Zubehör, das vom Hersteller in diesem Handbuch empfohlen wird.” 4. “Die Nähmaschine darf auf keinen Fall betrieben werden, wenn ein Kabel oder Stecker beschädigt ist, wenn sie nicht ordnungsgemäß arbeitet, wenn die Maschine gefallen ist, beschädigt wurde oder nass geworden ist. Muss die Maschine geprüft oder repariert werden oder sind elektrische oder mechanische Justierungen vorzunehmen, bringen Sie die Nähmaschine zum nächstgelegenen Vertragshändler oder Kundendienst.” 5. “Wenn das Netzkabel beschädigt ist, muss es vom Hersteller ersetzt werden, der Dienstleister oder ähnlich qualifizierte Personen, um eine Gefahr zu vermeiden.” 6. “Die Nähmaschine darf nicht betrieben werden, wenn irgendwelche Luftöffnungen verschlossen sind. Halten Sie die Belüftungsöffnungen der Nähmaschine und des Fußanlassers frei von Flusen, Staub und losem Gewebe.” 7. “Maschine niemals fallen lassen und keine Gegenstände in die Öffnungen der Maschine stecken.” 8. “Maschine nicht im Freien betreiben.” 9. “Die Maschine darf nicht an Orten betrieben werden, an denen Sprays oder reiner Sauerstoff verwendet werden.” 10. “Zum Trennen der Maschine von der Stromversorgung ist der Netzschalter auszuschalten (d.h. auf “0” zu stellen) und dann der Netzstecker aus der Steckdose zu ziehen.” 11. “Schalten Sie oder ziehen Sie das Gerät beim Verlassen Sie Ihren Arbeitsplatz, Trennen Sie das Gerät vor der Durchführung von Wartungs-oder Lampen zu ersetzen.” 12. “Den Netzstecker nicht am Kabel, sondern am Stecker aus der Steckdose ziehen.” 13. “Beim Nähen sind die Finger von allen sich bewegenden Teilen fernzuhalten. Besondere Achtung ist im Bereich um die Nähmaschinennadel geboten.” 14. “Auf keinen Fall eine beschädigte Stichplatte verwenden. Eine beschädigte Stichplatte kann Nadelbruch verursachen.” 15. “Keine verbogenen Nadeln verwenden.” 16. “Das Nähgut beim Nähen weder ziehen noch schieben. Dadurch könnte die Nadel abgelenkt werden und brechen.” 17. “Zur Durchführung von Arbeiten im Nadelbereich, wie Einfädeln der Nadel oder der Spule, Nadelwechsel, Auswechseln des Nähfußes usw., ist die Maschine auszuschalten.” 18. “Bevor Abdeckungen entfernt werden sowie zum Schmieren oder zum Ausführen von Wartungsarbeiten, die in diesem Handbuch beschrieben sind, ist der Stecker der Nähmaschine aus der Steckdose zu ziehen.” 19. “Um einen elektrischen Schlag zu vermeiden Sie niemals die Maschine noch das Netzkabel oder der Netzstecker nicht in Wasser oder anderen Flüssigkeiten aus.” 20. “Die maximale Aufnahme der LED-Leuchte ist 0.3W, maximale Spannung DC 5V. Wenn die LED-Leuchte defekt ist sollten Sie die Maschine nicht benutzen; bringen Sie sie schnellstmöglich zur Reparatur oder zum Austausch der Leuchte zum Hersteller oder einer geeigneten Service-Agentur.” 21. “Achtung der folgenden um Verletzungen zu vermeiden: - Ziehen Sie den Fuß-Controller des Gerätes beim Verlassen Sie Ihren Arbeitsplatz: - Ziehen Sie den Fuß-Controller des Geräts vor der Durchführung von Wartungsarbeiten.” VORSICHT - Verletzungsgefahr durch bewegliche Teile – zur Vermeidung von Personenschäden, Maschine ausschalten vor Wartungsarbeiten bzw. Abdeckungen schließen vor Gebrauch der Maschine. DIESE ANLEITUNG BITTE GUT AUFBEWAHREN Die Nähmaschine ist nur zum Hausgebrauch o. Ä. bestimmt. Diese Maschine entspricht der europäischen Richtlinie 2004/108/ EC über die elektromagnetische Verträglichkeit. “ENTSORGUNG: Dieses Gerät ist mit dem Recycling-Symbol gekennzeichnet. Entsorgen Sie dieses Produkt nicht über den unsortierten Hausmüll entsorgt werden. Sammlung dieser Altgeräte getrennt für eine besondere Behandlung erforderlich ist. (Nur Europäische Union) ” 1 “IMPORTANT SAFETY INSTRUCTIONS” “ When using an electrical appliance, basic safety precautions should always be followed, including the following.” “ Read all instructions before using this sewing machine.” “DANGER- To reduce the risk of electric shock:” 1. “This sewing machine should never be left unattended when plugged in. Always unplug this sewing machine from the electric outlet immediately after using and before cleaning.” “WARNING- To reduce the risk of burns, fire, electric shock, or injury to persons: ” 1. “Do not allow to be used as a toy. Close attention is necessary when this sewing machine is used by or near children.” 2. “This appliance is not intended for use by persons (including children) with reduced physical, sensory or mental capabilities, or lack of experience and knowledge, unless they have been given supervision or instruction concerning use of the appliance by a person responsible for their safety. Children should be supervised to ensure that they do not play with the appliance.” 3. “Use this sewing machine only for its intended use as described in this manual. Use only attachments recommended by the manufacturer as contained in this manual.” 4. “Never operate this sewing machine if it has a damaged cord or plug, if it is not working properly, if it has been dropped or damaged, or dropped into water. Return the sewing machine to the nearest authorized dealer or service center for examination, repair, electrical or mechanical adjustment.” 5. “If the supply cord is damaged, it must be replaced by the manufacturer, its service agent or similarly qualified persons in order to avoid a hazard.” 6. “Never operate the sewing machine with any air openings blocked. Keep ventilation openings of the sewing machine and foot control free from the accumulation of lint, dust, and loose cloth.” 7. “Never drop or insert any object into any opening.” 8. “Indoors use only.” 9. “Do not operate where aerosol (spray) products are being used or where oxygen is being administered.” 10. “To disconnect, turn switch to the off („0“) position, then remove plug from outlet.” 11. “Switch off or unplug the appliance when leaving it unattended, unplug the appliance before carrying out maintenance or replacing lamps.” 12. “Do not unplug by pulling on cord. To unplug, grasp the plug, not the cord.” 13. “Keep fingers away from all moving parts. Special care is required around the sewing machine needle.” 14. “Never sew with a damaged needle plate as this can cause needle to break.” 15. “Do not use bent needles.” 16. “Do not pull or push fabric while stitching. It may deflect the needle causing it to break.” 17. “Switch the sewing machine off (“0”) when making any adjustments in the needle area, such as threading needle, changing needle, threading bobbin, or changing presser foot, etc.” 18. “Always unplug sewing machine from the electrical outlet when removing covers, lubricating, or when making any other user servicing adjustments mentioned in the instruction manual.” 19. “To avoid electrical shock never put the machine nor the mains cable or mains plug into water or other liquids.” 20. “The LED lamp maximum power is 0.3w, maximum voltage is DC 5v, if the LED lamp is damaged, you should not use the product and send it to the manufacture or service agent to repair or replace at once.” 21. “Attention the following to avoid injury: - Unplug the foot controller of the appliance when leaving it unattended: - Unplug the foot controller of the appliance before carrying out any maintenance.” 2 “CAUTION-- Moving parts-To reduce risk of injury, switch off before servicing. Close cover before operating machine.” “SAVE THESE INSTRUCTIONS” “This product is for household use, or equivalent.” This appliance complies with EEC Directive 2004/108/EC covering the electromagnetic compatibility. DISPOSAL: This equipment is marked with the recycling symbol. Do not dispose this product as unsorted municipal waste. Collection of such waste separately for special treatment is necessary. (European Union only) INSTRUCŢIUNI PRINCIPALE PENTRU TEHNICA SECURITĂŢII Folosirea mecanizmului electrotehnic necesită respectarea măsurilor de siguranţă, arătate mai jos. Faceţi cunoştinţă cu ele înainte de a începe lucrul la maşina de cusut. PERICULOS - Pentru reducerea riscului electrocutării: 1. Nu lăsaţi maşina de cusut conectată fără atenţia D-stră. Scoateţi imediat fişa din priza electrică dupe ce aţi terminat lucrul la maşină şi înainte de a o curăţi. INSTRUCŢIUNI PRINCIPALE PENTRU TEHNICA SECURITĂŢII Maşina dată corespunde Directivei EES 89/336 /EES în sfera compatibilităţii electromagnetice. 2. Scoateţi întotdeauna fişa din priză înainte de a schimba lampa. Efectuaţi substituirea lămpii de acelaş tip pentru intensitate constantă 6,5 V şi capacitate 2,5 Vt. ATENŢIE-Pentru reducerea riscului de aprindere, incendiu, electrocutare şi traume a lucrătorilor: 1. Nu permiteţi folosirea maşinii în calitate de jucărie. Dacă alături se află copii, lucrul la maşina de cusut necesită o deosebită atenţiune. 2. Utilizaţi maşina de cusut după destinaţia ei în conformitate cu Instrucţiunea dată. Folosiţi numai accesoriile, ce sunt recomandate de către producători şi care sunt arătate în Instrucţiune. 3. Niciodată nu lucraţi la maşina de cusut în cazul deteriorării cordonului de alimentare şi a fişei, dacă maşina nu lucrează corect, dacă a fost scăpată jos şi stricată, sau dacă a căzut în apă. Restituiţi maşina celui mai apropiat dealer oficial sau în centrul de deservire pentru control, reparaţie, verificări electrice şi mecanice. 4. Niciodată nu lucraţi cu maşina în cazul astupării orificiilor aeriene. Feriţi orificiile aeriene ale maşinii şi pedala de comandă de fibre textile, praf şi bucăţi de ţesătură. 5. Nu permiteţi să cadă piese de prisos în vre-una din orificiile aeriene. 6. Nu folosiţi maşina de cusut în afara încăperii. 7. Nu lucraţi acolo, unde se folosesc substanţe în ambalaje de aerozol sau oxigen curat. 8. Pentru deconectarea maşinii întoarceţi întrerupătorul principal în poziţia „O” (DECONECTAT), apoi scoateţi fişa din priză. 9. Nu deconectaţi maşina, zmulgînd şnurul de alimentare. La deconectare ţineţi cu mîna priza, şi nu şnurul. 10. Feriţi degetele mînii de la toate părţile mobile. O atenţie deosebită se necesită în zona mişcării acului. 11. Nu coaseţi, dacă placa pentru ace e deteriorată, aceasta poate să aducă la ruperea acului. 12. Nu folosiţi ace îndoiate. 13. Nu trageţi şi nu împingeţi ţesătura la coasere. Aceasta va duce la răsfrîngerea acului şi la ruperea lui. 14. Deconectaţi maşina de cusut (poziţia „O”) în cadrul oricăror reglări în zona acului, cum ar fi băgarea aţei în ac, schimbarea acului, bobinajul mosorelului, înlocuirea picioruşului etc. 15. Întotdeauna trageţi fişa maşinii de cusut din priză cînd scoateţi capacul, la ungerea maşinii şi efectuarea tuturor reglărilor, menţionate în Instrucţiunea dată. Utilajul dat contine un marcaj, ce evidentiaza un ciclu recurent. Aceasta inseamna, ca dupa utilizare utilajul necesita a fi supus unei prelucrari izolate la un centru de receptie special. Nu evacuati intrun receptor de gunoi menager. Aceasta va contribui la pastrarea mediului inconjurator. (Numai pe teritoriul Uniunii Europene). mobile-Pentru preîntîmpinarea traumării deconectaţi maşina în timpul deservirii. Închideţi ATENŢIUNE -- Piese capacul înainte de a începe lucrul la maşină. PĂSTRAŢI ACESTE DISPOZIŢII ACTUALE Folosiţi maşina de cusut numai în condiţii de casă sau analogic. 3 СОДЕРЖАНИЕ INHALTSVERZEICHNIS 1. Знакомство с вашей машиной Составные части машины------------------------------------------------------------------------- 6 - 7 Принадлежностей------------------------------------------------------------------------------------ 8 - 9 Включение машины------------------------------------------------------------------------------ 10 - 11 Подготовка к шитью------------------------------------------------------------------------------ 12 - 15 Замена лапки--------------------------------------------------------------------------------------- 16 - 17 Замена иглы подбор игол и ниток в зависимости от мат-ла------------------------ 18 - 21 2. Начало шитья Заправка ниток------------------------------------------------------------------------------------Вспомогательные приемы---------------------------------------------------------------------Проверка качества стежков-------------------------------------------------------------------Таблица настройки------------------------------------------------------------------------------З-х ниточная оверлочная строчка с одной иглой--------------------------------------Узкий шов и шов “рулик” (подвернутый)--------------------------------------------------Регулировка натяжения нитй-----------------------------------------------------------------Регулировка длины стежка, Регулировка ширины обметываная-----------------Регулировка ширины обметываная--------------------------------------------------------“Палец” для образования петли (В)--------------------------------------------------------дифференциал-----------------------------------------------------------------------------------Регулятор давления лапки--------------------------------------------------------------------Работа с плотными материалами или с несколькими слоями ткани------------Основные операции Обметывание углов на ткани без обрезки ниток-----------------------------------Обработка криволинейных срезов------------------------------------------------------Как распороть строчку-----------------------------------------------------------------------Обметывание с прокладыванием шнура----------------------------------------------Отделочные строчки-------------------------------------------------------------------------Применение дифференциала------------------------------------------------------------- 22 - 27 28 - 29 30 - 31 32 - 35 36 - 37 38 - 39 40 - 43 44 - 45 44 - 45 44 - 45 46 - 47 48 - 49 48 - 49 50 - 51 50 - 51 50 - 51 52 - 53 54 - 55 56 - 57 3. Уход за вашей машиной Замена подвижного ножа, снятие подвижного ножа----------------------------------- 58 - 59 Снятие передней крышки---------------------------------------------------------------------- 58 - 59 Чистка и смазка------------------------------------------------------------------------------------ 60 - 61 1. Lernen Sie Ihre Maschine kennen Die Hauptteile der Maschine------------------------------------------------------------------------ 6 - 7 Das Zubehör--------------------------------------------------------------------------------------------- 8 - 9 Das Aufstellen der Maschine----------------------------------------------------------------------10 - 11 Vorbereitung zum Einfädeln---------------------------------------------------------------------- 12 - 15 Wechseln der Nähfüßchen------------------------------------------------------------------------ 16 - 17 Auswechseln der Nadeln, Nadel-und Garntabelle------------------------------------------ 18 - 21 2. Nähen mit Ihrer Maschine Das Einfädeln---------------------------------------------------------------------------------------Nützliche Hinweise---------------------------------------------------------------------------------Prüfen der Stichbildung---------------------------------------------------------------------------Einstellungs-Tabelle-------------------------------------------------------------------------------Dreifädige Überwendlingnaht mit einer Nadel----------------------------------------------Schmaler Überwendlingsaum, Rollsaum-----------------------------------------------------Feineinstellung der Fadenspannungen-------------------------------------------------------Einstellen der Stichlänge, Einstellen der Schnittbreite, Stichfinger (B)---------------Der Differentialtransport--------------------------------------------------------------------------Regulierung des Füßchendrucks---------------------------------------------------------------Nähen von extra-dickem Stoff oder mehrerer Stofflagen--------------------------------Grundtechniken Nähen von Ecken ohne Abschneiden der Fäden---------------------------------------Nähen von Kurven, Auftrennen--------------------------------------------------------------Überwendlingnaht mit Beilauffaden--------------------------------------------------------Dekorative Nähte--------------------------------------------------------------------------------Anwendung des Differentialtransports------------------------------------------------------ Austausch des Obermessers--------------------------------------------------------------------- 58 - 59 Austausch der Nählicht-Glühlampe, Reinigen und Ölen---------------------------------- 60 - 61 4. Nützliche Hinweise bei Störungen------------------------------------------------------ 62 - 63 5. Sonderzubehör----------------------------------------------------------------------------------- 64 - 73 5. Приспособления (дополнительно)-------------------------------------------------- 64 - 73 Число ниток: 3 или 4 нитки Ширина обметки: 6 мм (леваяигла), 3.8 мм (праваяигла) Иглы: HA×1SP, HA×1 (130 / 705 H) Длина стежка: 1 - 5 мм Скорость шитья: до 1300 стежков в мин. Габариты: 337 ммЧ249 ммЧ315 мм Масса: 8.7 кг 4 50 - 51 50 - 51 52 - 53 54 - 55 56 - 57 3. Instandhaltung der Maschine 4. Устранение неполадок--------------------------------------------------------------------- 62 - 63 СПЕЦИФИКАЦИЯ 22 - 27 28 - 29 30 - 31 32 - 35 36 - 37 38 - 39 40 - 43 44 - 45 46 - 47 48 - 49 48 - 49 TECHNISCHE DATEN Zahl der Fäden: 3 oder 4 Fäden Überwendlingstichbreite: 6 mm (linke Nadel) und 3.8 mm (rechte Nadel) Nadel: HA×1SP, HA×1 (130 / 705 H) Stichlänge: 1 - 5 mm Stichzahl: max. 1300 Stiche/Minute Abmessungen: 337 ×249 ×315 Gewicht: 8.7 Kg TABLE OF CONTENTS SUMAR 1. KNOWING YOUR SEWING MACHINE Identification chart-------------------------------------------------------------------------------------- 6 - 7 Accessories---------------------------------------------------------------------------------------------- 8 - 9 Setting up your machine--------------------------------------------------------------------------- 10 - 11 Preparation for threading-------------------------------------------------------------------------- 12 - 15 Changing presser feet------------------------------------------------------------------------------ 16 - 17 Changing needle, thread and fabric chart----------------------------------------------------- 18 - 21 2. STARTING TO SEW Threading your machine--------------------------------------------------------------------------Helpful hints------------------------------------------------------------------------------------------Testing stitch overlock stitches------------------------------------------------------------------Setting chart-----------------------------------------------------------------------------------------Three-thread overlock with one needle-------------------------------------------------------Narrow and rolled hem, picot stitch------------------------------------------------------------Adjusting thread tensions-------------------------------------------------------------------------Adjusting stitch length, Adjusting overedge cutting width, Stitch finger (B)----------Differential feed-------------------------------------------------------------------------------------Foot pressure regulator---------------------------------------------------------------------------Sewing with extra heavyweight fabric or multiple layers of fabric----------------------Basic techniques Turning outside corners without cutting threads---------------------------------------------Turning curved edges--------------------------------------------------------------------------Removing stitches from sewn fabric-------------------------------------------------------Corded overlock---------------------------------------------------------------------------------Decorative effects-------------------------------------------------------------------------------Differential feed applications------------------------------------------------------------------ 22 - 27 28 - 29 30 - 31 32 - 35 36 - 37 38 - 39 40 - 43 44 - 45 46 - 47 48 - 49 48 - 49 50 - 51 50 - 51 50 - 51 52 - 53 54 - 55 56 - 57 3. CARING FOR YOUR MACHINE Replacing moving cutter, Disengaging moving cutter-------------------------------------- 58 - 59 Removing face cover------------------------------------------------------------------------------- 58 - 59 Cleaning and oiling---------------------------------------------------------------------------------- 60 - 61 4. CHECKING PERFORMANCE PROBLEMS- ------------------------------------------ 62 - 63 5. OPTIONAL ACCESSORIES- ---------------------------------------------------------------- 64 - 73 SPECIFICATION OF MACHINE Number of threads: 3 or 4 threads Overedge stitch width: 6 mm (left needle) and 3.8 mm (right needle) Needle: HA×1SP, HA×1 (130 / 705 H) Stitch length: 1 - 5 mm Stitching speed: Up to 1300 stitches per minute Dimensions: 337 mm(W) ×249 mm(D)×315 mm(H) Weight: 8.7 Kgs 1. FACEŢI CUNOŞTINŢĂ CUMAŞINA D-STRĂ Piese ale maşinii------------------------------------------------------------------------------ 6 - 7 Accesorii---------------------------------------------------------------------------------------- 8 - 9 Conectarea maşinii----------------------------------------------------------------------- 10 - 11 Pregătirea pentru coasere--------------------------------------------------------------- 12 - 15 Schimbarea pocioruşului----------------------------------------------------------------- 16 - 17 Schimbarea acului, Alegerea aţei şi a acelor---------------------------------------- 18 - 21 2. ÎNCEPEREA CUSUTULUI Aranjarea aţei----------------------------------------------------------------------------------------Metode auxiliare------------------------------------------------------------------------------------Verificarea calităţii cusăturii----------------------------------------------------------------------Tăbliţa reglării---------------------------------------------------------------------------------------Overlock triplu cu un ac---------------------------------------------------------------------------Tighel îngust şi tighel „rulon” (îndoiat)----------------------------------------------------Reglarea întinderii aţei----------------------------------------------------------------------------AReglarea lungiii tighelului, Reglarea lăţimii însăilăturii----------------------------------„Degeţel” pentru formarea ochiului) -----------------------------------------------------------Diferenţial---------------------------------------------------------------------------------------------Reglorul presiunii picioruşului ------------------------------------------------------------------Lucrul cu materiale îndesate sau cu cîteva straturi de materiale ----------------------Operaţiuni de bază Însăilarea unghiurilor pînzei fără tăierea aţei--------------------------------------------Prelucrarea marginii curbilinii----------------------------------------------------------------Desfacerea cusăturii---------------------------------------------------------------------------Însăilare cu aşezarea şnurului --------------------------------------------------------------Cusături decorative-----------------------------------------------------------------------------Utilizarea diferenţialului ------------------------------------------------------------------------ 22 - 27 28 - 29 30 - 31 32 - 35 36 - 37 38 - 39 40 - 43 44 - 45 44 - 45 46 - 47 48 - 49 48 - 49 50 - 51 50 - 51 50 - 51 52 - 53 54 - 55 56 - 57 3. ÎNGRIJIREA MAŞINII DVS Schimbarea cuţitului mobil, Scoaterea cuţitului mobil-------------------------------------- 58 - 59 Scoaterea capacului din faţă--------------------------------------------------------------------- 58 - 59 Curăţarea şi ungerea ------------------------------------------------------------------------------ 60 - 61 4. ÎNLĂTURAREA DEFECŢIUNILOR - ------------------------------------------------- 62 - 63 5. DISPOZITIVE ADĂUGĂTOARE ------------------------------------------------------ 64 - 73 SPECIFICAŢIE Numărul aţelor: 3 sau 4 fire Lăţimea însemnării: 6 mm (acul stîng), 3,8 mm (acul drept) Ace: HA×1SP, HA×1 (130/705 Н) Lungimea tighelului: 1 - 5 mm Cusut cuvîntare : Sus la spre 1,300 cusut de minute Dimensiuni: 337мм х 249мм х 315мм Masa: 8.7 kg 5 1. ЗНАКОМСТВО С ВАШЕЙ МАШИНОЙ Составные части машины 1. 2. 3. 4. 5. 6. 7. 8. 9. 10. 11. 12. 13. 14. 15. 16. 17. 18. 19. 20. 21. 22. 23. 24. 25. 26. 27. 28. Направитель шнура Регулятор давления лапки Освещение Рычаг подъема лапки Игольная пластина Лапка Регулятор ширины стежка Рабочий стол Ось нитенаправителя Регулятор натяжения нити левой иглы Регулятор натяжения нити правой иглы Регулятор натяжения нити верхнего петлителя Регулятор натяжения нити нижнего петлителя Направитель игольны8 нитей Схема заправки ниток Педаль ножная Рычаг открытия стола Рычаг замены лапки Подставка под катушку Регулятор дифференциала Регулятор длины стежка Маховик Разъем включения в сеть Кнопка включения Передняя панель Подвижный нож Верхний петлитель Нижний петлитель 1 2 3 4 5 6 9 10 19 11 20 12 21 13 22 23 24 14 17 18 25 15 7 8 А - ВИД РАБОЧЕГО СТОЛА ИЗНУТРИ FRONTKLAPPE GEÖFFNET SWING AWAY SIDE COVER OPENED PARTE COPERTĂ DESCHIS 16 27 26 28 6 1.LERNEN SIE IHRE MASCHINE KENNEN 1.KNOWING YOUR SEWING MACHINE Die Hauptteile der Maschine IDENTIFICATION CHART 1. 2. 3. 4. 5. 6. 7. 8. 9. 10. 11. 12. 13. 14. 15. 16. 17. 18. 19. 20. 21. 22. 23. 24. 25. 26. 27. 28. 1. 2. 3. 4. 5. 6. 7. 8. 9. 10. 11. 12. 13. 14. 15. 16. 17. 18. 19. 20. 21. 22. 23. 24. 25. 26. 27. 28. Ansteckbare Fadenführung Füßchendruckregler Nählicht Füßchenlüfterhebel Stichplatte Nähfuß Schnittbreitenregler Arbeitstisch Teleskop-Fadenführung Fadenspannung für linke Nadel Fadenspannung für rechte Nadel Fadenspannung für oberen Greifer Fadenspannung für unteren Greifer Fadenführungen Einfädel-Skizze Fußanlasser Öffnungshebel Nähfuß-Auslöser Unterlegscheibe Differential-Einstellung Stichlängenknopf Handrad Steckergehäuse Schalter für Licht und Maschine Frontklappe Obermesser Oberer Greifer Unterer Greifer Cord guide Foot pressure regulator Sewing light Presser foot lever Needle plate Presser foot Overedge cutting width dial Working table Thread guide pole Left needle thread tension control Right needle thread tension control Lower looper thread tension control Upper looper thread tension control Needle thread guides Threading chart Foot control Release lever Foot release lever Spool disc Differential feed control dial Stitch length dial Hand wheel Plug connector socket Light and power switch Front cover Moving cutter Upper looper Lower looper 1. FACEŢI CUNOŞTINŢĂ CUMAŞINA D-STRĂ Piese ale maşinii 1. 2. 3. 4. 5. 6. 7. 8. 9. 10. 11. 12. 13. 14. 15. 16. 17. 18. 19. 20. 21. 22. 23. 24. 25. 26. 27. 28. Funie ghid Reglorul presiunii picioruşului Iluminare Pîrghia de ridicare a picioruşului Placă pentru ac Picioruş Reglorul lăţimii tighelului Suprafaţa de lucru Axa ghidajului pentru aţă Reglor de tensionare a firului din acul stîng Reglor de tensionare a firului din acul drept Reglor de tensionare a împletitorului inferior Reglor de tensionare a împletitorului superior Ghidajul firurilor din ac Schema aranjării firului Pedală de picior Pîrghia de deschidere a măsuţii Pîrghia de schimbare a picioruşului Suport pentru bobină Reglorul diferenţialului Reglorul lungimii tighelului Volant Conector Buton pentru conectare Panoul din faţă Cuţit mobil Împletitorul superior Împletitorul inferior 7 ПРИНАДЛЕЖНОСТЙ 1. 2. 3. 4. 5. 6. 7. 8. 9. 10. 11. 12. “Палец” для образования петли (В) см (стр.44) Набор игл Кисточка Отвертка (маленькая) Масленка Сумочка для принадлежностей Катушкодержатели Подставки под катушку Катушкодержатели Катушечный колпачок Сумочка для принадлежностей Чехол для машины 1 2 3 4 5 6 7 11 8 9 8 12 10 Das Zubehör ACCESSORIES ACCESORII 1. 2. 3. 4. 5. 7. 6. 8. 9. 10. 11. 12. 1. Stitch finger (B) (See page 45) 2. Needle set 3. Brush 4. Screw driver (small) 5. Oiler 6. Tweezers 7. Thread net 8. Spool disc 9. Spool holder 10. Spool cap 11. Accessory bag 12. Machine cover 1. 2. 3. 4. 5. 6. 7. 8. 9. 10. 11. 12. Stichfinger (B) (Siehe Seite 45) Nadeln Pinsel Schraubendreher (klein) Ölkannchen Garnrollennetze Pinzette Unterlegscheiben Garnrollenhalter Garnrollendeckel Zubehörbeutel Staubschutzhaube „Degeţel” pentru formarea ochiului (B) vezi pag. 45 Set de ace Periuţă Şurubelniţă (mică) Grasier Pensetă Fileu pentru aţă Proptele pentru mosorel Suporturi pentru bobine Capsula mosorelului Poşetă pentru accesorii Înveliş de protecţie 9 ВКЛЮЧЕНИЕ МАШИНЫ 1. Удалите избыток масла с игольной пластины и вокруг нее. 2. Подключите педаль управления, включите машину в сеть. *I 3. Машина не будет работать, пок а Вы не нажмете на кнопку включения, которая одновременно включает двигатель и освещение. При техническом обслуживании машины или ее простое выдергивайте шнур из розетки. * II 4. Для снятия передней панели оттяните ее направо и вниз на себя. 5. Чтобы снять рабочий стол, потяните рычаг открытия стола на себя правой рукой, поднимите лапку левой рукой. Иллюстрация * I : Разъем включения в сеть * II: Кнопка включения *III: Рычаг открытия стола *IV: Рабочий стол * V: Передняя панель * III * IV *V 10 DAS AUFSTELLEN DER MASCHINE SETTING UP YOUR MACHINE CONECTAREA MAŞINII 1. Wischen Sie überschüssiges Öl von der Stichplatte und vom Arbeitsbereich. 1. Wipe off excess oil in the needle plate and bed areas. 1. Înlăturaţi surplusul de grăsime de pe placa pentru ace şi împrejurul ei. 2. Der Fußanlasser Stecken Sie den Gerätestecker des Fußanlassers in das Steckergehäuse und den Netzstecker in die Steckdose. 3. Der Schalter für Licht und Maschine Ihre Maschine näht nur, wenn der Schalter für Licht und Maschine eingeschaltet ist. (Dieser Schalter bedient sowohl das Nählicht als auch den Nähmotor.) Bei einer Arbeitsunterbrechung, bei Wartungsarbeiten oder beim Wechseln von mechanischen Teilen ist die Maschine abzuschalten, indem Sie den Netzstecker aus dem Anschluß ziehen. 4. Öffnen der Frontklappe Zum Öffnen der Frontklappe ziehen Sie sie erst nach rechts und dann nach vorn (siehe Skizze). 5. Öffnen des Arbeitstisches Ziehen Sie mit der rechten Hand den Öffnungshebel nach vorn, und heben Sie mit der linken Hand den vorderen Teil des Nähfüßchens an. Abbildung * I : Steckergehäuse * II : Schalter für Licht und Maschine * III: Öffnungshebel * IV: Arbeitstisch * V: Frontklappe 2. FOOT CONTROL Push foot control plug into connector socket, and connect the power line plug into power supply outlet. 3. POWER/ LIGHT SWITCH Your machine will not operate unless the power/ light switch is turned on. This same switch controls both machine power and sewing light. When leaving the machine unattended, or servicing the machine, remove the power line plug from supply outlet. 4. OPENING FRONT COVER To open front cover, pull it to the right and down towards you. 5. OPENING WORKING TABLE To open working table, pull the release lever towards you with your right hand, and lift the front of presser foot up with your left hand. Illustration 2. Cuplaţi pedala de comandă, conectaţi maşina. 3. Maşina nu va lucra, pînă cînd nu veţi apăsa pe butonul de declanşare, ce porneşte odată motorul şi iluminarea. 4. Pentru a scoate panoul din faţă trageţi în dreapta şi în jos de la sine. 5. Pentru a scoate suprafaţa de lucru, trageţi pîrghia de deschidere a măsuţii înspre sine cu mîna dreaptă, ridicaţi picioruşul cu mîna dreaptă. Ilustrare * I : Conector * II : Buton de declanşare * III: Pîrghia de deschidere a măsuţii * IV: Suprafaţa de lucru * V : Panoul din faţă * I : Connector socket * II : Power/light switch * III: Release lever * IV: Working table * V : Front cover 11 ПОДГОТОВКА К ШИТЬЮ ОСЬ НИТЕНАПРАВИТЕЛЯ Вытяните ось нитенаправителя вверх до щелчка. Установите бобины на штифты и протяните нить через ушко нитенаправителя. Ось нитенаправителя должна находиться перед бобинами с нитками. Иллюстрация 12 * I : Нитенаправитель * II : Ось нитенаправителя *I * II VORBEREITUNG ZUM EINFÄDELN PREPARATION FOR THREADING PREGĂTIREA PENTRU COASERE Die Teleskop-Fadenführung THREAD GUIDE POLE AXA GHIDAJULUI DE AŢĂ Ziehen Sie die Teleskop-Fadenführung so weit wie möglich aus bis sie einrastet. Stecken Sie die Garnrollen auf die Garnrollenhalter, und ziehen Sie die Fäden von hinten nach vorn durch die jeweiligen Fadenführungen. Pull up thread guide pole to the highest point until you hear it click. Place thread spools on pins and draw thread through thread guides on the pole from rear to front. Trageţi axa ghidajului pentru fir în sus pînă ce veţi auzi un sunet uşor. Fixaţi bobinele pe ştifte ţi îmbrăcaţi acul prin urechea ghidajului. Thread guide of pole can hold thread spools on the spool stand by pulling down the pole as illustrated. Axa ghidajului trebuie să se afle înaintea bobinelor cu aţă. Nach dem Gebrauch können die Garnrollen wie in der Skizze gezeigt auf dem Garnrollenträger bleiben. Abbildung * I : Fadenführung * II : Teleskop-Fadenführung Illustration * I : Thread guide * II : Thread guide pole Ilustrare * I : Ghidaj pentru aţă * II : Axa ghidajului 13 КОЛПАЧКИ ДЛЯ БЫТОВЫХ КАТУШЕК см. рис. Иллюстрация * I : Катушечный колпачок * II : Бытовая катушка ниток ПОДСТАВКИ ИКАТУШКОДЕРЖАТЕЛИ ДЛЯ КОНИЧЕСКИ Х КАТУШЕК Для вольших конических бобин установите резиновые катушкодержатели широким концом вверх, а для маленьких -узким концом вверх. Иллюстрация *III : Катушка ниток в виде конуса *IV : Катушкодержатели * V : Подставки под катушки СЕТКА ДЛЯ КАТУШЕК Полиэстеровая нить спадает с катушки при сматывании. Чтобы этого не было, используйте сетку, надевающуюся на катушку. Иллюстрация 14 * VI : Нить, идушая сверху *VII : Сетка *VIII: Закрепить таким образом * IX : Шпулька GARNROLLENDECKEL FÜR HAUSHALTSGARN-ROLLEN Abbildung * I : Garnrollendeckel * II : Haushaltsrolle UNTERLEGSCHEIBEN UND GARNROLLENHALTER FÜR KONISCHE GARNROLLEN Um große konische Garnrollen festzuhalten, stecken Sie die Garnrollenhalter mit dem breiten Ende nach oben, für kleinere konische Garnrollen mit dem schmalen Ende nach oben auf die Garnrollenstifte. Abbildung *III : Konische Garnrollen *IV: Garnrollenhalter * V : Garnrollenteller SPOOL CAPS FOR DOMESTIC TYPE SPOOLS Illustration * I : Spool cap * II : Domestic cotton reel CAPSULE PENTRU MOSORELE OBIŞNUITE Ilustraţia * I : Capsula mosorelului * II : Mosorel de aţă obişnuit SPOOL DISC AND SPOOL HOLDERS FOR CONE SPOOLS PROPTELE ŞI SUPORTURI PENTRU MOSORELE CONICE For large cone spools use the rubber spool holders with the wide end at the top, and for small ones, use the same rubber spool holders but with the narrow end at the top. Pentru bobine mari în formă de conuri fixaţi suporturi de cauciuc cu capătul lat în sus, iar pentru cele mici- cu capetele înguste în sus. Illustration * III : Cone type thread * IV : Spool holder * V : Spool disc Ilustraţia * III : Bobină în formă de conus * IV : Suporturi pentru mosorele * V : Proptele pentru mosorele DIE GARNROLLENNETZE SPOOL NETS FILEU PENTRU MOSORELE Polyestergarn oder Nylon kann während des Nähens u n g l e i c h m ä ßi g a b ro l l e n , u n d d e r F a d e n kann si ch verfangen. Um dies zu verhindern, benutzen Sie bitte die Garnrollennetze wie die nebenstehende Skizze zeigt. Polyester or bulky nylon threads become loose while unwinding. To keep consistent feeding of such threads, utilize spool net sleeving over the spool. Firul de poliester alunecă de pe mosorel la bobinare. Pentru a preîntîmpina aceasta, folosiţi fileul, ce se îmbracă pe mosorel. Illustration Abbildung * VI : Faden läuft nach oben ab *VII : Netz *VIII: Umschlagen * IX : Garnrolle * VI : Thread comes off the top * VII : Net * VIII: Turn up * IX : Spool Ilustraţia * VI : Aţa, ce vine de sus * VII : Fileul * VIII: Întăriţi în aşa mod * IX : Mosorel 15 ЗАМЕНА ЛАПКИ Вращая маховик на себя, поднимите иглу в крайнее верхнее положение при поднятой лапке. 1. Нажмите на рычаг замены лапки. 2. Установите нужную лапку на игольную пластину, совмещая отверстия для иглы. 3. Опустите лапку и нажмите на рычаг смены лапки т.о., чтобы лапка плотно обхватила стержень. Иллюстрация 16 * I : Рычаг замены лапки *I AUSWECHSELN DER NÄHFÜSSCHEN CHANGING PRESSER FEET SCHIMBAREA POCIORUŞULUI Vergewissern Sie sich, daß die Nadeln oben stehen, und stellen Sie den Nähfuß-Lüfterhebel hoch. Be sure needle is in the up position. Raise presser foot lever. Rotind volantul spre sine, ridicaţi acul în poziţia superioară, picioruşul fiind ridicat. 1. Drücken Sie den Nähfuß-Auslöser und nehmen Sie den Nähfuß ab. 1. Push foot release lever to remove the foot. 1. Apăsaţi pîrghia de schimbare a picioruşului. 2. Place the desired foot on the needle plate aligning needle holes. 2. Fixaşi picioruşul cuvenit pe placa acului, suprapunînd orificiile acului. Coborîţi picioruşul şi apăsaţi pe pîrghia de schimbare a picioruşului în aşa mod, ca picioruşul să îmbrăţişeze strîns tija. 2. Legen Sie den gewünschten Nähfuß auf die Stichplatte, und bringen Sie die Stichlöcher zur Deckung. 3. Lassen Sie den Lüfterhebel herunter, sodaß der Nähfuß im Füßchenhalter einrastet. Abbildung * I : Nähfuß-Auslöser 3. Lower the presser foot lever and push foot release lever so that the foot holder snaps on the foot. Illustration * I : Foot release lever Ilustrare * I : Pîrghia de schimbare a picioruşuluir 17 ЗАМЕНА ИГЛЫ Поднимите иглу в крайнее верхнее положение при опущенной лапке. Ослабьте винт фиксации иглы (см. рис.) и вставьте иглу в держатель до упора, длинным желобком на себя, закрепите винты. Иллюстрация 18 * I : Винт иглодержателя * II : Плоская сторона от себя AUSWECHSELN DER NADEL(N) CHANGING NEEDLE SCHIMBAREA ACULUI Bringen Sie die Nadelstange in die höchste Stellung, indem Sie das Handrad nach vorn drehen. Nähfüßchen NICHT hochstellen. Lösen Sie die Nadelhalteschraube um die Nadel herauszunehmen. Schieben Sie die neue Nadel so weit wie möglich nach oben, wobei die flache Seite nach hinten zeigen muß. Halteschraube wieder fest anziehen. Raise needle bar to its highest point by turning hand wheel towards you, but leave presser foot down. Loosen needle clamp screw to remove the needle, and place new needle with Flat Side Away From You, into the needle bar as far as it will go, and tighten screw. Ridicaţi acul în poziţia de sus, picioruşul fiind coborît. Slăbiţi şurubul fixării acului (vezi des.), puneţi acul în fixator pînă la capăt, cu şănţuleţul înspre sine, strîngeţi şuruburile. Abbildung * I : Nadelhalteschraube * II : Flache Seite nach hinten Illustration * I : Needle clamp screw * II : Flat side away from you. Ilustrare * I : Şurubul fixatorului pentru ace * II : Partea turtită de la sine 19 ПОДБОР НИТОК И ИГЛ Nadel- und Garntabelle Verwenden Sie nur Nadeln des Systems 130/705H, HA × 1SP, HA × 1 ТКАНЬ Х/Б. ЛЕН ШЕРСТЬ СИНТЕТИЧ. ВОЛОКНО ТРИКОТАЖ НИТКИ Легкие: органза, батист х/б № 100 ТяжелЫе: деним, 8/6 габардин ПЭС № 60 - 50 х/б № 60 Легкие: Шерсть, поплин ПЭС № 80 х/б № 60 Саржа, габардин, фланел ПЭС № 80 - 60 х/б № 60 ТяжелЫе:велюр, верблюжья шерсть, каракуль ПЭС № 60 - 50 х/б № 60 Легкие: креп-жоржет, вуаль, сатин ПЭС № 100 - 80 х/б № 120 - 80 ТяжелЫе: тафта, твил, деним ПЭС № 60 х/б № 60 Трико ПЭС № 80 - 60 х/б № 80 - 60 Джерси ПЭС № 60 - 50 х/б № 60 Шерсть ПЭС № 60 - 50 Объемный нейлон ИГЛЫ Baumwolle Leinen № 90(14) для всех тканей № 75 (11) для легких тканей Wolle Stoffart Garn Leichte Stoffe, Organdy, Batist Baumwollgarn No. 100 Schwere Stoffe, Jeansstoffe, Gabardin Arbeitsbekleidung Synthetikgarn No. 60 - 50 Baumwollgarn No. 60 Leichte Wollstoff Synthetikgarn No. 80 Baumwollgarn No. 60 Serge, Gabardin, Flanell Synthetikgarn No. 60 - 50 Baumwollgarn No. 60 Schwere Wollstoffe, Velour, Kamelhaar Synthetische Stoffe StrickStoffe Leichte synth. Stoffe Crepe, Voile, Satin Schwere synth. Stoffe Taft, Twill Nadel No. 90 für normale Synthetikgarn No. 60 - 50 ÜberwendlinBaumwollgarn No. 60 garbeiten Synthetikgarn No. 100 - 80 No. 75 Baumwollgarn No. 120 - 80 für leichte Stoffe Synthetikgarn No. 60 Baumwollgarn No. 60 Trikot Synthetikgarn No. 80 - 60 Baumwollgarn No. 80 - 60 Jersey Synthetikgarn No. 60 - 50 Baumwollgarn No. 60 Wolle Synthetikgarn No. 60 - 50 Примечание: синтети ческие нитки рекомендуется применять для обЫчной обметки. Например, нитки полиэстер (ПЭС) подходят для всех видов ткани. Für die meisten Überwendlingarbeiten empfiehlt sich Synthetikgarn, das sehr vielseitig zu verwenden ist. Памятка: Расход ниток для петлителей в два раза больше чем для игл. УчитЫвайте это при покупке ниток, собенно редких цветов. Bitte beachten Sie, daß der obere und der untere Greifer fast doppelt soviel Garn wie die Nadeln benötigen. Denken Sie daran, wenn Sie Garn - besonders in Spezialfarben - einkaufen. 20 NEEDLE, THREAD AND FABRIC CHART ALEGEREA AŢEI ŞI A ACELOR Use HA × 1SP, HA × 1(130/ 705H) Needles. Use HA × 1SP, HA × 1(130/ 705H) Needles. FABRIC COTTON LINEN WOOL SYNTHETIC FIBRE KNIT THREAD Light weight: Organdy, Lawn, Gingham Cotton No. 100 Heavy weight: Oxford, Denim, Cotton Gaberdine Polyester No. 60 - 50 Cotton No. 60 Light weight: Tropical, Wool, Poplin Polyester No. 80 Cotton No. 60 Serge, Gaberdine, Flannel Polyester No. 80 - 60 Cotton No. 60 Heavy weight: Velours, Camelhair, Astrakhan Polyester No. 60 - 50 Cotton No. 60 Light weight: Georgette Crepe, Voile, Satin Polyester No. 100 - 80 Cotton No.120-80 Heavy weight: Taffeta, Twills, Denim Polyester No. 60 Cotton No. 60 Tricot Polyester No. 80 - 60 Cotton No. 80-60 Jersey Polyester No. 60 - 50 Cotton No. 60 Wool Polyester No. 60 - 50 Bulk Nylon ŢESĂTURĂ NEEDLE BUMBAC /IN LÎNĂ 90 (14) for general sewing 75 (11) for light weight fabrics FIR SINTETIC TRICOTAJ AŢĂ Uşoare: organză, batist Bumbac № 100 Grele: denim, 8/6 gabardin Poliester № 60 - 50 Bumbac № 60 Uşoare: lînă, poplin Poliester № 80 Bumbac № 60 Sarj, gabardin, flanelă Poliester № 80 - 60 Bumbac № 60 Grele: catifea, lînă de cămilă, caracul Poliester № 60 - 50 Bumbac № 60 Uşoare: crepjorjet, voal, satin Poliester № 100 - 80 Bumbac № 120 - 80 Grele: tafta, tvil, denim Poliester № 60 Bumbac № 60 Tricou Poliester № 80 - 60 Bumbac № 80 - 60 Jerseu Poliester №. 60 - 50 Bumbac № 60 Lînă Poliester №. 60 - 50 Neilon voluminos ACE № 90 (14) pentru toate ţesăturile № 75 (11) pentru ţesături uşoare *Synthetic threads are recommended for ordinary overlocking. Polyester thread, for example, is very useful for different types of fabric. Notă: firurile sintetice se recomandă pentru însăilare obişnuită. Spre exemplu, firul de poliester se potriveşte la orice material. NOTE : Keep in mind that the lower and upper loopers will use about twice the amount of thread as the needles. When purchasing thread for sewing, therefore, especially if it is an unusual colour, you should buy sufficient for your requirements. Îndrumare: Consumul aţei pentru împletitor e de două ori mai mare, decît pentru ac. Luaţi aceasta în consideraţie la procura aţei, mai ales dacă Vă trebuie culori rare. 21 2. НАЧАЛО ШИТЬЯ ЗАПРАВКА НИТОК Неверная заправка может быть причиной неровной строчки, поломки иглы и т.п. *I Перед тем как переходить к шитью, научитесь правильно заправлять нитки. Заправка выполняется в следующей последовательности:нижний петлитель - ерхний петлитель - игла. Откройте переднюю панель и рабочий стол. Поворотом маховика на себя поднимите иглу в верхнее положение. При перезаправке нижнего петлителя во избежание запутывания выньте нитку из игольного ушка. Натяжение ниток ослабнет, если оттянуть ручку регулятора натяжения(см.рис.). Примечание: натяжение нити регулируется при поднятой лапке. ЗАПРАВКА НИЖНЕГО ПЕТЛИТЕЛЯ 1. Пропустить нить в нитенаправитель(см.рис.) 2. Протяните нижнюю нить через устройство натяжения нити. Держа нить левой рукой, чуть натягивая, правой протяните нить вдоль прорези. 3. Протянуть нить через направители по схеме (поз.3 рис.) 4. Вдеть нить в ушко нижнего петлителя и заправить в крючок A, как указано на рис. (поз.3). Оставить свободный конец нити длиной 10 см. 22 * II 2.NÄHEN MIT IHRER MASCHINE 2.STARTING TO SEW 2. ÎNCEPUTUL CUSUTULUI DAS EINFÄDELN THREADING YOUR MACHINE ARANJAREA AŢEI Falsches Einfädeln kann Fehlstiche, Fadenreißen oder andere Nähprobleme verursachen. Wrong threading may cause skipped stitches, breaking threads, or other problems. O aranjare incorectă poate duce la tighelire strîmbă, la ruperea acului etc. Bemühen Sie sich deshalb um richtiges Einfädeln, bevor Sie mit dem Nähen beginnen. Try to master the correct threading before moving on to test sewing. Înainte de a coase, învăţaţi-Vă să aranjaţi corect firul. Fädeln Sie in der richtigen Reihenfolge ein: unterer Greifer, oberer Greifer, Nadeln. Threading must be carried out in the sequence of Lower Looper-Upper Looper-Needle. Öffnen Sie die Frontklappe und den Arbeitstisch. Bringen Sie die Nadelstange in die höchste Stellung, indem Sie das Handrad nach vorn drehen. Open the front cover and the working table. Raise needle to its highest point by turning hand wheel towards you. Bevor Sie den unteren Greifer neu einfädeln, entfernen Sie zuerst den Faden aus der Nadel und fädeln Sie danach den unteren Greifer wieder ein. Sie verhindern so ein Verwirren der Fäden. Before re-threading lower looper, remove thread from needle eye first, then re-thread the lower looper. This will prevent tangling. Aranjarea firului se îndeplineşte în următoarea succesiune: împletitorul de jos – împletitorul de sus – acul. Deschideţi panoul din faţă şi suprafaţa de lucru. Ridicaţi acul în poziţia de sus cu o rotire a volantului spre sine. La reîncărcarea împletitorului de jos scoateţi aţa din ac pentru a nu încurca firurile. Întinderea aţelor va slăbi, dacă rasuciţi mînerul pîrghiei de tensionare a firului (vezi des.). Atenţie: ridicaţi picioruşul, cînd reglaţi întinderea firului. NOTE: Thread tension is released when you pull the tension control knob. Zur Information: Wenn Sie den Spannungsknopf nach vorn ziehen, ist die Spannung ausgelöst. EINFÄDELN DES UNTEREN GREIFERS THREADING LOWER LOOPER 1. Z i e h e n S i e d e n F a d e n w i e g e z e i g t d u r c h d i e Fadenführung. 1. Feed the thread through the thread guide as illustrated. 2. Z i e h e n S i e d a n n d e n F a d e n d u r c h d i e r e c h t e Spannungseinheit. 3. Ziehen Sie den Faden wie gezeigt durch die unteren Fadenführungen. 4. Ziehen Sie den Faden durch das Nadelöhr des unteren Greifers, und haken Sie ihn dann hinter Teil A wie in der Skizze gezeigt. Lassen Sie ca. 10cm Faden überstehen. Abbildung * I : Normales oder dünnes Nähgarn * II : Dickes Nähgarn 2. Pull the lower looper thread through right hand tension. 3. Draw the thread through thread guide as illustrated. 4. Pass the thread through lower looper eye, and hook it around part A as indicated by the arrow. Leave about 4” (10 cm) extra thread. Illustration * I : When using normal or thin thread. * II : When using thick thread. ÎNCĂRCAREA ÎMPLETITORULUI INFERIOR 1. Lăsaţi aţa să treacă prin ghidaj (vezi des.). 2. Trageţi aţa de jos prin dispozitivul de întindere. Ţinînd aţa cu mîna stîngă, întinzînd uşor, trageţi firul cu dreapta prin crăpătură. 3. Trageţi aţa prin ghidaj după schemă (vezi des. 3) 4. Îmbrăcaţi aţa prin urechea împletitorului de jos şi agăţaţi în cîrligel (A), cum e indicat pe desen (4). Lăsaţi capătul firului liber cu 10 cm. Illustration * I : When using normal or thin thread. * II : When using thick thread. 23 ЗАПРАВКА ВЕРХНЕГО ПЕТЛИТЕЛЯ 1. Пропустите нить через нитенаправитель, как показано на рисунке. *I 2. Протяните верхнюю нить через устройство натяжения нити. Придерживая нить левой рукой, правой протяните нить вдоль прорези. 3. При заправке нитки согласно инструкции нить верхней петли проходит в нитевод (A) автоматически после вращения колеса вручную. 4. Вдеть нить в проволочный направитель и в ушко петлителя, оставляя свободный конец нити длиной 10 см. 24 * II EINFÄDELN DES OBEREN GREIFERS THREADING UPPER LOOPER 1. Z i e h e n S i e d e n F a d e n w i e g e z e i g t d u r c h d i e Fadenführung. 1. Feed the thread through the thread guide as illustrated. 2. Pull the upper thread through the tension control. 2. Ziehen Sie den Faden durch die Fadenspannungseinheit. 3. Z i e h e n S i e d e n F a d e n w i e g e z e i g t d u r c h d i e Fadenführungen. 4. Führen Sie den Faden durch die Führungsfeder, und ziehen Sie den Faden durch das Öhr des oberen Greifers. Lassen Sie ca 10cm Faden überstehen. Abbildung * I : Normales oder dünnes Nähgarn * II : Dickes Nähgarn 3. Draw the thread through the thread guide as illustrated. When threading according to the instruction, upper looper thread pass the thread guide (A) automatically after rotating hand wheel. 4. Pass the thread through wire thread guide and looper eye, leaving an excess length of about 4” (10 cm). Illustration ÎNCĂRCAREA ÎMPLETITORULUI DE SUS 1. Lăsaţi firul să treacă prin ghidajul de aţă, cum e indicat pe desen. 2. Întindeţi aţa de sus prin dispozitivul de întindere. Reţinînd firul cu mîna stîngă, cu mîna dreaptă trageţi aţa prin crăpătură. 3. Cînd aranjaţi aţa în conformitate cu instrucţiunea, aţa tighelului de sus trece prin purtătorul de aţă automat după o rotire a roţii cu mîna. * I : When using normal or thin thread. * II : When using thick thread. 25 ЗАПРАВКА НИТИ В ИГЛУ 1. Пропустить нить через нитенаправитель(см.рис). 2. Протяните нити, которые будут вдеваться в иглу, через устройство натяжения нити. Держите нить левой, рукой, чуть натягивая, правой протягивайте нить вдоль прорези. 3. Протянуть нить через нитенаправитель согласно рисунку. *I 4. Вдеть нить в игольное ушко, подвести нить под правую половину лапки, оставляя свободный конец длиной 10 см. * II НИТЕЗАПРАВИТЕЛЬ (Дополнительно) Упрощает заправку нити (см. стр. 72 - 73) 26 EINFÄDELN DER NADELN THREADING NEEDLES BĂGAREA AŢEI ÎN AC 1. F ü h r e n S i e d e n F a d e n w i e g e z e i g t d u r c h d i e Fadenführung. 1. Feed the thread through the thread guide as illustrated. 1. Daţi drumul aţei prin ghidaj (vezi des.) 2. Draw the needle threads through left-hand tension. 2. Întindeţi firele, care se vor întroduce în ac, prin dispozitivul de întindere a aţei. Ţineţi aţa cu mîna stîngă, trăgînd uşor, cu dreapta îmbrăcaţi prin crăpătură. 2. Z i e h e n S i e d i e N a d e l f ä d e n d u r c h d i e l i n k e n Spannungseinheiten. 3. Z i e h e n S i e d e n F a d e n w i e g e z e i g t d u r c h d i e Fadenführungen. 4. Fädeln Sie die Nadeln von vorn nach hinten ein, und ziehen Sie die Fäden nach hinten auf die rechte Seite des Nähfußes. Lassen Sie ca. 10cm Faden überstehen. Abbildung * I : Normales oder dünnes Nähgarn * II : Dickes Nähgarn NADEL-EINFÄDLER (Sonderzubehör) Sie können sich das Einfädeln mit dem Nadel-Einfädler (siehe Seite 72 - 73) erleichtern. 3. Draw the thread through the thread guide as illustrated. 4. Thread the needles from front to back through needle eye and pull the threads towards the back passing along the right side of presser foot, leaving an extra length of about 4” (10 cm). Illustration 3. Trageţi aţa prin ghidaj după desen. 4. Băgaţi aţa în urechea acului, aşezaţi firul sub partea dreaptă a picioruşului, lăsaţi capătul liber cu 10 cm. * I : When using normal or thin thread. * II : When using thick thread. NEEDLE THREADER (OPTION) Needle is threaded easily by needle threader. (See page 72 - 73.) DISPOZITIV DE ARANJARE A FIRULUI (Adăugător) Înlesneşte aranjarea firului (vezi pag. 72 - 73) 27 ВСПОМОГАТЕЛЬНЫЕ ПРИЕМЫ СМЕНА НИТОК, ДЛЯ БЫСТРОЙ ЗАМЕНЫ КАТУШЕК ПРЕДЛАГАЕМ СЛЕДУЮЩИЕ ШАГИ 1. Обрезать нитки у катушек. Связать концы новых и старых ниток, как показано на рисунке. 2. Поднять лапку. 3. Поворотом маховика поднять иглу в крайнее верхнее положение. Аккуратно протянуть узелки через ушки игл и петлителей, регулируя правой рукой натяжение ниток. 4. Установить необходимое натяжение материала. ОБРЕЗКА ИГОЛЬНОЙ НИТИ Расщепленная нить может затруднить заправку. Подведите нить к нитеобрезателю на игольной пластине и нажмите рычаг нитеобрезателя или заведите нить под подвижный нож, повернув маховик на себя (см. рис.). 28 NÜTZLICHE HINWEISE HELPFUL HINTS METODE AUXILIARE AUSWECHSELN DER GARNROLLEN REPLACING THREAD SPOOLS SCHIMBAREA AŢEI Folgende Hinweise helfen Ihnen zu einem schnellen Auswechseln der Garnrollen. When replacing thread spools, the following steps may be helpful for quick changeover. PENTRU SCHIMBAREA RAPIDĂ A MOSORELELOR VĂ PROPUNEM URMĂTORII PAŞI 1. Schneiden Sie die Fäden der noch eingefädelten Garnrollen nahe der Garnrolle ab. Verknoten Sie das Garnende mit dem Faden der neuen Garnrolle (Seemannsknoten). 1. Cut off existing threads near the spools. Tie the cut ends thread from new spools as illustrated (seamen’s knot). 1. Tăiaţi aţa mosorelelor, legaţi capetele firului vechi şi celui nou, cum e arătat pe desen. 2. Ridicaţi picioruşul. 2. Raise presser foot. 2. Stellen Sie den Nähfuß hoch. 3. Bringen Sie die Nadelstange in die tiefste Stellung, indem Sie das Handrad nach hinten drehen. Ziehen Sie nun vorsichtig nach und nach an jedem der schon eingefädelten Fäden, bis die Knoten die Nadelöhre, bzw. die Öhre der Greifer passiert haben. 3. Lower needle bar to its lowest position by turning hand wheel AWAY FROM YOU. Carefully pull the existing threads until the connecting knots pass through needle eye and looper eyes. 3. R i d i c a ţ i a c u l î n p o z i ţ i a d e s u s c u o r ă s u c i r e a volantului. Trageţi atent nodurile prin urechile acelor şi a împletitorilor, reglînd cu mîna dreaptă tensionarea firurilor. Instalaţi tensionarea cuvenită a materialului. ABSCHNEIDEN DES NADELFADENS CUTTING NEEDLE THREAD TĂIEREA AŢEI DIN AC Ausgefasertes Garn läßt sich schlecht einfädeln. Frayed thread may make needle threading difficult. Aţa despicată poate îngreuia procesul aranjării. Ziehen Sie den Faden unter das Obermesser, und drehen Sie das Handrad nach vorn: Sie haben ein glattes Fadenende. Draw the thread near the thread cutter on the needle plate and push the thread cutter lever or draw the thread passing under the moving cutter and turn hand wheel towards you to obtain clear cut end as illustrated. Aduceţi aţa la tăietorul firului de pe placa acului şi apăsaţi pîrghia de tăiere (numai model 056) sau puneţi aţa sub cuţitul mobil, rotind volantul spre sine (vezi des.). 29 ПРОВЕРКА КАЧЕСТВА СТЕЖКОВ Заправив нитки, проверьте качество стежков на образце. 1. Аккуратно подведите нитки под лапку и влево. Вращая маховик на себя, убедитесь, что образуется правильная строчка. Fig. 1 2. Слегка нажав на педаль, подложите ткань под лапку и, мягко протягивая ее вперед (поз. 2 рис.), направляйте материал, машина сама продвигает его. 3. Проверьте натяжение нитей на образце (см. рис. стр. 40 - 42). 4. Прошив до конца, снизьте скорость шитья, мягко вытягивая материал за лапку, образуя цепочку стежков длиной 5 - 6 см. Отрежьте нить с помощью рычага для перерезания нити или ножниц. Fig. 2 Fig. 3 30 PRÜFEN DER STICHBILDUNG Wenn Sie die Maschine eingefädelt haben, prüfen Sie die Stichbildung auf einem Stück des Stoffes, den Sie verarbeiten wollen. Gehen Sie folgendermaßen vor: TESTING STITCH OVERLOCK STITCHES After threading is completed, use a scrap of fabric that you plan to sew and test to sew in the following order. 1. Ziehen Sie leicht alle Fäden nach links, und lassen Sie den Nähfuß herunter. Drehen Sie das Handrad ein paarmal nach vorn, um zu sehen, ob das Stichbild in Ordnung ist. 1. Gently pulling all the threads to the left, lower the presser foot. Rotate the hand wheel towards you a few times to see if the lock stitches are properly formed. 2. Fangen Sie LANGSAM an zu nähen, und führen Sie den Stoff mit leichtem Druck unter den Nähfuß. (Außer bei dicken Stoffen braucht der Nähfuß dazu nicht angehoben werden.) Führen Sie den Stoff nur leicht; der Stofftransport erfolgt automatisch. 2. Start the machine at low speed and feed in test fabric under the presser foot by slightly pushing it forward. (This can be done with the presser foot down on most fabrics except bulky materials.) Guide the fabric gently as machine automatically feeds the material. 3. Prüfen Sie die Fadenspannungen mit einem Stück des zu verarbeitenden Stoffes (siehe Seite 40 - 42). 3. Check thread tensions by test sewing on spare fabric. (See page 40 - 42.) 4. Wenn Sie das Ende des Stoffes erreicht haben, nähen Sie langsam noch etwas weiter, bis eine ca. 5 - 6 cm lange Fadenkette übersteht. 4. At fabric end, carry on running machine at low speed, gently pulling the fabric towards the back, until about 5 to 6 cm of extra lock stitches are produced without fabric. Schneiden Sie die Fäden mit einer Schere ab. VERIFICAREA CALITĂŢII CUSĂTURII După aranjarea firului, verificaţi calitatea cusăturii de probă. 1. Aduceţi exact firurile sub picioruş şi în stînga. Rotind volantul spre sine, urmăriţi, ca cusătura să fie dreaptă. 2. Atingînd uşor pedala, aşezaţi pînza sub picioruş şi trageţi abea pînza înainte (des.2), conducînd numai procesul, maşina va împinge ţesătura singură. 3. Verificaţi tensionarea aţei pe model (vezi pag. 40 - 42) 4. Tighelînd pînă la urmă, micşoraţi viteza cusăturii, trăgînd moale materialul după picioruş şi formînd un lanţ de tighele cu lungimea de 5-6 cm. Tăiaţi aţa cu ajutorul pîrghiei (numai model 056) pentru tăierea aţei sau foarfecelui. Cut thread by pushing thread cutter lever down, or with scissors. 31 ТАБЛИЦА НАСТРОЙКИ Номер ниток 4 3 Ширина обметки -6 - Используемые иглы левая правая левая Указатель строчки Нить левой иглы Регулятор Нить правой иглы натяжения Нить верхнего петлителя Нить нижнего петлителя 4- -5 - правая левая правая -4 - -4 - - 0- - - - - -4 - - -4 - - 0- -4 - -4 - -4 - -4 - -4 - -4 - -4 -4 -4 - -4 - -4 - -4 - -4 - -4 - 7- 7- 0- -4 - -4 - 2 - 2.5 -R - -P - 2.5 - 3.5 Длина стежка № рисунка строчки 1A 6 2.5 - 3.5 2A 3 -5 3A 4A 5A Плоский шов Ссылка страницу 40 54 - 55 Примечание: вышеуказанные положения являются общими рекомендациями. Во многих случаях поднастройка улучшит качество строчкию вам помогут следующие советы: 1. Установите ширину обметки. (см.стр.44 - 45) 32 4 4 -6 правая 6A Узкая кромка 7A 8A Подвернутая Пикировочный кромка шов 38 - 39 2. Выбирайте натяжение нити в зависимости от толщины материала. 3. Ослабьте натяжение, если шьете толстыми нитками. 4. Неверное натяжение вызывает искривление строчки. Измените натяжение. 5. Неверно установленная игла вызывает неправильное натяжение, обязательно проверьте настройку, прошив на образце. EINSTELLUNGS-TABELLE Zahl der Fäden Schnittbreitenregler Nadel (n) Stichfinger Linker Nadelfaden Spannungs- Rechter Nadelfaden einstellung Faden für oberen Greifer Faden für unteren Greifer Stichlänge 4 3 -6 - 6 4- -5 - 4 -6 links und rechts links rechts links rechts -4 - -4 - - 0- - - - - -4 - - -4 - - 0- -4 - -4 - -4 - -4 - -4 - -4 - -4 -4 -4 - -4 - -4 - -4 - -4 - -4 - 7- 7- 0- -4 - -4 - 2 - 2.5 -R - -P - 2.5 - 3.5 1A 2.5 - 3.5 2A 41 rechts 3 -5 3A 4A Flachsaum siehe Seite 4 54 - 55 Bitte beachten: Die oben genannten Einstellungen dienen nur als Anhalt. In vielen Fällen wird eine Nachregulierung für Ihr Nähgut erforderlich sein. Folgende Hinweise dürften Ihnen helfen. 1. Stellen Sie die Schnittbreite nach (S. 44 - 45). 2. Stellen Sie die Nadelfadenspannungen nach, wenn Sie dünnen oder dicken Stoff nähen. 5A 6A Schmaler Überwendlingsaum 7A Rollsaum 8A Muschelkante 38 - 39 3. Verringern Sie die Spannung, wenn Sie mit dickem Garn nähen. 4. Falsche Spannungseinstellung verursacht Fehlstiche. Spannung(en) nachstellen. 5. Die Nadeln müssen korrekt eingesetzt sein. Nähen Sie immer eine Probe auf dem Stoff, den Sie verarbeiten wollen, um die besten Einstellungen auszuprobieren. 33 SETTING CHART Number of threads Overedge cutting width dial 3 -6 - 6 4- -- 5 -- 4 -- 6 Left Right Left Right Left needle thread -4 - -4 - - 0- - - - - Right needle thread -4 - - -4 - - 0- -4 - -4 - -4 - Upper looper thread -4 - -4 - -4 - -4 -4 -4 - -4 - -4 - Lower looper thread -4 - -4 - -4 - 7- 7- 0- -4 - -4 - 2 - 2.5 -R - -P - Stitch finger 2.5 - 3.5 Stitch length control Ref. No. Reference page 1A 42 2.5 - 3.5 2A Right 3 -5 3A 4A 5A 6A 7A 8A Flat seam Narrow hem Rolled hem Picot stitch 54 - 55 38 - 39 Note: The above settings of tension and overedge cutting width dial are for general guidance. A little fine tuning will improve your stitching in many cases. Following advice helps you. 1. Turn overedge cutting width dial. (See page 44 - 45) 2. Adjust needle tensions when you sew thin or thick material. 3. Reduce the tension when you use thick thread. 34 4 Left and Right Needle to use Tension control 4 4. Incorrect tension setting causes stitch skipping. Adjust the tension setting. 5. Tension setting will have problem when needle setting is incorrect. Try test-sewing with a piece of fabric you are going to use and find the best settings. TĂBLIŢA REGLĂRII Numărul aţei 4 3 4- -- 5 -- dreaptă stîngă dreaptă -4 - -4 - - 0- - - - - Reglorul Aţa din acul drept tensionării Aţa împletitorului superior -4 - - -4 - - 0- -4 - -4 - -4 - -4 - -4 - -4 - -4 -4 -4 - -4 - -4 - Aţa împletitorului inferior -4 - -4 - -4 - 7- 7- 0- -4 - -4 - 2 - 2.5 -R - -P - Lăţimea cusăturii Ace folosite Indicatorul tighelului Aţa din acul stîng Lungimea tighelului -6 - 6 stîngă, dreaptă stîngă 2.5 - 3.5 № desenului tighelului 1A 2.5 - 3.5 2A 3 -5 3A 4A Cusătură plată Referinţă la pagină 42 4 54 - 55 Notă: dispoziţiile de mai sus sunt recomandări generale. În multe cazuri o reglare adăugătoare va îmbunătăţi calitatea cusăturii. Vă vor ajuta următoarele sfaturi: 1. Fixaţi lăţimea însăilăturii. 2. Alegeţi tensionarea conform grosimii materialului. 5A 4 -- 6 dreaptă 6A Margine îngustă 7A Margine răsfrîntă 8A Cusătură repetată 38 - 39 3. Dacă coaseţi cu aţă groasă, slăbiţi tensionarea. 4. O întindere incorectă a firului va înrăutăţi calitatea tighelului. Reglaţi. 5. O aşezare greşită a acului duce la tensionare incorectă, recomandăm să încercaţi cusătura pe model. 35 3-х НИТОЧНАЯ ОВЕРЛОЧНАЯ СТРОЧКА С ОДНОЙ ИГЛОЙ При заправке только левой иглы образуется строчка шириной 6 мм, а при заправке только правой иглы - строчка шириной 3.8 мм. Неиспользуемую иглу снимите и уберите в игольницу. 36 DREIFÄDIGE ÜBERWENDLINGNAHT MIT EINER NADEL Wenn Sie nur die LINKE Nadel benutzen, erzielen Sie eine Überwendlingnaht von 6mm Breite. Fädeln Sie nur die RECHTE Nadel ein, ist die Nahtbreite 3.8mm. Stecken Sie die zwischenzeitlich nicht benötigte Nadel in das Kissen rechts neben der Einfädelskizze. THREE-THREAD OVERLOCK WITH ONE NEEDLE OVERLOCK TRIPLU CU UN AC Please keep the unused needle on the needle pad as illustrated. Acul de prisos se dă la o parte. By threading the LEFT needle only a width of 6 mm will be produced and by threading the RIGHT needle only a width of 3.8 mm will be produced. Dacă îmbrăcaţi numai acul stîng, primiţi un tighel cu lăţimea de 6 mm, şi dacă îmbrăcaţi numai acul dreptlăţimea de 3,8 mm. 37 УЗКИЙ ШОВ И ШОВ “РУЛИК” (ПОДВЕРНУТЫЙ) Для обработки края тонких материалов идеально подходит узкий или подвернутый шов. Для дорогих “газовых” материалов подойдет шов “пике”. Из-за естественной кромки зти швы не подходят для плотных или тажелых материалов. 1. Поднимите лапку. 2. Откройте переднюю панель и рабочий стол. 3. Отсоедините с помощью отвертки “палец” для образования петель(см.рис.) 4. Настройте машину согласно табл.на стр.32 Примечание: чтобы получился идеальный шов, используйте рекомендуемые ниток. После шитья установите “палец” строчки на место, как указано на рис.поз. 1. РЕКОМЕНДУЕМЫЕ НИТКИ Узкая обметка 3-х ниточный шов Игольная нить Верхний петлитель Нижний петлитель Иллюстрация 38 Полиэстер, нейлон, шелк № 50 - 100 Полиэстер, нейлон, шелк № 50 - 100, объемн. Нейлон (нерастяжимый) * I : “Палец”для образования петель (A) *III: Узкая кромка *IV: Подвернутая кромка * V : Пикировочный шов Подвернутый край 3-х ниточ. шов Нейлон № 100 Объемын. Нейлон (нерастяжимый) SCHMALER ÜBERWENDLINGSAUM, ROLLSAUM NARROW AND ROLLED HEM, PICOT STITCH TIGHEL ÎNGUST ŞI TIGHEL „RULON” (ÎNDOIAT) Diese Säume sind ideal für leichte Stoffe wie Georgette, Crêpe de Chine, Seide, usw. Die Muschelkante empfiehlt sich besonders für leichte Schals oder Halstücher. Narrow and rolled edge is ideal for use on thin materials such as georgette crepe, crepe de chine, silk etc. Pentru prelucrarea marginii ţesăturilor fine e ideal tighelul îngust şi răsucit. 1. Stellen Sie den Nähfuß hoch. Also, picot stitch can be produced particularly when sewing on fine ‘scarflike’ materials. In view of the nature of these hems, they are unsuitable for use on ‘hard’ or ‘heavy’ materials. Petru materiale scumpe „gazoase” merge tighel „pighe” Avînd marginea naturală, aceste tivuri nu se folosesc la materiale îndesate şi grele. 2. Öffnen Sie die Frontklappe und den Arbeitstisch. 1. Raise the presser foot. 3. E n t f e r n e n S i e m i t e i n e m S c h r a u b e n z i e h e r d e n Stichfinger von der Stichplatte, und bewahren Sie ihn in der dafür vorgesehenen Halterung im Zubehörabteil auf. 2. Open the front cover and working table. Es liegt in der Natur dieser Säume, daß sie sich nicht für schwere oder dicke Stoffe eignen. 4. Stellen Sie die Maschine entsprechend den Hinweisen auf Seite 33 ein. WICHTIG: 1.Bitte benutzen Sie das nachstehend genannte Nähgarn für ein optimales Nähergebnis. 2.W e n n S i e f e r t i g s i n d , s e t z e n S i e d e n Stichfinger wieder ein. Vergewissern Sie sich, daß er so weit wie möglich eingeschoben wird (Skizze 1) EMPFOHLENES NÄHGARN Unterer Greifer Abbildung 4. Set the machine according to page 34. 1.Please use following recommended thread for making ideal seams. 2.After finishing, re-set the stitch finger in its place. Please ensure inserting it deep as illustrated in Fig 1. RECOMMENDED THREAD 3. Dezuniţi cu şurubelniţa „degeţelul” pentru formarea ochiului (vezi des.) 4. Reglaţi maşina comform tăbliţei de la pag. 35. Atenţie: ca să primiţi o cusătură ideală, folosiţi aţa cu mărimea recomandată. După tighelire fixaţi „degeţelul” tighelului la loc, cum e indicat pe des. 1 AŢA RECOMANDATĂ Schmaler Überwendlingsaum Rollsaum Narrow overlock edge Rolled edge Însăilare îngustă Margine răsfrîntă mit drei Fäden mit drei Fäden with Three Threads with Three Threads Tighel triplu Tighel triplu Nadelfaden Polyester, Nylon, Seide No.50-10 Oberer Greifer 2. Deschideţi panoul din faţă şi măsuţa pentru lucru. 3. Remove the stitch finger from the needle plate by screw driver and keep it in the front cover as illustrated or in the accessory bag. NOTE: 1. Ridicaţi picioruţul. Nylon # 100 Polyester, Nylon, Seide No.50-10 Bauschgarn Bauschgarn (weniger dehnbar) (weniger dehnbar) * I : Stichfinger (A) *III : Schmaler Überwendlingsaum *IV: Rollsaum * V : Muschelkante Thread for needle Polyester, Nylon, Silk No. 50-100 Polyester, Nylon, Silk Upper looper No. 50-100 Bulk nylon Lower looper (less stretchable) Illustration * I : Stitch finger (A) * III : Narrow hem * IV : Rolled hem * V : Picot stitch Nylon No. 100 Bulk nylon (less stretchable) Aţă pentru ac Poliester, neilon, mătase № 50-100 Neilon № 100 Împletitorul de sus Poliester, neilon, mătase № 50-100 Neilon voluminos (neflexibil) Neilon voluminos (neflexibil) Împletitorul de jos Ilustrare * I : „Degeţel” pentru formarea ochiurilor (A) * III : Margine îngustă * IV : Margine răsfrîntă * V : Tighel repetat 39 РЕГУЛИРОВКА НАТЯЖЕНИЯ НИТЕЙ Натяжение нитей регулируется от “0” до “9”. Установив ручку регулятора на меньший номер, Вы ослабите натяжение. Отрегулируйте натяжение на образце ткани, которую будете шить. Увеличить натяжение Уменьшить натяжение Возможные дефекты и пути их устранения при использовании четырех нитей Правильно Изнаночная сторона Нить верхней петли перетягивается на изнаночную сторону. Нить нижней петли перетягивается на изнаночную сторону. Изнаночная сторона Изнаночная сторона Нить левой иглы Лицевая сторона 40 Нить нижней петли Нить правой иглы Fig. 1 Изнаночная сторона Нить левой иглы свободна и видна на изнаночной стороне. Изнаночная сторона Нить правой иглы Нить левой иглы Нить нижней петли Нить верхней петли Нить левой иглы свободна и видна на изнаночной стороне. Нить нижней петли Нить верхней петли Лицевая сторона Нить верхней петли Fig. 2 Увеличьте натяжение нити верхней петли иили ослабьте нить нижней петли. Лицевая сторона Fig. 3 Увеличьте натяжение нити нижней петли и/или ослабьте нить верхней петли. Лицевая сторона Fig. 4 Лицевая сторона Fig. 5 Увеличьте натяжение нити Увеличьте натяжение нити левой иглы и/или ослабьте правой иглы . нити обеих петель FEINEINSTELLUNG DER FADENSPANNUNGEN Durch Drehen der Spannungseinheit auf eine höhere Zahl erreichen Sie eine größere Fadenspannung; durch Drehen auf eine niedrigere Zahl verringern Sie die Spannung. Je höher die Zahl, desto größer die Spannung. Prüfen Sie jede Fadenspannung auf einem Stück des Stoffes, den Sie verarbeiten wollen. Spannung vergrößern Spannung verringern VIERFÄDIGE ÜBERWENDLINGNAHT Korrekte Fadenspannung. Unterseite Faden des oberen Greifers Faden des unteren Greifers auf die Unterseite gezogen. auf die Oberseite gezogen. Unterseite Unterseite Unterseite Linker Nadelfaden Faden für unteren Greifer Faden für oberen Greifer Linker Nadelfaden Oberseite Faden für unteren Greifer Rechter Nadelfaden Fig. 1 Linker Nadelfaden bildet auf Rechter Nadelfaden bildet der Unterseite Schlingen. auf der Unterseite Schlingen. Unterseite Rechter Nadelfaden Faden für unteren Greifer Faden für oberen Greifer Oberseite Faden für oberen Greifer Fig. 2 Fadenspannung für oberen Greifer erhöhen oder Spannung für unteren Greifer verringern. Oberseite Fig. 3 Fadenspannung für oberen Greifer erhöhen oder Spannung für unteren Greifer verringern. Oberseite Fig. 4 Oberseite Fig. 5 Linke Nadelfadenspannung Rechte Nadelfadenspannung erhöhen oder Spannung für erhöhen. oberen und unteren Greifer verringern. 41 ADJUSTING THREAD TENSIONS Turning tension dial to a higher number gives a tighter thread tension. Turning tension dial to a lower number gives a looser thread tension. The higher the number, the tighter the tension. Test thread tensions on a scrap you plan to use. Increase tension Decrease tension FOUR-THREAD USE Just right. Upper looper thread pulled Lower looper thread pulled to to under side. top side. Under side Upper looper thread Left needle thread Top side 42 Under side Lower looper thread Lower looper thread Right needle thread Fig. 1 Under side Left needle thread loose Right needle thread loose and visible on under side of and visible on under side of fabric. fabric. Under side Left needle thread Under side Right needle thread Lower looper thread Upper looper thread Top side Upper looper thread Fig. 2 Top side Fig. 3 Increase upper looper thread Increase lower looper thread tension and/ or decrease tension and/or decrease upper looper tension. lower looper tension. Top side Fig. 4 Top side Fig. 5 Increase left needle thread Increase right needle thread tension and/or decrease either tension. or both looper threads. REGLAREA ÎNTINDERII AŢEI Tensionarea se efectuiază de la „0” pînă la „9”. Fixînd mînerul reglorului la un număr mic, veţi micşora tensionare. Verificaţi tensionarea pe o bucată de material, pe care î-l veţi folosi. A mări tensionarea A scădea tensionarea Dereglări posibile şi căile de înlăturare la folosirea cusăturii cu 4 fire Corect Aţa împletirii de sus se trage Aţa împletirii de dos se trage pe dos. pe sus. Dosul articolului Firul împletirii de sus Dosul articolului Firul împletirii de jos Firul împletirii de jos Aţa acului stîng Aţa acului drept Faţa articolului Fig. 1 Dosul articolului Aţa din acul stîng e liberă şi se vede pe dos. Dosul articolului Aţa acului stîng Aţa din acul drept e liberă şi se vede pe dos. Dosul articolului Aţa acului drept Firul împletirii de jos Firul împletirii de sus Faţa articolului Firul împletirii de sus Fig. 2 Faţa articolului Fig. 3 Măriţi tensionare firului Măriţi tensionare firului împletirii de sus şi /sau împletirii de dos şi /sau slăbiţi firul împletirii de sus. slăbiţi firul împletirii de jos. Faţa articolului Fig. 4 Faţa articolului Fig. 5 Măriţi tensionarea firului Măriţi întinderea firului din acului stîng şi /sau slăbiţi acul drept. firele ambelor împletiri. 43 РЕГУЛИРОВКА ДЛИНЫ СТЕЖКА Установите ручку регулятора на требуемую длину стежка. Чем больше позиции, тем длиннее стежок. Длина стежка может меняться от 1 до 5 мм. Иллюстрация * I : Регулятор длины стежка * II: Регулятор подвижного ножа *I * II РЕГУЛИРОВКА ШИРИНЫ ОБМЕТЫВАНИЯ Ширина обметки может меняться от 4 до 7 мм поворотом ручки регулятора ширины обметки в соответствии с видом ткани. Установленная стандартная ширина обметывания - 6 мм. Уменьшите ее до 5 мм, если при шитье край ткани сворачивается. Увеличьте ее до 7 мм, если петли свисают с края ткани. Fig. 1 “Палец” для образования петли (В) Когла Вы шьете тремя нитями (заправляется только правая нить), установив расстояние до линии отреза 4 - 5, петли могут выступать за край материи (рис. 3). В зтом случае замените “палец” для образования петли (А) на (В), чтобы край стал опрятнее (рис. 4). Иллюстрация 44 *III : “Палец” для образования петли (В) Fig. 2 Fig. 3 “Палец” для образования петли (В) Stichfinger (B) Stitch finger (B) „Degeţel” pentru formarea ochiurilor (B) Fig. 4 “Палец” для образования петли (A) Stichfinger (A) Stitch finger (A) „Degeţel” pentru formarea ochiurilor (A) Einstellung der Stichlänge ADJUSTING STITCH LENGTH REGLAREA LUNGIII TIGHELULUI Drehen Sie die Stichlängeneinstellung, bis die gewünschte Stichlänge am Anzeigestrich steht. Turn the stitch length dial until the required length is obtained. Fixaţi mînerul reglorului la lungimea cuvenită a cusăturii. Je größer die Zahl, desto größer die Stichlänge, die von 1 bis 5 mm einstellbar ist. Die normale Länge ist 2.5 - 3.5. The higher the number, the longer the stitch. This dial can adjust the stitch length from 1 to 5 mm. Abbildung * I : Stichlängeneinstellung *II : Schnittbreitenregler EINSTELLUNG DER SCHNITTBREITE Je nach Stoffart können Sie die Schnittbreite für den Überwendlingstich zwischen 4 und 7mm variieren. Stellen Sie einfach den Stichbreitenregler entsprechend ein. (Siehe auch S. 23.) Werksseitig wird die Maschine mit der Standard-Schnittbreite von 6mm ausgeliefert. Falls sich die Stoffkante beim Nähen wellt, stellen Sie den Regler in Richtung “5”. Falls die Schlingen an der Kante überstehen, drehen Sie in Richtung “7”. Stichfinger (B) Es können Schlingen überstehen, wenn Sie leichten Stoff mit drei Fäden nähen (nur rechte Nadel) und die Schnittbreite auf 4 - 5 (Abb. 3) eingestellt ist. Tauschen Sie in diesem Fall den Stichfinger (A) gegen (B) aus, um ein sauberes Nähergebnis zu erzielen (Abb. 4). Illustration * I : Stitch length dial * II : Overedge cutting width dial ADJUSTING OVEREDGE CUTTING WIDTH Overedge cutting width can be adjusted from 4 to 7 mm by simply turning overedge cutting width dial according to the kind of fabric. It is set at standard width of 6 mm when delivered from the factory. Turn it towards “5” if fabric edge curls while sewing. (Fig. 1) Turn it towards “7 “ if loops hang off the edge. (Fig. 2) Stitch finger (B) Loops may hang off the edge, when you sew with lightweight fabric using 3 threads (right needle only), and setting cutting width dial at 4 - 5 (Fig. 3). In such a case change the stitch finger (A) to (B) to get neat stitching (Fig. 4). Illustration Abbildung *III : Stichfinger (B) Cu cît e mai mare numărul poziţiei, cu atît e mai lung tighelul. Lungimea poate fi între 1 şi 5 mm. Ilustrare * I : Reglorul lungimii tighelului * II : Reglorul cuţitului mobil REGLAREA LĂŢIMII ÎNSĂILĂTURII Lăţimea se schimbă de la 4 pînă la 7 mm cu o răsucire a mînerului reglorului lăţimii în conformitate cu tipul materialului. Lăţimea standartă de însăilare-6mm. Scădeţi pînă la 5 mm, în caz că marginea ţesăturii se strînge. Măriţi pînă la 7 mm, dacă ochiurile spînzură la margine. „Degeţel”pentru formarea ochiului Cînd coaseţi cu trei firuri (se aranjează numai cel din dreapta), fixînd o distanţă de 4-5mm pînă la tăietură, ochiurile pot ieşi in afara marginii (des.3). În acest caz schimbaţi „degeţelul” pentru ochiuri pe (B), pentru ca marginea să devină mai îngrijită. * III : Stitch finger (B) Ilustrare * III : „Degeţel” pentru formarea ochiurilor (B) 45 ДИФФЕРЕНЦИАЛ Устройство дифференциальной подачи состоит из 2-х зубчатых пластинок, обеспечивающих продвижение материала, каждая из которых имеет свой привод, обеспечиваюший подачу материала с разной длиной стежка. Иллюстрация * I : Разделенная на две части зубчатая рейка *I ПОЛОЖИТЕЛЬНАЯ ПОДАЧА ДИФФЕРЕНЦИАЛА В зтом положении передняя рейка (A) делает более длинный шаг, чем задняя (И). Это создает зффект сосбаривания материала под лапкой. Иллюстрация * II: Положительная подача дифференциала * II ОТРИЦАТЕЛЬНАЯ ПОДАЧА ДИФФЕРЕНЦИАЛА В зтом случае передняя рейка делает более короткие стежки чем задняя (И). Это создает зффект растягивания материала под лапкой. Иллюстрация *III : Отрицательная подача дифференциала * III 46 Der Differentialtransport DIFFERENTIAL FEED DIFERENŢIAL Der Differentialtransport wird durch zwei unabhängige Transporteurteile ermöglicht, einen vorderen (A) und einen hinteren (B). The differential feed has two independent feed dogs, one front (A) and one rear (B). Dispozitivul conducerii diferenţiale constă din 2 plăci dinţate, ce asigură înaintarea materialului, fiecare din ele avînd propria transmisie şi fac posibilă conducerea materialului cu tigheluri de lungimi diferite. Jeder Transporteurteil hat einen eigenen Antriebsmechanismus, sodaß der Materialtransport in unterschiedlicher Abstimmung erfolgen kann. Abbildung Each feed dog has an individual feed mechanism which enables the feeding of material at a different ratio. Illustration * I : Differential feed dogs POSITIVE DIFFERENTIAL FEED Beim positiven Differentialtransport führt der vordere Transporteur (A) mehr Material unter den Nähfuß als der hintere Transporteur (B). WHEN SET FOR POSITIVE DIFFERENTIAL FEED, the front feed dog (A) makes a longer stroke than the rear feed dog (B). Dadurch kommt mehr Stoff unter dem Nähfuß zusammen und verhindert ein Wellen des Nähguts. This has the effect of accumulating material under the presser foot to offset the wavering on the fabric. * II: Positiver Differentialtransport Illustration NEGATIVE DIFFERENTIAL FEED Beim negativen Differentialtransport führt der vordere Transporteur (A) weniger Material unter den Nähfuß als der hintere Transporteur (B). Dadurch wird das Material unter dem Nähfuß gestreckt und verhindert ein Zusammenziehen des Nähguts. WHEN SET FOR NEGATIVE DIFFERENTIAL FEED, the front feed dog (A) makes a shorter stroke than the rear feed dog (B). *III : Negativer Differentialtransport This has the effect of stretching material under the presser foot to offset the puckering on the fabric. Illustration ÎNAINTAREA POZITIVĂ A DIFERENŢIALULUI În acestă poziţie bara dinainte (A) face un un tighel mai lung, decît cea din urmă (B). Acesta creiază efectul de întindere a materialului sub picioruş. Ilustrare * II : Înaintarea pozitivă a diferenţialului * II : Positive differential feed Negativer Differentialtransport Abbildung * I : Bară dinţată împărţită în două părţi * I : Differential-Transporteur Positiver Differentialtransport Abbildung Ilustrare ÎNAINTAREA NEGATIVĂ A DIFERENŢIALULUI În acestă poziţie bara dinainte (A) face un un tighel mai scurt, decît cea din urmă (B). Acesta creiază efectul de întindere a materialului sub picioruş. Ilustrare * III: Înaintarea negativă a diferenţialului * III: Negative differential feed 47 РЕГУЛИРОВКА ДИФФЕРЕНЦИАЛА Устанавливается поворотом ручки регулятора дифференциала в нужном Вам направлении в соответствии с таблицей (см. ниже). *I Ширина диапазона - от “0.7” (отрицательная подача) до “2” (положительная подача). При обычном шитье регулятор должен быть установлен на “1”. В процессе шитЬя регулировка может быть изменена. ПОЛУЧАЕМЫЙ ЭФФЕКТ ВИД ПОДАЧИ РЕГУЛИРОВКА Сосбаривание, швы без растяжения положительная 1-2 Дифференциал не работает нейтральная Швы с растяжкой отрицательная Иллюстрация СООТНОШЕНИЕ ПОДАЧИ ВПЕРЕД-НАЗАД 1 0.7 - 1 * I : Регулятор дифференциала РЕГУЛЯТОР ДАВЛЕНИЯ ЛАПКИ * II Для обычного шитья не требуется изменять давление лапки, установленное на заводе. Если такая настройка необходима, поверните регулятор в сторону увеличения или уменьшения давления. Иллюстрация * II: Увеличить *III: Уменьшить * III РАБОТА С ПЛОТНЫМИ МАТЕРИАЛАМИ ИЛИ С НЕСКОЛЬКИМИ СЛОЯМИ ТКАНИ Машина может работать с любыми тканями, но для тяжелых тканей или при шитье пакета материалов рекомендуется затянуть винт как указано на рис. При шитье легких тканей или материалов средей плотности, а также при установке новой ширины обметывающего шва ослабьте винт, иначе нож может не прорезать ткань. Заводская регулировка установлена для средней толщины ткани. Иллюстрация 48 *IV : Затягивание * V : Ослабление *VI : Улитка * IV *V * VI EINSTELLUNG DES DIFFERENTIALTRANSPORTS Stellen Sie den gewünschten Differentialtransport entsprechend der nachstehenden Tabelle ein. Die Einstellung kann stufenlos zwischen 0.7 (negativer Transport) und 2 (positiver Transport) erfolgen. Diese Einstellungen zeigen des deutlichsten Differential-Effekt. Zum normalem Nähen sollte der Differentialknopf auf “1” stehen. Sie können den Differentialknopf auch während des Nähens verstellen. Abbildung * I : Differentialknopf Wirkung und Anwendung Kein Wellen des Stoffs; Kräuseln Art des Transports Positiver Differentialtransport Einstellung Verhältnis hinterer/ vorderer Transport 1-2 Kein Differential- Neutraler transport Transport 1 Kein Negativer Zusammenziehen Transport 0.7-1 SETTING DIFFERENTIAL FEED REGLAREA DIFERENŢIALULUI Set by simply moving the differential feed control dial in the direction desired referring to the chart below. Se fixează cu răsucirea mînerului reglorului diferenţialului într-o direcţie dorită şi conform tăbliţei (vezi mai jos). The adjustment can be made between 0.7 (negative effect) and 2 (Positive effect). These settings give the best ratio of feeding. Lăţimea diapazonului- de la „0,7” (transmitere negativă) pînă la „2” (transmitere pozitivă). For normal sewing, the dial should be set at 1. The dial can be reset even while sewing. Illustration * I : Differential feed control dial EFFECT AND APPLICATION TYPE OF FEEDING Waver-free Seams, Gathering Positive differential feed No differential feed Neutral feed Pucker-free seams Negative differential feed FEED RATIO SETTING REAR: FRONT Werksseitig ist die Maschine für ‘normale’ Stoffe eingestellt. Abbildung * IV : anziehen * V : lockern * VI : Screw RAPORTUL REGLAREA TRANSMISIEI ÎNAINTE / ÎNAPOI Diferenţialul nu lucrează Neitrală 1 Cusături cu extindere Negativă 0.7-1 0.7-1 * II: Increase * III: Decrease A wide range of fabric can be overlocked on this machine, but it is recommended to tighten screw as illustrated, when sewing with extra heavyweight fabrics or mulitiple layers of fabric. Open working table for adjustment. Loosen the screw when sewing with light to normal weight fabric or turning overedge cutting width dial, or otherwise fabric may not be well cut. The machine is set for normal weight fabrics from the factory. * IV: Tighten ASPECTUL TRANSMISIEI 1 SEWING WITH EXTRA HEAVYWEIGHT FABRIC OR MULTIPLE LAYERS OF FABRIC Illustration EFECTUL PRIMIT 1-2 Presser foot pressure has been correctly set at the factory, so you do not need to adjust it for most of ordinary sewing. If adjustment is necessary, turn the foot pressure regulator to higher number to increase or to lower number to decrease pressure. Die meisten Stoffarten können Sie ohne eine Nachjustierung bearbeiten. Bei extra-dickem Stoff oder beim Verarbeiten von mehreren Stofflagen empfiehlt es sich, die nebenstehend angezeigte Schraube anzuziehen. Öffnen Sie dazu den Arbeitstisch. Lockern Sie die Schraube, wenn Sie leichte (bis normale) Stoffe nähen, weil sonst der Stoff eventuall nicht gut geschnitten wird. Auch beim Einstellen des Schnittbreitenreglers kann es nötig sein, diese Schraube zu lockern. * I : Reglorul diferenţialului Pozitivă Für die meisten Näharbeiten brauchen Sie den werksseitig eingestellten Füßchendruck nicht ändern. Sollte ein Nachstellen erforderlich sein, drehen Sie den Regler auf eine höhere Zahl um den Druck zu vergrößern, und auf eine kleinere Zahl um den Druck zu verringern. NÄHEN VON EXTRA-DICKEM STOFF ODER MEHRERER STOFFLAGEN Ilustrare Încreţire, cusături lipsite de extindere FOOT PRESSURE REGULATOR Illustration În timpul coaserii puteţi efectua reglări. 1-2 DER FÜSSCHENDRUCKREGLER Abbildung * II : Erhöhen * III : Verringern La o cusătură obişnuită reglorul se aşează la „1”. * V : Loosen * VI : Screw REGLORUL PRESĂRII PICIORUŞULUI Cusătura obişnuită nu necesită o reglare specială, ea fiind fixată la întreprindere. Dacă apare nevoia de reglare, răsuciţi reglorul în partea măririi sau micşorării presării. Ilustrare * II: Măriţi * III: Micşoraţi LUCRUL CU MATERIALE ÎNDESATE SAU CU CÎTEVA STRATURI DE MATERIALE Maşina dată lucrează cu orice fel de materiale, însă pentru ţesături groase sau pentru coaserea pachetelor pentru materiale se recomandă strîngerea şurubului, cum e arătat pe desen. La coaserea ţesăturilor cu greutate medie, deasemenea la fixarea unei lăţimi a însăilăturii slăbiţi şurubul, în caz contrar cuţitul nu va tăia materialul. Reglarea de la producător e prevăzută pentru materiale cu grosime medie. Ilustrare * IV: Slăbiţi * V : Strîngeţi * VI : Melc 49 ОСНОВНЫЕ ОПЕРАЦИИ ОБМЕТЫВАНИЕ УГЛОВ ТКАНИ БЕЗ ОБРЕЗКИ НИТОК 1. Дойдя до края ткани, остановите иглу в верхнем положении. 2. Поднимите лапку и аккуратно подтяните цепочку ниток, чтобы не задеть указатель строчки. 3. Поверните ткань, опустите лапку и начинайте обметывать другую сторону ткани. ПРИМЕЧАНИЕ:Если Вы одновременно производите обметку и подшиваете край, разрежьте ткань вдоль новой линии строчки, не доходя до края 3 см, перед тем как повернуть ткань. Иллюстрация * I : Надрезать ОБРАБОТКА КРИВОЛИНЕЙНЫХ СРЕЗОВ Если край вогнутый, мягко направляйте рукой ткань по размеченной линии под правую половину лапки (или чуть левее), одновременно прикладывая усилие в направлении по стрелке A (рис.поз. 3) левой рукой, а в направлении по стрелке И правой рукой. Если край выпук лый, также подл ожите тк ань под лапк у, но направляйте тк ань в противоположных направлениях (см.рис. поз. 4). КАК РАСПОРОТЬ СТРОЧКУ Разрежьте ножницами с изнаночной стороны ткани стежки, которые необходимо удалить, и выньте из ткани остатки ниточной строчки. 50 GRUNDTECHNIKEN BASIC TECHNIQUES OPERAŢIUNI DE BAZĂ Nähen von Ecken ohne Zerschneiden der Fäden TURNING OUTSIDE CORNERS WITHOUT CUTTING THREADS ÎNSĂILAREA UNGHIURILOR PÎNZEI FĂRĂ TĂIEREA AŢEI 1. Wenn Sie an der Ecke ankommen, unterbrechen Sie die Näharbeit, wenn die Nadel über dem Stoff steht. 1. When you reach the fabric edge, stop stitching with the needle above the fabric. 1. Ajungînd la marginea ţesăturii, opriţi acul în poziţia de sus. 2. Stellen Sie den Nähfuß hoch, und ziehen Sie die Fadenkette vorsichtig etwas von Stichfinger ab. 3. Drehen Sie den Stoff, lassen Sie den Nähfuß wieder herunter, und nähen Sie in der neuen Richtung weiter (Fig. 1). Bitte beachten Sie: Wenn Sie gleichzeitig versäubern und abschneiden, schneiden Sie den Stoff ca. 3 cm entlang der neuen Nählinie mit einer Schere ein (Fig. 2), bevor Sie das Material drehen. Abbildung * I : Schneiden ! 2. Raise the presser foot and gently pull on the thread chain just enough to clear the stitch finger. 3. Turn the fabric, lower the presser foot and begin stitching in the new direction. Fig. 1. NOTE: When overlocking and trimming at the same time, cut the fabric along the new stitching line for about 3 cm, before turning the fabric. Fig. 2. Illustration * I : Cut ! 2. Ridicaţi picioruşul şi trageţi atent lănţişorul de aţe, ca să nu atingeţi indicele cusăturii. 3. Întoarceţi ţesătura, coborîţi picioruşul şi începeţi însăilarea de partea cealaltă. NOTĂ: Dacă Dvs efectuaţi simultan însăilarea şi tivirea marginii, tăiaţi ţesătura de-a lungul liniei noi de tighelare, neajungînd pînă la margine cu 3 cm înainte de a întoarce materialul. Ilustrare * I : Crestaţi Nähen von Kurven TURNING CURVED EDGES PRELUCRAREA MARGINII CURBILINII Für nach innen gebogene Kurven führen Sie den Stoff mit der Schnittkante rechts unter der Vorderseite des Nähfußes; dabei drücken Sie den Stoff bei Punkt A mit der linken Hand etwas in Pfeilrichtung und gleichzeitig mit der rechten Hand bei Punkt B in Gegenrichtung. (Fig. 3) For inside curves, guide fabric gently with trimming line of the fabric under the right front of the presser foot (or a little to the left), applying pressure at point A in the direction of the arrow with your left hand, and at the same time applying a little opposite pressure at point B with your right hand. Fig. 3. Dacă marginea e concavă, îndreptaţi uşor ţesăturacu mîna de-a lungul liniei însemnate sub partea draptă a oicioruşului (sau puţin în stînga), totodată apăsînd în direcţia săgeţii A (des.3) cu mîna stîngă, iar în direcţia săgeţii B- cu mîna dreaptă. Für nach außen gebogene Kurven legen Sie den Stoff in der gleichen Weise unter den Nähfuß, aber drücken Sie den Stoff jeweils in entgegengesetzter Richtung. (Fig. 4) Auftrennen Schneiden Sie die Nadelfäden in Abständen ein. Dann ziehen Sie leicht an den Greiferfäden, und der genähte Stich kann leicht wieder aufgetrennt werden. For outside curves place under the presser foot in a similar manner but applying the pressure in the opposite directions. Fig. 4. REMOVING STITCHES FROM SEWN FABRIC To remove stitches already sewn, snip off needle thread(s) at intervals and pull out looper thread(s). Dacă marginea e convexă, deasemenea puneţi pînza sub picioruş, însă îndreptaţi-o în direcţii opuse (vezi des.4). DESFACEREA CUSĂTURII Tăiaţi cu foarfecele tighelele, ce trebuiesc înlăturate, pe dosul ţesăturii şi scoateţi rămăşiţele de aţă. 51 ОБМЕТЫВАНИЕ С ПРОКЛАДЫВАНИЕМ ШНУРА Используется для упрочнения плечевых, боковых швов, швов пройм при обработке трикотажа. В качестве отделки вместо шнура можно использовать пряжу контрастных цветов. Машина оснащена спецлапкой с двумя отверстиями для прокладывания шнура с левой или правой стороны строчки. Порядок работы: 1. Проденьте шнур через направители 1 и 2 шнура и через направитель нити левой иглы. 2. Вденьте шнур в одно из отверстий спецлапки (см.рис. 3) и заведите его назад за лапку. 3. Подложите под лапку обрабатываемую ткань. Начинайте шить медленно, проверяя положение шнура, затем увеличьте скорость шитья. ДЛЯ СТАЧИВАНИЯ ПЛЕЧЕВЫХ ШВОВ ИЛИ ШВОВ ПРОЙМ вденьте шнур в переднее отверстие, убедитесь, что он проходит между левой и правой игольными нитками (рис.поз. 2). ДЛЯ СТАЧИВАНИЯ БОКОВЫХ ШВОВ пропустите шнур в заднее отверстие, убедитесь, что шнур прокладывается у нити правой иглы (рис.поз. 3). ДЛЯ ДЕКОРАТИВНОЙ ОТДЕЛКИ ВЫ можете пропустить шнур или пряжу контрастных цветов в любое или в оба отверстия. ДЛЯ СБОРКИ КРАЯ МАТЕРИАЛА НА ЛЕСКУ пропустите леску в заднее отверстие и обметайте край “подвернутым швом“ (см.стр. 38 - 39). Эта обработка используется для подшивки низа юбок и т.п. 52 Überwendlingnaht mit Beilauffaden CORDED OVERLOCK ÎNSĂILARE CU AŞEZAREA ŞIRETULUI Sie können die Überwendlingnaht mit einem Einlauffaden verstärken, z. B. für Schulter-und Ärmelnähte oder beim Zusammennähen von Teilen aus Strickstoff. Für dekorative Zwecke läßt sich gut ein Einlauffaden in einer Kontrastfarbe verwenden. Der Nähfuß der Maschine ist so gebaut, daß der Einlauffaden auf der linken oder rechten Seite des zentralen Geradstichs liegen kann. Corded overlock can be used to strengthen shoulder, sleeve or side seams when joining or making up knitted garments. As a decorative feature you can use knitting yarn of contrasting colours to further enhance your garment. Your machine is equipped with a presser foot which has been designed to feed your cord or yarn to the left of the safety stitch or to the right. Follow instructions as follows: Se foloseşte la întărirea cusăturilor de al umăr, laterale, clemelor, la cusături de răscroială a tircotajului. În calitate de finisare în locul şiretului puteţi folosi fire de culori contraste. Maşina e dotată cu un picioruş special cu 2 orificii pentru şireturi în dreapt sau stînga cusăturii. Ordinea lucrului: Beachten Sie bitte folgende Schritte: 1. Stellen Sie eine Rolle mit Einlauffaden, z. B. Baumwoll-Stickgarn, Wolle oder Gummifaden hinter den Garnrollenhalter der Maschine. Führen Sie den Einlauffaden durch die Fadenführungen (1) und (2), und dann durch die Fadenführung für die linke Nadel (3). Siehe Abbildung 1. 1. Place a “filler” cord, such as a crochet cotton, gimp, wool, knitting yarn, or shirring elastic at the rear of the machine spool pin. Pass the cord through the cord guides (1) and (2) and then through the left needle thread guide (3). See Fig. 1. 2. Führen Sie den Faden (je nach Näharbeit, siehe Fig.2 und 3) durch das vordere oder das hintere Loch im Nähfuß, und legen Sie den Faden nach hinten unter den Nähfuß zurück. 3. Legen Sie das Nähgut wie zum normalen Nähen ein. Fangen Sie langsam an zu nähen, und beobachten Sie, ob der Einlauffaden wie gewünscht transportiert wird; erhöhen Sie erst dann die Nähgeschwindigkeit. Z u m Z U S A M M E N N Ä H E N V O N S C H U LT E R - U N D ÄRMELNÄHTEN führen Sie den Einlauffaden durch das vordere Loch, und vergewissern Sie sich, daß er dabei zwischen dem linken und dem rechten Nadelfaden liegt. Zum ZUSAMMENNÄHEN VON SEITENTEILEN führen Sie den Einlauffaden durch das hintere Loch; er muß dabei rechts vom rechten Nadelfaden liegen. Für DEKORATIVE EFFEKTE können Sie kontrastfarbiges Garn einsetzen, das Sie entweder durch das vordere oder das hintere Loch, oder aber durch beide Löcher einfädeln. Z u m N ä h e n v o n G E W E L LT E N S Ä U M E N M I T BEILAUFFADEN (Fig.4) fädeln Sie den Einlauffaden durch das hintere Loch und nähen Sie einen ROLLSAUM (siehe Seite 38 - 39). 1. Treceţi şiretul prin linealul firelor acului stîng. 2. Insert the cord through either the front or rear hole (according to the operation, see diagrams Figures 2 and 3), in the presser foot and pass it under and to the rear of the foot. 3. Place the material to be sewn as normal. Start at slow speed observing if cord is feeding correctly and increase speed as needed. FOR JOINING SHOULDERS OR SLEEVES, pass the cord through the front hole, ensuring that it is fixed between the left and right needle threads as it is guided through the front hole. (Fig. 2). FOR JOINING SIDE SEAMS, pass the cord through the rear hole, ensuring it is positioned to the right needle thread. (Fig. 3). FOR DECORATIVE EFFECTS, you may pass contrasting colours either through the front or rear hole or if you desire, pass cord or yarn through each hole. 2. Îmbrăcaţi şiretul într-una din orificiile picioruşului special (vezi des.3) şi trăgeţi-l în urma picioruşului. 3. Puneţi sub picioruş ţesătura prelucrată. Începeţi să coaseţi încet, verificînd poziţia şiretului, apoi măriţi viteza. PENTRU SURFILAREA DUBLĂ A CUSĂTURILOR DE LA UMERI ŞI RĂSCROIALA Băgaţi şiretul în gaura dinainte, convingeţi-Vă, că el trece între firele acelor drept şi stîng (des.2). PENTRU TIGHELIREA CUSĂTURILOR LATERALE Lăsaţi şiretul să treacă prin orofociul din spate, convingeţiVă, că şiretul e aşezat la firul acului drept (des.poz.3). PENTRU TIV DECORATIV puteţi lăsa să treacă şiretul sau firele de contrast în oricare sau în ambele orificii. PENTRU ÎNCREŢIREA MARGINII PE SFOARĂ Lăsaţi să treacă sfoara în gaura din spate şi surfilaţi marginea cu „tighel răsfrînt”(vezi.pag.38 - 39). Acest procedeu se foloseşte la prelucrarea poalelor etc. FOR MAKING WAVED HEM WITH GUT (Fig. 4), pass the gut through the rear hole and start ROLL HEMMING (See page 38 - 39). This is used for the hem of skirt, etc. 53 ОТДЕЛОЧНЫЕ СТРОЧКИ Кроме обычного обметывания Ваша машина может выполнять ряд декоративных отделок, таких как декоративная обработка края, соединение материалов встык, защипы, изготовление каймы или тесьмы. Декоративная отделка края с использованием 2 нитей или 3 нитей (плоский шов). Сложите материал по намеченной линии и прошейте, не разрезая ножом подгибку (рис.поз. A). Распрямите ткань, вытяните концы ниток на изнанку и приутюжьте. Окончательный вид может быть улучшен при заправке в нижний петлитель шнура или вышивальных ниток. Соединение материалов встЫк с использованием 2 нитей или 3 нитей (плоский шов). Сложите два куска материала лицом вверх и обметайте по краю. Расправьте и приутюжьте. При использовании тканей различных цветов получается отделка в стиле “пзчворк”. Изготовление защипов (используя 3 нити). Заложите ткань по линиям и заколите булавками. Проложите оверлочную строчку по заложенному краю, стараясь не разрезать ткань. Вытяните концы ниток на изнанку и приутюжьте. Изготовление декоративной тесьмЫ (используя 3 нити). Обметайте шнур или тесьму, осторожно поддерживая ее двумя руками, чтобы не разрезать край (см.рис.). ПРИМЕЧАНИЕ: декоративные швы делать проще, используя лапку для потайной строчки. Уменьшите натяжение нити верхнего петлителя при использовании толстой нити 54 DEKORATIVE ANWENDUNGSMÖGLICHKEITEN DECORATIVE EFFECTS CUSĂTURI DECORATIVE In addition to normal overlocking which is fully described in this instruction book, your machine can also be used for a number of decorative applications such as decorative topstitching, butted seams, pin-tucking or making lengths of decorative braid. See below. În afara însăilăturii obişnuite maşina Dvs poate efectua un rînd de cusături decorative a marginii, îmbinarea materialelor, confecţionarea brîului sau a panglicilor. DEKORATIVE AUFLIEGENDE NÄHTE – mit zwei Fäden oder mit drei Fäden (Flachsaum) Falten Sie den Stoff an der gewünschten Linie, und nähen Sie über die gefaltete Kante: achten Sie darauf, die Kante nicht anzuschneiden. Fig. A. Falten Sie den Stoff wieder auseinander, ziehen Sie die Fadenenden auf die Unterseite, und bügeln Sie die Näharbeit. Sie können den Effekt noch erhöhen, wenn Sie für den unteren Greifer Knopflochgarn oder Stickgarn benutzen. Decorative top-stitching – using only two threads or using three threads (flat seam) Fold fabric along the line to be top-stitched and sew over the folded edge, making sure not to cut into the fold. Fig. A. Tiv decorativ cu 2 sau 3 fire (tighel plat). Aşezaţi materialul după o linie însemnată şi coaseţi, nu tăiaţi îndoitura (des.poz.A). Îndreptaţi materialul, scoateţi capetele firurilor pe dos şi călcaţi cu fierul de călcat. Puteţi îmbunătăţi aspectul definitiv, aranjînd şnurul sau aţa de broderie în împletitorul inferior. STOSSKANTEN – mit zwei Fäden oder mit drei Fäden (Flachsaum) Legen Sie zwei Lagen Stoff mit den Unterseiten aufeinander, und nähen Sie entlang der Stoffkante. Auseinanderfalten und bügeln. Butted seams – using only two threads or using three threads (flat seam) Place two pieces of fabric wrong sides together and overlock along the edge. Unfold and press. Îmbinarea ţesăturilor cu folosirea a 2 sau 3 fire (tighel plat). Puneţi două bucăţi de material cu faţa în sus şi însăilaţi pe margine. Îndreptaţi şi călcaţi cu fierul de călcat. By using different coloured fabrics and thread a pleasing ‘patchwork’ effect can be achieved. La folosirea ţesăturilor de diferite culori primiţi un tiv în stil „pachwork”. BIESEN – mit drei Fäden Falten Sie den Stoff an der gewünschten Linie, und nähen Sie entlang der gefalteten Kante. Geben Sie acht, die Kante nicht anzuschneiden (Siehe Seite 58 - 59.) Fadenenden auf die Unterseite ziehen und die Biese anbügeln. Pin-tucking – using three threads Fold fabric along a line to be pin-tucked and overlock sew along the folded edge, making sure not to cut into the folded edge of the fabric. (See page 58 - 59). Pull ends of threads to the underside and press. Confecţionarea clamelor (folosind 3 fire) Îndreptaţi materialul după linii şi prindeţi cu bolduri. Trageţi cu overlock pe marginea primită, stăruiţi-Vă să nu tăiaţi pînza. Scoateţi capetele aţelor pe dos şi călcaţi cu fierul de călcat. ZIERLITZEN – mit drei Fäden Nähen Sie im Überwendlingstich über eine Kordel oder ein entsprechend breites Band Vorsicht: Kanten nicht anschneiden. (Siehe Seite 58 - 59.) ZUR INFORMATION: *Der Einsatz des Blindstichfußes (Sonderzubehör, Seite 64 - 65) erleichtert dekorative Arbeiten. **Verringern Sie beim Nähen mit dickem Garn die Fadenspannung für den oberen Greifer. Making decorative braid – using three threads Overlock over a cord or braid, holding it carefully with both hands, making sure not to cut the edge. (See page 58 - 59). Confecţionarea bentiţei decorative (folosind 3 fire) Însăilaţi şnurul sau bentiţa, ţinînd atent cu mînile, ca să nu tăiaţi marginea (vezi des.). NOTE : *If you use blind hem foot, decorative stitch is made easily. **Reduce the upper looper tension when you use thick thread. NOTĂ : tivurile decorative se prregătesc uşor, dacă folosiţi picioruşul pentru tiv ascuns. Micşoraţi tensionarea firului împletitorului de sus, dacă firul superior e gros. Zusätzlich zum ‘normalen’ Nähen von Überwendlingsarbeiten können Sie mit Ihrer Maschine eine Reihe von dekorativen Effekten arbeiten, wie z.B. aufliegende Nähte, Stoßkanten, Biesen oder Zierlitzen. Mit kontrastfarbigem Stoff und Garn können Sie so einen ‘Patchwork’-Effekt erzielen. Unfold the fabric, pull the ends of the threads to the underside and press flat. The final appearance can be enhanced by using buttonhole twist or embroidery thread on the lower looper. 55 ПРИМЕНЕНИЕ ДИФФЕРЕНЦИАЛА Обратитесь к стр. 46 -49 текста. Дифференциал предназначен для предотвращения сосбаривания и волнистости. 1. СОСБАРИВАНИЕ - обычно образуется на легких тканях. Чтобы его избежать, установите регулятор дифференциала меньше “1“. 2. ВОЛНИСТОСТЬ - обычно образуется на трикотажных и легкорастяжимых материалах. Чтобы ее избежать, установите регулятор дифференциала больше “1 “. *I 3. СБОРКИ - с помощью дифференциала их можно делать на легких тканях. Используются для обработки линии талии, проймы, для изготовления оборок. Установите регулятор дифференциала между “1.5” и “2” в зависимости от нужной Вам степени сосбаривания. * II ЭТО ВАЖНО: На регулировку дифференциала влияет толщина и зластичность ткани, а также длина стежка (чем больше длина стежка, тем больше усадка). Всегда проверяйте установленную регулировку на образце. Иллюстрация * I : Непосечонный и нерастянутый край * II : Сосбаривание *III : Волнистость *IV: Сборки * III * IV 56 ANWENDUNG DES DIFFERENTIALTRANSPORTS Siehe Seite 46 -49, Differentialtransport. Durch den Differentialtransport können Sie ein Zusammenziehen oder Wellen des Nähguts weitgehend vermeiden. Darüberhinaus kann der Differentialtransport gut zum Kräuseln eingesetzt werden. 1. Zusammenziehen des Materials Webstoffe oder sehr dünne Stoffe können sich beim Nähen zusammenziehen. Um dies zu verhindern, stellen Sie den Differentialtransport auf kleiner als 1. 2. Wellen des Materials Ein Wellen des Stoffes kann bei Strickstoffen oder bei elastischem Material auftreten. Um dies zu verhindern, stellen Sie den Differentialtransport auf größer als 1. 3. Kräuseln Der Differentialtransport macht Kräuseln von leichten Stoffen einfach, z.B. an der Taille, bei Ärmelbündchen oder Rüschen. Stellen Sie den Differentialtransport zwischen 1.5 und 2 ein, und probieren Sie die beste Kräuselwirkung für Ihren Zweck aus. WICHTIG Die genaue Feineinstellung hängt von der Stärke und Dehnbarkeit Ihres Stoffes ab. Auch die Stichlänge kann die Einstellung beeinflussen. Je länger die Stiche sind, desto mehr Stoff wird zusammengezogen. DIFFERENTIAL FEED APPLICATIONS UTILIZAREA DIFERENŢIALULUI Please refer to pages 46 - 49 DIFFERENTIAL FEED. Adresaţi-Vă către pag. 46 - 49 ale textului. Differential feed is designed to minimize puckering and wavering. It is also very effective for gathering. Diferenţialul e destinat pentru preîntîmpinarea încreţirii materialului ţi a ondulărilor. 1. Puckering Puckering tends to occur on woven or sheer fabrics. To obtain pucker-free seams, set the differential feed control dial at less than 1. 1. ÎNCREŢIREA – de obicei se încreţesc ţesăturile uşoare. Pentru a preîntîmpina, fixaţi reglorul diferenţialului mai jos de „1”. 2. Wavering Wavering tends to occur on knitted or stretchable fabrics. To obtain waver-free seams, set the differential feed control dial at more than 1. 3. Gathering Differential feed makes gathering easier on lightweight fabric. Use it on waistlines, sleeve heads, sleeve bottoms and ruffles, etc. Set the differential feed control dial between 1.5 and 2 to obtain the best gathering effect for your use. IMPORTANT The exact adjustment depends on the thickness and elasticity of fabric. Even the stitch length can influence the setting. The longer the stitches, the more the fabric is contracted. Always do a test run with a piece of actual fabrics you use and find the best settings. Probieren Sie daher die Feineinstellung immer auf einem Stück des Stoffes aus, den Sie verarbeiten wollen. Abbildung * I: Korrekte, glatte Naht * II: Zusammengezogene Naht * III: Gewellte Naht *IV: Kräuseln Illustration 2. ONDULAREA – se ondulează uşor de obicei tricotajul şi materialele flexibile. Pentru a preîntîmpina, fixaţi reglorul diferenţialului mai sus de „1”. 3. CREŢURI – le puteţi face pe ţesături uşoare cu ajutorul diferenţialului. Se folosesc la prelucrarea liniilor taliei, răscroială, la pregătirea volanelor. Fixaţi reglorul diferenţialului între „1,5” şi „2” în dependenţă de măsura Dvs de încreţire. ESTE IMPORTANT Grosimea şi elasticitatea pînzei influenţează asupra reglării diferenţialului, precum şi lungimea tighelului (cu cît e mai mare lungimea tighelului, cu atît e mai mare contracţia ţesăturii). Ilustrare * I: Margine nedespicată şi răsfrîntă * II: Încreţire * III: Ondulare * IV: Creţuri * I: Pucker or waver-free seams * II: Puckering * III: Wavering * IV: Gathering 57 3. УХОД ЗА ВАШЕЙ МАШИНОЙ ЗАМЕНА ПОДВИЖНОГО НОЖ *I АПри затуплении ножа его необходимо заменить. Запаснойнож имеется в комплекте. ПРИМЕЧАНИЕ: Вам не потребуется заменять неподвижный нож, т.к. он сделан из твердосплавного материала. * II Прежде всего отключите машину от сети. 1. Ослабьте винт и снимите подвижный нож. 2. Закройте рабочий стол. Опустите ручку ножа в нижнее положение поворотом маховика на себя. В зтом положении установите новый нож, затяните винт. Убедитесь, что лезвие подвижного ножа примерно на 0.5 мм ниже поверхности неподвижного ножа. Иллюстрация * I: Винт * II: Подвижный нож СНЯТИЕ ПОДВИЖНОГО НОЖА Если Вы хотите шить не обрезая край, откройте рабочий стол и открепите подвижный нож, поворачивая в лево и на себя ручку, освобождающую нож (см.рис.). Убедитесь, что выступающий срез материала не превышает ширину обметывания, иначе верхний петлитель и игла могут быть повреждены. Иллюстрация *III : Колпачок для закрепления ножа * III СНЯТИЕ ПЕРЕДНЕЙ КРЫШКИ * IV Прежде всего выньте вилку из розетки. Крышка снимается отвинчиванием винта (см.рис.). Иллюстрация 58 * I : Винт *IV : Фронтовая крышка *I 3. INSTANDHALTUNG DER MASCHINE 3.CARING FOR YOUR MACHINE 3.ÎNGRIJIREA MAŞINII DVS Wenn das Obermesser stumpf wird, tauschen Sie es folgendermaßen aus. REPLACING MOVING CUTTER SCHIMBAREA CUŢITULUI MOBIL ZUR INFORMATION: D as Untermesser ist aus äußerst widerstandsfähigem Hartmetall gefertigt und braucht normalerweise nicht ausgewechselt werden. Replace a moving cutter if it becomes blunt as follows. A spare cutter will be found in your accessories. NOTE: You should not need to replace fixed cutter, which is made of a special hard alloy material. Un cuţit tocit trebuie schimbat. Cuţitul de rezervă se află în complet. ZIEHEN SIE ZUERST DEN NETZSTECKER AUS DER STECKDOSE. 1. L ö s e n S i e d i e S c h r a u b e , u n d n e h m e n S i e d a s Obermesser heraus. 2. Schließen Sie den Arbeitstisch. Bringen Sie die Antriebswelle für das Obermesser in ihre tiefste Stellung, indem Sie das Handrad per Hand nach vorn drehen. Setzen Sie in dieser Stellung das neue Obermesser ein, und ziehen Sie die Halteschraube wieder so an, daß sich DIE SCHNITTKANTE DES OBERMESSERS CA. 0,5MM UNTER DER OBERFLÄCHE DES UNTERMESSERS BEFINDET. Abbildung * I : Schraube * II : Obermesser FIRST REMOVE THE POWER PLUG FROM THE SUPPLY SOCKET-OUTLET. 1. Loosen screw and take out moving cutter. 2. Close the working table. Lower cutter driving arm to its lowest position by turning the hand wheel towards you by hand. In this position, set replacement cutter in position and secure it with screw, ENSURING THAT THE EDGE OF THE MOVING CUTTER IS APPROXIMATELY 0.5 MM BELOW THE SURFACE OF THE FIXED CUTTER. Illustration * I : Screw * II: Moving cutter NOTĂ: Cuţitul imobil nu necesită înlocuire, deoarece e făcut din aliaje tari. Mai întîi de toate deconectaţi maşina. 1. Slăbiţi şurubul şi scoateţi cuţitul mobil. 2. Închideţi masa de lucru. Coborîţi mînerul cuţitului în poziţia de jos cu o rotire a volantului spre sine. Fixaţi în această poziţie un alt cuţit , strîngeţi şurubul. ConvingeţiVă, că lama cuţitului mobil se află cu aproximativ 0,5 mm mai jos decît suprafaţa cuţitului imobil. Ilustrare * I : Şurubul * II: Cuşitul mobil DISENGAGING MOVING CUTTER SCOATEREA CUŢITULUI MOBIL Wenn Sie nähen wollen ohne gleichzeitiges Abschneiden, öffnen Sie den Arbeitstisch und schalten Sie das Obermesser ab: drücken Sie den Auslöser zuerst nach links, und drehen Sie ihn dann nach vorn wie die Skizze zeigt. If you want to sew without cutting, open the working table and disengage the moving cutter by pushing the cutter release knob to the left and turning it towards you as illustrated. Dacă doriţi să coaseţi fără să tăiaţi marginea, deschideţi masa de lucru şi slăbiţi cuţitul mobil, răsucind în stînga şi spre sine mînerul. Desprindeţi cuţitul. Vergewissern Sie sich, daß die Stoffkante nicht breiter ist als die eingestellte Überwendlingstichbreite, da sonst der obere Greifer oder die Nadeln beschädigt werden können. Ensure that fabric edge is not wider than overedge width selected or upper looper and needle can be damaged. AUSSCHALTEN DES OBERMESSERS Abbildung * III : Obermesser-Auslöser AUSTAUSCH DER NÄHLICHTGLÜHLAMPE Schalten Sie die Maschine vor dem Abnehmen des Kopfdeckels elektrisch ab. Schrauben Sie den Kopfdeckel wie gezeigt ab. Drücken Sie die Wärmeschutzplatte (A) zur Seite, damit Sie die defekte Birne herauschrauben können. Nach dem Austausch drücken Sie die Wärmeschutzplatte wieder in ihre Ausgangsstellung, und schrauben Sie den Kopfdeckel wieder an. Verwenden Sie nur Ersatzbirnen 220 Volt, 15 Watt, Fassung E 14. Abbildung * I : Schraube *IV: Kopfdeckel Illustration * III: Cutter release knob Convingeţi-Vă, că mărimea tăieturii materialului, ce iese în afară, nu depăşeşte lăţimea însăilăturii, în caz contrar împletitorul superior şi acul pot fi dereglate. Ilustrare * III: Capsula pentru întărirea cuţitului REMOVING FACE COVER SCOATEREA CAPACULUI DIN FAŢĂ Disconnect from power supply before removing face cover. Mai întîi de toate trageţi fişa din priză. Capacul se scoate la deşurubarea şurubului (vezi des.). Remove the screw and take off the face cover. Illustration * I : Screw * IV: Face cover Ilustrare * I : Şurubul * IV: Capacul frontal 59 ЧИСТКА И СМАЗКА Для плавного хода машины ее необходимо регулярно чистить и смазывать. Отключите машину от сети. 1. Откройте переднюю крышку и рабочий стол. Удалите из механизма кисточкой (есть в комплекте) грязь и обрезки. *I 2. Капните несколько капель масла в места, указанные на рис. Всегда используйте только хорошее машинное масло только высокого качества. Иллюстрация * I : Щеточка * II : Масло * II 60 REINIGEN UND ÖLEN CLEANING AND OILING CURĂŢAREA ŞI UNGEREA Für einen ruhigen Lauf der Maschine ist es unerläßlich, sie regelmäßig zu säubern und zu ölen. To keep the machine running smoothly, keep it clean and lubricated at all times. Pentru mersul liniştit a maşinii e necesar să curăţaţi şi să ungeţi regulat maşina. Deconectaţi maşina din priză. SCHALTEN SIE ZUERST DIE MASCHINE AB, INDEM SIE DEN NETZSTECKER AUS DER STECKDOSE ZIEHEN. FIRST DISCONNECT MACHINE FROM POWER SUPPLY BY REMOVING PLUG FROM SOCKET-OUTLET. 1. Öffnen Sie die Frontklappe und den Arbeitstisch. Säubern Sie die in der Skizze angezeigten Bereiche mit dem Pinsel aus dem Zubehör von Fadenresten und Nähstaub. 1. Open the front cover and working table. Using the brush provided, remove dust and lint that have accumulated. 1. Deschideţi capacul din faţă şi masa de lucru. Înlăturaţi murdăria şi rămăşiţele din mecanizm cu periuţa (este în complet). 2. Geben Sie einige Tropfen Öl auf die durch die Pfeile in der Skizze gezeigten Stellen. BENUTZEN SIE NUR GUTES NÄHMASCHINENÖL. Abbildung 2. Apply a few drops of oil to the points indicated by arrows. ALWAYS USE A GOOD QUALITY SEWING MACHINE OIL. Illustration 2. Picuraţi cîteva picături de ulei pe locul indicat pe des. Întotdeauna folosiţi pentru maşină ulei bun de calitate înaltă. Ilustrare * I: Periuţa * II: Ulei * I: Brushing * II: Oil * I : Säubern * II : Ölen 61 4. УСТРАНЕНИЕ НЕПОЛАДОК НЕПОЛАДКА ПРИЧИНА Неправильное натяжение нити Неверный иглы Неровная строчка Неверная заправка Продвижение ткани Не закреплена лапка 4. Nützliche Hinweise bei Störungen СПОСОБ УСТРАНЕНИЯ Изменить натяжение Правильно подобрать иглы под нитки и ткань Перезаправить машину Ткань не тянуть,а плавно направлять Вновь установить лапку Продвижение ткани Неверный иглы Поломка иглы Неправильно установлена игла Неверно закреплена лапка Ткань не тянуть, а направлять Подобрать иглу под ткань и нитки Вновь установить иглу Вновь установить лапку Неправильное натяжение нитей Сосбаривание Гнутая или тупая игла Неверно выбран режим работы дифференциала Изменить натяжение нитей Заменить иглу Установить менее “1” Неправильно отрегулирован дифференциала Установить на Б1Б или более Неверная заправка Неверный иглы Перезаправить машину Выбрать иглы соответствующий Ниткам и ткани Заменить иглу Вновь установить иглу Волнистость Пропуск стежков Обрыв нитей 62 Гнутая или тупая игла Неверно установлена игла Неверная заправка Гнутая игла Слишком большое натяжение нити (ей) Неверная установка иглы Спутались нитки в катушке Не до конца выдвинута ось нитенаправителя Перезаправить машину Установить новую иглу Отрегулировать натяжение нити Вновь установить иглу Правильно установить катушку Полностью выдвинуть ось нитенаправителя Störung Unsauberes Stichbild Mögliche Ursache Falsche Fadenspannung (en). Falsche Nadelstärke. Falsches Einfädeln. Ziehen am Nähgut. Nähfuß locker. Fadenspannung (en) prüfen. Richtige Nadel für Stoff und Garn benutzen. Maschine korrekt einfädeln. Nicht ziehen, nur leicht führen. Nähfuß fest anziehen. Falscher Sitz der Nadel. Nähfuß locker. Nicht ziehen, nur locker führen. Richtige Nadel für Stoff und Garn benutzen. Nadel richtig einsetzen. Nähfuß fest anziehen. Nähte ziehen sich zusammen Falsche Fadenspannung(en). Nadel stumpf oder verbogen. Falsche Differentialeinstellung. Fadenspannung (en) prüfen. Neue Nadel einsetzen. Einstellung kleiner als 1. Nähte wellen sich Falsche Differentialeinstellung. Einstellung auf 1 oder größer bei Strickstoff. Falsches Einfädeln. Falsche Nadelstärke. Maschine korrekt einfädeln. Richtige Nadel für Stoff und Garn benutzen. Neue Nadel einsetzen. Nadel richtig einsetzen. Brechen der Nadel Fehistiche Fadenreißen Ziehen am Nähgut. Falsche Nadelstärke. Abhilfe Nadel stumpf oder verbogen. Falscher Sitz der Nadel. Falsches Einfädeln. Verbogene Nadel. Fadenspannung (en) zu stark. Falscher Sitz der Nadel. Garnrolle verhakt. Teleskop-Fadenführung nicht ganz ausgezogen. Maschine korrekt einfädeln. Neue Nadel einsetzen. Fadenspannung (en) prüfen. Nadel richtig einsetzen. Garnrolle richtig einsetzen. Ganz ausziehen. 4. CHECKING PERFORMANCE PROBLEMS PROBLEM Irregular Stitches PROBABLE CAUSE Incorrect Thread Tension(s). Incorrect size Needle. Improper Threading. Pulling Fabric. Loose Presser Foot. Pulling fabric. Incorrect size Needle. CORRECTION Reset Thread Tension(s). Choose correct size Needle for Thread and Fabric. Re-thread Machine. Do not pull Fabric; guide it gently. Reset Presser Foot. 4. ÎNLĂTURAREA DEFECŢIUNILOR DEFECŢIUNE Tighel strîmb CAUZA METODA DE ÎNLĂTURARE Tensionare incorectă a firului Numărul acului incorect. Aranjarea incorectă Transmisia pînzei Picioruşul nu e fixat Reglaţi tensionarea Alegeţi corect numărul acului, aţei şi ţesăturii Umpleţi maşina cu aţă Nu trageţi ţesătura, ci conduceţi-o lin Fixaţi din nou picioruşul Transmisia pînzei Numărul acului incorect Acul nu e fixat corect Picioruşul e fixat greşit Nu trageţi ţesătura, ci numai conduceţi Alegeţi acul conform materialului şi aţei Instalaţi din nou acul Instalaţi iarăşi picioruşul Reglaţi tensionarea firelor Schimbaţi acul. Fixaţi mai puţin de „1” Incorrect setting of Needle. Loose Presser Foot. Do not pull Fabric; guide it gently. Choose correct size Needle for Thread and Fabric. Reset Needle. Reset Presser Foot. Puckering Incorrect Thread Tension(s). Bent or blunt Needle. Differential feed is set incorrectly. Reset Thread Tension(s). Insert new Needle. Set it at less than 1. Încreţire Tensionarea incorectă a firelor Acul e îndoiat sau tocit Regimul de lucru a diferenţialului nu e ales corect Wavering Differential feed is set incorrectly. Set it at 1 or at more than 1. for knitted fabrics. Ondulare Diferenţialul nu e reglat Fixaţi la „1” şi mai mult Incorrect size Needle. Improper Threading. Bent or blunt Needle. Incorrect setting of Needle. Re-thread Machine. Choose correct size Needle for Thread and Fabric. Insert new Needle. Reset Needle. Maşina scapă tigheli Aranjarea incorectă Numărul acului incorect Acul e îndoiat sau tocit Acul nu e fixat corect Înfăşuraţi bobina Alegeţi acul conform firului şi pînzei Schimbaţi acul Aşezaţi acul din nou Improper Threading. Bent needle. Thread Tension(s) too tight. Incorrect setting of Needle. Thread Spool tangled. Thread Guide Pole not extended. Re-thread Machine. Insert new Needle. Reset Thread Tension(s). Reset Needle. Reset Spool properly. Fully extend Guide Pole. Aranjarea incorectă Acul e îndoiat Tensionarea firului e prea mare Fixarea incorectă a acului Aţa din mosorel e încîlcită Axa ghidajului pentru aţă nu e împinsă pînă la urmă Înfăşuraţi bobina din nou Aşezaţi un ac nou Reglaţi tensionarea firurilor Fixaţi acul din nou Aţezaţi mosorelul corect Împingeţi axa ghidajului pentru fire Breaking Needle Skipping Stitches Breaking Threads Ruperea acului Ruperea firurilor 63 5. ДОПОЛНИТЕЛЬНЫЕ ПРИСПОСОБЛЕНИЯ ЛАПКА ДЛЯ ПОТАЙНОЙ СТРОЧКИ Лапки для потайной строчки являются дополнительным оборудованием и бывают двух размеров: 0.5 для легких и средних тканей и 1.0 для средних и тяжелых тканей. Подберите нужный размер лапки. Установите длину стежка 4 - 5. 1. Подогните материал на требуемую величину подгибки и приутюжьте. Отверните подгибку на лицеву. сторону ткани, образуя на изнаночной стороне мягку. складку (см.рис.поз. 1). 2. Подложите материал под лапку изнаночной стороной вверх. Заправьте подогнутый край в направитель перед лапкой, опустите лапку. Попробуйте сначала на образце и настройте направитель так, чтобы игла слегка захватывала складку. Регулировка направителя осуществляется маленькой отверткой на верхней части лапки (рис.поз. 2). 3. Прошейте подгибку. Излишек ткани будет срезан ножом. Расправьте и приутюжьте. На лицевой стороне ткани строчка будет не видна (рис.поз. 3). Иллюстрация 64 * I : Величина подгиба * II : Винт *III : Направитель 5. SONDERZUBEHÖR 5. OPTIONAL ACCESSORIES 5. DISPOZITIVE ADĂUGĂTOARE BLINDSTICHFUSS BLIND HEM FOOT PICIORUŞ PENTRU TIGHEL ASCUNS Der Blindstichfuß steht als Sonderzubehör in zwei Größen zur Verfügung: 0,5 für leichte/mittlere Stoffe und 1.0 für mittlere/schwere Stoffe. Blind hem feet are obtainable as an optional extra and are available in two sizes. 0.5 for fine-medium fabrics and 1.0 for medium/ heavy fabrics. Picioruşul pentru tighel ascuns prezintă utilaj adăugător şi este de două feluri: 0,5 pentru ţesături uşoare şi medii şi 1,0 pentru ţesături medii şi groase. Montieren Sie den entsprechenden Fuß. Stichlänge: 4 - 5. Fit the appropriate foot. Set the stitch length 4 - 5. Alegeţi mărimea cuvenită a picioruşului. Fixaţi lungimea tighelului de 4-5. Gehen Sie nun folgendermaßen vor: 1. Falten Sie den Stoff auf die gewünschte Saumbreite und bügeln Sie ihn an. Legen Sie die Falte zurück gegen die Oberseite des Nähguts, sodaß sich auf der Unterseite eine ‘weiche’ Falte bildet (Siehe Fig. 1.) Now proceed as follows: 1. Turn up the hem to the required depth and press. Fold the hem back against the 'right' side of the garment, creating a 'soft' fold on the 'wrong' side of the fabric – see Fig. 1. 1. Îndoiaţi materialul la mărimea cuvenită şi călcaţi cu fierul de călcat. Întoarceţi îndoitura pe faţă, formînd pe dos un fald moale (vezi des. poz. 1). 2. Legen Sie das Nähgut mit der Unterseite nach oben unter den Nähfuß. Führen Sie die gefaltete Kante in die Führung vorn am Nähfuß, und lassen Sie den Lüfterhebel herunter. Machen Sie eine Nähprobe auf einem Rest des Stoffes, den Sie verarbeiten wollen, und stellen Sie die Führung so ein, daß die Nadel die Saumkante gerade ansticht. Benutzen Sie zur Feineinstellung die kleine Schraube oben auf dem Nähfuß (Fig. 2). 2. Place fabric under the presser foot with the 'wrong' side up. Feed the folded edge through the guide in the front of the foot and lower the presser foot lever. Try a stitch (or several stitches) on a spare piece of the actual fabric, and adjust the guide so that the needle just catches the fold. Adjust the guide by means of the small screw on the top of the foot – see Fig. 2. 3. Wenn die Einstellung korrekt ist, nähen Sie den Saum Der überstehende Stoff wird dabei abgeschnitten (Fig. 2). Wenn Sie fertig sind, schlagen Sie den Stoff um und bügeln Sie noch einmal nach. Die Stiche sollten auf der Oberseite kaum sichtbar sein (Fig. 3). Abbildung * I : Gewünschte Saumbreite * II: Schraube *III: Gewünschte Saumbreite 3. When correctly set, sew the hem. The outside edge will be cut away by the machine – see also Fig. 2. After completion, open out and press again. The stitches should be almost invisible on the 'right' of the fabric – see Fig. 3. Illustration 2. Puneţi materialul sub picioruş cu partea pe dos în sus. Băgaţi marginea îndoiată în ghidajul din faţa picioruşului, coborîţi picioruşul. Încercaţi mai întîi pe model şi reglaţi ghidajul în aşa mod, ca acul abea să atingă faldul. Reglarea ghidajului se efectuiază cu ajutorul şurubelniţei mici pe partea superioară a picioruşului (des.poz.2). 3. Coaseţi îndoitura. Surplusul de material va fi retezat cu cuţitul. Îndreptaţi şi călcaţi. Cusătura nu se vede pe faţa articolului (des.piz.3). Ilustrare * I: Mărimea îndoiturii * II: Şurubul * III: Ghidaj * I: Final hem length * II: Screw * III: Guide 65 ЛАПКА ДЛЯ РЕЗИНКИ Эта дополнительная лапка может использоваться как направитель резинки, в тоже время она растягивает резинку, так как конструкция лапки со специально встроенным роликом контроля натяжения позволяет Вам контролировать растяжение в процессе шитья. 1. Замените обычную лапку на лапку для резинки. 2. Установите длину стежка на “ 4 “. 3. Слегка приподнимите ролик на лапке, вставьте резинку под ролик, как показано на рисюдо упора. 4. Прошейте резинку на длину ё см, убедитесь, что она прошита. 5. Подложите под лапку ткань и прошейте вместе с резинкой. 6. Проверьте качество стежков, если необходимо, измените натяжение (усильте). 7. Измените натяжение ролика т. о., чтобы получить желаемый результат. а) При усилении натяжения ролика материал после шитья будет более зластичным. б) При уменьшении натяжения ролика ткань становиться менее зластичной. 8. Если правый край резинки не выравнивается по правому краю материи, то передвиньте палец (А) или замените его на палец (В). В соответствии с размером резинки рекомендуется 3-х нитевой оверлок с правой или левой иглой. Иллюстрация 66 * I : Регулятор прижима ленты GUMMIBANDNÄHFUSS ELASTICATOR PICIORUŞ PENTRU ELASTIC Mit diesem Sonderfuß wird das Gummiband geführt, während Sie durch die Spannungsschraube am Fuß die Elastizität des Gummibands beeinflussen können. An elastic foot is available as an optional extra. This foot will guide your elastic and at the same time apply pressure to the elastic with our specially designed tension controlled roller, allowing you to control the elasticity while sewing. Acest picioruş adăugător poate fi folosit ca un lineal a elasticului, în acelaş timp el întinde elasticul, construcţia cu o rolă montată Vă permite să controlaţi întinderea elasticului în procesul lucrului. 1. Ta u s c h e n S i e d e n n o r m a l e n N ä h f u ß g e g e n d e n Gummibandnähfuß aus. 1. Replace regular foot with elasticator. 1. Înlocuiţi picioruşul obişnuit cu picioruş pentru elastic. 2. Set stitch length at about 4. 2. Fixaţi lungimea tighelului la „4”. 3. Slightly raise the roller portion of the foot and insert elastic tape between the roller and the lower support bar as illustrated, until the edge of elastic reaches the feed dog teeth. 3. Ridicaţi puţin rola pe picioruş, aşezaţi elasticul sub picioruş, cum e arătat pe des. pînă la urmă. 2. Stellen Sie die Stichlänge auf ca. 4 ein. 3. Heben Sie den Rollenteil des Fußes etwas an, und schieben Sie das Gummiband zwischen die Rolle und die untere Strebe (siehe Skizze), bis das Gummiband den Transporteur erreicht. 4. Nähen Sie das Gummiband ca. 3 cm um zu sehen, ob es richtig genäht wird. 5. Legen Sie Ihr Nähgut unter den Fuß, und nähen Sie das Gummiband an. 6. Prüfen Sie, ob die Stichbildung korrekt ist, und erhöhen Sie falls nötig die Spannung. 7. Stellen Sie die Spannungsschraube am Rollenteil nach, bis der gewünschte Effekt erreicht wird. a) Festere Spannung des Rollers erziehlt eine höhere Dehnbarkeit des Nähguts. b) Weniger Spannung des Rollers bewirkt eine geringere Elastizität. Abbildung * I : Spannungsschraube 4. Sew the elastic for about one inch (3 cm) or more to confirm if the tape is properly sewn. 4. Coaseţi elasticul la o distanţă de 3 cm, convingeţi-Vă, ce este cusut. 5. Băgaţi ţesătura sub picioruş şi coaseţi împreună cu elasticul. 5. Insert the fabric under the foot and sew together with the elastic. 6. Verificaţi calitatea tighelării, dacă e necesar, reglaţi tensionarea ( măriţi). 6. Check the stitches to make sure they are correct and adjust tension (tighter) if necessary. 7. Schimbaţi presiunea rotiţei în aşa mod, ca să primiţi un rezultat dorit a) La mărirea tensionării rotiţei ţesătura după coasere va fi mai elastică. b) La slăbirea tensionării rotiţei ţesătura după coasere va fi mai puţin elastică. 7. Adjust the tension control of the roller so that the desired finish can be obtained. a. Tighter tension of the roller gives more elasticity of the fabric after it is sewn. b. Weaker tension of the roller gives less elasticity of the fabric. 8. When the right side of elastic is not even with right side of fabric, remove the stitch finger (A) or change it to stitch finger (B). Decrease the number of overedge cutting width dial. Three threads overlock with right needle or left needle is recommendable in accordance with the size of elastic. Illustration 8. Dacă marginea dreaptă a elasticului nu se îndreaptă după marginea dreaptă a materialului, împingeţi degeţelul (A) sau schimbaţi-l cu degeţelul (B). În conformitate cu mărimea elasticului se recomandă overlock cu 3 fire şi cu 2 ace. Ilustrare * I: Reglor al presorului panglicii * I: Tension control of roller 67 ЛАПКА ДЛЯ ОКАНТОВКИ Приготовьте кант (полоску ткани, скроенную по косой). Вложите сложенный пополам кант между слоями ткани, уравнивая края. Сметайте или сколите булавками и прострочите. Так можно пришить тесьму или резинку, а также оборку. Используется для отделки воротников, манжет, карманов и т. п. ЛАПКА ДЛЯ ОБОРОТНОГО ДВУ ХЛИЦЕВОГО ВЯЗАНИЯ 1. ОБОРОТНОЕ ДВУ ХЛИЦЕВОЕ ВЯЗАНИЕ ПО КРАЮ Установить на левую иглу З-нитевый оверлок (правую иглу снять). Выбрать режим натяжения следующим образом. Левая игла : 4 Верхняя петля : 1 - 2 Нижняя петля : 7 - 8 Шитье : •Уберите обычную лапку: замените лапкой оборотного двухлицевого вязания. •Уберите палец стежка, когда используете подгиб краев. •Переведите обрезатель в самую нижнюю позицию, закройте передние крышки. •Поднимите иглы в самую верхнюю позицию. •Вставьте приспособление для двухлицевого вязания в канал справа от лапки в 2-х дюймах за лапкой. •Сделайте один стежок поворотом колеса вручную, чтобы закрепить приспособление для двухлицевого вязания. •Продолжайте по краю ткани вдоль метки ткани. •Вшейте приспособление для оборотного двухлицевого вязания в край ткани. •После окончания шитья верните обрезатель в первоначальную позицию. 2. ОБОРОТНОЕ ДВУ ХЛИЦЕВОЕ ВЯЗАНИЕ С ПЛОСКИМ ЗАМКОВЫМ СТЕЖКОМ Ткань : Ткань среднего веса 2 или 4 мм приспособления для двухлицевого вязания Установить З-нитевый плоский замок (только левая игла). Шитье : •Уберите обычную лапку : замените лапкой оборотного двухлицевого вязания. •Установите маленький палец стежка. •Переведите обрезатель в самую нижнюю позицию. •Поднимите иглы в самую верхнюю позицию. •Вставьте приспособление для двухлицевого вязания в канал справа от лапки в 2-х дюймах за лапкой. •Сделайте один стежок поворотом колеса вручную, чтобы закрепить приспособление для двухлицевого вязания. •Вшейте приспособление для оборотного двухлицевого вязания с левыми иглами так, чтобы просто прихватить складку. •Откройте плоский замок. 68 PASPELFUSS PIPING FOOT PICIORUŞ PENTRU CONTUR Nehmen Sie ein Stück Paspelband (Schrägstreifen mit eingearbeiter Kordel). Legen Sie das Paspelband zwischen den Stoff, sodaß die Faltkante des Bandes über die Nahtlinie hinausreicht, wie in der Abbildung gezeigt. Feststecken oder heften und dann nähen. Prepare a piece of ready-made piping (corded bias fold tape). Pregătiţi cantul ( o fîşie de materie, croită oblic). Întroduceţi cantul îndoiat în jumătate între straturile da material, îndreptînd marginile. Însăilaţi sau întăriţi cu boldurile şi trageţi la maşină. Aşa puteţi coase panglicile, elasticul, deasemenea şi volane. Se foloseşte la tivirea gulerelor, manjetelor, buzunarelor etc. Sie können auch Litze oder Borten, flach oder gefaltet als Verzierung für Kragen, Manschetten, Taschen usw einarbeiten. PERLENFUSS 1. PERLEN AN EINER KANTE: Rechte Nadel entnehmen und die linke Nadel zum 3-fädigen Nähen einfädeln. Spannungseinstellungen: Linke Nadel: 4 Oberer Greifer: 1 - 2 Unterer Greifer: 7 - 8 NÄHEN: Normalen Nähfuß abnehmen und Perlfuß einsetzen. Stitchfinger wie beim Rollsaumnähen entnehmen. Obermesser abschalten (S. 29), Arbeitstisch und Frontklappe wieder schließen. Nadel in die höchste Stellung bringen. Legen Sie die Perlen in die Führung an der rechten Seite des Fußes ein und lassen Sie etwa 3cm hinter dern Fuß überstehen. Nähen Sie einen Stich durch Drehen des Handrads um die Perlen zu sichern. Nähen Sie die Perlen an die Stoffkante. Wenn Sie fertig sind: Obermesser wieder einschalten. 2. PERLEN ANNÄHEN MIT DEM FLACHSAUM: STOFF: Mittelschwere Webstoffe 2 oder 4 mm Perlen Für 3-fädigen Flachsaum einstellen, nur linke Nadel, sh. S. 41. NÄHEN: Normalen Nähfuß abnehrnen und Perlfuß einsetzen. Schmalen Stichfinger einsetzen. Obermesser abschalten (S. 58 - 59), Arbeitstisch und Frontklappe wieder schließen. Nadel in die höchste Stellung bringen. Legen Sie die Perlen in die Führung an der rechten Seite des Fußes ein und lassen Sie etwa 3cm hinter dern Fuß überstehen. Nähen Sie einen Stich durch Drehen des Handrads um die Perlen zu sichern. Nähen Sie die Perlen mit der linken Nadel an indem Sie die Stoff-Falte nur gerade anstechen. Flachsaum aufziehen. Place folded piping between seam edges with fold extending beyond seam line toward garment. Pin or baste, and stitch the seam. Braid or ribbon may also be used, either flat or folded braid can be used in straight seams. Use for decorating edges of collars, cuffs, pockets, etc. PEARL FOOT 1. PEARLS ALONG AN EDGE: Set for left needle (remove right needle) 3-thread overlock. Set tensions as follows: Left needle: 4 Upper looper: 1 - 2 Lower looper: 7 - 8 SEW: Remove regular foot; replace with pearl foot. Remove stitch finger as you did for a rolled edge. Swing cutter away to lowest position, close front covers. Raise the needle to it’s highest position. Place pearls in the channel on the right side of the foot with 2" of pearls extending behind foot. Take one stitch with the hand wheel to secure the pearls. Follow edge of fabric along fabric guide. Sew pearls on edge of fabric. Return cutter to original position when finished. 2. PEARLS SEWN WITH A FLAT LOCK STITCH: FABRIC: Medium weight woven 2 or 4 mm pearls Set for a 3-thread flat lock, left needle only. See pg. 42 SEW: Remove regular foot; replace with pearl foot. Insert small stitch finger. Swing cutter away to lowest position. Raise needle to it’s highest position. Place pearls in channel on right side of the foot with 2" of pearls extending behind foot. Take one stitch with the hand wheel to secure the pearls. Sew pearls on with the left needle just catching the fold of the fabric. Pull flat lock open. PICIORUŞ PENTRU ÎMPLETIRE CIRCULANTĂ PE AMBELE PĂRŢI 1. ÎMPLETIRE CIRCULANTĂ A AMBELOR PĂRŢI PE MARGINE: Fixaţi pe acul stîng overlock cu 3 fire (acul drept scoateţi). Alegeţi regimul de tensionare în felul următor. Acul stîng:4 Împletitorul superior:1-2 Împletitorul inferior:7-8 Coaserea: Înlăturaţi picioruşul obişnuit, aşezaţi picioruşul pentru împletire circulantă Înlăturaţi degeţelul tighelului, cind folosiţi îndoitura Ridicaţi acele în poziţia de sus. Aşezaţi dispozitivul pentru împletire în canalul din dreapta picioruşului la 2 ţoli în urmă. Faceţi un tighel cu o răsucire a roţii, pentru a întări dispozitivul de împletire. Prelungiţi pe marginea materialului de-a lungul liniei. Coaseţi împletitura circulantă pe ambele părţi în marginea ţesăturii. După terminarea cusutului întoarceţi cuţitul în poziţia iniţială. 2. ÎMPLETIRE CIRCULANTĂ PE AMBELE PĂRŢI CU ÎNCHIZĂTOR PLAT: Ţesătură: Pînză de greutate medie 2 sau 4 mm adaos pentru împletire circulantă Fixaţi închizător plat cu 3 fire (numai acul stîng) Coaserea: Înlăturaţi picioruşul obişnuit: aşezaţi picioruşul pentru împleture circulantă. Fixaşi tighel mărunt. Coborîţi cuţitul în poziţia de jos. Ridicaţi acul în poziţia de sus. Aşezaţi dispozitivul pentru împletire în canalul din dreapta picioruşului la 2 ţoli în urma picioruşului Faceţi un tighel cu o răsucire a roţii, pentru a întări dispozitivul de împletire. Coaseţi dispozitivul pentru împletire pe ambele părţi cu acele din stînga aşa, ca să atingeţi pliul. Deschideţi inchizătorul plat. 69 ЛАПКА ДЛЯ СОСБАРИВАНИЯ 1. Для образования сборок необходимо установить следующие регулировки натяжения : Левая игла -4 Подача дифференциала - 2.0 Правя игла -4 Длина стежка - 4 Верхний петлитель - 4 Нижний петлитель - 4 *I * II 2. Замените обычную лапку на специальную. 3. Сделайте насечки на обоих слоях ткани приблизительно на расстоянии 1.5 см от края глубиной 4 см. 4. Положите сосбариваемую ткань вниз под лапку, а верхний слой ткани - между лапкой и специальной металлической пластиной. Протяните рассеченную часть ткани сквозь паз лапки. Опустите лапку. 5. Сделайте 4 - 5 стежков, поворачивая колесо вручную, убедитесь, что захватываются оба слоя ткани. 6. Строчите, направляя ткань обеими руками (оба слоя). Помните, что ткань снизу движется быстрее, чем верхняя, так как она сосбаривается. Иллюстрация 70 * I : Выпрямляемая ткань * II: Сосбариваемая ткань *I * II KRÄUSELFUSS GATHERING/SHIRRING FOOT PICIORUŞ PENTRU ÎNCREŢIRE 1. Spannungseinstellungen zum Kräuseln: Linke Nadel 4 Differentialtransport 2.0 Rechte Nadel 4 Stichlänge 4 Oberer Greifer 4 Unterer Greifer 4 1. Tension settings for gathering: Left needle 4 Differential feed 2.0 Right needle 4 Stitch length 4 Upper looper 4 Lower looper 4 2. Tauschen Sie den regulären Nähfuß gegen den Kräuselfuß aus. 2. Replace regular presser foot with gathering foot. 1. Pentru încreţire e necesar să fixaţi următoarele tensionări: Acul stîng-4 Transmisia diferenţialului-2,0 Acul drept-4 Lungimea tighelului-4 Împletitorul superior-4 Împletitorul inferior-4 2. Înlocuiţi picioruşul obişnuit cu unul special. 3. Clip both fabric layers approximately 5/8"(1.5 cm.) inside and 1 1/2"(4 cm.) down. Lift front of presser foot to place fabric. 3. Efectuaţi crestări pe ambele straturi de material aproximativ la distanţa de 1,5 cm de la margine şi cu adîncimea de 4 cm. 4. Place fabric to be gathered underneath the presser foot. Place fabric which will remain straight between presser foot and lower metal piece. Push clipped portion through slot in foot. Lower presser foot. 4. Aşezaţi materialul pentru încreţire sub picioruş, iar stratul de sus a materialului-între picioruş şi o placă metalică specială. Trageţi partea crestată a pînzei prin şanţul picioruşului. Coborîţi picioruşul. 5. Turn handwheel to make 4 - 5 stitches in the fabric, making sure to catch both upper and lower layers. 5. Faceţi 4-5 tigheli, rotind roata cu mîna, urmăriţi, ca acul să apuce ambele straturi. 6. Serge. Use both hands to guide fabric, one on the under layer of fabric. Keep in mind that the lower piece of fabric will move faster as it is gathering than the top piece. 6. Coaseţi, îndreptînd materialul cu ambele mîni (două straturi). Nu uitaţi, că ţesătura de jos se mişcă mai repede, decît cea de sus, fiindcă se încreţeşte. 3. Schneiden Sie beide Stofflagen ein, ca. 1.5 vom Rand und ca. 4 cm nach innen. Heben Sie den Kräuselfuß vorne an, um den Stoff einzulegen. 4. Die zu kräuselnde Stofflage gehört unter den Fuß, die Stofflage, die glatt bleiben soll, zwischen den Nähfuß und die untere Metallplatte. Schieben Sie das eingeschnittene Stück durch den Schlitz des Fußes. Lassen Sie den Fuß herunter. 5. Drehen Sie das Handrad ein paar mal um 4 - 5 Stiche im Stoff zu nähen, damit Sie sehen, ob beide Stofflagen erfaßt werden. 6. Nähen Sie. Benutzen Sie beide Hände zum Führen des Materials, eine zum Führen der unteren Stofflage. Beachten Sie, daß sich die untere Lage, die gekräuselt wird, schneller als die obere Stofflage bewegt. Abbildung Illustration * I : Fabric to be straight * II: Fabric to be gathered Ilustrare * I : Ţesătura îndreptată * II: Ţesătura încreţită * I : Stofflage, die glatt bleibt * II: Stofflage, die gekräuselt wird 71 НИТКОВДЕВАТЕЛЬ 1. Пропустите нить в направитель нити на иглодержателе (см.рис.). Поднимите л а п к у, п од н и м и т е и гл у в в е р х н е е положение, высвобождая свободный конец нитки длиной 4 см. Мщщк кусреуктффдв / Für die rechte Nadel / For right needle / Pentru ata drept 2. О п у с т и т е л а п к у . У с т а н о в и т е нитковдеватель т. о., чтобы крючок вошел в игольное отверстие. 3. О д н о й р у к о й п о д в е д и т е н и т к у к игольному отверстию. 4. Другой рукой зацепите нитку за крючок нитковдевателя. 5. Медленно отведите нитковдеватель назад, освободите его из петли. 6. Вытяните нить назад. Мщщк дштлуктффдв / Für die linke Nadel / For left needle / Pentru ata stîng 72 NADELEINFÄDLER NEEDLE THREADER 1. F ü h r e n S i e d e n F a d e n w i e g e z e i g t d u r c h d i e Fadenführung am Nadelhalter. Stellen Sie den Nähfuß hoch. Bringen Sie die Nadelstange in ihre höchste Stellung, und ziehen Sie etwa 10 cm Faden heraus. 1. Feed the thread through the thread guide of needle clamp as illustrated. Raise the presser foot. Raise the needle bar to highest position, and pull the thread leaving about 4” (10 cm) clear. 2. Lassen Sie den Nähfuß herunter. Setzen Sie den Einfädler so ein, daß das Häkchen des Einfädlers im Nadelöhr steckt. 2. Lower the presser foot. Set the needle threader ensuring the hooking fork enters into the needle hole. 3. Halten Sie den Faden und den Nadelhalter. 4. Führen Sie den Faden unter das Einfädel-Häkchen, und ziehen Sie den Faden an. 5. Ziehen Sie nun den Einfädler etwas nach hinten, und die Nadel ist eingefädelt. 6. Nehmen Sie den Einfädler ab. 7. Ziehen Sie den Faden nach hinten. 3. Hold the thread with the needle threader with your hand. 4. Guide the thread into hooking fork and pull the thread with your another hand. 5. Move the needle threader backwards slightly. Then release the hand which is pulling the thread. DISPOZITIV PENTRU BĂGAREA AŢEI ÎN AC 1. Trageţi aţa prin ghidajul firului pe suportul acului (vezi des.) Ridicaţi picioruşul, ridicaţi acul în poziţia de sus, lăsînd capătul firului liber cu 4 cm. 2. Coborîţi picioruşul. Fixaţi dispozitivul pentru băgarea aţei în ac în aşa mod, ca cîrligelul să intre în urechea acului. 3. Duceţi aţa cu o mînă la urechea acului. 4. Cu altă mînă aninaţi aţa de cîrligelul dispozitivului. 5. Eliberaţi dispozitivul, trăgînd încet în urmă. 6. Take the needle threader off the needle clamp. 7. Pull the thread away from you. 6. Scoateţi firul în urmă. 73 РУССКИЙ / DEUTSCH / ENGLISH / ROMÂN © Part No. 82156 12/07 055D / 550D ИНСТРУКЦИЯ ПО ЭКСПЛУАТАЦИИ BEDIENUNGSANLEITUNG INSTRUCTION MANUAL INSTRUCŢIA PENTRU EXPLOATARE ОСНОВНЫЕ УКАЗАНИЯ ПО ТЕХНИКЕ БЕЗОПАСНОСТИ При пользовании данным электротехническим устройством следует соблюдать основные меры безопасности, приведенные ниже. Ознакомьтесь с ними перед работой на швейной машине. ОПАСНО- Для снижения риска поражения электричеством: 1. “Швейную машину никогда не оставляйте без внимания во включенном состоянии. Немедленно вынимайте штепсель машины из электрической розетки после работы на машине и перед чисткой. ВНИМАНИЕ- Для снижения риска загорания, пожара, поражения электрическим током и травм у работающих: 1. “Не позволяйте использовать машину в качестве игрушки. Необходима особая внимательность при работе на швейной машине рядом с детьми.” 2. “Этот прибор не предназначен для использования лицами (включая детей) с ограниченными физическими, сенсорными или психическими возможностями, или отсутствие опыта и знаний, если они получили контроль или инструкции, касающиеся использования прибора лицом, ответственным за свою безопасность. Дети должны находиться под контролем, чтобы они не играли с устройством.” 3. “Используйте швейную машину только по ее назначению в соответствии с настоящей Инструкцией. Используйте только те принадлежности, которые рекомендованы изготовителем и приведены в Инструкции.” 4. “Никогда не работайте на швейной машине при поврежденных шнуре питания или вилке, если машина работает неправильно, если ее роняли и повредили, или же она попала в воду. Возвратите машину ближайшему официальному дилеру или в сервисный центр для обследования, ремонта, электрических или механических регулировок.” 5. “Если поврежден шнур питания, он должен быть заменен изготовителем, его агентом или аналогичные услуги квалифицированных специалистов для того, чтобы избежать опасности.” 6. “Никогда не работайте на швейной машине, если у нее засорены какие-либо воздушные отверстия. Содержите вентиляционные отверстия машины и педаль управления свободными от текстильного волокна, пыли и обрезков ткани.” 7. “Не допускайте попадания посторонних предметов в какое-либо из отверстий машины.” 8. “Только для использования в помещениях.” 9. “Не работайте там, где применяются вещества в аэрозольной упаковке или чистый кислород.” 10. “Для отсоединения машины поверните основной выключатель в положение «0» (ОТКЛЮЧЕНО), затем выньте вилку из розетки.” 11. “Выключить или отключить устройство, когда оставляете его отключить устройство перед проведением технического обслуживания или замене фонарей.” 12. “Не отключайте машину, выдергивая шнур питания. При отключении держите рукой вилку, а не шнур.” 13. “Оберегайте пальцы рук от всех подвижных частей. Особая осторожность необходима в зоне движения иглы.” 14. “Не шейте при поврежденной игольной пластине, так как это может вызвать поломку иглы.” 15. “Не пользуйтесь гнутыми иглами.” 16. “Не подтягивайте и не подталкивайте ткань при шитье. Это может отогнуть иглу и вызвать ее поломку.” 17. “Отключайте швейную машину (положение «0») при выполнении любых регулировок в зоне иглы, таких как заправка иглы нитью, смена иглы, намотка шпульки, замена прижимной лапки и т.д.” 18. “Всегда вынимайте штепсель швейной машины из электрической розетки при снятии крышек, смазке машины и осуществлении всех регулировок, упомянутых в настоящей Инструкции по эксплуатации.” 19. “Чтобы избежать поражения электрическим током никогда не поставил машину, ни сетевого кабеля или сетевой шнур в воду или другие жидкости.” 20. “Максимальная мощность светодиодной лампы 0.3W, максимальное напряжение DC 5V, в случае повреждения светодиодная лампа, вы не должны использовать продукт и направить его в производство или услуги агента по ремонту или замене сразу.” 21. “Внимание следующее, чтобы избежать травм: - Отключите педаль управления, когда не работаете на машине. - Отключите педаль управления при проведении любого ремонта машины.” F-2 ОСТОРОЖНО- Движущиеся части - Во избежание получения травм отключайте машину перед обслуживанием. Закройте крышку перед работой на машине. СОХРАНИТЕ НАСТОЯЩИЕ УКАЗАНИЯ Эта швейная машина предназначена только для домашней или аналогичной работы. Данная машина отвечает требованиям Директивы ЕЕС 2004/108/EC в части электромагнитной совместимости. “Утилизация: Это оборудование, отмеченные символом рециркуляции. Не уничтожайте этот продукт неотсортированными городскими отходами. Сбор таких отходов, отдельно для специального лечения не требуется. (Европейский Союз только) ”