1
ENGLISH
19
Tip: Start drilling holes at low speed. Then increase
the speed in stages.
6.7 Tips for working with your hammer drill
6.7.1 Drilling concrete and masonry
Switch the Drill/Hammer drill selector switch (3)
to position B (Hammer drill).
Always use carbide drill bits and a high speed
setting for drilling into masonry and concrete.
Benefits:
The drill bit is easier to control when starting the
hole and will not slide away.
You avoid drilling messy holes (for example in
tiles).
6.7.2 Drilling steel
Switch the drill / hammer drill selector switch (3)
to position A (drill).
Always use HSS drill bits (HSS = high speed
steel) and a low speed setting for drilling steel.
We recommend that you lubricate the hole with a
suitable cutting fluid to prevent unnecessary drill
bit wear.
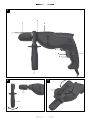
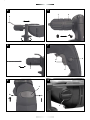
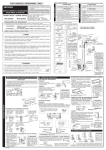
6.3 Preselecting the speed (Fig. 7/Item 6)
The speed setting ring (8) enables you to define
the maximum speed. The ON/OFF switch (5) can
only be pressed to the defined maximum speed
setting.
Set the speed using the setting ring (8) on the
ON/OFF switch (5).
Do not attempt to make this setting whilst the drill
is in use.
6.7.3 Inserting/Removing screws
Switch the Drill/Hammer drill selector switch (3)
to position A (drill).
Use a low speed setting
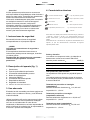
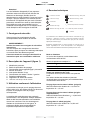
6.4 Clockwise/Counter-clockwise switch
(Fig. 7/Item 6)
Change switch position only when the drill is
at a standstill!
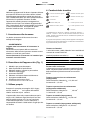
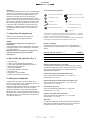
Switch the direction of the hammer drill using the
clockwise/counter-clockwise switch (6):
→
Direction
Clockwise (forwards and drill)
→
Counter-clockwise (reverse)
→
6.7.4 Starting holes
If you wish to drill a deep hole in a hard material
(such as steel), we recommend that you start the
hole with a smaller drill bit.
6.7.5 Drilling tiles
To start the hole, switch the drill / hammer drill
selector switch (3) to position A (drill).
Switch the drill / hammer drill selector switch (3)
to position B (hammer drill) as soon as the drill
bit has passed through the tiles.
Switch position
R
L
6.5 Drill / hammer drill selector switch
(Fig. 8/Item 3)
Change switch position only when the drill is at a
standstill!
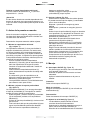
7. Replacing the power cable
If the power cable for this equipment is damaged, it
must be replaced by the manufacturer or its aftersales service or similarly trained personnel to avoid
danger.
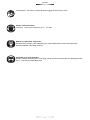
Drill
Drill / hammer drill selector switch (3) in the drill
position. (Position A)
Use for: Wood, metal, plastic
8. Cleaning, maintenance and
ordering of spare parts
Hammer drill
Drill / hammer drill selector switch (3) in the hammer
drill position. (Position B)
Use for: Concrete, rock, masonry
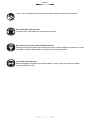
Always pull out the mains power plug before starting
any cleaning work.
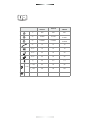
6.6 Gear Selection, Mechanical (TM900A-TM900)
- Actuate the gear selector 9 only when the
machine is at a standstill.
Two speed ranges can be preselected with the gear
selector 9.
2
I
I
2
8.1 Cleaning
Keep all safety devices, air vents and the motor
housing free of dirt and dust as far as possible.
Wipe the equipment with a clean cloth or blow it
with compressed air at low pressure.
We recommend that you clean the device
immediately each time you have finished using it.
Clean the equipment regularly with a moist cloth
and some soft soap. Do not use cleaning agents
or solvents; these could attack the plastic parts of
the equipment. Ensure that no water can seep
into the device.
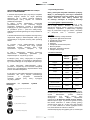
1st gear:
Low speed range; for working with large
drilling diameter or for driving screws.
2nd gear:
High speed range; for working with small
drilling diameter.
19