1
Instruction Manual / Bedienungsanleitung
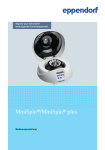
PerfectSpin 24 Plus
Microcentrifuge / Mikrozentrifuge
0312E+D
Creating the future together.
Instruction Manual PerfectSpin 24 Plus Microcentrifuge
CONTENTS
1
SAFETY PRECAUTIONS
1
2
GENERAL INFORMATION
2
2.1
2.2
2.3
2.4
2.5
3
INSTALLATION
3.1
3.2
3.3
4
Rotors and accessories
Rotor maintenance
Removing and installing the angle rotor
Loading the rotor
Overloading rotors
OPERATION
5.1
5.2
5.3
5.4
5.5
5.6
6
Unpacking the centrifuge
Required space
Installation
INSTALLATION OF ROTORS AND ROTOR MAINTENANCE
4.1
4.2
4.3
4.4
4.5
5
Description
Safety precautions
Technical data
Accessories supplied with centrifuge
Warranty
Attaching rotor lid
Closing the lid
Lid release
Lid lock
Speed selection (see Figure 2)
Selection of operating time, momentary operation, Start/Stop
SERVICE AND MAINTENANCE
6.1
6.2
6.3
6.4
6.5
Centrifuge service
Cleaning the centrifuge
Cleaning the rotor
Disinfection of the rotor
Replacing fuses
2
2
2
3
3
3
3
3
3
4
4
5
5
5
5
6
6
6
6
6
6
7
7
7
7
7
7
7
7
TROUBLESHOOTING
8
8
TECHNICAL SUPPORT
9
9
DETERMINATION OF G-VALUES
9
PEQLAB_v0312E
Instruction Manual PerfectSpin 24 Plus Microcentrifuge
1 SAFETY PRECAUTIONS
NEVER
NEVER
NEVER
use the centrifuge in any manner not specified in these instructions.
operate the centrifuge without a rotor properly attached to the shaft.
tighten rotor nut by hand only.
NEVER
NEVER
fill tubes while they are in the rotor. Liquid spillage may harm unit.
put hands in the rotor area unless the rotor is completely stopped.
NEVER
move the centrifuge while the rotor is spinning.
NEVER
NEVER
use solvents or flammables near this or other electrical equipment.
centrifuge flammable, explosive or corrosive materials.
NEVER
centrifuge hazardous materials outside of a hood or proper containment facility.
ALWAYS
load the rotor symmetrically. Each tube should be counter balanced by another tube of the same
type and weight.
ALWAYS
locate the centrifuge within easy access to an electrical outlet.
ALWAYS
use only microcentrifuge tubes made from plastic and designed to withstand centrifugal forces of
at least 21,200 x g.
ALWAYS
use a wrench to tighten the rotor nut.
PEQLAB_v0312E
1
Instruction Manual PerfectSpin 24 Plus Microcentrifuge
2 GENERAL INFORMATION
This manual provides important safety information for the PerfectSpin 24 Plus laboratory microcentrifuge
(Cat. No. 91-PSPIN-24P/91-PSPIN24P-US). It should be kept near the centrifuge for quick and easy
reference.
2.1 Description
The PerfectSpin 24 Plus is a small benchtop centrifuge designed for separation of various research
samples. The motor is brushless and requires no routine maintenance. The PerfectSpin 24 Plus is
supplied with a 24 x 1.5 / 2.0 ml rotor for micro samples. Adapters are available for tubes smaller
than 1.5 ml. The PerfectSpin 24 Plus reaches speeds of up to 15,000 rpm / 21,200 x g.
2.2 Safety precautions
Note: All users of the centrifuge must read the Safety Precautions section of this manual
before attempting to operate the unit!
If this equipment is used in a manner not specified by the manufacturer, the protection
provided by the equipment may be impaired.
Do not operate the centrifuge if any of the following conditions exist:
-
-
The centrifuge has not been installed properly.
The centrifuge is partially dismantled.
Service has been attempted by unauthorized or unqualified personnel.
The rotor has not been installed securely on the motor shaft.
Rotors and accessories not belonging to the standard range are being used without permission
being obtained from the manufacturer to use such rotors and / or accessories in the centrifuge.
Exception: Microcentrifuge tubes made of plastic, normally available in the laboratory.
The centrifuge is located in an explosive atmosphere.
Materials to be centrifuged are combustible and/or explosive.
Materials to be centrifuged are chemically reactive.
The rotor load is not properly balanced.
The rotor nut was not tightened with a wrench.
2.3 Technical data
Dimensions:
Width
Depth
Height
Maximum speed
Maximum RCF
Maximum volume
Admissible sample density
Electrical/fuse rating
Operating temp./humidity
PEQLAB_v0312E
9.45 inches
13.8 inches
7.48 inches
15,000 rpm
21,200 x g
24 x 1.5 / 2.0 ml
1.2 kg / dm3
120 V~, 50-60 Hz, 1.9 A, 5 AT
230 V~, 50-60 Hz, 1.1 A, 2.5 AT
0 °C to 40 °C – ≤ 80 % RH
2
Instruction Manual PerfectSpin 24 Plus Microcentrifuge
2.4 Accessories supplied with centrifuge
Each unit is supplied with 1 instruction manual, 1 power cord, a standard rotor and a rotor removal
tool.
2.5 Warranty
PEQLAB guarantees that the PerfectSpin 24 Plus laboratory microcentrifuge you have received has been
thoroughly tested and meets its published specification.
However, immediately upon arrival, please check carefully that the shipment is complete and has not
been damaged in transit. For missing parts or to report any kind of damage, please contact PEQLAB
(see 'TECHNICAL SUPPORT’). Please retain all packaging materials until the delivery has been
completely checked since this will speed up the return of goods if required and reduce environmental
impact. Any form of returns, replacements or credit notes must be agreed in advance by PEQLAB.
This centrifuge has been subjected to thorough testing and quality control. In the unlikely event of a
manufacturing fault, our two year warranty (from the date of delivery) covers the centrifuge and the
rotor. This warranty becomes invalid in the case of incorrect operation, use of non-standard spare parts
or accessories and unauthorized modification of the rotor or centrifuge.
PEQLAB reserves the right to make technical modifications.
3 INSTALLATION
3.1 Unpacking the centrifuge
Before unpacking the centrifuge, inspect the outside of the carton for any shipping damage.
The centrifuge is delivered in a carton with protective foam cushioning. Remove the centrifuge from the
carton. Retain the carton and cushioning until it has been established that the centrifuge is working
properly.
For missing parts or to report any kind of damage, please contact PEQLAB (see 'TECHNICAL SERVICE’).
The accessories supplied with the centrifuge should be kept with the instruction manual near the
centrifuge’s place of installation.
3.2 Required space
The centrifuge should be installed on a rigid, even surface such as a stable laboratory bench,
countertop, etc. To guarantee sufficient ventilation, ensure that the centrifuge has at least 15 cm
(6 inches) of free space on all sides, including the rear.
The centrifuge should not be located in areas subject to excessive heat such as in direct sunlight or near
radiators or the exhaust of a compressor, as a buildup of heat may occur within the chamber.
3.3 Installation
Before operating the centrifuge, check that the power source (electrical outlet on the wall) corresponds to
that on the manufacturer’s rating label, then connect the power cord to the centrifuge and the power
source.
PEQLAB_v0312E
3
Instruction Manual PerfectSpin 24 Plus Microcentrifuge
4 INSTALLATION OF ROTORS AND ROTOR MAINTENANCE
4.1 Rotors and accessories
The following accessories are included or available for the PerfectSpin 24 Plus:
Angle rotor for 24 x 1.5 ml tubes (Included)
Tube measurement
1.5 ml / 2.0 ml (10 x 40 mm)
Max. Speed
15,000 rpm
Centrifuging radius
8.4 cm
Max. RCF (g-value)
21,200 x g
Rotor Removal Tool
Order no.
(Included)
91-PSPIN-RW
Rotor Lid
Order no.
(Included)
91-PSPIN-RL
Rotor Securing Screw
Order no.
(Included)
91-PSPIN-RS
Strip Spin Adapter
Order no.
Tubes accepted
Max Speed
Range Centrifuge radius
Range RCF (g value)
91-PSPIN-AS
0.2 ml tubes or 8 x 0.2 ml strips
15,000 rpm
4.32 cm to 5.33 cm
10,874 x g to 13,405 x g
Adapter for 0.5 ml tubes (pk./6)
Order no.
91-PSPIN-A05
Tube measurement
8 x 30 mm
Max. Speed
15,000 rpm
Centrifuging radius
7.53 cm
RCF (g-value)
18,942 x g
Adapter for 0.4 ml tubes (pk./6)
Order no.
91-PSPIN-A04
Tube measurement
6 x 47 mm
Max. Speed
15,000 rpm
Centrifuging radius
8.4 cm
RCF (g-value)
21,200 x g
Adapter for 0.2 ml tubes (pk./6)
Order no.
91-PSPIN-A02
Tube measurement
6 x 21 mm
Max. Speed
15,000 rpm
Centrifuging radius
7.03 cm
RCF (g-value)
17,684 x g
PEQLAB_v0312E
4
Instruction Manual PerfectSpin 24 Plus Microcentrifuge
4.2 Rotor maintenance
The rotor should be cleaned thoroughly after each use. Thorough cleaning must be performed when
spinning samples containing phenol or phenol chloroform. Periodically inspect the rotor for dents,
dings, scratches, discoloration and cracks. If any damage to the rotor is found, discontinue use of the
rotor immediately and replace.
4.3 Removing and installing the angle rotor
The PerfectSpin 24 Plus comes complete with a standard 24 place rotor installed. To remove the rotor
for cleaning, remove the rotor securing screw from the motor shaft by turning the screw
counterclockwise, using the rotor wrench. Lift the rotor directly upward in a straight vertical motion.
To replace rotor, first make sure the motor shaft and rotor mounting hole are clean. Place the rotor on
the motor shaft. Reinstall the rotor securing screw on the motor shaft by turning it clockwise. Hold the
rotor with one hand and tighten the rotor securing screw, using the rotor wrench.
4.4 Loading the rotor
Tubes to be loaded should be filled equally by eye. The difference in the weight between the tubes
should not exceed 0.1 gram. Tubes should always be loaded so that there is equal spacing between all
tubes. One or two additional loaded tubes may need to be added to achieve this. Refer to Figure 1 to
see one typical balancing scheme.
Figure 1: Loading the rotor to achieve balance
4.5 Overloading rotors
The maximum load of the rotor and the maximum speed has been established by the manufacturer. Do
not attempt to exceed these values. The maximum speed of the rotor has been established for liquids
having a homogeneous density of 1.2 g/ml or less. In order to centrifuge liquids with a higher density it
is necessary to reduce the speed. Failure to reduce the speed may result in damage to the rotor and
centrifuge. The revised maximum speed can be calculated with the following formula:
Reduced speed (nred) =
1.2
x max speed (nmax)
higher _ density _ value
Example:
Where the density of the liquid is 1.7, the new maximum speed would be calculated as follows:
nred =
1.2 x 15,000 rpm = 12,602 rpm
1.7
If in doubt concerning maximum speeds, please contact the manufacturer for assistance.
PEQLAB_v0312E
5
Instruction Manual PerfectSpin 24 Plus Microcentrifuge
5 OPERATION
ATTENTION: Never attempt to operate the centrifuge with rotors or adapters that show signs of
corrosion or mechanical damage. Never centrifuge strongly corrosive materials that may damage the
rotors, accessories, or bowl of the unit.
5.1 Attaching rotor lid
After the rotor has been properly secured and loaded, attach the rotor lid to the rotor. Always use the
rotor lid for safety and to allow the rotor to reach proper speed. Make sure that the rotor lid snaps
securely into place, by pressing down on center catch.
5.2 Closing the lid
Close the centrifuge lid. The PerfectSpin 24 Plus has a lid lock that activates only when a run is started.
5.3 Lid release
The lid will remain locked during a centrifuge run. Once the run has been completed and the rotor has
come to a stop, a beep will indicate the end of a run, and the lid will unlock automatically.
WARNING: Do not attempt to open the lid of any centrifuge until the rotor has come to a complete
stop.
In the event of a power failure or malfunction, it may be necessary to open the lid manually.
1. Disconnect the power cord from the wall socket.
2. Remove the plastic plug, located on the left side of the unit.
3. Pull the wire (attached to the plug) to open the lid lock manually.
5.4 Lid lock
The centrifuge can be started only with the lid securely closed. When a run is started, the lid lock
automatically activates. Do not attempt to open the lid during a centrifuge run. At the end of the run, the
lid will automatically unlock.
Never attempt to override the lid lock mechanism. Doing so is dangerous and could damage the
centrifuge.
5.5 Speed selection (see Figure 2)
The speed (rpm or g-force) can be selected from 500 to 15,000 rpm in 100 rpm increments or from
100 to 21,200 x g with the control knob. The speed is selected by pressing the RPM or RCF button. The
speed signal will begin to blink. Then, turn the control knob to increase or decrease the value.
Figure 2: PerfectSpin 24 Plus control panel layout
PEQLAB_v0312E
6
Instruction Manual PerfectSpin 24 Plus Microcentrifuge
5.6 Selection of operating time, momentary operation, Start/Stop
Operating time can be selected from 0.5 min to 99 min by pressing the TIME button and adjusting with
the control knob. The time can be set in 0.5 minute increments from 0 to 10 minutes and in 1 minute
increments from 10 to 99 minutes. After 99 minutes, the display shows “--” which indicates continuous
run. In this mode, the centrifuge will run until manually stopped. To start a run, press the control knob.
When the pre-selected time expires, the centrifuge will stop automatically. To stop the centrifuge prior
to the expiration of set time, press the control knob.
The centrifuge may be operated for a short run by pressing and holding the control knob. The centrifuge
will continue to run as long as the control knob is depressed and the time, in seconds will count up on
the time display.
6 SERVICE AND MAINTENANCE
6.1 Centrifuge service
The brushless motor in the PerfectSpin 24 Plus requires no routine maintenance. Any required service
should be performed by authorized, qualified personnel only. Repairs performed by unauthorized
personnel may void the warranty.
6.2 Cleaning the centrifuge
Thorough cleaning not only has its purpose in hygiene but also in avoiding corrosion based on
pollution. Always keep the centrifuge housing, rotor chamber, rotor and rotor accessories clean. All
parts should be wiped down periodically with a soft cloth. For more thorough cleaning, use a neutral
cleaning agent (pH between 6 and 8) applied with a soft cloth to avoid damaging anodized parts such
as rotors. Alkaline cleaning agents (pH-value > 8) must not be used. Excessive amounts of liquid should
be avoided. Liquid should not come into contact with the motor. After cleaning, ensure that all parts are
dried thoroughly by hand or in a warm air cabinet (maximum temperature 50 °C).
6.3 Cleaning the rotor
The rotor should be cleaned after each use. When spinning samples containing phenol or phenol
chloroform, the rotor should be cleaned immediately after use.
6.4 Disinfection of the rotor
In case of infectious material spilling into the centrifuge, the rotor and rotor chamber have to be
disinfected right after the run. Rotors may be autoclaved at a maximum temperature of 121 °C. The
rotor should be cleaned with a universal, neutral disinfection agent, e.g. on formalin base. A
disinfection spray is most suitable in order to easily reach all difficult to access spots.
ATTENTION: Before applying any other cleaning resp. decontamination method than recommended by
the manufacturer, contact the manufacturer to ensure that it will not damage the unit or the rotor.
6.5 Replacing fuses
Check the fuse when it is recommended in the Troubleshooting Guide located in this manual. The fuse
holder is located in the power inlet on the rear of the unit. Disconnect the power cord from the power
inlet. Open the fuse holder drawer by inserting a small screwdriver under the tab and prying it open.
Remove the innermost (operative) fuse from its retaining tabs and replace the fuse if necessary. A spare
fuse is located in the outermost chamber of the fuse drawer. Replace only with a fuse of exactly the
same value as the original. (Fuse type may be found in the Technical data section of this manual.)
PEQLAB_v0312E
7
Instruction Manual PerfectSpin 24 Plus Microcentrifuge
7 TROUBLESHOOTING
Please refer to this guide before calling for service.
Centrifuge will not start
Possible reason:
Solution:
No power supply
Check that power is being supplied to the outlet
Check that the power cord is plugged into both the wall outlet and the
back of the centrifuge
Check that power cord is not damaged
Possible reason:
Solution:
Blown fuse
Check fuse and replace if necessary
Lid lock will not release
Possible reason:
Solution:
Defective lid lock
Open manually and have unit serviced
Possible reason:
Solution:
No power from PC board
Call for service
Possible reason:
Solution:
Lid lock is jammed
Call for service
Possible reason:
Solution:
Centrifuge is not receiving power
See “Centrifuge will not start”
Centrifuge cannot be started, although power is on
Possible reason:
Solution
Lid not closed correctly
Close lid correctly
Possible reason:
Solution:
No speed or time has been selected
Set speed and/or time
bAL: Error Message Indicates imbalance
Possible reason:
Solution:
Tubes not inserted symmetrically in rotor holes
Load tubes symmetrically (see 4.4 Loading the rotor)
Possible reason:
Solution:
Sample liquid in tubes not balanced
Make sure the same volume of liquid is in each tube
Possible reason:
Solution:
Defective or improperly adjusted balance sensor
Call service
Lid: (Error message) Lid not closed
Possible reason:
Solution:
Lid not closed completely
Close lid
Possible reason:
Solution:
Lid lock or sensor defective
Call service
Other Error Messages
Solution:
PEQLAB_v0312E
Er on Display
Press time or speed knob to clear error
Call service
8
Instruction Manual PerfectSpin 24 Plus Microcentrifuge
8 TECHNICAL SUPPORT
Should you have any questions about the PerfectSpin 24 Plus or its accessories, please visit
www.peqlab.com to find the respective contact person.
Please have the unit’s serial number (located on the back panel of the instrument) available when
calling. Should an item require return to PEQLAB for service, a repair authorization (RA) number must
be received and a decontamination form must be completed first by the user. Items sent without RA
number or decontamination form will not be accepted.
All returns must be pre-approved by PEQLAB!
9 DETERMINATION OF G-VALUES
The centrifuging radius of the 1.5 / 2.0 ml rotor is 8.4 cm. The PerfectSpin 24 Plus has an automatic gforce conversion program, so g-values are automatically calculated and can be displayed on the control
panel, for this centrifuging radius. If adapters or smaller tubes are used, the centrifuging radius changes
as does the g-force. Figure 3 can be used to manually determine g-values for any centrifuging radius.
Figure 3: Nomograph – Relative Centrifugal Force
PEQLAB_v0312E
9
Bedienungsanleitung PerfectSpin 24 Plus Mikrozentrifuge
INHALT
1
SICHERHEITSHINWEISE
11
2
ALLGEMEINE INFORMATIONEN
12
2.1
2.2
2.3
2.4
2.5
3
Auspacken der Zentrifuge
Installation
Inbetriebnahme
13
13
13
Rotor und Zubehör
Rotor Instandhaltung
Rotoraustausch
Beladen des Rotors
Überlastung des Rotors
16
Aufsetzen des Rotordeckels
Schließen der Zentrifuge
Öffnen des Deckels
Deckel-Verschlussmechanismus
Wahl der Geschwindigkeit
Wahl der Laufzeit, QuickSpin Funktion, Start/Stop
SERVICE UND WARTUNG
6.1
6.2
6.3
6.4
6.5
14
14
15
15
15
16
BEDIENUNG
5.1
5.2
5.3
5.4
5.5
5.6
6
13
INSTALLATION DES ROTORS UND ROTOR INSTANDHALTUNG
4.1
4.2
4.3
4.4
4.5
5
12
12
12
13
13
INSTALLATION
3.1
3.2
3.3
4
Produktbeschreibung
Sicherheitshinweise
Technische Merkmale
Lieferumfang
Garantie
16
16
16
17
17
17
18
Wartung der Zentrifuge
Reinigung der Zentrifuge
Reinigung des Rotors
Dekontamination des Rotors
Austausch der Sicherung
18
18
18
18
18
7
TROUBLESHOOTING
19
8
TECHNISCHER SERVICE
20
9
BESTIMMUNG DER G-WERTE
20
PEQLAB_v0312D
10
Bedienungsanleitung PerfectSpin 24 Plus Mikrozentrifuge
1 SICHERHEITSHINWEISE
NIEMALS die Zentrifuge in Betrieb nehmen, wenn der Rotor nicht sorgfältig befestigt ist.
NIEMALS die Rotorschraube nur mit der Hand festziehen.
NIEMALS Reaktionsgefäße befüllen, während sie sich im Rotor befinden. Verschüttete Flüssigkeit kann
Schäden am Gerät verursachen.
NIEMALS mit den Hände den Rotorraum berühren, ehe die Zentrifuge nicht vollständig gestoppt ist.
NIEMALS die Zentrifuge bewegen während der Rotor läuft.
NIEMALS entzündliche Substanzen in der Nähe der Zentrifuge oder anderen elektrischen Geräten
benutzen.
NIEMALS entzündliches, explosives oder ätzendes Material zentrifugieren.
NIEMALS gesundheitsgefährdendes Material außerhalb entsprechender Sicherheitsvorkehrungen wie z.B.
einer Hood zentrifugieren.
IMMER
die Zentrifuge der Bedienungsanleitung entsprechend verwenden.
IMMER
den Rotor symmetrisch beladen. Jedes Reaktionsgefäß sollte mit einem anderen Reaktionsgefäß
gleichen Typs und Gewichts austariert werden.
IMMER
die Zentrifuge in der Nähe eines einfach erreichbaren Stromanschlusses aufstellen.
IMMER
Reaktionsgefäße für Mikrozentrifugen aus Plastik verwenden, die einer Zentrifugalkraft von
mindestens 21.200 x g standhalten.
IMMER
einen Schraubenschlüssel zum Festziehen der Rotorschraube verwenden.
PEQLAB_v0312D
11
Bedienungsanleitung PerfectSpin 24 Plus Mikrozentrifuge
2 ALLGEMEINE INFORMATIONEN
Diese Bedienungsanleitung enthält wichtige Sicherheitshinweise für die PerfectSpin 24 Plus Labor-Mikrozentrifuge (Katalognummer 91-PSPIN-24P/91-PSPIN24P-US). Die Anleitung sollte zur schnellen und
einfachen Verfügbarkeit in der Nähe der Zentrifuge aufbewahrt werden.
2.1 Produktbeschreibung
Die PerfectSpin 24 Plus ist eine kleine Arbeitsplatzzentrifuge, die für die Zentrifugation verschiedenster
Proben in der Forschung entwickelt wurde. Der Motor ist bürstenlos und benötigt keine regelmäßige
Wartung. Die PerfectSpin 24 Plus verfügt standardmäßig über einen Rotor für 24 x 1.5/2.0 ml
Reaktionsgefäße, für kleinere Reaktionsgefäße sind Adapter erhältlich. Die PerfectSpin 24 Plus erreicht
eine maximale Drehzahl von 15.000 rpm/21.200 x g.
2.2 Sicherheitshinweise
Achtung: Bitte lesen Sie die Sicherheitshinweise dieser Bedienungsanleitung sorgfältig durch,
bevor Sie das Gerät in Betrieb nehmen.
Bitte beachten Sie die Bedienungshinweise dieser Anleitung bei Benutzung der Zentrifuge, da
sonst die Sicherheit dieses Gerätes nicht mehr gewährleistet werden kann.
Bitte nehmen Sie die Zentrifuge unter folgenden Voraussetzungen nicht in Betrieb:
-
Die Zentrifuge wurde nicht ordnungsgemäß angeschlossen.
Die Zentrifuge ist nicht vollständig aufgebaut.
Service am Gerät durch nicht autorisiertes oder unqualifiziertes Personal.
Der Rotor wurde nicht sorgfältig befestigt.
Verwendung von unzulässigem Rotor oder Zubehör ohne Genehmigung des Herstellers.
Ausnahme: gängige Reaktionsgefäße aus Plastik für Mikrozentrifugen.
Die Zentrifuge befindet sich in einer explosionsgefährdeten Umgebung.
Zentrifugation von leicht entflammbaren und/oder explosionsgefährlichen Substanzen.
Zentrifugation von chemisch reaktiven Substanzen.
Der Rotor wurde nicht sorgfältig austariert.
Die Rotorschraube wurde nicht mit einem Rotorschlüssel festgezogen.
2.3 Technische Merkmale
Außenmaße (B x H x T):
Maximale Drehzahl:
Rotor-Kapazität:
Zulässige Probendichte:
Stromversorgung:
24 x 19 x 35 cm
15.000 rpm (21.200 x g)
24 x 1.5 / 2.0 ml Reaktionsgefäße
1,2 kg / dm3
120 V~, 50-60 Hz, 1.9 A, 5 AT
230 V~, 50-60 Hz, 1.1 A, 2.5 AT
Arbeitstemperatur/relative Luftfeuchtigkeit: 0 °C bis 40 °C/≤ 80 % RL
PEQLAB_v0312D
12
Bedienungsanleitung PerfectSpin 24 Plus Mikrozentrifuge
2.4 Lieferumfang
Der Lieferumfang der PerfectSpin 24 Plus enthält folgende Komponenten:
1 Bedienungsanleitung, 1 Netzkabel, 1 Standardrotor, 1 Rotorschlüssel
2.5 Garantie
PEQLAB garantiert, dass die ausgelieferte PerfectSpin 24 Plus Mikrozentrifuge genauestens geprüft
wurde und den geltenden Anforderungen entspricht.
Bitte überprüfen Sie die Lieferung dennoch umgehend nach Erhalt auf Vollständigkeit und eventuelle
Transportschäden. Sollte die Lieferung beschädigt oder fehlerhaft sein, wenden Sie sich bitte umgehend
an den Technischen Service von PEQLAB (siehe „TECHNISCHER SERVICE“). Durch die Aufbewahrung
des Verpackungsmaterials bis zur vollständigen Prüfung der Lieferung wird die Umwelt geschont und
eine evtl. Rückholung beschleunigt. Alle Rücksendungen, Austauschlieferungen und Gutschriften müssen
zuvor von PEQLAB freigegeben werden.
Dieser Garantieanspruch verfällt, sollte die Zentrifuge anderweitig als der Bedienungsanleitung
entsprechend benutzt worden sein, bei der Verwendung von unzulässigen Ersatz-/Zubehörteilen oder
unerlaubter Modifikation des Rotors oder der Zentrifuge.
PEQLAB behält sich das Recht vor ohne weitere Ankündigung technische Modifikationen am Gerät
vorzunehmen.
3 INSTALLATION
3.1 Auspacken der Zentrifuge
Bitte überprüfen Sie vor Auspacken der Zentrifuge den Versandkarton auf eventuelle Transportschäden.
Die Zentrifuge wird in einem Versandkarton mit passendem Schaumstoff geliefert. Nehmen Sie die
Zentrifuge aus dem Karton und heben Sie diesen inkl. Schaumstoff auf bis sichergestellt ist, dass die
Zentrifuge einwandfrei funktioniert.
Sollte die Lieferung fehlerhaft oder beschädigt sein, wenden Sie sich bitte umgehend an den
Technischen Service von PEQLAB oder Ihren PEQLAB-Außendienstmitarbeiter (siehe 'TECHNISCHER
SERVICE & BESTELLINFORMATIONEN').
Bitte bewahren Sie mitgeliefertes Zubehör zusammen mit der Bedienungsanleitung in der Nähe der
Zentrifuge auf.
3.2 Installation
Die Zentrifuge sollte auf einer festen, ebenen Unterlage aufgestellt werden, wie z.B. einem stabilen
Labortisch, einer Arbeitsplatte, etc. Um eine ausreichende Ventilation zu gewährleisten, sollte die
Zentrifuge mindestens 15 cm Abstand zu benachbarten Geräten oder Wänden haben.
Stellen Sie die Zentrifuge nicht in einer Umgebung auf, in der es zu hoher Hitzeentwicklung kommen
kann, wie z.B. Platz mit direkter Sonneneinstrahlung, neben einem Heizkörper oder Entlüfter, weil dies
zu einem Hitzeanstieg innerhalb des Gerätes führen kann.
3.3 Inbetriebnahme
Prüfen Sie vor Inbetriebnahme der Zentrifuge, dass Stromnetz und Frequenz den Angaben des
Herstellers entsprechen. Dann schließen Sie die Zentrifuge mit dem mitgelieferten Netzkabel an das
Stromnetz an.
PEQLAB_v0312D
13
Bedienungsanleitung PerfectSpin 24 Plus Mikrozentrifuge
4 INSTALLATION DES ROTORS UND ROTOR INSTANDHALTUNG
4.1 Rotor und Zubehör
Folgendes Zubehör ist bei der PerfectSpin 24 Plus im Lieferumfang enthalten oder optional erhältlich:
Rotor für 24 x 1.5 ml Reaktionsgefäße (im Lieferumfang enthalten)
Größe Reaktionsgefäße
1.5 ml / 2.0 ml (10 x 40 mm)
Max. Drehzahl
15.000 rpm (21.200 x g)
Radius Zentrifuge
8.4 cm
Rotorschlüssel
Bestellnummer:
(im Lieferumfang enthalten)
91-PSPIN-RW
Rotor Deckel
Bestellnummer:
(im Lieferumfang enthalten)
91-PSPIN-RL
Rotor-Sicherungsschraube
Bestellnummer:
(im Lieferumfang enthalten)
91-PSPIN-RS
Rotor-Aufsatz für PCR 8er-Streifen
Bestellnummer:
91-PSPIN-AS
Geeignete Reaktionsgefäße
0.2 ml Reaktionsgefäße oder 8 x 0.2 ml Streifen
Max. Drehzahl
15.000 rpm (10.874 x g bis 13.405 x g)
Radius Zentrifuge
4.32 cm bis 5.33 cm
Rotor-Einsatz für 0.5 ml Reaktionsgefäße (6 Stück)
Bestellnummer:
91-PSPIN-A05
Größe Reaktionsgefäße
8 x 30 mm
Max. Drehzahl
15.000 rpm (18.942 x g)
Radius Zentrifuge
7.53 cm
Rotor-Einsatz für 0.4 ml Reaktionsgefäße (6 Stück)
Bestellnummer:
91-PSPIN-A04
Größe Reaktionsgefäße
6 x 47 mm
Max. Drehzahl
15.000 rpm (21.200 x g)
Radius Zentrifuge
8.4 cm
Rotor-Einsatz für 0.2 ml Reaktionsgefäße (6 Stück)
Bestellnummer:
91-PSPIN-A02
Größe Reaktionsgefäße
6 x 21 mm
Max. Drehzahl
15.000 rpm (17.684 x g)
Radius Zentrifuge
7.03 cm
PEQLAB_v0312D
14
Bedienungsanleitung PerfectSpin 24 Plus Mikrozentrifuge
4.2 Rotor Instandhaltung
Der Rotor sollte nach jeder Benutzung gründlich gereinigt werden. Enthalten die Proben Phenol oder
Phenol/Chloroform, dann ist eine sorgfältige Reinigung unbedingt nötig. Untersuchen Sie den Rotor in
regelmäßigen Abständen nach Dellen, Beulen, Rissen, Verfärbungen und Sprüngen. Falls der Rotor
Beschädigungen aufweist, sollte die weitere Benutzung unverzüglich unterbunden und der Rotor
getauscht werden.
4.3 Rotoraustausch
Die PerfectSpin 24 Plus wird inklusive eines Standardrotors für 24 Reaktionsgefäße (1.5 oder 2 ml)
geliefert. Um den Rotor zur Reinigung zu entfernen, entfernen Sie die Rotor-Sicherungsschraube, indem
Sie die Schraube mit dem Rotorschlüssel entgegen dem Uhrzeigersinn drehen. Der Rotor lässt sich direkt
nach oben abnehmen.
Wenn Sie den Rotor austauschen, vergewissern Sie sich zuerst, dass die Antriebswelle und die
Befestigungsbohrung für den Rotor sauber sind. Setzen Sie den Rotor auf die Antriebswelle und
befestigen Sie diesen wieder, indem Sie die Sicherungsschraube im Uhrzeigersinn drehen. Halten Sie
mit der einen Hand den Rotor fest, während Sie die Sicherungsschraube mit dem Rotorschlüssel
festziehen.
4.4 Beladen des Rotors
Die Reaktionsgefäße, mit denen die Zentrifuge beladen werden soll, sollten mit gleichem Volumen befüllt
sein (Augenmaß). Der Gewichtsunterschied zwischen den Gefäßen sollte nicht mehr als 0.1 Gramm
betragen. Die Gefäße sollten immer so in die Zentrifuge gestellt werden, dass zwischen allen Reaktionsgefäßen der gleiche Abstand ist. Evtl. sind dafür ein oder zwei zusätzlich beladene Gefäße als Tara
nötig. In Abbildung 1 ist eine solche Anordnung dargestellt.
Abbildung 1: Gleichmäßig beladener Rotor
PEQLAB_v0312D
15
Bedienungsanleitung PerfectSpin 24 Plus Mikrozentrifuge
4.5 Überlastung des Rotors
Die maximale Beladung des Rotors und die maximale Rotationsgeschwindigkeit wurden vom Hersteller
ermittelt. Versuchen Sie nicht, diese Werte zu überschreiten! Die maximale Rotationsgeschwindigkeit
wurde für Flüssigkeiten festgelegt, die eine homogene Dichte von 1.2 g/ml oder weniger haben. Um
Flüssigkeiten mit einer höheren Dichte zu zentrifugieren, ist es nötig, die Geschwindigkeit zu reduzieren.
Fehler bei der Geschwindigkeitsreduzierung können zu Schäden am Rotor oder der Zentrifuge
führen. Die korrigierte maximale Geschwindigkeit kann mit folgender Formel errechnet werden:
Reduzierte Geschwindigkeit (nred) =
1.2
x max. Geschwindigkeit (nmax)
höhere _ Dichte
Beispiel:
Beträgt die Dichte einer Flüssigkeit 1.7, dann würde die neue max. Geschwindigkeit folgendermaßen
errechnet werden:
nred =
1.2 x 15.000 rpm = 12.602 rpm
1.7
Sollten Sie Zweifel bezüglich der Maximalgeschwindigkeit haben, kontaktieren Sie den PEQLAB-Service.
5 BEDIENUNG
Achtung: Versuchen Sie niemals die Zentrifuge zu bedienen, wenn der Rotor oder Adapter
Beschädigungen oder Korrosion aufweist. Zentrifugieren Sie niemals ätzendes Material, welches den
Rotor, Zubehörteile oder den Innenraum beschädigen kann.
5.1 Aufsetzen des Rotordeckels
Nachdem der Rotor sorgfältig befestigt und beladen wurde, setzen Sie den Deckel auf den Rotor. Die
Verwendung des Rotordeckels erfolgt aus Sicherheitsgründen und um eine korrekte Geschwindigkeit zu
erreichen. Vergewissern Sie sich, dass der Rotordeckel einrastet, indem Sie ihn in der Mitte andrücken.
5.2 Schließen der Zentrifuge
Schließen Sie den Zentrifugendeckel. Die PerfectSpin 24 Plus hat einen Verschlussmechanismus, der
aktiviert wird, sobald ein Lauf gestartet wurde
5.3 Öffnen des Deckels
Der Deckel ist verriegelt, solange die Zentrifuge läuft. Sobald der Lauf beendet und der Rotor zum
Stillstand gekommen ist, ertönt ein Piepton und der Deckel entriegelt sich automatisch.
WARNUNG: Versuchen Sie nicht, den Deckel einer Zentrifuge zu öffnen, bevor der Rotor nicht völlig
zum Stillstand gekommen ist!
Im Falle einer Störung der Stromzufuhr oder einer technischen Störung kann es notwendig sein, den
Deckel manuell zu öffnen.
1. Ziehen Sie das Netzkabel aus der Steckdose.
2. Entfernen Sie die kleine Plastikabdeckung, welche sich auf der linken Geräteseite befindet.
3. Ziehen Sie am Kabel (welches an der Plastikabdeckung befestigt ist), um den Deckel manuell zu
entriegeln.
PEQLAB_v0312D
16
Bedienungsanleitung PerfectSpin 24 Plus Mikrozentrifuge
5.4 Deckel-Verschlussmechanismus
Die Zentrifuge kann nur gestartet werden, wenn der Deckel ordnungsgemäß verschlossen ist. Der
Verschlussmechanismus wird automatisch aktiviert sobald ein Lauf gestartet wird. Versuchen Sie nicht,
den Deckel zu öffnen, während die Zentrifuge läuft. Am Ende des Laufes wird der Deckel automatisch
entriegelt.
Versuchen Sie nicht, die Verriegelung außer Kraft zu setzen. Dies ist gefährlich und könnte die
Zentrifuge beschädigen.
5.5 Wahl der Geschwindigkeit
Die Geschwindigkeit (rpm oder g) kann von 500 bis 15.000 rpm in 100 rpm Schritten oder von 100 bis
21.200 x g mit dem Kontrollknopf eingestellt werden (siehe Abb. 2). Die Geschwindigkeit wird
ausgewählt, in dem der RPM oder RCF Button gedrückt wird. Wenn die Geschwindigkeitsanzeige blinkt,
drehen Sie den Kontrollknopf um den Wert zu verringern oder zu erhöhen.
Abbildung 2: PerfectSpin 24 Plus Bedienelemente
5.6 Wahl der Laufzeit, QuickSpin Funktion, Start/Stop
Die Laufzeit kann von 0.5 bis 99 Minuten durch Drücken des TIME Buttons und Drehen des Kontrollknopfes gewählt werden. Die Zeit kann in 0.5 min Schritten von 0 bis 10 Minuten und in 1 min Schritten
von 10 bis 99 Minuten eingestellt werden. Nach 99 Minuten zeigt das Display “--”, dies steht für
unendliche Laufzeit. In diesem Modus läuft die Zentrifuge solange bis sie manuell gestoppt wird. Um
einen Lauf zu starten drücken Sie den Kontrollknopf.
Wenn die eingestellte Zeit abgelaufen ist, stoppt die Zentrifuge automatisch. Um die Zentrifuge vor dem
Ende der Laufzeit zu stoppen, drücken Sie den Kontrollknopf.
Um die QuickSpin Funktion zu nutzen, halten Sie den Kontrollknopf gedrückt. Die Zentrifuge läuft
solange wie der Knopf gedrückt wird und die Zeit wird in Sekunden auf dem “Time”-Display
aufsteigend angezeigt.
PEQLAB_v0312D
17
Bedienungsanleitung PerfectSpin 24 Plus Mikrozentrifuge
6 SERVICE UND WARTUNG
6.1 Wartung der Zentrifuge
Der bürstenlose Motor der PerfectSpin 24 Plus erfordert keine regelmäßigen Wartungsarbeiten. Jeder
nötige Service sollte nur von autorisiertem, qualifiziertem Personal durchgeführt werden. Reparaturen
durch nicht autorisiertes Personal führen zum Verlust der Garantie.
6.2 Reinigung der Zentrifuge
Eine gründliche Reinigung ist nicht nur aus hygienischen Gründen sinnvoll und erforderlich, sondern
verhindert auch durch Schmutz bedingte Korrosion des Gerätes. Sorgen Sie dafür, dass das Gehäuse,
der Rotor, der Rotorinnenraum und -zubehör immer sauber sind. Alle Teile der Zentrifuge sollten in
regelmäßigen Abständen mit einem weichen Tuch abgewischt werden. Für eine gründlichere Reinigung
empfehlen wir eine neutrale Reinigungslösung (pH zwischen 6 und 8), die mit einem weichen Tuch
aufgetragen wird, um eine Beschädigung eloxierter Bauteile, wie z.B. dem Rotor zu verhindern.
Alkalische Reinigungsmittel (pH-Wert > 8) dürfen nicht verwendet werden. Übermäßige
Flüssigkeitsmengen sollten dabei vermieden werden. Es sollte keine Flüssigkeit mit dem Motor in Kontakt
kommen. Stellen Sie sicher, dass nach der Reinigung alle Teile entweder per Hand oder in einem
warmen Trockenschrank (maximale Temperatur 50 °C) gründlich getrocknet werden.
6.3 Reinigung des Rotors
Der Rotor sollte nach jedem Einsatz gereinigt werden. Wenn die Proben Phenol oder Phenol/Chloroform enthalten, dann sollte der Rotor sofort nach Gebrauch gereinigt werden.
6.4 Dekontamination des Rotors
Sollte infektiöses Material in den Rotor oder den Rotorinnenraum gelangt sein, muss das Gerät direkt im
Anschluss dekontaminiert werden. Der Rotor kann bis zu einer Temperatur von 121 °C autoklaviert
werden. Die Reinigung des Rotors kann mit einem universellen, neutralen Desinfektionsmittel z.B. auf
Formalinbasis erfolgen. Ein Desinfektionsspray ist besonders gut geeignet, um auch schwer zugängliche
Bereiche zu erreichen.
ACHTUNG: Bevor Sie andere Reinigungsmittel oder Dekontaminationsmethoden verwenden als vom
Hersteller empfohlen, kontaktieren Sie den Hersteller um sicherzugehen, dass dadurch das System oder
der Rotor nicht beschädigt werden.
6.5 Austausch der Sicherung
Überprüfen Sie die Sicherung, wenn dies im Kapitel “Troubleshooting“ dieser Bedienungsanleitung
empfohlen wird. Die Sicherungsdose befindet sich am Netzeingang auf der Rückseite des Gerätes.
Trennen Sie das Stromkabel vom Netzeingang. Öffnen Sie die Sicherheitsdose indem Sie einen kleinen
Schraubenzieher seitlich unter den Netzeingang ansetzen und diesen aufhebeln. Lösen Sie die innere (in
Betrieb befindliche) Sicherung aus ihrer Befestigungslasche und tauschen Sie diese bei Bedarf aus. Die
äußere Sicherung in der Sicherungsdose dient als Ersatz. Die Sicherung sollte immer nur durch eine
Sicherung des gleichen Typs wie das Original ersetzt werden. (Den korrekten Sicherungstyp können Sie
dem Kapitel “Technische Daten” dieser Bedienungsanleitung entnehmen)
PEQLAB_v0312D
18
Bedienungsanleitung PerfectSpin 24 Plus Mikrozentrifuge
7 TROUBLESHOOTING
Bitte lesen Sie erst diesen Leitfaden durch, bevor Sie den Technischen Service kontaktieren.
Zentrifuge startet nicht
Mögliche Ursache:
Lösung:
Keine Stromzufuhr
Prüfen Sie, dass die Steckdose mit Strom versorgt wird
Prüfen Sie, dass das Netzkabel sowohl an die Steckdose der Wand als
auch an den Netzeingang der Zentrifuge angeschlossen ist
Prüfen Sie das Netzkabel auf Beschädigungen
Mögliche Ursache:
Lösung:
Durchgebrannte Sicherung
Überprüfen Sie die Sicherung und tauschen Sie diese bei Bedarf aus
Deckel öffnet sich nicht
Mögliche Ursache:
Lösung:
Defekter Verschlussmechanismus
Deckel manuell öffnen und Technischen Service kontaktieren
Mögliche Ursache:
Lösung:
Kein Strom vom PC board
Technischen Service kontaktieren
Mögliche Ursache:
Lösung:
Verschlussmechanismus klemmt
Technischen Service kontaktieren
Mögliche Ursache:
Lösung:
Stromversorgung der Zentrifuge ist unterbrochen
Siehe “Zentrifuge startet nicht”
Zentrifuge kann nicht gestartet werden, obwohl sie mit Strom versorgt wird
bAL:
Mögliche Ursache:
Lösung:
Deckel ist nicht richtig geschlossen
Deckel richtig schließen
Mögliche Ursache:
Lösung:
Es wurde keine Geschwindigkeit oder Zeit eingegeben
Geschwindigkeit und/oder Zeit einstellen
Fehlermeldung
Mögliche Ursache:
Lösung:
Zeigt Ungleichgewicht an
Reaktionsgefäße wurden nicht symmetrisch im Rotor angeordnet
Reaktionsgefäße symmetrisch anordnen (siehe 4.4 Beladen des Rotors)
Mögliche Ursache:
Lösung:
Probenvolumen in den Reaktionsgefäßen ist nicht austariert
Stellen Sie sicher, dass sich in jedem Gefäß das gleiche Flüssigkeitsvolumen befindet
Mögliche Ursache:
Lösung:
Gleichgewichts-Sensor ist defekt oder falsch eingestellt
Technischen Service kontaktieren
Deckel: (Fehlermeldung)
Deckel nicht geschlossen
Mögliche Ursache:
Lösung:
Deckel ist nicht vollständig geschlossen
Deckel schließen
Mögliche Ursache:
Lösung:
Verschlussmechanismus oder Sensor defekt
Technischen Service kontaktieren
Weitere Fehlermeldungen
Lösung:
PEQLAB_v0312D
Er auf dem Display
Drücken Sie den “Time”- oder “Speed”-Knopf, um den Fehler zu
beseitigen
Technischen Service kontaktieren
19
Bedienungsanleitung PerfectSpin 24 Plus Mikrozentrifuge
8 TECHNISCHER SERVICE
Sollten Fragen zur PerfectSpin 24 Plus oder deren Zubehör bestehen, finden Sie den richtigen
Ansprechpartner unter www.peqlab.com.
Bitte halten Sie die Seriennummer des Gerätes bereit, Sie finden diese auf der Geräterückseite. Sollte
eine Rückholung der Zentrifuge zu PEQLAB zwecks Service nötig sein, füllen Sie bitte das
Dekontaminationszertifikat vollständig aus. Lieferungen ohne dieses Formular müssen wieder an Sie
zurück geschickt werden.
Alle Rückholungen müssen im Vorfeld mit PEQLAB abgeklärt werden.
9 BESTIMMUNG DER G-WERTE
Der Zentrifugenradius des 1.5/2 ml Rotors beträgt 8.4 cm. Die PerfectSpin 24 Plus hat ein
automatisches rpm-rcf-Umrechnungsprogramm, sodass der g-Wert für diesen Zentrifugenradius
automatisch errechnet wird und auf dem Bedienfeld angezeigt werden kann. Bei Verwendung von
Adaptern oder kleineren Reaktionsgefäßen, ändert sich sowohl der Zentrifugenradius als auch der gWert. Abbildung 3 kann herangezogen werden, um manuell den g-Wert für jeden Zentrifugenradius zu
bestimmen.
Abbildung 3: Nomogramm – Relative Zentrifugalkräfte
PEQLAB_v0312D
20
D
AT
UK
USA
PEQLAB Biotechnologie GmbH, 91052 Erlangen, Freecall (D): 0800 100 20 16, [email protected], www.peqlab.de
PEQLAB Biotechnologie GmbH, 6404 Polling, Tel: +43 (0) 5238 84 169, [email protected], www.peqlab.at
PEQLAB Ltd., Southampton SO31 7ZN, Freecall (UK): 0808 20 21 302, [email protected], www.peqlab.co.uk
PEQLAB LLC, Wilmington, DE 19810, Toll-Free (US): 877 737 5220, [email protected], www.peqlab.us
Creating the future together.