1
OPERATION INSTRUCTIONS
MODE D'EMPLOI
BEDIENUNGSANLEITUNG
INSTRUCCIONES DE EMPLEO
ISTRUZIONI PER L'USO
BRUKSANVISNING
27
19
28
18
29
17
Swiss PiezoClast
®
30
16
15
14
13
12
31
11
10
6
5
4
3
20
R
2
1
29
1x
9
29
28
8
34
26
7
1x
1x
25
24
23
33
22
2x
Caution! Federal (USA) law restricts this device
to sale by or on the order of a physician
21
R
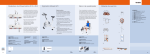
Fold out the cover pages to view technical drawings
Déplier les rabats pour visualiser les plans
Detailzeichnungen in den ausklappbaren Umschlagseiten
Despliegue las tapas de este manual para ver los dibujos
Spiegare i bordi piegati per leggere le istruzioni
Vik ut omslagen för att se innehållsförteckning och skisser
TECHNICAL MODIFICATIONS
MODIFICATIONS TECHNIQUES
M5
x1
0
32
TECHNISCHE ÄNDERUNGEN
EMS reserves the right to modify the technique, EMS se réserve le droit d’apporter à la technique,
accessories, operating instructions or contents of aux accessoires, au mode d’emploi et au contenu
"#
"
$
la poursuite des développements techniques et
$
EMS behält sich vor, im Zusammenhang mit
technischen oder wissenschaftlichen Weiterentwicklungen, Änderungen an der Technik, dem
Zubehör, der Bedienungsanleitung sowie am
Inhalt der Originalverpackung vorzunehmen.
MODIFICACIONES TÉCNICAS
MODIFICHE TECNICHE
TEKNISKA MODIFIKATIONER
ciones en la técnica, los accesorios, las instrucciones de empleo, así como en el contenido
del embalaje original, siempre y cuando estas
La EMS si riserva il diritto, nell’ambito delle
zioni per l’uso e al contenuto dell’imballo originale.
tekniken, tillbehören, bruksanvisningen eller
innehållet i detta set vid framtida teknisk eller
vetenskaplig utveckling.
1
2
3
4
5
6
10
11
12 13
14
15
17
16
8
COMPOSANTS
BESTANDTEILE
1
2
3
1
2
3
1
2
3
18
4
5
6
7
8
9
10
11
12
13
14
15
16
17
18
19
20
21
22
23
24
25
26
27
28
29
30
31
32
33
34
R
7
COMPONENTS
9
Unit
Shock wave intensity ("Intensity") display
Shock wave counter ("Impulse Count") and
"Status and error message" display
Pulse rate ("Frequency") indicator
Increase shock wave intensity button
Reduce shock wave intensity button
Increase pulse rate button
Reduce pulse rate button
Standby button
Standby indicator
"Preselection" button for number of shock waves
"Reset" button
Function 1 button
Function 2 button
Connecting socket for the handpiece
Handpiece holder
Connector
Foot pedal
Power cable
Power switch
Power input connector with fuse holder
Connecting socket for foot pedal
Data interface (only for service)
Potential equalization connector
Fan
Fuses
Gel bottle
Gel pad (replaceable)
Twist lock ring for gel pad
Handpiece
Gel pad assortment
PiezoClast-DolorClast mounting kit
Handpiece test cylinder complete
Handpiece holder (table top)
EMS supplies this unit with various accessories. The
"Packing list" shows exactly what your unit includes.
19
20
21
22
23 24
25
26
4
5
6
7
8
9
10
11
12
13
14
15
16
17
18
19
20
21
22
23
24
25
26
27
28
29
30
31
32
33
34
Appareil
<
==
<
=
=
=
<
$=
/
==
/#
==
/
$=
/#
$=
Touche veille
Témoin veille
/#=
Touche de remise à zéro
Touche de Fonction 1
Touche de Fonction 2
Connecteur pour la pièce à main
Support de pièce à main
Connecteur
Pédale de commande
Câble secteur
Interrupteur général
Prise de secteur avec porte-fusibles
Connecteur pour la pédale de commande
Interface des données (uniquement pour entretien)
Connecteur de compensation de potentiel
Ventilateur
Fusibles
Bouteille de gel
Gel pad (interchangeable)
Bague à baïonnette pour gel pad
Pièce à main
Assortiment de Gel pad
Kit de montage PiezoClast-DolorClast
Cylindre test de pièce à main complet
Support de pièce à main (de table)
EMS fournit cet appareil avec différents accessoires. La
"Packing list" détaille exactement ce qui est inclus avec
votre appareil.
4
5
6
7
8
9
10
11
12
13
14
15
16
17
18
19
20
21
22
23
24
25
26
27
28
29
30
31
32
33
34
Gerät
Anzeige "Stoßwellenintensität"
Anzeige "Stoßwellenzähler” und “Informations und
Fehlermeldungen"
Anzeige "Stosswellenfrequenz"
Taste Stosswellenintensität erhöhen
Taste Stosswellenintensität verringern
Taste Stosswellenfrequenz erhöhen
Taste Stosswellenfrequenz verringern
Taste Stand-By
Kontrollleuchte Stand-By
Taste Vorwahl der Stosswellenanzahl
Taste "Reset"
Taste Funktion 1
Taste Funktion 2
Anschlussbuchse für das Handstück
Halter für das Handstück
Anschluss des Fusspedals
Fusspedal
Netzkabel
Hauptschalter
Netzeingang mit Sicherungshalter
Anschlussbuchse für Fusspedal
Datenschnittstelle (nur für Service)
Anschluss "Potentialausgleich"
Lüfter
Sicherungen
Gel Flasche
Gel Pad (auswechselbar)
Bajonettring für Gelpad
Handstück
Gel Pad Set
Befestigungssatz für PiezoClast-DolorClast
Prüfzylinder komplett
&
'
&
'*+/#:;
EMS
bietet
Geräte
in
unterschiedlichen
Ausstattungsvarianten an. Für die genaue Ausstattung
Ihres Geräts beachten Sie bitte die beiliegende
Packliste.
COMPONENTES
COMPONENTI
KOMPONENTER
1
2
3
1
2
3
1
2
3
4
5
6
7
8
9
10
11
12
13
14
15
16
17
18
19
20
21
22
23
24
25
26
27
28
29
30
31
32
33
34
Aparato
Indicación "Intensidad de ondas de choque"
"Contador de ondas de choque" e "Información
y mensajes de error"
Indicación "Frecuencia de pulsos"
Tecla "Aumentar la intensidad de ondas de
choque"
Tecla "Reducir la intensidad de ondas de choque"
Tecla "Aumentar la frecuencia de pulsos"
Tecla "Reducir la frecuencia de pulsos"
Tecla "Stand-By"
Testigo de control "Stand-By"
Tecla "Preselección de número de ondas de
choque"
Tecla "Reset" (reposición)
Tecla "Función 1"
Tecla "Función 2"
Conector de mango
Soporte del mango
Conector
Pedal de mando
Cable de alimentación
Interruptor de alimentación
Toma de corriente con porta fusibles
Conector de interruptor de pedal
Interfaz de datos (solo para servicio técnico)
Compensación de potencial
Ventilador
Fusibles
Botella de gel
Almohadilla de gel (cambiable)
Anillo de bayoneta para almohadilla de gel
Mango
Surtido de almohadillas de gel
!
Cilindro de prueba completo
Soporte del mango (de tabla)
EMS suministra este aparato con diversos accesorios.
La "Lista de contenido" indica exactamente lo que incluye su aparato.
4
5
6
7
8
9
10
11
12
13
14
15
16
17
18
19
20
21
22
23
24
25
26
27
28
29
30
31
32
33
34
Apparecchio
Display "Intensità dell’onda d’urto"
Display "Conteggio di onde d’urto" e
"Informazioni e messaggi d’errore"
Display "Frequenza impulso"
Tasto "Aumentare intensità onde d’urto"
Tasto "Diminuire intensità onde d’urto"
Tasto "Aumentare frequenza impulso"
Tasto "Diminuire frequenza impulso"
Tasto "Stand-By"
Spia di controllo "Stand-By"
Tasto preselezione del numero onde d’urto
Tasto "Reset"
Tasto Funzione 1
Tasto Funzione 2
Boccola di collegamento per manipolo
Supporto manipolo
Connettore
Pedale di comando
Cavo di alimentazione
Interruttore di alimentazione
Interruttore di rete con portafusibile
Boccola di collegamento per il pedale di comando
Interfaccia dati (solo per assistenza)
Collegamento "compensazione di potenziale"
Ventola
Fusibili
Bottiglia di gel
Gelpad (sostituibile)
Anello baionetta per gelpad
Manipolo
Set di gelpad
Cilindro di prova completo
Supporto manipolo (di tavola)
EMS fornisce questa unità dotata di vari accessori.
Nella "distinta di spedizione" sono elencati esattamente
4
5
6
7
8
9
10
11
12
13
14
15
16
17
18
19
20
21
22
23
24
25
26
27
28
29
30
31
32
33
34
Apparat
Indikator tryckvågsintensitet
Indikator antal tryckvågsimpulser samt driftsoch felmeddelanden
Indikator pulsfrekvens
Knapp Öka tryckvågsintensitet
Knapp Minska tryckvågsintensitet
Knapp Öka pulsfrekvens
Knapp Minska pulsfrekvens
Knapp för vänteläge
Kontrollindikator vänteläge
Förvalsknapp för antal tryckvågsimpulser
Återställningsknapp
Knapp Funktion 1
Knapp Funktion 2
Uttag för handenhet
Hållare för handenhet
Uttag
Fotpedal
Nätkabel
Strömbrytare
Apparatingång för nätkabel med säkringshållare
Uttag för fotpedal
Datagränssnitt (endast för service)
Anslutning för potentialutjämning
Fläkt
Säkringar
Gelplatta (utbytbar)
Bajonettring för gelplatta
Handstycke
Gelplattsats
Monteringsanvisning för fastgöringssats för
PiezoClast-DolorClast
Testcylinder för handenhet
Hållare för handenhet (av bordlägga)
EMS utrustar enheten med olika tillbehör. Packlistan
visar exakt vad som medföljer denna enhet.
DEAR CUSTOMERS,
CHERS CLIENTS,
SEHR GEEHRTE KUNDEN,
Thank you for buying a new EMS product. It meets
the highest quality and safety standards.
Nous $ %& ' nouveau produit EMS. Il répond aux plus hautes
exigences en matière de qualité et de sécurité.
Wir gratulieren Ihnen zum Kauf Ihres neuen
EMS Produktes. Es erfüllt höchste Ansprüche an
Qualität und Sicherheit.
Utilisation prévue
Zweckbestimmung
Le Swiss PiezoClast EMS est destiné à produire
des ondes de choc focalisées pour le traitement de
%%&
*
Der EMS Swiss PiezoClast wurde zur Therapie
verschiedener Indikationen des Stütz- und
Bewegungsapparates mit fokussierten Stosswellen entwickelt.
Les indications suivantes sont traitées avec
succès avec le Swiss PiezoClast d’EMS.
Folgende Indikationen werden mit dem EMS
Swiss PiezoClast erfolgreich behandelt.
Traitement des points trigger par ondes de
Anwendungsgebiet Trigger-Punkt
Intended use
The EMS Swiss PiezoClast is intended to deliver
focussed shock waves for the treatment of various
indications on the musculoskeletal system.
The following indications are successfully treated
with the EMS Swiss PiezoClast.
Indications
Chronic painful muscular hardening, so-called
myofascial trigger points in the areas of the:
# Upper extremities
# Shoulder girdle
# Hip area
# Lower extremities
Contraindications
# Local infections
# Local tumor diseases
# Clotting disorders (before use, coagulation
status analysis is necessary)
# Use of haemo-diluting medication
# Pregnancy
# Lung tissue in the shock wave entry window
# Children with open epiphyses
Complications
Serious complications have not been observed.
Side effects
Occurrence of:
# Local haematomas, petechiae
# Local irritation of the skin
# Local edemas
Indications
Tensions musculaires douloureuses chroniques,
appelées points trigger dans les régions suivantes:
# Membres supérieurs
# Ceinture scapulaire
# Région pelvienne
# Membres inférieurs
Contre-indications
# Infections locales
# Tumeurs locales
# +/
;&$$&cation de l’état de la coagulation auparavant)
# Prise de médicaments anticoagulants
# Grossesse
# Présence de tissu pulmonaire dans la région
des ondes de choc
# Enfant en croissance épiphysaire
Complications
Indikationen
Chronische schmerzhafte muskuläre Verspannungen, sogenannte myofasziale Triggerpunkte
in den Bereichen:
# Obere Extremitäten
# Schultergürtel
# Hüftregion
# Untere Extremitäten
Kontraindikationen
# Lokale Infektionen
# Lokale Tumorleiden
# Gerinnungsstörungen (vorherige Gerinnungsstatusabklärung notwendig)
# Einnahme von blutverdünnenden Medikamenten
# Schwangerschaft
# Lungengewebe im Stoßwellenbereich
# Kinder mit offenen Wachstumsfugen
Komplikationen
Des complications sévères n’ont pas pu être
constatées.
Komplikationen ernst zu nehmender Art sind
bislang nicht beobachtet worden.
Effets secondaires
Nebenwirkungen
Apparition de:
# Hématomes locaux, pétéchies
# Irritations locales de la peau
# Œdèmes locaux
Auftreten von:
# Lokalen Hämatomen, Petechien
# Lokalen Hautreizungen
# Lokalen Ödemen
ESTIMADOS CLIENTES,
GENTILE CLIENTE,
BÄSTA KUND,
Les felicitamos por la adquisición de su nuevo
producto EMS. El cual satisface las exigencias más
'
=
Ci congratuliamo con voi per l’acquisto di questo
nuovo prodotto EMS. Esso soddisfa le più alte
esigenze di qualità e di sicurezza.
Tack för att ni valde denna nya EMS produkt.
Den uppfyller högsta kvalitets- och säkerhetskrav.
Uso previsto
Uso previsto
El Swiss PiezoClast está destinado a generar
ondas de choque focalizadas para el tratamiento
de diferentes indicaciones en el aparato musculoesquelético.
Lo Swiss PiezoClast EMS è destinato a produrre
delle onde d’urto focalizzate per il trattamento di
differenti indicazioni dell’apparato locomotore.
Tratan exitosamente las siguientes afecciones con
el Swiss PiezoClast EMS.
Terapia de puntos gatillo por ondas de
Indicaciones
Endurecimiento muscular crónico doloroso,
los llamados puntos gatillo miofasciales en las
regiones de:
# Extremidades superiores
# Cintura escapular
# Región de la cadera
# Extremidades inferiores
Contraindicaciones
# Infecciones locales
# Tumores locales
# Trastornos de coagulación (previamente se
'$
%
$
la coagulación)
# Toma de medicamentos diluentes
# Embarazo
# Tejido pulmonar en la zona de las ondas de
choque
# >?=?
@
/
Complicaciones
Lo Swiss PiezoClast EMS sono state trattate con
successo le seguenti indicazioni.
Terapia ad onde d’urto focalizzate su trigger
Indicazioni
Forme croniche di contrazioni muscolari dolorose,
altri punti trigger miofasciali nelle zone:
# Estremità superiori
# Cintura scapolare
# Regione dell’anca
# Estremità inferiori
Controindicazioni
# Infezioni locali
# Neoplasie locali
# Disordini della coagulazione (è necessario
conoscere lo stato di coagulazione
precedente)
# Assunzione di farmaci anticoagulanti
# Gravidanza
# Presenza di tessuti polmonari nella zona da
sottoporre alla terapia
# <
*/
Complicazioni
No se ha observado ninguna complicación de
gravedad.
Finora non sono state riscontrate complicazioni
di tipo più grave.
Efectos secundarios
Effetti collaterali
Presencia de:
# Hematomas locales, petequias
# Irritaciones locales de la piel
# Edemas locales
Riscontrato l’insorgere di:
# Ematomi locali, petecchie
# Irritazioni cutanee locali
# Edemi locali
Påtänkt användning
EMS Swiss PiezoClast är avsedd att användas för
att avge riktade stötvågor för behandling av olika
indikationer för det muskuloskeletala systemet.
Följande indikationer har med framgång
behandlats med EMS Swiss PiezoClast.
Triggerpunktbehandling med tryckvågor
Indikationer
Kroniska smärtsamma muskulära spänningar,
s.k. myofasciala triggerpunkter inom områdena:
# Övre extremiteter
# Skuldergördel
# Höftregion
# Nedre extremiteter
Kontraindikationer
# Lokala infektioner
# Lokala tumörer
# Koagulationsstörningar (föregående koagulationsstatusundersökning nödvändig)
# Medicinering med blodförtunningsmedel
# Graviditet
# Lungvävnad i tryckvågsområdet
# Barn med öppna epifyser
Komplikationer
Komplikationer av allvarligt tilltagande art har
hittills inte konstaterats.
Biverkningar
Kan uppträda:
# Lokala hematomer, petekier
# Lokala hudirritationer
# Lokala ödem
Extracorporeal Shock Wave Therapy
Thérapie extra corporelle par ondes de
Extrakorporale Stoßwellen-Therapie
Indications
# Calcifying tendinitis of the shoulder
# Subacromial pain syndrome
# Epicondylitis humeri radialis/ulnaris
# =*;*Y
# Medial tibial stress syndrome
# Achilles tendinopathy
# Plantar fasciopathy
# Pseudarthroses
Indications
# +
&
# X**=*&
# Épicondylite huméro-radiale ou ulnaire
# Syndrome de la pointe rotulienne
# Syndrome tibial
# Achillodynie
# Fasciite plantaire avec épine de Lenoir
# Pseudarthroses
Indikationen
# Tendinosis calcarea der Schulter
# Subakromiales Schmerzsyndrom
# Epicondylitis humeri radialis/ulnaris
# Patellaspitzensyndrom
# Tibiakantensyndrom
# Tendinopathien der Achillessehne
# Plantarfasziopathie
# Pseudarthrosen
Contraindications
# Local infections
# Local tumor diseases
# Clotting disorders (before use, coagulation
status analysis is necessary)
# Use of haemo-diluting medication
# Pregnancy
# Lung tissue in the shock wave entry window
# Children with open epiphyses
Contre-indications
# Infections locales
# Tumeurs locales
# +/
;&$$&cation de l’état de la coagulation auparavant)
# Prise de médicaments anticoagulants
# Grossesse
# Présence de tissu pulmonaire dans la région
des ondes de choc
# Enfant en croissance épiphysaire
Kontraindikationen
# Lokale Infektionen
# Lokale Tumorleiden
# Gerinnungsstörungen (vorherige Gerinnungsstatusabklärung notwendig)
# Einnahme von blutverdünnenden Medikamenten
# Schwangerschaft
# Lungengewebe im Stoßwellenbereich
# Kinder mit offenen Wachstumsfugen
Complications
Komplikationen
Des complications sévères n’ont pas pu être
constatées.
Komplikationen ernst zu nehmender Art sind
bislang nicht beobachtet worden.
Effets secondaires
Nebenwirkungen
Apparition de:
# Hématomes locaux, pétéchies locales
# Irritations locales de la peau
# Œdèmes locaux
Auftreten von:
# Lokalen Hämatomen, Petechien
# Lokalen Hautreizungen
# Lokalen Ödemen
Complications
Serious complications have not been observed.
Side effects
Occurrence of:
# Local haematomas, petechiae
# Local irritation of the skin
# Local edemas
Tratamiento extracorporal por ondas
$
Terapia ad onde d’urto extracorporea
!"!#$
Indicaciones
# +
!
supraespinoso
# Síndrome de pinzamiento del hombro
# Epicondilitis humeral radial/ulnar
# Síndrome patelo-femoral
# Dolor de tibia anterior
# Aquilodinia
# Fasciitis plantar con espolón calcáneo
# Seudoartrosis
Indicazioni
# +
# *
Z**Z
# Epicondilite dell’omero radiale-ulnare
# Sindrome della punta rotulea
# Sindrome degli spigoli tibiali
# Achillodinia
# Fascite plantare con sperone calcaneare
# Pseudoartrosi
Indikationer
# [
\
# Subakromialt smärtsyndrom
# Epicondylitis humeri radialis/ulnaris (tennis-/
golfarmbåge)
# Patella apex-syndrom
# ]
/
=*;/^
**
Y
# Akillestendinit
# Plantar fascit
# Pseudartros
Controindicazioni
# Infezioni locali
# Neoplasie locali
# Disordini della coagulazione (è necessario
conoscere lo stato di coagulazione
precedente)
# Assunzione di farmaci anticoagulanti
# Gravidanza
# Presenza di tessuti polmonari nella zona da
sottoporre alla terapia
# <
*/
Kontraindikationer
# Lokala infektioner
# Lokala tumörer
# Koagulationsstörningar (föregående koagulationsstatusundersökning nödvändig)
# Medicinering med blodförtunningsmedel
# Graviditet
# Lungvävnad i tryckvågsområdet
# Barn med öppna epifyser
Contraindicaciones
# Infecciones locales
# Tumores locales
# Trastornos de coagulación (previamente se
'$
%
$
coagulación)
# Toma de medicamentos diluentes
# Embarazo
# Tejido pulmonar en la zona de las ondas de
choque
# >?=?
@
/
Komplikationer
Complicazioni
Complicaciones
Hasta la fecha, no se ha observado ninguna
complicación de gravedad.
Finora non sono state riscontrate complicazioni
di tipo più grave.
Komplikationer av allvarligt tilltagande art har
hittills inte konstaterats.
Biverkningar
Effetti collaterali
Efectos secundarios
Presencia de:
# Hematomas locales, petequias
# Irritaciones locales de la piel
# Edemas locales
Riscontrato l’insorgere di:
# Ematomi locali, petecchie
# Irritazioni cutanee locali
# Edemi locali
Kan uppträda:
# Lokala hematomer, petekier
# Lokala hudirritationer
# Lokala ödem
ABOUT THIS MANUAL
A PROPOS DE CE MANUEL
ZU DIESEM HANDBUCH
These operating instructions are to ensure the
correct installation and use of this product.
Ce mode d’emploi est destiné à l’installation et à
l’utilisation correcte de ce produit.
Please read these operating instructions carefully
as they explain all the most important details and
procedures. Please pay special attention to the
safety precautions.
Veuillez lire attentivement ce mode d’emploi car
tous les détails et tous les gestes importants y
sont clairement décrits. Respectez en particulier
les remarques concernant la sécurité.
Diese Bediendungsanleitung soll Ihnen bei der
korrekten Installation und Bedienung des Produkts
helfen.
Always keep this manual close at hand.
Veuillez conserver ce document toujours à portée
de main.
Follow instructions for use: this product
needs special precautions regarding electromagnetic compatibility and needs to be installed and
put into service according to the "Electromagnetic
compatibility" manual.
To prevent possible patient or user injury or
damage to the PiezoClast, please note the corresponding directives:
Danger
Risk of patient or user injury
Caution
Risk of damage to the device or
environmental harm
Please note
Useful additional information and hints
Se référer au manuel d‘utilisation: ce
produit nécessite des précautions particulières
concernant la compatibilité électromagnétique. Il
doit être installé et mis en service selon le manuel
"Electromagnetic compatibility".
Pour prévenir des possibles accidents corporels
ou dommages au PiezoClast, merci de tenir
compte des directives suivantes:
Danger
Risque de blessure pour le patient ou
Attention
`'**
l’environnement
Lesen Sie sie somit aufmerksam durch, da
die wesentlichen Einzelheiten und Handgriffe
anschaulich erklärt werden. Beachten Sie dabei
besonders die Sicherheitshinweise.
Bewahren Sie diese Unterlagen immer griffbereit
auf.
Gebrauchsanweisung befolgen: für dieses
Gerät sind besondere Vorsichtsmaßnahmen
hinsichtlich der elektromagnetischen Kompatibilität zu beachten. Die Installation und Inbetriebnahme des Geräts muss die Anforderungen des
Handbuchs für die „Electromagnetic compatibility“
erfüllen.
Zur Vermeidung von Personenschäden oder
Sachschäden am Swiss PiezoClast beachten
Sie bitte die folgenden Hinweise:
Gefahr
Gefahr von Personenschäden
Achtung
Drohende Sach- und Umweltschäden
Prohibited
Remarques
Informations complémentaires et
conseils utiles
Authorized
Interdit
Hinweis
Nützliche Zusatzinformationen und
Anwendungstipps
Autorisé
Verboten
Erlaubt
PRESENTACIÓN DEL MANUAL
INFORMAZIONI SU QUESTO
MANUALE
OM DENNA HANDBOK
Estas instrucciones de empleo sirven para
garantizar una instalación y uso correctos de
este producto.
Le presenti istruzioni operative consentono la
corretta installazione e utilizzo di questo prodotto.
Syftet med denna bruksanvisning är att säkerställa
att produkten installeras och används på rätt sätt.
Leggere attentamente queste istruzioni operative
poiché spiegano tutti i dettagli e le procedure
{*
precauzioni di sicurezza.
Läs bruksanvisningen noga – här beskrivs alla
viktiga detaljer och procedurer. Var särskilt
uppmärksam på säkerhetsföreskrifterna.
Lea estas instrucciones de empleo atentamente ya
que explican todos los detalles y procedimientos
más importantes. Preste especial atención a las
precauciones de seguridad.
Tenga siempre a mano este documento.
Referirse a los instrucciones de empleo:
este producto requiere precauciones especiales
referentes a compatibilidad electromagnética,
y debe instalarse y ponerse en funcionamiento
conforme al manual de "Electromagnetic compatibility".
Para evitar posibles lesiones en el paciente o
usuario, o daños al PiezoClast, nótense las directrices correspondientes:
Peligro
Riesgo de lesiones en el paciente o
usuario
Precaución
Riesgo de daños en el dispositivo o
medioambientales
Observación
Información y consejos útiles
adicionales
Prohibido
Autorizado
Tenere questo documento sempre a portata di
mano.
`%
|'
prodotto richiede precauzioni speciali in relazione
alla compatibilità elettromagnetica e va installato
e messo in servizio in conformità al manuale
"Electromagnetic compatibility".
*/
zatore o danni al PiezoClast attenersi alle relative
direttive:
Pericolo
Rischio di lesioni al paziente o
Ha alltid detta dokument nära till hands.
Se till anvisningshandboken: denna
produkt kräver särskilda försiktighetsåtgärder
vad gäller elektromagnetisk kompatibilitet och
måste installeras och driftsättas i enlighet med
anvisningarna i handboken "Electromagnetic
compatibility".
För att förhindra patientskador eller skador på
PiezoClast ska följande varningar observeras:
Fara
Risk för skada på patient eller
användare
Varning
Risk för skada på enheten eller miljön
Attenzione
Rischio di danni al dispositivo o
*/
Observera
Ytterligare praktisk information och tips
Fare riferimento
a ulteriori informazioni e consigli
Tillåtet
Vietato
Autorizzato
Förbjudet
Note that the German version of this manual is
the master from which translations derive. In case
of any discrepancy, the binding version is the
German text.
Les traductions dans ce manuel sont basées sur
sa version allemande. Ainsi le texte en allemand
fera référence en cas de divergence.
Es wird darauf hingewiesen, dass das deutsche
Original dieser Bedienungsanleitung als Vorlage
für alle Übersetzungen gilt. Bei eventuellen Abweichungen ist der deutsche Text bindend.
We would be pleased to answer your questions
or listen to your suggestions. We do, of course,
provide support in case of technical problems.
Please call directly your approved EMS repair
center or your dealer.
Nous sommes à votre entière disposition pour
répondre à vos questions et nous sommes
à l’écoute de vos éventuelles suggestions.
Naturellement, nous vous proposons un soutien
technique en cas de problèmes. Veuillez contacter
votre centre de réparation agrée EMS ou votre
distributeur.
Wir stehen Ihnen gerne für Fragen zur Verfügung.
Bei Problemen bieten wir Ihnen selbstverständlich
technische Unterstützung an. Wenden Sie sich
bitte an ein EMS-genehmigtes Reparaturzentrum
oder Ihren Händler.
We wish you lots of success!
Avec nos meilleurs vœux de succès!
EMS
EMS
Wir wünschen Ihnen viel Erfolg!
EMS
Nótese que la versión en alemán de este manual
es la original de la que parten las traducciones.
En caso de discrepancias, la versión vinculante
es la alemana.
La versione tedesco di questo manuale è la
versione master da cui deriva la traduzione. In
caso di discrepanze fa fede il testo in tedesco.
Observera att den tysk versionen av handboken
är originalet som övriga språk har översatts från.
Vid eventuella avvikelser gäller den tyska texten.
Estaremos encantados de contestar a sus
preguntas o escuchar sus sugerencias. Por
supuesto, proporcionamos asistencia en caso de
problemas técnicos. Póngase en contacto con su
centro de reparaciones autorizado o distribuidor
de EMS.
A tutte le domande verrà data risposta e i consigli
sono ben accetti. Ovviamente forniamo assistenza
in caso di problemi tecnici. Rivolgersi direttamente
al centro di assistenza EMS autorizzato o al
proprio rivenditore.
Vi svarar gärna på frågor och tar emot förslag.
Vi ger självklart support vid tekniska problem.
Kontakta ditt godkända EMS-reparationscenter
eller din återförsäljare.
¡Le deseamos mucho éxito!
EMS
Auguriamo successo a tutti!
EMS
Lycka till!
EMS
CONTENTS
SOMMAIRE
INHALT
Installation ........................................................ 2
Power connection......................................... 2
Connecting the foot pedal ............................ 4
Assembly instructions for the Swiss
PiezoClast mounting kit (option) .................. 6
Operating the unit .......................................... 10
Checks........................................................ 10
Preparing the handpiece ............................ 12
Connecting the handpiece ......................... 16
Selecting shock wave intensity .................. 18
Setting the shock wave frequency ............. 20
Presetting the total number of shock waves
to be applied ............................................... 22
Treatment sequence .................................. 24
Foot pedal .................................................. 26
Evaluation of shock wave therapy ............. 28
Operating principle of the PiezoClast
handpiece ................................................... 30
Treatment sequence using the handpiece. 32
Trigger point shock wave therapy (TPST) ..... 37
Indications .................................................. 37
Orthopedics (ESWT) ..................................... 38
Positioning examples ................................. 38
Recommendation for shock waves therapy
(ESWT) ....................................................... 40
Reprocessing ................................................. 42
Reprocessing of the device ....................... 42
Reprocessing of the foot pedal .................. 42
Reprocessing of the handpiece ................. 44
Installation ........................................................ 2
Connexion électrique ................................... 2
Connexion de la pédale ............................... 4
Instruction de montage pour le kit de
fixation Swiss PiezoClast (option)................ 6
................................... 10
Contrôles .................................................... 10
Préparation de la pièce à main .................. 12
Connexion de la pièce à main.................... 16
Réglage de l’intensité des ondes de choc . 18
Réglage de la fréquence d’impulsions ....... 20
Présélection du nombre total
^
' ...................... 22
Déroulement du traitement ........................ 24
Pédale de commande ................................ 26
Evaluation du traitement par ondes de
choc ............................................................ 28
Principe de fonctionnement de la pièce à
main ............................................................ 30
Déroulement du traitement
avec la pièce à main................................... 32
Thérapie des trigger points par ondes de choc
(TPST) ............................................................ 37
Indications .................................................. 37
Orthopédie (ESWT) ....................................... 38
Postures recommandées ........................... 38
Recommandation pour le traitement par
ondes de chocs (ESWT) ............................ 40
Retraitement................................................... 42
`
*
.......................... 42
Retraitement de la pédale .......................... 42
Retraitement de la pièce à main ................ 44
Installieren ........................................................ 2
Stromanschluss............................................ 2
Aufstecken des Fußschalters....................... 4
Montageanweisung Befestigungssatz für
Swiss PiezoClast (optional) ......................... 6
Bedienen des Gerätes ................................... 10
Kontrollen ................................................... 10
Vorbereiten des Handstücks ...................... 12
Aufstecken des Handstücks....................... 16
Stoßwellenintensität einstellen .................. 18
Stosswellenfrequenz einstellen ................. 20
Voreinstellung der Anzahl der zu
applizierenden Stoßwellen ......................... 22
Behandlungsablauf .................................... 24
Fußschalter ................................................ 26
Auswertung der Stoßwellentherapie .......... 28
Funktionsprinzip des PiezoClast
Handstücks................................................. 30
Behandlungsablauf mit dem Handstück .... 32
Trigger-Punkt-Stoßwellen- Therapie (TPST) 37
Indikationen ................................................ 37
Orthopädie (ESWT) ....................................... 38
Lagerungsbeispiele .................................... 38
Empfohlene für Stoßwellen-Therapie
(ESWT) ....................................................... 40
Aufbereitung................................................... 42
Aufbereitung des Geräts ............................ 42
Aufbereitung des Fußschalters .................. 42
Aufbereitung des Handstücks .................... 44
INDICE
INDICE
INNEHÅLL
Instalación ........................................................ 3
Conexión a la red eléctrica .......................... 3
Suministro del pedal..................................... 5
Instrucciones de montaje por el juego de
fijación para el Swiss PiezoClast (opción) ... 7
Utilización del aparato ................................... 11
Controles .................................................... 11
Preparación´del mango.............................. 13
Conexión del mango .................................. 17
Graduar la intensidad de las ondas de
choque ........................................................ 19
Graduar la frecuencia de pulsos ................ 21
Preseleccionar la suma de ondas de
choque que se van a aplicar ...................... 23
Fases del tratamiento................................. 25
Pedal .......................................................... 27
Evaluación de la terapia con ondas de
choque ........................................................ 29
Principio de funcionamiento del mango .... 31
Fases del tratamiento con el mango.......... 33
Terapia de trigger points por ondas de choque
(TPST) ............................................................ 37
Indicaciones ............................................... 37
Ortopedia (ESWT) ......................................... 39
Posturas recomendadas ............................ 39
Recomendación por el tratamiento para
ondas de choque (ESWT).......................... 41
Reprocesamiento ........................................... 43
Reprocesamiento del equipo ..................... 43
Reprocesamiento del pedal ....................... 43
Reprocesamiento del mango ..................... 45
Installazione ..................................................... 3
Collegamento energia .................................. 3
Fornitura del pedale ..................................... 5
Istruzioni per il montaggio set di fissaggio
per Swiss PiezoClast (opzionale) ................ 7
.................................................. 11
Controlli ...................................................... 11
Preparativi del manipolo ............................ 13
Connessione del manipolo ........................ 17
Regolare l’intensità dell’onda d’urto ........... 19
Regolare la frequenza d’impulso ............... 21
Preimpostazione dell’insieme di onde
d’urto da applicare...................................... 23
Ciclo di trattamento .................................... 25
Pedale ........................................................ 27
Valutazione della terapia ad onde d’urto ... 29
Principio di funzionamento del manipolo ... 31
Ciclo di trattamento con il manipolo........... 33
Terapia ad onde d’urto su trigger point
(TPST) ............................................................ 37
Indicazioni .................................................. 37
Indikationer ................................................. 37
Ortopedico (ESWT) ....................................... 39
Esempi di posizione ................................... 39
Indicazioni per la terapia ad onde d’urto
(ESWT) ....................................................... 41
Ritrattamento ................................................. 43
Ritrattamento del apparecchio................... 43
Ritrattamento del pedale ............................ 43
Ritrattamento del manipolo ........................ 45
Installation ........................................................ 3
Anslutning till strömkälla .............................. 3
Ansluta en pedal .......................................... 5
Monteringsanvisning för fastgöringssats
för Swiss PiezoClast (tillval) ......................... 7
Använda enheten ........................................... 11
Kontroller .................................................... 11
Förberedelse av handstycke ...................... 13
Anslutning av handstycksslangen ............. 17
Inställning av tryckvågsintensitet ............... 19
Inställning av pulsfrekvens ......................... 21
Förinställning av antalet tryckvågor
som ska ges ............................................... 23
Behandling ................................................. 23
Fotpedal ..................................................... 27
Utvärdering av chockvågsterapin .............. 29
Funktionsprincip ......................................... 31
Behandlingsförlopp med handstyck........... 33
Triggerpunktbehandling med tryckvågor
(TPST) ............................................................ 37
Ortopedi (ESWT) ........................................... 39
Placeringsexempel ..................................... 39
Rekommendation för Triggerpunktbehandling
(ESWT) ....................................................... 41
Återanvändas ................................................. 43
Återbearbetning av apparaten ................... 43
Återbearbetning av fotpedal....................... 43
Återbearbetning av handstick .................... 45
Maintenance................................................... 48
Maintenance intervals ................................ 48
Fuses .......................................................... 50
Checking the output power of the
handpiece ................................................... 52
Display of software version ........................ 56
Safety precautions ......................................... 58
Storing the product ........................................ 62
Product disposal ............................................ 64
Warranty......................................................... 64
Accessories.................................................... 64
EMS Service .................................................. 66
Symbols ......................................................... 68
Technical data ................................................ 76
Electromagnetic compatibility ........................ 82
Troubleshooting ............................................. 84
Maintenance................................................... 48
X$
................................. 48
Fusibles ...................................................... 50
Vérification de l’énergie de
la pièce à main ........................................... 52
Affichage de la version du logiciel ............. 56
Remarques de sécurité .................................. 58
Rangement du produit ................................... 62
Recyclage ...................................................... 64
Garantie ......................................................... 64
Accessoires.................................................... 64
Service EMS .................................................. 66
Symboles ....................................................... 68
Caractéristiques techniques .......................... 77
Compatibilité electromagnetique ................... 82
]
.............. 85
Wartung .......................................................... 48
Wartungsintervalle ..................................... 48
Sicherungen ............................................... 50
Überprüfung des Handstücks .................... 52
Anzeige der Software-Version ................... 56
Sicherheitshinweise ....................................... 58
Aufbewahren Des Produktes ......................... 62
Entsorgen des produktes ............................... 64
Garantie ......................................................... 64
Zubehör .......................................................... 64
EMS-service .................................................. 66
Symbole ......................................................... 68
Technische daten ........................................... 78
Elektromagnetische verträglichkeit ............... 82
Fehlerbehebung ............................................. 86
Mantenimiento................................................ 49
Intervalos de mantenimiento ...................... 49
Fusibles ...................................................... 51
Comprobar la energía del mango .............. 53
Indicar la versión de software .................... 57
Precauciones de seguridad ........................... 59
Conservación del producto ............................ 63
Eliminación del producto................................ 65
Garantía ......................................................... 65
Accesorios ..................................................... 65
Servicio técnico EMS ..................................... 67
Símbolos ........................................................ 69
&
............................. 79
Compatibilidad electromagnética .................. 83
Medidas a adoptar en caso de incidentes ..... 87
Manutenzione................................................. 49
Intervalli di manutenzione .......................... 49
Fusibili ........................................................ 51
Verifica dell’energia del manipolo .............. 53
Display della versione software ................. 57
Osservazioni sulla sicurezza ......................... 59
Conservazione del prodotto .......................... 63
Smaltimento del prodotto ............................... 65
Garanzia......................................................... 65
Accessori ....................................................... 65
Servizio assistenza EMS ............................... 67
Simboli ........................................................... 69
Dati tecnici...................................................... 80
Compatibilità elettromagnetica ...................... 83
]
.......... 88
Underhåll ........................................................ 49
Underhållsintervall ..................................... 49
Säkringar .................................................... 51
Kontroll av applikatorns kapacitet .............. 53
Visning av programvaruversion ................. 57
Säkerhetsföreskrifter ..................................... 59
Förvaring av produkten .................................. 63
Kassering av produkten ................................. 65
Garanti ........................................................... 65
Tillbehör ......................................................... 65
EMS-Service .................................................. 67
Symboler ........................................................ 69
Tekniska data ................................................. 81
Elektromagnetisk kompatibilitet ..................... 83
Felsökning ...................................................... 89
INSTALLATION
INSTALLATION
INSTALLIEREN
Power connection
Connexion électrique
Stromanschluss
100-240 V AC / 50-60 Hz
To prevent damage to the unit, check that
its rated voltage corresponds to the local line
voltage.
&$ **
$&'
*
/
à la tension secteur de votre cabinet.
Use the unit only in a FI protected mains supply
(FI = Residual current protection).
'*
protégée par un interrupteur différentiel
(protection FI).
When applicable connect the equipotential
plug to other medical devices used.
The equipotential connector of the device can
be connected to the potential equalization point
of the room using a potential equalization cable.
2
Si applicable, brancher la prise équipotentielle aux autres appareils médicaux utilisés.
Réaliser la compensation du potentiel de l’appareil
en le raccordant à l’aide d’un conducteur d’équipotentialité à la compensation du potentiel du local.
Die Nennspannung des Gerätes muss
mit der örtlichen Versorgungsspannung übereinstimmen. Das Gerät kann sonst beschädigt
werden.
Schliessen Sie das Gerät nur über einen
FI-Schalter (Fehlerstromschutz) an.
Verbinden Sie gegebenenfalls den Potentialausgleichsstecker mit anderen verwendeten
medizinischen Geräten.
Ein Potentialausgleich des Gerätes kann über ein
Potentialausgleichskabel mit dem Potentialausgleich des Raumes hergestellt werden.
INSTALACIÓN
INSTALLAZIONE
INSTALLATION
Conexión a la red eléctrica
Collegamento energia
Anslutning till strömkälla
Compruebe que la tensión nominal
coincide con la tensión de la red de su consulta,
puesto que de lo contrario el aparato puede sufrir
desperfectos.
La tensione nominale dell’apparecchio
deve essere corrispondente alla tensione di
alimentazione del vostro studio. In caso contrario
$
^
För att undvika skador på apparaten,
kontrollera att dess märkspänning stämmer med
den lokala spänningen.
Conecte el aparato a una toma de corriente
protegida por un interruptor diferencial
(protección FI).
Collegare l’apparecchio unicamente ad una presa
protetta da un interruttore differenziale (protezione FI).
Conecte el enchufe equipotencial a otros
dispositivos médicos cuando corresponda.
Dove è applicabile collegate la spina
equipotenziale agli altri dispositivi medicali usati.
El conector para la compensación del potencial
del aparato se puede conectar a la conexión
equipotencial de la sala utilizando un cable
equipotencial.
La compensazione del potenziale dell’apparecchio può essere ricavata dalla compensazione
del potenziale del locale interessato utilizzando un
cavo di compensazione del potenziale.
Anslut apparaten till eluttag med jordfelsbrytare.
Anslut i förekommande fall den ekvipotentiella kontakten till annan medicinsk apparat som
används.
Potentialutjämning för apparaten kan åstadkommas genom att en potentialutjämningskabel
kopplas till omgivningen.
3
Connecting the foot pedal
Connexion de la pédale
Aufstecken des Fußschalters
Connect the connector of the foot pedal to the
socket and lock it.
Brancher le connecteur de la pédale dans la prise
prévue à cet effet et visser.
Stecker des Fußschalters in die Anschlußbuchse
einstecken und festschrauben.
4
Suministro del pedal
Fornitura del pedale
Ansluta en pedal
Enchufar el enchufe del interruptor de pedal en el
correspondiente conector y atornillarlo.
X
/
pedale e avvitate.
Sätt fotkontaktens anslutningskontakt i uttaget för
fotkontakten och skruva fast den.
5
Assembly instructions for the Swiss
'(!+
Instruction de montage pour le kit de
)*!!'(!
Montageanweisung Befestigungssatz
%&!!'(!
1x
1x
1x
2x
M5x10
6
Instrucciones de montaje por el juego de
)01!!'(!1
.!'+!$)!!
!!'(!'
Monteringsanvisning för fastgöringssats
%/!!'(!
1
2
7
5
3
6
4
8
7
9
OPERATING THE UNIT
UTILISATION DE L'APPAREIL
BEDIENEN DES GERÄTES
Checks
Contrôles
Kontrollen
Run through the checks before and after
each use.
Procéder aux contrôles décrits ci-dessous
avant et après tout emploi.
Die Kontrollen vor und nach jeder
Anwendung durchführen.
Do not use the products if it is damaged or incomplete or has loose parts.
Ne plus utiliser de produits qui présentent des
dommages et/ou des pièces manquantes ou
détachées.
Produkte, die beschädigt oder unvollständig sind
bzw. lose Teile aufweisen, nicht mehr verwenden.
Return damaged products together with any loose
parts for repair.
Renvoyer les produits défectueux avec les pièces
détachées pour réparation.
Do not attempt to do any repairs yourself.
Ne pas procéder à des tentatives de réparation.
Visual check
Contrôle visuel
Check the device and the accessories for damage,
loose or missing parts, hygiene and completeness.
&% ' présentent ni défectuosités, ni pièces détachées
ou manquantes, ni encrassement.
Gerät und Zubehör auf Beschädigungen, lose
oder fehlende Teile, hygienischen Zustand und
Vollständigkeit überprüfen.
&&
%
*
Netzanschlussleitungen auf Beschädigungen
überprüfen.
Check the power cables for damage.
Any inscriptions, lettering or labeling necessary for
the safe intended use must be legible.
]
/
leading to wrong handling or reprocessing must
be reinstated.
Check the contact surface of the handpiece for
damage.
Check the handpiece as required by the corresponding instruction in the chapter "Maintenance".
Function check
Connect the handpiece to the unit and switch on
the power switch of the device.
The device runs through a self-test.
If no errors are displayed, the Swiss PiezoClast
and the connected handpiece are operational.
&'*
'
&saires à un emploi sûr et conforme à la destination
sont lisibles.
`*&
//&*
'
'
*
lation ou un retraitement inadéquats.
&&
%
%
pièce à main.
Procéder au contrôle de la pièce à main en suivant
les instructions portant sur la pièce à main dans le
chapitre "Maintenance".
Essai fonctionnel
Raccorder la pièce à main à l’appareil et mettre
l’appareil en service en actionnant l’interrupteur
principal.
%^&Clast et la pièce à main connectée sont prêts à
fonctionner.
10
Beschädigte Produkte mit den losen Teilen zur
Reparatur einsenden.
Keine eigenen Reparaturversuche vornehmen.
Sichtkontrolle
Aufschriften und Kennzeichnungen, die zum
sicheren, bestimmungsgemäßen Gebrauch erforderlich sind, müssen lesbar sein.
Fehlende oder nicht mehr lesbare Aufschriften
und Kennzeichnungen, die zu Fehlern in der
Handhabung oder Aufbereitung führen, müssen
wieder hergestellt werden.
Kontaktfläche des Handstücks auf Beschädigungen überprüfen.
Kontrolle des Handstücks entsprechend der
Gebrauchsanweisung des Handstücks durchführen im Kapitel "Wartung".
Funktionskontrolle
Handstück am Gerät anschließen und Gerät am
Netzschalter einschalten.
Das Gerät führt einen Selbsttest durch.
Wenn keine Fehler angezeigt werden, ist der
Swiss PiezoClast und das angeschlossene
Handstück betriebsbereit.
UTILIZACIÓN DEL APARATO
USO DELL'UNITÀ
ANVÄNDA ENHETEN
Controles
Controlli
Kontroller
Los controles se han de llevar a cabo antes
y después de cada aplicación.
Eseguite i controlli necessari prima e dopo
ogni impiego.
Kontrollerna ska genomföras före och efter
varje användning.
No vuelva a utilizar los productos deteriorados,
incompletos o con piezas sueltas.
Non utilizzate più prodotti danneggiati, incompleti o
che presentano parti staccate.
Använd inte längre apparaten om den är skadad,
saknar delar eller har lösa delar.
Envíe los productos deteriorados junto con las
piezas sueltas para reparación.
Inviate per la riparazione i prodotti danneggiati con
le parti staccate.
Skicka skadad produkt tillsammans med lösa
delar för reparation.
Absténgase de repararlos.
Non cercate di eseguire da soli i lavori di riparazione.
Företa inga egna reparationsförsök.
Examen visual
Controllo visivo
Examinar el aparato incluidos los accesorios en
términos de daños, piezas sueltas o faltantes,
higiene e integridad.
Verificate se l’apparecchio e i relativi accessori
risultano danneggiati, se presentano parti staccate
o mancanti. Verificatene lo stato di pulizia e la
completezza.
Kontrollera att apparat och tillbehör inte har några
skador, lösa eller saknade delar, jämte hygieniskt
skick och skick i övrigt.
Comprobar los cables de conexión a la red en
términos de daños.
$
$
collegamento di rete.
Kontrollera att nätanslutningen inte har några
skador.
Los rótulos y las marcaciones necesarios para
!
=
^
estar legibles.
Le scritte e i contrassegni che sono necessari per un
impiego sicuro e conforme alle disposizioni devono
essere leggibili.
Kontrollera att etiketter och märkning som krävs
för att säkert kunna återanvändas apparaten är
läsliga.
Se han de restablecer todos aquellos rótulos y
marcaciones faltantes e ilegibles que llevan a
errores en el manejo y el retratamiento.
È necessario rifare le scritte e i contrassegni
mancanti o non più leggibili, che possono provocare
errori nella manipolazione o nel riprocessamento
dell’apparecchio.
Etiketter och märkning som inte längre är läsbara
och som kan leda till felaktigt handhavande eller
förberedelser måste bytas.
*/
*
para ver si presenta daños.
Controlar el mango conforme a las instrucciones
para el uso del correspondiente mango en el
capitulo "Mantenimiento".
$
*
Okulär kontroll
Kontrollera att applikatorns yta inte har några
skador.
Controllate la manipolo in base a quanto indicato
$
*
capitolo "Manutenzione".
Utför en kontroll av applikatorn i överensstämmelse med bruksanvisningen för denna i kapitlet
"Underhåll".
Control de funcionamiento
Controllo funzionale
Funktionskontroll
Conectar el mango al aparato y encender éste
con el interruptor de la red.
Collegate il manipolo all’apparecchio e l’apparecchio
all’interruttore di rete.
Anslut applikatorn till apparaten och slå på strömbrytaren.
El aparato realiza una autocomprobación.
L’apparecchio esegue un autotest.
Apparaten utför automatiskt ett självtest.
Si no se indica ningún error, el Swiss PiezoClast
y el mango están listos para el funcionamiento.
Se non sono indicati errori, lo Swiss PiezoClast e
*
^
Om inga fel signaleras är Swiss PiezoClast och
den anslutna applikatorn klara att användas.
11
Preparing the handpiece
Préparation de la pièce à main
Vorbereiten des Handstücks
Installing the gel pads
Mise en place du gel pad
Gelpad aufsetzen
1
2
3
=
%
on patients. Follow the gel manufacturer’s instructions.
N’utiliser que les gels de contact qui ont
&&&&
Observer les instructions du fabricant du gel.
Nur für Patientenanwendung zugelassene
Ultraschallgels verwenden. Die Angaben des
Gelherstellers beachten.
Installing the gel pad:
Mise en place du gel pad:
Gelpad aufsetzen:
# =
%
*%
to the center of the contact surface of the
handpiece.
# Put on the gel pad avoiding air bubbles.
12
# ''
&%
échographique au milieu de la surface de
contact de la pièce à main.
# Poser le gel pad en évitant toute bulles d’air.
# %][
/^
Handstücks ausreichend Ultraschallgel
auftragen.
# Gelpad luftblasenfrei aufsetzen.
Preparación´del mango
Preparativi del manipolo
Förberedelse av handstycke
Colocar la almohadilla de gel
Come collocare il gelpad
Montera gelplattan
4
Utilice solamente geles para ultrasonido
validados para el empleo en pacientes. Observe
las indicaciones del fabricante del gel.
Utilizzate esclusivamente il gel per
ultrasuoni autorizzato per l’impiego sui pazienti.
Seguite le indicazioni del fabbricante del gel.
Colocar la almohadilla de gel:
Come collocare il gelpad:
#
contacto del mango.
# Colocar la almohadilla de gel de tal manera
que no haya burbujas de aire algunas.
# contatto del manipolo applicate una quantità
%
# Collocate il gelpad evitando la formazione di
/
Använd endast ultraljudgel tillåtna för
patientbruk. Beakta geltillverkarens anvisningar.
Montera gelplattan:
# Applicera tillräckligt med ultraljudgel mitt på
applikatorns kontaktyta.
# Montera gelplattan utan luftblåsor.
13
# Push down the gel pad while moving it back
and forth slightly until the ultrasound gel is
slightly squeezed out around the circumference of the pad.
# Align the marking to install the twist-lock ring.
# Turn clockwise to lock.
# Appuyer sur le gel pad en le tournant dans un
sens et dans l’autre jusqu’à ce que le gel de
contact ressorte légèrement tout autour du
bord du gel pad.
# Mettre la bague à baïonnette en place.
# Verrouiller en tournant dans le sens des
aiguilles d’une montre.
# Das Gelpad andrücken und dabei leicht hinund herdrehen, bis rund um den Gelpadrand
das Ultraschallgel leicht herausquillt.
# Bajonettring aufsetzen und im Uhrzeigersinn
verriegeln.
# Darauf achten, dass beim Aufsetzen die
Markierungspunkte übereinstimmen.
Removing the gel pad:
# Turn the twist-lock ring counter-clockwise
and remove it.
# Before lifting the twist-lock ring, make sure
that the dots are aligned.
# Remove the gel pad.
# Reprocess the gel pad and the handpiece in
accordance with Chapter Reprocessing.
14
Enlèvement du gel pad:
# Déverrouiller la bague à baïonnette en
tournant dans le sens inverse des aiguilles
d’une montre et la retirer.
# Veiller pour ceci à ce que les points de
repère coïncident au moment où la bague à
baïonnette est soulevée.
# Enlever le gel pad.
# Traiter le gel pad et la pièce à main conformément aux instructions du chapitre "Retraitement".
Gelpad entfernen:
# Bajonettring gegen den Uhrzeigersinn
entriegeln und entfernen.
# Darauf achten, dass beim Abheben des
Bajonettrings die Markierungspunkte
übereinstimmen.
# Gelpad entfernen.
# Das Gelpad und die Therapiequelle
entsprechend Abschnitt "Aufbereitung"
handhaben.
# Apretar la almohadilla de gel girándola
levemente en ambos sentidos hasta que un
poco de gel salga por toda la circunferencia
de la almohadilla.
# Colocar el anillo de bayoneta.
# Inmovilizarlo girando en el sentido de las
agujas del reloj cuidando de que coincidan
los puntos de orientación.
# Premete il gelpad e ruotate lievemente avanti
^
fuoriesce attorno al bordo del gelpad.
# Collocate l’anello a baionetta e bloccatelo
ruotando in senso orario.
# Quando collocate l’anello, fate attenzione ai
punti di marcatura. Devono coincidere.
Come togliere il gelpad:
Quitar la almohadilla de gel:
# Desbloquear el anillo de bayoneta girando
en sentido contrario a las agujas del reloj y
quitarlo.
# Al levantar el anillo de bayoneta, cerciórese
de que coincidan los puntos de orientación.
# Quitar la almohadilla de gel.
# Someter la almohadilla de gel y el mango a la
preparación descrita en el capítulo "Reprocesamiento".
# Sbloccate l’anello a baionetta ruotando in
senso antiorario e toglietelo.
# Quando sollevate l’anello a baionetta, fate
attenzione ai punti di marcatura. Devono
coincidere.
# Togliete il gelpad.
#
*
quanto indicato nel paragrafo "Ritrattamento".
# Tryck på gelplattan och vrid den samtidigt lätt
fram och tillbaka så att ultraljudgelet tränger
ut litet längs kanten av gelplattan.
# Montera bajonettringen och lås den genom
att vrida den medurs.
# Var noga med att markeringspunkterna
överensstämmer.
Ta av gelplattan:
# Lossa bajonettringen genom att vrida den
moturs och avlägsna den.
# Var noga med att markeringspunkterna
stämmer överens när du tar av ringen.
# Avlägsna gelplattan.
# Gör i ordning gelplatta och applikator enligt
anvisningarna i avsnitt "Återbearbetning".
15
Connecting the handpiece
Connexion de la pièce à main
Aufstecken des Handstücks
Do not use the product if it is damaged or
incomplete or has loose parts.
Ne plus utiliser de produits qui présentent
des dommages et/ou des pièces manquantes ou
détachées.
Produkte, die beschädigt oder unvollständig sind bzw. lose Teile aufweisen, nicht mehr
verwenden.
Renvoyer les produits défectueux avec les pièces
détachées pour réparation. Ne pas procéder à des
tentatives de réparation.
Beschädigte Produkte mit den losen Teilen zur
Reparatur einsenden. Keine eigenen Reparaturversuche vornehmen.
Veiller à ce que le repère du connecteur et
celui de la prise coïncident.
Darauf achten, dass die Markierung am
Stecker und an der Buchse übereinstimmen.
Il ne faut pas connecter ou retirer le
connecteur de la pièce à main avant que l’appareil
ne soit éteint.
Der Stecker des Handstücks darf nur bei
ausgeschaltetem Gerät herausgezogen bzw.
eingesteckt werden.
Return damaged product together with any loose
parts for repair. Do not attempt to do any repairs
yourself.
Make sure that the markings on the plug
and socket are aligned.
Make sure to only connect or disconnect
the handpiece connector when the device is
switched off.
16
Conexión del mango
Connessione del manipolo
Anslutning av handstycksslangen
I
O
No vuelva a utilizar los productos deteriorados, incompletos o con piezas sueltas.
Non utilizzate più prodotti danneggiati,
incompleti o che presentano parti staccate.
Använd inte längre produkt som är skadad,
saknar delar eller har lösa delar.
Envíe los productos deteriorados junto con las
piezas sueltas para reparación. Absténgase de
repararlos.
Inviate per la riparazione i prodotti danneggiati
con le parti staccate. Non cercate di eseguire da
soli i lavori di riparazione.
Skicka skadad produkt tillsammans med lösa delar
för reparation. Företa inga egna reparationsförsök.
Cuidar de que la marca en el enchufe
coincida con la marca en el conector.
Fate attenzione alla marcatura sulla spina
e a quella sulla boccola. Devono coincidere.
Antes de sacar o enchufar el enchufe del
mango se ha de desconectar el aparato.
X
*
esclusivamente quando l’apparecchio è
scollegato.
Se till att markeringarna på anslutningskontakten och uttaget stämmer överens.
Applikatorns anslutningskontakt får bara
sättas i och dras ur apparaten när denna är
avstängd.
17
Selecting shock wave intensity
Réglage de l’intensité des ondes de
choc
1
Stoßwellenintensität einstellen
2
2 seconds
1. Shock wave intensity 1 to 20:
1. Régler l’intensité des ondes de choc entre 1 et 20 :
1. Stoßwellenintensität 1 bis 20:
Use the shock wave intensity "v" (reduce) and
shock wave intensity "^" (increase) buttons to set
the shock wave intensity.
Le niveau de l’intensité des ondes de choc peut être
&&
^Z$Z;&Y&
^ZZ;
*Y&
^
Mit den Tasten Stoßwellenintensität "v" (verringern)
und Stoßwellenintensität "^" (erhöhen) können die
Intensitätsstufen eingestellt werden.
Ajuster l’intensité des sous-niveaux 1 :
Die Intensitäts-Anpassungsstufen 0.0 bis 0.9
ermöglichen Einstellungen für z.B. schmerzemp^/<^
Sublevels of intensity 1:
The intensity adaptation levels "0.0" to "0.9" allow
settings for pain-sensitive or otherwise sensitive
application areas.
2. Activating the sublevels:
Press and hold the shock wave intensity "v"
(reduce) button for approx. 2 seconds until shock
wave intensity "0.0" is displayed.
The shock wave intensity can be adjusted between
"0.0" and "0.9".
3. Deactivating the sublevels:
Press and hold the "Reset" button for approx. 5
seconds until shock wave intensity "0" is displayed.
18
En présence d’une zone de traitement particulièrement sensible à la douleur, l’intensité de l’onde de
choc du niveau 1 peut être ajustée plus précisément
entre "0.0" et "0.9".
2. Activer les sous-niveaux :
^Z$Z;&Y&
de choc pendant environ 2 secs jusqu’à ce que
&ZZ
%^&
L’intensité de l’onde de choc peut alors être ajustée
entre "0.0" et "0.9".
3. Désactiver les sous-niveaux :
Actionner la touche "Reset" pendant environ 5 secs
''&ZZ
%^&
Unterstufen der Intensität 1:
2. Einschalten der Unterstufen:
Die Taste Stoßwellenintensität "v" (verringern) ca.
2 Sekunden betätigen, bis die Anzeige Stoßwellenintensität "0.0" anzeigt.
Die Stoßwellenintensität kann zwischen 0.0 und
0.9 eingestellt werden.
3. Ausschalten der Unterstufen:
Die Taste "Reset" ca. 2 Sekunden betätigen, bis
die Anzeige Stoßwellenintensität "0" anzeigt.
Graduar la intensidad de las ondas de
choque
Regolare l’intensità dell’onda d’urto
Inställning av tryckvågsintensitet
R
3
2 seconds
1. Niveles de intensidad de ondas de choque de 1 a 20:
1. Intensità dell’onda d’urto da 1 a 20:
1. Tryckvågsintensitet 1-20:
Los niveles de intensidad se pueden graduar con
las teclas "v" (reducir) y "^" (aumentar).
Potete regolare il livello d’intensità dell’onda d’urto
con i tasti "v" (diminuire) e "^" (aumentare).
Med knapparna "v" (minska) resp. "^" (öka) tryckvågsintensiteten kan intensitetsstegen ställas in.
Subniveles del nivel de intensidad 1:
Sottolivelli d’intensità 1:
Lägre intensitetsnivå än 1:
Los niveles de intensidad de "0.0" a "0.9" permiten
un ajuste de precisión, por ejemplo, en zonas de
tratamiento sensibles al dolor.
I livelli di adattamento dell’intensità da 0.0 a 0.9
consentono delle regolazioni per zone di trattamento particolarmente sensibili al dolore.
Intensitetsanpassningsstegen "0.0-0.9" möjliggör
inställningar för t.ex. smärtkänsliga/känsliga
behandlingszoner.
2. Activar los subniveles:
2. Inserimento dei sottilivelli:
2. Inkoppling av lägre nivåer:
Pulsar unos dos segundos la tecla "v" (reducir)
hasta que la intensidad indicada sea de "0.0".
Azionate per circa 2 secondi il tasto d’intensità
Z$Z;*Y
'
display dell’intensità dell’onda d’urto non indica
il valore "0.0".
Tryck under ca två sekunder på knappen v
(minska) tryckvågsintensitet, tills displayen visar
tryckvågsintensitet "0.0".
La intensidad de las ondas de choque se puede
graduar entre "0.0" y "0.9".
3. Desactivar los subniveles:
Pulsar unos dos segundos la tecla "Reset" hasta
que la intensidad indicada sea de "0".
Potete regolare l’intensità dell’onda d’urto da "0.0"
a "0.9".
3. Disinserimento dei sottilivelli:
Z`Z
a quando il display dell’intensità dell’onda d’urto
non indica il valore "0".
Tryckvågsintensiteten kan nu ställas in mellan
"0.0" och "0.9".
3. Urkoppling av lägre nivåer:
Tryck i ca två sekunder in knappen "Reset", tills
displayen visar tryckvågsintensitet "0".
19
Setting the shock wave frequency
Réglage de la fréquence d’impulsions
Stosswellenfrequenz einstellen
The shock wave frequency "v" (reduce) and "^"
(increase) buttons serve to set the required shock
wave frequency.
$
%&'*
&&
^Z$Z;réduire) la fréquence
* ZZ ;
*Y %&'
*
Mit den Tasten Stosswellenfrequenz "v"
(verringern) und Stosswellenfrequenz "^"
(erhöhen) kann die gewünschte Stosswellenfrequenz eingestellt werden.
20
Graduar la frecuencia de pulsos
Regolare la frequenza d’impulso
Inställning av pulsfrekvens
La frecuencia de pulsos deseada se puede seleccionar con las teclas "v" (reducir) y "^" (aumentar).
Potete regolare la frequenza d’impulso desiderata
con il tasti di frequenza d’impulso "v" (diminuire)
e "^" (aumentare).
Med knapparna "v" (minska) resp. "^" (öka)
pulsfrekvensen kan önskad pulsfrekvens ställas
in.
21
Presetting the total number of shock
waves to be applied
Présélection du nombre total
d'ondes de choc à appliquer
Voreinstellung der Anzahl der zu
applizierenden Stoßwellen
Preselection:
Présélection:
Vorwahl:
The shock wave counter counts down to "0"
starting from a preset number of shock waves.
Le compteur des ondes de choc décompte à partir
du nombre total des ondes de choc présélectionné
jusqu’à "0".
Der Stoßwellenzähler zählt eine voreingestellte
Anzahl von Stoßwellen abwärts bis "0".
Then the preset value is displayed again blinking.
Reset:
To set a new value press "Reset" which resets
all values to "0" (as long as a value is set under
shock wave "intensity", "Preselection" is inhibited).
Presetting the shock waves:
Keep actuating the "Preselection" button until the
required number of shock waves is reached. In
steps of 500, a minimum of 500 and a maximum
of 4,000 shock waves can be preset.
For presetting the shock waves, the shock wave
counter must be on "0".
Reset:
Resetting all presettings to "0":
Press the "Reset" button.
La valeur présélectionnée clignote encore une
fois.
Reset:
Pour régler une autre valeur, appuyer sur "Reset"
*$
ZZ;
'$
&^&&Zlection" reste bloqué).
Présélectionner les ondes de choc:
Appuyer sur le bouton "Preselection" autant de
%'&
$
*/
^^
&
minimum de 500 et un maximum de 4000 ondes
de chocs peut être choisi.
Pour pouvoir présélectionner les ondes de choc,
*^&&ZZ
Reset:
Remettre toutes les valeurs présélectionnées
à "0".
Actionner la touche "Reset".
22
Danach wird der voreingestellte Wert nochmals
blinkend angezeigt.
Reset:
Um einen neuen Wert einzustellen, "Reset"
drücken, dann werden alle Werte auf "0" gestellt
(solange ein Wert bei der Stoßwellenintensität
eingestellt ist, wird "Preselection" gesperrt).
Anzahl der Stoßwellen voreinstellen:
Die Taste "Preselection" so oft betätigen, bis die
gewünschte Stoßwellenanzahl erreicht ist. In 500
er Schritten können minimal 500 und maximal
4000 Stoßwellen voreingestellt werden.
Zur Stoßwellen-Voreinstellung muss der Stoßwellenzähler auf "0" stehen.
Reset:
Alle Voreinstellung auf "0" zurücksetzen:
Die Taste "Reset" betätigen.
Preseleccionar la suma de ondas de
choque que se van a aplicar
Preimpostazione dell’insieme di onde
d’urto da applicare
Förinställning av antalet tryckvågor
som ska ges
Preselection:
Preselection:
Preselection:
El contador de ondas de choque realiza una
cuenta atrás hasta „0“ de un número predeterminado de pulsos de onda de choque.
X
*
**
*
ZZ
Tryckvågsräknaren visar nedräkningen till 0 från
ett förinställt antal tryckvågor.
A continuación, el valor preseleccionado vuelve
a aparecer parpadeando.
In seguito il valore preimpostato è visualizzato
lampeggiante ancora una volta.
Reset:
Reset:
$$
Z`Z
para reponer todos los valores a "0" (la función
"Preselection" queda bloqueada mientras que
esté ajustado un valor referente a la intensidad
de las ondas de choque).
Per impostare un nuovo valore, premete il tasto
"Reset". In seguito tutti i valori sono regolati su "0"
;
'
*
$
/
%ZZY
Preseleccionar el número de ondas de
choque:
Pulsar la tecla "Preselection" tantas veces como
sea necesario para llegar al número de ondas
de choque deseado. En pasos de cada vez
500 ondas de choque, se puede seleccionar un
mínimo de 500 y un máximo de 4000 ondas de
choque.
Para realizar la preselección de las ondas de
choque, el contador de ondas de choque debe
estar en "0".
Preimpostare il numero di onde d’urto:
$*
ZZ
raggiungere il numero desiderato di onde d’urto. In
passi da 500 unità è possibile preimpostare da un
minimo di 500 a un massimo di 4000 onde d’urto.
*
* *$
azzerato.
Därefter visas åter förinställt antal blinkande.
Reset:
Ställ in ett nytt antal genom att trycka på Reset,
varvid alla värden ställs på 0 (så länge ett värde
för tryckvågsintensitet håller på att ställas in är
Preselection spärrat).
Förinställning av antal tryckvågor:
Tryck på knappen Preselection tills önskat antal
tryckvågor uppnåtts. I steg om 500 kan lägst 500
och högst 4 000 förinställas.
För att antalet tryckvågor ska kunna förinställas
måste tryckvågsräknaren stå på 0.
Reset:
Tryck på knappen "Reset" för att återställa alla
förinställningar till 0.
Reset:
Azzerare tutte le preimpostazioni:
Azionate il tasto "Reset".
Reset:
Reponer a "0" todos los ajustes realizados:
Pulsar la tecla "Reset".
23
Treatment sequence
Déroulement du traitement
Behandlungsablauf
Shock wave therapy
Traitement par ondes de choc
Stoßwellentherapie
Trigger a shock wave only if the focus is
in the target area. If this is not observed, the
incidence of side effects will increase. Apply
^
$=%=^
$
=^
target area and if you can assess any impairment
or possible negative impact on the areas to be
subjected to shock waves, i.e., the region the
shock wave is passing through.
Veiller à ne déclencher l’onde de choc que
si le foyer se trouve parfaitement dans la zone
à traiter. En cas d’inobservation, de possibles
effets secondaires peuvent se produire. Ne pas
appliquer d’ondes de choc avant que la zone
/&&
*
$
'
ne soit exclu qu’elles ne risquent pas de nuire aux
régions respectivement traversées.
Stoßwellen nur auslösen, wenn der Fokus
im Zielgebiet ist (sonst Möglichkeit erhöhten
Auftretens von Nebenwirkungen). Stoßwellenapplikationen dürfen nur erfolgen, wenn eine
X
/
Beurteilung möglicher Beeinträchtigungen der
durch den Verlauf der Stoßwellen beaufschlagten
Regionen erfolgt ist.
Intensity:
Intensité:
Intensität:
Press the two shock wave intensity "v" and "^"
buttons simultaneously to reset the intensity to
zero.
Actionner simultanément les touches Intensity "v"
ZZ*&
Durch gleichzeitiges Betätigen der beiden Tasten
Intensity "v" und "^" wird die Intensität auf Null
zurückgestellt. Bleibt eine der Tasten gedrückt,
wird die Stoßwellenintensität automatisch bis zum
minimalen bzw. maximalen Wert verstellt.
If you press and hold one of the buttons, the shock
wave intensity is automatically adjusted to the
minimum or maximum value, respectively.
Frequency:
Si une des touches reste enfoncée, l’intensité de
l’onde de choc sera automatiquement reportée
à la valeur minimale respectivement maximale.
Fréquence:
For single shock waves, set the pulse rate to "0".
Régler pour les impulsions individuelles, la
fréquence d’impulsions "0".
For continuous shock waves, select the corresponding shock waves rate.
Régler pour les impulsions continues, la valeur de
fréquence respective.
Start at a low shock wave intensity and then
slowly increase the intensity in accordance with
the indication.
Il est recommandé de commencer par une
intensité basse des ondes de choc et d’augmenter
l’intensité doucement en fonction de l’indication.
When treating larger therapy zones, we
recommend positioning the focus consecutively
at different areas.
Lorsqu’il s’agit d’une zone plus grande à traiter, il
peut s’avérer avantageux de positionner le foyer
sur différentes régions.
24
Frequenz:
Für einzelne Stosswellen die Stosswellenfrequenz
"0" einstellen.
Für kontinuierliche Stosswellenabgabe die
entsprechende Stosswellenfrequenz einstellen.
Mit niedriger Stoßwellenintensität beginnen und
dann langsam entsprechend der Indikation die
Intensität steigern.
Bei Behandlung größerer Therapiegebiete
ist es vorteilhaft, den Fokus nacheinander auf
verschiedene Bereiche zu positionieren.
Fases del tratamiento
Ciclo di trattamento
Behandling
Tratamiento con ondas de choque
Terapia ad onde d’urto
Chockvågsterapi
No disparar la onda de choque antes de que
el foco no se encuentre en la zona apuntada. De lo
contrario, aumenta el riesgo de efectos secundarios.
Las ondas de choque no se deben disparar si antes
^
duda y si no se han evaluado los posibles perjuicios
que pudiera causar la trayectoria de la onda de
choque en las regiones afectadas.
Rilasciate l’onda d’urto solo se il fuoco
si trova nella zona bersaglio. Diversamente è
possibile una forte insorgenza di effetti collaterali.
Le onde d’urto devono essere applicate solo se è
stata chiaramente individuata la zona bersaglio da
trattare e dopo aver valutato i possibili danni alle
regioni interessate dal percorso dell’onda d’urto.
Utlös chockvågen endast om fokus är
inställt på målområdet. Annars ökar mojligheten
att biverkningar kan uppträda. Chockvågsingrepp
får bara göras om målområdet entydigt fastställts
och en bedömning av möjliga biverkningar i de
regioner chockvågen måste passera gjorts.
Intensidad:
La intensidad se repone a cero si se pulsan al mismo
tiempo ambas teclas Intensity "v" y "^".
Si no se suelta una de las teclas, automáticamente
la intensidad se reduce / aumenta al valor mínimo/
máximo.
Frecuencia:
Graduar la frecuencia de pulsos al grado "0" para
disparar en régimen de pulsos individuales.
Graduar la frecuencia de pulsos al correspondiente
grado para disparar en régimen de pulsos continuos.
Comenzar el tratamiento con una intensidad baja
de ondas de choque aumentándola paulatinamente
de acuerdo con la indicación.
Para el tratamiento de zonas de cierto tamaño
conviene posicionar el foco sobre distintas regiones
una tras la otra.
Intensità:
Azionando contemporaneamente entrambi i tasti
dell’intensità "v" e "^" viene azzerato il valore
dell’intensità.
Se uno dei tasti rimane premuto, il valore d’intensità
*
*
al valore minimo e/o massimo.
Intensitet:
Genom att samtidigt trycka på de båda knapparna
"v" och "^" för intensitet nollställs intensiteten.
Om en av de båda knapparna hålls intryckt blir
tryckvågsintensiteten automatiskt inställd på det
lägsta resp. högsta värdet.
Frekvens:
Frequenza:
För enstaka pulser ska pulsfrekvensen ställas
in på "0".
Per impulsi singoli impostate la frequenza
d’impulso "0"
För kontinuerliga pulser ställs önskad pulsfrekvens
in.
Per impulsi continui impostate la relativa frequenza
d’impulso.
Börja med låg tryckvågsintensitet och öka sedan
gradvis intensiteten beroende på indikationerna.
X
{/
*
*
/
Vid behandling av större terapiområden är det
/
$=
%
*
Nel trattamento di zone terapiche più grandi è
preferibile posizionare il fuoco in punti diversi di
seguito.
25
Foot pedal
Pédale de commande
Fußschalter
Trigger the shock waves by pushing down the
foot pedal.
Actionner la pédale de commande pour déclencher
une onde de choc.
Die Stoßwellen werden durch Drücken des
Fußschalters ausgelöst.
Releasing the foot pedal stops shock wave
triggering.
Relâcher la pédale de commande interrompt le
déclenchement des ondes de chocs.
Durch Unterbrechung der Fußschalterbetätigung
wird die Stoßwellenabgabe beendet.
Automatic shock wave stop: after 4,000
shock waves or preselect maximum, shock wave
triggering is automatically stopped. Actuate the
"F2" function button (or operate the pedal again)
to reactivate shock wave triggering.
Arrêt automatique de l’onde de choc: après
avoir atteint 4000 ondes de choc, le déclen^*
*
'*
la touche de Fonction "F2" (ou en actionnant de
nouveau la pédale) le déclenchement de l’onde
de choc est de nouveau activé.
Automatischer Stoßwellenstop: nach
Erreichen von 4000 Stoßwellen stoppt die
Stoßwellenauslösung automatisch. Durch
Betätigen der Taste Funktion "F2" (oder durch
erneutes Betätigen des Fußpedals) wird die
Stoßwellenauslösung wieder aktiviert.
26
Pedal
Pedale
Fotpedal
Disparar la onda de choque pulsando el interruptor
de pedal.
Rilasciate l’onda d’urto premendo l’interruttore
a pedale.
Chockvågen utlöses genom att trampa på
fotpedal.
El equipo deja de disparar ondas de choque tan
pronto como se levante el pie del pedal.
Interrompendo l’azionamento dell’interruttore a
pedale, termina il rilascio dell’onde d’urto.
Genom att släppa upp fotkontakten avbryts chockvågsutlösningen.
Parada automática del disparo de ondas
de choque: una vez disparadas 4000 ondas
de choque, el equipo automáticamente deja de
disparar. Pulsando la tecla de Función "F2" (o
pulsando otra vez el pedal) se puede activar
nuevamente el disparo de las ondas de choque.
Arresto automatico di onde d’urto: al
*
%
*
mente. Azionando il tasto funzione "F2" (oppure
azionando nuovamente l’interruttore a pedale),
viene attivata nuovamente la funzione di rilascio
dell’ onda d’urto.
Automatiskt chockvågsstopp: efter att
4000 tryckvågor avgetts stannar chockvågsutlösningen automatiskt. Genom att trycka på knappen
Funktion F2 (eller genom att på nytt trampa på
fotpedal) aktiveras åter chockvågsutlösningen.
27
Evaluation of shock wave therapy
Evaluation du traitement par ondes de
choc
Auswertung der Stoßwellentherapie
Mean shock wave intensity:
The mean (average) shock wave intensity output
for each treatment is displayed when you press the
"F1" function button.
The shock wave statistics display is reset to zero by
pressing the "Reset" button.
The shock wave statistics display is reset to zero
automatically after switching the device off and on
again.
Overall shock wave statistics of the handpiece:
Press the "F2" function and the shock wave intensity
"^" buttons.
The display shows the total number of shock waves
generated by the handpiece connected to the device.
Overall shock wave statistics of the device:
Press the "F2" function and the shock wave intensity
"v" buttons.
The display shows the total number of shock waves
generated by the device.
Example:
This display represents 31476 shock waves.
Valeur moyenne de l’intensité des ondes de choc:
Mittelwert der Stoßwellenintensität:
La valeur moyenne de l’intensité de l’onde de choc
&*
*
%^&
*
la touche de Fonction "F1".
Die durchschnittliche Stoßwellenintensität pro
Behandlung wird bei Betätigen der Taste Funktion
"F1" angezeigt.
%^
'^*
à 0 par appui sur la touche Reset.
Die Anzeige der Stoßwellen-Statistik wird durch
Betätigen der Taste ”Reset” auf Null gesetzt.
%^
'^
automatiquement remis à 0 par la mise hors tension et
*$
Die Anzeige der Stoßwellen-Statistik wird automatisch
nach dem Aus- und wieder Einschalten des Gerätes
auf Null gesetzt.
Statistique du total des ondes de choc de la pièce
à main:
Gesamt-Stoßwellenstatistik der Therapiequelle:
28
Actionner la touche de Fonction "F2" et Intensité "^".
Taste Funktion "F2" und Stoßwellenintensität "^"
betätigen.
^
%^&
choc émises par la pièce à main branchée sur l’appareil.
Es wird die Summe der abgegebenen Stoßwellen des
am Gerät angeschlossenen Handstücks angezeigt.
Statistique du total des ondes de choc de
l’appareil:
Gesamt-Stoßwellenstatistik des Gerätes:
Actionner la touche de Fonction "F2" et Intensité "v".
Taste Funktion "F2" und Stoßwellenintensität "v"
betätigen.
^
%^&
choc émises par l’appareil.
Exemple :
%^
^
Es wird die Summe der abgegebenen Stoßwellen des
Gerätes angezeigt.
Beispiel:
Die Anzeige entspricht 31476 Stoßwellen.
Evaluación de la terapia con ondas de
choque
Valutazione della terapia ad onde
d’urto
Utvärdering av chockvågsterapin
Intensidad media de las ondas de choque:
La intensidad media de las ondas de choque disparadas
en cada tratamiento queda indicada tras pulsar la tecla
Función "F1".
Para reponer a cero la indicación de la estadística de
ondas de choque, pulse la tecla "Reset".
La reposición a cero de la indicación de la estadística
es automática después de desconectar y reconectar
el equipo.
Estadística de la suma total de ondas de choque
disparadas con el mango:
Pulsar la tecla Función "F2" y la tecla Intensidad de
ondas de choque "^".
Se podrá leer la suma de todas las ondas de choque
disparadas por el mango conectada al aparato.
Estadística de la suma total de ondas de choque
disparadas con el aparato:
Pulsar la tecla Función "F2" y la tecla Intensidad de
ondas de choque "v".
Se podrá leer la suma de todas las ondas de choque
disparadas por el aparato.
Ejemplo:
La indicación corresponde a 31476 ondas de choque.
Valore medio dell’intensità di onda d’urto:
Medelvärde tryckvågsintensitet:
L’intensità media di onda d’urto per trattamento è visualizzata azionando il tasto funzione "F1".
Genomsnittlig tryckvågsintensitet per behandling
visas genom att trycka på knappen Funktion F1.
Azionando il tasto "Reset" viene azzerata la statistica
Visningen av tryckvågsstatistiken nollställs genom
att trycka på knappen Reset.
Spegnendo e riaccendendo l’apparecchio, viene
azzerata automaticamente la statistica dell’onda d’urto.
Statistica complessiva di onde d'urto del
manipolo:
Azionate il tasto funzione "F2" e il tasto d’intensità di
onde d’urto "^".
È visualizzata la somma delle onde d’urto emesse del
manipolo collegata all’apparecchio.
Statistica complessiva di onde d’urto
dell’apparecchio:
Azionate il tasto funzione "F2" e il tasto d’intensità di
onde d’urto "v"
È visualizzata la somma delle onde d’urto emesse
dell’apparecchio.
Esempio:
Il valore indicato sul display corrisponde a 31476 onde
d’urto.
Om apparaten stängs av och åter slås på nollställs
automatiskt tryckvågsstatistiken.
Total tryckvågsstatistik för applikatorn:
Genom att trycka på knappen Funktion F2 och
knappen "^" tryckvågsintensitet, visas det totala
antalet tryckvågor som avgetts av den applikator
som är ansluten till apparaten.
Total tryckvågsstatistik för apparaten:
Genom att trycka på knappen Funktion F2 och
knappen v tryckvågsintensitet, visas det totala
antal tryckvågor som apparaten har avgett.
Exempel:
Displayen visar 31476 tryckvågor.
29
Operating principle of the PiezoClast
handpiece
Principe de fonctionnement de la pièce
à main
Funktionsprinzip des PiezoClast
Handstücks
F
S
The shape of the handpiece focuses the shock
waves (S) generated by the Piezo elements
mounted into the handpiece in one single therapy
focus (F).
The energy is coupled into the body in a focussed
manner.
30
La forme de la pièce à main focalise les ondes de
pression (S) des éléments piézoélectriques en un
foyer de traitement (F).
&
*
*
focalisée.
Bedingt durch die Bauform des Handstücks
werden die von den im Handstück angeordneten
Piezoelementen ausgelösten Druckwellen (S) in
einem Therapiefokus (F) gebündelt.
Die Energie wird fokussiert in den Körper eingekoppelt.
Principio de funcionamiento del
mango
Principio di funzionamento del
manipolo
Funktionsprincip
La forma del mango provoca la concentración de
las ondas de presión (S) de todos los piezoelementos en un foco terapéutico (F).
La forma del manipolo focalizza le onde di
pressione (S) di tutti gli elementi piezoelettrici in
un fuoco di terapia (F).
På grund av applikatorns uppbyggnad koncentreras tryckvågorna (S) i ett terapifokus (F).
La energía focalizada se aplica al cuerpo.
L’energia è trasmessa nel corpo in modo
focalizzato.
Energin överförs fokuserat till kroppen.
31
Treatment sequence using the
handpiece
Déroulement du traitement
avec la pièce à main
Behandlungsablauf mit dem
Handstück
Fig.1
Fig.2
F
F
E
E
B
C
A
Position the patient on a treatment table or chair
ensuring a stable position. Make sure that the
therapy area is easily accessible.
Positionner le patient sur une table de traitement
ou une chaise de sorte qu’il se trouve en position
stable. Veiller à ce que la zone à traiter soit
aisément accessible.
Patient auf einer Behandlungsliege oder einem Stuhl
lagern und in eine stabile Lage bringen. Dabei darauf
achten, dass das Therapiefeld leicht zugänglich ist.
Marquer les limites de la zone de traitement sur
la peau du patient (par exemple avec un feutre).
Landmarke (Grenzbereiche des Behandlungsfelds)
%¢
/^^;<**
Filzstift).
Choose a suitable gel pad to obtain the necessary
penetration depth.
Choisir le gel pad en fonction de la profondeur de
pénétration voulue.
Gelpad entsprechend der vorbestimmten Eindringtiefe auswählen.
The number on the gel pad (A) corresponds to the
penetration depth (E) of the therapy focus (F) in
mm, see Figs. 1 and 2.
Le chiffre sur le gel pad (A) correspond à la
profondeur de pénétration (E) du foyer de
traitement (F) en mm, voir Figs. 1 et 2.
Die Zahl auf dem Gelpad (A) entspricht der Eindringtiefe (E) des Therapiefokus (F) in mm; siehe Abb.
1 und 2.
The higher the gel pad, the lesser the penetration
depth (E), see Figs. 1 and 2.
Pour une profondeur de pénétration (E) réduite, il
faudra choisir un gel pad plus haut, voir Fig. 1 et 2.
Je höher das Gelpad, desto geringer die Eindringtiefe (E); siehe Abb. 1 und 2.
*
;*%^
*Y
the patient’s skin (e.g. with a felt-tip pen).
32
Fases del tratamiento con el mango
Ciclo di trattamento con il manipolo
Behandlingsförlopp med handstyck
Colocar al paciente en posición estable sobre una
litera de tratamiento o en una silla cuidando de
que el campo a tratar sea fácilmente accesible.
Il paziente deve essere collocato su un lettino
per trattamenti o su una sedia. La posizione del
paziente deve essere stabile. Fate in modo di poter
accedere facilmente all’apparecchio.
Placera patienten på ett patientbord eller en stol
/
/
Se till att terapiområdet är lätt åtkomligt.
Marcar en la piel la zona límite del campo a tratar
;
Y
Elegir la almohadilla de gel en función de la
profundidad de penetración previamente determinada.
La cifra inscrita en la almohadilla de gel (A) corresponde a la profundidad de penetración (E) del foco
terapéutico (F) en mm, vea las Fig. 1 y 2.
Cuanto más alto sea la almohadilla de gel, tanto
menor será la profundidad de penetración (E),
véase la Fig. 1 y 2.
I contorni della zona da sottoporre al trattamento
devono essere evidenziati tracciando dei segni sulla
pelle del paziente (ad esempio con un pennarello).
Selezionate il gelpad in base alla profondità di
penetrazione.
Il numero sul gelpad (A) corrisponde alla profondità
di penetrazione (E) del fuoco (F) in mm, veda le
Fig. 1 e 2.
Maggiore è l’altezza del gelpad, minore sarà la
profondità di penetrazione (E), veda le Fig. 1 e 2.
Markera (för att avgränsa behandlingsytan) på
^;\*
Y
Välj en gelplatta som motsvarar det förutbestämda
penetreringsdjupet.
Det på gelplattan (A) angivna numret motsvarar
penetreringsdjupet (E) för terapifokus (F) i mm,
se Abb. 1 och 2.
Ju högre gelplattan är, desto mindre är penetreringsdjupet (E), se Abb. 1 och 2.
33
The deepest penetration of approx. 40 mm is
^$/=^
;
Y
La plus grande profondeur de pénétration à
atteindre est de 40 mm. Ceci impose l’emploi du
gel pad le plus petit (sans marquage).
Die maximal mögliche Eindringtiefe von ca. 40 mm
wird erreicht, wenn das niedrigste Gelpad (ohne
Bezeichnung) verwendet wird.
Apply ultrasound gel evenly and free of air bubbles
to the gel pad and the patient.
Appliquer le gel de contact de manière uniforme et
exempte de bulles d’air sur le gel pad et le patient.
Ultraschallgel gleichmäßig und luftblasenfrei auf
das Gelpad und das Therapiefeld auftragen.
Place the handpiece at a right angle relative to the
body surface onto the point of indication.
Positionner la pièce à main de manière perpendiculaire sur la zone à traiter.
Das Handstück senkrecht auf die Indikationsstelle
aufsetzen.
The centering tip (B) and the guidance lines (C)
facilitate orientation and alignment when placing
the handpiece onto the area to be treated.
La pointe de centrage (B) et les lignes de repère
(C) sont prévues pour faciliter l’orientation et l’alignement de la pièce à main au moment où elle
est placée sur la zone à traiter.
Die Zentrierspitze (B) und die Leitlinien (C) dienen
der Orientierung bzw. Ausrichtung beim Aufsetzen
des Handstücks auf demTherapiefeld.
Reprocess the handpiece after each use in
accordance with Chapter Reprocessing.
=
%
on patients. Follow the gel manufacturer’s instructions.
34
La pièce à main doit être retraitée après
chaque emploi conformément aux instructions du
chapitre "Retraitement".
>'
&
pour être utilisés sur les patients. Observer les
instructions du fabricant du gel.
Das Handstück nach jeder Anwendung
entsprechend Kapitel "Aufbereitung" behandeln.
Nur für Patientenanwendung zugelassene
Ultraschallgels verwenden. Die Angaben des
Gelherstellers beachten.
La máxima profundidad de penetración posible
de unos 40 mm se logra con la almohadilla de
gel más baja (sin marcación).
Si raggiunge la profondità massima possibile di
penetrazione di 40 mm ca. se è utilizzato il gelpad
più basso (senza denominazione).
Det maximala penetreringsdjupet på ca 40 mm
uppnås när den lägsta gelplattan (utan beteckning)
används.
Aplicar el gel para ultrasonido uniformemente en
la almohadilla y el paciente evitando que haya
burbujas de aire.
Applicate in modo uniforme il gel per ultrasuoni
sul gelpad e sul paziente, evitando la formazione
di bolle d’aria.
Applicera jämnt och utan luftblåsor ultraljudgelet
på gelplattan och patienten.
Posicionar el mango verticalmente en el lugar de
la indicación.
Collocate il manipolo in posizione verticale sul
punto interessato.
La punta de centraje (B) y las líneas de guía (C)
sirven de orientación y guía a la hora de posicionar
la mango respecto del campo a tratar.
La punta di centraggio (B) e le linee guida (C)
servono per orientare e allineare l’apparecchio
quando viene collocato sulla zona da trattare.
Después de cada uso, el mango se debe
someter a la preparación descrita en el capítulo
"Retratamiento".
Dopo ogni impiego, limpiare il manipolo
secondo quanto indicato nel capitolo "Riprocessamento".
Utilice solamente geles para ultrasonido
validados para el empleo en pacientes.
Utilizzate esclusivamente i gel per ultrasuoni
autorizzati per l’impiego sui pazienti.
Placera applikatorn vinkelrätt mot huden på
behandlingsstället.
Centreringspunkten (B) och syftlinjerna (C) hjälper
till att placera och rikta in applikatorn på behandlingsstället.
Rengör applikatorn efter varje användning
enligt anvisningarna under avsnitt "Återanvändas".
Använd endast ultraljudgel tillåtna för
patientbruk. Beakta geltillverkarens anvisningar.
35
36
TRIGGER POINT SHOCK WAVE
Y<[=
THÉRAPIE DES TRIGGER POINTS
[<X\;;(YX(
TRIGGER-PUNKT-STOSSWELLENY<[.
Indications
Indications
Indikationen
8
]$!!$!$8
8
Chronical painful muscular hardening, so-called
myofascial trigger points in the areas of the:
Tensions musculaires douloureuses chroniques,
appelées trigger points dans les régions suivantes:
Chronische schmerzhafte muskuläre Verspannungen, sogenannte myofasziale Triggerpunkte
in den Bereichen:
#
#
#
#
Upper extremities
Shoulder girdle
Hip area
Lower extremities
#
#
#
#
Membres supérieurs
Ceinture scapulaire
Région pelvienne
Membres inférieurs
#
#
#
#
Obere Extremitäten
Schultergürtel
Hüftregion
Untere Extremitäten
TERAPIA DE TRIGGER POINTS
POR ONDAS DE CHOQUE
TERAPIA AD ONDE D’URTO SU
TRIGGER POINT
TRIGGERPUNKTBEHANDLING
9;<=(>?@JX<
Indicaciones
Indicazioni
Indikationer
$!$!$8
Terapia ad onde d’urto focalizzate su trigger point
8
Triggerpunktbehandling med tryckvågor:
Endurecimiento muscular crónico doloroso,
los llamados trigger points miofasciales en las
regiones de:
#
#
#
#
Extremidades superiores
Cintura escapular
Región de la cadera
Extremidades inferiores
Forme croniche di contrazioni muscolari dolorose,
altri trigger points miofasciali nelle zone:
#
#
#
#
Estremità superiori
Cintura scapolare
Regione dell’anca
Estremità inferiori
Kroniska smärtsamma muskulära spänningar,
s.k. myofasciala triggerpunkter inom områdena:
#
#
#
#
Övre extremiteter
Skuldergördel
Höftregion
Nedre extremiteter
37
X<YX;.(
X<YX};.
X<YX|;.
Positioning examples
Postures recommandées
Lagerungsbeispiele
$%$!
Plantar fasciopathy
#$!+$!$!
Positioning: Sitting or lying
Positioning: Lying (prone position)
Positioning: Sitting
}$!!
Fasciite plantaire
($]$+]
$
Posture: assise ou couchée
Posture: couchée (ventrale)
Posture: assise
$!!
Plantarfasziopathie
#$!+$!$!
Lagerung: Sitzend oder liegend
Lagerung: Liegend (Bauchlage)
Lagerung: Sitzend
Y+#$!!{
Fascitis plantar
($$!+$
Posición del paciente: sentado o tendido
Posición del paciente: tendido (decúbito abdominal)
Posición del paciente: sentado
$!$!
Fascite plantare
J+$$^+$
Posizione del paziente: seduto o sdraiato
Posizione del paziente: sdraiato (a pancia in giù)
Posizione del paziente: Seduto
>*$!!
Fasciitis plantar
Placering: sittande eller liggande
Placering: liggande (bukläge)
[+#"$!+$!_
!`!
_%+#"
38
Placering: sittande
X<X;.[
X<X;.(X
X<X;.
Posturas recomendadas
Esempi di posizione
Placeringsexempel
>+^!
Positioning: Lying or sitting
Achilles tendinopathy
Medial tibial stress syndrome
Positioning: Lying (prone position)
Positioning: Sitting or lying (dorsal position)
J!$+
$$^[$
Syndrome tibial
Posture: couchée ou assise
Posture: couchée (ventrale)
Posture : assise ou couchée (dorsale)
>'!$+
[!![$
Tibiakantensyndrom
Lagerung: Liegend oder sitzend
Lagerung: Liegend (Bauchlage)
Lagerung: Sitzend oder liegend (Rückenlage)
<$!~$+
%+
$1$[!$
Dolor de tibia anterior
Posición del paciente: tendido (decúbito dorsal)
Posición del paciente: tendido (decúbito abdominal)
Posición del paciente: sentado o tendido (decúbito dorsal)
J!$+$^
$[[$
Sindrome degli spigoli tibiali
Posizione del paziente: sdraiato (a pancia in su)
Posizione del paziente: sdraiato (a pancia in giù)
Posizione del paziente: seduto o sdraiato (a pancia in su)
>*
!$+
[!![!$
Medialt tibiasyndrom
Placering: liggande (ryggläge)
Placering: liggande (bukläge)
Placering: sittande eller liggande (ryggläge)
39
<++$%!!
Be careful when using excessively high shock wave rates. High
shock wave rates may damage the
tissue. Do not apply more shock
waves during one treatment session
^
^*/
Indication
Intensity
%Y'
Number of shock waves
Number of sessions
Tendinosis calcarea
6-10
4-6
2000
3
Epicondylitis humeri radialis
3-6
4-6
1500-2000
3
Epicondylitis humeri ulnaris
3-6
4
1500-2000
3
Achilles tendinopathy
4-6
4-6
2000
3
Plantar fasciitis
6-10
4-6
2000
3
Patella tip syndrome
3-6
4-6
2000-2500
3
<++$+$!$!
Des lésions tissulaires risquent
d’apparaître en cas d’une utilisation
excessive d’ondes de choc. Ne pas
appliquer plus d’ondes de choc par
traitement que préconisé.
Application
+
^
Intensité
Fréquence des ondes de
!Y'
Nombre d'ondes de chocs
2000
Nombre de séances
6-10
4-6
3
Épicondylite huméro-radiale
3-6
4-6
1500-2000
3
Épicondylite huméro ulnaire
3-6
4
1500-2000
3
Tendon d’Achille (achillodynie)
4-6
4-6
2000
3
Fasciite plantaire
6-10
4-6
2000
3
Genou (syndrome rotulien)
3-6
4-6
2000-2500
3
+%%&
Vorsicht bei zu hoher Anzahl
Stosswellen - mögliche Gewebeschädigungen. Pro Behandlung
nicht mehr Stoßwellen applizieren
als angegeben.
40
Einsatzgebiete
Tendinosis calcarea
Intensität
%'Y'
Anzahl der Stoßwellen
2000
Anzahl der Sitzungen
6-10
4-6
3
Epicondylitis humeri radialis
3-6
4-6
1500-2000
3
Epicondylitis humeri ulnaris
3-6
4
1500-2000
3
Achillodynien
4-6
4-6
2000
3
Plantarfasciitis
6-10
4-6
2000
3
Patella Spitzensyndrom
3-6
4-6
2000-2500
3
<+$1+$!$
Un número excesivo de
disparos puede causar lesiones
tisulares. No aplique más ondas
de choque que el número
señalado en las instrucciones.
Indicación
Intensidad
Frecuencia de las ondas de
Y'
Número de las ondas de
choque
Número de sessiones
Tendinosis calcárea
6-10
4-6
2000
3
Epicondilitis humeral radial
3-6
4-6
1500-2000
3
Epicondilitis humeral ulnar
3-6
4
1500-2000
3
Tendón de Aquiles (aquilodinia)
4-6
4-6
2000
3
Fascitis plantar
6-10
4-6
2000
3
Síndrome patelo-femoral
3-6
4-6
2000-2500
3
.$'$$$^
Se il numero di impulsi
pressori è troppo elevato
Possibili danni ai tessuti Per
ogni trattamento non applicate
un numero di onde d’urto che
supera quello indicato nelle
istruzioni.
Indicazioni
Intensità
Frequenza dell'ondes
$Y'
Número dell'ondes d'urto
Numero di
trattamenti
Tendinosis calcarea
6-10
4-6
2000
3
Epicondilite dell’omero radiale
3-6
4-6
1500-2000
3
Epicondilite dell’omero ulnare
3-6
4
1500-2000
3
Tallone di Achille (achillodinia)
4-6
4-6
2000
3
Fascite plantare
6-10
4-6
2000
3
Sindrome dell’apice patellare
3-6
4-6
2000-2500
3
<++$%/#$
Vid för stort antal tryckvågor Potentiella vävnadsskador.
Applicera inte ett större antal
tryckvågor per behandling än
som anges i bruksanvisningen.
Indikationer
Intensitet
Triggerpunktbehandling%!Y'
Stötar
Antal sessioner
Kalkaxel (tendinosis calcarea)
6-10
4-6
2000
3
Epicondylitis humeri radialis
3-6
4-6
1500-2000
3
Epicondylitis humeri ulnaris
3-6
4
1500-2000
3
Akillessena (Akillestendinit)
4-6
4-6
2000
3
Plantar fasciitis
6-10
4-6
2000
3
Patella apex-syndrom
3-6
4-6
2000-2500
3
41
REPROCESSING
RETRAITEMENT
AUFBEREITUNG
Reprocessing of the device
Retraitement de l'appareil
Aufbereitung des Geräts
Danger of electric shock! Make sure that no
humidity enters the device. Before reprocessing
switch off and disconnect the device from the
power supply / mains.
^*& ' && &¦]
hors service et le débrancher du secteur avant de
le soumettre au retraitement.
Feuchtigkeit kann in das Gerät eindringen
- Gefahr eines elektrischem Schlags. Vor der
Aufbereitung das Gerät abschalten und vom
Versorgungsnetz trennen.
Clean the device with a soft cloth moistened with
surface disinfectant or alcohol.
L’appareil peut être essuyé avec un linge imbibé
de désinfectant pour surfaces ou d’alcool.
Follow the instructions from the manufacturer of
the disinfectant!
Respecter les instructions du fabricant du désinfectant !
Das Gerät kann mit einem weichen Tuch, das
*¥/^%*^
befeuchtet ist, gereinigt werden.
Make sure that no humidity enters the
device. Do not use any cleaning agents, scouring
agents or solvents on this device!
Veiller à ce qu’aucune humidité ne puisse
pénétrer à l’intérieur de l’appareil. N’utiliser pour
l’entretien de l’appareil ni détergents, ni produits
à récurer, ni solvants!
Reprocessing of the foot pedal
Retraitement de la pédale
Aufbereitung des Fußschalters
Danger of electric shock! Humidity may
enter the foot pedal. Do not immerse the foot pedal
and the connector in water and do not clean under
the tap.
De l’humidité risque de pénétrer à l’intérieur
&
&¦>
*
immerger la pédale ni le connecteur dans l’eau et
ne pas les nettoyer sous l’eau du robinet.
The foot pedal can be cleaned with a soft cloth
moistened with surface disinfectant or alcohol.
La pédale peut être essuyée avec un linge imbibé
de désinfectant pour surfaces ou d’alcool.
Feuchtigkeit kann in den Fußschalter
eindringen - Gefahr eines elektrischem Schlags.
Den Fußschalter bzw. Stecker nicht in Wasser
eintauchen oder unter fließendem Wasser
reinigen.
Follow the instructions from the manufacturer of
the disinfectant!
Respecter les instructions du fabricant du désinfectant !
Die Angaben des Desinfektionsmittelherstellers
beachten!
Es ist darauf zu achten, dass keine Feuchtigkeit in das Gerät eindringt. Für die Pflege
des Geräts dürfen keine Putz-, Scheuer- oder
Lösungsmittel eingesetzt werden!
Der Fußschalter kann mit einem weichen Tuch,
das mit Oberflächendesinfektionsmittel oder
Alkohol befeuchtet ist, gereinigt werden.
Die Angaben des Desinfektionsmittelherstellers
beachten!
42
REPROCESAMIENTO
RITRATTAMENTO
ÅTERANVÄNDAS
Reprocesamiento del equipo
Ritrattamento del apparecchio
Återbearbetning av apparaten
Riesgo de penetración de humedad en el
equipo. Peligro de choque eléctrico. Antes de la
preparación del equipo se ha de desconectarlo y
separarlo de la red de alimentación.
L’umidità può penetrare nell’apparecchio.
Rischio di scosse elettriche. Prima di effettuare
$
^
dalla rete di alimentazione.
Fuktighet kan tränga in i apparaten. Risk
för elektriska stötar. Före skötsel ska apparaten
stängas av och stickkontakten dras ur eluttaget.
El aparato se puede limpiar con un paño suave
^*%
o alcohol.
È possibile pulire l’apparecchio con un panno
*/*%
o alcool.
Observe las indicaciones del productor del desinfectante.
Seguite le indicazioni del fabbricante del disinfettante.
Téngase cuidado en que no entre humedad
alguna en el aparato. Para los cuidados del
aparato no se deben utilizar detergentes, agentes
de restregado o disolventes.
Fate in modo che l’umidità non penetri
nell’apparecchio. Per la manutenzione non
utilizzate detergenti, abrasivi o solventi.
Reprocesamiento del pedal
Ritrattamento del pedale
Återbearbetning av fotpedal
Existe el riesgo de que humedad penetre
en el interruptor de pedal. Peligro de choque
eléctrico. Absténgase de sumergir el interruptor
de pedal o el enchufe en agua o de limpiarlo a
chorro de agua.
L’umidità può penetrare nell’interruttore
del pedale. Rischio di scosse elettriche. Non
immergete nell’acqua il pedale e/o la spina o non
pulitelo con acqua corrente.
Fuktighet kan tränga in i pedalen/fotkontakten. Risk för elektriska stötar. Pedalen/fotkontakten eller anslutningskontakten får inte sänkas
ned i vatten eller rengöras under rinnande vatten.
È possibile pulire il pedale con un panno morbido
*%
Pedalen/fotkontakten kan göras ren med en mjuk
trasa som fuktats med ytdesinfektionsmedel eller
alkohol.
El interruptor de pedal se puede limpiar con un
paño suave humedecido con un desinfectante
^
Observe las indicaciones del productor del desinfectante!
Seguite le indicazioni del fabbricante del disinfettante!
Apparaten kan göras ren med en mjuk trasa som
fuktats med ytdesinfektionsmedel eller alkohol.
Beakta desinfektionsmedeltillverkarens anvisningar!
Se noga till att ingen fuktighet tränger in i
apparaten. För apparatens skötsel får inga puts-,
skur- eller lösningsmedel användas!
Beakta desinfektionsmedeltillverkarens anvisningar!
43
Reprocessing of the handpiece
Retraitement de la pièce à main
Aufbereitung des Handstücks
Danger of electric shock! Make sure that no
humidity enters the handpiece. Do not immerse
the handpiece or plug.
&¦ '
^*&&
&
à main. Ne pas immerger la pièce à main ni le
connecteur.
Feuchtigkeit kann in das Handstück
eindringen - Gefahr eines elektrischem Schlags.
Das Handstück bzw. den Stecker nicht in Wasser
eintauchen.
Déconnecter la pièce à main avant le retrai*'
^*&
pénétrer à l’intérieur de la pièce à main ! N’utiliser
pour l’entretien de la pièce à main ni détergents,
ni produits à récurer, ni solvants!
Das Handstück zur Aufbereitung vom Gerät
trennen. Darauf achten, dass keine Feuchtigkeit
¢
§¨§§%
keine Putz-, Scheuer- oder Lösungsmittel eingesetzt werden!
For reprocessing, disconnect the handpiece
from the device. Make sure that no humidity enters
inside the handpiece. Do not use any cleaning or
scouring agents or solvents on the handpiece!
44
Reprocesamiento del mango
Ritrattamento del manipolo
Återbearbetning av handstick
Riesgo de penetración de humedad en el
mango. Peligro de choque eléctrico. No sumergir
la mango o el enchufe.
L’umidità può penetrare nelle manipolo.
Rischio di scosse elettriche. Non immergete il
manipolo e la spina.
Antes del reprocesamiento, separar el
mango del aparato. Tener cuidado en que no
penetre humedad alguna en el mango. Para
los cuidados no se deben utilizar detergentes,
agentes de restregado o disolventes.
Staccate il manipolo dall’apparecchio per
poterlo ritrattar. Fate in modo che l’umidità non
penetri nelle manipolo. Per la manutenzione non
utilizzate detergenti, abrasivi o solventi.
Fuktighet kan tränga in i pedalen/fotkontakten. Risk för elektriska stötar. Pedalen/fotkontakten eller anslutningskontakten får inte sänkas
ned i vatten eller rengöras under rinnande vatten.
Pedalen/fotkontakten kan göras ren med en
mjuk trasa som fuktats med ytdesinfektionsmedel,
alkohol eller sprit. Beakta desinfektionsmedeltillverkarens anvisningar!
45
Remove the gel pad from the handpiece.
Retirer le gel pad de la pièce à main.
Das Gelpad vom Handstück entfernen.
Clean the contact surface of the handpiece, the gel
pad and the twist-lock ring with warm water under
the tap (max. 30°C), then wipe with a disposable
cloth and disinfect with surface disinfectant.
Nettoyer la surface de contact de la pièce à main,
le gel pad et la bague à baïonnette sous l’eau tiède
du robinet (30°C maximum), les essuyer ensuite
avec un linge à usage unique et les désinfecter à
l’aide d’un désinfectant pour surfaces.
Die Kontaktoberfläche des Handstücks, das
<
©*
lauwarmen Wasser (max. 30°C) reinigen, danach
***
^
/^*¥/^%*
N’utiliser pour les gel pads que des produits de
désinfection appropriés et validés à cet effet.
Für die Gelpads dürfen nur geeignete und
zugelassene Desinfektionsmittel verwendet
werden.
Use only a suitable and approved disinfectants
for the gel pads.
Follow the instructions from the manufacturer of
the disinfectant!
Manufacturer
Brand name
Bode
Bacillol
Bacillol AF
Braun
Observer les instructions du fabricant du désinfectant.
Fabricant
Nom commercial
Bode
Bacillol
Bacillol AF
Braun
Meliseptol
Ecolab
Incidin Extra N
Merz
Pursept A
Meliseptol
Ecolab
Incidin Extra N
Merz
Pursept A
Schülke & Mayr
Antifect N Liquid
Schülke & Mayr
46
Antifect N Liquid
Die Angaben des Desinfektionsmittelherstellers
beachten.
Hersteller
Handelsname
Bode
Bacillol
Bacillol AF
Braun
Meliseptol
Ecolab
Incidin Extra N
Merz
Pursept A
Schülke & Mayr
Antifect N Liquid
Quitar la almohadilla de gel del mango.
Togliete il gelpad del manipolo.
Avlägsna gelplattan från applikatorn.
Lavar la superficie de contacto del mango, la
almohadilla de gel y el anillo de bayoneta con agua
tibia de la tubería (máx. 30°C), a continuación
frotar con un paño desechable y desinfectar con
%
*
/
'
tiepida corrente (max. 30°C), poi asciugate con un
panno monouso e disinfettate con un disinfettante
Rengör applikatorns kontaktyta, gelplattan och
bajonettringen under rinnande ljummet vatten
(max. 30°C), och torka därefter av dem med en
^
^
*=fektionsmedel.
Para la desinfección de las almohadillas de gel
se deben utilizar únicamente desinfectantes
=$
Per i gelpad potete utilizzare solo detergenti adatti
e autorizzati.
Till gelplattorna får endast användas härför
avsedda och godkända desinfektionsmedel.
Seguite le indicazioni del fabbricante del disinfettante.
Beakta desinfektionsmedeltillverkarens anvisningar.
Observe las indicaciones del productor del desinfectante.
Fabricante
Marca comercial
Bode
Bacillol
Bacillol AF
Braun
Meliseptol
Ecolab
Incidin Extra N
Merz
Pursept A
Schülke & Mayr
Antifect N Liquid
Fabbricante
Nome commerciale
Tillverkare
Produktnamn
Bode
Bacillol
Bacillol AF
Bode
Bacillol
Bacillol AF
Braun
Meliseptol
Braun
Meliseptol
Ecolab
Incidin Extra N
Ecolab
Incidin Extra N
Merz
Pursept A
Merz
Pursept A
Schülke & Mayr
Antifect N Liquid
Schülke & Mayr
Antifect N Liquid
47
MAINTENANCE
MAINTENANCE
WARTUNG
Maintenance intervals
Intervalles d'entretien
Wartungsintervalle
To avoid any incidents or damage caused
by aging and wear it is necessary to service the
product and the accessories at adequate intervals.
Depending on the frequency of use, but at least
once a year, have an expert check the functional
and operational safety of the equipment.
Pour éviter tout incident ou dommage causé
$*&
$
&'
%&'lisation, mais au minimum une fois par an, un
technicien spécialisé doit inspecter la sécurité de
fonctionnement du produit.
Zur Vermeidung von Vorfällen bzw.
Schäden, die durch Alterung und Verschleiß des
Gerätes sowie des Zubehörs entstehen können,
muss die Wartung in angemessenen Abständen
durchgeführt werden. Je nach Häufigkeit der
Benutzung, jedoch mindestens alle 12 Monate,
müssen Funktions- und Betriebssicherheit von
einem Fachmann geprüft werden.
Daily checks
Check the handpiece and the accessories for
damage, loose or missing parts, hygienic condition
and completeness.
Check the connection cable of the handpiece for
possible damage.
The gel pad must be removed from the handpiece.
The contact surface of the handpiece, the gel
pad and the twist-lock ring must be cleaned and
disinfected using a surface disinfectant.
Monthly checks
=
/
=
for the safe intended use must be legible.
Missing or illegible lettering, labeling or identi
^^*
=
^
reprocessing must be reinstated.
Check the contact surface of the handpiece for
damage.
Check the power output of the handpiece.
48
Contrôles quotidiens
&'
*
présentent ni défectuosités, ni pièces détachées
ou manquantes, ni encrassement.
&&
%
*
de la pièce à main.
&'
&&$&
main. La surface de contact de la pièce à main,
le gel pad et la bague à baïonnette doivent être
parfaitement nettoyés et désinfectés à l’aide d’un
désinfectant pour surfaces.
Tägliche Kontrollen
Das Handstück und alles Zubehör auf Beschädigungen, lose oder fehlende Teile, hygienischen
Zustand und Vollständigkeit überprüfen.
Verbindungskabel des Handstücks auf Beschädigungen überprüfen.
Das Gelpad muss vom Handstück entfernt sein.
[
/^¢
§
<
*§*¥/^%*
Contrôles mensuels
Monatliche Kontrollen
&'*
'
&
*«%*
sont lisibles.
Aufschriften und Kennzeichnungen, die zum
sicheren bestimmungsgemäßen Gebrauch erforderlich sind, müssen lesbar sein.
//&*
'
inscription qui risquerait de causer une manipulation ou un retraitement inadéquats impose leur
remise en état.
Fehlende oder nicht mehr lesbare Aufschriften
und Kennzeichnungen, die zu Fehlern in der
Handhabung oder Aufbereitung führen, müssen
wieder hergestellt werden.
&&
%
%
la pièce à main.
Kontaktfläche des Handstücks auf Beschädigungen überprüfen.
&&
*
Überprüfung der Handstückenergie.
MANTENIMIENTO
MANUTENZIONE
UNDERHÅLL
Intervalos de mantenimiento
Intervalli di manutenzione
Underhållsintervall
Para evitar incidentes y daños que pudieran
presentarse debido a envejecimiento y desgaste
del aparato y de los accesorios, éste se debe
someter a mantenimiento incluidos los accesorios
en intervalos razonables. Según la frecuencia
de uso, pero como mínimo una vez al año, un
especialista en la materia tiene que comprobar
la seguridad de funcionamiento y la fiabilidad
operacional.
Per evitare eventi spiacevoli e/o danni
che possono insorgere per l’invecchiamento e
l’usura dell’apparecchio e dei relativi accessori, la
manutenzione deve essere eseguita ad intervalli
adeguati. A seconda della frequenza di utilizzo,
$
**%
$
un tecnico specializzato la sicurezza funzionale
dell’apparecchio.
För att undvika tillbud eller skador som kan
uppstå på grund av att apparaten och tillbehören
åldras och förslits, måste underhåll utföras med
rimliga intervall. Beroende på hur ofta apparaturen används, dock minst var 12:e månad, måste
apparaturens funktions- och driftsäkerhet kontrolleras av en specialist.
Controles a efectuar cada día
Controlli giornalieri
Comprobar el mango y los accesorios en cuanto
a daños, piezas sueltas o faltantes, higiene e
integridad.
**
$
accessori risultano danneggiati, se presentano
*
pulizia e la completezza.
\
*
/\/\!
*
para ver si se hubiere producido algún daño.
$
/
/
*
*
Se tiene que quitar la almohadilla de gel del
mango. La superficie de contacto del mango,
la almohadilla de gel y el anillo de bayoneta se
deben limpiar y desinfectar con un desinfectante
del manipolo.
Pulite e disinfettate con un disinfettante per
*
/
Controles a efectuar cada mes
Los rótulos y las marcaciones necesarios para
!
=
^
estar legibles.
Controlli mensili
Le scritte e i contrassegni che sono necessari per
un impiego sicuro e conforme alle disposizioni
devono essere leggibili.
Se han de restablecer todos aquellos rótulos y
marcaciones faltantes e ilegibles que llevan a
errores en el manejo y el reprocesamiento.
È necessario rifare le scritte e i contrassegni
mancanti o non più leggibili, che possono
provocare errori nella manipolazione o ritrattamento dell’apparecchio.
*/
*
en términos de daños.
Verificate la presenza di eventuali danni sulla
*
Comprobar la energía del mango.
*
Dagliga kontroller
Kontrollera att applikatorn med tillbehör inte
har några skador, lösa eller saknade delar som
saknas, jämte hygieniskt skick och skick i övrigt.
Kontrollera att applikatorns anslutningsslang inte
har några skador.
Gelplattan måste avlägsnas från applikatorn.
Applikatorns, gelplattans och bajonettringens
=
¬
^
*=infektionsmedel.
Kontroller varje månad
Kontrollera att etiketter och märkning som krävs
för att säkert kunna använda apparaten, är läsliga.
Etiketter och märkning som inte längre är läsbara
och som kan leda till felaktigt handhavande och
förberedande ska bytas.
Kontrollera att applikatorns yta inte har några
skador.
Kontrollera applikatorns kapacitet.
49
Fuses
Fusibles
Sicherungen
Replace exclusively with the type of fuse
shown on the back of the unit.
Remplacez uniquement par le type de
%/*&
Should legal provisions in your country
demand shorter intervals, these must be observed.
Si les dispositions légales en vigueur dans
votre pays prévoient des intervalles de mainte
$=%*
Ersetzen Sie die Sicherung ausschliesslich
durch den auf der Rückseite des Gerätes angegebenen Sicherungstyp.
To comply to standard IEC-60601-1 about
technical and safety tests as well as intervals of
maintenance, the user must follow local laws and
regulations in the country where the device is in
operation. This maintenance can be carried out
by EMS or an approved repair center.
50
En respect de la norme IEC-60601-1 quant
à la tenue de tests techniques et de sécurité ainsi
que des intervalles de maintenance, l’utilisateur
devra se conformer aux dispositions légales en
vigueur dans le pays où l’appareil est utilisé. Ces
interventions peuvent être effectuées par EMS ou
un centre de réparation agréé.
Wenn die gesetzlichen Bestimmungen in
Ihrem Land kürzere Intervalle vorschreiben, so
gelten diese.
Um den Standard IEC-60601-1 bezüglich
technischen und Sicherheitstest sowie Wartungsintervalle zu erfüllen, muss der Benutzer die
Gesetze und Vorschriften in dem Land, in dem das
Gerät betrieben wird, einhalten. Diese Wartung
kann von EMS oder einem autorisierten Reparaturzentrum durchgeführt werden.
Fusibles
Fusibili
Säkringar
Reemplazar únicamente por el mismo
tipo de fusible indicado en el panel posterior del
aparato.
Sostituire unicamente con il tipo di fusibile
indicato sul retro dell’apparecchio.
Använd endast den typ av säkring som
anges på apparatens baksida.
Si las disposiciones legales en su país
prescriben intervalos más cortos de mantenimiento; debe tenerlo en cuenta.
Nel caso in cui le disposizioni di legge del
^
$
intervalli più brevi, dovranno essere osservati
questi ultimi.
Om lagbestämmelserna i ditt land kräver
kortare intervaller måste dessa följas.
Para cumplir la norma IEC-60601-1 acerca
de los ensayos técnicos y de seguridad, así como
los intervalos de mantenimiento, el usuario debe
seguir la legislación y reglamentación local en el
país en el que esté funcionando el dispositivo.
Este mantenimiento puede ser realizado por EMS
o por un centro de reparación autorizado.
Per soddisfare gli standard IEC-60601-1 sui
test tecnici e di sicurezza così come sugli intervalli
di manutenzione, l’utilizzatore deve seguire le
leggi e regolamentazioni locali nel paese in cui il
dispositivo è in funzionamento. Tale manutenzione
può essere realizzata da EMS o da un centro di
riparazioni autorizzato.
För att följa standarden IEC-60601-1 om
tekniska tester, säkerhetstester och underhållsintervall, måste användaren följa lokala lagar och
bestämmelser i det land där apparaten används.
Detta underhåll kan utföras av EMS eller av ett
auktoriserat serviceställe.
51
Checking the output power of the
handpiece
?])$^]$
la pièce à main
Fig.2
10cm
Fig.1
Überprüfung des Handstücks
M
Remove the twist-lock ring and the gel pad.
Retirer la bague à baïonnette et le gel pad.
Bajonettring und Gelpad entfernen.
Turn the handpiece holder upside down and place
it on an even surface.
Retourner le support de la pièce à main et le poser
sur une surface plane.
Handstückhalter umdrehen und auf eine ebene
Fläche stellen.
Place the handpiece into the handpiece holder
in such a way that it rests fully against the O-ring
(Fig. 1).
Placer la pièce à main dans le support de la pièce
à main de sorte qu’elle repose bien sur le joint
torique (voir Fig. 1).
Das Handstück so in den Handstückhalter
einsetzen, dass es vollständig auf dem O-Ring
;//Y
52
Comprobar la energía del mango
?)$^$+
Kontroll av applikatorns kapacitet
Quitar el anillo de bayoneta y la almohadilla de gel.
Togliete l’anello a baionetta e il gelpad.
Avlägsna gelplattans bajonettring.
Poner el soporte del mango cabeza abajo sobre
Rovesciare il supporto del manipolo e collocatelo
Vänd på applikatorhållaren och ställ den på plant
underlag.
Colocar el mango en el soporte, de tal manera que
descanse perfectamente en el anillo obturador
(Fig. 1).
Collocate el manipolo nel relativo supporto in
*
^*
*¥`
(Figura 1).
Sätt applikatorn i applikatorhållaren så att den vilar
helt på O-ringen (Abb. 1).
53
Make sure that the 3 pins of the twist-lock
mechanism engage in the recesses of the
handpiece holder.
Veiller à ce que les 3 broches du verrouillage à
baïonnette rentrent dans les rainures prévues à
cet effet dans le support.
Darauf achten, dass die 3 Stifte des Bajonettverschlusses in die Einfräsungen des Handstückhalters eingesetzt werden.
Close the 3 quick-action clamps.
Fermer les 3 dispositifs de serrage rapide.
Die 3 Schnellspanner schließen.
Make sure you can feel and hear each quickaction clamp engage in its self-locking position.
Veiller pour chaque dispositif de serrage rapide à
dépasser le point de verrouillage marqué par une
résistance mécanique et un déclic.
Darauf achten, dass der Verriegelungspunkt des
jeweiligen Schnellspanners spür- und hörbar
überdrückt wird.
Remplir ensuite le cylindre d’eau jusqu’au repère
;]Y;$Y
Prüfzylinder mit Wasser bis Füllmarke (M) füllen
(Abb. 2).
Régler l’intensité des ondes de choc au niveau 20.
Die Stoßwellenintensität auf Stufe 20 einstellen.
Régler la fréquence d’impulsion au niveau 1.
Pulsfrequenz 1 einstellen.
Déclencher l’onde de choc.
Stoßwelle auslösen.
^
*&
*
%
Beträgt die Spritzhöhe der Fontäne mehr als 10
cm, hat das Handstück noch genügend Energie.
^
inférieure à 10 cm, contacter le Service aprèsvente.
Beträgt die Spritzhöhe weniger als 10 cm,
Service benachrichtigen.
¨^=^
^
mark (M) (Fig. 2).
Set the shock wave intensity to stage 20.
Select pulse rate 1.
Trigger a shock wave.
+^%^^
%
if the height of the jet exceeds 10 cm.
If the height of the jet is less than 10 cm,
contact the service department.
54
Tener cuidado en que los tres salientes del cierre
de bayoneta se introduzcan en los huecos del
soporte de la mango.
Prestate attenzione ai 3 perni della chiusura a
baionetta: devono essere collocati nelle fresature
del manipolo.
Cerrar los tres cierres rápidos.
Chiudete i 3 dispositivi di serraggio rapido.
Se ha de sentir y escuchar el chasquido de enclavamiento de cada uno de los cierres rápidos.
Fate attenzione a serrare con forza in modo
visibile e udibile il punto di arresto di ciascun
dispositivo di serraggio.
Introducir agua en el cilindro de prueba hasta la
marca (M) (Fig. 2).
Graduar la intensidad de las ondas de choque
al grado 20.
Poner la frecuencia de pulsos en 1.
Disparar la onda de choque.
Si el surtidor alcanza una altura superior a 10
cm, entonces la energía de la mango es todavía
Si la altura del surtidor es inferior a 10 cm,
avisar al servicio de asistencia técnica.
`*$
'
**];
Y
Regolate l’intensità dell’onda d’urto sul livello 20.
Regolate la frequenza d’impulso su 1.
Rilasciate l’onda d’urto.
Se l’altezza d’iniezione della fontana è superiore
ai 10 cm, el manipolo dispone ancora di energia
%
Var noga med att bajonettanslutningens tre pinnar
sätts i applikatorhållarens frästa spår.
Stäng de tre snabbutlösningsspännena.
Kontrollera att snabbutlösningsspännena hörbart
och märkbart låser ordentligt fast i sina låspunkter.
Fyll testcylindern till påfyllningsmärket (M) (Abb.
2).
Ställ in tryckvågsintensiteten på steg 20.
Ställ in pulsfrekvens 1.
Utlös tryckvågor.
Om fontänens spruthöjd uppgår till mer än 10 cm,
har applikatorn fortfarande tillräcklig kapacitet.
Kontakta service om spruthöjden uppgår
till mindre än 10 cm.
Se l’altezza d’iniezione è inferiore a 10 cm,
contattare l’assistenza.
55
Display of software version
[%)$!$
Anzeige der Software-Version
R
Push the "F2" and "v" buttons simultaneously.
56
Appuyer simultanément sur la touche "F2" et la
touche "v".
Die Tasten "F2" und "v" gleichzeitig drücken.
Indicar la versión de software
Display della versione software
Visning av programvaruversion
Pulsar al mismo tiempo las teclas "F2" y "v".
Premete contemporaneamente i tasti "F2" e di "v".
Tryck samtidigt in knapparna "F2" och "v".
57
SAFETY PRECAUTIONS
REMARQUES DE SÉCURITÉ
SICHERHEITSHINWEISE
EMS and the distributor of this product accept no
liability for direct or consequential injury or damage
resulting from improper use, arising in particular
through non-observance of the operating instructions, or improper preparation and maintenance.
EMS et le distributeur de ce produit ne peuvent
être tenus responsables d’éventuels préjudices
directs et indirects résultant d’un emploi inadéquat
ou d’un maniement incorrect, en particulier
lorsque le mode d’emploi n’a pas été respecté
ou lorsque la préparation et l’entretien n’ont pas
été correctement effectués.
EMS und der Vertreiber dieses Produktes haften
nicht für direkte Schäden und Folgeschäden, die
durch unsachgemässen Einsatz oder Handhabung
dieses Produktes auftreten, insbesondere durch
Nichtbeachtung der Bedienungsanleitung oder
durch unsachgemässe Vorbereitung oder
Wartung.
Contre-indication: le fonctionnement correct
*
'&/
peut être perturbé par les oscillations ultrasoniques
de haute fréquence. Nous vous conseillons de ne
pas traiter les patients porteurs de stimulateurs
'&/
$
Kontraindikationen: Herzschrittmacher und
/
¬^
^
^gungen in ihrer Funktion gestört werden. Daher
empfehlen wir, Patienten mit Herzschrittmachern
/
^**
behandeln.
Pour les patients souffrant d’une maladie
infectieuse, il faut prévoir les mesures suivantes:
# Protéger les plaies ouvertes avant le
**
'
corporel ne puisse sortir.
# Soumettre l’appareil après le traitement à la
désinfection en observant les instructions du
fabricant du désinfectant utilisé.
$ &* ^ des organes à inclusion d’air tels que poumon,
intestin, et bien observer la fenêtre d’entrée en
positionnant le patient de manière adéquate.
Les ondes de choc risquent de provoquer des
réactions non voulues du coeur.
Bei Patienten mit infektiösen Krankheiten
müssen folgende Maßnahmen durchgeführt
werden:
# Vor der Behandlung offene Wunden so
//
[¤
austreten.
# >
^<^
zieren. Die Angaben des Desinfektionsmittelherstellers beachten.
Abgabe von Stoßwellen auf Organe mit
Lufteinschlüssen (z.B. Lunge, Darm) vermeiden.
Auf Eintrittsrichtung des Handstücks achten bzw.
Patient entsprechend lagern. Stoßwellen können
unerwünschte Herzaktionen verursachen.
>'
cations prévues. Ce mode d’emploi doit être
soigneusement étudié avant l’utilisation. Ceci est
également valable pour tous les équipements
pouvant être utilisés en combinaison avec ce
produit. Vous éviterez ainsi tous risques de
blessures et d’endommagement de votre produit.
Nur für den vorgesehenen Verwendungszweck einsetzen. Diese Bedienungsanleitung
ist vor dem Einsatz sorgfältig zu lesen und zu
verstehen. Dies gilt gleichermassen für alle in
Kombination mit diesem Gerät eingesetzten
Produkte. Auf diese Weise vermeiden Sie Verletzungen sowie Beschädigungen an Ihrem Produkt.
Contraindication: ultrasonic oscillations
*
=$
*
/lators from functioning properly. Therefore, we
recommend that patients with a cardiac pace
*
/
^/
^
this product.
Patients with infectious (contagious)
diseases require the following measures:
# Before the treatment, cover open wounds in
^
=^
/=
# Disinfect the device after the treatment.
Follow the disinfectant manufacturer’s
instructions.
Avoid applying shock waves to organs
which contain trapped air (e.g. lung, intestines).
Double-check the entry window and position of the
handpiece, and position the patient as required.
In addition, shock waves can cause undesirable
heart reactions.
Use for the intended purpose only: before
using the product, make sure that you have
studied and understood the operating instructions.
This also applies to any equipment used with this
product. Failure to observe the operating instructions may result in the patient or user suffering
serious injury or the product being damaged,
possibly beyond repair.
58
PRECAUCIONES DE
SEGURIDAD
OSSERVAZIONI SULLA
SICUREZZA
SÄKERHETSFÖRESKRIFTER
EMS y los distribuidores de este producto no
se hacen responsables de los daños directos
e indirectos derivados del uso o manipulación
incorrectos de este producto, especialmente
por la no observación de las instrucciones de
empleo o por una preparación y un mantenimiento
incorrectos.
EMS e il distributore di questo prodotto declinano
ogni responsabilità per danni diretti o indiretti che
possono derivare da uso improprio o errato del
prodotto, in particolare dall’inosservanza delle
istruzioni d’uso o da preparazioni o manutenzione
non idonei.
EMS och distributören av denna produkten tar
inte på sig ansvaret för varken direkt eller indirekt
skada som resultat av felhantering, eller ignorering
av bruksanvisningen eller felaktig förberedelse
och underhåll.
Contraindicación: las vibraciones ultrasónicas pueden hacer que los marcapasos y
/
%tamente. Por tanto, se recomienda no tratar
con este producto a pacientes portadores de un
*
/
Controindicazioni: le oscillazioni ad
ultrasuoni possono impedire il funzionamento
*
/latori. Pertanto consigliamo di non trattare con
questo prodotto i pazienti portatori di stimolatori
/
En pacientes que padecen enfermedades
infecciosas se han de llevar a cabo las siguientes
medidas:
# Antes del tratamiento, recubrir las heridas
abiertas de tal manera que no salga líquido
corporal alguno.
# Después de la terapia, desinfectar el aparato.
Observar las indicaciones del productor del
desinfectante.
No disparar ondas de choque sobre órganos
que contienen aire (p. ej. pulmón, intestino). Tener
en cuenta el sentido de entrada del mango y/o
posicionar al paciente correspondientemente.
Las ondas de choque pueden provocar acciones
cardíacas no deseadas.
Nei pazienti con malattie infettive è necessario adottare le seguenti precauzioni:
# Prima di effettuare il trattamento, proteggete
le ferite scoperte in maniera tale che non
fuoriescano liquidi corporali.
# Dopo il trattamento, disinfettate l’apparecchio. Seguite le indicazioni del fabbricante
del disinfettante.
$
'
;**
intestino). Fate attenzione alla direzione di entrata
dell’apparecchio e/o posizionate il paziente di
$
reazioni cardiache indesiderate.
Utilizar únicamente para su finalidad
prevista. Antes de utilizar este producto por
primera vez, lea con atención estas instrucciones
de empleo hasta su completa comprensión. Válido
igualmente para todos los productos que utilice en
combinación con este aparato. La no observancia
de estas instrucciones de empleo puede tener
como consecuencia lesiones o desperfectos de
los productos.
Utilizzate il prodotto soltanto per le applica$®$
essere accuratamente studiate e comprese prima
®
^$
per tutti i prodotti che possono essere utilizzati in
combinazione con questo apparecchio. Eviterete
così qualsiasi rischio di ferimento e di danno del
vostro prodotto.
Kontraindikation: ultraljudssvängningar
¬
*
^/
fungerar korrekt. Därför rekommenderar vi att
man inte behandlar patienter med pacemaker
/
*
För patienter med smittsamma sjukdomar
måste följande säkerhetsåtgärder vidtas:
# Före behandling ska öppna sår förbindas så
att inga kroppsvätskor kan läcka ut.
# %/^
^
Beakta anvisningarna från tillverkaren av
desinfektionsmedel.
Tryckvågor bör undvikas mot organ som
innesluter luft (t.ex. lungor, tarmar). Var noga
med hur applikatorn riktas resp. hur patienten
placeras. Tryckvågor kan ge upphov till oönskade
hjärtreaktioner.
Används endast till avsett ändamål: Bristfällig inlärning av bruksanvisningen kan resultera
i skador hos patient eller användaren, eller ge
skador på produkten, som i värsta fall blir oreparerbar. Före första användning av produkten, se
till att Ni har studerat bruksanvisningen noga.
Detta gäller även andra produkter som används
tillsammans med denna apparat.
59
Risk of explosion: do not use this product
^%
**
/
^
gases.
`'\|
&
^&'
*mables.
Explosionsgefahr: verwenden Sie dieses
Produkt nicht in Gegenwart von entzündlichen
Anästhetika oder Gasen.
This product must be used only by trained
'
Ce produit ne doit être utilisé que par un
'
&%*&
Dieses Produkt darf nur von ausgebildetem
'
*
/
Always examine the product for damage
before commencing treatment. Damaged accessories or a damaged unit must not be used and
must be replaced. Use original EMS spare parts
and accessories only.
Vérifier avant chaque traitement que le
produit ne présente pas de défauts. Un accessoire ou un appareil endommagé ne doit plus
être utilisé. Il doit être remplacé. N’utilisez que
des pièces et des accessoires EMS d’origine
This product must only be repaired by an
approved EMS repair center.
Faites réparer ce produit exclusivement par
un centre de réparation agréé par EMS.
Überprüfen Sie Ihr Produkt vor jeder
Behandlung auf Schäden. Beschädigtes Zubehör
oder ein beschädigtes Gerät darf nicht mehr
verwendet werden und ist zu ersetzen. Verwenden
Sie ausschliesslich original EMS Ersatzteile oder
Zubehör.
60
Lassen Sie dieses Produkt ausschliesslich
durch EMS oder durch einen von EMS autorisierten Händler warten oder instandsetzen.
Riesgo de explosión: no utilice este
producto en combinación con anestésicos o gases
*
/
`^|
'
*mabili.
Este producto deberá ser utilizado única*
=%*
ello.
Questo prodotto deve essere utilizzato
esclusivamente da personale qualificato e
formato.
Compruebe antes de cada tratamiento que
su producto no presenta defectos. Un accesorio
o un aparato dañado no se debe utilizar. Deben
sustituirlo. Utilice únicamente piezas y accesorios
originales EMS.
Controllare il prodotto prima di ogni trattamento. In caso di danni all’apparecchio o agli
accessori questi non devono essere usati, ma
sostituiti. Utilizzare solamente pezzi di ricambio
originali EMS.
La reparación de este producto debe ser
llevada a cabo exclusivamente por un agente
autorizado por EMS.
Effettuare le riparazioni al prodotto solo da
terzi abilitati da EMS.
Explosionsrisk: använd inte denna produkt
vid närvaro av brandfarliga anestetika eller gaser.
Denna produkt får endast användas av
/
^$
Undersök alltid Era produkter så att de ej
är skadade före användning. En skadad produkt
får inte användas, utan skall ersättas. Använd
endast originala EMS reservdelar och tillbehör.
Reparera denna produkt endast hos EMS
auktoriserad service.
61
STORING THE PRODUCT
RANGEMENT DU PRODUIT
AUFBEWAHREN DES
PRODUKTES
Keep the original packaging until the
product is to be disposed of permanently. You
can use it for shipping or storing at any time.
Nous vous conseillons de conserver
l’emballage d’origine jusqu’à la mise au rebut de
votre produit. Vous pouvez ainsi l’utiliser à tout
moment pour le rangement ou le transport.
Bewahren Sie die Originalverpackung bis
zur endgültigen Entsorgung Ihres Produktes auf.
Sie können diese so jederzeit für den Transport
oder die vorübergehende Lagerung des Produktes
verwenden.
Use the storage box provided for the storage and
transport of the gel pads.
If the unit is not going to be used for an extended
period of time:
# Proceed as described in the chapter
"Reprocessing".
# Pack the product and all accessories in the
original packaging.
Please refer to the storage and transport conditions in the "Technical data".
62
Utiliser la boîte de stockage fournie pour le
stockage et le transport des gel pads.
Si vous envisagez de ne pas utiliser votre produit
durant une période prolongée:
# Suivez les étapes décrites au chapitre
"Retraitement",
# Rangez le produit et les accessoires dans
l’emballage d’origine.
Veuillez tenir compte des conditions de stockage
et de transport décrites au chapitre "Caractéristiques techniques".
Zum Aufbewahren und Transport der Gelpads
sollte die dafür vorgesehene Aufbewahrungsbox
verwendet werden.
Wenn Sie Ihr Produkt längere Zeit nicht benutzen
wollen:
# Gehen Sie entsprechend dem Kapitel
„Aufbereitung“ vor, und
# Verpacken Sie dann das Produkt und alle
Zubehörteile in der Originalverpackung.
Beachten Sie bitte auch die Lager- und Transportbedingungen im Kapitel „Technische Daten“.
CONSERVACIÓN DEL
PRODUCTO
CONSERVAZIONE DEL
PRODOTTO
FÖRVARING AV PRODUKTEN
Le aconsejamos conserve el embalaje
original hasta el momento de deshacerse de
su producto. De este modo podrá utilizarlo en
cualquier momento para almacenarlo temporalmente o transportarlo.
Si consiglia di conservare l’imballo originale
*
*$$
Utilizzare l’imballo per la custodia ed il trasporto.
Behåll originalförpackningen tills produkten
skall skrotas permanent. Förpackningen kan alltid
användas till transport eller förvaring.
Per conservare e trasportare i gelpad, utilizzare
la scatola prevista a tal scopo.
Vid förvaring och transport av gelplattor ska därför
avsedd förvaringsbox användas.
In caso di inattività prolungata:
# Seguire le istruzioni nel capitolo "Ritrattamento",
# Imballare il prodotto e tutti gli accessori
nell’imballo originale.
Vogliate anche tener conto delle informazioni sulle
condizioni per lo stoccaggio ed il trasporto fornite
nel capitolo "Dati tecnici".
Gör så här om produkten skall ställas av under
längre tid:
# Följ anvisningarna i avsnittet "Återbearbetning",
# Lägg produkten och alla tillbehör i originalförpackningen.
Förvarings- och transportförhållanden beskrivs i
avsnittet "Tekniska data".
Utilice el recipiente de almacenamiento especial
para el transporte y el almacenamiento de las
almohadillas de gel.
Si piensa no utilizar su producto durante un
período prolongado:
# Siga el procedimiento descrito en el capítulo
"Reprocesamiento",
# Embale el producto y todos sus accesorios
en el embalaje original.
Por favor, observe también las condiciones de
almacenamiento y transporte descritas en el
@Z
&
Z
63
PRODUCT DISPOSAL
RECYCLAGE
ENTSORGEN DES PRODUKTES
The product must not be discarded in domestic
household waste.
Le produit, ses accessoires et son emballage ne
contiennent pas de substances dangereuses pour
l’environnement.
Das Produkt darf nicht mit dem normalen
Haushaltsmüll entsorgt werden.
Should you wish to definitively dispose of the
product, please comply with the regulations which
apply in your country.
Waste Electrical and Electronic Equipment
belonging to customers located in the European
Union may be shipped to EMS for recycling in
accordance to the WEEE regulations. The costs of
recycling, exclusive of shipping fees, are covered
by EMS.
$^
*&$*
/
le produit, respectez les directives nationales
&'$
$
=
Wollen Sie Ihr Produkt endgültig entsorgen,
beachten Sie bitte die jeweils in Ihrem Land
geltenden Bestimmungen.
Les équipements électriques et électroniques en
$
\
&
&$$=&]
pour être recyclés en accord avec la directive
¯«=
\
frais de transports, sont couverts par EMS.
Abfall aus elektrischen und elektronischen
Geräten im Besitz von Kunden in der Europäischen Union können gemäß der WEEE-Richtlinie
für die Wiederverwertung an EMS zurückgegeben
werden. Die Kosten für das Recycling, exklusive
der Kosten für die Anlieferung, werden von EMS
übernommen.
WARRANTY
GARANTIE
GARANTIE
Damages due to non-adherence to the operating
instructions or wear out of parts are excluded
from warranty.
Des dégâts liés au non-respect du mode
d’emploi ou l’usure des pièces sont exclus de la
garantie.
The warranty of your product will be
cancelled if you try to open it.
La garantie de votre produit sera annulée
si vous essayez de l’ouvrir.
Die durch Nichtbeachten der Bedienungsanleitung
und durch Abnutzung entstandenen Schäden
an Gerätebestandteilen sind von der Garantie
ausgenommen.
ACCESSORIES
ACCESSOIRES
ZUBEHÖR
Accessories are available from EMS or any
authorized dealer. Please contact your customer
service directly.
$
]
/
&
contacter votre service clientèle directement.
Zubehör erhalten Sie bei EMS oder einem autorisierten Händler. Wenden Sie sich bitte direkt an
Ihren zuständigen Ansprechpartner.
64
Die Garantie Ihres Produktes wird annulliert, wenn Sie versuchen, es zu öffnen.
ELIMINACIÓN DEL PRODUCTO
SMALTIMENTO DEL PRODOTTO
KASSERING AV PRODUKTEN
El producto, sus accesorios y el material de
embalaje no contienen sustancias nocivas para
el medio ambiente.
*
$
*
%
$
*
@
vigentes en su país.
Il prodotto, i suoi accessori e il suo imballaggio non contengono sostanze nocive per
*/
$$
*
smaltito, vi preghiamo di attenervi alle direttive
nazionali in vigore nel vostro paese.
Produkten, dess tillbehör och emballage
innehåller inget material som är skadligt för
miljön.
Följ gällande regler i ditt land om du vill kasta
bort dem för gott.
Los Residuos de Aparatos Eléctricos y Electrónicos (RAEE) que pertenezcan a clientes que se
encuentren en la Unión Europea pueden enviarse
a EMS para su reciclaje de conformidad con la
normativa sobre RAEE. El coste del reciclaje,
excluidos los gastos de envío, lo cubre EMS.
^
%
uso appartenente a clienti residenti nella UE
potrà essere spedita a EMS per il riciclaggio
in conformità alle normative RAEE. Il costo del
riciclaggio, eccetto i costi di spedizione, sarà a
carico di EMS.
GARANTÍA
GARANZIA
GARANTI
Los daños que pudieran resultar de la no
observación de las instrucciones de empleo y
del desgaste de las piezas no están cubiertos
por la garantía.
I danni derivanti da usura e dal non rispetto
di queste istruzioni d’uso sono esclusi dalla
garanzia.
Skador som uppkommit på grund av att bruksanvisningen inte följts samt normal förslitning
omfattas inte av garantin.
La garanzia del vostro prodotto sarà
annullata se provate ad aprirlo.
Garantin på din produkt annulleras om du
försöker öppna den.
ACCESORIOS
ACCESSORI
TILLBEHÖR
Los accesorios se encuentran disponibles directamente en EMS o a través de cualquiera de los
distribuidores autorizados. Por favor, póngase
en contacto directamente con el servicio de
atención al cliente.
Troverete gli accessori presso la EMS o i
rivenditori autorizzati. Vogliate contattare direttamente il vostro servizio clientela.
Tillbehör kan erhållas från EMS eller auktoriserad återförsäljare. Kontakta kundservice.
La garantía de su producto se cancelará
si intentan abrirlo.
Avfall som utgörs av eller innehåller elektriska eller
elektroniska produkter (WEEE – Waste Electrical
and Electronic Equipment) som tillhör kunder inom
EU kan skickas till EMS för återvinning i enlighet
med WEEE-direktivet. EMS står för återvinningskostnaden, men inte för fraktkostnaden.
65
EMS SERVICE
SERVICE EMS
EMS-SERVICE
Should your product need servicing and repairs,
please send it to your dealer or to an authorized
EMS Repair Center.
Pour toute autre intervention de maintenance ou
de réparation, envoyer le produit à votre distributeur ou directement à un centre de réparation
agréé EMS.
Bitte schicken Sie Ihr Produkt für alle Wartungsoder Reparaturarbeiten an Ihren Händler oder ein
von EMS autorisiertes Reparaturzentrum.
EMS declines responsibility for the safety of the
device and declares the warranty void if service or
repair is carried out by an unauthorized third party
or if non-genuine spare parts are used.
It is best to ship the product in the original
packaging. It protects the product against damage
during shipment.
Please clean, disinfect and sterilize the
product and all accessories as described in the
operating instructions before dispatching them.
When sending the product directly to an approved
EMS repair center, please include the name of
=
+^*
66
EMS décline toute responsabilité envers la
&&
&
si des entretiens ou des réparations sont effectués
par des tierces parties non-autorisées, ou si des
&
&
EMS lehnt jede Haftung hinsichtlich der Sicherheit
des Geräts ab und erklärt die Garantie ungültig,
falls Wartungen und Reparaturen durch nichtautorisierte Personen durchgeführt wurden, oder
falls andere als die Original-Ersatzteile benutzt
wurden.
Utiliser de préférence l’emballage d’origine pour
l’expédition. Le produit sera mieux protégé contre
les incidents de transport.
Verwenden Sie für den Transport am besten
die Originalverpackung. Dadurch ist Ihr Produkt
während des Transports geschützt.
Nettoyer, désinfecter et stériliser le produit
et l’ensemble de ses accessoires conformément
au mode d’emploi avant de les expédier.
Vor dem Versand müssen das Gerät und
alle Zubehörteile gemäß der Bedienungsanleitung
En cas d’expédition directe du produit vers un
centre de réparation agréé EMS, indiquer le nom
$/
**
le traitement.
Bei Direktversand des Produkts an das von EMS
autorisierte Reparaturzentrum geben Sie bitte
den Namen Ihres Händlers an. Dies erleichtert
die Abwicklung.
SERVICIO TÉCNICO EMS
SERVIZIO ASSISTENZA EMS
EMS-SERVICE
Si su producto necesitara una revisión o
reparación, envíelo a su distribuidor o a un centro
de reparación autorizado de EMS.
^
/
o di riparazioni, spedirlo al rivenditore o a un
centro di assistenza EMS autorizzato.
Om produkten behöver service eller reparation
skickar du den till din återförsäljare eller ett
godkänt EMS-reparationscenter.
EMS declina toda responsabilidad sobre la
seguridad del aparato, declarando la garantía no
válida si una tercera persona no autorizada realiza
una revisión o reparación, o si se utilizan piezas
de repuesto no originales.
EMS declina qualsiasi responsabilità relativa alla
sicurezza del dispositivo e dichiara la garanzia
effettuata da terzi non autorizzati o siano state
utilizzate parti di ricambio non originali.
EMS frånsäger sig allt ansvar för enhetens
säkerhet och förklarar garantin ogiltig om service
eller reparationer utförs av en icke-auktoriserad
tredjepart eller om reservdelar som inte är original
används.
Lo mejor es enviar el producto en su embalaje
original, que lo protege de daños durante el
transporte.
Si consiglia di spedire il prodotto nel suo imballo
originale. In questo modo sarà protetto da danni
durante la spedizione.
Produkten transporteras bäst i originalförpackningen. Den skyddar produkten mot skador under
transporten.
Limpie, desinfecte y esterilice el producto
y todos los accesorios como se describe en las
instrucciones de empleo antes de mandarlos.
Prima della spedizione pulire, disinfettare
e sterilizzare il prodotto e tutti gli accessori
attenendosi alle descrizioni fornite nelle istruzioni
Rengör, desinficera och sterilisera
produkten och alla tillbehör enligt beskrivningarna
i bruksanvisningen innan du skickar iväg dem.
Cuando envíe el producto directamente al centro
de reparación autorizado de EMS, incluya el
*//*
²
proceso.
Quando si spedisce il prodotto direttamente ad un
centro di assistenza EMS approvato, includere il
*$±*^
il processo.
Ange återförsäljarens namn om du skickar
produkten direkt till ett godkänt EMS-reparationscenter. Detta underlättar hanteringen.
67
SYMBOLS
SYMBOLES
SYMBOLE
Unit
Appareil
Gerät
Manufacturer’s logo
Logo du fabriquant
Herstellerlogo
Caution!
Attention!
Achtung!
Refer to instruction manual
Se référer au manuel d‘utilisation
Gebrauchsanweisung beachten
Applied part, type BF
Partie appliquée du type BF
Anwendungsteil Typ BF
~
Alternating current (AC)
Tension alternative
Wechselspannung
Data transfer
Transfert de données
Datentransfer
Footpedal connection
Connexion pour la pédale de commande
Anschluss Fußschalter
Fuse
Fusible
Sicherung
"Standby/ON" key, with control lamp
Touche "Veille/Marche", avec voyant de contrôle
Betriebsbereitschaft/Ein mit Kontrolllampe
68
SÍMBOLOS
SIMBOLI
SYMBOLER
Aparato
Apparecchio
Apparat
Logotipo del fabricante
Logo del produttore
Tillverkarens logotyp
¡Precaución!
Attenzione!
Akta!
Referirse a los instrucciones de empleo
Riferirsi a le istruzioni per l’uso
Se till anvisningshandboken
Pieza de aplicación tipo BF
Parte applicata del tipo BF
Tillämpad del, typ BF
~
Tensión alterna
Tensione alternata
Växelspänning
Transferencia de datos
Trasferimento dati
Dataöverföring
Conexión para el pedal de mando
Connessione per il pedale
Anslutning av fotpedal
Fusible
Fusibile
Säkring
Tecla "Espera/Funcionamiento" con diodo luminoso
Tasto "Standby/ON" con LED
Viloläge/PÅ med kontrollampa
69
Preselection
Reset
Shock wave preselection
Présélection des ondes de choc
Stoßwellenvorwahl
"Reset" button
Touche de remise à zéro
Taste ”Reset”
Intensity
Shock wave intensity
X&^
Stoßwellenintensität
Impulse Count
Number of shock waves
*^
Stoßwellenanzahl
Frequency
Shock wave frequency
Augmenter la valeur de réglage
Stoßwellenfrequenz
Increase value
Augmenter la valeur
”Wert erhöhen”
Decrease value
Baisser la valeur
”Wert verringern”
Handpiece connection
Connexion pour la pièce à main
Anschluss für das Handstück
70
Preselection
Reset
Intensity
Impulse Count
Frequency
Preselección de ondas de choque
Preselezione onda d’urto
Tryckvågsförval
Tecla "Reset" (reposición)
Tasto "Reset"
Återställningsknapp
Intensidad de ondas de choque
Intensità dell’onda d’urto
Tryckvågsintensitet
Número de ondas de choque
Conteggio delle onde d’urto
Impulsräknare
Frecuencia de pulsos
Frequenza d’impulso
Pulsfrekvens
”Aumentar el valor”
Aumento del valore impostato
Höj värdet
”Reducir el valor”
Diminuzione del valore impostato
Sänk värdet
Conexión para el mango
Connessione per il manipolo
Anslutning av handenhet
71
F1
"Function 1" button
Touche de "Fonction 1"
Taste "Funktion 1"
F2
"Function 2" button
Touche de "Fonction 2"
Taste "Funktion 2"
CE marking: Refers to directive 93/42 EC, including EN 60601-1 and EN 60601-1-2
Marquage de conformité CE: Se rapporte à la directive 93/42 CE, y compris EN 60601-1 et EN 60601-1-2
CE-Kennzeichen: Bezieht sich auf die Richtlinie 93/42 EWG, einschließlich EN 60601-1 und EN 60601-1-2
Disposal of old electrical & electronic equipment (applicable in the European Union and other European
countries with separate collection systems)
+
*
&'&'$;
/
=&
et aux autres pays européens disposant de systèmes de collecte sélective)
Entsorgung von Abfall aus elektrischen und elektronischen Geräten (für die Europäische Union
und andere europäische Länder ohne separates Entsorgungssystem)
Equipotential earth
Terre équipotentielle
Potentialausgleich Erde
72
F1
Tecla "Función 1"
Tasto "Funzione 1"
Funktionsknapp 1
F2
Tecla "Función 2"
Tasto "Funzione 2"
Funktionsknapp 2
Marcación de conformidad CE: Hace referencia a la norma 93/42 CE inclusive EN 60601-1 y EN 60601-1-2
Simbolo di conformità CE: Si riferisce alla direttiva 93/42 CE come anche alle norme EN 60601-1 e EN 60601-1-2
CE-märkning: enligt direktiv 93/42/EG, inklusive EN 60601-1 och EN 60601-1-2
+
*'&=!
$
µ;
/
!
y en países europeos con sistemas de recogida selectiva de residuos)
+
*$
$
;
/
e in quelli con sistema di raccolta differenziata)
Omhändertagande av gamla elektriska och elektroniska produkter (gäller i Europeiska unionen och andra
europeiska länder med separata insamlingssystem)
Tierra equipotencial
Messa a terra equipotenziale
Ekvipotentialjordning
73
Handpiece
Pièce à main
Unlocked
Déverrouillé
Entriegelt
Locked
Verrouillé
Verriegelt
74
Handstück
Mango
Manipolo
Handstycke
Desbloqueado
Sbloccato
Öppen
Bloqueado
Bloccato
Låst
75
TECHNICAL DATA
Description of the unit
Description of the handpiece
Distributor
EMS SA, CH-1260 Nyon, Switzerland
Distributor
EMS SA, CH-1260 Nyon, Switzerland
Manufacturer
RICHARD WOLF GmbH, 75438 Knittlingen,
Germany
Manufacturer
RICHARD WOLF GmbH, 75438 Knittlingen,
Germany
Model
Swiss PiezoClast®
Model
Handpiece F10 G4 for Swiss PiezoClast®
>
Class I
Applied part, Type B
IP 20, unit
IP X8, electrical foot pedal
Mode: continuous operation
>
Class I
Applied part, Type B
IP 20
Aperture angle
94°
¸
Class IIb
Supply voltage
100 – 127 – 220 – 240 VAC
Mains frequency
50 – 60 Hz
Aperture diameter
100 mm
=\=;$Y
0.03 to 0.4 mJ/mm2
Pressure range
11.5 to 82.2 MPa
1.2 to 2.8 mm
5.0 to 14.1 mm
Power consumption
150 VA
Noise level
65 dB(A)
Focal size (min. to max.):
fx(-6dB) = fy(-6dB)
fz(-6dB)
Fuses
T 3.15 L
Focal volume
58 mm3
Operating mode
Multiple pulse mode
repetition rate: 1 – 20 Hz
Pulse frequency
1 to 8 Hz
Intensity stages
20 steps
Overall energy E (5 mm)
9.54 mJ
Penetration depth
5 to 40 mm
Weight
approx. 14.5 kg (approx. 30.8 lbs)
Dimensions in mm (LxWxH)
395 mm x 400 mm x 170 mm
Operating conditions
+10°C to +35°C
30% to 75% relative humidity
atmospheric pressure 700 hPa to 1060 hPa
Storage and transport conditions
76
+5°C to +40°C
10% to 90% relative humidity
700 hPa to 1060 hPa air pressure
atmospheric pressure 700 hPa to 1060 hPa
Weight
approx. 1.2 kg (approx. 2.7 lbs)
Operating conditions
+10°C to +35°C
30% to 75% relative humidity
atmospheric pressure 700 hPa to 1060 hPa
Storage and transport conditions
+5°C to +40°C
10% to 90% relative humidity
700 hPa to 1060 hPa air pressure
atmospheric pressure 700 hPa to 1060 hPa
CARACTÉRISTIQUES TECHNIQUES
Description de l'appareil
Description de la pièce à main
Distributeur
EMS SA, CH-1260 Nyon, Suisse
Distributeur
EMS SA, CH-1260 Nyon, Suisse
Fabricant
RICHARD WOLF GmbH, 75438 Knittlingen,
Allemagne
Fabricant
RICHARD WOLF GmbH, 75438 Knittlingen,
Allemagne
Modèle
Swiss PiezoClast®
Modèle
Pièce à main F10 G4 pour Swiss PiezoClast®
>
Class I
Partie appliquée du type B
IP 20, appareil
IP X8, pédale électrique
Mode de fonctionnement: service continu
>
Class I
Partie appliquée du type B
IP 20
94°
¸
Classe IIb
Tension de l’alimentation
100 – 127 – 220 – 240 VAC
Fréquence secteur
50 – 60 Hz
*
100 mm
&\&;$Y
0,03 à 0,4 mJ/mm2
Plage de pression
11,5 à 82,2 MPa
de 1,2 à 2,8 mm
de 5,0 à 14,1 mm
58 mm3
Puissance nominale
150 VA
Niveau sonore
65 dB(A)
Taille du foyer (de min à max):
fx(-6dB) = fy(-6dB)
fz(-6dB)
Fusibles
T 3.15 L
Volume du foyer
Mode de travail
]*
Fréquence de répétition: 1 – 20 Hz
¨&'*
de 1 à 8 Hz
>$
\&
20 niveaux
Énergie totale E (5 mm)
9,54 mJ
Poids
environ 14,5 kg (environ 30,8 lbs)
Dimensions en mm (L x l x h)
395 mm x 400 mm x 170 mm
Conditions de fonctionnement
+10°C à +35°C
30% à 75% d’humidité relative
pression atm. de 700 hPa à 1060 hPa
Conditions de stockage et de
transport
+5°C à +40°C
10% à 95% d’humidité relative
pression atm. 700 hPa à 1060 hPa
Profondeur de pénétration
de 5 à 40 mm
Poids
approx. 1,2 kg (approx. 2,7 lbs)
Conditions de fonctionnement
+10°C à +35°C
30% à 75% d’humidité relative
pression atm. de 700 hPa à 1060 hPa
Conditions de stockage et de
transport
+5°C à +40°C
10% à 95% d’humidité relative
pression atm. 700 hPa à 1060 hPa
77
TECHNISCHE DATEN
Beschreibung des Gerätes
Beschreibung des Handstücks
Vertreiber
EMS SA, CH-1260 Nyon, Schweiz
Vertreiber
EMS SA, CH-1260 Nyon, Schweiz
Hersteller
RICHARD WOLF GmbH, 75438 Knittlingen,
Deutschland
Hersteller
RICHARD WOLF GmbH, 75438 Knittlingen,
Deutschland
Modell
Swiss PiezoClast®
Modell
Handstück F10 G4 für Swiss PiezoClast®
[
>
Klasse I
Anwendungsteil, Typ B
IP 20, für das Gerät
IP X8, für den elektrischen Fußschalter
Modus: Dauerbetrieb
[
>
Klasse I
Anwendungsteil, Typ B
IP 20
Aperturwinkel
94°
[
¸¯
Klasse IIb
Aperturdurchmesser
100 mm
©^;$Y
0.03 bis 0.4 mJ/mm2
Druckbereich
11.5 bis 82.2 MPa
1.2 bis 2.8 mm
5.0 bis 14.1 mm
Stromversorgung (Spannung)
100 – 127 – 220 – 240 VAC
Stromversorgung (Frequenz)
50 – 60 Hz
Leistungsaufnahme
150 VA
Geräuschpegel
65 dB(A)
Fokusgröße (min. bis max.):
fx(-6dB) = fy(-6dB)
fz(-6dB)
Sicherung
T 3.15 L
Fokusvolumen
58 mm3
Betriebsart
Dauerimpulsbetrieb
Wiederholfrequenz: 1 – 20 Hz
Pulsfrequenz
1 bis 8 Hz
Intensitätsstufen
20 Stufen
Gewicht
ca. 14,5 kg (ca. 30,8 lbs)
Gesamtenergie E (5 mm)
9.54 mJ
Abmessung (BxHxT)
395 mm x 400 mm x 170 mm
Eindringtiefe
5 bis 40 mm
Betriebsbedingungen
+ 10°C bis + 35°C, 30% bis 75% rel. Feuchte
Luftdruck 700 hPa bis 1060 hPa
Gewicht
ca. 1,2 kg (ca. 2,7 lbs)
Betriebsbedingungen
Lager- und Transportbedingungen
+ 5°C bis + 40°C, 10% bis 90% rel. Feuchte
Luftdruck 700 hPa bis 1060 hPa
+ 10°C bis + 35°C, 30% bis 75% rel. Feuchte
Luftdruck 700 hPa bis 1060 hPa
Lager- und Transportbedingungen
+ 5°C bis + 40°C, 10% bis 90% rel. Feuchte
Luftdruck 700 hPa bis 1060 hPa
78
ESPECIFICACIONES TÉCNICAS
Denominación del aparato
Denominación del mango
Distribuidor
EMS SA, CH-1260 Nyon, Suiza
Distribuidor
EMS SA, CH-1260 Nyon, Suiza
Fabricante
RICHARD WOLF GmbH, 75438 Knittlingen,
Alemania
Fabricante
RICHARD WOLF GmbH, 75438 Knittlingen,
Alemania
Modelo
Swiss PiezoClast®
Modelo
Mango F10 G4 por Swiss PiezoClast®
!>
Clase I
Pieza de aplicación tipo B
IP 20, aparato
IP X8, pedal eléctrica
Modo de utilización: continua
!>
Clase I
Pieza de aplicación tipo B
IP 20
Ángulo de apertura
94°
!¸
Clase IIb
Diámetro de apertura
100 mm
0,03 a 0,4 mJ/mm2
Tensión alimentación
100 – 127 – 220 – 240 VAC
&
(positivo)
Frecuencia red
50 – 60 Hz
Gama de presiones
11,5 a 82,2 MPa
Potencias nominales
150 VA
Nivel de ruido
65 dB(A)
Fusible
T 3.15 L
Tamaño de foco (mín. hasta máx.):
fx(-6dB) = fy(-6dB)
fz(-6dB)
1,2 a 2,8 mm
5,0 a 14,1 mm
Volumen de foco
58 mm3
Modo de funcionamiento
Modo de impulso continuo
Rango de repetitición: 1 – 20 Hz
Peso
unos 14,5 kg (unos 30,8 lbs)
Medidas long. x anch. x alt.
395 mm x 400 mm x 170 mm
Condiciones funcionamiento
+10°C a +35°C, humedad relativa 30% a
75% presión atmosférica 700 hPa a 1060
hPa
Condiciones almacenamiento y
transporte
+ 5°C a + 40°C, humedad relativa 10% a
90% presión atmosférica 700 hPa a 1060
hPa
Frecuencia de pulsos
1 a 8 Hz
Grados de intensidad
20 niveles
Energía total E (5 mm)
9,54 mJ
Profundidad de penetración
5 a 40 mm
Peso
approx. 1,2 kg (approx. 2.7 lbs)
Condiciones funcionamiento
+10°C a +35°C, humedad relativa 30% a
75% presión atmosférica 700 hPa a 1060
hPa
Condiciones almacenamiento y
transporte
+ 5°C a + 40°C, humedad relativa 10% a
90% presión atmosférica 700 hPa a 1060
hPa
79
DATI TECNICI
Descrizione del dispositivo
Descrizione del manipolo
Distributore
EMS SA, CH-1260 Nyon, Svizzera
Distributore
EMS SA, CH-1260 Nyon, Svizzera
Costruttore
RICHARD WOLF GmbH, 75438 Knittlingen,
Germania
Costruttore
RICHARD WOLF GmbH, 75438 Knittlingen,
Germania
Modello
Swiss PiezoClast®
Modello
Manipolo F10 G4 per Swiss PiezoClast®
>
Classe I
Parte applicata del tipo B
IP 20, apparecchio
IP X8, pedale di comando elettrico
Modo: funzionamento continuo
>
Classe I
Parte applicata del tipo B
IP 20
Angolo d’apertura
94°
¸
Classe IIb
Diametro apertura
100 mm
0,03 a 0,4 mJ/mm2
Tensione di alimentazione
100 – 127 – 220 – 240 VAC
(positiva)
Frequenza di rete
50 – 60 Hz
Campo pressore
Tra 11,5 e 82,2 MPa
Potenza nominale
150 VA
Livello di rumorosità
65 dB(A)
Fusibili
T 3.15 L
Dimensione fuoco (min a max):
fx(-6dB) = fy(-6dB)
fz(-6dB)
Tra 1,2 e 2,8 mm
Tra 5,0 e 14,1 mm
Modo operativo
Modo a impulsione continuo
Frequenza di repetizione: 1 – 20 Hz
Volume fuoco
58 mm3
Frequenza d’impulso
Tra 1 e 8 Hz
Peso
environ 14,5 kg (environ 30,8 lbs)
Livelli d’intensità
20 livelli
Dimensioni Lx L x A
395 mm x 400 mm x 170 mm
Energia complessiva E (5 mm)
9,54 mJ
Condizioni di funzionamento
Tra 10°C e 35°C, umidità relativa tra 30% e
75%, pressione dell’aria tra 700 hPa e 1060
hPa
Profondità di penetrazione
Tra 5 e 40 mm
Peso
ca. 1,2 kg (ca. 2,7lbs)
Tra 5°C e 40°C, umidità relativa tra 10% e
75%, pressione dell’aria tra 700 hPa e 1060
hPa
Condizioni di funzionamento
Tra 10°C e 35°C, umidità relativa tra 30% e
75%, pressione dell’aria tra 700 hPa e 1060
hPa
Condizioni di stoccaggio e di
trasporto
Tra 5°C e 40°C, umidità relativa tra 10% e
75%, pressione dell’aria tra 700 hPa e 1060
hPa
Condizioni di stoccaggio e di
trasporto
80
TEKNISKA DATA
Beskrivning av enheten
Beskrivning av handstycke
Distributör
EMS SA, CH-1260 Nyon, Schweiz
Distributör
EMS SA, CH-1260 Nyon, Schweiz
Tillverkare
RICHARD WOLF GmbH, 75438 Knittlingen,
Tyskland
Tillverkare
RICHARD WOLF GmbH, 75438 Knittlingen,
Tyskland
Modell
Swiss PiezoClast®
Modell
Handstycke F10 G4 Swiss PiezoClast®
[
>
Klass I
Tillämpad del, Typ B
IP 20, apparat
IP X8, elektrisk fotpedal
Mode: kontinuerlig drift
[
>
Klass I
Tillämpad del, Typ B
IP 20
Öppningsvinkel
94°
Öppningsdiameter
100 mm
¬^;$Y
0,03 – 0,4 mJ/mm2
Tryckkapacitet
11,5 – 82,2 MPa
1,2 – 2,8 mm
5,0 – 14,1 mm
[
¸
Klass IIb
Nätspänning
100 – 127 – 220 – 240 VAC
Nätfrekvens
50 – 60 Hz
Strömförbrukning
150 VA
Bullernivå
65 dB(A)
Fokusstorlek (min. till max.):
fx(-6dB) = fy(-6dB)
fz(-6dB)
Säkringar
T 3.15 L
Fokusvolym
58 mm3
Driftläge
Flerpulsläge
Pulsfrekvens: 1 – 20 Hz
Pulsfrekvens
1 – 8 Hz
Intensitetssteg
20 steg
Vikt
ca 14,5 kg
Mått l x b x h
395 mm x 400 mm x 170 mm
Användningsförhållanden
10-35°C, 30-75 % rel. luftfuktighet Lufttryck
700-1 060 hPa
Förvaring och transportförhållanden
5-40°C, 10-90 % rel. luftfuktighet
Lufttryck 700-1 060 hPa
Total energi E (5 mm)
9,54 mJ
Penetreringsdjup
5 – 40 mm
Vikt
ca1,2 kg
Användningsförhållanden
10-35°C, 30-75 % rel. luftfuktighet Lufttryck
700-1 060 hPa
Förvaring och transportförhållanden
5-40°C, 10-90 % rel. luftfuktighet
Lufttryck 700-1 060 hPa
81
ELECTROMAGNETIC
COMPATIBILITY
COMPATIBILITÉ
ELECTROMAGNETIQUE
ELEKTROMAGNETISCHE
VERTRÄGLICHKEIT
This product needs special precautions
regarding electromagnetic compatibility and needs
to be installed and put into service according to
the note "Electromagnetic compatibility".
Ce produit nécessite des précautions
particulières concernant la compatibilité électromagnétique. Il doit être installé et mis en service
selon la notice "Compatibilité Électromagnétique".
Für dieses Produkt sind im Bereich der
elektromagnetischen Verträglichkeit spezielle
Vorsichtsmassnahmen erforderlich. Es muss
daher in Übereinstimmung mit der Anweisung
"Elektromagnetische Verträglichkeit" installiert
und in Betrieb genommen werden.
Certain types of mobile telecommunication
equipment could potentially interfere with this
product. The separation distances recommended
in the note "Electromagnetic compatibility" must
be taken into account.
Certains types d’appareils mobiles de
télécommunication sont susceptibles d’interférer
avec ce produit. Les distances de séparation
recommandées dans la notice "Compatibilité
Électromagnétique" doivent être respectées.
This product should not be used adjacent
to or stacked with another unit, except of being
stacked to an EMS Swiss DolorClast. If the
product is used adjacent or stacked to an EMS
Swiss DolorClast, do not switch on both devices
simultaneously. In addition, this product should
always be observed to verify normal operation in
^
^^/
Ce produit ne doit pas être utilisé à proximité
d’un autre appareil ou empilé sur ce dernier,
\&**
$
]
&\*&
Swiss DolorClast, ne pas mettre sous tension
les deux appareils en même temps. En plus, il
*&
%
$
$&/
fonctionnement dans les conditions d’utilisation.
The use of accessories and cables
other than those specified or sold by EMS as
replacement parts, may result in increased
emissions or decreased immunity of this product.
L’utilisation d’accessoires ou de câbles
'\&&$
]
comme pièces de remplacement, peut avoir
comme conséquence une augmentation de
l’émission ou une diminution de l’immunité de ce
produit.
82
Bestimmte Typen mobiler Funkkommunikationsgeräte können das Funktionieren dieses
Produkts beeinträchtigen. Die empfohlenen
räumlichen Entfernungen müssen gemäss der
Anweisung "Elektromagnetische Verträglichkeit"
eingehalten werden.
Dieses Produkt darf nicht in der Nähe eines
anderen Geräts verwendet oder darauf gestapelt
werden ausser auf einem EMS Swiss DolorClast.
Wird dieses Produkt auf einem EMS Swiss DolorClast betrieben, darf jeweils nur eines der beiden
Geräte eingeschaltet sein. In jedem Fall muss die
¨[
$
Benutzung geprüft werden.
Der Gebrauch anderer Zubehörteile oder
Kabel, die nicht empfohlen oder als Ersatzteile
geliefert werden, kann zu verstärkten Emissionen
oder verringerter Störfestigkeit dieses Produktes
führen.
COMPATIBILIDAD
ELECTROMAGNÉTICA
COMPATIBILITÀ
ELETTROMAGNETICA
ELEKTROMAGNETISK
KOMPATIBILITET
Este producto necesita precauciones
especiales referentes a la compatibilidad electromagnética y necesita ser instalado y puesto en
servicio según la guía "Compatibilidad electromagnética".
Questo prodotto necessita di precauzioni
speciali riguardo alla compatibilità elettromagnetica e deve essere installato e messo in
funzione secondo la nota "Compatibilità Elettromagnetica".
Denna produkt kräver särskild försiktighet
avseende elektromagnetisk kompatibilitet och
måste installeras och tas i drift enligt anvisningarna "Elektromagnetisk kompatibilitet".
Determinados tipos de equipos de telecomunicaciones móviles pueden interferir potencialmente con este producto. Se deben tener en
cuenta las distancias de separación recomendadas en la guía "Compatibilidad electromagnética".
Certi tipi di apparecchi di telecomunicazione
mobile potrebbero potenzialmente interferire con
questo prodotto. Tenere conto delle distanze di
separazione raccomandate nella nota "Compatibilità Elettromagnetica".
No se debe utilizar este producto cerca
/
µ
guración posible es el apilamiento con el Swiss
DolorClast EMS. Si el aparato está utilizado cerca
de un Swiss DolorClast, no se ha de enchufar
ambos aparatos al mismo tiempo. Además, antes
de utilizarlo se debe controlar su buen funcionamiento en las condiciones de utilización.
El uso de accesorios y cables distintos a los
$]*
de repuesto, puede dar lugar a un aumento de
las emisiones o a la reducción de la inmunidad
de este producto.
Questo prodotto non può essere utilizzato
a prossimità di un altro apparecchio o impilato su
quest’ultimo, eccezione fatta per l’implilamento
con il Swiss DolorClast di EMS. Se l’apparecchio è
utilizzato a prossimità di un Swiss DolorClast, non
mettere contemporaneamente i due apparecchi
sotto tensione . Inoltre, è imperativa prima dell’uso
$
/
funzionamento.
L’utilizzo di accessori o cavi diversi da quelli
$
]*
*/
può avere come conseguenza un aumento delle
emissioni o una diminuzione dell’immunità di
questo prodotto.
Vissa typer av mobiltelekommunikationsutrustning kan eventuellt störa denna produkt.
Hänsyn måste tas till de avstånd som rekommenderas i anvisningarna "Elektromagnetisk
kompatibilitet".
Denna produkt ska inte användas intill eller
staplas på annan enhet, utom vid stapling på en
EMS Swiss DolorClast. Slå inte på båda apparaterna samtidigt om produkten används intill eller
är staplad på en EMS Swiss DolorClast. Denna
apparat ska vidare alltid hållas under tillsyn, för
att kontrollera att den fungerar normalt med den
*
$
Användning av andra tillbehör och kablar
**
$]*
reservdelar kan resultera i ökad emission eller
minskad immunitet för denna produkt.
83
TROUBLESHOOTING
Status and error messages on the display
Status message
Cause
Corrective action
APPL
Handpiece is not connected or the connection to the handpiece is disconnected during shock
wave triggering
Connect the handpiece
Err 1
Error in high-voltage generator
Contact service department
Err 2
Error in high-voltage generator
Contact service department
Err 3
Error in high-voltage generator
Contact service department
Err 4
Error in high-voltage generator or HV communication cable between processor PCB and high
voltage generator defective
Contact service department
Err 5
HV communication cable between processor PCB and high voltage generator defective
Contact service department
Err 6
Memory module in device defective
Contact service department
Err 7
Memory module in handpiece defective
Contact service department
Err 8
Error on processor PCB
Contact service department
Err 9
Error on processor PCB
Contact service department
Err 10
Data error in handpiece storage module
Contact service department
Err 11
Handpiece is not programmed
Contact service department
Err 12
Handpiece is not approved for this device
Connect approved handpiece
Shock wave indicator blinks
Handpiece is close to the end of its service life. (approx. 100,000 shock waves in reserve)
Actuate the "F2" function button, blinking is deactivated
Handpiece is close to the end of its service life. (approx. 50,000 shock waves in reserve)
Blinking cannot be deactivated
Handpiece is at the end of its service life (shock wave triggering no longer possible)
Connect a new handpiece
Shock wave indicator “End”
If the problem canot be solved with this table, please contact the service department or return the device for repair.
Do not attempt a repair by yourself !
Device error
Possible cause
Corrective action
Device is not functional
Power switch is not ON
The power cable is not connected
No line / mains voltage
Line / mains fuse defective
Actuate the power switch
Connect the power cable
Check in-house power supply
Replace line / mains fuse
No shock wave
Foot pedal not connected or defective
Connect or replace foot pedal
84
MESURE À PRENDRE EN CAS D'INCIDENT
9!!!$^%+$^!!$!^%)
Message
Cause
Action corrective
APPL
La pièce à main n’est pas raccordée ou la connexion a été interrompue pendant le déclenchement de l’onde de
choc.
Raccorder la pièce à main.
Err 1
Panne dans le générateur haute tension.
Informer le Service AV.
Err 2
Panne dans le générateur haute tension.
Informer le Service AV.
Err 3
Panne dans le générateur haute tension.
Informer le Service AV.
Err 4
Panne dans le générateur haute tension ou défectuosité du câble de communication haute tension entre le processeur e-card et générateur haute tension.
Informer le Service AV.
Err 5
Défectuosité du câble de communication haute tension entre le processeur e-card et générateur haute tension.
Informer le Service AV.
Err 6
Défectuosité du module de sauvegarde de l’appareil.
Informer le Service AV.
Err 7
Défectuosité de la pièce à main.
Informer le Service AV.
Err 8
Erreur sur le processeur e-card.
Informer le Service AV.
Err 9
Erreur sur le processeur e-card.
Informer le Service AV.
Err 10
Erreur de données dans le module de sauvegarde de la pièce à main.
Informer le Service AV.
Err 11
La pièce à main n’est pas programmée.
Informer le Service AV.
Err 12
La pièce à main n’a pas été validée pour l’appareil.
Raccorder une pièce à main validée.
%^
La pièce à main atteindra bientôt sa durée de vie prévue. (Il ne reste plus qu’environ 100.000 ondes de choc !)
de choc se met à
clignoter.
La pièce à main atteindra bientôt sa durée de vie prévue. (Il ne reste plus qu’environ 50000 ondes de choc !)
Actionner la touche de FONCTION “F2” pour
désactiver le clignotement.
%^
^
%^ZZ
Raccorder une pièce à main neuve.
La pièce à main a atteint sa durée de vie prévue. (Le déclenchement d’ondes de choc n’est plus possible.)
Le clignotement ne peut plus être désactivé.
Si les problèmes ne peuvent être résolus selon la table ci-dessous, informer le Service Après-vente ou renvoyer l’appareil à l’usine pour réparation.
Ne pas procéder à une tentative de réparation !
Panne de l'appareil
Cause éventuelle
Action corrective
L’appareil ne fonctionne pas.
L’interrupteur principal n’a pas été actionné.
Le cordon d’alimentation n’est pas branché.
Il n’y a pas de tension secteur.
Le fusible secteur est défectueux.
Actionner l’interrupteur principal
Brancher le cordon d’alimentation
&**/
Remplacer le fusible secteur
Il n’y a pas d’onde de choc
La pédale n’est pas branchée ou elle est défectueuse
Brancher / remplacer la pédale
85
FEHLERBEHEBUNG
Fehlermeldungen auf der Anzeige
Informations-nummer
Ursache
Behebung
APPL
Handstück ist nicht angeschlossen oder Steckverbindung des Handstücks wird während der
Stoßwellenauslösung unterbrochen
Handstück anschließen
Err 1
Fehler im Hochspannungsgenerator
Service benachrichtigen
Err 2
Fehler im Hochspannungsgenerator
Service benachrichtigen
Err 3
Fehler im Hochspannungsgenerator
Service benachrichtigen
Err 4
Fehler im Hochspannungsgenerator oder HV-Kommunikationskabel von der Processor EKarte zum Hochspannungsgenerator defekt
Service benachrichtigen
Err 5
HV-Kommunikationskabel von der Processor E-Karte zum Hochspannungsgenerator defekt
Service benachrichtigen
Err 6
Speichermodul im Gerät defekt
Service benachrichtigen
Err 7
Speichermodul im Handstück defekt
Service benachrichtigen
Err 8
Fehler auf Processor E-Karte
Service benachrichtigen
Err 9
Fehler auf Processor E-Karte
Service benachrichtigen
Err 10
Datenfehler im Speichermodul des Handstücks
Service benachrichtigen
Err 11
Handstück ist nicht programmiert
Service benachrichtigen
Err 12
Handstück ist für das Gerät nicht freigegeben
Freigegebene Therapiequelle anschließen
Stoßwellenanzeige blinkt
Handstück hat Lebensdauer fast erreicht (Reserve ca. 100000 Stoßwellen)
Funktionstaste “F2” betätigen, das Blinken wird deaktiviert
Handstück hat Lebensdauer fast erreicht (Reserve ca. 50000 Stoßwellen)
Das Blinken ist nicht mehr deaktivierbar
Handstück hat Lebensdauer erreicht (Stoßwellenauslösung nicht mehr möglich)
Neues Handstück anschließen
Stoßwellenanzeige "End"
Falls die Fehler anhand dieser Tabelle nicht behoben werden können, bitte Service benachrichtigen, oder das Gerät zur Reparatur einsenden.
Keine eigenen Reparaturversuche vornehmen !
Gerätefehler
Mögliche Ursache
Behebung
Gerät ohne Funktion
Netzschalter nicht eingeschaltet
Netzkabel nicht angeschlossen
Keine Netzspannung vorhanden
Netzsicherung defekt
Netzschalter betätigen
Netzkabel anschließen
Hausnetz überprüfen
Netzsicherung auswechseln
Keine Stoßwelle
Fußschalter nicht eingesteckt / defekt
Fußschalter einstecken / austauschen
86
MEDIDAS A ADOPTAR EN CASO DE INCIDENTES
Mensajes de error e informaciones en el visualizador
No. de información
Causa
Eliminación
APPL
La mango no está conectada o la conexión de la mango se desconecta durante el disparo de las
ondas de choque
Conectar la mango
Err 1
Avería en generador de alta tensión
Avisar al servicio técnico
Err 2
Avería en generador de alta tensión
Avisar al servicio técnico
Err 3
Avería en generador de alta tensión
Avisar al servicio técnico
Err 4
Avería en generador de alta tensión o averiado el cable de comunicación de alta tensión entre la
tarjeta PCI del procesador y el generador de alta tensión
Avisar al servicio técnico
Err 5
Averiado el cable de comunicación de alta tensión entre la tarjeta PCI del procesador y el generador de alta tensión
Avisar al servicio técnico
Err 6
Averiado el módulo de memoria en el aparato
Avisar al servicio técnico
Err 7
Averiado el módulo de memoria en la mango
Avisar al servicio técnico
Err 8
Error en la tarjeta PCI del procesador
Avisar al servicio técnico
Err 9
Error en la tarjeta PCI del procesador
Avisar al servicio técnico
Err 10
Error de datos en el módulo de memoria de la mango
Avisar al servicio técnico
Err 11
Mango no está programada
Avisar al servicio técnico
Err 12
Mango no está homologada para el equipo
Conectar una mango homologada
Parpadea la indicación de ondas de choque
Vida útil de mango casi terminada (quedan unas 100.000 ondas de choque)
Pulsar la tecla Función “F2” para que deje de parpadear
Indicación de ondas de choque
"End"
Vida útil de mango casi terminada (quedan unas 50.000 ondas de choque)
Ya no es posible apagar la indicación intermitente
Ha terminado la vida útil de la mango (ya no se puede disparar ninguna onda de choque)
Conectar una nueva mango
Si no fuera posible eliminar los errores con la ayuda de la tabla de abajo, habrá que avisar al servicio de asistencia técnica o enviar el producto a la fábrica para su
reparación. Absténgase de repararlo.
Averías del aparato
Posible causa
Eliminación
El aparato no funciona
No se ha conectado el interruptor de la red
No está conectado el cable-red
Falta la alimentación eléctrica
Fusible de red estropeado
Pulsar el interruptor de la red
Conectar el cable-red
Comprobar la red de alimentación
Cambiar el fusible de red
No onda de choque
El interruptor de pedal no está enchufado/averiado
Enchufar/cambiar el interruptor de pedal
87
MISURE DA ADOTTARE IN CASO D'INCIDENTE
9!!$^%+'_$!$!
Numero informazione
Problema riscontrato
Soluzione
APPL
Il manipolo non è collegata o il collegamento a spina del manipolo è stato interrotto durante
il rilascio di onde d’urto
Collegate el manipolo.
Err 1
Presenza di errore nel generatore di alta tensione
Informate l’assistenza
Err 2
Presenza di errore nel generatore di alta tensione
Informate l’assistenza
Err 3
Presenza di errore nel generatore di alta tensione
Informate l’assistenza
Err 4
Presenza di errore nel generatore di alta tensione o difetto del cavo di comunicazione HV
della scheda d’ingresso della unità di elaborazione al generatore di alta tensione
Informate l’assistenza
Err 5
Il cavo di comunicazione HV della scheda d’ingresso della unità di elaborazione al generatore di alta tensione è difettoso
Informate l’assistenza
Err 6
Il modulo di memoria nell’apparecchio è difettoso
Informate l’assistenza
Err 7
Il modulo di memoria nel manipolo è difettoso
Informate l’assistenza
Err 8
Errore sulla scheda d’ingresso della unità di elaborazione
Informate l’assistenza
Err 9
Errore sulla scheda d’ingresso della unità di elaborazione
Informate l’assistenza
Err 10
Errore dati nel modulo di memoria nel manipolo
Informate l’assistenza
Err 11
El manipolo non è programmata
Informate l’assistenza
Err 12
El manipolo non è quella autorizzata per l’apparecchio
Collegate il manipolo autorizzata
Il display delle onde d’urto lampeggia
Display delle onde d’urto indica "Fine"
La durata del manipolo è quasi scaduta (resta una scorta di circa 100000 onde d’urto)
Azionate il tasto funzione "F2" Il lampeggio è disattivato
La durata del manipolo è quasi scaduta (resta una scorta di circa 50000 onde d’urto)
Non è più possibile disattivare il lampeggio.
La durata del manipolo è scaduta (non è più possibile rilasciare onde d’urto
Collegate una nuova manipolo
Se non riuscite ad eliminare l’errore seguendo quanto indicato nella presente tabella, informate l’assistenza o inviate l’apparecchio per la riparazione.
Non cercate di eseguire da soli la riparazione !
Difetti dell’apparecchio
Possibile causa
Soluzione
L’apparecchio non funziona
L’interruttore di rete non è inserito
Il cavo di rete non è collegato
tensione di rete assente
Il fusibile di rete è difettoso
Azionate l’interruttore di rete
Collegate il cavo di rete
Sostituite il fusibile di rete
Assenza di onde d’urto
L’interruttore a pedale non è stato inserito/è difettoso
Inserite/sostituite l’interruttore a pedale
88
FELSÖKNING
Drift- och felmeddelanden på displayen
Meddelandenummer
Orsak
Åtgärd
APPL
Applikatorn ej ansluten eller applikatorns anslutning bruten under tryckvågsöverföring
Anslut applikatorn
Err 1
Fel i högspänningsgeneratorn
Kontakta Service
Err 2
Fel i högspänningsgeneratorn
Kontakta Service
Err 3
Fel i högspänningsgeneratorn
Kontakta Service
Err 4
Fel i högspänningsgeneratorn eller defekt kommunikationskabel högspänning från
display-E-kort till högspänningsgenerator
Kontakta Service
Err 5
Kommunikationskabel högspänning från display-E-kort till högspänningsgeneratorn
defekt
Kontakta Service
Err 6
Minnesmodul i apparaten defekt
Kontakta Service
Err 7
Minnesmodul i apparaten defekt
Kontakta Service
Err 8
Minnesmodul i apparaten defekt
Kontakta Service
Err 9
Minnesmodul i apparaten defekt
Kontakta Service
Err 10
Datafel i applikatorns minnesmodul
Kontakta Service
Err 11
Applikatorn ej programmerad
Kontakta Service
Err 12
Applikatorn inte godkänd för utrustningen
Anslut en godkänd applikator
Tryckvågsdisplay blinkar
Applikatorns livslängd nästan uppnådd (reserv ca 100 000 tryckvågor)
Tryck på funktionsknapp "F2"; blinkandet stängs av
Applikatorns livslängd nästan uppnådd (reserv ca 50 000 tryckvågor)
Blinkandet kan inte längre stängas av
Applikatorns livslängd uppnådd (tryckvågsöverföring inte längre möjlig)
Anslut en ny applikator
Tryckvågsdisplay "End"
Om felet inte kan avhjälpas med ledning av denna tabell, kontakta vår serviceavdelning eller skicka oss apparaten för reparation.
Företa inga egna reparationsförsök !
Driftfel
Möjlig orsak
Åtgärd
Apparaten fungerar inte
Strömbrytaren inte påslagen
Nätkabeln inte ansluten
X
Nätsäkringen defekt
Slå till strömbrytaren
Anslut nätkabeln
Kontrollera nätspänningen
Byt nätsäkring
Ingen tryckvåg
Fotkontakten inte isatt/defekt
Sätt i fotkontakten/byt fotkontakt
89
27
28
29
30
31
1x
1x
1x
2x
M5x10
34
33
32
FRANCE
EMS France Sarl
23, Av. Louis Bréguet
Immeuble Santos Dumont, Bâtiment D
F-78140 Vélizy Villacoublay
Tél. +33 1 34 58 03 80
Fax +33 1 34 58 03 90
e-mail: [email protected]
GERMANY
EMS Electro Medical Systems GmbH
Schatzbogen 86
D-81829 München
Tel. +49 89 42 71 61 0
Fax +49 89 42 71 61 60
e-mail: [email protected]
ITALY
EMS Italia S.p.a
Via Faravelli 5
I-20149 Milano
Tel. +39 02 3453 8075
Fax +39 02 3453 1724
e-mail: [email protected]
SPAIN
EMS Electro Medical Systems España SL
Bernardino Obregón 14 bis
E-28012 Madrid
Tlf. +34 91 528 99 89
Fax +34 91 539 34 89
e-mail: [email protected]
Ch. de la Vuarpillière 31
1260 Nyon
SWITZERLAND
Tel. +41 22 99 44 700
Fax +41 22 99 44 701
e-mail: [email protected]
Manufactured by:
RICHARD WOLF GmbH
75438 Knittlingen
Pforzheimerstr. 32
GERMANY
USA/CANADA
EMS Corporation
11886 Greenville Avenue #120
Dallas, TX 75243, USA
Tel. +1 972 690 83 82
Fax +1 972 690 89 81
e-mail: [email protected]
WWW.EMS-SWISSQUALITY.COM
ed. 2009/10
EMS Electro Medical Systems SA
FB-464/3
© Copyright EMS SA
Distributed by: