1
IRON 2
Ed. 01-2013 V
Type : NVC-4102 + NVM-1302M + NPS-17B
Guide d’installation et d’utilisation
Manuale d’installazione e uso
Installation and user guide
Installatie en Gebruiksaanwijzing
Installation und Bedienungsanleitung
Fig. 1
1
4
3
2
Fig. 2
1
2
3
4
5
6
11
9
10
7
12
8
Fig. 3
Fig. 4
j
j
1,60 m
1 2 3 4
& &
h
!
A
B
Fig. 5
P
CFI EXTEL IRON 2 - V1 - 01/2013
Fig. 6
01,5210
ID
HOUSE
ROOM
0
1
(TERM SW)
OFF
ON
SW1
P+ P- C+ C-
*
*
3/,521
ON
OFF
C+
C-
0 0 1 1
1 2 3 4
Fig. 7
1
01,521 *
ID
01,5210
HOUSE
ROOM
0
2
ID
P+ P- C+ C-
HOUSE
ROOM
0
1
(TERM SW)
OFF
ON
SW1
(TERM SW)
OFF
ON
SW1
P+ P- C+ C-
*
*
3/,521
ON
OFF
C+
C-
0 0 1 1
1 2 3 4
2SWLRQ2S]LRQH2SFLRQDO2SomR
2SWLRQ2SWLH2SWLRQHQ
*
*
3/,521 *
C+
C-
CFI EXTEL IRON 2 - V1 - 01/2013
ON
OFF
0 1 1 1
1 2 3 4
1
1
P+ P- C+ C-
HOUSE
ROOM
(TERM SW)
OFF
ON
SW1
ID
01,52101,5210
2SWLRQ2S]LRQH2SWLRQ2SWLH2SWLRQHQ
0RQLWHXUIRXUQLGDQVXQNLW,521
.LW,521FRQPRQLWRULQFOXVR
PRQLWRULQFOXGHGLQDQ,521NLW
PRQLWRUJHOHYHUGLQHHQ,521VHW
0RQLWRULQ,5216HWHQWKDOWHQ
P+ P- C+ C-
HOUSE
ROOM
(TERM SW)
OFF
ON
SW1
ID
01,52101,5210
2
1
2
P+ P- C+ C-
HOUSE
ROOM
(TERM SW)
OFF
ON
SW1
ID
01,52101,5210
0
1
1
P+ P- C+ C-
HOUSE
ROOM
(TERM SW)
OFF
ON
SW1
ID
01,5210
0
2
CFI EXTEL IRON 2 - V1 - 01/2013
C-
C+
C-
C+
ON
OFF
3/,521 *
*
*
ON
OFF
3/,521
*
*
2
2
1 2 3 4
0 1 1 0
1
1 2 3 4
0 0 1 0
1
Fig. 8
CFI EXTEL IRON 2 - V1 - 01/2013
P+ P- C+ C-
2
HOUSE
ROOM
(TERM SW)
OFF
ON
SW1
ID
01,52101,5210
1
1
P+ P- C+ C-
HOUSE
ROOM
0
2
P+ P- C+ C-
ID
(TERM SW)
OFF
ON
SW1
HOUSE
ROOM
01,52101,5210
(TERM SW)
OFF
ON
SW1
ID
01,52101,5210
1
1
2
HOUSE
ROOM
5
0
1
2SWLRQ2S]LRQH
2SWLRQ2SWLH2SWLRQHQ
0RQLWHXUIRXUQLGDQVXQNLW,521
.LW,521FRQPRQLWRULQFOXVR
PRQLWRULQFOXGHGLQDQ,521NLW
PRQLWRUJHOHYHUGLQHHQ,521VHW
0RQLWRULQ,5216HWHQWKDOWHQ
P+ P- C+ C-
ID
(TERM SW)
OFF
ON
SW1
01,5210
C-
C+
C-
C+
ON
OFF
3/,521 *
*
*
ON
OFF
3/,521
*
*
2
2
1 2 3 4
0 1 1 0
1
1 2 3 4
0 0 1 0
1
2
1
Fig. 9
SOMMAIRE
1 CONSIGNES DE SÉCURITÉ............................................. p.2
2 DESCRIPTIF......................................................................... p.2
3 NOMENCLATURE ............................................................. p.2
a. Moniteur
b. Platine de rue (caméra)
4 INSTALLATION.................................................................. p.3
a. Installation de la platine de rue
b. Installation du moniteur
c. Mise en place de l’alimentation
5 CÂBLAGE ....................................................................
p.4
a. Raccordement moniteur/platine de rue
b. Raccordement d’une gâche ou serrure électrique
c. Raccordement d’une motorisation de portail
d. Raccordement de l’alimentation électrique
e. Paramétrage de l’apairage moniteur/platine de rue pour un kit de base
6 RACCORDEMENT DES OPTIONS ..............................
p.5
a. Moniteur(s) supplémentaire(s) MN IRON 2
b. Platine de rue supplémentaire PL IRON 2
c. Activation du mode bi-familial
7 MODE D’EMPLOI ........................................................
p.6
a. Utilisation des fonctions principales du visiophone
b. Fonction vidéo
c. Fonction caméra en mode manuel
d. Réglages sur la ou les platine(s) de rue
e. Réglages du moniteur
8 MULTI MEDIA ..................................................................... p.8
a. Cadre photo numérique
b. Musique
c. Autres réglages
9 CARACTÉRISTIQUES TECHNIQUES ............................ p.9
a. Moniteur (MN IRON 2 M)
b. Alimentation
c. Caméra (PL IRON 2)
10 OPTIONS ...................................................................p.10
11 ASSISTANCE TECHNIQUE - GARANTIE
..................p.10
12 MESURES DE SÉCURITÉ............................................p.11
F1
CFI EXTEL IRON 2 - V1 - 01/2013
1. CONSIGNES DE SÉCURITÉ
Important !
• Veuillez lire le manuel d’utilisation soigneusement avant d’installer ou d’utiliser ce produit.
• Si vous installez ce produit pour d’autres, pensez à laisser le manuel ou une copie à l’utilisateur final.
Avertissement :
• Les différents éléments ne devront être démontés que par un technicien autorisé.
Mesures de sécurité :
• Pour une exploitation en toute sécurité de ce système, il est essentiel que les installateurs, utilisateurs et techniciens suivent toutes les procédures de sûreté décrites dans ce manuel.
• Des avertissements spécifiques et des symboles d’attention sont indiqués sur les éléments si nécessaire.
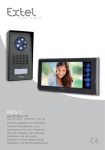
2. DESCRIPTIF (fig. 1)
1 • Platine de rue «caméra» en saillie avec visière
2 • Moniteur couleur, mural, mains libres (sans combiné)
3 • Grille de fixation du moniteur
4 • Adaptateur modulaire 230V~ / 17 V , 1,5A
Généralité
Ce visiophone est composé d’un moniteur avec son adaptateur modulaire et d’une platine de rue, il vous permet
de communiquer avec la personne se présentant à votre entrée et de commander l’ouverture de la porte et /ou
du portail.
Vous avez la possibilité de faire évoluer votre installation en rajoutant en option des moniteurs supplémentaires (un
moniteur supplémentaire par famille) et une deuxième platine de rue.
Pour une installation et un usage en toute sécurité, veuillez lire attentivement cette notice et la conserver précieusement.
3. NOMENCLATURE
a. Moniteur (fig. 2)
1. Écran de contrôle couleur de 18 cm sur lequel apparaît le visage de votre visiteur.
2. Écran allumé, communication avec le poste de rue, une seule impulsion est suffisante pour activer la liaison avec
la platine de rue. Une nouvelle impulsion coupera la liaison et l’image de la platine de rue.
Écran en veille, intercommunication avec le moniteur supplémentaire en option (MN IRON 2).// Permet de naviguer
en haut ou à gauche.
3. Relance de l’image sur le moniteur avec la sélection de la platine de rue « 1 » ou « 2 » si l’option PL IRON 2 est
installée.// Permet de naviguer en bas ou à droite.
4. Commande gâche/serrure (valide que si l’écran est allumé).// Réglages audio,vidéo et identification (valide que si
l’écran est éteint) // Entrer dans un menu // Lecture ou Pause lors de la visualisation d’une vidéo
5. Commande d’un automatisme (valide que si l’écran est allumé). // Sortie d’un menu
6. Entrer dans le menu
7. Fente pour Carte Micro SD (2 Go conseillés, 32 Go max) non fournie.
8. Micro, pour communiquer avec la platine de rue ou le moniteur supplémentaire.
9. Bornier pour le raccordement des fils
10. Micro-Interrupteur de terminaison
11. Haut parleur
12.Voyant rouge indiquant la prise en compte de l’appui sur une touche
CFI EXTEL IRON 2 - V1 - 01/2013
F2
b. Platine de rue, caméra extérieure (fig. 3)
1. Objectif de la caméra CMOS avec mise au point automatique, équipée d’un éclairage pour une vision dans la
pénombre (pour une vision de nuit, prévoir un éclairage d’appoint).
2. Haut parleur : permet de se faire entendre à l’extérieur.
3. Porte nom et Bouton d’appel : lorsqu’on appuie sur ce bouton, la sonnerie se fait entendre à l’intérieur et à
l’extérieur, l’écran et la caméra se mettent en fonction et le porte-nom s’éclaire.
4.Vis de fixation de la face avant sur son cadre. Démonter cette face pour accéder au bornier de raccordement et
aux trous de fixation de la platine de rue.
5. Micro, vous permettant de communiquer vers l’intérieur.
6. Pour inscrire votre nom sur le porte-étiquette, dégager délicatement la partie avant du porte-nom à l’aide d’un
petit tournevis.
4. INSTALLATION
Note : Si vous essayez votre produit avant de l’installer, veillez à ne pas le faire avec la platine de rue et le moniteur dans la même pièce, sinon le visiophone émettra un son strident (effet Larsen).
a. Installation de la platine de rue (fig. 4)
1. Dissocier la face avant du bloc caméra en enlevant les 2 vis (a)
2. A travers le presse-étoupe (b), faire passer le câble de 2 fils en provenance du moniteur et celui de la gâche et /
ou celui de la commande de l’automatisme.
3. Fixer la platine de rue sur le pilier à l’aide de 2 vis dans les trous (c).
4. Raccorder les fils sur le bornier (d)
5. La caméra « boule » (e) est orientable sans outil. (chap. 7.d)
6. 2 réglages sont accessibles sur le haut de la platine de rue : (chap. 7.d)
Pour retoucher les réglages, utiliser un petit tournevis et le tourner délicatement sans forcer sur les butées.
(f) à gauche, réglage du volume pour le haut-parleur de la platine de rue.
(g) à droite, réglage du volume pour le haut-parleur du moniteur.
7. Les micro interrupteurs (h), pour paramétrer l’adresse de la platine de rue en fonction de l’installation.
8. Remonter la plaque frontale et la verrouiller en replaçant les 2 vis au bas de la platine de rue (a).
Bien positionner la façade dans les encoches situées en haut de la platine de rue (j).
Important : Ne pas mettre de vis dans le trou du micro (5, fig.3).
Important : Mettre un joint silicone* sur la moitié supérieure entre la platine de rue et le mur.(i, fig.4)
Ne pas siliconer la moitié inférieure afin d’éviter toute formation de buée et une oxydation prématurée de l’électronique. *Ne pas utiliser de silicone à base d’acide acétique (odeur de vinaigre)
Important : Ne pas exposer la caméra directement face au soleil, ou face à une surface réfléchissante.
Conseil : il est recommandé de faire passer les câbles dans une gaine de protection, afin de les protéger des chocs
et des intempéries.
b. Installation du moniteur (fig. 5)
1. Fixer le support mural
2. Raccorder les 2 fils de la platine de rue et les 2 fils d’alimentation (chap 5.a) en respectant bien le schéma de
câblage (fig 6 pour une installation de base)
3. Mettre en place le moniteur sur son support mural.
4. Seulement après avoir raccordé la platine de rue, brancher l’alimentation 230 V~ sur l’adaptateur modulaire
(sur une installation conforme aux normes en vigueur, NFC 15-100 pour la France)
Attention à la polarité de l’alimentation.
c. Mise en place de l’alimentation
- Mettre en place l’adaptateur modulaire sur un rail DIN dans un tableau modulaire ou le fixer sur un support avec
les 2 pattes noires clipsées sur les côtés de l’alimentation.
F3
CFI EXTEL IRON 2 - V1 - 01/2013
5. CÂBLAGE
Dans le but d’éviter les risques de parasites et de dysfonctionnement, ne pas passer le câble de votre visiophone
dans la même gaine que les câbles électriques.
1. Bien raccorder les appareils en suivant les schémas de câblage. (voir fig.6-7-8-9)
2. Seulement 2 fils sont nécessaires pour toutes les fonctions :
Sonnerie, image, son, commande d’un automatisme et la commande d’une gâche ou serrure électrique
Distance entre la dernière platine
et le dernier moniteur
Type de câble à utiliser
De 1 à 100 mètres
2 fils de 1,5 mm²
ATTENTION : En aucun cas, ne doubler des fils de petites sections pour simuler du 1,5mm2
a. Raccordement moniteur/platine de rue :
• Bornes « C+» «C-» du moniteur sur les bornes « C+» «C-» de la platine de rue.
Afin d’éviter les perturbations vidéo, il est conseillé de réduire si possible la distance entre le moniteur le plus
éloigné et la platine de rue (voir câblage en étoile fig 9)
b. Raccordement d’une gâche ou serrure électrique (fig. 6)
La raccorder directement sur les bornes
de la platine de rue (aucune polarité à respecter).
A noter que cette fonction n’est valide que si l’écran est allumé. Une coupure brève de l’image se
produit au moment de la commande.
Important : La gâche ou la serrure électrique que vous allez installer, devra impérativement être équipée d’une
mémoire mécanique et être de faible consommation, comme toutes les références EXTEL.
c. Raccordement d’une motorisation de portail (fig. 6)
de la platine de rue. La platine de rue délivre un contact “sec”
La raccorder directement sur les bornes
sans courant à raccorder sur la commande “bouton poussoir” de votre automatisme.
A noter que cette fonction n’est valide que si l’écran est allumé.
d. Raccordement de l’alimentation électrique (fig. 6)
La raccorder directement sur les bornes P+ et P- au dos du moniteur. (Attention de bien respecter la polarité)
- Un seul bloc d’alimentation suffit dans le cas d’une installation avec plusieurs moniteurs.
- L’alimentation doit être installée sur le moniteur le plus proche de la première platine de rue.
e. Paramétrage de l’apairage moniteur/platine de rue pour un kit de base (Fig.6)
Votre visiophone est livré déjà apairé pour une configuration de base. Vous pouvez le vérifier ou le changer si
besoin en faisant les manipulations suivantes :
Pour le moniteur :
- Appuyer sur la touche
, puis sélectionner ID en utilisant le curseur
, valider avec la touche
HOUSE 0
HOUSE 1
ROOM 1
ROOM 2
= Famille 1
= Famille 2
= Poste principal
= Poste secondaire
la configuration pour un kit de base doit être HOUSE 0 ROOM 1
Vous pouvez paramétrer l’adresse de votre moniteur en appuyant sur les touches
et
glages en appuyant sur
, sortir du menu avec
.
Au dos du moniteur, le micro-interrupteur de terminaison (fig 2.10) doit être en position ON
CFI EXTEL IRON 2 - V1 - 01/2013
,validez vos ré-
F4
- Platine de rue :
la platine de rue se paramètre par les micro-interrupteurs (Fig.4.h)
ON
OFF
0 0 1 1
1 2 3 4
switch 1 et 2 : adresse de la platine
switch 3 : impédance à régler en fonction de la qualité de la vidéo sur l’écran
switch 4 : ON pour 1 famille, OFF pour 2 familles.
Après chaque modification du réglage, il est nécessaire de débrancher l’alimentation durant au moins 30 secondes.
Switch de terminaison 3 : il permet d’ajuster l’impédance du câble et est d’une grande aide en cas de mauvaise
qualité d’image. A positionner en ON ou OFF en fonction de la qualité de la vidéo sur l’écran.
6. RACCORDEMENT DES OPTIONS
a. Moniteur(s) supplémentaire(s) MN IRON 2
• Le moniteur supplémentaire se raccorde avec 2 fils sur le moniteur précédent.
• L’installation de ce moniteur vous oblige à modifier le paramètre de l’ID : HOUSE = 0 ROOM = 2 pour un poste
supplémentaire ou HOUSE = 1 ROOM = 1 pour une deuxième habitation (voir schémas de câblage fig. 7-8-9)
• Appuyer sur la touche
, puis sélectionner ID en utilisant le curseur
, valider avec la touche
. Vous
pouvez paramétrer l’adresse de votre moniteur en appuyant sur les touches
et
,validez vos réglages en
appuyant sur
, sortir du menu avec
.
• Sur ce deuxième moniteur vous avez aussi le choix de la sonnerie.
• Ce moniteur ne possède pas de slot SD, ni de menu multi-média.
b. Platine de rue supplémentaire PL IRON 2
• La platine rue supplémentaire se raccorde avec 2 fils sur la platine de rue précédente.
• L’installation de cette platine de rue vous oblige à modifier la position des micro-interrupteurs (voir schéma de
câblage fig. 7-8-9 et chap 5e)
ON
OFF
0 1 1 1
1 2 3 4
Après chaque modification du réglage, il est nécessaire de débrancher l’alimentation durant au moins 30 secondes
c. Activation du mode bi-famillial
Se reporter au schéma de câblage (fig. 8 et 9)
- Modifier la position des micro-interrupteurs sur la platine de rue (switch 4 en off) et, sur les moniteurs, confirmer
les paramètres de l’ID suivant votre installation. (chap 6a)
Il est nécessaire de débrancher l’alimentation durant au moins 30 secondes
Rappel : Il est nécessaire de débrancher l’alimentation durant au moins 30 secondes dans tous les cas où le produit ne
fonctionne pas correctement et notamment après :
- Ajout d’un moniteur
- Modifications du câblage
- Modifications de la position des micro-interrupteurs au dos du moniteur et platine de rue.
- Coupures secteur 230 V~ suite à un orage ou travaux
CONSIGNE DE SÉCURITÉ
Le transformateur devra impérativement être monté sur le rail DIN d’un tableau modulaire. Il est bien
entendu que les cache-borniers devront être obligatoirement remontés ; d’autre part le raccordement doit
se faire sur une installation électrique conforme à la norme NFC 15-100 pour la France, et UNE FOIS LE
CÂBLAGE COMPLÈTEMENT TERMINÉ.
Il est impératif de respecter la polarité lors du branchement.
F5
CFI EXTEL IRON 2 - V1 - 01/2013
7. MODE D’EMPLOI
Important : Les touches sensitives doivent être manipulées par effleurement des doigts. Le témoin rouge
(12 fig 2) indique la validation de l’appui.
a. Utilisation des fonctions principales du visiophone
• Un appel sur le bouton de la platine de rue déclenche un signal sonore et l’allumage du moniteur principal penpour communiquer avec lui.
dant environ 30 secondes. Une fois le visiteur identifié, appuyer sur la touche
Notes : - Une seule impulsion sur la touche
est suffisante pour entrer en communication avec la platine de rue.
- Dans le cas d’une installation avec plusieurs moniteurs, seul le moniteur paramétré «ROOM 1» affiche
l’image du visiteur. Les autres moniteurs font entendre la sonnerie sans afficher l’image, ils doivent appuyer sur
pour prendre la communication. Seul le moniteur sélectionné, que ce soit le principal ou l’un des autres, peut
gérer la communication et l’ouverture pour un appel.
• Un appel extérieur sera signalé sur les moniteurs, avec la possibilité de réponse avec l’appareil de son choix pour
une durée d’environ 15 secondes.
• La conversation terminée attendre la fin de la temporisation d’environ 60 secondes ou appuyer sur la touche
pour éteindre le moniteur.
- Pour relancer l’image 30 secondes supplémentaires, appuyer sur la touche
.
- Si vous avez une deuxième platine de rue en option, appuyer une deuxième impulsion sur la touche
passer d’une platine de rue à l’autre.
Si vous appuyez 2 fois sur la touche
pour
et que la caméra n’est pas connectée, vous avez un écran noir.
- Pour activer la fonction monitoring appuyer sur la touche
- Pour commander la gâche ou la serrure appuyer sur la touche
- Pour commander un automatisme appuyer sur la touche
.
.
A noter que les fonctions d’ouverture ne sont valides que si l’écran est allumé. Une coupure brève
de l’image se produit alors au moment de la commande
Pour la fonction mémoire de passage, se reporter au chapitre 8c, video
Mode Intercommunication avec MN IRON 2:
• La touche
vous permet d’appeler le moniteur supplémentaire et de rentrer en liaison, si le moniteur appelé
appuie également sur la touche
.
• Une impulsion sur la touche
met fin à la conversation.
b. Fonction vidéo - fonction possible si une micro carte SD est insérée dans le moniteur (non fournie)
Enregistrement automatique du visiteur lors d’un appel (vidéo seule, pas d’audio) : cette fonction est active d’origine
dans les paramètres de votre visiophone. En cas de non enregistrement se reporter au chapitre 8c.
Pour entrer dans le mode menu appuyer sur
.
Vous pouvez visionner les vidéos enregistrées de vos visiteurs sur votre Micro carte SD grâce au menu Vidéo.
- Entrer dans le menu Vidéo (1ere icône) en appuyant sur la touche
. Naviguer dans les différents dossiers
pour trouver votre vidéo à l’aide des curseurs
et
puis appuyer sur la touche
pour lire la vidéo.
CFI EXTEL IRON 2 - V1 - 01/2013
F6
Note :
MP4-AUTO : enregistrement automatique
MP4-MAN : enregistrement manuel
- Pour supprimer une vidéo, il suffit de la sélectionner et d’appuyer sur la touche
appuyant sur
.
et de valider «delete» en
Note : Les vidéos seront enregistrées sur votre micro carte SD pour un enregistrement de 15 secondes par séquence en mode automatique.
c. Fonction caméra en mode manuel - fonction possible si une micro carte SD est insérée dans le moniteur
(non fournie)
Vous pouvez enregistrer manuellement des vidéos grâce au menu Caméra. (vidéo seule, pas d’audio)
- Pour lancer l’enregistrement manuelle, vous devez rentrer dans le menu Caméra.
- Choisissez la caméra que vous voulez utiliser pour l’enregistrement (platine de rue du kit ou option : platine de
rue supplémentaire PL IRON 2) et validez votre choix avec
.
- Appuyez sur la touche
pour lancer l’enregistrement (5mn). Appuyez sur
pour stopper l’enregistrement.
- Pour les visualiser, vous devez vous reportez au paragraphe précédent (c. Vidéo : 2. Visualisation des vidéos enregistrées de vos visiteurs).
d. Réglages sur la (les) platine(s) de rue
- Si, lors de l’installation du moniteur et de la platine de rue à leurs emplacements définitifs, vous vous apercevez
d’un mauvais alignement de l’objectif de la caméra, vous pourrez rattraper ce décalage lors du câblage en manipulant la caméra horizontalement et verticalement et/ou en tournant l’orientation de la caméra.
Attention, vous ne pourrez rattraper seulement que quelques centimètres en hauteur.
- 2 réglages sont accessibles dans la platine de rue :
- En haut à gauche, réglage du volume pour le haut-parleur de la platine de rue.
- En haut à droite, réglage du volume pour le haut-parleur du moniteur.
Pour retoucher les réglages, utiliser un petit tournevis et le tourner délicatement sans forcer sur les butées.
e. Réglages du moniteur
GÉNÉRALITÉ :
• Pour accéder au menu de réglages du visiophone appuyer sur la touche
(ou sur la touche
pour le moniteur supplémentaire).
• Après avoir paramétrer, appuyer sur
pour valider et
pour retourner au menu précédent.
•Réglages de la vidéo :
Pour accéder aux réglages vidéo, sélectionner «Video» et appuyer sur
F7
CFI EXTEL IRON 2 - V1 - 01/2013
.
Vous pouvez paramètrer les réglages vidéo en appuyant à nouveau sur
touches
et
, valider vos réglages en appuyant sur
:
- «Brightness» : Luminosité
- «Contrast» : Contraste
- «Color» : Couleur
, naviguer dans les menus à l’aide des
•Réglages de l’audio :
Pour accéder aux réglages audio, sélectionner «Audio» à l’aide de la touche
Vous pouvez paramétrer les réglages audio en appuyant sur
et
,valider vos réglages en appuyant sur
:
- «Select melody» : Choix de sonnerie
- «Melody Volume» :Volume de la sonnerie
- «Voice Volume» : Volume Principale
, et appuyer sur
.
, naviguer dans les menus à l’aide des touches
•Paramètre de l’ID :
Pour accéder aux paramètres de l’ID, sélectionner «ID» et appuyer sur
.
Vous pouvez paramétrer l’adresse de votre moniteur en appuyant sur les touches
glages en appuyant sur
.(chap 5e)
et
,valider vos ré-
8. MULTI-MEDIA - fonction possible si une micro carte SD est insérée dans le moniteur (non fournie)
GÉNÉRALITÉ :
• Pour accéder aux menus du visiophone appuyer sur la touche
et utiliser les curseurs
et
pour vous
déplacer dans les menus, la touche
pour valider et la touche
pour sortir.
• Pour supprimer un fichier (vidéo/music/photo) : sélectionner le fichier, appuyer sur la touche
, choisir «delete»
pour supprimer, et valider avec
• Les fonctions multi-média se coupent au bout d’une temporisation d’une heure, à ce moment là le moniteur passe
en mode «stand by»
• Un appel de la platine de rue coupe la fonction multi-média le temps de la communication. Puis le moniteur passe
en mode «stand by»
a. Cadre Photo Numerique
Vous pouvez visionner vos photos grâce aux menus Photos. Introduisez une Micro Carte SD dans le moniteur afin
de visualiser vos photos préférées,
CFI EXTEL IRON 2 - V1 - 01/2013
F8
- Créer au préalable des dossiers dans votre Micro carte SD.
- Visualisez-les en rentrant dans le menu Photo => choisir une photo à l’aide des curseurs
et
puis taper
sur la touche
.
- Pour naviguer de photo en photo utiliser les curseurs
et
. Si vous souhaitez faire une rotation, un zoom
ou visionnage automatique (3, 6 ou 9 secondes par photos), cliquer sur la touche
.
Format photo supporté : JPEG.
b. Musique
Vous pouvez écouter votre musique grâce aux menus Musique. Introduisez une Micro Carte SD dans le moniteur
afin d’écouter vos musique préférées,
- Créer au préalable des dossiers dans votre Micro carte SD.
- Visualisez-les en rentrant dans le menu Musique => choisir une musique à l’aide des curseurs
et
puis
appuyer sur la touche
pour lire la musique, rappuyer sur cette touche pour faire pause. Le paramètre AUTOPLAY permet de lire les fichiers musique en boucle, OFFPLAY de les lire de façon manuelle
- Pour augmenter le volume, vous devez utiliser les curseurs
et
en mode lecture
Format audio supporté : MP3.
c. Autres réglages
Vous pouvez régler la date, l’heure, avoir les informations de stockage, activer l’enregistrement automatique du
visiteur lors d’un appel et formater la carte SD
Effectuer les réglages à l’aide des touches indiquées en début de chapitre 8 (Généralité).
Note : concernant le réglage du paramètre DATE, appuyer sur la touche
pour passer des heures aux minutes
ou des années aux mois et aux jours.
9. CARACTÉRISTIQUES TECHNIQUES
a. Moniteur (MN IRON 2 M)
• Référence : 811264
• Alimentation : 17 V 1.5 A
• Consommation : 8 W
• Ecran 7” (18cm)
• Résolution : 1440 x 234 points
• Dimensions (mm): 220 x 11.5
b. Alimentation
• Adaptateur modulaire 230V~ 17 V , 1.5A
F9
CFI EXTEL IRON 2 - V1 - 01/2013
c. Platine de rue (PL IRON 2)
• Référence : 720266Y
• Caméra C-MOS
• Résolution : 380 000 pixels
• Angle de prise de vue : 55°
• Sensibilité : 3 Lux
• Température d’utilisation (environ) : -10°C à +50°C.
• Indice de protection : IP44
• Dimension avec visière (mm) : 180 x 95 x 30
10. OPTIONS
• Toutes les gâches électriques Extel
• Toutes les serrures électriques Extel
• Toutes les motorisations Extel
• Moniteur supplémentaire : MN IRON 2
• 2ème platine de rue : PL IRON 2
11. ASSISTANCE TECHNIQUE - GARANTIE
Anomalie
Cause possible
Solution
• Le moniteur ne s’allume pas
• Le moniteur n’est pas alimenté
• Paramétrage de l’ID
• Vérifier que la polarité des fils + et • Rebrancher les connecteurs
• Seul le moniteur paramétré «ROOM 1» affiche
l’image lors d’un appel de la platine
• Mauvaise image et/ou
son
• Environnement
• Vérifier que les câbles utilisés sont de la bonne
section et que les câbles de liaison du visiophone
ne sont pas dans la même gaine que du 230V.
• Vérifier la position des switchs SW1
• Sonne en permanence
• Câblage
• Vérifier que les fils de liaisons ne soient pas inversés.
• Image trop lumineuse
• Position de la caméra
• Ne pas exposer l’objectif de la caméra directement au soleil ou sur une surface réfléchissante.
• Moniteur ou deuxième platine de rue
non fonctionnel
• Réglage switch
• Vérifier les Dip switch et les paramétrages de l’ID
(p5)
• Couper l’alimentation 30 secondes.
• Pas d’enregistrement
du visiteur
• Carte micro SD
• Paramétrage de l’enregistrement
• Insérer une carte micro SD
• Ne sonne pas
• Réglage
• Vérifier que le volume sonnerie ne soit pas à 0
• Pas de réinitialisation du
système.
En cas de besoin, note site technique est à votre disposition : www.cfi-extel.com
HOTLINE :€WWFPLQ
Dernière version de la notice téléchargeable en couleur sur : www.cfi-extel.com
CFI EXTEL IRON 2 - V1 - 01/2013
F10
CONDITION DE GARANTIE : Cet appareil est garanti, pièces et main d’œuvre dans nos ateliers.
La garantie ne couvre pas : les consommables (piles, batteries, etc.) et les dégâts occasionnés par : mauvaise utilisation, mauvaise installation, intervention extérieure, détérioration par choc physique ou électrique, chute ou
phénomène atmosphérique.
• Ne pas ouvrir l’appareil afin de ne pas perdre le couvert de la garantie.
• Lors d’un éventuel retour en SAV, protéger l’écran afin d’éviter les rayures.
• Entretien avec un chiffon doux seulement, pas de solvants. La garantie s’annule si vous démontez les pièces. Nettoyer l’extérieur seulement avec un tissu sec et doux. Avant le nettoyage, débranchez ou mettez l’appareil hors
tension.
Attention : N’employez aucun produit ou essence d’épuration carboxylique, alcool ou similaire. En plus
de risquer d’endommager votre appareil, les vapeurs sont également dangereuses pour votre santé et explosives.
N’employez aucun outil pouvant être conducteur de tension (brosse en métal, outil pointu...ou autre) pour le
nettoyage.
Le ticket de caisse ou la facture fait preuve de la date d’achat.
12. MESURES DE SÉCURITÉ
Les dommages provoqués par le manque de conformité au manuel mènent à l’expiration de la garantie. Nous n’assumerons aucune responsabilité pour les dommages en résultant !
Nous n’assumerons aucune responsabilité concernant tout dommage, sur les biens ou les personnes, causé par une
mauvaise manipulation ou par manque de conformité aux consignes de sécurité.
Ce produit a été fabriqué dans le respect total des consignes de sécurité. Afin de maintenir ce statut et d’assurer
la meilleure exploitation du produit, l’utilisateur doit observer les consignes et avertissements de sûreté contenus
dans ce manuel.
L’utilisateur de ce système en est responsable et se doit de vérifier si la vidéosurveillance est conforme à la loi en
vigueur dans le pays d’utilisation.
: Ce symbole indique un risque de choc électrique ou un risque de court-circuit.
- Vous ne devez utiliser ce produit qu’à une tension comprise entre : 100-240 Volts et 50-60 hertz. N’essayez jamais
d’utiliser cet appareil avec une tension différente.
- Veillez à ce que tous les raccordements électriques du système soient conformes aux consignes d’utilisation.
- Dans les établissements commerciaux, assurez-vous d’observer les règles de prévention des accidents pour les
installations électriques.
- Dans les écoles, les équipements de formation, les ateliers… la présence d’un personnel qualifié est nécessaire
pour contrôler le fonctionnement des appareils électroniques.
- Observez les consignes d’utilisation des autres appareils reliés au système.
- Veuillez contacter une personne expérimentée au cas où vous auriez des doutes au sujet du mode de
fonctionnement ou de la sûreté des appareils.
- Ne jamais brancher ou débrancher les appareils électriques avec les mains mouillées.
- Lors de l’installation de ce produit, vérifiez bien que les câbles d’alimentation ne risquent pas d’être endommagés.
- Ne remplacez jamais les câbles électriques endommagés vous-même ! Dans ce cas, enlevez-les et faites appel à
une personne expérimentée.
ATTENTION
Avertit l’utilisateur de la présence d’instructions importantes concernant l’utilisation et l’entretien (la réparation) dans la documentation accompagnant l’appareil.
$YHUWLWO·XWLOLVDWHXUGHODSUpVHQFHGH©WHQVLRQVGDQJHUHXVHVªQRQLVROpHVjO·LQWpULHXUHGX
ERvWLHU GX SURGXLW G·XQH LPSRUWDQFH VXIÀVDQWH SRXU UHSUpVHQWHU XQ ULVTXH G·pOHFWURFXWLRQ
SRXUOHVSHUVRQQHV
F11
CFI EXTEL IRON 2 - V1 - 01/2013
INDICE
1 DISPOSIZIONI DI SICUREZZA. ...................................... p.2
2 DESCRIZIONE. ................................................................... p.2
3 DESIGNAZIONE ELEMENTI............................................ p.2
a. Monitor
b. Pulsantiera esterna
4 INSTALLAZIONE ............................................................... p.3
a. Installazione della pulsantiera esterna
b. Installazione del monitor
c. Predisposizione dell’alimentazione
5 CABLAGGIO ...............................................................
p.4
a. Collegamento monitor/pulsantiera esterna
b. Collegamento di una bocchetta o di una serratura elettrica
c. Collegamento di una motorizzazione per cancello
d. Collegamento dell’alimentazione elettrica
e. Impostazione dei parametri per l’accoppiamento
monitor/pulsantiera esterna per un kit base
6 COLLEGAMENTO OPZIONI
...................................... p.5
a. Monitor supplementare/i MN IRON 2
b. Pulsantiera esterna supplementare PL IRON 2
c. Attivazione modalità bifamiliare
7 MODALITÀ D’USO
..................................................... p.6
a. Uso delle principali funzioni del videocitofono
b. Funzione video
c. Funzione telecamera in modalità manuale
d. Impostazioni pulsantiera/e esterna/e
e. Impostazioni monitor
8 MULTI MEDIA ..................................................................... p.8
a. Portafoto Digitale
b. Musica
c. Altre impostazioni
9 CARATTERISTICHE TECNICHE ..................................... p.9
a. Monitor (MN IRON 2 M)
b. Alimentazione
c. Telecamera (PL IRON 2)
10 OPZIONI ....................................................................p.10
11 ASSISTENZA TECNICA / GARANZIA .......................p.10
12 DISPOSIZIONI DI SICUREZZA ..................................p.11
CFI EXTEL IRON 2 - V1 - 01/2013
IT1
1. DISPOSIZIONI DI SICUREZZA
Importante !
• Leggere attentamente il manuale utente prima di installare o utilizzare questo prodotto.
• Se il prodotto viene installato per conto terzi, lasciare il presente manuale o copia di esso all’utente finale.
Avvertenza:
• I diversi elementi devono essere smontati solo da un tecnico autorizzato.
Misure di sicurezza:
• Per un utilizzo in assoluta sicurezza del presente sistema, è fondamentale che gli installatori, gli utenti e i tecnici
seguano tutte le procedure di sicurezza descritte nel manuale.
• Se necessario sono indicati sugli elementi avvertenze specifiche e simboli per richiamare l’attenzione.
2. DESCRIZIONE (fig. 1)
1 • Apparecchio esterno «telecamera» sporgente
2 • Monitor a colori, a muro, mani libere (senza ricevitore)
3 • Griglia di fissaggio del monitor
4 • Adattatore modulare 230V~ / 17 V , 1,5A
Generalità
Videocitofono composto da un monitor, un adattatore modulare e una pulsantiera esterna che permette di comunicare con chi è all’ingresso e comandare l’apertura della porta e/o del cancello.
È inoltre possibile aggiungere in opzione dei monitor supplementari (uno per famiglia) e una seconda pulsantiera
esterna.
Per installare e utilizzare l’impianto in tutta sicurezza leggere attentamente il presente manuale d’istruzioni e conservarlo per consultazioni future.
3. DESIGNAZIONE ELEMENTI
a. Monitor (fig. 2)
1. Display di controllo a colori di 18 cm su cui compare chi suona.
2. Display acceso, comunicazione in corso con la postazione esterna, per attivare la pulsantiera è sufficiente un
solo impulso. Un secondo impulso interrompe la visualizzazione delle immagini e il collegamento con la pulsantiera
esterna.
Display in stand-by, intercomunicazione con il monitor supplementare in opzione (MN IRON 2).// Consente di
navigare verso l’alto o verso sinistra.
3. Ripristina la visualizzazione delle immagini sul monitor e permette di selezionare la pulsantiera esterna “1” o “2”
se l’opzione PL IRON 2 è installata.// Consente di navigare verso il basso o verso destra
4. Comando bocchetta/serratura (valido solo se il display è acceso).// Impostazioni audio, video e identificazione
(valido solo se il display è spento) // Accedere a un menu // Durante la riproduzione di un video: Riproduci o Pausa
5. Comando automatismo (valido solo se il display è acceso). // Uscire da un menu
6. Accedere al menu
7. Porta per scheda Micro SD (consigliato: 2 GB, max.: 32 GB, scheda non fornita).
8. Microfono per comunicare con la pulsantiera esterna o con il monitor supplementare.
9. Morsettiera per collegamento fili
10. Microinterruttore di terminazione
11. Altoparlante
12. Spia rossa che si accende dopo aver premuto uno dei tasti per confermare che il comando è stato inviato.
IT2
CFI EXTEL IRON 2 - V1 - 01/2013
b. Pulsantiera esterna, telecamera esterna (fig. 3)
1. Obiettivo della telecamera CMOS con messa a fuoco automatica; telecamera dotata di illuminazione per visione
in penombra (per la visione notturna predisporre un’illuminazione complementare).
2. Altoparlante: permette di far sentire la propria voce a chi è in ascolto dalla pulsantiera esterna.
3. Portaetichette e Pulsante di chiamata: premendo questo pulsante si avverte una suoneria sia all’interno (in
corrispondenza del ricevitore) che all’esterno dell’abitazione (in corrispondenza della pulsantiera), il display e la
telecamera si accendono e il portaetichette s’illumina.
4. Viti per fissare la parte anteriore del videocitofono sulla staffa. Smontare la parte anteriore per accedere alla
morsettiera di collegamento e ai fori per il fissaggio della pulsantiera esterna.
5. Microfono che permette di comunicare con l’interno dell’abitazione.
6. Per scrivere il proprio nome sull’etichetta sganciare delicatamente la parte anteriore del portaetichette servendosi di un cacciavite.
4. INSTALLAZIONE
N.B.: Se si desidera provare il prodotto prima dell’installazione, fare attenzione a non effettuare il test con pulsantiera
esterna e moni-tor nella stessa stanza, altrimenti il videocitofono emetterà un suono stridente (effetto Larsen).
a. Installazione della pulsantiera esterna (fig. 4)
1. Separare la parte anteriore dal blocco telecamera rimuovendo le 2 viti (a).
2. Far passare il cavo (2 fili) proveniente dal monitor e quello per il comando della bocchetta e/o dell’automatismo
attraverso il premistoppa (b).
3. Fissare la pulsantiera esterna al pilastro avvitando le 2 viti negli appositi fori (c).
4. Collegare i fili alla morsettiera (d).
5. La telecamera “tonda” (e) è orientabile manualmente senza bisogno di utilizzare utensili. (cap. 7.d)
6. Sulla parte superiore della pulsantiera esterna è possibile effettuare 2 regolazioni: (cap. 7.d)
Per farlo, usare un cacciavite di piccole dimensioni avvitando delicatamente e senza forzare sulle battute delle viti.
(f) a sinistra: regolazione del volume dell’altoparlante della pulsantiera esterna.
(f) a destra: regolazione del volume dell’altoparlante del monitor.
7. Microinterruttori (h) per impostare l’indirizzo della pulsantiera esterna a seconda dell’impianto.
8. Rimontare il frontalino e bloccarlo sostituendo le 2 viti sulla parte inferiore della pulsantiera esterna (a).
Fare attenzione a posizionare correttamente il frontalino tra le due tacche presenti sulla parte superiore della
pulsantiera (j).
Importante: Non collocare viti all’interno del foro del microfono (5, fig. 3).
Importante: Applicare del silicone* tra la pulsantiera esterna e la parete solo sulla metà superiore della
pulsantiera (i, fig. 4).
Non applicare silicone sulla parte inferiore per evitare la formazione di condensa e la conseguente ossidazione
prematura dei componenti elettronici. *Non utilizzare silicone a base di acido acetico (odore di aceto).
Importante: Non puntare la telecamera direttamente contro la luce del sole o di fronte a una superficie
riflettente. Consiglio: per proteggere i cavi dagli urti e dalle intemperie si consiglia di farli passare all’interno di una
guaina di protezione.
b. Installazione del monitor (fig. 5)
1. Fissare il supporto murale.
2. Collegare i 2 fili della pulsantiera esterna e i 2 fili dell’alimentazione (cap. 5. a) rispettando lo schema di cablaggio
(fig. 6 per un impianto base).
3. Installare il monitor sull’apposito supporto murale.
4. Collegare l’alimentazione 230 V~ all’adattatore modulare (in un impianto conforme alle norme vigenti; per la
Francia, NFC 15-100) solo dopo aver collegato la pulsantiera esterna.
Rispettare le polarità dell’alimentazione.
c. Predisposizione dell’alimentazione
- Installare l’adattatore modulare su rotaia DIN all’interno di un quadro elettrico modulare oppure fissarlo a un
supporto mediante le 2 zanche nere agganciate ai lati dell’alimentazione.
CFI EXTEL IRON 2 - V1 - 01/2013
IT3
5. CABLAGGIO
Per evitare eventuali interferenze o malfunzionamenti non far passare il cavo del videocitofono all’interno della
stessa guaina in cui passano i cavi elettrici.
1. Collegare i dispositivi rispettando gli schemi di cablaggio. (v. figg. 6-7-8-9)
2. 2 soli fili bastano per assicurare tutte le funzioni dell’apparecchio:
Suoneria, video, audio, comando di un automatismo e comando di una bocchetta o di una serratura elettrica.
Distanza tra l’ultima pulsantiera esterna
e l’ultimo monitor
Tipo di cavo da utilizzare
da 1 a 100 metri
2 fili da 1,5 mm²
ATTENZIONE: Non addoppiare mai dei fili con sezione ridotta per simulare dei fili con sezione da 1,5 mm².
a. Collegamento monitor/pulsantiera esterna:
• Morsetti “C+” “C-“ del monitor con morsetti “C+” “C-“ della pulsantiera esterna.
Per evitare eventuali interferenze video, ove possibile, si consiglia di ridurre la distanza tra il monitor più lontano e
la pulsantiera esterna (v. cablaggio a stella fig. 9).
b. Collegamento di una bocchetta o di una serratura elettrica (fig. 6)
Collegare la bocchetta/serratura direttamente ai morsetti
della pulsantiera esterna (nessuna polarità da
rispettare). N.B.: funzione valida solo con display acceso. Quando il comando viene inviato si ha una
breve interruzione dell’immagine.
Importante: La bocchetta o la serratura elettrica da installare deve essere dotata di memoria meccanica e garantire bassi consumi (come tutti i prodotti EXTEL di tale tipologia).
c. Collegamento di una motorizzazione per cancello (fig. 6)
Collegare la motorizzazione direttamente ai morsetti
della pulsantiera esterna. La pulsantiera esterna ha un
contatto “pulito” senza corrente da collegare al comando “pulsante” dell’automatismo.
N.B.: funzione valida solo con display acceso.
d. Collegamento dell’alimentazione elettrica (fig. 6)
Collegare l’alimentazione direttamente ai morsetti P+ e P- presenti sulla parte posteriore del monitor (fare attenzione a rispettare le polarità).
- In un impianto dotato di più monitor è sufficiente un unico blocco di alimentazione.
- Installare l’alimentazione sul monitor più vicino alla prima pulsantiera esterna.
e. Impostazione dei parametri per l’accoppiamento monitor/pulsantiera esterna per un kit
base (fig. 6)
Il videocitofono è fornito già accoppiato per una configurazione base. Ove necessario è possibile controllare o
modificare l’accoppiamento come segue:
Per il monitor:
- Premere il tasto
, quindi selezionare ID con il cursore
e confermare premendo il tasto
HOUSE 0 = Famiglia 1
HOUSE 1 = Famiglia 2
ROOM 1 = Postazione principale
ROOM 2 = Postazione secondaria
la configurazione per un kit base deve essere: HOUSE 0 - ROOM 1
e
, confermare le modifiche premendo
Impostare l’indirizzo del monitor usando i tasti
uscire dal menu con
.
Il microinterruttore di terminazione (fig. 2.10) sulla parte posteriore del monitor deve essere su ON
IT4
CFI EXTEL IRON 2 - V1 - 01/2013
, quindi
- Per la pulsantiera esterna:
le impostazioni della pulsantiera esterna vengono modificate tramite i microinterruttori (fig. 4.h).
ON
OFF
0 0 1 1
switch 1 e 2: indirizzo della pulsantiera
switch 3: impedenza da regolare a seconda della qualità del video che appare sul display.
1 2 3 4 switch 4: ON per 1 famiglia, OFF per 2 famiglie.
Dopo aver modificato le impostazioni è necessario scollegare l’alimentazione per almeno 30 secondi.
Switch di terminazione 3: consente di regolare l’impedenza del cavo ed è di grande aiuto in caso di immagini di
scarsa qualità. Posizionare su ON o OFF a seconda della qualità del video che appare sul display.
6. COLLEGAMENTO OPZIONI
a. Monitor supplementare/i MN IRON 2
• Il monitor supplementare va collegato al monitor precedente tramite 2 fili.
• Per installare un monitor supplementare è necessario modificare le impostazioni dell’ID: HOUSE = 0 ROOM =
2 per una postazione supplementare o HOUSE = 1 ROOM = 1 per una seconda abitazione (v. schemi di cablaggio
figg. 7-8-9).
, quindi selezionare ID con il cursore
e confermare premendo il tasto
. Impostare
• Premere il tasto
l’indirizzo del monitor usando i tasti
e
, confermare le modifiche premendo
, quindi uscire dal
.
menu con
• Anche per il secondo monitor è possibile scegliere una suoneria.
• Il monitor supplementare non è dotato di slot SD, né di menu multimediale.
b. Pulsantiera esterna supplementare PL IRON 2
• La pulsantiera esterna supplementare va collegata alla pulsantiera esterna precedente tramite 2 fili.
• L’installazione di tale pulsantiera esterna comporta la modifica della posizione dei microinterruttori (v. schema di
cablaggio figg. 7-8-9 e cap. 5e).
ON
OFF
0 1 1 1
1 2 3 4
Dopo aver modificato le impostazioni è necessario scollegare l’alimentazione per almeno 30 secondi.
c. Attivazione modalità bifamiliare
Fare riferimento allo schema di cablaggio (figg. 8 e 9).
- Modificare la posizione dei microinterruttori sulla pulsantiera esterna (switch 4 su off) e confermare le impostazioni dell’ID sui monitor a seconda dell’impianto (cap. 6a).
È necessario scollegare l’alimentazione per almeno 30 secondi.
N.B.: È necessario scollegare l’alimentazione per almeno 30 secondi ogni volta che si verifica un malfunzionamento
del prodotto o in seguito a:
- installazione di un monitor supplementare;
- modifica del cablaggio;
- modifica della posizione dei microinterruttori sul retro del monitor e della pulsantiera esterna;
- interruzione della corrente 230 V~ dovuta a maltempo o lavori.
ISTRUZIONI DI SICUREZZA
Montare il trasformatore su rotaia DIN in un quadro elettrico modulare. Al termine del montaggio riposizionare i coprimorsetti e collegare il dispositivo a un impianto elettrico conforme alle norme vigenti (per la
Francia, norma NFC 15-100) SOLO UNA VOLTA CONCLUSA LA FASE DI CABLAGGIO.
Collegando i fili assicurarsi di rispettare le polarità.
CFI EXTEL IRON 2 - V1 - 01/2013
IT5
7. MODALITÀ D’USO
Importante: I tasti sensibili devono essere azionati sfiorandoli con le dita. La spia rossa (12 fig. 2) si accende per confermare che il comando è stato inviato.
a. Uso delle principali funzioni del videocitofono
• Quando si preme il pulsante di chiamata sulla pulsantiera esterna si avverte un segnale acustico e il monitor
per avviare la
principale si accende per circa 30 secondi. Dopo aver identificato chi suona premere il tasto
comunicazione.
una sola volta.
N.B.: - Per comunicare con la pulsantiera esterna è sufficiente premere il tasto
- In caso di impianto comprensivo di più monitor, solo quello impostato come “ROOM 1” visualizza le immagini provenienti dalla pulsantiera esterna. Gli altri monitor permettono di avvertire la suoneria senza però visualiz. Quando si
zare le immagini. Per rispondere da un monitor supplementare è necessario premere il tasto
riceve una chiamata proveniente dalla pulsantiera esterna solo il monitor selezionato (principale o non) può gestire la comunicazione e inviare un comando di apertura.
• La chiamata viene segnalata su tutti i monitor ed è possibile rispondere tramite uno qualsiasi di essi per circa 15
secondi.
• Al termine della comunicazione il monitor si spegne automaticamente dopo circa 60 secondi oppure premendo
.
il tasto
- Se si desidera continuare a visualizzare le immagini per altri 30 secondi, premere il tasto
.
- Se l’impianto comprende una seconda pulsantiera esterna, è possibile passare da una pulsantiera all’altra premendo nuovamente il tasto
.
Se la telecamera non è collegata, premendo 2 volte il tasto
- Per attivare la funzione di monitoring premere il tasto
- Per azionare la bocchetta o la serratura elettrica premere il tasto
.
- Per azionare un automatismo premere il tasto
viene visualizzata una schermata nera.
.
N.B.: la funzione di apertura è valida solo se il display è acceso. Quando il comando viene inviato si
ha una breve interruzione dell’immagine.
Per la funzione memoria buffer fare riferimento al capitolo 8c, video.
Modalità Intercomunicazione con MN IRON 2:
• Premendo il tasto
è possibile chiamare il monitor supplementare e entrare in comunicazione con lo stesso se
anche chi risponde preme il tasto
.
per chiudere la comunicazione.
• Premere il tasto
b. Funzione video - funzione disponibile solo nel monitor è inserita una scheda Micro SD (non fornita)
Registrazione automatica delle immagini in seguito a una chiamata (solo video, no audio): nelle impostazioni di fabbrica
del videocitofono tale funzione è attiva. Qualora le immagini non vengano registrate fare riferimento al capitolo 8c.
Per accedere alla modalità menu premere
.
È possibile riprodurre i video registrati sulla scheda Micro SD accedendo al menu Video.
- Accedere al menu Video (prima icona) premendo il tasto
. Navigare tra le varie cartelle usando i cursori
e
fino a individuare il video da riprodurre, quindi premere il tasto
per avviare la riproduzione.
IT6
CFI EXTEL IRON 2 - V1 - 01/2013
N.B.:
MP4-AUTO: registrazione automatica
MP4-MAN: registrazione manuale
- Per eliminare un video, selezionare il video desiderato e premere il tasto
do
.
, quindi convalidare “delete” premen-
N.B.: In modalità automatica i video saranno registrati sulla scheda Micro SD in sequenze della durata di 15 secondi.
c. Funzione telecamera in modalità manuale - funzione disponibile solo nel monitor è inserita una scheda
Micro SD (non fornita)
È possibile registrare dei video manualmente accedendo al menu Telecamera (solo video, no audio).
- Per avviare la registrazione manuale, accedere al menu Telecamera.
- Selezionare la telecamera desiderata (pulsantiera esterna compresa nel kit o opzione: pulsantiera esterna supplementare PL IRON2) e confermare la selezione premendo il tasto
.
- Premere il tasto
per avviare la registrazione (5mn). Premere
per interrompere la registrazione.
- Per riprodurre i video registrati fare riferimento al paragrafo precedente (c. Video: 2. Riproduzione video dei
visitatori registrati tramite videocitofono).
d. Impostazioni pulsantiera/e esterna/e
- Dopo aver installato il monitor e la pulsantiera esterna nelle rispettive ubicazioni definitive, qualora ci si accorga
che l’obiettivo della telecamera non è allineato correttamente, è possibile porre rimedio a tale problema in fase di
cablaggio spostando la telecamera orizzontalmente o verticalmente e/o ruotandone l’orientamento.
Attenzione: sarà possibile recuperare solo pochi centimetri in altezza.
- Sulla pulsantiera esterna è possibile effettuare 2 regolazioni:
- In alto a sinistra: regolazione del volume dell’altoparlante della pulsantiera esterna.
- In alto a destra: regolazione del volume dell’altoparlante del monitor.
Per effettuare le regolazioni usare un cacciavite di piccole dimensioni avvitando delicatamente e senza forzare sulle
battute delle viti.
e. Impostazioni monitor
GENERALITÀ:
• Per accedere al menu Impostazioni del videocitofono premere il tasto
plementare).
• Dopo aver modificato le impostazioni premere
per confermare e
• Impostazioni video:
Per accedere alle impostazioni video, selezionare “Video” e premere
Per modificare le impostazioni video premere nuovamente il tasto
tasti
e
e per confermare la modifiche premere
:
(o il tasto
per il monitor sup-
per tornare al menu precedente.
.
, per navigare all’interno dei menu usare i
CFI EXTEL IRON 2 - V1 - 01/2013
IT7
- “Brightness”: Luminosità
- “Contrast”: Contrasto
- “Color”: Colore
• Impostazioni audio:
Per accedere alle impostazioni audio selezionare “Audio” premendo il tasto
Per modificare le impostazioni audio premere
e per confermare le modifiche premere
:
- “Select melody”: Seleziona suoneria
- “Melody Volume”:Volume suoneria
- “Voice Volume”: Volume Principale
, per navigare all’interno dei menu usare i tasti
• Parametri ID:
Per accedere alle impostazioni relative all’ID, selezionare “ID” e premere
Impostare l’indirizzo del monitor usando i tasti
(cap. 5e).
, quindi premere
e
.
e
.
, quindi confermare le modifiche premendo
8. MULTIMEDIA - funzione disponibile solo nel monitor è inserita una scheda Micro SD (non fornita)
GENERALITÀ:
• Per accedere ai menu del videocitofono premere il tasto
, quindi usare i cursori
e
per spostarsi
all’interno dei menu stessi, il tasto
per convalidare e il tasto
per uscire.
• Per eliminare un file (video/musica/foto), selezionarlo, premere il tasto
, selezionare “delete” (cancella), quindi
convalidare premendo
• Le funzioni multimedia si interrompono automaticamente dopo un’ora (il monitor passa in modalità “stand-by”).
• Se si riceve una chiamata proveniente dalla pulsantiera esterna durante la comunicazione la funzione multimedia
viene interrotta. In seguito il monitor passa in modalità “stand-by”.
a. Portafoto Digitale
È possibile visualizzare fotografie accedendo al menu Foto. Per visualizzare le foto inserire una Scheda Micro SD
nel monitor,
- Prima di inserire la scheda nel monitor, accertarsi che i video contenuti nella scheda Micro SD siano raggruppati
all’interno di cartelle.
- Per visualizzare le foto, accedere al menu Foto => selezionare una foto usando i cursori
e
, quindi
premere il tasto
.
- Per navigare da una foto all’altra utilizzare i cursori
e
. Per ruotare un’immagine, zoomare o avviare la
IT8
CFI EXTEL IRON 2 - V1 - 01/2013
riproduzione automatica (3, 6 o 9 secondi per foto), cliccare sul tasto
Formato foto supportato: JPEG.
.
b. Musica
È possibile ascoltare brani musicali accedendo al menu Musica. Per avviare l’esecuzione dei brani, inserire una
Scheda Micro SD nel monitor,
- Prima di inserire la scheda nel monitor, accertarsi che i brani contenuti nella scheda Micro SD siano raggruppati
all’interno di cartelle.
- Per avviare l’esecuzione dei brani, accedere al menu Musica => selezionare un brano servendosi dei cursori
e
, quindi premere una volta il tasto
per avviare la riproduzione e premerlo nuovamente per mettere il
brano in pausa. Selezionando il parametro AUTOPLAY i file audio saranno riprodotti ciclicamente, mentre selezionando OFFPLAY i file da riprodurre dovranno essere scelti manualmente.
- Per aumentare il volume utilizzare i cursori
e
mentre il file viene letto.
Formato audio supportato: MP3.
c. Altre impostazioni
È possibile impostare la data e l’ora, avere informazioni relative ai dati salvati, attivare la videoregistrazione automatica di chi suona quando si riceve una chiamata e formattare la scheda Micro SD
Per accedere a tali impostazioni usare i tasti indicati all’inizio del capitolo 8 (Generalità).
N.B.: quando si imposta la DATA premere il tasto
per passare dalle ore ai minuti o dagli anni ai mesi e ai giorni.
9. CARATTERISTICHE TECNICHE
a. Monitor (MN IRON 2 M)
•
•
•
•
•
•
Tipo: 811264
Alimentazione: 17 V 1.5 A
Consumo: 8 W
Schermo 7” (18cm)
Risoluzione: 1440 x 234 points
Dimensioni (mm): 220 x 11.5
b. Alimentazione
• Adattatore modulare 230V~ 17 V , 1.5A
c. Pulsantiera esterna (PL IRON 2)
• Tipo: 720266Y
• Telecamera C-MOS
• Risoluzione: 380 000 pixels
CFI EXTEL IRON 2 - V1 - 01/2013
IT9
• Angolo di visione: 55°
• Sensibilità: 3 Lux
• Temperatura di utilizzo (circa): -10°C a +50°C.
• Indice di protezione: IP44
• Dimensione con visiera (mm) : 180 x 95 x 30
10. OPZIONI
• Tutti gli incontri elettrici EXTEL.
• Tutte le serrature elettriche EXTEL.
• Tutte le motorizzazioni EXTEL.
• Monitor supplementare : MN IRON 2
• 2a pulsantiera esterna : PL IRON 2
11. ASSISTENZA TECNICA / GARANZIA
Problema
Possibile causa
Soluzione
• Il monitor non si
accende
• Il monitor non è alimentato
• Parametri ID
• Controllare di aver rispettato le polarità + e - dei
fili
• Ricollegare i connettori
• Quando si riceve una chiamata proveniente dalla
pulsantiera esterna solo il monitor impostato come
"ROOM 1" visualizza le immagini
• Cattiva qualità audio/
video
• Ambiente
• Controllare che i cavi utilizzati siano della sezione
giusta e che i cavi di collegamento del videocitofono non passino all'interno della stessa guaina di
quelli della rete a 230V.
• Controllare la posizione degli switch SW1
• Non smette di suonare
• Cablaggio
• Controllare che i fili di collegamento non siano
invertiti tra loro.
• L'immagine è troppo
luminosa
• Posizione della telecamera
• Non puntare l'obiettivo della telecamera direttamente contro la luce del sole o di fronte a una
superficie riflettente.
• Il monitor o la seconda pulsantiera esterna
non funzionano
• Regolazione switch
• Controllare Dip switch e impostazioni dell’ID (p.
5)
• Interrompere l’alimentazione per 30 secondi.
• Le immagini non vengono registrate
• Scheda Micro SD
• Parametri registrazione
• Inserire una scheda Micro SD
• Non suona
• Regolazione
• Controllare che il volume della suoneria non sia
impostato su 0
• Mancato reset del sistema.
Assistenza Tecnica : +39 02 96488273
assistenza@cfi-extel.com
Ultima versione delle istruzioni scaricabili a colori su: www.cfi-extel.com
IT10
CFI EXTEL IRON 2 - V1 - 01/2013
CONDIZIONI DI GARANZIA : Questo apparecchio è garantito, pezzi di ricambio e manodopera, presso
la fabbrica. La garanzia non copre: i consumabili (pile, batterie ecc.) e i danni occasionati da: errato utilizzo, errata
installazione, intervento esterno, deterioramento a causa di urto, scarica elettrica, caduta o fenomeno atmosferico.
• Non aprire l’apparecchio al fine di non perdere la copertura della garanzia.
• Per un’eventuale restituzione al Servizio di Assistenza, proteggere lo schermo per evitare danneggiamenti.
• Pulire solo con un panno morbido, senza solventi. Prima di pulire, scollegare o togliere la corrente l’apparecchio.
Attenzione: Non impiegare nessuna soluzione pulente a base carbonilica, alcool o simili. Oltre al rischio di
danneggiare l’apparecchio, i vapori emanati sono pericolosi per la salute ed esplosivi. Non impiegare utensili conduttori di tensione (spazzole in metallo, utensili appuntiti o altro) per la pulizia.
Lo scontrino o la fattura costituiscono prova della data di acquisto.
12. DISPOSIZIONI DI SICUREZZA
I danni provocati dalla mancanza di conformità al manuale conducono alla decadenza della garanzia. Non ci
assumiamo alcuna responsabilità per i danni che ne potrebbero derivare!
Non ci assumiamo altresì responsabilità alcuna per qualsivoglia danno, a persone o beni, causato da una scorretta
manipolazione o dalla mancanza di conformità alle disposizioni di sicurezza.
Questo prodotto è stato fabbricato nel totale rispetto delle disposizioni di sicurezza. Al fine di mantenere tale
condizione e di garantire la migliore utilizzazione del prodotto, l’utente deve osservare disposizioni e avvertenze
contenute nel presente manuale.
L’utente del presente sistema deve verificare sotto la sua responsabilità che la sorveglianza sia conforme alle leggi
vigenti nel paese di utilizzo.
: Questo simbolo indica un rischio di shock elettrico o un rischio di corto circuito.
Questo prodotto deve essere utilizzato a una tensione compresa tra: 100-240 Volt e 50-60 hertz. Non tentare di
utilizzare questo apparecchio con una tensione differente.
- Sincerarsi che tutti i collegamenti elettrici del sistema siano conformi alle disposizioni di utilizzo.
- Nelle strutture commerciali, sincerarsi di osservare le regole di prevenzione degli incidenti concernenti impianti
elettrici.
- Nelle scuole, nelle strutture formative, nei laboratori… la presenza di personale qualificato è necessaria per
controllare il funzionamento degli apparecchi elettronici.
- Osservare le disposizioni di utilizzo degli altri apparecchi collegati al sistema. (videoregistratore, TV, PC per
esempio)
- Contattare una persona esperta in caso di dubbi circa le modalità di funzionamento o la sicurezza degli apparecchi.
- Mai collegare o scollegare gli apparecchi elettrici con le mani bagnate.
- Al momento dell’installazione di questi prodotti, verificare che i cavi di alimentazione non rischino di essere
danneggiati.
- Mai sostituire da soli dei cavi elettrici danneggiati ! Nel caso, toglierli e far ricorso a personale qualificato.
ATTENZIONE Avverte l’utente della presenza di istruzioni importanti circa l’utilizzo e la manutenzione (la riparazione) nella documentazione che accompagna l’apparecchio.
Avverte l’utente della presenza di “tensioni pericolose”, non isolate, all’interno della cassa del
prodotto, di una gravità sufficiente a rappresentare un rischio di folgorazione per le persone.
CFI EXTEL IRON 2 - V1 - 01/2013
IT11
SUMMARY
1 SAFETY INSTRUCTIONS................................................. p.2
2 DESCRIPTION. ................................................................... p.2
3 SPECIFICATION ................................................................ p.2
a. Monitor
b. Outdoor station
4 INSTALLATION.................................................................. p.3
a. Installing the outdoor station
b. Installing the monitor
c. Installation of the power supply
5 WIRING .......................................................................
p.4
a. Connecting the monitor/outdoor station
b. Connecting a strike plate or electric lock
c. Connecting a gate motor
d. Connecting the electrical supply
e. Monitor/outdoor station pairing settings for a basic kit
6 CONNECTING OPTIONAL EQUIPMENT ..................
p.5
a. Additional MN IRON 2 monitor(s)
b. Additional PL IRON 2 outdoor station
c. Activation of the dual-family mode
7 DIRECTIONS FOR USE ...............................................
p.6
a. Using the main functions of the videophone
b.Video function
c. Camera function in manual mode
d. Settings on the outdoor station(s)
e. Monitor settings
8 MULTI MEDIA ..................................................................... p.8
a. Digital photo frame
b. Music
c. Other settings
9 TECHNICAL SPECIFICATIONS ...................................... p.9
a. Monitor (MN IRON 2 M)
b. Power supply
c. Outdoor station (PL IRON 2)
10 OPTIONS ...................................................................p.10
11 TECHNICAL ASSISTANCE - GUARANTEE ...............p.10
12 SAFETY INSTRUCTIONS ..........................................p.11
GB1
CFI EXTEL IRON 2 - V1 - 01/2013
1. SAFETY INSTRUCTIONS
Important !
• Please read the user manual thoroughly before installing or using this product.
• If you install this product for other people, please give the manual or a copy to the end user
Warning :
• The different elements can only be dismantled by an authorised technician.
Safety instructions :
• To safely use this system, it is essential the fitters, users and technicians follow the safety procedures described
in this manual.
• Specific warnings and caution symbols are indicated on the elements if necessary.
2. DESCRIPTION (fig. 1)
1 • Surface-mounted “camera” roadside panel with rainshield
2 • Wall-mounted colour hands free monitor (without handset)
3 • Fixing grid of the monitor
4 • 230V~ / 17 V , 1,5A modular adapter
General
This videophone consists of a monitor with a modular adaptor and an outdoor station you can use to talk to the
person wishing to enter and to control the opening of the door and/or gate.
You can upgrade your equipment by adding optional additional monitors (one additional monitor per family) and a
second outdoor station.
To install and use this product safely, please read these instructions carefully and keep them in a safe place.
3. SPECIFICATION
a. Monitor (fig. 2)
1. 18-cm colour monitor on which your visitor’s face appears.
2. Monitor turned on, linked to the outdoor station. This only needs to be pressed once to activate the connection
to the outdoor station. Pressing a second time will turn off the connection and the image on the intercom.
Monitor in sleep mode, interconnection with the optional additional monitor (MN IRON 2).// Allows you to navigate upwards or to the left.
3. Image refreshed on the monitor by selecting “1” or “2” on the outdoor station if the optional PL IRON 2 is
installed.// Allows you to navigate downwards or to the right.
4. Strike plate/lock control (only available if the screen is turned on).// Audio, video and identification settings (available if the screen is off) // Enter a menu // Read or Pause when the video appears
5. Automatic opener control (only available if the screen is turned on). // Exit a menu
6. Enter the menu
7. Slot for Micro SD card (2 GB recommended, 32 GB max), not included.
8. Microphone for communicating with the outdoor station or the additional monitor.
9. Terminal block to connect the wires
10. On-Off micro-switch
11. Loudspeaker
12. Red light indicates that a button has been pressed
b. Outdoor station (fig. 3)
1. CMOS camera lens with automatic focus, with lighting for visibility at dusk (for visibility at night, use auxiliary
lighting).
2. Loudspeaker: allows you to be heard outside.
CFI EXTEL IRON 2 - V1 - 01/2013
GB2
3. Name Holder and Call Button: when this button is pressed, the bell can be heard both inside and outside, the
monitor and the camera are activated and the name holder lights up.
4. Mounting screws for the panel without the frame. Remove this panel to access the connection terminal and the
mounting holes for the outdoor station.
5. Mic, for communicating with those inside.
6. To write your name on the nameplate, carefully remove the front part of the name holder using a small screwdriver.
4. INSTALLATION
Note: If you test your product before installing it, ensure that you do not test it with the outdoor station and the
monitor in the same room to avoid the videophone emitting a shrill noise (Larsen effect).
a. Installing the outdoor station (fig. 4)
1. Detach the front panel of the camera unit by removing the 2 screws (a)
2. Run the 2-wire cable coming from the monitor and the cable coming from the strike plate and/or the cable for
the automatic opener control through the compression gland (b).
3. Attach the outdoor station to the pillar with 2 screws using the holes (c).
4. Connect the wires to the terminal (d)
5. The camera “ball” (e) can be adjusted without tools. (chap. 7.d)
6. 2 settings are accessible at the top of the outdoor station: (chap. 7.d)
To adjust the settings, use a small screwdriver, turning it gently to avoid excessive force on the stops.
(f), left, volume setting for the outdoor station loudspeaker.
(g), right, volume setting for the loudspeaker on the monitor.
7. Micro-switches (h) to configure the outdoor station address according to the installation.
8. Refit the front plaque, securing it by replacing the 2 crews at the bottom of the outdoor station (a).
Firmly position the front in the notches located at the top of the outdoor station (j).
Important: Do not put screws into the microphone hole (5, fig 3)
Important: Insert a silicon seal on the upper half between the outdoor station and the wall (i, fig.4)
Do not install a silicon seal on the lower part to avoid any condensation resulting in premature oxidation of the
electronics. *Do not use acetic acid-based silicone (vinegar odour)
Important: No not point the camera directly towards the sun, or opposite a reflective surface.
Tip: we recommend that you use protective sleeving when doing the cabling in order to protect the cables against
breakage and bad weather.
b. Installing the monitor (fig. 5)
1. Attach the wall bracket
2. Connect the 2 outdoor station wires and the 2 power supply wires (chap 5.a), paying close attention to the
wiring diagram (fig 6 for basic installation)
3. Position the monitor on the wall bracket.
4. Once the outdoor station has been connected, connect the 230 V~ power supply to the modular adaptor (for
installation in compliant with current standards, NFC 15-100 in France)
Make sure the power supply polarity is correct.
c. Installation of the power supply
- Position the modular adaptor on a DIN rail in a modular panel or install it on a bracket with the 2 black pins
clipped to the edges of the power supply.
5. WIRING
To avoid the risk of parasites and malfunctions, to no run the videophone cable through the same sleeving as the
electrical cables.
GB3
CFI EXTEL IRON 2 - V1 - 01/2013
1. Firmly connect the devices according to the wiring diagrams. (see figs. 6-7-8-9)
2. Only 2 wires are required for all functions:
Bell sound, image, sound, automatic opener control and strike plate or electric lock control.
Distance between the last panel
and the last monitor
Type of cable to be used
From 1 to 100 metres
Two 1.5 mm² wires
WARNING: Do not, under any circumstances, double up small sections of wire to make 1.5mm2.
a. Connecting the monitor/outdoor station
• Terminals “C+” “C-” of the monitor to terminals “C+” “C-” of the outdoor station.
To avoid any video disturbance, you are advised to reduce the distance between the most distant monitor and the
outdoor station, if possible (see star wiring fig.9)
b. Connecting a strike plate or electric lock (fig. 6)
Connect directly to the terminals
of the outdoor station (no need to observe polarity).
Note that this function is only available when the screen is turned on.The picture disappears briefly
when the control is activated.
Important: The strike plate or electric lock that you are about to install must have a mechanical memory and be
energy efficient, like all EXTEL products.
c. Connecting a gate motor (fig. 6)
of the outdoor station. The outdoor station delivers a “dry” contact with
Connect directly to the terminals
no current, to be connected to the “push button” control of your automatic opener.
Note that this function is only available when the screen is turned on.
d. Connecting the electrical supply (fig. 6)
Connect it directly to the P+ and P- terminals at the back of the monitor. (Take care to observe proper polarity)
- A single power unit is sufficient when installing with multiple monitors.
- The power supply must be installed on the monitor closest to the first outdoor station.
e. Monitor/outdoor station pairing settings for a basic kit (Fig. 6)
Your videophone comes already paired for basic configuration.You can check the pairing or change it, as applicable,
by doing the following:
For the monitor:
- Press the
key, then select ID using the cursor,
, validate by pressing the key
HOUSE 0 = Family 1
HOUSE 1 = Family 2
ROOM 1 = Main phone
ROOM 2 = Secondary phone
the configuration for a basic kit must be HOUSE 0 ROOM 1
You can set the address of your monitor by pressing the
and
keys, validate your settings by pressing
, exit the menu with
.
On the back of the monitor, the On-Off micro-switch (fig 2.10) must be in the ON position
- Outdoor station:
the outdoor station is set using the micro-switches (Fig.4.h)
CFI EXTEL IRON 2 - V1 - 01/2013
GB4
ON
OFF
0 0 1 1
switch 1 and 2: outdoor station address
switch 3: impedance to be set depending on the quality of the video on the screen
1 2 3 4 switch 4: ON for 1 family, OFF for 2 families.
After each change in settings, the power supply must be turned off for at least 30 seconds.
On/Off switch 3: this allows the impedance of the cable to be adjusted and is a great help in case of poor image
quality. To be set to ON or OFF depending on the quality of the video on the screen.
6. CONNECTING OPTIONAL EQUIPMENT
a. Additional MN IRON 2 monitor(s)
• The additional monitor is connected to the previous monitor using 2 wires.
• Installing this monitor forces you to modify the ID setting: HOUSE = 0 ROOM = 2 for an additional unit or
HOUSE = 1 ROOM = 1 for a second home (see wiring diagrams figs. 7-8-9)
• Press the
key, then select ID using the cursor,
, validate by pressing the
key. You can set the
address of your monitor by pressing the
and
keys, validate your settings by pressing
, exit the
menu with
.
• With this second monitor, you can choose the bell sound.
• This monitor does not have an SD slot or a multi-media menu.
b. Additional PL IRON 2 outdoor station
• The additional outdoor station is connected to the previous outdoor station using 2 wires.
• Installing this outdoor station forces you to modify the position of the micro-switches (see wiring diagram fig.
7-8-9 and chapter 5e)
ON
OFF
0 1 1 1
1 2 3 4
After each change in settings, the power supply must be turned off for at least 30 seconds
c. Activation of the dual-family mode
See the wiring diagram (figs 8 and 9)
- Modify the position of the micro-switches on the outdoor station (switch 4 to off) and, on the monitors, confirm
the ID settings according to your installation. (chap 6a)
The power supply must be turned off for at least 30 seconds
Note: The power supply must be turned off for at least 30 seconds whenever the product is not working properly and
in particular after:
- Adding a monitor
- Modifying the wiring
- Modifying the position of the micro-switches at the back of the monitor and outdoor station.
- Disconnect from the 230 V~ power source after a storm or repair work
SAFETY INSTRUCTIONS
The transformer must be installed on the DIN rail of a modular panel. It is understood that the terminal
covers must be re-installed; in addition the connection must be made on an electrical installation compliant
with standard NFC 15-100, in France, and ONCE THE WIRING HAS BEEN COMPLETED.
It is essential to ensure that the poles are correctly matched when connecting the power supply.
GB5
CFI EXTEL IRON 2 - V1 - 01/2013
7. DIRECTIONS FOR USE
Important: The touch keys must be handled by slightly touching with the fingers. The red light (12 fig 2)
indicates that the key has been pressed.
a. Using the main functions of the videophone
• Pressing the button on the outdoor station activates a tone and the main monitor turns on for about 30 seconds.
key to begin talking.
Once the visitor has been identified, press the
Notes: - Pressing the
key only once is sufficient to establish communication with the outdoor station.
- For an installation with several monitors, only the monitor set for “ROOM 1” displays the picture of the
visitor. The other monitors will emit the bell sound without displaying the picture,
must be pressed to begin
talking. Only the monitor that has been selected, whether it is the main monitor or one of the others, can control
communication and allow the visitor to enter.
• A call from outside will be displayed on the monitors, and it is possible to respond with the device of your choice
for a duration of around 15 seconds.
• When you have finished talking, wait until the time delay of about 60 seconds has expired, or press the
to turn the monitor off.
- To refresh the picture for an additional 30 seconds, press the
- If you have an optional second outdoor station, press the
station to the other.
If you press the
key
key.
key a second time to switch from one outdoor
key twice and the camera is not connected, the screen will be blank.
- To activate the monitoring function, press the key
- To control the strike plate or lock, press the
- To control an automatic opener, press the
key.
key.
Note that the opener functions are only available when the screen is turned on. The picture disappears briefly when the control is activated
For the visitor memory function, see chapter 8c, video
Intercommunication mode with MN IRON 2:
• The
key allows you to call the additional monitor and to establish a connection, if the monitor being called
also presses the
key.
• Pressing the
key once ends the conversation.
b.Video function - function available if a micro SD card (not included) is inserted in the monitor
Automatic recording of the visitor when a call is made (only video, no audio): this function is the original setting for
your videophone. If the image is not recorded, see chapter 8c.
To enter menu mode, press
.
You can watch the recordings of your visitors on your micro SD card using the Video menu.
- Enter the Video menu (1st icon) by pressing the
key. Browse the folders to find your video using the cursors
and
then press the
key to play the video.
Note:
CFI EXTEL IRON 2 - V1 - 01/2013
GB6
MP4-AUTO: automatic recording
MP4-MAN: manual recording
- To delete a video, select it, click on the
key and confirm “delete” by pressing
.
Note: Videos will be recorded by your micro SD card in a 15-second recording per sequence in automatic mode.
c. Camera function in manual mode
function available if a micro SD card (not included) is inserted in the monitor
You can record videos manually using the Camera menu. (only video, no audio)
- To launch manual recording, you must go into the Camera menu.
- Choose the camera that you wish to use for recording (outdoor station from the kit or as an option: additional
PL IRON 2 outdoor station) and confirm you choice with
.
- Press the
key to start recording (5mn). Press
to stop recording.
To view the recordings, see the previous paragraph (c. Video: 2. Viewing video recordings of your visitors).
d. Settings on the outdoor station(s)
- If you notice that the camera lens is not correctly aligned when installing the monitor and the outdoor station
in their final positions, you can compensate for this misalignment when wiring by moving the camera horizontally
and vertically and/or turning the direction of the camera.
Caution, you can only compensate by a few centimetres in height.
- 2 settings are accessible in the outdoor station:
- At the top left, volume setting for the outdoor station loudspeaker.
- At the top right, volume setting for the loudspeaker on the monitor.
To adjust the settings, use a small screwdriver, turning it gently to avoid excessive force on the stops.
e. Monitor settings
GENERAL:
• To access the videophone settings menu, press the
key (or the
key for the additional monitor).
• After completing the configuration, press
to confirm and
to return to the previous menu.
•Video settings:
To access the video settings, select “Video” and press
ou can configure the video settings by pressing
confirm your settings by pressing
:
- “Brightness”: Brightness
- “Contrast”: Contrast
- “Color”: Colour
GB7
.
again, navigate in the menus using the
CFI EXTEL IRON 2 - V1 - 01/2013
and
keys,
•Audio settings:
To access the audio settings, select “Audio” using the
You can configure the audio settings by pressing
confirm your settings by pressing
:
“Select melody”: Select melody
“Melody Volume”: Melody Volume
“Voice Volume”: Voice Volume
key, and press
.
, navigate in the menus using the
•ID configuration:
To access the ID configurations, select “ID” and press
You can set the address of your monitor by pressing the
, (chap 5e)
and
keys,
.
and
keys, confirm your settings by pressing
8. MULTI-MEDIA - function available if a micro SD card (not included) is inserted in the monitor
GENERAL:
• To access the videophone menus, press the
key and use the
and
cursors to move about in the
menus, the
key to confirm and the
key to exit.
• To delete a file (video/music/photo): select the file, press the
key, choose “delete”, and confirm with
• The multi-media functions turn off after one hour. At that time, the monitor switches to “stand by” mode.
• A call from the outdoor station turns the multi-media function off while the call is in progress. Then the monitor
switches to “stand by” mode
a. Digital photo frame
You can view your photos using the Photos menus. Insert a micro SD Card into the monitor to view your favourite
photos,
- Create folders in your micro SD card beforehand.
- View them by going into the Photo menu => choose a photo using the
and
cursors and then click
on the
key.
- To navigate between photos, use the
and
cursors. If you wish to rotate the photos, zoom in or do
a slide show (3, 6 or 9 seconds per photo), click on the
key.
Photo format supported: JPEG.
CFI EXTEL IRON 2 - V1 - 01/2013
GB8
b. Music
You can listen to music using the Music menus. Insert a micro SD card into the monitor to listen to your favourite
music,,
- Create folders in your micro SD card beforehand.
- Listen to the music by going into the Music menu => choose a piece of music using the
and
cursors
and then click on the
key to play the music. Press the key again to pause.With the AUTOPLAY configuration,
the music files are looped. With OFFPLAY, they are played manually.
- To increase the volume, use the
and
cursors in play mode
Audio format supported: MP3.
c. Other settings
You can set the date and time, see storage information, activate automatic visitor recording when a call is made,
and format the SD card.
For these settings, use the keys indicated at the beginning of chapter 8 (General).
Note: for setting the DATE, press the
key to switch from hours to minutes or from years to months and days..
9. TECHNICAL SPECIFICATIONS
a. Monitor (MN IRON 2 M)
•
•
•
•
•
•
Reference: 811264
Power supply: 17 V 1.5 A
Power consumption: 8W
Screen 7” (18cm)
Resolution 1440 x 234 points
Measurements (mm): 220 x 11.5
b. Power supply
• Modular adapter 230V~ 17 V , 1.5A
c. Roadside panel (PL IRON 2)
• Reference: 720266Y
• Camera C-MOS
• Resolution: 380 000 pixels
• Viewing angle: 55°
• Sensitivity: 3 Lux
• Operating temperature (approx.): -10°C a +50°C.
• Protection index: IP44
• Measurements with shield (mm) : 180 x 95 x 30
GB9
CFI EXTEL IRON 2 - V1 - 01/2013
10. OPTION
• All Extel electric catches
• All Extel electric locks
• All Extel mechanisms
• Additional monitor: MN IRON 2
• 2nd roadside panel: PL IRON 2
11. TECHNICAL ASSISTANCE - GUARANTEE
Anomaly
Possible Cause
Solution
• The monitor does not
turn on
• The monitor is not connected to a power source
• ID configuration
• Check the polarity of the + and – wires
• Reattach the connectors
• Only the monitor configured for "ROOM 1" displays the picture during a call from the outdoor
station
• Bad image and/or bad
sound
• Environment
• Check that the wires used are the correct size
and that the connection wires of the videophone
are not in the same sheath as the 230V.
• Check the position of the SW1 switches
• Does not stop ringing
• Wiring
• Check that the connection wires are not
reversed.
• Image is too bright
• Camera position
• Do not expose the lens of the camera directly to
sunlight or to a reflective surface.
• Monitor or second
outdoor station not
working
• Switch setting
• Check the Dip switches and the ID configurations
(p5)
• Disconnect from the power source for 30 seconds.
• The visitor is not
recorded
• Micro SD card
• Recording configuration
• Insert a micro SD card
• Does not ring
• Settings
• Check that volume of the bell sound is not at 0
• No system reset.
If necessary, our technical website is at your disposal www.cfi-extel.com
HOTLINE : 0892-35-00-69 (0,337€ttc/min)
Last version of the dowloadable manual in color on : www.cfi-extel.com
CFI EXTEL IRON 2 - V1 - 01/2013
GB10
GUARANTEE CONDITIONS : This device is guaranteed for labour and parts in our premises.
The guarantee does not cover: the consumables (batteries, etc.) and the damages caused by: misuse, improper
installation, external intervention, deterioration by mechanical or electrical shock, fall or atmospheric phenomenon.
• Never open the apparatus or the guarantee will be invalidated.
• For return in SAV, protect the screen to prevent scratching.
• Only ever clean with a soft cloth; never use solvents. Before cleaning, disconnect and switch off the system.
Caution : Do not use any acid or alcohol based or other similar cleaning product or solvent. You may damage
the appliance and the vapours are explosive and dangerous for your health.
Do not use any tool which can be voltage conductor (metallic brush, sharp tool…or other) for cleaning.
The sales slip or the invoice is required as proof of purchase date.
12. SAFETY INSTRUCTIONS
The damages caused by the non-compliance to the manual lead to the expiration of the warranty. We will not
assume any responsibility for the resulting damage!
We will not assume any responsibility concerning any damage, to the goods or people, caused by improper handling
or by non compliance with the safety instructions.
This product has been manufactured in compliance with safety instructions. In order to keep this status and
ensuring the best operation of the product, the user must respect the safety instructions and warnings contained
in this manual.
The user of this system is responsible for checking whether the video surveillance is compliant with the law in force
in the country of use.
: This symbol indicates a risk of electric shock or a risk of short circuit
- You should only use this product within a voltage range between: 100-240 Volts and 50-60 hertz. Never intend to
use this product with a different voltage.
- Make sure all electrical connections of the system are compliant with instructions of use.
- In commercial establishments, make sure to respect the rules for preventing accidents with the electrical
installations.
- In schools, training institutions and workshops… the presence of a qualified personnel is necessary to control the
operation of electronic appliances.
- Respect the instructions of use of other appliances connected to the system. (video recorder,TV, PC for example)
- Please contact an experienced person in case of doubt concerning the mode of operation or the safety of the
appliances.
- Never connect or disconnect the electrical appliances with wet hands.
- When installing this product, check the power supply cables are not liable to be damaged.
- Never replace the damaged electrical cables by yourself! In this case, remove them and contact an experienced
person.
WARNING
Informs the user about the presence of important instructions concerning the use
and the maintenance (repair) in the documentation supplied with the appliance.
Informs the user about the presence of “hazardous voltages” non-isolated inside the housing of
the product, being sufficiently high to represent a risk of electrocution for people.
GB11
CFI EXTEL IRON 2 - V1 - 01/2013
INHOUD
1 VEILIGHEIDSINSTRUCTIES. ........................................... p.2
2 BESCHRIJVING................................................................... p.2
3 NOMENCLATUUR............................................................. p.2
a. Monitor
b. Straatunit
4 INSTALLATIE...................................................................... p.3
a. Installatie van de straatunit
b. Installatie van de monitor
c. Plaatsing van de voeding
5 BEKABELING ..............................................................
p.4
a. Aansluiting van de monitor/straatunit
b. Aansluiting van een schootplaat of elektrisch slot
c. Aansluiting van een automatische poort
d. Aansluiting van de voeding
e. Instellingen van de afstemming monitor/straatunit voor een basisset
6 OPTIES AANSLUITEN ................................................
p.5
a. Extra MN IRON 2-monitor(en)
b. Extra PL IRON 2-straatunit
c. Activering van de modus voor een dubbele woning
7 GEBRUIKSAANWIJZING ............................................
p.6
a. De belangrijkste functies van de videofoon
b.Videofunctie
c. Handmatige camerafunctie
d. Instellingen van de straatunit(s)
e. Instellingen op de monitor
8 MULTI MEDIA ..................................................................... p.8
a. Digitale fotolijst
b. Muziek
c. Andere instellingen
9 TECHNISCHE EIGENSCHAPP ........................................ p.9
a. Monitor (MN IRON 2 M)
b.Voeding
c. Straatunit (PL IRON 2)
10 OPTIES .......................................................................p.10
11 TECHNISCHE HULPVERLENING / GARANTIE ........p.10
12 VEILIGHEIDSINSTRUCTIES ......................................p.11
CFI EXTEL IRON 2 - V1 - 01/2013
NL1
1. VEILIGHEIDSINSTRUCTIES
Belangrijk !
• Lees de gebruiksaanwijzing zorgvuldig door voordat u dit product installeert of gebruikt.
• Als u dit product installeert voor derden, denk er dan aan om de handleiding of een kopie achter te laten voor
de eindgebruiker.
Waarschuwing :
• De verschillende onderdelen mogen alleen worden gedemonteerd door een erkende reparateur.
Veiligheidsmaatregelen :
• Voor een geheel veilig gebruik van dit systeem, is het noodzakelijk dat de installateurs, gebruikers en technici alle
in deze handleiding beschreven veiligheidsprocedures volgen.
• Er worden zonodig specifieke waarschuwingen en aandachtssymbolen aangegeven op de onderdelen.
2. BESCHRIJVING (fig. 1)
a • Straatunit “camera” met overhangende rand
b • Kleuren wandmonitor, handsfree (zonder hoorn)
c • Bevestigingsrek van de monitor
d • Adapter modulair 230V~ / 17 V , 1,5A
Algemeen
Deze videofoon bestaat uit een monitor met bijbehorende modulaire adapter en een straatunit en stelt u in staat
met de persoon te praten die bij u aan de voordeur/poort staat en de deur en/of poort te openen.
U kunt uw installatie desgewenst uitbreiden met extra, optionele, monitoren (een extra monitor voor elke woning)
en een tweede straatunit.
Lees deze handleiding goed door en bewaar deze zorgvuldig, zodat u de videofoon veilig kunt installeren en gebruiken.
3. NOMENCLATUUR
a. Monitor (fig. 2)
1. 18-cm kleurenscherm waarop het gezicht van uw bezoeker wordt weergegeven.
2. Scherm ingeschakeld, communicatie met de straatunit: eenmaal drukken is voldoende om verbinding te maken
met de straatunit. Met nog een keer drukken verbreekt u de verbinding met de straatunit en verdwijnt het beeld.
Stand-byscherm, communicatie met de optionele extra monitor (MN IRON 2).// Hiermee beweegt u naar boven
of naar links.
3. Start opnieuw de beeldweergave op de monitor met de geselecteerde straatunit 1 of 2 als de optionele PL IRON
2 is geïnstalleerd.// Hiermee beweegt u naar beneden of naar rechts.
4. Bediening schootplaat/slot (wanneer het scherm is ingeschakeld)// Instellingen voor geluid, beeld en identificatie
(wanneer het scherm is uitgeschakeld) // Een menu openen// Weergave of pauzeren tijdens de weergave van een
video
5. Bediening van een automatisch hek (wanneer het scherm is ingeschakeld) // Een menu sluiten
6. Het menu openen
7. Sleuf voor Micro SD-kaart (2 GB aanbevolen, maximaal 32 GB), niet meegeleverd
8. Microfoon om te kunnen communiceren met de straatunit of de extra monitor
9. Connector voor de aansluiting van de draden
10. Micro-afsluitschakelaar
11. Luidspreker
12. Rood lampje dat brandt ter bevestiging dat op een toets is gedrukt
NL2
CFI EXTEL IRON 2 - V1 - 01/2013
b. Straatunit, buitencamera (afb. 3)
1. Lens van de CMOS-camera met automatische scherpstelling; uitgerust met een lampje om te kunnen zien tijdens
de schemering (zorg voor steunverlichting voor ‘s nachts).
2. Luidspreker: hiermee kan de persoon buiten u horen.
3. Naamplaatje en bel: wanneer iemand op deze knop drukt, klinkt binnen en buiten een bel, worden het scherm en
de camera ingeschakeld en wordt het naamplaatje verlicht.
4. Bevestigingsschroef voor de voorkant van het frame.Verwijder deze kant om toegang te krijgen tot de aansluiting
en de bevestigingsgaten voor de straatunit.
5. Microfoon waarmee de bezoeker met de persoon binnen kan communiceren
6. Om uw naam op het etiket van het naamplaatje te schrijven verwijdert u voorzichtig het voorste gedeelte van
het naamplaatje met behulp van een kleine schroevendraaier.
4. INSTALLATIE
Opmerking: als u het product vóór de installatie wilt testen, moet u ervoor zorgen dat de straatunit en de
monitor zich hierbij niet in hetzelfde vertrek bevinden, omdat de videofoon anders een schelle fluittoon kan afgeven (Larsen-effect).
a. Installatie van de straatunit (afb. 4)
1. Maak de voorkant van het camerablok los door de twee schroeven te verwijderen (a).
2. Leid de 2-draads kabels van de monitor en van de schootplaat en/of van de bediening van het automatische hek
door de pakkingbus (b).
3. Bevestig de straatunit aan de paal met twee schroeven in de gaten (c).
4. Sluit de draden aan op de connector (d).
5. De bolcamera (e) kan zonder gereedschap worden gericht (hoofdstuk 7.d).
6. Er zijn twee instelmogelijkheden aan de bovenkant van de straatunit (hoofdstuk 7.d).
Om de instellingen te wijzigen, draait u met een kleine schroevendraaier voorzichtig, zonder forceren, de aanslagen.
(f) links: om het volume van de luidspreker van de straatunit te regelen.
(g) rechts, om het volume van de luidspreker van de monitor te regelen.
7. DIP-switches (h) waarmee u het adres van de straatunit conform de installatie instelt.
8. Plaats de voorplaat weer terug en zet deze vast met de twee schroeven aan de onderkant van de straatunit (a).
Let erop dat de voorkant goed in de inkepingen boven in de straatunit (j) valt.
Belangrijk: plaats geen schroeven in het gat van de microfoon (5, afb. 3).
Belangrijk: dicht de ruimte tussen de straatunit en de muur over de bovenste helft af met siliconen* (i, afb.4).
Dicht de onderste helft niet af met siliconen om condensatie en vroegtijdige oxidatie van de elektronica te voorkomen. *Gebruik geen siliconen op basis van azijnzuur (ruikt naar azijn).
Belangrijk: plaats de camera niet direct in de zon of tegenover een weerspiegelend oppervlak.
Tip: het verdient aanbeveling de kabels door een beschermende buis te laten lopen om die tegen schokken en
weersinvloeden te beschermen.
b. Installatie van de monitor (afb. 5)
1. Bevestig de wandsteun.
2. Sluit de twee draden van de straatunit en de twee voedingskabels aan (hoofdstuk 5.a) conform het bedradingsschema (afb. 6 voor een basisinstallatie).
3. Bevestig de monitor correct op de wandsteun.
4. Sluit de modulaire adapter pas nadat u de straatunit hebt aangesloten aan op het stopcontact (230 V) (op een
installatie die voldoet aan de geldende regelgeving, voor Frankrijk NFC 15-100).
Let op de polariteit van de voeding.
c. Plaatsing van de voeding
- Plaats de modulaire adapter op een DIN-rail in een modulepaneel of bevestig die op een steun met de twee
zwarte pootjes die aan de zijkanten van de voeding zijn geklemd.
CFI EXTEL IRON 2 - V1 - 01/2013
NL3
5. BEKABELING
Laat de kabel van de videofoon niet door dezelfde buis lopen als de elektriciteitskabels om het risico van storingen
en een slechte werking te vermijden.
1. Sluit de apparaten goed aan volgens de bedradingsschema’s (zie afb. 6-7-8-9).
2. Er zijn maar twee kabels nodig voor alle functies:
bel, beeld, geluid, bediening van een automatisch hek en de bediening van een schootplaat of elektrisch slot.
Afstand tussen de laatste unit
en de laatste monitor
Te gebruiken kabeltype
Van 1 tot 100 meter
2 draden van 1,5 mm²
LET OP: verdubbel nooit draden met een kleinere doorsnede om te gebruiken als een draad van 1,5 mm2.
a. Aansluiting van de monitor/straatunit
• Connectoren “C+” “C-” van de monitor op de connectoren “C+” “C-” van de straatunit.
Het is raadzaam om zo mogelijk de afstand tussen de verst verwijderde monitor en de straatunit te verkleinen om
videostoringen te voorkomen (zie sterbekabeling, afb. 9).
b. Aansluiting van een schootplaat of elektrisch slot (afb. 6)
Sluit deze direct aan op de connectoren
van de straatunit (u hoeft geen rekening te houden met polariteit).
Let op dat deze functie alleen werkt als het scherm ingeschakeld is. Tijdens de bediening verdwijnt
het beeld even van het scherm.
Belangrijk: de schootplaat die of het elektrische slot dat u installeert, moet absoluut zijn voorzien van een mechanisch geheugen en moet weinig stroom verbruiken, zoals alle EXTEL-bronnen.
c. Aansluiting van een automatische poort (afb. 6)
Sluit deze direct aan op de connectoren
van de straatunit. De straatunit levert een “potentiaalvrij” contact
zonder stroom naar de bediening van de “drukknop” van uw automatische poort.
Let op dat deze functie alleen werkt als het scherm ingeschakeld is.
d. Aansluiting van de voeding (afb. 6)
Sluit de voeding direct aan op de “P+”- en “P-”-connectoren aan de achterzijde van de monitor (let hierbij goed
op de polariteit).
- Eén voedingsblok volstaat bij een installatie met meerdere monitoren.
- De voeding moet geïnstalleerd worden op de monitor die zich het dichtst bij de eerste straatunit bevindt.
e. Instellingen van de afstemming monitor/straatunit voor een basisset (afb. 6)
Bij levering is uw videofoon al correct ingesteld voor een basisconfiguratie. U kunt deze configuratie als volgt
controleren en zo nodig wijzigen:
Voor de monitor:
- Druk op toets
, selecteer ID met de pijltoets
en bevestig met
.
HOUSE 0
HOUSE 1
ROOM 1
ROOM 2
= Woning 1
= Woning 2
= Hoofdmonitor
= Secundaire monitor
De configuratie voor een basisset moet zijn HOUSE 0 ROOM 1
U kunt het adres van uw monitor instellen door op
en
te drukken en uw instellingen te bevestigen
te drukken. Druk op
om het menu te sluiten.
door op
De micro-afsluitschakelaar aan de achterkant van de monitor (afb. 2.10) moet op ON staan.
NL4
CFI EXTEL IRON 2 - V1 - 01/2013
- Straatunit:
De straatunit wordt ingesteld met DIP-switches (afb. 4h).
ON
OFF
0 0 1 1
1 2 3 4
Switch 1 en 2: adres van de straatunit
Switch 3: impedantie regelen afhankelijk van de beeldkwaliteit op het scherm
Switch 4: ON voor één woning, OFF voor twee woningen.
Na elke wijziging in de instellingen moet u de voeding uitschakelen en minimaal 30 seconden uitgeschakeld laten.
Afsluitschakelaar 3: hiermee kunt u de impedantie van de kabel aanpassen, wat zeer handig is in het geval van
slechte beeldkwaliteit. Zet deze in de ON- of OFF-stand, afhankelijk van de kwaliteit van het beeld op het scherm.
6. OPTIES AANSLUITEN
a. Extra MN IRON 2-monitor(en)
• De extra monitor wordt met twee draden op de vorige monitor aangesloten.
• Voor installatie van deze monitor moet u de ID-parameter wijzigen: HOUSE = 0 ROOM = 2 voor een extra monitor of HOUSE = 1 ROOM = 1 voor een tweede woning (zie het bedradingsschema afb. 7-8-9).
• Druk op
, selecteer ID met de pijltoets
en bevestig met
. U kunt het adres van uw monitor instellen door op
en
te drukken en uw instellingen te bevestigen door op
te drukken. Druk op
om het menu te sluiten.
• Op deze tweede monitor kunt u desgewenst ook zelf het belsignaal kiezen.
• Deze monitor heeft geen SD-sleuf of multimedia-menu.
b. Extra PL IRON 2-straatunit
• De extra straatunit wordt met twee draden op de vorige straatunit aangesloten.
• Voor de installatie van deze straatunit moet u de positie van de DIP-switches wijzigen (zie bedradingsschema afb.
7-8-9 en hoofdstuk 5e).
ON
OFF
0 1 1 1
1 2 3 4
Na elke wijziging in de instellingen moet u de voeding uitschakelen en minimaal 30 seconden uitgeschakeld laten.
c. Activering van de modus voor een dubbele woning
Raadpleeg het bedradingsschema (afb. 8 en 9).
- Pas de positie van de DIP-switches op de straatunit aan (switch 4 staat OFF) en bevestig, op de monitoren, de
ID-parameters afhankelijk van uw installatie (hoofdstuk 6a).
U moet de voeding uitschakelen en minimaal 30 seconden uitgeschakeld laten.
Herinnering: u moet de voeding uitschakelen en minimaal 30 seconden uitgeschakeld laten in alle gevallen waarin het
product niet naar behoren werkt en met name na:
- Toevoeging van een monitor
- Wijzigingen in de bedrading
- Wijzigingen in de positie van de DIP-switches aan de achterkant van de monitor en de straatunit.
- Stroomonderbrekingen (230 V) door onweer of werkzaamheden
BEVEILIGINGWAARSCHUWING
De transformator moet beslist worden bevestigd op de DIN-rail van een modulepaneel. Uiteraard moeten de afdekplaatjes van de connectoren weer worden teruggeplaatst. Bovendien moet het systeem worden aangesloten op een elektrische installatie conform norm NFC 15-100 voor Frankrijk en PAS ALS
DE BEDRADING HELEMAAL KLAAR IS.
Bij de aansluiting moet rekening worden gehouden met de polariteit.
CFI EXTEL IRON 2 - V1 - 01/2013
NL5
7. GEBRUIKSAANWIJZING
Belangrijk: de druktoetsen hoeft u slechts licht met de vingers aan te raken. Het rode lampje (12, afb. 2)
geeft aan dat de aanraking is geregistreerd.
a. De belangrijkste functies van de videofoon
• Wanneer iemand op de knop van de straatunit drukt, wordt een geluidssignaal afgegeven en wordt de hoofdmonitor ingeschakeld. Deze blijft ongeveer 30 seconden ingeschakeld. Wanneer u heeft gezien wie aan de deur staat,
om met uw bezoeker te praten.
drukt u op de toets
Opmerkingen: - U hoeft slechts eenmaal op
te drukken om met de straatunit te kunnen communiceren.
- Wanneer er meerdere monitoren zijn geïnstalleerd, verschijnt de bezoeker alleen op de hoofdmonitor met
parameter “ROOM 1”. Via de andere monitoren weerklinkt wel de bel, maar is geen beeld zichtbaar. Om de communicatie over te nemen op een andere monitor, moet de gebruiker op
drukken. Alleen via de geselecteerde monitor, of dat nu de hoofdmonitor is of een andere, is communicatie mogelijk en kan de poort/het slot
worden geopend.
• Wanneer iemand buiten op de bel drukt, wordt dit gesignaleerd op de monitoren en kan de bewoner gedurende
ongeveer 15 seconden via het apparaat van zijn keuze antwoorden.
• Wacht na afloop van het gesprek ongeveer 60 seconden of druk op
om de monitor uit te schakelen.
- Als u het beeld nog 30 seconden langer op de monitor wilt laten staan, drukt u op
.
- Als u een optionele tweede straatunit hebt, drukt u nog een keer op
om van de ene op de andere straatunit over te schakelen.
Als u tweemaal op
drukt en de camera niet is aangesloten, blijft het scherm zwart.
- Wanneer u de bewakingsfunctie wilt inschakelen, drukt u op
- Druk op
om de schootplaat of het slot te bedienen.
- Druk op
om het automatische hek te bedienen.
.
Let op dat de openingsfuncties alleen werken als het scherm ingeschakeld is. Tijdens de bediening
verdwijnt het beeld even van het scherm.
Zie hoofdstuk 8c, Video, voor de geheugenfunctie.
Communicatiemodus met MN IRON 2:
• Met de toets
kunt u de extra monitor aanroepen en daar verbinding mee maken, als op de desbetreffende
monitor ook op
wordt gedrukt.
• Met één druk op
wordt het gesprek beëindigd.
b.Videofunctie - voor deze functie moet een Micro SD-kaart in de monitor zijn gestoken (niet meegeleverd).
Automatische opname van de bezoeker die heeft aangebeld (alleen beeld, geen geluid): deze functie is standaard
geactiveerd in de parameters van uw videofoon. Raadpleeg hoofdstuk 8c wanneer er geen opname van de bezoeker
wordt gemaakt.
Druk op
om de menumodus te activeren.
U kunt de opgenomen beelden van uw bezoekers die op uw Micro SD-kaart zijn opgeslagen, weergeven via het
menu Video.
- Open het menu Video (eerste pictogram) door op
te drukken. Navigeer met de pijltoetsen
en
door de verschillende bestanden naar de gewenste video en druk op
om de video weer te geven.
Opmerking:
NL6
CFI EXTEL IRON 2 - V1 - 01/2013
MP4-AUTO: automatische opname
MP4-MAN : handmatige opname
- Wanneer u een video wilt verwijderen, selecteert u deze en drukt u op de knop
(“Delete”) door op
te drukken.
. Bevestig de verwijdering
Opmerking: uw video’s worden opgeslagen op uw Micro SD-kaart voor een opname van 15 seconden per reeks in
de automatische modus.
c. Handmatige camerafunctie
voor deze functie moet een Micro SD-kaart in de monitor zijn gestoken (niet meegeleverd).
U kunt handmatig video’s opslaan met het menu Camera (alleen beeld, geen geluid).
- U kunt handmatig video’s opslaan via het menu Camera.
- Kies de camera die u wilt gebruiken voor de opnamen (de straatunit van de basisset of de optionele extra PL
IRON 2-straatunit) en bevestig uw keuze met
.
- Druk op
om de opname te starten (5mn). Druk op
om de opname te stoppen.
- Raadpleeg de vorige paragraaf om de opnamen weer te geven (c. Video: 2. De opgenomen video’s van uw bezoekers weergeven).
d. Instellingen van de straatunit(s)
Indien u bij de installatie van de monitor en de straatunit op hun uiteindelijke plek ontdekt dat de lens van de
camera verkeerd gericht is, kunt u dit verschil bij de bedrading corrigeren door de camera horizontaal en verticaal
te bewegen en/of de richting van de camera te wijzigen.
Let op, u kunt slechts een paar centimeter in de hoogte corrigeren.
- Er zijn twee instelmogelijkheden op de straatunit:
- Linksboven: om het volume van de luidspreker van de straatunit te regelen.
- Rechtsboven: om het volume van de luidspreker van de monitor te regelen.
Om de instellingen te wijzigen, draait u met een kleine schroevendraaier voorzichtig, zonder forceren, de aanslagen.
e. Instellingen op de monitor
ALGEMEEN
• Om toegang te krijgen tot het menu met instellingen van de videofoon, drukt u op de toets
(of op de toets
voor de extra monitor).
• Druk na wijziging van de instellingen op
om de wijziging te bevestigen en op
om terug te keren naar
het voorgaande menu.
• Instellingen van de video:
Om toegang te krijgen tot de video-instellingen, selecteert u “Video” en drukt u op
Wanneer u de video-instellingen wilt programmeren, drukt u opnieuw op
CFI EXTEL IRON 2 - V1 - 01/2013
.
, navigeert u door de menu’s met
NL7
behulp van de toetsen
- “Brightness”: Helderheid
- “Contrast”: Contrast
- “Color”: Kleur
en
en bevestigt u uw instellingen door te drukken op
•Audio-instellingen:
Om toegang te krijgen tot de audio-instellingen, selecteert u “Audio” met de toets
Wanneer u de audio-instellingen wilt programmeren, drukt u op
en
en bevestigt u uw instellingen door te drukken op
- “Select melody” : Beltoon kiezen
- “Main Volume”: Belvolume
- “Voice Volume”: Hoofdvolume
en
en drukt u op
.
, navigeert u door de menu’s met de toetsen
:
•ID-parameter:
Om toegang te krijgen tot de ID-instellingen, selecteert u “ID” en drukt u op
U kunt het adres van uw monitor instellen door op
te drukken (hoofdstuk 5e).
door op
:
.
te drukken en uw instellingen te bevestigen
8. MULTIMEDIA - voor deze functie moet een Micro SD-kaart in de monitor zijn gestoken (niet meegeleverd).
ALGEMEEN
• Wanneer u toegang wilt krijgen tot de menu’s van de videofoon, drukt u op
en navigeert u met de pijltoetsen
en
door de menu’s. Druk op
om te bevestigen en op
om het menu te sluiten.
• Een bestand verwijderen (video, muziek of foto): selecteer het bestand, druk op
, kies “Delete” om het bestand
te verwijderen en bevestig met
.
• De multimediafuncties worden uitgeschakeld na een periode van een uur: op dat moment gaat de monitor over
in de stand-bystand.
• Een oproep vanaf de straatunit onderbreekt de multimediafunctie gedurende de communicatie. Vervolgens gaat
de monitor over naar de stand-bystand.
a. Digitale fotolijst
Met het menu Foto’s kunt u uw foto’s weergeven. Plaats een Micro SD-kaart in de monitor om uw favoriete foto’s
te bekijken.
- Maak van tevoren mappen op uw Micro SD-kaart.
NL8
CFI EXTEL IRON 2 - V1 - 01/2013
- Geef deze weer via het menu Foto => kies de gewenste foto met de pijltoetsen
en
en druk op
.
- Gebruik de pijltoetsen
en
om door de foto’s te bladeren. Als u een foto wilt draaien, wilt in- of
uitzoomen of automatisch verschillende foto’s wilt laten weergeven (3, 6 of 9 seconden per foto), drukt u op
.
Ondersteunde foto-indeling: JPEG.
b. Muziek
U kunt uw muziek beluisteren via het menu Muziek. Plaats een Micro SD-kaart in de monitor om uw favoriete
muziek af te spelen .
- Maak van tevoren mappen op uw Micro SD-kaart.
- Geef deze weer via het menu Muziek => kies de gewenste muziek met de pijltoetsen
en
en druk op
om de muziek af te spelen. Druk nogmaals op deze knop om de muziek te onderbreken. Met de parameter
AUTOPLAY kunt u muziekbestanden achter elkaar afspelen, met OFFPLAY kunt u de bestanden handmatig afspelen.
- U kunt het volume harder zetten met de pijltoetsen
en
in de afspeelmodus.
Ondersteunde audio-indeling: MP3.
c. Andere instellingen
U kunt de datum en tijd instellen, informatie over de opslagcapaciteit krijgen, automatische opname van de bezoeker die aanbelt, inschakelen en de SD-kaart formatteren.
U stelt deze waarden in met de toetsen die zijn aangegeven aan het begin van hoofdstuk 8 (Algemeen).
Opmerking: voor de instelling van de parameter DATE drukt u op
om te schakelen tussen uren en minuten of
tussen jaren, maanden en dagen.
9. TECHNISCHE EIGENSCHAPP
a. Monitor (MN IRON 2 M)
•
•
•
•
•
•
Referentie: 811264
Voeding: 17 V 1.5 A
Stroomverbruik: 8 W
Beeldscherm 7” (18cm)
Resolutie 1440 x 234 points
Afmetingen (mm): 220 x 11.5
b. Voeding
• Modulaire adapter 230V~ 17 V , 1.5A
CFI EXTEL IRON 2 - V1 - 01/2013
NL9
c. Straatunit (PL IRON 2)
• Referentie: 720266Y
• Camera C-MOS
• Resolutie: 380 000 pixels
• Hoek van de beeldopname: 55°
• Lichtgevoeligheid: 3 Lux
• Bedrijfstemperatuur (ongeveer): -10°C a +50°C.
• Beschermingsindex: IP44
• Afmetingen met kap (mm) : 180 x 95 x 30
10. OPTIES
• Alle elektrische schootplaten van Extel
• Alle elektrische sloten van Extel
• Alle poortmechanismen van Extel
• Extra monitor: MN IRON 2
• 2° extra straatunit: PL IRON 2
11. TECHNISCHE HULPVERLENING / GARANTIE
Probleem
Mogelijke oorzaak
Oplossing
• De monitor wordt
niet ingeschakeld.
• De monitor krijgt geen
voeding.
• Instelling van de
ID-parameter
• Controleer de polariteit van de plus- en min-draden.
• Sluit de connectoren opnieuw aan.
• Alleen op de monitor met parameter "ROOM 1"
verschijnt beeld als op de straatunit wordt gebeld.
• Slecht beeld en/of
geluid
• Omgeving
• Controleer of de gebruikte draden de juiste dikte
hebben en of de aansluitdraden van de videofoon
niet in dezelfde buis liggen als de 230 V-draad.
• Controleer de positie van de SW1-switches.
• Belt voortdurend.
• Bedrading
• Controleer of de aansluitdraden niet verkeerd
om zijn aangesloten.
• Beeld is te licht.
• Positie van de camera
• Plaats de camera niet direct in de zon of op een
weerspiegelend oppervlak.
• Monitor of tweede
straatunit werkt niet .
• Instelling van de switch
• Controleer de DIP-switch en de ingestelde
ID-parameters (p. 5).
• Schakel de stroom 30 seconden uit.
• Systeem wordt niet
opnieuw geïnitialiseerd.
• Er wordt geen opname van de bezoeker
gemaakt.
• Micro SD-kaart
• Opname-instellingen
• Plaats een Micro SD-kaart.
• Bel gaat niet over.
• Instellingen
• Controleer of het belvolume niet op 0 staat.
Indien nodig staat onze technische dienst tot uw beschikking www.cfi-extel.com
Laatste versie van de te downloaden kleurenhandleiding op : www.cfi-extel.com
NL10
CFI EXTEL IRON 2 - V1 - 01/2013
GARANTIEVOORWAARDEN : De garantie van dit toestel is van toepassing op de onderdelen en het
arbeidsloon in onze werkplaatsen. De garantie dekt niet : de consumptieartikelen (cellen, batterijen, enz.) en de
schade veroorzaakt door : verkeerd gebruik, slechte installatie, interventie van buitenaf, beschadiging door fysieke
of elektrische schok, val of atmosferisch verschijnsel.
• Het toestel niet openen om de dekking van de garantie niet te verliezen.
• Bij een eventuele terugkeer naar de Naverkoopdienst, het beeldscherm beschermen om krassen te vermijden.
• Onderhouden met een zachte doek, geen solventen gebruiken. Trek voordat u het systeem reinigt de stekker uit
of zet het apparaat uit.
OPGELET Gebruik geen producten die stoffen als carboxyl, alcohol of eensgelijks bevatten. Behalve het
risico dat het uw apparaat beschadigt, zijn de dampen gevaarlijk voor uw gezondheid en zijn ze explosief.
Gebruik bij het schoonmaken geen hulpmiddelen die de stroom geleiden (metalen borstels, puntige voorwerpen...
of anders).
De kassabon of de factuur dient als bewijs van de aankoopdatum.
12. VEILIGHEIDSINSTRUCTIES
Schade die wordt veroorzaakt door het niet respecteren van de handleiding, leidt tot het vervallen van de garantie.
Wij aanvaarden geen enkele verantwoordelijkheid voor schade die hier het gevolg van is!
We aanvaarden geen enkele verantwoordelijkheid betreffende enige schade aan goederen of personen die is
veroorzaakt door een verkeerd gebruik of door het niet respecteren van de veiligheidsinstructies.
Dit product is vervaardigd met volledige inachtneming van de veiligheidsinstructies. Om deze veiligheid te behouden
en om het optimale gebruik van dit product te garanderen, dient de gebruiker de veiligheidsinstructies en de
waarschuwingen in deze handleiding in acht te nemen.
De gebruiker van dit apparaat is er voor verantwoordelijk en is verplicht te controleren of de videobewaking in
overeenstemming is met de geldende wetgeving in het land waarin het wordt gebruikt.
: Dit symbool geeft een risico op elektrische schokken of kortsluiting aan.
- U dient dit product alleen te gebruiken bij een spanning tussen 100-240 volt en 50-60 hertz. - Probeer dit apparaat
nooit met een andere spanning te gebruiken.
- Let erop dat alle elektrische aansluitingen van het systeem conform de gebruiksinstructies zijn.
- Verzeker u er in bedrijven van dat u de regels voor het voorkomen van ongelukken inzake elektrische installaties
in acht neemt.
- Op scholen, opleidingen, werkplaatsen... is de aanwezigheid van bevoegd personeel noodzakelijk voor het
controleren van de werking van elektrische apparaten.
- Houd de gebruiksinstructies van andere apparaten die zijn verbonden met het systeem in acht. (videorecorder,
TV, PC bijvoorbeeld)
- Neem contact op met een deskundig persoon in het geval dat u twijfelt over de werking of de veiligheid van de
apparaten.
- U mag nooit met natte handen elektrische apparaten aansluiten of de stekkers uit stopcontacten trekken.
- Controleer tijdens de installatie van dit product goed of de voedingskabels geen risico lopen beschadigd te raken.
- Vervang nooit zelf beschadigde elektrische kabels! Verwijder ze in dat geval en doe beroep op een deskundig
persoon.
OPGELET Waarschuwt de gebruiker over de aanwezigheid van belangrijke instructies betreffende het gebruik en het onderhoud (de reparatie) in de documentatie bij het
apparaat.
Waarschuwt de gebruiker over de aanwezigheid van niet-geïsoleerde ‘gevaarlijke spanningen’
binnenin de kast van het product die van voldoende omvang zijn om een risico op elektrocutie
voor personen te betekenen.
CFI EXTEL IRON 2 - V1 - 01/2013
NL11
INHALTSVERZEICHNIS
1 SICHERHEITSEMPFHLUNGEN....................................... p.2
2 BESCREIBUNG. .................................................................. p.2
3 STÜCKLISTE ...................................................................... p.2
a. Monitor
b. Außenanlage
4 INSTALLATION.................................................................. p.3
a. Installation der Außenanlage
b. Installation des Monitors
c. Einrichten der Stromversorgung
5 VERKABELUNG ..........................................................
p.4
a. Anschluss von Monitor/Außenanlage
b. Anschluss eines elektrischen Türöffners oder Schlosses
c. Anschluss eines Portalantriebs
d. Anschluss der Stromversorgung
e. Parametrierung der Synchronisierung von Monitor/Außenanlage für ein Basisset
6 ANSCHLUSS DER OPTIONEN ...................................
p.5
a. Zusätzliche(r) Monitor(e) MN IRON 2
b. Zusätzliche Außenanlage PL IRON 2
c. Aktivierung des Zweifamilien-Modus
7 BEDIENUNGSANLEITUNG ........................................
p.6
a. Nutzung der grundlegenden Funktionen der Video-Türsprechanlage
b.Video-Funktion
c. Kamera-Funktion bei manueller Aufnahme
d. Einstellungen an der / den Außenanlage(n)
e. Monitor-Einstellungen
8 MULTI MEDIA ..................................................................... p.8
a. Digitaler Fotorahmen
b. Musik
c. Weitere Einstellungen
9 TECHNISCHE DATEN ...................................................... p.9
a. Monitor (MN IRON 2 M)
b. Stromversorgung
c. Außensprechstelle (PL IRON 2)
10 OPTIONEN ................................................................p.10
11 KUNDENDIENST - GARANTIE..................................p.10
12 SICHERHEITSEMPFHLUNGEN .................................p.11
D1
CFI EXTEL IRON 2 - V1 - 01/2013
1. SICHERHEITSEMPFHLUNGEN
Wichtig !
• Bitte lesen sie dieses Handbuch sorgfältig durch bevor sie das Produkt installieren oder verwenden.
• Wenn sie dieses Produkt für Dritte installieren denken sie bitte daran, das Handbuch oder eine Kopie für den
Endverbraucher vor Ort zu lassen.
Warnung :
• Unterschiedliche Elemente dürfen nur von einem zugelassenen Techniker ausgebaut werden.
Sicherheitsmaßnahmen :
• Für einen Betrieb in aller Sicherheit dieses Systems ist es wichtig, dass Verwender und Techniker die in diesem
Handbuch beschriebenen Sicherheitsverfahren befolgen.
• Die spezifischen Warnungen und Warnsymbole sind falls notwendig auf den Elementen angegeben.
2. BESCREIBUNG (fig. 1)
1 • „Kamera“ Außenstelle mit Aufputzmontage
2 • 1 Farbmonitor, wandbefestigt, Freisprechanlage (ohne Handgerät)
3 • Befestigungsgitter für den Monitor
4 • 230V~ / 17 V , 1,5A modular Adapter
Allgemeines
Diese Video-Türsprechanlage besteht aus einem Monitor mit passendem modularem Adapter und einer Außenstation. Sie ermöglicht Ihnen, mit der Person an Ihrer Haustüre zu kommunizieren und die Türe und / oder das
Tor per Fernsteuerung zu öffnen. Sie können Ihre Anlage anpassen, indem Sie sie optional um zusätzliche Monitore
(ein zusätzlicher Monitor pro Familie) und eine zweite Außenstation ergänzen. Um eine sichere Installation und
Verwendung zu gewährleisten, lesen Sie bitte diese Anleitung aufmerksam durch und bewahren Sie sie sorgfältig auf.
3. STÜCKLISTE
a. Monitor (fig. 2)
1. 18 cm-Kontrollfarbbildschirm, auf dem das Gesicht Ihres Besuchers zu sehen ist.
2. Bildschirm eingeschaltet, Sprechverbindung mit der Außenstation, ein einziger Impuls reicht aus, um die Verbindung mit der Außenstation zu aktivieren. Bei erneutem Impuls werden die Verbindung und das Bild der Außenstation
unterbrochen.
Bildschirm in Ruhezustand, Interkommunikation mit dem optionalen zusätzlichen Monitor (MN IRON 2).// Ermöglicht eine Navigation nach oben oder nach links.
3. Erneutes Erscheinen des Bilds auf dem Monitor durch Auswahl der Außenstation „1“ oder „2“, wenn die Option
PL IRON 2 installiert ist.// Ermöglicht eine Navigation nach unten oder nach rechts.
4. Steuerung des Türöffners / Schlosses (nur bei eingeschaltetem Bildschirm verfügbar).// Einstellungen für Ton,
Video und Identifizierung (nur bei ausgeschaltetem Bildschirm verfügbar) // Ein Menü aufrufen // Wiedergabe oder
Pause während einer Videoanzeige
5. Steuerung einer Automatik (nur bei eingeschaltetem Bildschirm verfügbar). // Ein Menü verlassen
6. Menü aufrufen
7. Slot für microSD-Karte (empfohlen: 2 GB, max. 32 GB), nicht im Lieferumfang enthalten.
8. Mikrofon für die Kommunikation mit der Außenanlage oder dem zusätzlichen Monitor.
9. Klemmleiste für den Anschluss der Kabel
10. Mikro-Abschlussschalter
11. Lautsprecher
12. Rote Kontrollleuchte, leuchtet auf, wenn ein Tastendruck registriert wurde
b. Außenanlage, Außenkamera (Abb. 3)
1. Objektiv der CMOS-Kamera mit Autofokus, mit Beleuchtung für Sicht in der Dämmerung (für Nachtsicht muss
eine zusätzliche Beleuchtung angebracht werden).
2. Lautsprecher: um im Außenbereich gehört zu werden.
CFI EXTEL IRON 2 - V1 - 01/2013
D2
3. Klingelschild und Ruftaste: bei Drücken dieser Taste ertönt die Klingel im Innen- und Außenbereich, Bildschirm
und Kamera werden eingeschaltet und das Klingelschild erleuchtet.
4. Schraube zur Befestigung der Abdeckung am Rahmen. Entfernen Sie die Abdeckung, um die Anschluss-Klemmleiste und die Befestigungslöcher für die Außenanlage freizulegen.
5. Mikrofon: Ermöglicht die Kommunikation mit dem Innenbereich.
6. Um das Klingelschild mit Ihrem Namen zu versehen, entfernen Sie vorsichtig die Vorderseite des Klingelschilds
mit Hilfe eines kleinen Schraubenziehers.
4. INSTALLATION
Hinweis: Sollten Sie Ihr Gerät vor der Einrichtung ausprobieren wollen, achten Sie bitte darauf, dass sich dabei die
Außenanlage und der Monitor nicht im gleichen Raum befinden, da die Türsprechanlage sonst einen schrillen Ton
von sich gibt (der als Rückkopplung bekannte Larsen-Effekt ).
a. Installation der Außenanlage (Abb. 4)
1. Nehmen Sie die Abdeckung des Kameramoduls ab, indem Sie die 2 Schrauben entfernen (a)
2. Führen Sie die vom Monitor kommende Zweidrahtleitung und das Kabel des Türöffners und / oder das der Steuerung der Automatik durch die Kabelverschraubung (b).
3. Befestigen Sie die Außenanlage am Pfosten, indem Sie die 2 Schrauben in die Löcher (c) eindrehen.
4. Schließen Sie die Kabel an der Klemmleiste (d) an
5. Die „Kugel“-Kamera (e) kann ohne Werkzeug ausgerichtet werden. (Kap. 7.d)
6. An der Oberseite der Außenanlage befinden sich 2 Regler: (Kap. 7.d)
Um die Regler anzupassen, drehen Sie sie mit einem kleinen Schraubenzieher leicht, ohne Druck auf den Anschlag
auszuüben.
(f) links befindet sich der Lautstärkeregler für den Lautsprecher der Außenanlage.
(g) rechts befindet sich der Lautstärkeregler für den Lautsprecher des Bildschirms.
7. Mikroschalter (h) zur Parametrierung der Adresse der Außenanlage in Abhängigkeit von der Installation.
8. Setzen Sie die Abdeckung wieder auf und fixieren Sie sie, indem Sie die 2 Schrauben an der Rückseite der Außenanlage (a) wieder eindrehen.
Setzen Sie die Vorderseite richtig in die Kerben ein, die sich an der Oberseite der Außenanlage (j) befinden.
Wichtig: Setzen Sie keine Schraube in das Mikrofon-Loch ein (5, Abb. 3).
Wichtig: Bringen Sie in der oberen Hälfte zwischen der Außenanlage und der Wand eine Silikondichtung*
an (i, Abb. 4).
Tragen Sie kein Silikon auf die untere Hälfte auf, um ein Beschlagen und vorzeitiges Rosten der Elektronik zu vermeiden. *Kein Silikon auf Essigsäurebasis verwenden (Essiggeruch)
Wichtig: Die Kamera nicht direkt gegen die Sonne oder in Richtung einer reflektierenden Fläche ausrichten.
Tipp: Um Kabel vor Stößen und Witterungseinflüssen zu schützen, wird empfohlen, sie durch einen Kabelschutzschlauch zu führen.
b. Installation des Monitors (Abb. 5)
1. Bringen Sie die Wandhalterung an
2. Schließen Sie die 2 Kabel der Außenanlage und die 2 Stromversorgungskabel an (Kap. 5.a) und halten Sie sich
dabei genau an das Kabelschema (Abb. 6 für die Grundinstallation)
3. Bringen Sie den Monitor an der Wandhalterung an.
4. Erst nach Anschließen der Außenanlage darf die 230 V~-Stromversorgung an den modularen Adapter angeschlossen werden (gemäß geltender Normen, NFC 15-100 für Frankreich)
Beachten Sie die Polarität des Stromanschlusses.
c. Einrichten der Stromversorgung
- Bringen Sie den modularen Adapter auf einer DIN-Schiene in einem modularen Verteilerkasten an oder befestigen Sie ihn auf einer Halterung mit 2 schwarzen Befestigungsklauen, die an den Seiten des Netzgeräts angeclipst
werden.
D3
CFI EXTEL IRON 2 - V1 - 01/2013
5. VERKABELUNG
Um Störungen und Fehlfunktionen zu vermeiden, führen Sie das Kabel Ihrer Video-Türsprechanlage nicht durch den
gleichen Leitungskanal wie die Stromkabel.
1. Schließen Sie die Geräte unter genauer Befolgung des Kabelschemas an. (siehe Abb. 6-7-8-9)
2. Für das Ausführen sämtlicher Funktionen sind nur 2 Kabel nötig:
Klingel, Bild, Ton, Steuerung einer Automatik und Steuerung eines elektrischen Türöffners oder Schlosses
Abstand zwischen der letzten Anlage
und dem letzten Monitor
Zu verwendender Kabeltyp
Zwischen 1 und 100 Metern
2 Kabel mit 1,5 mm²
ACHTUNG: Auf keinen Fall dürfen dünnere Kabel verbunden werden, um 1,5 mm2 zu simulieren
a. Anschluss von Monitor/Außenanlage:
• Klemmen „C+“ „C-“ des Monitors an die Klemmen „C+“ „C-“ der Außenanlage anschließen.
Um Video-Störungen zu vermeiden, wird empfohlen, den Abstand zwischen dem am weitesten entfernten Monitor
und der Außenanlage so gering wie möglich zu halten (siehe Sternverkabelung Abb. 9)
b. Anschluss eines elektrischen Türöffners oder Schlosses (Abb. 6)
Direkt an die Klemmen
der Außenanlage anschließen (es ist keine Polarität zu beachten).
Bitte beachten Sie, dass diese Funktion nur bei eingeschaltetem Bildschirm verfügbar ist. In dem
Moment, in dem die Steuerung betätigt wird, wird das Bild kurz unterbrochen.
Wichtig: Der Türöffner oder das elektrische Schloss, das Sie installieren möchten, muss in jedem Fall über einen mechanischen Speicher verfügen und einen niedrigen Verbrauch aufweisen, wie es bei allen Artikeln von EXTEL der Fall ist.
c. Anschluss eines Portalantriebs (Abb. 6)
Direkt an die Klemmen
der Außenanlage anschließen. Die Außenanlage liefert einen „Trocken“-Kontakt
ohne Strom, der an die „Druckschalter“-Steuerung Ihrer Automatik angeschlossen werden muss.
Bitte beachten Sie, dass diese Funktion nur bei eingeschaltetem Bildschirm verfügbar ist.
d. Anschluss der Stromversorgung (Abb. 6)
Direkt an die Klemmen P+ und P- auf der Rückseite des Monitors anschließen. (Vorsicht: Polarität beachten!)
- Ein einziges Stromversorgungsmodul reicht für eine Installation mit mehreren Monitoren aus.
- Die Versorgung muss an den Monitor angeschlossen werden, der der ersten Außenanlage am nächsten gelegen ist.
e. Parametrierung der Synchronisierung von Monitor/Außenanlage für ein Basisset (Abb. 6)
Ihre Video-Türsprechanlage ist bei der Lieferung bereits für eine Basiskonfiguration synchronisiert. Mit Hilfe der
folgenden Schritte können Sie sie überprüfen oder gegebenenfalls anpassen:
Für den Monitor:
- Drücken Sie die Taste
, wählen Sie mit dem Cursor
ID aus und bestätigen Sie mit der Taste
HOUSE 0
HOUSE 1
ROOM 1
ROOM 2
= Familie 1
= Familie 2
= Hauptstation
= Nebenstation
die Konfiguration für ein Basis-Set muss HOUSE 0 ROOM 1 sein
Sie können die Adresse Ihres Monitors durch Drücken der Tasten
und
einstellen, Ihre Einstellungen
durch Drücken von
bestätigen und das Menü mit
verlassen.
Der Mikro-Abschlussschalter auf der Rückseite des Monitors (Abb. 2.10) muss sich in der Stellung ON befinden
CFI EXTEL IRON 2 - V1 - 01/2013
D4
- Außenanlage:
die Außenanlage wird mit den Mikroschaltern parametriert (Abb. 4.h)
ON
OFF
0 0 1 1
Schalter 1 und 2: Adresse der Anlage
Schalter 3: stellen Sie die Impedanz je nach Videoqualität auf dem Bildschirm ein
1 2 3 4 Schalter 4: ON für 1 Familie, OFF für 2 Familien.
Nach jeder Einstellungsänderung muss die Stromversorgung für mindestens 30 Sekunden unterbrochen werden.
Abschlussschalter 3: ermöglicht die Anpassung der Kabelimpedanz und ist eine große Hilfe bei schlechter
Bildqualität. Bringen Sie ihn je nach Videoqualität auf dem Bildschirm in ON- oder OFF-Stellung.
6. ANSCHLUSS DER OPTIONEN
a. Zusätzliche(r) Monitor(e) MN IRON 2
• Der zusätzliche Monitor wird über 2 Kabel an den vorhergehenden Monitor angeschlossen.
• Für die Installation dieses Monitors müssen die ID-Parameter angepasst werden: HOUSE = 0 ROOM = 2 bei einer
zusätzlichen Station oder HOUSE = 1 ROOM = 1 bei einer zweiten Wohnung (siehe Kabelschemata Abb. 7-8-9)
, wählen Sie mit dem Cursor
ID aus und bestätigen Sie mit der Taste
. Sie
• Drücken Sie die Taste
können die Adresse Ihres Monitors durch Drücken der Tasten
und
einstellen, Ihre Einstellungen durch
bestätigen und das Menü mit
verlassen.
Drücken von
• Bei diesem zweiten Monitor können Sie ebenfalls den Klingelton auswählen.
• Dieser Monitor verfügt nicht über einen SD-Slot oder ein Multimedia-Menü.
b. Zusätzliche Außenanlage PL IRON 2
• Die zusätzliche Außenanlage wird über 2 Kabel an die vorhergehende Außenanlage angeschlossen.
• Für die Installation dieser Außenanlage muss die Stellung der Mikroschalter angepasst werden (siehe Kabelschema
Abb. 7-8-9 und Kap. 5e)
ON
OFF
0 1 1 1
1 2 3 4
Nach jeder Einstellungsänderung muss die Stromversorgung für mindestens 30 Sekunden unterbrochen werden
c. Aktivierung des Zweifamilien-Modus
Siehe Kabelschema (Abb. 8 und 9)
- Passen Sie die Stellung der Mikroschalter an der Außenanlage an (Schalter 4 in OFF-Stellung) und bestätigen Sie
nach der Installation an den Monitoren die ID-Parameter. (Kap. 6a)
Die Stromversorgung muss für mindestens 30 Sekunden unterbrochen werden
Zur Erinnerung: Ein Unterbrechen der Stromversorgung für mindestens 30 Sekunden ist immer nötig, wenn das
Produkt nicht korrekt funktioniert, und insbesondere nach:
- Hinzufügen eines Monitors
- Änderungen an der Verkabelung
- Anpassung der Stellung der Mikroschalter auf der Rückseite des Monitors und der Außenanlage.
- Ausfall des 230 V~-Netzes aufgrund von Gewitter oder Bauarbeiten
SICHERHEITSANWEISUNGEN
Der Transformator muss unbedingt auf die DIN-Schiene eines modularen Verteilers montiert werden. Es
versteht sich von selbst, dass die Blenden der Klemmleisten unbedingt wieder angebracht werden müssen;
außerdem muss das Produkt an eine elektrische Installation angeschlossen werden, die der Norm NFC 15100 für Frankreich entspricht, und DIE VERKABELUNG VOLLSTÄNDIG FERTIGGESTELLT SEIN.
Beim Anschließen muss grundsätzlich die Polarität beachtet werden.
D5
CFI EXTEL IRON 2 - V1 - 01/2013
7. BEDIENUNGSANLEITUNG
Wichtig: Die berührungsempfindlichen Tasten werden durch leichtes Berühren mit dem Finger betätigt. Die
rote Kontrollleuchte (12 Abb. 2) zeigt an, wenn der Tastendruck registriert wurde.
a. Nutzung der grundlegenden Funktionen der Video-Türsprechanlage
• Durch Drücken des Knopfes an der Außenanlage wird für etwa 30 Sekunden ein Ton und das Aufleuchten des
Hauptmonitors ausgelöst. Sobald Sie den Besucher erkannt haben, drücken Sie die Taste
, um mit ihm zu
kommunizieren.
Hinweise: - Ein einmaliges Drücken der Taste
ist ausreichend, um die Kommunikation mit der Außenanlage zu
aktivieren.
- Bei einer Installation mit mehreren Monitoren wird das Bild des Besuchers nur auf dem mit „ROOM 1“
parametrierten Monitor angezeigt. An den anderen Monitoren ertönt nur das Klingeln, ohne dass das Bild angezeigt
. Die Kommunikation und das Öffnen ist nur mit dem
wird. Um die Kommunikation zu aktivieren, drücken Sie
gewählten Monitor möglich, egal ob es sich um den Hauptmonitor oder einen anderen Monitor handelt.
• Ein Klingeln an der Außenanlage wird an den Monitoren angezeigt und Sie haben etwa 15 Sekunden Zeit, um mit
einem Gerät Ihrer Wahl darauf zu reagieren.
drücken,
• Nach Beendigung des Gesprächs können Sie entweder etwa 60 Sekunden abwarten oder die Taste
um den Monitor auszuschalten.
- Um sich das Bild weitere 30 Sekunden lang anzeigen zu lassen, drücken Sie die Taste
.
- Wenn Sie über eine optionale zweite Außenanlage verfügen, drücken Sie ein zweites Mal auf die Taste
, um
von einer Außenanlage zur nächsten zu schalten.
Wenn Sie 2 Mal auf die Taste
Bildschirm.
drücken und die Kamera nicht angeschlossen ist, erscheint ein schwarzer
- Um die Monitoring-Funktion zu aktivieren, drücken Sie die Taste
- Um den Türöffner oder das Schloss zu betätigen, drücken Sie die Taste
.
- Um eine Automatik zu steuern, drücken Sie die Taste
.
Bitte beachten Sie, dass die Öffnungsfunktionen nur bei eingeschaltetem Bildschirm verfügbar sind.
In dem Moment, in dem die Steuerung betätigt wird, wird das Bild kurz unterbrochen
Informationen zum Aufzeichnen von Besuchern finden Sie in Kapitel 8c, Video
Interkommunikationsmodus mit MN IRON 2:
• Mit der Taste
können Sie den zusätzlichen Monitor rufen und eine Verbindung herstellen, wenn am gerufenen
gedrückt wird.
Monitor ebenfalls auf die Taste
• Durch Drücken der Taste
wird die Konversation beendet.
b. Video-Funktion - für diese Funktion muss eine microSD-Karte in den Monitor eingelegt sein (nicht im Lieferumfang enthalten)
Automatische Aufzeichnung des Besuchers, wenn geklingelt wird (nur Video, kein Ton): diese Funktion ist in den
Parametern Ihrer Video-Türsprechanlage voreingestellt. Sollte keine Aufzeichnung stattfinden, siehe Kapitel 8c.
Zum Aufrufen des Menümodus drücken Sie
.
Die auf Ihrer microSD-Karte gespeicherten Videos Ihrer Besucher können im Video-Menü angesehen werden.
- Rufen Sie das Video-Menü auf (1. Icon), indem Sie die Taste
drücken. Navigieren Sie mit den Cursors
und
durch die verschiedenen Ordner, um zu Ihrem Video zu gelangen, und drücken Sie die Taste
, um
das Video abzuspielen.
CFI EXTEL IRON 2 - V1 - 01/2013
D6
Hinweis:
MP4-AUTO: automatische Aufnahme
MP4-MAN: manuelle Aufnahme
- Zum Löschen eines Videos wählen Sie das gewünschte Video aus, drücken Sie die Taste
„delete“, indem Sie auf
drücken.
und bestätigen Sie mit
Hinweis: Bei der automatischen Aufnahme werden die Videos in Sequenzen von 15 Sekunden auf Ihrer microSDKarte aufgezeichnet.
c. Kamera-Funktion bei manueller Aufnahme - für diese Funktion muss eine microSD-Karte in den Monitor eingelegt sein (nicht im Lieferumfang enthalten)
Mit dem Kamera-Menü können Sie Videos manuell aufzeichnen. (nur Video, kein Ton)
- Um die manuelle Aufzeichnung zu starten, rufen Sie das Kamera-Menü auf.
- Wählen Sie die Kamera aus, mit der Sie aufzeichnen möchten (im Set enthaltene Außenanlage oder optional:
zusätzliche Außenanlage PL IRON 2), und bestätigen Sie Ihre Auswahl mit
.
- Zum Starten der Aufnahme drücken Sie die Taste
(5mn). Zum Anhalten der Aufnahme drücken Sie
.
- Informationen zur Wiedergabe finden Sie im vorhergehenden Abschnitt (c. Video: 2. Ansehen von Videos Ihrer
Besucher).
d. Einstellungen an der / den Außenanlage(n)
- Wenn Sie bei der Installation des Monitors und der Außenanlage an ihren Bestimmungsorten feststellen, dass das
Kameraobjektiv falsch justiert ist, können Sie diese Diskrepanz bei der Verkabelung korrigieren, indem Sie die
Kamera horizontal und vertikal verschieben und / oder indem Sie die Ausrichtung der Kamera durch Drehen
verändern.
Achtung: Die Höhe kann nur um wenige Zentimeter korrigiert werden.
- An der Außenanlage befinden sich 2 Regler:
- Links oben befindet sich der Lautstärkeregler für den Lautsprecher der Außenanlage.
- Rechts oben befindet sich der Lautstärkeregler für den Lautsprecher des Monitors.
Um die Regler anzupassen, drehen Sie sie mit einem kleinen Schraubenzieher leicht, ohne Druck auf den Anschlag
auszuüben.
e. Monitor-Einstellungen
ALLGEMEINES:
• Um zum Menü für die Einstellungen der Video-Türsprechanlage zu gelangen, drücken Sie die Taste
(oder
die Taste
für den zusätzlichen Monitor).
• Nach Vornehmen der Einstellung drücken Sie
zum Bestätigen und
, um zum vorhergehenden Menü
zurückzukehren.
•Video-Einstellungen:
Um die Video-Einstellungen aufzurufen, wählen Sie „Video“ und drücken Sie
D7
CFI EXTEL IRON 2 - V1 - 01/2013
.
Sie können die Video-Einstellungen ändern, indem Sie erneut auf
drücken, mit Hilfe der Tasten
durch die Menüs navigieren und Ihre Einstellungen durch Drücken von
bestätigen:
- „Brightness“: Helligkeit
- „Contrast“: Kontrast
- „Color“: Farbe
•Audio-Einstellungen:
Um die Audio-Einstellungen aufzurufen, wählen Sie „Audio“ mit Hilfe der Taste
und drücken Sie
Sie können die Audio-Einstellungen ändern, indem Sie auf
drücken, mit Hilfe der Tasten
durch die Menüs navigieren und Ihre Einstellungen durch Drücken von
bestätigen:
- „Select melody“: Auswahl des Klingeltons
- „Melody Volume“: Lautstärke des Klingeltons
- „Voice Volume“: Lautstärke des Geräts
•ID-Parameter:
Um die ID-Parameter aufzurufen, wählen Sie „ID“ und drücken Sie
Sie können die Adresse Ihres Monitors durch Drücken der Tasten
lungen durch Drücken von
bestätigen. (Kap. 5e)
und
.
und
.
und
parametrieren und Ihre Einstel-
8. MULTIMEDIA - für diese Funktion muss eine microSD-Karte in den Monitor eingelegt sein (nicht im
Lieferumfang enthalten)
ALLGEMEINES:
• Um zu den Menüs der Türsprechanlage zu gelangen, drücken Sie die Taste
und bewegen Sie sich mit Hilfe der
Cursors
und
durch die Menüs, bestätigen Sie mit der Taste
und verlassen Sie das Menü mit der
Taste
.
• Zum Löschen einer Datei (Video / Musik / Foto): wählen Sie die Datei aus, drücken Sie die Taste
, wählen Sie
zum Löschen „delete“ und bestätigen Sie mit
• Die Multimedia-Funktionen werden nach Ablauf einer Stunde abgebrochen und der Monitor schaltet sich in den
„stand by“-Modus
• Bei einem Klingeln an der Außenanlage wird die Multimedia-Funktion für die Dauer der Kommunikation unterbrochen. Anschließend schaltet der Monitor in den „stand by“-Modus
a. Digitaler Fotorahmen
Mit den Foto-Menüs können Sie sich Ihre Fotos ansehen. Legen Sie eine microSD-Karte in den Monitor ein, um
Ihre Lieblingsfotos anzuzeigen,
CFI EXTEL IRON 2 - V1 - 01/2013
D8
- Legen Sie im Vorfeld auf Ihrer microSD-Karte Ordner an.
- Zeigen Sie sie an, indem Sie das Foto-Menü => mit Hilfe der Cursors
und
ein Foto auswählen und
anschließend die Taste
drücken.
- Um von Foto zu Foto zu wechseln, verwenden Sie die Cursors
und
. Wenn Sie ein Foto drehen, zoomen oder eine Diashow einstellen möchten (3, 6 oder 9 Sekunden pro Foto), drücken Sie die Taste
.
Unterstützes Bildformat: JPEG.
b. Musik
Mit den Musik-Menüs können Sie Ihre Musik abspielen. Legen Sie eine microSD-Karte in den Monitor ein, um Ihre
Lieblingsmusik anzuhören,
- Legen Sie im Vorfeld auf Ihrer microSD-Karte Ordner an.
- Zeigen Sie sie an, indem Sie das Musik-Menü => mit Hilfe der Cursors
und
eine Musikdatei auswählen
und anschließend die Taste
drücken, um die Musik abzuspielen. Drücken Sie erneut, um die Musik anzuhalten.
Mit der Einstellung AUTOPLAY können Sie Musikdateien in der Wiedergabeschleife anhören, mit OFFPLAY können
Sie sie manuell auswählen
- Um die Lautstärke zu erhöhen, verwenden Sie die Cursors
und
im Wiedergabemodus
Unterstützes Audioformat: MP3.
c. Weitere Einstellungen
Sie können Datum und Uhrzeit einstellen, Speicherinformationen anzeigen, die automatische Aufnahme des Besuchers, wenn geklingelt wird, aktivieren und die SD-Karte formatieren
Nehmen Sie die Einstellungen mit Hilfe der zu Beginn von Kapitel 8 (Allgemeines) angegebenen Tasten vor.
Hinweis: bei der Einstellung des Datums drücken Sie die Taste
, um von Stunden zu Minuten oder von Jahr zu
Monat zu Tag umzuschalten.
9. TECHNISCHE DATEN
a. Monitor (MN IRON 2 M)
• Typ: 811264
• Stromversorgung: 17 V 1.5 A
• Verbrauch: 8 W
• Bildschirm 7” (18cm)
• Auflösung 1440 x 234 points
• Maße (mm): 220 x 11.5
b. Stromversorgung
• Modularer Adapter 230V~ 17 V , 1.5A
c. Außensprechstelle (PL IRON 2)
• Typ: 720266Y
• Kamera C-MOS
D9
CFI EXTEL IRON 2 - V1 - 01/2013
• Auflösung: 380 000 pixels
• Blickwinkel: 55°
• Lichtempfindlichkeit: 3 Lux
• Betriebstemperatur (etwa): -10°C a +50°C.
• Schutzindex: IP44
• Abmessungen mit Einfassung (mm) : 180 x 95 x 30
10. OPTIONEN
• Alle Extel elektrischen Türöffner
• Alle Extel Elektroschlösser
• Alle Extel Motorisierungenl
• Zusatzmonitor: MN IRON 2
• zusätzliche Außenstation: PL IRON 2
11. KUNDENDIENST - GARANTIE
Problem
Mögliche Ursache
Lösung
• Der Monitor bleibt
schwarz
• Der Monitor ist nicht an
die Stromversorgung angeschlossen
• ID-Parameter
• Überprüfen Sie die Polarität der Kabel + und • Verbinden Sie die Anschlüsse erneut
• Nur der mit "ROOM 1" parametrierte Monitor
zeigt bei Klingeln an der Anlage ein Bild an
• Schlechtes Bild und /
oder schlechter Ton
• Umgebung
• Stellen Sie sicher, dass die verwendeten Kabel die
richtigen Maße aufweisen und dass sich die
Verbindungskabel der Video-Türsprechanlage nicht
im gleichen Leitungskanal wie das Stromkabel befinden.
• Überprüfen Sie die Position der Schalter SW1
• Die Klingel ertönt
ununterbrochen
• Verkabelung
• Stellen Sie sicher, dass die Verbindungskabel nicht
vertauscht sind.
• Das Bild ist zu hell
• Kamera-Position
• Das Kameraobjektiv nicht direkt in die Sonne
oder in Richtung einer reflektierenden Fläche ausrichten.
• Monitor oder zweite
Außenanlage nicht funktionell
• Schaltereinstellung
• Überprüfen Sie die Dip-Schalter und die
Parametrierung der ID (p5)
• Unterbrechen Sie die Stromversorgung für 30
Sekunden.
• Der Besucher wird
nicht aufgenommen
• microSD-Karte
• Aufnahme-Parameter
• Legen Sie eine microSD-Karte ein
• Es ertönt kein
Klingelton
• Einstellungen
• Überprüfen Sie, dass die Lautstärke des
Klingeltons nicht auf 0 gestellt ist
• Das System reinitialisiert
nicht.
Bei Bedarf steht ihnen unsere technische Website zur Verfügung www.cfi-extel.com
Die neueste Downloade Version der Gebrauchsanweisung in Farbe ist verfügbar auf : www.cfi-extel.com
CFI EXTEL IRON 2 - V1 - 01/2013
D10
GARANTIEBEDINGUNGEN : Dieses Gerät verfügt über eine Garantie für Einzelteile und Arbeitsaufwand
in unseren Werkstätten.œ. Die Garantie deckt nicht ab: das Verbrauchsmaterial (Batterien, Akkus, usw.) sowie
Schäden, die verursacht wurden durch: eine falsche Behandlung, falsche Installation, äußere Einflüsse, Beschädigung
durch physischen oder elektrischen Schock, Sturz oder atmosphärische Erscheinungen.
• Das Gerät nicht öffnen, um die Garantiedeckung nicht zu verlieren.
• Bei einer eventuellen Rücksendung an den Kundendienst den Bildschirm vor Kratzern schützen.
• Nur mit einem weichen Tuch reinigen, keine Reinigungsmittel verwenden.
Vor der Reinigung, das System vom Stromkreis unterbrechen.
Achtung : Kein Produkt oder Benzin, Kalkungscarbonatation, Alkohol oder ähnliches verwenden. Sie riskieren nicht nur ihr Gerät zu beschädigen, sondern die Dämpfe können ebenfalls ihrer Gesundheit schädigen und sich
entzünden.
Kein Werkzeug verwenden, das Spannung leiten könnte (Metallbürste, spitzes Werkzeug...oder anderes)
Der Kassenzettel oder die Rechnung dienen als Nachweis für das Kaufdatum.
12. SICHERHEITSEMPFHLUNGEN
Schäden, die durch einen Mangel an Konformität mit dem Handbuch hervorgerufen wurden, führen zu einer
Löschung der Garantie.
Wir übernehmen keine Haftung für daraus entstandene Schäden! Wir übernehmen keine Haftung für Schäden an
Gegenständen oder Personen, die durch eine nicht geeignete Handhabung oder einem Mangel an Konformität der
Sicherheitsempfehlungen entstanden sind.
Dieses Produkt wurde mit Respekt auf die Sicherheitsempfehlungen hergestellt. Um diesen Status zu erhalten
und um einen korrekten Gebrauch dieses Produkts zu erhalten, muss der Verbraucher die in diesem Handbuch
enthaltenen Sicherheitsratschläge und Warnungen respektieren.
Der Verwender ist dafür verantwortlich, zu überprüfen ob das Videoüberwachungssystem den geltenen Gesetzen
im Verwendungsland entspricht.
: Dieses Symbol gibt eine Gefahr auf Elektroschock oder Kurzschluss an.
- Sie dürfen dieses Gerät nur verwenden mit einer Spannung zwischen: 100 - 240 Volt und 50-60 Herz. Versuchen
sie niemals dieses Gerät mit einer anderen Spannung zu verwenden.
- Achten sie darauf, dass alle an dieses System angeschlossenen elektrischen Anschlüsse, den Verwendungsratschlägen
entsprechen.
- In kommerziellen Einrichtungen versichern sie sich, dass die Schutzregeln für Unfälle mit elektrischen Installationen
beachtet werden.
- In Schulen, Ausbildungsausrüstungen, Werkstätten... ist die Gegenwart von qualifiziertem Personal notwendig, um
den Betrieb von Elektrogeräten zu kontrollieren.
- Die Verwendungsratschläge der an das System angeschlossenen Geräten beachten (z.B.Videorekorder, TV, PC)
- Bei Zweifelsfällen hinsichtlich des Betriebs oder Sicherheit des Geräts, kontaktieren sie bitte erfahrene Personen
- Niemals elektrische Geräte mit feuchten Händen ein- oder ausschalten.
- Bei der Installation dieses Produkts bitte darauf achten, dass die Stromkabel nicht beschädigt werden können.
- Sie sollten niemals selbst ein beschädigtes Stromkabel ersetzen! In diesem Fall dieses entfernen und Rat bei einer
erfahrenen Person suchen.
ACHTUNG
Der Verwender wird auf wichtige Anweisungen hinsichtlich der Verwendung und
Wartung (Reparatur) in dem das Gerät begleitenen Dokument hingewiesen.
Warnt den Verwender vor nicht isolierten «gefährlichen Spannungen» im Inneren des
Produktgehäuses, die ausreichend sind, um für Menschen eine Gefahr für einen tödlichen
Elektroschock darzustellen.
D11
CFI EXTEL IRON 2 - V1 - 01/2013
CFI EXTEL IRON 2 - V1 - 01/2013
FR - Ne jetez pas les piles et les appareils hors d’usage avec les ordures ménagères. Les
substances dangereuses qu’ils sont susceptibles de contenir peuvent nuire à la santé et à
l’environnement. Faites reprendre ces appareils par votre distributeur ou utilisez les
moyens de collecte sélective mise à votre disposition par votre commune.
I - Non gettare le pile e le apparecchiature fuori uso insieme ai rifiuti domestici. Le sostanze
dannose contenute in esse possono nuocere alla salute dell’ambiente. Restituire questo
materiale al distributore o utilizzare la raccolta differenziata organizzata dal comune.
E - No tire las pilas ni los aparatos inservibles con los residuos domésticos, ya que las
sustancias peligrosas que puedan contener pueden perjudicar la salud y al medio ambiente.
Pídale a su distribuidor que los recupere o utilice los medios de recogida selectiva puestos a
su disposición por el ayuntamiento.
P - Não junte as pilhas nem os aparelhos que já não se usam com o lixo caseiro. As
substâncias perigosas que ambos podem conter podem ser prejudiciais para a saúde e para
o ambiente. Entregue esses aparelhos ao seu lixeiro ou recorra aos meios de recolha
selectiva ao seu dispor.
NL - De lege batterijen en oude apparaten niet met het huisvuil meegeven: deze kunnen
gevaarlijke stoffen bevatten die de gezondheid en het milieu schaden.
De oude apparaten door uw distributeur laten innemen of de gescheiden vuilinzameling van
uw gemeente gebruiken.
GB - Don’t throw batteries or out of order products with the household waste (garbage).
The dangerous substances that they are likely to include may harm health or the
environment. Make your retailer take back these products or use the selective collect of
garbage proposed by your city.
D - Verbrauchte Batterien und nicht mehr benützte Geräte sind Sondermüll. Sie enthalten
möglicherweise gesundheits- und umweltschädliche Substanzen.
Geben Sie alte Geräte zur fachgerechten Entsorgung beim Gerätehändler ab bzw. benutzen
Sie die örtlichen Recyclinghöfe.
CFI EXTEL IRON 2 - V1 - 01/2013
Découvrez nos produits sur :
www.cfi-extel.com,,
Printed in P.R.C.
• France : Hotline : 0 892 350 069 (0,337€ ttc/min)
• Italia : Assistenza Tecnica : +39 02 96488273
[email protected]
• España : Asistencia técnica : 902 109 819
[email protected]
• Portugal : Serviço de apoio ao cliente : 707 201 138
&
.