1
GB
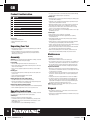
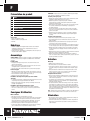
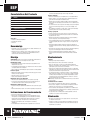
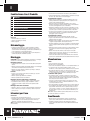
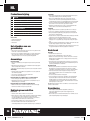
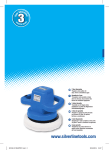
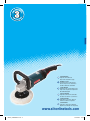
Product Familiarisation
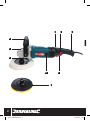
1
Spindle
2
3
4
5
6
7
8
9
Spindle Lock Button
Front Handle
Speed Control Dial
Lock Off Button
Rear Handle
On/Off Trigger Switch
Brush Access Plugs
Backing Pad (180mm dia)
Accessories
• Drawstring Polishing Bonnet
• Replacement Brushes (for the motor)
• Hex Key
Unpacking Your Tool
• Carefully unpack and inspect your tool. Fully familiarise yourself with all
its features and functions
• Ensure that all parts of the tool are present and in good condition. If
any parts are missing or damaged, have such parts replaced before
attempting to use this tool
Assembly
WARNING: Before performing any kind of adjustment or fitting, ensure that
the tool is disconnected from the power supply.
Front handle
• The Front Handle (3) must be fitted to the machine before use
• Use the bolts supplied to fit the handle via the fixing holes to either side
at the front of the machine
• Use the hex key supplied to tighten the bolts firmly to secure handle in
position
Backing pad
• Press and hold the Spindle Lock Button (2), and rotate the spindle until
you feel it lock
• Screw the Backing Pad (9) tightly onto the spindle
• Release the spindle lock button
Fitting polishing pads and sanding sheets
• Use 180mm dia accessories with this Backing Pad (9)
• Hook and loop sanding sheets, polishing sponges and polishing bonnets
are a press fit onto the face of the backing pad
Fitting the drawstring polishing bonnet
• Undo the drawstring and fit the polishing bonnet over the Backing Pad (9)
• Pull the drawstring tight and re-knot to secure in position for use
Operating Instructions
WARNING: Before performing any kind of adjustment or fitting, ensure that
the sander polisher is disconnected from the power supply.
Switching on
• The speed of the machine is controlled using the Speed Control Dial (4)
A higher number indicates a higher speed setting
Sanding tips
• Allow the machine to reach full speed before bringing the sanding paper
in contact with the workpiece
• Start with a coarse grit paper, and work through progressively finer grit
papers until the desired finish is achieved
• Only apply moderate pressure to the sander. Pressing too hard onto the
work surface may overheat the motor or damage the work surface
• Sand evenly over the work surface, as the machine works in a rotary
motion it is not necessary to work with the grain
• Only use the sander 'flat on' to the work. Tilting the sander onto its edge
will damage your work
Polishing tips
• Ensure that the area to be polished is clean and dry
• Read and understand all information supplied with your polishing
compound before use
• Evenly apply polishing compound to the polishing sponge and place
sponge against work surface
• Hold the machine securely, using both hands, by the handles provided.
The polishing sponge should lightly contact the work surface
• Start the machine, and work across the surface using a wide 'sweeping'
motion. Stop and apply extra compound as required
• When the entire surface has been covered, stop the machine and allow
the compound to dry (follow manufacturers guidance)
• Attach a clean polishing bonnet to the machine, and work across the
surface as before until all visible polishing compound is removed
Maintenance
Cleaning
• Always keep your machine clean.
• Never allow the ventilation holes to become obstructed.
• Use a soft brush, or dry cloth, to clean your machine. If it is available, use
clean and dry, compressed air to blow dust out of the ventilation holes.
• Be especially careful to clean the machine thoroughly if used for both
wood and metal. Sparks from metal work can easily ignite wood dust.
Replacement brushes
• Over time, the carbon brushes in the motor will wear away. This wear
process will be accelerated if the machine is used in dusty environments,
or if the machine is overloaded
• If the brushes have become excessively worn, motor performance may
decrease, the machine may fail to start, or excessive sparking may be
observed
• A spare pair of brushes is supplied with this tool <text from 128965>
• To replace the brushes, remove the Brush Access Plugs (8) from both
sides of the machine. The worn brushes can then be withdrawn, and
replaced with new. Replace the brush access plugs. Alternatively, have
the machine serviced at an authorised service centre
NOTE: Always replace both brushes. Never replace just one, even if the
wear on the brushes is not uniform
Disposal
• Do not dispose of power tools, or other waste electrical and electronic
equipment, with household waste
• Contact your local waste disposal authority for information on the proper
way to dispose of tools
• Connect the machine to the mains power supply
• To start the machine, depress the Lock Off Button (5), and squeeze the
On/Off Trigger Switch (7). The motor will take a few moments to reach
full operating speed
• To stop the machine, release the On/Off Trigger Switch (7)
6
129659_Z1MANPRO1.indd 6
17/05/2012 10:26