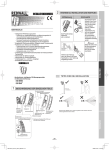
1
LRAD® 500X-RE
Rugged, Long Range Communication
DI RE C TIONALI T Y,
POW E R & R ANGE
› › Powerful, intelligible
communication up to 2,000
meters
› › S afely communicate beyond
stand-off distances to
determine intent
› › Variable beam width for
extended coverage
› › C lear, long-range directional
communication
› › C reates instant acoustic
standoff perimeter
FE ATURE S
› › Rugged military tested
construction
ORDERING INFORMATION
LRAD-500X-RE
LRAD 500X-RE remote electronics long range communications system
INCLUDED ACCESSORIES
Control Module
Record on the Fly Mic
USB Cable
Soft Cover
Tripod
MP3 Auxiliary Cable
Normalizer Software
Remote MP3 control module with 2GB onboard storage memory
Microphone with record and playback feature for immediate playback
USB cable for downloading files to the MP3 player
Protective soft cover
Rugged aluminum tripod is easily transported and quickly sets up for
rapid deployment, with carrying bag
Auxiliary audio cable for connecting to any audio device with a
headphone jack
Audio Normalizer software for creating audio recordings on a PC
OPTIONAL ACCESSORIES
Wireless Kit
Maxabeam Kit
Power Supply Module
Power Pack
GPK Mount
Hitch Mount
Ship Rail Mount
Hard Case
Wireless operation of LRAD systems at ranges up to 300 meters, 3.5
mm phone jack connects to a standard MP3 audio device (UHF, US
only), lightweight hyper-cardioid headset microphone included
12 million candlepower in a lightweight, mounted searchlight,
illuminates targets up to 3,500 meters away
External AC to DC power supply, 100-220VAC to 28VDC
Portable power pack with internal battery, charger, 24VDC, 21AH
Mounts to Objective Gunner Protection Kit (OGPK) for vehicle mounted
operations
Vehicle Mount attaches to standard 2” trailer hitch receiver
Stainless steel rail mount
Watertight and dust proof rugged enclosure for storage and transport
› › L ow power requirements
› › A ll-weather use
› › S calable, lightweight & portable
› › S imple to operate - Increased
coverage with single operator
› › S afe alternative to non-lethal
deterrent options
MARKE TS SE RVE D
› › Law Enforcement
› › Defense
› › Commercial Security
› › Critical Infrastructure Security
› › Maritime
› › Homeland Security
› › CBRNE Incident Management
› › Port & Border Security
› › Emergency Warning
› › Mass Communication
› › Wildlife Preservation & Control
LRAD products are available for purchase through multiple channels including:
GSA Advantage, Federal and State grants, FEMA RKB Standardized Equipment
List (SEL), and others. More information: [email protected]
Product Sheet: LRAD 500X-RE
COMPAC T FO R FI X E D
I NSTALL ATIO NS & SMA L L /
MEDIUM-SIZED V E H I C L E S
& VESSEL S
ACOUSTIC PERFORMANCE
Maximum Continuous
Output
Sound Projection
Communications Range
The L R AD 500X is co mp a c t ,
lightweight and desi g n e d fo r
a pplications ranging f ro m f i xed
s e c u r it y installation s to sma l l /
me diu m -sized vehic l e s a n d
ve ss els. It can be easi l y t ra n spo r ted to prov ide se c u ri t y a n d
de fe n s e pers onnel a h i g h l y effe c tive com m unicat i on , h a i l i n g
a n d warning capabil i t y.
The L R AD 500X has b een se-
149dB SPL @ 1 meter, A-weighted
+/- 15° at 1 kHz/-3dB
Highly intelligible voice messages over distances up to 2,000 meters; max range
of 650 meters over 88 dB of background noise. 6+ dB above background noise is
based on field trials conducted by independent sources.
ENVIRONMENTAL PERFORMANCE 1
Hot Operating
Temperature
Cold Operating
Temperature
Hot Storage Temperature
Cold Storage Temperature
Operating Humidity
Rain
Salt Fog
Shipboard Vibration
Shipboard Shock
Random Vibration
SRS Shock
1
MIL-STD-810G, Method 501.5, Procedure II, Design type Hot, 60°C
MIL-STD-810G, Method 502.5, Procedure II, Design type Basic Cold, -33°C
MIL-STD-810G, Method 501.5, Procedure I, 70°C
MIL-STD-810G, Method 502.5, Procedure I, -40°C
MIL-STD 810G, Method 507.5, Procedure II – Aggravated Cycle
MIL-STD-810G, Method 506.5, Procedure I, Blowing rain
MIL-STD-810G, Method 509.5
MIL-STD-167-1A
MIL-S-901D, Class I, Shock grade B
MIL-STD-810G, Method 514.6, Wheeled vehicles
MIL-STD-810G, Method 516.6, Procedure I, (Functional shock)
Tested by National Technical Systems (NTS) following MIL-STD-810G, MIL-STD-167-1A & MIL-S-901D.
le c te d as the U.S. N a v y a n d U . S .
A r my ’s AHD (acoust i c h a i l i n g
MECHANICAL
de v ice) for sm all vesse l s a n d
Dimensions
Weight
Construction
ve hicles . L R AD 500 X o p e ra tors
ha ve the capabilit y to i s-
25” W x 25” H x 12” D (63.5cm x 63.5cm x 30.5cm)
44 lbs. without accessories (19.96kg)
Molded cross-linked polyethylene, 6061 Aluminum, Stainless Steel connectors
available as an option.
s ue clear, authoritat i ve ve rba l co m m ands, follo we d w i t h
po wer ful deterrent ton es to
ELECTRICAL REQUIREMENTS 2
Power Consumption
mo dif y behavior, en h a n ce re-
Power Input
s po n s e capabilities a n d p ro vi d e
2
mo re tim e to scale t h e u se o f
5 0 0 X ensures voice co mma n d s
w ill be clearly heard a n d u n d er-
MIL-STD-1474D
3
MIL-STD-1474D standard establishes acoustical noise limits and prescribes testing requirements and measurement techniques for
determining conformance to the noise limits specified therein.
ELECTROMAGNETIC COMPATIBILITY (EMC) 4
sto o d .
FCC Part 15 class A radiated emissions, CE
4
Tel: 858.676.1112 | Fax: 858.676.1120
16990 Goldentop Road, STE A
San Diego, CA 92127 USA
Typical Power with warning tone. Normal power consumption with voice content, sound projection is wide and voice boost is off.
SAFETY 3
fo rce if required. Th e ex ten d ed
fre qu enc y range of t h e L R A D
Typical Power consumption 265 Watts (With tone)
Normal power consumption 60 Watts (With voice content)
12 - 28VDC
Requirements for the control of electromagnetic interference characteristics of subsystems and equipment.
www.LRADX.com
[email protected]
Specifications Subject to Change
Last Modified: July 30, 2014
Copyright © 2014 LRAD Corporation
LRAD® 100X
Lightweight, Portable, Long Range Communication
DI RE C TIONALI T Y,
POW E R & R ANGE
› › Powerful, intelligible
communication up to 600
meters
› › Focused, directional sound
pattern for targeted
communication
› › Safely communicate beyond
standoff distances to determine
intent
› › Create instant acoustic standoff
perimeter
› › Communications can be directed
into buildings & vehicles to
deliver clear instructions
FE ATURE S
ORDERING INFORMATION
LRAD-100X-BLK*
*Base system
LRAD-100X-BLK-MAG
100X-TRIPOD-SYS
LRAD 100X battery powered portable long range communications
system
LRAD 100X system includes magnetic base and accompanying
mounting yoke to secure the LRAD system to metallic surfaces such as
a vehicle roof
LRAD 100X system including tripod, stud mount and nylon storage bag
INCLUDED ACCESSORIES
MP3 Player
Record on the Fly Mic
MP3 Auxiliary Cable
USB Cable
Li-Fe-PO4 Battery
Battery Charger
Hard Case
2GB MP3 player plays up to 2GB of pre-recorded messages and tones
Microphone with record and playback feature for immediate playback
Allows connection to any audio device with a headphone jack
USB cable for downloading files to the MP3 player
8-Hour Lithium Iron Phosphate rechargeable battery
AC powered battery charger with LED battery charge status display
Watertight and dust proof rugged enclosure for storage and transport
OPTIONAL ACCESSORIES
Wireless Kit
AC Power Supply
Cigarette lighter/plug cable
Tripod Kit
Stud Kit
Table Mount Kit
Tactical Pack
Front Carry Pack
Wireless operation of LRAD systems at ranges up to 300 meters, 35
mm phone jack connects to a standard MP3 audio device (UHF, US only)
Lightweight hyper-cardioid headset microphone is included
Allows power by a standard AC source in place of the battery
Cigarette lighter/plug cable powers LRAD through 12 VDC cigarette
lighter
Tripod, stud mount, yoke and nylon storage bag
Weldment Stud Kit
Fixed mount for a flat surface
Rugged backpack for operation of the LRAD 100X within the pack and on
the move
Front carry pack for operation of the LRAD 100X within the pack and on
the move
› › 8-hour rechargeable battery
› › Operate easily with gloves or
MOPP gear
› › Optional power sources
› › Simple operator interface
› › Water-resistant
MARKE TS SE RVE D
› › Law Enforcement
› › Defense
› › Commercial Security
› › Critical Infrastructure Security
› › Maritime
› › Homeland Security
› › CBRNE Incident Management
› › Port & Border Security
› › Emergency Warning
› › Mass Communication
› › Wildlife Preservation & Control
LRAD products are available for purchase through multiple channels including:
GSA Advantage, Federal and State grants, FEMA RKB Standardized Equipment
List (SEL), and others. More information: [email protected]
Product Sheet: LRAD 100X
S ELF- CONTAINED,
HAND-HELD, PORTA BL E
COMMUNIC ATIONS
The L R AD 100X is a sel f- co n-
ACOUSTIC PERFORMANCE
Maximum Continuous
Output
Sound Projection
Communications Range
ta ine d, hand-held, p o r ta b l e
137dB SPL @ 1 meter, A-weighted
+/- 15° at 1 kHz/-3dB
Highly intelligible voice messages over distances up to 600 meters; max range of
250 meters over 88 dB of background noise. 6+ dB above background noise is
based on field trials conducted by independent sources.
co mmunications dev i ce fo r
o n -s cene and tac tica l co mmu-
ENVIRONMENTAL PERFORMANCE 1
nica t i ons .
Hot Operating
Temperature
Cold Operating
Temperature
Hot Storage Temperature
Cold Storage Temperature
Operating Humidity
Rain
Salt Fog
Shipboard Vibration
Shipboard Shock
Random Vibration
SRS Shock
At 2 0-30 decibels ( d B ) l o u d e r
tha n com peting m eg a p h on es,
the 1 00X is four to si x t i me s
lo u der than s y stem s o f comp ara ble size and weigh t . A s a p orta ble com m unicatio n s y ste m,
it o vercom es the ba c kg ro u n d
no is e of vehicles, ve ssel s, sire n s and boisterous c ro wd s to
e ns ure each m ess ag e i s c l ea rl y
hea rd and understoo d .
1
MIL-STD-810G, Method 501.5, Procedure II, Design type Hot, 60°C
MIL-STD-810G, Method 502.5, Procedure II, Design type Basic Cold, -33°C
MIL-STD-810G, Method 501.5, Procedure I, 70°C
MIL-STD-810G, Method 502.5, Procedure I, -40°C
MIL-STD 810G, Method 507.5, Procedure II – Aggravated Cycle
MIL-STD-810G, Method 506.5, Procedure I, Blowing rain
MIL-STD-810G, Method 509.5
MIL-STD-167-1A
MIL-S-901D, Class I, Shock grade B
MIL-STD-810G, Method 514.6, Wheeled vehicles
MIL-STD-810G, Method 516.6, Procedure I, (Functional shock)
Tested by National Technical Systems (NTS) following MIL-STD-810G, MIL-STD-167-1A & MIL-S-901D.
MECHANICAL
Dimensions
Weight
Construction
14” W x 14” H x 6.5” D (35.6 x 35.6 x 16.5 cm)
15 lbs.(6.8 kg) with battery, accessories and cables
Injection molded impact resistant polymer, 6061 Aluminum
ELECTRICAL REQUIREMENTS 2
O ptim ized driver an d wa ve-
Power Consumption
guide technolog y en su re c l ea r
Power Input
a n d loud com m unicat i o n so ev-
2
e r y s yllable is understood . T h e
wa r n ing tone prov id es a sa fe
a lte r n ative to other n o n - l et h a l
s o lu tions, m odif ying b e h a vi o r
a n d increas ing respo n se t i me to
s ca le force escalatio n .
Typical Power consumption 85 Watts (With tone)
Normal power consumption 20 Watts (With voice content)
10.8 to 16.8 VDC, Included rechargeable 13.2VDC Li-Fe-PO battery for up to 2
hours of continuous operation at maximum volume on a full charge.
Battery life up to 2 hours of continuous operation at maximum tone on a full charge. Adapters available for auto cigarette lighter
and for 2590 rechargeable military battery.
SAFETY 3
MIL-STD-1474D
MIL-STD-1474D standard establishes acoustical noise limits and prescribes testing requirements and measurement techniques for
determining conformance to the noise limits specified therein.
3
ELECTROMAGNETIC COMPATIBILITY (EMC) 4
FCC Part 15 class A radiated emissions, CE
4
Tel: 858.676.1112 | Fax: 858.676.1120
16990 Goldentop Road, STE A
San Diego, CA 92127 USA
Requirements for the control of electromagnetic interference characteristics of subsystems and equipment
www.LRADX.com
[email protected]
Specifications Subject to Change
Last Modified: July 30, 2014
Copyright © 2014 LRAD Corporation
No.59-1545-1 0905-01
INSTALLATION INSTRUCTIONS
2
INSTALLATION AND MAINTENANCE NOTES
Warning
REDWALL-V series
FEATURES
Never repair or
modify product
Nylon wire
loop
Hold the main unit
securely when you
install or service it.
If you remove your
hands from the main
unit when cables are
connected to it, the
main unit may fall
and the connector
cables may break
or the circuit board
may be damaged.
Caution
Verify that the
power is off before
connecting the
wiring.
When servicing, the sensor
can be hooked onto the
base using the nylon wire
loop.
FRANÇAIS
* Intelligent PIR Detection System
- Detection of ambient temperature and illuminance for automatic
sensitivity management
- Advanced detection algorithm
- Double Dual/One Quad pryo-elements with patented Double
Conductive Shielding for main area
* Built-in creep zone detector (Double dual pyro-elements)
* Anti-vandalism functions
- Anti-rotation function with 3-axis accelerometer
- Anti-masking function with photo-beam
- Reinforced polycarbonate housing
- Max. 4 m (13 ft.) installation height
* Independent sensitivity selector for creep/near/far areas
* Independent N.C. and N.O. output for main area SIP-5030
*2 x N.C. and N.O. independent output for main areas (Near and
Far areas ) SIP-100
* Adjustable alarm interval time
Caution
ENGLISH
Synthesized Intelligent PIR
REDWALL-V
1
DEUTSCH
2-1
: Synthesized Intelligent PIR with creep zone
• SIP-5030
• SIP-100
INSTALLATION HINTS
PARTS IDENTIFICATION
Far area mirror
2.3-4.0 m
(7.6-3 ft.)
ITALIANO
Base
Fixing screw
for the base
Main unit
Creep unit
Window
Fixing rubber
form (*1)
Masking plate for
near area (*1)
Adjustment screws
(two facing each other)
Angle adjustment guide
Fixing screw
for the cover
Mount the detector so that the majority of traffic flow is across the detection pattern.
Cover
Near area mirror
*1: Not used for the SIP-100.
ESPAÑOL
Arrow marking
Fixing screw
--
SIP5030_EN.indd
1
2009/03/26
11:39:34
3
INSTALLATION AND ANGLE ADJUSTMENT
3-1
Wall Mounting
(1)
3-2
Attach the paper template (an accessory) onto the wall,
and drill a 6-mm dia. mounting hole and a cabling hole.
Insert the anchor bolt (an accessory) into the board mount
hole.
Inside View of the Base
Main unit connector
Base
Waterproof seal
(Do not remove
this seal.)
Wall mounting hole
Wiring terminals
(SIP-100 ONLY)
Wiring terminals
Wall mounting hole
Distance from the ground to
the bottom of the template
must be between 2.3 m (7.6 ft.)
and 4 m (13 ft.).
(2)
Bushing of wiring
hole
Bushing of wiring
hole
Using an allen key, remove the main unit from the base.
4 Pull out.
Open wiring cap
2 Open.
1 Loosen the
fixing screw
for the
base.
(3)
3-3
3 Unplug
WIRING
the cable
connector.
Drill through the bushing of the wiring hole, pass the cable
through the hole, and secure the base to the wall.
FAR AREA *2
ALARM OUTPUT (N.C.)
ALARM OUTPUT (N.O.)
(SIP-100 only)
TROUBLE
OUTPUT
POWER INPUT
SPARE
TAMPER OUTPUT *1
(4)
Connect the cable to the terminal block (see Step 3-3).
(5)
Mount the main unit onto the base.
Nylon
wire
loop
4 Tighten and
3 Close.
2 Connect the
secure the
fixing screw
for the base.
connector.
Cautions>>
When mounting the main unit, take care not to trap the
nylon wire loop. Also, take care not to get your fingers
caught.
Check to see that the various settings and operations are
correct.
Caution>>
When the red LED flashes after the power turns on,
this signifies that the system is warming up. Wait for
approximately 60 seconds.
--
2
ALARM OUTPUT (N.O.)
ALARM OUTPUT
(N.O.)
Name
secure here.
SIP5030_EN.indd
CREEP
ALARM OUTPUT
(N.C.)
*1: TAMPER terminals to be connected to a 24 hour supervisory loop.
*2: FAR AREA ALARM OUTPUT, when the NUMBER OF OUTPUTS select switch is
ON(3) (see Step 5-3).
*3: Both FAR AREA and NEAR AREA ALARM OUTPUT, when the NUMBER OF
OUTPUTS select switch is OFF(2).
And Only NEAR AREA ALARM OUTPUT, when the NUMBER OF OUTPUTS
select switch is ON(3) (see Step 5-3).
1 Insert and
(6)
FAR AREA AND NEAR AREA *3
ALARM OUTPUT (N.C.)
Function
Trouble out is used for anti-masking signal. When
an object is placed close to the lens surface, for a
TROUBLE
period of more than 20 seconds (approx.), the IR
OUTPUT
anti-masking circuit will activate and generate a
trouble signal.
It is detected when the cover is opened.
It is detected when the main unit is removed from
its base.
Anti-Rotation:
Damage sustained by the main unit is detected.
When the system power switch is turned on while
the cover is closed, the mounting position of the
main unit itself will be determined and stored in
TAMPER memory after approximately 10 seconds. Then,
OUTPUT if the main unit is impacted in a horizontal or
vertical direction and if the position of the main
unit has changed, damage sustained by the main
unit will be detected. However, if you remove the
cover while keeping the system power turned on,
and if you close the cover again after correcting
the position of the main unit, the new position
of the main unit will be stored in memory after
approximately 10 seconds.
2009/03/18
9:28:07
(2)
Power wires should not exceed the following lengths.
0.33 mm2
(AWG22)
SIP-100
SIP-5030
12V DC 14V DC 24V AC 12V DC 14V DC 24V AC
1280
480
640
1370
410
550
(1570) (2100) (4490) (1350) (1800) (4200)
0.52 mm2
(AWG20)
760
(2490)
1010
(3310)
2160
(7090)
650
(2130)
860
(2820)
2020
(6630)
0.83 mm2
(AWG18)
1210
(3970)
1610
(5280)
3450
(11320)
1030
(3380)
1380
(4530)
3220
(10560)
Align the arrow of the main
unit with the “Angle adjustment
guide” of the adjustment
screw. The main unit is usually
adjusted within the width of this
guide.
ENGLISH
WIRE SIZE
Adjust the angle of the main unit in a vertical direction so
that you can cover the desired detection area.
When mounted at a height of
2.3 meters (7.6ft.)
m (ft.)
4
DETECTION AREA SETTING
Applicable
models
SIP-5030
Cautions>>
If the mounting wall is at an angle, the arrow of the
main unit may exceed the top or bottom limit of “Angle
adjustment guide”. Always check this using the area
viewfinder or the walk tester. If the detection area is too
high or too low, an object outside the detection area may
be detected or incorrect object detection may occur.
SIP-100
(3)
10°
Remove the cover.
Hooks
10°
85°
85°
FRANÇAIS
When mounted at a height of
4.0 meters (13ft.)
You can adjust the detection area by 90 degrees in a horizontal
direction and by 10 degrees in a vertical direction.
Correct the vertical detection angle according to the mounting
height of the sensor unit.
3 Slide the cover downward
and release the hooks.
1 Loosen two fixing screws for
To rotate the main unit counterclockwise, loosen the
RHside adjustment screw. To rotate the main unit
clockwise, loosen the LH-side adjustment screw.
Otherwise, you may find it difficult to tighten or you may
find that you cannot tighten the adjustment screw when
you are securing the main unit.
the cover and pull out the
cover until it stops.
Cover
DEUTSCH
Cautions>>
2 Hold the heads of both cover fixing screws
with your hands, and pull down and remove
the bottom section of the cover from the
main unit.
Cautions>>
The cover is linked to the main unit by nylon wire loop so
that the cover does not fall. Do not pull the cover using
excessive force.
Adjustment
screw
Mount the area viewfinder.
1
To rotate the unit counterclockwise
4-1
Put the red string
round the main unit.
Red string to
hold the main unit
To rotate the unit clockwise
Area plate
(an accessory)
* Peel off the
protection
seal from
both faces
of the area
plate.
Center circle
of the lens
Main Detection Area Setting
(1)
ITALIANO
(4)
Adjust the angle of the main unit in a horizontal direction so
that you can cover the desired detection area.
5030
3 Rotate the main unit.
4
2
1
2
3
4
5
6 (521206)
7
8 9 10
B1
B2 B3 B4
B5
B6
C1 C2 C3 C4
C5 C6
D1
D2 D3 D4 D5 D6
E1
E2 E3 E4 E5 E6
F1
F2 F3 F4 F5 F6
3
1
ESPAÑOL
Insert the area
plate into the slot.
Determine the
detection direction
(see Step 5).
Area viewfinder AVF-1 (optional)
Inspection window
Insert and
mount to
the main
unit.
1 Loosen the fixing
screw for the base.
2 Loosen the adjustment screw.
4 Tighten the adjustment screw slightly.
SIP5030_EN.indd
3
--
2009/03/26
11:39:56
Cautions>>
Mounting tips>>
• The area viewfinder is a supporting tool for detection
area adjustment.
• After you have adjusted the detection area using the
area viewfinder, always check the area using the walk
tester.
• Never look directly into the sun through the area
view finder.
• After you have used the area viewfinder, store it away
from direct sunlight.
• Engage the convex section of the area viewfinder fixing
arms with the notches of the main unit, and insert and
mount the arms.
Fixing arms
Alarm Creep
Notch
Convex
section
(6)
• Mount the area plate so that an arrow of the plate
center section faces upward and the letter surface can
be seen.
• Insert the area plate into the top and bottom grooves of
the area viewfinder until the plate is stopped by the ribs.
5030
1
2
3
4
5
9
8
7
B2 B3 B4
B1
C1 C2 C3 C4
D1 D2 D3 D4
E1
E2 E3 E4
F1 F2 F3 F4
6
Grooves
(521206)
100 (521207)
For near area alarm output
For far area alarm output
C1 C2
B5
B6
C5 C6
D5 D6
E5
Use at “REDWAVE ALARM
OUTPUT” position to
confirm far and near area
alarm output.
1
2
B1 B2
10
D1D2
E6
E1
E2
F1
F2
F5 F6
Use at “REDWALL” position.
Ribs
(5)
Connect the walk tester (optional) to the sensor unit, and
check that the detection area is correct.
For creep zone alarm output
SIP-00
SIP-5030
Arrow
marking
(7)
Securely tighten the adjustment screw that you have
loosened.
Fine adjust the main unit angle in vertical and horizontal
direction by observing the target area through the area
viewfinder.
Power selector
switch
REDWAVE
MICROWAVE
REDWAVE
PIR NEAR
REDWAVE
PIR FAR
REDWALL
REDWIDE
MEGARED
POWER
SUPPLY
FROM
SENSOR
REDWALL
REDWIDE
CONNECTION
SELECT
SWITCH
1 To change the direction of the inspection
REDWAVE
ALARM OUTPUT
CELL BATTERY
REDWAVE
MEGARED
NEAR
MEGARED
FAR
MODE
SELECT
SWITCH
WALKTESTER
POWER OFF
POWER
SELECT
SWITCH
OPM-WT
window, rotate the area viewfinder in a
horizontal direction until it clicks and stops.
1 When the power selector switch is turned to “POWER
2 Move your face close to the viewfinder
so that your eye comes within 5 mm of
the inspection window (lens surface).
3Locate the center circle of the area
plate on the center circle of the lens
of the area viewfinder, and check the
detection area pattern on the area
plate and the background image.
* Each letter on the area plate
corresponds to each mirror number
(see Step 8-2).
* You cannot observe mirror
numbers B1 to F1 and B6 to F6
(shown at right) of the SIP-5030
area plate through the inspection
window. Check them using the
walk tester.
SUPPLY FROM SENSOR” position after plugging
the cable into the walk tester connector, a continuous
beeping sound will be heard.
2 When a pedestrian first enters the detection area, the
strong and weak beeps will sound alternately.
3 When the entirety of a pedestrian’s body is detected, the
strong beep will sound continuously.
Center circle of the lens
Center circle of the
area plate
5030
4
3
2
1
5
6
(521206)
8 9 10
7
B2 B3 B4 B5
B6
B
1
B1
4 C5 C6
C1 C2 C3 C4
6
1 D2 D33 D44 D5 D6
D1
6
E6
EE1
E2 E3 E4 E5
F1 F2 F3 F4 F5 F6
The detection area is
Invisible area inside the frame
border.
Adjusting tips>>
If you experience any of the following, see Step 10.
Limit line of
detection area
5030
1
2
3
4
5
6
(521206)
8 9 10
7
B2 B3 B4 B5
B6
B1
C1 C2 C3 C4 C5 C6
D1 D2 D3 D4 D5 D6
E6
E1
E2 E3 E4 E5
F1 F2 F3 F4 F5 F6
The sensor area is extended
over the street where a person
walks or a car drives.
SIP5030_EN.indd
4
5030
1
2
3
4
5
6
(521206)
8 9 10
7
B2 B3 B4 B5
B6
B1
C1 C2 C3 C4 C5 C6
D1 D2 D3 D4 D5 D6
E6
E1
E2 E3 E4 E5
F1 F2 F3 F4 F5 F6
Branches of a tree and grass
move when the wind blows.
--
2009/03/18
9:28:31
4-2
(3)
Connect the walk tester (optional) to the sensor unit, and
check that the detection area is correct.
For creep zone alarm output
The creep zone detection area can be adjusted between
-90° and 90° horizontally.
For near area alarm output
For far area alarm output
Use at “REDWAVE ALARM
OUTPUT” position to
confirm far and near area
alarm output.
Creep zone
adjustment guides
If you want to
adjust the creep
zone at the angle
of 0°, align these
guides.
-90°
Use at “REDWALL” position.
Power selector
switch
REDWAVE
PIR NEAR
REDWAVE
MICROWAVE
REDWAVE
PIR FAR
REDWALL
REDWIDE
MEGARED
REDWAVE
ALARM OUTPUT
CELL BATTERY
REDWAVE
POWER
SUPPLY
FROM
SENSOR
REDWALL
REDWIDE
CONNECTION
SELECT
SWITCH
MEGARED
NEAR
MEGARED
FAR
MODE
SELECT
SWITCH
WALKTESTER
POWER OFF
POWER
SELECT
SWITCH
OPM-WT
[ft.] [m]
50 5
1 When the power selector switch is turned to “POWER
40
30
20
0
2
5
0
0
3
0
30
When you are checking the detection area, take care not
to cover the shaded area of the window with the walk
tester or its cable. If infrared beams to the sensor are
partially shielded, the detection sensitivity will drop and
the detection operation may fail.
5
0
40
DEUTSCH
20
SUPPLY FROM SENSOR” position after plugging
the cable into the walk tester connector, a continuous
beeping sound will be heard.
When a pedestrian first enters the detection area, the
strong and weak beeps will sound alternately.
When the entirety of a pedestrian’s body is detected,
the strong beep will sound continuously.
Cautions>>
0
FRANÇAIS
+90°
ENGLISH
Creep Zone Detection Area Setting
(1) Adjust the creep zone horizontally.
50 5
If it is difficult to detect an object>>
(2) Adjust the creep zone vertically.
The creep zone detection area can be adjusted between -3°
and 3° vertically.
1. Set the detection logic switch to the “OR” position (see Step 5-2).
If the sensor is OK when you have completed the walk
test, return the logic switch to the “AND” position.
2. Adjust the sensor sensitivity switch (see Step 5-1).
To mask the detection area>>
-3°
+3°
Gently press to move
upward
Gently press to move
downward
Far area
Near
area
Detection area at -3° adjusted.
Detection area at +3° adjusted.
[ft.] [m]
3.2 4
0
Attach the masking seal
(an accessory) to the area
mirror surface.
Use the masking plate
(mounted in the main
unit).
Attach the masking
seal (an accessory)
to the area mirror
surface.
SIP-100
Reference
Far area
cannot be Step 7
masked.
Near area
cannot be
masked.
Step 8-1
Step 8-2
0
20
ESPAÑOL
00
0
SIP-5030
* Creep zone cannot be masked.
2
0
How to mask the area
ITALIANO
Detection
area
0 [m]
30 [ft.]
--
SIP5030_EN.indd
5
2009/03/18
9:28:34
5
FUNCTION SETTING
Applicable
models
SIP-5030
SIP-100
Far area sensitivity selector
switch
5-2 Detection Logic Selector Switch
Near area sensitivity
selector switch
Applicable
models
Creep zone
sensitivity selector
switch
Tamper
switch
Walk tester
connector
Sens.Select.SW. 5730980
Sens.Select.SW. 5730980
UP DWN
Far area Near area Creep zone
Alarm Creep
Operation indicator
(See Step 11.)
UP DWN
(
1: Detection logic selector
(AND or OR)
2: Setting invalid
3,4: Alarm holding time selectors
Cautions>>
If the red LED keeps blinking for approx. 60 seconds
after turning the power on, turn the power off and then
on again.
Applicable
models
SIP-5030
)
SIP-100
5-3 Number of Outputs Selector Switch
Near area sensitivity
selector switch
Far area sensitivity selector
switch
Creep zone
sensitivity selector
switch
Tamper
switch
Walk tester
connector
Applicable
models
UP
Sens.Select.SW. 5730980
DWN
Sens.Select.SW. 5730980
Far area Near area Creep zone
UP DWN
Far Near Creep
SIP-5030
SELECTOR
STATUS
POSITION
UP
3
Far area Near area Creep zone
UP DWN
Far Near Creep
DWN
Factory
( default
)
Operation indicator
(See Step 11.)
1: Detection logic selector
(AND or OR)
2: Number of Outputs selector
switch
3,4: Alarm holding time selectors
Sensitivity Selector Switch for Far
Area, Near Area and Creep Zone
SIP-5030
5-4
SIP-100
SELECTOR
POSITION
SH
Far area Near area Creep zone
H
M
(Factory
default)
L
SIP-5030
FUNCTION
Suitable for sites requiring a level
of sensitivity higher than “H”
Suitable for sites requiring a level
of sensitivity higher than “M”
Suitable for standard applications
SIP-100
SELECTOR
POSITION
Suitable for hostile and narrow area
--
6
Dip switch 3-4
You can set an interval (4 different times) to
suspend the alarm signal output.
For example, if you set this interval to 30
seconds, no more alarm signals will be output
for 30 seconds after the output of the first alarm
signal. If no pedestrians are detected for more
than 30 seconds, the system returns to the
standby mode.
Then, when a pedestrian is detected, the alarm
signal will be output.
FUNCTION
SIP5030_EN.indd
FUNCTION
SIP-100
The three alarms,
which are far area, near
Setting invalid.
area and creep zone
are output separately.
The two alarms, which
are far/near area and
Setting invalid.
creep zone are output
separately.
SIP-5030
Alarm Interval Switch
Applicable
models
You can change the sensitivity for far area
detection, near area detection and creep zone
detection independently.
Sens.Select.SW.
SIP-100
When you output far area alarm with Number of Output
Selector Switch, far area detection area depends on the
main unit installation height.
Detection area is approximately 35-100m for 4m (13ft.)
installation height and 20-100m for 2.3m (7.6ft.) installation
height.
If the red LED keeps blinking for approx. 60 seconds
after turning the power on, turn the power off and then
on again.
Applicable
models
2
Dip switch 2
Cautions>>
Cautions>>
5-1
SIP-100
Detection area of SIP-5030 and SIP-100 consist
of two types of plane detection areas in an
alternative manner constructed by two pairs of
pyro-elements (quad element for the far area),
for the near area, far area and the creep zone.
SELECTOR
UP
STATUS
FUNCTION
POSITION
A
sensor
signal
is output when an
DWN
object is detected in either of the two
OR detection areas.
UP
Factory * Use this mode when you adjust
default
the detection area. Switch to AND
mode after you have finished the
detection area adjustment.
Use this mode to reduce instances
of incorrect detection of objects. The
sensor signal is output only when
DWN
AND an object is detected within the two
detection areas. If any objects are
blocking multiple detection areas,
use OR mode.
Far area Near area Creep zone
Alarm Creep
SIP-5030
Dip switch 1
0 sec
(Factory 15 sec 30 sec 60 sec
default)
2009/03/26
11:41:48
6
DETECTION AREA
Applicable
models
SIP-5030
SIP-100
20
40
0
30
20
5
0
0
0
20
30
0
5
0
0
0
TOP VIEW (Installation height 2.3 m (7.6ft.))
[ft] [m]
50 5
40
30
ENGLISH
TOP VIEW (Installation height 4.0 m (13ft.))
[ft] [m]
50 5
0
0
5
20
30
0
5
0
40
50 5
50 5
SIDE VIEW (Installation height 4.0 m (13 ft.))
[ft] [m]
3 4
0
2
0 0
: Near area SIDE VIEW (Installation height 2.3 m (7.6 ft.))
: Far area
[ft] [m]
7.6 2.3
: Creep zone
0
0
0
0
20
0
30 40
Applicable
models
50
20
60 70
80
90
SIP-5030
30
50 [m]
40
00 0 20 30 40 50 60 [ft]
0
0
0
: Near area 0
20
0
30 40
50
60
20
70
80
90
: Far area
: Creep zone
30
50 [m]
40
00 0 20 30 40 50 60 [ft]
SIP-100
DEUTSCH
Cautions>>
When you output far area alarm with Number of Output
Selector Switch, far area detection area depends on the
main unit installation height.
Detection area is approximately 35-100m for 4m (13ft.)
installation height and 20-100m for 2.3m (7.6ft.) installation
height.
[ft]
[m]
20
5
0
FRANÇAIS
40
TOP VIEW (Installation height 4.0 m (13ft.))
0
20
5
[ft] [m]
3 4
0 2
0
0
SIDE VIEW (Installation height 4.0 m (13ft.))
[ft]
[m]
20
5
0
0
0
0
0
20
30
40
50
60
20
70
80
90
: Near area : Far area
: Creep zone
90
00 [m]
40
60
50
80
30
70
00 0 20 30 40 50 60 70 80 90 200 20 220 230 240 250 260 270 280 290 300 30 320 330 [ft]
TOP VIEW (Installation height 2.3 m (7.6ft.))
0
ESPAÑOL
0
ITALIANO
0
0
20
5
[ft] [m]
7.6 2.3
0
0
SIDE VIEW (Installation height 2.3 m (7.6ft.))
0
0
0
0
20
30
40
50
60
20
70
80
90
: Near area : Far area
: Creep zone
90
00 [m]
40
60
50
80
30
70
00 0 20 30 40 50 60 70 80 90 200 20 220 230 240 250 260 270 280 290 300 30 320 330 [ft]
--
SIP5030_EN.indd
7
2009/03/18
9:30:11
7
8
MASKING THE FAR AREA SENSOR
Applicable
models
SIP-5030
SIP-100
8-1
Cautions>>
• The window is linked to the main unit by nylon wire loop
so that the window does not fall. Do not pull the window
using excessive force.
• After you have masked the detection areas, mount the
window and place the excessive nylon wire loop inside
the main unit.
MASKING THE NEAR AREA SENSOR
Masking the Detection Areas using
Masking Plates
Applicable
models
SIP-5030
SIP-100
The near area mirror mounted in the main unit has 2 near
masking plates; one at the right side of this mirror and another
at the left side of this mirror. You can mask the detection area
by changing the position of these masking plates.
How to remove the window>>
Cautions>>
You can mask the outside detection areas only; they are
areas 1 and 6. Use the area masking seals (an accessory)
to mask the other detection areas (see Step 8-2).
Window
1Remove the masking
plate from the storage,
and check the detection
area and the mirror you
use by referring to the
area chart.
Press the left bottom hole with your
finger, and pull the window up.
Using the tweezers (an accessory), carefully attach the area
masking seals (an accessory) to the far area mirror.
2Attach the masking plate to the mirror, and
secure it to the ribs.
Rib
Rib
Area masking seals
Far area mirror
MIRROR
6
4
2
5
3 1
3 Insert the fixing rubber form to secure
the knob of the masking plate.
Near area mirror
50
5
40
50
5
30
0
20
5
0
0
0
0
5
30
40
0
20
40
30
0
20
0
0
0
5
0
20
5
30
40
0
50 [ft.]
5 [m]
50 [ft.]
5 [m]
6
2
3
4
5
If tree branches or other moving objects
are in the path of the detection beam.
7
0
8
2
3
9
4
5
6
--
SIP5030_EN.indd
8
2009/03/18
9:30:16
9
8-2
Applicable
models
(1)
Using the tweezers (an accessory), carefully attach the area
masking seals (an accessory) to the near area mirror.
SIP-100
After you have adjusted all sensor items, securely tighten all
adjustment screws that you have loosened. Finally, securely
tighten the bottom fixing screws.
Area masking seals
MIRROR
Near area
mirror
F
E
D
C
F6
SIP-5030
6 4 2
5 3 1
F6 F4 F 2
E6 E4 E 2
D6 D4 D 2
C6 C 4 C 2
F 5 F3 F 1
E 5 E3 E 1
ENGLISH
Masking the Detection Areas using
Masking Seals
E6
TERMINATION PROCEDURE
D5 D3 D 1
C5 C3 C1
B B6 B4 B 2 B5 B3 B1
50
40
30
20
10
10
0
5
10
20
0
30
5
40
10
50[ft.]
1 Adjustment screw
2 Fixing screw
15 [m]
F
E
Cautions>>
• If you need to adjust the detection area again, be sure
to loosen the fixing screw. If you try to move the main
unit without loosening the fixing screw, the unit may be
damaged.
• When you mount the cover, place the excessive nylon
wire loop in the main unit. If the wire has been pinched
by the window and the cover, rain drops may be able to
enter into the main unit.
D
C
DEUTSCH
B
6
1
2
5
4
3
[ft.] [m]
13 4
10
2
0
00
0
10
20
F
30
E
10
D
40
50
60
C
20
70
80
90
FRANÇAIS
15
30 [m]
100 [ft.]
B
ITALIANO
ESPAÑOL
--
SIP5030_EN.indd
9
2009/03/18
9:30:18
10
OPERATION TEST
10-1 If There is a Public Street Where People
Walk or Cars Drive by the Detection Area
10-2 If Tree Branches or Grass are Detected
When They Move Within the Detection Area
Points>>
Points>>
Adjust the detection area so that it does not cover tree
branches or grass that move when the wind blows.
Reduce the size of the detection area so that it does not
include any public streets.
(1)
(1)
Check to see that the arrow of the main unit is within the
width of “Angle adjustment guide” on the adjustment screw.
(2)
Using the area viewfinder, check to see that the detection
area does not include any public streets.
(2)
(3)
If the detection area does go beyond a public street, correct
the vertical angle of the main unit.
However, exercise care so that the arrow does not move
away significantly from the “Angle adjustment guide”
position.
Using the area viewfinder, check to see that the detection
area does not cover tree branches or grass that may move
when the wind blows.
(3)
Use the walk tester to listen for sound level changes when
there is no apparent activity in the detection area.
Adjust the detection area so that it does not detect
unwanted areas.
If the arrow does move away significantly from
the “Angle adjustment guide” position:
For SIP-5030, mask the far area detection area using
the masking seal. You may be required to also mask the
near area detection area under specific sensor installation
conditions (see Step 8).
For SIP-100, you cannot mask neither far area nor near
area.
(4)
Check to see that the arrow of the main unit is within the
width of “Angle adjustment guide” on the adjustment screw.
If the sound level changes, some part of the detection area
must be active (i.e.: an object is moving).
(4)
Use the walk tester and locate the part of the detection area
that is active. Change the walk tester selector switch
position and determine whether the active part of the
detection area is far area, near area or creep zone.
(5)
Using the area viewfinder again, locate the active detection
area.
(6)
Mask the active detection area. For SIP-5030, mask the far
area detection area using the masking seal. You may be
required to also mask the near area detection area using
the masking plate or masking seal (see Step 8).
For SIP-100, the far area, near area and creep zones
cannot be masked. Adjust the detection area for the area
that cannot be masked.
(7)
Using the walk tester again, check that the sound level
changes. If the sound level does not change excessively,
you can finish the adjustment.
When a person walks along the street or a car drives along
it, check the detection area using the walk tester.
Points>>
You cannot mount and use both the area viewfinder and
walk tester simultaneously.
Cautions>>
The detection area may increase if there is a large
difference in temperature between the moving object and
the background.
Points>>
You cannot mount and use both the area viewfinder and
the walk tester simultaneously.
Cautions>>
A heat source beyond the detection area may cause a
false alarm due to the reflection of heat off the ground.
Examples of types of surfaces that reflect include water
(puddles), wet roads, smooth concrete surfaces and
asphalt roads.
If the source of the heat is strong and/or the reflection
rate is high, the detection distance will be longer than
required and may detect unnecessary objects beyond the
target area. Therefore, select the detection range position
according to the ground conditions of the installation site.
- 10 -
SIP5030_EN.indd
10
2009/03/18
9:31:00
11
12
LED STATUS
Applicable
models
SIP-5030
SIP-100
Applicable
models
If the red LED keeps blinking for
approx. 60 seconds after turning the
power on, turn the power off and
then on again.
Far area
Alarm Creep
Creep zone Operation indicator - Red LED
Far/Near area Operation indicator - Red LED
Detector Status
LED Status
During power ON
Blinks.
Turns OFF.
Lights.
When detected (in creep zone)
Lights.
Applicable
models
SIP-5030
Coverage
(Main area)
Coverage
(Creep zone)
Number Main area
of
detection
Creep
zones
zone
SIP-100
Far area
Passive infrared
50 x 30m
(164 x 100ft.)
3 x 5m (10 x 17ft.) at 2.3m (7.6ft.) height
(6 x 9m (20 x 30ft.) at 4m (13ft.) height
Detection angle adjustable
100 zones
28 zones
36 zones
Power input
11 - 16V DC
22 - 26V AC
Current draw
40mA max. (12V DC) 45mA max. (12V DC)
75mA max. (24V AC) 80mA max. (24V AC)
Red LED
Red LED
Creep
zone alarm
Near area Operation indicator - Red LED
Far area Operation indicator - Red LED
100 x 3m
(330 x 10ft.)
2.3 to 4m (7.6 to 13ft.)
Indicator Near alarm
Creep zone Operation indicator - Red LED
SIP-100
Mounting height
Far alarm
If the red LED keeps blinking for
approx. 60 seconds after turning
the power on, turn the power off
and then on again.
SIP-5030
Detection method
Cautions>>
SIP-100
Far Near Creep
Model
SIP-100
Red LED
Red LED
Alarm period
Approx. 2 sec.
Warm-up period
Approx. 60 sec.
LED Status
During power ON
Blinks.
During standby
Turns OFF.
Alarm interval period
Off / 15 / 30 / 60 sec.
When detected (in far area)
Lights.
AND/OR
When detected (in near area)
Lights.
Detection logic
selector
When detected (in creep zone)
Lights.
Tamper output
N.C. 28V DC, 0.1A max.
Trouble output
N.C. 28V DC, 0.2A max.
-
Dip switch: 2 / 3
DEUTSCH
Detector Status
No. of outputs selector
FRANÇAIS
During standby
When detected (in far/ near area)
SIP-5030
ENGLISH
Cautions>>
SIP-5030
SPECIFICATIONS
N.C.28V DC, 0.2A max.
N.C.28V DC, 0.2A max. N.O.28V DC, 0.2A max.
N.O.28V DC, 0.2A max. N.C.28V DC, 0.2A max.
Near area
N.O.28V DC, 0.2A max.
Far area
Alarm
output
Sensitivity selector
Without
optional
Operating heating unit
With
temperature
optional
heating unit
N.C.28V DC, 0.2A max.
N.O.28V DC, 0.2A max.
Far: SH/H/M/L Near: SH/H/M/L
Creep zone: SH/H/M/L
-25 to +60°C (-13 to +140°F)
-40 to +60°C (-40 to +140°F)
IP rating
Main unit: IP65
Chassis : IP55
Dimensions
(H × W × D)
271 x 102 x 290 mm
(10.7 x 4.0 x 11.4 in.)
Weight
1.6 kg (56 oz.)
Screws,
Paper template,
Allen key,
Area masking seal,
Tweezers,
Instruction manual,
Area plate,
Fixing rubber form
Screws,
Paper template,
Allen key,
Instruction manual,
Area plate
ESPAÑOL
Accessories
ITALIANO
Creep
zone
- 11 -
SIP5030_EN.indd
11
2009/03/27
13:28:55
OPTION
02
(4.0)
290
(.4)
23
(0.9)
SIP-5030, 100
•
•
•
•
248
(9.8)
DIMENSION
OPM-WT
AVF-1
SIP-MIDIHOOD
SIP-HU
-Audio Walk Tester
-Area View Finder
-Sun/Snow shield
-Heating unit
These units are designed to detect movement to activate CCTV
system. Being only part of a complete surveillance system,
we cannot accept responsibility for any damage or other
consequences resulting form the activation of the unit.
This product confirms to the EMC Directive 2004/108/EC.
Specifications and design are subject to change without prior
notice.
6
(4.57)
2
(0.83)
3
(0.5)
96
(3.78)
75
(3.0)
2
(0.83)
7.
(0.67)
90
(3.6)
Unit:mm (inch)
OPTEX CO., LTD. (JAPAN)
(ISO 9001 Certified) (ISO 14001 Certified)
5-8-12 Ogoto Otsu Shiga 520-0101 JAPAN
TEL:+81-77-579-8670 FAX:+81-77-579-8190
URL:http://www.optex.co.jp/e/
OPTEX INCORPORATED (USA)
OPTEX SECURITY SAS (FRANCE)
OPTEX (EUROPE) LTD. (UK)
OPTEX SECURITY Sp.z o.o.
(POLAND)
TEL:+1-909-993-5770
Tech:(800)966-7839
URL:http://www.optexamerica.com
TEL:+44-1628-631000
URL:http://www.optex-europe.com
- 12 -
SIP5030_EN.indd
12
TEL:+33-437-55-50-50
URL:http://www.optex-security.com
TEL:+48-22-598-06-55
URL:http://www.optex.com.pl
2009/03/18
9:31:04
2
INSTRUCTIONS D'INSTALLATION
NOTES D'INSTALLATION ET DE MAINTENANCE
Avertissement
Série REDWALL-V
FONCTIONNALITÉS
Ne jamais réparer ni
modifier le produit
Bouche métallique
en nylon
Sécurisez l'unité
principale lors de
son installation ou
de son entretien.
Si vous ne
retenez pas l'unité
principale lorsque
les câbles y sont
connectés, celle-ci
risque de tomber
et vous risquez
d'endommager
les câbles du
connecteur ou la
carte de circuit.
Attention
Assurez-vous que
l'appareil est hors
tension avant de
brancher les câbles.
FRANÇAIS
* Système de détection PIR intelligent
- Détection de la température ambiante et éclairement pour une gestion
automatique de la sensibilité
- Algorithme de détection avancée
- Pyroéléments deux fois doubles et quadruples avec un double
blindage conducteur breveté pour la zone principale.
*Détecteur intégré de la zone située sous le capteur
(Pyroéléments deux fois doubles)
* Fonctions anti-vandalisme
- Fonction anti-rotation avec un accéléromètre triaxial
- Fonction anti-masquage à faisceau photoélectrique
- Logement polycarbonate renforcé
- Hauteur d'installation max de 4 m (13 ft.)
*Sélecteur de sensibilité indépendant pour la zone située sous le
capteur de détecteur, la portées courte et la portées longue
*Sortie à commande N.C. et N.O. indépendante pour la zone
principale SIP-5030
*2 x sortie à commande N.C. et N.O. indépendante pour les zones
principales (Portées courte et longue) SIP-100
* Intervalle des alarmes réglable
Attention
ENGLISH
Capteur infrarouge passif (PIR)
intelligent synthétisé
Lors du fonctionnement, le
capteur peut être accroché
à la base grâce à la bouche
métallique en nylon.
REDWALL-V
DEUTSCH
2-1
ASTUCES D'INSTALLATION
: Capteur infrarouge passif (PIR) intelligent synthétisé avec
zone située sous le capteur de détection
• SIP-5030
• SIP-100
1
IDENTIFICATION DE PIÈCES DÉTACHÉES
2,3-4,0 m
(7,6-13 ft.)
Miroir pour portée longue
ITALIANO
Base
Vis de fixation
pour la base
Unité principale
Unité de zone située
sous le capteur de
détection
Vis de réglage
(deux face à face)
Guide de réglage angulaire
Fenêtre
Embout en caoutchouc
de fixation (*1)
Plaque de masquage
pour portée courte (*1)
Vis de fixation
pour le cache
Installez le détecteur de manière à capter la majorité du trafic.
Cache
Miroir pour portée courte
*1: Non utilisé pour le SIP-100.
ESPAÑOL
Marquage fléché
Vis de fixation
- 13 -
REDWALL-V_SIP-5030_100_FR.indd
13
2009/03/30
16:01:42
3
INSTALLATION ET RÉGLAGE DES ANGLES
3-1
Montage au mur
(1)
3-2
Vue interne de la base
Connecteur de l'unité
principale
Trou pour le
montage au mur
Montez le gabarit en papier (accessoire) au mur et percez
un trou de 6 mm de diamètre pour le montage, ainsi qu'un
trou de câblage.
Insérez le boulon d'ancrage (accessoire) dans le trou de
montage de la carte.
Base
Joint étanche
(Ne pas enlever
ce joint.)
Bornes de câblage
(SIP-100 UNIQUEMENT)
Bornes de câblage
Trou pour le
montage au mur
La distance entre le sol et
la base du gabarit doit être
comprise entre 2,3 m
(7,6 ft.) et 4 m (13 ft.).
(2)
Douille du trou de
câblage
Douille du trou de
câblage
À l'aide d'une clé à six pans, retirez l'unité principale de la base.
4 Tirez.
Capot de
câblage ouvert
2 Ouvrez.
1 Desserrez
la vis de
fixation pour
la base.
(3)
3 Débranchez le
connecteur de
câbles.
3-3
CÂBLAGE
Forez à travers la douille du trou de câblage, passez le
câble dans le trou et fixez la base sur le mur.
PORTÉE LONGUE *2
ALARME DE SORTIE (N.C.)
ALARME DE SORTIE (N.O.)
(SIP-100 uniquement)
DÉRANGEMENT
DE SORTIE
ALIMENTATION D'ENTRÉE
ANTI-SABOTAGE DE SORTIE *1
PIÈCE DE RECHANGE
ALARME DE SORTIE EN PORTÉE LONGUE*3
ET EN PORTÉE COURTE (N.C.)
ZONE SITUÉE SOUS LE
CAPTEUR
ALARME DE SORTIE (N.C.)
ALARME DE SORTIE (N.O.)
(4)
Connectez le câble au bornier (voir étape 3-3).
(5)
Installez l'unité principale sur la base.
*1 : bornes anti-sabotage à connecter à une boucle de supervision 24/24.
*2 : L’ALARME DE SORTIE EN PORTÉE LONGUE, si le NUMÉRO DU
COMMUTATEUR DE SORTIE est ON (3) (voir étape 5-3).
*3 : Les deux ALARME DE SORTIE EN PORTÉE LONGUE et EN PORTÉE
COURTE, si le NUMÉRO DU COMMUTATEUR DE SORTIE est OFF (2).
Et uniquement L’ALARME DE SORTIE EN PORTÉE COURTE, si le NUMÉRO
DU COMMUTATEUR DE SORTIE est ON (3) (voir étape 5-3).
1 Insérez et
sécurisez ici.
Nom
Bouche
métallique
en nylon
2 Branchez le
connecteur.
sécurisez
la vis de
fixation pour
la base.
Attention>>
Lors de l'installation de l'unité principale, veillez à ne pas
bloquer la bouche métallique en nylon. Veillez également
à ne pas coincer vos doigts.
(6)
Fonction
Le dérangement de sortie est utilisé pour un signal
anti-masquage. Lorsqu'un objet est placé près de
DÉRANGEMENT
la surface de la lentille au-delà de 20 secondes
DE SORTIE
(environ), le circuit anti-masquage IR est activé et
génère un signal d'alarme.
Elle est détectée si le cache est ouvert.
Elle est détectée si l'unité principale est retirée de la base.
Anti-rotation :
Tout endommagement de l'unité principale est détecté.
Lorsque le commutateur d'alimentation système est
branché alors que le cache est fermé, la position
ANTIde montage sera déterminée pour l'unité principale
SABOTAGE et mémorisée après 10 secondes environ. Si l'unité
DE SORTIE principale est affectée à l'horizontale ou à la verticale
et si sa position est modifiée, tout endommagement
de l'unité principale est détecté. Cependant, si vous
enlevez le cache alors que le système est en marche
et si vous le refermez après avoir repositionné l'unité
principale, ce nouvel emplacement sera mémorisé
après 10 secondes environ.
4 Serrez et
3 Fermez.
ALARME DE
SORTIE (N.O.)
Vérifiez si les divers réglages et opérations sont corrects.
Attention>>
Le clignotement de la diode photoémettrice rouge, après la
mise sous tension de l'appareil, indique que le système est
en cours de démarrage. Patientez environ 60 secondes.
- 14 -
REDWALL-V_SIP-5030_100_FR.indd
14
2009/03/30
16:03:15
Les câbles électriques ne doivent pas dépasser les longueurs suivantes.
(2)
0,52 mm2
(AWG20)
760
(2490)
1010
(3310)
2160
(7090)
650
(2130)
860
(2820)
2020
(6630)
0,83 mm2
(AWG18)
1210
(3970)
1610
(5280)
3450
(11320)
1030
(3380)
1380
(4530)
3220
(10560)
Alignez la flèche de l'unité
principale avec le « guide de
réglage angulaire » sur la vis
de réglage. En règle générale,
l'unité principale est réglée sur
la largeur de ce guide.
Une fois installé à une hauteur de
2,3 mètres (7,6 ft.)
m (pieds.)
4
ENGLISH
SIP-5030
SIP-100
DIMENSION
DE CÂBLE 12 V CC 14 V CC 24 V CA 12 V CC 14 V CC 24 V CA
0,33 mm2
480
640
1370
410
550
1280
(AWG22)
(1570) (2100) (4490) (1350) (1800) (4200)
Réglez l'angle de l'unité principale à la verticale. Ainsi,
vous pouvez couvrir la zone de détection souhaitée.
PARAMÈTRE DE LA ZONE DE DÉTECTION
Modèles
applicables
SIP-5030
Une fois installé à une hauteur de
4 mètres (13 ft.)
Attention>>
Si le mur de montage est incliné, la flèche de l'unité principale risque
de dépasser la limite inférieure ou supérieure du « guide de réglage
angulaire ». Vérifiez systématiquement ce point à l'aide du viseur de
zone ou du testeur de mouvement. Si la zone de détection est trop
haute ou trop basse, un objet en dehors de cette zone risque d'être
détecté ou une erreur de détection risque de se produire.
SIP-100
(3)
10°
10°
Enlevez le cache.
Crochets
85°
85°
FRANÇAIS
Vous pouvez régler la zone de détection de 90 degrés à
l'horizontale et de 10 degrés à la verticale.
Rectifiez l'angle de détection verticale selon la hauteur de
montage du capteur.
3 Glissez le cache vers le
bas et libérez les crochets.
Pour faire pivoter l'unité principale dans le sens
contraire des aiguilles d'une montre, desserrez la vis
de réglage à droite. Pour faire pivoter l'unité principale
dans le sens des aiguilles d'une montre, desserrez la
vis de réglage à gauche. Sinon, vous risquez d'avoir du
mal à visser ou d'échouer à serrer la vis de réglage lors
de l'installation de l'unité principale.
1 Desserrez les deux vis de
fixation pour le cache et tirez
dessus jusqu'à son arrêt.
Cache
2 Tenez les têtes des deux vis de fixation du
cache, tirez vers le bas et enlevez la partie
inférieure du cache de l'unité principale.
Attention>>
Vis de
réglage
Le cache est rattaché à l'unité principale par une
bouche métallique en nylon pour en éviter toute chute.
Ne tirez pas sur le cache avec trop de force.
Installez le viseur de zone.
1
Pour faire pivoter l'unité dans le sens Pour faire pivoter l'unité dans le
contraire des aiguilles d'une montre sens des aiguilles d'une montre
Placez la ficelle rouge
autour de l'unité principale.
Ficelle rouge pour
maintenir l'unité principale Plaque de zone
(accessoire)
PARAMÈTRE DE LA ZONE DE
DÉTECTION PRINCIPALE
(1) Réglez l'angle de l'unité principale à l'horizontale.
* Retirez le
joint de
protection
des deux
faces de la
plaque de
zone.
Cercle central
de la lentille
Ainsi, vous pouvez couvrir la zone de détection souhaitée.
ITALIANO
(4)
4-1
DEUTSCH
Attention>>
5030
1
2
3
4
5
6 (521206)
7
8 9 10
B1
B2 B3 B4
B5
B6
C1 C2 C3 C4
C5 C6
D1
D2 D3 D4 D5 D6
E2 E3 E4 E5 E6
F1
F2 F3 F4 F5 F6
3 Faites pivoter l'unité
E1
principale.
4
2
3
1
ESPAÑOL
Insérez la plaque
de la zone dans la fente.
Déterminez
le sens de détection
(voir étape 5).
Viseur AVF-1 (en option)
Fenêtre d'inspection
Insérez et
montez sur
l'unité
principale.
1 Desserrez la vis de
fixation pour la base.
2 Desserrez la vis de réglage.
4 Serrez légèrement la vis de réglage.
REDWALL-V_SIP-5030_100_FR.indd
15
- 15 -
2009/03/30
16:03:20
Attention>>
Astuces de montage>>
• Le viseur de zone est un outil vous permettant de régler
la zone de détection.
• Après avoir réglé la zone de détection à l'aide du viseur,
vérifiez-la toujours avec le testeur de mouvement.
• Ne regardez jamais directement le soleil à travers le
viseur.
• Après avoir utilisé le viseur, mettez-le à l'abri des
expositions directes au soleil.
• Placez la partie convexe des bras de fixation du viseur
sur les encoches de l'unité principale, avant d'y insérer
et d'y installer les bras.
Bras de fixation
Alarm Creep
Encoche
Section
convexe
• Montez la plaque de zone de sorte qu'une flèche de la
section soit face supérieure et que la surface avec les
lettres soit visible.
• Insérez la plaque de zone dans les rainures supérieures
et inférieures du viseur jusqu'à l'arrêt complet de la
plaque par les nervures.
SIP-100
SIP-5030
Marquage
fléché
5030
1
2
3
4
9
8
7
B2 B3 B4
B1
C1 C2 C3 C4
D1 D2 D3 D4
E1
E2 E3 E4
F1 F2 F3 F4
5
6
Rainures
(521206)
100 (521207)
1
2
B1 B2
10
C1 C2
B5
B6
C5 C6
D6
D5
E5
(6)
Sécurisez la vis de réglage que vous avez desserrée.
(7)
Connectez le testeur de mouvement (en option) au capteur et
vérifiez l'exactitude de la zone de détection.
Pour alarme de sortie de zone située
sous le capteur de détection
Pour l'alarme de sortie en portée courte
Pour l'alarme de sortie en portée longue
À utiliser en position
« REDWAVE ALARM
OUTPUT » pour confirmer
l'alarme de sortie en portée
courte et longue.
D1D2
E6
E1
E2
F1
F2
À utiliser en position
« REDWALL ».
F5 F6
Commutateur
d'alimentation
Nervures
(5)
Réglez l'angle de l'unité principale à la verticale et à
l'horizontale en observant la zone cible à travers le viseur.
1 Pour changer le sens de la fenêtre d'inspection,
faites pivoter le viseur de zone à l'horizontale
jusqu'à un déclic et arrêt complet.
REDWAVE
MICROWAVE
REDWAVE
PIR NEAR
REDWAVE
PIR FAR
REDWAVE
ALARM OUTPUT
CELL BATTERY
REDWAVE
REDWALL
REDWIDE
MEGARED
POWER
SUPPLY
FROM
SENSOR
REDWALL
REDWIDE
CONNECTION
SELECT
SWITCH
MEGARED
NEAR
MEGARED
FAR
MODE
SELECT
SWITCH
WALKTESTER
POWER OFF
POWER
SELECT
SWITCH
OPM-WT
1 Lorsque le commutateur d'alimentation est en position
2 Rapprochez votre visage du viseur
« POWER SUPPLY FROM SENSOR » après avoir
connecté le câble au connecteur du testeur de
mouvement, vous entendrez un signal sonore continu.
2 Lorsqu'un piéton pénètre dans la zone de détection
pour la première fois, des signaux forts et faibles seront
audibles en alternance.
3 Lorsque le corps d'un piéton est détecté dans son
intégralité, le signal fort est audible en continu.
de sorte que vos yeux se trouvent à
5 mm max de la fenêtre d'inspection
(surface de la lentille).
3Localisez le cercle central de la
plaque de zone sur le cercle central
de la lentille du viseur puis vérifiez
le modèle de la zone de détection
sur la plaque de zone et l'image en
arrière-plan.
* Chaque lettre figurant sur la plaque
de zone correspond à un numéro
du miroir (voir étape 8-2).
* Vous ne pouvez pas voir les
numéros de miroir B1 à F1 et B6 à
F6 (illustrés à droite) de la plaque
de zone SIP-5030 à travers la
fenêtre d'inspection. Vérifiez-les en
utilisant le testeur de mouvement.
Cercle central de la lentille
Cercle central de la
plaque de zone
5030
4
3
2
1
5
6
(521206)
8 9 10
7
B2 B3 B4 B5
B6
B
1
B1
4 C5 C6
C1 C2 C3 C4
6
1 D2 D33 D44 D5 D6
D1
6
E6
EE1
E2 E3 E4 E5
F1 F2 F3 F4 F5 F6
La zone de détection est
Zone invisible dans la bordure du cadre.
Astuces de réglage>>
Ligne de délimitation de
la zone de détection
Si vous rencontrez ces scénarios, reportez-vous à l'étape 10.
5030
1
2
3
4
5
6
(521206)
8 9 10
7
B2 B3 B4 B5
B6
B1
C1 C2 C3 C4 C5 C6
D1 D2 D3 D4 D5 D6
E6
E1
E2 E3 E4 E5
F1 F2 F3 F4 F5 F6
La zone du capteur s'étend
à la rue au cas où une personne marche
dans la rue ou conduit une voiture.
REDWALL-V_SIP-5030_100_FR.indd
16
5030
1
2
3
4
5
6
(521206)
8 9 10
7
B2 B3 B4 B5
B6
B1
C1 C2 C3 C4 C5 C6
D1 D2 D3 D4 D5 D6
E6
E1
E2 E3 E4 E5
F1 F2 F3 F4 F5 F6
Les branches d'un arbre et l'herbe
bougent quand il vente.
- 16 -
2009/03/30
16:03:37
4-2
(3)
Connectez le testeur de mouvement (en option) au capteur et
vérifiez l'exactitude de la zone de détection.
Pour alarme de sortie de zone située
sous le capteur de détection
Pour l'alarme de sortie en portée courte
Pour l'alarme de sortie en portée longue
À utiliser en position
« REDWAVE ALARM
OUTPUT » pour confirmer
l'alarme de sortie en portée
courte et longue.
détection.
La zone de détection de la zone située sous le capteur
peut être réglée horizontalement entre -90° et 90°.
+90°
Pour régler la zone
située sous le
capteur de détection
selon un angle de 0°,
alignez ces guides.
À utiliser en position
« REDWALL ».
Commutateur
d'alimentation
REDWAVE
MICROWAVE
REDWAVE
PIR NEAR
CELL BATTERY
CONNECTION
SELECT
SWITCH
MEGARED
NEAR
MODE
SELECT
SWITCH
10
5
10
30
Attention>>
Lorsque vous vérifiez la zone de détection, pensez à ne
pas recouvrir la zone ombrée de la fenêtre avec le testeur
de mouvement ou son câble. Si les faisceaux infrarouges
du capteur sont protégés partiellement, la sensibilité de
détection s'amenuisera et l'opération de détection risque
d'échouer.
5
10
40
50 15
(2)
OPM-WT
Détection difficile d'un objet>>
La zone de détection de la zone située sous le capteur
peut être réglée verticalement entre -3° et 3°.
Pour maquer la zone de détection>>
+3°
Zone de
détection
Appuyez doucement pour
un déplacement vers le haut
Portée
longue
Appuyez doucement
pour un déplacement
vers le bas
Zone de détection réglée à -3°.
Zone de détection réglée à +3°.
[ft.] [m]
13,2 4
10
Portée
courte
0
00
0
10
20
10 [m]
30 [ft.]
SIP-5030
SIP-100
Montez le joint de
masquage (accessoire)
sur la surface du miroir de
zone.
Utilisez la plaque de
masquage
(installée sur l'unité
principale).
Montez le joint de
masquage (accessoire)
sur la surface du miroir de
zone.
La portée
longue ne
peut être
masquée.
La portée
courte ne
peut être
masquée.
Référence
Étape 7
Étape 8-1
Étape 8-2
• La zone située sous le capteur de détection ne peut être
masquée.
ESPAÑOL
2
Comment masquer la zone
ITALIANO
1. Définissez le commutateur de logique de détection sur
« OR » (voir l'étape 5-2).
Si le capteur est OK une fois le test de mouvement
terminé, basculez le commutateur de logique en mode
« AND ».
2. Réglez le commutateur de sensibilité du capteur (voir
étape 5-1).
Réglage vertical de la zone située sous le capteur de
détection.
-3°
DEUTSCH
0
10
20
POWER OFF
POWER
SELECT
SWITCH
« POWER SUPPLY FROM SENSOR » après avoir
connecté le câble au connecteur du testeur de
mouvement, vous entendrez un signal sonore continu.
2 Lorsqu'un piéton pénètre dans la zone de détection
pour la première fois, des signaux forts et faibles seront
audibles en alternance.
3 Lorsque le corps d'un piéton est détecté dans son
intégralité, le signal fort est audible en continu.
40
0
MEGARED
FAR
1 Lorsque le commutateur d'alimentation est en position
[ft.] [m]
50 15
20
REDWAVE
ALARM OUTPUT
POWER
SUPPLY
FROM
SENSOR
REDWALL
REDWIDE
WALKTESTER
30
REDWAVE
PIR FAR
REDWAVE
REDWALL
REDWIDE
MEGARED
FRANÇAIS
-90°
Guides de réglage
de la zone située
sous le capteur de
détection
ENGLISH
RÉGLAGE DE LA ZONE SITUÉE SOUS
LE CAPTEUR DE DÉTECTION
(1) Réglage horizontal de la zone située sous le capteur de
- 17 -
REDWALL-V_SIP-5030_100_FR.indd
17
2009/03/30
16:03:40
5
PARAMÈTRE DE FONCTION
Modèles
applicables
SIP-5030
SIP-100
Commutateur de sensibilité
de portée longue
Commutateur de sensibilité
de portée courte
5-2 Commutateur de logique de détection
Modèles
applicables
Commutateur de
sensibilité de la
zone située sous le
capteur de détection
Commutateur
anti-sabotage
Connecteur
du testeur de
mouvement
Sens.Select.SW. 5730980
Sens.Select.SW. 5730980
UP DWN
Far area Near area Creep zone
Alarm Creep
Indicateur d'opération
(Voir l'étape 11.)
UP DWN
(
1 : Sélecteur de logique de détection
(AND ou OR)
2 : Paramètre non valide
3,4 :Sélecteurs de la durée de
maintien d'alarmes
Attention>>
Si la diode photoémettrice rouge continue à clignoter
pendant environ 60 secondes après la mise sous tension,
mettez hors tension et à nouveau sous tension.
Modèles
applicables
SIP-5030
SIP-100
Commutateur de sensibilité
de portée courte
Commutateur de sensibilité
de portée longue
Sens.Select.SW. 5730980
)
Modèles
applicables
UP
SIP-5030
POSITION
STATUT
SÉLECTEUR
DWN
Sens.Select.SW. 5730980
Indicateur d'opération
(Voir l'étape 11.)
DWN
Paramètre
usine
(
Attention>>
Si la diode photoémettrice rouge continue à clignoter
pendant environ 60 secondes après la mise sous tension,
mettez hors tension et à nouveau sous tension.
5-1
Commutateur de sensibilité pour
les portées courte et longue et la
zone située sous le capteur de
détection
Modèles
applicables
SIP-5030
POSITION
SÉLECTEUR
SH
Far area Near area Creep zone
H
Lorsque vous sortez une alarme de portée longue à l'aide
du Numéro du commutateur de sortie, la zone de détection
de portée longue dépend de la hauteur d'installation de
l'unité principale.
La zone de détection est approximativement de 35-100 m
pour une hauteur d'installation de 4 m (13 ft.) et de 20100 m pour une hauteur d'installation de 2,3 m (7,6 ft.).
5-4
SIP-100
REDWALL-V_SIP-5030_100_FR.indd
18
Commutateur de l'intervalle
des alarmes
Modèles
applicables
SIP-5030
Commutateur DIP
3-4
SIP-100
Vous pouvez définir un intervalle (4 fois) pour
interrompre le signal d'alarme.
Par exemple, si vous définissez cet intervalle
sur 30 secondes, aucun signal d'alarme ne sera
émis pendant 30 secondes après le premier
signal. Si aucun piéton n'est détecté pendant
plus de 30 secondes, le système bascule en
mode de veille.
Plus tard, lorsqu'un piéton est détecté, le signal
d'alarme est émis.
FONCTION
Destiné aux sites nécessitant un
niveau de sensibilité supérieur à
« H »
Destiné aux sites nécessitant un
niveau de sensibilité supérieur à
« M »
M
(Paramètre Destiné aux applications standard
usine)
L
Destiné aux zones hostile et étroite
FONCTION
SIP-100
Attention>>
Vous pouvez modifier indépendamment la
sensibilité pour la détection de portée longue, de
portée courte et la détection de la zone située
sous le capteur de détection.
Sens.Select.SW.
)
SIP-5030
2
UP DWN
1 : Sélecteur de logique de détection
(AND ou OR)
2 : Numéro du commutateur de sortie
3,4 :Sélecteurs de la durée de
maintien d'alarmes
SIP-100
Les deux alarmes,
à savoir de portée
longue/courte et
Paramètre non
de zone située
valide.
sous le capteur de
détection sont émises
séparément.
Far area Near area Creep zone
Far Near Creep
DIP 2
3
UP DWN
UP
Commutateur
Les trois alarmes,
à savoir de portée
Paramètre non longue, de portée
courte et de zone
valide.
située sous le capteur
de détection sont
émises séparément.
Far area Near area Creep zone
Far Near Creep
SIP-100
5-3 Numéro du commutateur de sortie
Commutateur de
sensibilité de la zone
située sous le capteur
de détection
Commutateur
anti-sabotage
Connecteur
du testeur de
mouvement
DIP 1
La zone de détection de SIP-5030 et SIP-100 est constituée
de deux types de zones de détection planes d’une manière
alternative construites par deux paies de pyroéléments
(élément quadruple pour la portée longue), pour la portée
courte, la portée longue et la zone située sous le capteur.
POSITION
UP
STATUT
FONCTION
SÉLECTEUR
Le capteur émet un signal lorsqu'un
DWN
objet est détecté dans l'une des
OR deux zones de détection.
UP
Paramètre * Utilisez ce mode lorsque vous réglez
la zone de détection. Passez en
usine
mode AND après avoir terminé le
réglage de la zone de détection.
Utilisez ce mode pour réduire les
instances de détection erronée
d'objets. Le capteur émet uniquement
DWN
AND un signal lorsqu'un objet est détecté
dans les deux zones de détection. Si
des objets bloquent plusieurs zones
de détection, utilisez le mode OR.
Far area Near area Creep zone
Alarm Creep
SIP-5030
Commutateur
POSITION
SÉLECTEUR
FONCTION
- 18 -
0 sec
(Paramètre 15 sec 30 sec 60 sec
usine)
2009/03/30
16:05:15
6
ZONE DE DÉTECTION
Modèles
applicables
SIP-5030
SIP-100
20
40
10
30
20
5
10
30
5
0
0
10
10
20
10
10
0
0
VUE EN PLAN (Hauteur d'installation 2,3 m (7,6 ft.))
[ft] [m]
50 15
40
30
ENGLISH
VUE EN PLAN (Hauteur d'installation 4,0 m (13 ft.))
[ft] [m]
50 15
5
20
30
10
5
10
40
50 15
50 15
VUE LATÉRALE (Hauteur d'installation 4,0 m (13 ft.))
[ft] [m]
13 4
10
2
0 0
: Portée courte VUE LATÉRALE (Hauteur d'installation 2,3 m (7,6 ft.))
: Portée longue
: Zone située sous le capteur de détection
[ft] [m]
7,6 2,3
0
0
0
10
20
10
30 40
Modèles
applicables
50
20
60 70
80
90
30
50 [m]
40
100 110 120 130 140 150 160 [ft]
SIP-5030
0
0
0
: Portée courte 10
20
10
30 40
50
60
20
70
80
90
: Portée longue
: Zone située sous le capteur de détection
30
50 [m]
40
100 110 120 130 140 150 160 [ft]
SIP-100
DEUTSCH
Attention>>
Lorsque vous sortez une alarme de portée longue à l'aide
du Numéro du commutateur de sortie, la zone de détection
de portée longue dépend de la hauteur d'installation de
l'unité principale.
La zone de détection est approximativement de 35-100 m
pour une hauteur d'installation de 4 m (13 ft.) et de 20100 m pour une hauteur d'installation de 2,3 m (7,6 ft.).
[ft]
[m]
20
5
10
FRANÇAIS
40
VUE EN PLAN (Hauteur d'installation 4,0 m (13 ft.))
0
20
5
[ft] [m]
13 4
10 2
0
0
VUE LATÉRALE (Hauteur d'installation 4,0 m (13 ft.))
[ft]
[m]
20
5
10
10
0
0
10
20
30
40
50
60
20
70
80
90
: Portée courte : Portée longue
: Zone située sous le capteur de détection
90
100 [m]
40
60
50
80
30
70
100 110 120 130 140 150 160 170 180 190 200 210 220 230 240 250 260 270 280 290 300 310 320 330 [ft]
VUE EN PLAN (Hauteur d'installation 2,3 m (7,6 ft.))
0
ESPAÑOL
0
ITALIANO
10
10
20
5
[ft] [m]
7,6 2,3
0
0
VUE LATÉRALE (Hauteur d'installation 2,3 m (7,6 ft.))
10
0
0
10
20
30
40
50
60
20
70
80
90
: Portée courte : Portée longue
: Zone située sous le capteur de détection
90
100 [m]
40
60
50
80
30
70
100 110 120 130 140 150 160 170 180 190 200 210 220 230 240 250 260 270 280 290 300 310 320 330 [ft]
- 19 -
REDWALL-V_SIP-5030_100_FR.indd
19
2009/03/30
16:05:17
7
8
MASQUAGE DU CAPTEUR DE PORTÉE LONGUE
Modèles
applicables
SIP-5030
SIP-100
8-1
Attention>>
• La fenêtre est rattachée à l'unité principale par une
bouche métallique en nylon pour en éviter toute chute.
Ne tirez pas sur la fenêtre avec trop de force.
• Après avoir masqué les zones de détection, installez la
fenêtre et placez l'excédent de la bouche métallique en
nylon dans l'unité principale.
MASQUAGE DU CAPTEUR DE PORTÉE COURTE
Masquage des zones de détection à
l'aide des plaques de masquage
Modèles
applicables
SIP-5030
SIP-100
Le miroir de portée courte, installé sur l'unité principale, comporte
deux plaques de masquage de portée courte ; l'une à sa droite et
l'autre à sa gauche. Vous pouvez masquer la zone de détection
en modifiant la position de ces plaques de masquage.
Comment enlever la fenêtre>>
Attention>>
Vous pouvez masquer uniquement l'extérieur des zones
de détection. Il s'agit des zones 1 et 6. Utilisez les joints
de masquage (accessoire), pour masquer les autres zones
de détection (voir étape 8-2).
Fenêtre
1Déballez la plaque de
masquage et vérifiez la
zone de détection et le
miroir utilisés en vous
reportant au tableau de
la zone.
Utilisez votre doigt pour appuyer sur
la fente en bas et à gauche, puis
ouvrez la fenêtre.
2Attachez la plaque de masquage au miroir
et sécurisez-la aux nervures.
Utilisez les brucelles (accessoire), montez soigneusement les
joints de masquage (accessoire) sur le miroir de zone longue.
Joints de masquage
de zone
MIROIR
Miroir pour portée
longue
Nervure
Nervure
6
4
2
5
3 1
3Insérez l'embout en caoutchouc de
fixation pour sécuriser le bouton de la
plaque de masquage.
Miroir pour portée courte
50
15
40
50
15
30
10
20
5
10
0
0
10
5
30
40
10
20
40
30
10
20
10
0
0
5
10
20
5
1
3
3
4
5
Si des branches d'arbres ou d'autres objets
mobiles se trouvent dans le faisceau de
détection.
10
2
50 [ft.]
15 [m]
6
2
8
40
10
50 [ft.]
15 [m]
1
7
30
9
4
5
6
- 20 -
REDWALL-V_SIP-5030_100_FR.indd
20
2009/03/30
16:05:22
9
8-2
Modèles
applicables
(1)
Utilisez les brucelles (accessoire), montez soigneusement les
joints de masquage (accessoire) sur le miroir de zone courte.
F6
SIP-100
Après avoir réglé tous les éléments du capteur, sécurisez
toutes les vis de réglage que vous avez desserrées. Pour
finir, sécurisez les vis de fixation inférieures.
Joints de masquage de zone
MIROIR
Miroir pour portée
courte
E6
SIP-5030
6 4 2
5 3 1
F6 F4 F 2
E6 E4 E 2
D6 D4 D 2
C6 C 4 C 2
F 5 F3 F 1
E 5 E3 E 1
ENGLISH
Masquage des zones de détection à
l'aide des joints de masquage
F
E
D
C
PROCÉDURE DE CLÔTURE
D5 D3 D 1
C5 C3 C1
B B6 B4 B 2 B5 B3 B1
50
40
30
20
10
10
0
5
10
20
0
30
5
40
10
50[ft.]
1 Vis de réglage
2 Vis de fixation
15 [m]
F
E
Attention>>
• Si vous devez régler la zone de détection une nouvelle
fois, veillez à desserrer la vis de fixation. Si vous tentez
de déplacer l'unité principale sans desserrer la vis de
fixation, vous risquez de l'endommager.
• Lorsque vous installez le cache, placez l'excédent de la
bouche métallique en nylon dans l'unité principale. Si le
câble a été pincé par la fenêtre et le cache, des gouttes
de pluie risquent de rentrer dans l'unité principale.
D
C
DEUTSCH
B
6
1
2
5
4
3
[ft.] [m]
13 4
10
2
0
00
0
10
20
F
30
E
10
D
40
50
60
C
20
70
80
90
FRANÇAIS
15
30 [m]
100 [ft.]
B
ITALIANO
ESPAÑOL
- 21 -
REDWALL-V_SIP-5030_100_FR.indd
21
2009/03/30
16:05:24
10
TEST D'OPÉRATION
10-1 S'il existe une voie publique où se promènent
des piétons ou roulent des voitures à
proximité de la zone de détection
10-2 Détection de branches d'arbres ou de l'herbe
En cas de mouvement dans la zone de détection
Remarques>>
Réglez la zone de détection de sorte qu'elle exclut les
branches ou l'herbe bougeant au vent.
Remarques>>
Réduisez la taille de la zone de détection de sorte qu'elle
exclut les voies publiques.
(1)
Vérifiez que la flèche de l'unité principale est réglée sur
la largeur du « guide de réglage angulaire » sur la vis de
réglage.
(1)
Vérifiez que la flèche de l'unité principale est réglée sur la
largeur du « guide de réglage angulaire » sur la vis de réglage.
(2)
À l'aide du viseur, assurez-vous que la zone de détection
exclut les voies publiques.
(2)
À l'aide du viseur, assurez-vous que la zone de détection
exclut les branches d'arbres ou l'herbe bougeant au vent.
(3)
Si la zone de détection va au-delà d'une voie publique,
corrigez l'angle vertical de l'unité principale.
Cependant, veillez à ce que la flèche ne s'éloigne pas trop
de la position du « guide de réglage angulaire ».
(3)
Utilisez le testeur de mouvement pour écouter les variations
du niveau sonore an cas d'absence d'activité apparente
dans la zone de détection.
Réglez la zone de détection de sorte qu'elle n'identifie pas
les emplacements non souhaités.
Si la flèche s'éloigne trop de la position du
« guide de réglage angulaire » :
Pour SIP-5030, masquez la zone de détection de portée
longue en utilisant le joint de masquage. Vous devrez
peut-être masquer également la zone de détection de
portée courte dans des conditions d'installation du capteur
spécifiques (voir l'étape 8).
Pour SIP-100, vous ne pouvez masquer ni pour portée
longue ni pour portée courte.
(4)
Si le niveau sonore change, une partie de la zone de
détection doit être active (par exemple : un objet en
mouvement).
(4)
Utilisez ce testeur de mouvement et localisez la partie de
la zone de détection qui est active. Modifiez la position du
commutateur de sélecteur pour le testeur de mouvement
et déterminez si la partie active de la zone de détection
est de portée courte, longue ou située sous le capteur de
détection.
(5)
Utilisez le viseur une nouvelle fois pour localiser la zone de
détection active.
(6)
Masquez la zone de détection active. Pour SIP-5030,
masquez la zone de détection de portée longue en utilisant
le joint de masquage. Vous devrez peut-être aussi masquer
la zone de détection de portée courte à l'aide de la plaque
ou du joint de masquage (voir l'étape 8).
Pour SIP-100, les zones de portée longue, courte ou
situées sous la capteur de détection ne peuvent être
masquées. Réglez la zone de détection en fonction de la
zone qui ne peut être masquée.
(7)
Utilisez le testeur de mouvement une nouvelle fois pour
vérifier si le niveau sonore a changé. Si ce niveau n'a pas
trop changé, vous pouvez terminer le réglage.
Lorsqu'une personne marche dans la rue ou une voiture roule,
vérifiez la zone de détection à l'aide du testeur de mouvement.
Remarques>>
Vous ne pouvez ni installer ni utiliser le viseur et le testeur
de mouvement simultanément.
Attention>>
La zone de détection peut augmenter en cas d'écart
important de température entre l'objet mobile et l'arrière-plan.
Remarques>>
Vous ne pouvez ni installer ni utiliser le viseur et le testeur
de mouvement simultanément.
Attention>>
Une source de chaleur au-delà de la zone de détection
risque de se solder par une fausse alarme à cause de la
réflexion de chaleur au sol.
Parmi les surfaces de réflexion, on compte notamment
l'eau (flaques), les routes mouillées, les surfaces lisses
en béton et les routes en asphalte.
Si la source de chaleur est importante et/ou le taux de
réflexion est élevé, la distance de détection requise sera
plus longue et pourra détecter des objets non nécessaires
au-delà de la zone cible. C'est pourquoi, nous vous
recommandons de sélectionner la position de la portée de
détection d'après les conditions au sol du site d'installation.
- 22 -
REDWALL-V_SIP-5030_100_FR.indd
22
2009/03/30
16:06:07
11
STATUT DE LA DIODE PHOTOÉMETTRICE
Modèles
applicables
SIP-5030
12
SIP-100
Modèles
applicables
Modèle
Si la diode photoémettrice rouge
continue à clignoter pendant environ
60 secondes après la mise sous
tension, mettez hors tension et à
nouveau sous tension.
Far area
Alarm Creep
SIP-5030
SIP-5030
Mode de détection
Couverture
(Zone principale)
SIP-100
Infrarouge passif
50 x 30 m
(164 x 100 ft.)
100 x 3 m
(330 x 10 ft.)
Couverture
3 x 5 m (10 x 17 ft.) à une hauteur de 2,3 m (7,6 ft.)
(Zone située sours le 6 x 9 m (20 x 30 ft.) à une hauteur de 4 m (13 ft.)
capteur)
Angle de détection ajustable
Indicateur d'opération de zone située sous le capteur de
détection - Diode photoémettrice rouge
Indicateur d'opération de portée longue/courte - Diode
photoémettrice rouge
Clignotement.
En mode de veille
Appareil éteint
En cas de détection
(portée courte/longue)
Allumage.
En cas de détection (dans la
zone située sous le capteur)
Allumage.
Alimentation d'entrée
Statut de la diode
photoémettrice
100 zones
28 zones
36 zones
2,3 à 4 m (7,6 à 13 ft.)
11 - 16 V CC
22 - 26 V CA
Modèles
applicables
SIP-5030
SIP-100
Attention>>
Si la diode photoémettrice rouge
continue à clignoter pendant environ
60 secondes après la mise sous
tension, mettez hors tension et à
nouveau sous tension.
SIP-100
Far area
Far Near Creep
Indicateur d'opération de zone située sous le capteur de
détection - Diode photoémettrice rouge
Indicateur d'opération de portée courte - Diode
photoémettrice rouge
Indicateur d'opération de portée longue - Diode
photoémettrice rouge
Statut de la diode
photoémettrice
Appareil en marche
Clignotement.
En mode de veille
Appareil éteint.
En cas de détection
(portée longue)
Allumage.
En cas de détection
(portée courte)
Allumage.
En cas de détection (dans la
zone située sous le capteur)
Allumage.
N.C. 28 V CC, 0,1 A max.
Dérangement de sortie
N.C. 28 V CC, 0,2 A max.
Portée
longue
Environ 60 sec
-
Commutateur DIP :
2/3
Éteint / 15 / 30 / 60 sec
AND/OR
N.C.28 V CC, 0,2 A max.
N.C.28 V CC, 0,2 A max. N.O.28 V CC, 0,2 A max.
N.O.28 V CC, 0,2 A max. N.C.28 V CC, 0,2 A max.
N.O.28 V CC, 0,2 A max.
Portée
courte
Zone
située
N.C.28 V CC, 0,2 A max.
sous le
N.O.28 V CC, 0,2 A max.
capteur de
détection
Sélecteur de
Long : SH/H/M/L Court : SH/H/M/L
sensibilité
Zone située sous le capteur : SH / H / M / L
Sans unité
de chauffage
-25 à +60°C (-13 à +140°F.)
Température de en option
fonctionnement Avec unité
de chauffage
-40 à +60°C (-40 à +140°F.)
en option
Unité principale : IP65
Notation IP
Châssis
: IP55
Alarme de
sortie
Dimensions
(H × L × P)
Accessoires
271 x 102 x 290 mm
(10,7 x 4,0 x 11,4 in.)
1,6 kg (56 oz.)
Vis,
gabarit en papier,
clé Allen,
Vis,
joint de masquage gabarit en papier,
de zone,
clé Allen,
brucelles,
manuel
manuel
d'instruction,
d'instruction,
plaque de zone,
plaque de zone
embout de fixation
en caoutchouc
ESPAÑOL
Poids
ITALIANO
Statut du détecteur
Période de
réchauffement
Numéro du
commutateur de sortie
Période de l'intervalle
des alarmes
Sélecteur de logique
de détection
Anti-sabotage de sortie
DEUTSCH
40 mA max. (12 V CC) 45 mA max. (12 V CC)
75 mA max. (24 V CA) 80 mA max. (24 V CA)
Diode photoémettrice
Alarme en
Diode
portée longue
rouge
photoémettrice
Diode photoémettrice
Alarme en
rouge
portée courte
rouge
Indicateur Alarme de
zone située
sous le
Diode photoémettrice rouge
capteur de
détection
Période des alarmes
Environ 2 sec
Appel de courant
FRANÇAIS
Appareil en marche
Zone
Nombre principale
de zones
de
Zone située
sous le
détection
capteur de
détection
Hauteur de montage
Statut du détecteur
SIP-100
ENGLISH
Attention>>
SIP-5030
SPÉCIFICATIONS
- 23 -
REDWALL-V_SIP-5030_100_FR.indd
23
2009/03/30
16:06:10
OPTION
DIMENSION
SIP-5030, 100
•
•
•
•
23
(0,9)
290
(11,4)
OPM-WT
AVF-1
SIP-MIDIHOOD
SIP-HU
-Testeur de mouvement audio
-Viseur de zone
-Protection soleil/neige
-Unité de chauffage
Ces unités sont conçues pour détecter le mouvement capable
d'activer le système de télévision en circuit fermé. N'étant qu'une
partie d'un système de surveillance complet, nous ne pouvons
pas être tenus responsables de tout endommagement ou autres
conséquences résultant de la mise en service de l'unité.
Ce produit est conforme à la Directive CEM 2004/108/CE.
248
(9,8)
102
(4,0)
Les spécifications et le concept peuvent être modifiés sans
préavis.
116
(4,57)
21
(0,83)
13
(0,51)
96
(3,78)
75
(3,0)
21
(0,83)
17,1
(0,67)
90
(3,6)
Unité : mm (pouces)
OPTEX CO., LTD. (JAPON)
(Certifié ISO 9001) (Certifié ISO 14001)
5-8-12 Ogoto Otsu Shiga 520-0101 JAPON
TEL : +81-77-579-8670 FAX : +81-77-579-8190
URL:http://www.optex.co.jp/e/
OPTEX INCORPORATED (ÉTATS-UNIS) OPTEX SECURITY SAS (FRANCE)
TEL : +1-909-993-5770
Tech : (800)966-7839
URL:http://www.optexamerica.com
TEL : +33-437-55-50-50
URL:http://www.optex-security.com
OPTEX (EUROPE) LTD. (ROYAUME-UNI)
OPTEX SECURITY Sp.z o.o.
(POLOGNE)
TEL : +44-1628-631000
URL:http://www.optex-europe.com
- 24 -
REDWALL-V_SIP-5030_100_FR.indd
24
TEL : +48-22-598-06-55
URL:http://www.optex.com.pl
2009/03/30
16:06:11
2
INSTALLATIONSHINWEISE
HINWEISE ZU INSTALLATION UND WARTUNG
Warnung
REDWALL-V Serie
MERKMALE
Das Produkt niemals
reparieren
oder verändern
Nylonfadenschlaufe
Das Hauptgerät sicher
festhalten, wenn Sie
es einbauen oder
warten.
Wenn Sie Ihre Hände
vom Hauptgerät
entfernen, während
Kabel daran
angeschlossen sind,
kann das Hauptgerät
fallen und können
die Anschlusskabel
brechen bzw. kann
die Schaltplatine
beschädigt werden.
Vorsicht
Stellen Sie
sicher, dass die
Stromversorgung
ausgeschaltet ist,
bevor Sie die Kabel
anschließen.
FRANÇAIS
* Intelligentes PIR-Erfassungssystem
- Erfassung von Umgebungstemperatur und Beleuchtungsstärke
für eine automatische Anpassung der Empfindlichkeit
- Zukunftsweisender Erfassungsalgorithmus
- Doppelte duale/vierfache Pyroelemente mit patentiertem
Double Conductive Shielding (abgeschirmter Doppelleitung) für
den Hauptbereich
* Eingebauter Kriechzonendetektor (Doppelte duale Pyroelemente)
* Funktionen zum Schutz vor Vandalismus
- Drehsicherung durch 3-Achsen-Beschleunigungsmesser
- Abdecküberwachung (Antimasking) mit Fotozelle
- Verstärktes Polykarbonatgehäuse
- Einbauhöhe max. 4 m (13 ft.)
*Unabhängiger Empfindlichkeitswahlschalter für Kriechzone/Nah‑/
Fernbereiche
*Unabhängiger N.C.- und N.O.- Ausgang für Hauptbereich
SIP‑5030
*2 x unabhängiger N.C.- und N.O.- Ausgang für Hauptbereiche
(Nah- und Fernbereiche) SIP-100
* Einstellbare Alarmintervallzeit
Vorsicht
ENGLISH
Synthetisierter, intelligenter PIRBewegungsmelder
Während der Wartung
kann der Sensor mit einem
Nylonfaden an der Halterung
aufgehängt werden.
REDWALL-V
1
BESCHREIBUNG DER EINZELNEN TEILE
Fernbereichsspiegel
DEUTSCH
2-1
: Synthetisierter, intelligenter PIR-Bewegungsmelder
mit Kriechzonenerfassung
• SIP-5030
• SIP-100
TIPPS FÜR DIE INSTALLATION
2,3-4,0 m
(7,6-13 ft.)
ITALIANO
Halterung
Befestigungsschraube für
Halterung
Hauptgerät
Kriechzonengerät
Einstellschrauben
(jeweils zwei gegenüberliegende
Schrauben)
Führung für Winkeleinstellung
Fenster
Befestigungsgummi (*1) Befestigungsschraube
für die Abdeckung
Abdeckblende für
den Nahbereich (*1) Abdeckung
Bauen Sie den Detektor so ein, dass der größte Teil des Verkehrs über das
Erfassungsbereichsmuster verläuft.
Nahbereichsspiegel
ESPAÑOL
*1: W
ird bei dem Modell SIP-100 nicht
verwendet.
Pfeilmarkierung
Befestigungsschraube
- 25 -
REDWALL-V_SIP-5030_100_DE.indd
25
2009/03/30
15:39:03
3
INSTALLATION UND WINKELEINSTELLUNG
3-1
Wandmontage
(1)
3-2
Innenansicht der Halterung
Anschluss für
Hauptgerät
Befestigen Sie die Papierschablone (Zubehör) an der Wand
und bohren Sie ein Loch für die Montage (Durchmesser
6 mm) und ein Loch für die Kabelführung. Setzen Sie die
Ankerschraube (Zubehör) in die Montagebohrung ein.
Halterung
Wasserfeste Folie
(Diese Folie
nicht entfernen.)
Wandmontagebohrung
Kabelanschlüsse
(NUR SIP-100)
Kabelanschlüsse
Wandmontagebohrung
Die Entfernung vom Boden bis
zur Unterseite der Schablone
muss zwischen 2,3 m (7,6 ft.)
und 4 m (13 ft.) betragen.
(2)
Buchse für
Kabelbohrung
Buchse für
Kabelbohrung
Trennen Sie das Hauptgerät mit einem
Innensechskantschlüssel von der Halterung.
4 Herausziehen.
Kappe für offene
Verkabelung
2 Öffnen.
1 Die Befesti-
(3)
gungsschraube
für die Halterung lösen.
3 Kabelanschluss
abziehen.
Bohren Sie durch die Buchse der Kabelführungsbohrung,
führen Sie das Kabel durch die Bohrung und befestigen
Sie die Halterung sicher an der Wand.
FERNBEREICH *2
ALARMAUSGANG (N.C.)
ALARMAUSGANG (N.O.)
(nur SIP-100)
FREI
STROMVERSORGUNGSEINGANG
SABOTAGEAUSGANG *1 (TAMPER)
FEHLERAUSGANG
KRIECHALARMAUSGANG
(N.C.)
ALARMAUSGANG
(N.O.)
FERNBEREICH UND NAHBEREICH *3
ALARMAUSGANG (N.C.)
ALARMAUSGANG (N.O.)
(4)
Verbinden Sie das Kabel mit der Anschlussleiste (siehe Schritt 3-3).
(5)
Montieren Sie das Hauptgerät auf der Halterung.
1 Hier einsetzen
und sicher
befestigen.
Bezeichnung
4 Die Befe3 Schließen.
2 Anschluss
verbinden.
stigungsschraube der
Halterung
festziehen
und sichern.
Vorsicht>>
Achten Sie bei der Montage des Hauptgeräts darauf, dass
die Nylonfadenschlaufe nicht eingeklemmt wird. Passen
Sie auch auf, dass Sie Ihre Finger nicht einklemmen.
Überprüfen Sie, ob die verschiedenen Einstellungen und
Betriebsfunktionen richtig sind.
Vorsicht>>
Wenn die rote LED blinkt, nachdem die Stromversorgung
eingeschaltet wird, bedeutet das, dass sich das System
aufwärmt. Warten Sie ungefähr 60 Sekunden.
- 26 -
REDWALL-V_SIP-5030_100_DE.indd
26
Funktion
Der Fehlerausgang (Trouble out) wird für das Signal der
Abdecküberwachung verwendet. Wenn sich ein Objekt länger als
(ca.) 20 Sekunden sehr nahe vor dem Objektiv befindet, wird der IR
Abdecküberwachungskreis aktiviert und ein Fehlersignal erzeugt.
Das Öffnen der Abdeckung wird erfasst.
Es wird erfasst, wenn das Hauptgerät von der
Halterung getrennt wird.
Drehsicherung:
Erlittener Schaden am Hauptgerät wird erfasst.
Wenn die Stromversorgung des Systems
eingeschaltet wird, während die Abdeckung
geschlossen ist, wird die Montageposition des
Hauptgeräts selbst ermittelt und nach ungefähr 10
SABOTAGEAUSGANG Sekunden im Speicher gespeichert. Wenn danach
(TAMPER)
in horizontaler oder vertikaler Richtung auf das
Hauptgerät eingewirkt wird und wenn sich die
Position des Hauptgeräts geändert hat, wird ein
vom Hauptgerät erlittener Schaden erfasst. Wenn
Sie die Abdeckung jedoch abnehmen und dabei die
Stromversorgung des Systems eingeschaltet lassen
und wenn Sie die Abdeckung wieder schließen,
nachdem Sie die Position des Hauptgeräts korrigiert
haben, wird die neue Position des Hauptgeräts nach
ungefähr 10 Sekunden gespeichert.
FEHLERAUSGANG
Nylonfadenschlaufe
(6)
*1: TAMPER-Anschlüsse (Sabotageanschlüsse) zum Anschluss an eine 24-StundenÜberwachungsschleife.
*2: F
ERNBEREICH ALARMAUSGANG, wenn der WAHLSCHALTER FÜR DIE
NUMMER DES AUSGANGS eingeschaltet ist (ON (3)) (siehe Schritt 5-3).
*3: F
ERNBEREICH UND NAHBEREICH ALARMAUSGANG, wenn der WAHLSCHALTER
FÜR DIE NUMMER DES AUSGANGS ausgeschaltet ist (OFF(2)).Nur NAHBEREICH
ALARMAUSGANG, wenn der WAHLSCHALTER FÜR DIE NUMMER DES
AUSGANGS eingeschaltet ist (ON (3)) (siehe Schritt 5-3).
2009/03/30
15:40:42
(2)
Stromkabel sollten die folgenden Längen nicht überschreiten.
0,52 mm2
(AWG20)
760
(2490)
1010
(3310)
2160
(7090)
650
(2130)
860
(2820)
2020
(6630)
0,83 mm2
(AWG18)
1210
(3970)
1610
(5280)
3450
(11320)
1030
(3380)
1380
(4530)
3220
(10560)
Richten Sie den Pfeil auf
dem Hauptgerät mit Hilfe der
Einstellschraube mit der "Führung
für Winkeleinstellung" aus. Das
Hauptgerät ist im Allgemeinen in der
Bahn dieser Führung eingestellt.
Bei Montage in einer
Höhe von 2,3 Metern (7,6 ft.)
m (Fuß)
4
EINSTELLUNG DES ERFASSUNGSBEREICHS
Gilt für
folgende
Modelle
SIP-5030
Bei Montage in einer Höhe von
4,0 Metern (13 ft.)
Vorsicht>>
Wenn Wandmontage unter einem Winkel stattfindet, kann der Pfeil auf dem
Hauptgerät über die obere oder untere Grenze der "Führung für Winkeleinstellung"
hinausgehen. Überprüfen Sie dies immer mit dem Bereichssucher oder dem
Signalgenerator (Gehtester). Wenn der Erfassungsbereich zu hoch oder zu niedrig
eingestellt ist, wird möglicherweise ein Objekt außerhalb des Erfassungsbereichs
erfasst oder können falsche Objekte erfasst werden.
SIP-100
(3)
10°
Entfernen Sie die Abdeckung.
10°
Haken
85°
85°
3 Die Abdeckung nach unten
Vorsicht>>
Bevor Sie das Hauptgerät entgegen dem Uhrzeigersinn
drehen können, müssen Sie die Einstellschraube
auf der rechten Seite lösen. Um das Hauptgerät im
Uhrzeigersinn zu drehen, lösen Sie die Einstellschraube
auf der linken Seite. Wenn Sie das nicht tun, können
Sie die Einstellschraube nur schwer oder überhaupt
nicht festziehen, wenn Sie das Hauptgerät befestigen.
1 Die zwei Befestigungsschrauben der
Abdeckung lösen und die Abdeckung
bis zum Anschlag herausziehen.
Abdeckung
DEUTSCH
schieben und die Haken
lösen.
2 Die Köpfe der beiden Befestigungsschrauben
mit den Händen festhalten und dann den
unteren Bereich der Abdeckung herausziehen
und vom Hauptgerät trennen.
Vorsicht>>
Die Abdeckung ist mit einer Nylonfadenschlaufe mit dem
Hauptgerät verbunden, so dass sie nicht herunterfällt.
Ziehen Sie nicht mit übermäßiger Kraft an der Abdeckung.
Einstellschraube
Montieren Sie den Bereichssucher.
1
Drehen entgegen dem Uhrzeigersinn Drehen im Uhrzeigersinn
Den roten Faden
um das Hauptgerät legen.
Roter Faden zum
Halten des Hauptgeräts Bereichsplatte
(Zubehör)
* Ziehen Sie die
Mittelkreis
Schutzfolie
des Objektivs
von beiden
Seiten der
Bereichsplatte
ab.
EINSTELLUNG DES HAUPTERFASSUNGSBEREICHS
Stellen Sie den Winkel des Hauptgeräts in einer horizontalen Richtung
so ein, dass der gewünschte Erfassungsbereich detektiert wird.
3 Hauptgerät drehen.
5030
4
2
1
2
3
4
5
6 (521206)
7
8 9 10
B1
B2 B3 B4
B5
B6
C1 C2 C3 C4
C5 C6
D1
D2 D3 D4 D5 D6
E1
E2 E3 E4 E5 E6
F1
F2 F3 F4 F5 F6
3
1
ESPAÑOL
Die Bereichsplatte
in den Schlitz einsetzen.
Festlegen der
Erfassungsrichtung
(siehe Schritt 5).
Bereichssucher AVF-1 (optional)
Inspektionsfenster
Einsetzen
und am
Hauptgerät
befestigen.
ITALIANO
(4)
(1)
FRANÇAIS
Sie können den Erfassungsbereich in jeder horizontalen Richtung um
90 Grad und in jeder vertikalen Richtung um 10 Grad verstellen.
Korrigieren Sie den vertikalen Erfassungswinkel entsprechend der
Montagehöhe der Sensoreinheit.
4-1
ENGLISH
0,33 mm2
(AWG22)
SIP-5030
SIP-100
12 V DC 14 V DC 24 V AC 12 V DC 14 V DC 24 V AC
480
640
1370
410
550
1280
(1570) (2100) (4490) (1350) (1800) (4200)
KABELSTÄRKE
Stellen Sie den Winkel des Hauptgeräts in einer vertikalen
Richtung so ein, dass der gewünschte Erfassungsbereich
detektiert wird.
1 Die
Befestigungsschraube
für die Halterung
lösen.
2 Die Einstellschraube lösen.
4 Die Einstellschraube etwas festziehen.
- 27 -
REDWALL-V_SIP-5030_100_DE.indd
27
2009/03/30
15:40:48
Vorsicht>>
Montagetipps>>
• Der Bereichssucher ist ein Hilfswerkzeug für die
Einstellung des Erfassungsbereichs.
• Nachdem Sie den Erfassungsbereich mit dem
Bereichssucher eingestellt haben, müssen Sie den Bereich
immer mit dem Signalgenerator (Gehtester) überprüfen.
• Schauen Sie mit dem Bereichssucher niemals
direkt in die Sonne.
• Bewahren Sie den Bereichssucher nach der Verwendung
immer vor direktem Sonnenlicht geschützt auf.
• Setzen Sie den konvexen Teil der Befestigungsarme
des Bereichssuchers in die Nuten des Hauptgeräts ein,
schieben Sie die Arme hinein und montieren Sie diese.
Befestigungsarme
Alarm Creep
Nut
Konvexer
Teil
(6)
• Montieren Sie die Bereichsplatte so, dass der Pfeil in der
Plattenmitte nach oben zeigt und die Fläche mit den Buchstaben
sichtbar ist.
• Setzen Sie die Platte in die oberen und unteren Rillen des
Bereichssuchers ein, bis die Platte von den Rippen gestoppt wird.
5030
1
2
3
4
5
6
(521206)
Rillen
100 (521207)
8 9 10
7
B2 B3 B4 B5
B6
B1
C1 C2 C3 C4 C5 C6
D3
D4
D1 D2
D5 D6
E6
E1
E2 E3 E4 E5
F1 F2 F3 F4 F5 F6
Für die Ausgabe eines Nahbereichsalarms
Für die Ausgabe eines Fernbereichsalarms
1
2
B1 B2
Bei der Stellung "REDWAVE
ALARM OUTPUT" (REDWAVE
ALARMAUSGABE) verwenden, um
die Alarmausgabe für den Fern- und
Nahbereich sicherzustellen.
C1 C2
D1D2
E1
E2
F1
F2
Bei der Stellung
"REDWALL" verwenden.
Rippen
(5)
Schließen Sie den Signalgenerator (Gehtester) (optionales
Zubehör) an die Sensoreinheit an und überprüfen Sie, ob der
Erfassungsbereich richtig eingestellt ist.
Für die Alarmausgabe für den Kriechzonenbereich
SIP-100
SIP-5030
Pfeilmarkierung
(7)
Ziehen Sie die Einstellschraube, die Sie gelöst haben,
wieder sicher fest.
Führen Sie die Feineinstellung des Winkels des Hauptgeräts
in vertikaler und horizontaler Richtung aus, indem Sie den
Zielbereich durch den Bereichssucher beobachten.
StromversorgungsWahlschalter
REDWAVE
MICROWAVE
1 Um die Richtung des Inspektionsfensters zu ändern,
drehen Sie den Bereichssucher in einer horizontalen
Richtung, bis er mit einem Klicken einrastet.
2 Legen Sie Ihr Gesicht nahe an den
REDWAVE
PIR NEAR
REDWAVE
PIR FAR
REDWAVE
ALARM OUTPUT
CELL BATTERY
REDWAVE
REDWALL
REDWIDE
MEGARED
POWER
SUPPLY
FROM
SENSOR
REDWALL
REDWIDE
CONNECTION
SELECT
SWITCH
MEGARED
NEAR
MODE
SELECT
SWITCH
WALKTESTER
POWER OFF
MEGARED
FAR
POWER
SELECT
SWITCH
OPM-WT
1 Wenn der Stromversorgungs-Wahlschalter nach
Bereichssucher, so dass Ihr Auge
maximal 5 mm vom Inspektionsfenster
(der Objektivfläche) entfernt ist.
dem Einstecken des Kabels in den Signalgenerator
(Gehtester) auf "POWER SUPPLY FROM SENSOR"
(Stromversorgung von Sensor) gedreht wird, ertönt ein
ununterbrochener Piepton.
2 Wenn ein Fußgänger den Erfassungsbereich dann zum
ersten Mal betritt, ertönen abwechselnd laute und leise
Pieptönen.
3 Wenn der gesamte Körper des Fußgängers erfasst wird,
ertönt ununterbrochen der laute Piepton.
3Lokalisieren Sie den Mittelkreis der
Mittelkreis des Objektivs
Bereichsplatte auf dem Mittelkreis
Mittelkreis der
des Objektivs des Bereichssuchers
Bereichsplatte
und überprüfen Sie das Muster
des Erfassungsbereichs auf
(521206)
5030
3 4
5
6
1 2
der Bereichsplatte und der
8 9 10
7
B2 B3 B4 B5
B6
B
1
B1
Hintergrundabbildung.
4 C5 C6
C1 C2 C3 C4
* Jeder Buchstabe auf der
6
1 D2 D33 D44 D5 D6
D1
Bereichsplatte entspricht jeweils einer
6
E6
EE1
Spiegelnummer (siehe Schritt 8-2).
E2 E3 E4 E5
* Sie können die Spiegelnummern
F1 F2 F3 F4 F5 F6
B1 bis F1 und B6 bis F6 (rechts
dargestellt) der SIP-5030
Bereichsplatte nicht durch das
Der Erfassungsbereich
Inspektionsfenster beobachten.
Überprüfen Sie diese mit dem
Unsichtbarer liegt innerhalb der
Rahmengrenzen.
Signalgenerator (Gehtester).
Bereich
Einstelltipps>>
Begrenzungslinie
des Erfassungsbereichs
Informationen zu den folgenden Situationen, siehe Schritt 10.
5030
1
2
3
4
5
6
(521206)
8 9 10
7
B2 B3 B4 B5
B6
B1
C1 C2 C3 C4 C5 C6
D1 D2 D3 D4 D5 D6
E6
E1
E2 E3 E4 E5
F1 F2 F3 F4 F5 F6
Der Sensorbereich wird auf die
Straße erweitert, auf der eine Person
vorbeigeht oder ein Fahrzeug vorbeifährt.
REDWALL-V_SIP-5030_100_DE.indd
28
5030
1
2
3
4
5
6
(521206)
8 9 10
7
B2 B3 B4 B5
B6
B1
C1 C2 C3 C4 C5 C6
D1 D2 D3 D4 D5 D6
E6
E1
E2 E3 E4 E5
F1 F2 F3 F4 F5 F6
Äste oder Grashalme bewegen
sich, wenn der Wind weht.
- 28 -
2009/03/30
15:41:06
4-2
(3)
EINSTELLEN DER KRIECHZONE
Die Kriechzone horizontal einstellen.
Für die Alarmausgabe für den Kriechzonenbereich
Der Erfassungsbereich für die Kriechzone kann zwischen
-90° und 90° horizontal eingestellt werden.
Für die Ausgabe eines Nahbereichsalarms
Für die Ausgabe eines Fernbereichsalarms
Bei der Stellung "REDWAVE
ALARM OUTPUT" (REDWAVE
ALARMAUSGABE) verwenden, um
die Alarmausgabe für den Fern- und
Nahbereich sicherzustellen.
Führungen für
Kriechzoneneinstellung
Wenn Sie die Kriechzone
in einem Winkel von
0° einstellen möchten,
richten Sie diese
Führungen aus.
-90°
Bei der Stellung
"REDWALL" verwenden.
StromversorgungsWahlschalter
+90°
REDWAVE
PIR NEAR
REDWAVE
PIR FAR
REDWAVE
ALARM OUTPUT
CELL BATTERY
POWER
SUPPLY
FROM
SENSOR
REDWALL
REDWIDE
CONNECTION
SELECT
SWITCH
MEGARED
NEAR
MODE
SELECT
SWITCH
WALKTESTER
[ft.] [m]
50 15
30
20
5
0
Vorsicht>>
5
Wenn Sie den Erfassungsbereich überprüfen, müssen Sie
darauf achten, dass Sie den schattierten Bereich des Fensters
nicht mit dem Signalgenerator (Gehtester) oder seinen Kabeln
abdecken. Wenn die Infrarotstrahlen des Sensors teilweise
abgeschirmt werden, sinkt die Erfassungsempfindlichkeit und
kann der Erfassungsvorgang fehlschlagen.
10
40
50 15
(2)
Wenn es schwierig ist, ein Objekt zu erfassen>>
Die Kriechzone vertikal einstellen.
Der Erfassungsbereich für die Kriechzone kann zwischen
-3° und 3° vertikal eingestellt werden.
-3°
+3°
Drücken Sie vorsichtig,
um diese nach oben zu Drücken Sie vorsichtig,
bewegen
um diese nach unten
zu bewegen
Erfassungsbereich bei -3° eingestellt.
Erfassungsbereich bei +3° eingestellt.
[ft.] [m]
13,2 4
10
Erfassungsbereich
SIP-5030
SIP-100
Befestigen Sie die Abdeckfolie Der Fernbereich
Fernbereich (Zubehör) auf der Spiegelfläche kann nicht abgedeckt
für den Bereich.
werden.
Nahbereich
2
So decken Sie einen Bereich ab
Referenz
ITALIANO
1. Stellen Sie den Schalter für die Erfassungslogik auf die
Stellung "OR" (ODER) (siehe Schritt 5-2).
Wenn der Sensor in Ordnung ist, nachdem Sie den Gehtest
beendet haben, drehen Sie den Schalter der Logik wieder in
den Stand "AND" (UND).
2. Stellen Sie den Schalter für die Sensorempfindlichkeit
an (siehe Schritt 5-1).
Den Erfassungsbereich abdecken>>
Schritt 7
Verwenden Sie die Abdeckblende
Schritt 8-1
(eingebaut in das Hauptgerät). Der Nahbereich kann
Befestigen Sie die Abdeckfolie n i c h t a b g e d e c k t
(Zubehör) auf der Spiegelfläche werden.
Schritt 8-2
für den Bereich.
* Die Kriechzone kann nicht abgedeckt werden.
00
0
10
20
ESPAÑOL
0
DEUTSCH
30
OPM-WT
dem Einstecken des Kabels in den Signalgenerator
(Gehtester) auf "POWER SUPPLY FROM SENSOR"
(Stromversorgung von Sensor) gedreht wird, ertönt ein
ununterbrochener Piepton.
2 Wenn ein Fußgänger den Erfassungsbereich dann zum ersten
Mal betritt, ertönen abwechselnd laute und leise Pieptönen.
3 Wenn der gesamte Körper des Fußgängers erfasst wird,
ertönt ununterbrochen der laute Piepton.
10
10
20
POWER OFF
POWER
SELECT
SWITCH
1 Wenn der Stromversorgungs-Wahlschalter nach
10
0
MEGARED
FAR
FRANÇAIS
REDWAVE
MICROWAVE
REDWAVE
REDWALL
REDWIDE
MEGARED
40
ENGLISH
(1)
Schließen Sie den Signalgenerator (Gehtester) (optionales
Zubehör) an die Sensoreinheit an und überprüfen Sie, ob der
Erfassungsbereich richtig eingestellt ist.
10 [m]
30 [ft.]
- 29 -
REDWALL-V_SIP-5030_100_DE.indd
29
2009/03/30
15:41:09
5
FUNKTIONSEINSTELLUNG
Gilt für
folgende
Modelle
SIP-5030
Empfindlichkeitswahlschalter
für den Fernbereich
SIP-100
5-2 Wahlschalter für die Erfassungslogik
Empfindlichkeitswahlschalter
für den Nahbereich
Gilt für
folgende
Modelle
Empfindlichkeitswahlschalter
für den Kriechzonenbereich
Anschluss für
Signalgenerator
(Gehtester)
Sens.Select.SW. 5730980
Sens.Select.SW. 5730980
UP DWN
Far area Near area Creep zone
Alarm Creep
Betriebsanzeige
(Siehe Schritt 11.)
UP DWN
1: Wahlschalter für Erfassungslogik
(AND oder OR)
2: Einstellung ungültig
3,4: Wahlschalter für Alarmhaltezeit
( )
Vorsicht>>
Wenn die rote LED ca. 60 Sekunden lang blinkt,
nachdem die Stromversorgung eingeschaltet wurde, die
Stromversorgung ausschalten und wieder einschalten.
Gilt für
folgende
Modelle
SIP-5030
Empfindlichkeitswahlschalter
für den Fernbereich
Anschluss für
Signalgenerator
(Gehtester)
Sens.Select.SW. 5730980
SIP-100
Empfindlichkeitswahlschalter
für den Nahbereich
Empfindlichkeitswahlschalter für den
Kriechzonenbereich
Sabotageschutzschalter
(TamperSchalter)
5-3 Wahlschalter für die Nummer des Ausgangs
Gilt für
folgende
Modelle
Sens.Select.SW. 5730980
Far area Near area Creep zone
UP DWN
Far Near Creep
UP
Far area Near area Creep zone
UP DWN
Far Near Creep
Betriebsanzeige
(Siehe Schritt 11.)
DWN
1: Wahlschalter für Erfassungslogik
(AND oder OR)
2: Wahlschalter für die Nummer des
Ausgangs
3,4: Wahlschalter für Alarmhaltezeit
Wenn die rote LED ca. 60 Sekunden lang blinkt,
nachdem die Stromversorgung eingeschaltet wurde, die
Stromversorgung ausschalten und wieder einschalten.
SIP-5030
SCHALTERSTELLUNG
SH
Far area Near area Creep zone
H
SIP-100
5-4
DWN
NACH
UNTEN
FabrikVorgabe
2
)
Einstellung
ungültig.
Die zwei Alarme
Fern-/Nahbereich und
Kriechzone werden
separat ausgegeben.
Dip-Schalter 3-4
SIP-5030
SIP-100
Sie können ein Intervall (4 unterschiedliche Zeitabstände)
einstellen, um die Ausgabe des Alarmsignals auszusetzen.
Wenn Sie dieses Intervall beispielsweise auf 30 Sekunden
einstellen, werden in den 30 Sekunden nach der
Ausgabe des ersten Alarms keine weiteren Alarmsignale
ausgegeben. Wenn länger als 30 Sekunden keine
Fußgänger erfasst werden, kehrt das System in den
Standby-Modus zurück.
Wenn dann wieder ein Fußgänger erfasst wird, wird erneut
ein Alarmsignal ausgegeben.
FUNKTION
Geeignet für Standorte, die eine
höhere Empfindlichkeit als "H"
erfordern
Geeignet für Standorte, die eine
höhere Empfindlichkeit als "M"
erfordern
- 30 -
30
3
FUNKTION
SIP-100
Die drei Alarme
Fernbereich,
Einstellung
Nahbereich und
ungültig.
Kriechzone werden
separat ausgegeben.
SIP-5030
Alarmintervallschalter
Gilt für
folgende
Modelle
M
(Fabrik- Für Standardanwendungen geeignet
Vorgabe)
Geeignet für unwirtliche und enge
L
Bereiche
REDWALL-V_SIP-5030_100_DE.indd
UP
(NACH
OBEN)
SIP-100
Wenn Sie den Fernbereichalarm mit dem Wahlschalter für die
Nummer des Ausgangs ausgeben, hängt die Erfassung im
Fernbereich von der Installationshöhe des Hauptgeräts ab.
Der Erfassungsbereich beträgt ungefähr 35-100 m bei 4 m
(13 ft.) Installationshöhe und 20-100 m bei 2,3 m (7,6 ft.)
Installationshöhe.
Sie können die Empfindlichkeit für die Erfassung
im Fernbereich, im Nahbereich und im
Kriechzonenbereich unabhängig voneinander
ändern.
Sens.Select.SW.
SCHALTERZUSTAND
STELLUNG
Dip-Schalter 2
Vorsicht>>
Empfindlichkeitswahlschalter für
Fernbereich, Nahbereich und Kriechzone
Gilt für
folgende
Modelle
SIP-5030
(
Vorsicht>>
5-1
SIP-100
Der Erfassungsbereich des SIP-5030 und
SIP-100 besteht aus zwei sich abwechselnden
Typen von Flächenerfassungsbereichen mit
zwei Paar Pyroelementen (Vierfachelement für
den Fernbereich) für den Nah- /Fernbereich und
die Kriechzone.
UP
SCHALTERZUSTAND
FUNKTION
STELLUNG
Es wird ein Sensorsignal ausgegeben,
DWN
wenn in einem der beiden Bereiche ein
OR Objekt erfasst wird.
UP
ODER * Verwenden Sie diesen Modus, wenn Sie
(NACH
Fabrikden Erfassungsbereich einstellen. Schalten
OBEN)
Vorgabe Sie in den Modus AND (UND), nachdem
Sie die Einstellung des Erfassungsbereichs
beendet haben.
Verwenden Sie diesen Modus,
um Erfassungsvorgänge oder
falsches Erfassen von Objekten zu
DWN
reduzieren. Das Sensorsignal wird nur
AND
(NACH
ausgegeben, wenn ein Objekt in beiden
(UND)
UNTEN)
Erfassungsbereichen erfasst wird. Wenn
irgendwelche Objekte die mehrfachen
Erfassungsbereiche blockieren, sollten
Sie den Modus OR (ODER) verwenden.
Sabotageschutzschalter (TamperSchalter)
Far area Near area Creep zone
Alarm Creep
SIP-5030
Dip-Schalter 1
SCHALTERSTELLUNG
FUNKTION
0 Sek
(Fabrikvorgabe)
15
Sek.
30
Sek.
60
Sek.
2009/03/30
15:42:46
6
ERFASSUNGSBEREICH
Gilt für
folgende
Modelle
SIP-5030
SIP-100
20
40
10
30
20
5
10
30
5
0
0
10
10
20
10
10
0
0
DRAUFSICHT (Installationshöhe 2,3 m (7,6 ft.))
[ft] [m]
50 15
40
30
ENGLISH
DRAUFSICHT (Installationshöhe 4,0 m (13 ft.))
[ft] [m]
50 15
5
20
30
10
5
10
40
50 15
50 15
SEITENANSICHT (Installationshöhe 4,0 m (13 ft.))
[ft] [m]
13 4
10
2
0 0
SEITENANSICHT (Installationshöhe 2,3 m (7,6 ft.))
: Fernbereich
: Nahbereich [ft] [m]
7,6 2,3
: Kriechzone
0
0
0
10
20
10
30 40
80
90
30
50 [m]
40
100 110 120 130 140 150 160 [ft]
SIP-5030
0
0
0
10
20
10
30 40
50
60
20
70
80
90
: Fernbereich
: Kriechzone
30
50 [m]
40
100 110 120 130 140 150 160 [ft]
SIP-100
DEUTSCH
Gilt für
folgende
Modelle
50
20
60 70
: Nahbereich Vorsicht>>
Wenn Sie den Fernbereichalarm mit dem Wahlschalter für die
Nummer des Ausgangs ausgeben, hängt die Erfassung im
Fernbereich von der Installationshöhe des Hauptgeräts ab.
Der Erfassungsbereich beträgt ungefähr 35-100 m bei 4 m
(13 ft.) Installationshöhe und 20-100 m bei 2,3 m (7,6 ft.)
Installationshöhe.
[ft]
[m]
20
5
10
FRANÇAIS
40
DRAUFSICHT (Installationshöhe 4,0 m (13 ft.))
0
20
5
[ft] [m]
13 4
10 2
0
0
SEITENANSICHT (Installationshöhe 4,0 m (13 ft.))
[ft]
[m]
20
5
10
10
0
0
10
20
30
40
50
60
20
70
80
90
: Nahbereich : Fernbereich
: Kriechzone
90
100 [m]
40
60
50
80
30
70
100 110 120 130 140 150 160 170 180 190 200 210 220 230 240 250 260 270 280 290 300 310 320 330 [ft]
DRAUFSICHT (Installationshöhe 2,3 m (7,6 ft.))
0
ESPAÑOL
0
ITALIANO
10
10
20
5
[ft] [m]
7,6 2,3
0
0
SEITENANSICHT (Installationshöhe 2,3 m (7,6 ft.))
10
0
0
10
20
30
40
50
60
20
70
80
90
: Nahbereich : Fernbereich
: Kriechzone
90
100 [m]
40
60
50
80
30
70
100 110 120 130 140 150 160 170 180 190 200 210 220 230 240 250 260 270 280 290 300 310 320 330 [ft]
- 31 -
REDWALL-V_SIP-5030_100_DE.indd
31
2009/03/30
15:42:48
7
8
ABDECKEN DES NAHBEREICHSSENSORS
8-1
Abdecken der Erfassungsbereiche mit Abdeckblenden
ABDECKEN DES FERNBEREICHSSENSORS
Gilt für
folgende
Modelle
SIP-5030
SIP-100
Vorsicht>>
Gilt für
folgende
Modelle
• Das Fenster ist mit einer Nylonfadenschlaufe mit dem
Hauptgerät verbunden, so dass es nicht herunterfällt.
Ziehen Sie nicht mit übermäßiger Kraft am Fenster.
• Nachdem Sie die Erfassungsbereiche abgedeckt
haben, montieren Sie das Fenster und legen Sie die
überschüssige Nylonfadenschlaufe in das Hauptgerät.
SIP-5030
SIP-100
Der in das Hauptgerät eingebaute Nahbereichsspiegel enthält
2 Abdeckblenden für den Nahbereich; eine auf der rechten
Seite des Spiegels und eine auf der linken Seite des Spiegels.
Sie können den Erfassungsbereich abdecken, indem Sie die
Position dieser Abdeckblenden ändern.
So entfernen Sie das Fenster>>
Vorsicht>>
Sie können damit nur die äußeren Erfassungsbereiche abdecken; das
sind die Bereiche 1 und 6. Verwenden Sie die Abdeckfolie (Zubehör),
um die anderen Erfassungsbereiche abzudecken (siehe Schritt 8-2).
Fenster
1Nehmen Sie die
Abdeckblende aus dem
Aufbewahrungsplatz
und überprüfen Sie den
von Ihnen verwendeten
Erfassungsbereich und
Spiegel an Hand der
Bereichstabelle.
Drücken Sie mit Ihrem Finger auf die
linke untere Öffnung und ziehen Sie
das Fenster nach oben.
Befestigen Sie die Abdeckfolie (Zubehör) vorsichtig mit der
Pinzette (Zubehör) am Fernbereichsspiegel.
Spiegel und sichern Sie sie an den Rippen.
Rippe
Rippe
Abdeckfolien für
Erfassungsbereich
SPIEGEL
Fernbereichsspiegel
2Befestigen Sie die Abdeckblende am
6
4
2
5
3 1
3Setzen Sie das Befestigungsgummi ein
und sichern Sie damit den Knopf der
Abdeckblende.
Nahbereichsspiegel
50
15
40
50
15
30
10
20
5
10
0
0
10
5
30
40
10
20
40
30
10
20
10
0
0
5
10
20
5
30
40
10
50 [ft.]
15 [m]
50 [ft.]
15 [m]
6
1
2
3
4
5
Wenn sich Äste oder andere bewegende Objekte
in der Bahn des Erfassungsstrahls befinden.
7
10
8
1
2
3
9
4
5
6
- 32 -
REDWALL-V_SIP-5030_100_DE.indd
32
2009/03/30
15:42:53
9
8-2
Gilt für
folgende
Modelle
(1)
Befestigen Sie die Abdeckfolie (Zubehör) vorsichtig mit der
Pinzette (Zubehör) am Nahbereichsspiegel.
F
E
D
C
F6
E6
SIP-5030
SIP-100
Nachdem Sie alle Sensoreinstellungen vorgenommen haben,
ziehen Sie sorgfältig alle gelösten Einstellschrauben wieder an.
Ziehen Sie zuletzt die unteren Befestigungsschrauben an.
Abdeckfolien für Erfassungsbereich
SPIEGEL
6 4 2
5 3 1
F6 F4 F 2
E6 E4 E 2
D6 D4 D 2
C6 C 4 C 2
F 5 F3 F 1
E 5 E3 E 1
ENGLISH
Abdecken der Erfassungsbereiche mit
Abdeckfolien
Nahbereichsspiegel
BEENDEN DER EINSTELLUNG
D5 D3 D 1
C5 C3 C1
B B6 B4 B 2 B5 B3 B1
50
40
30
20
10
10
0
5
10
20
0
30
5
40
10
50[ft.]
1 Einstellschraube
2 Befestigungsschraube
15 [m]
F
E
Vorsicht>>
• Wenn Sie den Erfassungsbereich erneut einstellen müssen,
dürfen Sie nicht vergessen, die Befestigungsschraube zu lösen.
Sollten Sie Sie versuchen, das Hauptgerät zu bewegen, ohne die
Befestigungsschraube zu lösen, kann das Gerät beschädigt werden.
• Legen Sie die überschüssige Nylonfadenschlaufe in das Hauptgerät,
wenn Sie die Abdeckung anbringen. Wenn der Faden zwischen
Fenster und Abdeckung eingeklemmt wird, können Regentropfen in
das Innere des Hauptgeräts gelangen.
D
C
DEUTSCH
B
6
1
2
5
4
3
[ft.] [m]
13 4
10
2
0
00
0
10
20
F
30
E
10
D
40
50
60
C
20
70
80
90
FRANÇAIS
15
30 [m]
100 [ft.]
B
ITALIANO
ESPAÑOL
- 33 -
REDWALL-V_SIP-5030_100_DE.indd
33
2009/03/30
15:42:55
10
BETRIEBSTEST
10-1 Wenn sich im Erfassungsbereich eine öffentliche, von
Fußgängern und Fahrzeugen benutzte Straße befindet
10-2 Wenn Äste oder Grashalme erfasst werden,
die sich im Erfassungsbereich bewegen
Bemerkung>>
Verringern Sie die Größe des Erfassungsbereichs so, dass
keine öffentlichen Straßen umfasst werden.
(1)
Kontrollieren Sie, dass sich der Pfeil auf dem Hauptgerät
innerhalb der Bahn der "Führung für Winkeleinstellung" auf
der Einstellschraube befindet.
(2)
Kontrollieren Sie mit dem Bereichssucher, dass sich im
Erfassungsbereich keine öffentlichen Straßen befinden.
(3)
Wenn sich der Erfassungsbereich auf eine öffentliche
Straße erstreckt, müssen Sie den vertikalen Winkel des
Hauptgeräts anpassen.
Gehen Sie dabei vorsichtig vor, so dass sich der
Pfeil nicht deutlich von der Position der "Führung für
Winkeleinstellung" entfernt.
Stellen Sie den Erfassungsbereich so ein, dass sich keine Äste
oder Grashalme darin befinden, die sich durch den Wind bewegen.
(1)
Kontrollieren Sie, dass sich der Pfeil auf dem Hauptgerät
innerhalb der Bahn der "Führung für Winkeleinstellung" auf
der Einstellschraube befindet.
(2)
Kontrollieren Sie mit dem Bereichssucher, dass sich im
Erfassungsbereich keine Äste oder Grashalme befinden, die
sich bei Wind bewegen.
(3)
Wenn sich der Pfeil deutlich von der Position
der "Führung für Winkeleinstellung" entfernt:
Verwenden Sie den Signalgenerator (Gehtester), um
Änderungen beim Schallpegel zu erfassen, wenn keine
sichtbare Aktivität im Erfassungsbereich wahrzunehmen ist.
Den Erfassungsbereich so einstellen, dass unerwünschte
Bereiche nicht erfasst werden.
Wenn sich der Schallpegel ändert, muss ein Teil des
Erfassungsbereichs aktiv sein (d. h.: ein Objekt bewegt sich).
Beim SIP-5030 decken Sie den Fernerfassungsbereich
mit der Abdeckfolie ab. Unter spezifischen
Sensoreinbaubedingungen kann es erforderlich sein, dass
Sie auch den Nahbereich abdecken (siehe Schritt 8).
Beim SIP-100 können Sie weder den Fernbereich noch
den Nahbereich abdecken.
(4)
Bemerkung>>
Wenn ein Fußgänger vorbeigeht oder ein Fahrzeug vorbeifährt,
überprüfen Sie den Erfassungsbereich mit dem Signalgenerator (Gehtester).
(4)
(5)
(6)
Bemerkung>>
Sie können den Bereichssucher und den Signalgenerator
(Gehtester) nicht gleichzeitig montieren und verwenden.
Vorsicht>>
Der Erfassungsbereich kann größer werden, wenn
ein großer Temperaturunterschied zwischen dem
bewegenden Objekt und dem Hintergrund besteht.
(7)
Lokalisieren Sie den Teil des Erfassungsbereichs, der aktiv
ist, mit dem Signalgenerator (Gehtester). Ändern Sie die
Wahlschalterstellung des Signalgenerators (Gehtesters)
und ermitteln Sie, ob der aktive Teil des Erfassungsbereichs
Fernbereich, Nahbereich oder Kriechzone ist.
Lokalisieren Sie den aktiven Erfassungsbereich erneut mit
dem Bereichssucher.
Decken Sie den aktiven Bereich ab. Beim SIP-5030 decken
Sie den Fernerfassungsbereich mit der Abdeckfolie ab. Es
kann erforderlich sein, dass Sie auch den Nahbereich mit der
Abdeckblende oder der Abdeckfolie abdecken (siehe Schritt 8).
Beim SIP-100 kann weder der Fern- und Nahbereich noch die
Kriechzone abgedeckt werden. Stellen Sie den Erfassungsbereich
für den Bereich ein, der nicht abgedeckt werden kann.
Kontrollieren Sie erneut mit dem Signalgenerator (Gehtester),
ob sich der Schallpegel ändert. Wenn sich der Schallpegel
nicht stark ändert, können Sie die Einstellung beenden.
Bemerkung>>
Sie können den Bereichssucher und den Signalgenerator
(Gehtester) nicht gleichzeitig montieren und verwenden.
Vorsicht>>
Eine Wärmequelle außerhalb des Erfassungsbereichs kann einen
Fehlalarm auslösen, weil die Wärme vom Boden reflektiert wird.
Reflektierende Flächen sind u. A. Wasser (Pfützen), nasse Straßen,
glatte Betonflächen und Asphaltstraßen.
Wenn die Wärmequelle stark ist und/oder die Reflektionsrate hoch ist,
kann die Erfassungsentfernung größer als erforderlich sein und ist es
möglich, dass unnötig Objekte erfasst werden, die sich außerhalb des
Zielbereichs befinden. Passen Sie die Position des Erfassungsbereichs
daher an die Bodenbedingungen am Einbaustandort an.
- 34 -
REDWALL-V_SIP-5030_100_DE.indd
34
2009/03/30
15:43:37
11
12
LED-STATUS
Gilt für
folgende
Modelle
SIP-5030
Gilt für
folgende
Modelle
SIP-100
Modell
Wenn die rote LED ca. 60 Sekunden
lang blinkt, nachdem die
Stromversorgung eingeschaltet
wurde, die Stromversorgung
ausschalten und wieder einschalten.
Far area
Alarm Creep
Wenn Stromversorgung
eingeschaltet ist (ON)
Blinkt.
Im Standby-Modus
Erlischt (OFF).
Bei Erfassung (im Fern-/
Nahbereich)
Leuchtet.
Bei Erfassung (in der
Kriechzone)
Leuchtet.
SIP-5030
Abdeckung
(Hauptbereich)
50 x 30 m
100 x 3 m
(164 x 100 ft.)
(330 x 10 ft.)
3 x 5 m (10 x 17 ft.) bei 2,3 m (7,6 ft.) Höhe
6 x 9 m (20 x 30 ft.) bei 4 m (13 ft.) Höhe
Erfassungswinkel einstellbar
Anzahl an Hauptbereich
ErfassungszoKriechzone
nen
2,3 bis 4 m (7,6 bis 13 ft.)
Eingangsspannung
11 - 16 V DC
22 - 26 V AC
Stromaufnahme
40 mA max. (12 V DC) 45 mA max. (12 V DC)
75 mA max. (24 V AC) 80 mA max. (24 V AC)
Far Near Creep
Fernbereich Betriebsanzeige - Rote LED
Kriechzone Betriebsanzeige - Rote LED
Nahbereich Betriebsanzeige - Rote LED
Detektorstatus
LED-Status
Wenn Stromversorgung
eingeschaltet ist (ON)
Blinkt.
Im Standby-Modus
Erlischt (OFF).
Bei Erfassung (im Fernbereich)
Leuchtet.
Bei Erfassung (im Nahbereich)
Leuchtet.
Bei Erfassung
(in der Kriechzone)
Leuchtet.
Rote LED
Rote LED
Rote LED
Rote LED
Alarmzeitraum
Ungefähr 2 Sek.
Aufwärmdauer
Ungefähr 60 Sek.
Wahlschalter für die
Nummer des Ausgangs
-
Alarmintervallzeitraum
Aus / 15 / 30 / 60 Sek.
Wahlschalter für
Erfassungslogik
Sabotageausgang
(Tamper)
Fehlerausgang
Fernbereich
Alarmausgang Nahbereich
Empfindlichkeitswahlschalter
Ohne
optionale
Heizeinheit
Betriebstemperatur
Mit
optionaler
Heizeinheit
AND/OR (UND/ODER)
N.C. 28 V DC, 0,1 A max.
N.C. 28 V DC, 0,2 A max.
N.C. 28 V DC, 0,2 A max.
N.O. 28 V DC, 0,2 A max.
N.C. 28 V DC, 0,2 A max.
N.O. 28 V DC, 0,2 A max.
N.C. 28 V DC, 0,2 A max.
N.O. 28 V DC, 0,2 A max.
N.C. 28 V DC, 0,2 A max.
N.O. 28 V DC, 0,2 A max.
Fern: SH/H/M/L Nah: SH/H/M/L
Kriechzone: SH/H/M/L
-25 bis +60°C (-13 bis +140°F.)
-40 bis +60°C (-40 bis +140°F.)
Schutzklasse
Hauptgerät: IP65
Rahmen : IP55
Abmessungen
(H × B × T)
271 x 102 x 290 mm
(10,7 x 4,0 x 11,4 in.)
Gewicht
1,6 kg (56 oz.)
Schrauben,
Papierschablone,
Inbusschlüssel,
Abdeckfolie für
Erfassungsbereich,
Pinzette,
Bedienungsanleitung,
Bereichsplatte,
Befestigungsgummi
Schrauben,
Papierschablone,
Inbusschlüssel,
Bedienungsanleitung,
Bereichsplatte
ESPAÑOL
Zubehör
ITALIANO
Kriechzone
Dip-Schalter: 2 / 3
DEUTSCH
Far area
Wenn die rote LED ca. 60 Sekunden
lang blinkt, nachdem die
Stromversorgung eingeschaltet
wurde, die Stromversorgung
ausschalten und wieder einschalten.
28 Zonen
36 Zonen
Kriechzonenbereichsalarm
Vorsicht>>
SIP-100
100 Zonen
Montagehöhe
Anzeige Nahbereichsalarm
SIP-100
SIP-100
Passiv-Infrarot
Fernbereichsalarm
Gilt für
folgende
Modelle
SIP-5030
FRANÇAIS
LED-Status
SIP-100
Erfassungsmethode
Abdeckung
(Kriechzone)
Kriechzone Betriebsanzeige - Rote LED
Fern-/Nahbereich Betriebsanzeige - Rote LED
Detektorstatus
SIP-5030
ENGLISH
Vorsicht>>
SIP-5030
TECHNISCHE DATEN
- 35 -
REDWALL-V_SIP-5030_100_DE.indd
35
2009/03/30
15:43:40
ABMESSUNGEN
OPTIONEN
SIP-5030, 100
•
•
•
•
23
(0,9)
290
(11,4)
OPM-WT
AVF-1
SIP-MIDIHOOD
SIP-HU
-Audio Signalgenerator
-Bereichssucher
-Sonnen-/Schneeschutz
-Heizeinheit
Diese Einheiten wurden so ausgelegt, dass sie Bewegungen
erfassen und das CCTV-System aktivieren. Da wir nur ein Teil
eines kompletten Überwachungssystems sind, übernehmen wir
keine Verantwortlichkeit für eventuelle Schäden oder andere
Folgen, die durch das Aktivieren der Einheit entstehen.
Dieses Produkt entspricht der EMC Richtlinie 2004/108/EC.
248
(9,8)
102
(4,0)
Die technischen Daten und das Design können ohne vorherige
Bekanntgabe geändert werden.
116
(4,57)
21
(0,83)
13
(0,51)
96
(3,78)
75
(3,0)
21
(0,83)
17,1
(0,67)
90
(3,6)
Einheit: mm (Zoll)
OPTEX CO., LTD. (JAPAN)
(ISO 9001 zertifiziert) (ISO 14001 zertifiziert)
5-8-12 Ogoto Otsu Shiga 520-0101 JAPAN
TEL:+81-77-579-8670 FAX:+81-77-579-8190
URL:http://www.optex.co.jp/e/
OPTEX INCORPORATED (USA)
TEL:+1-909-993-5770
Tech:(800)966-7839
URL:http://www.optexamerica.com
OPTEX (EUROPE) LTD. (UK)
TEL:+44-1628-631000
URL:http://www.optex-europe.com
- 36 -
REDWALL-V_SIP-5030_100_DE.indd
36
OPTEX SECURITY SAS (FRANKREICH)
TEL:+33-437-55-50-50
URL:http://www.optex-security.com
OPTEX SECURITY Sp.z o.o.
(POLEN)
TEL:+48-22-598-06-55
URL:http://www.optex.com.pl
2009/03/30
15:43:42
2
ISTRUZIONI PER L'INSTALLAZIONE
NOTE PER L'INSTALLAZIONE E LA MANUTENZIONE
Attenzione
Serie REDWALL-V
CARATTERISTICHE
Non riparare o
modificare il prodotto
Cappio in
nylon
Mantenere
fermamente
l'unità durante
l'installazione o la
manutenzione.
Se si lascia l'unità
principale quando ad
essa sono collegati
cavi, può cadere e i
cavi di collegamento
possono spezzarsi o
si può danneggiare
la scheda elettronica.
Attenzione
Prima di effettuare
i collegamenti
verificare che l'unità
sia spenta.
Durante la manutenzione, il
sensore può essere appeso
alla base utilizzando il
cappio in nylon.
FRANÇAIS
* Sistema di rilevamento PIR intelligente
- Rilevamento di temperatura e illuminazione dell'ambiente per
la gestione della sensibilità automatica
- Algoritmo di rilevamento avanzato
- Piroelementi doppi duali/quadrupli con schermatura conduttiva
doppia brevettata per l’area principale
* Rilevatore creep zone incorporato (piroelementi doppi duali)
* Funzioni antivandalismo
- Funzione antirotazione con accelerometro a 3 assi
- Funzione antimascheramento con fotocellula
- Involucro in policarbonato rinforzato
- Altezza di installazione max. 4 m (13 ft.)
* Selettore di sensibilità indipendente per le aree vicine, distanti e
creep zone
* Uscita N.C. e N.A. indipendente per area principale SIP-5030
*2 uscite indipendenti per N.C. e N.A. per le aree principali (aree
vicine e distanti) SIP-100
* Tempo di intervallo allarme regolabile
Attenzione
ENGLISH
PIR intelligente combinato
REDWALL-V
1
IDENTIFICAZIONE DELLE PARTI
SSUGGERIMENTI PER L'INSTALLAZIONE
DEUTSCH
2-1
: PIR intelligente combinato con creep zone (campo di
rilevazione sotto il rilevatore)
• SIP-5030
• SIP-100
2,3-4,0 m
(7,6-13 ft.)
Specchio per area distante
ITALIANO
Base
Vite di
fissaggio per
la base
Unità principale
Unità creep
Viti di regolazione
(due contrapposte)
Guida per la regolazione
dell'angolo
Finestra
Gommino di
fissaggio (*1)
Placca di mascheramento
per area vicina (*1)
Specchio per area vicina
Vite di
fissaggio per il
coperchio
Coperchio
Montare il rilevatore in modo che la maggior parte del traffico attraversi l'area di
rilevamento.
*1: Non usato per SIP-100.
ESPAÑOL
Riferimento
Vite di fissaggio
- 37 -
REDWALL-V_SIP-5030_100_IT.indd
37
2009/03/30
16:12:16
3
INSTALLAZIONE E REGOLAZIONE DELL'ANGOLO
3-1
Montaggio a parete
(1)
3-2
Appendere il modello in carta (accessorio) alla parete, quindi praticare
un foro di montaggio del diametro di 6 mm e un foro per i cavi.
Inserire il bullone di ancoraggio (accessorio) nel foro di
montaggio della base.
Vista interna della base
Foro di montaggio
a parete
Connettore unità
principale
Base
Guarnizione
impermeabile
(non rimuovere
questa guarnizione).
Morsettiere di cablaggio
(SOLO SIP-100)
Morsettiere di
cablaggio
Foro di montaggio a
parete
La distanza dal suolo alla base
del modello deve essere tra
2,3.m (7,6 ft) e 4 m (13 ft.).
(2)
Boccola per il foro
di cablaggio
Boccola per il foro
di cablaggio
Utilizzando una chiave a brugola, rimuovere l'unità centrale dalla base.
4 Estrarre.
Tappo apertura
cavi
2 Aprire.
1 Allentare
la vite di
fissaggio
della base.
(3)
3-3
3 Scollegare il
CABLAGGIO
connettore.
Praticare un foro attraverso la boccola del foro di cablaggio,
inserire il cavo nel foro e fissare la base alla parete.
AREA DISTANTE *2
USCITA ALLARME (N.C.)
USCITA ALLARME (N.A.)
(Solo SIP-100)
INGRESSO ALIMENTAZIONE
USCITA
GUASTO
USCITA MANOMISSIONE *1
SCORTA
USCITA ALLARME AREA *3
DISTANTE E AREA VICINA (N.C.)
CREEP USCITA
ALLARME (N.C.)
USCITA ALLARME
(N.A.)
USCITA ALLARME (N.A.)
(4)
Collegare il cavo alla morsettiera (vedere il punto 3-3).
(5)
Montare l'unità principale sulla base.
*1: Terminali MANOMISSIONE da collegare a un ciclo di supervisione di 24 ore.
*2: USCITA ALLARME AREA DISTANTE da collegare a uscita allarme area distante.
*3: Sia USCITA ALLARME AREA DISTANTE che AREA VICINA, se il NUMERO DI
USCITE DEL SELETTORE si trova su OFF (2).
E solo USCITA ALLARME AREA VICINA, se il NUMERO DI USCITE DEL
SELETTORE si trova su ON (3) (vedere il punto 5-3).
Nome
1 Inserire e
bloccare qui.
L'uscita di guasto viene utilizzata per il segnale
antimascheramento. Quando viene posizionato
un oggetto vicino alla superficie della lente per un
periodo superiore a 20 secondi (circa), il circuito IR
antimascheramento attiva e genera un segnale di guasto.
Viene rilevata quando il coperchio è aperto.
Viene rilevata quando l'unità principale viene
rimossa dalla base.
Antirotazione:
Viene rilevato un danno provocato all'unità
principale.
Quando l'interruttore del sistema è acceso e
il coperchio è chiuso, dopo circa 10 secondi
USCITA
viene determinata e memorizzata la posizione di
MANOMISSIONE montaggio dell'unità principale. Quindi, se l'unità
principale viene colpita in direzione orizzontale o
verticale e la sua posizione cambia, viene rilevato
un danno all'unità principale. Tuttavia, se si
rimuove il coperchio mantenendo il sistema acceso
e si chiude nuovamente il coperchio dopo avere
corretto la posizione dell'unità principale, la sua
nuova posizione viene memorizzata dopo circa
10 secondi.
USCITA
GUASTO
Cappio
in nylon
4 Serrare e
3 Chiudere.
2 Collegare il
connettore.
bloccare
la vite di
fissaggio
della base.
Attenzione>>
Durante il montaggio dell'unità principale, prestare
attenzione a non bloccare il cappio in nylon.
Inoltre prestare attenzione a non pizzicarsi le dita.
(6)
Funzione
Verificare che le diverse impostazioni e il funzionamento
siano corretti.
Attenzione>>
Quando il LED rosso lampeggia dopo l'accensione,
significa che il sistema è in fase di riscaldamento.
Attendere circa 60 secondi.
- 38 -
REDWALL-V_SIP-5030_100_IT.indd
38
2009/03/30
16:13:49
I cavi di alimentazione non devono superare le lunghezze indicate nella tabella.
SIP-5030
14 Vcc 24 Vca
640
1370
(2100) (4490)
12 Vcc
410
(1350)
SIP-100
14 Vcc 24 Vca
550
1280
(1800) (4200)
0,33 mm2
(AWG22)
12 Vcc
480
(1570)
0,52 mm2
(AWG20)
760
(2490)
1010
(3310)
2160
(7090)
650
(2130)
860
(2820)
2020
(6630)
0,83 mm2
(AWG18)
1210
(3970)
1610
(5280)
3450
(11320)
1030
(3380)
1380
(4530)
3220
(10560)
Regolare l'angolo dell'unità principale in direzione verticale
in modo da poter coprire l'area di rilevamento desiderata.
Allineare la freccia dell'unità
principale alla guida di
regolazione dell'angolo della
vite di regolazione. Solitamente
l'unità principale viene regolata
entro l'ampiezza di questa guida.
ENGLISH
DIMENSIONE
CAVO
(2)
Quando montata a un'altezza
di 2,3 metri (7,6 ft.)
m (ft.)
4
IMPOSTAZIONE DELL'AREA DI RILEVAMENTO
Modelli
SIP-5030
Quando montata a un'altezza di
4,0 metri (13 ft.)
Attenzione>>
Se la parete di montaggio si trova su un angolo, il riferimento
dell'unità principale può superare il limite superiore o inferiore
della guida di regolazione dell'angolo. Verificarlo sempre
utilizzando il mirino di area o il walk tester. Se l'area di
rilevamento è troppo alta o troppo bassa, può essere rilevato
un oggetto al di fuori dell'area oppure si può verificare un
errore nel rilevamento di oggetti.
SIP-100
10°
(3)
10°
Rimuovere il coperchio.
85°
85°
FRANÇAIS
È possibile regolare l'area di rilevamento in un intervallo di 90
gradi in direzione orizzontale e di 10 gradi in direzione verticale.
Correggere l'angolo di rilevamento verticale secondo l'altezza di
montaggio del sensore.
Ganci
3 Far scorrere il coperchio
Attenzione>>
Per ruotare l'unità principale in senso orario,
allentare la vite di regolazione di sinistra. Per ruotare
l'unità principale in senso orario, allentare la vite di
regolazione di sinistra. In caso contrario può risultare
difficile o impossibile serrare la vite di regolazione
quando si blocca l'unità principale.
1 Allentare due viti di fissaggio per il
coperchio e tirare verso l'esterno il
coperchio fino a quando si blocca.
Coperchio
DEUTSCH
verso il basso e sbloccare
dai ganci.
2 Tenere le teste delle viti di fissaggio del
coperchio con le mani, tirare verso il basso
e rimuovere la parte inferiore del coperchio
dall'unità principale.
Attenzione>>
Vite di
regolazione
(4)
4-1
Montare il mirino di area.
1
Per ruotare l'unità in senso antiorario Per ruotare l'unità in senso orario
ITALIANO
Il coperchio è legato all'unità principale mediante un
cappio in nylon, in modo da non cadere. Non tirare
eccessivamente il coperchio.
Collocare la stringa rossa
intorno all'unità principale.
La stringa rossa che
trattiene l'unità principale. Placca di area
(accessorio)
IMPOSTAZIONE DELL'AREA DI
RILEVAMENTO PRINCIPALE
(1) Regolare l'angolo dell'unità principale in direzione orizzontale in
* Staccare la
guarnizione
di protezione
dalle facce
della placca
di area.
Cerchio centrale
della lente
modo da poter coprire l'area di rilevamento desiderata.
3 Ruotare l'unità principale.
5030
1
2
3
4
5
6 (521206)
7
8 9 10
B1
B2 B3 B4
B5
B6
C1 C2 C3 C4
C5 C6
D1
D2 D3 D4 D5 D6
E2 E3 E4 E5 E6
F1
F2 F3 F4 F5 F6
E1
4
Inserire la placca
di area nella scanalatura.
Determinare la
direzione di rilevamento
(vedere il punto 5).
Mirino di area AVF-1 (opzionale)
Finestra di ispezione
Inserire e
montare
nell'unità
principale.
3
1
ESPAÑOL
2
1 Allentare la vite di
fissaggio della base.
2 Allentare la vite di regolazione.
4 Serrare leggermente la vite di regolazione.
- 39 -
REDWALL-V_SIP-5030_100_IT.indd
39
2009/03/30
16:13:54
Attenzione>>
Suggerimenti per il montaggio>>
• Il mirino di area è uno strumento di supporto per la
regolazione dell'area di rilevamento.
• Dopo avere regolato l'area di rilevamento mediante il
mirino di area, verificare sempre l'area utilizzando il
walk tester.
• Non osservare mai direttamente il sole attraverso il
mirino di area.
• Dopo avere utilizzato il mirino di area, proteggerlo dalla
luce solare diretta.
• Allineare la parte convessa dei bracci di fissaggio del
mirino di area alle tacche dell'unità principale, quindi
inserire e montare i bracci.
Bracci di fissaggio
Alarm Creep
Tacca
Parte
convessa
(6)
(7)
• Montare la placca dell'area in modo che una freccia
della parte centrale della placca sia rivolta verso l'alto e
sia visibile la superficie con le lettere.
• Inserire la placca di area nelle scanalature superiore e inferiore
del mirino dell'area fino a quando la placca viene fissata dai fermi.
5030
1
2
3
4
5
9
8
7
B2 B3 B4
B1
C1 C2 C3 C4
D1 D2 D3 D4
E1
E2 E3 E4
F1 F2 F3 F4
6
Scanalature
(521206)
100 (521207)
Per uscita allarme area vicina
Per uscita allarme area distante
Utilizzare nella posizione
"REDWAVE ALARM OUTPUT"
(Uscita allarme Redwave) per
confermare l'uscita di allarme
per l'area distante e vicina.
1
2
B1 B2
10
C1 C2
B5
B6
C5 C6
D5 D6
E5
Collegare il walk tester (opzionale) al sensore e verificare
la correttezza dell'area di rilevamento.
Per uscita allarme creep zone
SIP-100
SIP-5030
Riferimento
Bloccare la vite di regolazione che è stata allentata.
D1D2
E6
E1
E2
F1
F2
Utilizzare nella posizione
"REDWALL".
F5 F6
Selettore di
alimentazione
Fermi
(5)
Regolare con precisione l'angolo dell'unità principale
nelle direzioni orizzontale e verticale osservando l'area
desiderata mediante il mirino di area.
REDWAVE
MICROWAVE
REDWAVE
PIR NEAR
REDWAVE
PIR FAR
REDWAVE
ALARM OUTPUT
CELL BATTERY
REDWAVE
REDWALL
REDWIDE
MEGARED
POWER
SUPPLY
FROM
SENSOR
REDWALL
REDWIDE
CONNECTION
SELECT
SWITCH
MEGARED
NEAR
MEGARED
FAR
MODE
SELECT
SWITCH
WALKTESTER
POWER OFF
POWER
SELECT
SWITCH
OPM-WT
1 Per cambiare la direzione della finestra di
ispezione, ruotare il mirino di area in direzione
orizzontale fino a quando si blocca.
1 Quando l'interruttore di accensione è nella posizione
"POWER SUPPLY FROM SENSOR" dopo il
collegamento del cavo al connettore del walk tester,
viene emesso un segnale acustico continuo.
2 Quando un pedone inizia a entrare nell'area di
rilevamento, vengono emessi alternativamente segnali
acustici forti e deboli.
3 Quando viene rilevato l'intero corpo del pedone, viene
emesso un segnale acustico forte continuo.
2 Spostare il volto vicino al mirino in
modo che l'occhio si trovi entro 5 mm
dalla finestra di ispezione (superficie
della lente).
3Individuare il cerchio centrale della
Cerchio centrale della lente
placca di area nel cerchio centrale
Cerchio centrale
della lente del mirino di area e
della placca di area
verificare l'area di rilevamento sulla
placca di area e sull'immagine di
(521206)
5030
3 4
5
6
1 2
sfondo.
8 9 10
7
B2 B3 B4 B5
B6
B
1
B1
* Ciascuna lettera sulla placca di
4 C5 C6
C1 C2 C3 C4
area corrisponde a un numero di
6
1 D2 D33 D44 D5 D6
D1
specchio (vedere il punto 8-2).
6
E6
EE1
* Attraverso la finestra di ispezione
E2 E3 E4 E5
non è possibile osservare gli
F1 F2 F3 F4 F5 F6
specchi da B1 a F1 e da B6 a F6
(mostrati a destra) della placca
di area del SIP-5030. Verificarli
L'area di rilevamento è
utilizzando il walk tester.
Area invisibile all'interno del bordo
dell'inquadratura.
Suggerimenti per la regolazione>>
Linea di limite
dell'area di rilevamento
Se si verifica una delle situazioni indicate di seguito, consultare il punto 10.
5030
1
2
3
4
5
6
(521206)
8 9 10
7
B2 B3 B4 B5
B6
B1
C1 C2 C3 C4 C5 C6
D1 D2 D3 D4 D5 D6
E6
E1
E2 E3 E4 E5
F1 F2 F3 F4 F5 F6
L'area del sensore è estesa
oltre la strada in cui cammina una
persona o passa un'auto.
REDWALL-V_SIP-5030_100_IT.indd
40
5030
1
2
3
4
5
6
(521206)
8 9 10
7
B2 B3 B4 B5
B6
B1
C1 C2 C3 C4 C5 C6
D1 D2 D3 D4 D5 D6
E6
E1
E2 E3 E4 E5
F1 F2 F3 F4 F5 F6
I rami di un albero e l'erba si
muovono con il vento.
- 40 -
2009/03/30
16:14:11
4-2
(3)
Collegare il walk tester (opzionale) al sensore e verificare la
correttezza dell'area di rilevamento.
Per uscita allarme creep zone
(1) Regolamento della creep zone in maniera orizzontale.
Per uscita allarme area vicina
Per uscita allarme area distante
Utilizzare nella posizione
"REDWAVE ALARM OUTPUT"
(Uscita allarme Redwave) per
confermare l'uscita di allarme
per l'area distante e vicina.
L'area di rilevamento della creep zone può essere regolato
tra -90° e 90° orizzontalmente.
-90°
+90°
Utilizzare nella posizione
"REDWALL".
Selettore di
alimentazione
REDWAVE
MICROWAVE
REDWAVE
PIR NEAR
CELL BATTERY
MEGARED
NEAR
10
2
5
3
10
0
30
"POWER SUPPLY FROM SENSOR" dopo il
collegamento del cavo al connettore del walk tester,
viene emesso un segnale acustico continuo.
Quando un pedone inizia a entrare nell'area di
rilevamento, vengono emessi alternativamente segnali
acustici forti e deboli.
Quando viene rilevato l'intero corpo del pedone, viene
emesso un segnale acustico forte continuo.
Attenzione>>
10
20
OPM-WT
Quando si verifica l'area di rilevamento, prestare attenzione a
non coprire l'area ombreggiata della finestra con il walk tester o
con il suo cavo. Se il fascio di raggi infrarossi verso il sensore
è parzialmente ombreggiato, la sensibilità di rilevamento
diminuisce e la funzione di rilevamento può non funzionare.
5
10
DEUTSCH
0
POWER OFF
POWER
SELECT
SWITCH
1 Quando l'interruttore di accensione è nella posizione
40
20
MEGARED
FAR
MODE
SELECT
SWITCH
WALKTESTER
[ft.] [m]
50 15
REDWAVE
ALARM OUTPUT
POWER
SUPPLY
FROM
SENSOR
REDWALL
REDWIDE
CONNECTION
SELECT
SWITCH
30
REDWAVE
PIR FAR
REDWAVE
REDWALL
REDWIDE
MEGARED
FRANÇAIS
Guide di
regolazione della
creep zone
Se si vuole
regolare la creep
zone con un
angolo di 0°,
allineare queste
guide.
ENGLISH
IMPOSTAZIONE DELL'AREA DI
RILEVAMENTO DELLA CREEP ZONE
40
Se risulta difficile rilevare un oggetto>>
50 15
(2) Regolamento della creep zone in maniera verticale.
L'area di rilevamento della creep zone può essere regolato
tra -3° e 3° verticalmente.
Per mascherare l'area di rilevamento>>
-3°
+3°
Premere
delicatamente per
muovere verso l'alto
Area di
rilevamento
Premere
delicatamente per
muovere verso il
basso
Area
distante
Area
vicina
00
0
10
20
Applicare il contrassegno
di mascheramento
(accessorio) alla superficie
dello specchio di area.
10 [m]
30 [ft.]
Applicare il
contrassegno di
mascheramento
(accessorio) alla
superficie dello
specchio di area.
SIP-100
Riferimento
Area
distante non
Punto 7
può essere
mascherata.
il punto
8-1
Area vicina
non può
essere
mascherata. il punto
8-2
* Creep zone non può essere mascherata.
ESPAÑOL
2
0
SIP-5030
Utilizzare la placca
di mascheramento
(montata nell'unità
principale).
Area di rilevamento regolata a -3°.
Area di rilevamento regolata a +3°.
[ft.] [m]
13,2 4
10
Come mascherare l'area
ITALIANO
1. Impostare il selettore di logica di rilevamento sulla
posizione "OR" (vedere punto 5-2).
Se il sensore funziona correttamente al completamento
del walk test, riportare il selettore di logica nella
posizione "AND".
2. Regolare il selettore di sensibilità del sensore (vedere il
punto 5-1).
- 41 -
REDWALL-V_SIP-5030_100_IT.indd
41
2009/03/30
16:14:14
5
IMPOSTAZIONE DELLA FUNZIONE
Modelli
SIP-5030
Selettore di sensibilità area
distante
SIP-100
5-2 Selettore della logica di rilevamento
Selettore di sensibilità
area vicina
Modelli
SIP-5030
Selettore della
sensibilità creep
zone
Interruttore di
manomissione
Connettore walk
tester
Sens.Select.SW. 5730980
Sens.Select.SW. 5730980
UP DWN
UP
Far area Near area Creep zone
Alarm Creep
Indicatore di funzionamento
(vedere il punto 11).
UP DWN
POSIZIONE
STATO
SELETTORE
DWN
(
SU
1: Selettore di logica di rilevamento
(E od O)
2: Impostazione non valida.
3,4: Selettori tempo di allarme
O
)
Impostazione
di fabbrica
Attenzione>>
Se il LED rosso continua a lampeggiare per circa
60 secondi dopo l'accensione dell'alimentazione,
spegnere e riaccendere il dispositivo.
Modelli
SIP-5030
Selettore di sensibilità area
distante
GIÙ
Selettore della
sensibilità creep
zone
Interruttore di
manomissione
Connettore walk
tester
FUNZIONE
Viene inviato un segnale del sensore
quando viene rilevato un oggetto in
una delle due aree di rilevamento.
* Utilizzare questa modalità quando
si regola l'area di rilevamento. Al
termine della regolazione dell'area
di rilevamento passare alla
modalità AND.
Utilizzare questa modalità per ridurre
la quantità di errori nei rilevamenti di
oggetti. Il segnale del sensore viene
inviato solo quando viene rilevato
un oggetto in entrambe le aree di
rilevamento. Se sono presenti oggetti
che bloccano aree di rilevamento
multiple, utilizzare la modalità OR.
5-3 Numero di uscite del selettore
Modelli
UP
Sens.Select.SW. 5730980
Sens.Select.SW. 5730980
Far area Near area Creep zone
UP DWN
Far Near Creep
E
SIP-100
Selettore di sensibilità
area vicina
SIP-5030
POSIZIONE
STATO
SELETTORE
DWN
Far area Near area Creep zone
Indicatore di funzionamento
(vedere il punto 11).
SU
UP DWN
Far Near Creep
(
1:Selettore di logica di rilevamento
(E od O)
2: Numero di uscite del selettore
3,4: Selettori tempo di allarme
5-4
SIP-100
È possibile modificare la sensibilità di rilevamento
delle aree distanti, vicine e creep zone in modo
indipendente.
POSIZIONE
SELETTORE
Sens.Select.SW.
SH
H
Far area Near area Creep zone
FUNZIONE
Adatto a siti che richiedono un
livello di sensibilità maggiore di "H"
Adatto a siti che richiedono un
livello di sensibilità maggiore di "M"
M
(Impostazione Adatto ad applicazioni standard
di fabbrica)
L
)
2
SIP-100
SIP-5030
FUNZIONE
SIP-100
I tre allarmi, che sono area
distante, area vicina e creep
zone (campo di rilevazione
sotto il rilevatore) sono emessi
separatamente.
I due allarmi, che sono area
Impostazione distante/ vicina e creep zone
(campo di rilevazione sotto
non valida.
il rilevatore) sono emessi
separatamente.
Impostazione
non valida.
Quando si emette un allarme area distante con Numero di
uscita del selettore, l'area di rilevamento dell'area distante
dipende dall'altezza di installazione dell'unità principale.
L'area di rilevamento è circa 35-100 m per 4 m (13 ft.)
altezza installazione e 20-100 m per 2,3 m (7,6 ft.) altezza
installazione.
Selettore della sensibilità per le
aree distanti, vicine e le creep zone
SIP-5030
GIÙ
Dip switch 2
Attenzione>>
Se il LED rosso continua a lampeggiare per circa
60 secondi dopo l'accensione dell'alimentazione,
spegnere e riaccendere il dispositivo.
Modelli
3
Impostazione di
fabbrica
Attenzione>>
5-1
SIP-100
L’area di rilevamento di SIP-5030 e SIP-100
consiste in due tipi di aree di rilevamento piano
in modalità alternativa costituita da due coppie
di piroelementi (elemento quadruplo per l’area
distante), per l’area vicina, l’area distante e la
creep zone.
Far area Near area Creep zone
Alarm Creep
Dip switch 1
Adatto ad aree ristrette e difficili
Interruttore di intervallo allarme
Modelli
SIP-5030
Dip switch 3-4
SIP-100
È possibile impostare un intervallo (4 tempi diversi) di
sospensione del segnale di allarme in uscita.
Per esempio, se tale intervallo viene impostato
su 30 secondi, dopo l'emissione del primo
segnale di allarme non vengono emessi altri
segnali di allarme per 30 secondi.
Se non vengono rilevati pedoni per oltre
30 secondi, il sistema torna alla modalità standby.
Quindi, quando viene rilevato un pedone, viene
emesso il segnale di allarme.
POSIZIONE
SELETTORE
FUNZIONE
0 sec
(Impostazione
di fabbrica)
15 sec 30 sec 60 sec
- 42 -
REDWALL-V_SIP-5030_100_IT.indd
42
2009/03/30
16:15:49
6
AREA DI RILEVAMENTO
Modelli
SIP-5030
SIP-100
20
40
10
30
20
5
10
30
5
0
0
10
10
20
10
10
0
0
VISTA DALL'ALTO (altezza di installazione 2,3 m (7,6 ft.))
[ft] [m]
50 15
40
30
ENGLISH
VISTA DALL'ALTO (altezza di installazione 4,0 m (13 ft.))
[ft] [m]
50 15
5
20
30
10
5
10
40
50 15
50 15
VISTA LATERALE (altezza di installazione 4,0 m (13 ft.))
[ft] [m]
13 4
10
2
0 0
: Area vicina : Area distante
VISTA LATERALE (altezza di installazione 2,3 m (7,6 ft.))
[ft] [m]
7,6 2,3
: Creep zone
0
0
0
10
20
10
30 40
Modelli
50
20
60 70
80
90
SIP-5030
30
50 [m]
40
100 110 120 130 140 150 160 [ft]
0
0
0
: Area vicina 10
20
10
30 40
50
60
20
70
80
90
: Area distante
: Creep zone
30
50 [m]
40
100 110 120 130 140 150 160 [ft]
SIP-100
DEUTSCH
Attenzione>>
Quando si emette un allarme area distante con Numero di
uscita del selettore, l'area di rilevamento dell'area distante
dipende dall'altezza di installazione dell'unità principale.
L'area di rilevamento è circa 35-100 m per 4 m (13 ft.)
altezza installazione e 20-100 m per 2,3 m (7,6 ft.) altezza
installazione.
[ft]
[m]
20
5
10
FRANÇAIS
40
VISTA DALL'ALTO (altezza di installazione 4,0 m (13 ft.))
0
20
5
[ft] [m]
13 4
10 2
0
0
VISTA LATERALE (altezza di installazione 4,0 m (13 ft.))
[ft]
[m]
20
5
10
10
0
0
10
20
30
40
50
60
20
70
80
90
: Area vicina : Area distante
: Creep zone
90
100 [m]
40
60
50
80
30
70
100 110 120 130 140 150 160 170 180 190 200 210 220 230 240 250 260 270 280 290 300 310 320 330 [ft]
VISTA DALL'ALTO (altezza di installazione 2,3 m (7,6 ft.))
0
ESPAÑOL
0
ITALIANO
10
10
20
5
[ft] [m]
7,6 2,3
0
0
VISTA LATERALE (altezza di installazione 2,3 m (7,6 ft.))
10
0
0
10
20
30
40
50
60
20
70
80
90
: Area vicina : Area distante
: Creep zone
90
100 [m]
40
60
50
80
30
70
100 110 120 130 140 150 160 170 180 190 200 210 220 230 240 250 260 270 280 290 300 310 320 330 [ft]
- 43 -
REDWALL-V_SIP-5030_100_IT.indd
43
2009/03/30
16:15:51
7
8
MASCHERAMENTO DEL SENSORE DELL'AREA DISTANTE
Modelli
SIP-5030
SIP-100
8-1
Attenzione>>
• La finestra è collegata all'unità principale mediante un
cappio in nylon, in modo da non cadere. Non tirare
eccessivamente la finestra.
• Dopo avere mascherato le aree di rilevamento, montare
la finestra e inserire il cappio di nylon in eccesso
nell'unità principale.
MASCHERAMENTO DEL SENSORE DELL'AREA VICINA
Mascheramento delle aree di rilevamento
con le placche di mascheramento
Modelli
SIP-5030
SIP-100
Lo specchio di area vicina montato nell'unità principale dispone di
due placche di mascheramento vicino; una a destra e una a sinistra
dello specchio. È possibile mascherare l'area di rilevamento
modificando la posizione di tali placche di mascheramento.
Come rimuovere la finestra>>
Attenzione>>
È possibile mascherare solo le aree di rilevamento
esterne, vale a dire le aree 1 e 6. Utilizzare i contrassegni
di mascheramento di area (accessori) per mascherare le
altre aree di rilevamento (vedere il punto 8-2).
Finestra
1Estrarre la placca
di mascheramento
dall'alloggiamento e verificare
l'area di rilevamento e lo
specchio facendo riferimento
al diagramma di area.
Premere il foro inferiore sinistro con il
dito e sollevare la finestra.
2Applicare la placca di mascheramento sullo
specchio e fissarla ai fermi.
Utilizzando le pinzette (accessorie), applicare con cura i contrassegni
di mascheramento di area (accessori) allo specchio di area vicina.
Fermi
Fermi
Contrassegni di
mascheramento di area
SPECCHIO
Specchio per area
distante
6
4
2
5
3 1
3 Inserire il fermo in gomma per bloccare la
protuberanza della placca di mascheramento
Specchio per area vicina
50
15
40
50
15
30
10
20
5
10
0
0
10
5
30
40
10
20
40
30
10
20
10
0
0
5
10
20
5
1
3
3
4
5
Se rami di alberi o altri oggetti in
movimento si trovano nell'area del raggio
di rilevamento.
10
2
50 [ft.]
15 [m]
6
2
8
40
10
50 [ft.]
15 [m]
1
7
30
9
4
5
6
- 44 -
REDWALL-V_SIP-5030_100_IT.indd
44
2009/03/30
16:15:56
9
8-2
Utilizzando le pinzette (accessorie), applicare con cura i
contrassegni di mascheramento di area (accessori) allo
specchio dell'area distante.
F
E
D
C
F6
(1)
SIP-5030
SIP-100
Dopo avere regolato tutti gli elementi del sensore, bloccare
tutte le viti di regolazione che sono state allentate. Infine
bloccare le viti di fissaggio inferiori.
Contrassegni di mascheramento di area
SPECCHIO
Specchio per
area vicina
E6
Modelli
6 4 2
5 3 1
F6 F4 F 2
E6 E4 E 2
D6 D4 D 2
C6 C 4 C 2
F 5 F3 F 1
E 5 E3 E 1
ENGLISH
Mascheramento delle aree di rilevamento
con i contrassegni di mascheramento
PROCEDURA FINALE
D5 D3 D 1
C5 C3 C1
B B6 B4 B 2 B5 B3 B1
40
15
30
20
10
10
0
5
10
20
0
30
5
40
10
1 Vite di regolazione
2 Vite di fissaggio
50[ft.]
15 [m]
F
Attenzione>>
E
• Se è necessario regolare nuovamente l'area di
rilevamento, assicurarsi di allentare la vite di fissaggio.
Se si cerca di spostare l'unità principale senza allentare
la vite di fissaggio, l'unità può essere danneggiata.
• Quando si monta il coperchio, inserire il cappio di nylon
in eccesso nell'unità principale. Se il filo è stato pinzato
tra la finestra e il coperchio, è possibile che entri pioggia
nell'unità principale.
D
C
DEUTSCH
B
6
1
2
5
4
3
FRANÇAIS
50
[ft.] [m]
13 4
10
2
0
00
0
10
20
F
30
E
10
D
40
50
60
C
20
70
80
90
30 [m]
100 [ft.]
B
ITALIANO
ESPAÑOL
- 45 -
REDWALL-V_SIP-5030_100_IT.indd
45
2009/03/30
16:15:58
10
TEST DI FUNZIONAMENTO
10-1 Se è presente una strada pubblica in cui camminano
persone o passano auto nell'area di rilevamento
10-2 Se vengono rilevati rami o erba
quando si muovono nell'area di rilevamento
Importante>>
Importante>>
Regolare l'area di rilevamento in modo che non copra
rami o erba in movimento con il vento.
Ridurre le dimensioni dell'area di rilevamento in modo che
non comprenda strade pubbliche.
(1)
Verificare che la freccia dell'unità principale si trovi entro
l'ampiezza della "Guida di regolazione dell'angolo" sulla vite
di regolazione.
(2)
Utilizzando il mirino di area, verificare che l'area di
rilevamento non comprenda strade pubbliche.
(3)
Se l'area di rilevamento va oltre una strada pubblica,
correggere l'angolo verticale dell'unità principale.
Tuttavia, prestare attenzione a che la freccia non si sposti
significativamente dalla pozione di "Guida di regolazione di
angolo".
Verificare che la freccia dell'unità principale si trovi entro
l'ampiezza della "Guida di regolazione dell'angolo" sulla vite
di regolazione.
(2)
Utilizzando il mirino di area, verificare che l'area di
rilevamento non copra rami o erba che si possono muovere
con il vento.
(3)
Utilizzare il walk tester per ascoltare cambiamenti nel livello
sonoro quando apparentemente non sono presenti attività
nell'area di rilevamento.
Regolare l'area di rilevamento in modo che non vengano
rilevate aree indesiderate.
Se la freccia si sposta significativamente dalla
posizione "Guida di regolazione di angolo":
Mascherare l'area di rilevamento dell'area distante
utilizzando la placca di mascheramento per il SIP-5030.
Può essere necessario mascherare anche l'area di
rilevamento di area vicina, in particolari condizioni di
installazione di sensore (vedere il punto 8).
Non si può mascherare né l'area distante né quella vicina
per il SIP-100.
(4)
(1)
Se il livello sonoro cambia, una parte dell'area di
rilevamento deve essere attiva (vale a dire che un oggetto è
in movimento).
Quando una persona cammina sulla strada o passa
un'auto, verificare l'area di rilevamento utilizzando il walk
tester.
(4)
Utilizzare il walk tester e individuare la parte dell'area di
rilevamento attiva. Cambiare la posizione del selettore
di walk tester e determinare se la parte attiva dell'area di
rilevamento è area distante, vicina o creep zone.
(5)
Utilizzando nuovamente il mirino di area, individuare l'area
di rilevamento attiva.
(6)
Mascherare l'area di rilevamento attiva. Mascherare l'area
di rilevamento dell'area distante utilizzando la placca di
mascheramento per il SIP-5030. Può essere necessario
anche mascherare l'area di rilevamento dell'area vicina
usando utilizzando la placca di mascheramento o il
contrassegno di mascheramento (vedere il punto 8).
L'area distante, l'area vicina e le creep zone non possono
essere mascherate per il SIP-100. Regolare l'area di
rilevamento per l'area che non può essere mascherata.
Importante>>
Non è possibile montare e utilizzare contemporaneamente
il mirino di area e il walk tester.
Attenzione>>
L'area di rilevamento può aumentare se è presente una
forte differenza di temperatura tra l'oggetto in movimento
e lo sfondo.
(7)
Utilizzando nuovamente il walk tester, verificare che
cambi il livello sonoro. Se il livello sonoro non cambia
eccessivamente, è possibile terminare la regolazione.
Importante>>
Non è possibile montare e utilizzare contemporaneamente
il mirino di area e il walk tester.
Attenzione>>
Una fonte di calore oltre l'area di rilevamento può causare
un falso allarme dovuto alla riflessione del calore sul
suolo.
Tra gli esempi di superfici riflettenti si trovano acqua
(pozzanghere), strade bagnate, superfici in cemento liscio
e strade asfaltate.
Se la fonte di calore è forte e/o il tasso di riflessione è alto,
la distanza di rilevamento è maggiore del necessario e
può rilevare oggetti non importanti oltre l'area desiderata.
Di conseguenza, selezionare la posizione dell'intervallo
di rilevamento secondo le condizioni del suolo del sito di
installazione.
- 46 -
REDWALL-V_SIP-5030_100_IT.indd
46
2009/03/30
16:16:41
11
12
STATO LED
Modelli
SIP-5030
SIP-100
Modelli
Modello
Se il LED rosso continua a
lampeggiare per circa 60 secondi
dopo l'accensione dell'alimentazione,
spegnere e riaccendere il dispositivo.
Metodo di
rilevamento
Copertura
(Area principale)
Far area
Alarm Creep
Indicatore di funzionamento nella creep zone - LED rosso
Indicatore di funzionamento nell'area vicina/distante - LED rosso
Stato LED
Quando l'alimentazione è ON
Lampeggia.
In standby
Si spegne.
Durante un rilevamento (nell'area vicina/distante)
Si accende.
Durante un rilevamento (nella creep zone)
Si accende.
Modelli
SIP-5030
Area
Numero principale
di zone di
Creep
rilevamento
zone
SIP-100
Se il LED rosso continua a
lampeggiare per circa 60 secondi
dopo l'accensione dell'alimentazione,
spegnere e riaccendere il dispositivo.
Far area
Far Near Creep
Indicatore di funzionamento nella creep zone - LED rosso
Indicatore di funzionamento nell'area vicina - LED rosso
Indicatore di funzionamento nell'area distante - LED rosso
SIP-5030
SIP-100
A infrarossi passivo
50 x 30 m
100 x 3 m
(164 x 100 ft.)
(330 x 10 ft.)
3 x 5 m (10 x 17 ft.) ad altezza di 2,3 m (7,6 ft.)
6 x 9 m (20 x 30 ft.) ad altezza di 4 m (13 ft.)
Angolo di rilevamento regolabile
100 zone
28 zone
36 zone
Altezza di montaggio
da 2,3 a 4 m (da 7,6 a 13 ft.)
Ingresso
alimentazione
11 - 16 Vcc
22 - 26 Vca
Assorbimento
40 mA max. (12 Vcc) 45 mA max. (12 Vcc)
75 mA max. (24 Vca) 80 mA max. (24 Vca)
Allarme
distante
Allarme
Indicatore
vicino
Allarme
Creep zone
Attenzione>>
SIP-100
Copertura
(Creep zone)
SIP-100
LED rosso
LED rosso
LED rosso
LED rosso
Periodo d'allarme
Circa 2 sec.
Tempo di avviamento
Circa 60 sec.
Stato LED
Numero di uscite del
selettore
Quando l'alimentazione è ON
Lampeggia.
Intervallo di allarme
Off / 15 / 30 / 60 sec.
In standby
Si spegne.
Durante un rilevamento (nell'area distante)
Si accende.
Selettore di logica di
rilevamento
E/O
Durante un rilevamento (nell'area vicina)
Si accende.
Uscita manomissione
N.C. 28 Vcc, 0,1 A max.
Durante un rilevamento (nella creep zone)
Si accende.
Uscita di guasto
N.C. 28 Vcc, 0,2 A max.
Uscita
allarme
Area
vicina
Dip switch: 2 / 3
N.C. 28 Vcc, 0,2 A max.
N.C. 28 Vcc, 0,2 A max. N.A. 28 Vcc, 0,2 A max.
N.A. 28 Vcc, 0,2 A max. N.C. 28 Vcc, 0,2 A max.
N.A. 28 Vcc, 0,2 A max.
N.C. 28 Vcc, 0,2 A max.
N.A. 28 Vcc, 0,2 A max.
Distante: SH/H/M/L Vicino: SH/H/M/L
Creep zone: SH/H/M/L
da -25 a +60°C (da -13 a +140°F)
da -40 a +60°C (da -40 a +140°F)
Classificazione IP
Unità principale: IP65
Chassis
: IP55
Dimensioni
(A × L × P)
271 x 102 x 290 mm
(10,7 x 4,0 x 11,4 in.)
Peso
1,6 kg (56,4 oz.)
Viti,
modello in carta,
chiave Allen,
contrassegno di
mascheramento
dell'area,
pinzette,
manuale di istruzioni,
placca di area,
gommino di fissaggio
Viti,
modello in carta,
chiave Allen,
manuale di
istruzioni,
placca di area
ESPAÑOL
Accessori
ITALIANO
Creep
zone
Selettore di
sensibilità
Senza unità di
riscaldamento
Temperatura di opzionale
funzionamento Con unità di
riscaldamento
opzionale
-
DEUTSCH
Stato rilevatore
Area
distante
FRANÇAIS
Stato rilevatore
SIP-5030
ENGLISH
Attenzione>>
SIP-5030
SPECIFICHE
- 47 -
REDWALL-V_SIP-5030_100_IT.indd
47
2009/03/30
16:16:45
OPZION
DIMENSIONI
SIP-5030, 100
•
•
•
•
23
(0,9)
290
(11,4)
OPM-WT
AVF-1
SIP-MINIHOOD
SIP-HU
-Walk tester audio
-Mirino di area
-Schermo sole/neve
-Unità di riscaldamento
Queste unità sono progettate per rilevare movimenti per
l'attivazione di un sistema CCTV. Essendo solo una parte di
un sistema di sorveglianza completo, non possiamo accettare
responsabilità per danni o altre conseguenze derivanti
dall'attivazione dell'unità.
Questo prodotto è conforme alla Direttiva EMC 2004/108/EC.
248
(9,8)
102
(4,0)
Le specifiche e il design sono soggetti a cambiamenti senza
preavviso.
116
(4,57)
21
(0,83)
13
(0,51)
96
(3,78)
75
(3,0)
21
(0,83)
17,1
(0,67)
90
(3,6)
Unità:mm (pollici)
OPTEX CO., LTD. (JAPAN)
(ISO 9001 Certified) (ISO 14001 Certified)
5-8-12 Ogoto Otsu Shiga 520-0101 JAPAN
TEL:+81-77-579-8670 FAX:+81-77-579-8190
URL:http://www.optex.co.jp/e/
OPTEX INCORPORATED (USA)
OPTEX SECURITY SAS (FRANCE)
OPTEX (EUROPE) LTD. (UK)
OPTEX SECURITY Sp.z o.o.
(POLAND)
TEL:+1-909-993-5770
Tech:(800)966-7839
URL:http://www.optexamerica.com
TEL:+44-1628-631000
URL:http://www.optex-europe.com
- 48 -
REDWALL-V_SIP-5030_100_IT.indd
48
TEL:+33-437-55-50-50
URL:http://www.optex-security.com
TEL:+48-22-598-06-55
URL:http://www.optex.com.pl
2009/03/30
16:16:46
2
INSTRUCCIONES DE INSTALACIÓN
NOTAS DE INSTALACIÓN Y MANTENIMIENTO
Advertencia
Serie REDWALL-V
FUNCIONES
Nunca repare o modifique
el producto
Lazo de hilo
de nylon
Sujete la unidad
principal fuertemente
cuando instale o
realice tareas de
mantenimiento.
Si retira las manos
de la unidad principal
cuando los cables
están conectados, la
unidad principal puede
caer y romper los
cables de conexión,
así como dañarse la
placa de circuitos.
Precaución
Verifique que la
alimentación está
desconectada antes
de conectar los
cables.
Cuando se realicen tareas
de mantenimiento, es posible
enganchar el sensor sobre la
base empleando el lazo de hilo
de nylon.
FRANÇAIS
* Sistema de detección PIR inteligente
- Detección de temperatura ambiente e iluminancia para una
gestión de sensibilidad automática
- Algoritmo de detección avanzada
- Piro elementos dobles duales/cuádruples con apantallamiento
conductivo doble patentado para la zona principal
* Detector de zona de arrastre (piro elementos dobles duales)
* Funciones antivandalismo
- Función antirrotación con acelerómetro de 3 ejes
- Función antienmascarami