1
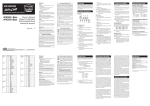
Precautions Location Using the unit in the following locations can result in a malfunction. • In direct sunlight • Locations of extreme temperature or humidity • Excessively dusty or dirty locations • Locations of excessive vibration • Close to magnetic fields Power supply Please connect the designated AC adapter to an AC outlet of the correct voltage. Do not connect it to an AC outlet of voltage other than that for which your unit is intended. Interference with other electrical devices Radios and televisions placed nearby may experience reception interference. Operate this unit at a suitable distance from radios and televisions. Handling To avoid breakage, do not apply excessive force to the switches or controls. Care www.voxamps.com 2010 VOX AMPLIFICATION LTD. If the exterior becomes dirty, wipe it with a clean, dry cloth. Do not use liquid cleaners such as benzene or thinner, or cleaning compounds or flammable polishes. Keep this manual After reading this manual, please keep it for later reference. Keeping foreign matter out of your equipment GENRE 8 BEAT 16 BEAT TRIPLET IRREGULAR VARIATION 1 2 3 4 5 6 1 2 3 4 5 6 1 2 3 4 5 6 1 2 3 4 5 6 Name 8 Beat 1 8 Beat 2 8 Beat 3 8 Beat Shuffle 1 8 Beat Shuffle 2 8 Beat Shuffle 3 16 Beat 1 16 Beat 2 16 Beat 3 16 Beat Swing 1 16 Beat Swing 2 16 Beat Swing 3 3/4 1 3/4 2 3/4 3 3/4 Shuffle 3/4 Swing 1 3/4 Swing 2 5/4 6/4 7/4 5/8 6/8 7/8 GENRE ROCK/ METAL VARIATION 1 2 3 4 5 6 BLUES 1 2 3 4 5 6 JAZZ/ 1 2 FUNK 3 4 5 6 COUNTRY 1 2 3 4 5 6 Name Rock 1 Rock 2 Rock 3 Metal 1 Metal 2 Metal 3 Blues 8 Beat Blues Blues Shuffle Motown 1 Motown 2 Motown 3 Jazz 1 Jazz 2 Jazz 3 Funk 1 Funk 2 Funk 3 Country Country Shuffle 1 Country Shuffle 2 Bossa Nova Surf Ondo GENRE REGGAE DANCE SONGS VARIATION 1 2 3 4 5 6 1 2 3 4 5 6 1 2 3 4 5 6 Name Reggae 1 Reggae 2 Reggae 3 Afro 1 Afro 2 Afro 3 Disco 1 Disco 2 Disco 3 House 1 House 2 House 3 Song 1 Song 2 Song 3 Song 4 Song 5 Song 6 Never set any container with liquid in it near this equipment. If liquid gets into the equipment, it could cause a breakdown, fire, or electrical shock. Be careful not to let metal objects get into the equipment. If something does slip into the equipment, unplug the AC adapter from the wall outlet. Then contact your nearest VOX dealer or the store where the equipment was purchased. IMPORTANT NOTICE TO CONSUMERS This product has been manufactured according to strict specifications and voltage requirements that are applicable in the country in which it is intended that this product should be used. If you have purchased this product via the internet, through mail order, and/or via a telephone sale, you must verify that this product is intended to be used in the country in which you reside. WARNING: Use of this product in any country other than that for which it is intended could be dangerous and could invalidate the manufacturer’s or distributor’s warranty. Please also retain your receipt as proof of purchase otherwise your product may be disqualified from the manufacturer’s or distributor’s warranty. THE FCC REGULATION WARNING (for USA) This equipment has been tested and found to comply with the limits for a Class B digital device, pursuant to Part 15 of the FCC Rules. These limits are designed to provide reasonable protection against harmful interference in a residential installation. This equipment generates, uses, and can radiate radio frequency energy and, if not installed and used in accordance with the instructions, may cause harmful interference to radio communications. However, there is no guarantee that interference will not occur in a particular installation. If this equipment does cause harmful interference to radio or television reception, which can be determined by turning the equipment off and on, the user is encouraged to try to correct the interference by one or more of the following measures: Reorient or relocate the receiving antenna. Increase the separation between the equipment and receiver. Connect the equipment into an outlet on a circuit different from that to which the receiver is connected. Consult the dealer or an experienced radio/TV technician for help. Unauthorized changes or modification to this system can void the user’s authority to operate this equipment. Notice regarding disposal (EU only) When this “crossed-out wheeled bin” symbol is displayed on the product, owner’s manual, battery, or battery package, it signifies that when you wish to dispose of this product, manual, package or battery you must do so in an approved manner. Do not discard this product, manual, package or battery along with ordinary household waste. Disposing in the correct manner will prevent harm to human health and potential damage to the environment. Since the correct method of disposal will depend on the applicable laws and regulations in your locality, please contact your local administrative body for details. If the battery contains heavy metals in excess of the regulated amount, a chemical symbol is displayed below the “crossed-out wheeled bin” symbol on the battery or battery package. * All product names and company names are the trademarks or registered trademarks of their respective owners. Introduction Thank you for purchasing the VOX AC1 Rhythm VOX Mini Guitar Amplifier with Rhythm. To enjoy your AC1 Rhythm VOX to its fullest potential, please read this manual carefully and use the AC1 Rhythm VOX only as directed. Part Names and Functions Top panel 1 2 3 4 5 6 7 12.START/STOP button Starts or stops playback of the rhythm pattern. Side panel 1. PHONES jack 1 Connect the headphones here. Note:If you connect the headphones to 2 this jack, the internal speaker will be muted. 3 Note:Be sure to connect a pair of stereo headphones. If you connect mono ones there will be no sound. 2. STANDBY switch Turns the power to the unit on and off. When the power is turned on, the POWER indicator on the top panel will light up. 3. DC-9V IN jack Connect a separately-sold AC adapter here. 8 9 Using the Tuner 11.LEVEL knob Controls the volume level of the rhythm pattern. 10 11 12 Amplifier section 1. INPUT jack Plug in your guitar here. 2. POWER indicator The indicator lights up when the power to the unit is turned on. 3. OVERDRIVE switch Set the switch to CLEAN to get a clean sound, and to OVERDRIVE to get a high-gain sound. 4. GAIN knob Controls the pre-amp gain. 5. TONE knob Controls the tonal color of the amplifier. 6. VOLUME knob Controls the level of the amplifier volume. 7. AUX IN jack Connect your CD or MP3 player here. This is great if you want to jam along to your favourite music. Rhythm section 8. GENRE selector Enables you to select the genre for a rhythm pattern. 9. VARIATION/TUNER button and indicator You can select one of six variations for each genre. (“Using the Rhythm Section”) 10.TEMPO knob Controls the tempo of the rhythm pattern. Setting Up Your Amplifier This section explains the basic setup procedure for your amplifier. Note:This manual includes safety precautions and an explanation of the parts and functions of the amplifier. Please read this manual throughly. 1. Set the VOLUME knob and LEVEL knob on the AC1RV to minimum. 2. Insert batteries into the battery compartment. Alternatively, connect a separately-sold AC adapter to the DC9V IN jack on the side panel, then insert the plug on the other end of the AC adapter into an appropriate AC outlet. 3. Plug your guitar into the INPUT jack on the top panel. If you plan to use a CD or MP3 player, connect the player to the AUX IN jack on the top panel. 4. Set the STANDBY switch to ON to power on the amplifier. 5. Turn up the VOLUME knob slowly to adjust the volume level. Use the LEVEL knob to adjust the rhythm pattern volume. Note:Some guitars or certain settings on the amp may generate feedback. In such cases, turn down the VOLUME knob. Inserting batteries Remove the battery compartment cover from the rear of the cabinet. Insert six AA batteries in the correct orientation as shown in the figure below. Note:Be sure to insert batteries in the correct orientation. Replacing the batteries If the POWER indicator becomes dim, replace the batteries with new ones. Note:The sound may become noisy if the battery power is low. Note:Remove exhausted batteries immediately. Otherwise, a malfunction may occur, or the batteries may leak liquid. Also, remove the batteries if you plan not to use the amplifier for a long period of time. Note:Batteries are included primarily for the purpose of checking amp operation. However, the life of the included batteries may be short. The tuner function on the AC1RV enables you to tune a guitar you connect to the INPUT jack. The tuner will recognize the pitch of an input sound and will light up LEDs indicating the pitch relative to “E.” 1. Press and hold down the VARIATION/TUNER button for a second or longer. The rhythm pattern playback will stop and the tuner function is engaged. Indication during tuner mode (when no valid signal is input) 2. Play the open 6th string. Note:Be careful not to play other strings accidentally. 3. Tune the string so that only the middle indicator lights up green. Very sharp Slightly sharp In tune Slightly flat Using the Rhythm Section Very flat Selecting a rhythm pattern Select a genre for each rhythm pattern using the GENRE selector. The SONGS genre features rhythms based on popular songs. Select a rhythm variation using the VARIATION/TUNER button. One of three VARIATION/TUNER indicators lights up green or red in the following sequence each time you press the button. Green Red VARIATION 4 VARIATION 1 VARIATION 2 VARIATION 3 VARIATION 5 VARIATION 6 Starting and stopping the playback of a rhythm pattern Press the START/STOP button to start or stop playing a rhythm pattern. During playback, the VARIATION/TUNER indicator that corresponds to the selected rhythm pattern will flash in sync with the tempo. Adjusting the volume of a rhythm pattern Use the LEVEL knob to adjust the volume of a rhythm pattern. Changing the tempo of a rhythm pattern Use the TEMPO knob to change the tempo in the range from 40 to 240bpm. Tip: If you selected the SONGS genre, the alreadyprogrammed tempo will be used. Tip: The tuner can recognize an E note at higher or lower octaves. You can also use the tuner to tune to harmonics, or to tune other instruments, such as a bass guitar. 4. Press the VARIATION/TUNER button again to complete tuning. Tip: After you tune the 6th string, tune the other strings using the 6th string as a reference. Specifications Number of Rhythm Patterns: 66 (including 6 song patterns) Tempo Range: 40–240bpm I/O Jacks: INPUT jack x 1, AUX IN jack x 1, PHONES jack x 1 Output Power: Maximum approx. 1W, RMS into 8 Ohms Speakers: 3-inch, 4 Ohms x 2 Power Source: AA batteries (R6/LR6) x 6; or, optional AC adapter Battery Life: Max. 26 hours (alkaline batteries) Current Consumption: 55mA Dimensions (W x D x H): 170 x 67 x 128mm / 6.69 x 2.64 x 5.04 inches Weight: 508g / 1.12 lbs. (without batteries) Accessories: AA batteries (R6) x 6 ) Optional Item: AC adapter (DC 9V * Specifications and appearance are subject to change without notice for improvement. Précautions Règle le timbre de l’amplificateur. Emplacement L’utilisation de cet instrument dans les endroits suivants peut en entraîner le mauvais fonctionnement. • En plein soleil • Endroits très chauds ou très humides • Endroits sales ou fort poussiéreux • Endroits soumis à de fortes vibrations • A proximité de champs magnétiques Alimentation Branchez l’adaptateur secteur mentionné à une prise secteur de tension appropriée. Evitez de brancher l’adaptateur à une prise de courant dont la tension ne correspond pas à celle pour laquelle l’appareil est conçu. Interférences avec d’autres appareils électriques Les postes de radio et de télévision situés à proximité peuvent par conséquent souffrir d’interférences à la réception. Veuillez dès lors faire fonctionner cet appareil à une distance raisonnable de postes de radio et de télévision. Maniement Pour éviter de les endommager, manipulez les commandes et les boutons de cet instrument avec soin. Entretien Lorsque l’instrument se salit, nettoyez-le avec un chiffon propre et sec. Ne vous servez pas d’agents de nettoyage liquides tels que du benzène ou du diluant, voire des produits inflammables. Conservez ce manuel Après avoir lu ce manuel, veuillez le conserver soigneusement pour toute référence ultérieure. Evitez toute intrusion d’objets ou de liquide Ne placez jamais de récipient contenant du liquide près de l’instrument. Si le liquide se renverse ou coule, il risque de provoquer des dommages, un court-circuit ou une électrocution. Veillez à ne pas laisser tomber des objets métalliques dans le boîtier (trombones, par ex.). Si cela se produit, débranchez l’alimentation de la prise de courant et contactez votre revendeur VOX le plus proche ou la surface où vous avez acheté l’instrument. Note concernant les dispositions (Seulement EU) Quand un symbole avec une poubelle barrée d’une croix apparait sur le produit, le mode d’emploi, les piles ou le pack de piles, cela signifie que ce produit, manuel ou piles doit être déposé chez un représentant compétent, et non pas dans une poubelle ou toute autre déchetterie conventionnelle. Disposer de cette manière, de prévenir les dommages pour la santé humaine et les dommages potentiels pour l'environnement. La bonne méthode d'élimination dépendra des lois et règlements applicables dans votre localité, s’il vous plaît, contactez votre organisme administratif pour plus de détails. Si la pile contient des métaux lourds au-delà du seuil réglementé, un symbole chimique est affiché en dessous du symbole de la poubelle barrée d’une croix sur la pile ou le pack de piles. REMARQUE IMPORTANTE POUR LES CLIENTS Ce produit a été fabriqué suivant des spécifications sévères et des besoins en tension applicables dans le pays où ce produit doit être utilisé. Si vous avez acheté ce produit via l’internet, par vente par correspondance ou/et vente par téléphone, vous devez vérifier que ce produit est bien utilisable dans le pays où vous résidez. ATTENTION: L’utilisation de ce produit dans un pays autre que celui pour lequel il a été conçu peut être dangereuse et annulera la garantie du fabricant ou du distributeur. Conservez bien votre récépissé qui est la preuve de votre achat, faute de quoi votre produit ne risque de ne plus être couvert par la garantie du fabricant ou du distributeur. * Tous les noms de produits et de sociétés sont des marques commerciales ou déposées de leur détenteur respectif. Introduction Nous vous remercions d’avoir opté pour le mini amplificateur de guitare avec accompagnement rythmique VOX AC1 Rhythm VOX. Afin de pouvoir exploiter au mieux toutes les fonctions de l’AC1 Rhythm VOX, veuillez lire attentivement ce manuel et utiliser l’AC1 Rhythm VOX de la manière préconisée. Noms des éléments et fonctions 2 3 8 4 9 5 10 6 11 7 12 Section amplificateur 1. Prise INPUT Branchez-y votre guitare. 2. Témoin POWER Le témoin s’allume lorsque l’amplificateur est sous tension. 3. Commutateur OVERDRIVE Réglez le commutateur sur CLEAN pour obtenir un son clair ou sur OVERDRIVE pour obtenir un son saturé. 4. Commande GAIN Règle le gain du préampli. 5. Commande TONE 7. Prise AUX IN Vous pouvez y brancher un lecteur CD ou MP3. Cela vous permet d’improviser sur vos morceaux favoris. Section rythmique 8. Sélecteur GENRE Ce sélecteur permet de choisir un genre de motif rythmique. 9. Bouton et témoin VARIATION/TUNER Vous avez le choix entre six variations pour chaque genre. ( “Utilisation de la section rythmique”) 10.Commande TEMPO Détermine le tempo du motif rythmique. 11.Commande LEVEL Détermine le volume du motif rythmique. 12.Bouton START/STOP Lance/arrête le motif rythmique. Régler le volume du motif rythmique Utilisez la commande LEVEL pour régler le volume du motif rythmique. Changer le tempo du motif rythmique Utilisez la commande TEMPO pour changer le tempo sur la plage 40~240bpm. Astuce: Si vous avez sélectionné le genre SONGS, le tempo préprogrammé est utilisé. Utiliser l’accordeur L’accordeur interne du AC1RV permet d’accorder la guitare branchée à la prise INPUT. L’accordeur détecte la hauteur du signal d’entrée: les témoins s’allument pour indiquer cette hauteur par rapport à “E” (mi). 1. Maintenez le bouton VARIATION/TUNER enfoncé durant au moins une seconde. La reproduction du motif rythmique s’arrête et l’accordeur est activé. Indication en mode d’accordage (en l’absence d’un signal d’entrée reconnaissable) Panneau latéral 1. Prise PHONES 1 Vous pouvez y brancher un casque. Remarque: Quand vous branchez un 2 casque à cette prise, le haut-parleur interne est coupé. 3 Remarque: Branchez un casque stéréo. Si vous branchez un casque mono, vous n’entendrez rien. 2. Pincez la 6ème corde à vide. Remarque: Veillez à ne pas toucher d’autres cordes par inadvertance. 3. Accordez la corde jusqu’à ce que seul le témoin central s’allume en vert. Nettement trop haut Légèrement trop haut 2. Commutateur STANDBY Met l’appareil sous/hors tension. Quand l’appareil est sous tension, le témoin POWER situé sur le panneau avant s’allume. 3. Prise DC-9V IN Branchez l’adaptateur secteur disponible séparément à cette prise. Installation de votre amplificateur Cette section décrit une installation de base intégrant l’amplificateur. Remarque: Ce manuel comprend des consignes de sécurité ainsi qu’une description des différents éléments et fonctions de l’amplificateur. Veuillez lire ce manuel entièrement. 1. Réglez les commandes VOLUME et LEVEL de l’AC1RV au minimum. 2. Insérez les piles dans le compartiment à piles. Vous pouvez aussi brancher un adaptateur secteur vendu séparément à la prise DC9V IN en face arrière puis brancher la fiche à l’autre extrémité de l’adaptateur à une prise de courant. 3. Branchez votre guitare à la prise INPUT en face avant. Si vous voulez utiliser un lecteur CD ou MP3, branchez le lecteur à la prise AUX IN sur le panneau avant. 4. Réglez le commutateur STANDBY sur “ON” pour mettre l’amplificateur sous tension. 5. Augmentez doucement le réglage de la commande VOLUME. Utilisez la commande LEVEL pour régler le volume du motif rythmique. Remarque: Certaines guitares ou certains réglages de l’ampli peuvent générer un effet larsen. Dans ce cas, diminuez le réglage de la commande VOLUME. Juste Légèrement trop bas Nettement trop bas Astuce: L’accordeur peut reconnaître un mi (“E”) à différentes octaves. Vous pouvez donc aussi accorder l’instrument avec les harmoniques ou accorder d’autres instruments comme une guitare basse. 4. Appuyez à nouveau sur le bouton VARIATION/TUNER pour clôturer l’accordage. Astuce: Quand vous avez accordé la 6ème corde, accordez les autres cordes en utilisant la 6ème corde comme référence. Fiche technique Nombre de motifs rythmiques: 66 (dont 6 motifs de morceaux) Plage de réglage du tempo: 40~240bpm Entrées/sorties: Prise INPUT x 1, Prise AUX IN x 1, Prise PHONES x1 Puissance de sortie: Maximum environ 1W, RMS sous 8Ω Haut-parleurs: 3”, 4Ω x 2 Alimentation: Piles AA (R6/LR6) x 6 ou adaptateur secteur en option (DC 9V) Autonomie des piles: Max. 26 heures (piles alcalines) Consommation électrique: 55mA Dimensions (L x P x H): 170 x 67 x 128mm Poids: 508g (sans les piles) Accessoires: Piles AA (R6) x 6 ) Option: Adaptateur secteur (DC 9V Retirez le couvercle du compartiment à piles à l’arrière de l’enceinte. Insérez six piles AA en les orientant convenablement (voyez l’illustration ci-dessous). Remarque: Veillez à insérer les piles en les orientant correctement. Utilisation de la section rythmique Sélection d’un motif rythmique Sélectionnez un genre de motif rythmique avec le sélecteur GENRE. Le genre SONGS propose des rythmes basés sur des morceaux populaires. Utilisez le bouton VARIATION/TUNER pour choisir une variation de rythme. Un des trois témoins VARIATION/ TUNER s’allume en vert ou en rouge selon la séquence suivante chaque fois que vous appuyez sur le bouton. Vert VARIATION 1 Rouge VARIATION 4 VARIATION 2 VARIATION 5 VARIATION 3 VARIATION 6 Lancer/arrêter un motif rythmique Appuyez sur le bouton START/STOP pour lancer ou arrêter un motif rythmique. Durant la lecture, le témoin VARIATION/TUNER corres- Wenn Sie das Symbol mit der „durchgekreuzten Mülltonne“ auf Ihrem Produkt, der dazugehörigen Bedienungsanleitung, der Batterie oder dem Batteriefach sehen, müssen Sie das Produkt in der vorgeschriebenen Art und Weise entsorgen. Dies bedeutet, dass dieses Produkt mit elektrischen und elektronischen Komponenten nicht mit dem normalen Hausmüll entsorgt werden darf. Für Produkte dieser Art existiert ein separates, gesetzlich festgelegtes Entsorgungssystem. Gebrauchte elektrische und elektronische Geräte müssen separat entsorgt werden, um ein umweltgerechtes Recycling sicherzustellen. Diese Produkte müssen bei benannten Sammelstellen abgegeben werden. Die Entsorgung ist für den Endverbraucher kostenfrei! Bitte erkundigen sie sich bei ihrer zuständigen Behörde, wo sie diese Produkte zur fachgerechten Entsorgung abgeben können. Falls ihr Produkt mit Batterien oder Akkumulatoren ausgerüstet ist, müssen sie diese vor Abgabe des Produktes entfernen und separat entsorgen (siehe oben). Die Abgabe dieses Produktes bei einer zuständigen Stelle hilft ihnen, dass das Produkt umweltgerecht entsorgt wird. Damit leisten sie persönlich einen nicht unerheblichen Beitrag zum Schutz der Umwelt und der menschlichen Gesundheit vor möglichen negativen Effekten durch unsachgemäße Entsorgung von Müll. Batterien oder Akkus, die Schadstoffe enthalten, sind auch mit dem Symbol einer durchgekreuzten Mülltonne gekennzeichnet. In der Nähe zum Mülltonnensymbol befindet sich die chemische Bezeichnung des Schadstoffes. Cd oder NiCd steht für Cadmium, Pb für Blei und Hg für Quecksilber. WICHTIGER HINWEIS FÜR KUNDEN Dieses Produkt wurde unter strenger Beachtung von Spezifikationen und Spannungsanforderungen hergestellt, die im Bestimmungsland gelten. Wenn Sie dieses Produkt über das Internet, per Postversand und/oder mit telefonischer Bestellung gekauft haben, müssen Sie bestätigen, dass dieses Produkt für Ihr Wohngebiet ausgelegt ist. WARNUNG: Verwendung dieses Produkts in einem anderen Land als dem, für das es bestimmt ist, verwendet wird, kann gefährlich sein und die Garantie des Herstellers oder Importeurs hinfällig lassen werden. Bitte bewahren Sie diese Quittung als Kaufbeleg auf, da andernfalls das Produkt von der Garantie des Herstellers oder Importeurs ausgeschlossen werden kann. * Alle Produkt- und Firmennamen sind Warenzeichen oder eingetragene Warenzeichen der betreffenden Eigentümer. Vorweg Vielen Dank für Ihre Entscheidung zum VOX AC1 Rhythm VOX Minigitarrenverstärker mit Rhythmusfunktion. Um alle Funktionen des AC1 Rhythm VOX kennen zu lernen und über Jahre hinaus Freude daran zu haben, müssen Sie sich diese Bedienungsanleitung vollständig durchlesen. Bedienelemente und Funktionen 1 2 3 4 5 6 Aufstellungsort 9 10 11 12 1. INPUT-Buchse Hier müssen Sie Ihre Gitarre anschließen. 2. POWER-Diode Diese Diode leuchtet, wenn Sie das Gerät einschalten. 3. OVERDRIVE-Schalter Stellen Sie den Schalter auf „CLEAN“, wenn Sie einen unverzerrten Sound benötigen bzw. auf „OVERDRIVE“ für einen „High-Gain“-Sound. Stromversorgung 5. TONE-Regler Hiermit kann die Klangfarbe geändert werden. Störeinflüsse auf andere Elektrogeräte 4. GAIN-Regler Regelt die Pegelanhebung des Vorverstärkers. 6. VOLUME-Regler Hiermit regeln Sie die Lautstärke des Verstärkers. Aufstellen des Verstärkers Hier wird erklärt, wie man den Verstärker aufstellt. Anmerkung: Diese Bedienungsanleitung enthält eine Auflistung der Vorsichtsmaßnahmen und eine Vorstellung der Bedienelemente und Anschlüsse des Verstärkers. Bitte lesen Sie sich die Anleitung vollständig durch. 1. Stellen Sie den LEVEL- und VOLUME-Regler des AC1RV auf den Mindestwert. 2. Legen Sie Batterien in das Fach. Alternativ können Sie das eine Ende eines optionalen AC-Netzteils an die DC9V IN-Buchse auf der Seitenplatte und das andere Ende an eine geeignete Steckdose anschließen. 3. Verbinden Sie die Gitarre mit der INPUT-Buchse auf der Oberseite. Wenn Sie auch einen CD- oder MP3-Player verwenden möchten, müssen Sie ihn mit der AUX INBuchse auf der Oberseite verbinden. 4. Schieben Sie den STANDBY-Schalter in die „ON“Position. 5. Stellen Sie mit dem VOLUME-Regler die gewünschte Lautstärke ein. Stellen Sie mit dem LEVEL-Regler die Lautstärke der Rhythmusbegleitung ein. Anmerkung: Bei bestimmten Gitarren bzw. bei bestimmten Einstellungen könnte Rückkopplung auftreten. Verringern Sie dann die Einstellung des VOLUMEReglers. Entfernen Sie die Batteriefachblende an der Gehäuserückseite. Legen Sie sechs AA-Batterien auf die nachstehend gezeigte Art ein. Anmerkung: Achten Sie beim Einlegen der Batterien auf die Polarität. Wenn die POWER-Diode nur noch schwach leuchtet, müssen Sie die Batterien komplett ersetzen. Anmerkung: Bei einer geringen Batteriespannung tritt eventuell Rauschen auf. Anmerkung: Erschöpfte Batterien müssen sofor t entnommen werden. Sonst können die Batterien nämlich auslaufen und Funktionsstörungen verursachen. Entnehmen Sie die Batterien außerdem, wenn Sie den Verstärker längere Zeit nicht verwenden möchten. Anmerkung: Die zum Lieferumfang gehörigen Batterien sind nur für Testzwecke gedacht. Daher ist ihre Lebensdauer relativ begrenzt. Verwendung der Rhythmusfunktion Anwahl eines Rhythmus-Pattern Wählen Sie mit dem GENRE-Wahlschalter den gewünschten Rhythmustyp. Das „SONGS“-Genre enthält Rhythmusbegleitungen für bekannte Titel. Wählen Sie mit dem VARIATION/TUNER-Taster eine Rhythmusvariation. Eine der drei VARIATION/TUNERDioden leuchtet jetzt grün oder rot, um anzuzeigen, welche Variation momentan gewählt ist. Grün VARIATION 1 Rot VARIATION 5 VARIATION 3 VARIATION 6 Bedienung Rhythmus-Sektion Lautstärke der Rhythmusbegleitung Reinigung 8. GENRE-Wahlschalter Hiermit wählen Sie das Genre des gewünschten Rhythmus'. 9. VARIATION/TUNER-Taster und Diode Hiermit können Sie eine der 6 Variationen des aktuellen Genres wählen. („Verwendung der Rhythmusfunktion“) Ändern des Rhythmus-Tempos Bedienungsanleitung Bewahren Sie diese Bedienungsanleitung gut auf, falls Sie sie später noch einmal benötigen. Flüssigkeiten und Fremdkörper Stellen Sie niemals Behältnisse mit Flüssigkeiten in der Nähe des Geräts auf. Wenn Flüssigkeit in das Gerät gelangt, können Beschädigung des Geräts, Feuer oder ein elek-trischer Schlag die Folge sein. Beachten Sie, daß keinerlei Fremdkörper in das Gerät gelangen. Sollte ein Fremdkörper in das Gerät gelangt sein, so trennen Sie es sofort vom Netz. Wenden Sie sich dann an Ihren VOX-Fachhändler. 10.TEMPO-Regler Hiermit stellen Sie das Tempo der Rhythmusbegleitung ein. 11.LEVEL-Regler Hiermit bestimmen Sie die Lautstärke der Rhythmusbegleitung. 12.START/STOP-Taster Hiermit können Sie die Rhythmusbegleitung starten und anhalten. VARIATION 4 VARIATION 2 Dieser kann bei in der Nähe aufgestellten Rund-funkempfängern oder Fernsehgeräten Empfangsstörungen hervorrufen. Betreiben Sie solche Geräte nur in einem geeigneten Abstand von diesem Erzeugnis. Bei auftretender Verschmutzung können Sie das Gehäuse mit einem trockenen, sauberen Tuch abwischen. Verwenden Sie keinerlei Flüssigreiniger wie beispielsweise Reinigungsbenzin, Verdünnungs- oder Spülmittel. Verwenden Sie niemals brennbare Reiniger. Anzeige der Stimmung (wenn kein brauchbares Signal empfangen wird) 2. Schlagen Sie die offene 6. Saite an. Anmerkung: Es darf nur diese eine Saite angeschlagen werden. 3. Stimmen Sie die Saite so, dass nur die Diode in der Mitte grün leuchtet. Viel zu hoch Starten und Anhalten der Rhythmusbegeleitung Drücken Sie den START/STOP-Taster, um die Rhythmuswiedergabe zu starten oder anzuhalten. Während der Wiedergabe blinkt die VARIATION/TUNER-Diode der gewählten Variation im aktuellen Tempo. Stellen Sie mit dem LEVEL-Regler die Lautstärke der Rhythmusbegleitung ein. Mit dem TEMPO-Regler kann das Wiedergabetempo im Bereich 40–240BPM eingestellt werden. Tipp: Bei Anwahl des „SONGS“-Genres wird das jeweils vorprogrammierte Tempo verwendet. Verwendung der Stimmfunktion (Tuner) Der Tuner des AC1 Rhythm VOX erlaubt das Stimmen des Signals, das an der INPUT-Buchse anliegt. Der Tuner erkennt die Tonhöhe des Eingangssignals und zeigt mit Hilfe der Dioden die eventuelle Abweichung von der Note „E“ an. Introducción Insertar las baterías Gracias por adquirir el amplificador de guitarra mini con percusión AC1 Rhythm VOX de VOX. Para disfrutar al máximo del AC1 Rhythm VOX, lea este manual detenidamente y utilice el AC1 Rhythm VOX siguiendo las indicaciones. Panel superior 1 2 3 4 5 6 7 Sustituir las baterías Richtig gestimmt Etwas zu tief Viel zu tief Tipp: Die Stimmfunktion erkennt nur „E“-Noten, wobei die Oktave eine untergeordnete Rolle spielt. Sie eignet sich demnach auch zum Stimmen der Flageoletts oder anderer Instrumente wie eine Bassgitarre. 4. Drücken Sie den VARIATION/TUNER-Taster, um die Stimmfunktion zu deaktivieren. Tipp: Wenn die 6. Saite richtig gestimmt ist, können Sie sich zum Stimmen der übrigen Saiten an der 6. Saite orientieren. Technische Daten Anzahl der Rhythmus-Pattern: 66 (darunter 6 „Song“-Pattern) Tempo: 40–240BPM Ein- und Ausgänge: INPUT-Buchse x1, AUX IN-Buchse x1, PHONES-Buchse x1 Ausgangsleistung: Maximal ca. 1W RMS an 8Ω Lautsprecher: 3”, 4Ω x 2 Stromversorgung: AA-Batterien (R6/LR6) x6 oder optionales ACNetzteil (DC 9V) Batterielaufzeit: Max. 26 Stunden (Alkalibatterien) Stromverbrauch: 55mA Abmessungen (B x T x H): 170 x 67 x 128mm Gewicht: 508g (ohne Batterien) Lieferumfang: AA-Batterien (R6) x 6 ) Sonderzubehör: AC-Netzteil (DC 9V * Änderungen der technischen Daten und des Designs ohne vorherige Ankündigung vorbehalten. 8 9 10 11 12 Sección del amplificador 1. Jack INPUT Conecte aquí la guitarra. 2. Indicador POWER El indicador se ilumina cuando se activa la unidad. 3. Conmutador OVERDRIVE Ajuste el conmutador a “CLEAN” para conseguir un sonido nítido y a “OVERDRIVE” para un sonido de alto gain. 4. Mando GAIN Controla el gain del preamplificador. 5. Mando TONE Controla el color tonal del amplificador. 6. Mando VOLUME Controla el nivel de volumen del amplificador. 7. Jack AUX IN Conecte el reproductor de CD o MP3 aquí. Es fantástico si desea ensayar junto con su música favorita. Sección de percusión 8. Selector GENRE Permite seleccionar el género de un patrón de percusión. 9. Botón e indicador VARIATION/TUNER Puede seleccionar una de las seis variaciones para cada género. ( “Utilizar la sección de percusión”) Precauciones 10.Mando TEMPO Controla el tempo del patrón de percusión. Ubicación 11.Mando LEVEL Controla el nivel de volumen del patrón de percusión. El uso de la unidad en las siguientes ubicaciones puede dar como resultado un mal funcionamiento: • Expuesto a la luz directa del sol • Zonas de extremada temperatura o humedad • Zonas con exceso de suciedad o polvo • Zonas con excesiva vibración • Cercano a campos magnéticos Fuente de alimentación Por favor, conecte el adaptador de corriente designado a una toma de corriente con el voltaje adecuado. No lo conecte a una toma de corriente con voltaje diferente al indicado. Interferencias con otros aparatos Las radios y televisores situados cerca pueden experimentar interferencias en la recepción. Opere este dispositivo a una distancia prudencial de radios y televisores Manejo Para evitar una rotura, no aplique excesiva fuerza a los conmutadores o controles. Cuidado Si exterior se ensucia, límpiese con un trapo seco. No use líquidos limpiadores como disolvente, ni compuestos inflamables. Guarde este manual Después de leer este manual, guárdelo para futuras consultas. Mantenga los elementos externos alejados del equipo Nunca coloque ningún recipiente con líquido cerca de este equipo, podría causar un cortocircuito, fuero o descarga eléctrica. Cuide de que no caiga ningún objeto metálico dentro del equipo. Nota respecto a residuos y deshechos (solo UE) Cuando aparezca el símbolo del cubo de basura tachado sobre un producto, su manual de usuario, la batería, o el embalaje de cualquiera de éstos, significa que cuando quiere tire dichos artículos a la basura, ha de hacerlo en acuerdo con la normativa vigente de la Unión Europea. No debe verter dichos artículos junto con la basura de casa. Verter este producto de manera adecuada ayudará a evitar daños a su salud pública y posibles daños al medioambiente. Cada país tiene una normativa específica acerca de cómo verter productos potencialmente tóxicos, por tanto le rogamos que se ponga en contacto con su oficina o ministerio de medioambiente para más detalles. Si la batería contiene metales pesados por encima del límite permitido, habrá un símbolo de un material químico, debajo del símbolo del cubo de basura tachado. NOTA IMPORTANTE PARA EL CONSUMIDOR Este producto ha sido fabricado de acuerdo a estrictas especificaciones y requerimientos de voltaje aplicables en el país para el cual está destinado. Si ha comprado este producto por internet, a través de correo, y/o venta telefónica, debe usted verificar que el uso de este producto está destinado al país en el cual reside. AVISO: El uso de este producto en un país distinto al cual está destinado podría resultar peligroso y podría invalidar la garantía del fabricante o distribuidor. Por favor guarde su recibo como prueba de compra ya que de otro modo el producto puede verse privado de la garantía del fabricante o distribuidor. * Todos los nombres de productos y compañías son marcas comerciales o marcas registradas de sus respectivos propietarios. Retire la tapa del compartimiento de las baterías de la parte posterior de la unidad. Inserte seis baterías AA en la orientación correcta, como se muestra en la siguiente figura. Nota: Asegúrese de insertar las baterías en la orientación correcta. Nombres y funciones de las partes Etwas zu hoch Einlegen von Batterien 7. AUX IN-Buchse Schließen Sie hier Ihren CD- oder MP3-Spieler an. Dann können sie nämlich zu Ihrer Lieblingsmusik jammen. Vermeiden Sie bei der Bedienung von Schaltern und Reglern unangemessenen Kraftaufwand. 1. Halten Sie den VARIATION/TUNER-Taster mindestens eine Sekunde gedrückt. Die Rhythmusbegleitung wird bei Bedarf angehalten und die Stimmfunktion wird aktiviert. 3. DC-9V IN-Buchse Hier kann ein optionales AC-Netzteil angeschlossen werden. Auswechseln der Batterien • es direkter Sonneneinstrahlung ausgesetzt ist; • hohe Feuchtigkeit oder Extremtemperaturen auftreten können; • Staub oder Schmutz in großen Mengen vorhanden sind; • das Gerät Erschütterungen ausgesetzt sein kann. • in der Nähe eines Magnetfeldes. Schließen Sie das optionale Netzteil nur an eine geeignete Steckdose an. Verbinden Sie es niemals mit einer Steckdose einer anderen Spannung. 2. STANDBY-Schalter Hiermit schalten Sie das Gerät ein und aus. Wenn es eingeschaltet ist, leuchtet die POWER-Diode im Bedienfeld. 7 Verstärkersektion Vorsichtsmaßnahmen 1. PHONES-Buchse 1 Hier kann ein Kopfhörer angeschlossen werden. 2 Anmerkung: Wenn Sie hier etwas anschließen, wird der interne Lautsprecher 3 stummgeschaltet. Anmerkung: Schließen Sie unbedingt einen Stereokopfhörer an. Bei Verwendung eines Monokopfhörers hören Sie nichts. Oberseite 8 Vermeiden Sie das Aufstellen des Geräts an Orten, an denen Si le témoin POWER faiblit, remplacez les piles par des piles neuves. Remarque: L’ampli risque de générer du bruit lorsque les piles commencent à faiblir. Remarque: Retirez immédiatement des piles épuisées. Faute de quoi, un dysfonctionnement peut se produire et les piles risquent de fuir. Retirez également les piles si vous avez l’intention de laisser l’amplificateur inutilisé assez longtemps. Remarque: Les piles fournies servent principalement à vérifier le fonctionnement de l’ampli. La durée de vie de ces piles peut être assez brève. Seitenplatte Hinweis zur Entsorgung (Nur EU) * Les caractéristiques et l’aspect du produit sont susceptibles d’être modifiés sans avis préalable en vue d’une amélioration. Installer des piles Remplacer les piles Face supérieure 1 6. Commande VOLUME Détermine le volume de l’amplificateur. pondant au motif rythmique sélectionné clignote selon le tempo en vigueur. 12.Botón START/STOP Inicia o detiene la reproducción del patrón de percusión. Panel lateral 1. Jack PHONES 1 Conecte aquí los auriculares. Nota: Si conecta los auriculares a este 2 jack, el altavoz interno se enmudecerá. Nota: Asegúrese de conectar unos auri- 3 culares estéreo. Si conecta unos auriculares mono, no habrá sonido. 2. Conmutador STANDBY Activa y desactiva la unidad. Cuando se activa la unidad, el indicador POWER del panel superior se ilumina. 3. Jack DC-9V IN Conecte aquí un adaptador de CA, que debe adquirir por separado. Si el indicador POWER se oscurece, sustituya las baterías por unas nuevas. Nota: Pueden producirse interferencias en el sonido si se agotan las baterías. Nota: Retire las baterías agotadas inmediatamente. En caso contrario, puede producirse un funcionamiento anómalo o las baterías pueden perder líquido. También debe retirar las baterías si no va a utilizar el amplificador durante un periodo prolongado de tiempo. Nota: Las baterías se incluyen para comprobar el funcionamiento del amplificador. Sin embargo, éstas pueden durar poco. Utilizar la sección de percusión Seleccionar un patrón de percusión Seleccione un género para cada patrón de percusión utilizando el selector GENRE. El género “SONGS” dispone de percusiones basadas en canciones populares. Seleccione una variación de la percusión utilizando el botón VARIATION/TUNER. Uno de los tres indicadores VARIATION/TUNER se iluminará en verde o rojo en la siguiente secuencia cada vez que pulse el botón. Verde Rojo VARIACIÓN 1 VARIACIÓN 4 VARIACIÓN 2 VARIACIÓN 5 VARIACIÓN 3 VARIACIÓN 6 Iniciar y detener la reproducción de un patrón de percusión Pulse el botón START/STOP para iniciar o detener la reproducción de un patrón de percusión. Durante la reproducción, el indicador VARIATION/TUNER que corresponde al patrón de percusión seleccionado parpadeará sincronizado con el tempo. Ajustar el nombre de un patrón de percusión Utilice el mando LEVEL para ajustar el volumen de un patrón de percusión. Cambiar el tempo de un patrón de percusión Utilice el mando TEMPO para cambiar el tempo en un intervalo de 40 a 240 bpm. Consejo: Si ha seleccionado el género “SONGS”, se utilizará el tempo programado. Utilizar el afinador La función de afinador del AC1RV permite afinar una guitarra conectada al jack INPUT. El afinador reconocerá el tono de un sonido de entrada e iluminará los LEDs para indicar el tono relativo a “E”. 1. Mantenga pulsado el botón VARIATION/TUNER durante un segundo o más. Se detendrá la reproducción del patrón de percusión y se activará la función de afinador. Indicación en el modo de afinador (cuando no se recibe ninguna señal válida) 2. Toque la 6ª cuerda abierta. Nota: Procure no tocar otras cuerdas inadvertidamente. 3. Afine la cuerda, de forma que se ilumine en verde sólo el indicador central. Muy aguda Configurar el amplificador Esta sección explica el procedimiento básico de configuración del amplificador. Nota: Este manual incluye precauciones de seguridad y una descripción de las partes y las funciones del amplificador. Léalo por completo. 1. Ajuste el mando VOLUME y el mando LEVEL del AC1RV al mínimo. 2. Inserte las baterías en el compartimiento. Como alternativa, puede conectar un adaptador de CA que debe adquirir por separado al jack DC9V IN del panel lateral, e insertar el conector del otro extremo del adaptador de CA a una toma de corriente adecuada. 3. Conecte la guitarra al jack INPUT del panel superior. Si desea utilizar un reproductor de CD o MP3, conéctelo al jack AUX IN del panel superior. 4. Ajuste el conmutador STANDBY a “ON” para activar el amplificador. 5. Suba el mando VOLUME lentamente para ajustar el nivel de volumen. Utilice el mando LEVEL para ajustar el volumen del patrón de percusión. Nota: Algunas guitarras o determinados ajustes del amplificador pueden producir feedback. En este caso, baje el mando VOLUME. Bastante aguda Afianda Bastante grave Muy grave Consejo: El afinador reconoce una nota E en octavas superiores o inferiores. También puede utilizar el afinador para afinar a armónicos o para afinar otros instrumentos como un bajo. 4. Pulse de nuevo el botón VARIATION/TUNER para completar la afinación. Consejo: Después de afinar la 6ª cuerda, afine otras cuerdas utilizando la 6ª cuerda como referencia. Especificaciones Número de patrones de percusión: 66 (incluyendo 6 patrones de canción) Intervalo de tempo: 40–240 bpm Jacks de E/S: Jack INPUT x 1, Jack AUX IN x 1, Jack PHONES x 1 Potencia de salida: Aprox. 1W, RMS en 8Ω como máximo Altavoces: 3", 4Ω x 2 Fuente de alimentación: Baterías AA (R6/LR6) x 6 o adaptador de CA opcional (DC 9V) Duración de las baterías: 26 horas como máximo (baterías alcalinas) Consumo actual: 55mA Dimensiones (anch. x prof. x alt.): 170 x 67 x 128mm Peso: 508g (sin las pilas) Accesorios: Baterías AA (R6) x 6 ) Artículo opcional: Adaptador de CA (DC 9V * Las especificaciones y el aspecto están sujetas a cambios sin previo aviso por mejora.