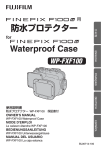
1
対応機種
Specially Designed for XQ1
日
本
語
WP-XQ1
ENGLISH
防水プロテクター
Waterproof Case
FRANÇAIS
DEUTSCH
使用説明書
防水プロテクター WP-XQ1 保証書付
OWNER'S MANUAL
WP-XQ1 Waterproof Case
ESPAÑOL
MODE D'EMPLOI
Le caisson étanche WP-XQ1
BEDIENUNGSANLEITUNG
WP-XQ1 Unterwassergehäuse
MANUAL DEL USUARIO
WP-XQ1 La caja estanca
BL04600-100
安全上のご注意
このたびは、弊社製品をお買上げいただきありがとうございます。
ご使用の前に必ず本「使用説明書」、特にこの「安全上のご注意」と、
デジタルカメラ本体の「使用説明書」をよくお読みの上、正しくお
使いください。お読みになったあとは、いつでも見られるところに
必ず保管してください。
■ 表示内容を無視して誤った使
いかたをしたときに生じる危
害や障害の程度を次の表示で
説明しています。
警告
分解禁止
分解や改造は絶対にしない。
水もれの原因になります。
警告
こ の 表 示 の 欄 は「 死
亡または重傷などを
負う可能性が想定さ
れる」内容です。
不安定な場所に置かない。
バランスがくずれて倒れた
り落下したりして、けがの原
因になります。
注意
こ の 表 示 の 欄 は「 障
害を負う可能性また
は物的損害のみが発
生する可能性が想定
される」内容です。
指定外のバッテリーを使用
しない。
火災の原因になります。
■ お守りいただく内容の種類を
次の絵表示で説明していま
す。
このような絵表示は、気を
つけていただきたい「警告」
や「注意」の内容です。
このような絵表示は、しては
いけない「禁止」内容です。
このような絵表示は、必ず実
行していただく「強制」内容
です。
JP-2
指定外の方法でバッテリー
を使用しない。
バッテリーは指標に合わせ
て入れてください。
バッテリーを分解、加工、加
熱しない。
バッテリーを落としたり、衝
撃を加えない。
バッテリーをショートさせ
ない。
バッテリーを金属製品と一
緒に保管しない。
バッテリーを指定充電器以
外で充電しない。
バッテリーの破裂・液もれに
より、火災・けがの原因にな
ります。
小さいお子様の手の届くとこ
ろに置かない。
けがの原因になります。
ストラップを持ったまま本
製品を振り回さない。
自分や人に当って、けがをす
る原因になります。
炎天下または直射日光の当
たるところに放置しない。
内部の気圧が上昇し、ふたが
跳ね上がる可能性がありけ
がの原因になります。
本製品用のシリカゲルや専
用グリスを口に入れたり、食
べたりしない。
口に入れたり、食べた場合は
ただちに医師と相談してく
ださい。
注意
本製品を落としたり、岩など
固いものにぶつけたりしな
い。
ひび割れが発生し、水もれの
原因になることがあります。
お手入れの際や長時間使用
しないときは、バッテリーを
外す。
液もれや火災の原因になる
ことがあります。
フラッシュを人の目に近づ
けて発光させない。
一時的に視力に影響するこ
とがあります。特に乳幼児を
撮影するときは気をつけて
ください。
JP-3
砂、ほこり、ゴミの多いとこ
ろで開閉しない。
Oリングに付着すると、水も
れの原因になることがあり
ます。
異常に高温になるところ、異
常に温度が低くなるところ
に本製品を放置しない。
故障の原因になることがあ
ります。
水もれがあった場合は、カメ
ラよりバッテリーを速やか
に取り外す。
水深40mを超える水中では
使用しない。
故障の原因になることがあ
ります。
日
本
語
目次
安全上のご注意................................................................................ 2
目次 ................................................................................................... 4
はじめに ........................................................................................... 5
付属品 ............................................................................................... 5
各部の名前 ....................................................................................... 6
防水機能を事前にチェックする .................................................... 8
カメラに装着する前に浸水テストをする ......................................... 8
カメラに防水プロテクターを装着する ...................................... 11
最終テストをする ............................................................................. 14
ストラップを取り付ける ............................................................. 16
フラッシュ拡散板を取り付ける ................................................. 17
撮影する ........................................................................................ 18
撮影が終わったら(保管方法)................................................... 20
コントロールリングの設定について .......................................... 23
メンテナンス ................................................................................ 24
使用後のメンテナンス ..................................................................... 24
別売アクセサリーの紹介 ............................................................. 27
使用上のご注意............................................................................. 28
主な仕様 ........................................................................................ 29
アフターサービスについて ......................................................... 30
JP-4
はじめに
■ ご使用前に必ずお読みください
• 本製品の故障に起因する付随的損害(撮影に要した諸費用および撮影によ
り得るであろう利益の喪失など)については補償いたしかねます。
• この防水プロテクターは、水深40m以内の水中で使用するよう設計されて
日
います。取り扱いには十分にご注意ください。
• 防水プロテクターのご使用前の取り扱い方法と事前のチェック、メンテナ 本
語
ンス、ご使用後の保管方法はこの使用説明書の内容をよくご理解の上、正
しくご使用ください。
• 万一、防水プロテクター取扱上の不注意により水もれ事故を起こした場合、
内部機材の損傷、および付随的損害については補償いたしかねます。
• 使用時の事故(人身・物損)の補償はいたしかねます。
ダイバーズ保険のご案内
万一の水もれ事故によるカメラの損傷や、使用時の事故(人身・物損)に
備えて、ダイバーズ保険への加入をお薦めします。詳しくは保険会社また
は保険代理店などにお問い合わせください。
付属品
• ハンドストラップ(1本)
• 開閉ノブロック外し/
Oリング取外し用ピック(1枚)
• 専用グリス(1個)
• シリカゲル(3個)
• 使用説明書(本書1部)
• クイックメンテナンスガイド
(1部)
• フラッシュ拡散板
JP-5
各部の名前
i( 望 遠 ズ ー ム ) /
j(広角ズーム)レバー
ON/OFF(電源)ボタン
アクセサリーシュー
モードダイヤル
シャッターボタン
開閉ノブロック
開閉ノブ
レンズ窓
コントロールリング用
ダイヤル
レンズリング
ストラップ
取り付け部
遮光フード
液晶インナーフード
Oリング/Oリング溝
フラッシュ拡散板
取り付け部
• WP-XQ1装着時は、フラッシュポップアップスイッチ(→11ページ)と、コ
マンドダイヤル(→23ページ)の回転操作はできません。
JP-6
t(動画撮影)
ボタン
a(再生)ボタン
液晶モニター窓
MENU(メニュー)
/OKボタン
DISP(表示)/
BACK(戻る)
ボタン
E-Fn(拡張ファンクション)
ボタン
Wi-Fiボタン(再生時)
6789(セレクター)ボタン
【撮影時】
【再生時】
8/F(マクロ)ボタン
6/b(消去)ボタン
9/N(フラッシュ)ボタン
6/d(露出補正)ボタン
7/h(セルフタイマー)ボタン
• 操作部は、カメラの各操作に対応しています。カメラの使用説明書で、機能
をご確認ください。
• ご購入時は液晶モニター窓に保護シートが付いています。ご使用前に、保護
シートをはがしてください。
JP-7
日
本
語
防水機能を事前にチェックする
カメラに装着する前に浸水テストをする
カメラに装着する前に水もれがないか必ずご確認ください。
1
2
防水プロテクター全体を見回して、ひび割れ、変形がないか確
認します。
開閉ノブロック外し/Oリング取外し用ピックを使い、開閉ノ
ブを開けます。
開閉ノブ
開閉ノブロック外し/Oリング取
外し用ピック
➀ 開閉ノブのロックを外します。
➁ 開 閉 ノ ブ を 回 し て(OPEN方 向 )
防水プロテクターを開けます。
防水プロテクターを開閉するとき
は、指や手のひらを挟みこまないよ
うにご注意ください。
開閉ノブロック外し用ピックが無い
ときは、ストラップの止め具で代用
できます(→16ページ)。
3
内部を確認します。
Oリング
• 本体のひび割れ(特にOリング付
近)
• Oリングがきちんと装着されてい
るか(正しいOリングの取り付け
方は24ページをご参照ください)
• Oリ ン グ の 傷、 ひ び 割 れ、 変 形、
変質、ねじれ、はみ出しなど
• Oリングに砂、ゴミが付着してい
ないか
JP-8
4
繊維くずの出ないやわらかい布などで、OリングやOリング密着
面(A面)に付着した異物をふき取ります。
ティッシュペーパーでふき取る際は、細かな繊維くずが残ることがあるの
でご注意ください。
Oリング
A
日
本
語
Oリング
5
Oリングの取り付けを確認します。
指先でOリングをなぞり段差やねじれがないことを確認します。段差やね
じれがある場合は、Oリングが正しくついていない可能性があります。
取り付けが不完全な場合は、
24ページを参照して取り付け直してください。
Oリングのねじれやはみ出し、異物のはさみ込みがあると水もれの原因に
なります。
Oリング
JP-9
防水機能を事前にチェックする
6
問題がなければきれいに洗った指先に付属の専用グリスを適量
取り、Oリングの表面に伸ばしながら、Oリング全体が適度に湿
る程度に塗布します。
Oリング
専用グリス以外は使用しないでくだ
さい。
塗布後、Oリングに砂、ゴミが付着
していないか確認してください。
7
防水プロテクターを閉めます。
➀ 防水プロテクターを閉め、開閉ノ
ブを回して(CLOSE方向)密封し
ます。
➁ 開閉ノブのロックをかけます。
8
防水プロテクターを閉めるときは、
指や手のひらを挟みこまないように
ご注意ください。
水槽やお風呂などに浸して、水もれしていないかを確認します。
確認方法については、14ページをご参照ください。
もし水もれが確認されたら…
➀ ただちに防水プロテクターを水中から引き上げ、水分をふき取ってください。
➁ 防水プロテクター本体のひび割れ、Oリングに異物の付着、傷、ひび割れ、
変形、変質、ねじれ、Oリング溝に異物の付着がないか確認します。
➂ 確認後、異常が見られない場合は8ページの手順からやり直してください。
防水プロテクターに異常があった場合はただちに使用を中止し、富士フイル
ム修理サービスセンター、またはお近くの弊社サービスステーションに修理
をご依頼ください。
JP-10
カメラに防水プロテクターを装着する
装着前に次のことをご確認ください。
• 水中撮影中にバッテリー切れにならないよう、バッテリーをあらかじめフ
ル充電しておきましょう。
• メディアの撮影可能枚数が十分にあることをご確認ください。
• カメラからストラップを外してください。ストラップをカメラに付けたま 日
ま防水プロテクターを装着すると水もれの原因になります。
本
語
1
カメラの電源を切ります。
• カメラに防水プロテクターを装着するときは、フラッシュをポップアップし
た状態にしてください。
2
カメラのフラッシュポップアップスイッチをスライドします。
フラッシュの発光モードなど、カメラの操作方法については、カメラ本
体の使用説明書を参照してください。
JP-11
カメラに防水プロテクターを装着する
3
防水プロテクターを開けて(→8ページ)
、①モードダイヤルを
引き上げながら、②カメラをセットします。
カメラがしっかり止まるまで防水プ
ロテクター内に滑り込ませるように
セットします。
防水プロテクターを開閉するとき
は、指や手のひらを挟みこまないよ
うにご注意ください。
カメラをセットするときは、カメラ
の向きに注意してセットしてくださ
い。
4
シリカゲルを、カメラ底面と防水プロテクターの間に入れます。
シリカゲル
シリカゲルは必ず奥まで入れてくだ
さい。奥まで入れずに防水プロテク
ターを閉めるとシリカゲルがOリン
グ部に挟まり、水もれの原因になり
ます。
JP-12
5
カメラと防水プロテクターが正しくセットされているか確認し
ます。
シリカゲル
6
• シリカゲルが本体からはみ出して
いないか
• OリングやOリング溝、Oリングに
合わさる防水プロテクター本体側
部にゴミや髪の毛などの異物が付 日
いていないか
本
• カメラが防水プロテクターに対し 語
て曲がってセットされていないか
Oリング
問題がなければ、防水プロテクターを閉めます
→
ON/OFF(電源)ボタンが作動するか確認してください。
➀ 防水プロテクターを閉め、開閉ノ
ブを回して(CLOSE方向)密封し
ます。
➁ 開閉ノブのロックをかけます。
防水プロテクターを閉めるときは、
指や手のひらを挟みこまないように
ご注意ください。
水もれ事故を防ぐために
Oリングに異物が付着している場合
は浸水の原因になります。
24ページを
参照して異物を取り除いてくださ
い。異物が取り除けないときは新し
いOリングと交換してください。
JP-13
毛
繊維
砂
カメラに防水プロテクターを装着する
最終テストをする
カメラに防水プロテクターを装着した状態で浸水テストを行います。水もれ
がないか確認しますので、必ず行ってください。
真水の入った水槽やお風呂などに浸したまま水もれがないか確認します。た
だちに水中から引き上げられるよう十分に注意して確認してください。
1
30秒程度水に浸します。
合わせ目
2
• 水に入れたときに防水プロテク
ターの合わせ目から連続して気泡
が出ていませんか?(→15ページ)
• 実際に水中でボタン類を操作して
みましょう。
• 写真も撮ってみましょう。
防水プロテクターをゆっくりと水から引き上げよく確認します。
水滴
• 防水プロテクター内の合わせ目付
近に、水滴が付いていませんか?
(→15ページ)
• 防水プロテクター内に水がたまっ
ていませんか?(→15ページ)
JP-14
もし水もれが確認されたら…
➀ ただちに防水プロテクターを水中から引き上げ、水分をふき取ってくだ
さい。
➁ 防水プロテクターからカメラを取り出してください。カメラ本体に水滴
が付着している場合はただちにふき取ってください。
防水プロテクターからカメラを取り外すときは、カメラを落とさない
ようレンズ部を下に向けて防水プロテクターを開けてください。また、
防水プロテクターを開閉するときは、指や手のひらを挟みこまないよう
にご注意ください。
➂ 防水プロテクター本体のひび割れ、Oリングに異物の付着、傷、ひび割れ、
変形、変質、ねじれ、Oリング溝に異物の付着がないか確認します。
➃ 確認後、異常が見られない場合は8ページの手順からやり直してくださ
い。
防水プロテクターに異常があった場合はただちに使用を中止し、富士フ
イルム修理サービスセンター、またはお近くの弊社サービスステーショ
ンに修理をご依頼ください。
カメラ本体に水が入った場合はただちに使用を中止し、お近くの弊社
サービスステーションに修理をご依頼ください。異常があるまま使用す
ると発火や感電の原因になりますので絶対に使用しないでください。
Oリングに異物が付着している場合
は浸水の原因になります。
24ページを
参照して異物を取り除いてくださ
い。
JP-15
毛
繊維
砂
日
本
語
ストラップを取り付ける
1
防水プロテクターにストラップを取り付けます。
➀➁の順にストラップを取り付けま
す。
2
ストラップを手首に固定します。
➀ ストラップに手首を通します。
➁ 長さ調節止め具をスライドし、落
とさないように手首に固定します。
止め具で防水プロテクターを開ける
防水プロテクターを開けるとき、開閉ノブロック外し用ピックがお手元
に無い場合に、止め具で代用できます。
➀ 止め具の突起部分を図の位置には
さみ込みます。
➁ ロックに引っ掛けて起こします。
ストラップ止め具をOリングの取
り外しには絶対に使用しないでく
ださい。Oリングにキズやゴミが
つき、浸水の原因になります。
JP-16
フラッシュ拡散板を取り付ける
付属のフラッシュ拡散板を取り付けてください。
フラッシュ拡散板を取り付けていない場合、レンズ部に光をさえぎられ、画
像の上だけが明るくなります(ケラレ)。
■ フラッシュ拡散板を取り付ける
日
フラッシュ拡散板の取り付けひもを 本
語
➀➁の順に取り付けます。
防水プロテクターの開閉時に、取り
付けひもがはさまらないように注意
してください。
図のように、フラッシュ拡散板をレン
ズリングの溝に差し込んでください。
「カチッ」と音がするまで、しっか
り差し込んでください。
JP-17
撮影する
• 水深40mまで使用可能です。
• 操作部は、カメラの各操作に対応しています。カメラの操作方法や機能に
ついてはカメラ本体の使用説明書を参照してください。
1
カメラの電源を入れます。
2
モードを設定します。
ON/OFF(電源)ボタンを押します。
➀ モードダイアルをまわして、撮影
➀
したいモードに合わせます。
➁ 液晶モニター窓で撮影モードの確
認をしてください。
水中で撮影する前に地上で試し撮り
をしてください。
撮影モードを設定するときは、必ず
液晶モニター窓で設定した撮影モー
ドをご確認ください。
➁
3
両手で防水プロテクターをしっかり支えて構えます。
レンズ窓、フラッシュ部に指やストラップがかからないようにしてくださ
い。ピントが合わなかったり、適正な明るさで撮影できないことがあります。
JP-18
4
撮影します。
➀ シャッターボタンを半押しし ➁ 半押しのままさらにシャッターボ
てピントを合わせます。
タンを押し込むと撮影されます。
日
本
語
シャッターボタンを軽く押すと途中で少し止まるところがあります。そこ
まで押すことを半押しといいます。半押ししたときにピントと明るさが決
まります。
動画撮影は半押しできません。
水中撮影モードについて
カメラで撮影モードのH(シーン
ポジション)で“F水中”を選ぶと、
海の青さを鮮やかに撮影できます。
また、撮影メニューのホワイトバラ
ンスで“g水中”を選ぶこともで
きます。
設定方法や設定できる撮影モード
についてはカメラ本体の使用説明
書をご参照ください。
近距離撮影について
WP-XQ1を利用し、拡散板を付けて内蔵フラッシュで近い被写体を撮影
した場合には、撮影画の右側が暗くなる場合があります。その場合には
被写体とカメラを少し離して撮影してください。
また、近距離を撮影されたい場合には、市販の外部フラッシュのご利用
をお薦めします。
JP-19
撮影が終わったら(保管方法)
1
カメラの電源を切ります。
ON/OFF(電源)ボタンを押して電
源を切ります。
必ずカメラの電源が切れていること
を確認してください。
2
撮影終了後すぐに、容器に真水を張り海水の塩抜きをします。
こ の と き 手 で 水 を 送 る よ う に し て、
細部の塩分を落とします。
塩抜きを行わないと、サビや各部の
動きが悪くなるなどの原因になりま
す。
3
防水プロテクターに付いている水滴をていねいにふき取ります。
特に防水プロテクターの合わせ目の水滴は、ていねいにふき取ってくだ
さい。
繊維くずの出ないやわらかい布などをご使用ください。
シャッターボタンや開閉ノブなど細かい部分の水滴もしっかりふき取って
ください。
JP-20
4
カメラを防水プロテクターから取り外します。
➀ 開閉ノブのロックを外します。
➁ 開 閉 ノ ブ を 回 し て(OPEN方 向 )
カメラに水滴がかからないように
防水プロテクターをゆっくり開け
ます。
防水プロテクターを開閉する際は防 日
本
水プロテクター内部やカメラに水滴
語
が付かないように手や髪の毛などが
十分に乾いていることを確認してく
ださい。
防水プロテクターを開閉するとき
は、指や手のひらを挟みこまないよ
うにご注意ください。
ぬれた手でカメラやバッテリーに触
れないでください。
水しぶきや砂のかかるところで防水
プロテクターの開閉はしないでくだ
さい。
➂ モードダイヤルのノブを引き上げ
ながら、④カメラを防水プロテク
ターから取り外します。
3
防水プロテクターからカメラを取り
外すときは、カメラを落とさないよ
うレンズ部を下に向けて防水プロテ
クターを開けてください。
4
JP-21
撮影が終わったら(保管方法)
5
カメラを外した状態でOリングに水滴、異物がないことを確認
して防水プロテクターを閉め、開閉ノブを回して(CLOSE方向)
密封します(→10ページ)。もう一度、真水でよく洗います。
水 の 中 で ボ タ ン 類 を か る く 操 作 し、
塩分を取り除くようにしてください。
その後、真水に1時間程度つけてお
くことをお薦めします。
十分に塩分を落とさずに保管する
と、塩の結晶により開閉ノブなどが
動かなくなります。また、サビの原
因になります。
防水プロテクターを閉めるときは、
指や手のひらを挟みこまないように
ご注意ください。
6
防水プロテクターに付いている水滴をていねいにふき取ります。
繊維くずの出ないやわらかい布などをご使用ください。
シャッターボタンや開閉ノブなど細かい部分の水滴もしっかりふき取って
ください。
7
防水プロテクターを少し開けて、風通しのよい日陰で乾燥させ
てください。乾燥後は、直射日光の当たらないところに保管し
てください。
温風機などの熱風や直射日光に当て
て乾燥させないでください。
JP-22
コントロールリングの設定について
コントロールリングの機能は変更できます。事前にお好みの設定に変更して
から撮影することをおすすめします。変更の方法はカメラ本体の使用説明書
をご覧ください。
カメラのコントロールリングは、コントロールリング用ダイヤルで操作して
ください。
コマンドダイヤルについて
防水プロテクター使用時は、コマンドダイヤルの操作ができないため、
次の機能を設定できません。
■ 撮影時
• ぼかしコントロール時に、ぼかし強度を設定すること
• フォーカスエリア選択時に、AFエリアのサイズを変更すること
• シーンポジションをp 花火に設定しているときに、シャッタース
ピードを変更すること
■ 再生時
• 拡大表示したまま、前後の画像へ表示を切り替えること
コントロールリング設定について
zコントロールリング設定をスタンダードに設定すると、コントロール
リング用ダイヤルでプログラムシフト、シャッタースピード、絞り値の設
定を行えます。マニュアルフォーカスで撮影したい場合は、さらにフォー
カスモードをN に設定してお使いください。
コントロールリング設定がスタンダード以外の場合、またはフォーカスモ
ードがNマニュアルフォーカスの場合は、次の設定を変更できません。
• Pモードのプログラムシフト
• Aモードの絞り設定
• Sモードのシャッタースピード設定
• Mモードのシャッタースピード設定と絞り設定
JP-23
日
本
語
メンテナンス
使用後のメンテナンス
防水プロテクターを使用したあとに必ず行ってください。次回使用するとき
のために、Oリングに“異物によるへこみや傷、ひび割れ”などの異常がない
ことを確認します。
1
Oリングを防水プロテクターから取り外します。
Oリング
Oリング
➀ OリングとOリング溝の壁の間に開
閉ノブロック外し/Oリング取外し
用ピックを差し込みます。
➁ 差し込んだ開閉ノブロック外し/O
リング取外し用ピックの先端をO
リングの下にくぐらせるようにし
ます(ピックの先端で溝を傷つけ
ないように注意してください)。
➂ 浮き上がったOリングを指先でつ
まみ、防水プロテクターから取り
外します。
JP-24
2
Oリングの古いグリスや付着した異物(繊維や砂など)を取り
除きます。
繊維くずの出ないやわらかい布などで、Oリングに付着した異物をふき取
ります。
水洗いをして水分をふき取らずに乾燥させます(繊維の付着防止)。
3
Oリングを指でつまみ、全周を軽くしごいて異物の付着による 日
へこみや傷、劣化によるひび割れの有無を確認します(指先の 本
語
感触で確認できます)。
異常が見受けられるときは、新しいOリングと交換してください。
Oリングを指でしごく際には、強く引っ張って、引き伸ばさないようご注
意ください。
異物や異常の一例
毛
4
繊維
砂
異物によるへこみ
傷
ひび割れ
Oリング溝は歯ブラシや綿棒などで、古いグリスや付着した異
物を取り除きます。
綿棒の繊維くずが残らないように十分にご注意ください。
5
Oリングに専用グリスを塗布します。
清 潔 な ポ リ 袋( 大 き さ は10cm×
20cmぐらい)の中に付属のグリス
を5mmくらいチューブからしぼり出
して、グリスが薄く均一につくよう
によくもみます。
Oリングをポリ袋に入れてさらにも
み、グリスをよくなじませます。
ポリ袋は清潔な状態であれば繰り返
し使用できます。
JP-25
メンテナンス
6
Oリングを取り付けます。
指先でOリングをなぞり段差やねじれがないことを確認します。段差やね
じれがある場合は、Oリングが正しくついていない可能性があります。
取り付けが不完全な場合は、
24ページを参照して取り付け直してください。
Oリングのねじれやはみ出し、異物のはさみ込みがあると水もれの原因に
なります。
Oリングのメンテナンスを行うときは、レンズ窓や液晶モニター窓にグリ
スが付着しないよう十分にご注意ください。レンズ窓や液晶モニター窓が
汚れた際には、乾いた柔らかい布などで軽くふいてください。
JP-26
別売アクセサリーの紹介
■ デジタルカメラXQ1用防水プロテクター
WP-XQ1の別売の消耗品をご紹介いたします。
※ 最新情報は富士フイルムホームページをご覧ください。
http://fujifilm.jp/
日
本
語
• シリカゲルセット(SST-01)
レンズの曇りを低減する乾燥剤です。
(シリカゲル×6個)
• Oリングキット(ORK-XQ1)
メンテナンス用の消耗品のセットです。
(スペア用Oリング×1個、開閉ノブロック外し/Oリング取外し用ピック×1枚)
• シリコングリス(SGR-01)
Oリングメンテナンス用の専用グリスです。
(専用グリス×1個、内容量約3g)
別売アクセサリーのご使用については、各種アクセサリーに付属の使用
説明書などの指示に従ってください。
JP-27
使用上のご注意
• 環境温度+40℃以上のところでは使用または保管しないでください。
• +40℃を超える温水の中では使用しないでください。浸水の原因になりま
す。
• シンナー、ベンジン、アルコールなどの揮発性の薬品は表面をいため、高
圧下でひび割れの原因になりますので使用しないでください。
• 三脚座には無理な力を加えないでください。
• ぶつけたり強い衝撃を与えないでください。
• 防水プロテクターを水中に投げ込まないでください。
• 海辺などでの使用後は、防水プロテクターを完全に閉めた状態でバケツな
どにためた水道水で洗い、砂や塩分を落としてから、乾いた柔らかい布で
水分を十分にふき取ってください。
• 本製品は、防水プロテクターとして水中で使うことを想定しています。カ
メラを入れたままの放置、または保管はしないでください。特にバッテリー
は、液もれや火災の原因になることがあります。
• 防水プロテクターを閉めた状態で航空機に持ち込んだ場合、開かなくなる
ことがあります。必ず開いた状態で運んでください。万一、開かなくなっ
た場合は、ぬるま湯に浸して内部の空気をあたため、気圧差を小さくして
から開けてください。
■ 水もれ事故を防ぐために
本製品を使用中に水もれ事故が発生すると装着されたカメラが修理不能にな
ります。以下の注意を守った上でご使用ください。
• Oリングは使いかたによって差異がありますが、約1年を目安に新品と交換
してください。
• Oリングに異物が付着している場合は浸水の原因になりますので、ふき取っ
てください。ふき取るときは繊維くずが残らないようにしてください。異
物が取れないときは水洗いしてください。
• Oリングに傷やひびがあるとき、変色や変形が現れたときは新品と交換し
てください。
• Oリング交換時にはOリング溝内をクリーニングし、砂やゴミ、頭髪など異
物がないことを確認してください。
• Oリングには弊社指定のグリスをご使用ください。
• Oリングは正しくセットされていないと、浸水する場合があります。Oリン
グをセットする際は溝の形状に合わせ、ねじれたりしないように注意して
セットしてください(→26ページ)。
• 夏期の直射日光の当たるところ、閉め切った自動車および暖房器具の近く
などに放置したり、長時間外力を加えたりしないでください。熱や力によっ
て変形し、防水性能が損なわれ使用できなくなる場合があります。
• Oリングとその接触面をぶつけたり異物(砂やゴミ、頭髪など)を挟み込
んだりして傷を付けないようにしてください。
JP-28
• 浸水テストと最終テストを実施した上でご使用ください。
• 水もれの兆候が起きたらできるだけ早く水中から出し、水もれ原因をよく
調べて、適切な処置をとってください。
異物や異常の一例
毛
繊維
砂
異物によるへこみ
傷
ひび割れ
主な仕様
対象カメラ
フジフイルムデジタルカメラXQ1
許容水深
水深40m以内
主要材質
本体 :透明ポリカーボネート
レンズ窓:ガラス
本体外形寸法
幅143.6mm×高さ101mm×奥行き105mm(拡
散板を取り外した場合、突起部含む)
本体質量
約421g(カメラ、付属品含まず)
※ 仕様・性能は、予告なく変更することがありますのでご了承ください。使用説明
書の記載の誤りなどについての補償はご容赦ください。
JP-29
日
本
語
アフターサービスについて
保証書
■ 修理部品について
• 本製品の補修用部品は、製造打ち切
• 保証書はお買上げ店に所定事項を記
り後5年を目安に保有しておりますの
入していただき、大切に保存してく
で、この期間中は原則として修理を
ださい。
お引き受けいたします。ただしこの
• 保証期間中は、保証書の記載内容に
期間中であっても、部品都合等によ
基づいて無償修理をさせていただき
り、同等の製品に交換させていただ
ます。保証規定に基づく修理をご依
く場合もあります。
頼になる場合には、必ず保証書を添
• 本製品の修理の際には、環境に配慮
付してください。なお、お買上げ店
し再生部品や再生部品を含むユニッ
または修理サービスセンターにお届
トと交換させていただく場合があり
けいただく際の運賃などの諸費用は、
ます。交換した部品およびユニット
お客様にてご負担願います。
は回収いたします。交換部品が必要
な場合には、修理をご依頼されると
修理
きにその旨をお伝えください。
■ 調子が悪い時はまずチェックを
個人情報の取扱について
使 い 方 の 問 題 か、 故 障 か 迷 う と き は、
FinePixサポートセンターへお問い合わ 当社は、お客様の住所・氏名・電話番号
せください。電話番号が34ページに記載 等の個人情報を大切に保護するため、個
人情報保護に関する法令を遵守するとと
されています。
もに、電話問い合わせ時あるいは修理依
■ 故障と思われるときは
頼時にご提供いただいたお客様の個人情
富士フイルム修理サービスセンターまた 報を次のように取扱います。
は当社サービスステーションに修理をご 1. お客様の個人情報は、お客様のお問
依頼ください。富士フイルム修理サービ
い合わせに対する当社からの回答、
スセンター、サービスステーションのご
修理サービスの提供およびその後の
案内が34ページにあります。
依頼方法は、
ユーザーサポートの目的にのみ利用
次のページの中からお客様のご都合によ
いたします。
りお選びください。
2. 弊社指定の宅配業者、修理業務担当
会社、その他の協力会社に当社が作
業を委託する場合、委託作業実施の
• 33ページにある
「修理依頼票」
をコピー
ために必要な範囲内でお客様の個人
していただき、必要事項をご記入の
情報を開示することがございます。
上、製品に添付してください。
「修理
開示にあたりましては、盗難・漏洩
依頼票」は、故障箇所を正確に把握し、
等の事故を防止し、また当社より委
託した作業以外の目的に使用しない
迅速な修理を行うための貴重な資料
よう、適切な監督を行います。
になります。
• 修理料金の見積をご希望の場合には、 3. ご提供いただいたお客様の個人情報
「修理依頼票」の「見積」欄にご記入
に関するお問い合わせ等は、FinePix
ください。ご指定のないときは、修
サポートセンター等のお問合せ先、
理を進めさせていただきます。なお、
富士フイルム修理サービスセンター
あるいは修理依頼先サービスステー
見積は有料となります。
ション宛にお願いいたします。
• 落下・衝撃、砂・泥かぶり、冠水・浸水な
どにより、修理をしても機能の維持
が困難な場合には、修理をお断りす
る場合もあります。
■ 修理ご依頼に際してのご注意
JP-30
修理の依頼方法は、下記の中からお客様のご都合に合わせてお選びください。
● 富士フイルム修理サービスセンター
への送付修理
• ご依頼の際「修理依頼票」を記載の
上修理依頼品に添付してください。
• 修理料金は、修理完了品お届け時に
宅配業者に直接お支払いください。
● お買上げ店への持込修理
• 修理料金及びその支払方法について
は、お持ちいただいたお店にご確認
下さい。
日
本
語
JP-31
■ 修理に関する情報は
• 修理サービスQ&A
http://fujifilm.jp/support/digitalcamera/repairservice/index.html
修理依頼方法、紛失した付属品の購入方法など修理に関するよくある質問と回答
をまとめて掲載しています。
• 修理納期検索サービス
http://repairlt.fujifilm.co.jp/repair/certificate.jsp
東京もしくは大阪のサービスステーションおよび富士フイルム修理サービスセン
ターへ修理依頼品を送付、あるいは持ち込みされた場合、修理完了予定日を検索
することができます。
• 修理料金のご案内
http://repairlt.fujifilm.co.jp/estimate/index.php
当社サービスステーションに直接修理依頼された場合の目安の修理料金を確認で
きます。
JP-32
WP-XQ1 修理依頼票
※ 予め30ページの「個人情報の取扱について」をご確認ください。
※ 本紙は拡大コピーしてお使いください。
※ 下表の□は、該当する項目にチェック(✔)を入れてください。
フ
リ
ガ
ナ
電
ファクス番号
お
名
前
ご
住
所
話
番
号
日
本
語
〒 −
ボディ番号(機番)本体内側底面に記載
してある11桁の番号です。修理お問い合わせ
時にご連絡ください。
修理品への添付
No.
□保証書
□(
) □(
)
□(
) □(
)
故障内容(故障時の様子や発生頻度、症状など具体的にご記入ください)
見
積
見積連絡方法
□必要(修理金額 円以上見積) □不要
□電話 □ファクス
JP-33
● 本製品に関するお問い合わせは…
富士フイルムFinePixサポートセンター
TEL 050-3786-1060
ご利用いただけない
場合は
0228-30-2992
月曜日∼金曜日(日・祝日・年末年始を除く)
9:00 ∼17:40/土曜日 10:00 ∼17:00
FAX 050-3786-2060
受付時間:24時間(返信対応は電話の受付時間と同一です)
※予め「アフターサービスについて」の項の「個人情報の取扱について」をご確認ください。
● 本製品の関連情報は、下記のホームページをご覧ください。
http://fujifilm.jp/
弊社ホームページの自己解決に役立つ「Q&A検索」もご利用ください。
● 修理の受付は…
※詳細は本文中の「アフターサービスについて」をご覧ください。
※予め「アフターサービスについて」の項の「個人情報の取扱について」をご確認ください。
■ 修理のご相談受付窓口 富士フイルム修理サービスセンター
TEL 050-3786-1040
月曜日∼金曜日(日・祝日・年末年始を除く)
9:00 ∼17:40/土曜日 10:00 ∼17:00
FAX 050-3786-2040
受付時間:24時間(返信対応は電話の受付時間と同一です)
■ 修理品ご送付受付窓口 富士フイルム修理サービスセンター
〒989-5501 宮城県栗原市若柳字川北中文字95-1
TEL 050-3786-1040
• お急ぎの場合は、全国どこからでも
【FinePix クイックリペアサービス】お預かりからお届け迄が最短3日の宅配修理サービス
http://repairlt.fujifilm.co.jp/quick/index.php:TEL 050-3786-1020
• お近くのサービスステーション
【サービスステーション一覧】
http://fujifilm.jp/support/digitalcamera/repairservice/servicestation/index.html
サービスステーションにつきましては、弊社ホームページ http://fujifilm.jp/ または上記の<
修理のご相談受付窓口>にてご確認・お問い合わせください。
● 本製品以外の富士フイルム製品のお問い合わせは…
お客様コミュニケーションセンター TEL 050-3786-1711
(月曜日∼金曜日 9:00 ∼17:40/土曜日 10:00 ∼17:00)
※日・祝日・年末年始を除く
JP-34
日
本
語
JP-35
Safety Notes
Thank you for purchasing this product.
Before using the product, make sure to read this “Owner’s Manual,” particularly
these “Safety Notes,” as well as the “Owner’s Manual” for the Digital Camera. After
reading them, keep them available so that you can check them easily at any time.
■ The icons shown below are used
in this document to indicate the
severity of the injury or damage
that can result if the information
indicated by the icon is ignored
or the product is used incorrectly.
WARNING
This icon indicates that
serious injury can result if the
information is ignored.
CAUTION
This icon indicates that
personal injury or material
damage can result if the
information is ignored.
WARNING
Do not
disassemble.
Never attempt to modify or
disassemble the product.
This may cause water to leak in.
Do not place the product on an
unstable surface.
This can cause the product to fall or
tip over and cause damage or injury.
Use only the battery specified for
use with the camera.
The use of other power sources can
cause fire.
■ The icons shown below are
Do not use the battery except as
specified.
Load the battery as shown with the
indicator.
used to indicate the nature of
the information which is to be
observed.
Do not heat, modify or attempt
to disassemble the battery.
Do not drop or subject the
battery to any impact.
Do not short-circuit the battery.
Do not store the battery with
metallic products.
Do not use chargers other than
the specified model to charge
the battery.
Ignoring any of the above
instructions can cause the battery
to explode or leak and cause fire or
injury as a result.
Triangular icons notify the user of
information requiring attention
(“Important”).
Circular icons with a diagonal bar
tell you that the action indicated is
prohibited (“Prohibited”).
Filled circles with an exclamation
mark notify the user of an
action that must be performed
(“Required”).
EN-2
Keep out of the reach of small
children.
This product could cause injury in
the hands of a child.
Do not open or close this product
in sandy or dusty places.
If a sand grain or dust is caught
in the O-ring, it may cause water
to leak in.
Take care when using the
waterproof case with the strap
attached.
This may cause the case to swing
unexpectedly, causing damage
or injury.
Do not leave the product in
places subject to extremely high
or low temperatures.
It may cause it to break down.
Do not eat the silica gel or grease
for use with this product.
If it is put in the mouth or eaten,
seek medical advice immediately.
CAUTION
Do not drop the product or strike
it against hard objects.
It may crack the product and cause
water to leak in.
Remove the battery when you
are cleaning the camera or you
do not plan to use the camera for
an extended period.
Failure to do this can cause the
battery to leak or cause fire.
Do not use the flash too close to a
person’s eyes.
It may temporarily affect the
eyesight. Take particular care when
photographing infants and young
children.
EN-3
If the camera gets wet,
immediately remove the battery
from the camera.
Do not use the product at depths
exceeding 40 m (131 ft.) below
the surface.
It may cause it to break.
ENGLISH
Do not leave the underwater
camera housing in direct sunlight
or in places subject to extreme
temperatures.
If pressure inside the case rises
due to heat, the lid may pop open
violently and cause damage or
injury.
Contents
Safety Notes .....................................................................................................................................2
Contents.............................................................................................................................................4
Preface .................................................................................................................................................5
Accessories Included..................................................................................................................5
Part Names .......................................................................................................................................6
Preliminary check of the case ...............................................................................................8
Make a preliminary submersion test on the waterproof case before
positioning the digital camera ...................................................................................................8
Positioning the Digital Camera in the Waterproof Case....................................11
Conducting a final test.................................................................................................................14
Attaching the strap ..................................................................................................................16
Installing the flash diffusion plate ...................................................................................17
Taking Pictures ............................................................................................................................18
After Taking Pictures (Storage) ..........................................................................................20
About the settings of the control ring .........................................................................23
Maintenance.................................................................................................................................24
Maintenance after use..................................................................................................................24
Notes on Using the Waterproof Case Correctly......................................................27
Specifications ...............................................................................................................................28
Accessories Guide .....................................................................................................................28
EN-4
Preface
• FUJIFILM Corporation cannot accept liability for any incidental losses (such as
photographic costs or loss of income from photography) incurred as a result of
faults with this product.
■ Be sure to read this before use
Accessories Included
• Hand strap (1)
• Special pick (1)
(for Opening knob unlocked / O-ring
remover)
• Special silicone grease (1)
• Silica gel pack (3)
• Owner’s manual (this manual)
• Quick maintenance guide
• Flash diffusion plate
EN-5
ENGLISH
• This waterproof case is designed for use underwater to a depth of 40 m (131 ft.).
Handle the case carefully.
• Please follow the guidelines in this manual regarding how to prepare the waterproof
case for use, how to make a preliminary check, maintaining the case and putting it
away it after use. Use the product only as described in this manual.
• FUJIFILM Corporation will not compensate for any damage to the digital camera or
any incidental losses caused by improper use of the waterproof case.
• FUJIFILM Corporation will not compensate for any personal injury or death or
property damage caused during use.
Part Names
Zoom control
(i Tele/j Wide)
ON/OFF button
Accessory shoe
Mode dial
Shutter button
Lock for open/close knob
Open/close knob
Lens window
Dial for the control ring
Lens ring
Shade hood
Strap mount LCD inner hood
O-ring/O-ring groove
Flash diffusion
plate mount
• The flash pop-up switch (pg.11) and the command dial (pg.23) cannot be
operated while using the waterproof case.
EN-6
t (movie recording)
button
a Playback
button
LCD monitor
window
MENU/OK button
DISP (Display)/
BACK button
6789 Selector button
[Photography]
[Playback]
8/F Macro button
6/b Delete button
9/N Flash button
6/d Exposure compensation button
7/h Self-timer button
• The operation unit functions correspond to individual operations of the
camera. Confirm the functions of the unit in the “Owner’s Manual” for the
Digital Camera.
• A protection sheet is attached to the LCD monitor window when you
purchase the unit. Make sure to peel off the sheet before using it.
EN-7
ENGLISH
E-Fn (extended function)
button
Wi-Fi button (playback mode)
Preliminary check of the case
Make a preliminary submersion test on the waterproof case before
positioning the digital camera
Before installing the digital camera in the case, make sure that there is no water leakage.
1
Check the outside of the waterproof case to make sure that there are no
cracks or faults with it.
2
Open the waterproof case using the special pick (included).
open/close knob
special pick (included)
➀ Release the lock of the open/close
knob.
➁ Turn the open/close knob in the
direction of the “OPEN” arrow to open
the waterproof case.
When opening or closing the waterproof
case, take care not to catch your fingers
or palm in the case.
You can also use the adjuster of the strap
if you do not have the special pick (pg. 16).
3
Check the inside of the waterproof case for the following:
O-ring
• Cracks (especially around the O-ring)
• Correct seating of the O-ring (For
correct installation of the O-ring, see
page 24.)
• That the O-ring has no scratches
or cracks, or that it is oddly shaped,
twisted, detached, etc.
• Sand or foreign particles stuck to the
O-ring
EN-8
4
Wipe off any foreign particles attached to the O-ring and O-ring seal
surface (Fig. A position) using soft, lint-free cloth or something similar.
If using tissue paper to wipe it off with, be careful, since fine lint may be left behind.
O-ring
A
O-ring
5
Check the O-ring installed.
If installed incompletely, reinstall it, following the instructions on page 24.
If the O-ring is twisted or bulged out, or if there is any foreign particle on or
underneath it, water will leak in.
O-ring
EN-9
ENGLISH
Feel the O-ring with the tip of your finger to confirm that there is no step or twists.
If you feel a step or twists, the O-ring may not be attached correctly.
Preliminary check of the case
6
When all is well, use a clean fingertip to apply the special silicone
grease. And then spread it on the surface of the O-ring until it is
completely covered.
O-ring
Only use the special silicone grease
provided.
After applying the grease, check that
there is no sand or other substances
attached to the O-ring.
7
Close the waterproof case.
➀ Close the waterproof case and turn the
open/close knob in the direction of the
“CLOSE” arrow to seal it.
➁ Lock the open/close knob.
When closing the waterproof case, take
care not to catch your fingers or palm in
the waterproof case.
8
Dip the empty waterproof case into a water tank or a bathtub and
check for water leaks. For how to check it, see page 14.
If a water leak is detected …
➀ Immediately take the waterproof case out of the water and dry it on the outside.
➁ Make sure that there are no cracks in the waterproof case body. Check the Oring for attached foreign particles, flaws, cracks, odd shape, or twisting, and for
any foreign particles in the O-ring groove.
➂ When all is well, start over from the procedure on page 8.
If you find something wrong with the waterproof case, immediately stop using it and
contact your FUJIFILM dealer.
EN-10
Positioning the Digital Camera in the
Waterproof Case
Before installation, check the following:
• To avoid losing power while shooting underwater, charge the battery fully before
use.
• Check how many new images can be stored on the media.
• Remove the hand strap from the digital camera. Using the camera in the waterproof
case with its strap may cause the case to leak.
1
Turn the camera off.
ENGLISH
• Raise the flash before the camera is set in the waterproof case.
2
Slide the flash pop-up switch to raise the flash.
For the operating instructions for the camera, such as the setting of flash mode,
see the Owner’s Manual supplied with your camera.
EN-11
Positioning the Digital Camera in the Waterproof Case
3
Open the waterproof case (pg.8) and pull the mode dial up (➀), then set
the camera in it (➁).
Slip the camera into the waterproof case
until it stops securely.
When opening or closing the waterproof
case, take care not to catch your fingers
or palm in the case.
When setting the camera, pay attention
to the position of the camera upon
attachment.
4
Insert the silica gel pack into the space underneath the bottom of the
camera.
Silica gel pack
Make sure to insert the silica gel pack
correctly. If it is incompletely inserted, it
will prevent the O-ring from acting as a
seal, and water will leak in.
EN-12
5
Confirm the following before closing the waterproof case.
Silica gel pack
6
• No part of the silica gel pack is
protruding.
• There is no dust, hair, or other foreign
particle on the O-ring, in the O-ring
groove, or on the edge face of the
waterproof case that engages with the
O-ring.
• The camera is correctly seated and
aligned in the waterproof case.
O-ring
When all is well, close the waterproof case.
→ Check that the camera’s “ON/OFF” button can be correctly operated using the
controls on the housing.
open/close knob in the direction of the
“CLOSE” arrow to seal it.
➁ Lock the open/close knob.
When closing the waterproof case, take
care not to catch your fingers or palm in
the waterproof case.
To prevent water leaks
Any foreign particles attached to the
O-ring may cause a water leak. Remove
the foreign particles (see page 24). If you
cannot remove them, replace the O-ring
with a new one.
EN-13
Hair
Lint
Sand
ENGLISH
➀ Close the waterproof case and turn the
Positioning the Digital Camera in the Waterproof Case
Conducting a final test
Carry out a final submersion test on the waterproof case after mounting the digital
camera. To check for water leaks, watch for any water leaking in while immersing it in
a water tank or a bathtub filled with water. Check it in a way that lets you take it out of
water immediately (to save the camera inside) if you need to.
1
Immerse it in water for 30 seconds.
Joint
2
• If you see a continuous flow of
air bubbles from the joint of the
waterproof case while in the water, this
indicates a leak (pg.15).
• When all is well, operate the buttons
and take some test shots while it is
under water.
After slowly lifting the waterproof case out of water, closely check for
the following:
Water
droplets
• Water droplets near the joint of the
waterproof case (pg.15).
• Water pooled inside the waterproof
case (pg.15).
EN-14
If a water leak is detected ...
➀ Immediately take the waterproof case out of the water and dry it on the outside.
➁ Take the digital camera out of the waterproof case. If you see any drops of water
on the digital camera, wipe them off at once.
When taking the camera out of the waterproof case, open the waterproof case
with the lens facing downwards to avoid the camera falling out. Also, when
opening or closing the waterproof case, take care not to catch your fingers or
palm in the case.
➂ Make sure that there are no cracks in the waterproof case body. Check the Oring for attached foreign particles, flaws, cracks, odd shape, or twisting, and for
foreign particles in the O-ring groove.
➃ When all is well, start over from the procedure on page 8.
If water has entered the camera body, stop using it immediately and contact
your FUJIFILM dealer. Using the camera in a faulty state may cause fire or
electric shock. Do not use it in this state under any circumstances.
Any kind of foreign particle attached to the
O-ring may cause a water leak. Remove
the foreign particles after checking how
to on page 24.
EN-15
Hair
Lint
Sand
ENGLISH
If you find something wrong with the waterproof case, immediately stop using
it and contact your FUJIFILM dealer.
Attaching the strap
1
Attach the strap to the waterproof case.
Attach the strap to the waterproof case as
shown in ➀ and ➁.
2
Tighten the hand strap around your wrist.
➀ Put your hand and wrist through the
hand strap.
➁ To reduce the risk of dropping the
camera, tighten the hand strap around
your wrist using the adjuster.
Opening the waterproof case using the adjuster of the strap
When opening the waterproof case, you can also use the adjuster of the strap if
you do not have the special pick.
➀ Insert the adjuster’s tab as shown in
the illustration.
➁ Release the lock of the open/close
knob.
Do not use the adjuster of the strap
to detach the O-ring. Water leaks may
result if the O-ring is damaged or
contaminated with foreign particles.
EN-16
Installing the flash diffusion plate
Install the supplied flash diffusion plate.
■ Install the flash diffusion plate
Attach the flash diffusion plate strap to the
waterproof case as shown in ➀ and ➁.
Avoid catching the strap when opening
or closing the waterproof case.
Insert the plate securely until it clicks.
EN-17
ENGLISH
Insert the flash diffusion plate into the
groove of the lens ring as shown in the
illustration.
Taking Pictures
• Using the waterproof case, you can take pictures down to 40 m (131 ft.)
underwater.
• The operation unit functions correspond to individual operations of the
camera. For the operating instructions or functions for the camera, see the
Owner’s Manual supplied with your camera.
1
Turn the camera on.
2
Set the Shooting Mode.
Press the “ON/OFF” button.
➀ Rotate the mode dial to choose a
➀
Shooting mode.
➁ Check the Shooting mode on the LCD
monitor window.
Test-shoot before using the protected
camera under water.
When setting the Shooting mode, be
sure to that the mode indication for
the selected mode appears in the LCD
monitor.
➁
3
Hold the waterproof case firmly with both hands.
Hold the camera so that your fingers or the strap do not cover the lens, or flash.
If the lens, or flash is obscured, subjects may be out of focus or the brightness
(exposure) of your shot may be incorrect.
EN-18
4
Take the pictures.
➀ Press the Shutter button down
➁ Press the Shutter button down fully to
halfway to focus.
take a picture.
It is not possible to press the
Shutter button halfway while
recording movies.
Rotate the camera mode dial to H
and select F UNDERWATER for vivid
blues when shooting underwater. You
can also select g for the WHITE BALANCE
option in the camera mode menu.
For more information, see the Owner’s
Manual supplied with your camera.
Close-ups
Using a commercially available external flash is recommended for close-up shooting.
EN-19
ENGLISH
About the UNDERWATER mode
After Taking Pictures (Storage)
1
Turn the camera off.
Press the “ON/OFF” button to turn the
camera off.
Make sure that the camera is turned off.
2
At the end of shooting, immediately fill a container with fresh water to
wash off the salty sea water.
Rinse the outside of the waterproof case
well by stirring the water by hand.
If any salt remains on the case, it can
cause rust, local malfunctioning, and
other problems.
3
Wipe off the water droplets carefully from the waterproof case.
In particular, carefully wipe away the droplets from the joint of the waterproof
case.
Use a soft, lint-free piece of cloth or something similar.
Remove the water droplets from under the Shutter button, the open/close knob
and the others.
EN-20
4
Take the camera out of the waterproof case.
➀ Release the lock of the open/close
knob.
➁ Turn the open/close knob in the
direction of “OPEN” arrow to open the
waterproof case. Open it slowly so that
water does not drip onto the camera
inside.
Before opening or closing the
waterproof case, confirm that your hands
and hair are dry so that water droplets
do not drip onto the camera and inside
the waterproof case.
When your hands are wet, make sure not
to touch the camera or the battery.
Do not open the waterproof case in
places where the inside might get wet or
sandy.
➂ Pull the mode dial up and take the
camera out of the waterproof case (➃).
3
When taking the camera out of the
waterproof case, open the waterproof
case with the lens facing downwards to
avoid the camera falling out.
4
EN-21
ENGLISH
When opening or closing the waterproof
case, take care not to catch your fingers
or palm in the case.
After Taking Pictures (Storage)
5
With the camera dismounted, make sure that there are no water
droplets or foreign particles on the O-ring, close the waterproof case
and turn the open/close knob in the direction of “CLOSE” arrow to seal it
tight (pg.10). Wash it thoroughly with fresh water once again.
Try to remove any remaining salt by lightly
moving the various buttons under the
water.
We recommend soaking it in fresh water
for about 1 hour.
If stored with drops of salty water on it,
salt crystals will clog the movement of
the open/close knob and other parts.
Rusting may also be caused.
When closing the waterproof case, take
care not to catch your fingers or palm in
the waterproof case.
6
Carefully wipe off the water droplets from the waterproof case.
Use a soft, lint-free piece of cloth or something similar.
Remove the water droplets from under the Shutter button, the open/close knob
and the others.
7
Open the waterproof case a little and dry it in a breezy place out of
direct sunlight. After drying the case, store it where it will not be directly
exposed to sunlight.
Do not use a hair dryer, warm or hot air,
or direct sunlight to dry the waterproof
case.
EN-22
About the settings of the control ring
You can change the function assigned to the control ring. We recommend that you
change the function of the control ring before using the water proof case. For the
operating instructions for the camera, see the Owner’s Manual supplied with your
camera.
To operate the control ring of the camera, use the dial for the control ring.
ENGLISH
About the command dial
Since operation of the command dial is not available while using the water
proof case, the following functions cannot be operated.
■ Shooting
• The amount of softening cannot be adjusted when using the pro focus
mode.
• The size of the focus frame cannot be reduced or enlarged when
F FOCUS AREA is selected.
• The shutter speed cannot be changed when the A SCENE POSITION
option is set to p.
■ Playback
• While a picture is zoomed in, the other pictures cannot be viewed.
About the settings of the control ring
When DEFAULT is selected in CONTROL RING SETTING, the dial for the control
ring can be used to set program shift, shutter speed or aperture. To use manual
focus, set FOCUS MODE to N.
The following settings cannot be changed when the control ring is set other than
DEFAULT or when N MANUAL FOCUS is selected for F FOCUS MODE.
• Program shift in P mode
• Aperture in A mode
• Shutter speed in S mode
• Aperture/Shutter speed in M mode
EN-23
Maintenance
Maintenance after use
Always do this immediately after using the waterproof case. Check that the O-ring has
no dents or flaws caused by foreign particles, cracks, or other damage.
1
Remove the O-ring from the waterproof case.
O-ring
O-ring
➀ Insert the special pick between the Oring and the O-ring groove.
➁ Insert the tip of the special pick
beneath the O-ring. Take care not to
scratch the groove with the tip of the
pick.
➂ Grip the suspended the O-ring
between your fingers and remove it
from the waterproof case.
EN-24
2
Remove old grease and foreign particles such as fibers and sand from
the O-ring.
Wipe foreign particles off with a soft, lint-free piece of cloth.
Dry the rinsed O-ring without wiping water again. This is to prevent fiber
attachment.
3
Pick up the O-ring with your fingers and feel it carefully, exerting only
light pressure, all along it to check whether or not there are any dents or
flaws caused by foreign particles or cracks due to deterioration (you can
feel these with the tip of the finger).
When pressing with your fingers and sliding them over the O-ring, be careful not to
stretch it by pulling too tight.
ENGLISH
Examples of foreign particles and damage
Hair
4
Lint
Sand
Dents caused by
foreign particles
Flaw
Crack
Remove all foreign particles from the O-ring groove using a toothbrush
or cotton swab.
Make completely sure that no waste lint from the cotton swab is left behind.
5
Coat the O-ring with the special grease.
To apply a uniformly thin layer of silicone
grease to the O-ring, squeeze out about
5 mm (0.2 in.) of the grease provided
with this product from the tube into a
clean plastic bag (about 10 cm (3.9 in.) ×
20 cm (7.9 in.) in size) and then knead it
thoroughly. Put the O-ring into the plastic
bag and continue kneading until the
O-ring is completely covered with grease.
The plastic bag can be used more than
once if kept clean.
EN-25
Maintenance
6
Install the O-ring.
Feel the O-ring with the tip of your finger to confirm that there is no step or twist.
If you feel a step or twits, the O-ring may not be attached correctly.
If installed incompletely, reinstall it, following the instructions on page 24.
If the O-ring is twisted or bulged out, or if there is any foreign particle on or
underneath it, water will leak in.
When carrying out O-ring maintenance, take particular care to avoid getting grease
on the lens window and LCD monitor window. If there is any soiling on the lens
window or LCD monitor window, gently wipe it off with a soft dry cloth.
EN-26
Notes on Using the Waterproof Case Correctly
■ To avoid water leaks
If this case leaks while using it and soaks the digital camera inside, the camera cannot
be repaired. Take the following precautions before use.
• The standard life of the O-ring is about one year, though it depends on operating
conditions. Replace the O-ring with a new one once a year.
• Any foreign particles caught in the O-ring may cause a water leak. Wipe them off,
making sure that no lint remains stuck to the O-ring. If a foreign particle cannot
easily be removed, try washing it off with water.
• If the O-ring is scratched, cracked, discolored or deformed, replace it with a new one.
• When replacing the O-ring, first clean the groove for the O-ring and check that it is
free of grains of sand, dust, hair, and other foreign particles.
• For the O-ring, use the specified brand of silicone grease recommended by
FUJIFILM.
• If the O-ring is not seated correctly, a water leak may occur. When mounting the
O-ring, take care that it stays in the groove and does not become twisted (pg. 26).
• Do not leave the waterproof case in direct sunlight in summer, in a closed vehicle,
or near heating equipment. Do not apply any long-term external force to the
waterproof case. Deformation caused by heat or force may cause a loss of waterproofing, making it unusable for use under water.
• Be careful not to damage the O-ring or the face that contacts it by banging them
together or letting foreign particles (sand, dust or hair) get between them.
EN-27
ENGLISH
• Do not use or store the waterproof case at temperatures above
+40 °C/+104 °F.
• Do not use in water above +40 °C/+104 °F, since it may leak.
• Do not use thinner, benzene, alcohol, or other volatile chemicals for cleaning.
Applying any such chemicals to the waterproof case may cause damage to its
surface, and it will crack under high pressure.
• Do not overstrain the tripod mount.
• Do not strike or subject the waterproof case to impacts.
• Do not throw the waterproof case into the water.
• When you use waterproof case in seawater, wash it, while still tightly closed, in a
bucketful of fresh water to rinse off the salt. Then dry the outside of the case, using a
dry, soft piece of cloth.
• This product is designed to be used under water as a waterproof case. Do not leave
it or store it with the camera still inside: the battery may leak or even cause a fire.
• When the camera is carried onboard an airplane with the waterproof case closed,
the case may not open. Be sure to open the waterproof case before bringing the
camera onto the airplane. If the waterproof case does not open, immerse the
camera into lukewarm water to warm the inside air and reduce the difference in air
pressure, and then open the waterproof case.
• Carry out the submersion and final test before using the product.
• If you find any signs of water leakage while taking photos, immediately take the
product out of the water. Look into the cause and take suitable action.
Examples of foreign particles and damage
Hair
Lint
Sand
Dents caused by
foreign particles
Flaw
Crack
Specifications
Camera with which
it should be used
Digital camera XQ1
Pressure resistance
Up to 40 m (131 ft.) deep in water
Main materials
Case proper: Transparent polycarbonate
Lens window: Glass
Dimensions
(W × H × D)
143.6 mm × 101 mm × 105 mm / 5.6 in. × 3.9 in. × 4.1 in.
(including the attachments)
Weight
Approx. 421 g / 14.8 oz. (not including camera and
accessories)
✽ These specifications are subject to change without notice. FUJIFILM shall not be held liable
for any damage resulting from errors in this Owner’s Manual.
Accessories Guide
• Silica gel pack set (SST-01)
Desiccating agent for lens blur reduction (Silica gel pack × 6)
• O-ring kit (ORK-XQ1)
Optional kit for maintenance
(Spare O-ring × 1, Special pick for Opening knob unlocked/O-ring remover × 1)
• Special silicone grease (SGR-01)
Special silicone grease for O-ring maintenance
(Special silicone grease × 1[approx. 3 g / 0.1 oz])
EN-28
ENGLISH
EN-29
Notes pour la sécurité
Merci d’avoir choisi un de nos produits.
Avant d’employer le produit, n’oubliez pas de lire le “Mode d’emploi”, et en
particulier les “Notes pour la sécurité”, aussi bien que le “Mode d’emploi” de
l’appareil photo numérique. Après les avoir lus, gardez-les à proximité afin de
pouvoir les consulter facilement à tout moment.
■ Dans ce document, les icônes
AVERTISSEMENT
montrées ci-dessous sont
employées pour indiquer la
sévérité des blessures ou des
dommages qui peuvent résulter
si l’information indiquée par
l’icône est ignorée ou si le
produit est manipulé de façon
incorrecte.
Ne le
démontez pas.
AVERTISSEMENT
Cette icône indique que des
blessures graves peuvent se
produire si l’information est
ignorée.
ATTENTION
Cette icône indique que l’on
risque d’être blessé ou de
provoquer des dommages
matériels si l’information est
ignorée.
■ Les icônes illustrées, ci-dessous,
sont utilisées pour indiquer la
nature des informations que
vous devez observer.
N’essayez jamais de modifier ou
de démonter l’appareil photo.
Cela risque de causer des fuites
d’eau.
Ne mettez pas l’appareil photo
sur une surface inclinée ou
mobile.
Cela risque de faire tomber ou de
casser l’appareil et également cela
risquerait de causer des blessures
ou des dégâts.
N’utilisez que la batterie indiquée
pour l’appareil photo.
L’utilisation d’autres sources
d’énergie peut causer un incendie.
N’utilisez que la batterie
indiquée.
Chargez la batterie en respectant la
marche à suivre de l’indicateur.
Ne chauffez pas, ne modifiez pas
et n’essayez pas de démonter la
batterie.
Ne laissez pas tomber ou ne
soumettez la batterie à aucun
impact.
Ne court-circuitez pas la batterie.
Ne stockez pas la batterie à côté
de produits métalliques.
N’employez pas de chargeur
autre que le modèle indiqué pour
charger la batterie.
La non conformité aux instructions
ci-dessus risque de provoquer
l’éclatement de la batterie, ainsi que
des fuites, du feu ou des blessures.
Les icônes triangulaires informent
l’utilisateur d’information
demandant une importante
attention (“Important”).
Les icônes circulaires barrées en
diagonale vous informent que
l’action indiquée est interdite
(“Interdite”).
Les cercles entourant un point
d’exclamation informent l’utilisateur
qu’une action doit être effectuée
(“Requis”).
FR-2
Ne laissez pas cet appareil à côté
de jeunes enfants.
Ce produit peut causer des
blessures s’il se trouve dans les
mains d’un enfant.
Faites attention lorsque vous
utilisez le caisson étanche avec la
dragonne.
Cela risque de faire ballotter le
caisson inopinément, entraînant des
dommages ou des blessures.
Ne laissez pas l’appareil photo
sous-marin dans la lumière
du soleil directe ou dans des
endroits aux températures
extrêmes.
Si la pression à l’intérieur du caisson
est élevée due à la chaleur, le
couvercle peut s’ouvrir brutalement
et causer des dommages ou des
blessures.
Ce produit ne doit être ni ouvert
ni fermé dans des endroits
sableux ou poussiéreux.
Si un grain de sable ou de poussière
s’introduit dans le joint torique, cela
risque de causer des fuites d’eau.
Ne laissez pas le produit dans
les endroits aux températures
extrêmement élevées ou basses.
Cela risque de l’endommager.
S’il arrive que l’appareil
photo soit mouillé, enlevez
immédiatement la batterie de
l’appareil photo.
N’employez pas le produit à des
profondeurs excédant 40 m audessous de la surface.
Au-delà, il risque de se casser.
FRANÇAIS
Le gel de silice ou la graisse
utilisés avec ce produit ne
doivent pas être mangés.
Si ceux-ci sont portés à la
bouche ou mangés, consultez
immédiatement un médecin.
ATTENTION
Ne laissez pas tomber le produit
et ne le cognez pas contre des
objets durs.
Cela peut fendre le produit et
causer des fuites d’eau.
Enlevez la batterie lorsque vous
nettoyez l’appareil photo ou
lorsque vous ne l’employez pas
pendant une longue période.
Sinon, la batterie risquerait de fuir
ou de s’enflammer.
N’employez pas le flash trop près
des yeux d’une personne.
Cela peut temporairement
affecter la vue. Faites attention,
en particulier, lorsque vous
photographiez des enfants.
FR-3
Tables des matières
Notes pour la sécurité................................................................................................................2
Tables des matières .....................................................................................................................4
Préface .................................................................................................................................................5
Accessoires inclus.........................................................................................................................5
Légende .............................................................................................................................................6
Essai préliminaire du caisson .................................................................................................8
Faire un essai préliminaire d’immersion du caisson étanche avant
d’y placer l’appareil photo numérique .................................................................................8
Mettre l’appareil photo numérique dans le caisson étanche ........................11
Effectuez un essai final .................................................................................................................14
Fixation de la dragonne.........................................................................................................16
Installation de la plaque de diffusion flash ................................................................17
Prises de vues ...............................................................................................................................18
Après les prises de vues (stockage)................................................................................20
Paramètres de la bague de contrôle .............................................................................23
Entretien ..........................................................................................................................................24
Entretien après utilisation...........................................................................................................24
Notes pour employer le caisson étanche correctement ..................................27
Caractéristiques ..........................................................................................................................28
Guide des accessories.............................................................................................................28
FR-4
Préface
• FUJIFILM Corporation n’accepte pas de responsabilité pour des pertes fortuites
telles qu’elles soient (tels que des coûts ou des pertes de revenu concernant la
photographie) qui proviendraient de susceptibles défauts de ce produit.
■ N’oubliez pas de lire ceci avant tout usage
• Ce caisson étanche est conçu pour l’usage sous-marin à une profondeur maximum
de 40 m. Utilisez le avec soin.
• Veuillez suivre les directives de ce mode d’emploi concernant la préparation du
caisson étanche avant son utilisation, comment faire un essai préliminaire, comment
entretenir le caisson et comment l’entreposer après utilisation. N’employez ce
produit uniquement comme décrit dans ce mode d’emploi.
• FUJIFILM Corporation n’indemnisera aucun dommage causé à l’appareil photo
numérique ou aucune perte fortuite causés par l’utilisation incorrecte du caisson
étanche.
• FUJIFILM Corporation ne compensera aucune blessures, morts ou dégâts matériels
causés pendant l’utilisation.
Accessoires inclus
• Stylet (1)
(pour libérer le bouton d’ouverture et
enlever le joint torique)
• Graisse de silicone spéciale (1)
• Paquet de gel de silice (3)
• Mode d’emploi (cette brochure)
• Guide d’entretien rapide
• Plaque de diffusion flash
FR-5
FRANÇAIS
• Dragonne (1)
Légende
Commande de zoom
(i Téléobjectif /
j grand angle)
Touche “ON/OFF”
Molette de mode
Bouton du
déclencheur
Griffe flash
Blocage du bouton d’ouverture /
fermeture
Bouton d’ouverture /
fermeture
Fenêtre d’objectif
Bouton de la bague de
contrôle
Anneau d’objectif
Monture de la
dragonne
Paresoleil
Capot intérieur du LCD
Joint torique / rainure du
joint torique
Monture de la
plaque de diffusion flash
• Le bouton du flash (P. 11) et la molette de commande (P. 23) ne peuvent être
actionnés lorsque le boîtier étanche est ouvert.
FR-6
Touche t
(enregistrement de film)
Touche a Lecture
Fenêtre d’écran LCD
Touche MENU / OK
Touche DISP
(Affichage) / BACK
Bouton E-Fn (à fonctions
multiples)
Bouton Wi-Fi (mode lecture)
6789 Touche de sélection
[Photographie]
[Lecture]
8/F Touche macro
6/b Touche supprimer
9/N Touche flash
6/d Touche de compensation d’exposition
FRANÇAIS
7/h Touche retardateur
• Les fonctions d’unité opératoires correspondent aux opérations individuelles
de l’appareil photo. Vérifiez les fonctions de l’unité dans le “Mode d’emploi” de
l’appareil photo numérique.
• Une feuille de protection recouvre la fenetre d’ecran LCD lors de votre achat.
N’oubliez pas d’enlever cette feuille avant l’emploi.
FR-7
Essai préliminaire du caisson
Faire un essai préliminaire d’immersion du caisson étanche avant
d’y placer l’appareil photo numérique
Avant d’installer l’appareil photo numérique dans le caisson, veillez à ce que celui-ci soit
bien étanche.
1
Examinez l’extérieur du caisson étanche pour vérifier s’il n’y a aucune
fissure ou défaut.
2
Ouvrez le caisson étanche en utilisant le stylet (livrée avec le caisson).
Bouton d’ouverture/
fermeture
Stylet (livrée avec le caisson)
➀ Libérez le blocage du bouton
d’ouverture/fermeture.
➁ Tournez le bouton d’ouverture/
fermeture dans la direction de la flèche
“OPEN” pour ouvrir le caisson étanche.
Lorsque vous ouvrez ou refermez le caisson
étanche, veillez à ne pas vous coincer les
doigts ou la main dans le caisson.
Vous pouvez également utiliser le régleur
de la dragonne si vous ne possédez pas
le stylet (P.16).
3
Examinez l’intérieur du caisson étanche pour les points suivants :
Joint torique
• S’assurer qu’il n’y a pas de fissures (en
particulier autour du joint torique)
• S’assurer que le joint torique est
installé correctement (pour installer
correctement le joint torique, voir P.24.)
• S’assurer que le joint torique n’a
aucune éraflure ou fissure, et qu’il n’est
pas déformé, tordu, détaché, etc.
• S’assurer que ni du sable ni des
particules étrangères ne sont collés au
joint torique
FR-8
4
Essuyez avec un morceau de tissu doux et non pelucheux les corps
étrangers qui sont collés sur le joint torique entier. (Fig. Position A)
Si vous utilisez du papier de soie ou des mouchoirs en papier, vérifiez bien que de
fines fibres ne se déposent pas sur le joint.
Joint torique A
Joint torique
5
Vérifiez le joint torique installé.
Faites glisser le bout de votre doigt sur le joint torique pour confirmer qu’il n’est ni
renflé, ni déformé. Si vous constatez que celui-ci l’est en effet, il pourrait ne pas se
fixer correctement.
S’il n’est pas posé complètement, posez-le de nouveau en vous référant à la P.24.
Si le joint torique est déformé ou renflé, ou si un corps étranger se loge dessus ou
dessous, l’eau s’y infiltrera.
FRANÇAIS
Joint torique
FR-9
Essai préliminaire du caisson
6
Si vous êtes assuré que tout est en ordre, appliquez la graisse de silicone
spécial avec un doigt propre. Ensuite, assurez-vous que la graisse de silicone
est étalée également sur le joint jusqu’à ce qu’il soit complètement graissé.
Joint torique
N’utilisez que la graisse de silicone
spéciale qui est fournie.
Après avoir appliqué la graisse, examinez
qu’aucun grain de sable ou autres
substances ne sont collés au joint
torique.
7
Fermez le caisson étanche.
➀ Fermez le caisson étanche et tournez
le bouton d’ouverture/fermeture dans
la direction de la flèche “CLOSE” pour le
fermer.
➁ Bloquez le bouton d’ouverture/fermeture.
Lorsque vous fermez le caisson étanche,
veillez à ne pas vous coincer les doigts
ou la main.
8
Mettez le caisson étanche vide dans une bassine ou une baignoire
remplie d’eau et assurez vous qu’il n’y a pas de fuites d’eau. Pour vérifier
le montage des joints toriques, voir la P.14.
Si des gouttelettes d’eau sont détectées ...
➀ Enlevez immédiatement le caisson étanche de l’eau et séchez en l’extérieur.
➁ Vérifiez qu’il n’y a aucune fissure dans le corps du caisson étanche. Examinez
le joint torique pour vous assurer qu’il n’y a pas de particules étrangères, de
défauts, fissures, déformations ou torsions. Examinez également la rainure du
joint torique pour vous assurer qu’aucune particule étrangère ne s’y soit glissée.
➂ Si tout est bien, recommencez en utilisant le procédé détaillé en P.8.
Si vous trouvez des anomalies dans le caisson étanche, arrêtez immédiatement de
l’utiliser et prenez contact avec votre revendeur FUJIFILM.
FR-10
Mettre l’appareil photo numérique dans le
caisson étanche
Avant installation, effectuez les vérifications suivantes :
• Pour utiliser la capacité totale de la batterie lorsque vous prenez des photos sousmarines, chargez la batterie entièrement avant utilisation.
• Vérifiez combien de nouvelles photos peuvent être stockées sur le support.
• Enlevez la dragonne de l’appareil photo numérique. L’usage de l’appareil photo dans
le caisson étanche avec la dragonne peut causer des fuites d’eau.
1
Mettez l’appareil photo hors tension.
2
Faites glisser le bouton du flash pour allumer le flash.
Concernant les instructions d’utilisation de l’appareil photo, comme le réglage du
mode flash, consultez le Manuel du Propriétaire fourni avec l’appareil photo.
FR-11
FRANÇAIS
• Allumez le flash avant de placer l’appareil photo dans le boîtier étanche.
Mettre l’appareil photo numérique dans le caisson étanche
3
Ouvrez le boîtier étanche (P. 8) et tournez la molette de mode (➀), puis
placez-y l’appareil photo (➁).
Glissez l’appareil photo dans le caisson
jusqu’à ce qu’il soit correctement bloqué.
Lorsque vous ouvrez ou refermez le caisson
étanche, veillez à ne pas vous coincer les
doigts ou la main dans le caisson.
Veillez à placer correctement l’appareil
photo dans le caisson étanche.
4
Insérez le paquet de gel de silice dans l’espace, sous la base de l’appareil
photo.
Paquet de gel de silice
Assurez vous que le paquet de gel de
silice soit correctement installé. S’il est
incomplètement inséré, il empêchera le
joint torique d’agir et l’eau entrera.
FR-12
5
Assurez-vous des points suivants avant de fermer le caisson étanche.
Paquet de gel
de silice
6
• Aucune partie du paquet de gel de
silice ne doit dépasser.
• Il ne doit y avoir aucune poussière,
cheveux, ou autres corps étrangers
sur le joint torique, dans la rainure du
joint torique, ou sur le côté du caisson
étanche qui correspond au joint
torique.
• L’appareil photo doit être correctement
posé et aligné dans le caisson étanche.
Joint torique
Lorsque toutes les vérifications sont effectuées, refermez le caisson
étanche.
→ Vérifiez que la touche « ON/OFF » peut être correctement actionnée à l’aide des
commandes du boîtier.
➀ Fermez le caisson étanche et tournez
Lorsque vous fermez le caisson étanche,
veillez à ne pas vous coincer les doigts
ou la main.
Pour éviter les fuites d’eau
Toutes les particules étrangères
attachées au joint torique peuvent
causer des fuites d’eau. Enlevez-les (voir
P.24). Si vous ne pouvez pas les enlever,
remplacez le joint torique par un neuf.
Cheveux
FR-13
Fibres
Sable
FRANÇAIS
le bouton d’ouverture/fermeture dans
la direction de la flèche “CLOSE” pour le
fermer.
➁ Bloquez le bouton d’ouverture/fermeture.
Mettre l’appareil photo numérique dans le caisson étanche
Effectuez un essai final
Effectuez un essai final d’immersion du caisson étanche après montage de l’appareil
photo numérique. Vérifiez si vous apercevez des fuites d’eau lorsque vous immergez le
caisson dans une bassine ou une baignoire remplie d’eau. Si besoin est, c’est-à-dire si
vous apercevez une fuite d’eau, soyez prêt à retirer l’ensemble immédiatement de l’eau
(afin de protéger l’appareil photo à l’intérieur).
1
Immergez l’ensemble dans l’eau pendant 30 secondes.
Jonction
2
• Si vous voyez un écoulement continu
de bulles d’air à partir du joint du
caisson étanche dans l’eau, ceci
indique une fuite (P.15).
• Si, au contraire tout va bien, actionnez
les boutons et prennez quelques
photos d’essai dans l’eau.
Après avoir soulevé doucement le caisson étanche hors de l’eau, vérifiez
attentivement ce qui suit :
Gouttelettes
d’eau
• Gouttelettes d’eau près du joint du
caisson étanche (P.15).
• Traces d’eau à l’intérieur du caisson
étanche (P.15).
FR-14
Si des gouttelettes d’eau sont détectées ...
➀ Enlevez immédiatement le caisson étanche de l’eau et séchez en l’extérieur.
➁ Enlevez l’appareil photo numérique du caisson étanche. Si vous voyez des
gouttes d’eau sur l’appareil photo numérique, essuyez-les immédiatement.
Lorsque vous retirez l’appareil photo du caisson étanche, ouvrez le caisson
étanche objectif vers le bas afin d’éviter que l’appareil photo ne tombe.
Egalement, lorsque vous ouvrez ou refermez le caisson étanche, veillez à ne pas
vous coincer les doigts ou la main dans le caisson.
➂ Vérifiez qu’il n’y a aucune fissure dans le corps du caisson étanche. Examinez
le joint torique pour vous assurer qu’il n’y a pas de particules étrangères, de
défauts, fissures, ou déformations ou torsions. Examinez également la rainure du
joint torique pour vous assurer qu’aucune particule étrangère ne s’y est glissée.
➃ Si tout est bien, recommencez en utilisant le procédé détaillé en P.8.
Si vous trouvez des anomalies dans le caisson étanche, arrêtez immédiatement
de l’utiliser et prenez contact avec votre revendeur FUJIFILM.
Si l’eau est entrée dans le corps de l’appareil photo, cessez immédiatement
de l’utiliser et prenez contact avec votre revendeur FUJIFILM. Utiliser l’appareil
photo dans un état défectueux peut causer une décharge électrique ou un
début d’incendie. Ne l’utilisez jamais dans cet état, dans aucune circonstance.
Cheveux
FR-15
Fibres
Sable
FRANÇAIS
N’importe quel genre de particule
étrangère attachée au joint torique
peut causer une fuite d’eau. Enlevez
les particules étrangères en suivant les
instructions données en P.24.
Fixation de la dragonne
1
Fixez la dragonne au caisson étanche.
Attachez la dragonne au caisson étanche
comme montré en ➀ et ➁.
2
Serrez-la bien autour de votre poignet.
➀ Mettez votre main et votre poignet à
l’intérieur de la dragonne.
➁ Pour réduire le risque de laisser tomber
l’appareil photo, serrez la dragonne
autour de votre poignet à l’aide du
régleur.
Ouverture du caisson étanche à l’aide du régleur de la dragonne
Lors de l’ouverture du caisson étanche, vous pouvez également utiliser le régleur
de la dragonne si vous ne possédez pas le stylet.
➀ Insérez l’onglet du régleur comme
indiqué dans l’illustration.
➁ Libérez le blocage du bouton
d’ouverture/fermeture.
N’utilisez pas le régleur de la dragonne
pour retirer le joint torique. Des fuites
d’eau risquent de se produire si le joint
torique est endommagé ou contaminé
par les particules étrangères.
FR-16
Installation de la plaque de diffusion flash
Installez la plaque de diffusion flash fournie.
■ Pour installer la plaque de diffusion flash
Fixez la dragonne de la plaque de diffusion
flash au caisson étanche comme indiqué
dans les schémas ➀ et ➁.
Veillez à ne pas coincer la dragonne
lorsque vous ouvrez ou fermez le caisson
étanche.
Insérez la plaque de diffusion flash dans
la rainure de l’anneau d’objectif comme
indiqué dans l’illustration.
Insérez bien la plaque jusqu’à ce
qu’elle s’encliquète.
FRANÇAIS
FR-17
Prises de vues
• En utilisant le caisson étanche, vous pouvez prendre des photos jusqu’à 40 m
sous l’eau.
• Les fonctions de l’unité correspondent à celles de l’appareil photo. Pour
obtenir les instructions de fonctionnement ou pour connaître les fonctions de
l’appareil photo, reportez-vous au mode d’emploi fourni avec l’appareil photo.
1
Mettez l’appareil photo sous tension.
Appuyez sur la touche « ON/OFF ».
2
Sélectionnez le mode prise de vues.
➀ Tournez la molette de mode pour
➀
choisir un mode de prise de vue.
➁ Vérifiez le mode de prise de vues dans
la fenêtre de l’écran LCD.
Prenez quelques photos avant de mettre
le caisson dans l’eau.
Lorsque vous activez le mode de prise
de vues, assurez-vous que l’indication du
mode sélectionné apparaît sur l’écran
LCD.
➁
3
Tenez le caisson étanche fermement avec les deux mains.
Tenez fermement l’appareil photo en prenant soin de ne pas obstruer l’objectif ou le
flash avec vos doigts ou avec la dragonne. Si l’objectif ou le flash est obstrué, le sujet
risque de se retrouver hors champ ou la luminosité (exposition) de votre photo ne
sera pas optimale.
FR-18
4
Effectuez des prises de vues.
➀ Appuyez à mi-course sur le
➁ Appuyez à fond sur le déclencheur
déclencheur pour faire la mise au
point.
pour prendre une photo.
Il n’est pas possible d’appuyer à micourse sur le déclencheur en mode
vidéo.
À propos du mode PLONGEE
Pour plus d’informations, reportezvous au mode d’emploi fourni avec
l’appareil photo.
Gros plans
Il est recommandé d’utiliser un flash externe, vendu dans le commerce, pour
prendre des photos en gros plan.
FR-19
FRANÇAIS
Tournez la molette de mode de
l'appareil photo sur H et sélectionnez
F PLONGEE pour obtenir des bleus
vifs lors d’un tournage sous l’eau. Vous
pouvez également sélectionner g
pour l'option BALANCE DES BLANCS dans le
menu des modes de l'appareil photo.
Après les prises de vues (stockage)
1
Mettez l’appareil photo hors tension.
Appuyez sur la touche « ON/OFF » pour
mettre l’appareil photo hors tension.
Assurez-vous que l’alimentation
électrique est vraiment coupée.
2
À l’issue des prises de vues, remplissez immédiatement un seau d’eau
douce de mer salée.
Veillez à bien rincer l’extérieur du caisson
étanche en remuant l’eau à la main.
Si du sel reste sur le caisson, cela peut
causer de la corrosion, des défauts de
fonctionnement et autres problèmes.
3
Essuyez soigneusement les gouttelettes d’eau sur le caisson étanche.
En particulier, essuyez soigneusement les gouttelettes du joint du caisson
étanche.
Utilisez un morceau de tissu doux et non pelucheux ou quelque chose de
semblable.
Enlevez les gouttelettes d’eau sous le déclencheur, le bouton d’ouverture/fermeture,
etc.
FR-20
4
Sortez l’appareil photo du caisson étanche.
➀ Libérez le blocage du bouton
d’ouverture/fermeture.
➁ Tournez le bouton d’ouverture/
fermeture dans la direction de la flèche
“OPEN”, ouvrez lentement le caisson
étanche afin que des gouttes d’eau ne
tombent pas dans l’appareil.
Avant d'ouvrir ou de refermer le caisson
étanche, assurez-vous que vos mains et vos
cheveux sont secs et que des gouttelettes
d'eau ne s'égouttent pas sur l'appareil
photo et à l'intérieur du caisson étanche.
Lorsque vous ouvrez ou refermez le caisson
étanche, veillez à ne pas vous coincer les
doigts ou la main dans le caisson.
Si vos mains sont mouillées, veuillez
absolument à ne pas toucher l’appareil
photo ou la batterie.
N’ouvrez pas le caisson étanche dans
des endroits où l’intérieur pourrait être
mouillé ou recevoir du sable.
➂ Tournez la molette de mode et retirez
l’appareil photo du boîtier étanche (➃).
Lorsque vous retirez l’appareil photo
du caisson étanche, ouvrez le caisson
étanche objectif vers le bas afin d’éviter
que l’appareil photo ne tombe.
4
FR-21
FRANÇAIS
3
Après les prises de vues (stockage)
5
Après avoir retiré l’appareil photo du caisson étanche, vérifiez qu’il n’y a
aucune gouttelette d’eau ou de particules étrangères sur le joint torique,
fermez le caisson étanche et tournez le bouton d’ouverture/fermeture
dans la direction de la flèche « CLOSE » pour le sceller et le rendre étanche
(P.10). Lavez-le complètement avec de l’eau douce de nouveau.
Essayez d’enlever tout sel resté en
tournant légèrement les divers touches
dans l’eau.
Nous vous recommandons de le laisser
tremper dans de l’eau claire environ 1 heure.
Si le caisson est stocké avec des gouttes
d’eau salée à l’extérieur, les cristaux de sel
obstrueront le mouvement du bouton
d’ouverture/fermeture ainsi que d’autres
pièces. Cela peut également entraîner de
la corrosion.
Lorsque vous fermez le caisson étanche,
veillez à ne pas vous coincer les doigts
ou la main.
6
Essuyez soigneusement les gouttelettes d’eau sur le caisson étanche.
Utilisez un morceau de tissu doux et non pelucheux ou quelque chose de
semblable.
Enlevez les gouttelettes d’eau sous le déclencheur, le bouton d’ouverture/fermeture,
etc.
7
Ouvrez légèrement le caisson étanche et séchez-le dans un endroit frais
hors de la lumière directe du soleil. Après avoir séché le caisson, mettezle où il ne sera pas directement exposée à la lumière du soleil.
N’employez pas un sèche-cheveux, de
l’air tiède ou chaud, ou la lumière directe
du soleil pour sécher le caisson étanche.
FR-22
Paramètres de la bague de contrôle
Vous pouvez modifier la fonction assignée à la bague de contrôle. Nous vous
recommandons de modifier la fonction de la bague de contrôle avant d’utiliser le
boîtier étanche. Concernant les instructions d’utilisation de l’appareil photo, consultez
le Manuel du Propriétaire fourni avec votre appareil photo.
Pour actionner la bague de contrôle de l’appareil photo, appuyez le bouton de la
bague de contrôle.
Molette de commande
La molette de commande ne pouvant être actionnée lors de l’utilisation du
boîtier étanche, les fonctions suivantes ne peuvent être actionnées.
• Le degré de flou ne peut être ajusté en utilisant la mise au point pro.
• La taille du cadre de mise au point ne peut être ni réduite, ni augmentée
lorsque la F ZONE DE MISE AU POINT est sélectionnée.
• La vitesse d’obturation ne peut être modifiée lorsque l’option A SCENES
est définie sur p.
■ Lecture
• Lorsqu’une image est agrandie, les autres images ne peuvent pas être
visualisées à l’écran.
Paramètres de la bague de contrôle
Lorsque DÉFAUT est sélectionné dans RÉGL. BAGUE CTRL., le bouton de la
bague de contrôle peut être utilisé pour ajuster le décalage du programme,
la vitesse d’obstruction ou l’ouverture. Pour utiliser le focus manuel, ajustez le
MODE MISE AU PT au N.
Les paramètres suivants ne peuvent être modifiés lorsque la bague de contrôle
est ajustée en un mode autre que DÉFAUT ou lorsque N FOCUS MANUEL est
sélectionné pour F MODE MISE AU POINT.
•
•
•
•
Décalage de Programme du mode P
Ouverture du mode A
Vitesse d’obturation du mode S
Ouverture/Vitesse d’obturation du mode M
FR-23
FRANÇAIS
■ Prise de vue
Entretien
Entretien après utilisation
Faites toujours ceci juste après l’utilisation du caisson étanche. Vérifiez que le joint
torique n’a subit aucune fissure ou détérioration causée par des particules étrangères.
1
Retirez le joint torique du caisson étanche.
Joint torique
Joint torique
➀ Insérez le stylet entre le joint torique et
la rainure du joint torique.
➁ Insérez le bout du stylet sous le joint
torique. Ne pas rayer la rainure avec le
bout du stylet.
➂ Saisissez le joint torique entre vos
doigts et enlèvez-le du caisson
étanche.
FR-24
2
Retirez la graisse et les particules, telles que fibres ou sable, du joint
torique.
Essuyez les particules du joint torique à l’aide d’un chiffon doux et non pelucheux.
Après avoir rincé le joint torique à l’eau claire, séchez-le sans l’essuyer afin
d’empêcher que des fibres s’y attachent.
3
Prenez le joint torique et glissez vos doigts dessus, soigneusement
et en exerçant une légère pression tout le long pour vérifier qu’il n’y
a ni bosselures ni dommages ou fissures causés par des particules
étrangères (vous pouvez sentir ces derniers avec le bout du doigt).
Faites attention, lorsque vous tirez le joint torique, de ne le détendre en le tirant trop
fort.
Exemples des particules étrangères et de dommages
Cheveux
Sable
Eraflures causées
par des particules
étrangères
Défaut
Fissure
Enlevez toutes les particules étrangères de la rainure du joint torique en
utilisant un coton tige ou une brosse à dents.
Vérifiez soigneusement qu’aucunes fibres du coton tige ne soit laissées.
5
Enduisez le joint torique avec la graisse spéciale.
Pour appliquer uniformément une fine
couche de graisse de silicone sur le joint
torique, pressez le tube pour sortir environ
5 mm de la graisse fournie avec ce produit
dans un sac plastique propre (d'environ 10
cm × 20 cm) et malaxez-la complètement.
Après, mettez le joint torique dans le sac
plastique et continuez de malaxer jusqu’à ce
que le joint soit complètement couvert de
graisse. Le sac plastique peut être employé
plus d’une fois s’il est maintenu propre.
FR-25
FRANÇAIS
4
Fibres
Entretien
6
Installer le joint torique.
Faites glisser le bout de votre doigt sur le joint torique pour confirmer qu’il n’est ni
renflé, ni déformé. Si vous constatez que le joint torique est renflé ou déformé, il se
pourrait qu’elle ne se fixe pas correctement.
S’il n’est pas installé correctement, installez-le à nouveau conformément aux
instructions données à la page 24.
Si le joint torique est déformé ou renflé, ou si un corps étranger se loge dessus ou
dessous, l’eau s’y infiltrera.
Concernant l’entretien du joint torique, veillez particulièrement à éviter que la
graisse se dépose sur la fenêtre du viseur et la fenêtre du moniteur LCD. Si tel est le
cas, essuyez-le délicatement avec un chiffon doux et sec.
FR-26
Notes pour employer le caisson étanche
correctement
■ Pour éviter des fuites d’eau
Si ce caisson fuit tandis que vous l’employez et mouille l’appareil photo numérique à
l’intérieur, l’appareil photo ne peut pas être réparé. Prenez les précautions suivantes
avant utilisation.
• La vie standard d’un joint torique est d’environ un an, bien qu’elle dépende des
conditions d’utilisation. Changez le joint torique par un neuf une fois par an.
• Les particules étrangères attrapées par le joint torique peuvent causer une fuite
d’eau. Essuyez-les, en vérifiant qu’aucune fibre n’est collée au joint torique. Si une
particule étrangère ne peut pas être enlevée facilement, essayez de l’enlever en
lavant dans l’eau.
• Si le joint torique est rayé, fendu, décoloré ou déformé, remplacez-le par un neuf.
• Lors du remplacement du joint torique, nettoyez d’abord la rainure du joint torique
et vérifiez qu’elle est exempte de grains de sable, de poussières, de cheveux ou poils,
et d’autres particules étrangères.
• Pour le joint torique, employez la graisse de silicone de la marque spécifiée qui est
recommandée par FUJIFILM.
• Si le joint torique n’est pas posé correctement, une fuite d’eau peut se produire. En
mettant le joint torique, veuillez à ce qu’il reste bien dans la rainure et qu’il ne soit ni
tordu ni débordant la rainure (p.26).
• Ne laissez pas le caisson étanche à la lumière du soleil directe en été, dans un
véhicule fermé, ou à côté d’équipement de chauffage. N’appliquez aucune force
externe pendant une longue durée au caisson étanche. La déformation causée par
la chaleur ou la force peut causer une perte d’étanchéité, le rendant inutilisable dans
l’eau.
FR-27
FRANÇAIS
• N’employez pas, et ne gardez pas non plus le caisson étanche à des températures
dépassant +40 °C.
• Ne l’employez pas dans de l’eau dont la température excède +40 °C, car alors il
pourrait fuir.
• N’employez pas du diluant, benzène, alcool, ou d’autres produits chimiques volatils
pour le nettoyage. L’application de tels produits chimiques sur le caisson étanche
peut en endommager la surface, et causer des fissures sous haute pression.
• Ne surchargez pas la monture de trépied.
• Ne cognez pas, ne donnez pas d’impacts forts au caisson étanche.
• Ne jettez pas le caisson étanche dans l’eau.
• Si vous employez le caisson étanche dans l’eau de mer, lavez-le dans un seau d’eau
douce pour en enlever le sel, tandis qu’il est encore fermé et étanche. Séchez
ensuite l’extérieur du caisson, en utilisant un morceau de tissu sec et doux.
• Ce produit est conçu pour être employé dans l’eau comme caisson étanche. Ne le
laissez pas, ne le stockez pas non plus avec l’appareil photo à l’intérieur : la batterie
peut fuir et même déclencher un feu.
• Lorsque l'appareil photo est transporté dans un avion avec le caisson étanche fermé,
il se peut que le caisson ne puisse pas être ouvert. Veillez à ouvrir le caisson étanche
avant d'apporter l'appareil photo dans l'avion. Si le caisson étanche ne s'ouvre
pas, immergez l'appareil photo dans de l'eau tiède pour réchauffer l'air intérieur et
réduire la différence de pression d'air, puis ouvrez le caisson étanche.
• Faites attention de ne pas endommager le joint torique ou le côté qui le touche en
frappant ou en laissant des particules étrangères (sable, poussière ou cheveux) entre
eux.
• N’ultisez le caission étanche qu’après un essai d’immersion et un essai final.
• Si vous avez trouvé des signes de fuite d’eau tout en prenant des photos, retirez
immédiatement le produit hors de l’eau. Examinez la cause et prenez les mesures
appropriées.
Exemples des particules étrangères et de dommages
Cheveux
Fibres
Sable
Eraflures causées
par des particules
étrangères
Défaut
Fissure
Caractéristiques
Appareil avec lequel
le produit devrait être
utilize
Appareil photo numérique de XQ1
Résistance à la pression
Jusqu’à 40 m de profondeur dans l’eau maximum
Matériaux principaux
Caisse : polycarbonate transparent
Fenêtres d’objectif : Verre
Dimensions (W × H × D)
143.6 mm × 101 mm × 105 mm (accessoires compris)
Poids
Environ 421 g (l’appareil photo et les accessoires ne sont
pas inclus.)
✽ Sous réserve de modifications sans préavis. FUJIFILM n’acceptera aucune responsabilité à la
suite de dégâts éventuels proventuels provenant d’erreurs dans ce mode d’emploi.
Guide des accessories
• Jeu de paquets de gel de silice (SST-01)
Agent dessiccant destiné à réduire le flou de l’objectif (Paquet de gel de silice × 6)
• Kit pour joints toriques (ORK-XQ1)
Kit d’entretien en option
(Joint torique de rechange × 1, stylet pour libérer le bouton d’ouverture/enlever le
joint torique × 1)
• Graisse de silicone spéciale (SGR-01)
Graisse de silicone spéciale pour l’entretien du joint torique (Graisse de silicone
spéciale × 1 [environ 3 g])
FR-28
FRANÇAIS
FR-29
Sicherheitshinweise
Vielen Dank für den Kauf dieses Produktes.
Bevor Sie dieses Produkt verwenden, lesen Sie unbedingt diese
Bedienungsanleitung, insbesondere die Sicherheitshinweise und ebenfalls die
Bedienungsanleitung für die Digitalkamera. Nachdem Sie diese durchgelesen
haben, halten Sie diese zur Hand, so dass Sie dort jederzeit schnell nachschlagen
können.
■ Die folgenden Symbole werden
in diesem Dokument verwendet, um
den Schweregrad der Verletzungen
oder Schäden anzuzeigen, die
entstehen können, wenn die mit dem
Symbol gekennzeichnete Information
ignoriert oder das Produkt nicht
ensprechend bedient wird.
WARNUNG
WARNUNG
Nicht
auseinandemehmen.
Dieses Symbol zeigt an, dass
es bei Nichtbeachtung der
Information zu schweren
Verletzungen führen kann.
Dieses Symbol zeigt an, dass
es bei Nichtbeachtung der
VORSICHT Information zu persönlichen
Verletzungen oder
Sachschäden führen kann.
Versuchen Sie niemals, dieses
Produkt zu modifizieren oder
auseinanderzunehmen.
Dies kann zu Wassereintritt führen.
Legen Sie dieses Produkt nicht auf
eine schräge oder sich bewegende
Oberfläche.
Dies kann dazu führen, dass das
Produkt herunter- oder umfällt
und Schäden oder Verletzungen
verursacht.
Verwenden Sie nur Akkus, die für
den Gebrauch mit dieser Kamera
spezifiziert sind.
Die Verwendung von anderen
Stromquellen kann zu Feuergefahr
führen.
Verwenden Sie den Akku nur auf
die spezifizierte Weise.
Laden Sie den Akku gemäß der
Anzeige.
■ Die folgenden Symbole zeigen
die Art der zu beachtenden
Information an.
Diesen Akku niemals erhitzen
oder modifizieren und niemals
versuchen, ihn zu zerlegen.
Lassen Sie den Akku nicht fallen,
und setzen Sie ihn keinen Stößen
aus.
Schließen Sie den Akku nicht kurz.
Lagern Sie den Akku nicht
zusammen mit anderen
metallischen Produkten.
Verwenden Sie zum Aufladen des
Akkus keine anderen Ladegeräte
als das dafür spezifizierte Modell.
Wird eine der oben aufgeführten
Anweisungen nicht beachtet, kann
der Akku explodieren oder auslaufen
und somit Feuer oder Verletzungen
verursachen.
Dreieckige Symbole weisen den
Benutzer auf eine Information
hin, die beachtet werden muss
(“Wichtig”).
Kreisförmige Symbole mit einem
diagonalen Strich weisen den
Benutzer darauf hin, dass die
angegebene Aktion verboten ist
(“Verboten”).
Gefüllte Kreise mit einem
Ausrufezeichen weisen den
Benutzer auf eine Maßnahme hin,
die durchgeführt werden muss
(“Erforderlich”).
DE-2
Außerhalb der Reichweite von
Kleinkindern halten.
Dieses Produkt kann in den Händen
eines Kindes zu Verletzungen
führen.
Verwenden Sie das Blitzlicht
nicht zu nahe an den Augen einer
Person.
Die Sehkraft kann vorübergehend
beeinträchtigt werden. Lassen
Sie besondere Vorsicht walten,
wenn Sie Babys oder Kleinkinder
fotografieren.
Seien Sie vorsichtig, wenn
Sie das Unterwassergehäuse
mit angebrachtem Handgurt
verwenden.
Dies könnte zu unerwarteten
Schwingungen des Gehäuses
führen und infolgedessen Schäden
oder Verletzungen verursachen.
Öffnen oder schließen Sie dieses
Produkt nicht an sandigen oder
staubigen Orten.
Falls ein Sandkorn oder Staub an
dem O-Ring haftet, kann es zu
Wassereintritt führen.
Belassen Sie das
Unterwassergehäuse nicht in
direktem Sonnenlicht oder
an Orten mit extrem hohen
Temperaturen.
Falls der Druck im Inneren des
Gehäuses aufgrund der Hitze
ansteigt, kann sich der Deckel
schlagartig öffnen und zu
Verletzungen führen.
Belassen Sie dieses Produkt nicht
an einem Ort mit extrem hohen
oder niedrigen Temperaturen.
Dies kann zu Fehlbetrieb führen.
Falls Wasser in die Kamera
eintritt, entfernen Sie sofort den
Akku aus der Kamera.
Verwenden Sie dieses Produkt
nicht in Tiefen von mehr als 40 m
unter der Wasseroberfläche.
Es kann zu Fehlbetrieb führen.
Essen Sie nicht das für den
Gebrauch mit diesem Produkt
bestimmte Silikagel oder Fett.
Falls Silikagel oder Fett in Ihren
Mund gelangt oder verschluckt
wird, wenden Sie sich sofort an
einen Arzt.
VORSICHT
DEUTSCH
Lassen Sie dieses Produkt nicht
fallen, oder schlagen Sie es nicht
gegen harte Objekte.
Dadurch könnte das Produkt
Sprünge bekommen und
Wassereintritt verursachen.
Nehmen Sie den Akku aus der
Kamera,wenn Sie die Kamera
reinigen oder vorhaben,diese für
längere Zeit nicht zu gebrauchen.
Nichteinhaltung dieser Maßnahme
kann zum Auslaufen des Akkus oder
zu Feuergefahr führen.
DE-3
Inhalt
Sicherheitshinweise ....................................................................................................................2
Inhalt.....................................................................................................................................................4
Vorbemerkungen .........................................................................................................................5
Mitgeliefertes Zubehör .............................................................................................................5
Bezeichnung der Teile ...............................................................................................................6
Vorbereitende Überprüfung des Gehäuses .................................................................8
Führen Sie vor dem Einsetzen der Digitalkamera eine vorläufige
Eintauchprüfung des Unterwassergehäuses durch .....................................................8
Einsetzen der Digitalkamera in das Unterwassergehäuse ...............................11
Ausführen einer endgültigen Prüfung ...............................................................................14
Anbringen des Tragegurts ...................................................................................................16
Anbringen der Blitzdiffusorplatte ....................................................................................17
Fotografieren ................................................................................................................................18
Nach der Aufnahme (Aufbewahrung) .........................................................................20
Die Steuerring-Einstellungen .............................................................................................23
Wartung...........................................................................................................................................24
Pflege nach der Verwendung ..................................................................................................24
Hinweise zur richtigen Verwendung des Unterwassergehäuses ................27
Technische Daten ......................................................................................................................28
Sonderzubehör ...........................................................................................................................28
DE-4
Vorbemerkungen
• FUJIFILM Corporation übernimmt keine Haftung für Verluste (wie z.B. die Kosten für
Fotoabzüge oder den Verdienstausfall bei nicht gelungenen Fotos), die auf Fehler an
diesem Produkt zurückzuführen sind.
■ Lesen Sie vor der Verwendung unbedingt das Folgende
• Dieses Unterwassergehäuse ist für eine Wassertiefe von bis zu 40 m konstruiert.
Behandeln Sie das Gehäuse vorsichtig.
• Bitte folgen Sie den Richtlinien in dieser Anleitung hinsichtlich der Vorbereitung des
Unterwassergehäuses vor der Verwendung, der vorläufigen Kontrolle, der Wartung
des Gehäuses und der Aufbewahrung nach der Verwendung. Behandeln Sie dieses
Produkt nur nach der Beschreibung dieser Anleitung.
• FUJIFILM Corporation entschädigt nicht für etwaige Beschädigungen der
Digitalkamera oder Verluste aufgrund von ungeeigneter Verwendung des
Unterwassergehäuses.
• FUJIFILM Corporation entschädigt nicht für persönliche Verletzungen, Todesfolge
oder Sachschäden, die auf Mängel an diesem Produkt zurückzuführen sind.
Mitgeliefertes Zubehör
• Handgurt (1)
• Ausbauwerkzeug (1)
(zum Öffnen des Drehkopfes /
O-Ring-Entferner)
• Spezial-Silikonfett (1)
• Bedienungsanleitung
(dieses Handbuch)
• Schnellwartungsanleitung
• Blitzdiffusorplatte
DE-5
DEUTSCH
• Silikagel-Packung (3)
Bezeichnung der Teile
Zoomsteuerung
i (Tele-Zoom) /
j (Weitwinkel-Zoom)
ON/OFF-Taste
Zubehörschuh
Drehschalter
Moduswahl
Auslöser
Sperre des Öffnungs- /
Schließknopfes
Öffnungs- / Schließknopf
Objektivfenster
Steuerring-Drehrad
Objektivring
TragegurtBefestigungsbügel
Sonnenblende
BlitzdiffusorplatteBefestigungsbügel
LCD-Innenblende
O-Ring / O-Ring-Nut
• Die Taste zum Ausfahren des Blitzes (S. 11) und das Befehlsrad (S. 23) können
nicht genutzt werden, solange sich die Kamera im Unterwassergehäuse
befindet.
DE-6
t-Taste
(Filmaufnahme)
a Wiedergabe-Taste
LCD-Monitorfenster
MENU / OK-Taste
E-Fn-Taste (erweiterte
Funktionen)
Wi-Fi-Taste (Wiedergabemodus)
DISP (Display) /
BACK-Taste
6789 Auswahltaste
[Beim Aufnehmen]
[Bei der Wiedergabe]
8/F Makro-Taste
6/b Löschen-Taste
9/N Blitztaste
6/d Belichtungskorrektur-Taste
7/h Selbstauslöser-Taste
DE-7
DEUTSCH
• Die Funktionen der Regler entsprechen den einzelnen Betätigungsarten
der Kamera. Vergewissern Sie sich über die Funktionen der Regler in der
“Bedienungsanleitung” für die Digitalkamera.
• Bei Erwerbszustand dieses Gerates ist eine Schutzfolie an dem LCDMonitorfenster angebracht. Ziehen Sie diese Folie vor der Benutzung
unbedingt ab.
Vorbereitende Überprüfung des Gehäuses
Führen Sie vor dem Einsetzen der Digitalkamera eine vorläufige
Eintauchprüfung des Unterwassergehäuses durch
Stellen Sie, bevor Sie die Kamera in das Gehäuse einsetzen, sicher, dass kein Wasser
eindringt.
1
Kontrollieren Sie die Außenseite des Unterwassergehäuses und stellen
Sie sicher, dass weder Sprünge noch Kratzer vorhanden sind.
2
Öffnen Sie das Unterwassergehäuse mit dem Ausbauwerkzeug
(mitgeliefert).
Öffnungs-/
Schließknopf
Ausbauwerkzeug
(mitgeliefert).
➀ Geben Sie die Sperre des Öffnungs-/
Schließknopfes frei.
➁ Drehen Sie den Öffnungs-/
Schließknopf in Richtung “OPEN”, um
das Unterwassergehäuse zu öffnen.
Beim Öffnen und Schließen des
Unterwassergehäuses darauf achten,
dass Finger oder Handfläche nicht im
Gehäuse eingeklemmt werden.
Wenn Sie nicht über das
Ausbauwerkzeug (S. 16) verfügen,
können Sie auch die Justierung des
Tragegurts verwenden.
3
Kontrollieren Sie die Innenseite des Unterwassergehäuses auf
Folgendes:
O-Ring
• Sprünge (insbesondere rund um den
O-Ring)
• Richtige Positionierung des O-Rings
(zum richtigen Einsetzen des O-Rings,
siehe S. 24)
• Dass der O-Ring keine Kratzer, Sprünge,
Verformung, Verdrehung oder
Ablösung usw. aufweist
• Am O-Ring haftende Sandkörner oder
Fremdkörper
DE-8
4
Wischen Sie mit einem flusenfreien, weichen Tuch o.ä. evtl. am O-Ring
und an der Kontaktfläche des O-Rings (Abb. A Position) haftende
Fremdkörper ab.
Falls Sie Kosmetiktücher zum Abwischen verwenden, achten Sie darauf, dass keine
feinen Fasern zurückbleiben.
O-Ring
A
O-Ring
5
Überprüfen Sie den angebrachten O-Ring.
Tasten Sie den O-Ring mit der Fingerspitze ab, achten Sie darauf, dass der O-Ring
absolut glatt aufliegt und nicht verdreht ist. Falls Sie Unregelmäßigkeiten spüren
oder der O-Ring verdreht ist, wurde er vermutlich nicht richtig eingelegt.
Falls der O-Ring nicht vollständig eingesetzt ist, setzen Sie ihn noch einmal nach
der Anleitung auf S. 24 ein.
Falls der O-Ring verdreht ist, nach außen ragt oder sich ein Fremdkörper darauf oder
darunter befindet, dringt Wasser ein.
O-Ring
DEUTSCH
DE-9
Vorbereitende Überprüfung des Gehäuses
6
Falls alles in Ordnung ist, tragen Sie mit sauberem Finger das SpezialSilikonfett auf. Streichen Sie damit die Oberfläche des O-Rings ein, bis
sie vollständig überzogen ist.
O-Ring
Verwenden Sie nur das mitgelieferte
Spezial-Silikonfett.
Kontrollieren Sie nach dem Auftragen
des Fettes, ob keine Sandkörner oder
andere Substanzen am O-Ring haften.
7
Schließen Sie das Unterwassergehäuse.
➀ Schließen Sie das Unterwassergehäuse,
und drehen Sie den Öffnungs-/
Schließknopf in Richtung “CLOSE”, um
es abzudichten.
➁ Sperren Sie den Öffnungs-/Schließknopf.
Achten Sie beim Schließen des
Unterwassergehäuses darauf, dass sich
Ihre Finger oder Ihre Handfläche nicht im
Unterwassergehäuse verfangen.
8
Tauchen Sie das leere Unterwassergehäuse in einen Wassertank oder
eine Badewanne ein, und kontrollieren Sie auf Wassereintritt. Wie Sie es
kontrollieren sollen, lesen Sie auf S. 14.
Falls Wassereintritt festgestellt wird …
➀ Nehmen Sie sofort das Unterwassergehäuse aus dem Wasser und trocknen Sie
die Außenseite.
➁ Stellen Sie fest, ob das Unterwassergehäuse Sprünge aufweist. Kontrollieren
Sie den O-Ring, ob an ihm keine Fremdkörper, Kratzer, Sprünge, Verformung
oder Verdrehung vorliegen, und ob sich an der O-Ring-Nut keine Fremdkörper
befinden.
➂ Falls alles in Ordnung ist, fangen Sie nochmals mit dem Vorgang auf S. 8 von
vorne an.
Falls Sie eventuelle Mängel am Unterwassergehäuse finden, stellen Sie sofort dessen
Verwendung ein, und wenden Sie sich an Ihren FUJIFILM Fachhändler.
DE-10
Einsetzen der Digitalkamera in das
Unterwassergehäuse
Überprüfen Sie vor der Montage Folgendes:
• Laden Sie den Akku vor der Verwendung vollständig auf, damit es nicht zu einer
niedrigen Batteriespannung während der Unterwasseraufnahmen kommt.
• Stellen Sie fest, wie viele neue Aufnahmen auf dem Medium noch gespeichert
werden können.
• Falls der Handgurt an der Digitalkamera angebracht ist, nehmen Sie diesen
unbedingt ab. Die Verwendung der Kamera, wenn sie samt dem Handgurt im
Unterwassergehäuse eingesetzt ist, kann Wassereintritt herbeiführen.
1
Schalten Sie die Kamera aus.
• Fahren Sie den Blitz aus, bevor Sie die Kamera in das Unterwassergehäuse
einsetzen.
2
Fahren Sie den Blitz mit der Blitzausfahrtaste aus.
DEUTSCH
Hinweise zur Bedienung der Kamera, beispielsweise zum Einstellen des
Blitzmodus, finden Sie in der mit der Kamera gelieferten Bedienungsanleitung.
DE-11
Einsetzen der Digitalkamera in das Unterwassergehäuse
3
Öffnen Sie das Unterwassergehäuse (S. 8), ziehen Sie das Modusrad (➀)
nach oben, setzen Sie dann die Kamera ein (➁).
Setzen Sie die Kamera richtig in das
Unterwassergehäuse ein.
Beim Öffnen und Schließen des
Unterwassergehäuses darauf achten,
dass Finger oder Handfläche nicht im
Gehäuse eingeklemmt werden.
Achten Sie beim Einstellen der Kamera
auf die Position der Kamera am Vorsatz.
4
Sie die Silikagel-Packung in den Zwischenraum unter dem Boden der
Kamera ein.
Silikagel-Packung
Die Silikagel-Packung muss richtig
hineingeschoben werden. Falls sie
nicht ganz hineingeschoben ist, wird
die Funktion des O-Rings als Dichtung
verhindert und führt zu Wassereintritt.
DE-12
5
Überprüfen Sie Folgendes, bevor Sie das Unterwassergehäuse
schließen.
Silikagel-Packung
6
O-Ring
• Es darf kein Teil der Silikagel-Packung
überstehen.
• Es dürfen kein Staub, keine Haare oder
keine Fremdkörper am O-Ring, an
der O-Ring-Nut oder an der Seite des
Unterwassergehäuses haften, an der
der O-Ring montiert ist.
• Die Kamera ist im Unterwassergehäuse
richtig positioniert und ausgerichtet.
Schließen Sie das Unterwassergehäuse, wenn alles in Ordnung ist.
→ Prüfen Sie, ob die „ON/OFF“-Taste mit der Steuerung am Gehäuse richtig bedient
werden kann.
➀ Schließen Sie das Unterwassergehäuse,
und drehen Sie den Öffnungs-/
Schließknopf in Richtung “CLOSE”, um
es abzudichten.
➁ Sperren Sie den Öffnungs-/Schließknopf.
Achten Sie beim Schließen des
Unterwassergehäuses darauf, dass sich
Ihre Finger oder Ihre Handfläche nicht im
Unterwassergehäuse verfangen.
Um Wassereintritt vorzubeugen
Haar
DE-13
Fluse
Sand
DEUTSCH
Falls Fremdkörper am O-Ring haften,
kann es zu Wassereintritt führen.
Entfernen Sie die Fremdkörper (Siehe
S. 24). Falls Sie sie nicht entfernen
können, wechseln Sie den O-Ring
gegen einen neuen aus.
Einsetzen der Digitalkamera in das Unterwassergehäuse
Ausführen einer endgültigen Prüfung
Führen Sie nach dem Einsetzen der Kamera in das Unterwassergehäuse eine
endgültige Eintauchprüfung durch. Um auf Wassereintritt zu kontrollieren, tauchen
Sie das Unterwassergehäuse in einen mit Wasser gefüllten Wassertank oder eine
Badewanne ein, und kontrollieren Sie auf möglichen Wassereintritt. Führen Sie
diese Prüfung so aus, durch Sie das Unterwassergehäuse sofort aus dem Wasser
herausnehmen können (um die sich innen befindende Kamera zu retten), falls es nötig
sein sollte.
1
Lassen Sie das Unterwassergehäuse für 30 Sekunden im Wasser.
Fuge
2
• Falls Sie im Wasser Luftblasen aus
der Fuge des Unterwassergehäuses
ununterbrochen aufsteigen sehen,
weist dies auf Wassereintritt hin (S.15).
• Falls alles in Ordnung ist, bedienen Sie
die Tasten und machen Sie im Wasser
einige Probe-Aufnahmen.
Nachdem Sie das Unterwassergehäuse langsam aus dem Wasser
herausgenommen haben, kontrollieren Sie ganz genau auf Folgendes:
Wassertropfen
• Wassertropfen in der Nähe der Fuge
des Unterwassergehäuses (S.15).
• Wasser hat sich an der Innenseite des
Unterwassergehäuses angesammelt
(S.15).
DE-14
Falls Wassereintritt festgestellt wird …
➀ Nehmen Sie sofort das Unterwassergehäuse aus dem Wasser und trocknen Sie
die Außenseite.
➁ Nehmen Sie die Digitalkamera aus dem Unterwassergehäuse. Falls Sie
Wassertropfen auf der Digitalkamera sehen, wischen Sie diese gleich ab.
Wenn Sie die Kamera aus dem Unterwassergehäuse herausnehmen, öffnen
Sie das Unterwassergehäuse so, dass das Objektiv nach unten zeigt, um zu
verhindern, dass die Kamera herausfällt. Ebenso ist darauf zu achten, dass beim
Öffnen und Schließen des Unterwassergehäuses weder Finger noch Handfläche
im Gehäuse eingeklemmt werden.
➂ Stellen Sie fest, ob das Unterwassergehäuse Sprünge aufweist. Kontrollieren
Sie den O-Ring, ob an ihm keine Fremdkörper, Kratzer, Sprünge, Verformung
oder Verdrehung vorliegen und ob sich in der O-Ring-Nut keine Fremdkörper
befinden.
➃ Falls alles in Ordnung ist, fangen Sie nochmals mit dem Vorgang auf S. 8 von
vorne an.
Falls Sie eventuelle Mängel am Unterwassergehäuse finden, stellen Sie sofort
dessen Verwendung ein und wenden Sie sich an Ihren FUJIFILM Fachhändler.
Falls Wasser in die Kamera eingedrungen ist, stellen Sie sofort deren
Verwendung ein und wenden Sie sich an Ihren FUJIFILM Fachhändler. Falls
Sie die Kamera in einem fehlerhaften Zustand betätigen kann es zu Feuer
oder elektrischem Schlag führen. Verwenden Sie die Kamera niemals im oben
beschriebenen Zustand.
Jegliche Art von Fremdkörper am
O-Ring kann Wassereintritt verursachen.
Entfernen Sie die Fremdkörper nach der
Anweisung auf S. 24.
Haar
Fluse
Sand
DEUTSCH
DE-15
Anbringen des Tragegurts
1
Bringen Sie den Tragegurt am Unterwassergehäuse an.
Bringen Sie den Handgurt am
Unterwassergehäuse an, wie es in ➀ und
➁ dargestellt ist.
2
Befestigen Sie den Handgurt fest an Ihrem Handgelenk.
➀ Führen Sie Ihre Hand und Ihr
Handgelenk durch den Handgurt.
➁ Um die Gefahr des Fallenlassens der
Kamera zu mindern, befestigen Sie den
Handgurt mit dem Einsteller um Ihr
Handgelenk.
Öffnen des Unterwassergehäuses mit der Justierung des
Tragegurts
Wenn Sie das Unterwassergehäuse öffnen, können Sie auch die Justierung des
Tragegurts verwenden, wenn Sie das Ausbauwerkzeug nicht zur Hand haben.
➀ Setzen Sie die Öse der Justierung ein,
wie in der Abbildung gezeigt.
➁ Geben Sie die Sperre des Öffnungs-/
Schließknopfes frei.
Verwenden Sie die Justierung des
Tragegurts nicht, um den O-Ring zu
lösen. Wenn der O-Ring beschädigt
wird oder Fremdkörper daran haften,
kann es zu einem Wassereintritt
kommen.
DE-16
Anbringen der Blitzdiffusorplatte
Bringen Sie die mitgelieferte Blitzdiffusorplatte an.
■ Anbringen der Blitzdiffusorplatte
Bringen Sie den BlitzdiffusorplattenTragegurt am Unterwassergehäuse an, wie
unter ➀ und ➁ gezeigt.
Achten Sie darauf, dass sich der
Tragegurt nicht verheddert, wenn das
Unterwassergehäuse geöffnet oder
geschlossen wird.
Schieben Sie die Blitzdiffusorplatte in
die Nut des Objektivrings ein, wie in der
Abbildung gezeigt.
Schieben Sie die Platte fest ein, bis sie
mit einem Klickgeräusch einrastet.
DEUTSCH
DE-17
Fotografieren
• Unter Verwendung des Unterwassergehäuses können Sie in einer Wassertiefe
von bis zu 40 m Aufnahmen machen.
• Die Funktionen der Bedienungseinheit entsprechen den einzelnen
Operationen der Kamera. Informationen zur Bedienungsanleitung oder
den Funktionen der Kamera finden Sie in der Bedienungsanleitung, die im
Lieferumfang Ihrer Kamera enthalten war.
1
Schalten Sie die Kamera ein.
2
Stellen Sie den Aufnahmemodus ein.
➀ Drehen Sie den Drehschalter
➀
Moduswahl, um einen
Drücken Sie die „ON/OFF“-Taste.
Aufnahmemodus auszuwählen.
➁ Überprüfen Sie den Aufnahmemodus
➁
3
auf dem LCD-Monitor.
Machen Sie Probeaufnahmen, bevor Sie
die Kamera im Gehäuse unter Wasser
verwenden.
Wenn Sie den Aufnahmemodus
einstellen, stellen Sie sicher, dass die
Modusanzeige für den ausgewählten
Modus auf dem LCD-Monitor zu sehen
ist.
Halten Sie das Unterwassergehäuse mit beiden Händen fest.
Halten Sie die Kamera so, dass das Objektiv oder der Blitz nicht von Ihren Fingern
oder dem Tragegurt verdeckt werden. Wenn das Objektiv oder der Blitz verdeckt
werden, kann das Objekt unscharf sein oder die Helligkeit (Belichtung) der
Aufnahme ist nicht richtig.
DE-18
4
Nehmen Sie Bilder auf.
➀ Drücken Sie den Auslöser zur
➁ Drücken Sie den Auslöser vollständig
Hälfte nieder, um das Bild scharf
zu stellen.
nieder, um ein Bild aufzunehmen.
Während der Filmaufnahme kann
der Auslöser nicht bis zur Hälfte
niedergedrückt werden.
Zum TAUCHEN
Stellen Sie den Drehschalter
Moduswahl auf H und wählen Sie
F TAUCHEN für kräftige Blautöne bei
Unterwasseraufnahmen. Außerdem
kann g als WEISSABGLEICH-Option im
Kameramodus-Menü gewählt werden.
Weitere Informationen finden Sie
in der Bedienungsanleitung, die im
Lieferumfang Ihrer Kamera enthalten
war.
DE-19
DEUTSCH
Nahaufnahmen
ES wird empfohlen, einen handelsüblichen externen Blitz für die Nahaufnahme zu
benutzen.
Nach der Aufnahme (Aufbewahrung)
1
Schalten Sie die Kamera aus.
Betätigen Sie die „ON/OFF“-Taste, um die
Kamera auszuschalten.
Achten Sie darauf, dass die
Stromversorgung der Kamera
ausgeschaltet ist.
2
Wenn Sie mit den Aufnahmen fertig sind, füllen Sie sofort einen Eimer
oder anderen Behälter mit Frischwasser, um das salzige Meerwasser
abzuwaschen.
Achten Sie darauf, die Außenseite des
Unterwassergehäuses gut abzuspülen,
indem Sie das Wasser mit der Hand
rühren.
Falls Reste von Salzablagerung am
Gehäuse zurückbleiben, kann dies zu
Bildung von Rost, schlechterer Funktion
der einzelnen Bedienelemente und
anderen Problemen führen.
3
Wischen Sie die Wassertropfen sorgfältig vom Unterwassergehäuse ab.
Wischen Sie insbesondere die Tropfen von der Fuge des Unterwassergehäuses
sorgfältig ab.
Verwenden Sie ein weiches, flusenfreies Tuch oder Ähnliches.
Entfernen Sie die Wassertröpfchen unter dem Auslöser, dem Öffnungs-/Schließknopf
und den anderen Bedienelementen.
DE-20
4
Nehmen Sie die Kamera aus dem Unterwassergehäuse.
➀ Geben Sie die Sperre des Öffnungs-/
Schließknopfes frei.
➁ Drehen Sie den Öffnungs-/
Schließknopf in Richtung “OPEN” und
öffnen Sie das Unterwassergehäuse
langsam, um keine Wassertropfen auf
die Kamera zu spritzen.
Vor dem Öffnen des
Unterwassergehäuses sich vergewissern,
dass Hände und Haare trocken
sind, damit keine Wassertropfen
auf die Kamera oder ins Innere des
Unterwassergehäuses gelangen können.
Beim Öffnen und Schließen des
Unterwassergehäuses darauf achten,
dass Finger oder Handfläche nicht im
Gehäuse eingeklemmt werden.
Falls Ihre Hände nass sind, achten Sie
darauf, dass Sie nicht die Kamera oder
der Akku anfassen.
Öffnen Sie das Unterwassergehäuse
nicht an Orten, an denen Wasser oder
Sand in die Innenseite des Gehäuses
gelangen könnte.
➂ Ziehen Sie das Modusrad nach oben,
nehmen Sie die Kamera aus dem
Unterwassergehäuse (➃).
3
4
DE-21
DEUTSCH
Wenn Sie die Kamera aus dem
Unterwassergehäuse herausnehmen,
öffnen Sie das Unterwassergehäuse
so, dass das Objektiv nach unten zeigt,
um zu verhindern, dass die Kamera
herausfällt.
Nach der Aufnahme (Aufbewahrung)
5
Nachdem Sie festgestellt haben, dass keine Wassertropfen oder
Fremdkörper am O-Ring haften, schließen Sie das Unterwassergehäuse
und drehen den Öffnungs-/Schließknopf in Richtung “CLOSE”, um es fest
zuzuschließen (S. 10). Waschen Sie das Unterwassergehäuse noch
einmal mit Frischwasser gründlich ab.
Versuchen Sie, alle Reste von
Salzablagerung zu entfernen, indem Sie
im Wasser auf die einzelnen Knöpfe leicht
drücken.
Wir empfehlen, das Gehäuse 1 Stunde in
Frischwasser einweichen zu lassen.
Falls das Unterwassergehäuse mit nicht
abgewischten Salzwassertropfen gelagert
wird, können Salzablagerungen die
Bewegung des Öffnungs-/Schließknopfes
und der anderen Teile verhindern.
Achten Sie beim Schließen des
Unterwassergehäuses darauf, dass sich
Ihre Finger oder Ihre Handfläche nicht im
Unterwassergehäuse verfangen.
6
Wischen Sie sorgfältig die Wassertropfen vom Unterwassergehäuse ab.
Verwenden Sie ein weiches, flusenfreies Tuch oder Ähnliches.
Entfernen Sie die Wassertröpfchen unter dem Auslöser, dem Öffnungs-/
Schließknopf und den anderen Bedienelementen.
7
Öffnen Sie das Unterwassergehäuse ein wenig und lassen Sie es an
einem gut durchlüfteten und schattigen Ort trocknen. Wenn Sie das
Gehäuse getrocknet haben, bewahren Sie es an einem Ort auf, der
keinem direkten Sonnenlicht ausgesetzt ist.
Verwenden Sie keinen Fön, keine
Warm- oder Heißluft und kein
direktes Sonnenlicht, um das
Unterwassergehäuse zu trocknen.
DE-22
Die Steuerring-Einstellungen
Sie können die dem Steuerring zugewiesene Funktion ändern. Wir empfehlen,
die Steuerring Funktion zu ändern, bevor Sie das Unterwassergehäuse benutzen.
Hinweise zur Bedienung der Kamera finden Sie in der mit der Kamera gelieferten
Bedienungsanleitung.
Bedienen Sie den Steuerring mit dem Steuerring-Drehrad.
Das Befehlsrad
Da das Befehlsrad im Unterwassergehäuse nicht bedient werden kann, lassen
sich folgende Funktionen nicht nutzen.
■ Aufnahme
• Sie können den Grad der Weichzeichnung über den Pro Focus Modus
einstellen.
• Wenn F FOKUSSIERBEREICH ausgewählt ist, können Sie die Größe des
Fokusrahmens nicht vergrößern oder verkleinern.
• Die Belichtungszeit kann nicht geändert werden, wenn die
A MOTIVWAHL-Option auf p eingestellt ist.
■ Wiedergabe
Die Steuerring-Einstellungen
Wenn STANDARD als STEUERRING-EINST. ausgewählt wurde, können Sie über
das Steuerring-Drehrad Programmenanpassung, Belichtungszeit oder Blende
festlegen. Wenn Sie den Fokus manuell einstellen möchten, stellen Sie FOCUS
MODUS auf N ein.
Die folgenden Einstellungen können nicht geändert werden, wenn der Steuerring
nicht auf STANDARD eingestellt oder N MANUELL FOKUS bei F FOKUS
MODUS ausgewählt wurde.
•
•
•
•
Programmanpassung im P-Modus
Blende im A-Modus
Belichtungszeit im S-Modus
Blende/Belichtungszeit im M-Modus
DE-23
DEUTSCH
• Solange ein Bild vergrößert dargestellt wird, können keine weiteren Bilder
angezeigt werden.
Wartung
Pflege nach der Verwendung
Führen Sie sofort nach jeder Verwendung des Unterwassergehäuses Folgendes durch.
Kontrollieren Sie, ob der O-Ring weder durch Fremdkörper verursachte Dellen noch
Kratzer, Sprünge oder andere Beschädigungen aufweist.
1
Entfernen Sie den O-Ring vom Unterwassergehäuse.
O-Ring
O-Ring
➀ Führen Sie das Ausbauwerkzeug
zwischen den O-Ring und die O-RingNut ein.
➁ Führen Sie die Spitze des
Ausbauwerkzeugs unter den O-Ring.
Achten Sie darauf, dass die Nut nicht
durch die Spitze des Ausbauwerkzeugs
zerkratzt wird.
➂ Fassen Sie den hängenden O-Ring mit
Ihren Fingern und entfernen Sie ihn
aus dem Unterwassergehäuse.
DE-24
2
Entfernen Sie altes Fett und Fremdkörper wie Fasern oder Sand vom
O-Ring.
Wischen Sie Fremdkörper mit einem weichen, fusselfreien Lappen ab.
Lassen Sie den abgespülten O-Ring trocknen, ohne ihn noch einmal abzuspülen.
So verhindern Sie das Anhaften von Fasern.
3
Nehmen Sie den O-Ring mit Ihren Fingern und tasten Sie den ganzen
O-Ring unter leichtem Druck ab, um zu kontrollieren, ob er weder durch
Fremdkörper verursachte Dellen noch Kratzer, oder durch Alterung
entstandene Sprünge aufweist (dies können Sie mit den Fingerspitzen
fühlen).
Beim Ziehen des O-Rings durch die Hand, achten Sie darauf, dass Sie ihn nicht zu
stark ziehen und der O-Ring nicht ausgedehnt wird.
Beispiele von Fremdkörpern und Beschädigungen
Haar
4
Fluse
Sand
Durch Fremdkörper Kratzer
verursachte Dellen
Sprünge
Entfernen Sie mit Hilfe einer Zahnbürste oder Wattestäbchen alle
Fremdkörper aus der O-Ring-Nut.
Achten Sie besonders darauf, dass keine Fasern vom Wattestäbchen
zurückbleiben.
Überziehen Sie den O-Ring mit Spezialfett.
Um eine gleichmäßig dünne Schicht
Silikonfett auf den O-Ring aufzutragen, etwa
5 mm des bei diesem Produkt mitgelieferten
Fetts aus der Tube herausdrücken und in
einem sauberen Plastikbeutel (ungefähr 10
× 20 cm) gründlich durchkneten. Setzen
Sie danach den O-Ring in den Plastikbeutel
ein und kneten diesen weiter, bis der ORing mit dem Fett völlig überzogen ist. Der
Plastikbeutel kann mehr als einmal verwendet
werden, wenn er sauber gehalten wird.
DE-25
DEUTSCH
5
Wartung
6
O-Ring installieren.
Tasten Sie den O-Ring mit der Fingerspitze ab, achten Sie darauf, dass der O-Ring
absolut glatt aufliegt und nicht verdreht ist. Falls Sie Unregelmäßigkeiten spüren
oder der O-Ring verdreht ist, wurde er vermutlich nicht richtig eingelegt.
Bei falscher Installation installieren Sie bitte erneut, orientieren sich dabei an den
Hinweisen auf Seite 24.
Falls der O-Ring verdreht ist, nach außen ragt oder sich ein Fremdkörper darauf oder
darunter befindet, dringt Wasser ein.
Achten Sie bei der Pflege des O-Rings insbesondere darauf, dass kein Schmiermittel
auf die Objektiv- und LCD-Monitor-Fenster gelangt. Falls Objektiv- oder LCDMonitor-Fenster verschmutzen sollten, entfernen Sie die Verschmutzungen durch
sanftes Wischen mit einem weichen, trockenen Tuch.
DE-26
Hinweise zur richtigen Verwendung des
Unterwassergehäuses
•
•
•
•
•
•
•
•
•
Verwenden oder lagern Sie das Unterwassergehäuse nicht bei Temperaturen höher als
+40 °C.
Verwenden Sie das Unterwassergehäuse nicht in Wasser mit einer Temperatur von mehr
als +40 °C, da es sonst zu Wassereintritt führen kann.
Verwenden Sie weder Verdünnungsmittel noch Leichtbenzin, Alkohol oder
andere flüchtige Chemikalien zur Reinigung. Falls Sie solche Chemikalien auf dem
Unterwassergehäuse auftragen, kann es zu Beschädigung der Oberfläche bzw. zu
Sprüngen unter hohem Druck führen.
Vermeiden Sie übermäßige Kraftanwendung an der Stativgewinde.
Setzen Sie das Unterwassergehäuse keinen Stößen oder Schlägen aus.
Werfen Sie das Unterwassergehäuse nicht in das Wasser.
Falls Sie das Unterwassergehäuse in Meerwasser verwendet haben, waschen Sie das
Unterwassergehäuse noch gut verschlossen in einem Eimer mit Frischwasser ab, um das
Salz zu entfernen. Trocknen Sie danach die Außenseite des Gehäuses mit einem trockenen,
weichen Tuch.
Dieses Produkt ist für die Verwendung im Wasser als Unterwassergehäuse konstruiert.
Belassen Sie niemals die Kamera in diesem Produkt, wenn Sie dieses aufbewahren.
Batterieflüssigkeit kann aus der Kamera austreten und ein Feuer verursachen.
Wenn die Kamera mit geschlossenem Unterwassergehäuse in ein Flugzeug
mitgenommen wird, lässt sich das Gehäuse unter Umständen nicht öffnen. Daher
unbedingt das Unterwassergehäuse öffnen, bevor die Kamera in ein Flugzeug
mitgenommen wird. Sollte sich das Unterwassergehäuse nicht öffnen lassen, die Kamera
in lauwarmes Wasser eintauchen, um den Druckunterschied auszugleichen; danach kann
das Unterwassergehäuse geöffnet werden.
■ Zur Vermeidung von Wassereintritt
DE-27
DEUTSCH
Falls es zu Wassereintritt während der Verwendung des Unterwassergehäuses kommt, wird die
Digitalkamera beschädigt, so dass sie nicht mehr repariert werden kann. Beachten Sie daher
vor der Verwendung die folgenden Vorsichtsmaßregeln.
• Die normale Lebensdauer des O-Rings beträgt etwa ein Jahr, hängt aber von den
Betriebsbedingungen ab. Wechseln Sie einmal jährlich den O-Ring gegen einen neuen aus.
• Alle am O-Ring anhaftenden Fremdkörper können einen Wassereintritt verursachen.
Wischen Sie alle Fremdkörper ab und achten Sie dabei darauf, dass keine Flusen am O-Ring
verbleiben. Falls ein Fremdkörper nicht leicht entfernt werden kann, versuchen Sie, den
O-Ring mit Wasser abzuspülen.
• Falls der O-Ring Kratzer, Sprünge, Verfärbung oder Verformung aufweist, ersetzen Sie ihn
durch einen neuen.
• Wenn Sie den O-Ring auswechseln, reinigen Sie zuerst die O-Ring-Nut und kontrollieren
Sie, ab keine Sandkörner, Staub, Haare oder andere Fremdkörper vorhanden sind.
• Verwenden Sie für den O-Ring nur das Silikonfett der von FUJIFILM empfohlenen Marke.
• Falls der O-Ring nicht richtig eingesetzt ist, kann es zu Wassereintritt führen. Beim Einsetzen
des O-Rings achten Sie darauf, dass er in der Nut liegen bleibt und sich nicht verdreht (S. 26).
• Belassen Sie das Unterwassergehäuse im Sommer niemals in direktem Sonnenlicht,
in einem geschlossenen Fahrzeug oder in der Nähe eines Heizgeräts. Legen Sie
nicht langfristig externe Kräfte an das Unterwassergehäuse an. Verformungen durch
Wärme oder Krafteinwirkung können eine Verschlechterung der Wasserdichtigkeit des
Unterwassergehäuses bewirken und es für den Einsatz im Wasser unbrauchbar machen.
• Achten Sie darauf, dass der O-Ring oder dessen Kontaktfläche nicht durch Zusammenstoß
beider Teile aufeinander oder durch eingeklemmte Fremdkörper (Sand, Staub oder Haare)
beschädigt wird.
• Führen Sie eine Eintauch- und endgültige Prüfung durch, bevor Sie dieses Produkt verwenden.
• Falls Sie während des Fotografierens Anzeichen von Wassereintritt bemerken,
nehmen Sie das Produkt sofort aus dem Wasser. Stellen Sie die Ursache fest und
ergreifen Sie entsprechende Maßnahmen.
Beispiele von Fremdkörpern und Beschädigungen
Haar
Fluse
Sand
Durch Fremdkörper Kratzer
verursachte Dellen
Sprünge
Technische Daten
Für den Gebrauch
bestimmte Kamera
Digitalkamera XQ1
Druckwiderstand
Bis zu 40 m unter Wasser
Hauptmaterial
Gehäuse: Transparentes Polycarbonat
Objektivfenster: Glas
Abmessungen
(B × H × T)
143.6 mm × 101 mm × 105 mm (einschließlich Überstände)
Gewicht
ca. 421 g (ohne Kamera und Zubehör)
✽ Änderungen der Spezifikationen und Leistungsdaten sind ohne Vorankündigung
vorbehalten. FUJIFILM kann für Schäden, die durch Fehler in dieser Bedienungsanleitung
entstanden sind, nicht haftbar gemacht werden.
Sonderzubehör
• Silikagel-Packungen (SST-01)
Trockenmittel zur Reduzierung von Kondenswasser auf dem Objektiv (SilikagelPackung, 6 Stück)
• O-Ring-Werkzeug (ORK-XQ1)
Optionaler Reparatursatz
(Ersatz-O-Ring, Ausbauwerkzeug zum Öffnen des Drehkopfes/O-Ring-Entferner (1
Stück))
• Spezial-Silikonfett (SGR-01)
Spezial-Silikonfett für die Pflege des O-Rings (Spezial-Silikonfett × 1 [ca. 3 g])
DE-28
DEUTSCH
DE-29
Notas sobre seguridad
Gracias por haber comprado este producto.
Antes de utilizarlo, asegúrese de que lee este “Manual del usuario”, y
especialmente estas “Notas sobre seguridad”, así como el “Manual del usuario”
de su cámara digital. Después de leer estas notas de seguridad, guárdelas en un
lugar seguro, con el fin de poder consultarlas con comodidad posteriormente.
■ Los símbolos que se muestran a
continuación se utilizan para indicar
la gravedad del daño o el peligro
que puede suponer el no tener en
cuenta la información indicada por
el símbolo, o si el producto se utiliza
incorrectamente.
Este símbolo indica que, si
se ignora la información,
ADVERTENCIA
pueden producirse lesiones
graves.
ADVERTENCIA
No
desmontar.
No intente modificar ni
desmontar el producto.
Puede hacer que el agua se filtre.
No coloque el producto sobre
una superficie inestable.
Si lo hace, el producto puede caerse
o volcarse y causar daños o lesiones.
Utilice sólo la pila que se
especifica para su uso con la
cámara.
El uso de otra fuente de
alimentación puede causar un
incendio.
Este símbolo indica que, si
se ignora la información,
PRECAUCIÓN pueden producirse lesiones
personales o daños a
materiales.
■ Los símbolos que se reproducen a
continuación se utilizan para indicar
la naturaleza de las precauciones
que deben observarse.
Los símbolos triangulares indican
al usuario una información que
requiere su atención (“Importante”).
Los símbolos circulares cruzados
por una barra diagonal indican al
usuario que la acción que se indica
está prohibida (“Prohibido”).
Los símbolos en negro con un signo
de exclamación indican al usuario
que tiene que realizar alguna acción
(“Obligatorio”).
ES-2
Use la pila sólo según lo
especificado.
Cargue la pila según la indicación
de polaridad.
No caliente, modifique ni intente
desmontar la pila.
No someta la pila a impactos
fuertes ni la tire contra el suelo.
No cortocircuite la pila.
No almacene la pila junto a
productos metálicos.
Utilice sólo el modelo de
cargador especificado para la
pila.
Si no sigue cualquiera de las
instrucciones anteriores, puede
hacer que la pila explote o que se
produzcan fugas en el líquido de
la pila, y dar lugar a un incendio o
a lesiones.
Mantenga fuera del alcance de
los niños pequeños.
Este producto puede causar
lesiones en manos de un niño.
No abra o cierre el producto en
lugares con arena o polvo.
Si un grano de arena o una mota
de polvo entrara en la junta tórica,
puede hacer que el agua se filtre
dentro.
Tenga cuidado cuando utilice
la caja estanca con la correa
acoplada.
Puede hacer que la caja se balancee
inesperadamente, causando daños
o lesiones.
No deje el producto en lugares
sometidos a temperaturas
extremadamente altas o bajas.
Puede originar su rotura.
No deje la caja estanca para la
cámara expuesta a la luz directa
del sol ni en lugares sometidos a
temperaturas extremas.
Si la presión dentro de la caja
subiera debido al calor, la tapa
podría abrirse violentamente y
causar daños o lesiones.
Si la cámara se moja, quite
inmediatamente la pila de la
cámara.
No utilice el producto en
profundidades que superen los
40 m bajo el agua.
Puede originar su rotura.
No ingiera el silicagel ni la grasa
que se utilizan con este producto.
Si alguien se los introduce en la
boca o se ingieren, busque un
médico inmediatamente.
PRECAUCIÓN
No deje caer el producto ni lo
golpee contra objetos duros.
Puede romper el producto y hacer
que el agua se filtre dentro.
Cuando limpie la cámara o no
tenga intención de utilizarla
durante un tiempo prolongado,
extraiga la pila.
Si no lo hiciera, podría producirse
una pérdida en la pila u originarse
un incendio.
ESPAÑOL
No utilice el flash demasiado
cerca de los ojos de una persona.
Puede afectar temporalmente a
la vista. Tenga especial cuidado al
fotografiar a niños pequeños.
ES-3
Contenido
Notas sobre seguridad ..............................................................................................................2
Contenido .........................................................................................................................................4
Prefacio ...............................................................................................................................................5
Accesorios incluidos ...................................................................................................................5
Nombres de las partes ..............................................................................................................6
Comprobación previa de la caja .........................................................................................8
Realice una prueba de inmersión previa con la caja estanca, antes de
poner en ella la cámara digital ...................................................................................................8
Cómo colocar la cámara digital dentro de la caja estanca ..............................11
Cómo realizar una prueba final ..............................................................................................14
Cómo acoplar la correa..........................................................................................................16
Instalación de la placa de difusión del flash .............................................................17
Cómo hacer fotos ......................................................................................................................18
Después de la toma fotográfica (almacenamiento) ............................................20
Acerca de los ajustes del anillo de control ................................................................23
Mantenimiento ...........................................................................................................................24
Mantenimiento después del uso...........................................................................................24
Notas acerca de cómo utilizar correctamente la caja estanca ......................27
Especificaciones .........................................................................................................................28
Guía de accesorios ....................................................................................................................28
ES-4
Prefacio
• FUJIFILM Corporation no responderá en modo alguno de pérdidas accidentales
(como costes fotográficos o pérdida de ingresos procedentes de la fotografía) como
resultado de fallos en este producto.
■ Asegúrese de que lee estas indicaciones antes de utilizarlo
• Esta caja estanca está diseñada para su uso bajo el agua, hasta una profundidad de
40 m. Manipule la caja con cuidado.
• Rogamos siga las instrucciones de este manual respecto a la preparación la
caja estanca para su uso, cómo hacer una prueba anticipada, cómo realizar el
mantenimiento de la caja y cómo guardarla tras su uso. Utilice el producto sólo
según se describe en este manual.
• FUJIFILM Corporation no responderá en modo alguno de cualquier daño sufrido
por la cámara digital o cualquier pérdida causada por el uso inadecuado de la caja
estanca.
• FUJIFILM Corporation no responderá en modo alguno de lesiones personales,
muertes o daños materiales producidos durante el uso del producto.
Accesorios incluidos
• Correa muñequera (1)
• Extractor especial (1)
(para abrir el tirador de cierre /
extraer la junta tórica)
• Grasa especial para silicona (1)
• Paquete de silicagel (3)
• Manual del usuario (este manual)
• Guía de mantenimiento rápido
ESPAÑOL
• Placa de difusión del flash
ES-5
Nombres de las partes
Control de zoom
(i zoom teleobjetivo/
j gran angular)
Botón ON/OFF
Zapata de accesorios
Dial de modo
Botón del disparador
Cierre para el tirador de
apertura/cierre
Tirador de apertura/cierre
Ventanilla de objetivo
Dial del anillo de control
Anillo del objetivo
Parasol
Enganche de la correa
Enganche de la
placa de difusión del flash
Parasol de LCD
Junta tórica/ranura de la junta tórica
• El botón del flash (p. 11) y el dial de comandos (p. 23) no pueden manipularse
mientras se use la caja estanca.
ES-6
Botón t
(grabación de vídeo)
Botón de a
(Reproducción)
Ventanilla
monitor LCD
Botón MENU/OK
Botón E-Fn (función ampliada)
Botón Wi-Fi (modo de
reproducción)
Botón DISP/BACK
6789 Botón selector
[Fotografía]
[Reproducción]
8/F Botón macro
6/b Botón borrar
9/N Botón del flash
6/d Botón compensación de la exposición
7/h Botón autodisparador
• Las funciones de operación de la unidad corresponden a las operaciones
individuales de la cámara. Consulte las funciones de la unidad en el “Manual del
usuario” de su cámara digital.
• Al comprar la unidad, la ventana del monitor LCD viene protegida por una
pelicula protectora. Asegurese de quitarla antes de comenzar a utilizar el
producto.
ESPAÑOL
ES-7
Comprobación previa de la caja
Realice una prueba de inmersión previa con la caja estanca, antes
de poner en ella la cámara digital
Antes de instalar la cámara digital en la caja, compruebe que no hay ninguna filtración
de agua.
1
Compruebe el exterior de la caja estanca, para asegurarse de que no
hay fisuras ni defectos en ella.
2
Abra la caja estanca, utilizando el extractor especial (incluido).
tirador de
apertura/cierre
extractor especial (incluido)
➀ Suelte el cierre del tirador de
apertura/cierre.
➁ Gire el tirador de apertura/cierre en la
dirección de la flecha “OPEN” para abrir
la caja estanca.
Cuando abra o cierre la caja estanca,
tenga cuidado para no pillarse los dedos,
o la palma de la mano con la caja.
También puede utilizar el ajustador de
la correa si no dispone del extractor
especial (p. 16).
3
Compruebe lo siguiente en el interior de la caja estanca:
Junta tórica
• Que no hay rajaduras (especialmente,
alrededor de la junta tórica).
• Que la junta tórica esté correctamente
asentada. (Para ver cómo se instala
correctamente la junta tórica, consulte
la p. 24).
• Que la junta tórica no tiene arañazos ni
rajaduras, ni una forma extraña, ni está
retorcida o suelta, etc.
• Que no hay arena ni partículas extrañas
adheridas a la junta tórica.
ES-8
4
Limpie cualquier partícula extraña que haya quedado adherida a la
junta tórica, así como la superficie de sellado de la junta tórica (posición
fig. A), utilizando un trapo suave y que no suelte fibras, u otro utensilio
similar.
Si utiliza un pañuelo de papel para limpiar, tenga cuidado, ya que puede dejar
pequeñas fibras.
Junta tórica
A
Junta tórica
5
Compruebe la junta tórica instalada.
Pase la punta del dedo por la junta tórica para confirmar que no esté torcida ni
doblada. Si nota que la junta tórica está torcida o doblada, puede que no esté
colocada correctamente.
Si no está bien instalada, vuelva a instalarla, siguiendo las instrucciones de la p. 24.
Si la junta tórica está torcida o abombada, o si hay partículas extrañas encima o
debajo de ella, penetrará agua.
Junta tórica
ESPAÑOL
ES-9
Comprobación previa de la caja
6
Cuando todo esté correcto, con el dedo limpio, aplique la grasa especial
para silicona. Extiéndala en la superficie de la junta tórica, hasta que
quede completamente recubierta.
Junta tórica
Utilice sólo la grasa especial para silicona
que se incluye.
Una vez aplicada la grasa, compruebe
que no hay arena ni otras sustancias
pegadas a la junta tórica.
7
Cierre la caja estanca.
➀ Cierre la caja estanca y gire el tirador
de apertura/cierre en la dirección
de la flecha “CLOSE” para cerrarla
herméticamente.
➁ Bloquee el tirador de apertura/cierre.
8
Cuando cierre la caja estanca, tenga
cuidado para no pillarse los dedos o la
palma de la mano con la caja estanca.
Introduzca la caja estanca vacía en un depósito o una bañera con
agua, y compruebe si se producen filtraciones de agua. Consulte cómo
comprobarlo en la p. 14.
Si detecta una filtración de agua...
➀ Saque inmediatamente la caja estanca del agua, y seque su parte exterior.
➁ Asegúrese de que no hay rajaduras en el cuerpo de la caja estanca. Compruebe
que en la junta tórica no hay partículas extrañas pegadas, desperfectos,
rajaduras, defectos o torceduras, así como si hay partículas extrañas en la ranura
de la junta tórica.
➂ Cuando todo esté bien, vuelva a comenzar el procedimiento descrito en la p. 8.
Si encuentra que algo va mal con la caja estanca, deje inmediatamente de utilizarla y
póngase en contacto con su distribuidor FUJIFILM.
ES-10
Cómo colocar la cámara digital dentro de la caja
estanca
Antes de comenzar la instalación, verifique los puntos siguientes:
• Para evitar quedarse sin carga cuando esté haciendo fotografías, cargue la pila por
completo antes de utilizarla.
• Compruebe cuántas imágenes nuevas pueden guardarse en el soporte de
grabación.
• Quite la correa muñequera de la cámara digital. Si utiliza la cámara dentro de la caja
estanca sin haber quitado la correa de la cámara, pueden producirse filtraciones en
la caja.
1
Apague la cámara.
• Levante el flash antes de colocar la cámara en el interior de la caja estanca.
2
Deslice el botón del flash para levantar el flash.
ES-11
ESPAÑOL
Consulte las instrucciones de funcionamiento de la cámara (por ejemplo, el ajuste
del modo flash) en el manual del propietario suministrado junto con la cámara.
Cómo colocar la cámara digital dentro de la caja estanca
3
Abra la caja estanca (pág. 8) y tire hacia arriba del dial de modo (➀); a
continuación, introduzca la cámara en la caja (➁).
Deslice la cámara dentro de la caja
estanca, hasta que quede bien asentada.
Cuando abra o cierre la caja estanca,
tenga cuidado para no pillarse los dedos,
o la palma de la mano con la caja.
Preste especial atención a la posición de
la cámara al introducirla.
4
Inserte el paquete de silicagel en el espacio que hay bajo la parte
inferior de la cámara.
Paquete de silicagel
Asegúrese de introducir correctamente
el paquete de silicagel. Si no se introduce
por completo, evitará que la junta tórica
haga su función selladora, y el agua se
filtrará dentro de la caja.
ES-12
5
Asegúrese de lo siguiente, antes de cerrar la caja estanca.
Paquete de silicagel
6
• Ninguna parte del paquete de silicagel
sobresale.
• No hay polvo, pelos ni otras partículas
extrañas en la junta tórica ni en la
ranura de la junta tórica, ni en la
superficie del borde de la caja estanca
que encaja con la junta tórica.
• La cámara está correctamente
asentada y alineada en la caja estanca.
Junta tórica
Cuando todo esté correcto, cierre la caja estanca.
→ Compruebe que el botón “ON/OFF” de la cámara se puede manipular correctamente
mediante los controles de la carcasa.
➀ Cierre la caja estanca y gire el tirador
de apertura/cierre en la dirección
de la flecha “CLOSE” para cerrarla
herméticamente.
➁ Bloquee el tirador de apertura/cierre.
Cuando cierre la caja estanca, tenga
cuidado para no pillarse los dedos o la
palma de la mano con la caja estanca.
Para evitar filtraciones de agua
Cualquier partícula extraña pegada a la
junta tórica puede causar una filtración
de agua. Quite las partículas extrañas
(consulte la p. 24). Si no puede quitarlas,
sustituya la junta tórica por una nueva.
Pelo
Fibra
Arena
ESPAÑOL
ES-13
Cómo colocar la cámara digital dentro de la caja estanca
Cómo realizar una prueba final
Realice una prueba de inmersión final con la caja estanca, después de montar la cámara
digital. Para comprobar si hay filtraciones de agua, observe cualquier goteo de agua
que entre, mientras introduce la caja en un depósito o una bañera llenos con agua.
Realice la prueba de forma que pueda sacar la caja inmediatamente del agua (para
proteger la cámara que está dentro), si fuera necesario.
1
Introdúzcala en el agua durante 30 segundos.
Junta
2
• Si ve un rastro continuo de burbujas
de aire que salen de la junta de la caja
estanca mientras está introducida en el
agua, eso es señal de una filtración de
agua (p.15).
• Si todo está correcto, manipule los
botones y haga algunas fotografías de
prueba con la caja debajo del agua.
Tras sacar lentamente la caja estanca del agua, compruebe con
atención lo siguiente.
Gotas de
agua
• Si hay gotas de agua cerca de la
juntura de la caja estanca (p.15).
• Si hay algún charco de agua dentro de
la caja estanca (p.15).
ES-14
Si detecta una filtración de agua...
➀ Saque inmediatamente la caja estanca del agua y seque su parte exterior.
➁ Extraiga la cámara digital de la caja estanca. Si ve gotas de agua en la cámara
digital, séquelas inmediatamente.
Cuando extraiga la cámara de la caja estanca, abra la caja estanca con el
objetivo orientado hacia abajo para evitar que se caiga la cámara. Asimismo,
cuando abra o cierre la caja estanca, tenga cuidado para no pillarse los dedos, o
la palma de la mano con la caja.
➂ Asegúrese de que no hay rajaduras en el cuerpo de la caja estanca. Compruebe
que en la junta tórica no hay partículas extrañas pegadas, defectos, rajaduras,
deformaciones o torceduras, así como si hay partículas extrañas en la ranura de
la junta tórica.
➃ Cuando todo esté bien, vuelva a comenzar el procedimiento descrito en la p. 8.
Si encuentra que algo va mal con la caja estanca, deje inmediatamente de
utilizarla y póngase en contacto con su distribuidor FUJIFILM.
Si entró agua en el cuerpo de la cámara, no la vuelva a utilizar y póngase
en contacto con su distribuidor FUJIFILM. Si utiliza la cámara en un estado
defectuoso puede causar un incendio o una descarga eléctrica. No la utilice en
este estado, bajo ninguna circunstancia.
Cualquier clase de partícula extraña
pegada a la junta tórica puede causar
una filtración de agua. Quite las partículas
extrañas después de comprobar cómo se
hace, en la p. 24.
Pelo
Fibra
Arena
ESPAÑOL
ES-15
Cómo acoplar la correa
1
Acople la correa a la caja estanca.
Acople la correa a la caja estanca, tal y
como se muestra en ➀ y ➁.
2
Ajuste la correa muñequera alrededor de la muñeca.
➀ Pase su mano y su muñeca a través de
la correa muñequera.
➁ Para reducir el riesgo de que se caiga la
cámara, ajuste la correa alrededor de la
muñeca, mediante el ajustador.
Apertura de la caja estanca con el ajustador de la correa
Al abrir la caja estanca, puede utilizar también el ajustador de la correa si no
dispone del extractor especial.
➀ Inserte la pestaña del ajustador tal
como se muestra en la ilustración.
➁ Suelte el cierre del tirador de
apertura/cierre.
No utilice el ajustador de la correa para
soltar la junta tórica. Podrían producirse
filtraciones de agua si se daña la junta
tórica o si se contamina con partículas
extrañas.
ES-16
Instalación de la placa de difusión del flash
Instale la placa de difusión del flash suministrada.
■ Instalación de la placa de difusión del flash
Acople la correa de la placa de difusión
del flash a la caja estanca, tal y como se
muestra en ➀ y ➁.
Evite pillar la correa al abrir o cerrar la
caja estanca.
Inserte la placa de diffusion del flash en
la ranura del anillo del objetivo como se
muestra en la ilustración.
Inserte firmemente la placa hasta que
chasquee.
ESPAÑOL
ES-17
Cómo hacer fotos
• Con la caja estanca, puede hacer fotografías hasta 40 m debajo del agua.
• Las funciones de operación de la unidad corresponden a las operaciones
individuales de la cámara. Si desea ver instrucciones de operación o funciones de
la cámara, consulte el manual del usuario que viene con su cámara.
1
Conecte la cámara.
Pulse el botón “ON/OFF”.
2
Ajuste el modo de disparo.
➀ Gire el dial de modo para seleccionar el
➀
modo de disparo.
➁ Compruebe el modo de disparo en la
ventana del monitor LCD.
Haga una fotografía de prueba, antes de
utilizar bajo el agua la cámara protegida.
Cuando ajuste el modo de disparo,
confirme que aparece el indicador
de modo correspondiente al modo
seleccionado en el monitor LCD.
➁
3
Sostenga la caja estanca firmemente con ambas manos.
Sostenga la cámara, de forma que los dedos o la correa no cubran el objetivo ni el
flash. Si el objetivo o flash estuviesen tapados, el sujeto podría quedar desenfocado
o la luminosidad (exposición) de la toma podría resultar incorrecta.
ES-18
4
Tome las fotografías.
➀ Pulse hacia abajo la palanca del
➁ Pulse hacia abajo la palanca del
disparador, hasta la mitad del
recorrido, para enfocar.
disparador, hasta el fondo, para tomar
la fotografía.
No es posible pulsar a medias la
palanca del disparador cuando se
graba vídeo.
Acerca del modo SUBMARINO
Gire el dial de modo de la cámara hacia
H y seleccione F SUBMARINO para
conseguir azules vívidos al disparar bajo
el agua. También puede seleccionar g
para la opción EQUILIBRIO BLANCO en el
menú de modo de la cámara.
Para obtener más información,
consulte el manual del usuario de su
cámara.
Primeros planos
Se recomienda utilizar un flash externo comercial para realizar macros.
ESPAÑOL
ES-19
Después de la toma fotográfica
(almacenamiento)
1
Apague la cámara.
Pulse el botón “ON/OFF” para desconectar
la cámara.
Asegúrese de que la cámara está
desconectada.
2
Cuando termine de hacer fotografías, llene inmediatamente un
contenedor con agua del grifo para eliminar la sal dejada por el agua
del mar.
Enjuague bien el exterior de la caja
estanca, sacudiendo el agua con la mano.
Si quedara algo de sal en la caja, podría
causar corrosión, mal funcionamiento
local y otros problemas.
3
Quite cuidadosamente las gotas de agua de la caja estanca.
Especialmente, quite con cuidado las gotas que haya en la junta de la caja estanca.
Utilice un trapo suave y que no suelte fibras, o un utensilio parecido.
Retire las gotas de agua que queden bajo la palanca del disparador, el tirador de
apertura/cierre y otras piezas.
ES-20
4
Extraiga la cámara de la caja estanca.
➀ Suelte el cierre del tirador de
apertura/cierre.
➁ Gire el tirador de apertura/cierre en la
dirección de la flecha “OPEN” para abrir
la caja estanca. Ábrala lentamente,
de forma que el agua no caiga en la
cámara que está dentro.
Antes de abrir o cerrar la caja estanca,
asegúrese de que sus manos y pelo
estén secos y que no goteará agua sobre
la cámara, ni dentro de la caja estanca.
Cuando abra o cierre la caja estanca,
tenga cuidado para no pillarse los dedos,
o la palma de la mano con la caja.
Si sus manos están mojadas, asegúrese
de no tocar la cámara ni la pila.
No abra la caja estanca en lugares en los
que el interior pueda llenarse de arena o
mojarse.
3
➂ Tire hacia arriba del dial de modo y
saque la cámara de la caja estanca (➃).
Cuando extraiga la cámara de la caja
estanca, abra la caja estanca con el
objetivo orientado hacia abajo para
evitar que se caiga la cámara.
4
ESPAÑOL
ES-21
Después de la toma fotográfica (almacenamiento)
5
Con la cámara desmontada, asegúrese de que no quedan gotas de
agua ni partículas extrañas en la junta tórica, cierre la caja estanca y gire
el tirador de apertura/cierre en la dirección de la flecha “CLOSE” para
cerrarla herméticamente (p. 10). Lávela cuidadosamente con agua
del grifo una vez más.
Intente eliminar cualquier residuo de
sal, moviendo ligeramente los diversos
botones, debajo del agua.
Recomendamos que sumerja la caja
estanca en agua limpia durante,
aproximadamente, 1 hora.
Si la caja se guarda con restos de agua
salada, los cristales de sal obturarán el
movimiento del tirador de apertura/
cierre y de otras partes. También puede
producirse corrosión.
6
Cuando cierre la caja estanca, tenga
cuidado para no pillarse los dedos o la
palma de la mano con la caja estanca.
Quite cuidadosamente las gotas de agua de la caja estanca.
Utilice un trapo suave y que no suelte fibras, o un utensilio parecido.
Retire las gotas de agua que queden bajo la palanca del disparador, el tirador de
apertura/cierre y otras piezas.
7
Abra ligeramente la caja estanca y séquela en un lugar aireado,
resguardada de la luz directa del sol. Tras secar la caja, guárdela donde
no quede directamente expuesta a la luz del sol.
No utilice un secador de pelo, aire
caliente o luz directa del sol para secar la
caja estanca.
ES-22
Acerca de los ajustes del anillo de control
Puede cambiar la función asignada al anillo de control. Le recomendamos que cambie
la función del anillo de control antes de usar la caja estanca. Consulte las instrucciones
de funcionamiento de la cámara en el manual del propietario suministrado junto con
la cámara.
Para manipular el anillo de control de la cámara, use el dial del anillo de control.
Sobre el dial de comandos
Puesto que el dial de comandos no puede manipularse mientras se está usando
la caja estanca, las siguientes funciones no estarán disponibles.
■ Disparo
• El suavizado no puede ajustarse al usar el modo enfoque pro.
• El tamaño del cuadro de enfoque no puede reducirse ni aumentarse al
seleccionar F ÁREA DE ENFOQUE.
• La velocidad del obturador no puede modificarse cuando la opción
A ESCENAS está establecida en p.
■ Reproducción
• Al usar el zoom para ampliar una imagen, las demás imágenes no pueden
visualizarse.
Acerca de los ajustes del anillo de control
Al seleccionar PREDETERMIN. en AJ. ANILLO CONTR., el dial del anillo de control
puede usarse para ajustar el cambio de programa, la velocidad del obturador o la
apertura. Para usar el enfoque manual, ajuste MODO ENFOQUE a N.
Los siguientes ajustes no pueden modificarse cuando el anillo de control está
ajustado a una posición distinta de PREDETERMIN. o cuando N ENFOQUE
MANUAL está seleccionado en F MODO ENFOQUE.
Cambio de programa del modo P
Apertura del modo A
Velocidad del obturador del modo P
Apertura/velocidad del obturador del modo M
ES-23
ESPAÑOL
•
•
•
•
Mantenimiento
Mantenimiento después del uso
Haga esto siempre inmediatamente después de utilizar la caja estanca. Compruebe
que la junta tórica no tiene muescas ni defectos causados por partículas extrañas,
rajaduras ni otros daños.
1
Retire la junta tórica de la caja estanca.
Junta tórica
Junta tórica
➀ Introduzca el extractor especial entre
la junta tórica y la ranura de la junta
tórica.
➁ Introduzca la punta del extractor
especial debajo de la junta tórica.
Tenga cuidado de no arañar la ranura
con la punta del extractor.
➂ Cuando la junta tórica salga de la
ranura, sujétela con los dedos y sáquela
de la caja estanca.
ES-24
2
Limpie la junta tórica de restos de grasa y partículas extrañas, como
fibras y arena.
Retire las partículas extrañas con un trapo suave y que no suelte fibras.
Seque la junta tórica enjuagada, sin volver a echar agua. Esto es para evitar que
quede adherida alguna fibra.
3
Sujete la junta tórica con los dedos y tóquela con cuidado en toda su
extensión, ejerciendo sólo una ligera presión, para comprobar que no
haya muescas ni defectos causados por partículas extrañas, ni rajaduras
debidas al desgaste (se pueden sentir con las puntas de los dedos).
Al presionar con los dedos y deslizarlos por la junta tórica, tenga cuidado de no
estirarla tirando demasiado fuerte de ella.
Ejemplos de partículas extrañas y de daños
Pelo
4
Fibra
Arena
Muescas
Deterioro
causadas por
partículas extrañas
Rajadura
Quite todas las partículas extrañas de la ranura de la junta tórica,
utilizando un cepillo de dientes o un bastoncillo algodonado.
Cerciórese de que no quedan fibras sueltas del bastoncillo algodonado.
5
Recubra la junta tórica con la grasa especial.
ES-25
ESPAÑOL
Para aplicar una capa uniforme y fina
de grasa para silicona a la junta tórica,
extraiga unos 5 mm de grasa del tubo
que viene con el producto, depositando la
grasa en una bolsa de plástica limpia (de
un tamaño aproximado de 10 cm × 20 cm)
y después extiéndala concienzudamente.
Ponga la junta tórica en la bolsa de
plástico y remuévala hasta que la junta
tórica quede completamente cubierta de
grasa. La bolsa de plástico se puede utilizar
más de una vez, si se conserva limpia.
Mantenimiento
6
Coloque la junta tórica.
Pase la punta del dedo por la junta tórica para confirmar que no esté torcida ni
doblada. Si nota que la junta tórica está torcida o doblada, puede que no esté
colocada correctamente.
Si la junta tórica estaba completamente instalada, vuelva a instalarla siguiendo las
instrucciones de la página 24.
Si la junta tórica está torcida o abombada, o si hay partículas extrañas encima o
debajo de ella, penetrará agua.
Al realizar el mantenimiento de la junta tórica, tenga especial cuidado en evitar que
las ventanas del objetivo y del monitor LCD se manchen de grasa. Si las ventanas del
objetivo o el monitor LCD se mancharan, límpielas con un paño suave y seco.
ES-26
Notas acerca de cómo utilizar correctamente la
caja estanca
• No utilice ni guarde la caja estanca a temperaturas que superen los +40 °C.
• No la utilice en agua a temperatura superior a +40 °C, ya que podrían producirse
filtraciones.
• No utilice disolventes, benzina, alcohol ni otros productos químicos volátiles para la
limpieza. Si aplica esos productos químicos a la caja estanca, puede ocasionar daños
en su superficie y se agrietará cuando esté bajo altas presiones.
• No fuerce la rosca para el trípode.
• No golpee la caja estanca ni la someta a impactos.
• No arroje la caja estanca al agua.
• Cuando utilice la caja estanca en agua de mar, lávela después, todavía
perfectamente cerrada, en un cubo de agua pura para eliminar por completo la sal.
A continuación, seque el exterior de la caja, utilizando un paño seco y suave.
• Este producto está diseñado para su uso bajo el agua, como caja estanca. No la deje
ni guarde con la cámara todavía dentro: la pila puede tener fugas o incluso causar
un incendio.
• Si lleva la cámara a bordo de un avión con la caja estanca cerrada, es posible que
la caja no pueda abrirse. Cerciórese de abrir la caja estanca antes de entrar con
la cámara en el avión. Si la caja estanca no se abre, sumerja la cámara en agua
templada para calentar el aire del interior y reducir la diferencia de presión de aire, y
después abra la caja estanca.
■ Para evitar filtraciones de agua
ES-27
ESPAÑOL
Si esta caja tiene filtraciones durante su uso y la cámara digital que va dentro se moja, la
cámara no se puede reparar. Tome las siguientes precauciones antes de usarla.
• La vida estándar de la junta tórica es de alrededor de un año, aunque depende de
las condiciones de funcionamiento. Sustituya la junta tórica por una nueva, una vez
al año.
• Cualquier partícula extraña adherida a la junta tórica puede causar una filtración
de agua. Elimínelas con un paño, asegurándose de que no quedan restos de fibras
pegados a la junta tórica. Si una partícula extraña no se puede quitar fácilmente,
pruebe a quitarla con agua.
• Si la junta tórica se araña, agrieta, decolora o deforma, sustitúyala por una nueva.
• Al sustituir la junta tórica, primero limpie la ranura de la junta tórica y compruebe
que está libre de granos de arena, polvo, pelo y otras partículas extrañas.
• Para la junta tórica, utilice grasa para silicona de la marca recomendada por FUJIFILM.
• Si la junta tórica no está correctamente asentada, puede producirse una filtración de
agua. Cuando monte la junta tórica, asegúrese de que se fija en la ranura y de que
no se retuerce (p. 26).
• No deje la caja estanca expuesta a la luz directa del sol en verano, ni en un vehículo
cerrado, ni cerca de un aparato calefactor. No aplique una fuerza externa de larga
duración a la caja estanca. La deformación causada por el calor o la fuerza puede dar
lugar a la pérdida de impermeabilidad, inutilizándola para ser usada bajo el agua.
• Tenga cuidado de no dañar la junta tórica ni la superficie en contacto con ella,
apretándolas en exceso una contra otra, o dejando que partículas extrañas (arena,
polvo o pelo) se metan entre ellas.
• Lleve a cabo la prueba de inmersión y la prueba final antes de utilizar el producto.
• Si advierte señales de filtración de agua mientras toma fotografías, saque el
producto inmediatamente del agua. Busque la causa y haga lo que corresponda.
Ejemplos de partículas extrañas y de daños
Pelo
Fibra
Arena
Muescas
Deterioro
causadas por
partículas extrañas
Rajadura
Especificaciones
Cámara con la que debe
ser utilizada
Cámara digital XQ1
Resistencia a la presión
Hasta 40 m de profundidad bajo el agua
Materiales principales
Cuerpo de la caja: Policarbonato transparente
Ventanilla de objetivo: Cristal
Dimensiones (ancho ×
altura × profundidad)
143.6 mm × 101 mm × 105 mm (incluidas las partes
salientes)
Peso
Aprox. 421 g (no incluye la cámara y los accesorios)
✽ Estas especificaciones están sujetas a cambio sin previo aviso. FUJIFILM no se hará
responsable de ningún daño resultante de posibles errores en este Manual del usuario.
Guía de accesorios
• Juego de paquetes de silicagel (SST-01)
Agente desecante para la reducción del desenfoque del objetivo (Paquete de
silicagel × 6)
• Kit de junta tórica (ORK-XQ1)
Kit opcional de mantenimiento
(Junta tórica de repuesto × 1, extractor especial para abrir el tirador de cierre/extraer
la junta tórica × 1)
• Grasa especial para silicona (SGR-01)
Grasa especial para silicona para el mantenimiento de la junta tórica (Grasa especial
de silicona × 1 [aprox. 3 g])
ES-28
製品保証規定
1. 保証期間内に正常な使用状態(使用説明書、注意書に従った使用状態)で
故障した場合には、弊社またはお買上げ店にて無料修理いたします。
2. 無料修理を受ける場合は、商品と本書をご提示の上、弊社またはお買上げ
店に依頼してください。なお、お届けいただく際の運賃などの諸費用は、
お客様でご負担願います。
3. ご贈答品、ご転居後の修理については、弊社にご相談ください。
4. 保証期間内でも、次の場合には有料修理になります。
(1) 業務用の長時間使用、車両、船舶などへ搭載して使用された場合の故障、
損傷、および消耗部分を交換した場合。
(2) 修理ご依頼の際、保証書の提示または添付のないもの。
(3) 保証書にお名前、お買上げ日、お買上げ店名の記載がない場合
あるいは、これらの字句を書き換えられた場合。
(4) 使用上の誤りおよび弊社以外での修理、調整による故障および損傷。
(5) お買上げ後の、落下、衝撃、砂、泥かぶり、冠水、浸水などによる故障
および損傷。
(6) 火災、地震、水害、落雷、その他の天災地変、公害や異常電圧による故
障および損傷。
(7) 故障の原因が本製品以外(電源、他の機器など)にあって、修理した場合。
(8) 上記以外で弊社の責に帰すことのできない原因により生じた故障。
5. この保証書は、日本国内でのみ有効です。
6. この保証書は再発行いたしませんので大切に保存してください。
※ この保証書は本書に明示した期間、条件のもとにおいて無料修理をお約束するも
のです。したがって、この保証書によってお客様の法律上の権利を制限するもの
ではありません。
※ 修理、アフターサービスに関する事項については、本書の「アフターサービスに
ついて」の項をご覧ください。
保証書
型名
WP-XQ1
保証期間
本体
1年
□□□ −□□□□
お
客
様
ご住所
お名前
様
電話
お
買
上
げ
店
住所・
店名
印
電話
お買上げ日
本書は、本書記載内容で無料修理を行うことをお約束するものです。修理ご
依 頼 の 際には 、商 品と本 書を弊 社 もしくは お 買 上 げ 店にご持 参ください 。
・ 使いかたのお問い合わせ:
富士フイルムFinePixサポートセンター TEL. 050-3786-1060
月曜日∼金曜日 9:00 ∼17:40/土曜日 10:00 ∼17:00
日・祝日・年末年始を除く
・ 修理のお問い合わせ:
富士フイルム修理サービスセンター TEL. 050-3786-1040
月曜日∼金曜日 9:00 ∼17:40/土曜日 10:00 ∼17:00
日・祝日・年末年始を除く
This warranty is valid only in JAPAN.
〒107-0052 東京都港区赤坂9丁目7番3号
7-3, AKASAKA 9-CHOME, MINATO-KU, TOKYO 107-0052, JAPAN
Printed in China