1
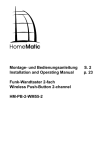
Installations- und Bedienungsanleitung (S. 2) Installation and operating manual (p. 20) Funk-Sirenen- und Blitzansteuerung Aufputzmontage: Radio-controlled alarm siren and flash actuator surface-mount: HM-Sec-SFA-SM 2. Ausgabe Deutsch, Mai 2009 Dokumentation © 2008 eQ-3 Ltd., Hong Kong Alle Rechte vorbehalten. Ohne schriftliche Zustimmung des Herausgebers darf dieses Handbuch auch nicht auszugsweise in irgendeiner Form reproduziert werden oder unter Verwendung elektronischer, mechanischer oder chemischer Verfahren vervielfältigt oder verarbeitet werden. Es ist möglich, dass das vorliegende Handbuch noch drucktechnische Mängel oder Druckfehler aufweist. Die Angaben in diesem Handbuch werden jedoch regelmäßig überprüft und Korrekturen in der nächsten Ausgabe vorgenommen. Für Fehler technischer oder drucktechnischer Art und ihre Folgen übernehmen wir keine Haftung. Alle Warenzeichen und Schutzrechte werden anerkannt. Printed in Hong Kong. Änderungen im Sinne des technischen Fortschritts können ohne Vorankündigung vorgenommen werden. 84438 / V 1.01 2 Inhaltsverzeichnis 1 2 3 3.1 3.1.1 3.1.2 4 5 6 6.1 6.2 7 7.1 7.2 8 9 10 11 11.1 11.2 11.3 12 13 13.1 13.2 14 Hinweise zu dieser Anleitung . . . . . . . . . . . . . . . . . . . . . . . . . . . Gefahrenhinweise . . . . . . . . . . . . . . . . . . . . . . . . . . . . . . . . . . . . Funktion . . . . . . . . . . . . . . . . . . . . . . . . . . . . . . . . . . . . . . . . . . . . Bedien- und Anzeigeelemente, Anschlüsse . . . . . . . . . . . . . . . Frontplatte, Kabeldurchführungen . . . . . . . . . . . . . . . . . . . . . . . Anschlüsse, Sicherungen, Sonstiges . . . . . . . . . . . . . . . . . . . . . 4 4 5 6 6 7 Allgemeine Systeminformation zu HomeMatic . . . . . . . . . . . . . . 8 Allgemeine Hinweise zum Funkbetrieb . . . . . . . . . . . . . . . . . . . . 8 Montage und Installation . . . . . . . . . . . . . . . . . . . . . . . . . . . . . . 9 Montage . . . . . . . . . . . . . . . . . . . . . . . . . . . . . . . . . . . . . . . . . . . . 9 Installation . . . . . . . . . . . . . . . . . . . . . . . . . . . . . . . . . . . . . . . . . 10 Inbetriebnahme . . . . . . . . . . . . . . . . . . . . . . . . . . . . . . . . . . . . . 12 Einfache Bedienfunktionen am Gerät . . . . . . . . . . . . . . . . . . . 12 Anlernen . . . . . . . . . . . . . . . . . . . . . . . . . . . . . . . . . . . . . . . . . . 12 Bedienung . . . . . . . . . . . . . . . . . . . . . . . . . . . . . . . . . . . . . . . . . 13 Zurücksetzen in den Auslieferungszustand . . . . . . . . . . . . . . . 13 Verhalten nach Spannungswiederkehr . . . . . . . . . . . . . . . . . . 14 Rückmeldungen der Geräte-LEDs . . . . . . . . . . . . . . . . . . . . . . 14 Blinkcodes der Kanal-LED . . . . . . . . . . . . . . . . . . . . . . . . . . . . 14 Anzeige des Betriebszustandes . . . . . . . . . . . . . . . . . . . . . . . . 15 Statusanzeige der Spannungsversorgung . . . . . . . . . . . . . . . . 15 Hinweise zum Akku . . . . . . . . . . . . . . . . . . . . . . . . . . . . . . . . . . 15 Wartung und Reinigung . . . . . . . . . . . . . . . . . . . . . . . . . . . . . . 16 Reinigung . . . . . . . . . . . . . . . . . . . . . . . . . . . . . . . . . . . . . . . . . . 16 Sicherungswechsel . . . . . . . . . . . . . . . . . . . . . . . . . . . . . . . . . . 17 Technische Daten . . . . . . . . . . . . . . . . . . . . . . . . . . . . . . . . . . . 17 3 1 Hinweise zu dieser Anleitung Lesen Sie diese Anleitung sorgfältig, bevor Sie ihre HomeMatic-Komponenten in Betrieb nehmen. Bewahren Sie die Anleitung zum späteren Nachschlagen auf! Wenn Sie das Gerät anderen Personen zur Nutzung überlassen, übergeben Sie auch diese Bedienungsanleitung. Benutzte Symbole: Achtung! Hier wird auf eine Gefahr hingewiesen. Hinweis. Dieser Abschnitt enthält zusätzliche wichtige Informationen! 2 Gefahrenhinweise Das beschriebene Gerät ist Teil einer Gebäudeinstallation. Bei der Planung und Errichtung von Elektrischen Anlagen sind die einschlägigen Normen und Richtlinien des Landes zu beachten, in dem die Anlage installiert wird. Der Betrieb des Gerätes ist ausschließlich am 230V/50Hz-Wechselspannungsnetz zulässig. Arbeiten am 230V-Netz dürfen nur von einer Elektro-Fachkraft (nach VDE 0100) erfolgen. Dabei sind die geltenden Unfallverhütungsvorschriften zu beachten. Zur Vermeidung eines elektrischen Schlages vor Arbeiten am Gerät Netzspannung freischalten (Sicherungsautomat abschalten). Bei Nichtbeachtung der Installationshinweise können Brand oder andere Gefahren entstehen. Belasten Sie das Gerät nur bis zur angegebenen Leistungsgrenze. Eine Überlastung kann zur Zerstörung des Gerätes, zu einem Brand oder elektrischen Unfall führen. Öffnen Sie das Gerät nicht, solange die Netzspannung daran angeschlossen ist. Das Öffnen des Gerätes unter Netzspannung birgt die Gefahr eines Stromschlages. Beachten Sie beim Anschluss an die Geräteklemmen die hierfür zulässigen Leitungen und Leitungsquerschnitte. 4 3 Funktion Die Sirenen-Blitz-Ansteuerung ist ein Aktor des HomeMatic-Systems. Sie ermöglicht die Ansteuerung von Signalgeräten der Alarmtechnik, typischerweise kombinierte, elektronische Sirenen und Blitzleuchten, über Funk-Sendebefehle. Diese Funk-Sendebefehle können von Fernbedienungen, Sensoren oder der HomeMatic-Zentrale CCU ausgesandt werden. Die Ausstattung und die Funktionen*: • Ansteuerung einer 12-V-Sirene und einer 12-V-Blitzleuchte • Stromversorgung von Sirene/Blitzlicht von der Funk-SirenenBlitzansteuerung. Gesamtstromaufnahme der angeschlossenen Signalgeräte max. 1 A/12 V. Schaltausgänge kurzschlussgeschützt. • Signaldauer entsprechend den gesetzlichen Vorschriften voreingestellt: Sirene: 2 Minuten; Blitzlicht: 5 Minuten • Spannungsversorgung der Funk-Sirenen-Blitzansteuerung über internes 230-V-Netzteil, Notstromversorgung über internen BleiGel-Akku 12 V/1,2 Ah • Sabotageschutz durch internen Sabotagekontakt und AlarmAussendung* bei Entfernen der Bedienplatte und Trennung des Gerätes vom Netz • Sabotagekontakt des Signalgerätes auswertbar* • Direktes Anlernen von HomeMatic-Sendern, z. B. Sensoren, möglich • Interne Akku-Zustandsüberwachung mit Signalisierung von Fehlerzuständen, Tiefentladeschutz und Verpolschutz * einige Funktionen nur mit HomeMatic-Zentrale verfügbar, siehe Anleitungstexte. Beachten Sie bei der Anbindung des Aktors an Ihre HomeMatic-Zentrale, dass Sie die aktuelle HomeMatic-Firmware heruntergeladen haben (Beschreibung siehe Anleitung zur Zentrale). 5 3.1 Bedien- und Anzeigeelemente, Anschlüsse 3.1.1 Frontplatte, Kabeldurchführungen C D E B A (A) – Kabeldurchführung Signalgeräte-Anschluss (B) – Geräte-LED: Status der Spannungsversorgung (C) – Kanaltaste Sirenenfunktion (D) – Geräte-LED Sirenenfunktion (E) – Geräte-LED Blitzfunktion (F) – Kanaltaste Blitzfunktion (G) – Kabeldurchführung Netzkabel 6 F G 3.1.2 Anschlüsse, Sicherung, Sonstiges J D9 I H TA1 D10 TA2 KL4 KL3 KL2 KL1 D8 S1 K SI1 L (H) – Sicherung für Sirenen-/Blitzausgang (I) – Anschlussklemmen für Sirene, Blitzlicht, Sabotagemeldung: KL 1: Eingang für Sabotagekontakt des Signalgebers KL 2: 12-V-Ausgang für Sirenenanschluss KL 3: 12-V-Ausgang für Blitzleuchtenanschluss (J) – Sabotagekontakt (K) – Netzanschluss KL 4 (L) – Blei-Gel-Akku zur Netzspannungsausfall-Überbrückung 7 4 Allgemeine Systeminformation zu HomeMatic Dieses Gerät ist Teil des HomeMatic-Haussteuersystems und arbeitet mit dem bidirektionalen BidCoS® Funkprotokoll. Alle Geräte werden mit einer Standardkonfiguration ausgeliefert. Darüber hinaus ist die Funktion des Gerätes über ein Programmiergerät und Software konfigurierbar. Welcher weitergehende Funktionsumfang sich damit ergibt, und welche Zusatzfunktionen sich im HomeMatic-System im Zusammenspiel mit weiteren Komponenten ergeben, entnehmen Sie bitte der gesonderten Konfigurationsanleitung oder dem HomeMatic-Systemhandbuch. Alle technischen Dokumente und Updates finden Sie stets aktuell unter www.HomeMatic.com. 5 Allgemeine Hinweise zum Funkbetrieb Die Funk-Übertragung wird auf einem nicht exklusiven Übertragungsweg realisiert, weshalb Störungen nicht ausgeschlossen werden können. Weitere Störeinflüsse können durch Schaltvorgänge, Elektromotoren oder defekte Elektrogeräte hervorgerufen werden. Die Reichweite in Gebäuden kann stark von der im Freifeld abweichen. Außer der Sendeleistung und den Empfangseigenschaften der Empfänger spielen neben Umwelteinflüssen wie Luftfeuchtigkeit bauliche/abschirmende Gegebenheiten vor Ort eine wichtige Rolle. Hiermit erklärt die eQ-3 Entwicklung GmbH, dass sich dieses Gerät in Übereinstimmung mit den grundlegenden Anforderungen und den anderen relevanten Vorschriften der Richtlinie 1999/5/EG befindet. Die vollständige Konformitätserklärung finden Sie unter www.HomeMatic.com. 8 6 Montage und Installation 6.1 Montage Die Funk-Sirenen-Blitzansteuerung ist in einem Aufputzgehäuse untergebracht, das aufgrund der Schutzart IP 65 auch zur Montage im Außenbereich und in Feuchträumen geeignet ist. Die Montage des Gerätes sollte jedoch so erfolgen, dass Unbefugte das Gerät nicht erreichen können. Wir empfehlen daher die Montage innerhalb des zu sichernden Objektes, gut erreichbar für den Eigentümer, nicht erreichbar für Unbefugte. Der Montageort ist so zu wählen, dass sich ein möglichst kurzer Leitungsweg zum Signalgerät ergibt und sich das Gerät sicher innerhalb der Funkreichweite des auslösenden HomeMatic-Gerätes, z. B. Zentrale oder Sensor, befindet. • • Die Montagelage des Gerätes ist wie auf Seite 6/7 gezeigt einzuhalten, die Aussparung für den Akku muss nach unten zeigen. Die Befestigung des Gerätes erfolgt über die vier Bohrungen zur Wandbefestigung in den Ecken des Gehäuses. Vergewissern Sie sich, dass die Wand an den markierten Bohrlöchern tragfähig ist und dort keine Strom-, Gas-, Wasser-, Abflussleitungen etc. verlaufen. • • Zusätzlich wird die Geräterückwand über eine Schraube, die mit der mitgelieferten Gummidichtung zu versehen ist, an der Wand befestigt. Diese Schraube sichert das Gerät gegen unbemerktes Abnehmen vom Montageort. Das Bohrloch befindet sich im Akku-Fach. Bitte verwenden Sie bei Montage die mitgelieferte Gummidichtung. Um später an diese Schraube zu gelangen, muss die Frontplatte abgenommen werden. Wird diese entfernt, löst der Sabotage taster eine Warnmeldung aus, die an die Zentrale gesendet wird. Nach der Befestigung des Gerätes ist der Akku einzusetzen und anzuschließen. 9 Setzen Sie den Akku in die dafür vorgebene Aussparung ein , die Anschlussklemmen nach rechts, und schließen Sie ihn polrichtig an die Akku-Anschlussleitungen des Gerätes an (Rot an Plus, Schwarz an Minus). Achten Sie darauf, dass die Akku-Anschlussleitungen keine Elektronikteile auf der Platine berühren. Insbesondere dürfen die Leitungen nicht den Sabotagetaster blockieren. 6.2 Installation Das Anschlussbild rechts zeigt den Anschluss des Gerätes an die Netzspannung sowie an das Signalgerät. Zum Anschluss an die Klemmen sind die Adern der Anschlusskabel auf ca. 10 mm abzuisolieren. Zum Anschluss ist der jeweilige Betätiger der Klemme niederzudrücken, die Ader bis zum Anschluss einzuführen und der Betätiger loszulassen. Anschließend ist der feste Sitz der Ader in der Klemme zu prüfen. • • • • 10 Schließen Sie zunächst das Signalgerät an die Klemmen KL1 bis KL3 an (Kabelquerschnitt 0,5-1,5 mm2). Verfügt das Signalgerät nicht über einen eigenen Sabotagekontakt, so belassen Sie die werkseitig montierte Drahtbrücke in KL1. Beachten Sie die Polarität der Anschlüsse. Alle Minus-Anschlüsse sind im Gerät zusammengefasst, so dass ggf. eine gemeinsame Masseader für Sirene, Blitzlicht und Sabotagekontakt ausreicht. Beachten Sie die maximal zulässige Stromaufnahme des Signalgerätes von je max. 0,5 A für Sirene und Blitzleuchte. Schalten Sie den Stromkreis, an den das Gerät angeschlossen werden soll, spannungsfrei und schließen Sie das Netzkabel an KL4 (Kabelquerschnitt 0,5-2,5 mm2) an. Setzen Sie die Frontplatte auf und verschrauben Sie diese mit den vier Kunststoffschrauben. Zum Abschluss sind die Kabeldurchführungen festzudrehen, sie wirken als Zugentlastung und schützen vor dem Eindringen von Feuchtigkeit und Staub. L N Blitz (Flash) KL4 Sirene + – + – + – KL2 Sabotage* PE N L KL3 Signalgerät + – + – + – KL1 PE KL1 * Signalgerät ohne Sabotagekontakt: KL4: L KL4: N KL4: PE KL1: + KL1: – KL2: + KL2: – KL3: + KL3: – Netzanschluss Außenleiter Netzanschluss Neutralleiter Netzanschluss PE Sabotagekontakt Signalgerät, Plusanschluss Sabotagekontakt Signalgerät, Minusanschluss Sirenenansteuerung, +12 V, max. 500 mA Sirenenansteuerung, Masse Blitzleuchtenansteuerung, +12 V, max. 500 mA Blitzleuchtenansteuerung, Masse 11 7 Inbetriebnahme 7.1 Einfache Bedienfunktionen am Gerät Für das direkte Schalten der Sirene bzw. des Blitzlichts verfügt das Gerät über jeweils einen Bedientaster und eine Geräte-LED. Sie können die Funktionen des angeschlossenen Signalgerätes sowie die korrekte elektrische Installation sofort nach der Installation, ohne Anlernen, überprüfen. Zum Bedienen wird nur der kurze Tastendruck verwendet. Der lange Tastendruck (länger als 4 Sekunden) versetzt den Aktor in den Anlernmodus. 7.2 Anlernen Bitte lesen Sie diesen Abschnitt erst vollständig, bevor sie mit dem Anlernen beginnen! Zum Anlernen müssen beide zu verknüpfenden Geräte in den Anlernmodus gebracht werden und der gewünschte Kanal zum Anlernen muss ausgewählt werden. • • Zum Anlernen an einen Kanal des Aktors halten Sie die zugehörige Kanaltaste für etwa 4 Sekunden lang gedrückt. Dauerhaftes Blinken der Geräte-LED signalisiert den Anlernmodus. Nach erfolgreichem Anlernen erlischt die Geräte-LED. Wenn kein Anlernen erfolgt, wird der Anlernmodus automatisch nach 20 Sekunden beendet. Hinweis: Ist der Aktor bereits an eine Zentrale angelernt und damit für direktes Anlernen gesperrt, signalisiert er dies durch kurzes Aufleuchten der Geräte-LED (statt dauerhaftem Blinken). Es ist kein direktes Anlernen möglich! 12 8 Bedienung Nach dem Anlernen stehen einfache Bedien- bzw. Aktivierungsfunktionen über die angelernten Bedienelemente, Sensoren oder die Zentrale zur Verfügung: • • Je nach angelerntem Bedien- bzw. Aktivierungselement lässt sich der jeweilige Kanal an- oder ausschalten. Bei Auslösen eines Sabotageereignisses (Sabotagekontakt Signalgerät, Sabotagekontakt Aktor, Trennung vom Stromnetz) wird eine Sabotagemeldung an die Zentrale gesendet. Die Auswertung der Sabotagemeldungen kann nur über eine Zentrale, wie die HomeMatic-Zentrale CCU oder die FunkAlarmzentrale erfolgen. Sollten für diese Ereignisse Alarmszenarien angelegt sein, so sollten diese vor einem Serviceeingriff (z. B. Akkuwechsel) deaktiviert werden. 9 Zurücksetzen in den Auslieferungszustand • • • Halten Sie die Kanaltaste des Kanals 1 (Sirene) für mindestens 4 Sekunden gedrückt. Die Kanal-LED beginnt langsam zu blinken. Zum Zurücksetzen des Geräts drücken Sie nun erneut für mindestens 4 Sekunden die Kanaltaste. Die LED beginnt währenddessen schneller zu blinken. Loslassen der Kanaltaste schließt den Rücksetzvorgang ab und zur Bestätigung des Zurücksetzens erlischt die LED. Mögliche Fehlermeldungen: (Dieser Fehler kann nur auftreten, wenn Sie eine Zentrale besitzen und das Gerät an diese Zentrale angelernt haben.) Beginnt die LED nach 4 Sekunden gedrückt Halten nicht zu blinken, sondern leuchtet dauerhaft auf, kann das Gerät nicht zurückgesetzt werden! 13 In diesem Falle ist die Verschlüsselung mit einem vom Auslieferungsschlüssel verschiedenen System-Sicherheitsschlüssel aktiv. Um den Aktor zurückzusetzen, müssen sie die Konfigurationssoftware der Zentrale zum Zurücksetzen benutzen! Der Vorgang ist in der Anleitung zur Zentralen-Software beschrieben. 10 Verhalten nach Spannungswiederkehr Die folgenden Hinweise beschreiben das Verhalten des Gerätes nach Netzausfall (bzw. Trennen vom Netz) und Ausfall des Akkus. Nach dem Einschalten der Betriebsspannung (Wiederkehr der Netzspannung) überprüft der Aktor seine Komponenten. Sollte dabei ein Fehler festgestellt werden, so wird dieses durch gemeinsames Blinken aller Kanal-LEDs dargestellt. Dieses wiederholt sich kontinuierlich und das Gerät nimmt seine eigentliche Funktion nicht auf. Sollte der Test ohne Fehler durchlaufen, sendet der Aktor ein Funktelegramm mit seiner Statusinformation aus. Damit bei Spannungswiederkehr nicht alle Aktoren gleichzeitig senden, wartet der Aktor eine zufällige Verzögerungszeit vor dem Senden. In dieser Zeit blinken die Kanal-LEDs (wie im Anlernmodus). Ist die Verzögerungszeit sehr kurz, kann es sein, dass das Blinken kaum wahrnehmbar ist. 11 Rückmeldungen der Geräte-LEDs 11.1 Blinkcodes der Kanal-LED Verschiedene Zustände des Aktors werden durch Blinken der KanalLEDs angezeigt: Langsames Blinken Schnelles Blinken Einmal lang, n-mal kurz (je nach Fehlerart) Lange an, kurz aus 14 Anlernmodus Reset Fehler Zugehöriger Ausgang ist eingeschaltet mit Ausschalttimer 11.2 Anzeige des Betriebszustandes Sobald ein Schaltausgang aktiv ist, leuchtet die entsprechende Kanal-LED dauerhaft, bei aktivem Ausschalttimer blinkt die LED. Nach Konfiguration des Aktors über die Zentrale oder über ein Programmiertool zeigt die LED neben den beschriebenen noch zusätzliche Zustände des Geräts an. In der Konfigurationsanleitung und im Systemhandbuch der Zentrale wird hierauf näher eingegangen. 11.3 Statusanzeige der Spannungsversorgung Über die grüne Geräte-LED „Power” werden verschiedene Zustände der Spannungsversorgung ausgegeben: Dauerhaftes Leuchten Blinkt jeweils 1 x Blinkt jeweils 2 x Blinkt jeweils 3 x AUS Netzspannung liegt an, Akku OK Netzspannung fehlt Akku defekt Akku leer Gerät defekt oder Netzspannung und Akku fehlen Liegen mehrere Fehler vor, wird der Fehler mit der niedrigsten Anzahl von Blinkfolgen angezeigt. 12 Hinweise zum Akku Ein funktionierender Akku ist zum Betrieb der Funk-SirenenBlitzansteuerung zwingend erforderlich. • • • Zum Schutz vor Tiefentladung des Akkus werden die Schaltausgänge des Gerätes bei leerem Akku abgeschaltet. Ein leerer Akku benötigt eine Ladezeit von bis zu 30 Stunden. Ein sehr weit entladener Akku kann u. U. auch als defekt angezeigt werden. Sollte diese Anzeige auch nach der genannten Ladezeit immer noch erfolgen, ist der Akku auszutauschen. 15 • Das Gerät verfügt über eine interne Überwachung der Akkuqualität durch Messung des Innenwiderstands. Ist der Innenwiderstand zu hoch, wird der Akku als defekt gemeldet. Durch die Alterung des Akkus und die damit abnehmende Leistungsfähigkeit werden darüber hinaus die Wechselintervalle in Abhängigkeit von der Betriebstemperatur aus nachstehender Tabelle empfohlen: Betriebstemperatur Akku-Wechselintervall -10°C..20°C 5 Jahre 20°C..25°C 4 Jahre 25°C..30°C 3 Jahre 30°C..35°C 2 Jahre 35°C..40°C 1,5 Jahre 40°C..50°C 1 Jahr Muss der Akku ausgetauscht werden, ist er durch einen Akku mit folgenden Parametern zu ersetzen: - Blei-Gel-Akku, 12 V, 1,2 Ah - Abmessungen (B x H x T, ohne Anschlüsse): 94 x 50 x 24 mm bis 99 x 54 x 44 mm - Max. Höhe mit Anschlüssen: 60 mm 13 Wartung und Reinigung Das Produkt ist für Sie bis auf einen evtl. erforderlichen Akku- oder Sicherungswechsel wartungsfrei. Überlassen Sie eine Wartung oder Reparatur einer Fachkraft. 13.1 Reinigung Reinigen Sie das Produkt mit einem weichen, sauberen, trockenen und fusselfreien Tuch. Für die Entfernung von stärkeren Verschmutzungen kann das Tuch leicht mit lauwarmem Wasser angefeuchtet werden. Ver16 wenden Sie keine lösungsmittelhaltigen Reinigungsmittel, das Kunststoffgehäuse und die Beschriftung können dadurch angegriffen werden. 13.2 Sicherungswechsel Bei Verpolung des Bleiakkus oder einem Kurzschluss bzw. Überlast an den Schaltausgängen löst die interne Sicherung aus, die sich neben der Anschlussklemme KL3 unter einer Schutzhaube befindet. Vor Ausbau der Gerätefrontplatte Netzspannung freischalten! • • • • • • Beseitigen Sie die Fehlerursache, z. B. einen Kurzschluss. Lösen Sie die vier Deckelschrauben und nehmen Sie den Klarsichtdeckel ab. Lösen Sie die vier Kunststoffschrauben der Frontplatte und nehmen Sie diese ab. Entfernen Sie die Schutzhaube der Sicherung (Lage s. Seite 7) und wechseln Sie die Sicherung gegen eine Sicherung des gleichen Typs (Feinsicherung 5 x 20 mm, 1 A träge) aus. Setzen Sie die Schutzhaube der Sicherung wieder auf, montieren Sie Frontplatte und Abdeckung und schalten Sie die Netzspannung wieder zu. Testen Sie die Gerätefunktion. 13.3 Akkuwechsel Vor Ausbau der Gerätefrontplatte Netzspannung freischalten! Es besteht die Gefahr eines Stromschlags! 1. Lösen Sie die vier Deckelschrauben und nehmen Sie den Klarsichtdeckel ab. 2. Lösen Sie die vier Kunststoffschrauben der Frontplatte und nehmen Sie die Platte ab. 3. Ziehen Sie den Akku leicht aus dem Gehäuse heraus. Ziehen Sie dann die Anschlusskabel vorsichtig von den Anschlüssen ab. 4. Setzen Sie nun den neuen Akku gleichen Typs wieder in selber Weise in das Gehäuse ein, während Sie die Anschlusskabel auf die zugehörigen Anschlüsse des Akkus stecken. Das rote Kabel ist dabei an den Plus-Anschluss und das schwarze Kabel an den Minus-Anschluss des Akkus anzuschließen. Achten Sie darauf, 17 dass die Anschlusskabel nicht beschädigt werden und keinen Kontakt zu den Bauteilen auf den Platinen im Gerät haben. 5. Montieren Sie Frontplatte und Abdeckung und schalten Sie die Netzspannung wieder zu. 6. Testen Sie die Gerätefunktion. Vorsicht! Explosionsgefahr bei unsachgemäßem Austausch der Batterie. Verbrauchte Batterien gehören nicht in den Hausmüll! Entsorgen Sie diese in Ihrer örtlichen Batteriesammelstelle! 14 Technische Daten Funkfrequenz: 868,3 MHz Stromversorgung: 230 V / 50 Hz, max. 30 mA Notstromversorgung: Blei-Gel-Akku, 12 V/ 1,2 Ah Schaltausgänge: 2 x 12 VDC, Gesamtbelastung max. 1 A Schutzart: IP65 Betriebstemperaturbereich: max. -10°C bis +50°C empf. 20°C bis 25°C Abmessungen (B x H x T): 160 x 160 x 90 mm 18 Technische Änderungen vorbehalten. Das CE-Zeichen ist ein Freiverkehrszeichen, das sich ausschließlich an die Behörden wendet und keine Zusicherung von Eigenschaften beinhaltet. Entsorgungshinweis Gerät nicht im Hausmüll entsorgen! Elektronische Geräte sind entsprechend der Richtlinie über Elektro- und Elektronik-Altgeräte über die örtlichen Sammelstellen für Elektronik-Altgeräte zu entsorgen. 19 2nd English edition, May 2009 Documentation © 2008 eQ-3 Ltd., Hong Kong All rights reserved. This manual may not be reproduced in any format, either in whole or in part, nor may it be duplicated or edited by electronic, mechanical or chemical means, without the written consent of the publisher. Typographical and printing errors cannot be excluded. However, the information contained in this manual is reviewed on a regular basis and any necessary corrections will be implemented in the next edition. We accept no liability for technical or typographical errors or the consequences thereof. All trademarks and industrial property rights are acknowledged. Printed in Hong Kong. Changes may be made without prior notice as a result of technical advances. 84438/V 1.01 20 Table of contents 1 2 3 3.1 3.1.1 3.1.2 4 5 6 6.1 6.2 7 7.1 7.2 8 9 10 11 11.1 11.2 11.3 12 13 13.1 13.2 14 Information about these instructions . . . . . . . . . . . . . . . . . . . . Hazard information . . . . . . . . . . . . . . . . . . . . . . . . . . . . . . . . . . Function . . . . . . . . . . . . . . . . . . . . . . . . . . . . . . . . . . . . . . . . . . . Controls and indicators, connections . . . . . . . . . . . . . . . . . . . Front panel, cable bushings . . . . . . . . . . . . . . . . . . . . . . . . . . . Connections, fuses, miscellaneous . . . . . . . . . . . . . . . . . . . . . General system information about HomeMatic . . . . . . . . . . . . . General information about radio control . . . . . . . . . . . . . . . . . . Mounting and installation . . . . . . . . . . . . . . . . . . . . . . . . . . . . . Mounting . . . . . . . . . . . . . . . . . . . . . . . . . . . . . . . . . . . . . . . . . . Installation . . . . . . . . . . . . . . . . . . . . . . . . . . . . . . . . . . . . . . . . . Start-up . . . . . . . . . . . . . . . . . . . . . . . . . . . . . . . . . . . . . . . . . . . Simple operator functions on the device . . . . . . . . . . . . . . . . . Teaching-in . . . . . . . . . . . . . . . . . . . . . . . . . . . . . . . . . . . . . . . . Operation . . . . . . . . . . . . . . . . . . . . . . . . . . . . . . . . . . . . . . . . . . Resetting to the initial state . . . . . . . . . . . . . . . . . . . . . . . . . . . Response to power recovery . . . . . . . . . . . . . . . . . . . . . . . . . . Channel LED feedback . . . . . . . . . . . . . . . . . . . . . . . . . . . . . . . Channel LED flashing codes . . . . . . . . . . . . . . . . . . . . . . . . . . Operating status display . . . . . . . . . . . . . . . . . . . . . . . . . . . . . . Power supply status display . . . . . . . . . . . . . . . . . . . . . . . . . . . Notes about the battery . . . . . . . . . . . . . . . . . . . . . . . . . . . . . . Maintenance and cleaning . . . . . . . . . . . . . . . . . . . . . . . . . . . . Cleaning . . . . . . . . . . . . . . . . . . . . . . . . . . . . . . . . . . . . . . . . . . . Changing the fuse . . . . . . . . . . . . . . . . . . . . . . . . . . . . . . . . . . . Technical data . . . . . . . . . . . . . . . . . . . . . . . . . . . . . . . . . . . . . . 22 22 23 24 24 25 26 26 27 27 28 30 30 30 31 31 32 32 32 33 33 33 34 34 35 36 21 1 Information about these instructions Read this manual carefully before starting to use your HomeMatic components. Keep the instructions handy so you can refer to them at a later date. If you hand over the device to other persons for use, please hand over the operating manual as well. Symbols used: Attention! This indicates a hazard. Note. This section contains additional important information. 2 Hazard information The device described is part of a building installation. When planning and setting up electrical installations, the standards and guidelines which are applicable in the country in which the equipment is installed must be complied with. The device has been designed solely for operation on a 230 V/50 Hz AC supply. Only qualified electricians (to VDE 0100) are permitted to carry out work on the 230 V mains. Applicable accident prevention regulations must be complied with whilst such work is being carried out. To avoid electric shock, disconnect the mains voltage prior to starting work on the device (trip the miniature circuit-breaker). Noncompliance with the installation instructions can cause fire or introduce other hazards. Do not exceed the capacity specified for the device. If this capacity is exceeded, this could lead to the destruction of the device, to a fire or to an electrical accident. Disconnect the mains voltage before opening the device. There is a risk of electric shock if the device is opened with the mains voltage connected. When connecting to the device terminals, take the permissible cables and cable cross sections into account. 22 3 Function The alarm siren flash actuator is a HomeMatic system actuator. It is used to activate signalling devices in alarm systems, usually combined electronic sirens and flashing lights, via radio-controlled transmit commands. These radio-controlled transmit commands can be sent from remote controls, sensors or the HomeMatic CCU central control unit. Features and functions*: • Activation of a 12 V siren and a 12 V flashing light • Power supply for siren/flashing light from radio-controlled siren/flashing light actuator. Total power consumption of the connected signalling devices max. 1 A/12 V. Switching outputs protected against short circuits. • Signal duration preset in accordance with legal requirements: siren: 2 minutes; flashing light: 5 minutes. • Power supply for the radio-controlled siren/flashing light actuator via internal 230 V power supply unit, back-up supply via lead gel battery 12 V/1.2 Ah. • Internal tamper contact provides tamper protection; the alarm will go off* if the control panel is removed and the device is disconnected from the mains. • Signalling device’s tamper contact can be evaluated*. • Direct teaching-in of HomeMatic transmitters, e.g. sensors, is supported. • Internal battery status monitoring with signalling of error states, deep discharge protection and protection against polarity reversal. * Some functions are only available in conjunction with the HomeMatic central control unit; refer to the manual for further information. Please ensure that you download the latest HomeMatic firmware when connecting the actuator to your HomeMatic central control unit (a description appears in the instructions for the central control unit). 23 3.1 Controls and indicators, connections 3.1.1 Front panel, cable bushings C D E B A (A) – Cable bushing for signalling device connection (B) – Device LED: status of the power supply (C) – Channel button for siren function (D) – Device LED for siren function (E) – Device LED for flashing function (F) – Channel button for flashing function (G) – Cable bushing for mains cable 24 F G 3.1.2 Connections, fuse, miscellaneous J D9 I H TA1 D10 TA2 KL4 KL3 KL2 KL1 D8 S1 K SI1 L (H) – Fuse for siren/flashing output (I) – Terminals for siren, flashing light, tamper signal: KL 1: Input for signalling device’s tamper contact KL 2: 12 V output for siren connection KL 3: 12 V output for flashing light connection (J) – Tamper contact (K) – Mains connection KL 4 (L) – Lead gel battery to provide back-up in the event of a mains supply failure 25 4 General system information about HomeMatic This device is part of the HomeMatic home control system and works with the bi-directional BidCoS® wireless protocol. All devices are delivered in a standard configuration. The functionality of the device can also be configured with a programming device and software. For information on the additional functions that can be made available in this way and on the supplementary functions which you can benefit from by using the HomeMatic system in conjunction with other components, please refer to the separate Configuration Instruction or to the HomeMatic System Manual. All current technical documents and updates are provided at www.HomeMatic.com. 5 General information about radio control Radio transmission is performed on a non-exclusive transmission path, which means that it is a the possibility of interference occurring. Interference an also be caused by switching operations, electric motors or defective electric devices. The range of transmission within buildings can deviate greatly from open air distances. Besides the transmitting power and reception characteristics of the receiver, environmental influences such as humidity in the vicinity and local structures play an important role. eQ-3 Entwicklung GmbH hereby declares that this device conforms to the essential requirements and other relevant regulations of Directive 1999/5/EC. The full declaration of conformity is provided at www.HomeMatic.com. 26 6 Mounting and installation 6.1 Mounting The radio-controlled alarm siren and flash actuator is housed inside a surface-mounting enclosure whose IP 65 protection also ensures suitability for mounting outdoors and in damp locations. However, the device should be mounted in such a way that unauthorised parties cannot gain access to it. We therefore recommend mounting the device inside the item of property to be protected, in a location that is easy to access for the owner but cannot be accessed by unauthorised parties. The mounting location should be selected so that the line to the signalling device is as short as possible and the device is located within the wireless range of the triggering HomeMatic device, e.g. the central control unit or a sensor. • • The mounting position of the device must match that shown on page 6/7; the recess for the battery must point downwards. The device is fastened to the wall through the four holes drilled in the corners of the housing. Make sure that the wall is able to carry a load at the points where you have marked your bore holes and that no electricity, gas, water or drain lines, etc. run there. • Furthermore, the device rear panel is fastened to the wall using an additional screw which must be fitted with the rubber seal included in the package contents. This screw provides protection against the device being removed from the mounting location unnoticed. The bore hole is located in the battery compartment. Please use the rubber seal included in the scope of supply when mounting the device. Once mounting is complete, the front panel will have to be removed in order to gain access to this screw. If the front panel is removed, the tamper sensor will trigger a warning message which is sent to the central control unit. 27 • Once the device has been fastened in place the battery should be fitted and connected. Insert the battery into the designated recess with the terminals to the right and connect the poles to the appropriate battery connecting cables on the device (red to +, black to -). Make sure that the battery connecting cables do not make contact with any of the electronic components on the PCB. In particular, the cables must not block the tamper sensor. 6.2 Installation The connection diagram on the right shows how the device is connected to the mains voltage and to the signalling device. The wires in the connecting cable need to be stripped approx. 10 mm for connection to the terminals. To make the connection, press down the actuator on the relevant terminal, push the wires in to make the connection then release the actuator. Then check that the wires are seated correctly in the terminal. • • • • 28 Next, connect the signalling device to terminals KL1 to KL3 (cable cross section 0.5 - 1.5 mm2). If the signalling device does not have its own tamper contact, leave the factory-assembled wire bridge in KL1. Do not reverse the polarity of the connections. All negative connections are grouped in the device, so that for example a common earth conductor can be used for the siren, flashing light and tamper contact. Do not exceed the maximum permissible current consumption of the signalling device (0.5 A each for the siren and the flashing light). Disconnect the circuit to which the device is to be connected from the mains power supply and connect the mains cable to KL4 (cable cross section 0.5-2.5 mm2). Attach the front panel and screw it tight with the four plastic screws. Finally, screw the cable bushings tight. They provide strain relief and protect against the ingress of moisture and dust. L N Flash(Flash) Blitz KL4 Siren Sirene + – + – + – KL2 Tamper* Sabotage* PE N L KL3 + – + – Signalling device + Signalgerät – KL1 PE KL1 *Signalling device without tamper contact: * Signalgerät ohne Sabotagekontakt: KL4: L KL4: N KL4: PE KL1: + KL1: – KL2: + KL2: – KL3: + KL3: – Mains connection L-conductor Mains connection neutral conductor Mains connection PE Tamper contact signalling device, positive connection Tamper contact signalling device, negative connection Siren control, +12 V, max. 500 mA Siren control, earth Flashing light control, +12 V, max. 500 mA Flashing light control, earth 29 7 Start-up 7.1 Simple operator functions on the device The siren and the flashing light can be operated directly using the control buttons and LEDs on the device (there is one control button and one LED for each). You can check the functions of the connected signalling device, as well as the integrity of the electrical installation, immediately after installation (without teaching-in). Simply press and release the button to operate the actuator. Pressing and holding down the button (for more than 4 seconds) will switch the actuator to teach-in mode. 7.2 Teaching-in Please read this entire section before starting the teach-in procedure. To execute the teach-in procedure, both of the devices to be connected must be in teach-in mode and the channel to be taught-in must be selected. • • To teach-in on an actuator channel, press and hold down the corresponding channel button for approximately 4 seconds. The device LED will flash continuously to indicate that teach-in mode is active. Once teaching-in has been completed successfully, the device LED will go out. If no teaching-in is carried out, teach-in mode will be exited automatically after 20 seconds. Note: If the actuator has already been taught-in on a central control unit and is therefore blocked for direct teach-in, this will be indicated by the device LED lighting up briefly (instead of flashing continuously). Direct teach-in is not possible. 30 8 Operation After teach-in has been performed, simple operator and activation functions are available via the taught-in control elements, sensors or the central control unit: • • Each channel can be activated or deactivated in accordance with the taught-in operator or activation element. If an attempt is made to tamper with the device (tamper contact on the signalling device, actuator tamper contact, disconnection from power supply), a tamper signal is sent to the central control unit. Tamper signals can only be evaluated with a central control unit, e.g. CCU or alarm central unit. If alarm scenarios have been configured for these events, they should be deactivated before commencing service operations (e.g. battery replacement). 9 Resetting to the initial state • • • Press and hold down the channel button for channel 1 (siren) for at least 4 seconds. The channel LED starts to flash slowly. To reset the device, press and hold down the teach-in button again for at least 4 seconds. The LED will now start to flash faster. To complete the reset operation, release the channel button; the LED will go out to confirm that the device has been reset. Possible error messages: (This error can only occur if you have a central control unit on which you have taught-in the device.) If the LED does not start to flash once the button has been held down for 4 seconds but lights up continuously instead, the device cannot be reset. 31 In this case, coding is activated using a system security key that differs from the one supplied with the product. To reset the actuator, you will have to use the configuration software for resetting the central control unit. The procedure to follow is described in the manual for the central control unit software. 10 Response to power recovery The instructions below describe how the device responds to a power failure (or disconnection from the mains) and the failure of the battery. When the operating voltage is switched on (recovery of mains voltage), the actuator checks its components. If an error is detected, all channel LEDs will flash. This is repeated continuously and the device does not perform its function. If the test is completed without errors, the actuator transmits a wireless telegram containing its status information. To prevent all actuators transmitting at the same time when power is recovered, there is a random delay before the actuator transmits. During this time, the channel LEDs flash (as in teach-in mode). If the delay is very short, this flashing may be almost imperceptible. 11 Channel LED feedback 11.1 Channel LED flashing codes Various actuator states are indicated by the channel LEDs flashing: Slow flashing Fast flashing One long flash, n brief flashes (depending on the type of error) Long on, short off 32 Teach-in mode Reset Error Corresponding output activated with switch-off timer 11.2 Operating status display As soon as a switching output is active, the corresponding channel LED will light up continuously; if the switch-off timer is active, the LED will flash. Once the actuator has been configured using the central control unit or a programming tool, the LED will indicate other device states in addition to those already described. More detailed information can be found in the configuration manual and the system manual for the control unit. 11.3 Power supply status display Various power supply states are indicated by the device’s green “Power” LED: Continuously lit Flashing 1 x Flashing 2 x Flashing 3 x OFF Mains voltage present, battery OK No mains voltage Battery fault Battery empty Device faulty or mains voltage and battery missing If several errors are pending, the error with the least number of flashing sequences will be displayed. 12 Notes about the battery A functioning battery is absolutely essential to the operation of the radio-controlled alarm siren and flash actuator. • • • To provide protection against deep discharge of the battery, the device’s switching outputs are deactivated when the battery is empty. It takes up to 30 hours to charge an empty battery. Under certain circumstances, a very discharged battery can be 33 • indicated as faulty. If this status is displayed even after the designated charging time, replace the battery. The device has an internal feature for monitoring battery quality by means of measuring internal resistance. If the internal resistance is too high, a battery fault will be displayed. As the battery ages and its performance deteriorates, we recommend the replacement intervals listed in the following table, which are dependent upon operating temperature: Operating temperature Battery replacement interval -10°C..20°C 5 years 20°C..25°C 4 years 25°C..30°C 3 years 30°C..35°C 2 years 35°C..40°C 1.5 years 40°C..50°C 1 year If the battery has to be changed, it must be replaced with a battery meeting the following specifications: - Lead gel battery, 12 V, 1.2 Ah - Dimensions (W x H x D, without connections): 94 x 50 x 24 mm to 99 x 54 x 44 mm - Max. height with connections: 60 mm 13 Maintenance and cleaning This product does not require you to carry out any maintenance other than replacing the battery or fuse when necessary. Enlist the help of an expert to carry out any maintenance or repairs. 13.1 Cleaning Clean the product using a soft, lint-free cloth that is clean and dry. You may dampen the cloth a little with lukewarm water in order to remove 34 more stubborn marks. Do not use any detergents containing solvents, as they could corrode the plastic housing and label. 13.2 Changing the fuse Reversing the polarity of the lead battery or a short circuit/overload at the switching outputs will blow the internal fuse located next to terminal KL3 underneath a protective cover. Disconnect the mains voltage before removing the device front panel. • • • • • • Rectify the cause of the error (e.g. a short circuit). Unscrew the four screws on the cover and remove the clear cover. Unscrew the four plastic screws on the front panel and remove it. Remove the fuse’s protective cover (its position is shown on page 7) and replace the fuse with one of the same type (miniature fuse 5 x 20 mm, 1 A slow-blowing). Replace the fuse‘s protective cover, fit the front panel and cover and reconnect the mains voltage. Test the function of the device. 13.3 Replacing the battery Disconnect the mains voltage before removing the device front panel. Risk of electric shock! 1. Unscrew the four screws on the cover and remove the clear cover. 2. Unscrew the four plastic screws on the front panel and remove it. 3. Carefully lift the battery out of the housing. Then carefully disconnect the connecting cable from the terminals. 4. Still proceeding with caution, insert the new battery (of the same type) into the housing and connect the connecting cable to the corresponding terminals on the battery. Connect the red cable to the battery’s positive terminal and the black cable to its negative terminal. Take care not to damage the connecting cable and do not make contact with the components on the PCBs inside the device. 35 5. Fit the front panel and cover and reconnect the mains voltage. 6. Test the function of the device. Caution! There is a risk of explosion if the battery is not replaced correctly. Used batteries should not be disposed of with regular domestic waste. Instead, they should be taken to your local battery disposal point. 14 Technical data Radio frequency: 868.3 MHz Power supply: 230 V/50 Hz, max. 30 mA Back-up supply: Lead gel battery, 12 V, 1.2 Ah Switching outputs: 2 x 12 VDC, total load max. 1 A Degree of protection: IP65 Operating temperature range: Max. -10°C to +50°C Recomm. 20°C to 25°C Dimensions (W x H x D): 160 x 160 x 90 mm Subject to technical alterations. 36 The CE sign is a free trade sign addressed exclusively to the authorities and does not warrant any properties. Instructions for disposal Do not dispose of the device with regular domestic waste. Electronic devices are to be disposed of in accordance with the Waste Electrical and Electronic Equipment Directive via the local collection point for waste electronic devices. 37 eQ-3 AG Maiburger Straße 29 D-26789 Leer www.eQ-3.com 38