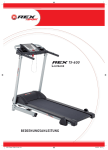
1
TX-800
L AUFBAND
BEDIENUNGSANLEITUNG
REX_Trainer_TX800_12.indd D-1
22.05.12 15:33
Inhaltsverzeichnis
Inhaltsverzeichnis
Vorwort .....................................................................................................................................................
Kennzeichnung wichtiger Hinweise .............................................................................................................
Wichtige Sicherheitshinweise .....................................................................................................................
Explosionszeichnung ..................................................................................................................................
Stückliste .................................................................................................................................................
Montage ...................................................................................................................................................
Klappmechanismus/Transport .....................................................................................................................
D-3
D-3
D-4
D-6
D-7
D-10
D-13
Trainingsanleitung .....................................................................................................................................
Trainingsgestaltung/Hinweise ..................................................................................................................
A Intensität .........................................................................................................................................
B Häufigkeit ..........................................................................................................................................
C Motivation ........................................................................................................................................
D Organisation der Trainigseinheiten ........................................................................................................
1. Aufwärmphase ................................................................................................................................
2. Trainingsphase ...............................................................................................................................
3. Abkühlphase ...................................................................................................................................
E Muskelaufbau .....................................................................................................................................
F Gewichtsabnahme ...............................................................................................................................
D-14
D-14
D-14
D-14
D-14
D-14
D-14
D-15
D-15
D-15
D-15
Bedienung ................................................................................................................................................
Voreinstellungen ....................................................................................................................................
Sicherheitsschlüssel .................................................................................................................................
Tastenfunktion .......................................................................................................................................
Anzeige-Informationen ............................................................................................................................
Trainings-Programme ...............................................................................................................................
A P1–P24/H1 ........................................................................................................................................
B Trainings-Parameter ............................................................................................................................
C Manuell .............................................................................................................................................
D-16
D-16
D-16
D-16
D-17
D-17
D-17
D-20
D-20
Pflege/Wartung .........................................................................................................................................
Technische Daten .......................................................................................................................................
Entsorgung ................................................................................................................................................
Gewährleistung .........................................................................................................................................
D-21
D-23
D-23
D-25
D-2
REX_Trainer_TX800_12.indd D-2
22.05.12 15:33
Vorwort
wir gratulieren Ihnen zum Kauf unseres FitnessGerätes. Sie haben ein wirklich gutes Produkt
erworben und werden bestimmt viel Freude damit haben.
Lesen Sie sich vor dem erstmaligen Gebrauch unbedingt die
Bedienungsanleitung aufmerksam durch, um Schäden am
Gerät oder Verletzungen zu vermeiden. Bewahren Sie die Bedienungsanleitung gut auf.
DEUTSCH
Vorwort · Kennzeichnung wichtiger Hinweise
Mit freundlichen Grüßen
Prophete GmbH u. Co. KG
Kennzeichnung wichtiger Hinweise
Besonders wichtige Hinweise sind in der Bedienungsanleitung wie folgt gekennzeichnet:
Dieser Warnhinweis macht Sie auf mögliche Gefahren für Ihre Gesundheit oder Ihr Leben oder
das anderer Personen aufmerksam, die beim Umgang oder beim Betrieb des Gerätes entstehen
GEFAHR können.
Diese Information gibt Ihnen zusätzliche Ratschläge und Tipps.
Dieser Hinweis macht Sie auf mögliche Gefahren
für Ihr Gerät aufmerksam.
ACHTUNG
D-3
REX_Trainer_TX800_12.indd D-3
22.05.12 15:33
Wichtige Sicherheitshinweise
Wichtige Sicherheitshinweise
Heben Sie die Bedienungsanleitung gut auf. Geben Sie sie im Fall eines Verkaufs
oder bei Weitergabe des Fitness-Gerätes ebenfalls mit.
GEFAHR
Es ist wichtig, dass Sie sich die komplette Anleitung durchlesen, bevor Sie das Gerät zusammenbauen und benutzen.
Eine sichere und leistungsfähige Nutzung kann nur erreicht werden, wenn das Gerät ordnungsgemäß montiert,
gewartet und richtig verwendet wird. Es ist Ihre Pflicht,
dass alle Nutzer dieses Gerätes über Gefahren und Vorsichtsmaßnahmen vor Nutzung informiert werden.
Das Gerät entspricht der DIN EN 957-1/6 und ist nur für
den privaten Hausgebrauch und nicht für den kommerziellen, sowie therapeutischen Gebrauch geeignet.
Verwenden Sie das Gerät ausschließlich nur in trockenen
Innenräumen bei Raumtemperatur. Schützen Sie es vor
Feuchtigkeit, Staub/Dreck und extremen Temperaturschwankungen.
Stellen Sie das Gerät nur auf einer festen, ebenen Fläche
auf und verwenden Sie eine Schutzabdeckung für den Boden/Teppich. Entfernen Sie alle scharfkantigen Gegenstände aus dem Umfeld und lassen Sie um das Gerät einen
Freiraum von mind. 0,5 m.
Stellen Sie sicher, dass niemals Flüssigkeiten (inkl. Körperschweiß!) in das Geräteinnere bzw. in den Fitness-Computer gelangen.
Benutzen Sie das Gerät nur wie vorgegeben! Wenn Sie
während der Montage oder der Überprüfung defekte Bauteile finden, bzw. während der Nutzung ungewöhnliche Geräusche wahrnehmen, stoppen Sie umgehend Ihr
Training. Benutzen Sie das Gerät bis zur Behebung des
Problems nicht.
Prüfen Sie vor Benutzung des Trainingsgerätes ob alle
Schrauben und Muttern sicher befestigt und fest angezogen sind.
Das Sicherheitsniveau des Gerätes kann nur aufrecht erhalten werden, wenn es regelmäßig auf Schäden und Verschleiß geprüft wird. Lassen Sie Reparaturen nur von
Fachpersonal durchführen und verwenden Sie nur Original-Ersatzteile.
ACHTUNG
Fähigkeiten oder mangels Erfahrung und/oder mangels
Wissen benutzt zu werden, es sei denn, sie werden durch
eine für ihre Sicherheit zuständige Person beaufsichtigt
oder erhielten von ihr Anweisungen, wie das Gerät zu
benutzen ist.
Das zulässige Maximalgewicht des Nutzers darf 130 kg
nicht überschreiten.
Suchen Sie vor Trainingsbeginn einen Arzt auf, um festzustellen, ob das Training ein Risiko für Ihre Gesundheit
darstellen könnte. Der Rat Ihres Arztes ist unerlässlich,
wenn Sie Medikamente einnehmen sollten, die die Herzfrequenz, den Blutdruck oder den Cholesterinspiegel beeinflussen.
Nehmen Sie körperlich Signale zur Kenntnis! Falsches
oder exzessives Training kann Ihre Gesundheit beeinträchtigen oder gar schädigen. Stoppen Sie bei folgenden
Symptomen die Übungen: Schmerz, Anspannung in der
Brust, unregelmäßiger Herzschlag, Kurzatmigkeit, Gefühl
der Benommenheit, Schwindel oder Übelkeit. Wenn auch
nur einer dieser Zustände auftritt, sollten Sie Ihren Arzt
aufsuchen bevor Sie mit dem Übungsprogramm fortfahren.
Tragen Sie beim Training geeignete Kleidung! Meiden Sie
weite Kleidungsstücke, mit denen Sie im Gerät hängen
bleiben könnten oder die Sie in Ihren Bewegungen einschränken bzw. behindern. Tragen Sie während des Trainings immer festes Schuhwerk.
Der Sicherheitsschlüssel dient dazu, das Laufband im
Falle eines Sturzes oder einer Notfallsituation sofort zu
stoppen. Benutzten Sie daher das Laufband nie, ohne
vorher den Sicherheitsclip sorgfältig an Ihrer Kleidung zu
befestigen. Prüfen Sie vor Trainingsbeginn, ob sich der
Sicherheitsclip nicht unbeabsichtigt von Ihrer Kleidung
lösen kann.
Halten Sie das Gerät von Kindern und Haustieren fern. Es
ist ausschließlich für Erwachsene geeignet.
Steigen Sie in einer Notfallsituation (z. B. plötzlicher
Schwindel, Schmerzen, usw.) wie folgt vom TrainingsGerät ab:
1. Halten Sie sich an den seitlichen Handgriffen fest.
2. Steigen Sie mit den Füßen auf die seitlichen Standflächen.
3. Ziehen Sie den Sicherheitsschlüssel ab.
Das Gerät ist nicht dafür bestimmt, durch Personen mit
eingeschränkten physischen, sensorischen oder geistigen
Springen Sie niemals während des Betriebs auf das Laufband!
D-4
REX_Trainer_TX800_12.indd D-4
22.05.12 15:33
DEUTSCH
Wichtige Sicherheitshinweise
Heben Sie die Bedienungsanleitung gut auf. Geben Sie sie im Fall eines Verkaufs
oder bei Weitergabe des Fitness-Gerätes ebenfalls mit.
GEFAHR
Lassen Sie das Laufband vollständig zum Stillstand kommen bevor Sie absteigen.
Schalten Sie das Fitnessgerät nach dem Training, zum
Säubern oder zum Warten aus und trennen Sie den Netzstecker von der Steckdose.
ACHTUNG
Seien Sie beim Heben und Bewegen des Gerätes vorsichtig, um z. B. Verletzungen Ihres Rückens zu vermeiden.
Benutzen Sie wenn möglich immer Hubtechniken oder
suchen Sie Hilfe.
D-5
REX_Trainer_TX800_12.indd D-5
22.05.12 15:33
Explosionszeichnung
Explosionszeichnung
D-6
REX_Trainer_TX800_12.indd D-6
22.05.12 15:33
Stückliste
DEUTSCH
Stückliste
74.
99.
100.
101.
125.
126.
44.
104.
103.
Nr.
1
2
3
4
5
6
7
8
Beschreibung
Hauptrahmen
Untergestell
Neigungswinkel
Holm rechts
Holm links
Konsole
Außenzug
Innenzug
102.
Größe
Menge
1
1
1
1
1
1
1
1
D-7
REX_Trainer_TX800_12.indd D-7
22.05.12 15:33
Stückliste
Nr.
9
10
11
12
13
14
15
16
16~3
17
19
20
21
21-1
21-2
21-3
21-6
21-10
21-12
21-13
22
23
24
25
26
27
28
29
30
31
32
33
34
35
36
37
38
40
41
42
43
44
45
46
47
48
49
50
51
52
53
55
57
58
59
60
61
62
63
64
65
66
Beschreibung
Feststellknopf
Neigungsmotor
Keilriemen
Motorhalterung
Motor
Laufband
Laufdeck
vordere Walze
Magnet
hintere Walze
Hülse
Hülse
Display
Display Vorderseite
Display Rückseite
Abdeckung
Lüfter
Blechschraube
Verbindungskabel Display
Computerkabel Display
Halterung Display
Abdeckung Untergestell (L)
Abdeckung Untergestell (R)
Motorabdeckung oben
Hintere Anpassungsbasis (L)
Hintere Anpassungsbasis (R)
Geschwindigkeit / Hand-Puls-Komplex
Neigung / Hand-Puls-Komplex
Leistungsschalter
Schalter an/ aus
Stopfen
Transportrolle vorne
Transportrolle hinten
Gummifüße
Haltegriff
Seitenlauf
Anti-Rutsch-Gummi
Motorabdeckung
Stopfen
Stopfen
Stopfen
Sicherheitsschlüssel
Steckdose
Kabel
Kaltgerätestecker
Netzkabel
Verbindungskabel (weiß)
Verbindungskabel (schwarz)
Verbindungskabel (schwarz)
Regler
Computerkabel Holm
Computerkabel Konsole
Bodenabdeckung
Sechskantschraube
Innensechskantschraube
Sechskantschraube
Sechskantschraube
Sechskantschraube
Sechskantschraube
Sechskantschraube
Innensechskantschraube
Innensechskantschraube
Größe
3.5 × 32 m/m
150 m/m_12P
200 m/m_10P
21.4 × 21.4 m/m
25.4 × 25.4 m/m
20 × 40 m/m
800 m/m
1000 m/m
20 cm × 764 × 764
20 cm × 764 × 764
100 m/m
1900 m/m
650 m/m
1/2" × 1"
3/8" × 3-3/4"
3/8" × 1-3/4"
3/8" × 1-1/2"
3/8" × 3/4"
M8 × 60 m/m
M8 × 12 m/m
5/16" × 1"
3/8" × 4"
Menge
1
1
1
1
1
1
1
1
1
1
2
2
1
1
1
1
1
4
1
1
2
1
1
1
1
1
1
1
1
1
2
2
2
6
2
2
2
5
1
1
2
1
1
1
1
1
2
1
1
1
1
1
1
2
1
1
1
4
1
2
2
1
D-8
REX_Trainer_TX800_12.indd D-8
22.05.12 15:33
Nr.
67
68
69
70
73
74
75
76
77
78
79
80
81
82
82
83
84
85
86
87
88
89
90
90-1
90-3
90-5
90-7
91
92
93
94
95
96
98
99
100
101
102
103
104
105
106
110
111
112
113
114
125
126
128
129
130
131
132
133
134
135
136
137
138
139
140
Beschreibung
Flachkopfschraube
Schraube
Bolzen
Flachkopfschraube
Schraube
Blechschraube
Mutter
Mutter
Mutter
Mutter
Federring
Federring
Federring
Unterlegscheibe
Unterlegscheibe
Unterlegscheibe
Unterlegscheibe
Nylonritzel (B)
Nylonritzel (A)
Unterlegscheibe
Unterlegscheibe
Schnellschlussmutter-Clip
Getränkehalter Montage
Getränkehalter
Sicherheit-Switch-Modul
Blechschraube
Verbindungskabel
Blechschraube
Gurtführung
Blechschraube
Blechschraube
Zylinder
Flachkopfsenkschraube
Sechskantschraube
Sechskantschraube
Unterlegscheibe
Unterlegscheibe
Innen-Sechskant-/ Kreuz-Schraubenschlüssel
Innen-Sechskant-Schlüssel
Schmiermittel
Stopfen
Abdeckung
Blechschraube
Blechschraube
Kabelbinder
Fuß-Reling (R)
Fuß-Reling (L)
Kreuzschlitzschraube
Kreuzschlitzschraube
Kreuzschlitzschraube
Äußere Lenkerverkleidung (L)
Äußere Lenkerverkleidung (R)
Untere innere Lenkerverkleidung (R)
Untere innere Lenkerverkleidung (L)
Obere innere Lenkerverkleidung (L)
Obere innere Lenkerverkleidung (R)
Blechschraube
Stopfen
Starterklappe
Filter
Verbindungskabel Motor
Blechschraube
Größe
3/8" × 2"
1/2" × 28 m/m
M8 × 3"
M6 × 1"
5 × 16 m/m
3.5 × 12 m/m
1/2" × 8T
3/8" × 7T
5/16" × 7T
M8 × 7T
3/8" × 2T
M8 × 1.5T
M5
3/8" × 19 × 1.5T
3/8" × 19 × 1.5T
3/8" × 25 × 2T
Ø 5 × Ø 13 × 1.0T
Ø 50 × Ø 13 × 3T
Ø 10 × Ø 25 × 3T
Ø 6.5 × Ø 25 × 1.5T
M5
5 × 2T
300 m/m
3 × 10 m/m
250 m/m
14 × 12 m/m
5 × 16 m/m
5 × 19 m/m
M8 × 1" × 1/4"
3/8" × 3"
5/16" × 1/2"
5/16" × 18 × 1.5T
5/16" × 23 × 1.5T
M5
M6 (66 × 88)
3.5 × 20 m/m
3.5 × 16 m/m
M5 × 25 m/m
M5 × 35 m/m
M5 × 12 m/m
3 × 63 m/m
400 m/m
4 × 19 m/m
Menge
4
2
2
6
13
22
4
6
2
1
6
2
3
6
6
5
10
4
2
8
3
2
1
1
1
2
1
2
2
22
8
1
2
1
14
6
8
1
1
1
2
1
2
5
5
1
1
2
2
7
1
1
1
1
1
1
2
2
1
1
1
4
DEUTSCH
Stückliste
D-9
REX_Trainer_TX800_12.indd D-9
22.05.12 15:33
Montage
Montage
SCHRITT 1
ACHTUNG
1. Nehmen Sie das Laufband vorsichtig aus dem Karton
und legen Sie es auf eine freie, ebene Fläche.
SCHRITT 2
ACHTUNG
1. Verbinden Sie das untere Computerkabel (53) mit
dem Computerkabel des rechten Holmes (4).
2. Führen Sie beide Holme (L, R / 5, 4) in das Untergestell (2) ein und verschrauben diese mit acht Schrauben 5/16" × 1/2“ (99), vier Unterlegscheiben 5/16"
× 18 × 1.5T (100) und vier 5/16" × 23 × 1.5T Unterlegscheiben (101). Verwenden Sie zum Festziehen
den beiliegenden Innen-Sechskant-Schlüssel (102).
D-10
REX_Trainer_TX800_12.indd D-10
22.05.12 15:33
Montage
DEUTSCH
Montage
SCHRITT 3
ACHTUNG
1. Verbinden Sie das Computerkabel der Konsole (55)
mit dem Computerkabel des Holmes (53).
2. Fixieren Sie anschließend die Konsole (6) mit den
beiden Holmen (L, R / 5, 4) mit sechs Schrauben
5/16" ×1/2 (99), zwei Unterlegscheiben 5/16" × 18
× 1.5T (100) und vier Unterlegscheiben 5/16" × 23 ×
1.5T (101). Benutzen Sie zum Festziehen den mitgelieferten Innen-Sechskant-Schlüssel (102).
SCHRITT 4
ACHTUNG
1. Montieren Sie die äußere Lenkerverkleidungen (L, R /
129, 130) an den Enden der Konsole (6) mit vier
Schrauben 3.5 × 12 m/m (74). Ziehen Sie die Schrauben mittels des mitgelieferten Werkzeugs (102) fest
an.
D-11
REX_Trainer_TX800_12.indd D-11
22.05.12 15:33
Montage
Montage
SCHRITT 5
ACHTUNG
1. Verbinden Sie das Computerkabel der Konsole (55)
mit dem Computerkabel des Displays (21-13).
2. Verbinden Sie ebenso Kabel (90-7) mit (21-12).
3 . Optional werden Geräte mit HR-Empfänger angeboten. Sollte Ihr Gerät über diesen verfügen, so verbinden das Kabel (21-14) mit Kabel (90-8).
SCHRITT 6
ACHTUNG
1. Schieben Sie das Display (21) vorsichtig in die Halterung der Konsole (6) und verschrauben Sie beide
Teile mit zwei Schrauben M5×25mm (125) und zwei
Schrauben M5×35mm (126). Verwenden Sie hierzu
ebenfalls das mitgelieferte Werkzeug (102).
D-12
REX_Trainer_TX800_12.indd D-12
22.05.12 15:33
Klappmechanismus/Transport
Ausklappen
DEUTSCH
Klappmechanismus/Transport
2
1. Stellen Sie sich hinter das Gerät und ziehen Sie den Verriegelungsknopf. (Abb. 1)
2. Lassen Sie das Laufband langsam auf den Boden herab.
(Abb. 2)
Einklappen
1. Ziehen Sie mit der rechten Hand den Verriegelungsknopf
(Abb. 3) und heben Sie mit der linken Hand das Laufband
bis in ca. 30 cm Höhe an.
2. Heben Sie nun beidhändig das Laufband an, bis es fest in
die Verriegelung einrastet. (Abb. 4)
Transport
Um das Laufband zu verschieben, muss das Gerät zuerst eingeklappt werden (s. Punkt „Einklappen“). Vergewissern Sie
sich, dass der Verriegelungsknopf fest eingerastet ist.
Kippen Sie das Laufband langsam zurück, bis es auf den
Transport-Rollen steht. Sie können das Gerät nun vorsichtig
zum gewünschten Platz bewegen. Beachten Sie zur Auswahl
eines geeigneten Platzes die Sicherheitshinweise am Anfang
dieser Bedienungsanleitung.
3
1
4
D-13
REX_Trainer_TX800_12.indd D-13
22.05.12 15:33
Trainingsanleitung
Trainingsanleitung
Die Nutzung Ihres Fitness-Gerätes wird Ihnen zahlreiche Vorteile bieten. Es wird Ihre körperliche Fitness verbessern, Ihre
Muskeln betonen und Ihnen in Verbindung mit einer kalorienreduzierten Diät auch beim Abnehmen helfen.
TRAININGSGESTALTUNG/-HINWEISE
Um ein optimales Training zu erzielen, sollten Sie vor Beginn des Trainings einige wichtige Dinge bezüglich der Art
und Weise (wie man trainiert) und der Gestaltung des
Trainings beachten. Um sich gesundheitlich und körperlich
zu verbessern, sollten folgende Faktoren bei der Planung des
Trainings beachtet werden:
C Motivation
Um ein Trainingsprogramm erfolgreich zu absolvieren, ist
Regelmäßigkeit ein sehr wichtiger Punkt. Auch geistige
Vorbereitung, sowie ein fester Zeitraum und Platz pro
Trainingseinheit tragen dazu bei. Es ist empfehlenswert,
sich immer sein persönliches Ziel vor Augen zu halten und
wenn möglich, nur bei guter Laune zu trainieren. Trainieren Sie kontinuierlich, um sich Tag für Tag weiterzuentwickeln und dem Trainingsziel näher zu kommen.
D Organisation der Trainingseinheiten
Es gibt 3 Trainingsphasen die bei jedem Training durchgeführt werden sollten:
A Intensität
a) Aufwärm-Phase
Das Training muss so gestaltet werden, dass die körperliche Belastung während des Trainings höher ist als bei
normaler Belastung. Atemlosigkeit bzw. Erschöpfung darf
jedoch nicht auftreten. Bei einem effektiven Training
sollte sich der Puls zwischen 70 % und 85 % des Maximalpulses bewegen (s. auch Kapitel „Trainingsphase“).
Während der ersten Trainingswochen sollte sich der Puls
bei ca. 70% des Maximalpulses befinden und in den darauf folgenden Wochen und Monaten langsam bis 85%
des Maximalpulses steigen. Die Trainingsanforderungen
können z. B. durch Verlängerung der Trainingsdauer und/
oder eine Erhöhung der Schwierigkeitsstufen, entsprechend der steigenden Kondition, erhöht werden. Sie haben mit folgenden Hilfsmitteln die Möglichkeit Ihre Pulsfrequenz zu kontrollieren:
b) Trainings-Phase
c) Abkühl-Phase
1. Aufwärmphase
Diese Phase trägt zu einer guten Durchblutung des Körpers
und einer richtigen Funktion der Muskeln bei. Ebenso verringert sie das Risiko von Krämpfen und Muskelverletzungen. Es ist daher empfehlenswert, vor jeder Trainingseinheit ein paar Dehnübungen (s. Abb.) zu machen. Jede
Übung sollte ca. 30 Sekunden andauern. Vermeiden Sie
hierbei ruckartige Bewegungen und belasten Sie die Muskeln nicht. Stoppen Sie die Dehnübung sobald es schmerzt.
a) Sie können Ihren Pulsschlag selbst fühlen und die
Schläge pro Minute zählen (z. B. am Handgelenk)
Messung der Pulsfrequenz auf herkömmliche Weise.
b) Sie können den Puls mittels der am Griff angebrachten
Sensorflächen messen.
c) Sie können Ihre Pulsfrequenz auch durch spezifische,
kalibrierte Puls-Mess-Geräte bestimmen.
Die Pulsmessung per Sensor dient nur zur Orientierung, da es
durch Bewegung, Reibung, Schweiß etc. zu Abweichungenvom tatsächlichen Puls kommen kann. Bei manchen Personen ist die pulsschlagbedingte Hautwiderstandsänderung so
gering, dass das Ergebnis nicht für eine genaue Pulsmessung
ausreicht.
RUMPFBEUGE
SEITENBEUGE
B Häufigkeit
Experten empfehlen, je nach Trainingsziel, 3–5 Einheiten
pro Woche zu trainieren. Das Training sollte mit einer
ausgewogenen und gesunden Ernährung begleitet werden. Ein durchschnittlicher Erwachsener braucht mind.
3 Trainingseinheiten pro Woche, um eine Veränderung
des Körpergewichts oder Verbesserung der Kondition zu
erzielen bzw. 2 Trainingseinheiten pro Woche, um den
derzeitigen Zustand zu halten.
INNENSEITE/
OBERSCHENKEL
AUSSENSEITE/
OBERSCHENKEL
WADE/ACHILLES
D-14
REX_Trainer_TX800_12.indd D-14
22.05.12 15:33
2. Trainingsphase
E Muskelaufbau
Achten Sie beim Training darauf, dass Sie Ihr Tempo
gleichmäßig und durchgehend halten. Für ein optimales
Training sollte die Belastung so gewählt sein, dass Ihr
Puls einen Wert von ca. 70–85 % des Maximalpulses erreicht (Zielzone) Anhand der Grafik können Sie die für Sie
passende Zielzone ablesen:
Um Ihre Muskeln mittels des Heimtrainers aufzubauen,
muss die Trainingsbelastung höher gewählt werden. Unter Umständen werden Sie feststellen, dass das TrainingsProgramm aufgrund Ihrer Fitness nicht in voller Länge
durchgehalten werden kann.
DEUTSCH
Trainingsanleitung
Ändern Sie in diesem Fall Ihren Trainingsplan wie folgt ab:
PULS
MAXIMUM
ZIELZONE
ABKÜHLPHASE
ALTER
Die Trainingsphase sollte mindestens 12 Minuten dauern.
Für den Einstieg ist eine Trainingszeit von ca. 15–20
Minuten üblich.
Wenn Sie nach einiger Zeit einen höheren Fitnessstand
erreicht haben, müssen Sie eventuell länger und höher
dosiert trainieren.
Achten Sie während des Trainings auf Ihre Körperhaltung:
• Oberkörper möglichst aufrecht halten
• Blick nach vorne richten
Sie sollten während der Warmlaufphase und der Abkühlphase wie gewohnt trainieren. Erhöhen Sie jedoch am
Ende der Übungsphase die Belastung, damit Ihre Beine
stärker trainiert werden. Falls Sie jedoch die Zielzone des
Pulses überschreiten, müssen Sie Ihr Tempo unbedingt
verringern!
F Gewichtsabnahme
Damit Ihr Körper richtig arbeiten kann, benötigt er wie
ein Motor „Treibstoff“. Die Muskulatur erhält Sauerstoff
von dem kardio-vaskulärem System des Körpers. Dieser
Sauerstoff wird zum einen zur Energieversorgung der
Muskeln und auch zur Verbrennung von Kohlenhydraten
bzw. Fetten genutzt. Aufgrund der chemischen Zusammensetzung kann die Umwandlung von Körperfetten in
Energie nur dann stattfinden, wenn Sie ein aerobes Training absolvieren, das heißt, wenn ausreichend Sauerstoff
beim Training vorhanden ist. Bei anaerobem Training
(„außer Atem sein“) herrscht Sauerstoffmangel, wodurch
kein Fett abgebaut werden kann. Der Körper hat bei 50%
bis 80% des Maximalpulses (Maximalpuls = 220 –Lebensalter) noch genügend Sauerstoff und kann in diesem Bereich die besten Ergebnisse bzgl. der Fettverbrennung
erzielen. Die Fettverbrennung wird gesteigert, je öfter
und länger Sie ein solches Training absolvieren.
• Die Bewegung sollte möglichst aus den Beinen
heraus kommen
• Nicht freihändig trainieren! –
Die Arme sollen den Körper stabilisieren.
• Fersen während des Trainings wie beim klassischen
Langlaufstil leicht anheben
• Öfters die Griffposition wechseln
3. Abkühlphase
Diese Phase dient zur Entspannung der Muskeln und des
Herz-Kreislauf-Systems. Reduzieren Sie hierfür z. B. das
Tempo für ca. 5 Minuten. Wiederholen Sie anschließend
die in Phase 1 beschriebenen Dehnübungen. Denken Sie
daran, dass Sie auch in dieser Phase keine ruckartigen
Bewegungen machen und das Sie die Muskeln nicht belasten.
D-15
REX_Trainer_TX800_12.indd D-15
22.05.12 15:33
Bedienung
Bedienung
VOREINSTELLUNGEN
Stecken Sie den Netzstecker in eine 220/240 V-Steckdose
(Sicherheitshinweise beachten!) und schalten Sie das Fitness-Gerät mittels des Hauptschalters auf der Rückseite ein.
SICHERHEITSSCHLÜSSEL
Abb. 1
Abb. 2
ACHTUNG
Benutzen Sie das Laufband nie, ohne vorher den Sicherheitsclip 1 sorgfältig an Ihrer Kleidung zu befestigen.
Prüfen Sie vor Trainingsbeginn, ob sich der Sicherheitsclip nicht von Ihrer Kleidung lösen kann.
Das Laufband kann nur in Betrieb genommen werden, wenn
der Sicherheitsschlüssel 2 am Kontaktpunkt der Computerkonsole eingesteckt ist.
(Abb. ähnlich)
2
1
2
Der Sicherheitsschlüssel dient dazu, das Laufband im
Falle eines Sturzes oder anderen Notfällen umgehend zu
stoppen.
Wird der Sicherheitsschlüssel 2 wieder in die Konsole eingesteckt, so müssen alle eventuell zuvor eingegebenen
Trainings-Programme oder Parameter erneut eingegeben
werden!
TASTENFUNKTIONEN
START:
Mit der START-Taste können Sie das Training starten. Ein
unterbrochenes Trainingsprogramm kann durch erneutes
Drücken der START-Taste fortgeführt werden.
RESET/STOP:
Mit der RESET/STOP-Taste können Sie das Laufband bis zum
Stillstand anhalten bzw. durch nochmaliges Drücken die
gewählten Programme und Werte zurücksetzen.
STEIGUNG (INCLINE):
Mit den Pfeiltasten können Sie die Steigung des Laufbandes
vorgeben. Durch die Pfeiltasten am linken Griff (s. Abb. 1)
lässt sich diese Einstellung ebenfalls verändern.
EINGABE:
Mit der EINGABE-Taste können Sie Trainingsparameter eingeben.
MODUS:
Durch Drücken der MODUS-Taste können Sie ein vorgegebenes Trainingsprogramm auswählen.
TEMPO (SPEED):
Mit den Pfeiltasten können Sie die Geschwindigkeit des
Laufbandes vorgeben bzw. in 0,5 km/h Schritten verändern.
Durch die Pfeiltasten am rechten Griff (s. Abb. 2) lässt sich
diese Einstellung ebenfalls steuern.
STEIGUNG 9/6/3:
Mit den Schnellwahltasten 9/6/3 können Sie eine vorgegebene Steigung direkt einstellen.
TEMPO RUN/JOGGEN/WALK:
Mit den Schnellwahltasten RUN/JOGGEN/WALK können Sie
eine vorgegebene Geschwindigkeit direkt einstellen.
RUN: 9 km/h
JOGGEN: 6 km/h
WALK: 3 km/h
D-16
REX_Trainer_TX800_12.indd D-16
22.05.12 15:33
Bedienung
TRAININGS-PROGRAMME
Folgende Anzeige-Informationen können abgerufen werden:
A Trainingsprogramme (P1–P24/H1)
1. TIME (Zeit)
Der Computer zeigt Ihnen die aktuelle Trainingszeit an.
Bei Eingabe einer Vorgabezeit läuft die Zeit rückwärts
(Countdown). Nach Erreichen des Vorgabewertes stoppt
das Gerät und ein akustisches Signal ertönt.
Ihnen stehen 24 verschiedene Trainings-Programme zur Verfügung. Eine Trainingseinheit dauert jeweils 30 Minuten.
Die Programme P1–P14 unterscheiden sich in der Abfolge
der Laufband-Geschwindigkeit. Die Programme P15–P24 unterscheiden sich hingegen in der Laufband-Geschwindigkeit,
sowie der Steigungseinstellung. Sie sind daher nur für
Personen mit guter Kondition geeignet.
2. SPEED (Tempo)
Der Computer zeigt die eingestellte Zielgeschwindigkeit
in km/h an.
3. DISTANCE (Strecke)
Der Computer zeigt Ihnen die zurück gelegte Strecke an.
Bei Eingabe einer Vorgabestecke läuft die Anzeige rückwärts (Countdown). Nach Erreichen des Vorgabewertes
stoppt das Gerät und ein akustisches Signal ertönt.
4. CALORIES (Kalorien)
Der Computer zeigt Ihnen die während des Trainings verbrannten Kalorien an. Die Anzeige läuft nach Eingabe der
zu verbrennenden Kalorienzahl rückwärts (Countdown)
bis auf Null. Nach Erreichen des Vorgabewertes stoppt das
Gerät und ein akustisches Signal ertönt.
5. PULSE (Puls/Herzschlag)
Die PULSE-Anzeige gibt Ihre aktuelle Pulsfrequenz in
Herzschläge pro Minute wieder. Die Anzeige kann nur
korrekte Werte wiedergeben, wenn Sie beide Sensoren
richtig mit Ihren Handflächen umfassen. Es kann unter
Umständen bis zu 2 Minuten dauern, bis die Pulsfrequenz
angezeigt wird.
DEUTSCH
ANZEIGE-INFORMATIONEN
Im H1-Programm geben Sie Ihre gewünschte Trainingszeit
(min. 5 Minuten), sowie Ihren persönlichen Zielpuls (60–
220 BPM) über die EINGABE-Taste ein. Der Computer passt
hierbei alle 15 Sekunden die Steigung des Laufbandes Ihrem
Zielpuls an.
Mit der MODUS-Taste und den TEMPO-Pfeiltasten können Sie
eines der 24 Trainings-Programme bzw. das H1-Programm
auswählen. Das aktuelle Trainings-Programm wird mittig
im rechten Displaybereich (P1–P24/H1) angezeigt. Durch
drücken der START-Taste können Sie das gewählte Programm
starten.
Eine individuelle Anpassung der Geschwindigkeit oder der
Neigung ist während des Trainings jederzeit über die TEMPObzw. STEIGUNG-Pfeiltasten möglich.
6. STEIGUNG (Incline)
Der Computer zeigt Ihnen den eingestellten Neigungswert an.
7. PROGRAM
Der Computer zeigt das eingestellte Trainingsprogramm
an.
D-17
REX_Trainer_TX800_12.indd D-17
22.05.12 15:33
Bedienung
PROGRAMMÜBERSICHT
Programm P1
Min
km/h
1
1
2
3
3
4
4
5
5
6
6
5
7
4
8
3
9
2
10 11 12 13 14 15 16 17 18 19 20 21 22 23 24 25 26 27 28 29 30
1 2 3 4 5 6 5 4 3 2 1 2 3 4 5 6 5 4 3 2 1
3
3
4
3
5
3
6
4
7
4
8
4
9
4
10 11 12 13 14 15 16 17 18 19 20 21 22 23 24 25 26 27 28 29 30
4 4 4 4 4 4 4 4 4 4 4 4 4 4 4 4 2 2 2 1 1
3
6
4
8
5
6
6
6
7
4
8
4
9
2
10 11 12 13 14 15 16 17 18 19 20 21 22 23 24 25 26 27 28 29 30
2 2 4 6 8 6 6 4 4 2 2 2 4 6 8 6 6 4 4 2 2
3
6
4
6
5
6
6
6
7
6
8
6
9
4
10 11 12 13 14 15 16 17 18 19 20 21 22 23 24 25 26 27 28 29 30
4 4 4 4 4 4 6 6 6 6 6 6 6 3 3 3 3 3 3 3 1
3
6
4
8
5
10
6
8
7
6
8
4
9
2
10 11 12 13 14 15 16 17 18 19 20 21 22 23 24 25 26 27 28 29 30
2 2 4 6 8 10 8 6 4 2 2 2 4 6 8 10 8 6 4 2 2
3
6
4
6
5
6
6
6
7
6
8
6
9
7
10 11 12 13 14 15 16 17 18 19 20 21 22 23 24 25 26 27 28 29 30
7 7 7 7 7 7 6 6 6 6 6 6 6 3 3 3 3 3 3 3 1
3
6
4
6
5
8
6
10
7
6
8
6
9
2
10 11 12 13 14 15 16 17 18 19 20 21 22 23 24 25 26 27 28 29 30
2 2 2 6 6 8 10 6 6 2 2 2 2 6 6 8 10 6 6 2 2
3
5
4
5
5
6
6
6
7
6
8
8
9
8
10 11 12 13 14 15 16 17 18 19 20 21 22 23 24 25 26 27 28 29 30
8 5 5 5 6 6 6 9 9 9 5 5 5 5 9 9 9 6 6 5 5
3
4
4
5
5
2
6
3
7
4
8
5
9
3
10 11 12 13 14 15 16 17 18 19 20 21 22 23 24 25 26 27 28 29 30
2 2 3 4 5 2 3 4 5 3 2 2 3 4 5 2 3 4 5 3 2
3
6
4
2
5
4
6
6
7
2
8
4
9
6
10 11 12 13 14 15 16 17 18 19 20 21 22 23 24 25 26 27 28 29 30
2 2 4 6 2 4 6 2 4 6 3 3 4 6 2 4 6 2 4 6 2
3
7
4
7
5
7
6
8
7
8
8
8
9
8
10 11 12 13 14 15 16 17 18 19 20 21 22 23 24 25 26 27 28 29 30
9 9 9 9 9 8 8 8 8 9 9 9 8 8 8 9 9 9 8 8 8
3
4
4
5
5
6
6
5
7
4
8
3
9
2
10 11 12 13 14 15 16 17 18 19 20 21 22 23 24 25 26 27 28 29 30
1 1 3 4 5 6 5 4 3 2 1 1 3 4 5 6 5 4 3 2 1
3
6
4
8
5
6
6
6
7
4
8
4
9
2
10 11 12 13 14 15 16 17 18 19 20 21 22 23 24 25 26 27 28 29 30
2 1 4 6 8 6 6 4 4 2 2 1 4 6 8 6 6 4 4 2 2
Programm P2
Min
km/h
1
1
2
3
Programm P3
Min
km/h
1
2
2
4
Programm P4
Min
km/h
1
2
2
6
Programm P5
Min
km/h
1
3
2
4
Programm P6
Min
km/h
1
3
2
6
Programm P7
Min
km/h
1
4
2
2
Programm P8
Min
km/h
1
4
2
5
Programm P9
Min
km/h
1
5
2
3
Programm P10
Min
km/h
1
6
2
4
Programm P11
Min
km/h
1
6
2
6
Programm P12
Min
km/h
1
7
2
3
Programm P13
Min
km/h
1
8
2
4
D-18
REX_Trainer_TX800_12.indd D-18
22.05.12 15:33
Programm P14
Min
km/h
1
9
2
9
3
9
4
8
5
8
6
8
7
8
8
8
9
7
10 11 12 13 14 15 16 17 18 19 20 21 22 23 24 25 26 27 28 29 30
7 7 7 6 6 6 6 5 5 5 5 4 4 4 4 3 3 2 2 1 1
3
5
5
4
6
6
5
5
3
6
6
4
7
6
5
8
5
6
9
4
5
10 11 12 13 14 15 16 17 18 19 20 21 22 23 24 25 26 27 28 29 30
2 1 2 3 6 7 6 6 5 4 2 6 5 3 6 4 3 6 5 4 2
4 3 4 5 6 3 4 5 6 3 4 3 4 5 6 3 4 5 6 5 4
3
5
5
4
5
8
5 6 7
5 5 5
10 12 10
8
5
8
9
5
6
10 11 12 13 14 15 16 17 18 19 20 21 22 23 24 25 26 27 28 29 30
5 5 5 5 5 5 5 5 5 5 5 5 5 5 5 5 5 5 5 5 5
4 2 4 6 8 10 12 10 8 6 4 2 4 6 8 10 11 10 8 6 4
3
3
7
4
3
9
5
3
11
6
9
9
7
9
7
8
9
7
9
9
3
10 11 12 13 14 15 16 17 18 19 20 21 22 23 24 25 26 27 28 29 30
7 7 7 6 6 9 9 9 9 5 5 5 7 7 7 7 6 6 6 6 6
3 3 7 7 9 11 9 7 7 3 3 3 7 7 9 11 9 7 7 3 3
3
6
3
4
6
5
5
8
9
6
10
4
7
6
2
8
6
4
9
2
6
10 11 12 13 14 15 16 17 18 19 20 21 22 23 24 25 26 27 28 29 30
2 1 2 6 6 8 10 6 6 2 2 1 2 6 6 8 10 6 6 2 2
8 10 12 1 2 3 4 5 6 7 8 9 2 1 2 1 2 1 1 2 0
3
4
2
4
5
3
5
2
4
6
3
4
7
4
3
8
5
2
9
3
1
10 11 12 13 14 15 16 17 18 19 20 21 22 23 24 25 26 27 28 29 30
2 1 3 4 5 2 3 4 5 3 2 1 3 4 5 2 3 4 5 3 2
0 1 1 2 3 4 4 3 2 1 0 1 1 2 3 4 4 3 2 1 0
3
6
5
4
2
7
5
4
9
6
6
11
7
2
9
8
4
7
9
6
5
10 11 12 13 14 15 16 17 18 19 20 21 22 23 24 25 26 27 28 29 30
2 1 4 6 2 4 6 2 4 6 2 1 4 6 2 4 6 2 4 6 2
3 1 3 5 7 9 11 9 7 5 3 1 3 5 7 9 11 9 7 5 3
3
3
3
4
3
3
5
3
3
6
3
3
7
3
3
8
3
3
9
4
6
10 11 12 13 14 15 16 17 18 19 20 21 22 23 24 25 26 27 28 29 30
4 4 4 4 4 4 5 5 5 5 5 5 5 6 6 6 6 6 6 7 7
6 6 6 6 6 6 10 10 10 10 10 10 10 3 3 3 3 3 3 0 0
3
4
9
4
4
9
5
4
9
6
4
9
7
4
9
8
4
9
9
6
9
10 11 12 13 14 15 16 17 18 19 20 21 22 23 24 25 26 27 28 29 30
6 6 6 6 6 6 8 8 8 8 8 8 8 5 5 5 5 5 5 3 3
9 9 9 9 9 9 9 9 9 9 9 9 9 9 9 9 9 9 9 9 9
DEUTSCH
Bedienung
Programm P15
Min
km/h
Neigung
1
3
3
2
4
4
Programm P16
Min
km/h
Neigung
1
5
2
2
5
4
Programm P17
Min
km/h
Neigung
1
5
3
2
5
7
Programm P18
Min
km/h
Neigung
1
1
7
2
2
5
Programm P19
Min
km/h
Neigung
1
2
3
2
3
1
Programm P20
Min
km/h
Neigung
1
3
1
2
4
3
Programm P21
Min
km/h
Neigung
1
2
0
2
3
3
Programm P22
Min
km/h
Neigung
1
2
9
2
4
9
Programm P23
Min
1 2 3 4 5 6 7 8 9 10 11 12 13 14 15 16 17 18 19 20 21 22 23 24 25 26 27 28 29 30
km/h
2 4 4 4 4 4 4 4 6 6 6 6 6 6 6 8 8 8 8 8 8 8 6 6 6 6 6 6 5 5
Neigung 10 10 10 10 10 10 10 10 10 10 10 10 10 10 10 10 10 10 10 10 10 10 10 10 10 10 10 10 10 10
Programm P24
Min
km/h
Neigung
1
3
0
2
4
9
3
4
9
4
4
9
5
4
9
6
4
9
7
4
9
8
4
9
9
7
9
10 11 12 13 14 15 16 17 18 19 20 21 22 23 24 25 26 27 28 29 30
7 7 7 7 7 7 12 12 12 12 12 12 12 3 3 3 3 3 3 3 1
9 9 9 9 9 9 9 9 9 9 9 9 9 9 9 9 9 9 9 9 9
D-19
REX_Trainer_TX800_12.indd D-19
22.05.12 15:33
Bedienung
B Training mit Trainings-Parametern
Sie können in diesem Programm einen der drei zur Auswahl stehenden Trainings-Parameter setzen. TrainingsParameter sind Zielvorgaben, die Sie je nach Ihrem per-
sönlichem Fitnesstand, Motivation oder verfügbarer Zeit setzen können.
Folgende Trainings-Parameter stehen zur Auswahl:
Parameter
Einstellbereich
Schritt
Bemerkung
TIME (Zeit)
DIST (Distanz)
CAL (Kalorien)
0:00~ 99:00 Min
0.00~ 99.0 km
10 ~ 9990 Cal
± 1:00
±1
± 10
Vorgabewert = 5:00 Min
Vorgabewert = 5 km
Vorgabewert = 500 Cal
Drücken Sie ca. 3 Sek. die EINGABE-Taste, um den gewünschten Trainings-Parameter auszuwählen und geben
Sie anschließend mittels den STEIGUNGS- oder TEMPOPfeiltasten den gewünschten Wert ein.
Soll ein Trainings-Parameter nicht vorgegeben werden, so
können Sie mit der EINGABE-Taste zum darauffolgenden
Parameter springen.
Nach Eingabe des gewünschten Trainings-Parameters
können Sie mit dem Laufen beginnen. Drücken Sie hierzu
die START-Taste. Das Gerät gibt unmittelbar vor dem
Anlaufen des Laufbandes ein akustisches Signal ab. Sie
können mittels der TEMPO-Pfeiltasten bzw. den Tasten
RUN/JOGGEN/WALK die Geschwindigkeit individuell anpassen. Das Laufband erreicht nach kurzer Zeit die
vorgegebene Zielgeschwindigkeit. Ebenso können Sie die
Steigung über die STEIGUNGS-Pfeiltasten oder die
Schnellwahltasten 9/6/3 variieren.
Das Training wird beendet, sobald der vorgegebene
Trainings-Parameter erreicht worden ist. Es ertönt ein
akustisches Signal, bevor das Laufband abschaltet.
C Manuell
Sie können statt mit einem der vorgegebenen TrainingsProgrammen bzw. Trainings-Parametern auch im sogenannten manuellen Trainings-Programm trainieren. In
diesem Programm können Sie die Geschwindigkeit sowie
die Steigung manuell einstellen bzw. auch während des
Trainings jederzeit anpassen.
Sie starten das manuelle Trainings-Programm, in dem Sie
die START-Taste drücken. Sollten Sie zuvor einen der Trainingsparameter gesetzt oder eines der 25 TrainingsProgramme ausgewählt haben, so ziehen Sie zuvor den
Sicherheitsschlüssel kurz heraus, um die eingegebenen
Werte zu löschen. Das Gerät gibt unmittelbar vor dem
Anlaufen des Laufbandes ein akustisches Signal ab. Die
Anfangsgeschwindigkeit beträgt 1 km/h. Sie können die
Geschwindigkeit mittels der TEMPO-Pfeiltasten bzw. den
RUN/JOGGEN/WALK-Tasten jederzeit während des Trainings individuell anpassen. Das Gerät erreicht nach wenigen Sekunden die neu vorgegebene Zielgeschwindigkeit.
Ebenso können Sie die STEIGUNG über die STEIGUNGSPfeiltasten oder die Schnellwahltasten 9/6/3 variieren.
Das Training wird durch Drücken der STOP-Taste beendet.
D-20
REX_Trainer_TX800_12.indd D-20
22.05.12 15:33
Pflege/Wartung
GEFAHR
Trennen Sie vor allen Pflege- und Wartungsarbeiten
unbedingt den Netzstecker von der Steckdose!
LEBENSGEFAHR!
Wir empfehlen, etwa alle 2 bis 4 Wochen bzw. je nach
Benutzungshäufigkeit, alle Geräteteile, bei denen Gefahr
des Lösens besteht (Schrauben, Mutter u. ä.) regelmäßig zu
kontrollieren. Benutzen Sie zum säubern bzw. pflegen ein
weiches, evtl. leicht angefeuchtetes Tuch. Verwenden Sie
keinesfalls aggressive Reinigungsmittel. Flüssigkeiten jeglicher Art sollten vom Computer oder dem Gerätinneren fern
gehalten werden, da es unter Umständen sonst zu erheblichen Funktionsbeeinträchtigungen führen könnte. Im
unteren Bereich des Trainingsgerätes kann sich durch den
Riemen Gummiabrieb bilden. Dies ist völlig normal.
Laufbandjustierung
ACHTUNG
Stellen Sie sicher, dass das Laufband während der Justierung nicht in Betrieb ist. Ziehen Sie zu Sicherheit den
Sicherheitsschlüssel ab.
Ist das Laufband nach links verrutscht, so drehen Sie die
rechte Stellschraube gegen den Uhrzeigersinn (max. je ¼
Umdrehungen). Lassen Sie anschließend das Laufband für
mind. 2 Umdrehungen laufen, um zu prüfen ob, die Justierung ausreichend ist. Wiederholen Sie ggf. diesen Vorgang
bis die Matte zentriert ist.
DEUTSCH
Pflege/Wartung
Laufband spannen:
ACHTUNG
Achten Sie darauf, dass das Laufband nicht zu stramm
gespannt wird, da dies sonst zu erhöhtem Verschleiß
oder gar Schäden führen kann.
Sie können das Laufband mittels der beiden Stellschrauben
am hinteren Ende des Hauptrahmens spannen (s. Abb.).
Drehen Sie die linke und die rechte Stellschrauben gleichmäßig je eine viertel Drehung nach rechts (Uhrzeigersinn).
Verwenden Sie hierfür einen Innen-Sechskant-Schlüssel.
Stellen Sie anschließend das Laufband an und kontrollieren
Sie, ob es nun ausreichend gespannt ist.
➡
➡
Nach längerer Nutzungsdauer oder nach dem Transport kann
es vorkommen, dass das Laufband nicht mehr mittig justiert
ist oder während des Trainings „wegrutscht“. In diesem Falle
muss das Laufband neu eingestellt werden, da es sonst zu
Schäden und Funktionsbeeinträchtigungen kommen kann.
Laufband zentrieren:
Sie können das Laufband mittels eines Innen-SechskantSchlüssels am rechten, hinteren Ende des Hauptrahmens
justieren (s. Abb.).
Ist das Laufband nach rechts verrutscht, so drehen Sie die
rechte Stellschraube im Uhrzeigersinn (max. je ¼ Umdrehungen). Lassen Sie anschließend das Laufband für mind. 2
Umdrehungen laufen, um zu prüfen ob, die Justierung ausreichend ist. Wiederholen Sie ggf. diesen Vorgang bis die
Matte zentriert ist.
Wiederholen Sie den Vorgang solange, bis das Laufband
beim Laufen nicht mehr „wegrutscht“. Drehen Sie die Stellschrauben jedoch niemals mehr als eine Viertelumdrehung
nach jeder Kontrolle. Sollte das Laufband zu stramm eingestellt sein, so lockern Sie die beiden Stellschrauben gleichmäßig.
D-21
REX_Trainer_TX800_12.indd D-21
22.05.12 15:33
Pflege/Wartung
Laufbandschmierung
Schmierung
ACHTUNG
GEFAHR
Stellen Sie sicher, dass das Laufband während der
Prüfung bzw. Schmierung nicht in Betrieb ist. Ziehen
Sie zur Sicherheit den Sicherheitsschlüssel ab.
Tragen Sie nicht zu viel Schmiermittel auf – maximal
eine halbe Tube pro Anwendung! Wischen Sie überschüssiges Schmiermittel, welches unter Umständen
seitlich herausquillt, mit einem Tuch ab. Sturzgefahr!
Das Laufband ist so konstruiert worden, dass es nur einen
minimalen Wartungsaufwand benötigt. Es ist jedoch erforderlich, dass das Laufdeck von Zeit zu Zeit nachgeschmiert
wird. Eine sorgfältige Schmierung garantiert eine ordnungsgemäße Funktion und verlängert die Lebensdauer des Geräts.
Wir empfehlen die erste Schmierung spätestens nach den
ersten 25 Betriebsstunden (2–3 Monate) und danach alle 50
Betriebsstunden (ca. 5–8 Monate) durchzuführen.
Verwenden Sie hierfür handelsübliches Silikon-Öl bzw. Spray.
1. Heben Sie eine Seite des Laufbandes an.
2. Tragen Sie maximal die Hälfte der Schmiermitteltube (im
Lieferumfang enthalten) auf die Oberfläche des Laufdecks
auf. (s. Abb.)
3. Laufen Sie anschließend für etwa 3–5 Minuten mit einer
geringen Geschwindigkeit auf dem Laufband, damit sich
das Schmiermittel verteilen kann.
Prüfung
Heben Sie eine Seite des Laufbandes an und fühlen Sie an
der Oberseite des Laufdecks.
Wenn Sie noch Silikon ertasten können, ist keine Schmierung erforderlich. Fühlt sich die Oberfläche dagegen trocken
an, so müssen Sie das Laufdeck nachschmieren.
D-22
REX_Trainer_TX800_12.indd D-22
22.05.12 15:33
Technische Daten · Entsorgung
Maße:
ca. 178 cm (L) x 80 cm (B) x 138 cm (H)
Laufgeschwindigkeit:
1–16 km/h
DEUTSCH
Technische Daten
Gewicht:
ca. 80 kg
Steigungsverstellung:
12-fach (1,25º–7,5º)
Klasseneinteilung:
HB
max. Dauerabgabeleistung:
1,3 KW
max. Gewichtsbelastung:
130 kg
Maximalleistung:
2,2 KW
Entsorgung
Fitness-Gerät entsorgen
Das Fitness-Gerät darf am Ende der Lebensdauer nicht in den normalen Haushaltsabfall
gelangen. Es muss stattdessen an einem
Sammelpunkt für das Recycling von elektrischen und elektronischen Geräten abgeben
werden.
Verpackungs-Recycling
Das Verpackungsmaterial ist teilweise wieder
verwertbar. Entsorgen Sie die Verpackung umweltgerecht und führen Sie sie der Wertstoffsammlung zu. Entsorgen Sie sie bei einer
öffentlichen Sammelstelle. Erfragen Sie bei
der Stadt-/Gemeindeverwaltung die für Sie
zuständige Entsorgungsstelle.
D-23
REX_Trainer_TX800_12.indd D-23
22.05.12 15:33
Konformitätserklärung
D-24
REX_Trainer_TX800_12.indd D-24
22.05.12 15:33
Gewährleistung
1. Gewährleistungsansprüche können Sie nur innerhalb
eines Zeitraumes von max. 2 Jahren, gerechnet ab Kaufdatum, erheben. Unsere Gewährleistung ist auf die Behebung von Material- und Fabrikationsfehlern bzw. Austausch des Gerätes beschränkt. Die Erfüllung erfolgt nach
unserer Wahl durch Instandsetzung des Gerätes. Unsere
Gewährleistung ist für Sie kostenlos.
• Bauteile die dem Verschleiß, Abnutzung oder Verbrauch
unterliegen (ausgenommen eindeutiger Material bzw.
Herstellungsfehler) wie z. B.: – Lager – Leuchtmittel
– Aufkleber – Riemen – Batterien usw.
Die Untersuchung der Störung und Ihrer Ursachen erfolgt
stets durch unseren Kundendienst und umfasst:
6. Der Anspruch auf Gewährleistung berechtigt den Kunden
nur, die Beseitigung des Mangels zu verlangen. Ansprüche auf Rückgabe oder Minderung des Kaufpreises gelten
erst nach Fehlschlägen der Nachbesserung.
• Ersatzteillieferungen für die Reparaturarbeiten im Rahmen der Gewährleistung
• Reparatur oder Austausch des defekten Bauteils
(Getauschte Ersatzteile gehen in unser Eigentum über.)
2. Bei berechtigtem Gewährleistungsanspruch gehen die Kosten des Versandes und die Kosten des Aus- und Einbaus zu
unseren Lasten. Durch Vorlage der Kaufquittung ist der
Gewährleistungsanspruch nachzuweisen.
3. Der Käufer verpflichtet sich, das gekaufte Gerät zu keinem
anderen als in der Bedienungsanleitung vorgesehenen
Zweck zu benutzen.
4. Wenn das Gerät von Dritten oder durch Einbau fremder
Teile verändert worden ist bzw. eingetretene Mängel in
ursprünglichem Zusammenhang mit der Veränderung stehen, erlischt der Gewährleistungsanspruch. Ferner erlischt
der Gewährleistungsanspruch, wenn die Vorschriften über
die Behandlung des Gerätes nicht befolgt worden sind.
5. Nicht eingeschlossen in die Gewährleistung sind:
• Verbrauchsmaterial, das nicht in Zusammenhang mit Reparaturarbeiten an anerkannten Störungen steht.
• alle Wartungsarbeiten oder sonstige Arbeit, die durch
Abnutzung, Unfall oder Betriebsbedingungen so wie
Benutzen unter Nichtbeachtung der Herstellerangaben
entstehen.
• alle Vorkommnisse, wie Geräuschentwicklung, Schwingungen, Abnutzung usw., die die Geräteeigenschaften
nicht beeinträchtigen.
• Schäden, die zurückzuführen sind auf:
– den Einbau von Teilen von fremder Seite oder die Bemühungen des Benutzers, den Schaden selbst zu beheben.
Kosten für Wartungs-, Überprüfungs- und Säuberungsarbeiten.
7. Die Prüfung und Entscheidung über einen Gewährleistungsanspruch obliegt dem Hersteller.
8. Ersatz eines mittelbaren oder unmittelbaren Schadens
wird nicht gewährt.
9. Gewährleistungsansprüche werden nur dann berücksichtigt, wenn sie unverzüglich nach Feststellung des Mangels gegenüber der SI-Zweirad-Service GmbH erhoben
werden.
10. Durch eine ausgeführte Gewährleistung wird die Gewährleistungsdauer weder erneuert noch verlängert. Die Geltendmachung von Gewährleistungsansprüchen nach Ablauf des Gewährleistungszeitraumes ist ausgeschlossen.
11. Andere als die vorstehend aufgeführten Abmachungen
sind nur dann gültig, wenn sie vom Hersteller schriftlich
bestätigt sind.
12. Sollte Ihr Gerät bei der Anlieferung Schaden genommen
haben, vermerken Sie bitte alle Schäden auf dem Lieferschein. Lassen Sie die Schadensmeldung vom Lieferer
(Markt, Spediteur) unterzeichnen und setzen Sie sich
unverzüglich mit uns in Verbindung.
13. Sollten Sie mit dem von Ihnen erworbenen Gerätes ein
technisches Problem haben, stehen Ihnen unsere Kundendienstmitarbeiter zur Verfügung:
D
SI-Zweirad-Service GmbH Telefon: 0 52 42 41 08 98 24
Lindenstraße 50
Telefax: 0 52 42/41 08 72
33378 Rheda-Wiedenbrück E-Mail: [email protected]
www.rex-sport.de
AT
– die Nichtverwendung von Original-Ersatzteilen
– Schäden, die durch mangelnde Pflege, ungeeignete
Pflegemittel usw. entstanden sind.
DEUTSCH
Gewährleistung
CH
SI-Zweirad-Service GmbH Telefon: + 49 52 42 41 08 98 24
Lindenstraße 50
Telefax: + 49 52 42 41 08 72
33378 Rheda-Wiedenbrück E-Mail: [email protected]
www.rex-sport.de
D-25
REX_Trainer_TX800_12.indd D-25
22.05.12 15:33
nb
brück
Postfach 21 24 • 33349 Rheda-Wiedenbrück
eMail: si-service왁prophete.nett
REX_Trainer_TX800_12.indd D-26
Technische Änderungen vorbehalten·Nachdruck
vorbehalten· Nachdruck verboten
verboten·
·Stand
Stand 04/2012·88733 · © Prophete GmbH u. Co. KG
Prophete GmbH u. Co. KG
22.05.12 15:33
Technische Änderungen vorbehalten Nachdruck verboten Stand 04/2012 88733
Prophete GmbH u. Co. KG
TX-800
T READMILL
OPERATING INSTRUCTIONS
REX_Trainer_TX800_12.indd GB-27
22.05.12 15:33
Table of contents
Table of contents
Preface .....................................................................................................................................................
Identification of important notes ...............................................................................................................
Important safety instructions .....................................................................................................................
Exploded view ...........................................................................................................................................
Parts list ...................................................................................................................................................
Assembly ..................................................................................................................................................
Folding mechanism/Transport .....................................................................................................................
GB-29
GB-29
GB-30
GB-32
GB-33
GB-36
GB-39
Workout instructions .................................................................................................................................
Workout instructions/Notes ......................................................................................................................
A Intensity ...........................................................................................................................................
B Frequency ..........................................................................................................................................
C Motivation ........................................................................................................................................
D Organisation of workout sessions ..........................................................................................................
1. Warming up phase ...........................................................................................................................
2. Workout phase ................................................................................................................................
3. Cooling down phase .........................................................................................................................
E Muscle development ............................................................................................................................
F Weight loss ........................................................................................................................................
GB-40
GB-40
GB-40
GB-40
GB-40
GB-40
GB-40
GB-41
GB-41
GB-41
GB-41
Operation .................................................................................................................................................
Default settings .....................................................................................................................................
Safety key ..............................................................................................................................................
Button functions ....................................................................................................................................
Display informationen ..............................................................................................................................
Workout programmes ...............................................................................................................................
A P1–P24/H1 ........................................................................................................................................
B Trainings-Parameter ............................................................................................................................
C Manual ..............................................................................................................................................
GB-42
GB-42
GB-42
GB-42
GB-43
GB-43
GB-43
GB-46
GB-46
Care/Maintenance ......................................................................................................................................
Technical data ...........................................................................................................................................
Disposal ...................................................................................................................................................
Warranty ...................................................................................................................................................
GB-47
GB-49
GB-49
GB-51
GB-28
REX_Trainer_TX800_12.indd GB-28
22.05.12 15:33
Preface · Identification of important notes
Preface
To avoid injuring yourself or damaging the
machine, please read the operating instructions carefully
before using the machine for the first time. Keep the operating instructions in a safe place.
Kind regards,
Prophete GmbH u. Co. KG
ENGLISH
Congratulations on your purchase of our fitness
machine. You have purchased a really excellent
product and will certainly enjoy using it.
Identification of important notes
Particularly important notes are identified in the operating
instructions as follows:
DANGER
This warning alerts you to possible hazards to
your health or life or that of other persons
which may occur with the handling or operation
of this machine.
This information provides you with additional
advice and tips.
This note alerts you to possible hazards for your
machine.
WARNING
GB-29
REX_Trainer_TX800_12.indd GB-29
22.05.12 15:33
Important safety instructions
Important safety instructions
Keep the operating instructions in a safe place. Make sure they are included in case
you sell or pass the fitness machine on to someone else.
DANGER
It is important for you to read through the instructions
completely before assembling and using the machine.
The safe and highly productive use can only be achieved
if the machine is properly assembled, maintained and
used correctly. It is your obligation to inform all users of
this machine about the hazards and safety precautions
before use.
The machine complies with DIN EN 957-1/6 and is suitable only for private home use and may not be used commercially or for therapeutic purposes.
Use the machine only in dry indoor rooms at room temperature. Protect it from moisture, dust/dirt and extreme
temperature fluctuations.
Only set up the machine on a solid, level surface and use
a protective cover for the floor/carpet. Remove all sharpedged objects from the surroundings and leave a free
space of at least 0.5 m around the machine.
Make sure to prevent liquids (including perspiration!) from
leaking into the inside of the machine or in the fitness
computer.
Use the machine only as specified! If you find defective
components during the assembly or the inspection, or if
you hear unusual noises during use, stop your training
immediately. Do not use the machine until the problem
has been remedied.
Before using the exercise machine, check to see if all
screws and nuts have been securely fastened and tightened.
The safety level of the machine can only be maintained if
it is regularly checked for damage and wear. Have professionals carry out repairs and use only original spare parts.
Keep the machine away from children and house pets. It
is only suitable for adults.
WARNING
The machine is not designed for use by persons with restricted physical, sensory or mental abilities or lack of
experience and/or knowledge unless they are supervised
by a person responsible for their safety or have received
instructions on how to use the machine from such a person.
The approved maximum weight of the user may not exceed 130 kg.
Before you begin training, consult your doctor to determine whether training could represent a risk to your
health. Your doctor’s advice is imperative if you are taking medication that affects your heart rate, blood pressure or cholesterol level.
Be aware of your body’s signals! Incorrect or excessive
training can impair your health or even damage it. Stop
if any of the following symptoms occur: pain, tightness
of chest, irregular heartbeat, shortness of breath, feelings of lightheadedness, dizziness or nausea. If only one
of these conditions occurs, consult your doctor before
continuing your exercise programme.
Wear suitable clothing when working out! Do not wear
loose clothing with which you could get caught in the
machine or which could restrict or hinder your movements. Always wear sturdy footwear during your workout.
The safety key is used to immediately stop the treadmill
in case someone falls, or if there is an emergency situation. Therefore, never use the treadmill without carefully
attaching the safety clip to your clothing. Before you
begin your workout, make sure the safety clip cannot
detach itself from your clothing unintentionally.
In an emergency situation (e. g. sudden dizziness, pain,
etc.), step off from the exercise machine as follows:
1. Hold on to the side handgrips.
2. Step onto the side bases.
3. Remove the safety key.
Never jump onto a running treadmill!
GB-30
REX_Trainer_TX800_12.indd GB-30
22.05.12 15:33
Keep the operating instructions in a safe place. Make sure they are included in case
you sell or pass the fitness machine on to someone else.
DANGER
Let the belt fully come to standstill before you descend.
Shut off the fitness machine after the workout, or when
cleaning or maintaining the device and disconnect the
mains plug from the power outlet.
WARNING
ENGLISH
Important safety instructions
Use caution when lifting and moving the machine to,
e. g., prevent injuries to your back. Always use lifting
techniques if possible, or get someone to help you.
GB-31
REX_Trainer_TX800_12.indd GB-31
22.05.12 15:33
Exploded view
Exploded view
GB-32
REX_Trainer_TX800_12.indd GB-32
22.05.12 15:33
Parts list
74.
99.
100.
101.
125.
126.
ENGLISH
Parts list
44.
104.
103.
No.
1
2
3
4
5
6
7
8
Name
Main frame
Base frame
Incline angle
Bar right
Bar left
Console
Outer cable
Inner cable
102.
Size
Quantity
1
1
1
1
1
1
1
1
GB-33
REX_Trainer_TX800_12.indd GB-33
22.05.12 15:33
Parts list
No.
Name
9
10
11
12
13
14
15
16
16~3
17
19
20
21
21-1
21-2
21-3
21-6
21-10
21-12
21-13
22
23
24
25
26
27
28
29
30
31
32
33
34
35
36
37
38
40
41
42
43
44
45
46
47
48
49
50
51
52
53
55
57
58
59
60
61
62
63
64
65
66
Locking knob
Pitch motor
V-belt
Motor mount
Motor
Walking belt
Deck
Front roller
Magnet
Rear roller
Sleeve
Sleeve
Display
Display front side
Display rear side
Cover
Fan
Sheet metal screw
Connecting cable display
Computer cable
Holder display
Cover base frame (L)
Cover base frame (R)
Motor cover top
Rear adjustment base (L)
Rear adjustment base (R)
Speed/Hand-Pulse complex
Incline/Hand-Pulse complex
Power switch
Switch on/off
Plug
Transport roll front
Transport roll rear
Rubber bases
Handgrip
Guard rail
Non-skid rubber
Motor cover
Plug
Plug
Plug
Safety key
Power outlet
Cable
Inlet connector
Power cable
Connecting cable (white)
Connecting cable (black)
Connecting cable (black)
Controller
Computer cable bar
Computer cable console
Floor cover
Hexagon head screw
Allen screw
Hexagon head screw
Hexagon head screw
Hexagon head screw
Hexagon head screw
Hexagon head screw
Allen screw
Allen screw
Size
3.5 × 32 m/m
150 m/m_12P
200 m/m_10P
21.4 × 21.4 m/m
25.4 × 25.4 m/m
20 × 40 m/m
800 m/m
1000 m/m
20 cm x 764 x 764
20 cm x 764 x 764
100 m/m
1900 m/m
650 m/m
1/2" × 1"
3/8" × 3-3/4"
3/8" × 1-3/4"
3/8" × 1-1/2"
3/8" × 3/4"
M8 × 60 m/m
M8 × 12 m/m
5/16" × 1"
3/8" × 4"
Quantity
1
1
1
1
1
1
1
1
1
1
2
2
1
1
1
1
1
4
1
1
2
1
1
1
1
1
1
1
1
1
2
2
2
6
2
2
2
5
1
1
2
1
1
1
1
1
2
1
1
1
1
1
1
2
1
1
1
4
1
2
2
1
GB-34
REX_Trainer_TX800_12.indd GB-34
22.05.12 15:33
Parts list
Name
Size
67
68
69
70
73
74
75
76
77
78
79
80
81
82
82
83
84
85
86
87
88
89
90
90-1
90-3
90-5
90-7
91
92
93
94
95
96
98
99
100
101
102
103
104
105
106
110
111
112
113
114
125
126
128
129
130
131
132
133
134
135
136
137
138
139
140
Countersunk screw
Screw
Pin
Countersunk screw
Screw
Sheet metal screw
Nut
Nut
Nut
Nut
Spring clip
Spring clip
Spring clip
Washer
Washer
Washer
Washer
Nylon pinion (B)
Nylon pinion (A)
Washer
Washer
Quick-action nut clip
Beverage holder assembly
Beverage holder
Safety switch module
Sheet metal screw
Connecting cable
Sheet metal screw
Belt guide
Sheet metal screw
Sheet metal screw
Cylinder
Flat head countersunk screw
Hexagon head screw
Hexagon head screw
Washer
Washer
Allen wrench / Phillips spanner
Allen wrench
Lubricant
Plug
Cover
Sheet metal screw
Sheet metal screw
Cable tie
Foot skirting strip (R)
Foot skirting strip (L)
Phillips screw
Phillips screw
Phillips screw
Outer handlebar covering (L)
Outer handlebar covering (R)
Lower inner handlebar covering (R)
Lower inner handlebar covering (L)
Upper inner handlebar covering (L)
Upper inner handlebar covering (R)
Sheet metal screw
Plug
Starter flap
Filter
Connecting cable motor
Sheet metal screw
3/8" × 2"
1/2" × 28 m/m
M8 × 3"
M6 × 1"
5 × 16 m/m
3.5 × 12 m/m
1/2" × 8T
3/8" × 7T
5/16" × 7T
M8 × 7T
3/8" × 2T
M8 × 1.5T
M5
3/8" × 19 × 1.5T
3/8" × 19 × 1.5T
3/8" × 25 × 2T
Ø 5 × Ø 13 × 1.0T
Ø 50 × Ø 13 × 3T
Ø 10 × Ø 25 × 3T
Ø 6.5 × Ø 25 × 1.5T
M5
5 × 2T
300 m/m
3 × 10 m/m
250 m/m
14 × 12 m/m
5 × 16 m/m
5 × 19 m/m
M8 × 1" × 1/4"
3/8" × 3"
5/16" × 1/2"
5/16" × 18 × 1.5T
5/16" × 23 × 1.5T
M5
M6 (66 × 88)
3.5 × 20 m/m
3.5 × 16 m/m
M5 × 25 m/m
M5 × 35 m/m
M5 × 12 m/m
3 × 63 m/m
400 m/m
4 × 19 m/m
Quantity
4
2
2
6
13
22
4
6
2
1
6
2
3
6
6
5
10
4
2
8
3
2
1
1
1
2
1
2
2
22
8
1
2
1
14
6
8
1
1
1
2
1
2
5
5
1
1
2
2
7
1
1
1
1
1
1
2
2
1
1
1
4
ENGLISH
No.
GB-35
REX_Trainer_TX800_12.indd GB-35
22.05.12 15:33
Assembly
Assembly
STEP 1
WARNING
1. Carefully take the treadmill out of the box and lay it
on a free, level surface.
STEP 2
WARNING
1. Connect the lower computer cable (53) to the computer cable of the right bar (4).
2. Guide both bars (L, R / 5, 4) into the base frame (2)
and screw together with eight 5/16" x 1/2" screws
(99), four 5/16" x 18 x 1.5T washers (100) and four
5/16" x 23 x 1.5T washers (101). Use the supplied
Allen key (102) to tighten.
GB-36
REX_Trainer_TX800_12.indd GB-36
22.05.12 15:33
Assembly
Assembly
WARNING
1. Connect the computer cable of the console (55) to
the computer cable of the bar (53).
2. Then fix both consoles (6) with both bars (L, R / 5,
4) with six 5/16" x 1/2” screws (99), two 5/16" x 18
x 1.5T washers (100) and four 5/16" x 23 x 1.5T
washers (101). Use the supplied Allen key (102) to
tighten.
ENGLISH
STEP 3
STEP 4
WARNING
1. Assemble the outer handlebar covering (L, R / 129,
130) to the ends of the console (6) with four 3.5 x
12 m/m screws (74). Firmly tighten the screws using
the supplied tool (102).
GB-37
REX_Trainer_TX800_12.indd GB-37
22.05.12 15:33
Assembly
Assembly
STEP 5
WARNING
1. Connect the computer cable of the console (55) to
the computer cable of the display (21-13).
2. Also connect the cable (90-7) to (21-12).
3 . Optionally, devices with an HR receiver are offered.
Should your machine have such a device, then connect cable (21-14) to cable (90-8).
STEP 6
WARNING
1. Carefully push the display (21) into the holder of the
console (6) and screw both parts with two M5 x 25
mm screws (125) and two M5 x 35 mm screws (126).
Use the supplied tool (102) here as well.
GB-38
REX_Trainer_TX800_12.indd GB-38
22.05.12 15:33
Folding mechanism/Transport
Folding mechanism/Transport
Opening out
2
ENGLISH
1. Stand behind the machine and pull the locking knob
(Fig. 1)
2. Slowly lower the treadmill onto the ground. (Fig. 2)
Folding together
1. Pull the locking knob (Fig. 3) with your right hand and
with your left hand lift up the treadmill to approx. 30 cm
height.
2. Now lift the treadmill with both hands until it firmly engages in the locking mechanism. (Fig. 4)
Transport
To shift the treadmill, the machine must be first folded together (see point “Folding together”). Make sure that the
locking knob is engaged.
Slowly tilt the treadmill back until it stands on the transport
rolls. You may now carefully move the device to the desired
location. When choosing a suitable location, please observe
the safety instructions at the beginning of these operating
instructions.
3
1
4
GB-39
REX_Trainer_TX800_12.indd GB-39
22.05.12 15:33
Workout instructions
Workout instructions
Using your fitness machine will provide you with numerous
advantages. It will improve your physical fitness, emphasize
your muscles, and help you lose weight in conjunction with a
calorie-reduced diet.
DESIGNING YOUR WORKOUT/NOTES
To achieve an optimal workout, you should consider several
important things regarding the manner (of working out) and
organization of your workout before you begin. To improve
your health and body, you should consider the following
factors when planning your workout:
A Intensity
The workout must be organised in such a way that the
physical effort during the workout is higher than your
normal effort. But breathlessness or exhaustion may not
occur. During an effective workout, your pulse should be
between 70% and 85% of your maximum pulse (see also
the „Workout Phase“ chapter).
During the first few weeks of your workout, your pulse
should be at roughly 70% of your maximum pulse and
slowly increase to 85% of your maximum pulse in the
following weeks and months. The workout requirements
could be increased, e. g., by extending the workout duration and/or increasing the levels of difficulty according
to your increasing condition. The following resources can
help you to check your pulse rate:
a) You can feel your pulse rate yourself and count the
beats per minute (e. g. at your wrist)
Measurement
of pulse rate by the usual methods.
b) You can measure your pulse with the sensor surfaces
attached to the handle.
c) You can also determine your pulse rate using specific
calibrated pulse measuring devices.
Pulse measurement by sensor is only an orientation, as movement, friction, perspiration etc. can cause deviations from
the actual pulse. The pulse beat related electrodermal effect
of some people is so low that the result is insufficient for
accurate pulse measurement.
C Motivation
To successfully complete a training programme, regularity
is a very important point. Mental preparation as well as a
fixed time period and space per workout session will also
contribute to that goal. We recommend you always keep
your personal goal in sight and if possible, to workout
only when you are in a good mood. Work out continuously
so that each day helps you come closer to your training
objective.
D Organisation of workout sessions
There are three workout phases that should be done
during every workout:
a) Warming up phase
b) Workout phase
c) Cooling down phase
1. Warming up phase
This phase contributes to improved circulation in your
body and correct muscle function. It also decreases the
risk of cramps and muscle injury. It is therefore recommended to start with a few stretching exercises (see figure)
before every workout session. Each exercise should last
approx. 30 seconds. Avoid sudden movements and do not
strain your muscles. Stop the stretching exercise as soon
as it hurts.
FORWARD BEND
SIDE BEND
B Frequency
Experts recommend 3–5 workout sessions per week, depending on your training goal. Your workout should be
accompanied by a balanced and healthy diet. An average
adult requires at least 3 workout sessions per week to
change their body weight or improve their condition, or
2 workout sessions per week to maintain their current
condition.
INNER SIDES/
THIGHS
OUTER SIDE/
THIGHS
CALF/ACHILLES
GB-40
REX_Trainer_TX800_12.indd GB-40
22.05.12 15:33
2. Workout phase
In this case, modify your workout plan as follows:
When working out, make sure you keep an even and consistent speed. Optimal training means choosing a workout
that keeps your pulse at a value of approx. 70%–85% of
your maximum pulse (target zone). Use the graphic to read
the matching target zone for you.
You should work out during the warm up and cool down
phase as usual. But at the end of the exercise phase, increase the intensity so that your legs receive a more intense workout. However, if you exceed the target zone of
your pulse, you will have to decrease your speed!
PULSE
F Weight loss
MAXIMUM
target zone
Cooling down
phase
AGE
The workout phase should last at least 12 minutes. At the
beginning, a workout time of approx. 15–20 minutes is
usual.
Once you have reached a higher degree of fitness, you may
have to work out longer and harder.
ENGLISH
Workout instructions
For your body to work correctly, it will need “fuel” just
like a motor. The muscles receive oxygen from the cardiovascular system of the body. This oxygen supplies energy to the muscles on the one hand and is also used to
burn carbohydrates or fats on the other hand. Due to the
chemical composition, the conversion of body fats to
energy can only then occur, if you do aerobic training,
meaning you have sufficient oxygen while exercising. Anaerobic training (“being breathless”) causes oxygen deficiency, which means fat cannot be broken down. The body
still has enough oxygen at 50% to 80% of the maximum
pulse (maximum pulse = 220 – age) and can achieve the
best results in this area regarding fat burning. Fat burning
is increased the more often and longer you complete such
a workout.
Watch your posture during the workout:
• Keep your torso upright
• Keep your eyes directed forwards
• Movement should occur from your legs
• Do not exercise without holding on! –
Your arms are meant to stabilize your body.
• Lift your heels up slightly during the workout just as
for the classic cross-country method.
• Change your grip position regularly
3. Cooling down phase
This phase is intended to relax your muscles and your
cardiovascular system. To do so, e. g. reduce your speed
for approx. 5 minutes. Then repeat the stretching exercises as described in Phase 1. Remember not to make
any sudden movements in this phase and do not strain
your muscles.
E Muscle development
To develop your muscles with the home exercise machine,
you will have to choose a higher workout intensity. You
may discover that your fitness is not sufficient enough to
keep to the workout programme in its entirety.
GB-41
REX_Trainer_TX800_12.indd GB-41
22.05.12 15:33
Operation
Operation
DEFAULT SETTINGS
Insert the mains plug into a 220/240 V power outlet (observe the safety instructions!) and switch on the fitness
machine by using the master switch on the rear side.
SAFETY KEY
fig. 1
fig. 2
WARNING
Therefore, never use the treadmill without carefully
attaching the safety clip 1 to your clothing. Before you
begin your workout, make sure the safety clip cannot
detach itself from your clothing.
START:
Your workout can be started with the START button. If the
button is pressed during your workout, the speed of the
treadmill is slowly reduced until standstill. If the button is
pressed again, the workout programme that was paused
with the standstill of the treadmill can then be continued.
The treadmill can only be put into operation if the safety
key 2 is inserted in the contact point of the computer console.
RESET/STOP:
With the RESET/STOP button you can stop the treadmill until standstill, with pushing again you can reset the selected
programmes and settings.
(fig. similar)
STEIGUNG (INCLINE):
Use the arrow keys to adjust the incline of the treadmill.
Pretend with the arrow keys on the left grip (see Figure 1)
this setting can also change.
2
1
2
The safety key is used to immediately stop the treadmill in
case someone falls, or if there are other emergencies.
If the safety key 2 is inserted back into the console, then
all previously entered workout programmes or parameters
will have to be entered again!
BUTTON FUNCTIONS
EINGABE:
You can enter the workout parameters with the enter button.
MODUS:
The MODUS button lets you choose the workout programme.
TEMPO (SPEED):
Use the arrow keys to adjust the speed of the treadmill or
pretend to change in 0.5 km/h steps. With the arrow keys
on the right handle (see Figure 2) can be also control this
setting.
STEIGUNG (INCLINE) 9/6/3:
The shortcut keys you can set a 9/6/3 setting the right
pitch.
RUN/JOGGEN/WALK:
You can set a specified speed with the RUN, JOGGEN, WALK
buttons.
RUN: 9 km/h
JOGGEN: 6 km/h
WALK: 3 km/h
GB-42
REX_Trainer_TX800_12.indd GB-42
22.05.12 15:33
DISPLAY INFORMATIONEN
WORKOUT PROGRAMMES
The following display information can be called up:
1. TIME
The computer displays the current workout time. When a
specified time is entered, the time runs backwards
(countdown). Once the specified value is reached, the
machine stops and an acoustic signal sounds.
A Workout programmes (P1–P24/H1)
2. SPEED
The computer displays the set target speed in km/h.
3. DISTANCE
The computer shows you the distance you’ve travelled.
When a specified distance is entered, the display runs
backwards (countdown). Once the specified value is reached, the machine stops and an acoustic signal sounds.
4. CALORIES
The computer shows you the calories you have burned
during the workout. After the number of calories to be
burned has been entered, the display runs backwards
(countdown) to zero. Once the specified value is reached,
the machine stops and an acoustic signal sounds.
5. PULSE (pulse/heartbeat)
The PULSE display reflects your current pulse rate in
heartbeats per minutes. The display can only reflect the
correct values if you properly grasp both sensors with the
palms of your hands. Under the circumstances, it can take
up to 2 minutes until the pulse rate is displayed.
There are 24 different available workout programmes. One
workout session lasts respectively 30 minutes. The programmes P1–P14 differ in the sequence of the treadmill
speed. The programmes P15–P24 differ regarding the treadmill speed as well as the incline setting. They are therefore
only suitable for people in good physical condition.
ENGLISH
Operation
In the H1 programme, enter your desired workout time (min.
5 minutes) as well as your personal target pulse (60–220
BPM) using the EINGABE button. The computer adapts the
inclination of the treadmill to your target pulse every 15
seconds.
You can select one of the 24 workout programmes or the H1
programme with the MODUS button and the TEMPO arrow
keys. The current workout programme is displayed in the
centre of the right display area (P1–P24/H1). You start the
selected programme by pressing the START button.
It is possible to individually adjust the speed or the inclination during the workout at any time using the TEMPO or
STEIGUNGS arrow keys.
6. INCLINE (inclination)
The computer displays the set incline value.
7. PROGRAM
The computer displays the set workout programme.
GB-43
REX_Trainer_TX800_12.indd GB-43
22.05.12 15:33
Operation
PROGRAM SERVEY
Program P1
Min
km/h
1
1
2
3
3
4
4
5
5
6
6
5
7
4
8
3
9
2
10 11 12 13 14 15 16 17 18 19 20 21 22 23 24 25 26 27 28 29 30
1 2 3 4 5 6 5 4 3 2 1 2 3 4 5 6 5 4 3 2 1
2
3
3
3
4
3
5
3
6
4
7
4
8
4
9
4
10 11 12 13 14 15 16 17 18 19 20 21 22 23 24 25 26 27 28 29 30
4 4 4 4 4 4 4 4 4 4 4 4 4 4 4 4 2 2 2 1 1
2
4
3
6
4
8
5
6
6
6
7
4
8
4
9
2
10 11 12 13 14 15 16 17 18 19 20 21 22 23 24 25 26 27 28 29 30
2 2 4 6 8 6 6 4 4 2 2 2 4 6 8 6 6 4 4 2 2
2
6
3
6
4
6
5
6
6
6
7
6
8
6
9
4
10 11 12 13 14 15 16 17 18 19 20 21 22 23 24 25 26 27 28 29 30
4 4 4 4 4 4 6 6 6 6 6 6 6 3 3 3 3 3 3 3 1
2
4
3
6
4
8
5
10
6
8
7
6
8
4
9
2
10 11 12 13 14 15 16 17 18 19 20 21 22 23 24 25 26 27 28 29 30
2 2 4 6 8 10 8 6 4 2 2 2 4 6 8 10 8 6 4 2 2
2
6
3
6
4
6
5
6
6
6
7
6
8
6
9
7
10 11 12 13 14 15 16 17 18 19 20 21 22 23 24 25 26 27 28 29 30
7 7 7 7 7 7 6 6 6 6 6 6 6 3 3 3 3 3 3 3 1
2
2
3
6
4
6
5
8
6
10
7
6
8
6
9
2
10 11 12 13 14 15 16 17 18 19 20 21 22 23 24 25 26 27 28 29 30
2 2 2 6 6 8 10 6 6 2 2 2 2 6 6 8 10 6 6 2 2
2
5
3
5
4
5
5
6
6
6
7
6
8
8
9
8
10 11 12 13 14 15 16 17 18 19 20 21 22 23 24 25 26 27 28 29 30
8 5 5 5 6 6 6 9 9 9 5 5 5 5 9 9 9 6 6 5 5
2
3
3
4
4
5
5
2
6
3
7
4
8
5
9
3
10 11 12 13 14 15 16 17 18 19 20 21 22 23 24 25 26 27 28 29 30
2 2 3 4 5 2 3 4 5 3 2 2 3 4 5 2 3 4 5 3 2
2
4
3
6
4
2
5
4
6
6
7
2
8
4
9
6
10 11 12 13 14 15 16 17 18 19 20 21 22 23 24 25 26 27 28 29 30
2 2 4 6 2 4 6 2 4 6 3 3 4 6 2 4 6 2 4 6 2
2
6
3
7
4
7
5
7
6
8
7
8
8
8
9
8
10 11 12 13 14 15 16 17 18 19 20 21 22 23 24 25 26 27 28 29 30
9 9 9 9 9 8 8 8 8 9 9 9 8 8 8 9 9 9 8 8 8
2
3
3
4
4
5
5
6
6
5
7
4
8
3
9
2
10 11 12 13 14 15 16 17 18 19 20 21 22 23 24 25 26 27 28 29 30
1 1 3 4 5 6 5 4 3 2 1 1 3 4 5 6 5 4 3 2 1
2
4
3
6
4
8
5
6
6
6
7
4
8
4
9
2
10 11 12 13 14 15 16 17 18 19 20 21 22 23 24 25 26 27 28 29 30
2 1 4 6 8 6 6 4 4 2 2 1 4 6 8 6 6 4 4 2 2
Program P2
Min
km/h
1
1
Program P3
Min
km/h
1
2
Program P4
Min
km/h
1
2
Program P5
Min
km/h
1
3
Program P6
Min
km/h
1
3
Program P7
Min
km/h
1
4
Program P8
Min
km/h
1
4
Program P9
Min
km/h
1
5
Program P10
Min
km/h
1
6
Program P11
Min
km/h
1
6
Program P12
Min
km/h
1
7
Program P13
Min
km/h
1
8
GB-44
REX_Trainer_TX800_12.indd GB-44
22.05.12 15:33
Operation
Program P14
Min
km/h
1
9
2
9
3
9
4
8
5
8
6
8
7
8
8
8
9
7
10 11 12 13 14 15 16 17 18 19 20 21 22 23 24 25 26 27 28 29 30
7 7 7 6 6 6 6 5 5 5 5 4 4 4 4 3 3 2 2 1 1
2
4
4
3
5
5
4
6
6
5
5
3
6
6
4
7
6
5
8
5
6
9
4
5
10 11 12 13 14 15 16 17 18 19 20 21 22 23 24 25 26 27 28 29 30
2 1 2 3 6 7 6 6 5 4 2 6 5 3 6 4 3 6 5 4 2
4 3 4 5 6 3 4 5 6 3 4 3 4 5 6 3 4 5 6 5 4
2
5
4
3
5
5
4
5
8
5 6 7
5 5 5
10 12 10
8
5
8
9
5
6
10 11 12 13 14 15 16 17 18 19 20 21 22 23 24 25 26 27 28 29 30
5 5 5 5 5 5 5 5 5 5 5 5 5 5 5 5 5 5 5 5 5
4 2 4 6 8 10 12 10 8 6 4 2 4 6 8 10 11 10 8 6 4
2
5
7
3
3
7
4
3
9
5
3
11
6
9
9
7
9
7
8
9
7
9
9
3
10 11 12 13 14 15 16 17 18 19 20 21 22 23 24 25 26 27 28 29 30
7 7 7 6 6 9 9 9 9 5 5 5 7 7 7 7 6 6 6 6 6
3 3 7 7 9 11 9 7 7 3 3 3 7 7 9 11 9 7 7 3 3
2
2
5
3
6
3
4
6
5
5
8
9
6
10
4
7
6
2
8
6
4
9
2
6
10 11 12 13 14 15 16 17 18 19 20 21 22 23 24 25 26 27 28 29 30
2 1 2 6 6 8 10 6 6 2 2 1 2 6 6 8 10 6 6 2 2
8 10 12 1 2 3 4 5 6 7 8 9 2 1 2 1 2 1 1 2 0
2
3
1
3
4
2
4
5
3
5
2
4
6
3
4
7
4
3
8
5
2
9
3
1
10 11 12 13 14 15 16 17 18 19 20 21 22 23 24 25 26 27 28 29 30
2 1 3 4 5 2 3 4 5 3 2 1 3 4 5 2 3 4 5 3 2
0 1 1 2 3 4 4 3 2 1 0 1 1 2 3 4 4 3 2 1 0
2
4
3
3
6
5
4
2
7
5
4
9
6
6
11
7
2
9
8
4
7
9
6
5
10 11 12 13 14 15 16 17 18 19 20 21 22 23 24 25 26 27 28 29 30
2 1 4 6 2 4 6 2 4 6 2 1 4 6 2 4 6 2 4 6 2
3 1 3 5 7 9 11 9 7 5 3 1 3 5 7 9 11 9 7 5 3
2
3
3
3
3
3
4
3
3
5
3
3
6
3
3
7
3
3
8
3
3
9
4
6
10 11 12 13 14 15 16 17 18 19 20 21 22 23 24 25 26 27 28 29 30
4 4 4 4 4 4 5 5 5 5 5 5 5 6 6 6 6 6 6 7 7
6 6 6 6 6 6 10 10 10 10 10 10 10 3 3 3 3 3 3 0 0
2
4
9
3
4
9
4
4
9
5
4
9
6
4
9
7
4
9
8
4
9
9
6
9
10 11 12 13 14 15 16 17 18 19 20 21 22 23 24 25 26 27 28 29 30
6 6 6 6 6 6 8 8 8 8 8 8 8 5 5 5 5 5 5 3 3
9 9 9 9 9 9 9 9 9 9 9 9 9 9 9 9 9 9 9 9 9
Min
km/h
1
3
Inclination 3
ENGLISH
Program P15
Program P16
Min
km/h
1
5
Inclination 2
Program P17
Min
km/h
1
5
Inclination 3
Program P18
Min
km/h
1
1
Inclination 7
Program P19
Min
km/h
1
2
Inclination 3
Program P20
Min
km/h
1
3
Inclination 1
Program P21
Min
km/h
1
2
Inclination 0
Program P22
Min
km/h
1
2
Inclination 9
Program P23
Min
km/h
1 2 3 4 5 6 7 8 9 10 11 12 13 14 15 16 17 18 19 20 21 22 23 24 25 26 27 28 29 30
2 4 4 4 4 4 4 4 6 6 6 6 6 6 6 8 8 8 8 8 8 8 6 6 6 6 6 6 5 5
Inclination 10 10 10 10 10 10 10 10 10 10 10 10 10 10 10 10 10 10 10 10 10 10 10 10 10 10 10 10 10 10
Program P24
Min
km/h
1
3
Inclination 0
2
4
9
3
4
9
4
4
9
5
4
9
6
4
9
7
4
9
8
4
9
9
7
9
10 11 12 13 14 15 16 17 18 19 20 21 22 23 24 25 26 27 28 29 30
7 7 7 7 7 7 12 12 12 12 12 12 12 3 3 3 3 3 3 3 1
9 9 9 9 9 9 9 9 9 9 9 9 9 9 9 9 9 9 9 9 9
GB-45
REX_Trainer_TX800_12.indd GB-45
22.05.12 15:33
Operation
B Working out with workout parameters
You can set one of the three available workout parameters in this programme. Workout parameters are objec-
tives which you can set according to your personal level
of fitness, motivation or available time.
The following workout parameters are available:
Parameter
Setting range
Step
Remark
TIME
DIST (distance)
CAL (calories)
0:00~ 99:00 Min
0.00~ 99.0 km
10 ~ 9990 Cal
± 1:00
±1
± 10
specified value = 5:00 min
specified value = 5 km
specified value = 500 Cal
Press the EINGABE button for 3 sec. to choose the required workout parameter and then enter the required
value with the STEIGUNGS- or SPEED button.
If a workout parameter is not specified, you can use the
EINGABE button to jump to the subsequent parameter.
After having entered all of the required workout parameters, you may begin running. Press the START button to
do so. The machine emits an acoustic signal directly before the treadmill begins to move. You can individually
adjust the speed using the SPEED buttons, or by using
the RUN/JOGGEN/WALK buttons. The treadmill reaches
the specified target speed after a short time. You can also
vary the inclination using the STEIGUNGS arrow keys or
the 9/6/3 quick-selection buttons.
Training is ended as soon as the specified workout parameter has been reached. An audible tone sounds before
the treadmill stops.
C Manuell
Instead of working with one of the specified workout programmes or workout parameters, you can also work out in
the so-called manual workout programme. In this programme you can manually set the speed or adjust it at
any time during your workout.
You start the manual workout programme by pressing the
START button. If you have set one of the workout parameters or selected one of the 25 workout programmes,
briefly remove the safety key to delete the entered values. The machine emits an acoustic signal directly before
the treadmill begins to move. The beginning speed is 1
km/h. You can individually adjust the speed with the
SPEED buttons or with the RUN/JOGGEN/WALK buttons
at any time during your workout. The treadmill reaches
the specified target speed after a short time. You can also
vary the inclination using the STEIGUNGS arrow keys or
the 9/6/3 quick-selection buttons. The workout is ended
by pressing the STOP button.
GB-46
REX_Trainer_TX800_12.indd GB-46
22.05.12 15:33
Care/Maintenance
DANGER
You must disconnect the mains plug from the power
outlet before any care and maintenance work! MORTAL
DANGER!
We recommend checking all machine parts that could loosen
(screws, nuts, etc.) regularly every 2 to 4 weeks, depending
on the frequency of use. Use a soft, perhaps slightly moistened cloth to clean. Do not use aggressive cleaning agents.
Keep liquids of any type away from the computer and the
machine interior, as the liquids could cause considerable
functional impairments. The belt in the lower area of the
exercise machine can develop rubber skid marks. This is
completely normal.
Treadmill adjustment
WARNING
If the walking belt has slipped over to the left, turn the
right adjusting screw anti-clockwise (no more than a 1/4
revolution). Then let the treadmill run for at least 2 revolutions to check if the adjustment is sufficient. Repeat this
procedure until the belt is centred.
Tensioning the walking belt:
ENGLISH
Care/Maintenance
WARNING
Make sure not to tension the walking belt too strongly
as this results in increased wear or even damage.
You can tension the walking belt with the two adjusting
screws at the right rear end of the main frame (see Fig.).
Turn the left and right adjusting screws evenly a quarter
turn to the right (clockwise). Use an M6 Allen key for this.
Then switch on the treadmill and check if it is sufficiently
tensioned.
➡
➡
Make sure the treadmill is not in operation during the
adjustment. Remove the safety key to ensure your safety.
After a longer period of use or after transport, the walking
belt may no longer be centred or may “slip away” during
your workout. In this case you will have to readjust the
walking belt, as damage and functional impairments could
occur.
Centring the walking belt:
You can adjust the walking belt with an M6 Allen key at the
right rear end of the main frame (see Fig.).
If the walking belt has slipped over to the right, turn the
right adjusting screw clockwise (no more than a 1/4 revolution).Then let the treadmill run for at least 2 revolutions to
check if the adjustment is sufficient. Repeat this procedure
until the belt is centred.
Repeat the procedure until the walking belt stops “slipping
away” during running. However, never turn the adjusting
screws more than a quarter turn after each check. If the
walking belt is adjusted too tightly, evenly loosen both adjusting screws.
GB-47
REX_Trainer_TX800_12.indd GB-47
22.05.12 15:33
Care/Maintenance
Treadmill lubrication
Lubrication
WARNING
DANGER
Make sure the treadmill is not in operation during
the adjustment. Remove the safety key to ensure your
safety.
Do not apply too much lubricant – no more than half a
tube per application! Use a cloth to wipe off excess
lubricant that may ooze out at the sides. DANGER OF
FALLING!
The treadmill has been constructed so that it only required
minimum maintenance effort. However, it is necessary to lubricate the deck from time to time. Thorough lubrication
guarantees proper function and increases the service life of
the machine. We recommend the first lubrication after the
first 25 operating hours (2–3 months) and then every 50
operating hours (approx. 5–8 months). Therefore use commercially available silicone oil or spray.
1. Lift up one side of the walking belt.
2. Apply no more than half of the lubricant tube (included
in the delivery) onto the surface of the deck. (see Fig.)
3. Then run on the treadmill for approx. 3–5 minutes at a
low speed to help distribute the lubricant.
Inspection
Lift up one side of the walking belt and feel the top side of
the deck. If you can still feel the silicon, then lubrication is
not necessary. But if the surface feels dry, you must relubricate the deck.
GB-48
REX_Trainer_TX800_12.indd GB-48
22.05.12 15:33
Technical Data · Disposal
Technical data
running speed:
1–16 km/h
Weight:
approx. ca. 80 kg
pitch adjustment:
12-fold (1,25º–7,5º)
Classification:
HB
Max. continuous output power: 1,3 KW
Max. Weight load:
130 kg
Maximum output:
ENGLISH
Dimensions: approx. ca. 178 cm (L) x 80 cm (B) x 138 cm (H)
2,2 KW
Disposal
Disposing of the fitness machine
At the end of its useful life, the fitness
machine may not be disposed of in normal
household rubbish. Instead, it must be
deposited at a collection point for the recycling of electrical and electronic devices.
Packaging recycling
The packaging material is partially re-useable. Dispose of the packaging in an environmentally friendly manner and add it to
the recyclable waste. Dispose of the packaging at a public collection point. Enquire of
your city/municipal administration for your
nearest available disposal point.
GB-49
REX_Trainer_TX800_12.indd GB-49
22.05.12 15:34
Declaration of conformity
GB-50
REX_Trainer_TX800_12.indd GB-50
22.05.12 15:34
Warranty
Warranty
The malfunction and its causes are always examined by
our customer service and includes:
• Spare parts delivery for the repair work within the scope
of the warranty
Costs for maintenance, inspection and cleaning work.
6. Warranty claims only authorize the customer to demand
the elimination of the defect. Claims for return or reduction of the purchase price only apply after subsequent
improvement fails.
ENGLISH
• Components subject to wear or use (except clear material or manufacturer defects), such as: – Bearings
– Lamps – Stickers – Belts – Batteries, etc.
1. You may only assert warranty claims within a period of
max. 2 years as of the purchase date. Our warranty is
limited to the elimination of material and fabrication
defects, or the replacement of the machine. Realisation
occurs according to our choice through repair to the
machine. Our warranty is free of charge.
7. The examination and decision about a warranty claim is
incumbent upon the manufacturer.
• Repair or replacement of the defective component
(Replaced spare parts will be passed to our possession.)
2. For eligible warranty claims, the costs for shipping and the
costs for disassembly and installation will be charged at
our expense. Warranty claims must be verified by submitting the purchase receipt.
3. The buyer agrees to use the purchased machine for no
other purpose than as designated in the operating instructions.
4. The warranty expires if the machine is modified by third
parties, or changed by installing outside parts, or defects
that occurred in initial conjunction with the change.
Further, the warranty claim also expires if the regulations
regarding the management of the machine were not
observed.
8. The replacement of direct or indirect damage will not be
granted.
9. Warranty claims will only be considered if lodged with
SI-Zweirad-Service-GmbH directly after finding the defect.
10. An executed warranty will neither renew nor extend the
period of warranty. Asserting warranty claims after the
period of warranty has expired is precluded.
11. Arrangements other than the above-mentioned only
then apply if they are confirmed by the manufacturer in
writing.
12. If your machine sustained damage during the delivery,
please record all damage on the delivery note. Have the
supplier (market, carrier) sign the damage report and
then contact us immediately.
5. Not included in the warranty:
• Expendable items not associated with repair work on
recognised malfunctions.
13. Should you have a technical problem with the machine
you have acquired, our customer service staff are available:
• All maintenance work or other work that developed due
to wear, accident or operating conditions as well as use
with disregard to the manufacturers‘ specifications.
• All events, such as noise development, vibrations, wear,
etc. that do not affect the machine qualities.
• Damage caused by:
– installing parts by third parties or the efforts of the
user to remedy the damage himself.
D
SI-Zweirad-Service GmbH Phone: 0 52 42 41 08 98 24
Lindenstraße 50
Fax:
0 52 42/41 08 72
33378 Rheda-Wiedenbrück E-Mail: [email protected]
Germany
www.rex-sport.de
AT
– not using original spare parts
– damage caused by lack of care, unsuitable care products, etc.
CH
SI-Zweirad-Service GmbH Phone: + 49 52 42 41 08 98 24
Lindenstraße 50
Fax:
+ 49 52 42 41 08 72
33378 Rheda-Wiedenbrück E-Mail: [email protected]
Germany
www.rex-sport.de
GB-51
REX_Trainer_TX800_12.indd GB-51
22.05.12 15:34
nb
brück
Postfach 21 24 • 33349 Rheda-Wiedenbrück
eMail: si-service왁prophete.nett
REX_Trainer_TX800_12.indd GB-52
Technische Änderungen vorbehalten·Nachdruck
vorbehalten· Nachdruck verboten
verboten·
·Stand
Stand 04/2012·88733 · © Prophete GmbH u. Co. KG
Prophete GmbH u. Co. KG
22.05.12 15:34
Technische Änderungen vorbehalten Nachdruck verboten Stand 04/2012 88733
Prophete GmbH u. Co. KG
TX-800
T APIS
REX_Trainer_TX800_12.indd F-53
ROULANT
MANUEL DE L’UTILISATEUR
22.05.12 15:34
Sommaire
Sommaire
Avant-propos .............................................................................................................................................
Identification des remarques importantes ...................................................................................................
Consignes de sécurité importantes ..............................................................................................................
Vue éclatée ...............................................................................................................................................
Nomenclature des pièces ............................................................................................................................
Montage ...................................................................................................................................................
Mécanisme de pliage/Transport ..................................................................................................................
F-55
F-55
F-56
F-58
F-59
F-62
F-65
Guide d’entraînement ................................................................................................................................
Conseils pour structurer votre entraînement ................................................................................................
A Intensité ...........................................................................................................................................
B Fréquence ..........................................................................................................................................
C Motivation ........................................................................................................................................
D Organisation des séances d’entraînement ...............................................................................................
1. Phase d’échauffement .....................................................................................................................
2. Phase d’entraînement ......................................................................................................................
3. Phase de refroidissement ...................................................................................................................
E Musculation .......................................................................................................................................
F Perte de poids ....................................................................................................................................
F-66
F-66
F-66
F-66
F-66
F-66
F-66
F-67
F-67
F-67
F-67
Utilisation ................................................................................................................................................
Préréglages ...........................................................................................................................................
Clé de sécurité .......................................................................................................................................
Fonctions des touches .............................................................................................................................
Affichage des informations .......................................................................................................................
Programmes d’entraînement ......................................................................................................................
A P1–P24/H1 ........................................................................................................................................
B Paramètres d’entraînement ...................................................................................................................
C Manuel ..............................................................................................................................................
F-68
F-68
F-68
F-68
F-69
F-69
F-69
F-72
F-72
Entretien/Maintenance ..............................................................................................................................
Caractéristiques techniques ........................................................................................................................
Élimination ...............................................................................................................................................
Garantie ...................................................................................................................................................
F-73
F-75
F-75
F-77
F-54
REX_Trainer_TX800_12.indd F-54
22.05.12 15:34
Avant-propos · Identification des remarques importantes
Avant-propos
Avant la première utilisation, veuillez lire impérativement le
manuel de l’utilisateur avec attention afin d’éviter tout
dommage sur l’appareil ou toute blessure. Conservez soigneusement le manuel de l’utilisateur.
Cordialement
Prophete GmbH u. Co. KG
FRANÇAISE
Nous vous félicitons d’avoir acheté notre appareil de remise en forme. Vous avez fait l’acquisition d’un produit qui est vraiment d’excellente
qualité et qui vous apportera certainement beaucoup de satisfactions.
Identification des remarques importantes
Dans le manuel de l’utilisateur, les remarques particulièrement importantes sont identifiées comme suit :
DANGER
Ce symbole attire votre attention sur des dangers possibles qui pourraient menacer votre santé, votre vie ou celle d’autres personnes dans le
cadre de l’utilisation de l’appareil.
Ce symbole d’information vous indique des conseils et des astuces supplémentaires.
Ce symbole attire votre attention sur des dangers possibles menaçant votre appareil.
ATTENTION
F-55
REX_Trainer_TX800_12.indd F-55
22.05.12 15:34
Consignes de sécurité importantes
Consignes de sécurité importantes
Conservez soigneusement le manuel de l’utilisateur. Donnez-le également à l ’acheteur
en cas de vente ou de cession de l’appareil de remise en forme.
DANGER
Il est important que vous lisiez entièrement le manuel de
l’utilisateur avant d’assembler l’appareil et de l’utiliser.
Une utilisation sûre et performante ne peut être obtenue
que si l’appareil est assemblé, entretenu et utilisé de manière conforme. Tous les utilisateurs de cet appareil ont
l’obligation de s’informer avant l’utilisation des dangers
existants et des mesures de précaution.
L’appareil satisfait aux spécifications de la norme DIN EN
957-1/6; il est exclusivement destiné à un usage domestique et non à une utilisation commerciale ou thérapeutique.
Utilisez l’appareil uniquement dans des locaux secs et à
température ambiante. Protégez-le de l’humidité, de la
poussière/saleté et des variations extrêmes de température.
Placez l’appareil sur une surface stable et plane ; utilisez
une protection pour le sol ou la moquette. Éloignez tous
les objets contondants des alentours de l’apparei ; conservez un espace libre d’au moins 0,5 m tout autour de
l’appareil.
Assurez-vous qu’aucun liquide (sueur compris !) ne peut
pénétrer à l’intérieur de l’appareil ou dans la console
d’entraînement.
Utilisez l ’appareil uniquement de la manière prescrite !
Si, pendant le montage ou lors du contrôle, vous découvrez des pièces défectueuses, ou bien si vous percevez des
bruits inhabituels pendant l’utilisation, stoppez immédiatement votre entraînement. Ne pas utiliser l’appareil
tant que le problème n’est pas résolu.
Avant l’utilisation de votre vélo elliptique, contrôlez que
toutes les vis et tous les écrous sont correctement vissés
et bien serrés.
Le niveau de sécurité de l’appareil ne peut être maintenu
que s’il bénéficie de contrôles réguliers concernant l’absence de dommage et l’existence d’usure. Faites exécuter
les réparations par un personnel qualifié et n’utilisez que
des pièces détachées originales.
ATTENTION
Tenir les enfants et les animaux domestiques éloignés de
l’appareil. Cet appareil est exclusivement destiné aux
adultes.
L’appareil n’est pas conçu pour être utilisé par des personnes présentant une diminution de leurs capacités physiques, sensorielles ou mentales, ni par des personnes
manquant d’expérience ou de connaissances, sauf si elles
sont placées sous la surveillance d’une personne responsable de leur sécurité ou qu’elles ont reçu des instructions leur indiquant comment utiliser l’appareil.
Le poids maximum admissible de l’utilisateur ne doit pas
dépasser 130 kg.
Avant d’entamer votre entraînement, consultez un médecin pour déterminer si l’entraînement pourrait constituer
un risque pour votre santé. Le conseil d’un médecin est
incontournable si vous devez prendre des médicaments
qui exercent une influence sur la fréquence cardiaque, la
pression sanguine ou le taux de cholestérol.
Tenez compte des signaux qu’envoie votre corps ! Un entraînement incorrect ou excessif peut affecter votre santé, voire lui nuire. Cessez les exercices dès que vous
percevez les symptômes suivants : douleur, tension dans
la poitrine, battements cardiaques irréguliers, essoufflement, sentiment d’étourdissement, vertige ou nausée. Si
jamais un seul de ces symptomes devait se manifester,
consultez votre médecin avant de poursuivre votre programme d’entraînement.
Portez des vêtements adaptés à votre entraînement ! Évitez de porter des vêtements trop larges qui pourraient
rester accrochés à l’appareil ou qui pourraient gêner ou
empêcher vos mouvements. Portez toujours des chaussures maintenant bien le pied pendant l‘entraînement.
La clé de sécurité sert à stopper immédiatement le tapis
de course en cas de chute ou d’urgence. N’utilisez donc
jamais le tapis de course sans avoir soigneusement fixé le
clip de sécurité à vos vêtements. Avant d’entamer l’entraînement, vérifiez que le clip de sécurité ne s’est pas
détaché involontairement de vos vêtements.
F-56
REX_Trainer_TX800_12.indd F-56
22.05.12 15:34
Consignes de sécurité importantes
Conservez soigneusement le manuel de l ’utilisateur. Donnez-le également à l ’acheteur
en cas de vente ou de cession de l’appareil de remise en forme.
En cas d’urgence (p. ex. vertige soudain, douleur, etc.),
descendez de l’appareil de remise en forme comme suit :
1. Tenez-vous bien aux poignées latérales.
2. Posez les pieds sur les bordures latérales.
3. Retirez la clé de sécurité.
Ne sautez jamais du tapis de course pendant la marche !
ATTENTION
Coupez l’appareil de remise en forme après l’entraînement,
pour le nettoyage ou l’entretien et retirer le connecteur
de la prise d’alimentation électrique.
Soyez prudents lorsque vous soulevez et que vous déplacez l’appareil afin d’éviter toute lésion dorsale. Si
possible, utilisez toujours des techniques de levage ou
demandez de l ’aide.
FRANÇAISE
DANGER
Permettre à la bande de bien venir à l’arrêt avant de descendre.
F-57
REX_Trainer_TX800_12.indd F-57
22.05.12 15:34
Vue éclatée
Vue éclatée
F-58
REX_Trainer_TX800_12.indd F-58
22.05.12 15:34
Nomenclature des pièces
Nomenclature des pièces
99.
100.
101.
125.
126.
FRANÇAISE
74.
44.
104.
103.
N°
1
2
3
4
5
6
7
8
Nom
Châssis
Sous-châssis
Équerre d ’inclinaison
Montant droit
Montant gauche
Console d’appui
Tube télescopique extérieur
Tube télescopique intérieur
102.
Taille
Quantité
1
1
1
1
1
1
1
1
F-59
REX_Trainer_TX800_12.indd F-59
22.05.12 15:34
Nomenclature des pièces
N°
9
10
11
12
13
14
15
16
16~3
17
19
20
21
21-1
21-2
21-3
21-6
21-10
21-12
21-13
22
23
24
25
26
27
28
29
30
31
32
33
34
35
36
37
38
40
41
42
43
44
45
46
47
48
49
50
51
52
53
55
57
58
59
60
61
62
63
64
65
66
Nom
Bouton de serrage
Moteur d ’inclinaison
Courroie trapézoïdale
Support de moteur
Moteur
Bande de déroulement
Plateau de course
Rouleau avant
Aimant
Rouleau arrière
Douille
Douille
Écran d ’affichage
Écran, face avant
Écran, face arrière
Couvercle
Ventilateur
Vis à tôle
Câble de raccordement Écran
Câble de console d ’entraînement
Support d ’écran
Habillage Sous-châssis (G)
Habillage Sous-châssis (D)
Capot moteur, supérieur
Base d ’adaptation arrière (G)
Base d ’adaptation arrière (D)
Ensemble Vitesse/Pouls-Main
Ensemble Inclinaison/Pouls-Main
Interrupteur de puissance
Interrupteur Marche/Arrêt
Bouchon
Rouleau de transport, avant
Rouleau de transport, arrière
Pieds en caoutchouc
Guidon fixe
Bordure latérale
Tapis caoutchouc antidérapant
Couvercle de moteur
Bouchon
Bouchon
Bouchon
Clé de sécurité
Prise
Câble
Connecteur IEC
Câble d ’alimentation électrique
Câble de connexion (blanc)
Câble de connexion (noir)
Câble de connexion (noir)
Régulateur
Câble de console d ’entraînement Montant
Câble de console d ’entraînement Console d ’appui
Plaque de recouvrement inférieur
Vis à tête hexagonale
Vis Allen
Vis à tête hexagonale
Vis à tête hexagonale
Vis à tête hexagonale
Vis à tête hexagonale
Vis à tête hexagonale
Vis Allen
Vis Allen
Taille
3.5 × 32 m/m
150 m/m_12P
200 m/m_10P
21.4 × 21.4 m/m
25.4 × 25.4 m/m
20 × 40 m/m
800 m/m
1000 m/m
20 cm × 764 × 764
20 cm × 764 × 764
100 m/m
1900 m/m
650 m/m
1/2" × 1"
3/8" × 3-3/4"
3/8" × 1-3/4"
3/8" × 1-1/2"
3/8" × 3/4"
M8 × 60 m/m
M8 × 12 m/m
5/16" × 1"
3/8" × 4"
Quantité
1
1
1
1
1
1
1
1
1
1
2
2
1
1
1
1
1
4
1
1
2
1
1
1
1
1
1
1
1
1
2
2
2
6
2
2
2
5
1
1
2
1
1
1
1
1
2
1
1
1
1
1
1
2
1
1
1
4
1
2
2
1
F-60
REX_Trainer_TX800_12.indd F-60
22.05.12 15:34
Nomenclature des pièces
Nom
67
68
69
70
73
74
75
76
77
78
79
80
81
82
82
83
84
85
86
87
88
89
90
90-1
90-3
90-5
90-7
91
92
93
94
95
96
98
99
100
101
102
103
104
105
106
110
111
112
113
114
125
126
128
129
130
131
132
133
134
135
136
137
138
139
140
Vis à tête plate
Vis
Boulon
Vis à tête plate
Vis
Vis à tôle
Écrou
Écrou
Écrou
Écrou
Rondelle ressort
Rondelle ressort
Rondelle ressort
Rondelle d ’appui
Rondelle d ’appui
Rondelle d ’appui
Rondelle d ’appui
Pignon en nylon (B)
Pignon en nylon (A)
Rondelle d ’appui
Rondelle d ’appui
Rondelle pour écrou à fermeture rapide
Porte-boissons Montage
Porte-boissons
Module Switch de sécurité
Vis à tôle
Câble de connexion
Vis à tôle
Guidage de bande
Vis à tôle
Vis à tôle
Vérin
Vis à tête plate fraisée
Vis à tête hexagonale
Vis à tête hexagonale
Rondelle d ’appui
Rondelle d ’appui
Clé Allen/Tournevis cruciforme
Clé Allen
Lubrifiant
Bouchon
Habillage
Vis à tôle
Vis à tôle
Serre-câbles
Garde-pied (D)
Garde-pied (G)
Vis cruciforme
Vis cruciforme
Vis cruciforme
Revêtement extérieur de guidon (G)
Revêtement extérieur de guidon (D)
Revêtement inférieur interne de guidon (D)
Revêtement inférieur interne de guidon (G)
Revêtement supérieur interne de guidon (G)
Revêtement supérieur interne de guidon (D)
Vis à tôle
Bouchon
Volet de starter
Filtre
Câble de connexion Moteur
Vis à tôle
Taille
3/8" × 2"
1/2" × 28 m/m
M8 × 3"
M6 × 1"
5 × 16 m/m
3.5 × 12 m/m
1/2" × 8T
3/8" × 7T
5/16" × 7T
M8 × 7T
3/8" × 2T
M8 × 1.5T
M5
3/8" × 19 × 1.5T
3/8" × 19 × 1.5T
3/8" × 25 × 2T
Ø 5 × Ø 13 × 1.0T
Ø 50 × Ø 13 × 3T
Ø 10 × Ø 25 × 3T
Ø 6.5 × Ø 25 × 1.5T
M5
5 × 2T
300 m/m
3 × 10 m/m
250 m/m
14 × 12 m/m
5 × 16 m/m
5 × 19 m/m
M8 × 1" × 1/4"
3/8" × 3"
5/16" × 1/2"
5/16" × 18 × 1.5T
5/16" × 23 × 1.5T
M5
M6 (66 × 88)
3.5 × 20 m/m
3.5 × 16 m/m
M5 × 25 m/m
M5 × 35 m/m
M5 × 12 m/m
3 × 63 m/m
400 m/m
4 × 19 m/m
Quantité
4
2
2
6
13
22
4
6
2
1
6
2
3
6
6
5
10
4
2
8
3
2
1
1
1
2
1
2
2
22
8
1
2
1
14
6
8
1
1
1
2
1
2
5
5
1
1
2
2
7
1
1
1
1
1
1
2
2
1
1
1
4
FRANÇAISE
N°
F-61
REX_Trainer_TX800_12.indd F-61
22.05.12 15:34
Montage
Montage
ÉTAPE 1
ATTENTION
1. Retirez le tapis de course du carton avec précaution
et déposez-le sur une surface libre et plane.
ÉTAPE 2
ATTENTION
1. Reliez le câble inférieur de la console d’entraînement
(53) au câble de console d’entraînement du montant
droit (4).
2. Introduisez les deux montants (G, D/5, 4) dans le
sous-châssis (2) et vissez-les avec huit vis 5/16" ×
1/2" (99), quatre rondelles d’appui 5/16" × 18 × 1.5T
(100) et quatre rondelles d’appui 5/16" × 23 × 1.5T
(101). Pour serrer, utiliser la clé Allen fournie (102).
F-62
REX_Trainer_TX800_12.indd F-62
22.05.12 15:34
Montage
Montage
ÉTAPE 3
1. Connectez le câble de la console d’entraînement (55)
au câble de console d’entraînement de montant (53).
2. Fixez ensuite la console d’appui (6) sur les deux
montants (L, R / 5, 4) avec six vis 5/16" ×1/2 (99),
deux rondelles d’appui 5/16" × 18 × 1.5T (100) et
quatre rondelles d’appui 5/16" × 23 × 1.5T (101).
Pour serrer, utilisez la clé Allen fournie (102).
FRANÇAISE
ATTENTION
ÉTAPE 4
ATTENTION
1. Montez les deux revêtements extérieurs de guidon
(G, D / 129, 130) sur les extrémités de la console
d’appui (6) avec quatre vis 3,5 × 12 m/m (74). Serrez
les vis à fond au moyen de l’outil fourni (102).
F-63
REX_Trainer_TX800_12.indd F-63
22.05.12 15:34
Montage
Montage
ÉTAPE 5
ATTENTION
1. Connectez le câble de la console d’entraînement (55)
au le câble de console de l’écran (21-13).
2. Connectez de la même manière les câbles (90-7) avec
(21-12).
3. En option, les appareils sont disponibles avec un
récepteur HR. Si votre appareil dispose de cette option, reliez le câble (21-14) au le câble (90-8).
ÉTAPE 6
ATTENTION
1. Insérez avec précaution l’écran (21) dans le support
de la console d’appui (6) et vissez les deux éléments
avec deux vis M5 × 25 mm (125) et deux vis M5 × 35 mm
(126). Pour cela, utilisez également l’outil fourni (102).
F-64
REX_Trainer_TX800_12.indd F-64
22.05.12 15:34
Mécanisme de pliage/ Transport
Mécanisme de pliage/Transport
Déplier
2
1. Placez-vous derrière l’appareil et tirez sur le bouton de
verrouillage (ill. 1)
2. Laissez le tapis de course descendre doucement jusqu’au
sol. (ill. 2)
FRANÇAISE
Replier
1. Tirez avec la main droite sur le bouton de verrouillage
(ill. 3) et soulevez le tapis de course avec la main gauche
jusqu’à une hauteur de 30 cm env.
2. Soulevez ensuite à deux mains le tapis de course jusqu’à
ce que le verrouillage s’enclenche (ill. 4).)
Transport
Pour déplacer le tapis de course, l’appareil doit tout d’abord
être replié (cf. le point « Replier »). Assurez-vous que le
bouton de verrouillage est correctement enclenché.
Basculez lentement le tapis de course vers l’arrière jusqu’à
ce qu’il repose sur les roulettes de transport. Vous pouvez
maintenant déplacer l’appareil à l’emplacement voulu. Pour
le choix d’un emplacement adapté, observez les consignes
de sécurité au début de ce manuel de l’utilisateur.
3
1
4
F-65
REX_Trainer_TX800_12.indd F-65
22.05.12 15:34
Guide d’entraînement
Guide d’entraînement
L’utilisation de votre appareil de remise en forme vous apportera de nombreux avantages. Elle améliorera votre forme physique, affinera votre musculature et, en association avec un
régime hypocalorique, vous aidera également dans votre perte de poids.
CONSEILS POUR STRUCTURER VOTRE ENTRAÎNEMENT
Pour réussir un entraînement optimal, vous devez pourtant
veiller à respecter certains points concernant le type et la
manière (comment s’entraîner), ainsi que la structure de votre entraînement. Pour améliorer votre santé et votre condition physique, les facteurs suivants doivent être pris en
compte lors de la planification de votre entraînement :
modification de son poids ou une amélioration de sa condition physique ou de 2 séances par semaine pour conserver son état actuel.
C Motivation
La régularité est un aspect très important pour le succès
d’un programme d’entraînement. La préparation mentale,
ainsi qu’un horaire et un emplacement fixe par séance
d’entraînement contribuent au succès. Il est recommandé
de toujours garder son objectif personnel en vue et, si
possible, de s’entraîner uniquement lorsqu’on est de bonne humeur. Entraînez-vous de manière continue pour progresser de jour en jour et de vous rapprocher ainsi de votre objectif.
D Organisation des séances d’entraînement
A Intensité
L’entraînement doit être conçu de telle sorte que les efforts physiques développés pendant l’entraînement soient
supérieurs à des efforts normaux. Toutefois, vous ne devez pas aller jusqu’à l’essoufflement ni jusqu’à l’épuisement. Lors d’un entraînement efficace, le pouls doit se
situer entre 70% et 85% du pouls maximum (cf. également le chapitre « Phase d’entraînement »).
Pendant les premières semaines d’entraînement, le pouls
doit se situer à env. 70% du pouls maximum ; il doit
monter peu à peu jusqu’à 85% du pouls maximum au
cours des semaines et des mois qui suivent. Les efforts
d’entraînement peuvent être augmentés p. ex. avec l’allongement de la durée de l’entraînement ou le passage à
un niveau d’effort supérieur, en fonction de l’amélioration
de la condition physique. Les moyens d’aide suivants
vous permettent de contrôler la fréquence de votre pouls :
a) Vous pouvez vous-même prendre votre pouls de manière conventionnelle (p. ex. au poignet) et compter les
pulsations par minute
Mesure de la fréquence du
pouls de manière conventionnelle.
b) Vous pouvez contrôler votre pouls au moyen des surfaces de contact montées sur les poignées de guidon.
c) Vous pouvez également contrôler la fréquence de votre
pouls avec des appareils spécifiques et calibrés de mesure du pouls.
Chaque séance d’entraînement doit être structurée en
trois phases :
a) Phase d’échauffement
b) Phase d’entraînement
c) Phase de refroidissement
1. Phase d’échauffement
Cette phase entraîne une bonne irrigation sanguine de
tout le corps et facilite le fonctionnement correct des muscles. De même, elle réduit le risque de crampes et de lésions musculaires. Il est de ce fait recommandé d’effectuer
quelques exercices d’étirement (cf. ill.) avant chaque entraînement. Chaque exercice doit durer env. 30 secondes.
Évitez ici les mouvements brusques et ne sollicitez pas les
muscles. Cessez l’étirement dès que la douleur se manifeste.
FLEXION AVANT DU BUSTE
La mesure du pouls par capteur sert uniquement d’orientation
car les mouvements, les frottements, la sueur, etc. peuvent
indiquer des valeurs différentes de celles du pouls effectif.
Chez certaines personnes, la modification de la résistance de
la peau due aux pulsations du pouls est si faible que le résultat ne suffit pas pour une mesure précise du pouls.
FLEXION LATÉRALE DU BUSTE
B Fréquence
Les experts recommandent entre 3 et 5 séances d’entraînement par semaine, en fonction de l’objectif à atteindre.
L’entraînement doit être accompagné d’une alimentation
saine et équilibrée. Un adulte moyen a besoin d’au moins
3 séances d’entraînement par semaine pour obtenir une
INTÉRIEUR/
CUISSE
EXTÉRIEUR/
CUISSE
MOLLET/TENDON D’ACHILLE
F-66
REX_Trainer_TX800_12.indd F-66
22.05.12 15:34
Guide d’entraînement
2. Phase d’entraînement
Lors de l’entraînement, veillez à maintenir un rythme régulier et constant. Pour un entraînement optimal, le niveau
d’effort doit être choisi de manière à ce que votre pouls
atteigne env. 70 à 85% du pouls maximum (zone cible).
Vous pouvez lire sur le graphique la zone cible qui correspond à votre situation :
Dans ce cas, modifiez alors votre plan d’entraînement
comme suit :
Eentraînez-vous comme d’habitude pendant la phase
d’échauffement et celle de refroidissement. Toutefois, à la
fin de la phase d’exercice, augmentez le niveau d’effort
pour solliciter encore plus vos jambes. Si toutefois vous
dépassez alors la zone cible de pouls, vous devez impérativement réduire votre rythme !
MAXIMUM
ZONE CIBLE
Phase de
refroidissement
ÂGE
La phase d’entraînement doit durer au moins 12 minutes. Il
est habituel de commencer avec une durée d’entraînement
d’env. 15 à 20 minutes.
Si vous avez atteint un niveau de forme physique supérieur
au bout de quelque temps, vous pouvez alors vous entraîner
plus longtemps et à des doses plus importantes.
Veillez à votre posture pendant l’entraînement :
Pour que votre corps puisse travailler correctement, il a
besoin de « combustible », comme un moteur. Les muscles sont alimentés en oxygène par l ’intermédiaire du
système cardiovasculaire. Cet oxygène est utilisé d ’une
part pour l ’alimentation des muscles en énergie, d ’autre
part pour brûler les hydrates de carbone et les graisses.
En raison de leur composition chimique, les graisses corporelles ne peuvent être transformées en énergie que
lorsque vous effectuez un entraînement aérobie, c’est-àdire lorsque les muscles disposent d’une quantité suffisante d’oxygène pendant l’entraînement. Lors de l’entraînement anaérobie (« être essoufflé »), le corps subit
un déficit en oxygène, ce qui empêche toute désintégration des graisses. Dans la plage de 50 à 80% du pouls
maximum (pouls maximum = 220 – Âge), le corps dispose
encore de suffisamment d’oxygène ; il est ainsi en mesure d’obtenir les meilleurs résultats en matière de combustion des graisses. La combustion des graisses sera augmentée en augmentant la fréquence et la longueur d’un
tel d’entraînement aérobie.
FRANÇAISE
F Perte de poids
POULS
• Buste maintenu aussi droit que possible
• Regard dirigé vers l’avant
• Les mouvements doivent provenir le plus possible des
jambes
• Ne pas s’entraîner sans les mains ! –
Les bras servent à stabiliser le corps.
• Levez légèrement les talons pendant l’entraînement,
comme pour une foulée de ski de fond
• Changez souvent la position des mains sur les poignées
3. Phase de refroidissement
Cette phase sert à détendre les muscles et à calmer le
système cardiovasculaire. Réduisez pour cela p. ex. votre
vitesse pendant env. 5 minutes. Répétez ensuite les exercices d ’étirement décrits à la phase 1. Veillez, pendant
cette phase également, à ne pas effectuer de mouvements brusques et à ne pas solliciter votre musculature.
E Musculation
Vous devez sélectionner un niveau d’effort supérieur
pour développer votre musculation avec l ’appareil de remise en forme. Selon les circonstances, vous constaterez
que votre forme physique ne vous permettra pas de tenir
le programme d ’entraînement sur toute sa durée.
F-67
REX_Trainer_TX800_12.indd F-67
22.05.12 15:34
Utilisation
Utilisation
PRÉRÉGLAGES
Branchez le connecteur d’alimentation électrique dans une
prise 220/240 V (observez les consignes de sécurité !) et
mettez l’appareil de remise en forme en marche au moyen de
l’interrupteur principal monté sur la face arrière.
CLÉ DE SÉCURITÉ
fig. 1
ATTENTION
N’utilisez donc jamais le tapis de course sans avoir soigneusement fixé le clip de sécurité 1 à vos vêtements.
Avant d’entamer l’entraînement, assurez-vous que le clip
de sécurité ne peut pas se détacher de vos vêtements.
Le tapis de course peut être mis en service uniquement lorsque la clé de sécurité 2 est branchée sur le point de contact
de la console d’entraînement.
(Fig. similaire)
2
1
2
La clé de sécurité sert à stopper immédiatement le tapis de
course en cas de chute ou d’urgence.
fig. 2
START :
Avec le bouton START pour commencer la formation. Une
peut en vertu du programme de formation brochenes par reappuyez sur le bouton START pour continuer.
RESET/STOP :
Le bouton RESET/STOP pour mettre le tapis roulant jusqu’à
adhérer à l’arrêt ou en appuyant sur la sélectionné le programme et les valeurs à zéro.
STEIGUNG (PENTE) :
Utilisez les touches fléchées pour ajuster l’inclinaison du
tapis roulant faire semblant. Avec les touches fléchées sur la
poignée gauche (voir figure 1) ce paramètre peut aussi
changer.
EINGABE (ENTER) :
En utilisant la touche EINGABE pour entrer les paramètres de
formation.
MODUS :
En appuyant sur la touche MODE à une donnée choisissez un
programme de formation.
Si la clé de sécurité 2 est de nouveau branchée sur la console d’entraînement, tous les programmes d’entraînement
ou paramètres saisis auparavant doivent être de nouveau
saisis !
TEMPO (VITESSE) :
Utilisez les touches fléchées pour ajuster la vitesse de la
Tapis de course ou de la prétention de changer de 0,5 km/h
étapes. Avec les touches fléchées sur la poignée droite (voir
figure 2) peut être également contrôler ce paramètre.
FONCTIONS DES TOUCHES
STEIGUNG (PENTE) 9/6/3 :
Les touches de raccourci que vous pouvez définir un 9/6/3
réglage de la hauteur à droite.
TEMPO RUN/JOGGEN/WALK :
Avec les boutons de numérotation rapide RUN/JOG/WALK,
vous pouvez une vitesse prédéterminée mis à droite.
RUN: 9 km/h
JOGGEN: 6 km/h
WALK: 3 km/h
F-68
REX_Trainer_TX800_12.indd F-68
22.05.12 15:34
AFFICHAGE DES INFORMATIONS
PROGRAMMES D’ENTRAÎNEMENT
Les informations suivantes peuvent être affichées :
A Programmes d’entraînement (P1–P24/H1)
1. TIME (Durée)
La console affiche la durée actuelle de l’entraînement.
Lorsqu’une durée prédéfinie est saisie, le comptage se fait
à rebours (countdown). L’appareil se stoppe lorsque la
valeur préréglée est atteinte et un signal sonore retentit.
Vous pouvez choisir entre 24 programmes d’entraînement
différents. Une séance d’entraînement dure chaque fois 30
minutes. Les programmes P1–P14 se distinguent par la
chronologie des vitesses de bande de déroulement. Les programmes P15–P24 se distinguent par contre par la vitesse
de la bande de déroulement, ainsi que par l’angle d’inclinaison. De ce fait, ils sont conçus uniquement pour les personnes affichant une bonne condition physique.
2. SPEED (Vitesse)
La console d’entraînement affiche la vitesse réglée en
km/h.
3. DISTANCE (Distance)
La console d’entraînement affiche la distance parcourue.
Lorsqu’une distance prédéfinie est saisie, le comptage se
fait à rebours (countdown). L’appareil se stoppe lorsque
la valeur préréglée est atteinte et un signal sonore retentit.
4. CALORIES (Calories)
La console d’entraînement affiche la quantité de calories
brûlées pendant l’entraînement. Après saisie de la quantité de calories à brûler, le système démarre le compte à
rebours (countdown) jusqu’à zéro. L’appareil se stoppe
lorsque la valeur préréglée est atteinte et un signal sonore retentit.
Dans le programme H1, vous pouvez définir la durée d’entraînement souhaitée (au moins 5 minutes), ainsi que votre
pouls cible individuel avec l’aide de la touche EINGABE (Saisie). L’ordinateur adapte ici toutes les 15 secondes l’inclinaison de la bande de déroulement à votre pouls cible.
FRANÇAISE
Utilisation
La touche MODUS (mode) et les touches fléchées TEMPO (vitesse) vous permettent de sélectionner l’un des 24 programmes d’entraînement ou le programme H1. Le programme
d’entraînement actuel sera affiché au milieu de la zone droite de l’écran (P1–P24/H1). En actionnant la touche START,
vous pouvez démarrer le programme choisi.
Il est toujours possible d’adapter individuellement la vitesse ou l’inclinaison pendant l’entraînement à l’aide des touches fléchées TEMPO (vitesse) ou STEIGUNG (montée).
5. PULSE (Pouls/Pulsations cardiaques)
L’affichage PULSE (pouls) vous indique la fréquence actuelle de votre pouls en pulsations cardiaques par minute.
L’affichage ne peut indiquer de valeurs correctes que si
vous appliquez correctement les paumes de vos mains sur
les deux capteurs. Dans certaines circonstances, 2 minutes peuvent s’écouler avant que le pouls soit affiché.
6. STEIGUNG (Inclinaison)
La console d’entraînement affiche l’angle d’inclinaison
réglé.
7. PROGRAM
La console d’entraînement affiche le programme d’entraînement réglé.
F-69
REX_Trainer_TX800_12.indd F-69
22.05.12 15:34
Utilisation
ENQUÊTE SUR LES PROGRAMMES
Programme P1
Min
km/h
1
1
2
3
3
4
4
5
5
6
6
5
7
4
8
3
9
2
10 11 12 13 14 15 16 17 18 19 20 21 22 23 24 25 26 27 28 29 30
1 2 3 4 5 6 5 4 3 2 1 2 3 4 5 6 5 4 3 2 1
3
3
4
3
5
3
6
4
7
4
8
4
9
4
10 11 12 13 14 15 16 17 18 19 20 21 22 23 24 25 26 27 28 29 30
4 4 4 4 4 4 4 4 4 4 4 4 4 4 4 4 2 2 2 1 1
3
6
4
8
5
6
6
6
7
4
8
4
9
2
10 11 12 13 14 15 16 17 18 19 20 21 22 23 24 25 26 27 28 29 30
2 2 4 6 8 6 6 4 4 2 2 2 4 6 8 6 6 4 4 2 2
3
6
4
6
5
6
6
6
7
6
8
6
9
4
10 11 12 13 14 15 16 17 18 19 20 21 22 23 24 25 26 27 28 29 30
4 4 4 4 4 4 6 6 6 6 6 6 6 3 3 3 3 3 3 3 1
3
6
4
8
5
10
6
8
7
6
8
4
9
2
10 11 12 13 14 15 16 17 18 19 20 21 22 23 24 25 26 27 28 29 30
2 2 4 6 8 10 8 6 4 2 2 2 4 6 8 10 8 6 4 2 2
3
6
4
6
5
6
6
6
7
6
8
6
9
7
10 11 12 13 14 15 16 17 18 19 20 21 22 23 24 25 26 27 28 29 30
7 7 7 7 7 7 6 6 6 6 6 6 6 3 3 3 3 3 3 3 1
3
6
4
6
5
8
6
10
7
6
8
6
9
2
10 11 12 13 14 15 16 17 18 19 20 21 22 23 24 25 26 27 28 29 30
2 2 2 6 6 8 10 6 6 2 2 2 2 6 6 8 10 6 6 2 2
3
5
4
5
5
6
6
6
7
6
8
8
9
8
10 11 12 13 14 15 16 17 18 19 20 21 22 23 24 25 26 27 28 29 30
8 5 5 5 6 6 6 9 9 9 5 5 5 5 9 9 9 6 6 5 5
3
4
4
5
5
2
6
3
7
4
8
5
9
3
10 11 12 13 14 15 16 17 18 19 20 21 22 23 24 25 26 27 28 29 30
2 2 3 4 5 2 3 4 5 3 2 2 3 4 5 2 3 4 5 3 2
3
6
4
2
5
4
6
6
7
2
8
4
9
6
10 11 12 13 14 15 16 17 18 19 20 21 22 23 24 25 26 27 28 29 30
2 2 4 6 2 4 6 2 4 6 3 3 4 6 2 4 6 2 4 6 2
3
7
4
7
5
7
6
8
7
8
8
8
9
8
10 11 12 13 14 15 16 17 18 19 20 21 22 23 24 25 26 27 28 29 30
9 9 9 9 9 8 8 8 8 9 9 9 8 8 8 9 9 9 8 8 8
3
4
4
5
5
6
6
5
7
4
8
3
9
2
10 11 12 13 14 15 16 17 18 19 20 21 22 23 24 25 26 27 28 29 30
1 1 3 4 5 6 5 4 3 2 1 1 3 4 5 6 5 4 3 2 1
3
6
4
8
5
6
6
6
7
4
8
4
9
2
10 11 12 13 14 15 16 17 18 19 20 21 22 23 24 25 26 27 28 29 30
2 1 4 6 8 6 6 4 4 2 2 1 4 6 8 6 6 4 4 2 2
Programme P2
Min
km/h
1
1
2
3
Programme P3
Min
km/h
1
2
2
4
Programme P4
Min
km/h
1
2
2
6
Programme P5
Min
km/h
1
3
2
4
Programme P6
Min
km/h
1
3
2
6
Programme P7
Min
km/h
1
4
2
2
Programme P8
Min
km/h
1
4
2
5
Programme P9
Min
km/h
1
5
2
3
Programme P10
Min
km/h
1
6
2
4
Programme P11
Min
km/h
1
6
2
6
Programme P12
Min
km/h
1
7
2
3
Programme P13
Min
km/h
1
8
2
4
F-70
REX_Trainer_TX800_12.indd F-70
22.05.12 15:34
Utilisation
Programme P14
Min
km/h
1
9
2
9
3
9
4
8
5
8
6
8
7
8
8
8
9
7
10 11 12 13 14 15 16 17 18 19 20 21 22 23 24 25 26 27 28 29 30
7 7 7 6 6 6 6 5 5 5 5 4 4 4 4 3 3 2 2 1 1
3
5
5
4
6
6
5
5
3
6
6
4
7
6
5
8
5
6
9
4
5
10 11 12 13 14 15 16 17 18 19 20 21 22 23 24 25 26 27 28 29 30
2 1 2 3 6 7 6 6 5 4 2 6 5 3 6 4 3 6 5 4 2
4 3 4 5 6 3 4 5 6 3 4 3 4 5 6 3 4 5 6 5 4
3
5
5
4
5
8
5 6 7
5 5 5
10 12 10
8
5
8
9
5
6
10 11 12 13 14 15 16 17 18 19 20 21 22 23 24 25 26 27 28 29 30
5 5 5 5 5 5 5 5 5 5 5 5 5 5 5 5 5 5 5 5 5
4 2 4 6 8 10 12 10 8 6 4 2 4 6 8 10 11 10 8 6 4
3
3
7
4
3
9
5
3
11
6
9
9
7
9
7
8
9
7
9
9
3
10 11 12 13 14 15 16 17 18 19 20 21 22 23 24 25 26 27 28 29 30
7 7 7 6 6 9 9 9 9 5 5 5 7 7 7 7 6 6 6 6 6
3 3 7 7 9 11 9 7 7 3 3 3 7 7 9 11 9 7 7 3 3
3
6
3
4
6
5
5
8
9
6
10
4
7
6
2
8
6
4
9
2
6
10 11 12 13 14 15 16 17 18 19 20 21 22 23 24 25 26 27 28 29 30
2 1 2 6 6 8 10 6 6 2 2 1 2 6 6 8 10 6 6 2 2
8 10 12 1 2 3 4 5 6 7 8 9 2 1 2 1 2 1 1 2 0
3
4
2
4
5
3
5
2
4
6
3
4
7
4
3
8
5
2
9
3
1
10 11 12 13 14 15 16 17 18 19 20 21 22 23 24 25 26 27 28 29 30
2 1 3 4 5 2 3 4 5 3 2 1 3 4 5 2 3 4 5 3 2
0 1 1 2 3 4 4 3 2 1 0 1 1 2 3 4 4 3 2 1 0
3
6
5
4
2
7
5
4
9
6
6
11
7
2
9
8
4
7
9
6
5
10 11 12 13 14 15 16 17 18 19 20 21 22 23 24 25 26 27 28 29 30
2 1 4 6 2 4 6 2 4 6 2 1 4 6 2 4 6 2 4 6 2
3 1 3 5 7 9 11 9 7 5 3 1 3 5 7 9 11 9 7 5 3
3
3
3
4
3
3
5
3
3
6
3
3
7
3
3
8
3
3
9
4
6
10 11 12 13 14 15 16 17 18 19 20 21 22 23 24 25 26 27 28 29 30
4 4 4 4 4 4 5 5 5 5 5 5 5 6 6 6 6 6 6 7 7
6 6 6 6 6 6 10 10 10 10 10 10 10 3 3 3 3 3 3 0 0
3
4
9
4
4
9
5
4
9
6
4
9
7
4
9
8
4
9
9
6
9
10 11 12 13 14 15 16 17 18 19 20 21 22 23 24 25 26 27 28 29 30
6 6 6 6 6 6 8 8 8 8 8 8 8 5 5 5 5 5 5 3 3
9 9 9 9 9 9 9 9 9 9 9 9 9 9 9 9 9 9 9 9 9
Min
km/h
1
3
Inclination 3
2
4
4
Programme P16
Min
km/h
1
5
Inclination 2
2
5
4
FRANÇAISE
Programme P15
Programme P17
Min
km/h
1
5
Inclination 3
2
5
7
Programme P18
Min
km/h
1
1
Inclination 7
2
2
5
Programme P19
Min
km/h
1
2
Inclination 3
2
3
1
Programme P20
Min
km/h
1
3
Inclination 1
2
4
3
Programme P21
Min
km/h
1
2
Inclination 0
2
3
3
Programme P22
Min
km/h
1
2
Inclination 9
2
4
9
Programme P23
Min
km/h
1 2 3 4 5 6 7 8 9 10 11 12 13 14 15 16 17 18 19 20 21 22 23 24 25 26 27 28 29 30
2 4 4 4 4 4 4 4 6 6 6 6 6 6 6 8 8 8 8 8 8 8 6 6 6 6 6 6 5 5
Inclination 10 10 10 10 10 10 10 10 10 10 10 10 10 10 10 10 10 10 10 10 10 10 10 10 10 10 10 10 10 10
Programme P24
Min
km/h
1
3
Inclination 0
2
4
9
3
4
9
4
4
9
5
4
9
6
4
9
7
4
9
8
4
9
9
7
9
10 11 12 13 14 15 16 17 18 19 20 21 22 23 24 25 26 27 28 29 30
7 7 7 7 7 7 12 12 12 12 12 12 12 3 3 3 3 3 3 3 1
9 9 9 9 9 9 9 9 9 9 9 9 9 9 9 9 9 9 9 9 9
F-71
REX_Trainer_TX800_12.indd F-71
22.05.12 15:34
Utilisation
B Entraînement avec paramètres
Dans ce programme, vous pouvez définir l’un des trois
paramètres d’entraînement disponibles. Les paramètres
d’entraînement sont des objectifs à atteindre que vous
pouvez définir en fonction de votre niveau de forme physique, de votre motivation ou du temps disponible.
Vous disposez des paramètres d’entraînement suivants :
Paramètre
Plage de réglage
Palier
Remarque
TIME (Durée)
DIST (Distance)
CAL (Calories)
0:00~ 99:00 Min
0.00~ 99.0 km
10 ~ 9990 Cal
± 1:00
±1
± 10
Valeur prédéfinie = 5:00 Min
Valeur prédéfinie = 5 km
Valeur prédéfinie = 500 Cal
Actionnez la touche EINGABE (Reste/Saisie) pour 3. Sec.
pour sélectionner le paramètre d’entraînement voulu et
réglez ensuite la valeur souhaité avec l’aide de la touche
STEIGUNGS- ou TEMPO touche (plus vite/plus lent).
Si vous ne souhaitez pas définir un paramètre d’entraînement, vous pouvez le sauter et passer au paramètre
suivant en actionnant la touche EINGABE (Reset/Saisie).
Vous pouvez commencer à courir après avoir saisi le paramètre d’entraînement voulu. Actionnez pour cela la
touche START. L’appareil émet un signal sonore immédiatement avant le démarrage de la bande de déroulement.
Vous pouvez adapter la vitesse de manière individuelle
avec les touches TEMPO (plus vite/plus lent) ou avec les
touches RUN/JOGGEN/WALK (course/jogging/marche).
La bande de déroulement atteint très vite la vitesse cible
définie. Vous pouvez de même varier l ’inclinaison par
l’intermédiaire des touches fléchées STEIGUNG (montée)
ou avec les touches de sélection rapide 9/6/3.
L’entraînement est terminé dès que le paramètre d’entraînement prédéfini est atteint. Un signal sonore est
émis avant que le tapis roulant hors dignal.
C Manuel
Vous pouvez également vous entraîner en mode Manuel
au lieu de recourir aux programmes ou aux paramètres
d’entraînement prédéfinis. Ce programme vous permet de
régler la vitesse manuellement, ainsi que de l’adapter à
tout moment pendant l’entraînement.
Pour démarrer le programme manuel d’entraînement, actionnez la touche START. Si vous avez saisi auparavant un
paramètre d’entraînement ou sélectionné l’un des 25 programmes d’entraînement, vous devez alors retirer brièvement la clé de sécurité de la console pour effacer les
valeurs saisies. L’appareil émet un signal sonore immédiatement avant le démarrage de la bande de déroulement.
La vitesse de démarrage est de 1 km/h. Vous pouvez adapter la vitesse de manière individuelle à tout moment
pendant l’entraînement avec les touches TEMPO (plus
vite/plus lent) ou avec les touches RUN/JOGGEN/WALK
(course/jogging/marche). La bande de déroulement atteint très vite la vitesse cible définie. Vous pouvez de
même varier l’inclinaison par l’intermédiaire des touches
fléchées STEIGUNG (montée) ou avec les touches de sélection rapide 9/6/3. L’entraînement sera arrêté en actionnant la touche STOP.
F-72
REX_Trainer_TX800_12.indd F-72
22.05.12 15:34
Entretien/Maintenance
Entretien/Maintenance
Débranchez impérativement le connecteur d’alimentation
électrique de la prise avant toute intervention d’entretien ou de maintenance ! DANGER DE MORT !
Nous recommandons de contrôler régulièrement, soit toutes
les 2 à 4 semaines environ ou bien en fonction de la fréquence d’utilisation, tous les éléments de l’appareil qui présentent un risque de desserrage (vis, écrous et simil.). Pour
le nettoyage et l’entretien, utilisez un chiffon doux, éventuellement légèrement humide. N’utilisez en aucun cas de
produits nettoyants agressifs. Veillez à ce qu’aucun liquide
n’entre en contact avec la console d’entraînement et l’intérieur de l’appareil, car ces derniers pourraient entraîner
des dysfonctionnement importants. Des résidus d’usure de la
courroie d’entraînement peuvent apparaître à la partie inférieure de l’appareil. Ceci est tout à fait normal.
Centrage de la bande de déroulement
ATTENTION
Assurez-vous que le tapis de course n’est pas en marche
pendant le centrage. Pour plus de précautions, retirez la
clé de sécurité.
Tendre la bande de déroulement :
FRANÇAISE
DANGER
Si la bande de déroulement est décentrée vers la gauche,
tournez la vis de réglage droite dans le sens inverse des aiguilles d’une montre (¼ de tour à chaque fois max). Faites
ensuite tourner la bande de déroulement pendant au moins
2 rotations pour contrôler que le recentrage est suffisant.
Répétez la procédure le cas échéant jusqu’à ce que la bande
de déroulement soit centrée.
ATTENTION
Veillez à ce que la bande de déroulement ne soit pas
trop tendue car ceci peut entraîner une usure accrue,
voire des dommages.
Vous pouvez tendre la bande de déroulement avec une clé
Allen M6 à l’extrémité arrière du châssis (cf. ill.). Tournez
les vis de réglage gauche et droite de manière identique
d’un quart de tour chacune vers la droite (sens des aiguilles
d’une montre). Utilisez pour cela une clé Allen M6. Mettez
ensuite en marche le tapis de course et contrôlez si la tension de la bande de déroulement est suffisante.
➡
➡
Après une longue période d’immobilisation ou après un
transport, il peut arriver que la bande de déroulement ne
soit plus alignée au centre de l’appareil ou qu’elle « dérape »
pendant l’entraînement. Dans un tel cas, la bande de déroulement doit être de nouveau centrée sous peine d’entraîner
des dommages et des dysfonctionnements.
Centrer la bande de déroulement :
Vous pouvez centrer la bande de déroulement avec une clé
Allen M6 à l’extrémité arrière droite du châssis (cf. ill.).
Si la bande de déroulement est décentrée vers la droite,
tournez la vis de réglage droite dans le sens des aiguilles
d’une montre (¼ de tour à chaque fois max). Faites ensuite
tourner la bande de déroulement pendant au moins 2 rotations pour contrôler que le recentrage est suffisant. Répétez
la procédure le cas échéant jusqu’à ce que la bande de déroulement soit centrée.
Répétez la procédure jusqu’à ce que la bande de déroulement ne « dérape » plus lorsque vous courez dessus. N’effectuez pourtant jamais plus d’un quart de tour de vis après
chaque contrôle. Si la bande de déroulement est trop tendue, desserrez les deux vis de réglage de manière identique.
F-73
REX_Trainer_TX800_12.indd F-73
22.05.12 15:34
Entretien/Maintenance
Lubrification de la bande de déroulement
ATTENTION
Assurez-vous que le tapis de course n’est pas en marche
pendant le centrage. Pour plus de précautions, retirez la
clé de sécurité.
Le tapis de course est construit de telle sorte qu’il n’exige
qu’un minimum de maintenance. Il est toutefois nécessaire
de renouveler de temps en temps la lubrification du plateau
de course. Une lubrification soigneuse garantit un fonctionnement conforme et prolonge la durée de vie de l’appareil.
Nous recommandons de procéder à la première lubrification
au bout des 25 premières heures d’utilisation (2–3 mois) et
ensuite, toutes les 50 heures (env. 5–8 mois). Utilisez l’huile
de silicone disponible dans le commerce ou par pulvérisation.
Lubrification
DANGER
Ne pas appliquer trop de lubrifiant – Un demi-tube au
maximum par intervention ! Essuyez ensuite avec un
chiffon le lubrifiant superflu qui pourrait éventuellement
ressortir sur les côtés. RISQUE DE CHUTE !
1. Soulevez un côté du tapis de course.
2. Appliquez au maximum la moitié du tube de lubrifiant
(fourni) sur la surface du plateau de course (cf. ill.).
3. Courez ensuite pendant environ 3 à 5 minutes à faible
vitesse sur le tapis de course pour que le lubrifiant puisse
se répartir.
Contrôle
Soulevez l’un des côtés du tapis de course et touchez la face
supérieure du plateau de course. Si vous sentez encore du
silicone, aucune lubrification n’est encore nécessaire. Si, par
contre, la surface est sèche, vous devez renouveler la lubrification du plateau de course.
F-74
REX_Trainer_TX800_12.indd F-74
22.05.12 15:34
Caractéristiques techniques · Élimination
Caractéristiques techniques
Dimensions : ca. 178 cm (L) x 80 cm (B) x 138 cm (H) env.
la vitesse de course :
1–16 km/h
Poids :
80 kg env.
le réglage du pas :
12-étape (1,25º–7,5º)
Classe :
HB
Puissance continue max délivrée : 1,3 KW
Charge max. :
130 kg
Puissance maximum :
FRANÇAISE
2,2 KW
Élimination
Éliminer l’appareil de remise en forme
En fin de vie, l’appareil de remise en forme
ne doit pas être éliminé avec les déchets
domestiques normaux. Il doit au contraire
être ramené à un point de collecte dédié au
recyclage des appareils électriques et électroniques.
Verpackungs-Recycling
Le matériel d’emballage est en partie recyclable. Éliminez l’emballage de manière écocompatible et ramenez-le à un point de collecte de déchets. L’élimination doit se faire à
un point de collecte public. Demandez à
votre commune/administration communale
où se trouve le point de collecte compétent.
F-75
REX_Trainer_TX800_12.indd F-75
22.05.12 15:34
Déclaration de conformité
F-76
REX_Trainer_TX800_12.indd F-76
22.05.12 15:34
Garantie
Garantie
• Les pièces soumises à l’usure, l’abrasion ou à la consommation (sauf les vices de matériau ou de fabrication indiscutables), p. ex. : – Palier – Moyen
d’éclairage – Autocollant – Courroie – Piles, etc.
1. Vous ne pouvez présenter vos droits à prestations de
garantie que pendant un délai de 2 ans maximum, à
compter de la date de l’achat. Nos prestations de garantie se limitent à l’élimination des vices de matériau et de
fabrication ou au remplacement de l’appareil. Nous nous
acquitterons de nos engagements de garantie – à notre
choix – par la remise en état de l’appareil. Notre garantie
est gratuite pour vous.
• Les livraisons de pièces de rechange pour les travaux de
réparation effectuées dans le cadre de la garantie
• La réparation ou le remplacement de la pièce défectueuse
(Les pièces remplacées redeviennent notre propriété.)
2. En cas de prétentions justifiées à la garantie, les coûts
d’expédition et les coûts de démontage et de montage
sont à notre charge. Les prétentions à prestations de
garantie doivent être démontrées par présentation du
justificatif d’achat.
3. L’acheteur s’engage à ne pas affecter le véhicule acheté à
un usage autre que celui qui est prévu dans le manuel de
l’utilisateur.
4. La garantie est annulée si l’appareil a été modifié par des
tiers ou par le montage de pièces de fournisseurs tiers, ou
bien si les défauts survenus présentent un lien de cause à
effet avec cette modification. Le droit à prestations de
garantie est également annulé en cas de non-respect des
prescriptions relatives à l’utilisation de l’appareil.
5. Sont exclus de la garantie :
• Les consommables non liés à des travaux de réparation
suite à des défaillances reconnues.
• Toutes opérations de maintenance ou autre travaux
résultant de l’usure, d’un accident ou de conditions
d’utilisation ou d’une conduite ne respectant pas les
prescriptions du fabricant.
6. Le droit à prestations de garantie autorise uniquement
le client à réclamer l’élimination du défaut. Les droits à
rendre la marchandise ou à la réduction du prix d’achat
vaudront seulement après l’échec des tentatives de réparation.
FRANÇAISE
L’analyse de la défaillance et des causes sera toujours
faite par notre service après-vente et englobe :
Les coûts relevant des opérations de maintenance, de
vérification et de nettoyage.
7. La vérification et la décision concernant un droit à prestations de garantie relèvent uniquement du fabricant.
8. La réparation d’un dommage direct ou indirect n’est pas
garantie.
9. Les prétentions à prestations de garantie ne seront
prises en compte que lorsqu’elles auront été présentées
à la société SI-Zweirad-Service GmbH immédiatement
après constatation des défauts.
10. La période de garantie ne sera ni renouvelée ni prolongée par la fourniture d’une prestation de garantie. La
réclamation de droits à prestations de garantie est exclue à l’issue du délai de garantie.
11. Toute autre convention que celles qui sont mentionnées
ci-dessus ne sont valables que si elles sont confirmées
par écrit par le fabricant.
12. Si votre appareil a été endommagé pendant le transport,
veuillez noter tous les dégâts sur le bon de livraison.
Faites signer la déclaration des dégâts par le livreur
(marché, agent de transport) et contactez-nous dans les
plus brefs délais.
13. Si vous deviez connaître un problème technique avec
l’appareil que vous venez d’acquérir, notre serviceaprèsvente se tient à votre disposition :
D
• Tous les phénomènes tels que bruits, vibrations, usure,
etc. qui ne gênent pas les caractéristiques fondamentales de l’appareil.
• Les dégâts imputables :
– au montage de pièces provenant de fournisseurs tiers
ou aux tentatives de l’utilisateur de réparer lui-même
les dégâts.
– à la non-utilisation de pièces détachées d’origine.
SI-Zweirad-Service GmbH Téléphone : 0 52 42 41 08 98 24
Lindenstraße 50
Télécopie : 0 52 42/41 08 72
33378 Rheda-Wiedenbrück Courriel : [email protected]
Allemagne
www.rex-sport.de
AT
CH
SI-Zweirad-Service GmbH Téléphone : + 49 52 42 41 08 98 24
Lindenstraße 50
Télécopie : + 49 52 42 41 08 72
33378 Rheda-Wiedenbrück Courriel : [email protected]
Allemagne
www.rex-sport.de
– aux dommages provoqués par le défaut d’entretien,
l’utilisation de produits d’entretien inappropriés, etc.
F-77
REX_Trainer_TX800_12.indd F-77
22.05.12 15:34
nb
brück
Postfach 21 24 • 33349 Rheda-Wiedenbrück
eMail: si-service왁prophete.nett
REX_Trainer_TX800_12.indd F-78
Technische Änderungen vorbehalten·Nachdruck
vorbehalten· Nachdruck verboten
verboten·
·Stand
Stand 04/2012·88733 · © Prophete GmbH u. Co. KG
Prophete GmbH u. Co. KG
22.05.12 15:34
Technische Änderungen vorbehalten Nachdruck verboten Stand 04/2012 88733
Prophete GmbH u. Co. KG
TX-800
R OUTINE
ISTRUZIONI PER L’USO
REX_Trainer_TX800_12.indd I-79
22.05.12 15:34
Indice
Indice
Premessa ................................................................................................................................................
Identificazione di indicazioni importanti ...................................................................................................
Indicazioni di sicurezza importanti ...........................................................................................................
Disegno esploso ......................................................................................................................................
Lista dei componenti ...............................................................................................................................
Montaggio ...............................................................................................................................................
Meccanismo di ribaltamento/trasporto ......................................................................................................
I-81
I-81
I-82
I-84
I-85
I-88
I-91
Istruzioni per l’allenamento .....................................................................................................................
Organizzazione dell’allenamento/avvertenze .............................................................................................
A Intensità .........................................................................................................................................
B Frequenza ........................................................................................................................................
C Motivazione .....................................................................................................................................
D Organizzazione delle unità di allenamento ............................................................................................
1. Fase di riscaldamento ....................................................................................................................
2. Fase di allenamento ......................................................................................................................
3. Fase di raffreddamento ...................................................................................................................
E Struttura muscolare ...........................................................................................................................
F Perdita di peso .................................................................................................................................
I-92
I-92
I-92
I-92
I-92
I-92
I-92
I-93
I-93
I-93
I-93
Uso ........................................................................................................................................................
Impostazioni iniziali .............................................................................................................................
Chiave di sicurezza ...............................................................................................................................
Funzioni dei tasti .................................................................................................................................
Informazioni visualizzate .......................................................................................................................
Programmi di allenamento .....................................................................................................................
A P1–P24/H1 .....................................................................................................................................
B Parametri di allenamento ...................................................................................................................
C Manuale ..........................................................................................................................................
I-94
I-94
I-94
I-94
I-95
I-95
I-95
I-98
I-98
Cura/manutenzione .................................................................................................................................
Dati tecnici .............................................................................................................................................
Smaltimento ...........................................................................................................................................
Garanzia .................................................................................................................................................
I-99
I-101
I-101
I-103
I-80
REX_Trainer_TX800_12.indd I-80
22.05.12 15:34
Premessa · Identificazione di indicazioni importanti
Premessa
Ci congratuliamo con Lei per l’acquisto del
nostro apparecchio per il fitness. Ora possiede
un prodotto di alta qualità che certamente Le
darà grandi soddisfazioni.
Prima di utilizzarlo per la prima volta, legga con attenzione
il manuale d’uso onde evitare possibili lesioni fisiche o danni all’apparecchio. Conservi con cura il manuale di istruzioni.
Cordiali saluti
Prophete GmbH u. Co. KG
Identificazione di indicazioni importanti
PERICOLO
Questa avvertenza richiama l’attenzione su possibili pericoli per la salute e l’incolumità dell’
utilizzatore o di altre persone, che possono derivare dall’utilizzo o dal funzionamento dell’apparecchio.
Questa informazione fornisce consigli e suggerimenti aggiuntivi.
ITALIANO
Le indicazioni particolarmente importanti all’interno del manuale di istruzioni sono contrassegnate nel modo seguente:
Questa avvertenza segnala i possibili pericoli
per l’apparecchio.
AVVERTENZA
I-81
REX_Trainer_TX800_12.indd I-81
22.05.12 15:34
Indicazioni di sicurezza importanti
Indicazioni di sicurezza importanti
Conservare con cura il manuale di istruzioni. In caso di vendita o cessione dell’apparecchio
per il fitness, consegnare anche il manuale al nuovo proprietario.
PERICOLO
È importante leggere attentamente l’intero contenuto delle istruzioni prima di assemblare ed utilizzare l’apparecchio.
Un impiego sicuro e performante si può ottenere solo se
l’apparecchio viene regolarmente montato e sottoposto a
manutenzione ed utilizzato correttamente. È vostro obbligo fare sì che tutti coloro che utilizzano questo apparecchio siano informati prima dell’uso circa i pericoli e le
misure precauzionali.
L’apparecchio è conforme alla norma DIN EN 957-1/6 ed
è idoneo solo all’uso domestico privato, non è indicato
per scopi commerciali e terapeutici.
Utilizzare l’apparecchio esclusivamente in ambienti chiusi e asciutti a temperatura ambiente. L’apparecchio deve
essere protetto dall’umidità, dalla polvere/sporcizia e
dalle variazioni estreme di temperatura.
Collocare l’apparecchio solo su una superficie stabile e
piana e utilizzare una copertura protettiva per il pavimento o il tappeto. Rimuovere tutti gli oggetti affilati
dalla zona circostante e lasciare intorno all’apparecchio
uno spazio libero di almeno 0,5 m.
Accertarsi che nessun tipo di liquido (incluso il sudore!)
penetri all’interno dell’apparecchio e nel fitness computer.
Utilizzare l’apparecchio solo nel modo indicato! Se durante il montaggio o il controllo si riscontrano componenti
difettosi o se durante l’utilizzo si percepiscono rumori
inconsueti, interrompere immediatamente l’allenamento.
Non utilizzare l’apparecchio fino a che il problema non è
stato risolto.
Prima di utilizzare la macchina da allenamento, controllare che tutte le viti e i dati siano fissati in modo sicuro
e serrati correttamente.
Il livello di sicurezza dell’apparecchio può essere mantenuto solo con regolari controlli volti ad accertare l’eventuale presenza di danni e usura. Le riparazioni devono
essere effettuate solo da personale qualificato e con
l’impiego di ricambi originali.
Tenere l’apparecchio lontano da bambini e animali domestici. Si tratta di un prodotto adatto esclusivamente per
gli adulti.
AVVERTENZA
L’apparecchio non è progettato per essere utilizzato da
persone con capacità fisiche, sensoriali o mentali limitate
o privi della necessaria esperienza e/o conoscenza, a
meno che non siano sorvegliati o ricevano istruzioni
sull’uso dell’apparecchio da una persona che è responsabile della loro sicurezza.
Il peso massimo dell’utente non deve superare i 130 kg.
Prima di intraprendere gli allenamenti, consultare un medico per stabilire se l’allenamento potrebbe costituire un
pericolo per la vostra salute. Il consiglio di un medico è
indispensabile se si assumono medicinali che influiscono
sulla frequenza cardiaca, la pressione sanguigna o la
colesterolemia.
Prestate attenzione ai segnali che il vostro corpo vi
manda! Un allenamento errato o eccessivo può compromettere la vostra salute o addirittura procurarvi danni.
Interrompere gli esercizi in presenza dei seguenti sintomi: dolore, tensione al petto, battito cardiaco irregolare,
affanno, sensazione di stordimento, vertigini o nausea.
Se si presenta anche una sola di queste condizioni, è
consigliabile consultare il medico curante prima di proseguire con il programma di allenamento.
Indossare indumenti adatti durante l’allenamento! Evitare i capi di abbigliamento ampi, con i quali potreste
restare agganciati all’apparecchio o che potrebbero limitare o impedire i movimenti. Durante l’allenamento indossare sempre calzature robuste.
La chiave di sicurezza serve a stoppare immediatamente
il nastro in caso di caduta o in situazioni d’emergenza.
Pertanto, non utilizzare mai il nastro senza aver prima
fissato accuratamente la clip di sicurezza al vostro indumento. Prima di iniziare l’allenamento, verificare che la
clip di sicurezza non possa staccarsi involontariamente
dal vostro indumento.
In situazione d’emergenza (ad es. vertigini improvvisi,
dolori, ecc.), scendere dall’apparecchio da allenamento
nel seguente modo:
1. Tenersi saldamente alle impugnature laterali.
2. Scendere con i piedi sulle pedane laterali.
3. Staccare la chiave di sicurezza.
Non saltare mai mentre il nastro è in funzione!
I-82
REX_Trainer_TX800_12.indd I-82
22.05.12 15:34
Indicazioni di sicurezza importanti
Conservare con cura il manuale di istruzioni. In caso di vendita o cessione dell’apparecchio
per il fitness, consegnare anche il manuale al nuovo proprietario.
PERICOLO
Consentono la cintura sono completamente a fermo prima
di scendere.
Procedere con cautela durante il sollevamento e lo spostamento dell’apparecchio, onde evitare danni alla schiena o simili. Se possibile utilizzare apposite tecniche di
sollevamento o chiedere aiuto ad altri.
ITALIANO
Dopo l’allenamento, per la pulizia o per la manutenzione,
spegnere l’apparecchio e staccare la spina dalla presa
elettrica.
AVVERTENZA
I-83
REX_Trainer_TX800_12.indd I-83
22.05.12 15:34
Disegno esploso
Disegno esploso
I-84
REX_Trainer_TX800_12.indd I-84
22.05.12 15:34
Lista dei componenti
74.
99.
100.
101.
125.
126.
ITALIANO
Lista dei componenti
44.
104.
103.
Nr.
1
2
3
4
5
6
7
8
Descrizione
Telaio principale
Struttura inferiore
Angolo di inclinazione
Longherone destro
Longherone sinistro
Consolle
Cavo esterno
Cavo interno
102.
Dimensione
Quantità
1
1
1
1
1
1
1
1
I-85
REX_Trainer_TX800_12.indd I-85
22.05.12 15:34
Lista dei componenti
Nr.
9
10
11
12
13
14
15
16
16~3
17
19
20
21
21-1
21-2
21-3
21-6
21-10
21-12
21-13
22
23
24
25
26
27
28
29
30
31
32
33
34
35
36
37
38
40
41
42
43
44
45
46
47
48
49
50
51
52
53
55
57
58
59
60
61
62
63
64
65
66
Descrizione
Manopola di bloccaggio
Motore inclinazione
Cinghia trapezoidale
Supporto motore
Motore
Nastro
Piano di corsa
Rullo anteriore
Magnete
Rullo posteriore
Bussola
Bussola
Display
Lato anteriore display
Lato posteriore display
Copertura
Ventola
Vite per lamiera
Cavo di collegamento display
Cavo computer
Supporto display
Copertura struttura inferiore (S)
Copertura struttura inferiore (D)
Copertura motore alta
Base adattamento posteriore (S)
Base adattamento posteriore (D)
Gruppo velocità/hand pulse
Gruppo inclinazione/hand pulse
Interruttore circuito
Interruttore on/off
Tappo
Rotella per trasporto anteriore
Rotella per trasporto posteriore
Piedini in gomma
Impugnatura
Scorrimento laterale
Gomma antiscivolo
Copertura motore
Tappo
Tappo
Tappo
Chiave di sicurezza
Presa
Cavo
Spina
Cavo elettrico
Cavo di collegamento (bianco)
Cavo di collegamento (nero)
Cavo di collegamento (nero)
Regolatore
Cavo computer longherone
Cavo computer consolle
Copertura per pavimento
Vite a testa esagonale
Vite a brugola
Vite a testa esagonale
Vite a testa esagonale
Vite a testa esagonale
Vite a testa esagonale
Vite a testa esagonale
Vite a brugola
Vite a brugola
Dimensione
3.5 × 32 m/m
150 m/m_12P
200 m/m_10P
21.4 × 21.4 m/m
25.4 × 25.4 m/m
20 × 40 m/m
800 m/m
1000 m/m
20 cm × 764 × 764
20 cm × 764 × 764
100 m/m
1900 m/m
650 m/m
1/2" × 1"
3/8" × 3-3/4"
3/8" × 1-3/4"
3/8" × 1-1/2"
3/8" × 3/4"
M8 × 60 m/m
M8 × 12 m/m
5/16" × 1"
3/8" × 4"
Quantità
1
1
1
1
1
1
1
1
1
1
2
2
1
1
1
1
1
4
1
1
2
1
1
1
1
1
1
1
1
1
2
2
2
6
2
2
2
5
1
1
2
1
1
1
1
1
2
1
1
1
1
1
1
2
1
1
1
4
1
2
2
1
I-86
REX_Trainer_TX800_12.indd I-86
22.05.12 15:34
Lista dei componenti
Descrizione
67
68
69
70
73
74
75
76
77
78
79
80
81
82
82
83
84
85
86
87
88
89
90
90-1
90-3
90-5
90-7
91
92
93
94
95
96
98
99
100
101
102
103
104
105
106
110
111
112
113
114
125
126
128
129
130
131
132
133
134
135
136
137
138
139
140
Vite a testa piatta
Vite
Perno
Vite a testa piatta
Vite
Vite per lamiera
Dado
Dado
Dado
Dado
Rondella elastica
Rondella elastica
Rondella elastica
Rondella
Rondella
Rondella
Rondella
Pignone in nylon
Pignone in nylon
Rondella
Rondella
Clip dado a chiusura rapida
Montaggio portaborraccia
Portaborraccia
Modulo switch di sicurezza
Vite per lamiera
Cavo di collegamento
Vite per lamiera
Passaggio cinghia
Vite per lamiera
Vite per lamiera
Cilindro
Vite a testa piatta svasata
Vite a testa esagonale
Vite a testa esagonale
Rondella
Rondella
Chiave a brugola/a croce
Chiave a brugola
Lubrificante
Tappo
Copertura
Vite per lamiera
Vite per lamiera
connettori cavi
Bordo piede (D)
Bordo piede (S)
Vite a croce
Vite a croce
Vite a croce
Rivestimento manubrio esterno (S)
Rivestimento manubrio esterno (D)
Rivestimento manubrio inferiore interno (D)
Rivestimento manubrio inferiore interno (S)
Rivestimento manubrio superiore interno (S)
Rivestimento manubrio superiore interno (D)
Vite per lamiera
Tappo
Sportello starter
Filtro
Cavo di collegamento motore
Vite per lamiera
Dimensione
3/8" × 2"
1/2" × 28 m/m
M8 × 3"
M6 × 1"
5 × 16 m/m
3.5 × 12 m/m
1/2" × 8T
3/8" × 7T
5/16" × 7T
M8 × 7T
3/8" × 2T
M8 × 1.5T
M5
3/8" × 19 × 1.5T
3/8" × 19 × 1.5T
3/8" × 25 × 2T
Ø 5 × Ø 13 × 1.0T
Ø 50 × Ø 13 × 3T
Ø 10 × Ø 25 × 3T
Ø 6.5 × Ø 25 × 1.5T
M5
5 × 2T
300 m/m
3 × 10 m/m
250 m/m
14 × 12 m/m
5 × 16 m/m
5 × 19 m/m
M8 × 1" × 1/4"
3/8" × 3"
5/16" × 1/2"
5/16" × 18 × 1.5T
5/16" × 23 × 1.5T
M5
M6 (66 × 88)
3.5 × 20 m/m
3.5 × 16 m/m
M5 × 25 m/m
M5 × 35 m/m
M5 × 12 m/m
3 × 63 m/m
400 m/m
4 × 19 m/m
Quantità
4
2
2
6
13
22
4
6
2
1
6
2
3
6
6
5
10
4
2
8
3
2
1
1
1
2
1
2
2
22
8
1
2
1
14
6
8
1
1
1
2
1
2
5
5
1
1
2
2
7
1
1
1
1
1
1
2
2
1
1
1
4
ITALIANO
Nr.
I-87
REX_Trainer_TX800_12.indd I-87
22.05.12 15:34
Montaggio
Montaggio
FASE 1
AVVERTENZA
1. Estrarre con cautela il nastro dal cartone ed appoggiarlo su una superficie libera e piana.
FASE 2
AVVERTENZA
1. Collegare il cavo computer inferiore (53) al cavo
computer del longherone destro (4).
2. Inserire i due longheroni (S,D / 5, 4) nella struttura
inferiore (2) ed avvitarli con otto viti da 5/16" ×
1/2" (99), quattro rondelle 5/16" × 18 × 1.5T (100)
e quattro rondelle 5/16" × 23 × 1.5T (101). Per stringere utilizzare la chiave a brugola fornita (102).
I-88
REX_Trainer_TX800_12.indd I-88
22.05.12 15:34
Montaggio
Montaggio
FASE 3
AVVERTENZA
ITALIANO
1. Collegare il cavo computer della consolle (55) al cavo
computer del longherone (53).
2. Fissare poi la consolle (6) ai due longheroni (S,D/5,
4) con sei viti da 5/16" × 1/2" (99), due rondelle
5/16" × 18 × 1.5T (100) e quattro rondelle 5/16" ×
23 × 1.5T (101). Per stringere utilizzare la chiave a
brugola fornita (102).
FASE 4
AVVERTENZA
1. Montare i rivestimenti esterni del manubrio (S, D/
129, 130) alle estremità della consolle (6) con quattro
viti 3.5 × 12 m/m (74). Stringere bene le viti con
l’utensile fornito (102).
I-89
REX_Trainer_TX800_12.indd I-89
22.05.12 15:34
Montaggio
Montaggio
FASE 5
AVVERTENZA
1. Collegare il cavo computer della consolle (55) al cavo
computer del display (21-13).
2. Collegare anche il cavo (90-7) con (21-12).
3. Gli apparecchi vengono proposti con ricevitore HR
opzionale. Se il vostro apparecchio ne dispone, collegare il cavo (21-14) con il cavo (90-8).
FASE 6
AVVERTENZA
1. Spingere con cautela il display (21) nel supporto della consolle (6) ed avvitare le due parti con due viti
M5 x 25 mm (125) e due viti M5 x 35 mm (126).
Utilizzare anche in questo caso l’utensile fornito
(102).
I-90
REX_Trainer_TX800_12.indd I-90
22.05.12 15:34
Meccanismo di ribaltamento/trasporto
Meccanismo di ribaltamento/trasporto
Apertura
2
1. Posizionarsi dietro l’apparecchio e tirare la manopola di
bloccaggio (Fig. 1).
2. Abbassare lentamente il nastro sul pavimento. (Fig. 2)
Chiusura
ITALIANO
1. Tirare con la mano destra la manopola di bloccaggio
(Fig. 3) e sollevare con la mano sinistra il nastro fino a
un ’altezza di circa 30 cm.
2. Sollevare quindi il nastro con entrambe le mani fino a che
non scatta saldamente in posizione bloccata. (Fig. 4)
Trasporto
Per spostare il nastro, prima è necessario chiudere l’apparecchio (v. punto «Chiusura»). Accertarsi che la manopola
di bloccaggio sia saldamente bloccata in posizione.
Inclinare lentamente il nastro all’indietro fino ad appoggiarlo sulle rotelle. A questo punto è possibile spostare con
cautela l’apparecchio nel punto desiderato. Per la scelta di
una posizione idonea, seguire le avvertenze di sicurezza presenti all’inizio di questo manuale d’istruzioni.
3
1
4
I-91
REX_Trainer_TX800_12.indd I-91
22.05.12 15:34
Istruzioni per l’allenamento
Istruzioni per l’allenamento
L’utilizzo di un apparecchio per il fitness offre numerosi vantaggi. Permette di migliorare la forma fisica, di tonificare i
muscoli ed anche di perdere peso se abbinato a una dieta
ipocalorica.
ORGANIZZAZIONE DELL’ALLENAMENTO /
AVVERTENZE
Per ottenere un allenamento ottimale, prima di iniziare dovreste considerare alcuni aspetti importanti relativi alle sue
modalità (come allenarsi) e all’organizzazione dell’allenamento. Per migliorare la propria salute e il proprio fisico,
nella pianificazione dell’allenamento si dovrebbe tenere
conto dei seguenti fattori:
A Intensità
L’allenamento deve essere organizzato in modo tale che
la sollecitazione fisica durante l’allenamento sia superiore alla sollecitazione normale. Non devono però subentrare affanno o eccessiva spossatezza. Con un allenamento efficace, il battito cardiaco dovrebbe variare tra il 70%
e l’85% della soglia massima (v. anche il capitolo «Fase
di allenamento»).
Durante le prime settimane di allenamento, il battito
dovrebbe ammontare al 70% circa della soglia massima e
nelle settimane e nei mesi successivi dovrebbe lentamente salire fino all ’85%. Tali requisiti si possono incrementare, ad esempio, prolungando la durata dell’allenamento e/o aumentando i gradi di difficoltà in sintonia
con il miglioramento della condizione. Con i seguenti ausili è possibile controllare la propria frequenza cardiaca:
a) Potete percepire da soli il vostro battito cardiaco e
Misucontare i battiti al minuto (ad es. sul polso)
razione della frequenza cardiaca con il metodo tradizionale.
b) Potete misurare il battito mediante le superfici dei
sensori applicate sul manubrio.
c) Potete determinare la vostra frequenza cardiaca anche
mediante appositi cardiofrequenzimetri calibrati.
La misurazione del battito tramite il sensore è solo indicativa, poiché mediante il movimento, l’attrito, il sudore, ecc.
possono verificarsi differenze rispetto al battito effettivo.
In alcune persone, la variazione della resistenza cutanea
dovuta alle pulsazioni è talmente bassa che il risultato non
è sufficiente per una misurazione esatta del battito.
C Motivazione
Per portare a termine con successo un programma di allenamento, la costanza è un aspetto molto importante.
Anche la preparazione mentale e il fatto di stabilire un
momento e uno spazio sempre uguali per ogni unità di
allenamento contribuiscono alla riuscita. È consigliabile
non perdere mai di vista il proprio obiettivo personale e,
se possibile, allenarsi solo quando si è di buonumore. Per
notare un’evoluzione giorno dopo giorno ed avvicinarsi
all’obiettivo bisogna allenarsi con costanza.
D Organizzazione delle unità di allenamento
Esistono 3 fasi che dovrebbero essere eseguite in ogni
allenamento:
a) Fase di riscaldamento
b) Fase di allenamento
c) Fase di cool-down (raffreddamento)
1. Fase di riscaldamento
Questa fase contribuisce a una buona irrorazione sanguigna del corpo e ad un corretto funzionamento dei
muscoli. Inoltre riduce il rischio di crampi e lesioni
muscolari. Pertanto è consigliabile eseguire alcuni esercizi di allungamento (v. fig.) prima di ogni unità di allenamento. Ogni esercizio dovrebbe durare all’incirca 30 secondi. In questa fase, evitate i movimenti bruschi e non
caricate i muscoli. Interrompete l’esercizio di allungamento non appena sentite dolore.
FLESSIONE DEL TRONCO
FLESSIONE LATERALE
B Frequenza
Gli esperti consigliano 3–5 unità di allenamento alla settimana a seconda dell’obiettivo. L’allenamento dovrebbe
essere accompagnato da un’alimentazione sana e bilanciata. Un adulto medio ha bisogno di almeno 3 unità di
allenamento alla settimana per ottenere una variazione
del peso corporeo o un miglioramento della forma fisica,
oppure di 2 unità di allenamento alla settimana per mantenere la condizione attuale.
LATO INTERNO/
COSCIA
LATO ESTERNO/
COSCIA
POLPACCIO/TALLONE
I-92
REX_Trainer_TX800_12.indd I-92
22.05.12 15:34
Istruzioni per l’allenamento
2. Fase di allenamento
E Struttura muscolare
Durante l’allenamento, abbiate l’accortezza di mantenere
una velocità costante e senza interruzioni. Per un allenamento ottimale, il carico dovrebbe essere scelto in modo
tale che il battito cardiaco raggiunga un valore pari al 70 –
85% circa della soglia massima (zona target). Sulla base
del grafico potrete leggere la zona target adatta a voi:
Per sviluppare i muscoli con l ’home trainer, è necessario
aumentare il carico di allenamento. Potreste anche riscontrare che il programma di allenamento, a causa delle
vostre condizioni di forma, non può essere mantenuto
per l ’intera lunghezza.
In questo caso bisogna modificare il programma di allenamento nel modo seguente:
MASSIMO
Zona target
Fase di
raffreddamento
ETÀ
La fase di allenamento dovrebbe durare almeno 12 minuti.
Per un principiante, l’allenamento dura normalmente circa
15–20 minuti.
Se dopo un po’ di tempo riscontrate un miglioramento del
vostro livello di forma fisica, dovreste allenarvi più a lungo e
con maggiore intensità.
Durante l’allenamento prestate attenzione alla postura:
• Tenere il busto il più possibile eretto
• Rivolgere lo sguardo in avanti
• Il movimento dovrebbe essere generato il più
possibile dalle gambe
Durante la fase di riscaldamento e di raffreddamento
dovreste allenarvi come di consueto. Al termine della fase
degli esercizi, però, aumentate il carico in modo tale che
le gambe si allenino con maggiore intensità. Se però superate la zona target delle pulsazioni dovete assolutamente
ridurre la velocità!
F Perdita di peso
Il corpo, proprio come un motore, ha bisogno di «carburante» per lavorare correttamente. La muscolatura riceve
ossigeno dall ’apparato cardiovascolare del corpo. Questo
ossigeno viene utilizzato per fornire energia ai muscoli,
ma anche per bruciare i carboidrati o i grassi. A causa
della composizione chimica, la trasformazione del grasso
corporeo in energia può avvenire solo se si svolge un
allenamento aerobico, ossia se è presente una quantità
sufficiente di ossigeno durante l’allenamento. Nell’allenamento anaerobico («senza respiro») predomina una
condizione di carenza d’ossigeno, per cui non è possibile
bruciare i grassi. Il corpo, tra il 50% e l’80% delle pulsazioni massime (pulsazioni massime = 220–l’età), dispone
ancora di sufficiente ossigeno e in questo intervallo può
ottenere i migliori risultati in riferimento alla combustione dei grassi. La combustione dei grassi aumenta quanto più frequentemente e a lungo si compie un allenamento di questo tipo.
ITALIANO
IMPULSO
• Non allenatevi senza usare le mani! –
Le braccia hanno lo scopo di stabilizzare il corpo.
• Durante l’allenamento, sollevare leggermente
i talloni come nello stile classico del fondo
• Cambiare frequentemente la posizione
dell’impugnatura
3. Fase di raffreddamento
Questa fase serve a rilassare i muscoli e il sistema cardiocircolatorio. A tale scopo, ad esempio, si può procedere a
velocità ridotta per circa 5 minuti. Quindi ripetere gli
esercizi di allungamento descritti nella fase 1. Anche
in questa fase, ricordatevi di non compiere movimenti
bruschi e di non caricare i muscoli.
I-93
REX_Trainer_TX800_12.indd I-93
22.05.12 15:34
Uso
Uso
IMPOSTAZIONI INIZIALI
Collegare la spina a una presa da 220/240 V (seguire le avvertenze di sicurezza!) e accendere l’apparecchio mediante
l’interruttore principale posto sul retro.
CHIAVE DI SICUREZZA
fig. 1
fig. 2
AVVERTENZA
Per questa ragione, non utilizzare mai il nastro senza
aver prima fissato accuratamente la clip 1 di sicurezza
al vostro indumento. Prima di iniziare l’allenamento,
verificare che la clip di sicurezza non possa staccarsi dal
vostro indumento.
Il nastro può essere messo in funzione soltanto se la chiave
di sicurezza 2 è inserita nel punto di contatto della consolle del computer.
(fig. simile)
START:
Con il pulsante START per avviare la formazione. A possibile
nell’ambito del programma di formazione brochenes repremere il pulsante START per continuare.
RESET/STOP:
Il RESET / STOP per accendere il tapis roulant fino a aderire
a un punto morto o premendo il selezionati s del programma
e valori di reset.
STEIGUNG (SLOPE):
Utilizzare i tasti freccia per regolare l’inclinazione del tapis
roulant. Finta con i tasti freccia sulla manopola sinistra
(vedi Figura 1) questa impostazione può anche cambiare.
2
EINGABE (INVIO):
Utilizzando il tasto ENTER per immettere i parametri di formazione.
1
2
La chiave di sicurezza serve a stoppare immediatamente il
nastro in caso di caduta o in altre situazioni d’emergenza.
Se la chiave di sicurezza 2 viene nuovamente inserita nella
consolle, è necessario immettere nuovamente tutti i programmi di allenamento o i parametri eventualmente inseriti
in precedenza!
FUNZIONI DEI TASTI
MODUS:
Premendo il tasto MODUS per un dato scegliere un programma di formazione.
TEMPO (SPEED):
Utilizzare i tasti freccia per regolare la velocità del tapis
roulant o fingere di cambiare in 0,5 km/h passi. Con i tasti
freccia sulla maniglia destra (vedi figura 2) può essere anche
controllare questa impostazione.
STEIGUNG (SLOPE) 9/6/3:
I tasti di scelta rapida è possibile impostare un 9/6/3 ilmpostare il tono giusto.
TEMPO RUN/JOGGEN/WALK:
Con i tasti di selezione rapida RUN/JOGGEN/WALK, è possibile una velocità prestabilita trova proprio.
RUN: 9 km/h
JOGGEN: 6 km/h
WALK: 3 km/h
I-94
REX_Trainer_TX800_12.indd I-94
22.05.12 15:34
Uso
INFORMAZIONI VISUALIZZATE
PROGRAMMI DI ALLENAMENTO
Le seguenti informazioni possono essere richiamate per la
visualizzazione:
A Programmi di allenamento (P1–P24/H1)
2. SPEED (velocità)
Il computer indica la velocità target impostata in km/h.
3. DISTANCE (distanza)
Il computer indica la distanza percorsa. In caso di impostazione di una distanza predefinita, la visualizzazione
avviene con il conto alla rovescia. Al raggiungimento del
valore impostato, l’apparecchio si ferma ed emette un
segnale acustico.
4. CALORIES (calorie)
Il computer indica le calorie consumate durante l’allenamento. Se viene inserito il numero di calorie da bruciare, il display esegue un conto alla rovescia fino a zero.
Al raggiungimento del valore impostato, l’apparecchio si
ferma ed emette un segnale acustico.
Si può scegliere fra 24 diversi programmi di allenamento.
Ogni unità di allenamento dura 30 minuti. I programmi P1–
P14 si distinguono per la sequenza e per la velocità del
nastro. I programmi P15–P24 si distinguono invece per la
velocità del nastro e per la regolazione della pendenza. Pertanto sono indicati solo le persone che godono di una buona
condizione atletica.
Nel programma H1 si inseriscono tramite il tasto INPUT il
tempo di allenamento desiderato (min. 5 minuti) e le proprie pulsazioni target personali (60–220 BPM). Il computer
adatta ogni 15 secondi l’inclinazione del nastro alle pulsazioni target.
Con il tasto MODE e i tasti freccia VELOCITÀ è possibile selezionare uno dei 24 programmi di allenamento o il programma H1. Il programma di allenamento corrente è visualizzato
al centro nella parte destra del display (P1–P24/H1). Premendo il tasto START è possibile avviare il programma selezionato.
ITALIANO
1. TIME (tempo)
Il computer indica il tempo di allenamento corrente. In
caso di impostazione di un tempo predefinito, il tempo
viene calcolato con il conto alla rovescia. Al raggiungimento del valore impostato, l’apparecchio si ferma ed
emette un segnale acustico.
Un adattamento individuale della velocità o dell’inclinazione
è possibile in ogni momento durante l’allenamento tramite
i tasti freccia VELOCITÀ e INCLINAZIONE.
5. PULSE (pulsazioni/battito cardiaco)
La visualizzazione PULSE riproduce la frequenza cardiaca
corrente in battiti al minuto. Il display può indicare valori corretti solo se i due sensori vengono impugnati correttamente. Potrebbero trascorrere fino a 2 minuti prima
di visualizzare la frequenza cardiaca.
6. INCLINE (inclinazione)
Il computer indica il valore dell’inclinazione impostato.
7. PROGRAM
Il computer indica il programma di allenamento impostato.
I-95
REX_Trainer_TX800_12.indd I-95
22.05.12 15:34
Uso
PROGRAMMA DI INDAGINI
Programma P1
Min
km/h
1
1
2
3
3
4
4
5
5
6
6
5
7
4
8
3
9
2
10 11 12 13 14 15 16 17 18 19 20 21 22 23 24 25 26 27 28 29 30
1 2 3 4 5 6 5 4 3 2 1 2 3 4 5 6 5 4 3 2 1
3
3
4
3
5
3
6
4
7
4
8
4
9
4
10 11 12 13 14 15 16 17 18 19 20 21 22 23 24 25 26 27 28 29 30
4 4 4 4 4 4 4 4 4 4 4 4 4 4 4 4 2 2 2 1 1
3
6
4
8
5
6
6
6
7
4
8
4
9
2
10 11 12 13 14 15 16 17 18 19 20 21 22 23 24 25 26 27 28 29 30
2 2 4 6 8 6 6 4 4 2 2 2 4 6 8 6 6 4 4 2 2
3
6
4
6
5
6
6
6
7
6
8
6
9
4
10 11 12 13 14 15 16 17 18 19 20 21 22 23 24 25 26 27 28 29 30
4 4 4 4 4 4 6 6 6 6 6 6 6 3 3 3 3 3 3 3 1
3
6
4
8
5
10
6
8
7
6
8
4
9
2
10 11 12 13 14 15 16 17 18 19 20 21 22 23 24 25 26 27 28 29 30
2 2 4 6 8 10 8 6 4 2 2 2 4 6 8 10 8 6 4 2 2
3
6
4
6
5
6
6
6
7
6
8
6
9
7
10 11 12 13 14 15 16 17 18 19 20 21 22 23 24 25 26 27 28 29 30
7 7 7 7 7 7 6 6 6 6 6 6 6 3 3 3 3 3 3 3 1
3
6
4
6
5
8
6
10
7
6
8
6
9
2
10 11 12 13 14 15 16 17 18 19 20 21 22 23 24 25 26 27 28 29 30
2 2 2 6 6 8 10 6 6 2 2 2 2 6 6 8 10 6 6 2 2
3
5
4
5
5
6
6
6
7
6
8
8
9
8
10 11 12 13 14 15 16 17 18 19 20 21 22 23 24 25 26 27 28 29 30
8 5 5 5 6 6 6 9 9 9 5 5 5 5 9 9 9 6 6 5 5
3
4
4
5
5
2
6
3
7
4
8
5
9
3
10 11 12 13 14 15 16 17 18 19 20 21 22 23 24 25 26 27 28 29 30
2 2 3 4 5 2 3 4 5 3 2 2 3 4 5 2 3 4 5 3 2
3
6
4
2
5
4
6
6
7
2
8
4
9
6
10 11 12 13 14 15 16 17 18 19 20 21 22 23 24 25 26 27 28 29 30
2 2 4 6 2 4 6 2 4 6 3 3 4 6 2 4 6 2 4 6 2
3
7
4
7
5
7
6
8
7
8
8
8
9
8
10 11 12 13 14 15 16 17 18 19 20 21 22 23 24 25 26 27 28 29 30
9 9 9 9 9 8 8 8 8 9 9 9 8 8 8 9 9 9 8 8 8
3
4
4
5
5
6
6
5
7
4
8
3
9
2
10 11 12 13 14 15 16 17 18 19 20 21 22 23 24 25 26 27 28 29 30
1 1 3 4 5 6 5 4 3 2 1 1 3 4 5 6 5 4 3 2 1
3
6
4
8
5
6
6
6
7
4
8
4
9
2
10 11 12 13 14 15 16 17 18 19 20 21 22 23 24 25 26 27 28 29 30
2 1 4 6 8 6 6 4 4 2 2 1 4 6 8 6 6 4 4 2 2
Programma P2
Min
km/h
1
1
2
3
Programma P3
Min
km/h
1
2
2
4
Programma P4
Min
km/h
1
2
2
6
Programma P5
Min
km/h
1
3
2
4
Programma P6
Min
km/h
1
3
2
6
Programma P7
Min
km/h
1
4
2
2
Programma P8
Min
km/h
1
4
2
5
Programma P9
Min
km/h
1
5
2
3
Programma P10
Min
km/h
1
6
2
4
Programma P11
Min
km/h
1
6
2
6
Programma P12
Min
km/h
1
7
2
3
Programma P13
Min
km/h
1
8
2
4
I-96
REX_Trainer_TX800_12.indd I-96
22.05.12 15:34
Uso
Programma P14
Min
km/h
1
9
2
9
3
9
4
8
5
8
6
8
7
8
8
8
9
7
10 11 12 13 14 15 16 17 18 19 20 21 22 23 24 25 26 27 28 29 30
7 7 7 6 6 6 6 5 5 5 5 4 4 4 4 3 3 2 2 1 1
3
5
5
4
6
6
5
5
3
6
6
4
7
6
5
8
5
6
9
4
5
10 11 12 13 14 15 16 17 18 19 20 21 22 23 24 25 26 27 28 29 30
2 1 2 3 6 7 6 6 5 4 2 6 5 3 6 4 3 6 5 4 2
4 3 4 5 6 3 4 5 6 3 4 3 4 5 6 3 4 5 6 5 4
3
5
5
4
5
8
5 6 7
5 5 5
10 12 10
8
5
8
9
5
6
10 11 12 13 14 15 16 17 18 19 20 21 22 23 24 25 26 27 28 29 30
5 5 5 5 5 5 5 5 5 5 5 5 5 5 5 5 5 5 5 5 5
4 2 4 6 8 10 12 10 8 6 4 2 4 6 8 10 11 10 8 6 4
3
3
7
4
3
9
5
3
11
6
9
9
7
9
7
8
9
7
9
9
3
10 11 12 13 14 15 16 17 18 19 20 21 22 23 24 25 26 27 28 29 30
7 7 7 6 6 9 9 9 9 5 5 5 7 7 7 7 6 6 6 6 6
3 3 7 7 9 11 9 7 7 3 3 3 7 7 9 11 9 7 7 3 3
3
6
3
4
6
5
5
8
9
6
10
4
7
6
2
8
6
4
9
2
6
10 11 12 13 14 15 16 17 18 19 20 21 22 23 24 25 26 27 28 29 30
2 1 2 6 6 8 10 6 6 2 2 1 2 6 6 8 10 6 6 2 2
8 10 12 1 2 3 4 5 6 7 8 9 2 1 2 1 2 1 1 2 0
3
4
2
4
5
3
5
2
4
6
3
4
7
4
3
8
5
2
9
3
1
10 11 12 13 14 15 16 17 18 19 20 21 22 23 24 25 26 27 28 29 30
2 1 3 4 5 2 3 4 5 3 2 1 3 4 5 2 3 4 5 3 2
0 1 1 2 3 4 4 3 2 1 0 1 1 2 3 4 4 3 2 1 0
3
6
5
4
2
7
5
4
9
6
6
11
7
2
9
8
4
7
9
6
5
10 11 12 13 14 15 16 17 18 19 20 21 22 23 24 25 26 27 28 29 30
2 1 4 6 2 4 6 2 4 6 2 1 4 6 2 4 6 2 4 6 2
3 1 3 5 7 9 11 9 7 5 3 1 3 5 7 9 11 9 7 5 3
3
3
3
4
3
3
5
3
3
6
3
3
7
3
3
8
3
3
9
4
6
10 11 12 13 14 15 16 17 18 19 20 21 22 23 24 25 26 27 28 29 30
4 4 4 4 4 4 5 5 5 5 5 5 5 6 6 6 6 6 6 7 7
6 6 6 6 6 6 10 10 10 10 10 10 10 3 3 3 3 3 3 0 0
3
4
9
4
4
9
5
4
9
6
4
9
7
4
9
8
4
9
9
6
9
10 11 12 13 14 15 16 17 18 19 20 21 22 23 24 25 26 27 28 29 30
6 6 6 6 6 6 8 8 8 8 8 8 8 5 5 5 5 5 5 3 3
9 9 9 9 9 9 9 9 9 9 9 9 9 9 9 9 9 9 9 9 9
Programma P15
Min
km/h
1
3
Incliazione 3
2
4
4
Min
km/h
1
5
Incliazione 2
2
5
4
Programma P17
Min
km/h
1
5
Incliazione 3
2
5
7
ITALIANO
Programma P16
Programma P18
Min
km/h
1
1
Incliazione 7
2
2
5
Programma P19
Min
km/h
1
2
Incliazione 3
2
3
1
Programma P20
Min
km/h
1
3
Incliazione 1
2
4
3
Programma P21
Min
km/h
1
2
Incliazione 0
2
3
3
Programma P22
Min
km/h
1
2
Incliazione 9
2
4
9
Programma P23
Min
km/h
1 2 3 4 5 6 7 8 9 10 11 12 13 14 15 16 17 18 19 20 21 22 23 24 25 26 27 28 29 30
2 4 4 4 4 4 4 4 6 6 6 6 6 6 6 8 8 8 8 8 8 8 6 6 6 6 6 6 5 5
Incliazione 10 10 10 10 10 10 10 10 10 10 10 10 10 10 10 10 10 10 10 10 10 10 10 10 10 10 10 10 10 10
Programma P24
Min
km/h
1
3
Incliazione 0
2
4
9
3
4
9
4
4
9
5
4
9
6
4
9
7
4
9
8
4
9
9
7
9
10 11 12 13 14 15 16 17 18 19 20 21 22 23 24 25 26 27 28 29 30
7 7 7 7 7 7 12 12 12 12 12 12 12 3 3 3 3 3 3 3 1
9 9 9 9 9 9 9 9 9 9 9 9 9 9 9 9 9 9 9 9 9
I-97
REX_Trainer_TX800_12.indd I-97
22.05.12 15:34
Uso
B Parametri di allenamento
In questo programma è possibile impostare uno dei tre
parametri di allenamento disponibili. I parametri di allenamento sono impostazioni target che è possibile im-
postare in base al proprio stato di forma, alla propria
motivazione o al tempo disponibile.
Si può scegliere tra i seguenti parametri di allenamento:
Parametro
Intervallo
Incremento/decremento
Osservazioni
TIME (Tempo)
DIST (Distanza)
CAL (Calorie)
0:00~ 99:00 Min
0.00~ 99.0 km
10 ~ 9990 Cal
± 1:00
±1
± 10
valore predefinito = 5:00 Min
valore predefinito = 5 km
valore predefinito = 500 Cal
Premere il tasto EINGABE per 3 Sec. per selezionare il parametro di allenamento desiderato e poi inserire il valore
desiderato mediante il tasto STEIGUNG e i tasto TEMPO.
Se non si vuole impostare un parametro di allenamento,
è possibile passare al successivo con il tasto EINGABE.
Una volta inserito il parametro desiderato, è possibile
iniziare la corsa. A tale scopo, premere il tasto START/
STOP. L’apparecchio emette un segnale acustico subito
prima dell’avvio del nastro. È possibile adattare individualmente la velocità mediante i tasti TEMPO e i tasti RUN/
JOGGING/WALK. Dopo breve tempo il nastro raggiunge la
velocità target impostata. È possibile variare l’inclinazione
tramite i tasti freccia INCLINAZIONE o i tasti di selezione
rapida 9/6/3.
L’allenamento si conclude non appena viene raggiunto il
parametro di allenamento impostato. Un segnale acustico prima dignal off il tapis roulant.
C Manuale
Invece che con uno dei programmi o parametri di allenamento impostati, è possibile allenarsi anche con il cosiddetto programma manuale. In questo programma è possibile impostare manualmente la velocità e adattarla in
qualsiasi momento anche durante l’allenamento.
Il programma di allenamento manuale si avvia premendo
il tasto START. Se in precedenza è stato impostato uno
dei parametri di allenamento o se è stato selezionato uno
dei 25 programmi di allenamento, prima è necessario estrarre brevemente la chiave di sicurezza per cancellare i
valori inseriti. L’apparecchio emette un segnale acustico
subito prima dell’avvio del nastro. La velocità iniziale è
pari a 1 km/h. È possibile adattare individualmente la
velocità in qualsiasi momento dell’allenamento mediante
i tasti TEMPO e i tasti RUN/JOGGING/WALK. Dopo breve
tempo il nastro raggiunge la velocità target impostata. È
possibile variare l’inclinazione tramite i tasti freccia INCLINAZIONE o i tasti di selezione rapida 9/6/3. L’allenamento si conclude premendo il tasto STOP.
I-98
REX_Trainer_TX800_12.indd I-98
22.05.12 15:34
Cura/manutenzione
Cura/manutenzione
Prima di tutte le operazioni di cura e manutenzione, è
obbligatorio staccare la spina dalla presa! PERICOLO DI
MORTE!
Raccomandiamo di controllare regolarmente, all’incirca ogni
2–4 settimane a seconda della frequenza d’uso, tutte le parti dell’apparecchio che potrebbero allentarsi (viti, dadi e
simili). Per la cura e la pulizia utilizzare un panno morbido,
eventualmente leggermente inumidito. Non utilizzare mai
detergenti aggressivi. I liquidi di ogni tipo dovrebbero essere tenuti a distanza dal computer o dall’interno dell’apparecchio, poiché potrebbero causare problemi di funzionamento di seria entità. Nella parte inferiore dell’apparecchio la
gomma potrebbe usurarsi a causa della cinghia. Si tratta di
un fenomeno assolutamente normale.
Regolazione del nastro
AVVERTENZA
Tensionamento del nastro:
AVVERTENZA
Accertarsi che il nastro non venga teso eccessivamente,
poiché questo potrebbe comportare una maggiore usura
o addirittura un danneggiamento.
ITALIANO
PERICOLO
Se il nastro è scivolato verso sinistra, ruotare la vite di regolazione sinistra in senso orario (max. ¼ di giro ogni volta).
Quindi far scorrere il nastro per almeno 2 giri per controllare
se la regolazione è sufficiente. Eventualmente ripetere questa operazione fino a che il tappeto non è centrato.
Il nastro può essere teso mediante le due viti di regolazione
che si trovano all’estremità posteriore destra del telaio principale (v. Fig.). Ruotare uniformemente verso destra (in senso orario) le viti di regolazione sinistra e destra di un quarto
di giro ciascuna. A tale scopo utilizzare una chiave a brugola M6. Quindi mettere in moto il nastro e controllare se è
sufficientemente teso.
➡
➡
Accertarsi che il nastro non sia in funzione durante la
regolazione. Staccare la chiave di sicurezza per evitare i
rischi.
Dopo un tempo di utilizzo prolungato o dopo il trasporto,
può accadere che il nastro non sia più perfettamente centrato o che «scivoli via» durante l’allenamento. In questo caso
è necessario regolare nuovamente il nastro, poiché in caso
contrario potrebbero verificarsi danni e difetti di funzionamento.
Centratura del nastro:
Il nastro può essere regolato mediante una chiave a brugola
M6 all’estremità posteriore destra del telaio principale (v.
Fig.).
Ripetere l’operazione fino a che il nastro non cessa di «scivolare via» durante la corsa. Non ruotare mai le viti di regolazione di più di un quarto di giro dopo ogni controllo. Se il
nastro dovesse risultare troppo teso, allentare le due viti di
regolazione in modo uniforme.
Se il nastro è scivolato verso destra, ruotare la vite di regolazione destra in senso orario (max. ¼ di giro ogni volta).
Quindi far scorrere il nastro per almeno 2 giri per controllare
se la regolazione è sufficiente. Eventualmente ripetere questa operazione fino a che il tappeto non è centrato.
I-99
REX_Trainer_TX800_12.indd I-99
22.05.12 15:34
Cura/manutenzione
Lubrificazione del nastro
AVVERTENZA
Accertarsi che il nastro non sia in funzione durante la
regolazione. Staccare la chiave di sicurezza per evitare i
rischi.
Il nastro è stato progettato in modo tale da richiedere un
minimo impegno per la manutenzione. Tuttavia, di tanto in
tanto è necessario lubrificare un po’ il piano di corsa. Una
lubrificazione accurata garantisce un funzionamento regolare
e prolunga la durata utile dell’apparecchio. Raccomandiamo
di eseguire la prima lubrificazione non oltre le prime 25 ore
di funzionamento (2–3 mesi) e poi ogni 50 ore di funzionamento (5–8 mesi circa). Usano olio di silicone disponibili in
commercio o spray.
Lubrificazione
PERICOLO
Non applicare una quantità eccessiva di lubrificante: al
massimo mezzo tubo per ogni applicazione! Rimuovere
con un panno il lubrificante in eccesso che potrebbe
fuoriuscire lateralmente. PERICOLO DI CADUTA!
1. Sollevare un lato del nastro.
2. Applicare non più della metà del tubo di lubrificante (fornito) sulla superficie del piano di corsa. (v. Fig.)
3. Quindi camminare sul nastro per 3-5 minuti circa a velocità ridotta in modo tale che il lubrificante possa distribuirsi.
Controllo
Sollevare un lato del nastro e toccare il lato superiore del
piano di corsa. Se riuscite a tastare ancora del silicone, non
è necessaria una lubrificazione. Se la superficie invece risulta asciutta è necessario lubrificarla superficie di corsa.
I-100
REX_Trainer_TX800_12.indd I-100
22.05.12 15:35
Dati tecnici · Smaltimento
Dati tecnici
Dimensioni:
ca. 178 cm (L) x 80 cm (B) x 138 cm (H)
Velocità di marcia:
1–16 km/h
12-stadi (1,25º–7,5º)
Peso:
ca. 80 kg
Passo di regolazione:
Classificazione:
HB
Potenza di uscita permanente max.: 1,3 KW
Carico max.:
130 kg
Potenza massima:
2,2 KW
Smaltimento
L’apparecchio per il fitness, al termine della
sua vita utile, non può essere smaltito con i
normali rifiuti domestici. Deve invece essere
portato in un punto di raccolta per il riciclo
di apparecchi elettrici ed elettronici.
Riciclo dell’ imballaggio
Il materiale di imballaggio è in parte riutilizzabile. L’imballaggio deve essere smaltito nel
rispetto dell’ambiente, consegnandolo all’apposito centro di raccolta e riciclaggio. Smaltite il materiale in un centro di raccolta pubblico. Informatevi presso il vostro comune
sul centro di raccolta competente.
ITALIANO
Smaltimento dell’apparecchio per il fitness
I-101
REX_Trainer_TX800_12.indd I-101
22.05.12 15:35
Dichiarazione di conformità
I-102
REX_Trainer_TX800_12.indd I-102
22.05.12 15:35
Garanzia
Garanzia
1. I diritti di garanzia possono essere esercitati solo in un
periodo di massimo 2 anni, calcolati dalla data di acquisto. La nostra garanzia è limitata all’eliminazione dei
difetti di materiali e fabbricazione o alla sostituzione
dell’apparecchio. L’adempimento avviene a nostra scelta
mediante riparazione dell’apparecchio. La nostra prestazione di garanzia è gratuita per il cliente.
• Componenti soggetti a normale usura o consumo (ad
eccezione dei difetti di materiali o fabbricazione evidenti), come ad es.: cuscinetti – lampadine – adesivi
– cinghie – batterie, ecc.
L’analisi delle anomalie e delle rispettive cause avviene
sempre ad opera del nostro servizio clienti e comprende:
6. Il diritto alla garanzia autorizza il cliente a richiedere
solo l’eliminazione del vizio. Eventuali richieste di restituzione o riduzione del prezzo di acquisto possono
essere avanzate solo a seguito di un esito negativo della riparazione.
• Riparazione o sostituzione del componente difettoso
7. Spetta al produttore la facoltà di verificare e decidere in
merito a una richiesta di garanzia.
(I componenti sostituiti diventano di nostra proprietà).
2. In caso di diritto di garanzia legittimo, i costi di spedizione e di smontaggio e montaggio sono a nostro carico. Il
diritto di garanzia deve essere documentato presentando
la ricevuta d’acquisto.
3. L’acquirente si impegna ad utilizzare l’apparecchio acquistato solo per lo scopo previsto nel manuale d’uso.
4. La garanzia decade se l’apparecchio è stato modificato da
terzi o con il montaggio di componenti estranei, o se i
vizi riscontrati sono direttamente correlati a modifiche
dello stato originale. Inoltre il diritto di garanzia viene
meno in caso di inosservanza delle istruzioni d’uso
dell’apparecchio.
5. Sono esclusi dalla garanzia:
• I materiali di consumo non correlati ai lavori di riparazione delle anomalie riscontrate.
• Tutti i lavori di manutenzione o di altro genere derivanti
da usura, incidente o condizioni d’uso, nonché dall’utilizzo in violazione delle indicazioni del produttore.
• Tutti gli eventi, come produzione di rumori, oscillazioni, usura ecc., che non compromettono le caratteristiche dell’apparecchio.
• danni da ricondurre a:
– Installazione di parti eseguita da terzi o tentativi
dell’utente di riparare da solo il danno.
– Mancato utilizzo di ricambi originali.
– Danni causati da una cura carente, dall’uso di prodotti detergenti non idonei, ecc.
8. Non viene concesso il risarcimento di un danno diretto
o indiretto.
ITALIANO
• Fornitura dei ricambi per i lavori di riparazione nell’ambito della garanzia
I costi per i lavori di manutenzione, controllo e pulizia.
9. I diritti di garanzia vengono tenuti in considerazione
solo se vengono segnalati alla SI-Zweirad-Service GmbH
subito dopo aver individuato il vizio.
10. Dopo un intervento in garanzia, la durata della garanzia
non viene rinnovata né prolungato I diritti di garanzia
non possono essere esercitati dopo la scadenza del
periodo di garanzia.
11. Altri accordi diversi da quanto riportato sopra sono validi solo se sono confermati per iscritto dal produttore.
12. Se l’apparecchio presenta danni al momento della consegna, si prega di annotare tutti i danni sulla bolla di
consegna. Far firmare la comunicazione del danno dal
fornitore (punto vendita, corriere) e contattare immediatamente la nostra sede.
13. In caso di problemi tecnici con l’apparecchio acquistato,
potete contattare gli addetti del nostro servizio clienti:
D
SI-Zweirad-Service GmbH Telefono: 0 52 42 41 08 98 24
Lindenstraße 50
Fax:
0 52 42/41 08 72
33378 Rheda-Wiedenbrück E-mail: [email protected]
Germania
www.rex-sport.de
AT
CH
SI-Zweirad-Service GmbH Telefono: + 49 52 42 41 08 98 24
Lindenstraße 50
Fax:
+ 49 52 42 41 08 72
33378 Rheda-Wiedenbrück E-mail: [email protected]
Germania
www.rex-sport.de
I-103
REX_Trainer_TX800_12.indd I-103
22.05.12 15:35
nb
brück
Postfach 21 24 • 33349 Rheda-Wiedenbrück
eMail: si-service왁prophete.nett
REX_Trainer_TX800_12.indd I-104
Technische Änderungen vorbehalten·Nachdruck
vorbehalten· Nachdruck verboten
verboten·
·Stand
Stand 04/2012·88733 · © Prophete GmbH u. Co. KG
Prophete GmbH u. Co. KG
22.05.12 15:35
Technische Änderungen vorbehalten Nachdruck verboten Stand 04/2012 88733
Prophete GmbH u. Co. KG
TX-800
T REDMOLDEN
BEDIENINGSHANDLEIDING
REX_Trainer_TX800_12.indd NL-105
22.05.12 15:35
Inhoudsopgave
Inhoudsopgave
Voorwoord ...............................................................................................................................................
Aanduiding van de belangrijke aanwijzingen ..............................................................................................
Belangrijke veiligheidsinstructies .............................................................................................................
Explosietekening .....................................................................................................................................
Onderdelenlijst .......................................................................................................................................
Montage .................................................................................................................................................
Klapmechanisme/Transport ......................................................................................................................
NL-107
NL-107
NL-108
NL-110
NL-111
NL-114
NL-117
Trainingshandleiding ...............................................................................................................................
Trainingsinrichting/-aanwijzingen ...........................................................................................................
A Intensiteit ......................................................................................................................................
B Frequentie ........................................................................................................................................
C Motivatie ........................................................................................................................................
D Organisatie van de trainingseenheden ..................................................................................................
1. Opwarmfase .................................................................................................................................
2. Trainingsfase ................................................................................................................................
3. Afkoelfase.....................................................................................................................................
E Spieropbouw ....................................................................................................................................
F Gewichtsafname ...............................................................................................................................
NL-118
NL-118
NL-118
NL-118
NL-118
NL-118
NL-118
NL-119
NL-119
NL-119
NL-119
Bediening ...............................................................................................................................................
Voorinstellingen ...................................................................................................................................
Veiligheidssleutel .................................................................................................................................
Functie van de knoppen ........................................................................................................................
Weergegeven informatie .........................................................................................................................
Trainingsprogramma .............................................................................................................................
A P1–P24/H1 ......................................................................................................................................
B Trainingsparameters ..........................................................................................................................
C Handmatig .......................................................................................................................................
NL-120
NL-120
NL-120
NL-120
NL-121
NL-121
NL-121
NL-124
NL-124
Verzorging/onderhoud ..............................................................................................................................
Technische gegevens ................................................................................................................................
Afvalverwijdering ....................................................................................................................................
Garantie .................................................................................................................................................
NL-125
NL-127
NL-127
NL-129
NL-106
REX_Trainer_TX800_12.indd NL-106
22.05.12 15:35
Voorwoord · Aanduiding van de belangrijke aanwijzingen
Voorwoord
Wij feliciteren u met de aankoop van ons fitnessapparaat. U hebt een uitstekend product
gekozen en zult er ongetwijfeld veel plezier
mee hebben.
Lees voor het eerste gebruik de bedieningshandleiding zorgvuldig door om schade aan het apparaat of lichamelijk letsel
te voorkomen. Bewaar de bedieningshandleiding goed.
Met vriendelijke groet,
Prophete GmbH u. Co. KG
Aanduiding van de belangrijke aanwijzingen
Zeer belangrijke aanwijzingen zijn in de bedieningshandleiding als volgt aangeduid:
Deze informatie geeft u extra adviezen en tips.
NEDERLANDS
WAARSCHUWING
Deze waarschuwing maakt u attent op mogelijke
gevaren voor uw gezondheid of voor uw leven of
dat van anderen die bij de omgang met of het
gebruik van het apparaat kunnen ontstaan.
Deze aanwijzing maakt u opmerkzaam op mogelijke gevaren voor uw apparaat.
ATTENTIE
NL-107
REX_Trainer_TX800_12.indd NL-107
22.05.12 15:35
Belangrijke veiligheidsinstructies
Belangrijke veiligheidsinstructies
Bewaar de bedieningshandleiding goed. Geef de handleiding mee bij verkoop
of doorgave van het fitnessapparaat.
ATTENTIE
WAARSCHUWING
Het is belangrijk dat u de complete handleiding doorleest
voordat u het apparaat in elkaar zet en gebruikt.
Een veilig en productief gebruik kan alleen worden bereikt, als het apparaat volgens de voorschriften wordt
gemonteerd, onderhouden en gebruikt. Het is uw plicht
alle gebruikers van het apparaat vóór het gebruik op
de hoogte te stellen van de gevaren en voorzorgsmaatregelen.
Het apparaat voldoet aan DIN EN 957-1/6 en is alleen
bestemd voor privé-gebruik, niet voor commercieel, zoals
bijvoorbeeld therapeutisch gebruik.
Gebruik het apparaat uitsluitend in droge binnenruimtes
bij omgevingstemperatuur. Tegen vocht, stof/vuil en
extreme temperatuurschommelingen beschermen.
Plaats het apparaat alleen op een vaste, vlakke ondergrond en gebruik een beschermende afdekking voor de
vloer/vloerbedekking. Verwijder alle voorwerpen met
scherpe randen uit de omgeving en laat rond het apparaat
een ruimte vrij van min. 0,5 m
Verzeker u ervan dat er nooit vloeistoffen (incl. lichaamszweet!) binnen in het apparaat of in de fitnesscomputer
terechtkomen.
Gebruik het apparaat alleen zoals aangegeven! Als u
tijdens de montage of de controle defecte onderdelen
vindt of tijdens het gebruik ongewone geluiden hoort,
stop uw training dan onmiddellijk. Gebruik het apparaat
niet meer tot het probleem is verholpen.
Controleer voor gebruik van het trainingsapparaat of alle
schroeven en moeren goed vast zitten.
Het veiligheidsniveau van het apparaat kan alleen bewaard blijven, als het regelmatig op schade wordt gecontroleerd. Laat reparaties alleen door vakmensen uitvoeren
en gebruik altijd originele onderdelen.
Houd het apparaat uit de buurt van kinderen en huisdieren. Het is uitsluitend geschikt voor volwassenen.
personen die niet voldoende ervaring en/of kennis
hebben, tenzij zij terzijde worden gestaan door een persoon die verantwoordelijk is voor hun veiligheid of hen
aanwijzingen geeft over het gebruik.
Het toelaatbare maximale gewicht van 130 kg van de
gebruiker mag niet worden overschreden.
Vraag voor het begin van de training een arts om vast te
stellen of de training een risico voor uw gezondheid kan
zijn. Het advies van een arts is noodzakelijk als u geneesmiddelen gebruikt die hartslag, bloeddruk of cholesterolgehalte beïnvloeden.
Let op lichamelijke signalen. Verkeerde of bovenmatige
training kan uw gezondheid beïnvloeden of zelfs schaden. Stop de oefeningen bij de volgende symptomen:
pijn, spanning op de borst, onregelmatige hartslag,
kortademigheid, versuft gevoel, duizeligheid of misselijkheid. Ook als slechts een van deze toestanden zich
voordoet, moet u meteen een arts raadplegen voordat u
doorgaat met het oefenprogramma.
Draag bij de training geschikte kleding! Vermijd te wijde
kledingstukken waarmee u aan het apparaat kan blijven
hangen of kledingstukken die u in uw bewegingen hinderen of beperken. Draag tijdens de training altijd stevige schoenen.
De veiligheidssleutel dient ertoe de loopband bij een val
of in een noodsituatie meteen te stoppen. Gebruik daarom de loopband nooit zonder vooraf de veiligheidsclip
zorgvuldig aan uw kleding te bevestigen.Controleer voor
het begin van de training of de veiligheidsclip niet los
kan raken.
Stap bij een noodsituatie (bijv. plotselinge duizeligheid,
pijn enz.) als volgt van uw trainingsapparaat af:
1. Houd u vast aan de handgrepen aan de zijkant.
2. Stap met de voeten op de treden aan de zijkant.
3. Trek de veiligheidssleutel eruit.
Spring nooit op de loopband als die draait!
Laat de riem volledig tot stilstand voordat zij afdalen.
Het apparaat is niet geschikt voor gebruik door personen
met een fysieke, zintuiglijke of geestelijke beperking of
NL-108
REX_Trainer_TX800_12.indd NL-108
22.05.12 15:35
Belangrijke veiligheidsinstructies
Bewaar de bedieningshandleiding goed. Geef de handleiding mee bij verkoop
of doorgave van het fitnessapparaat.
WAARSCHUWING
Wees voorzichtig bij het opheffen en verplaatsen van het
apparaat ter voorkoming van bijv. rugproblemen. Gebruik
zo mogelijk altijd heftechnieken of zoek hulp.
NEDERLANDS
Schakel het fitnessapparaat na de training uit om het
schoon te maken of onderhoud uit te voeren en trek de
stekker uit het stopcontact.
ATTENTIE
NL-109
REX_Trainer_TX800_12.indd NL-109
22.05.12 15:35
Explosietekening
Explosietekening
NL-110
REX_Trainer_TX800_12.indd NL-110
22.05.12 15:35
Onderdelenlijst
74.
99.
100.
101.
125.
126.
NEDERLANDS
Onderdelenlijst
44.
104.
103.
Nr.
1
2
3
4
5
6
7
8
Beschrijving
hoofdframe
onderstel
hellingshoek
stang rechts
stang links
console
buitenkabel
binnenkabel
102.
Grootte
Aantal
1
1
1
1
1
1
1
1
NL-111
REX_Trainer_TX800_12.indd NL-111
22.05.12 15:35
Onderdelenlijst
Nr.
9
10
11
12
13
14
15
16
16~3
17
19
20
21
21-1
21-2
21-3
21-6
21-10
21-12
21-13
22
23
24
25
26
27
28
29
30
31
32
33
34
35
36
37
38
40
41
42
43
44
45
46
47
48
49
50
51
52
53
55
57
58
59
60
61
62
63
64
65
66
Beschrijving
stelknop
hellingmotor
V-riem
motorhouder
motor
loopband
loopdek
voorste wals
magneet
achterste wals
huls
huls
display
display voorkant
display achterkant
afdekking
ventilator
parkerschroef
verbindingskabel display
computerkabel
houder display
afdekking onderstel (L)
afdekking onderstel (R)
motorafdekking boven
achterste aanpassingsbasis (L)
achterste aanpassingsbasis (R)
snelheid/hand-polsslag-complex
helling/hand-polsslag-complex
vermogensschakelaar
schakelaar aan/uit
stop
transportrol voor
transportrol achter
rubber voeten
handgreep
zijloop
antisliprubber
motorafdekking
stop
stop
stop
veiligheidssleutel
stopcontact
kabel
stekker voor koude apparaten
netkabel
verbindingskabel (wit)
verbindingskabel (zwart)
verbindingskabel (zwart)
regelaar
computerkabel stang
computerkabel console
bodemafdekking
zeskantbout
zeskantige inbusbout
zeskantbout
zeskantbout
zeskantbout
zeskantbout
zeskantbout
zeskantige inbusbout
zeskantige inbusbout
Grootte
3.5 × 32 m/m
150 m/m_12P
200 m/m_10P
21.4 × 21.4 m/m
25.4 × 25.4 m/m
20 × 40 m/m
800 m/m
1000 m/m
20 cm × 764 × 764
20 cm × 764 × 764
100 m/m
1900 m/m
650 m/m
1/2" × 1"
3/8" × 3-3/4"
3/8" × 1-3/4"
3/8" × 1-1/2"
3/8" × 3/4"
M8 × 60 m/m
M8 × 12 m/m
5/16" × 1"
3/8" × 4"
Aantal
1
1
1
1
1
1
1
1
1
1
2
2
1
1
1
1
1
4
1
1
2
1
1
1
1
1
1
1
1
1
2
2
2
6
2
2
2
5
1
1
2
1
1
1
1
1
2
1
1
1
1
1
1
2
1
1
1
4
1
2
2
1
NL-112
REX_Trainer_TX800_12.indd NL-112
22.05.12 15:35
Onderdelenlijst
Beschrijving
67
68
69
70
73
74
75
76
77
78
79
80
81
82
82
83
84
85
86
87
88
89
90
90-1
90-3
90-5
90-7
91
92
93
94
95
96
98
99
100
101
102
103
104
105
106
110
111
112
113
114
125
126
128
129
130
131
132
133
134
135
136
137
138
139
140
vlakkopschroef
schroef
bout
vlakkopschroef
schroef
parkerschroef
moer
moer
moer
moer
borgveer
borgveer
borgveer
onderlegring
onderlegring
onderlegring
onderlegring
Nylon tandwiel
Nylon tandwiel
onderlegring
onderlegring
snelsluitmoerclip
drankhouder montage
drankhouder
veiligheidsswitchmodule
parkerschroef
verbindingskabel
parkerschroef
riemgeleider
parkerschroef
parkerschroef
cilinder
vlakkopbout met verzonken kop
zeskantbout
zeskantbout
onderlegring
onderlegring
zeskantige inbus-/kruisschroefsleutel
zeskantige inbussleutel
smeermiddel
stop
afdekking
parkerschroef
parkerschroef
kabelbinder
voetreling (R)
voetreling (L)
kruiskopschroef
kruiskopschroef
kruiskopschroef
buitenste stuurbekleding (L)
buitenste stuurbekleding (R)
onderste binnenstuurbekleding (R)
onderste binnenstuurbekleding (L)
bovenste binnenstuurbekleding (L)
bovenste binnenstuurbekleding (R)
parkerschroef
stop
starterklep
filter
verbindingskabel motor
parkerschroef
Grootte
3/8" × 2"
1/2" × 28 m/m
M8 × 3"
M6 × 1"
5 × 16 m/m
3.5 × 12 m/m
1/2" × 8T
3/8" × 7T
5/16" × 7T
M8 × 7T
3/8" × 2T
M8 × 1.5T
M5
3/8" × 19 × 1.5T
3/8" × 19 × 1.5T
3/8" × 25 × 2T
Ø 5 × Ø 13 × 1.0T
Ø 50 × Ø 13 × 3T
Ø 10 × Ø 25 × 3T
Ø 6.5 × Ø 25 × 1.5T
M5
5 × 2T
300 m/m
3 × 10 m/m
250 m/m
14 × 12 m/m
5 × 16 m/m
5 × 19 m/m
M8 × 1" × 1/4"
3/8" × 3"
5/16" × 1/2"
5/16" × 18 × 1.5T
5/16" × 23 × 1.5T
M5
M6 (66 × 88)
3.5 × 20 m/m
3.5 × 16 m/m
M5 × 25 m/m
M5 × 35 m/m
M5 × 12 m/m
3 × 63 m/m
400 m/m
4 × 19 m/m
Aantal
4
2
2
6
13
22
4
6
2
1
6
2
3
6
6
5
10
4
2
8
3
2
1
1
1
2
1
2
2
22
8
1
2
1
14
6
8
1
1
1
2
1
2
5
5
1
1
2
2
7
1
1
1
1
1
1
2
2
1
1
1
4
NEDERLANDS
Nr.
NL-113
REX_Trainer_TX800_12.indd NL-113
22.05.12 15:35
Montage
Montage
STAP 1
ATTENTIE
1. Haal de loopband voorzichtig uit het karton en leg
hem op een vlakke ondergrond.
STAP 2
ATTENTIE
1. Verbind de onderste computerkabel (53) met de computerkabel van de rechter stang (4).
2. Breng beide stangen (L, R / 5, 4) in het onderstel (2)
en schroef deze vast met acht schroeven 5/16" ×
1/2" (99), vier onderlegringen 5/16" × 18 × 1.5T
(100) en vier 5/16" × 23 × 1.5T onderlegringen
(101). Gebruik de meegeleverde inbussleutel (102)
om vast te zetten.
NL-114
REX_Trainer_TX800_12.indd NL-114
22.05.12 15:35
Montage
Montage
STAP 3
ATTENTIE
NEDERLANDS
1. Verbind de computerkabel van de console (55) met
de computerkabel van de stang (53).
2. Bevestig daarna de console (6) met de beide stangen
(L, R/5, 4) met zes schroeven 5/16" ×1/2 (99), twee
onderlegringen 5/16" × 18 × 1.5T (100) en vier onderlegringen 5/16" × 23 × 1.5T (101). Gebruik de
meegeleverde inbussleutel (102) om vast te zetten.
STAP 4
ATTENTIE
1. Monteer de buitenste stuurbekledingen (L, R/129,
130) aan de einden van de console (6) met vier
schroeven 3.5 × 12 m/m (74). Draai de schroeven
met het meegeleverde werktuig (102) vast aan.
NL-115
REX_Trainer_TX800_12.indd NL-115
22.05.12 15:35
Montage
Montage
STAP 5
ATTENTIE
1. Verbind de computerkabel van de console (55) met
de computerkabel van de display (21-13).
2. Verbind ook kabel (90-7) met (21-12).
3. Optioneel worden apparaten met HR-ontvanger aangeboden. Als uw apparaat hierover beschikt, dan verbindt u de kabel (21-14) met kabel (90-8).
STAP 6
ATTENTIE
1. Schuif de display (21) voorzichtig in de houder van
de console (6) en schroef de beide onderdelen vast
met twee schroeven M5 × 25mm (125) en twee
schroeven M5 × 35mm (126). Gebruik hiervoor ook
het meegeleverde werktuig (102).
NL-116
REX_Trainer_TX800_12.indd NL-116
22.05.12 15:35
Klapmechanisme/Transport
Klapmechanisme/Transport
Uitklappen
2
1. Ga achter het apparaat staan en trek aan de vergrendelknop (afb. 1)
2. Laat de loopband langzaam op de vloer zakken. (Afb. 2)
Inklappen
1. Trek met de rechterhand aan de vergrendelknop (afb. 3)
en trek met de linkerhand de loopband ca. 30 cm omhoog.
2. Til nu met beide handen de loopband omhoog tot deze
vastklikt in de vergrendeling. (Afb. 4)
Transport
Kantel de loopband langzaam terug tot deze op de transportrol staan. U kunt het apparaat nu voorzichtig naar de gewenste plaats verrijden. Neem bij de keuze van een geschikte plaats de veiligheidsinstructies in acht aan het begin
van deze bedieningshandleiding.
NEDERLANDS
Om de loopband te verschuiven moet het apparaat eerst
worden ingeklapt (zie punt „Inklappen”). Verzeker u ervan
dat de vergrendelknop is vastgeklikt.
3
1
4
NL-117
REX_Trainer_TX800_12.indd NL-117
22.05.12 15:35
Trainingshandleiding
Trainingshandleiding
Het gebruik van uw fitnessapparaat zal u tal van voordelen
bieden. Het zal uw lichamelijke conditie verbeteren, uw spieren accentueren en in combinatie met een caloriearm dieet u
ook helpen af te vallen.
TRAININGSINRICHTING/-AANWIJZINGEN
Om een optimale training te bereiken, moet u voor aanvang
van de training een paar belangrijke zaken met betrekking
tot de manier (waarop men traint) en de inrichting van de
training in acht nemen. Ter verbetering van de gezondheid
en van uw figuur, moeten volgende factoren bij de planning
van de training in aanmerking worden genomen:
C Motivatie
Om een trainingsprogramma succesvol te voltooien, is
regelmaat een essentieel punt. Ook geestelijke voorbereiding, zoals een vast tijdsbestek en vaste plaats per
trainingseenheid dragen daartoe bij. Het is raadzaam
altijd een persoonlijk doel voor ogen te houden en, indien
mogelijk, alleen te trainen als u goed gehumeurd bent.
Train voortdurend om u dag voor dag verder te ontwikkelen en het trainingsdoel te benaderen.
D Organisatie van de trainingseenheden
Er zijn 3 trainingsfases die bij iedere training moeten
worden gedaan:
A Intensiteit
a) Opwarmfase
De training moet zo worden ingericht, dat de lichamelijke
belasting tijdens de training hoger is dan de normale belasting. Ademnood of uitputting mag echter niet optreden. Bij een effectieve training moet de polsslag tussen
70% en 85% van de maximale polsslag liggen (zie ook
hoofdstuk „Trainingsfase”).
Tijdens de eerste trainingsweken moet de polsslag ca.
70% van de maximale polsslag zijn en in de daarop
volgende weken en maanden langzaam stijgen tot 85%
van de maximale polsslag. De trainingseisen kunnen bijv.
door verlenging van de trainingsduur en/of een verhoogde moeilijkheidsgraad, afhankelijk van de verbeterende conditie worden verhoogd. U hebt met volgende
hulpmiddelen de mogelijkheid uw polsfrequentie te controleren:
b) Trainingsfase
c) Afkoelfase
1. Opwarmfase
Deze fase draagt bij tot een goede doorbloeding van het
lichaam en een goede werking van de spieren. U vermindert ook het risico op krampen en spierbeschadigingen.
Daarom is het raadzaam voor iedere trainingseenheid een
paar rekoefeningen (zie afb.) te doen. U moet iedere oefening ca. 30 seconden volhouden. Vermijd hierbij schokkende bewegingen en belast uw spieren niet. Stop met de
rekoefening zodra het pijn doet.
a) U kunt uw polsslag zelf voelen en de slagen per minuut
Meting van de
tellen (bijv aan het polsgewricht)
polsfrequentie op gebruikelijke wijze.
b) U kunt de polsslag met behulp van de op de greep
aangebrachte sensoroppervlakken meten.
c) U kunt uw polsfrequentie ook door middel van specifieke, gekalibreerde polsslagmeetapparatuur bepalen.
ROMPBUIGING
De polsmeting per sensor dient alleen ter oriëntering, omdat
er door beweging, wrijving, zweet etc. afwijkingen van de
echte polsslag kunnen ontstaan. Bij sommige mensen is de
huidweerstandswijziging met betrekking tot de polsslag zo
klein, dat het resultaat niet voldoende is voor een exacte
polsmeting.
ZIJBUIGING
B Frequentie
Experts adviseren, afhankelijk van het trainingsdoel, trainingen van 3–5 eenheden per week. De training dient
samen te gaan met een evenwichtige en gezonde voeding. Een doorsnee volwassene heeft min. 3 trainingseenheden per week nodig om een verandering van het
lichaamsgewicht of verbetering van de conditie te bereiken en 2 trainingseenheden per week om de bestaande
toestand te behouden.
BINNENKANT/
BOVENBEEN
BUITENZIJDE/
BOVENBEEN
KUIT/ACHILLESSPIER
NL-118
REX_Trainer_TX800_12.indd NL-118
22.05.12 15:35
Trainingshandleiding
2. Trainingsfase
Let er bij de training op dat uw tempo gelijkmatig en aanhoudend is. Voor een optimale training moet de belasting
zo zijn gekozen, dat uw polsslag een waarde van ca. 70–
85% van de maximale polsslag bereikt (doelzone) Aan de
hand van de grafiek kunt u de voor u geschikte doelzone
aflezen:
Wijzig in dat geval uw trainingsschema als volgt:
U moet tijdens de opwarmfase en de afkoelfase trainen
zoals u gewend bent. Verhoog echter aan het einde van de
oefenfase de belasting, zodat uw benen sterker worden
getraind. Als u echter de doelzone van de polsslag overschrijdt, moet u uw tempo beslist verlagen!
MAXIMAAL
DOELZONE
Afkoelfase
LEEFTIJD
De trainingsfase moet minstens 12 minuten aanhouden.
Voor een eerste begin is een trainingstijd van ca. 15–20
minuten gebruikelijk.
Als u na enige tijd een hoger fitnessniveau hebt bereikt,
moet u eventueel langer en hoger gedoseerd trainen.
F Gewichtsafname
Om ervoor te zorgen dat uw lichaam goed zijn werk kan
doen, heeft het net als een motor „brandstof” nodig. Het
spierstelsel krijgt zuurstof van het cardiovasculaire systeem van het lichaam. Deze zuurstof wordt voor de energievoorziening van de spieren en ook voor de verbranding van koolhydraten resp. vetten gebruikt. Op basis
van de chemische samenstelling kan de omzetting van
lichaamsvetten in energie alleen plaatsvinden, als u een
aërobe training doet, dat wil zeggen, als voldoende zuurstof bij de training aanwezig is. Bij anaërobe training
(„buiten adem zijn”) is er gebrek aan zuurstof waardoor
geen vet kan worden afgebouwd. Het lichaam heeft bij
50% tot 80% van de maximale polsslag (maximale polsslag = 220–leeftijd) nog voldoende zuurstof en kan in dit
gebied de beste resultaten met betrekking tot de vetverbranding geven. De vetverbranding neemt toe, naarmate
u vaker en langer een dergelijke training uitvoert.
NEDERLANDS
POLS
Let bij de training op uw lichaamshouding:
• Bovenlichaam zo recht mogelijk houden
• Blik naar voren richten
• De beweging moet zo mogelijk vanuit de benen komen
• Niet met losse handen trainen! –
De armen moeten het lichaam stabiliseren.
• Hielen tijdens de training licht optrekken, zoals bij de
klassieke langlaufstijl
• Vaak van greepstand veranderen
3. Afkoelfase
Deze fase dient ter ontspanning van de spieren en het
cardiovasculaire systeem. Beperkt hiertoe bijv. het tempo gedurende ca. 5 minuten. Herhaal vervolgens de in
fase 1 beschreven rekoefeningen. Denk eraan dat u ook
in deze fase geen schokkende bewegingen maakt en dat
u de spieren niet belast.
E Spieropbouw
De trainingsbelasting moet hoger worden ingesteld om
uw spieren met de hometrainer op te bouwen. Onder bepaalde omstandigheden zult u merken dat het trainingsprogramma op basis van uw conditie niet in de volle
lengte kan worden uitgevoerd.
NL-119
REX_Trainer_TX800_12.indd NL-119
22.05.12 15:35
Bediening
Bediening
VOORINSTELLINGEN
Steek de stekker in een 220/240 V-stopcontact (veiligheidsinstructies in acht nemen!) en schakel het fitnessapparaat
in met behulp van de hoofdschakelaar aan de achterzijde.
VEILIGHEIDSSLEUTEL
fig. 1
ATTENTIE
Gebruik daarom de loopband nooit zonder vooraf de veiligheidsclip 1 zorgvuldig aan uw kleding te bevestigen.
Controleer voor het begin van de training of de veiligheidsclip goed vast zit.
De loopband kan alleen in bedrijf worden genomen, als de
veiligheidssleutel 2 in het contactpunt van de computerconsole is gestoken.
(fig. gelijk)
2
1
2
De functie van de veiligheidssleutel is de loopband bij een
val of bij andere noodgevallen meteen te stoppen.
Als de veiligheidssleutel 2 weer in de console wordt gestoken, moeten alle eventueel vooraf ingevoerde trainingsprogramma’s of parameters opnieuw worden ingevoerd!
fig. 2
START:
Met de START-knop kunt u de training te beginnen. Als u de
training onderbroken heeft, kunt u weer verder gaan door
weer op de START-knop te drukken.
RESET/STOP:
De RESET / STOP-knop om de loopband te zetten tot houd u
aan een stilstand of door op de geselecteerde programma’s
en reset waarden.
SLOPE (INCLINE):
Gebruik de pijltjestoetsen om de helling van de loopband
aan te passen . Met de pijltjestoetsen op de linker handgreep (zie figuur 1) deze instelling kan ook veranderen.
EINGABE:
Met behulp van de ENTER-toets om training parameters in te
voeren.
MODE:
Door op de MODE toets om een bepaalde kies een opleiding.
TEMPO (SPEED):
Gebruik de pijltjestoetsen om de snelheid van de aan te
passen Loopband of pretenderen te wijzigen in 0,5 kmh
stappen. Met de pijltjestoetsen op het rechter handvat (zie
figuur 2) kan worden. Ook controleren deze instelling.
FUNCTIES VAN DE KNOPPEN
SLOPE 9/6/3:
De sneltoetsen kunt u een 9/6/3 het instellen van de juiste
toonhoogte.
TEMPO RUN/JOGGEN/WALK:
Met de speed dial-knoppen RUN/JOG/WALK, kunt u een
vooraf bepaalde snelheid in te stellen naar rechts.
RUN: 9 km/h
JOGGEN: 6 km/h
WALK: 3 km/h
NL-120
REX_Trainer_TX800_12.indd NL-120
22.05.12 15:35
Bediening
WEERGAVE-INFORMATIE
TRAININGSPROGRAMMA
Volgende weergegeven informatie kan worden opgeroepen:
A Trainingsprogramma’s (P1–P24/H1)
1. TIME (tijd)
De computer geeft de ingestelde trainingstijd weer. Bij
invoer van een vastgestelde tijd loopt de tijd terug
(countdown). Na het bereiken van de vastgestelde waarde stopt het apparaat en klinkt een akoestisch signaal.
Er staan u 24 verschillende trainingsprogramma’s ter beschikking. Een trainingseenheid duurt steeds 30 minuten.
De programma’s P1–P14 onderscheiden zich in de volgorde
van de loopbandsnelheid. De programma’s P15–P24 onderscheiden zich daarentegen in de loopbandsnelheid en de
hellinginstelling. Daarom zijn zij alleen geschikt voor mensen met een goede conditie.
3. DISTANCE (afstand)
De computer geeft u de afgelegde afstand weer. Bij invoer van een vastgestelde afstand loopt de weergave terug
(countdown). Na het bereiken van de vastgestelde waarde stopt het apparaat en klinkt een akoestisch signaal.
4. CALORIES (calorieën)
De computer geeft de tijdens de training verbrande calorieën weer. De weergave loopt na de invoer van het aantal te verbranden calorieën terug (countdown) naar nul.
Na het bereiken van de vastgestelde waarde stopt het
apparaat en klinkt een akoestisch signaal.
5. PULSE (pols-/hartslag)
De PULSE-weergave geeft uw huidige polsfrequentie in
hartslagen per minuut weer. De weergave kan slechts correcte waarden weergeven, als u beide sensoren goed met
uw handpalmen vastpakt. Het kan soms max. 2 minuten
duren tot de polsfrequentie wordt weergegeven.
In het H1-programma voert u de gewenste trainingstijd
(min. 5 minuten) in, evenals uw persoonlijke doelpolsslag
(60–220 BPM) via de INVOER-knop. De computer past hierbij om de 15 seconden de helling van de loopband aan uw
doelpolsslag aan.
Met de MODUS-knop en de TEMPO-pijlknoppen kunt u een
van de 24 trainingsprogramma’s resp. het H1-programma selecteren. Het huidige trainingsprogramma wordt midden in
het rechter displaygebied (P1–P24/H1) weergegeven. Door
indrukken van de START-knop kunt u het geselecteerde programma starten.
Een individuele aanpassing van de snelheid of de helling
is tijdens de training steeds mogelijk via de TEMPO- resp.
HELLING-pijlknoppen.
NEDERLANDS
2. SPEED (tempo)
De computer geeft de ingestelde doelsnelheid in km/h
aan.
6. INCLINE (helling)
De computer geeft de ingestelde hellingwaarde weer.
7. PROGRAM
De computer geeft het ingestelde trainingsprogramma
weer.
NL-121
REX_Trainer_TX800_12.indd NL-121
22.05.12 15:35
Bediening
PROGRAMMA OVERZICHT
Programma P1
Min
km/h
1
1
2
3
3
4
4
5
5
6
6
5
7
4
8
3
9
2
10 11 12 13 14 15 16 17 18 19 20 21 22 23 24 25 26 27 28 29 30
1 2 3 4 5 6 5 4 3 2 1 2 3 4 5 6 5 4 3 2 1
3
3
4
3
5
3
6
4
7
4
8
4
9
4
10 11 12 13 14 15 16 17 18 19 20 21 22 23 24 25 26 27 28 29 30
4 4 4 4 4 4 4 4 4 4 4 4 4 4 4 4 2 2 2 1 1
3
6
4
8
5
6
6
6
7
4
8
4
9
2
10 11 12 13 14 15 16 17 18 19 20 21 22 23 24 25 26 27 28 29 30
2 2 4 6 8 6 6 4 4 2 2 2 4 6 8 6 6 4 4 2 2
3
6
4
6
5
6
6
6
7
6
8
6
9
4
10 11 12 13 14 15 16 17 18 19 20 21 22 23 24 25 26 27 28 29 30
4 4 4 4 4 4 6 6 6 6 6 6 6 3 3 3 3 3 3 3 1
3
6
4
8
5
10
6
8
7
6
8
4
9
2
10 11 12 13 14 15 16 17 18 19 20 21 22 23 24 25 26 27 28 29 30
2 2 4 6 8 10 8 6 4 2 2 2 4 6 8 10 8 6 4 2 2
3
6
4
6
5
6
6
6
7
6
8
6
9
7
10 11 12 13 14 15 16 17 18 19 20 21 22 23 24 25 26 27 28 29 30
7 7 7 7 7 7 6 6 6 6 6 6 6 3 3 3 3 3 3 3 1
3
6
4
6
5
8
6
10
7
6
8
6
9
2
10 11 12 13 14 15 16 17 18 19 20 21 22 23 24 25 26 27 28 29 30
2 2 2 6 6 8 10 6 6 2 2 2 2 6 6 8 10 6 6 2 2
3
5
4
5
5
6
6
6
7
6
8
8
9
8
10 11 12 13 14 15 16 17 18 19 20 21 22 23 24 25 26 27 28 29 30
8 5 5 5 6 6 6 9 9 9 5 5 5 5 9 9 9 6 6 5 5
3
4
4
5
5
2
6
3
7
4
8
5
9
3
10 11 12 13 14 15 16 17 18 19 20 21 22 23 24 25 26 27 28 29 30
2 2 3 4 5 2 3 4 5 3 2 2 3 4 5 2 3 4 5 3 2
3
6
4
2
5
4
6
6
7
2
8
4
9
6
10 11 12 13 14 15 16 17 18 19 20 21 22 23 24 25 26 27 28 29 30
2 2 4 6 2 4 6 2 4 6 3 3 4 6 2 4 6 2 4 6 2
3
7
4
7
5
7
6
8
7
8
8
8
9
8
10 11 12 13 14 15 16 17 18 19 20 21 22 23 24 25 26 27 28 29 30
9 9 9 9 9 8 8 8 8 9 9 9 8 8 8 9 9 9 8 8 8
3
4
4
5
5
6
6
5
7
4
8
3
9
2
10 11 12 13 14 15 16 17 18 19 20 21 22 23 24 25 26 27 28 29 30
1 1 3 4 5 6 5 4 3 2 1 1 3 4 5 6 5 4 3 2 1
3
6
4
8
5
6
6
6
7
4
8
4
9
2
10 11 12 13 14 15 16 17 18 19 20 21 22 23 24 25 26 27 28 29 30
2 1 4 6 8 6 6 4 4 2 2 1 4 6 8 6 6 4 4 2 2
Programma P2
Min
km/h
1
1
2
3
Programma P3
Min
km/h
1
2
2
4
Programma P4
Min
km/h
1
2
2
6
Programma P5
Min
km/h
1
3
2
4
Programma P6
Min
km/h
1
3
2
6
Programma P7
Min
km/h
1
4
2
2
Programma P8
Min
km/h
1
4
2
5
Programma P9
Min
km/h
1
5
2
3
Programma P10
Min
km/h
1
6
2
4
Programma P11
Min
km/h
1
6
2
6
Programma P12
Min
km/h
1
7
2
3
Programma P13
Min
km/h
1
8
2
4
NL-122
REX_Trainer_TX800_12.indd NL-122
22.05.12 15:35
Bediening
Programma P14
Min
km/h
1
9
2
9
3
9
4
8
5
8
6
8
7
8
8
8
9
7
10 11 12 13 14 15 16 17 18 19 20 21 22 23 24 25 26 27 28 29 30
7 7 7 6 6 6 6 5 5 5 5 4 4 4 4 3 3 2 2 1 1
3
5
5
4
6
6
5
5
3
6
6
4
7
6
5
8
5
6
9
4
5
10 11 12 13 14 15 16 17 18 19 20 21 22 23 24 25 26 27 28 29 30
2 1 2 3 6 7 6 6 5 4 2 6 5 3 6 4 3 6 5 4 2
4 3 4 5 6 3 4 5 6 3 4 3 4 5 6 3 4 5 6 5 4
3
5
5
4
5
8
5 6 7
5 5 5
10 12 10
8
5
8
9
5
6
10 11 12 13 14 15 16 17 18 19 20 21 22 23 24 25 26 27 28 29 30
5 5 5 5 5 5 5 5 5 5 5 5 5 5 5 5 5 5 5 5 5
4 2 4 6 8 10 12 10 8 6 4 2 4 6 8 10 11 10 8 6 4
3
3
7
4
3
9
5
3
11
6
9
9
7
9
7
8
9
7
9
9
3
10 11 12 13 14 15 16 17 18 19 20 21 22 23 24 25 26 27 28 29 30
7 7 7 6 6 9 9 9 9 5 5 5 7 7 7 7 6 6 6 6 6
3 3 7 7 9 11 9 7 7 3 3 3 7 7 9 11 9 7 7 3 3
3
6
3
4
6
5
5
8
9
6
10
4
7
6
2
8
6
4
9
2
6
10 11 12 13 14 15 16 17 18 19 20 21 22 23 24 25 26 27 28 29 30
2 1 2 6 6 8 10 6 6 2 2 1 2 6 6 8 10 6 6 2 2
8 10 12 1 2 3 4 5 6 7 8 9 2 1 2 1 2 1 1 2 0
3
4
2
4
5
3
5
2
4
6
3
4
7
4
3
8
5
2
9
3
1
10 11 12 13 14 15 16 17 18 19 20 21 22 23 24 25 26 27 28 29 30
2 1 3 4 5 2 3 4 5 3 2 1 3 4 5 2 3 4 5 3 2
0 1 1 2 3 4 4 3 2 1 0 1 1 2 3 4 4 3 2 1 0
3
6
5
4
2
7
5
4
9
6
6
11
7
2
9
8
4
7
9
6
5
10 11 12 13 14 15 16 17 18 19 20 21 22 23 24 25 26 27 28 29 30
2 1 4 6 2 4 6 2 4 6 2 1 4 6 2 4 6 2 4 6 2
3 1 3 5 7 9 11 9 7 5 3 1 3 5 7 9 11 9 7 5 3
3
3
3
4
3
3
5
3
3
6
3
3
7
3
3
8
3
3
9
4
6
10 11 12 13 14 15 16 17 18 19 20 21 22 23 24 25 26 27 28 29 30
4 4 4 4 4 4 5 5 5 5 5 5 5 6 6 6 6 6 6 7 7
6 6 6 6 6 6 10 10 10 10 10 10 10 3 3 3 3 3 3 0 0
3
4
9
4
4
9
5
4
9
6
4
9
7
4
9
8
4
9
9
6
9
10 11 12 13 14 15 16 17 18 19 20 21 22 23 24 25 26 27 28 29 30
6 6 6 6 6 6 8 8 8 8 8 8 8 5 5 5 5 5 5 3 3
9 9 9 9 9 9 9 9 9 9 9 9 9 9 9 9 9 9 9 9 9
Programma P15
Min
km/h
Neiging
1
3
3
2
4
4
Programma P16
Min
km/h
Neiging
1
5
2
2
5
4
Min
km/h
Neiging
1
5
3
2
5
7
Programma P18
Min
km/h
Neiging
1
1
7
2
2
5
NEDERLANDS
Programma P17
Programma P19
Min
km/h
Neiging
1
2
3
2
3
1
Programma P20
Min
km/h
Neiging
1
3
1
2
4
3
Programma P21
Min
km/h
Neiging
1
2
0
2
3
3
Programma P22
Min
km/h
Neiging
1
2
9
2
4
9
Programma P23
Min
km/h
Neiging
1 2 3 4 5 6 7 8 9 10 11 12 13 14 15 16 17 18 19 20 21 22 23 24 25 26 27 28 29 30
2 4 4 4 4 4 4 4 6 6 6 6 6 6 6 8 8 8 8 8 8 8 6 6 6 6 6 6 5 5
10 10 10 10 10 10 10 10 10 10 10 10 10 10 10 10 10 10 10 10 10 10 10 10 10 10 10 10 10 10
Programma P24
Min
km/h
Neiging
1
3
0
2
4
9
3
4
9
4
4
9
5
4
9
6
4
9
7
4
9
8
4
9
9
7
9
10 11 12 13 14 15 16 17 18 19 20 21 22 23 24 25 26 27 28 29 30
7 7 7 7 7 7 12 12 12 12 12 12 12 3 3 3 3 3 3 3 1
9 9 9 9 9 9 9 9 9 9 9 9 9 9 9 9 9 9 9 9 9
NL-123
REX_Trainer_TX800_12.indd NL-123
22.05.12 15:35
Bediening
B Training met trainingsparameters
U kunt in dit programma een van de drie te selecteren
trainingsprogramma’s instellen. Trainingsparameters zijn
doelrichtlijnen die u afhankelijk van uw persoonlijke fitnessniveau, motivatie of beschikbare tijd kunt instellen.
Volgende trainingsparameters kunnen worden geselecteerd:
Parameter
Instelgebied
Stap
Opmerking
TIME (tijd)
DIST (afstand)
CAL (calorieën)
0:00~ 99:00 Min
0.00~ 99.0 km
10 ~ 9990 Cal
± 1:00
±1
± 10
vastgestelde waarde = 5:00 min
vastgestelde waarde = 5 km
vastgestelde waarde = 500 Cal
Druk op de EINGABE-knop fur 3 Sec. om de gewenste trainingsparameter te selecteren en voer daarna met behulp
van de STEIGUNGS ou TEMPO-knoppen de gewenste waarde in.
Als er geen trainingsparameter wordt opgegeven, kunt u
met de EINGABE-knop naar de daarop volgende parameter
springen.
Na invoer van de gewenste trainingsparameter kunt u
met lopen beginnen. Druk daartoe op de START-knop. Het
apparaat geeft onmiddellijk voor de start van de loopband een akoestisch signaal. U kunt door middel van de
TEMPO-knoppen resp. de RUN/JOGGEN/WALK-knoppen de
snelheid individueel aanpassen.De loopband bereikt na
korte tijd de vastgestelde doelsnelheid. Ook kunt u de
helling via de HELLING-pijlknoppen of de snelkeuzetoetsen 9/6/3 variëren.
De training wordt beëindigd zodra de opgegeven trainingsparameter is bereikt. Een geluidssignaal klinkt voordat dignal de loopband.
C Handmatig
U kunt in plaats van in een van de opgegeven trainingsprogramma’s resp. trainingsparameters ook in het zogenaamde handmatige trainingsprogramma trainen. In dit
programma kunt u de snelheid handmatig instellen resp.
ook tijdens de training steeds aanpassen.
U start het handmatige trainingsprogramma door op de
START-knop te drukken. Als u tevoren een van de trainingsparameters hebt ingesteld of een van de 25 trainingsprogramma’s hebt geselecteerd, dan trekt u vooraf
de veiligheidssleutel er even uit om de ingevoerde waarde te verwijderen. Het apparaat geeft onmiddellijk voor
de start van de loopband een akoestisch signaal. De
beginsnelheid bedraagt 1 km/h. U kunt de snelheid door
middel van de TEMPO-knoppen resp. de RUN/JOGGEN/
WALK-knoppen op elk moment tijdens de training individueel aanpassen. De loopband bereikt na korte tijd de
vastgestelde doelsnelheid. Ook kunt u de helling via de
STEIGUNG-pijlknoppen of de snelkeuzetoetsen 9/6/3
variëren. Het apparaat bereikt na een paar seconden de
zojuist ingestelde doelsnelheid. De training wordt door
indrukken van de STOP-knop beëindigd.
NL-124
REX_Trainer_TX800_12.indd NL-124
22.05.12 15:35
Verzorging/onderhoud
Verzorging /onderhoud
Trek voordat u onderhoudswerkzaamheden uitvoert altijd de netstekker uit het stopcontact. LEVENSGEVAAR!
Wij adviseren ca alle 2 tot 4 weken of afhankelijk van het
gebruik, alle onderdelen, waarbij gevaar op losraken bestaat
(schroeven, moeren en dergelijke) regelmatig te controleren. Gebruik voor schoonmaken of verzorgen een zachte,
evt. iets vochtige doek. Gebruik in geen geval agressieve
reinigingsmiddelen. Vloeistoffen moeten uit de buurt gehouden worden van de computer of de binnenkant van het
apparaat, omdat deze onder bepaalde omstandigheden tot
aanzienlijke functiestoringen kunnen leiden. In het onderste gedeelte van het trainingsapparaat kan zich door de riem
rubber gaan afzetten. Dit is heel normaal.
Loopbandafstelling
ATTENTIE
Loopband spannen:
ATTENTIE
Let erop dat de loopband niet te strak gespannen is,
omdat dit tot verhoogde slijtage of zelfs tot schade kan
leiden.
U kunt de loopband door middel van de beide stelbouten
aan de achterkant van het hoofdframe spannen (zie afb.).
Draai de linker en rechter stelbout gelijkmatig steeds een
kwart slag naar rechts (met de wijzers van de klok mee).
Gebruik hiervoor een M6-inbussleutel.Zet daarna de loopband aan en controleer of deze nu voldoende is gespannen.
➡
NEDERLANDS
WAARSCHUWING
Als de loopband naar links wegglijdt, draait u de rechter
stelbout naar links (max. steeds ¼ slag). Laat daarna de
loopband min. 2 omwentelingen lopen om te controleren of
de band goed is afgesteld. Herhaal evt. deze procedure tot
de mat gecentreerd is.
➡
Zorg ervoor dat de loopband tijdens de afstelling niet in
bedrijf is. Trek voor uw veiligheid de veiligheidssleutel
eruit.
Na langere gebruiksduur of na transport kan het vorkomen
dat de loopband niet meer centraal is afgesteld of tijdens de
training is „weggegleden”. In dit geval moet de loopband
opnieuw worden ingesteld, omdat anders schade kan ontstaan of functies worden beïnvloed.
Loopband centreren:
U kunt de loopband door middel van een M6-inbussleutel
rechts aan de achterkant van het hoofdframe afstellen (zie
afb.).
Als de loopband naar rechts wegglijdt, draait u de rechter
stelbout naar rechts (max. steeds ¼ slag). Laat daarna de
loopband min. 2 omwentelingen lopen om te controleren of
de band goed is afgesteld. Herhaal evt. deze procedure tot
de mat gecentreerd is.
Herhaal de procedure net zo lang tot de loopband bij het
lopen niet meer „wegglijdt”. Draai de stelbouten echter
nooit meer dan een kwart slag na iedere controle. Als de
loopband te strak is ingesteld, stel dan beide stelbouten
gelijkmatig losser af.
NL-125
REX_Trainer_TX800_12.indd NL-125
22.05.12 15:35
Pflege/Wartung
Loopbandsmering
Smering
ATTENTIE
WAARSCHUWING
Zorg ervoor dat de loopband tijdens de afstelling niet in
bedrijf is. Trek voor uw veiligheid de veiligheidssleutel
eruit.
Breng niet te veel smeermiddel op – maximaal een halve
tube per toepassing! Wis overtollig smeermiddel, dat
er onder bepaalde omstandigheden aan de zijkant uitloopt, met een doek af GEVAAR VOOR VALLEN!
De loopband is zo geconstrueerd, dat deze slechts minimaal
onderhoud behoeft. Het is echter noodzakelijk dat het loopdek van tijd tot tijd wordt gesmeerd. Een zorgvuldige smering garandeert een goede werking en verlengt de levensduur
van het apparaat. Wij adviseren de eerste smering uiterlijk
na de eerste 25 bedrijfsuren (2–3 maanden) en daarna om de
50 bedrijfsuren (ca. 5–8 maanden) uit te voeren. Zij maken
gebruik van in de handel verkrijgbare siliconen olie of spray.
1. Til een kant van de loopband op.
2. Breng maximaal de helft van de tube smeermiddel (meegeleverd) aan op het oppervlak van het loopdek. (zie
afb.)
3. Loop aansluitend ca. 3–5 minuten met een lage snelheid
op de loopband, zodat het smeermiddel zich kan verdelen.
Controle
Til een kant van de loopband op en voel aan de bovenkant
van het loopdek. Als u nog siliconen voelt, hoeft niet te
worden gesmeerd. Als het oppervlak echter droog aanvoelt,
dan moet u het loopdek nasmeren.
NL-126
REX_Trainer_TX800_12.indd NL-126
22.05.12 15:35
Technische gegevens · Afvalverwijdering
Technische gegevens
Afmetingen:
ca. 178 cm (L) x 80 cm (B) x 138 cm (H)
Rijsnelheid:
1–16 km/h
Gewicht:
ca. 80 kg
toonhoogte aanpassen:
12-traps (1,25º–7,5º)
Klasse-indeling:
HB
Max. Doorloopvermogen:
1,3 KW
max. gewichtsbelasting:
130 kg
Maximaal vermogen:
2,2 KW
Afvalverwijdering
Het fitnessapparaat mag aan het einde van
de levensduur niet met het normale huishoudelijke afval worden verwijderd. Het moet
op een inzamelpunt voor het recyclen van
elektrische en elektronische apparaten worden afgegeven.
Recycling van verpakkingsmateriaal
Het verpakkingsmateriaal is gedeeltelijk opnieuw te gebruiken. Verwijder de verpakking
milieuvriendelijk zodat deze kan worden hergebruikt. Verwijder via een openbaar inzamelpunt Vraag bij de gemeente van welke
inzamelpunten u gebruik kunt maken.
NEDERLANDS
Fitnessapparaat verwijderen
NL-127
REX_Trainer_TX800_12.indd NL-127
22.05.12 15:35
Conformiteitsverklaring
NL-128
REX_Trainer_TX800_12.indd NL-128
22.05.12 15:35
Garantie
Garantie
Het onderzoek naar de storing en de oorzaken ervan
gebeurt altijd door onze klantenservice en omvat:
• levering van reserveonderdelen voor de reparatie in het
kader van de garantie
• reparatie of vervanging van het defecte onderdeel
(Vervangen onderdelen gaan over in ons eigendom.)
2. Bij gerechtvaardigde garantieclaims zijn de verzendkosten
en de kosten van demontage en montage voor onze rekening. De garantieaanspraak moet worden aangetoond
door overlegging van de kassabon.
3. De koper is verplicht het gekochte apparaat voor geen
enkel ander doel te gebruiken dan aangegeven in de bedieningshandleiding.
4. Als het apparaat door derden of door montage van
vreemde onderdelen is gewijzigd resp. opgetreden gebreken in de oorspronkelijke samenhang door de wijziging
zijn ontstaan, komt de garantie te vervallen. Verder komt
de garantie te vervallen, als de voorschriften voor de behandeling van het apparaat niet zijn opgevolgd.
5. Niet inbegrepen in de garantie zijn:
• verbruiksmaterialen die, los van reparatiewerkzaamheden, de oorzaak zijn van bekende storingen.
• alle onderhoudswerkzaamheden of andere werkzaamheden, die ontstaan door slijtage of ongeval danwel door
bedrijfsvoorwaarden, zoals gebruik waarbij de bepalingen van de fabrikant niet worden opgevolgd.
• alle voorvallen, zoals geluidsontwikkeling, trillingen,
slijtage enz. die de eigenschappen van het apparaat
niet beïnvloeden.
• schade die terug te voeren is tot:
– de montage van onderdelen door onbekenden of de
bemoeienissen van de gebruiker zelf om de schade
te verhelpen.
– het niet gebruiken van originele reserveonderdelen.
– schade die door gebrekkig onderhoud, ongeschikte
schoonmaakmiddelen enz. zijn ontstaan.
•
onderdelen die onderhevig zijn aan slijtage of verbruik
(met uitzondering van eenduidig materiaal resp. fabricagefouten) zoals bijv.: – lagers – verlichting – stickers –
riem – batterijen enz.
Kosten voor onderhouds-, controle- en reinigingswerkzaamheden.
6. De aanspraak op garantie geeft de klant het recht alleen
het verhelpen van defecten te vragen. Aanspraken op
teruggave of vermindering van de koopprijs gelden pas
na mislukken van de verbetering.
7. De controle en beslissing van een garantieaanspraak
berust bij de fabrikant.
8. Vergoeding van een directe of indirecte schade valt niet
onder de garantie.
9. Garantieaanvragen worden alleen in behandeling genomen, als zij onmiddellijk na vaststelling van het defect
bij de SI-Zweirad-Service GmbH worden verholpen.
10. Door een uitgevoerde garantieservice wordt de garantieperiode niet verkort of verlengd. Het indienen van
garantieaanvragen na afloop van de garantieperiode is
uitgesloten.
NEDERLANDS
1. Garantieclaims kunt u alleen binnen een periode van
max. 2 jaar, te rekenen vanaf de aankoopdatum, indienen. Onze garantie is beperkt tot het verhelpen van
materiële en fabricagefouten resp. vervanging van het
apparaat. Het nakomen gebeurt, als wij daarvoor kiezen,
door reparatie van het apparaat. De garantie is voor u
gratis.
11. Andere dan de hierboven vermelde overeenkomsten zijn
alleen geldig als zij schriftelijk bevestigd zijn door de
fabrikant.
12. Als het apparaat bij de levering beschadigd is geraakt,
dient u alle schade op de leveringsbon te vermelden.
Laat de schademelding door de leverancier (markt, expediteur) ondertekenen en stel u onmiddellijk met ons in
verbinding.
13. Als er met het door u aangekochte apparaat een technisch probleem is, staan onze medewerkers van de klantenservicetot uw beschikking:
D
SI-Zweirad-Service GmbH Telefoon: 0 52 42 41 08 98 24
Lindenstraße 50
Fax:
0 52 42/41 08 72
33378 Rheda-Wiedenbrück Email: [email protected]
Duitsland
www.rex-sport.de
AT
CH
SI-Zweirad-Service GmbH Telefoon: + 49 52 42 41 08 98 24
Lindenstraße 50
Fax:
+ 49 52 42 41 08 72
33378 Rheda-Wiedenbrück Email: [email protected]
Duitsland
www.rex-sport.de
NL-129
REX_Trainer_TX800_12.indd NL-129
22.05.12 15:35
Notes
NL-130
REX_Trainer_TX800_12.indd NL-130
22.05.12 15:35
NEDERLANDS
Notes
NL-131
REX_Trainer_TX800_12.indd NL-131
22.05.12 15:35
Postfach 21 24 • 33349 Rheda-Wiedenbrück
eMail: si-service왁prophete.net
REX_Trainer_TX800_12.indd NL-132
Technische Änderungen vorbehalten· Nachdruck verboten· Stand 04/2012·88733 · © Prophete GmbH u. Co. KG
Prophete GmbH u. Co. KG
22.05.12 15:35