1
IT
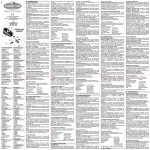
Installation of product
MOTIONCAMMINI begins to record videos. When you
press the power key once more, red light will be always
on, and video will be stored, MOTIONCAMMINI is in
standby time again.
Automatic shutdown comes after standby for 30 seconds without any further operation.
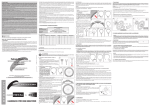
MOTIONCAMMINI
Use with
helmet-band
Use back clip
together with stand
Battery replacement
Replacement lithium battery
Operations
Insert Micro SD card
Press the power key for 2 seconds. MOTIONCAMMINI
will be turned on with LED light in red which indicates
that it is in Standby mode.
Notes:
In the case of low battery, red indicator will flash quickly. 2
minutes later, it will shut down automatically.
If there is no micro SD card inserted, yellow indicator will
flash for 1 minute and then it will shut down automatically.
If the card is fully loaded, yellow indicator will flash for 30
seconds and then it will shut down automatically.
14
Manual video recording
Press the power key long to turn it on, red light will be always on, indicating that MOTIONCAMMINI is in standby
time. Press the power key short, red light will flash and
Photo shooting:
When MOTIONCAMMINI is turned on. Press the function
key to switch to the photo shooting modes when yellow
light is always on. Press the power key short, it will take a
photo with red light flashing once. Then it is in standby
time. Automatic shutdown comes after standby for 30
seconds without any further operation
Notes:
In the course of recording, if you turn off power by
force directly without saving the videos beforehand,
the video recorded this time will fail to be saved.
In the case of long time video recording, videos recorded every 30 minutes will be automatically saved as
a independent file.
When you press the function key directly to switch to
another mode or when the machine recognize the low
power itself, the files will be stored automatically.
Charging:
A: Charging with charger: When it is power off, connect
it with charger and electrical board to charge. While it
is charging, blue light and red light are always on. Blue
light will be always on and red light will be off when it is
full charged. When you connect it with charger and electrical board to charge while it is power on, you can press
the mode key short to enter into all kinds of work modes
while charging. In this condition, two lights will be on.
B: Charging with computer: When it is power off, connect
it with computer, blue light and red light will be on, indicating that it is charging. Yellow light will be on when it is
full charged, and it enters into the U-disk mode.
Notes:
Please use the charger supplied by our company for better
compatibility.
Key functions:
1. LED
LED control key
When it is power on, press this key short, LED light will
circle in 4 modes, that is off – low light – medium light
– strong light - off.
2. Power key
When it is power off, press this key for 2 seconds, the
machine will be on. When it is power on, press this key
for 2 seconds, the machine will be off.
3. Function key
Use this key to switch video recording and photo
shooting modes.
Inserting the date and time
Turn on the video camera.
Connect the USB cable to the PC and then to the video
camera.
If it doesn’t open automatically, open the corresponding
UDISK (start-computer-removable disk).
Inside the UDISK you will find a DCIM folder.
Right click on the screen and from the pull down menu
select NEW - TEXT DOCUMENT.
The newly created document appears next to the DCIM
folder.
Give it the name “time” (typing only “time”, do NOT type
“.txt”).
Open the document and enter the current date and
time in the following format:
Year/month/day (space) hour:minutes:seconds
(example: 2012/05/09 08:30:00)
Go to FILE-EXIT or simply click on the X in the right hand
corner to close the window.
A notice will appear: SAVE CHANGES TO E:\TIME.TXT?
Click on SAVE.
Return to the previous screen and you should see the
DCIM folder and the text document named TIME.
Disconnect the CAM safely by right clicking on the UDISK and selecting eject USB camera.
Try making a short video and then reconnect the video
camera to the PC.
If it worked properly, you will no longer see the text
document.
Inside the DCIM folder you will find the video you just
made with the correct date and time.
Storage and playback of file
After video recording, as shown in the following figure,
copy or cut the video with USB data cable onto computer for playback. You also can remove micro SD card and
read the video data in the card with a card reader. It is
recommended to use Media Player, KM Player and other
software player to playback the video data.
MOTIONCAMMINI
USB data cable
EN
FR
computer USB interface
ES
PC camera function
MOTIONCAMMINI can also be used as PC camera. Please
install the software in the CD disk into your computer
first. When MOTIONCAMMINI is power on, connect MOTIONCAMMINI with USB cable to computer, a standard
video camera will appear in the computer, then it can be
used as PC camera. Otherwise, it may enter into charging mode and U-disk mode
In the PC camera status, the battery can also be recharged at the same time.
DE