1
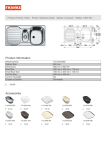
Bedienungsanleitung|User Manual Bracket CRX (mit und ohne Stromversorgung / with and without power connection) Bild zeigt Halter mit Stromversorgung und Netzteiladapter The image shows the mount with power connection Bracket CRX Bedienungsanleitung User Manual Rev. 2.2 Deutsch…………………...… Seite 3 English……………..…………………. Page 19 05.06.14 |2 Bracket CRX INHALTSVERZEICHNIS Einleitung…………………………………………………….................. 4 Sicherheitshinweise …………………………………………………… 5 Verwendungszweck |Lieferumfang …………………………….…….. 6 Technische Daten…………………………….………………………… 7 Zubehör…………………………………………….……………………. 8 Montage ………………….……………………………………………... 9 Installation ………………………………………………………………. 13 Bedienung ………….…………………………………………………… 14 Warnhinweise…………...………………………………………………. 15 Reinigung | Desinfektion ……….. ……………………………………. 17 Verwendete Symbole | Entsorgung …………...……………………… 17 Service | Hersteller…………………………………………...………… 18 Welcome | Scope of Delivery | Technical Data | Accessories ………………...... Installation………………………………………………………………. Operation……………………………………………………………. Cleaning | Disinfection…………………………………………………. 9 10 11 12 13 Rev. 2.2 |3 Bracket CRX Lieber Kunde, vielen Dank für den Kauf des Bracket CRX. In dieser Anleitung finden Sie technische Informationen, Bedienungs- und Montagehinweise. Rev. 2.2 |4 Bracket CRX SICHERHEITSHINWEISE Lesen Sie die Bedienungsanleitung sorgfältig durch, bevor Sie das Bracket CRX in Betrieb nehmen. Bewahren Sie diese Anleitung für Nachschlagezwecke sorgfältig auf und beachten Sie vor allem die Sicherheitshinweise. CRS medical haftet nicht für Schäden die von verwendeten Netzteilen oder Spannungsversorgern für die ZOLL X-Series® entstanden sind, unabhängig von der verwendeten Bracket CRX Version. Für Schäden, die durch unsachgemäße Bedienung, Befestigung, Montage oder Installation entstehen, übernimmt der Hersteller keine Haftung. Instandsetzung und Wartung am Bracket CRX dürfen nur von autorisiertem Fachpersonal durchgeführte werden. Bitte wenden Sie sich bei einem Defekt direkt an den technischen Kundendienst von CRS medical GmbH. Jegliche Veränderungen an der Vorrichtung oder ihrem Zubehör, die nicht vom Hersteller vorgenommen werden, führen zu einem Außerkrafttreten der Gewährleistungs- und Haftungsverpflichtungen von CRS medical GmbH. Überprüfung Sie das Bracket CRX nach jeder Anwendung und benutzen Sie es nicht wenn: o mechanische Beschädigungen am CRX Adapter zu erkennen sind o mechanische Beschädigungen an dem CRX Wandhalter zu erkennen sind o mechanische/elektrische Beschädigungen an der Stromversorgung zu erkennen sind o der Adapter nicht von alleine in die Halterung hinein gleitet o die Verriegelung nicht sicher schließt o sich Gegenstände an den beiden Magnetkupplungen befinden, z.B. Metallspäne Rev. 2.2 |5 Bracket CRX VERWENDUNGSZWECK Das Bracket CRX ist für den stationären Gebrauch oder im Rettungswagen für den Defibrillator ZOLL X-Series® konzipiert. Es ist für die Montage an einer senkrechten Wand ausgelegt. Das Bracket CRX w power hat die zusätzliche Option einer Spannungsversorgung für den Defibrillator, unter der Verwendung einer externen Spannungsversorgung. LIEFERUMFANG BRACKET CRX w power P/N: 2106533002 1 CRX Adaption (P/N: 2306533002) mit Stromversorgung zur Befestigung an der X-Series, inklusive 4 Befestigungsschrauben. 1 CRX Wandhalterung (P/N: 2306533004) mit Stromversorgung zur Aufnahme der Adaption 1 Wandhalter (P/N: 2306533005) für ZOLL-Netzteile 1 Bedienungsanleitung oder BRACKET CRX w/o power P/N: 2106533001 1 CRX Adaption (P/N: 2306533001) zur Befestigung an der X-Series, inklusive 4 Befestigungsschrauben. 1 CRX Wandhalterung (P/N: 2306533003) zur Aufnahme der Adaption 1 Bedienungsanleitung Rev. 2.2 |6 Bracket CRX TECHNISCHE DATEN P/N: 2306533003 2306533004 2306533001 2306533002 2306533005 Beschreibung Wall Fastening w/o power Wall Fastening w power Adaption w/o power Adaption w power Power Supply Fastening 310mm 330mm 109mm 109mm 180mm 225mm 40mm 1460g n/a n/a 225mm 80mm 1610g 14,5VDC 4,15A 83mm 57mm 292g n/a n/a 0 – 50°C -30 – 70°C 130mm 57mm 405g 14,5VDC 4,15A 190mm 40mm 260g n/a n/a Höhe Maß Breite Tiefe Gewicht Spannung Strom Betriebstemperatur Lagertemperatur Im Zuge von Produktverbesserungen behalten wir uns technische und optische Veränderungen am Artikel vor. Rev. 2.2 |7 Bracket CRX ZUBEHÖR (nicht im Lieferumfang enthalten) Softbag X- Serie EU P/N: 2103033003 Das Bild zeigt den Defibrillator mit Tasche Softbag X-Series EU und Halterung Bracket CRX Desktop Shoulder Strap P/N: 2209933006 Das Bild zeigt den Defibrillator mit Tasche Softbag X-Series EU und Trageriemen Shoulder Strap Rev. 2.2 |8 Bracket CRX MONTAGE 1. Platzierung des CRX Adapters auf der Geräte-Rückseite Setzen Sie die Adaption auf die Rückseite des Defibrillators auf, wie im Bild gezeigt. Bei Verwendung der Softbag X- Serie EU ist darauf zu achten, dass der Verbindungsgurt der Tasche zwischen Defibrillator und Adaption zu platzieren ist. Bei einer Adaption mit Stromversorgung ist darauf zu achten, dass der Stromanschluss ordnungsgemäß auf der Eingangsbuchse des Defibrillators platziert ist, sodass die elektrischen Kontakte der Adaption sicher mit dem Netzteilanschluss der ZOLL X Series verbunden sind, bevor die Adaption mit den mitgelieferten 4 Schrauben angeschraubt wird. Haben Sie ein Gerät mit Stromversorgung erworben, so beachten Sie bitte auch den Montageschritt Netzgerät. 2. Montage der CRX Wandhalterung Befestigen Sie den Wandhalter mit 6 Schrauben an einer ebenen Fläche gemäß dem Bohrbild auf Seite 10. Für einen sicheren und ergonomischen Einsatz des Halters empfehlen wir eine Befestigungshöhe des Halters von ca. 1m (bezogen auf die mittleren Bohrlöcher). Rev. 2.2 |9 Bracket CRX Achten Sie darauf, dass Sie genügend Bewegungsfreiheit für das Einsetzen und die Entnahme des Defibrillators haben. Wir empfehlen eine Bewegungsfreiheit von ca. 40 cm oberhalb des Halters. Bohrbild CRX Wandhalterung 40 103 160 139 30 100 8 (alle Angaben in mm) Rev. 2.2 | 10 Bracket CRX 3. Montage des Wandhalters für das Netzteil * Im Lieferumfang sind 2 Versionen von Haltewinkeln für die unterschiedlich dimensionierten externen ZOLL-Netzteile (Wechselstrom oder Gleichstrom) enthalten. Benutzen Sie nur die passenden Haltewinkeln, die eine sichere Fixierung des ZOLLNetzteiles sicherstellen. Befestigen Sie das Netzteil (dies ist nicht im Lieferumfang enthalten und muss ggf. separat erworben werden) mit den Haltewinkeln auf dem Wandhalter. Sichern Sie die Muttern mit Schraubensicherungslack ab. Befestigen Sie anschließend mit Hilfe der beiden Klettbänder das Kabel des Netzteils. Beachten Sie dabei die Länge des Kabels zum Defibrillator. Befestigen Sie den Wandhalter für das Netzteil mit 4 Schrauben gemäß dem Bohrbild auf Seite 12. Sie können den Wandhalter für das Netzteil, je nach Platzbedarf einzeln oder auch mit dem CRX Wandhalter verschrauben. *nur für Bracket CRX, w power Rev. 2.2 | 11 Bracket CRX Bohrbild des Wandhalters für das Netzteil (Alle Angaben in mm) 100 139 100 5,5 Rev. 2.2 | 12 Bracket CRX INSTALLATION* Das zu verwendete Netzteil zur Spannungsversorgung für die ZOLL X-Series muss den Spezifikationen des Defibrillator-Herstellers entsprechen (z.B. ZOLL Externes Wechselstromnetzteil, 8300-0004 oder Externes Gleichstromnetztel, 8300-000006). 1. Verbinden des Elektroanschlusses Verbinden Sie den DCAusgang des Netzteils mit der DC- Anschlussbuchse auf der Rückseite der CRX Wandhalterung, wie im Bild dargestellt Zum Anschluss des Netzteiles auf der Versorgungsseite beachten Sie bitte die Herstellerangaben. 2. Lösen des Elektroanschlusses 1 2 Rev. 2.2 Zuerst den Bajonettverschluss im Uhrzeigersinn drehen und anschließend den Stecker des Netzteils von der Buchse abziehen. | 13 Bracket CRX BEDIENUNG 1. Einhängen des Defibrillators Defibrillator mit Adaption in den Aufnehmer des CRX Wandhalters einsetzen. Der CRS Wandhalter ist verriegelt, wenn die Adaption hörbar einrastet. Für einen CRX Wandhalter mit Stromversorgung: Vergewissern Sie sich, dass das externe Netzteil vom Defibrillator detektiert wird. 2. Entnahme des Defibrillators 1. 2. Rev. 2.2 Lösen Sie zuerst die Arretierung des CRX Wandhalters, indem Sie den roten Knebel zu sich hin ziehen. Entnehmen Sie dann den Defibrillator senkrecht nach oben aus dem CRX Wandhalter. | 14 Bracket CRX WARNHINWEISE Das Herausnehmen oder Einsetzen des Defibrillators muss immer in der Senkrechten erfolgen. Ansonsten kann der magnetische Netzstecker des Halters beschädigt werden. Einsatz nur in gerader horizontaler Richtung Entnahme nur in gerader horizontaler Richtung Schritt 1: Entriegelungsknopf ziehen Schritt 2: Halter entnehmen Rev. 2.2 | 15 Bracket CRX Vergewissern Sie sich, dass alle mechanischen und elektrischen Teile frei von Beschädigungen und Fremdkörpern sind. Diese könnten den Halter beschädigen oder blockieren, bzw. zu einem elektrischen Defekt am Defibrillator, Netzteil oder der CRXStromversorgung führen. Die schwimmend gelagerte Magnetkupplung enthält mechanische Begrenzungen. Werden diese gewaltsam überwunden, entstehen Schäden an der Magnetkupplung, die eine Weiterbenutzung ausschließen. Verwenden Sie das Netzteil für den Defibrillator entsprechend den Herstellervorgaben. ZOLL empfiehlt ausdrücklich, den Defibrillator immer mit eingesetztem Akku zu betreiben, auch wenn eine externe Spannungsversorgung angeschlossen ist. Beachten Sie für alle verwendeten Geräte weiterhin die Bedienungs- und Warnhinweise sowie die Spezifikationen des Herstellers. Lassen Sie keine Flüssigkeiten oder Feuchtigkeit in die Elektronik eindringen. Rev. 2.2 | 16 Bracket CRX REINIGUNG | DESINFEKTION Bitte entnehmen Sie den Defibrillator und das Netzteil zur Reinigung aus der Halterung und trennen Sie alle Geräte von den Versorgungsspannungen. Die Oberfläche kann mit einem feuchten Tuch und handelsüblichem milden Reinigungsmittel gereinigt werden. Achten Sie darauf, dass keine Flüssigkeit oder Feuchtigkeit in die Elektronik eindringt. VERWENDETE SYMBOLE Siehe Begleitdokumente / Bedienungsanleitung CE-Kennzeichnung entsprechend durch den Hersteller EU-Richtlinie 93/42/EWG ENTSORGUNG Verpackungen sind Rohstoffe und daher wiederverwertbar. Entsorgen Sie diese im Interesse des Umweltschutzes sortenrein. Weitere Informationen zur umweltfreundlichen Entsorgung erhalten Sie vom Hersteller. Rev. 2.2 | 17 Bracket CRX SERVICE | HERSTELLER CRS medical GmbH Loherstr. 6 D-35614 Asslar T. +49 (0)6441-38331-0 F. +49 (0)6441-38331-29 Rev. 2.2 | 18 Bracket CRX TABLE OF CONTENTS Welcome………………………………………………………………… 20 Notes on safety………………………………………………………… 21 Intended purpose | Scope of delivery………………………………… 22 Technical data…………………………………………………………... 23 Accessories……………………………………………………………... 24 Mounting………………………………………………………………… 25 Installation……………………………………………………………….. 29 Operation………………………………………………………………... 30 Warnings………………………………………………………………… 31 Cleaning | Disinfection ……………………………..……………..…… 32 Symbols used| Disposal ………………………………………………. 33 Service| Manufacturer……………………………….…………..... 34 Rev. 2.2 | 19 Bracket CRX Dear customer, Thank you for purchasing the Bracket CRX. These instructions contain technical information and guidance for use and installation of your Bracket CRX. Rev. 2.2 | 20 Bracket CRX NOTES ON SAFETY Read these instructions carefully before using the Bracket CRX. Keep these instructions in a safe place for future reference and pay particular attention to the notes on safety. CRS medical shall not be liable for damages caused by the use of power packs or connections for the ZOLL X Series®, irrespective of the Bracket CRX version used. The manufacturer accepts no liability for damage resulting from improper use, attachment, assembly or installation. Repairs and maintenance of the Bracket CRX may only be carried out by authorised specialists. In the event of a defect, please contact the technical customer service of CRS medical GmbH. Any modifications to the equipment or its accessories not authorised or carried out by the manufacturer shall void the warranty and liability obligations of CRS medical GmbH. Inspect the Bracket CRX after every use and do not use if: o there is mechanical damage to the CRX mounting adapter Rev. 2.2 o there is mechanical damage to the CRX wall mount o there is mechanical or electrical damage to the power connection o the adapter does not slide into the wall mount without assistance o the locking mechanism does not work securely o There are foreign objects located on the magnetic connector, i.e. metal filings | 21 Bracket CRX INTENDED PURPOSE The Bracket CRX is designed for stationary use or in ambulances with the ZOLL X Series® defibrillator. It should be installed on a vertical wall. The Bracket CRX w power features the additional option of an external power supply for the defibrillator. SCOPE OF DELIVERY BRACKET CRX w power P/N: 2106533002 1 CRX mounting adapter (P/N: 2306533002) with power connection for attaching to the X Series, including four fastening screws 1 CRX wall mount (P/N: 2306533004) with power connection for receiving the mounting adapter 1 wall mount (P/N: 2306533005) for the ZOLL power pack 1 set of instructions OR BRACKET CRX w/o power P/N: 2106533001 1 CRX mounting adapter (P/N: 2306533001) for attaching to the X Series, including four fastening screws 1 CRX wall mount (P/N: 2306533003) for receiving the mounting adapter 1 set of instructions Rev. 2.2 | 22 Bracket CRX TECHNICAL DATA P/N: 2306533003 2306533004 2306533001 2306533002 2306533005 Description Wall Fastening w/o power Wall Fastening w power Adaption w/o power Adaption w power Power Supply Fastening Height 310mm 330mm 109mm 109mm 180mm Width 225mm 225mm 83mm 130mm 190mm Depth 40mm 80mm 57mm 57mm 40mm Weight 1460g 1610g 292g 405g 260g Voltage n/a 14,5VDC n/a 14,5VDC n/a Current n/a 4,15A n/a 4,15A n/a Dimensions Working temperature 0 – 50°C Storage temperature -30 – 70°C CRS medical reserves the right to make technical and aesthetic modifications to the equipment in the interest of product improvements. Rev. 2.2 | 23 Bracket CRX ACCESSORIES (not included) Softbag X- Serie EU P/N: 2103033003 Figure shows defibrillator with Softbag X-Series EU and Bracket CRX Desktop Shoulder Strap P/N: 2209933006 Figure shows defibrillator with Softbag X-Series EU and Shoulder Strap Rev. 2.2 | 24 Bracket CRX MOUNTING 1. Positioning the CRX mounting adapter on the back of the device Attach the mounting adapter to the back of the defibrillator as shown in the image. If using the X Series EU soft bag, care must be taken to ensure that the bag’s connecting strap is placed between the defibrillator and the adapter. If using a mounting adapter with a power connection, take care to ensure that the power socket is properly positioned at the input jack of the defibrillator. The electrical contacts of the mounting adapter must be securely connected to the power pack connector of the ZOLL X Series before screwing on the mounting adapter with the four included screws.If you have purchased a device with a power connection, please also read the mounting instructions for the power pack. 2. Attaching the CRX wall mount Attach the wall mount to a flat surface using six screws as shown in the drilling diagram on page 26. For safe and ergonomic operation of the Bracket CRS recommens mounting at a height of approx. 1 meter (referenced at the drilling holes in the middle of the bracket). Rev. 2.2 | 25 Bracket CRX Be careful to leave enough space above the bracket – CRS recommends approx. 40cm. Drilling diagram for CRX wall mount (all dimensions in mm) 40 103 160 139 30 100 8 Rev. 2.2 | 26 Bracket CRX 3. Attaching the wall mount for the power pack* The shipment contains two different versions of angel brackets based on the different dimensions of the ZOLL AC or DC Auxiliary Power Adapter. Select the correct version for safely mounting the ZOLL Auxiliary Power Adapter. Attach the power pack (not included, must be purchased separately, if necessary) to the wall mount using the holding bracket. Protect the nuts with screw locking varnish. Secure the power pack cable with the two Velcro straps. Pay attention to the length of the power cable and the distance to the defibrillator. Attach the wall mount for the power pack using four screws as shown in the drilling diagram on page 28. Depending on available space, you can screw on the wall mount for the power pack alone or directly with the CRX wall mount as seen in the above picture. *only for Bracket CRX w power Rev. 2.2 | 27 Bracket CRX Drilling diagram for the power pack wall mount (all dimensions in mm) 100 139 100 5,5 Rev. 2.2 | 28 Bracket CRX INSTALLATION* The power supply for the electrical supply of the ZOLL X Series must conform to the specifications of the defibrillator manufacturer (e.g. AC Auxiliary Power Adapter 8300-0004 or DC Auxiliary Power Adapter, 8300-000006). 1. Connecting the power Connect the DC output of the power pack with the DC connector jack on the back of the CRX wall mount as shown in the image. Please refer to the manufacturer’s instructions on how to connect the power cable of a ZOLL Auxiliary Power Adapter. 2. Disconnecting the power 1 2 Step 1: Turn the bayonet fastening clockwise Step 2: Remove the power pack connector from the jack. *only for Bracket CRX w power Rev. 2.2 | 29 Bracket CRX OPERATION 1. Inserting the defibrillator Insert the defibrillator with the mounting adapter into the receiver of the CRX wall mount. The CRX wall mount is locked when the adapter audibly engages (“click”). For CRX wall mounts with a power connection: ensure that the external power pack is detected by the defibrillator. 2. Removing the defibrillator 1. Step 1: Release the lock of the CRX wall mount by pulling the red lever towards yourself. Step 2: Remove the defibrillator from the CRX wall mount by pulling it up vertically. 2. Rev. 2.2 | 30 Bracket CRX HANDLING WARNINGS Removing or inserting the defibrillator other than vertically upwards or vertically downwards will damage the magnetic power connector over repeated use. Insert straight downwards ONLY Remove straight upwards ONLY Step 1: Pull Handle Step 2: Remove vertically Rev. 2.2 | 31 Bracket CRX WARNINGS Ensure that all mechanical and electrical parts are free of damage and foreign objects. These may damage or jam the mount, or result in an electrical defect in the defibrillator, power pack or CRX power connection. The float-mounted magnet connector contains mechanical limitations. Moving the connector forcibly beyond these limits will cause damage and prevent further use. Use the defibrillator power pack in accordance with the manufacturer’s instructions. ZOLL strongly recommends to always operate the defibrillator with an inserted battery, even when connected to an external power supply. Please observe the operating instructions, warnings and manufacturer specifications for all equipment used. Do not allow liquids to enter into the defibrillator. CLEANING | DISINFECTION Please remove the defibrillator and the power pack from the mount for cleaning and disconnect all equipment from the power supply. The surface can be cleaned with a damp cloth and commercially available mild detergent. Do not allow liquids to enter into the defibrillator. Rev. 2.2 | 32 Bracket CRX SYMBOLS USED See supporting documentation / instructions CE mark in accordance with EU directive 93/42/EEC by manufacturer DISPOSAL The packaging is made of raw materials and can therefore be recycled. In the interests of the environment, dispose of it according to type. More information on environmentally-friendly disposal can be obtained from the manufacturer. Rev. 2.2 | 33 Bracket CRX SERVICE | MANUFACTURER CRS medical GmbH Loherstr. 6 D-35614 Asslar, Germany Tel +49 (0)6441-38331-0 Fax +49 (0)6441-38331-29 Rev. 2.2 | 34