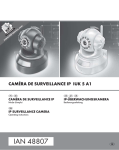
1
WILD-/ÜBERWACHUNGSKAMERA WK 5 A1 WILD-/ÜBERWACHUNGSKAMERA Bedienungsanleitung IAN 94376 GAME/SURVEILLANCE CAMERA Operating instructions Klappen Sie vor dem Lesen die beiden Seiten mit den Abbildungen aus und machen Sie sich anschließend mit allen Funktionen des Gerätes vertraut. Before reading, unfold both pages containing illustrations and familiarise yourself with all functions of the device. DE / AT / CH GB Bedienungsanleitung Operating instructions Seite Page 1 43 A 1 B 3 2 8 4 5 6 9 7 C 11 10 12 14 13 D 15 16 17 18 19 20 21 E 22 F 23 28 24 25 29 26 27 3x 3x 30 31 32 33 34 35 36 Inhaltsverzeichnis Einführung . . . . . . . . . . . . . . . . . . . . . . . . . . . . . . . . . . . 3 Informationen zu dieser Bedienungsanleitung . . . . . . . . . . . . . . . . 3 Urheberrecht . . . . . . . . . . . . . . . . . . . . . . . . . . . . . . . . . . . . . . . . . 3 Bestimmungsgemäße Verwendung . . . . . . . . . . . . . . . . . . . . . . . . 3 Hinweise zu Warenzeichen . . . . . . . . . . . . . . . . . . . . . . . . . . . . . . 4 Warnhinweise. . . . . . . . . . . . . . . . . . . . . . . . . . . . . . . . . . . . . . . . . 4 Sicherheit . . . . . . . . . . . . . . . . . . . . . . . . . . . . . . . . . . . . 5 Grundlegende Sicherheitshinweise . . . . . . . . . . . . . . . . . . . . . . . . 5 Verletzungsgefahr durch falschen Umgang mit Batterien . . . . . . . . 7 Verletzungsgefahr durch falschen Umgang mit Speicherkarten . . . 7 Mögliche Verletzung von Rechten Dritter . . . . . . . . . . . . . . . . . . . . 8 Teilebeschreibung . . . . . . . . . . . . . . . . . . . . . . . . . . . . 10 Inbetriebnahme . . . . . . . . . . . . . . . . . . . . . . . . . . . . . . 12 Lieferumfang und Transportinspektion . . . . . . . . . . . . . . . . . . . . . 12 Entsorgung der Verpackung . . . . . . . . . . . . . . . . . . . . . . . . . . . . . 13 Anforderungen an den Aufstellort . . . . . . . . . . . . . . . . . . . . . . . . 13 Öffnen und Verschließen der Kamera . . . . . . . . . . . . . . . . . . . . . 14 Einsetzen der Batterien/Stromversorgung . . . . . . . . . . . . . . . . . . 14 Videoanschluss . . . . . . . . . . . . . . . . . . . . . . . . . . . . . . . . . . . . . . . 15 Speichermedien einsetzen . . . . . . . . . . . . . . . . . . . . . . . . . . . . . . 15 Adapterkarte verwenden . . . . . . . . . . . . . . . . . . . . . . . . . . . . . . . 17 Bedienung und Betrieb . . . . . . . . . . . . . . . . . . . . . . . . 18 Ein- und Ausschalten, Einstellungen vornehmen . . . . . . . . . . . . . . 18 Montage mit Befestigungsgurt . . . . . . . . . . . . . . . . . . . . . . . . . . . 27 Verwendung der Wandhalterung . . . . . . . . . . . . . . . . . . . . . . . . . 27 Kamera ausrichten . . . . . . . . . . . . . . . . . . . . . . . . . . . . . . . . . . . . 29 WK 5 A1 1 DE AT CH DE AT CH Live-Modus aktivieren . . . . . . . . . . . . . . . . . . . . . . . . . . . . . . . . . . 30 Nachtaufnahmen . . . . . . . . . . . . . . . . . . . . . . . . . . . . . . . . . . . . . 30 Aufnahmen auf dem Bildschirm anzeigen . . . . . . . . . . . . . . . . . . 31 Aufnahmen auf externem Monitor anzeigen . . . . . . . . . . . . . . . . 34 Aufnahmen auf einen Computer überspielen . . . . . . . . . . . . . . . . 34 Reinigung . . . . . . . . . . . . . . . . . . . . . . . . . . . . . . . . . . . 35 Fehlerbehebung . . . . . . . . . . . . . . . . . . . . . . . . . . . . . 36 Fehlerursachen und -behebung . . . . . . . . . . . . . . . . . . . . . . . . . . 36 Lagerung/Entsorgung . . . . . . . . . . . . . . . . . . . . . . . . . 38 Lagerung . . . . . . . . . . . . . . . . . . . . . . . . . . . . . . . . . . . . . . . . . . . 38 Gerät entsorgen . . . . . . . . . . . . . . . . . . . . . . . . . . . . . . . . . . . . . . 38 Batterien/Akkus entsorgen . . . . . . . . . . . . . . . . . . . . . . . . . . . . . . 38 Anhang. . . . . . . . . . . . . . . . . . . . . . . . . . . . . . . . . . . . . 39 Hinweise zur Konformitätserklärung . . . . . . . . . . . . . . . . . . . . . . . 39 Technische Daten . . . . . . . . . . . . . . . . . . . . . . . . . . . . . . . . . . . . . 39 Garantie . . . . . . . . . . . . . . . . . . . . . . . . . . . . . . . . . . . . . . . . . . . . 41 Service . . . . . . . . . . . . . . . . . . . . . . . . . . . . . . . . . . . . . . . . . . . . . 42 Importeur . . . . . . . . . . . . . . . . . . . . . . . . . . . . . . . . . . . . . . . . . . . 42 2 WK 5 A1 Einführung DE AT CH Informationen zu dieser Bedienungsanleitung Herzlichen Glückwunsch zum Kauf Ihres neuen Gerätes. Sie haben sich damit für ein hochwertiges Produkt entschieden. Die Bedienungsanleitung ist Bestandteil dieses Produkts. Sie enthält wichtige Hinweise für Sicherheit, Gebrauch und Entsorgung. Machen Sie sich vor der Benutzung des Produkts mit allen Bedien- und Sicherheitshinweisen vertraut. Benutzen Sie das Produkt nur wie beschrieben und für die angegebenen Einsatzbereiche. Händigen Sie bei Weitergabe oder Verkauf des Produktes an Dritte alle Unterlagen inkl. dieser Bedienungsanleitung mit aus. Urheberrecht Diese Dokumentation ist urheberrechtlich geschützt. Jede Vervielfältigung, bzw. jeder Nachdruck, auch auszugsweise, sowie die Wiedergabe der Abbildungen, auch im veränderten Zustand ist nur mit schriftlicher Zustimmung des Herstellers gestattet. Bestimmungsgemäße Verwendung Dieses Gerät ist ein Gerät der Informationstechnik und ist nur zum Aufzeichnen von digitalen Fotos und Videos, speziell zur Wildbeobachtung bestimmt. Eine andere oder darüber hinausgehende Benutzung gilt als nicht bestimmungsgemäß. Das Gerät ist nicht zur Verwendung in gewerblichen oder industriellen Bereichen vorgesehen. Ansprüche jeglicher Art wegen Schäden aus nicht bestimmungsgemäßer Verwendung, unsachgemäßen Reparaturen, unerlaubt vorgenommener Veränderungen oder Verwendung nicht zugelassener Ersatzteile sind ausgeschlossen. Das Risiko trägt allein der Benutzer. WK 5 A1 3 DE AT CH Hinweise zu Warenzeichen - USB ist ein eingetragenes Warenzeichen von USB Implementers Forum, Inc.. Alle weiteren Namen und Produkte können die Warenzeichen oder eingetragene Warenzeichen ihrer jeweiligen Eigentümer sein. Warnhinweise In der vorliegenden Bedienungsanleitung werden folgende Warnhinweise verwendet: GEFAHR Ein Warnhinweis dieser Gefahrenstufe kennzeichnet eine drohende gefährliche Situation. Falls die gefährliche Situation nicht vermieden wird, kann dies zum Tod oder zu schweren Verletzungen führen. ► Die Anweisungen in diesem Warnhinweis befolgen, um die Gefahr des Todes oder schwerer Verletzungen von Personen zu vermeiden. WARNUNG Ein Warnhinweis dieser Gefahrenstufe kennzeichnet eine mögliche gefährliche Situation. Falls die gefährliche Situation nicht vermieden wird, kann dies zu Verletzungen führen. ► Die Anweisungen in diesem Warnhinweis befolgen, um Verletzungen von Personen zu vermeiden. 4 WK 5 A1 DE AT CH ACHTUNG Ein Warnhinweis dieser Gefahrenstufe kennzeichnet einen möglichen Sachschaden. Falls die Situation nicht vermieden wird, kann dies zu Sachschäden führen. ► Die Anweisungen in diesem Warnhinweis befolgen, um Sachschäden zu vermeiden. HINWEIS ► Ein Hinweis kennzeichnet zusätzliche Informationen, die den Umgang mit dem Gerät erleichtern. Sicherheit In diesem Kapitel erhalten Sie wichtige Sicherheitshinweise im Umgang mit dem Gerät. Dieses Gerät entspricht den vorgeschriebenen Sicherheitsbestimmungen. Ein unsachgemäßer Gebrauch kann zu Personen- und Sachschäden führen. Grundlegende Sicherheitshinweise Beachten Sie für einen sicheren Umgang mit dem Gerät die folgenden Sicherheitshinweise: ■ Kontrollieren Sie das Gerät vor der Verwendung auf äußere sichtbare Schäden. Nehmen Sie ein beschädigtes oder heruntergefallenes Gerät nicht in Betrieb. ■ Bei Beschädigung der Kabel oder Anschlüsse lassen Sie diese von autorisiertem Fachpersonal oder dem Kundenservice austauschen. ■ Personen, die aufgrund ihrer körperlichen, geistigen oder motorischen Fähigkeiten nicht in der Lage sind das Gerät sicher zu bedienen, dürfen das Gerät nur unter Aufsicht oder Anweisung durch eine verantwortliche Person benutzen. WK 5 A1 5 DE AT CH ■ Befestigen Sie das Gerät nicht an freistehenden oder besonders hohen Bäumen, da bei diesen die Blitzschlaggefahr besonders hoch ist. Wird der Baum, an dem die Kamera befestigt ist, vom Blitz getroffen, kann das Gerät zerstört werden. ■ Gestatten Sie Kindern die Benutzung des Gerätes nur unter Aufsicht. Kinder können mögliche Gefahren nicht immer richtig erkennen. ■ Lassen Sie Reparaturen am Gerät nur von autorisierten Fachbetrieben oder dem Kundenservice durchführen. Durch unsachgemäße Reparaturen können Gefahren für den Benutzer entstehen. Zudem erlischt der Garantieanspruch. Das Gerät darf nicht vom Anwender geöffnet werden. ■ Eine Reparatur des Gerätes während der Garantiezeit darf nur von einem vom Hersteller autorisierten Kundendienst vorgenommen werden, sonst besteht bei nachfolgenden Schäden kein Garantieanspruch mehr. ■ Defekte Bauteile dürfen nur gegen Original-Ersatzteile ausgetauscht werden. Nur bei diesen Teilen ist gewährleistet, dass sie die Sicherheitsanforderungen erfüllen. ■ Stellen Sie keine Gegenstände auf das Gerät. ■ Das Gerät nicht in der Nähe von offenen Flammen (z. B. Kerzen) betreiben. ■ Sollten Sie ungewöhnliche Geräusche, Rauch oder ähnlich unklare Situationen wahrnehmen, entnehmen Sie die Batterien oder trennen ein ggf. angeschlossenes Netzteil von der Stromversorgung und wenden sich an den Service (siehe Kapitel „Service”). GEFAHR! Verpackungsmaterialien dürfen nicht zum Spielen ■ verwendet werden. Es besteht Erstickungsgefahr! 6 WK 5 A1 Verletzungsgefahr durch falschen Umgang mit Batterien ■ Batterien dürfen nicht in die Hände von Kindern gelangen. Kinder könnten Batterien in den Mund nehmen und verschlucken. Wurde eine Batterie verschluckt, muss sofort medizinische Hilfe in Anspruch genommen werden. ■ Batterien nicht ins Feuer werfen. Batterien keinen hohen Temperaturen aussetzen. ■ Explosionsgefahr! Nur als „aufladbar“ gekennzeichnete Batterien dürfen wieder aufgeladen werden. ■ Batterien nicht öffnen oder kurzschließen. ■ Unterschiedliche Batterie- bzw. Akkutypen dürfen nicht gemischt eingesetzt werden. Leere Batterien sollten wegen des erhöhten Auslaufrisikos entnommen werden. Auch bei Nichtgebrauch des Gerätes sollten die Batterien aus der Kamera entnommen werden. ■ Batteriesäure, die aus einer Batterie austritt, kann zu Hautreizungen führen. Bei Hautkontakt mit viel Wasser abspülen. Wenn die Flüssigkeit in die Augen gelangt ist, gründlich mit Wasser ausspülen, nicht reiben und sofort einen Arzt aufsuchen. ■ Wie Sie die Batterien in das Gerät einlegen und wieder herausnehmen erfahren Sie im Kapitel „Stromversorgung“. Verletzungsgefahr durch falschen Umgang mit Speicherkarten ■ Kinder sollen beaufsichtigt werden, um sicherzustellen, dass sie nicht mit der Speicherkarte spielen. Sollte versehentlich eine Speicherkarte verschluckt worden sein, muss sofort medizinische Hilfe in Anspruch genommen werden. WK 5 A1 7 DE AT CH DE AT CH Mögliche Verletzung von Rechten Dritter Bei der Benutzung der Wildkamera müssen Sie folgende Hinweise beachten: Urheberschutz Grundsätzlich hat jede Person das Recht am eigenen Bild. Nach dem Urheberrechtsgesetz dürfen Bilder ohne Einwilligung der Betroffenen nur dann veröffentlicht werden, wenn die Personen lediglich als Beiwerk neben einer Landschaft oder sonstigen Örtlichkeiten erscheinen. Die Beantwortung der Frage, ob eine Person nur Beiwerk ist, hängt von den Umständen des Einzelfalls ab. Aus Gründen der Rechtssicherheit sollte in allen Fällen, in denen Aufnahmen mit Bezug zu identifizierbaren Personen möglich sind, über die Wildkamera informiert werden (siehe auch Abschnitt „Hinweispflicht“). Schutz der Privatsphäre Die Privatsphäre Anderer darf durch die aufgenommenen Bilder nicht verletzt werden. Richten Sie Ihre Kamera nicht in den Garten oder auf die Eingangstür Ihrer Nachbarwohnung, auch wenn diese Orte aus Ihrer eigenen Wohnung oder von öffentlichen Standorten aus einsehbar sind. Dies berechtigt nicht zur Veröffentlichung dieser Einsichten. Personelle Bestimmbarkeit Eine personelle Bestimmbarkeit liegt vor, wenn festgestellt werden kann, dass eine bestimmte Person zu einer bestimmten Zeit an einem bestimmten Ort war. Die Identifikation kann dabei auch über ein personenbezogenes Kennzeichen, wie z.B. das Fahrzeugkennzeichen, erfolgen. Eine personelle Bestimmbarkeit von Personen ist unbedingt zu vermeiden. 8 WK 5 A1 Überwachungskameras am Arbeitsplatz Die Überwachung am Arbeitsplatz untersteht in Deutschland besonders strengen Auflagen. Arbeitgeber sollten auf Überwachungskameras am Arbeitsplatz vollständig verzichten, solange eine mögliche Rechtsverletzung nicht vollständig ausgeschlossen werden kann. Überwachungskameras im Straßenverkehr Bei Überwachungskameras mit Blick auf den Straßenverkehr empfiehlt es sich, den Standort der Kameras und den Bildausschnitt so zu konfigurieren, dass durch die Aufnahmen die Verkehrsteilnehmer nicht über die Autonummer bestimmbar sind. Auch Fahrzeugaufschriften können zu einer Bestimmbarkeit der Verkehrsteilnehmer führen. Hinweispflicht Ist eine Identifikation von Personen nicht auszuschließen, muss ein Hinweis auf die Überwachungskamera an allen Zugangswegen zum Aufnahmebereich gut erkennbar aufgestellt sein. Passanten müssen zudem darüber informiert werden, dass sie mit dem Betreten des Aufnahmebereichs ihre Einwilligung zur Aufnahme der Bilder erteilen und dass sie im Falle der Verweigerung der Einwilligung die Aufnahme vermeiden können, indem sie den Bereich nicht betreten. Hierbei ist auf die Freiwilligkeit der Erklärung zu achten. Befindet sich die Kamera an einer Stelle, die Betroffene passieren müssen, um zum Ziel zu gelangen (z.B. am Eingang einer Sehenswürdigkeit), so liegt mangels Freiwilligkeit keine wirksame Einwilligung vor. Beachten Sie zu möglichen Verletzungen von Rechten Dritter immer die gesetzlichen Bestimmungen des jeweiligen Einsatzlandes. WK 5 A1 9 DE AT CH DE AT CH Teilebeschreibung (Abbildungen siehe Ausklappseiten) 1 Infrarot LEDs 2 Bereitschaftsanzeige, rote LED 3 Bewegungsanzeige, grüne und blaue LED 4 Kameraobjektiv 5 Verriegelungsöse 6 Frontaler Bewegungssensor 7 Seitliche Bewegungssensoren 8 Baumhalterung 9 Sicherungsschraube 10 Bildschirm 11 Batteriefach 12 Verschlussklammern 13 Lautsprecher 14 Bedienfeldtasten 15 Speicherkarteneinschub (microSD) 16 AV-Buchse 17 Mini-USB-Buchse 18 Betriebswahlschalter (OFF - TEST - ON) 19 Mikrofon 20 DC-Anschlussbuchse (für Netzadapter; nicht mitgeliefert) 21 Stativgewinde 22 Stativschraube 23 Konterscheibe 24 Gelenk-Flügelschrauben 10 WK 5 A1 25 Bohrlöcher 26 Dübel 27 Schrauben 28 TV-Kabel (Miniklinke auf Cinch; Audio/Video) 29 Mini-USB auf USB 2.0 Anschlusskabel 30 Befestigungsgurt 31 Gurtverschluss 32 Aufbewahrungsbox 33 Adapterkarte (microSD auf SD) 34 microSDHC-Speicherkarte (4 GB) 35 8 x 1,5 V Batterien Typ AA/Mignon/LR6 36 Bedienungsanleitung WK 5 A1 DE AT CH 11 DE AT CH Inbetriebnahme Lieferumfang und Transportinspektion Bitte prüfen Sie den Lieferumfang (siehe Ausklappseiten). Der Lieferumfang besteht aus folgenden Komponenten: ▯ ▯ ▯ ▯ ▯ ▯ ▯ ▯ ▯ ▯ ▯ ▯ Wild-/Überwachungskamera WK 5 A1 Wandhalterung 3 x Dübel 26 3 x Schraube 27 TV-Kabel (Miniklinke auf Cinch; Audio/Video) 28 Mini-USB auf USB 2.0 Anschlusskabel 29 Befestigungsgurt (2,5 cm breit, ca. 190 cm lang) 30 Aufbewahrungsbox 32 Adapterkarte (microSD auf SD) 33 microSDHC-Speicherkarte (4 GB) 34 8 x 1,5 V Batterien Typ AA/Mignon/LR6 35 Bedienungsanleitung 36 HINWEIS ► Prüfen Sie die Lieferung auf Vollständigkeit und auf sichtbare Schäden. ► Bei einer unvollständigen Lieferung oder Schäden infolge mangelhafter Verpackung oder durch Transport wenden Sie sich an die Service-Hotline (siehe Kapitel Service). ♦ Entnehmen Sie alle Teile des Gerätes und die Bedienungsanleitung aus dem Karton. ♦ Entfernen Sie sämtliches Verpackungsmaterial und die Schutzfolien vom Gerät. 12 WK 5 A1 Entsorgung der Verpackung Die Verpackung schützt das Gerät vor Transportschäden. Die Verpackungsmaterialien sind nach umweltverträglichen und entsorgungstechnischen Gesichtspunkten ausgewählt und deshalb recyclebar. Die Rückführung der Verpackung in den Materialkreislauf spart Rohstoffe und verringert das Abfallaufkommen. Entsorgen Sie nicht mehr benötigte Verpackungsmaterialien gemäß den örtlich geltenden Vorschriften. HINWEIS ► Heben Sie wenn möglich die Originalverpackung während der Garantiezeit des Gerätes auf, um das Gerät im Garantiefall ordnungsgemäß verpacken zu können. Anforderungen an den Aufstellort Das Gerät entspricht der Schutzklasse IP54. Somit ist die Kamera staub- und spritzwassergeschützt und kann daher wetterunabhängig eingesetzt werden. Voller Staub- und Spritzwasserschutz ist allerdings nur gegeben, wenn die Kamera korrekt verschlossen ist und die Dichtung intakt und sauber sind. Bitte beachten Sie, dass der Staub- u. Spritzwasserschutz nur noch eingeschränkt gegeben ist, wenn das Gerät mit einem externen Netzteil betrieben wird. WK 5 A1 13 DE AT CH DE AT CH Öffnen und Verschließen der Kamera Die Bedientasten, Anschlüsse und das Batteriefach befinden sich im Inneren der Kamera. ♦ Lösen Sie die beiden seitlichen Verschlussklammern 12 , um die Kamera zu öffnen. ♦ Um die Kamera wieder zu verschließen, haken Sie die Metallbügel der Verschlussklammern in die Halterungen ein und drücken dann die Plastiklasche nach unten. Zwischen den beiden Verschlussklammern befindet sich eine Verriegelungsöse 5 , mit der Sie die Kamera mit Hilfe eines Vorhängeschlosses sicher verschließen können. Einsetzen der Batterien/Stromversorgung ♦ Um Batterien 35 in das Gerät einzulegen, öffnen Sie die Kamera. ♦ Drücken Sie nun den Klemmverschluss an der Oberseite des Batteriefachdeckels etwas nach unten heben Sie den Batteriefachdeckel ab. ♦ Setzen Sie 4 oder 8 1,5 V-Batterien Typ AA / Mignon in das Batterienfach 11 ein. Beachten Sie dabei die angegebene Polarität. HINWEIS ► Bei Verwendung von 4 Batterien können diese entweder alle in den oberen Teil oder alle in den unteren Teil des Batteriefachs eingesetzt werden. Andere Kombinationen sind nicht möglich. ♦ Schließen Sie das Batteriefach wieder. Achten Sie darauf, dass der Batteriefachdeckel hörbar einrastet. ♦ Sollten Sie das Gerät über einen Netzadapter (nicht mitgeliefert) betreiben, öffnen Sie die Gummidichtung an der Unterseite der Kamera und stecken Sie den Stecker des Netzadapterkabels in die DC-Anschlussbuchse 20 . Der Netzadapter muss eine Gleich14 WK 5 A1 spannung von 6 V und mindestens 1,5 A liefern. Verwenden Sie einen Hohlstecker, an dessen innerem Pol der Pluspol anliegt ( ). Der Betrieb über einen Netzadapter ist auch mit eingelegten Batterien möglich. Fällt eine der Spannungsquellen aus, wird der Betrieb über die andere aufrecht erhalten. Videoanschluss HINWEIS ► Die Kamera kann das Videobild und den Ton an einen externen Monitor bzw. an den Video/Audio-Eingang eines Fernsehgerätes übertragen. Bitte beachten Sie hierzu auch die Anleitung des jeweiligen Wiedergabegerätes. ♦ Schließen Sie dazu einen geeigneten Monitor über das beiliegende TV-Kabel 28 an die AV-Buchse 16 an. Speichermedien einsetzen HINWEISE ► Da die Kamera über keinen eingebauten Speicher verfügt, funktioniert sie nur bei eingesetzter microSDHC-Speicherkarte 34 . ► Das Gerät unterstützt microSDHC-Speicherkarten mit bis zu 32 GB Kapazität. WK 5 A1 15 DE AT CH DE AT CH ACHTUNG ► Halten Sie die Speicherkarte von Feuchtigkeit fern und vermeiden Sie Erschütterungen, Staub, Hitze und direkte Sonnenbestrahlung, um Betriebsstörungen zu vermeiden. ► Beachten Sie beim Einstecken der Speicherkarte die auf dem Kartensteckplatz angegebene Einsteckposition. Stecken Sie die Speicherkarte niemals mit Gewalt in den Kartensteckplatz. Verbiegen oder Verkanten Sie die Speicherkarte nicht. ► Warten Sie nach einem Transport solange mit der Inbetriebnahme, bis die Speicherkarte die Umgebungstemperatur angenommen hat. Bei großen Temperatur- oder Feuchtigkeitsschwankungen kann es durch Kondensation zur Feuchtigkeitsbildung kommen, die einen elektrischen Kurzschluss verursachen kann. Bewahren Sie die Speicherkarte in der Aufbewahrungsbox 32 auf. ♦ Um die microSDHC-Speicherkarte 34 aus dem Speicherkarteneinschub 15 des Gerätes zu entnehmen, drücken Sie leicht auf die nach außen ragende Kante der Speicherkarte, so dass diese ausrastet. Entnehmen Sie dann die Speicherkarte. ♦ Um die microSDHC-Speicherkarte in den Speicherkarteneinschub des Gerätes einzusetzen, führen Sie sie in den Einschub ein, bis sie einrastet. Dabei müssen die Kontaktflächen der Speicherkarte in die Richtung der Kamerafront weisen. 16 WK 5 A1 Adapterkarte verwenden Die microSDHC-Speicherkarte 34 wird mit einer praktischen Adapterkarte (microSD auf SD) 33 ausgeliefert, damit Sie die microSDHCSpeicherkarte in allen Geräten mit SD-Kartensteckplatz verwenden und auf die Daten zugreifen können. ♦ Setzen Sie die microSD-Speicherkarte, wie in der Abbildung dargestellt, in die Adapterkarte ein. HINWEIS ► Die Adapterkarte verfügt über eine Verriegelung zum Schreibschutz. Um die microSDHC-Speicherkarte von Schreibzugriffen zu schützen, schieben Sie den seitlichen Schreibschutzschalter in die Position „LOCK“ (siehe Abbildung). ► Der Schreibschutzschalter schützt die microSDHC-Speicherkarte nur während sie sich in der Adapterkarte befindet. Sobald Sie die microSDHC-Speicherkarte herausnehmen, steht kein Schreibschutz mehr zur Verfügung. WK 5 A1 17 DE AT CH DE AT CH Bedienung und Betrieb In diesem Kapitel erhalten Sie wichtige Hinweise zu Bedienung und Betrieb des Gerätes. Ein- und Ausschalten, Einstellungen vornehmen Nach Herstellen der Stromversorgung schieben Sie den Betriebswahlschalter 18 in die Stellung „TEST“, um die auf den folgenden Seiten beschriebenen Einstellungen mit Hilfe der Bedienfeldtasten 14 vorzunehmen: ♦ Drücken Sie die umzuschalten. -Taste, um vom Video- auf den Fotomodus ♦ Drücken Sie die umzuschalten. -Taste, um vom Foto- auf den Videomodus ♦ Drücken Sie die -Taste, um eine Aufnahme (Foto oder Video) manuell zu starten. Erneutes drücken der -Taste beendet die Aufnahme. ♦ Drücken Sie die 18 -Taste, um das Einstellungs-Menü zu öffnen. WK 5 A1 ♦ Drücken Sie die / -Tasten, um den gewünschten Menüeintrag auszuwählen, den Sie dann mit der -Taste aufrufen. Wenn Sie Einstellungen ändern, müssen Sie diese immer mit der -Taste bestätigen. Mit der -Taste wechseln Sie jeweils eine Menüebene zurück. Modus Zum Auswählen, ob bei Bewegungserkennung Fotos oder Videos aufgenommen werden sollen. Im Modus „Foto & Video“ nimmt die Kamera zuerst ein Foto und anschließend ein Video auf. Fotoauflösung Wählen Sie die Fotogröße aus: 1 MP, 3 MP, 5 MP (voreingestellt), 8 MP oder 12 MP. Je größer die Datei, umso kleinere Details lassen sich darauf erkennen. Allerdings ist die mögliche Anzahl von Aufnahmen bei hoher Dateigröße geringer, da die Speicherkarte eher voll ist. Serienaufnahme Wählen Sie die Anzahl der Fotos aus, die bei Auslösung im FotoModus in Folge aufgenommen werden sollen. Neben der Einzelaufnahme (1 Foto) können Sie „2 Fotos in Serie“ oder „3 Fotos in Serie“ auswählen. Videoauflösung Wählen Sie die Anzahl der Bildpunkte aus: 1920 × 1080P, 1280 × 720P, 720 × 480P, 640 × 480P oder 320 × 240P. Je höher die Auflösung, umso eher ist auch hier die Kapazitätsgrenze der Speicherkarte erreicht. WK 5 A1 19 DE AT CH DE AT CH Videolänge Wählen Sie mit den / -Tasten die Länge der Videoaufzeichnung zwischen 3 – 59 Sekunden bzw. 1 – 10 Minuten aus, die bei Auslösung im Video-Modus aufgenommen werden soll. Je länger Sie die Aufzeichnungszeit wählen, umso geringer ist die Betriebsdauer. Voreingestellt ist eine Videolänge von 5 Sekunden. Tonaufnahme Wenn die Kamera bei der Aufnahme von Videos auch Toninformationen aufzeichnen soll, wählen Sie hier „Ein“. Aufnahmeabstand Hier wählen Sie mit den / -Tasten den Zeitraum aus, für den die Kamera mindestens pausiert, bevor sie auf nachfolgende Auslösungen des Hauptsensors nach der Ersterfassung reagiert. Während des gewählten Intervalls nimmt die Kamera keine Bilder oder Videos auf. Dadurch wird verhindert, dass zu viele Aufnahmen des gleichen Ereignisses die Speicherkarte füllen. 5 – 59 Sekunden bzw. 1 – 60 Minuten können ausgewählt werden. Seitliche Bewegungsmelder Hier können Sie die beiden seitlichen Bewegungssensoren 7 einoder ausschalten. Werden die seitlichen Bewegungssensoren z.B. durch sich bewegende Äste gestört, wählen Sie „Aus“, bestätigen mit der -Taste und schalten die seitlichen Bewegungssensoren damit ab. Ansonsten werden durch die sich bewegenden Äste Aufnahmen ausgelöst. Voreingestellt ist „Ein“. 20 WK 5 A1 Empfindlichkeit Bewegungsmelder Stellen Sie hier die Empfindlichkeit des frontalen Bewegungssensors 6 ein. Wählen Sie „Hoch“ für Innenbereiche und Umgebungen mit wenigen Störeinflüssen wie z.B. Äste im Wind, „Mittel“ für Außenbereiche und Umgebungen mit normalen Störeinflüssen und „Gering“ für Außenbereiche und Umgebungen mit hohen Störeinflüssen. Auch die Temperatur beeinflusst die Empfindlichkeit. Die Einstellung „Hoch“ eignet sich für eine warme Umgebungstemperatur, während Sie für kalte Umgebungen die Einstellung „Gering“ wählen sollten. HINWEIS ► Bei Auslieferung ist die Empfindlichkeit des frontalen Bewegungssensors 6 auf „Mittel“ voreingestellt. Diese Voreinstellung ist für die meisten Einsatzbereiche am geeignetsten. ► Beachten Sie, dass bei der Einstellung „Hoch“ die Wahrscheinlichkeit von Fehlauslösungen erhöht ist. Bei der Einstellung „Gering“ kann es dazu führen, dass evtl. kleine Tiere nicht erfasst werden. Ziel-Aufnahmezeit Wählen Sie „Ein“, wenn die Kamera nur während einer bestimmten Zeitspanne aktiv sein soll. Im anschließend erscheinenden Bildschirmmenü können Sie dann die Start- und Endzeit für die aktive Phase einstellen: Ziel-Aufnahmezeit einstellen Stopp: Start: Std: Min Std: Min ♦ Drücken Sie die / -Tasten, um die Stunde für den Start der aktiven Phase einzustellen. WK 5 A1 21 DE AT CH DE AT CH ♦ Wechseln Sie mit der -Taste zum nächsten Feld. Drücken Sie die / -Tasten, um die Minute für den Start der aktiven Phase einzustellen. ♦ Wechseln Sie mit der -Taste zum nächsten Feld. Drücken Sie die / -Tasten, um die Stunde für das Ende der aktiven Phase einzustellen. ♦ Wechseln Sie mit der -Taste zum nächsten Feld. Drücken Sie die / -Tasten, um die Minute für das Ende der aktiven Phase einzustellen. Die hier vorgenommenen Einstellungen gelten für jeden Tag. Außerhalb der aktiven Phase nimmt die Kamera keine Aufnahmen auf. ♦ Bestätigen Sie Ihre Eingabe mit der -Taste. Drücken Sie anschließend die -Taste, um dieses Untermenü zu schließen. Zeitraffer-Aufnahme Mit dieser Funktion erstellt die Kamera automatisch Aufnahmen in einem einstellbaren Intervall. Dies ist z. B. hilfreich, wenn Sie das Aufblühen von Pflanzen o. Ä. beobachten wollen. Wenn Sie „Ein“ mit der -Taste bestätigen, können Sie im anschließend erscheinenden Bildschirmmenü die gewünschte Intervall-Zeit eingeben: ♦ Drücken Sie die / -Tasten, um die Stunden des gewünschten Aufnahmeintervalls einzustellen. ♦ Wechseln Sie mit der -Taste zum nächsten Feld „Min“. Drücken Sie die / -Tasten, um die Minuten des gewünschten Aufnahmeintervalls einzustellen. 22 WK 5 A1 ♦ Wechseln Sie mit der -Taste zum nächsten Feld „Sek“. Drücken Sie die / -Tasten, um die Sekunden des gewünschten Aufnahmeintervalls einzustellen. ♦ Bestätigen Sie Ihre Eingabe mit der -Taste. Drücken Sie anschließend die -Taste, um dieses Untermenü zu schließen. HINWEIS ► Bei aktivierter Zeitraffer-Aufnahme sind die Bewegungssensoren deaktiviert. Sprache Hier können Sie Englisch, Deutsch, Finnisch, Schwedisch, Dänisch, Französisch, Italienisch, Niederländisch, Spanisch oder Portugiesisch als Menüsprache auswählen. Zeit & Datum Hier können Sie Uhrzeit und Datum, das Zeitformat (12/24 Std) sowie das Datumsformat (TT/MM/JJJJ, JJJJ/MM/TT oder MM/TT/ JJJJ) einstellen. ♦ Wechseln Sie mit den / -Tasten zwischen den Werten und verändern Sie den ausgewählten Wert mit den / -Tasten. ♦ Bestätigen Sie Ihre Einstellungen mit der -Taste. Fotostempel Hier wählen Sie aus, ob Fotos mit oder ohne Zeitstempel abgespeichert werden. Sie können wählen, ob der Stempel aus Zeit und Datum besteht (Voreinstellung) oder ob nur das Datum verwendet wird. WK 5 A1 23 DE AT CH DE AT CH Passwortschutz Wählen Sie „Ein“, wenn Sie die Kamera durch Eingabe eines Passwortes vor unbefugtem Zugriff schützen wollen. Im anschließend erscheinenden Bildschirmmenü können Sie dann eine vierstellige Zahlenkombination einstellen: ♦ Drücken Sie die auszuwählen. / ♦ Wechseln Sie mit der -Tasten, um die erste Zahl zwischen 0 – 9 -Taste zum nächsten Feld. ♦ Wiederholen Sie die voran beschriebenen Schritte, um alle vier Zahlen einzustellen. ♦ Bestätigen Sie Ihre Eingabe mit der -Taste. Drücken Sie anschließend die -Taste, um dieses Untermenü zu schließen. Die eingestellte Zahlenkombination wird ab jetzt bei jedem Einschalten im TEST-Modus abgefragt, bevor die Kamera bedient werden kann. Sollten Sie die Zahlenkombination vergessen haben, gehen Sie wie folgt vor, um die Kamera zu entsperren und in den Auslieferungszustand zurück zu versetzen: ♦ Laden Sie die Software der Wildkamera in Produktuntersützungsbereich auf www.kompernass.com herunter. ♦ Entpacken Sie die Datei und kopieren die Dateien „ISP_SD.bin“ und „Rom_CodeWK5A1.bin“ auf eine leere Speicherkarte. 24 WK 5 A1 ♦ Schieben Sie die Speicherkarte ins Gerät, während der Betriebswahlschalter 18 in der OFF-Position steht. ♦ Halten Sie die -Taste gedrückt, während Sie den Betriebswahlschalter in die TEST-Position schieben. Halten Sie die -Taste solange gedrückt, bis auf dem Bildschirm 10 die Meldung „Firmware upgrading... Keep Table“ erscheint. ♦ Nach ca. 25 Sekunden schaltet sich die Kamera aus. ♦ Schalten Sie die Kamera wieder ein, indem Sie den Betriebswahlschalter in die OFF-Position und anschließend in die TEST-Position stellen. Die Kamera ist jetzt wieder ohne Eingabe eines Passwortes bedienbar. HINWEIS ► Sämtliche zuvor vorgenommenen Einstellungen werden durch diese Prozedur in den Auslieferungszustand zurückversetzt. Akustisches Signal Hier bietet Ihnen das Gerät die Einstellmöglichkeit, ob Sie bei Betätigung der Tasten einen Ton hören (voreingestellt) oder nicht. Speicherkarte formatieren Beim Formatieren der microSDHC-Speicherkarte 34 werden alle darauf gespeicherten Dateien unwiederbringlich gelöscht. Bevor Sie eine Speicherkarte in der Kamera verwenden, die neu ist oder zuvor in einem anderen Gerät verwendet wurde, sollten Sie diese zunächst formatieren. ♦ Wählen Sie in diesem Fall die Einstellung „Ja“ mit der -Taste aus. Das Formatieren beginnt. Während der Formatierung erscheint „Bitte warten“. WK 5 A1 25 DE AT CH DE AT CH ACHTUNG ► Stellen Sie sicher, dass sich keine noch benötigten Dateien auf der Speicherkarte befinden! Einstellungen zurücksetzen Wenn Sie in diesem Menüpunkt „Ja“ wählen und mit der -Taste bestätigen, werden alle von Ihnen vorgenommenen Einstellungen sowie ein ggf. gesetztes Passwort gelöscht und der Auslieferungszustand wiederhergestellt. Version In diesem Menüpunkt können Sie sich den Versionsstand der Kamerasoftware anzeigen lassen. 26 WK 5 A1 Montage mit Befestigungsgurt Benutzen Sie den mitgelieferten Befestigungsgurt 30 , um die Kamera an einem Baum oder anderem Objekt zu befestigen. Die nachfolgenden Abbildungen zeigen Ihnen, wie Sie den Befestigungsgurt durch die Baumhalterung 8 und den Gurtverschluss 31 führen müssen. ♦ Hängen Sie die Kamera nun wie gewünscht auf und drücken Sie die Klammer des Gurtverschlusses nach unten. ♦ Ziehen Sie den Befestigungsgurt stramm, bis die Kamera einen festen Halt hat und lassen Sie dann die Klammer wieder los. ♦ Um die Kamera wieder zu lösen, drücken Sie die Klammer des Gurtverschlusses nach unten und ziehen Sie den Befestigungsgurt aus dem Gurtverschluss heraus. Verwendung der Wandhalterung Mit Hilfe der mitgelieferten Wandhalterung können Sie die Kamera an Wänden oder Decken fest montieren. Bevor Sie die Wandhalterung montieren sollten Sie sicherstellen, dass alle vorhandenen Schrauben fest angezogen sind. WK 5 A1 27 DE AT CH DE AT CH ACHTUNG ► Achten Sie darauf, dass an der vorgesehenen Bohrstelle keine elektrischen Leitungen, Wasser- oder Heizungsrohre verlegt sind! ► Die mitgelieferten Dübel sind nur für die Befestigung in Beton oder Stein geeignet. Bitte prüfen Sie unbedingt vor der Montage Ihren Montageort auf Eignung für die Dübel. Das verwendete Montagematerial muss immer für den jeweiligen Montageort geeignet sein. Ziehen Sie im Zweifelsfall einen Fachmann hinzu. ♦ Markieren Sie die Bohrlöcher 25 , in dem Sie den Fuß der Wandhalterung an den gewünschten Montageort halten und die Löcher anzeichnen. ♦ Bohren Sie mit der Bohrmaschine und einem 6 mm Bohrer die Löcher und stecken Sie die Dübel 26 bündig hinein. ♦ Schrauben Sie die Wandhalterung mit Hilfe der mitgelieferten Schrauben 27 an die Wand. ♦ Setzen Sie nun die Kamera mit dem Stativgewinde 21 auf die Stativschraube 22 und schrauben Sie die Kamera ein Stück weit (ca. 3 Umdrehungen) ein. ♦ Drehen Sie die Kamera in die gewünschte Richtung und arretieren Sie sie mit der Konterscheibe 23 . ♦ Um die Kamera in die endgültige Position zu bringen, öffnen Sie die beiden Gelenk-Flügelschrauben 24 ein wenig, richten die Kamera aus und fixieren die Position durch Festziehen der beiden Gelenk-Flügelschrauben. 28 WK 5 A1 Kamera ausrichten DE AT CH Im Testmodus können Sie den optimalen Erfassungswinkel und die Reichweite der Bewegungssensoren 6 , 7 ermitteln. HINWEIS ► Wägen Sie bei der Ausrichtung ab, ob der Einsatz der seitlichen Bewegungssensoren für das gewünschte Beobachtungsergebnis sinnvoll sein kann. Sie können die seitlichen Bewegungssensoren im zuvor beschriebenen Menü ein- oder ausschalten. Richten Sie die Kamera wie folgt aus: Befestigen Sie die Kamera in 1–2 Meter Höhe an einem Baum o.Ä. und richten Sie die Kamera in die gewünschte Richtung aus. Gehen Sie nun langsam von einer Seite des anvisierten Bereichs zur anderen Seite. Beobachten Sie dabei die Bewegungsanzeige 3 . Leuchtet diese blau, so wurden Sie von einem der ggf. eingeschalteten seitlichen Bewegungssensoren 7 erfasst. Leuchtet sie grün, wurden Sie vom frontalen Bewegungssensor 6 erfasst. Auf diese Weise können Sie die beste Position zur Ausrichtung der Kamera ausfindig machen. Nur wenn der Betriebswahlschalter 18 in der TEST-Position steht, leuchtet die Bewegungsanzeige auf, sobald einer der Bewegungssensoren eine Bewegung erfasst hat. Im normalen Betrieb erfolgt hier keine LED-Anzeige. Damit das Gerät nicht aufgrund irrelevanter Bewegungen unnötige Aufnahmen macht, sollten Sie die Kamera weder an sonnigen Plätzen einsetzen, noch im Bereich von Ästen, die sich im Wind bewegen können. Der Erfassungswinkel der Sensoren liegt bei ca. 100° von Ecke zu Ecke, das Aufnahmefelds für Fotos und Videos liegt bei ca. 89°. WK 5 A1 29 DE AT CH Live-Modus aktivieren Der normale Betrieb des Gerätes ist der sogenannte Live-Modus. In diesem Modus werden Aufnahmen über die Bewegungssensoren 6 , 7 ausgelöst. Um den Live-Modus einzustellen, schieben Sie den Betriebswahlschalter 18 in die Position „ON“. Nach 15 Sekunden erlischt die rote LED der Bereitschaftsanzeige 2 , danach beginnt die Kamera selbstständig zu arbeiten und geht in den Standby-Modus. Sobald Wildtiere o. Ä. unmittelbar in den Erfassungsbereich der zentralen Sensorzone treten, beginnt die Kamera je nach Konfiguration mit der Aufzeichnung von Fotos und/oder Videos. Wenn Wildtiere von der Seite in den Erfassungsbereich der seitlichen Bewegungssensoren 7 kommen, erfassen diese die Bewegung und aktivieren die Kamera. Während die Wildtiere sich weiter in den Erfassungsbereich des frontalen Bewegungssensors 6 bewegen, nimmt die Kamera Fotos und/oder Videos auf. Wenn die Wildtiere sich nach dem Eintritt in den Erfassungsbereich der seitlichen Bewegungssensoren 7 wegbewegen, schaltet die Kamera ab und geht in den Standby-Modus. Nachtaufnahmen Bei Nachtaufnahmen liefern die Infrarot-LEDs 1 an der Vorderseite der Wildkamera das nötige Licht, um Aufnahmen zu ermöglichen. Die LEDs strahlen in einem großen Winkel ab. Dies erlaubt Nachtaufnahmen in einer Distanz von ca. 3 m bis 20 m, ohne dabei das Objekt überzubelichten. Reflektierende Gegenstände (z.B. Verkehrsschilder) können allerdings auch innerhalb dieser Reichweite zu Überbelichtungen führen. Bitte beachten Sie, dass Nachtaufnahmen in schwarz/weiß erfolgen. 30 WK 5 A1 Aufnahmen auf dem Bildschirm anzeigen DE AT CH ♦ Schieben Sie den Betriebswahlschalter in die Position „TEST“. Nun sehen Sie das Live-Bild der Kamera. ♦ Drücken Sie die -Taste, um den Wiedergabemodus zu aktivieren. Je nach eingestellten Modus erscheint eine der folgenden Anzeigen: A B C I J D H A: B: C: D: E: F: G: H: I: J: K: G F E K Anzeige für Videoaufnahme Anzeige der Videoauflösung Schreibschutzanzeige für die angezeigte Datei Nummer der aktuellen Aufnahme/Gesamtzahl der Aufnahmen Batteriestandsanzeige Datum und Uhrzeit der Aufnahme Wiedergabe mit der -Taste starten Anzeige der Videolänge Anzeige für Fotoaufnahme Anzeige der Fotoauflösung Uhrzeit und Datum der Aufnahme ♦ Mit den / -Tasten können Sie nun durch die Aufnahmen blättern und auf dem Bildschirm 10 betrachten. WK 5 A1 31 DE AT CH ♦ Drücken Sie bei der Anzeige eines Fotos die Bild hinein zu zoomen. ♦ Drücken Sie die -Taste, um in das -Taste, um heraus zu zoomen. ♦ Drücken Sie die - oder -Taste, um den Bildausschnitt aufoder abwärts zu bewegen. ♦ Drücken Sie die - oder -Taste, um den Bildausschnitt seitlich zu bewegen. Wenn ein Bild vergrößert dargestellt wird, wird die entsprechende Position des Zooms oben rechts im Bildschirm 10 angezeigt. ♦ Handelt es sich bei der aktuell angewählten Aufnahme um ein Video, drücken Sie die -Taste, um das Video abspielen zu lassen. ♦ Drücken Sie die -Taste erneut, um das Video anzuhalten. ♦ Drücken Sie die -Taste, um das Video zu stoppen. ♦ Wenn Sie jetzt die menü: -Taste drücken, öffnet sich das Einstellungs- ♦ Drücken Sie die / -Tasten, um den gewünschten Menüeintrag auszuwählen, den Sie dann mit der -Taste aufrufen. Mit der -Taste wechseln Sie jeweils eine Menüebene zurück. 32 WK 5 A1 Auswahl löschen Mit dieser Funktion können Sie einzelne Aufnahmen von der Speicherkarte löschen. Nachdem Sie diese Funktion aufgerufen haben, bewegen Sie den Auswahlbalken auf „Löschen“ und drücken die -Taste, um die ausgewählte Aufnahme zu löschen. Alle Aufnahmen löschen Mit dieser Funktion können Sie alle Aufnahmen von der Speicherkarte löschen. Nachdem Sie diese Funktion aufgerufen haben, bewegen Sie den Auswahlbalken auf „Löschen“ und drücken Sie die -Taste, um alle Aufnahmen zu löschen. Diashow aktivieren Mit dieser Funktion können Sie die gespeicherten Fotos von der Speicherkarte in einer automatisch Abfolge für je ca. 2 Sekunden anzeigen lassen. Um die Abfolge zu stoppen und das gerade angezeigte Foto dauerhaft anzeigen zu lassen, drücken Sie die -Taste. Schreibschutz Mit dieser Funktion können Sie einzelne oder alle gespeicherten Aufnahmen gegen unbeabsichtigtes Löschen schützen. ♦ Wählen Sie „Auswahl schreibschützen“, um die gerade angewählte Aufnahme gegen versehentliches Löschen zu schützen. ♦ Wählen Sie „Alle schreibschützen“, um alle bereits gespeicherten Aufnahme gegen versehentliches Löschen zu schützen. ♦ Wählen Sie „Auswahl entsperren“, um den Schreibschutz für die gerade angewählte Aufnahme aufzuheben. WK 5 A1 33 DE AT CH DE AT CH ♦ Wählen Sie „Alle entsperren“, um den Schreibschutz aller bereits gespeicherten Aufnahmen aufzuheben. Wenn Sie eine schreibgeschützte Datei anwählen, erscheint das oben im Bildschirm 10 . Schreibschutzsymbol Aufnahmen auf externem Monitor anzeigen ♦ Stellen Sie den Betriebswahlschalter 18 in die TEST-Position. ♦ Stecken Sie den Miniklinkenstecker des mitgelieferten TV-Kabels 28 in die AV-Buchse 16 der Kamera, und die Cinch-Stecker in den Audio- und Video-Eingang eine TV-Gerätes o.Ä. Sobald der Miniklinkenstecker in der AV-Buchse steckt, wird der eingebaute Bildschirm 10 deaktiviert und das Bild über die AV-Buchse ausgegeben. Aufnahmen auf einen Computer überspielen ♦ Stecken Sie den Mini-USB-Stecker des mitgelieferten USB-Kabels 29 in die Mini-USB-Buchse 17 der Kamera. ♦ Stecken Sie den USB-Stecker in einen freien USB-2.0-Anschluss eines eingeschalteten Computers. Dieser erkennt das Gerät nun als „Wechseldatenträger“ und installiert automatisch die benötigten Treiber. Anschließend kann mit dem Datei-Explorer der Inhalt der microSDHC-Speicherkarte 34 angezeigt werden. Führen Sie dann die gewünschten Dateioperationen durch. 34 WK 5 A1 Reinigung DE AT CH ACHTUNG Beschädigung des Gerätes! ► Stellen Sie sicher, dass bei der Reinigung keine Feuchtigkeit in das Gerät eindringt, um eine irreparable Beschädigung des Gerätes zu vermeiden. ■ Reinigen Sie die Oberflächen des Gerätes mit einem weichen, trockenen Tuch. Verwenden Sie bei hartnäckigen Verschmutzungen handelsübliche Spülmittel und Wasser. Achten Sie darauf, dass kein Wasser ins Gerät eindringt. ■ Halten Sie die Dichtung zwischen den beiden Gehäuseteilen stets sauber, damit keine Feuchtigkeit in das Gerät eindringen und es beschädigen kann. Verschmutzung der Dichtung kann den Staubund Spritzwasserschutz (IP54) einschränken. ■ Halten Sie auch stets die Dichtung in der Bodenplatte, die die DC-Anschlussbuchse 20 schützt, sauber. ■ Pflegen Sie die Dichtungen regelmäßig mit etwas Vaseline, damit diese geschmeidig bleiben. Nur so können die Dichtungen das Geräteinnere vor Feuchtigkeit schützen. ■ Sollten Sie die Dichtungen austauschen wollen, wenden Sie sich an den Service (siehe Kapitel Service). WK 5 A1 35 DE AT CH Fehlerbehebung In diesem Kapitel erhalten Sie wichtige Hinweise zur Störungslokalisierung und Störungsbehebung. Beachten Sie die Hinweise um Gefahren und Beschädigungen zu vermeiden. WARNUNG Beachten Sie die folgenden Sicherheitshinweise, um Gefahren und Sachschäden zu vermeiden: ► Reparaturen an Elektrogeräten dürfen nur von Fachleuten durchgeführt werden, die vom Hersteller geschult sind. Durch unsachgemäße Reparaturen können erhebliche Gefahren für den Benutzer und Schäden am Gerät entstehen. Fehlerursachen und -behebung Die nachfolgende Tabelle hilft bei der Lokalisierung und Behebung kleinerer Störungen: Fehler Die Kamera funktioniert nicht. 36 Mögliche Ursache Behebung Keine Batterien eingelegt. Setzen Sie 4 Stück 1,5 VBatterien in das Batteriefach 11 ein. Die Batterien sind erschöpft. Ersetzen Sie die Batterien in der Kamera. Sollten Sie mit der Betriebsdauer der Batterien unzufrieden sein, setzen Sie zusätzlich 4 Stück 1,5 V-Batterien in das Batteriefach ein. WK 5 A1 Fehler Mögliche Ursache DE AT CH Behebung Die Kamera ist auf reflektierende Gegenstände ausgerichtet. Die Bilder sind überbelichtet. Direkte Sonneneinstrahlung könnte das Gerät treffen, evtl. auch nur zu bestimmten Uhrzeiten (Sonnenstand beachten). Ändern Sie die Ausrichtung der Kamera. Es befinden sich keine Aufnahmen auf der Speicherkarte, obwohl die Einstellungen der Kamera korrekt sind. Sie haben die Kamera so installiert, dass kein Wild in die Erfassungsbereiche der Bewegungssensoren treten kann. Ändern Sie den Installationsort der Kamera. Die Kamera könnte von Astbewegungen im Wind ausgelöst worden sein. Ändern Sie den Installationsort und/oder die Ausrichtung der Kamera. Die Empfindlichkeit der Bewegungssensoren könnte zu hoch eingestellt sein. Reduzieren Sie die Empfindlichkeit der Bewegungssensoren. Die Kamera fertigt zu viele unbeabsichtigte Aufnahmen. HINWEIS ► Wenn Sie mit den vorstehend genannten Schritten das Problem nicht lösen können, wenden Sie sich bitte an den Kundendienst. WK 5 A1 37 DE AT CH Lagerung/Entsorgung Lagerung Sollten Sie das Gerät längere Zeit nicht benutzen, entnehmen Sie die Batterien und lagern Sie es an einem sauberen, trockenen Ort ohne direkte Sonneneinstrahlung. Gerät entsorgen Werfen Sie das Gerät keinesfalls in den normalen Hausmüll. Dieses Produkt unterliegt der europäischen Richtlinie 2012/19/EU WEEE (Waste Electrical and Electronic Equipment) . Entsorgen Sie das Gerät über einen zugelassenen Entsorgungsbetrieb oder über Ihre kommunale Entsorgungseinrichtung. Beachten Sie die aktuell geltenden Vorschriften. Setzen Sie sich im Zweifelsfall mit Ihrer Entsorgungseinrichtung in Verbindung. Batterien/Akkus entsorgen Batterien/Akkus dürfen nicht im Hausmüll entsorgt werden. Batterien können Giftstoffe enthalten, die die Umwelt schädigen. Entsorgen Sie die Batterien/Akkus deshalb unbedingt entsprechend der geltenden gesetzlichen Bestimmungen. Jeder Verbraucher ist gesetzlich verpflichtet, Batterien/Akkus bei einer Sammelstelle seiner Gemeinde, seines Stadtteils oder im Handel abzugeben. Diese Verpflichtung dient dazu, dass Batterien/Akkus einer umweltschonenden Entsorgung zugeführt werden können. Geben Sie Batterien/Akkus nur im entladenen Zustand zurück. 38 WK 5 A1 Anhang DE AT CH Hinweise zur Konformitätserklärung Dieses Gerät entspricht hinsichtlich Übereinstimmung mit den grundlegenden Anforderungen und den anderen relevanten Vorschriften der europäischen Richtlinie für elektromagnetische Verträglichkeit 2004/108/EC sowie der RoHS-Richtlinie 2011/65/EU. Die vollständige Original-Konformitätserklärung ist beim Importeur erhältlich. Technische Daten Wildkamera Betriebsspannung und Stromaufnahme 6 V , max. 1,5 A 4 oder 8 x 1,5 V Batterien AA/Mignon microSDHC-Kartenslot 2 GB bis 32 GB Karten werden unterstützt Bildschirm Standbyzeit 2,4“ TFT Farb-LC-Display (ca. 6,1 cm Bilddiagonale) Bis zu 6 Monaten (beim Betrieb mit 8 Batterien) Foto Auflösungen Aufl. 1: 12 MPixel (4000 x 3000 Pixel) Aufl. 2: 8 MPixel (3264 x 2448 Pixel) Aufl. 3: 5 MPixel (2592 x 1944 Pixel) Aufl. 4: 3 MPixel (2048 x 1536 Pixel) Aufl. 5: 1 MPixel (1280 x 960 Pixel) Aufnahmeformat JPEG WK 5 A1 39 DE AT CH Video-Auflösungen Aufnahmeformat Video Video-Bildrate Erfassungswinkel Aufnahmefeld für Fotos und Videos Schutzart Aufl. 1: 1920 x 1080 Pixel Aufl. 2: 1280 x 720 Pixel Aufl. 3: 720 x 480 Pixel Aufl. 4: 640 x 480 Pixel Aufl. 5: 320 x 240 Pixel AVI 30 fps ca. 100° von Ecke zu Ecke ca. 89° IP54 Betriebstemperatur –15 bis +60°C Lagertemperatur –25 bis +70°C Feuchtigkeit (keine Kondensation) Abmessungen (B x T x H) Gewicht 40 5 bis 75 % ca. 13,7 × 9,5 x 8,1 cm ca. 360 g WK 5 A1 Garantie DE AT CH Sie erhalten auf dieses Gerät 3 Jahre Garantie ab Kaufdatum. Das Gerät wurde sorgfältig produziert und vor Auslieferung gewissenhaft geprüft. Bitte bewahren Sie den Kassenbon als Nachweis für den Kauf auf. Bitte setzen Sie sich im Garantiefall mit Ihrer Servicestelle telefonisch in Verbindung. Nur so kann eine kostenlose Einsendung Ihrer Ware gewährleistet werden. HINWEIS ► Die Garantieleistung gilt nur für Material- oder Fabrikationsfehler, nicht aber für Transportschäden, Verschleißteile oder für Beschädigungen an zerbrechlichen Teilen, z. B. Schalter oder Akkus. Das Produkt ist nur für den privaten und nicht für den gewerblichen Gebrauch bestimmt. Bei missbräuchlicher und unsachgemäßer Behandlung, Gewaltanwendung und bei Eingriffen, die nicht von unserer autorisierten Service-Niederlassung vorgenommen wurden, erlischt die Garantie. Ihre gesetzlichen Rechte werden durch diese Garantie nicht eingeschränkt. Die Garantiezeit wird durch die Gewährleistung nicht verlängert. Dies gilt auch für ersetzte und reparierte Teile. Eventuell schon beim Kauf vorhandene Schäden und Mängel müssen sofort nach dem Auspacken gemeldet werden, spätestens aber zwei Tage nach Kaufdatum. Nach Ablauf der Garantiezeit anfallende Reparaturen sind kostenpflichtig. WK 5 A1 41 DE AT CH Service Service Deutschland Tel.: 0800 5435 111 (Kostenfrei aus dem dt. Festnetz/Mobilfunknetz) E-Mail: [email protected] IAN 94376 Service Österreich Tel.: 0820 201 222 (0,15 EUR/Min.) E-Mail: [email protected] IAN 94376 Service Schweiz Tel.: 0842 665566 (0,08 CHF/Min., Mobilfunk max. 0,40 CHF/Min.) E-Mail: [email protected] IAN 94376 Erreichbarkeit Hotline: Montag bis Freitag von 8:00 Uhr – 20:00 Uhr (MEZ) Importeur KOMPERNASS HANDELS GMBH BURGSTRASSE 21 44867 BOCHUM GERMANY www.kompernass.com 42 WK 5 A1 Contents Introduction . . . . . . . . . . . . . . . . . . . . . . . . . . . . . . . . . 45 Information concerning these operating instructions . . . . . . . . . . 45 Copyright . . . . . . . . . . . . . . . . . . . . . . . . . . . . . . . . . . . . . . . . . . . 45 Intended use . . . . . . . . . . . . . . . . . . . . . . . . . . . . . . . . . . . . . . . . . 45 Notes on trademarks . . . . . . . . . . . . . . . . . . . . . . . . . . . . . . . . . . 46 Warning notices . . . . . . . . . . . . . . . . . . . . . . . . . . . . . . . . . . . . . . 46 Safety . . . . . . . . . . . . . . . . . . . . . . . . . . . . . . . . . . . . . . 47 Basic safety guidelines . . . . . . . . . . . . . . . . . . . . . . . . . . . . . . . . . 47 Risk of injury if batteries are improperly handled . . . . . . . . . . . . . 49 Mishandling memory cards can lead to a risk of injury . . . . . . . . 49 Possible infringements of the rights of third parties . . . . . . . . . . . . 50 Descriptions of components . . . . . . . . . . . . . . . . . . . . 52 Initial operation. . . . . . . . . . . . . . . . . . . . . . . . . . . . . . 54 Package contents and transport inspection . . . . . . . . . . . . . . . . . 54 Disposal of packaging materials . . . . . . . . . . . . . . . . . . . . . . . . . 55 Set-up location requirements . . . . . . . . . . . . . . . . . . . . . . . . . . . . 55 Opening and closing the camera. . . . . . . . . . . . . . . . . . . . . . . . . 56 Inserting the batteries/connecting power supply . . . . . . . . . . . . . 56 Video connection . . . . . . . . . . . . . . . . . . . . . . . . . . . . . . . . . . . . . 57 Inserting storage media . . . . . . . . . . . . . . . . . . . . . . . . . . . . . . . . 57 Using an adapter card . . . . . . . . . . . . . . . . . . . . . . . . . . . . . . . . . 59 Handling and operation . . . . . . . . . . . . . . . . . . . . . . . 60 Switching on and off, changing settings . . . . . . . . . . . . . . . . . . . . 60 Attaching with the securing strap . . . . . . . . . . . . . . . . . . . . . . . . . 69 Using the wall bracket . . . . . . . . . . . . . . . . . . . . . . . . . . . . . . . . . 69 Aligning the camera . . . . . . . . . . . . . . . . . . . . . . . . . . . . . . . . . . . 71 WK 5 A1 43 GB GB Activating live mode . . . . . . . . . . . . . . . . . . . . . . . . . . . . . . . . . . . 72 Night exposures . . . . . . . . . . . . . . . . . . . . . . . . . . . . . . . . . . . . . . 72 Displaying recordings on the screen . . . . . . . . . . . . . . . . . . . . . . 73 Showing recordings on an external monitor. . . . . . . . . . . . . . . . . 76 Transferring recordings to a computer . . . . . . . . . . . . . . . . . . . . . 76 Cleaning . . . . . . . . . . . . . . . . . . . . . . . . . . . . . . . . . . . . 77 Troubleshooting . . . . . . . . . . . . . . . . . . . . . . . . . . . . . 78 Fault causes and rectification . . . . . . . . . . . . . . . . . . . . . . . . . . . . 78 Storage/disposal . . . . . . . . . . . . . . . . . . . . . . . . . . . . 80 Storage . . . . . . . . . . . . . . . . . . . . . . . . . . . . . . . . . . . . . . . . . . . . . 80 Disposal of the device . . . . . . . . . . . . . . . . . . . . . . . . . . . . . . . . . 80 Disposal of (rechargeable) batteries . . . . . . . . . . . . . . . . . . . . . . 80 Appendix . . . . . . . . . . . . . . . . . . . . . . . . . . . . . . . . . . . 81 Notes on the Declaration of Conformity . . . . . . . . . . . . . . . . . . . 81 Technical data . . . . . . . . . . . . . . . . . . . . . . . . . . . . . . . . . . . . . . . 81 Warranty . . . . . . . . . . . . . . . . . . . . . . . . . . . . . . . . . . . . . . . . . . . 83 Service . . . . . . . . . . . . . . . . . . . . . . . . . . . . . . . . . . . . . . . . . . . . . 84 Importer . . . . . . . . . . . . . . . . . . . . . . . . . . . . . . . . . . . . . . . . . . . . 84 44 WK 5 A1 Introduction Information concerning these operating instructions Congratulations on the purchase of your new device. You have selected a high-quality product. The operating instructions are part of this product. They contain important information on safety, usage and disposal. Before using the product, familiarise yourself with all handling and safety guidelines. Use the product only as described and for the range of applications specified. Please pass on all documentation incl. these operating instructions to any future owner(s) if you sell this product or give it away. Copyright This documentation is copyright protected. Any copying or reproduction, including in the form of extracts, or any reproduction of images (even in a modified state), is permitted only with the written authorisation of the manufacturer. Intended use This device is an information technology device intended only for recording digital photos and videos, and particularly for observing wildlife. It is not intended for any other or more extensive use. This device is not intended for use in commercial or industrial environments. The manufacturer accepts no responsibility for damage caused by failure to observe these instructions, improper use or repairs, unauthorised modifications or the use of unapproved replacement parts. The risk shall be borne solely by the user. WK 5 A1 45 GB Notes on trademarks - USB is a registered trademark of USB Implementers Forum, Inc. GB All other names and products may be trademarks or registered trademarks of their respective owners. Warning notices The following warning notice types are used in these operating instructions: DANGER A warning notice at this hazard level indicates an imminently hazardous situation. If the hazardous situation is not avoided, it could result in death or serious physical injury. ► Follow the instructions in this warning notice to avoid the risk of death or serious injury. WARNING A warning notice at this hazard level indicates a potentially hazardous situation. Failure to avoid this hazardous situation could result in injury. ► Follow the instructions in this warning notice to prevent injury. 46 WK 5 A1 CAUTION A warning notice at this hazard level indicates a potential for property damage. GB Failure to avoid this situation could result in property damage. ► Follow the instructions in this warning notice to prevent property damage. NOTICE ► A notice provides additional information that will assist you in using the device. Safety In this section, you will find important safety instructions for using the device. The device complies with statutory safety regulations. Improper use may result in personal injury and property damage. Basic safety guidelines To ensure safe operation of the device, follow the safety guidelines set out below: ■ Check the device for visible external damage before use. Do not operate a device that has been damaged or dropped. ■ If the cables or connections are damaged, have them replaced by an authorised specialist or the Customer Service department. ■ People who, due to their physical, intellectual or motor abilities, are incapable of operating the device safely may only use the device under the supervision or direction of a responsible person. WK 5 A1 47 GB ■ Do not attach the device to free-standing or extremely tall trees, since these are particularly susceptible to lightning strikes. If the tree that the camera is attached to is struck by lightning, the device may be destroyed. ■ Allow children to use the device only with supervision. Children are not always able to correctly recognise potential dangers. ■ All repairs must be carried out by authorised specialist companies or by the Customer Service department. Failure to make proper repairs may put the user at risk. It will also invalidate any warranty claims. This device may not be used by children. ■ Repairs to the device during the warranty period may only be carried out by a customer service department authorised by the manufacturer. Otherwise no warranty claims can be considered for subsequent damage. ■ Defective components must always be replaced with original replacement parts. Compliance with the safety requirements can only be guaranteed by using these replacement parts. ■ Do not place any objects on the device. ■ Do not operate or place the device close to open flames (e.g. candles). ■ If you notice any unusual noises, smoke or similar unusual situations, remove the batteries and disconnect any attached mains adapter from the power supply and contact Customer Service (see Chapter "Service"). DANGER! Packaging material may not be used as a toy. ■ Risk of suffocation! 48 WK 5 A1 Risk of injury if batteries are improperly handled ■ Keep batteries out of the reach of children. Children might put batteries into their mouth and swallow them. If a battery has been swallowed, seek medical assistance IMMEDIATELY. ■ Do not throw batteries into a fire. Never subject batteries to high temperatures. ■ Risk of explosion! Do not charge batteries unless they are explicitly labelled as "rechargeable". ■ Do not open the batteries or short-circuit them. ■ Do not mix different types of batteries. Due to increased risk of leakage, empty batteries should be removed. The batteries should also be removed from the device if it is not being used for long periods. ■ Battery acid leaking from a battery can cause skin irritation. In the event of contact with the skin, rinse with plenty of water. If the liquid comes into contact with your eyes, rinse thoroughly with water, do not rub and consult a doctor immediately. ■ The chapter titled "Power Supply" describes how to correctly insert and remove batteries. Mishandling memory cards can lead to a risk of injury ■ Children should be supervised to ensure they do not play with the memory card. Seek medical help immediately if the memory card is accidentally swallowed. WK 5 A1 49 GB Possible infringements of the rights of third parties Please note the following when using the game camera: GB Copyright protection Every person owns the rights to their own image. According to copyright law, pictures of people may only be published without their permission if the affected person appears merely as an incidental feature in a landscape or other location. The question as to whether a person is merely an incidental feature must be ascertained on a case by case basis. To avoid any legal uncertainty, a warning notice about the game camera should be provided in all cases in which recordings that could feature images of potentially identifiable persons are possible (see Chapter "Duty of notification"). Protection of privacy The privacy of others may not be infringed by any recorded images. Do not set up the camera so it points to the garden or an entrance of a neighbouring residence, even if these locations are easily visible from your own residence or to the general public. This does not a constitute a right to publish these views. Personal identifiability Personal identifiability exists when it can be established that a certain person was at a certain location at a certain time. This identification can be made by means of an identifier related to a specific person, e.g. a car number plate. Personal identifiability must avoided under all circumstances. 50 WK 5 A1 Surveillance cameras at the workplace Surveillance at the workplace is subject to particularly strict legislation in Germany. Employers should not use surveillance cameras in the workplace in any cases where this could lead to a possible infringement of legal rights. Road traffic surveillance cameras In case of surveillance cameras directed at road traffic, it is advisable that the location of the camera and the framing of the image be selected so that the road users cannot be identified by means of the registration plates. Inscriptions/logos on vehicles may also serve as a means of identifying a road user. Duty of notification If it is not possible to preclude the identification of persons, a notification informing of the presence of the surveillance camera must be placed at clearly visible locations on all access routes to the area within the filming range of the camera. Pedestrians must also be informed that by entering the filming range of the camera they give their consent to be filmed/photographed and if they do not consent then they should not access the affected area. The voluntary nature of this consent must be considered. If the camera is located such that an affected person must pass by in order to reach a destination (e.g. at the entrance to a place of interest) then the absence of voluntariness precludes the granting of an effective consent. The respective legal requirements of the country in which the camera is being used should always be observed to avoid possible infringements of the rights of third parties. WK 5 A1 51 GB Descriptions of components (For illustrations see fold-out pages) GB 1 Infrared LEDs 2 Standby indicator, red LED 3 Motion indicator, green and blue LED 4 Camera lens 5 Locking eyelet 6 Front motion sensor 7 Side motion sensors 8 Tree bracket 9 Locking screw 10 Screen 11 Battery compartment 12 Locking clamps 13 Speaker 14 Control panel buttons 15 Memory card slot (microSD) 16 AV socket 17 Mini-USB socket 18 Mode selector switch (OFF - TEST - ON) 19 Microphone 20 DC connection socket (for mains adapter; not supplied) 21 Tripod thread 22 Tripod screw 23 Locking washer 24 Joint wing screws 52 WK 5 A1 25 Drilled holes 26 Anchors 27 Screws 28 TV cable (miniature stereo phone plug to cinch; audio/video) 29 Mini USB to USB 2.0 connection cable 30 Securing strap 31 Strap latch 32 Storage box 33 Adapter card (microSD to SD) 34 microSDHC memory (4 GB) 35 8 x 1.5 V type AA/Mignon/LR6 batteries 36 Operating instructions WK 5 A1 53 GB Initial operation Package contents and transport inspection GB Please check the contents of the package (see fold-out pages). The following components are included in delivery: ▯ ▯ ▯ ▯ ▯ ▯ ▯ ▯ ▯ ▯ ▯ ▯ Game/surveillance camera WK 5 A1 Wall bracket 3 x anchors 26 3 x screws 27 TV cable (miniature stereo phone plug to cinch; audio/video) 28 Mini USB to USB 2.0 connection cable 29 Securing strap (2.5 cm wide, approx. 190 cm long) 30 Storage box 32 Adapter card (microSD to SD) 33 microSDHC memory (4 GB) 34 8 x 1.5 V type AA/Mignon/LR6 batteries 35 Operating instructions 36 NOTICE ► Check the package for completeness and for signs of visible damage. ► If the delivery is incomplete or damaged due to defective packaging or carriage, contact the Service hotline (see the section Service). ♦ Remove all parts of the device and the operating instructions from the box. ♦ Remove all packaging materials and the protective film from the device. 54 WK 5 A1 Disposal of packaging materials The packaging protects the device from damage during carriage. The packaging materials have been selected for their environmental friendliness and ease of disposal, and are therefore recyclable. Returning the packaging to the material cycle conserves raw materials and reduces the amount of waste that is generated. Dispose of packaging materials that are no longer needed in accordance with applicable local regulations. NOTICE ► If possible, keep the original packaging of the device during the warranty period so that the device can be packed properly for return shipment in the event of a warranty claim. Set-up location requirements This device complies with protection class IP54. This means that the camera is protected from dust and water spray, and can be used regardless of the weather conditions. However, proper protection from dust and water spray is only provided if the camera is correctly closed and all seals are intact and clean. Please be aware that protection from dust and water spray will be limited when used with an external mains adapter. WK 5 A1 55 GB Opening and closing the camera The control buttons, connections and the battery compartment are inside the camera. GB ♦ Undo both of the side locking clamps 12 to open the camera. ♦ To close the camera, hook the metal bars of the locking clamps into the brackets and then press the plastic latch downwards. There is a locking eyelet 5 between the two locking clamps with which you can securely close the camera with the help of a padlock. Inserting the batteries/connecting power supply ♦ To insert batteries 35 in the device, open the camera. ♦ Now press the latch on the upper side of the battery compartment down a little way and lift the battery compartment cover off. ♦ Insert 4 or 8 x 1.5 V AA/mignon batteries into the battery compartment 11 . Ensure that the polarity is correct. NOTICE ► When using 4 batteries, these can either all be inserted in the upper part or all in the lower part of the battery compartment. Other combinations are not possible. ♦ Close and secure the battery compartment. Ensure that the battery compartment cover clicks firmly in place. ♦ If you are operating the device on a mains adaptor (not supplied), open the rubber seal on the bottom of the camera and insert the plug of the AC adapter cable into the DC socket 20 . The mains adapter must supply a direct-current voltage of 6 V with at least 1.5 A. Use a barrel jack whose interior polarity is connected to the plus pole ( ). 56 WK 5 A1 Operation via a mains adapter is possible even with batteries inserted. If one power source fails, operation will be maintained using the other. GB Video connection NOTICE ► The camera can transfer the video signal to an external monitor or the video/audio input of a television set. Please also follow the instructions of the respective playback device. ♦ Use the supplied TV cable 28 to connect to a suitable external monitor via the camera’s AV socket 16 . Inserting storage media NOTICES ► Since the camera has no built-in memory, it can only work if an microSDHC memory card 34 is inserted. ► The device supports microSDHC memory cards with a capacity of up to 32 GB. WK 5 A1 57 CAUTION GB ► To avoid malfunctions, keep the memory card away from moisture and avoid strong vibration, dust, heat sources and direct sunlight. ► Insert the memory card as indicated by the icon on the slot. Never force the memory card into the slot. Never bend or twist the memory card. ► After transport, wait until the memory card has reached ambient temperature before using it for the first time. Major fluctuations in temperature or humidity can lead to condensation which could cause an electrical short-circuit. Keep the memory card in the storage box 32 . ♦ To remove a microSDHC memory card 34 from the memory card slot 15 of the device, press the protruding edge of the memory card in a little way until it pops out. Then remove the memory card. ♦ To insert a microSDHC memory card into the memory card slot of the device, push it into the slot until it clicks into place. The electrical contact of the memory card must be facing towards the front of the camera. 58 WK 5 A1 Using an adapter card The microSDHC memory card 34 is delivered with a useful adapter card (microSD to SD) 33 , so that you can use the microSDHC memory card in any device with an SD card slot and access the data. ♦ Insert the microSD memory card into the adapter card as shown in the figure. NOTICE ► The adapter card has a write-protect lock. To protect the microSDHC memory card from write access, slide the switch on the side of the card to the "LOCK" position (see figure). ► The write-protect switch protects the microSDHC memory card only as long as it is in the adapter. As soon as you remove the microSDHC memory card, the write protection will no longer be available. WK 5 A1 59 GB Handling and operation In this chapter you will receive important information about proper handling and operation of the device. GB Switching on and off, changing settings After connecting a power supply, move the mode selector switch 18 to the "TEST" position to adjust the settings described on the following pages using the control panel buttons 14 : ♦ Press the button to switch from video to photo mode. ♦ Press the button to switch from photo to video mode. ♦ Press the button to take a photo/record a video manually. button again ends the recording. Pressing the ♦ Press the button to open the settings menu. Settings Mode Photo resolution Photo series Video resolution Video length Audio recording Back 60 Select WK 5 A1 ♦ Press the / buttons to select the desired menu entry which you can then activate with the button. If you change settings, you must always confirm your changes with the button. Use the button to navigate one menu level backwards. Mode To select whether photos or videos will be recorded when motion is detected. In "Photo & Video" mode, the camera first takes a photo and then starts filming video. Photo resolution Select a photo size: 1 MP, 3 MP, 5 MP (preset), 8 MP or 12 MP. The larger the file size, the more detailed the image. However, the maximum number of high-resolution images that can be stored before the memory card is full is much lower. Photo series Select the number of photos that are to be taken in succession when the camera is activated in photo mode. In addition to single shot mode (1 photo), you can take "2 photos in series" or "3 photos in series". Video resolution Select the screen resolution: 1920 × 1080P, 1280 × 720P, 720 × 480P, 640 × 480P or 320 × 240P. Here too, the higher the resolution, the sooner the capacity limit of the memory card will be reached. WK 5 A1 61 GB Video length GB Use the / buttons to select the length of the video recording (between 3–59 seconds or 1–10 minutes) that will be made when video recording is activated. The longer the recording time selected, the shorter the operating time. The preset video length is 5 seconds. Audio recording If you want the camera to record sound when recording videos, select "On" here. Shot lag Use the / buttons to select the minimum time period that the camera should wait before reacting to subsequent activation of the main sensor after the initial recording. During the selected interval, the camera will not record any images or videos. This prevents the memory card from being filled up with too many recordings of the same event. You can select between 5–59 seconds or 1–60 minutes. Side motion sensors The two side motion sensors 7 can be switched on or off here. If the side motion sensors are being affected by branches blowing in the wind, for example, select "Off", confirm with the button to deactivate the side motion sensors. Otherwise the moving branches will trigger recordings. The default setting is "On". 62 WK 5 A1 Sensitivity motion sensors Set the sensitivity of the front motion sensor 6 here. For inside spaces and environments with little interference, such as branches blowing in the wind, select "High". Select "Medium" for outdoor spaces and environments with a normal amount of interference, and select "Low" for environments with a high level of interference. Temperature can also affect the sensitivity. The "High" setting is suitable for warm ambient temperatures, whereas "Low" should be selected for cold environments. NOTICE ► The sensitivity of the front motion sensor 6 is factory-set to medium. This setting is suitable for most applications. ► Note that the setting of "high" increases the likelihood of the camera being triggered unintentionally. The setting "Low" can lead to small animals not being detected at all. Target recording time Select "On" if the camera should only be active during a certain time period. In the screen menu that subsequently appears, you can then set the start and end time for the active phase: Set target recording time Start: Stop: Hr:Min Hr:Min ♦ Press the phase. WK 5 A1 / buttons to set the hour for the start of the active 63 GB GB button. Press the ♦ Then switch to the next field using the buttons to set the minutes for the start of the active phase. / ♦ Then switch to the next field using the button. Press the buttons to set the hour for the end of the active phase. / ♦ Then switch to the next field using the button. Press the buttons to set the minutes for the end of the active phase. / The settings made here apply every day. The camera will not record any images outside of the active phase. ♦ Confirm your selection with the button to close this sub-menu. button. Afterwards, press the Time lapse With this function the camera automatically takes pictures at an adjustable interval. This is useful if you want to observe the blooming of plants or the like, for example. After you confirm "On" with the button, you can set the desired time interval in the menu that now appears: Set time lapse Hr Sec Notification: Motion sensors deactivated ♦ Press the interval. / buttons to set the hour of the desired time ♦ Now switch to the next field, "Min", using the button. Press the / buttons to set the minutes of the desired time interval. 64 WK 5 A1 ♦ Now switch to the next field, "Sec", using the button. Press the / buttons to set the seconds of the desired time interval. ♦ Confirm your selection with the button. Afterwards, press the button to close this sub-menu. NOTICE ► When time lapse is activated, the motion sensors are deactivated. Language Here you can set English, German, Finnish, Swedish, Danish, French, Italian, Dutch, Spanish or Portuguese as the menu language. Time & date Here you can set the date and time, the time format (12/24 hr) as well as the date format (DD/MM/YYYY, YYYY/MM/DD or MM/ DD/YYYY). ♦ Use the / buttons to switch between the values and change the selected value with the / buttons. ♦ Confirm your settings with the button. Photo stamp Here you can choose whether to save your photos with a time stamp. You can choose whether the stamp consists of the time and date (default setting) or just the date. WK 5 A1 65 GB Password protection GB Select "On" if you want to use a password to protect the camera from unauthorised access. In the following screen menu, you can set a 4-digit combination: Set password ♦ Press the / buttons to select the first digit between 0–9. ♦ Then switch to the next field using the button. ♦ Repeat the steps described above to set all four digits. ♦ Confirm your selection with the button. Afterwards, press the button to close this sub-menu. The selected number combination must now be entered each time the camera is switched on in TEST mode before the unit can be operated. If you forget the number combination, proceed as follows to unlock the camera and to reset it to its factory default settings: ♦ Download the game camera software from the product support page on www.kompernass.com. ♦ Unzip the file and copy the files "ISP_SD.bin" and "Rom_CodeWK5A1.bin" onto a blank memory card. 66 WK 5 A1 ♦ Insert the memory card into the device while the mode selector switch 18 is set to the OFF position. ♦ Keep the button pressed while moving the mode selector switch to the TEST position. Keep the button pressed down until the display 10 shows the notification "Firmware upgrading... Keep table". ♦ After around 25 seconds the camera switches off. ♦ Switch the camera back on by moving the mode selector switch to the OFF position and then to the TEST position. The camera can now be used without entering a password. NOTICE ► This procedure will permanently delete any previously made settings and return the device to the factory settings. Beep sound The device allows you to select whether or not you wish to hear an audible signal (default setting) when you press a button. Format memory card Formatting the microSDHC memory card 34 will permanently delete all data on it. Before you use a new memory card in the camera or a card that has previously been used in another device, you should first format the memory card. ♦ In this case, select the setting "YES" with the button. The formatting process starts. While the card is being formatted, the message "Please wait" appears. WK 5 A1 67 GB CAUTION GB ► Ensure that the memory card does not contain any files that you need! Reset settings button, all settings you If you select "Yes" and confirm with the have made (incl. any passwords you have set) will be deleted and the factory settings restored. Version In this menu item, you can view the version of the camera software. 68 WK 5 A1 Attaching with the securing strap Use the supplied securing strap 30 to fasten the camera to a tree or other object. The following illustrations show you how to guide the securing strap through the tree bracket 8 and the strap latch 31 . ♦ Now hang the camera as desired and press the clip of the strap latch downwards. ♦ Pull the securing strap tight until the camera is fastened firmly and then release the clip. ♦ To remove the camera, press the clip of the strap latch down and pull the securing strap out of the strap latch. Using the wall bracket You can mount the camera permanently on a wall or ceiling using the supplied wall bracket. Before mounting the wall bracket you should ensure that all screws are tight. WK 5 A1 69 GB CAUTION GB ► Ensure that there are no electric lines, water or heating pipes installed at the proposed drilling location! ► The supplied anchors are only suitable for mounting on concrete or stone. Before starting the installation, please check your installation location carefully for its suitability for the anchors. The assembly material must be suitable for the respective location. If in doubt, consult a professional. ♦ Mark the drill holes 25 by holding the foot of the wall bracket at the desired mounting location and marking the hole positions. ♦ Use a drill with a 6 mm drill bit to drill the required holes and insert the plugs and insert the anchors 26 flush with the wall. ♦ Screw the wall bracket to the wall using the supplied screws 27 . ♦ Mount the camera with the tripod thread 21 on the tripod screw 22 and screw the camera a little way on (about three turns). ♦ Turn the camera in the desired direction and lock it with the locking washer 23 . ♦ To move the camera into its final position, undo the two joint wing screws 24 a little, position the camera and fix the position by tightening the two joint wing screws. 70 WK 5 A1 Aligning the camera In test mode, you can work out the optimum exposure angle and the range of the motion sensors 6 , 7 . GB NOTICE ► During alignment, consider whether the use of the side motion sensors may be useful for attaining the desired observation results. You can activate/deactivate the side motion sensors using the above-described menu. Align the camera as follows: Fasten the camera to a tree or similar object at a height of 1–2 metres and align the camera in the desired direction. Then move slowly from one side of the target area to the other side. While doing this, monitor the motion indicator 3 . If this lights up blue, you have been detected by one of the activated side motion sensors 7 . If it lights up red, you have been detected by the front motion sensor 6 . Repeat this process to find the best alignment for the camera. The motion indicator only lights up when the mode selector switch 18 is in the TEST position and one of the motion sensors has detected movement. During normal operation, there will be no LED display in this case. To ensure that the camera does not make unwanted recordings of irrelevant movements, it should not be set up in a sunny location nor close to branches that can move in the wind. The recording angle of the sensors is about 100° from corner to corner; and the recording field for photos and videos is around 89°. WK 5 A1 71 Activating live mode GB Live mode is the standard operating mode of the camera. In this mode, recordings are triggered via the motion sensors 6 , 7 . To set live mode, slide the operating mode selector switch 18 to the "ON" position. After fifteen seconds the red LED of the standby indicator 2 will go off. Then the camera will start to operate independently and will go into standby mode. As soon as any wild or other animals or people enter the detection range of the central sensor zone, the camera will start capturing photos and/or videos (depending on the configuration). If wild animals enter the detection range of the side motion sensors 7 , these will detect the motion and activate the camera. If the wild animals continue to move in front of the front motion sensor 6 , the camera will continue taking photos/videos. When the wild animals leave the detection range of the side motion sensors 7 , the camera switches off and goes back into standby mode. Night exposures During night exposures the infrared LEDs 1 on the front of the camera provide the required light for making recordings possible. The LEDs emit light over a wide angle. This makes it possible to make night recordings at a distance of about 3 m to 20 m without overexposing the subject. However, reflective objects such as traffic signs can cause overexposure if they are located within the recording range. Please note that night exposures are made in black and white. 72 WK 5 A1 Displaying recordings on the screen ♦ Slide the mode selector switch to the "TEST" position. Now you will see the live picture from the camera. button to enable playback mode. Depending on the ♦ Press the set mode one of the following displays will be shown: A B C I J D H A: B: C: D: E: F: G: H: I: J: K: G F E K Display for video recording Video resolution display Write protection status of the shown file Number of the current recording/total number of recordings Battery level display Date and time of recording button Start playback by pressing the Video length Display for photo recording Display of the photo resolution Date and time of recording ♦ You can use the / buttons to scroll through the recordings and view them on the display 10 . WK 5 A1 73 GB GB ♦ Press the button to zoom in on the image on the display. ♦ Press the button to zoom out again. ♦ Press the or button to move the image section up or down. ♦ Press the or button to move the image section sideways. If the picture is zoomed on the display, the current position of the zoomed section is indicated on the top right of the display 10 . ♦ If the currently selected recording is a video, press the to play back the video. ♦ Press the button again to pause the video. ♦ Press the button to stop video playback. ♦ If you now press the button button, the settings menu opens: Settings Delete current file Delete all files Activate slide show Write protect Back Select ♦ Press the / buttons to select the desired menu entry which you can then activate with the button. Use the button to navigate one menu level backwards. 74 WK 5 A1 Delete current file You can use this function to delete individual recordings from the memory card. After you have called up this function, move the select button to delete the selected recording. bar to "Delete" and press the Delete all files You can use this function to delete all recordings from the memory card. After you have called up this function, move the select bar to button to delete all recordings. "Delete" and press the Activate slide show This function can be used to automatically play back the photos stored on the memory card. Each photo is shown for about 2 seconds. To stop the slide show and keep the current image on the screen, button. press the Write protect This function can be used to protect individual recordings or all saved recordings from accidental deletion. Write-protect current file Write-protect all files Unlock current file Unlock all files ♦ Select "Write-protect current file" to protect the currently selected recording from accidental deletion. ♦ Select "Write-protect all files" to protect all saved recordings from accidental deletion. ♦ Select "Unlock current file" to remove the write protection for the currently selected recording. WK 5 A1 75 GB ♦ Select "Unlock all files" to remove the write protection for all saved recordings. GB If you select a write-protected file, the write protection symbol appears on the display 10 . Showing recordings on an external monitor ♦ Move the mode selector switch 18 to the TEST position. ♦ Attach the mini jack plug of the supplied TV cable 28 to the AV socket 16 of the camera and the cinch plugs to the audio and video inputs on a TV set or other device. As soon as the mini jack plug is connected to the AV socket, the built-in screen 10 is deactivated and the image is played back via the AV socket. Transferring recordings to a computer ♦ Connect the mini USB connector of the supplied USB cable 29 to the mini USB port 17 on the camera. ♦ Connect the USB connector to a free USB 2.0 port of a powered-on computer. This now detects the device as a "Removable Disk" and automatically installs the necessary drivers. Afterwards, you can use your file explorer to display the contents of the microSDHC memory card 34 . Now carry out the desired file operations. 76 WK 5 A1 Cleaning CAUTION Damage to the device! GB ► To avoid irreparable damage to the device, ensure that no moisture gets into it during cleaning. ■ Clean the surfaces of the device with a soft, dry cloth. Use a normal commercial detergent and water to remove stubborn residue. Ensure that no water gets into the device. ■ Always keep the seal between the camera housing and the tree bracket clean so that no moisture gets into the device and damages it. Contamination of the seal can impair the dust and water spray protection (IP54). ■ Always keep the base plate seal that protects the DC connection socket 20 clean. ■ Clean the seal regularly with a small amount of Vaseline to keep it malleable. This is the only way to ensure that the interior of the device is adequately protected from moisture. ■ If you need to replace the seal, contact customer service (see the Service chapter). WK 5 A1 77 Troubleshooting This section contains important information about fault identification and rectification. Follow the instructions to avoid hazards and damage. GB WARNING Observe the following safety information to avoid hazards and property damage: ► Repairs to electrical devices should only be carried out by specialists trained by the manufacturer. Improper repairs can cause considerable risks to users and damage to the device. Fault causes and rectification The following table will help to identify and rectify minor malfunctions: Malfunction The camera does not work. Possible cause Remedy No batteries inserted. Insert 4 x 1.5 V batteries into the battery compartment 11 . The batteries are exhausted. Replace the batteries. If you are unsatisfied with the service life of the batteries, insert an additional 4 x 1.5 V batteries in the battery compartment. The camera is pointing at reflective objects. The images are overexposed. 78 Direct sunlight may be shining onto the device, possibly only at certain times of the day (pay attention to the position of the sun). Change the alignment of the camera. WK 5 A1 Malfunction Possible cause Remedy There are no pictures on the memory card even though the settings of the camera are correct. You have installed the camera such that no wildlife can enter the detection range of the motion sensors. Change the installation location of the camera. The camera may be being triggered by branches moving in the wind. Change the installation location and/or the alignment of the camera. The sensitivity of the motion sensors may be set too high. Reduce the sensitivity of the motion sensors. The camera is making too many unwanted recordings. GB NOTICE ► If you are unable to resolve the problem by taking any of the aforementioned steps, please contact the Customer Service department. WK 5 A1 79 Storage/disposal Storage GB If you decide not to use the device for a long period, remove the batteries and store it in a clean, dry place away from direct sunlight. Disposal of the device Never dispose of the device in the normal domestic waste. This product is subject to the provisions of the European WEEE (Waste Electrical and Electronic Equipment) Directive 2012/19/EU. Dispose of the device via an approved waste disposal company or your municipal waste disposal facility. Please observe applicable regulations. Please contact your waste disposal facility if you are in any doubt. Disposal of (rechargeable) batteries Used batteries may not be disposed of in domestic waste. Batteries can contain poisons which are damaging to the environment. Therefore, dispose of the batteries/rechargeable batteries in accordance with statutory regulations. All consumers are statutorily obliged to dispose of batteries at a collection site in their community/city district or with a collection company. The purpose of this requirement is to ensure that batteries are disposed of in an environmentally friendly manner. Only dispose of batteries when they are fully discharged. 80 WK 5 A1 Appendix Notes on the Declaration of Conformity This device complies with the basic requirements and other relevant provisions of the Electromagnetic Compatibility Directive 2004/108/EC and the RoHS Directive 2011/65/EU. GB The complete Declaration of Compliance, in its original form, is available from the importer. Technical data Game camera Operating voltage and current consumption 6 V , max. 1.5 A 4 or 8 x 1.5 V AA/Mignon batteries microSDHC card slot Supports cards from 2 GB to 32 GB Screen Standby time Photo resolutions WK 5 A1 2.4" TFT colour LC display (approx. 6.1 cm screen diagonal) Up to 6 months (with 8 battery operation) Res. 1: 12 megapixels (4000 x 3000 pixels) Res. 2: 8 megapixels (3264 x 2448 pixels) Res. 3: 5 megapixels (2592 x 1944 pixels) Res. 4: 3 megapixels (2048 x 1536 pixels) Res. 5: 1 megapixel (1280 x 960 pixels) 81 Recording format GB Video resolution Video recording format JPEG Res. 1: Res. 2: Res. 3: Res. 4: Res. 5: 1920 x 1080 pixels 1280 x 720 pixels 720 x 480 pixels 640 x 480 pixels 320 x 240 pixels AVI Video frame rate 30 fps Detection angle approx. 100° from corner to corner Detection range for photos and videos Protection class approx. 89° IP54 Operating temperature –15 to +60°C Storage temperature –25 to +70°C Humidity (no condensation) Dimensions (W x H x D) Weight 82 5 to 75 % approx. 13.7 x 9.5 x 8.1 cm approx. 360 g WK 5 A1 Warranty You are provided a 3-year warranty on this device, valid from the date of purchase. This device has been manufactured with care and inspected meticulously prior to delivery. Please retain your receipt as proof of purchase. In the event of a warranty claim, please contact your Customer Service department by telephone. This is the only way to guarantee free return of your goods. NOTICE ► The warranty only covers claims for material and manufacturing defects, not for transport damage, worn parts or damage to fragile components such as buttons or rechargeable batteries. This product is intended solely for private use and not for commercial purposes. The warranty shall be deemed void in cases of misuse or improper handling, use of force and interventions which have not been carried out by one of our authorised Service centres. Your statutory rights are not restricted by this warranty. The warranty period is not prolonged by warranty performances. This also applies to replaced and repaired components. Any damage and defects present at the time of purchase must be reported immediately after unpacking, but no later than two days after the date of purchase. Repairs carried out after expiry of the warranty period shall be subject to charge. WK 5 A1 83 GB Service Service Great Britain Tel.: 0871 5000 720 (£ 0.10/Min.) E-Mail: [email protected] IAN 94376 GB Hotline availability: Monday to Friday 08:00 - 20:00 (CET) Importer KOMPERNASS HANDELS GMBH BURGSTRASSE 21 44867 BOCHUM GERMANY www.kompernass.com 84 WK 5 A1 KOMPERNASS HANDELS GMBH BURGSTRASSE 21 44867 BOCHUM DEUTSCHLAND / GERMANY www.kompernass.com Stand der Informationen · Last Information Update: 02 / 2015 · Ident.-No.: WK5A1-012015-2 IAN 94376 1