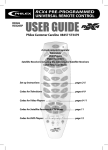
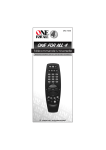
1
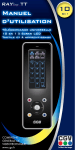
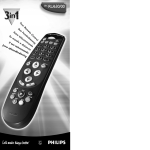
RAYLINE TS
Advanced Universal Touch
Screen Remote Control
Manuel d'utilisation p1 à 11
Bedienungsanleitung p12 bis 23
User guide p24 to 34
COMPAGNIE GENERALE DE
VIDEOTECHNIQUE
version1 oct 2004
www.cgv.fr - FRANCE
820-6150-0003
Français
1.2 Présentation de la télécommande
Introduction
Félicitations ! La télécommande universelle RAYline TS à écran
tactile est un produit bénéficiant des dernières innovations
technologies en matière d'écran électroluminescent. Grâce à sa
banque de donnée (librairie des codes) très complète, vous allez
pouvoir contrôler l'ensemble de vos équipements audio&vidéo du
bout du doigt.
Avant tout utilisation, veuillez attentivement lire ce manuel.
1.1 Principales Caractéristiques
Codes Préprogrammés et mode LEARNING (apprentissage)
Universelle 6 en 1 (remplace TV, VCR, SAT, DVD, etc...)
Apprend jusqu'à 120 commandes
Ecran Electroluminescent (EL)
Clavier comportant 5 touches principales utiles pour l'accès
direct aux fonctions (
, CH+, CH-, VOL+, VOL-)
Programmation simplifiée soit par une recherche
automatique de code ou via la bibliothèque fournie
3 programmes SMART, chacun pouvant mémorisé jusqu'à 15
étapes
Le réglage du volume de votre téléviseur 'passe au travers'
des touches de modes.
Possibilité de contrôler le système télétexte et Fastext
Mise hors tension automatique (mode veille)
pour la conservation des piles
1.
2.
3.
4.
5.
Diode infrarouge
Indicateur (voyant vert)
Ecran tactile
Touches principales (rigide)
Compartiment des piles
Sur l'écran Electroluminescent
6.
7.
8.
9.
10.
Touches de mode de fonctions (pour choisir votre appareil)
Touches du clavier alphanumérique
Touche MUTE (pour couper le volume du TV)
Touche SHIFT (pour accéder aux fonctions secondaires)
Touche PAGE (pour accéder aux pages suivantes)
1
2
6
3
7
9
8
VO
L
C
5
10
H
4
C
VO
L
1
Français
H
1
2
Français
Français
2
1.3 Caractéristiques
- Programmation : En utilisant les codes préprogrammés
(voir bibliothèque à la fin de ce livret) ou à apprentissage
- Compatibilité : Codes Préprogrammés avec la
bibliothèque de code : Télévisions (TV), Magnétoscope
(VCR), Lecteurs de disque (DVD), Récepteurs satellites
analogiques et numériques (SAT), Décodeur câble
- Capacité d' apprentissage : 120 commandes
- Conservation de mémoire lors du changement de piles :
Mémoire non-volatile et permanente
- Panneau d'affichage : écran à cristaux liquides
monochrome à technologie tactile
- Touches rétro éclairante du type 'EL :
Electroluminescent' de couleur bleu-vert
- Distance de fonctionnement (Infrarouge) : 8 mètres
- Alimentation : 4 piles de type LR03 (piles alcalines
recommandées non fournies)
- Dimensions : 154 x 52 x 23 mm
- Poids : 100g (sans piles installées), 140g (les piles étant
installées)
1.4 Comment installer les piles ?
Des piles alcalines sont recommandées.
1. Ouvrez le capot du logement des piles.
2. Respectez le symbole de polarité indiqué dans le
compartiment à piles.
3. Insérez les piles à
l'intérieur de celui-ci.
4. Refermer le capot
du logement des piles.
Comment démarrer ?
❑
Après avoir installés les piles, votre télécommande RAYline TS
démarre en mode TV. Si vous n'effectuez pas d'appui sur l'une des
touches de l'écran tactile pendant 4s, celui-ci se mettra en mode
économie d'énergie (veille) et arrêtera l'affichage. Un simple appui sur
l'une des touches permettra de le redémarrer.
Note : Même si l'écran tactile est en mode veille, les 5 touches
principales restent actives pour commander vos appareils vidéo.
❑
Appuyez sur l'une des touches de mode (ex : TV ), l'icône
va
clignoter et ainsi, vous permettre d'accéder aux fonctions de celui-ci.
❑
Appuyez sur l'une des touches pour envoyer l'ordre infrarouge
correspondant à la commande que vous souhaitez activer.
2.1 Touches Principales
Il y a 5 touches principales. Elles transmettent les commandes infrarouges des appareils vidéo sélectionnés.
CH +
CH –
VOL +
VOL –
Mise sous tension/ hors tension
Changement vers le haut du programme
Changement vers le bas du programme
Augmentation le volume
Baisse le volume
2.2 Tonalité
Dès que vous appuyez sur une touche,
un léger signal sonore (BIP) se fera entendre.
2.3 Rétro- éclairage
Note: Piles faibles
Si l'icône "
" est allumé sur le panneau d'affichage,
cela indique que le niveau des piles est bas. Vous devez
alors remplacer celles-ci avec de nouvelles piles pour
assurer un bon fonctionnement. N'employez pas de
vieilles et nouvelles piles ensemble car les vieilles piles
tendent à fuir.
3
L'écran Electroluminescent de couleur bleu-vert s'allume dès que
vous appuyez sur une touche de celui-ci.
L'écran se mettra automatiquement en mode veille après une
période de 4s sans appui.
4
Français
3
Comment Programmer
votre RAYline TS
3.1 En utilisant la bibliothèque
Veuillez suivre attentivement ces instructions pour programmer
votre télécommande.
1. Référez-vous à la liste des codes mentionnés dans la
bibliothèque situé en fin de ce livret. Recherchez le code
à 4 chiffres qui correspond à la marque de l'appareil que
vous souhaitez commander. S'il y a plusieurs codes
d'énumérés sous votre marque, essayez-les en
commençant par le premier code jusqu'au dernier code
de sorte à trouver celui qui fonctionne avec votre appareil
audio&vidéo.
2. Appuyez sur la touche de mode désirée (par exemple
,
l'icône associé clignotera)
3. Maintenez appuyé " CH+ " et " VOL- " simultanément
jusqu'à l'allumage de l'indicateur (voyant vert).
4. Entrez le code à 4 chiffres, l'indicateur clignotera deux
fois.
Mettez en marche votre appareil (par exemple TV), essayez
d'activer différentes fonctions en utilisant la télécommande. Si
votre appareil (par exemple TV) répond aux fonctions
correctement, vous avez programmé le bon code.
Sinon, répétez les instructions de programmation décrites cidessus et essayez tous les codes de disponible jusqu'à trouver
celui qui correspond à votre appareil (par exemple la TV).
* Répétez simplement les procédures décrites ci-dessus pour
programmer les codes correspondants aux autres appareils
audio&vidéo que vous souhaitez contrôler avec la
télécommande, comme pour votre VCR, SAT, DVD, etc.
Note :
- Les codes correspondants aux appareils suivants : DVD,
décodeur câble ou satellite ne peuvent être programmés dans
les modes 'TV' ou 'VCR'.
Appuyez simplement sur la touche de mode correspondante à
l'appareil que vous souhaitez commander et programmez son
code 4 chiffres dans la télécommande.
- Si le voyant clignote 6 fois dans l'étape 4, un mauvais choix de
sélection de mode (ex : TV) a été utilisé. Vous êtes prié de
répéter les étapes 2 à 4 encore une fois.
Français
3.2 Recherche automatique
Si vous ne pouvez pas identifier un code correct pour votre
équipement dans la bibliothèque des codes, vous pouvez
rechercher ce code automatiquement en faisant un balayage
de l'ensemble des codes contenus dans la bibliothèque :
1. Mettez en marche votre appareil vidéo manuellement
(par exemple TV) en utilisant la télécommande de celui-ci.
2. Appuyez sur la touche du mode désiré (par exemple
,
l'icône associé clignotera)
3. Maintenez " CH+ " et " VOL- " simultanément jusqu'à
l'allumage de l'indicateur (voyant vert).
4. Entrez le code correspondant du tableau ci-dessous:
TYPE d'APPAREIL:
TV
(par exemple : Appuyez sur la touche TV, puis appuyez
sur " CH+ " et " VOL- ", et insérez le code 0001)
5. Appuyez une seconde fois sur la même touche désirée de
mode (ex : TV) comme décrit dans l'étape 2 ci-dessus.
6. Maintenez appuyé " CH+ " et " VOL- " simultanément
jusqu'à ce que l'indicateur (voyant vert) s'allume.
Maintenant votre télécommande est prête pour
commencer la recherche.
7. Dirigez votre télécommande en direction de l'appareil
que vous souhaitez contrôler et appuyez de façon
répétitive sur la touche '
' jusqu'à ce que
votre télécommande trouve le code permettant de mettre
hors tension votre appareil (ex : TV). Une fois votre
appareil éteint, appuyez immédiatement sur la touche
mode (ex :TV) pour valider le code trouvé.
*Répétez simplement les procédures ci-dessus pour rechercher le
code des appareils suivants : VCR, SAT, DVD etc...
IMPORTANT:
- Si la fonction de mise sous/ hors tension de votre appareil n'est pas
commandée par infrarouge,vous devez suivre les étapes de 2 à 6
comme décrite ci-dessus et redémarrer la procédure de recherche
automatique.
Appuyez sur la touche "
" et une autre touche de fonction
alternativement jusqu'à ce que votre appareil réponde à la fonction
attendue.Appuyez sur la touche mode (ex:TV) pour verrouiller le code.
Exemple : Appuyez sur les touches " " et " 1 " alternativement
Appuyez sur les touches " " et " " alternativement.
Note:
Suggestion :
- Si vous ne trouvez pas le code approprié de votre appareil
vidéo dans la bibliothèque, retournez dans le chapitre " 3.2
recherche automatique ".
5
VCR SAT CTV DVD
CODE DE RECHERCHE: 0001 0002 0003 0004 0005
- Les codes correspondants aux appareils suivants :DVD,décodeur
câble ou satellite,ne peuvent être programmés dans les modes 'TV' ou
'VCR'.
Appuyez simplement sur la touche de mode correspondante à
l'appareil que vous souhaitez commander et entrez le code de
recherche approprié au DVD ou décodeur satellite.
6
Français
- A chaque nouvel appui sur la touche "
", votre
télécommande se positionne sur le prochain code de
fonction (exemple : DVD) et envoie un signal infrarouge
vers celui-ci pour le mettre en mode veille.
Si vous n'appuyez pas à temps sur la touche "
"
quand votre appareil est éteint, rallumez-le
immédiatement avant que votre indicateur (voyant vert)
ne s'éteigne et appuyez sur la touche " CH– " de la
télécommande pour revenir en arrière. Répétez l'étape 7
décrite ci-dessus pour verrouiller le code.
- Si l'indicateur (voyant vert) clignote 6 fois après votre
appui sur la touche "
", vous êtes sur le dernier
code de la bibliothèque.
4
Comment programmer votre RAYline TS
<Apprentissage de codes/commandes>?
Votre télécommande est programmée par défaut pour faire
fonctionner les appareils comme le TV, VCR, DVD, SAT et décodeur
câble. En raison du nombre limité de touches, certaines fonctions
mineures peuvent ne pas être incluses.
Vous pouvez rendre compatible (les fonctions manquantes) votre
télécommande avec celle d'origine de l'appareil que vous souhaitez
utiliser.
Sans compter avec les appareils préprogrammés, vous pouvez
également apprendre à votre télécomande comment contrôler un
autre appareil commandé par infrarouge, tels que les systèmes home
cinéma, etc. Votre télécommande peut apprendre et reproduire jusqu'à
120 commandes d'autres télécommandes. Chacun des 6 modes (TV,
magnétoscope VCR, DVD, SAT, décodeur câble, AUX) peut être utilisé
pour contrôler des commandes additionnelles.
1. Appuyez sur une touche de mode désirée (par exemple, "
" l'icône
correspondant va s'allumer).
2. Maintenez simultanément appuyé les touches " CH+ " et " VOL- " de
votre télécommande jusqu'à ce que l'indicateur (voyant vert)
s'allume.
3. Entrez le code d'apprentissage - 0000, l'icône " Learn " de votre
télécommande va s'allumer et signifie qu'elle est prête à apprendre.
4. Placez votre télécommande d'origine en face
de la diode infrarouge (environ 5 à 8 cm) de la
télécommande RAYline TS. Assurez vous que
votre télécommande d'origine ait des piles neuves.
5. Sur votre télécommande RAYline TS,
appuyez et relâchez la touche que vous
souhaitez utiliser pour la mémorisation de
la nouvelle commande.
Maintenant, l'icône correspondant à la touche du mode choisi
(par exemple :
) va cesser de clignoter.
6. Appuyez et maintenez la touche de la télécommande de votre appareil pour
transférer la commande. Durant le transfert, l'indicateur est allumé. Si la
commande est copiée, l'indicateur clignotera deux fois et l'icône
correspondant à la touche recommencera à clignoter. Vous pouvez
maintenant relâcher la touche de la télécommande de votre appareil. Si
l'indicateur clignote 6 fois, il signale une erreur dans le processus
d'apprentissage.Ajustez la position des deux télécommandes et répétez les
étapes 5 et 6 encore une fois.
7
Français
7. Répétez les étapes 5 et 6 pour transférer d'autres nouveaux signaux de
commandes correspondants à d'autres touches de votre télécommande.
Une fois que vous aurez terminé votre apprentissage, appuyez à nouveau
sur la même touche de mode (exemple : TV ) pour sauvegarder
votre programmation.
4.1 Apprentissage avancé
Si vous trouvez une commande/ fonction de votre appareil ne
fonctionnant qu'occasionnellement, il se peut que votre appareil
fonctionne avec un double signal infrarouge. Suivez les
prochaines étapes décrites ci dessous pour reprogrammer cette
commande à votre RAYline TS.
1. Suivez les étapes de 1 à 4 de votre chapitre 4.
2. Appuyez et relâchez la touche que vous souhaitez utiliser pour
la nouvelle commande. Maintenant, l'icône correspondant à
la touche du mode choisi (par exemple :
) va cesser de
clignoter.
3. Appuyez et maintenez la touche de la télécommande de votre
appareil pour transférer la commande. L'indicateur (voyant
vert) clignotera deux fois et l'icône correspondant à la touche
recommencera à clignoter si la commande est copiée. Le
premier signal a été transmis avec succès et vous pouvez
maintenant relâcher la touche correspondant de la
télécommande d'origine.
4. Appuyez et relâchez la même touche sur votre télécommande
RAYline TS. L' icône correspondant à la touche du mode
choisi va s'éteindre.
5. Appuyez et maintenez la même touche de la télécommande
de votre appareil pour transférer la commande. L'indicateur
clignotera deux fois et l'icône correspondant à la touche
recommencera à clignoter si la commande est copiée. Le
deuxième signal a été transmis avec succès.
6. Répétez les étapes 2 à 5 pour transférer d'autres nouveaux
signaux de commandes correspondants à d'autres touches de
votre télécommande.
7. Une fois que vous aurez terminé votre apprentissage, appuyez
à nouveau sur la même touche de mode (exemple :
) pour
sauvegarder votre programmation.
Avertissement :
Écrire/apprendre un nouveau code va automatiquement effacer
et remplacer toutes les commandes apprises au préalable.
Note:
- N'essayez pas d'apprendre de nouvelles commandes sur les
touches de mode " Page " et "
", car elles ne retiendront
pas les commandes.
- Chaque touche de fonction ne peut contenir qu'une seule
commande. Tout apprentissage d'une nouvelle commande
effacera et remplacera automatiquement la précédente.
- Si vous avez accidentellement appuyé sur une mauvaise
touche lors de la procédure d'apprentissage dans l'étape 5
décrite ci-dessus, vous devrez attendre 30 secondes jusqu'à
ce que l'indicateur (voyant vert) s'éteigne pour retourner à
nouveau dans le mode opératoire. Vous pouvez répéter les
procédures décrites ci-dessus pour reprogrammer la
télécommande.
- Si l'indicateur (voyant vert) clignote 6 fois pendant le transfert des
signaux, ceci vous indique que la banque de mémoire est pleine.
Appuyez sur la même touche de fonction pour reprendre
l'opération (Vous pouvez également effacer ce nouveau code
pour en sauvegarder un autre. Voir " Avertissement ci- dessus ".
8
Français
5
Français
A l'aide de SMART, vous pouvez programmer un groupe de
commandes retardé dans le temps pour s'exécuter dans l'envoi
d'ordres de signaux infrarouges simplement par une pression de la
touche SMART.
Comment utiliser votre télécommande ?
5.1 Mode normal
Une fois que vous avez programmé votre télécommande en
fonction de votre appareil audio&vidéo, elle fonctionne
comme la télécommande originelle. Pour la faire fonctionner,
placez la en face de votre appareil, appuyez sur une touche
de mode (exemple : TV) puis appuyez sur une touche de
fonction en mode TV. L'indicateur (voyant vert) s'illumine,
l'écran tactile s'éclaire et vous entendez un bip sonore
confirmant votre appui sur la touche.
5.2 Page
Chaque touche de mode contient 3 groupes de commandes.
Vous avez simplement à effectuer un appui sur la touche
" Page " situé sur le coin inférieur droit de l'écran de la
télécommande pour appeler un autre groupe de commande.
5.3 Shift
Grâce à la télécommande RAYline TS, vous pourrez contrôler
facilement les fonctions suivantes de votre téléviseur, à savoir :
CH+
CHVOL+
VOL-
Hausse du contraste
Baisse du contraste
Hausse de la couleur
Baisse de la couleur
Pour cela, appuyez sur la touche "
" puis effectuez des appuis
répétés sur la touche dont vous souhaitez contrôler le niveau
(CH+, CH-, VOL+ ou VOL-). Quand vous aurez atteint le niveau
souhaité, appuyez de nouveau sur "
" pour mémoriser
l'enregistrement du niveau souhaité ou attendez que
l'indicateur (voyant vert) s'éteigne, la mémorisation se faisant
alors automatiquement.
6
1. Maintenez appuyé simultanément les touches " CH+ " et " VOL- "
sur votre télécommande jusqu'à l'allumage de l'indicateur (voyant
vert).
2. Entrez le code 0009.
3. Les icônes SMART apparaîtront sur l'écran tactile.
4. Choisissez une touche SMART. (par exemple :
)
5. Choisissez une commande à partir du mode (exemple : TV)
correspondant et l'indicateur clignotera une fois pour chaque
touche.
6. Répétez l'étape 5 jusqu'à ce que vous finissiez le programme
entier et appuyez à nouveau sur la même touche SMART. Le
programme SMART (par exemple :
) est sauvegardé.
7. Pour programmer une autre fonction SMART, répétez les étapes
1 à 6 décrites ci-dessus.
6.1 Fonctionnement d'un programme SMART
1. Placez votre télécommande en face de votre appareil audio&vidéo.
2. Appuyez puis relâchez la touche SMART que vous avez programmé
(par exemple
). L' icône SMART correspondant et
l'indicateur (voyant vert) clignoteront lentement pendant la
transmission des signaux. L'icône SMART et l'indicateur s'arrêteront
de clignoter quand la chaîne des signaux infrarouges aura été
transmise complètement. La télécommande se mettra de nouveau
en mode de fonctionnement normal.
7
-
5.4 Passer au travers
Cette fonction permet de contrôler le volume du téléviseur et
de l'assourdir (mute) sans devoir commuter les touches de
mode même lorsque votre télécommande est dans un mode
autre que TV.
Cependant, si vous avez appris des commandes sur les
touches VOL+, VOL- ou dans les modes (magnétoscope
VCR, DVD, SAT, décodeur câble ou AUX.), la fonction " passer
au travers " sera neutralisé dans le mode correspondant de
votre appareil.
5.5 Fonction SMART
Votre télécommandes contient 3 programmes SMART
(
) chacun pouvant mémorisé jusqu'à 15
étapes au maximum.
9
Comment Programmer la fonction SMART ?
-
Entretien
N' exposez pas votre télécommande à la poussière, lumière forte
du soleil, humidité, choc à hautes températures ou mécanique.
N' utilisez pas de vieilles et nouvelles piles ensemble sachant que
les vieilles piles tendent à fuir.
N' utilisez pas de matières corrosives ou abrasives pour nettoyer
votre télécommande.
Maintenez votre télécommande sans poussière en l'essuyant avec
un tissu doux et sec.
Ne démontez pas votre télécommande, elle ne sera plus couverte
par la garantie constructeur.
8
Dépannage
Q. Ma télécommande ne fonctionne pas ! ! !
R. Vérifiez que votre appareil audio&vidéo soit bien allumé, sinon,
la télécommande ne pourra pas le contrôler.
R. Vérifiez si vos piles sont insérées correctement et que leurs
polarités sont respectées .
R. Si les piles sont faibles, remplacez-les . Voir " 1.4 comment
installer les piles ".
10
Français
Q. Comment choisir le bon code si la bibliothèque contient
plusieurs codes pour une même marque ?
R. Pour chercher le code correspondant à votre appareil, essayez les
codes un à un jusqu'à ce que la plupart des touches
fonctionnent correctement.
Q. Mon appareil audio&vidéo ne répond seulement qu'à certaines
commandes ?
R. Vous avez programmé un code pour lequel seulement quelques
commandes fonctionnent correctement. Essayez d'autres codes
jusqu'à ce que la plupart des touches fonctionnent
correctement.
R. Vous pouvez également apprendre les codes de la
télécommande original à votre télécommande RAYline TS. Voir "
chapitre 4 "
Q. L' indicateur montre des erreurs dans les commandes apprises en
mode " apprentissage "
R. Assurez-vous que vous aviez bien placé la diode infrarouge votre
télécommande originale en face (~ 5 à 8 cm) de celle de votre
télécommande RAYline TS.
R. Assurez-vous que les procédures d'apprentissage sont suivies
dans un environnement libre de la lumière directe du soleil et/ou
de forte lumière.
R. Nettoyez la diode de transmission infrarouge de votre
télécommande et essayez encore une fois.
R. Vérifiez l'état des piles de la télécommande de votre appareil
audio&vidéo. Si les piles sont faibles, les télécommandes ne
peuvent pas transmettre ou apprendre la commande
correctement.
R. Assurez-vous que la distance entre la télécommande originale de
votre appareil audio&vidéo et celle de votre télécommande
RAYline TS est resté le même pendant la durée des procédures
d'apprentissage.
Q. Quelques commandes apprises sur ma télécommande ne
fonctionnent pas ?
R. Ces signaux ne sont pas appris correctement. Apprenez à votre
télécommande ces fonctions encore une fois.
Deutsch
1
Übersicht
Herzlichen Glückwunsch zum Erwerb Ihrer Universalfernbedienung
RAYline TS. Diese Fernbedienung stellt Ihnen die Funktionen eines
PDA (Personal Digital Assistant) für Ihr digitales Heimkino zu Verfügung.
Große Flexibilität und gleichzeitig einfachste Bedienung zeichnen
dieses technisch hockwertige Produkt aus.
Bitte lesen Sie diese Bedienungsanleitung aufmerksam durch um mit
allen Funktionen der Fernbedienung vertraut zu werden. Dewahren
Sie diese Anleitung für spätere Verwendung gut auf.
1.1 Leistungsmerkmale der Fernbedienung
Vorprogrammiert und lernfähig.
Ersetzt bis zu 6 Fernbedienungen für TV, VCR, SAT, CTV,
DVD, und AUX.
Speicherkapazität für max. 120 Funktionen.
Berührungssensitives Display mit intelligenter
Hintergrundbeleuchtung.
5 zusätzliche Direkt - Tasten zur Bedienung von
Programmauswahl, Lautstärke und Ein/Aus ( , CH+,
CH–, VOL+, VOL–).
Einfachste Einrichtung über direkte Codeeingabe oder
automatischer Codesuche.
3 SMART Programme zum automatischen Abrufen einer
Funktionsabfolge mit bis zu 15 Befehlen.
Umleitung von Volumen- und Stummschaltungssignalen.
Umfangreiche Videotextfunktionen.
Automatische Batteriesparschaltung.
Q. Quelques commandes apprises fonctionnent de temps en
temps.
R. Votre télécommande originale peut comporter des commandes
double de signal. Voir " chapitre 4.1 "
Q. Qu'est ce qu'une fonction SMART ?
R. C'est une fonction évoluée ( ou MACRO) offerte par votre
télécommande RAYline TS qui vous permet de programmer une
série de commandes retardées dans le temps. Par une simple
pression de la touche SMART choisie, votre télécommande va
envoyer une chaîne de signaux infrarouges automatiquement.
Pour plus de détails, voir " chapitre 5.5 "
11
12
Deutsch
1.2 Die Universalfernbedienung im Überblick
1.
2.
3.
4.
5.
6.
7.
8.
9.
10.
Deutsch
1.3 Technische Daten
Betriebssystem:
Infrarot Sender und Linse
Grüne Kontrollleuchte (LED)
Brührungssensitives Display (touch screen)
Zusätzliche “echte” Tasten für direkten Zugriff
Batteriefach
Gerätetasten (zur Auswahl des zu bedienenden Gerätes)
Zusätzliche Direkt-Tasten für die wichtigsten Funktionen
Stummschaltung (MUTE)
Zweite Tastenebene (SHIFT)
Auswahl der Funktionsebene (PAGE) für das aktuelle Gerät
Speicher:
Batterien
Display:
Reichweite:
Stromversorgung:
Abmessungen:
Gewicht :
Für Infrarotsignale vorprogrammierte und
lernfähige Spezialsoftware
Ausreichend für 120 IR-Befehle. Kein
Datenverlust beim Wechseln der
Berührungssensitiv mit türkiser
Hintergrundbeleuchtung
Bis zu 8 Meter
4 Batterien vom Typ AAA
154 x 52 x 23 mm
100g (ohne Batterien)
140g (mit Batterien)
Im Rahmen des technischen Fortschritts sind die vorangegangenen Angaben
ohne Gewähr.
1
1.4 Einlegen der Batterien
Öffnen Sie das Batteriefach auf der Rückseite der Fernbedienung
und legen sie frische Batterien unter Beachtung der Polung ein.
Die vorgeschriebene Polung ist im Batteriefach abgebildet
(+/–). Schließen Sie danach
das Batteriefach wieder. Wir
empfehlen Alkalien
Batterien zum Betrieb
dieser Fernbedienung.
2
6
3
7
Hinweis:
Wenn die Batteriezustandanzeige “
” im Display erscheint
sollten Sie beide Batterien austauschen um einen einwandfreien
Betrieb der Fernbedienung zu gewährleisten und mögliche
Schäden durch Auslaufen der Batterien zu verhindern.
9
8
10
5
L
C
H
VO
2
Einführung
❑
Nach der Installation der Batterien “erwacht” die Fernbedienung
zunächst im TV-Modus. Wenn Sie ca. 4 Sekunden lang nicht
bedient wird wechselt sie in den Standby Modus und schaltet
das Display ab. Um die Fernbedienung wieder einzuschalten
berühren Sie das Display einfach ein mal.
Hinweis: Die Direkt-Tasten für Programm, Volumen und EinAus
sind immer verfügbar, auch im Standby Modus.
❑
Um ein gewünschtes Gerät zu bedienen, betätigen Sie einfach
die zugehörige Gerätetaste (z.B. TV ). Zur Bestätigung “
”
blinkt das zugehörige Gerätesymbol einige Male.
❑
Alle anderen Tasten können Sie dann wie gewohnt zur
Bedienung des Gerätes verwenden.
C
VO
L
4
H
13
14
Deutsch
2.1 Direkt verfügbare “echte” Tasten
Die SmartOne Fernbedienung verfügt über 5 direkt
verfügbare Tasten:
CH+
CH–
VOL+
VOL–
Ein- bzw. Ausschalten des Gerätes
Programm bzw. Kanal +
Programm bzw. Kanal –
Lautstärke erhöhen
Lautstärke veringern
Hinweise:
– DVD, CTV, SAT, oder andere Gerätetasten können Sie auch
mit Codes belegen, die für andere Geräte vorgesehen sind.
Hiervon ausgenommen sind TV und VCR. Geben Sie einfach
den entsprechenden Gerätecode wie oben angegeben ein.
– Sollte bei der Eingabe des Gerätecodes (Schritt 4) die LED
6 mal nacheinander aufblinken, so zeigt dies an, dass ein
unzulässiger Code eingegeben wurde. Widerholen Sie in
diesem Fall die Schritte 2 bis 4.
Empfehlung:
2.2 Signalton
Jede Tastenberührung auf dem Display wird zur Bestätigung
mit einem kurzen Signalton quittiert.
2.3 Hintergrundbeleuchtung
Die türkise Hintergrundbeleuchtung schaltet sich ein sobald
Sie das Display berühren. Nach vier Sekunden Inaktivität
schaltet sich die Beleuchtung von selbst wieder aus.
3
Deutsch
Einrichten der Fernbedienung
3.1 Durch Eingabe eines Gerätecodes
Um die Fernbedienung anhand eines Codes aus der
beigefügten Liste einzurichten, gehen Sie wie folgt vor:
1. Suchen Sie in der Codeliste den vierstelligen Code für Ihr
Gerät aus (Markenname). Sollten mehrere Codes angegeben
sein, so verwenden Sie zunächst den Ersten.
2. Bedienen Sie eine der Gerätetasten auf der Fernbedienung
(z.B. TV , “
” beginnt zu blinken).
3. Halten Sie die Tasten “ CH+ ” und “ VOL– ” auf der
Fernbedienung für zwei Sekunden gedrückt bis die
Kontrollanzeige aufleuchtet.
4. Geben Sie den 4-stelligen Gerätecode ein. Die
Kontrollanzeige blinkt zwei mal.
Schalten Sie das fernzubedienende Gerät (z.B. TV) ein und
versuchen Sie einige Funktionen zu bedienen. Wenn das Gerät
einwandfrei auf die Funktionen reagiert, haben Sie den
richtigen Code eingegeben. Die Fernbedienung ist somit
korrekt eingerichtet. Anderenfalls wiederholen Sie die Schritte
1 bis 4 um einen anderen Code einzugeben, solange bis Sie
das beste Ergebnis erzielt haben.
* Wiederholen Sie die oben angegebene Prozedur für andere
Geräte, wie z.B. VCR, SAT, DVD oder CTV. Beachten Sie
hierbei, dass Sie in Schritt 2 die entsprechende Gerätetaste
drücken.
15
– Sollten Sie keinen passenden Code für Ihr Gerät finden, so
können Sie den Code automatisch suchen lassen, wie im
nachfolgenden Abschnitt beschrieben: “ 3.2 (Halb-)
Automatisches durchsuchen der Codebibliothek ”.
3.2 (Halb-) Automatisches durchsuchen der
Codebibliothek
Wenn Sie Ihr Gerät nicht eindeutig identifizieren können und
damit keinen Code haben, können Sie die Fernbedienung
veranlassen, selbstständig die Codebibliothek nach einem
passenden Code zu durchsuchen. Gehen sie hierzu wie folgt
vor:
1. Schalten Sie das Gerät, welches Sie einrichten wollen (z.B.
TV) ein.
2. Bedienen Sie eine der Gerätetasten auf der Fernbedienung
(z.B. TV , das “
” beginnt zu blinken).
3. Halten Sie die Tasten “ CH+ ” und “ VOL– ” auf der
Fernbedienung für zwei Sekunden gedrückt bis die LED
aufleuchtet.
4. Wählen Sie die zugehörige Bibliothek für Ihren Gerätetyp
durch Eingabe einer der nachfolgenden Nummer aus.
Die LED erlischt dann sofort. Den Bibliotheken sind diesen
Nummern zugeordnet:
Bibliothek:
TV VCR SAT CTV DVD
Auswahlcode:
0001 0002 0003 0004 0005
(Die Schritte 2 bis 4 würden also z.B. wie folgt aussehen:
TV-Gerätetaste betätigen TV ,“ CH+ ” und “ VOL– ” für 2
Sekunden gemeinsam betätigen, Auswahlcode 0001
eingeben.)
5. Bedienen Sie nun erneut die Gerätetaste Ihrer Wahl wie in
Schritt 2.
6. Halten Sie die Tasten “ CH+ ” und “ VOL– ” auf der
Fernbedienung für zwei Sekunden gedrückt bis die
Kontrollanzeige aufleuchtet (wie in Schritt 3).
7. Richten Sie die Fernbedienung auf Ihr Gerät (z.B. TV).
Betätigen Sie die “ ” (Ein/Aus) Taste wiederholt, solange
bis das Gerät (z.B. TV) sich abschaltet. Gehen Sie hierbei
bitte mit etwas Geduld vor, da die
16
Deutsch
Codebibliotheken umfangreich sind. Sobald sich das
Gerät abschaltet betätigen Sie die entsprechende
Gerätetaste (z.B. TV ) um den “Treffer” zu bestätigen
und den Suchvorgang abzuschließen. Das Gerät wurde
hiermit eingerichtet.
* Wiederholen Sie den Vorgang wenn gewünscht für
andere Geräte wie VCR, SAT, CTV, oder DVD. Beachten
Sie hierbei, wie in Schritt 2 bis 5 angegeben, die
entsprechende Gerätetaste zu bedienen und die für Ihr
Gerät passende Bibliotheksnummer einzugeben.
Wichtig:
– Sollte Ihr Gerät die Funktion “ ” (Ein/Aus) nicht über
Infrarot bedienen können, so müssen Sie in Schritt 4
zusätzlich eine andere gängige Taste verwenden um
eine Reaktion Ihres Gerätes zu erkennen. Also z.B. “ ” und
“ 1 ” oder “ ” und “ ”.
Hinweise:
– DVD, CTV, SAT, oder andere Gerätetasten können Sie auch
mit Codes belegen, die für andere Geräte vorgesehen sind.
Wählen Sie in den Schritten 2 und 5 einfach eine Gerätetaste
und dann eine andere passende Bibliotheksnummer.
– Bei jedem Betätigen der “ ” Taste springt die
Fernbedienung zum nächsten Code in der Bibliothek und
sendet das PWR Signal an Ihr Gerät. Sollten Sie nicht
rechtzeitig aufhören, die “ ” Taste zu drücken, so schalten
Sie Ihr Gerät wieder ein. Betätigen Sie auf der Fernbedienung
die Taste “ CH– ” um zum vorangegangenen Code zu
springen und führen Sie den Vorgang bei Schritt 7 fort.
– Wenn die LED 6 mal nacheinander aufblinkt, während Sie
die “ ” Taste betätigen sind Sie am Ende der CodeBibliothek angelangt. Um wieder zum Anfang der Bibliothek
zu springen betätigen Sie erneut die entsprechende
Gerätetaste.
17
Deutsch
4
Einlernen der Fernbedienung
(abscannen von Signalen einer anderen Fernbedienung)
Diese Fernbedienung ist für eine Großzahl von Geräten der Bereiche TV,
VCR, SAT, CTV und DVD vorprogrammiert. Sollten sich nach Einrichtung
der Geräte über die Codebibliothek nur eine gewisse Anzahl von
Funktionen bedienen lassen oder sollten Sie keinen passenden Gerätecode
gefunden haben, können Sie fehlende Funktionen von der OriginalFernbedienung (wenn vorhanden) einlesen (scannen).
Neben den vorprogrammierten Geräten können Sie auf diese Weise
auch andere über Infra-Rot steuerbare Geräte bedienen, wie z.B. Ihre
Hi-Fi Anlage, eine Klimaanlage, Rollläden oder ähnliches, sofern Sie die
Original-Infrarot-Fernbedienung dieser Geräte zur Hand haben.
Es lassen sich bis zu 120 verschiedene Kommandos einlernen. Alle sechs
Gerätemodi (TV, VCR, DVD, SAT, CTV und AUX) sind für das Einlernen von
Signalen vorgesehen. Gehen Sie hiebei wie folgt vor:
1. Wählen Sie eine der Gerätetasten aus (z.B. TV ).
2. Halten Sie die Tasten “ CH+ ” und “ VOL– ” auf der Fernbedienung
für zwei Sekunden gedrückt bis die Kontrollanzeige aufleuchtet.
3. Geben Sie 0000 ein, um den Lernmodus der Fernbedienung zu
aktivieren.
4. Zeigen Sie mit der Originalfernbedienung
auf die Infrarot-Linse der Universalfernbedienung. Halten Sie hierbei einen
Abstand von 5 bis 8 cm ein. Bitte stellen
Sie sicher, dass die Batterien der
Originalfernbedienung frisch sind.
5. Betätigen Sie auf der Universalfernbedienung die Taste, die sie mit
dem neuen Kommando belegen möchten. Das entsprechende
Gerätesymbol (z.B.
) blinkt dann nicht mehr.
6. Betätigen Sie nun auf Ihrer Originalfernbedienung die zu
übernehmende Funktion, also eine gewünschte Taste, für eine
gewisse Zeit. Die LED blinkt zwei mal auf und das Gerätesymbol
(z.B.
) beginnt wieder zu blinken. Die gewünschte Taste wurde
jetzt überspielt.
Sollte die LED sechs mal auflinken, zeigt dies einen Fehler beim
Überspielen der Taste an. Kontrollieren Sie in diesem Fall den
Abstand der beiden Fernbedienungen und wiederholen Sie die
Schritte 5 und 6.
7. Widerholen Sie die Schritte 5 und 6 um weitere Tasten bzw. deren
Funktionen zu überspielen.
18
Deutsch
4.1 Einlernen eines Dual-Signals von einer
anderen Fernbedienung
Sollten Sie feststellen, dass die überspielten Funktionen einer
Originalfernbedienung nur teilweise funktionieren, könnte es
sein, dass die Originalfernbedienung Dual-Signale sendet.
Gehen Sie in diesem Fall wie folg vor:
1. Führen Sie die Schritte 1 bis 4 des vorangegangenen
Abschnitts durch “ 4 Einlernen der Fernbedienung ”.
2. Betätigen Sie auf der Universalfernbedienung die Taste, die
sie mit dem neuen Kommando belegen möchten. Das
entsprechende Gerätesymbol (z.B.
) blinkt dann nicht mehr.
3. Betätigen Sie nun auf Ihrer Originalfernbedienung die zu
übernehmende Funktion, also eine gewünschte Taste, für
eine gewisse Zeit. Die LED blinkt zwei mal auf und das
Gerätesymbol (z.B.
) beginnt wieder zu blinken. Die erste
Teil des Dual-Signals der Taste wurde jetzt überspielt.
4. Betätigen Sie auf der Universalfernbedienung erneut die
zu belegende Taste. Das Gerätesymbol blinkt dann nicht mehr.
5. Betätigen Sie nun af Ihrer Originalfernbedienung abermals
die zu übernehmende Taste, für eine gewisse Zeit. Die LED
blinkt zwei mal auf und das Gerätesymbol (z.B.
) beginnt
wieder zu blinken. Es wurde nun der zweite Teil des DualSignals überspielt. Das Signal wurde somit vollständig
übertragen.
6. Widerholen Sie die Schritte 2 bis 5 um andere Tasten zu
überspielen.
7. Betätigen Sie erneut die entsprechende Gerätetaste (z.B.
TV ) um den vorgang abzuschließen.
Deutsch
5
5.1 Normaler Betriebs-Modus
Nach dem Sie die Fernbedienung wie in den vorhergehenden
Abschnitten eingerichtet haben können Sie die Funktionen
nun in gewohnter Weise verwenden. Richten Sie die
Fernbedienung einfach auf das zu bedienende Gerät und
betätigen Sie die gewünschte Taste. Die LED blinkt hierbei auf
und Sie hören einen kurzen Ton, der das Senden des Signals
bestätigt.
5.2 PAGE
Jedes Gerät auf der Fernbedienung besitzt drei
Funktionsebenen (-seiten). Betätigen Sie einfach die
“ Page ” -Taste um auf die nächste Geräteseite zu gelangen.
5.3 SHIFT
Halten Sie die
-Taste und betätigen Sie eine der 4 “echten”
Zusatztasten um die folgenden Funktionen auszuführen:
CH+
CH–
VOL+
VOL–
Die SmartOne leitet die Funktionen VOL+, VOL– und
immer an das TV Gerät weiter, sodass Sie beispielsweise ohne
weiteres Ihren Videorekorder bedienen können und trotzdem
die Lautstärke Ihres Fernsehgerätes im Griff haben ohne auf
TV umschalten zu müssen.
Wenn Sie jedoch die Tasten VOL+, VOL– oder
umprogrammiert haben, d.h. Signale anderer Fernbedienungen
auf diese Tasten überspielt haben, so werden diese nicht an das
Fernsehgerät weitergeleitet sondern direkt an das momentan
ausgewählte Gerät gesendet.
Hinweise:
19
Helligkeit +
Helligkeit –
Farbe +
Farbe –
5.4 Umleitung der Lautstärkefunktionen
Achtung:
Das Einlernen einer bestimmten Taste überschreibt die
Funktion, mit der die Taste zuvor belegt war.
– Die Gerätetasten an sich, sowie die Tasten “ Page ” und
lassen sich nicht mit individuellen Funktionen belegen. Sie
dienen ausschließlich der Steuerung der Universalfernbedienung.
– Jede Taste kann genau eine Funktion ausführen. Wird die Taste mit
einer neuen Funktion belegt, so wird hierbei die alte Funktion
überschrieben.
– Sollten sie in Schritt 5 versehentlich eine falsche Taste betätigt haben,
so warten Sie einfach 30 Sekunden. Die Universalfernbedienung
wechselt dann automatisch in den normalen Modus zurück.
Wiederholen Sie dann den Vorgang des Einlernens.
– Wenn die LED der Fernbedienung während der Übertragung der
Signale 3 mal blinkt, so könnte der zur Verfügung stehende Speicher
knapp geworden sein. Betätigen Sie in diesem Fall die entsprechende
Gerätetaste um in den normalen Modus zurückzukehren. (Sie können
dann nicht benötigte Funktionen löschen um wieder Platz für neue
Funktionen zu schaffen.)
Benutzen der Fernbedienung
6
Smart Programme
(automatisches Senden mehrerer Funktionen)
Es stehen Ihnen insgesamt drei Smart Programme (
,
) zur Verfügung. Jedes Smart Programm kann bis zu 15
verschieden Funktionen nacheinander senden. Smart Programme
ermöglichen es Ihnen somit eine Liste mehrer Infra-Rot Kommandos
auf einen Tastendruck zu senden. Die Fernbedienung fügt zwischen
die einzelnen Kommandos automatisch kurze Sendepausen ein um
Reaktionszeiten der Geräte zu berücksichtigen.
20
Deutsch
6.1 Erstellen eines Smart Programms
1. Halten Sie die Tasten “ CH+ ” und “ VOL– ” für zwei Sekunden
gedrückt bis die LED aufleuchtet.
2. Geben Sie 0009 ein um den Smart Modus der Fernbedienung
zu aktivieren.
3. Das Smart Symbol auf der Fernbedienung beginnt zu
blinken.
4. Wählen Sie eines der drei Smart Programme aus
(z.B.
).
5. Wählen Sie eines der Geräte aus (z.B.
) und bedienen
Sie Tasten Ihrer Wahl (z.B. 1).
6. Wiederholen Sie den Schritt 5 um weitere Tasten in das
Smart Programm aufzunehmen. Sie können beliebige
Tasten beliebiger Geräte bedienen. Um die Aufzeichnung
des Smart Programms zu beenden betätigen Sie die Smart
Taste, die Sie zuvor ausgewählt hatten. (Also z.B.
)
7. Um ein anderes Smart Programm einzurichten wiederholen
Sie die Schritte 1 bis 6.
6.2 Benutzen eines Smart Programms
1. Richten Sie die Fernbedienung so gut es geht auf die Geräte
für die Sie Funktionen aufgezeichnet haben.
2. Betätigen Sie eine der drei Smart Tasten (z.B.
) Das
entsprechende Smart Symbol blinkt währen der
Übertragung der einzelnen Infrarot-Kommandos. Sobald
die Übertragung beendet ist erlischt auch die LED. Die
Fernbedienung ist dann wieder bereit andere Kommandos
zu senden.
7
Pflege und Handhabung der
Fernbedienung
– Setzen Sie die Fernbedienung bitte auf keinen Fall Staub, hohen
Temperaturen, Feuchtigkeit, harten Stößen und langfristigem
direktem Sonnenlicht aus.
– Benutzen Sie bitte nie alte und neue Batterien gemeinsam, da
alte Batterien auslaufen und die Neuen sowie die Fernbedienung
beschädigen könnten.
– Zur Pflege der Fernbedienung sind Reinigungsmittel ungeeignet.
Sie könnten das Display und die Oberfläche der Fernbedienung
angreifen.
– Reinigen Sie die Fernbedienung, wenn nötig, statt dessen vorsichtig
mit einem trockenen weichen Tuch.
– Demontieren Sie die Fernbedienung nicht. Sie enthält keine vom
Benutzer austauschbaren Teile.
21
Deutsch
8
Problembehebung
Antworten auf die am häufigsten gestellten Fragen:
Frage:
Die Fernbedienung funktioniert überhaupt nicht! Woran
kann das liegen?
Antwort: Überprüfen Sie ob der Hauptschalter des zu bedienenden
Geräte eingeschaltet ist und das Gerät betriebsbereit ist.
Antwort: Überprüfen Sie die Batterien insbesondere auf Polung (+/–).
Verwenden Sie gegebenenfalls einen neuen Satz Batterien
(siehe 1.4 Einlegen der Batterien)
Frage:
Für mein Gerät gibt es mehrere Codes. Wie finde ich den
passenden Code für mein Gerät?
Antwort: Probieren Sie nacheinander alle Codes aus und entscheiden
Sie sich für den Code, bei dem die meisten Funktionen korrekt
arbeiten.
Frage:
Mein Gerät reagiert nur auf manche Funktionen korrekt!
Woran kann das liegen?
Antwort: Wenn mehrere Codes für Ihr Gerät angegeben sind, versuchen
sie es mit einem anderen Code.
Antwort: Sollten trotzdem manche Funktionen nicht korrekt arbeiten,
so können Sie diese von Ihrer Originalfernbedienung
übernehmen (siehe 4 Einlernen der Fernbedienung).
Frage:
Während dem Einlernen (Überspielen) einzelner
Kommandos von meiner Originalfernbedienung zeigt
die LED (Kontrolleuchte) durch sechs mal Blinken einen
Übertragungsfehler an. Woran kann das liegen?
Antwort: Stellen Sie sicher, dass Sie Ihre Originalfernbedienung im
Abstand von ca. 5 bis 8 cm auf die Infra-Rot Linse der
UniversalFernbedienung gerichtet ist.
Antwort: Das Übertragen von Infrarotsignalen kann durch direkte
Sonneneinstrahlung oder andere starke Lichteinflüsse gestört
werden. Bei durchschnittlichen Raumlicht-Verhältnissen
sollte die Übertragung jedoch einwandfrei funktionieren.
Antwort: Sollte der Infra-Rot Sender Ihrer Originalfernbedienung
verschmutzt sein, könnte das ein Grund für den
Übertragungsfehler sein. Reinigen Sie in diesem Fall die
Infra-Rot LED der Originalfernbedienung.
Antwort: Überprüfen Sie die Batterien der Originalfernbedienung. Es
kann vorkommen, dass Sie mit der Originalfernbedienung
Ihr Gerät zwar gerade noch ansteuern können aber eine
sichere Übertragung auf die Universalfernbedienung nicht
mehr gewährleistet ist und somit blockiert wird.
Antwort: Verändern Sie den Abstand zwischen Originalfernbedienung
und Universalfernbedienung während der Übertragung
nicht. Am besten, sie legen beide Fernbedienungen
aufeinander gerichtet auf einen Tisch um in Ruhe den
Übertragungsvorgang zu durchzuführen.
22
Deutsch
Frage:
Manche eingelernten (überspielten) Kommandos
funktionieren nicht. Was könnte die Ursache sein?
Antwort: Möglicherweise ist bei der Übertragung ein Fehler
aufgetreten. Wiederholden Sie in diesem Fall die Übertragung.
Frage:
Manche eingelernten (überspielten) Kommandos
funktionieren manchmal und manchmal wieder nicht.
Woran könnte das liegen?
Antwort: Es könnte sein, dass Ihre Originalfernbedienung so genannte
“Dual Signale” sendet. In diesem Fall können Sie diese Signale
im Dual-Modus überspielen (siehe 4.1 Einlernen eines DualSignals von einer anderen Fernbedienung).
Frage:
Was bedeutet Smart für diese Fernbedienung?
Antwort: Mit dieser fortschrittlichen Technologie können Sie auf
einen Tastendruck einen ganzen Stapel von Funktionen
(Infra-Rot Signalen) senden und so Ihr Heimkino automatisieren.
Mehrere Geräte können so auf diese Weise in definierter
Reihenfolge verschiedene Funktionen ausführen (siehe 6
Smart Programme).
23
English
1
Introduction
Congratulations! Your Home Theatre Master Remote (HTMR) is a stateof-the-art device which integrates many different infrared remote
controls to deliver instant A/V action to your fingertips. We hope that
you love this remote and take it as your Personal Digital Assistant for
your Home Theatre system.
Before operating the remote, please read thoroughly this manual.
Then, reserve it for future reference.
1.1 Key Features
Pre-programmed with learning capability
6-in-1 high end Home Theatre remote (replace TV, VCR, SAT,
CTV, DVD and AUX)
Learn up to 120 commands
EL backlit touch screen panel
5 useful hard keys for direct access ( , CH+, CH–, VOL+, VOL–)
Easy set up by code entering and library code search
3 SMART programs, each with 15 steps in maximum
Volume punch through control for TV
Teletext and Fastext control available
Auto power off (Sleep mode) for battery conservation
24
English
1.2 Getting to know your Home Theatre
Master Remote
1.
2.
3.
4.
5.
Infra-red lens
Green LED indicator
Touch screen panel
Hard keys
Battery compartment
1.3 Specifications
Operation System:
Compatibility:
For Touch Screen panel:
6.
7.
8.
9.
10.
English
Device mode keys (for device mode selection)
Function keys (for remote operation)
MUTE key (for TV volume shut down)
SHIFT key (for secondary function)
PAGE key (for next group function keys)
1
2
Memory Capacity:
Memory Retention
after Battery
Disconnection:
Display Panel:
EL Backlighting:
Operating Distance:
Power Requirement:
recommended)
Dimensions:
Weight :
Integrated preprogrammed & learning
infra-red remote control system
Preprogrammed with code library of
Televisions (TVs), Video Cassette Recorders
(VCRs), Satellite / Digital Satellite Receivers
(SATs), Cable Converters (CTVs) and Digital
Video Disc Players (DVDs)
120 learning commands
Non-volatile and permanent memory
Monochrome touch screen LCD
Blue-Green EL backlit
8 metres (25 feet)
4 x AAA size batteries (Alkaline is
154 x 52 x 23 mm
100g (without batteries installed)
140g (with batteries installed)
For improvement purposes, specifications and functions are subjected to
change without priority notice.
6
1.4 How to Install Batteries
3
Alkaline batteries are recommended.
7
9
8
1. Open the battery cover.
2. Follow the polarity symbol shown in the battery
compartment.
3. Place the batteries inside.
4. Replace the battery cover.
10
5
L
C
H
VO
Note: Battery Low
C
VO
L
4
H
25
If the icon “
” is shown on the display panel, it shows that
the battery level is low. You must replace the battery with the
new one to ensure proper functioning. Do not use old and new
batteries together as old batteries tend to leak.
26
English
2
Getting Start
❑
After installed batteries, your HTMR prompts at TV mode. If it is
inactive for about 4 seconds, it goes to power saving (sleep)
mode and shut down the display. Simply, touch the screen panel
to activate the unit again.
Note: When in power saving (sleep) mode, the hard key section
is still available for command.
3
❑
Tap any of the Device Mode Key on the screen to enter the
corresponding device mode. e.g. TV . The “
” icon will flash.
❑
Tap a key directly to send out the corresponding infra-red
command.
2.1 Hard Keys
There are 5 hard keys, it transmits IR command corresponding
to the device selected.
CH+
CH–
VOL+
VOL–
English
Power ON/OFF
Program up or channel up
Program down or channel down
Volume up
Volume down
2.2 Key Tone
When you tap any key, there is a short beep sound.
2.3 Backlit
How to Set Up the Home Theatre
Master Remote
3.1 By Entering Device Code
You may setup the remote by the following code entering
instructions.
1. Refer to the Device Code List, look up the 4-digit device
code which corresponds to the brands of your A/V
equipment. If there are more than one device code listed
under your brand, try from the first code.
2. Press a desired device mode key (e.g. TV , “
” icon
will flash)
3. Hold down “ CH+ ” and “ VOL– ” on the remote simultaneously for 2 seconds until the indicator lights up.
4. Input the 4-digit device code, the indicator should flash
twice.
Turn on your device (e.g. TV), try the function keys on the
remote. If your device (e.g. TV) responds to your invoked
function correctly, you have entered the right device code.
Otherwise, repeat the above setup instructions with the rest
available device codes until your device (e.g. TV) responds to
your invoked function, and most keys work correctly.
* Simply repeat the above procedures to enter the device
codes for your VCR, SAT, DVD or CTV. (Remember to press
a correct device mode key in step 2 above.)
Note:
Blue-Green EL Backlit will be turned on once you tap the
remote. The backlit will be turned off automatically if the
remote is not active for 4 seconds.
– DVD, CTV, SAT and other device codes can be entered into
any device modes except “TV” & “VCR” modes. Just simply
press the device mode key and enter your 4-digit device
code for DVD, CTV, SAT and other devices.
– If the indicator flashes 6 times in step 4, a wrong device
code has been entered. You are required to repeat step 2
to 4 again.
Suggestion:
– If you cannot find a correct device code for your equipment,
see “ 3.2 By Searching Through the Library ”.
27
28
English
English
3.2 By Searching Through the Library
– Each time you press the “ ”, the HTMR will skip to the next
code and send out a POWER signal trying to turn off your
device.
If you failed to stop pressing “ ” in time when your device
has been turned off, turn on your device again immediately.
Before the indicator goes out, press “ CH– ” on the HTMR to
skip backward. Repeat the step 7 above and lock in code.
If you cannot identify a correct device code for your equipment
from the Device Code List, you may search the code through
the library:
1. Turn on your device manually (e.g. TV).
2. Press a desired device mode key (e.g. TV , “
” icon
will flash)
3. Hold down “ CH+ ” and “ VOL– ” on the HTMR simultaneously
for 2 seconds until the indicator lights up.
4. Enter a corresponding Magic Search Code from the following
table. The indicator should go out immediately.
DEVICE TYPE:
TV
VCR SAT CTV DVD
MAGIC SEARCH CODE: 0001 0002 0003 0004 0005
(e.g. press TV device mode key, then press “ CH+ ” and
“ VOL– ”, and enter TV Magic Search Code 0001.)
5. Press the same desired device mode key again as in step
2 above. (e.g. TV )
6. Hold down “ CH+ ” and “ VOL– ” simultaneously for 2 seconds
until the indicator lights up, and your HTMR is ready to start
searching.
7. Aim the HTMR at your device (e.g. TV), press the “ ” key
repeatedly, slowly and patiently until the device has been
turned off. Once your device has been turned off,
immediately press the device mode key (e.g. TV ) to lock
in code and the indicator should go out.
* Simply repeat the above setup procedures to search the
device code for your VCR, SAT, DVD or CTV.
(Remember to press a correct device mode key and correct
Magic Search Code in step 2 to 5 above.)
IMPORTANT:
– If the power on/off function of your device is not infra-red
controlled — you need to follow step 2 to 6 above and start
searching.
Press “ ” and another important function key alternately
until your device responds to the expected function, press
the device mode key (e.g. TV ) to lock in the code.
e.g. Press “ ” & “ 1 ” alternately, or
Press “ ” & “ ” alternately.
Note:
– DVD, CTV and other device codes can be searched and
locked into any device modes except “TV” & “VCR” modes.
Just simply press the corresponding device mode key in
step 2 & 5 and enter an appropriate Magic Search Code for
your DVD, CTV and other devices.
29
– If the indicator flashes 6 times after your pressing of “ ”
key, you are already at the last code of the library. Press the
device mode key (e.g. TV) to resume the HTMR and repeat
carefully the above procedures to search again.
4
How to Set Up Your HTMR
(Learning Commands)
Your HTMR is factory preprogrammed to operate your TVs, VCRs, SATs,
CTVs & DVDs. Due to the limited number of key, some minor function
may not be included. You may teach your remote with the original A/V
remote to operate any excluded function by your choice.
Besides the preprogrammed devices, you may also teach your HTMR
to operate other infra-red controlled equipment and appliances, such
as HiFi, etc. Your HTMR can learn and reproduce up to 120 commands
from other remote controls. All 6 device modes (TV, VCR, DVD, SAT, CTV,
AUX) can be taught to operate additional commands:–
1. Press a desired device mode key (e.g. TV , “
” icon will flash).
2. Hold down “ CH+ ” & “ VOL– ” on the remote simultaneously for 2
seconds until the indicator lights up.
3. Enter the Magic Learn Code – 0000, the “ Learn ” icon will light
up and your HTMR is ready to learn commands.
4. Aim your A/V remote control to the
HTMR infra-red lens on a flat surface,
with 5-8 cm apart. Make sure your A/V
remote control is with fresh batteries.
5. Press and release a desired keys on the
HTMR you want to hold the command.
Now, the device mode key icon (e.g.
)
will stop flashing.
6. Press and hold the corresponding key on your A/V remote control
to transfer the command. The indicator will flash twice and the
device mode key icon (e.g.
) will flash again when the command
is copied. You can release the key on the A/V remote control. If the
indicator flashes 6 times, it shows error in learning process. Adjust
the position of both remote controls and repeat step 5 to 6 again.
30
English
7. Repeat step 5 to 6 to transfer other signals into next function key.
When you finish the whole device mode, press the same device
mode key (e.g. TV ) again to store your setting.
4.1 Advance Learning – Teaching a Dual Signal
If you found a learned command work for your A/V equipment
only occasionally, your original remote control may contain
dual signals. Try the following steps to reprogram this
command:
1. Follow step 1 to 4 of “ 4 How to Set Up Your HTMR
(Learning Commands) ”.
2. Press and release a desired keys on the HTMR you want
to hold the command. The device mode key icon (e.g.
)
will stop flashing.
3. Press and hold the corresponding key on your A/V remote
control to transfer the command. The indicator will flash
twice and the device mode key icon (e.g.
) will flash
again. The first signal has been transferred successfully and
you can release the key on the A/V remote control.
4. Press and release the same button on the HTMR again. The
device mode key icon (e.g.
) will stop flashing.
5. Press and hold the same corresponding key on your A/V
remote control until the indicator will flash twice and the
device mode key icon (e.g.
) flash again. The dual signal
command has been transferred successfully.
6. Repeat step 2 to 5 of this procedure to transfer other signals
if there is any.
7. When finished, press the same device mode key again to
store your setting.
Warning:
Entering a new preprogrammed device code will automatically
erase and replace all learned commands in the chosen device
mode.
Note:
– Do not attempt to learn additional commands with the Device
Mode Keys, “ Page ” Key &
Key. They will not hold
commands by themselves.
– Each function key will hold one command only, a new command
to be learned will automatically erase and replace the previous one.
– If you have accidentally pressed an unexpected key in step 5 above,
you have to wait 30 seconds until the indicator goes out and the
HTMR will go back to normal operation. You may repeat the above
procedures to setup the remote again.
– If the indicator flashes 3 times during the transference of the signals,
this tells you the memory bank is full. Press the same device key
again to resume normal operation. (You may erase the learned
commands in a device mode and make room for any new signal.
See “Warning” above.)
31
English
5
Operating the Remote
5.1 Normal Operation
Once you have setup the remote for your A/V equipment, it
works like your original remote controls. To operate, just aim
it at your equipment, press an appropriate device mode key
and invoke the desired function by pressing a corresponding
key on the remote. The indicator flashes and you can hear beep
sound during signal transmission as confirmation of key touch.
5.2 Page
Each device mode contains 3 groups of commands. You can
simply tap the “ Page ” key on the right bottom corner of
the remote panel to turn to another command group.
5.3 Shift
By pressing “
” key followed by one of the hard key, you
can control the following function for your TVs.
CH+
CH–
VOL+
VOL–
Brightness up
Brightness down
Colour up
Colour down
5.4 Punch Through
Punch through allows you to operate TV’s volume and mute
functions without having to switch the device modes
repeatedly even when your remote is in other operating modes.
However, if you have learned commands on VOL+, VOL– or
in the device mode (VCR, DVD, SAT, CTV or AUX), the punch
through function will be disabled in that corresponding device
mode.
5.5 Advanced Function – Smart Program
Create a chain of multiple commands – your remote comes
with 3 programmable Smart programs (
,
,
) each with maximum 15 key steps. With the help of
Smart, you can program a group of commands in time delay
to execute in a chain of infra-red signal simply by a press of
Smart.
32
English
6
Program a Smart
1. Hold down “ CH+ ” & “ VOL– ” on the HTMR simultaneously for 2
seconds until the indicator lights up.
2. Enter the Magic Code – 0009.
3. The Smart icons will turn on.
4. Select a desired Smart key. (e.g.
)
5. Select a command from the corresponding device mode and
indicator will flash once for each key.
6. Repeat step 5 until you finish the whole program and press the
same Smart key (e.g.
). The Smart program is stored.
7. To program another Smart, repeat the steps 1 to 6 above.
6.1 Operating a Smart Program
1. Aim your remote at the equipment.
2. Press and release the Smart key that you have programmed
(e.g.
). The corresponding Smart icon and the indicator
will flash slowly during transmission of the signals. The
Smart icon and the indicator will stop flashing when the
chain of infra-red signals has been transmitted completely.
The remote will go back to normal.
7
Q. My A/V equipment responds only to some of the commands.
A. You have set a code for which only some commands work properly
but some do not. Try other codes until most keys work properly.
A. You can also copy from the original A/V remote. See “ 4 How to
Set Up Your HTMR (Learning Commands) ”.
Q. My remote indicator shows error in learning commands from
other A/V remote control.
A. Make sure you are aiming your A/V remote control at the HTMR
infra-red lens on a flat surface with 5-8 cm apart.
A. Make sure the learning procedures are carried out in an environment
free from direct sunlight and /or strong light.
A. Clean the infra-red transmission diode/lens of your A/V remote and
try again.
A. Check the batteries inside the A/V remote control. If the batteries
are weak, the remote cannot learn command properly.
A. Make sure the distance between the A/V remote and your HTMR
is remained the same throughout the whole learning procedures.
Q. Some learned commands in my remote do not work.
A. Those signals are not learned properly. Try to teach your HTMR again
for those functions.
Q. Some learned commands in my remote work occasionally.
Maintenance
– Do not expose your HTMR to dust, strong sunlight, humidity, high
temperature or mechanical shock.
– Do not use old and new batteries together as old batteries tend
to leak.
– Do not use corrosive or abrasive cleansers on your HTMR.
– Keep the unit dust free by wiping it with a soft, dry cloth.
– Do not disassemble your HTMR, it contains no user-serviceable
parts.
8
English
Troubleshooting
A. Your original A/V remote may carry dual signal commands. You have
to go through the section “ 4.1 Advanced Learning – Teaching a
Dual Signal ”.
Q. What is SMART?
A. It is an advanced feature of your HTMR which allows you to program
a series of commands in appropriate time delay. By simply a press
of the selected Smart button, your HTMR will execute a chain of
infra-red signals automatically. For details, please refer to section
“ 5.5 Advanced Function – Smart Program ”.
Q. My remote does not work all !!!
A. Check your A/V device, if the main switch of the device is turned
off, your remote could not operate it.
A. Check whether your batteries are inserted properly and are in
correct +/– marks.
A. If the batteries are weak, replace the batteries. See “ 1.4 How to
Install Batteries ”.
Q. If several device codes listed under the brand of my A/V device,
how can I select the correct device code?
A. To seek the correct device code for your A/V device, test the code
one by one until most keys work properly.
33
34
9
Liste de Code des Appareils
BSR
BUSH
BUSH (UK)
CANDLE
CARAD
CARENA
CASCADE
CASIO
CATHAY
CCE
CENTURION
CENTURY
CGE
TV
Modèle
Code
ACCENT
ADMIRAL
AGEF
AIKO
AIM
AKAI
AKIBA
AKITO
AKURA
ALBA
ALBIRAL
ALLSTAR
AMSTRAD
ANAM
ANITECH
ANSONIC
ARCAM
ARC EN CIEL
0651
0121
0121
0221
0651
0221
0591
0651
0651
0101
1971
0591
0101
1171
0651
0621
0571
0331
1821
1421
0591
0591
0451
0121
0651
1511
0651
1511
0101
1571
1421
0091
1391
0491
1101
0121
0391
0651
1451
0041
0651
0651
0101
0591
2661
0241
2121
0651
0651
0331
1571
1321
0591
0121
0121
ARDEM
ARISTONA
A.R. SYSTEMS
ARTHUR MARTIN
ASA
ASBERG
ASTRA
ATLANTIC
ATORI
AUDIOSONIC
AUDIOTON
AUTOVOX
AWA
BAIRD
BANG & OLUFSEN
BARCO
BASIC LINE
BAUER
BAUR
BEKO
BEON
BESTAR
BLACK DIAMOND
BLAUPUNKT
BLUE SKY
BPL
BRANDT
BRIGMTON
BRINKMANN
BRIONVEGA
BRUNS
0411
0451
0911
0591
0651
0891
0651
0651
1191
1351
1331
0651
1561
1331
2691
2201
0651
0651
1301
1511
0651
0681
0571
0901
1571
1981
1681
1811
CROWN
CTC CLATRONIC
CXC
DANSAI
DANTAX
DAEWOO
DAWA
DAYTRON
DECCA
0651
0651
0411
0451
0781
0871
0651
1181
1321
1421
1511
0121
0231
0351
0951
1051
0651
1351
1571
1791
2721
1321
1331
0061
1561
1421
0651
0651
0101
0131
0221
2311
2321
0251
2131
0471
0521
0601
0741
0551
1681
1511
0651
0651
0821
0571
1811
0731
1821
0901
1131
35
1051
0991
CITIZEN
CLARIVOX
CLATRONIC
CONCERTO
CONDOR
CONTEC
CONTINENTAL
CONTINENTAL EDISON
CRAIG
CROSLEY
0231
DECCA (UK)
DEGRAAF
DEITRON
DESMET
DIAMANT
DIGILINE
DIXI
DORIC
DREAN
DUAL
DUAL-TEC
DUMONT
DUX
D-VISION
DYNATRON
ELBE
ELCIT
ELECTRO TECH
ELEKTRONSKA
ELG
ELIN
ELITE
ELMAN
ELTA
EMERSON
0691
0101
1331
0261
0791
0651
0591
0651
0651
0101
0651
0101
0121
0391
1611
0791
0101
0651
0791
0651
0151
0901
0331
1171
0021
1941
0101
0261
1171
0101
1421
0101
0231
0651
0101
1691
0271
0451
0651
0591
0591
0651
0101
1031
0651
0091
2081
1511
0121
0651
0591
0591
0651
0121
1511
0771
0651
0101
0651
0261
1511
0121
1261
1621
0261
1741
1561
1901
0391
2111
1611
1981
0451
0621
0651
0811
1621
0981
1641
1371
1891
1401
1941
1531
1981
0821
1181
0961
1331
1971
1171
1571
0571
1681
0731
1811
1821
1371
1401
1641
1891
1421
2331
0621
0651
0651
1501
1511
2371
0271
0581
0651
0971
1101
0581
1351
1101
1791
0651
0651
0651
0121
1981
0651
0651
0651
0651
0651
0991
1511
0231
0571
0651
1611
1621
0261
2091
0751
1981
2101
0651
1551
1971
0921
1121
0651
1621
0221
1301
36
0651
1171
ERRES
ESC
ETRON
EUROMAN
EUROPA
EUROPHON
EXQUISIT
FENNER
FERGUSON
FIDELITY
FIDELITY (UK)
FILMNET
FINLUX
FIRST LINE
FISHER
FLINT
FORMENTI
FORMENTI-PHOENIX
FORTRESS
FRABA
FRIAC
FRONTECH
FUJITSU
FUNAI
FUTURETECH
GALAXI
GALAXIS
GBC
GE
GEC
GEC (UK)
GELOSO
GENERAL
GENERAL TECHNIC
GENEXXA
GOLDSTAR
GOODMANS
GORENJE
GRAETZ
GRADIENTE
GRANADA
GRANADA (UK)
GRANDIN
GRUNDIG
HANSEATIC
HANTAREX
HANTOR
HARWOOD
0101
0651
0591
0591
0651
0261
1621
0651
0621
0101
0881
1571
0221
0561
1141
0021
0781
0651
0021
0801
0651
0101
1981
0021
0121
0591
0651
0451
1261
0691
1171
0651
0591
0021
1981
0291
0101
0031
0021
1981
0731
2431
0451
0101
1621
0101
1131
0981
0221
0651
0101
1101
0081
1521
0651
0471
1691
0021
0591
0581
0651
0651
0651
HAUPPAUGE
HCM
HIFIVOX
HIGHLINE
HINARI
0651
0651
1981
0581
2001
0591
0651
0771
1091
1511
0281
1131
1971
0231
1931
0291
1181
2151
0451
0371
1301
2181
0651
0551
1361
2631
0861
1461
2721
0101
0811
1511
0091
0821
0121
0871
1981
0141
0981
0261
1981
0651
2101
0751
0231
1981
0511
0781
0121
0391
0451
1451
1541
0431
HORNYPHONE
HUANYU
HYPER
HYPERSONIC
HYPSON
IBERIA
ICE
IMPERIAL
INDIANA
INGERSOL
INNO HIT
INNOVATION
0451
INTERFUNK
0651
1181
1981
1171
1181
1261
0651
0141
0391
1321
1511
0731
0451
0081
0411
1131
0651
0581
0451
1571
1101
1101
1321
1791
1281
1561
1511
1411
1571
0651
0651
1331
0791
0141
1791
1061
0451
1621
2161
1621
1491
1511
1561
0291
2141
0621
0651
1101
0141
1111
0141
1561
0291
1131
0451
0451
1351
0581
0581
1981
1031
0651
2161
1311
0581
2021
0101
0651
0591
0651
2041
0141
1561
0651
0711
2461
0221
0741
2471
0231
0751
37
HITACHI
0431
INTERNAL
INTERVISION
IRRADIO
ISUKAI
ITC
ITS
ITT
ITT-NOKIA
ITV
JVC
KAISUI
KARCHER
KATHREIN
KENDO
KENNEDY
KNEISSEL
KOLSTER
KONKA
KORPEL
KORTING
KOSMOS
KTV
LENCO
LENOIR
LEYCO
LEYEO
LG
LIESENK & TTER
LIFETEC
0651
0651
1571
0651
0071
1351
0001
0451
1601
1871
0591
0621
1511
0221
0101
0651
0651
0391
1401
0101
1511
0581
2011
2351
2411
0031
1571
0651
0101
0101
0651
0391
0651
0031
0231
1601
0031
0451
1921
0651
0071
0651
0591
1561
0591
0261
0021
0651
0591
0651
0101
0121
0651
1171
0121
1511
0101
1181
0651
0101
0651
2401
2501
1681
1811
1821
0101
1511
0011
0651
1681
1881
0651
0141
1981
0031
0701
1791
1981
0451
2011
0081
0901
1831
2161
0651
1261
0141
1281
1841
2181
0341
1561
1861
0451
1611
0651
0651
1621
0811
1681
0981
1891
1371
1941
0651
0841
1101
1331
1511
2361
2461
0101
1811
2371
2471
0181
1821
2381
2501
0221
1981
2391
2511
0451
2401
2521
0651
0651
0651
1331
1421
1321
1331
1511
2011
0051
0411
1741
0051
1291
1981
0071
0451
1921
0071
1351
2171
0081
1291
1981
0081
1501
0181
1351
2171
0181
1601
0221
1501
0721
1321
0651
1441
1331
0841
1581
1741
1091
1321
0391
0951
1981
1011
1541
2361
2421
2521
2371
2431
1621
0651
0651
0351
2651
0651
2451
0651
0431
0411
1741
1511
0651
0651
0651
2351
2411
2511
38
2381
2441
2391
2461
LOEWE
LOEWE OPTA
LOGIC
LOGIK
LOWEWE
LUMA
LUMATRON
LUXMAN
LUX MAY
LUXMAN STEREO TUNER
LUXOR
LYCO
MADIATOR
MADISON
MAGNADYNE
MAGNAFON
MAGNAVOX
MAGNUM
MANESTH
MANHATTAN
MARANTZ
MARK
MARELLI
MATSUI
MAXIMAL
MCMICHAEL
MEDIATOR
MEDION
M ELECTRONIC
MEMOREX
MERCURY
METRO
METZ
MGA
MICROMAXX
MINERVA
MINOKA
MITSUBISHI
MIVAR
MORGAN’S
MTC
MULTITEC
MULTITECH
MURPHY
MURPHY (UK)
N.E.I.
NAD
NAIKO
0061
0131
1691
0491
0831
0351
0651
0791
0591
0791
0001
0461
1921
1181
0101
0651
0021
1621
0261
0651
2591
0651
0651
0101
0101
0121
0021
0691
1561
2681
0071
1281
0651
0651
2401
2471
0101
1511
0591
2591
0121
2071
1231
0651
2501
0751
0651
0061
1191
0501
2571
0651
0061
0651
0261
1421
0451
0081
0101
1341
0651
0121
0581
0451
2721
0651
0611
0651
NAKIMURA
NEC
NECKERMANN
1901
0651
0181
0671
1981
0221
1351
0341
1561
0421
1601
0451
1911
0121
1981
0581
0261
0581
0641
0771
0641
1091
2001
2611
2621
2631
2641
0591
0651
0651
0101
1101
1691
2701
1981
0231
1151
2501
2711
0451
1271
2511
2351
2411
2501
0621
2361
2421
2511
0651
2371
2431
2521
0781
NEUFUNK
NEWTECH
NICAM
NIKKAI
NOBLEX
NOBLIKO
NOGAMATIC
NOKIA
NORDMENDE
0491
1301
2521
NOVATRONIC
OCEANIC
OCEANIC (F)
OKANO
ONWA
OPERA
ORBIT
ORION
0651
1511
2671
2381
2441
2391
2461
1571
1791
0651
2601
0741
1001
1041
1481
2061
2351
2511
2381
2521
2391
2401
2461
0121
1201
0581
0141
1231
0771
0201
1671
1431
0651
1691
2541
0661
1741
2551
39
PALLADIUM
PALSONIC
PANAMA
PANASONIC
PANAVISION
PANORAMIC
PATHE’ CINEMA (F)
PATHE MARCONI
PAUSA
PAUZA
PERDIO
PERFEKT
PHILCO
PHILIPS
0791
0581
1511
0781
1031
0651
ORLINE
OSAKA
OSAKI
OSIO
OSUME
OTTO VERSAND
0641
0961
0651
0981
1321
PHOENIX
PHONOLA
PIONEER
PLANTRON
POLICOM
PRANDONI-PRINCE
PRANDONI-PROMCE
PRIMA
0651
0141
0101
1081
0651
0591
0231
0101
0651
0261
0571
0031
0411
1741
2531
0031
0731
1791
0651
0221
0031
0591
1171
0591
0591
0101
1251
1981
0651
2011
0651
0651
0151
0021
0591
0651
0311
0651
0031
1311
0591
2191
0391
0331
1821
1511
1511
0651
0591
0021
1371
1891
0101
0681
0121
0101
0451
0591
1821
0411
0451
0451
0651
0121
1561
1721
0451
1931
1731
0591
1981
0651
0981
0651
1791
0651
0641
1571
0051
0451
1921
1101
1331
1701
2011
1681
0071
1291
1981
1811
0081
1351
2031
1821
0181
1501
2171
0221
1601
2281
0291
0901
1811
0451
1051
1821
0541
1131
0571
1571
0651
1681
0321
0321
0651
1651
0441
1981
1661
0651
0651
0231
1301
2211
0651
1481
2261
0691
1511
0851
1691
1211
1801
1101
1331
2011
0041
0651
0061
1561
0101
1571
0141
1741
0391
1981
0481
0531
0631
0651
2231
0201
1751
0651
0211
1961
0451
2341
0651
2481
0701
0431
0571
1621
0901
1661
1571
1971
1681
1811
0891
0651
0121
1401
2271
0121
0761
0651
0121
0651
0651
1101
0651
1621
0811
1641
0981
1751
0591
1281
1421
0621
1791
0651
1421
1571
1791
0451
0581
0581
40
0391
1611
2291
0361
1021
1081
0651
1341
PROFEX
PROFI-TRONIC
PROLINE
PROSONIC
PROVISION
PROTECH
PYE
QUELLE
R-LINE
RADIALVA
RADIOLA
RADIOMARELLI
RADIONETTE
RADIOSHACK
RADIOTONE
RBM
RCA
RECOR
RECTILIGNE
REDIFFUSION
REDIFFUSION (UK)
REDSTAR
REFLEX
REX
RFT
REVOX
ROADSTAR
ROBOTRON
ROTEL
SABA
SACCS
SAISHO
SALORA
SAMBERS
SAMSUNG
SANSUI
SANYO
SAVE
SBR
SCHAUB LORENZ
SCHNEIDER
SCOTT
SEG
SEI
SELECO
SENTRA
0221
0591
0551
0621
0651
0101
0591
0041
0491
1371
1941
0101
0651
0101
0121
0031
0651
0591
0751
0291
0651
0651
0221
0081
0651
0651
0071
2051
0121
0101
0651
0121
0151
0121
0571
1131
1971
0231
1671
0011
1291
1921
0261
0101
1181
0591
0141
0801
1351
0651
0101
0221
0021
0511
1791
1171
0261
0041
1481
0071
2051
1601
1981
0651
0651
0651
0391
0651
0061
0521
1381
0641 0651 1181 1981
0101 0221 0231 0391
0601 0651 0751 0781
1571 1641 1811 1891
0651
1571
0651 0681
0451 0651 0661 0771 1081
0651
2111
0551 1131
0451 0661 1981 2171
1031
0351 0411 0451 0951 1901
2081 2091
0991
0651
1321 1511
0301 0421 0451 0541 0551
0581 0731 0901 0931 1071
1571 1681 1791 1811 1821
0451
1691
0071
1351
1931
0581
0591
1511
0651
0151
0821
1691
0491 1161 1301 1511
0651
0451
0071
0651
2081
1261
0391
0121
1981
0351
2081
1281
41
0221
1521
1981
0641
0651
2011
0341
1561
2161
1091
0841
2581
0451 0671
1601 1911
2001
0981 1101
0401 0491 0651 0781
0981 1101 1111 1291
1741
0091 0101 0231 0451
0681 1321 1361 1621
2091
0651 0821 0991
0641 0651 0691 1301
0411 0451 0951 1901
2091
SHARP
SIAM
SIAREM
SICATEL
SIEMENS
SIERA
SIERRA
SILVA
SILVER
SINGER
SINUDYNE
SKANTIC
SOLAVOX
SONNECLAIR
SONOKO
SONTEC
SONY
SOUNDESIGN
SOUND & VISION
SOUNDWAVE
SSS
STANDARD
STAR LITE
STERN
STRATO
SUNKAI
SUNSTAR
SUNWOOD
SUPERTECH
SUPRA
SUSUMU
SYSLINE
TANDBERG
TANDY
TASHIKO
TATUNG
TCM
TEAC
TEC
TECH LINE
TECHNICS
TECHWOOD
TEKNIKA
TELE
TELEAVIA
TELECOR
TELEFUNKEN
TELEFUSION
TELEGAZI
TELEMEISTER
TELESONIC
TELESTAR
0141
0651
0021
1971
0101
0741
0651
0591
0651
1181
0021
0021
0651
1481
0451
0451
0651
0101
0101
0041
1941
1171
0621
0101
1171
0651
0591
0071
2051
0651
0651
0651
0591
0651
0621
1131
0101
0161
0451
0141
0101
1101
2381
0651
0391
0651
1311
0791
1171
1141
0331
1811
0651
0301
1371
1591
1821
0651
0591
0651
0591
0651
0151
0191
1761
1781
0121
0261
0581
0641
1981
0151
2011
0451
2121
0521
2131
0601
0651
0121
0041
0691
1631
0261
0121
0851
1981
0651
0231
0941
0261
1301
0641
1321
1181
1511
0171
2561
0491
1121
1691
0411
2091
0451
0951
1901
0611
0191
1281
0271
1691
2391
1571
1331
1681
1531
1771
2071
0581
2641
2461
0651
0691
0971
2501
2511
2521
1131
1411
1231
1261
0571
1821
0731
1241
1571
1681
0551
1381
1641
1891
0571
1411
1681
1941
0651
1421
1791
1991
0731
1471
1801
2721
1131
1571
1811
2011
0651
0651
0141
2491
0651
0651
0351
2081
0691
0651
0791
0651
0651
42
TELETECH
TEMPEST
TENSAI
TEVION
THOMSON
THORN
THORN-FERGUSON
TMK
TOKAI
TOSHIBA
TOWADA
TRANS CONTINENS
TRANSONIC
TRIUMPH
UHER
ULTRAVOX
UNIC LINE
UNITED
UNIVERSUM
UNIVOX
VEGAVOX
VESTEL
VEXA
VICTOR
VIDEO SYSTEM
VIDEOTON
VISION
VORTEC
VOXSON
WALTHAM
WATSON
WATT RADIO
WEGA
WELTBLICK
WESTON
WHARFEDALE
WHITE WESTINGHOUSE
XRYPTON
YAMISHI
YAMASHI
YOKAN
YOKO
ZANUSSI
ZOPPAS
0651
0651
0651
0651
0291
0901
1791
0101
1131
0281
1461
0141
0591
0141
1711
0391
0451
0651
0581
0431
1541
0021
0651
0651
0101
1811
0121
0811
0101
0591
1441
0591
2301
0651
0591
0121
0451
0101
0021
1971
0121
0591
1621
0651
0101
0651
0651
0591
0651
0101
0071
2051
0451
1511
2221
1331
0331
1131
1811
0221
1371
0371
1971
0791
0651
0381
1741
2231
2241
2251
0551
1241
1821
0651
1641
0861
0571
1411
0651
1571
0731
1681
0741
1941
0881
0781
2721
1181
0861
0751
1851
1221
1271
1361
1701
0651
0651
0451
2101
0511
0651
0261
0651
1981
0391
1891
0591
0651
1941
0651
0781
0651
0651
1511
1311
1181
1421
1571
1971
0651
0651
0411
0651
0431
0231
1981
0141
0651
0451
0731
0651
0261
2001
0651
0651
0261
0431
0651
0651
0351
2081
1511
0411
2091
0391
FIDELITY
FINLANDIA
FINLUX
0641
1091
1981
0451
1401
0951
1541
1901
Magnétoscope
Modèle
Code
AIWA
AKAI
0042
0042
0652
0002
0322
ALBA
AMSTRAD
0352
0422
0762
0112
0432
43
0432
0492
0812
0282
0452
0582
0912
0332
ANITECH
ANITSCH
ASA
AUDIOSONIC
BAIRD
BANG & OLUFSEN
BAUR
BLACK DIAMOND
BLAUPUNKT
BRIONVEGA
BUSH
BUSH (UK)
CAPEHART
CGE
CRAIG
CROWN
DAEWOO
DANSAI
DAYTRON
DECCA
DECCA (UK)
DEGRAAF
DIXI
DUAL
DUMONT
DYNATECH
DYNATRON
ELBE
ELIN
EMERSON
ERRES
FERGUSON
0612
0642
0342
0972
FIRST LINE
FISHER
FORMENTI-PHOENIX
FRONTECH
FUNAI
GBC
GEC (UK)
GELOSO
GENERAL TECHNIC
GOLDSTAR
GOODMANS
GOODMANS (UK)
GRAETZ
GRANADA
GRANADA (UK)
GRUNDIG
HANSEATIC
HARMAN/KARDON
HCM
HINARI
HITACHI
0002
1002
0012
0002
0042
0042
0052
0922
0062
0032
0002
0812
0112
0042
0072
0112
0112
0012
0112
0042
0052
0052
0442
0042
0052
0432
0012
0122
0072
0012
0012
0042
1022
0432
0052
0012
0432
0912
0002
0162
0012
0112
0432
0002
0022
0002
1172
0012
0002
0002
0022
0052
0052
0052
0752
1282
0052
0122
0002
0002
0042
0812
0052
0282
0492
0062
0972
0092
0812
0252
0462
0672
0992
0282
0332
0342
0512
0972
0432
0482
0282
0282
0762
0052
0432
0942
0132
0432
0532
0602
0632
0432
0532
0162
0202
0432
0512
0522
0712
1082
0722
0852
0902
1012
0052
0492
0082
0532
0262
0572
0382
0602
0532
0542
0572
0592
0812
0282
0952
0432
0502
0532
0462
0092
1242
1302
0572
0602
0232
1252
0812
0252
1262
0822
0262
1272
0412
0292
0442
0432
0522
0602
0662
0532
0042
0462
0912
0482
0052
0622
0622
0052
0122
0072
0042
0132
0092
0062
0802
1292
0812
0922
0202
0172
1022
44
IMPERIAL
INGERSOL
INNO HIT
INNOVATION
INTERFUNK
IRRADIO
ITT
ITT-NOKIA
JENSEN
JVC
KARCHER
KENDO
KENWOOD
LIFETEC
LLOYD
LOEWE OPTA
LOGIK
LUMA
LUXOR
M ELECTRONIC
MAGNADYNE
MAGNASONIC
MANESTH
MARANTZ
MARK
MARTA
MATSUI
MEDION
MEMOREX
METZ
MGA
MICROMAXX
MINERVA
MINOLTA
MITSUBISHI
MTC
MULTITECH
MURPHY
N.E.I.
NATIONAL
NEC
NECKERMANN
NIKKAI
NOBLIKO
NOKIA
NORDMENDE
OLYMPUS
OPTONICA
ORION
OSAKA
OSAKI
OTTO VERSAND
0072
0442
0002
1142
0022
0002
0022
0532
0022
0532
0042
0042
0782
0052
0492
0042
1142
0432
0052
0002
0162
0492
0432
0052
0572
0012
0012
0012
0012
0012
0512
1222
1142
0012
0062
0912
1142
0062
0172
0052
0072
0002
0432
0012
0462
0042
0032
0522
0112
0092
0022
0532
0042
0392
0782
0462
0132
0162
0982
0432
0002
0052
0432
PANASONIC
0052
1162
0052
0012
0032
0572
0032
0572
0072
1172
0042
0762
0042
0762
0072
0292
0492
0072
0292
0492
0102
0902
0072
0142
0272
0742
0762
0142
1162
0572
1172
0092
0072
0152
0442
0572
0812
0052
0092
0122
0502
0032
0522
1232
1162
0132
0092
0042
0812
0052
0972
0062
1202
0442
1212
1172
0432
0932
0482
0532
0572
1162
0092
0602
0062
0432
0052
1172
0252
0142
0912
0922
0972
0062
0282
0432
0812
PHONOLA
PILOT
PIONEER
PORTLAND
PROLINE
PYE
QUARTZ
QUELLE
RADIONETTE
REALISTIC
RET
REX
RICOH
SABA
SAISHO
0052
0122
0042
0572
0142
0052
0762
0072
0812
0092
0202
0032
0572
0102
0402
0792
0042
0762
0142
0632
0832
0072
1152
0192
0732
0842
0292
0492
0222
0742
0872
0242
0762
0502
0202
0312
0442
0512
0522
0012
0062
0432
0812
45
PENTAX
PERDIO
PHILCO
PHILIPS
SALORA
SAMSUNG
SANSUI
SANYO
SBR
SCHAUB LORENZ
SCHNEIDER
SEG
SEI-SINUDYNE
SELECO
SENTRA
SHARP
SHINTOM
SIEMENS
SINUDYNE
SONITRON
SONOKO
SONY
STS
SUNKAI
SUNSTAR
SYLVANIA
SYMPHONIC
TANDBERG
TASHIKO
TATUNG
TCM
TEAC
TECHNICS
TEKNIKA
TELEFUNKEN
TEMPEST
TENOSAL
0022
1102
0172
0432
1062
0052
0372
0052
0012
0052
0112
0432
0052
0572
0012
0092
0022
0012
0532
1072
0042
0952
0042
0632
0792
0162
0972
0192
0052
0042
0482
0052
0022
0002
0002
0442
0042
0112
0132
0002
0062
0052
0532
0282
0432
0962
0602
0512
0512
0432
0432
0062
0132
0042
1142
0042
0462
0012
0042
0782
1032
0002
0212
1182
0602
0462
0672
0992
1092
0082
0382
0152
0092
0472
0152
0502
0182
1072
0362
0142
0372
0472
0032
0202
0042
0462
0052
0522
0062
0942
0072
0072
0572
0132
0432
0482
0502
0742
0782
0142
0732
0872
0202
0192
0742
0222
0762
0242
0772
0392
0782
0292
0442
0512
0522
0572
0072
0142
0532
0152
0042
0012
0072
0812
0622
0822
0652
0912
1192
0562
0182
0572
0052
0072
0502
0702
0092
0382
0572
0252
0442
0572
0932
0552
1122
0682
1132
0692
0522
0932
0432
1172
0922
0632
0892
1052
0732
0152
0912
0912
0162
0432
0052
1162
0432
0432
0192
0882
1042
46
0432
0942
0952
0742
0762
THOMSON
THORN
THORN-FERGUSON
TMK
TONSAI
TOSHIBA
TOTEVISION
TRIUMPH
UHER
ULTRAVOX
UNITECH
VECTOR RESEARCH
VICTOR
VIDEON
WELTBLICK
WHITE WESTINGHOUSE
XENON
YAMAHA
YOKO
0042
0762
0042
0042
0762
0522
0002
0042
0012
0922
0042
0032
0072
0122
0042
1162
0012
0032
0162
0042
0012
0102
0142
0192
0402
0632
0902
0222
0852
0302
0862
0712
0872
0722
0902
0742
0622
0072
0912
0072
0102
1172
0122
0062
0142
HIGH PERFORMANCE
HIRSCHMANN
0072
Satellite
Modèle
Code
AKAI
AKENA
ALBA
ALLSAT
AMSTRAD
1273
1303
0823
1763
0163
1593
0403
1153
1673
0123
1813
0963
0103
1273
0953
0823
0193
1363
1783
1773
0013
1213
1333
0613
0303
1893
1763
1163
0853
0423
1763
0003
0223
0993
1283
0143
AST
ASTRA
ASTRO
AUSTAR
BEKO
BLAUPUNKT
BMC SATELLITE
BRITISH TELECOM
BT
BUSH
CAMBRIDGE
CANAL+
CANAL DIGITAL
CANAL SAT
CHAPARRAL
CITYCOM
CNT
COLUMBUS
CONNEXIONS
CONRAD
CYRUS
D-BOX
DISCUS ELIPSE
DISKXPRESS
DNT
DRAKE
ECHOSTAR
ELTA
ELTA SAT
1643
1273
1643
1813
0793
1013
1023
1473
EURODEC
EUROSTAR
FERGUSON
FINLANDIA
FINLUX
FOXTEL
FRACARRO
FTE
FUBA
GARDINER
GIUCAR RECORD
GOLD BOX
GOODMANS
GRANADA
GRUNDIG
1733
1303
1643
1273
1783
1643
0693
1003
1293
1583
KOSMOS
KYOSTAR
LENG
LIFESAT
LUXOR
1743
MACAB
MANHATTAN
MARANTZ
MASPRO
MATSUI
MEDIASAT
MEDION
METRONIC
0423
1903
0863
1913
0233
1043
0603
1053
HITACHI
HOUSTON
HUMAX
ICX INTERNATIONAL
INNOVATION
ITT NOKIA
JEEMON
JERROLD
JOHANSSON
JOK
JVC
KATHREIN
0623
1063
0663
1103
0923
1783
METZ
MICROMAXX
MINERVA
MITSUBISHI
MORGANS
MULTICHOICE
MULTISTAR
MURATTO
MYRYAD
NEC
NIKKO
NOKIA
NORSAT
ONDIGITAL
47
1223
0993
0183
1153
0973
0063
0023
0323
0613
1213
0203
1773
1813
1153
0123
1683
0913
0753
1443
0513
1303
2063
0883
2461
1153
0143
0843
0243
0953
1203
0113
1763
0263
1033
0243
1323
0133
1903
0353
1333
1763
0013
1203
1783
1323
1973
2033
0963
1323
1203
0963
0593
0123
0323
0403
1763
0283
1133
1153
1923
0783
1523
1233
1243
0843
1813
1153
0123
0533
1813
1463
0773
0633
1053
1493
1753
1823
0333
1783
0943
1693
0963
1703
1123
1183
1203
0963
1893
0703
1403
1413
1423
1433
0943
1813
1163
1913
0983
1273
0263
1643
0273
0323
0363
1393
1353
0503
2461
1153
1163
1893
0113
0253
1183
1933
1343
1983
2043
2461
1993
2003
2013
1343
2461
0323
1083
1343
0463
1943
1813
2023
1743
0313
1143
1163
1953
0763
0783
0833
1813
1893
1903
1863
1873
48
1913
OPTUS
OTTO VERSAND
OURALIS
PACE
PACE MSS
PALCOM
PALLADIUM
PALSAT
PALTEC
PANSAT
PANASONIC
PANDA
PATRIOT
PHILIPS
PIONEER
PREMIERE
PROMAX
PROSAT
PTT TELECOM
QUELLE
RADIOLA
RADIX
REDIFFUSION
RFT
SABA
SABRE
SAGEM
SAKURA
SALORA
SAMSUNG
SAT
SATCOM
SATECO
SATELLITE
SATPARTNER
SCHNEIDER
SECTOR
SEDEA
SENTRA
SIEMENS
SINTRACK
SKY (SKY Digital)
SKYSCAN
SONY
STELLA
STREAM
STRONG
STV
SUN/MOON/STAR
TANDBERG
TANDY
TANTEC
TATUNG
TECHNISAT
TELECOM
TELEMAX
TELEVES
0123
0963
2053
0933
1803
0943
0613
1203
0393
0703
0123
0803
1813
1643
0933
1533
1863
1773
1163
1813
1173
0303
0963
1763
1053
0313
1763
0953
1813
1253
0563
0133
0743
0403
0893
0643
1543
1333
1123
1263
1093
0413
0893
0903
1453
0873
0733
0303
0043
0123
0633
1473
1113
0913
0613
0513
0083
0303
0583
0173
1503
1723
1523
1813
1573
1883
0683
0703
1623
1933
1633
1793
1073
1463
0953
1763
1873
1783
1773
1123
1773
1183
1783
1783
1903
1193
1813
1203
1853
WOLSEY
WORLDSAT
XSAT
ZEHNDER
ZENDER
ZINWEL
0893
1333
0483
1563
0493
0573
1153
0963
0943
0153
0393
1033
1083
1813
0543
0093
0523
0553
1053
0293
1513
1833
0443
1553
2073
0473
1653
2083
1313
1663
49
1843
1783
0073
1303
0943
1373
0403
0123
0033
1203
0883
1763
0753
0433
0243
0053
1053
0913
1603
1383
0263
0403
2093
1813
0183
0213
0673
0713
0723
1033
1073
0353
1813
0373
0383
0403
0653
1613
1963
0323
0343
0403
1213
1333
0094
0114
0074
0164
0174
CPL
0783
1933
0813
0453
0753
TELE+
THOMSON
THORN-FERGUSON
TONNA
TOSHIBA
TPS
TRIAD
UEC
UNIDEN
UNIVERSUM
US ELECTRONICS
VENTANA
VORTEC
VTECH
WINERSAT
WISI
Modèle
Code
AUSTAR
CABLETIME
CLYDE CABLEVISION
FILMNET
FOXTEL
FRANCE TELECOM
GEC
G.I.
HK CABLE
JERROLD
MOVIE TIME
NSC
OPTUS VISION
PHILIPS
SAMSUNG
SCIENTIFIC ATLANTA
STARCOM
STS
TELE
TELE + 1
TELESERVICE
TUDI
UNITED CABLE
ZENITH
0194
0084
0064
0034
0154
0024
0064
0194
0054
0054
0104
0104
0184
0024
0134
0124
0054
0104
0074
0074
0044
0014
0054
0044
0214
0204
0144
0114
1483
1713
50
DVD
Modèle
Code
3DLAB
AKAI
CYBER HOME
DENON
GOLDSTAR
GRUNDIG
HARMAN KARDON
HITACHI
JVC
KENWOOD
LASONIC
LG
LINN
LOEWE
MAGNAVOX
MARANTZ
MICROMEGA
MITSUBISHI
NAD
ONKYO
OPTIMUS
PANASONIC
PHILIPS
PIONEER
SAMSUNG
SHINSONIC
SONY
SONY-PS2
TECHNICS
THOMSON
TOSHIBA
UNIVERSUM
X-BOX
YAMAHA
ZENITH
0155
0035
0265
0025
0125
0155
0205
0195
0135
0025
0115
0125
0245
0255
0055
0155
0155
0005
0215
0055
0175
0025
0055
0175
0095
0075
0045
0165
0025
0015
0055
0125
0295
0025
0055
0225
0145
0085
0275
0105
0155
0185
0225
0255
0235
0285
0065
0125
51
52