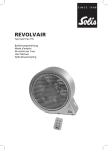
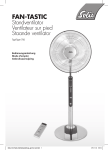
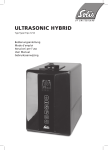
Download SOLIS Magic Fan 753
Transcript
magic fan Typ / Type / Tipo 753 Bedienungsanleitung Mode d’emploi Istruzioni per l’uso User Manual Gebruiksaanwijzing s g er ä t e b e s c h r e i b u ng í ì î å ç é è ê ë ï ñ åGitterring çVorderes Schutzgitter éPlastikmutter èRotorblatt ê Befestigungsmutter ëHinteres Schutzgitter íMotorwelle ìMotorgehäuse für Netzadapter öAnschlussstecker des Netzadapters �Netzadapter 2 ï mit Funktionstasten îFunktions-Display ïSteckstifte ñLösetaste für Steckstifte óStandfuss-Verlängerung ò Sockel ôAnschlussbuchse ó ò ñ ô ö � s W ic ht i g e S i c h e r h e i ts hi nwe i s e Bitte lesen Sie vor Gebrauch Ihres SOLIS Ventilators diese Bedienungsan leitung aufmerksam durch, damit Sie Ihr Gerät kennenlernen und sicher be dienen können. Wir empfehlen, diese Anleitung sorgfältig aufzubewahren und gegebenenfalls bei Weitergabe des Gerätes auch dem neuen Besitzer auszuhändigen. Bei der Verwendung von elektrischen Geräten sind zu Ihrer eigenen Sicherheit folgende Vorsichts-Massnahmen zu beachten: 1. Um einen Stromschlag zu vermeiden, dürfen weder der Ventilator noch das Netzkabel und der Netzadapter mit Wasser, Regen oder anderen Flüssigkeiten in Kontakt kommen. In das Gerät könnte Wasser eindringen und es beschädigen! Sollten das Gerät bzw. das Netzkabel oder der Netzadapter mit Flüssigkeit in Kontakt kommen, ziehen Sie mit trockenen Gummihandschuhen sofort den Netzadapter aus der Steckdose. 2. Prüfen Sie vor der Inbetriebnahme, ob die auf dem Netzadapter angegebene Spannung mit Ihrer Netzspannung übereinstimmt. 3. Das Gerät muss während des Gebrauchs auf einem festen und trockenen Unter grund stehen. Stellen Sie den Ventilator nicht auf einen unstabilen oder mit Textilien bedeckten Untergrund. Achten Sie darauf, dass das Gerät stabil steht, so dass es niemand umwerfen kann. 4. Verlegen Sie das Netzkabel so, dass niemand darüber stolpern kann oder das Gerät zum Umstürzen bringen kann. Achten Sie darauf, dass es nicht mit heissen Oberflächen in Kontakt kommt. Kabel immer komplett entrollen, bevor Sie den Netzadapter einstecken. 5. Gerät von heissem Gas, heissen Öfen oder anderen wärmeabgebenden Geräten oder Wärmequellen fernhalten. Gerät nicht in Räumen mit explosiven bzw. entflammbaren Stoffen oder Flüssigkeiten benutzen. Benutzen Sie den Ventilator nicht in Räumen mit hoher Luftfeuchte, bei Raumtemperaturen über 40 °C oder in staubigen Räumen. 6. Gerät nie auf einer nassen oder heissen Oberfläche benutzen. Gerät nicht in der Nähe von Feuchtigkeit, Hitze und offenen Flammen platzieren. Ventilator von beweglichen Teilen oder Geräten fernhalten. 7. Gerät nie am Kabel tragen oder ziehen und nichts auf das Kabel stellen. 8. Sprühen Sie nichts in den Ventilator – auch kein Insektenspray. 9. Ziehen Sie immer den Netzadapter, wenn das Gerät ausser Betrieb oder unbeaufsichtigt ist, oder wenn es gereinigt werden soll. Wir empfehlen den Einsatz eines Fehlerstromschutzschalters (FI-Sicherheitsschalter), um einen zusätzlichen Schutz bei der Verwendung von elektrischen Geräten zu gewährleisten. Es ist ratsam, einen Sicherheitsschalter mit einem Nennfehlerbetriebsstrom von maximal 30 mA zu verwenden. Fachmännischen Rat erhalten Sie bei Ihrem Elektriker. 3 10. Nehmen Sie keine Änderungen am Gerät, Kabel, Netzadapter oder am Zubehör vor. 11. Ventilator während des Betriebs niemals unbeaufsichtigt lassen! Bei unsach gemässem Gebrauch besteht Verletzungsgefahr! 12. Greifen Sie niemals nach einem Gerät, das ins Wasser gefallen ist. Ziehen Sie immer erst den Netzadapter, bevor Sie es aus dem Wasser nehmen. Nehmen Sie es nicht wieder in Betrieb, bevor Sie es bei SOLIS oder einer von SOLIS autorisierten Servicestelle auf seine Funktionsfähigkeit und Sicherheit über prüfen haben lassen. 13. Gerät niemals so platzieren, dass es ins Wasser fallen könnte (z.B. neben Schwimmbecken). 14. Gerät so platzieren, dass es keiner direkten Sonneneinstrahlung ausgesetzt ist. 15. Niemals scharfe oder spitze Gegenstände und Werkzeug in die Geräteöffnungen stecken. Das Gerät könnte beschädigt werden bzw. Gefahr von Stromschlag! Stecken Sie niemals Finger oder andere Gegenstände in den Ventilator, während er in Gebrauch ist. Achten Sie speziell auf Kinder, dass diese den Ventilator nicht berühren. 16. Gerät nicht schütteln oder umplatzieren während es in Gebrauch ist. 17. Gerät nur wie in dieser Bedienungsanleitung beschrieben verwenden. Nur mitgeliefertes Zubehör benutzen, falsches Zubehör kann zur Beschädigung des Geräts führen. 18. Das Gerät ist nur für den häuslichen Gebrauch und nicht für den gewerblichen Einsatz geeignet. Nicht in Fahrzeugen oder auf Booten verwenden. 19. Prüfen Sie Ihren Ventilator vor jedem Gebrauch. 20. Um einen Stromschlag zu vermeiden, verwenden Sie das Gerät nicht, wenn Kabel oder Netzadapter beschädigt sind oder das Gerät anderweitige Störungen aufweist, heruntergefallen oder sonstwie beschädigt ist. Führen Sie Reparaturen niemals selbst durch sondern geben Sie das Gerät bei SOLIS oder bei einer von SOLIS autorisierten Servicestelle ab, um es zu überprüfen, reparieren oder mechanisch und elektrisch instand setzen zu lassen. 21. Personen mit eingeschränkten physischen, sensorischen oder geistigen Fähigkeiten (auch Kinder) oder unwissende und unerfahrende Personen dürfen den Ventilator nicht benutzen, ausser sie werden durch eine für ihre Sicherheit zuständige Person beaufsichtigt oder von dieser genau instruiert, wie das Gerät zu benutzen ist. 22. Kinder müssen beaufsichtigt werden, damit sie nicht mit dem Ventilator spielen. 23. Stellen Sie sicher, dass der SOLIS Ventilator korrekt zusammengebaut ist, bevor Sie ihn in Betrieb nehmen. Wie Sie dies genau machen müssen, entnehmen Sie bitte dieser Anleitung. 4 24. Bevor Sie das Gerät verstellen, auseinander nehmen oder reinigen, warten Sie immer bis der Ventilator zum Stillstand gekommen ist. Ziehen Sie den AnschlussStecker aus dem Gerät und den Netzadapter aus der Steckdose. Dies gilt auch wenn das Gerät nicht in Gebrauch ist. 25. Bevor Sie die Schutzgitter abmontieren bitte immer prüfen, ob der Netzadapter aus der Steckdose und der Anschlussstecker aus der Buchse gezogen ist. 26. Besondere Vorsicht sollten Sie walten lassen, wenn sich Kinder, ältere Personen oder Tiere in der Nähe des Ventilators aufhalten. 27. Der Luftstrom des Ventilators sollte nicht direkt auf ältere oder kranke Personen bzw. auf Kinder gerichtet sein. 5 s m o n ta g e d e s v e n t i l at ors 1. Schritt: Montage d e r Sta n d fus s -Ve rl ängeru ng au f den So cke l (nur nötig, wenn Sie die lange Variante als Standventilator benötigen) Legen Sie den Sockel auf den Boden. Stecken Sie die drei Steckstifte der Standfuss-Verlängerung (12) in den Sockel und drücken Sie den Fuss nach unten, bis er einrastet. Achtung: Bitte achten Sie auf das Klick-Geräusch, damit der Fuss auch wirklich im Sockel einrastet. 2. Schritt: H i nt er es Schutz g itte r mo n ti eren (bereits vormontiert) Führen Sie das hintere Schutzgitter (6) über die Motorwelle (7) und drücken Sie es auf die drei Stifte des Motorgehäuses, wie in der Abbildung gezeigt. Führen Sie die Befestigungsmutter (5) ebenfalls über die Motorwelle und drehen Sie es am hinteren Schutzgitter im Uhrzeigersinn fest. 3. Schritt: r ot or B latt mo n tie re n (bereits vormontiert) Setzen Sie das Rotorblatt (4) auf die Motorwelle. Schieben Sie das Rotorblatt bis zum Anschlag nach hinten und drehen Sie es, bis das Führungskreuz des Rotorblatts in den kleinen Stiften der Motorwelle einrastet. Die Spitze der Motorwelle ist in der Mitte des Rotorblatts sichtbar. Setzen Sie die Plastikmutter (3) auf die Motorwelle und drehen Sie sie im Gegen uhrzeigersinn fest. Achtung: Wenn das Rotorblatt nicht richtig aufgesetzt wird, lässt sich die Plastikmutter nicht festdrehen. 6 4. Schritt: V or der es Schutz g itte r mo n tieren (bereits vormontiert) Legen Sie das vordere Schutzgitter (2) in das hintere Schutzgitter. Achten Sie darauf, dass die Gitterstäbe nicht die Führungslöcher des hinteren Schutzgitters abdecken. Legen Sie nun den Gitterring (1) so auf den Rand, dass die Stifte auf der Innenseite des Rings ç genau in die grösseren Führungslöcher des hinteren Schutzgitters passen und stecken Sie sie fest in die Löcher. å Stift Um den Ring stabil auf dem Gitter å ç Runde Öffnung für Schraube zu befestigen, müssen nun noch die drei mitgelieferten kleinen Schrauben durch das hintere Gitter hindurch in den Ring geschraubt werden. Stecken Sie dazu die Schrauben in die innen liegenden, runden Löcher am hinteren Gitter und ziehen Sie sie mit einem Schraubendreher fest. 5. Schritt: Mot or ge hä us e a uf d ie Sta n df u ssV er l änge run g o d e r d e n So c k el mont ieren Stecken Sie die drei Steckstifte am Ende des Motorgehäuse-Fusses oben in die Standfuss-Verlängerung (12), wenn Sie den Ventilator als Standventilator einsetzen wollen oder direkt in den Sockel, wenn das Gerät als Tischventilator genutzt werden soll. Drücken Sie den Fuss nach unten, bis er hörbar einrastet. Achtung: Bitte achten Sie auf das KlickGeräusch, damit die Steckstifte im Sockel bzw. in der Standfuss-Verlängerung wirklich einrasten. Hinweis: Wenn Sie die Lösetaste drücken, können Sie die Teile wieder voneinander trennen. 7 s D i e F u n k t i o n s ta s t en a uf I h r e m M o t o r g ehäus e Mit dieser Taste können Sie das Gerät ein- oder ausschalten, wenn der Netzadapter in der Steckdose steckt und der Anschlussstecker in der Buchse des Ventilators. Drücken Sie die ; -Taste einmal, beginnt Ihr Gerät in der niedrigsten Geschwindigkeit und im „Normal“-Modus zu arbeiten. Drücken Sie die Taste ein weiteres Mal, schalten Sie das Gerät wieder aus. Geschwindigkeits-Taste „Wind“ Mit dieser Taste können Sie die Rotationsgeschwindigkeit des Rotor blatts einstellen, wenn das Gerät eingeschaltet ist. Sie können zwischen 9 verschiedenen Geschwindigkeiten wählen – durch jeden Druck der Taste erhöht sich die Geschwindigkeit, an der linken unteren Leiste des Displays sehen Sie anhand der Menge der aufleuchtenden Punkte, in welcher Geschwindigkeitsstufe Sie sich befinden. Beim 9. Drücken schaltet das Gerät wieder in Stufe 1. EIN / AUS-Taste „On/Off“ Oszillations-Taste „Swing“ Mit dieser Taste können Sie die Oszillation des Ventilators einschalten. Drücken Sie diese Taste, schwingt der Ventilator gleichmässig von links nach rechts und wieder zurück. Drücken Sie die Taste ein weiteres Mal, ist die Oszillation wieder ausgeschaltet. 8 Horizontale Oszillation „Timer“-Taste Mit dieser Taste können Sie die Betriebsdauer Ihres Ventilators ein stellen. Sie können eine Dauer zwischen 0,5 Stunden und 7,5 Stunden einstellen. Durch jedes Drücken erhöht sich die Zeit, am Display rechts oben sehen Sie, welche Stunden aktiviert sind. Leuchten mehrere grüne Punkte auf, werden diese Angaben addiert – die Summe ergibt die eingestellte Betriebsdauer. Nachdem Sie die Höchstzeit von 7,5 Stunden erreicht haben, erlöschen beim nächsten Drücken der Taste alle grünen Punkte – der Timer ist wieder ausgeschaltet und Sie müssen den Ventilator manuell ausschalten. Hinweis: Sie können durch Verstellen nach oben oder unten des Motorgehäuses den Ventilator auch nach oben oder unten schwenken und so zusätzlich die Richtung des Luftstroms einstellen. Auf und ab am Motorgehäuse zu verstellen „Timer“-Taste Oszillations-Taste „Swing“ Geschwindigkeits-Taste „Wind“ EIN/AUS-Taste „On/Off“ 9 s d a s d i s p l ay i h r e s ve nt i l at ors å Timer-Einstellung ç Stundenanzahl é Funktionsleuchten des Timers å ç è é ê ë í für die gewählten Stunden è Funktionsleuchten für Geschwindigkeitseinstellung Programm-Einstellung (nur mit „Mode“-Taste der Fern bedienung möglich) ê Schlaf-Programm ë Natürlicher Wind í Normaler Wind s d i e fe r n b e d i e n u n g Generell gilt: – Die Funktionstasten auf der Fernbedienung entsprechen den Funktionstasten am Bedienfeld des Ventilators. Einzige Ausnahme: Die Programme der „Mode“-Taste der Fernbedienung können nicht am Gerät selbst eingestellt werden, auch das Licht des Displays kann nur mit der Fernbedienung ausgeschaltet werden. – Bitte legen Sie eine CR 2025 Batterie ein. Achten Sie auf die angegebene Polarität. Sollten Sie die Fernbedienung länger nicht benutzen, entnehmen Sie bitte die Batterie und bewahren Sie sie gesondert auf. So schonen Sie die Lebensdauer der Batterie. – Die Betriebsdistanz der Fernbedienung beträgt bis zu 3,5 Meter. Wenn Sie die Fernbedienung nicht direkt in Richtung Empfänger, d. h. in Richtung Display am Ventilator halten, ist die Betriebsdistanz niedriger. –Bitte achten Sie darauf, dass sich keine Hindernisse zwischen der Fernbedienung und dem Empfänger am Display befinden. – Bitte bewahren Sie die Fernbedienung sicher auf, sie darf nicht herunterfallen oder brechen. 10 D ie F unk tionstasten I hrer Fernbedienung: Swing Horizontale Oszillation Wind Zum Reduzieren der VentilatorGeschwindigkeit Timer Zum Einstellen der Betriebsdauer: Es ist eine Einstellung zwischen 0,5 und 7,5 Stunden einstellbar. Das grüne Licht leuchtet bei der jeweiligen Einstellung auf dem Display auf. Leuchten mehrere Lichter, werden diese Stunden addiert. Wind Zum Erhöhen der VentilatorGeschwindigkeit Mode Zum Einstellen folgender Programme: „Normaler Wind“ – das unterste Funktionslicht an der rechten unteren Leiste leuchtet auf. „Natürlicher Wind“ – das mittlere Funktionslicht an der rechten unteren Leiste leuchtet auf. „Wind zum Schlafen“ – das oberste Funktionslicht an der rechten unteren Leiste leuchtet auf. Hinweis: Diese drei Programm-Einstellungen können nur über die Fernbedienung vorgenommen werden! Light Zum Ein- und Ausschalten der Funktionslichter auf dem Display 11 s Reinigung und Pflege Bevor Sie das Gerät reinigen, verstellen und lagern, bitte Ventilator immer mit der ; -Taste ausschalten und den Netzadapter aus der Steckdose und der Gerätebuchse ziehen. Wenn Sie das Gerät demontieren wollen, gehen Sie bitte wie folgt vor: 1. Entfernen Sie die Schrauben des Gitterrings und nehmen Sie den Gitterring und das vordere Schutzgitter ab. (Siehe Schritt 4 im Kapitel „Montage“) 2. Nehmen Sie die Plastikmutter und das Rotorblatt von der Motorwelle. (Siehe Schritt 3 im Kapitel „Montage“) 3. Schrauben Sie die Befestigungsmutter ab und nehmen Sie das hintere Schutzgitter von der Motorwelle. (Siehe Schritt 2 im Kapitel „Montage“) Die Aussenteile des Ventilators sollten von Zeit zu Zeit mit einem leicht feuchten Tuch gereinigt werden. Tauchen Sie das Gerät niemals ins Wasser und sprühen Sie kein Wasser in das Gerät! Verwenden Sie keine aggressiven oder chemischen Reinigungsmittel bzw. scharfe oder raue Schwämme oder dergleichen. Sie könnten die Oberfläche des Ventilators beschädigen. Lagern Sie das Gerät an einem trockenen, dunklen Ort. 12 s P r o b l e m e u n d m ö gl i che Urs ache n Der Ventilator lässt sich nicht in Betrieb –Steckt der Netzadapter fest in der nehmen. Steckdose und der Anschlussstecker im Ventilator? – Bitte prüfen Sie, dass die Schutzgitter das Rotorblatt nicht berühren oder deformieren. Während des Betriebs sind unregel- – Bitte prüfen, ob das Rotorblatt fest auf der Motorwelle sitzt. mässige Geräusche des Ventilators zu hören. –Bitte prüfen, ob irgendetwas das Rotorblatt berührt. Das Rotorblatt rüttelt. –Bitte nehmen Sie das Rotorblatt nochmals von der Motorwelle und drehen Sie es um 180 °. s T ec hn i s c h e A n g a b en Modell-Nr. FS-30ET1, Typ 753 Produktbezeichnung Tisch- und Standventilator Spannung / Frequenz Netzadapter 220–240 V~ / 50/60 Hz Spannung Ventilator 12 V DC Leistung 20 Watt Abmessungen: Höhe: ca. 93,5 cm mit Mittelteil ca. 57,5 cm ohne Mittelteil Durchmesser Sockel: ca. 32 cm Durchmesser Rotorgehäuse: ca. 33,5 cm Gewicht ca. 4,5 kg / 4,2 kg (mit / ohne Mittelteil) 13 Hinweise zur ordnungsgemässen Entsorgung des Produkts gemäss EU-Richtlinie 2002/96/EC Das Gerät darf nach Gebrauch nicht als normaler Haushaltsabfall entsorgt werden. Es muss zu einer örtlichen Abfallsammelstelle oder einem Händler gebracht werden, der es fachgerecht entsorgt. Die getrennte Entsorgung von elektrischen und elektronischen Geräten vermeidet im Gegensatz zur nicht fachgerechten Entsorgung mögliche negative Folgen für Umwelt und Gesundheit und ermöglicht die erneute Nutzung und Rezyklierung der Komponenten mit bedeutenden Energie- und Rohstoffeinsparungen. Um die Verpflichtung zur ordnungsgemässen Entsorgung des Geräts deutlich hervorzuheben, ist es mit dem Symbol eines durchgestrichenen Abfallcontainers gekennzeichnet. s E n tsor g u n g EURecht 2002 / 96 / EC SOLIS behält sich das vor, jederzeit technische und optische Veränderungen sowie der Produktverbesserung dienliche Modifikationen vorzunehmen. Hinweise zur ordnungsgemässen Entsorgung des Produkts gemäss EU-Richt linie 2002 / 96 / EC Das Gerät darf nach Gebrauch nicht als normaler Haushaltsabfall entsorgt werden. Es muss zu einer örtlichen Abfallsammelstelle oder einem Händler gebracht werden, der es fachgerecht entsorgt. Die getrennte Entsorgung von elektrischen und elektronischen Geräten vermeidet im Gegensatz zur nicht fachgerechten Entsorgung mögliche negative Folgen für Umwelt und Gesundheit und ermöglicht die erneute Nutzung und Rezyklierung der Komponenten mit bedeutenden Energie- und Rohstoffeinsparungen. Um die Verpflichtung zur ordnungsgemässen Entsorgung des Geräts deutlich hervorzuheben, ist es mit dem Symbol eines durchgestrichenen Abfallcontainers gekennzeichnet. SOLIS behält sich das Recht vor, jederzeit technische und optische Veränderungen sowie der Produktverbesserung dienliche Modifikationen vorzunehmen. SOLIS HELPLINE: 044 874 64 14 (Nur für Kundinnen und Kunden in der Schweiz) Dieser Artikel zeichnet sich durch Langlebigkeit und Zuverlässigkeit aus. Sollte aber trotzdem einmal eine Funktionsstörung auftreten, rufen Sie uns einfach an. Oftmals lässt sich nämlich eine Panne mit dem richtigen Tipp oder Kniff unkompliziert und einfach wieder beheben, ohne dass Sie das Gerät gleich zur Reparatur einschicken müssen. Wir stehen Ihnen gerne mit Rat und Tat zur Seite. 8 Bewahren Sie die Originalverpackung dieses Artikels gut auf damit Sie sie für einen eventuell nötigen Transport oder Versand des Produktes verwenden können. SOLIS AG Solis_PowerMixerPro_Betriebsanleitung.indd 8-9 Solis-Haus • CH-8152 Glattbrugg-Zürich • Schweiz Telefon +41 44 874 64 54 • Telefax +41 44 874 64 99 [email protected] • www.solis.ch • www.solis.com 14 15 s DESCRIPTION DE L ´ APPAREIL í ì î å ç é è ê ë ï ñ åbague de la grille çgrille de protection avant éécrou en plastique èhélice ê écrou de fixation ëgrille de protection arrière ítige du bloc moteur ìbloc moteur avec touches ó ï de fonction ñ îécran d´affichage des programmes ïchevilles de fixation ñtouche de déblocage des chevilles ò de fixation ópied extension òsocle ôprise femelle pour l´adaptateur d´alimentation öprise mâle de l´adaptateur d´alimentation �adaptateur d´alimentation 16 ö � s CONSIGNES DE SECURITE IMPORTANTES Merci de lire ce mode d´emploi attentivement avant la première utilisa tion afin de vous familiariser avec votre SOLIS ventilateur et de l´utiliser en toute sécurité. Nous vous conseillons de conserver ce mode d´emploi. En cas de vente de l´appareil, merci de transmettre le mode d´emploi au nouveau propriétaire. Comme pour chaque utilisation d´un appareil électrique les consignes suivantes sont à respecter pour votre propre sécurité : 1. Afin d´éviter toute électrocution, le ventilateur (y compris le cordon et l´adaptateur d´alimentation) ne doit pas entrer en contact avec de l´eau, de la pluie ou autre liquide. De l´eau pourrait s´infiltrer dans l´appareil et l´endommager. Si l´appareil (y compris le cordon et l´adaptateur d´alimentation) est entré en contact avec un liquide, enfilez des gants en caoutchouc secs et débranchez aussitôt l´appareil. 2. Vérifiez avant l´utilisation que la tension de l´adaptateur soit compatible avec la tension de secteur. 3. Pendant son utilisation, l´appareil doit être placé sur un support stable et sec. Ne placez jamais l´appareil sur un support instable ou recouvert de tissus. Prenez soin que l´appareil soit placé de telle manière que personne ne puisse le faire tomber. 4. Placez le cordon électrique de manière à ce que personne ne puisse trébucher ou faire tomber l´appareil. Veillez à ce que le cordon n´entre pas en contact avec des surfaces chaudes. Déroulez le cordon entièrement avant de brancher l´adaptateur dans la prise secteur. 5. Tenez l'appareil à l´écart de sources de chaleur telles qu´une gazinière, un four ou autre appareil dégageant de la chaleur. N'utilisez jamais l'appareil dans une pièce dans laquelle sont entreposés des matières ou liquides explosifs ou inflammables. N´utilisez jamais le ventilateur dans une pièce dans laquelle l´humidité atmosphérique est trop élevée, la température supérieure à 40°C ou dans une pièce poussiéreuse. 6. N'utilisez jamais l'appareil sur une surface mouillée ou chaude. Ne placez jamais l'appareil à proximité d´une source d'humidité, de chaleur ou d´une flamme nue. Tenez le ventilateur à l´écart d´objets ou appareils mobiles. 7. Ne tenez jamais l´appareil par le cordon. Ne tirez pas sur le cordon. Ne posez pas d´objets sur le cordon. 8. Ne vaporisez aucun produit (y compris une bombe insecticide) dans le ventilateur. 17 9. Débranchez toujours l´appareil lorsque celui-ci n´est pas utilisé ou n´est pas sous surveillance ou lorsque vous voulez le nettoyer. Afin de garantir une protection supplémentaire lors de l´utilisation d´appareils électriques, nous vous recommandons un disjoncteur différentiel (DDR). Nous conseillons d´utiliser un interrupteur de sécurité avec une sensibilité différentielle de maximum 30 mA. Demandez conseil à votre électricien. 10. N´apportez aucune modification à l´appareil, au câble, à l'adaptateur ou aux accessoires. 11. Ne laissez jamais le ventilateur sans surveillance lorsqu´il est en marche. Risque d´accident en cas d´utilisation inappropriée ! 12. Ne cherchez jamais à attraper un appareil tombé dans l´eau. Débranchez d´abord l´appareil de la prise secteur avant de le sortir de l´eau. Avant de le réutiliser, remettez votre appareil à SOLIS ou à un service après-vente agréé par SOLIS afin que celui-ci vérifie son bon fonctionnement et sa sécurité ! 13. Ne disposez jamais l´appareil à proximité d´une source d´eau dans laquelle il pourrait tomber (par exemple une piscine). 14. N´exposez pas l´appareil directement au soleil. 15. N´introduisez jamais d´objets aigus ou pointus dans les ouvertures de l´appareil. Risque d´endommagement de l´appareil ou d´électrocution ! Ne mettez jamais vos doigts ou autres objets dans le ventilateur pendant que celui-ci est en marche. Faites particulièrement attention aux enfants, afin que ceux-ci ne touchent pas le ventilateur. 16. Ne secouez jamais trop fortement ou déplacez l´appareil pendant son utilisation. 17. N´utilisez l´appareil que comme indiqué dans ce mode d´emploi. N´utilisez que les accessoires fournis. Des accessoires inappropriés peuvent entraîner un endommagement de l´appareil. 18. L´appareil est destiné à un usage privé et non pas commercial. Ne pas utiliser le ventilateur dans un véhicule ou sur un bateau. 19. Contrôlez toujours votre ventilateur avant de l´utiliser. 20. Afin d´éviter toute électrocution, n´utilisez pas l´appareil si le câble ou l'adaptateur est endommagé ou si l´appareil présente une anomalie, a subi une chute ou est lui-même endommagé. N´essayez jamais de réparer vous-même l´appareil. Remettez un appareil défectueux à SOLIS ou à un service après-vente agréé par SOLIS afin que celui-ci le vérifie et le répare. 21. Les personnes ayant un handicap physique, sensoriel ou mental (et les enfants) ainsi que les personnes inexpérimentées ne doivent pas utiliser le ventilateur sans surveillance d´une personne responsable ou sans avoir été instruites par cette dernière sur son fonctionnement. 18 22. Ne laissez pas les enfants jouer avec l´appareil. 23. Vérifiez que le ventilateur SOLIS est correctement assemblé avant de le mettre en marche. Référez-vous pour cela au mode d´emploi. 24. Avant de déplacer l´appareil, de le démonter ou de le nettoyer, attendez toujours que le ventilateur soit à l´arrêt complet, débranchez la prise mâle de l´appareil et l´adaptateur d´alimentation de la prise secteur. Suivez ces instructions même si l´appareil n´était pas en service. 25. Avant de démonter les grilles de protection, vérifiez toujours que l´adaptateur d´alimentation a été débranché de la prise secteur et la prise mâle de la prise femelle. 26. Soyez particulièrement prudent lorsque des enfants, personnes âgées ou animaux sont près du ventilateur. 27. Prenez soin que le ventilateur ne soit pas orienté directement sur des personnes âgées ou malades ou des enfants. 19 s ASSEMBLAGE DU VENTILATEUR 1ère étape: ASSEMBLAGE DU PIED e xte n s ion SUR LE SOCLE (seulement nécessaire, si vous voulez utiliser l´appareil comme ventilateur sur pied) Placez le socle sur le sol. Placez les trois chevilles de fixation du pied extension (12) dans le socle et appuyez vers le bas jusqu´à enclenchement du pied. Attention : Assurez-vous que vous entendez bien un « clic », indiquant que le pied est correctement fixé sur le socle. 2ième étape: ASSEMBLAGE DE LA GRILLE DE PROTECTION ARRIERE (déjà pré-assemblé) Faites glisser la grille de protection arrière (6) sur la tige du bloc moteur (7) et enfoncez-la sur les trois chevilles du bloc moteur, comme indiqué sur l´illustration. Faites également glisser l´écrou de fixation (5) sur la tige du bloc moteur et vissez-le sur la grille de protection arrière en le tournant dans le sens des aiguilles d´une montre. 3ième étape: ASSEMBLAGE DE L´HELICE (déjà pré-assemblé) Placez l´hélice (4) sur la tige du bloc moteur, poussez-la vers le fond jusqu´à la butée et faites-la tourner jusqu´à ce qu´elle s´enclenche dans les petites chevilles de la tige du bloc moteur. L´extrémité de la tige du bloc moteur est apparente au centre de l´hélice. Placez l´écrou en plastique (3) sur la tige du bloc moteur et vissez-le dans le sens inverse des aiguilles d´une montre. Attention : Si l´hélice n´est pas montée correctement, l´écrou en plastique ne peut pas être vissé. 20 4ième étape: ASSEMBLAGE DE LA GRILLE DE PROTECTION AVANT (déjà pré-assemblé) Placez la grille de protection avant (2) sur la grille arrière. Veillez à ce que les barreaux de la grille avant ne couvrent pas les trous de fixation de la grille arrière. Placez ensuite la bague (1) sur le rebord de la grille de telle manière à ce que les chevilles situées à l´intérieur de la bague s´adaptent parfaitement sur les grands trous de fixation de la grille de protection arrière, puis ç emboitez les chevilles dans les trous. Pour ensuite bien fixer la bague sur la å cheville grille, il suffit de visser les trois petites å trou rond pour les vis vis livrées dans la bague en les passant à travers la grille arrière. Placez pour cela les vis dans les trous ronds de la grille arrière et vissez-les à l´aide d´un tournevis. 5ième étape: ASSEMBLAGE DU BLOC MOTEUR SUR LE PIED e xte n s io n OU SUR LE SOCLE Placez les trois chevilles de fixation situées à l´extrémité du pied du bloc moteur dans le pied extension (12) si vous voulez utiliser le ventilateur sur pied ou directement dans le socle, si vous voulez utiliser l´appareil comme ventilateur de table. Emboitez le pied du bloc moteur jusqu´à ce qu´il s´enclenche. Attention : Assurez-vous que vous entendez bien un « clic », indiquant que le pied du bloc moteur est correctement fixé sur le pied extension ou le socle. Remarque : Vous pouvez démonter le bloc moteur du pied extension ou du socle en appuyant sur la touche de déblocage. 21 s LES TOUCHES DE FONCTION SUR VOTRE BLOC MOTEUR Vous pouvez mettre en marche et arrêter l´appareil grâce à cette touche si l´adaptateur d´alimentation est branché dans la prise secteur et la prise mâle dans la prise femelle du ventilateur. Si vous appuyez une fois sur la touche ; , l´appareil se met en marche à la vitesse la plus faible et en mode « normal ». Si vous appuyez à nouveau sur cette touche, l´appareil s´éteint. Touche de sélection de la vitesse « Wind » Grâce à cette touche, vous pouvez sélectionner la vitesse de rotation de l´hélice du ventilateur, si l´appareil est en marche. Il existe 9 vitesses programmables. A chaque fois que vous appuyez sur cette touche, vous passez à une vitesse supérieure. La vitesse sélectionnée est indiquée en bas à gauche de l´écran grâce au nombre de points allumés. En appuyant une 9ième fois sur la touche, vous repassez à la vitesse la plus faible. Touche marche / arrêt « On/Off » Touche de sélection de l´oscillation « Swing » Grâce à cette touche, vous pouvez sélectionner l´oscillation du ventilateur. Si vous appuyez une fois sur cette touche, le ventilateur oscille régulièrement de gauche à droite et retour. Si vous appuyez à nouveau sur cette touche, l´oscillation est interrompue. 22 oscillation horizontale Touche de sélection de la minuterie « Timer » Grâce à cette touche, vous pouvez sélectionner la durée de fonctionnement de votre ventilateur. Vous pouvez programmer une durée de fonctionnement entre une demi-heure et 7,5 heures. La durée de fonctionnement programmée augmente à chaque fois que vous appuyez sur cette touche et est parallèlement indiquée à droite en haut de l´écran. Tous les points verts illuminés s´additionnement pour donner la durée totale de fonctionnement programmée. Une fois la durée maximum de 7,5 heures atteinte, si vous appuyez à nouveau sur cette touche, tous les points verts s´éteignent - la minuterie est à nouveau arrêtée et vous devez éteindre le ventilateur manuellement. Remarque : En relevant ou en abaissant le bloc moteur, vous pouvez faire pivoter le ventilateur vers le haut ou le bas et régler ainsi le brassage de l´air du ventilateur de façon plus ciblée. vers le haut et vers le bas à régler au niveau du bloc moteur touche minuterie « Timer » touche de sélection de l´oscillation « Swing » touche de sélection de la vitesse « Wind » touche marche/arrêt « On/Off » 23 s L ´ECRAN DE VOTRE VENTILATEUR åprogrammation de la minuterie çnombre d´heures étémoin lumineux de la minuterie å ç è é ê ë í indiquant le nombre d´heures sélectionnées ètémoin lumineux de la vitesse programmée Sélection du programme (possible seulement avec la touche « Mode » de la télécommande) êprogramme sommeil ëventilation naturelle íventilation normale s LA TELECOMMANDE De manière générale, les règles suivantes s´appliquent : – Les touches de la télécommande correspondent aux touches du panneau de commande du ventilateur. Sauf dans le cas suivant : Les programmes de la touche « Mode » de la télécommande ne peuvent pas être sélectionnés directement sur l´appareil et le té moin lumineux correspondant sur l´écran ne peut être éteint que depuis la télécommande. –Mettez une pile bouton CR2025 dans la télécommande. Respectez les polarités. Si vous n´utilisez pas la télécommande pendant un certain temps, retirez la pile de la télécommande et conservez-la séparément. Vous allongerez ainsi la durée de vie de la pile. –La distance de fonctionnement de la télécommande est de 3,5 mètres. Si vous n´orientez pas directement la télécommande en direction du récepteur, c´est à dire de l´écran situé sur le ventilateur, la distance de fonctionnement en sera réduite. – Veillez à ce qu´il n´y ait pas d´obstacles entre la télécommande et le récepteur sur l´écran. – Rangez la télécommande dans un endroit sécurisé afin qu´elle ne tombe pas ou ne casse pas. 24 L E S T OU CH ES DE VO TR E TELEC O M MA N D E Swing oscillation horizontale Wind pour réduire la vitesse du ventilateur Timer pour programmer la durée de fonctionnement : Une durée de fonctionnement entre une demi-heure et 7,5 heures est programmable. Un témoin lumineux vert correspondant à chaque programmation s´allume sur l´écran. Si plusieurs témoins sont allumés, les heures doivent être additionnées. Wind pour augmenter la vitesse du ventilateur Mode pour sélectionner les programmes suivants : « ventilation normale » – le témoin lumineux inférieur situé en bas à droite de l´écran s´allume. « ventilation naturelle » – le témoin lumineux du milieu situé en bas à droite de l´écran s´allume. « programme sommeil » – le témoin lumineux supérieur situé en bas à droite de l´écran s´allume. Remarque : Ces trois programmes ne peuvent être sélectionnés qu´au moyen de la télécommande ! Light pour allumer ou éteindre les voyants sur l´écran 25 s NETTOYAGE ET ENTRETIEN Avant de nettoyer, déplacer ou ranger l´appareil, éteignez toujours le ventilateur à l´aide de la touche ; et débranchez l´adaptateur de la prise secteur et de la prise femelle de l´appareil. Si vous voulez démonter l´appareil, procédez comme suit : 1. Retirez les vis de la bague et enlevez la bague et la grille de protection avant (voir étape 4 du chapitre « Assemblage »). 2. Retirez l´écrou en plastique et l´hélice de la tige du bloc moteur (voir étape 3 du chapitre « Assemblage »). 3. Dévissez l´écrou de fixation et retirez la grille de protection arrière de la tige du bloc moteur (voir étape 2 du chapitre « Assemblage »). Nettoyez de temps en temps les parties extérieures du ventilateur avec un chiffon humide. Ne plongez jamais l´appareil dans de l´eau et ne vaporisez jamais d´eau dans l´appareil ! N´utilisez pas de détergents chimiques ou agressifs, d´éponges-grattoir ou similaires. Cela risquerait d´endommager la surface du ventilateur. Rangez l´appareil dans un endroit sec et sombre. 26 s DEPANNAGE Le ventilateur ne se met pas en marche. – Vérifiez que l´adaptateur est bien branché dans la prise secteur et la prise mâle dans le ventilateur. – Vérifiez que les grilles de protection ne touchent pas ou ne déforment pas l´hélice. Le ventilateur émet des bruits irréguliers pendant son utilisation. – Vérifiez que l´hélice est solidement fixée sur la tige du bloc moteur. – Vérifiez que l´hélice tourne librement. L´hélice vibre. – Retirez l´hélice de la tige du bloc moteur et tournez-la à 180 °. s DONNEES TECHNIQ UES numéro de modèle FS-30ET1, type 753 description du produit ventilateur de table et sur pied voltage / fréquence de l´adaptateur 220–240 V~ / 50/60 Hz voltage du ventilateur 12 V DC puissance 20 Watt dimensions hauteur : env. 93,5 cm avec pied extension env. 57,5 cm sans pied extension diamètre du socle : env. 32 cm diamètre du corps de l´hélice : env. 33,5 cm poids env. 4,5 kg / 4,2 kg (avec / sans pied extension) 27 Indications sur l’élimination réglementaire du produit conformément à la directive 2002/96/EC Après usage, l’appareil ne doit pas être éliminé avec les ordures ménagères normales. Vous devez l’apporter dans un centre local de collecte des déchets ou chez un revendeur qui l’éliminera de façon appropriée. Contrairement à une élimination inappropriée, l’élimination séparée des appareils électriques et électroniques permet d’éviter les éventuelles conséquences négatives sur l’environnement et la santé et autorise la réutilisation et le recyclage des composants, ainsi que des économies d’énergie et de matières premières significatives. Afin d’attirer clairement l’attention sur l’obligation d’élimination réglementaire de l’appareil, celui-ci porte un symbole représentant un conteneur à ordures barré. s Elim in at i o n EU 2002 / 96 / EC SOLIS se réserve le droit d’apporter à tout moment des modifications techniques et de présentation, ainsi que de procéder à des modifications visant à l’amélioration du produit. Indications sur l’élimination réglementaire du produit conformément à la directive 2002 / 96 / EC Après usage, l’appareil ne doit pas être éliminé avec les ordures ménagères normales. Vous devez l’apporter dans un centre local de collecte des déchets ou chez un revendeur qui l’éliminera de façon appropriée. Contrairement à une élimination inappropriée, l’élimination séparée des appareils électriques et électroniques permet d’éviter les éventuelles conséquences négatives sur l’environnement et la santé et autorise la réutilisation et le recyclage des composants, ainsi que des économies d’énergie et de matières premières significatives. Afin d’attirer clairement l’attention sur l’obligation d’élimination réglementaire de l’appareil, celui-ci porte un symbole représentant un conteneur à ordures barré. SOLIS se réserve le droit d’apporter à tout moment des modifications techniques et de présentation, ainsi que de procéder à des modifications visant à l’amélioration du produit. SOLIS HELPLINE: 044 874 64 14 (Uniquement pour clientes et clients en Suisse) Cet article se distingue par sa longévité et sa fiabilité. Si un disfonctionnement devait tout de même survenir, appelez-nous tout simplement. Il arrive souvent qu’une panne soit facile à réparer sans difficulté grâce au bon conseil et à la bonne astuce, sans que l’appareil ne doive être envoyé chez un réparateur. Nous vous conseillons et vous aidons volontiers. 16 Conservez l´emballage d´origine de cet article afin de pouvoir le transporter en cas de besoin. Solis_PowerMixerPro_Betriebsanleitung.indd 16-17 SOLIS AG Solis-Haus • CH-8152 Glattbrugg-Zurich • Suisse Téléphone +41 44 874 64 54 • Téléfax +41 44 874 64 99 [email protected] • www.solis.ch • www.solis.com 28 29 s D esc ri z i o n e d e l l’ a ppare cchi o í ì î å ç é è ê ë ï ñ åAnello grata çGrata di protezione anteriore éDado in plastica èVentola ruotante ê Dado di fissaggio ëGrata di protezione posteriore íAlberino motore ìBlocco motore ó ï con tasti di funzione îFunzioni display ïPerni di fissaggio ñTasto di sgancio per perni di fissaggio óProlunga del cavalletto òBasamento ôPresa di collegamento per l’adattatore öSpina di collegamento per l’adattatore �Adattatore di rete 30 ò ñ ô ö � s N o r m e d i s i c u r e z z a i mp ortant i Leggere per cortesia attentamente, prima dell’uso del Suo ventilatore SOLIS, questi istruzioni per l’uso, in modo che Lei conosca bene il Suo apparecchio e possa utilizzarlo in modo corretto. Noi Le consigliamo di conservare accu ratamente queste istruzioni ed in caso di un passaggio dell’apparecchio ad un nuovo proprietario. Utilizzando apparecchi elettrici, sono da osservare, per la Sua sicurezza, le seguenti misure di precauzione: 1. Per evitare una scossa elettrica, sia il ventilatore od il cavo di rete e l’adattatore di rete non devono venire a contatto con acqua, pioggia od altri liquidi. Nell’apparecchio potrebbe entrare acqua e danneggiarlo! Se l’apparecchio, il cavo elettrico o l’adattatore siano venuti a contatto con liquidi, staccare subito l’adattatore di rete dalla presa di corrente con guanti in gomma. 2. Esaminare prima della messa in funzione se la tensione elettrica dell’adattatore corrisponde alla Sua tensione di rete. 3. Durante l’impiego, l’apparecchio deve trovarsi su una base solida ed asciutta. Non posizionare il ventilatore su un fondo instabile o coperto da tessuti. Fare attenzione che l’apparecchio sia stabile e che nessuno possa rovesciarlo. 4. Posizionare il cavo di rete così che nessuno possa inciampare o che possa rovesciare l’apparecchio. Fare attenzione che non venga a contatto con superfici bollenti. Srotolare sempre del tutto il cavo, prima che Lei infila l’adattatore di rete. 5. Mantenere lontano l’apparecchio da gas bollente, forni caldi od altri apparecchi che emanano calore o siano fonti di calore. Non usare l’apparecchio in luoghi con materiali esplosivi od infiammabili o liquidi. Non usare il ventilatore in ambienti con alta umidità, con temperature ambientali sopra i 40°C o ambienti polverosi. 6. Non utilizzare mai l’apparecchio su una superficie umida o bollente. Non posizionare l’apparecchio nelle vicinanze di umidità, calore o fiamme aperte. Mantenere lontano il ventilatore da pezzi movibili od altri apparecchi. 7. Non trasportare mai il ventilatore dal cavo di rete e non appoggiare nulla su di questo. 8. Non spruzzare nulla nel ventilatore – neanche insetticidi. 9. Staccare l'adattatore sempre quando l’apparecchio è fuori uso od incustodito, o quando deve essere pulito. Noi le consigliamo un interruttore di protezione per guasto corrente (FI-interruttore di sicurezza), per garantire un’ulteriore protezione utilizzando apparecchi elettrici. E’ consigliabile utilizzare un interruttore di sicurezza con un nominale di impiego di corrente residua di un massimo di 30 mA. Un consiglio da esperto Lei lo riceve dal Suo elettricista. 31 10. Non effettuare nessuna variazione all’apparecchio, cavo di rete, spina od accessorio. 11. Non lasciare mai incustodito il ventilatore durante l’uso! Con uso improprio, rischio di ferimento! 12. Non afferrare mai un apparecchio caduto in acqua. Staccare sempre per primo l'adattatore, prima di estrarlo fuori dall’acqua. Non rimetterlo di nuovo in funzione, prima di averlo fatto esaminare nella sua funzionalità e sicurezza da SOLIS o da un servizio autorizzato dalla SOLIS. 13. Non posizionare mai l’apparecchio, così che possa cadere nell’acqua (ad esempio vicino ad una piscina). 14. Posizionare così l’apparecchio che non sia soggetto ai raggi diretti del sole. 15. Non infilare mai oggetti affilati, appuntiti od attrezzi nell’aperture dell’apparecchio. L’apparecchio potrebbe essere danneggiato ed esserci il pericolo di scossa elettrica! Non infilare mai le dita od altri oggetti nel ventilatore, durante il funzionamento. Fare attenzione specialmente ai bambini, che questi non tocchino il ventilatore. 16. Non scuotere l’apparecchio o spostarlo mentre è in funzione. 17. Utilizzare l’apparecchio soltanto come descritto in queste istruzioni per l’uso. Utilizzarlo soltanto con gli accessori consegnati, accessorio sbagliato può portare ad un danneggiamento dell’apparecchio. 18. L’apparecchio è concepito soltanto per l’utilizzo domestico e non per un impiego commerciale. Non utilizzarlo in veicoli o su barche. 19. Controllare il Suo ventilatore prima di ogni uso. 20. Per evitare una scossa elettrica, non utilizzare l’apparecchio quando il cavo di rete o l'adattatore sono danneggiati o l’apparecchio presenta ulteriori disturbi, sia caduto od altrimenti danneggiato. Non effettuare mai da soli riparazioni, ma portare l’apparecchio presso SOLIS o presso un punto di servizio autorizzato SOLIS, per esaminarlo, ripararlo o per essere messo in funzione meccanicamente od elettricamente. 21. Persone con capacità fisiche, sensoriali o mentali limitate (anche bambini) o persone senza conoscenza od esperienza non devono utilizzare il ventilatore, a meno che vengono sorvegliati per la loro sicurezza da una persona addetta o da questa esattamente istruiti, come è da utilizzare l’apparecchio. 22. I bambini devono essere sorvegliati, in modo che non giochino con il ventilatore. 23. Assicurarsi che il ventilatore SOLIS sia correttamente montato, prima che Lei lo metta in funzione. Come deve essere esattamente montato, viene ricavato dalle seguenti istruzioni. 32 24. Prima che Lei sposta l’apparecchio, smontarlo o pulirlo, attendere sempre che il ventilatore si sia fermato. Staccare la spina di collegamento dall’apparecchio e l’adattatore dalla presa di corrente. Questo vale anche quando l’apparecchio non è in funzione. 25. Prima che Lei smonta la grata di protezione, controllare sempre se l’adattatore è staccato dalla presa di corrente e la spina di collegamento dalla presa di collegamento. 26. Particolare attenzione è richiesta quando bambini, persone anziane od animali si trovano nelle vicinanze del ventilatore. 27. La corrente di aria del ventilatore non dovrebbe essere diretta verso persone anziane o malate così come verso i bambini. 33 s M o n ta g g i o d e l v e nt i l at ore 1. Passo: Montagg io d e lla p ro lun g a del c aval l e tto s ulla ba s e (necessario solo quando Lei abbisogna della variazione lunga come ventilatore eretto) Appoggiare il basamento sul pavimento. Infilare i tre perni della prolunga del cavalletto (12) nel basamento e premere il cavalletto verso il basso fino a che scatta. Attenzione: Fare attenzione al rumore di incastro, in modo che il cavalletto sia bloccato bene nel basamento. 2. Passo: Montagg io d e lla g rata d i prot ezione post eriore (già premontato) Portare la grata di protezione posteriore (6) sull’alberino motore (7) e premerlo sui tre perni del blocco motore, come mostra la figura. Portare il dado di fissaggio (5) sull’alberino motore e girarlo nella grata di protezione posteriore in senso orario. 3. Passo: Montagg io d e lla ve n to la ru otant e (già premontato) Mettere la ventola (4) sull’alberino motore. Spingere la ventola fino allo scatto verso l’interno e girarlo fino a che la croce di guida della ventola nei perni piccoli dell’alberino motore si incastrano. La punta dell’alberino motore è visibile al centro della ventola. Mettere il dado in plastica (3) sull’alberino motore e girarlo in senso antiorario. Attenzione: Quando la ventola non è inserita bene, il dado in plastica non si lascia avvitare. 34 4. Passo: Montag g io d e lla g rata d i p rot ezione ant eriore (già premontato) Mettere la grata di protezione anteriore (2) nella grata di protezione posteriore. Fare attenzione che le bacchette della grata non coprano i fori di guida della grata di protezione posteriore. Mettere ora l’anello della grata (1) così sul bordo, che i perni ç all’interno della parete dell’anello esattamente combaciano nei fori di guida più grandi della grata di å Perno å protezione posteriore ed infilarli bene ç Fori rotandi per vite nei fori. Per fissare stabile l’anello sulla grata, bisogna ora solo avvitare le tre piccole viti allegate, attraverso la grata posteriore ed attraverso l’anello. Infilare le viti nei fori rotondi interni alla grata posteriore ed avvitarle con una cacciavite. 5. Passo: Montag g io d e l blo cco mo tore su l l a prol u nga del c avalle tto o d e l ba s a ment o Infilare i tre perni all’estremità del cavalletto del blocco motore sopra la prolunga del cavalletto (12), quando Lei vuole utilizzare il ventilatore eretto oppure direttamente nel basamento, quando l’apparecchio deve essere utilizzato come ventilatore da tavolo. Premere il cavalletto verso il basso, fino a che scatta. Attenzione: Fare attenzione al rumore di incastro, in modo che i perni si incastrano veramente nel basamento o nella prolunga del cavalletto. Osserva: Quando Lei preme il tasto di sblocco, Lei può separare di nuovo i pezzi uno dall’altro. 35 s I ta st i d i f u n z i o n e s ul b lo c co m o t o r e Con questo tasto Lei può accendere e spegnere l’apparecchio, quando l’adattatore è allacciato alla presa di corrente e la spina di collegamento alla presa del ventilatore. Premere il tasto una volta, il Suo apparecchio comincia a lavorare con la velocità bassissima e nella modalità “normale”. Premere di nuovo il tasto, l’apparecchio si spegne di nuovo. Tasto velocità “Wind” Con questo tasto Lei può regolare la velocità di rotazione della ventola, quando l’apparecchio è acceso. Lei può scegliere tra 9 diverse velocità – premendo il tasto ogni volta, la velocità aumenta, nell’ultima barra del display sinistra, Lei apprende dalla quantità dei punti illuminati, in quale grado di velocità Lei si trova. Premendo nono volta, l’apparecchio si accendere di nuovo sul grado 1. Tasto “On/Off” Tasto oscillazione “Swing” Con questo tasto Lei può accendere l’oscillazione del ventilatore. Premere questo tasto, il ventilatore oscilla ugualmente da sinistra verso destra ed indietro. Premendo di nuovo il tasto, l’oscillazione viene spenta. 36 Oscillazione orizzontale Tasto “Timer” Con questo tasto Lei può regolare la durata di funzionamento del Suo ventilatore. Lei può regolare una durata tra 0,5 ore e 7,5 ore. Premendo ogni volta il tempo di durata aumenta. Sul display sopra a destra, Lei vede quali ore sono state attivate. Se si illuminano diversi punti verdi, le impostazioni vengono addizionate – la somma è la durata di funzionamento programmata. Dopo aver raggiunto la massima durata di 7,5 ore, premendo successivamente, tutti i punti verdi si spengono. Il timer è spento di nuovo e Lei deve spegnere il ventilatore manualmente. Osserva: Spostando il blocco motore verso l’alto od il basso, Lei può far sventolare il ventilatore verso l’alto od il basso, cambiando così ulteriormente la direzione della corrente di aria. Su e giù da regolare al blocco motore Tasto “Timer” Tasto oscillazione “Swing” Tasto velocità “Wind” Tasto “On / Off” 37 s I l d is p l ay d e l S u o ve nt i l at ore åImpostazione timer çNumero delle ore éSpie di funzione del timer å ç è é ê ë í per le ore scelte èSpie di funzione per l’impo stazione di velocità Impostazione di programma (solo con il tasto “Mode” sul telecomando possibile) êModalità sleep ëVento naturale íVento normale s I l tel e c o m a n d o Generalmente vale: – I tasti di funzione sul telecomando corrispondono i tasti di funzione sul pannello comandi del ventilatore. Unica eccezione: I programmi del tasto “Mode” del teleco mando non possono essere programmati nell’appa recchio stesso, anche la spia del display può essere spenta solo con il telecomando. – Inserire gentilmente una batteria CR 2025. Fare attenzione alla polarità indicata. Se Lei non dovesse utilizzare il telecomando per lungo tempo, estrarre gentilmente la batteria e conservarla separatamente. Così Lei conserva la durata di vita della batteria. – La distanza di impiego del telecomando comporta fino ai 3,5 metri. Quando il telecomando non viene tenuto direttamente in direzione del ricevitore, precisamente in direzione display, la distanza di impiego è più bassa. – Fare attenzione che nessun ostacolo si trova tra il telecomando e ricevitore del display. – Conservare in modo sicuro il telecomando, non deve cadere o spaccarsi. 38 I tasti di funzione del Suo telecomando: Swing Oscillazione orizzontale Wind Per ridurre la velocità del ventilatore Timer Per regolare la durata di impiego: E`regolabile una impostazione tra 0,5 e 7,5 ore. La spia verde si illumina nella impostazione regolata sul display. Si illuminano diverse spie, queste vengono addizionate. Wind Per aumentare la velocità del ventilatore Mode Per regolare i seguenti programmi: “Vento normale” – la spia di funzione più bassa nella barra a destra bassa si illumina. “Vento naturale” – la spia di funzione centrale nella barra destra in basso si illumina. “Vento per dormire” – la spia di funzione superiore nella barra inferiore destra si illumina. Osserva: Queste tre impostazioni di programma possono essere effettuate solo attraverso il telecomando! Light Per accendere e spegnere le spie di funzione sul display 39 s Pulizia e manutenzione Prima che Lei pulisce, sposta e ripone l’apparecchio, spegnere sempre il ventilatore con il tasto ; e staccare l’adattatore dalla presa di corrente e dalla presa di collegamento dell’apparecchio. Quando Lei vuole smontare l’apparecchio, proseguire come segue: 1. Eliminare le viti dell’anello di grata ed estrarre l'anello di grata e la grata di protezione anteriore. (Vedi passo 4 nel capitolo “Montaggio”) 2. Eliminare il dado in plastica e la ventola dall’alberino motore (Vedi passo 3 nel capitolo “Montaggio”) 3. Svitare il dado di fissaggio e staccare la grata di protezione posteriore dall’alberino motore. (Vedi passo 2 nel capitolo “Montaggio”) Le parti esteriori del ventilatore dovrebbero essere pulite di tanto in tanto con un panno leggermente umido. Non immergere mai l’apparecchio nell’acqua e non spruzzare mai acqua nell’apparecchio! Non utilizzare detergenti aggressivi o chimici, spugne affilate o ruvide o simili. Queste potrebbero danneggiare la superficie del ventilatore. Conservare l’apparecchio in un luogo asciutto e buio. 40 s P r o b l e m i e d e v e n t u al i caus e Il ventilatore non si lascia mettere in funzione. – L’adattatore è inserito bene nella presa di corrente e la spina di collegamento è inserita nel ventilatore? – Controllare gentilmente se le grate di protezione non toccano la ventola e la deformano. Durante il funzionamento si sento dei rumori irregolari del ventilatore. – Esaminare se la ventola è fissata bene all’alberino del motore. – Esaminare se qualcosa tocca la ventola. La ventola sbatte. – Prendere gentilmente di nuovo la ventola dall’alberino del motore e girarla di 180 °. s D ati t e c n i c i Modello FS-30ET1, tipo 753 Descrizione del prodotto Ventilatore eretto e da tavolo Tensione / Frequenza dell’adattatore di rete 220–240 V~ / 50/60 Hz Tensione ventilatore 12 V DC Potenza 20 Watt Dimensioni Altezza: ca. 93,5 cm con pezzo centrale ca. 57,5 cm senza pezzo centrale Circonferenza basamento: ca. 32 cm Circonferenza del blocco ruotante: ca. 33,5 cm Peso ca. 4,5 kg / 4,2 kg (con / senza pezzo centrale) 41 EU 2002/96/EC Alla fine del ciclo di vita, l’apparecchio non deve essere smaltito insieme ai rifiuti domestici. Lo stesso dovrà essere portato a un centro di raccolta rifiuti locale o a un rivenditore che provvederà al regolare smaltimento. Rispetto a uno smaltimento non conforme, lo smaltimento separato di apparecchi elettrici ed elettronici evita conseguenze negative per l’ambiente e per la salute e consente inoltre il recupero e il riutilizzo di componenti con un risparmio energetico e di materia prima notevole. Per richiamare l’attenzione sull’obbligo di smaltimento regolare dell’apparecchio, lo stesso è contrassegnato con un simbolo di un contenitore di rifiuti barrato. s S m a lt i m e n t o SOLIS si riserva il diritto di apportare, in qualsiasi momento, modifiche tecniche ed estetiche nonché modifiche atte a migliorare il prodotto. EU 2002 / 96 / EC Istruzioni per lo smaltimento del prodotto conforme alle prescrizioni secondo la direttiva EU 2002 / 96 / EC Alla fine del ciclo di vita, l’apparecchio non deve essere smaltito insieme ai rifiuti domestici. Lo stesso dovrà essere portato a un centro di raccolta rifiuti locale o a un rivenditore che provvederà al regolare smaltimento. Rispetto a uno smaltimento non conforme, lo smaltimento separato di apparecchi elettrici ed elettronici evita conseguenze negative per l’ambiente e per la salute e consente inoltre il recupero e il riutilizzo di componenti con un risparmio energetico e di materia prima notevole. Per richiamare l’attenzione sull’obbligo di smaltimento regolare dell’apparecchio, lo stesso è contrassegnato con un simbolo di un contenitore di rifiuti barrato. SOLIS si riserva il diritto di apportare, in qualsiasi momento, modifiche tecniche ed estetiche nonché modifiche atte a migliorare il prodotto. SOLIS HELPLINE: 044 874 64 14 (Solo per i clienti in Svizzera) Questo articolo si contraddistingue per la sua lunga durata ed affidabilità. Se ciononostante dovessero presentarsi dei problemi di funzionamento, ci telefoni. Spesso, un guasto si risolve senza complicazioni e in modo semplice con il consiglio o lo stratagemma giusti senza dovere spedire subito l’apparecchio per ripararlo. Siamo a Sua disposizione per consigli ed aiuto. 24 Conservare la confezione originale di questo articolo, in modo che Lei può utilizzarla per un eventuale e necessario trasporto o spedizione. SOLIS AG Solis_PowerMixerPro_Betriebsanleitung.indd 24-25 Solis-Haus • CH-8152 Glattbrugg-Zürich • Svizzera Telefono +41 44 874 64 54 • Fax +41 44 874 64 99 [email protected] • www.solis.ch • www.solis.com 42 S S T i 43 s U n it d e s c r i p t i o n í ì î å ç é è ê ë ï ñ åGuard grille clamping ring çFront guard grille éPlastic nut èFan blade êSecuring nut for guard grille ëRear guard grille íMotor shaft ìMotor housing ó ï with function buttons îFunction-display ïMale pins ñRelease button for the male pins óStand extension òBase ôInput jack for the AC adaptor öInput connector for the AC adaptor �AC power adaptor 44 ò ñ ô ö � s I m po rta n t s a f e t y pre caut i ons Please read through this user manual thoroughly before using your SOLIS fan, so that you become familiar with your appliance and can use it safely. We thoroughly recommend that you keep these instructions and, if you pass the appliance on, that you also hand these instructions to the new owner. For your own safety, please observe the following safety measures when using elec trical appliances: 1. In order to avoid electric shock, neither the fan, cable or the AC adaptor, may come into contact with water, rain or other fluids. Water could seep into the appliance and damage it! If the appliance, the cable or the AC power adaptor come into contact with fluid, remove the plug from the socket immediately, using dry, rubber gloves. 2. Before using the appliance, check that the voltage stated on the AC adaptor matches your mains voltage. 3. The appliance must stand on a secure and dry surface during use. Do not place the fan on unstable or textile covered surfaces. Ensure that the appliance is stable, so that nobody will knock it over. 4. Lay the appliance where it will not be tripped over or where it could topple the appliance. Ensure that the cable does not come into contact with any hot surfaces. Always unroll the cable fully before plugging the AC adaptor in. 5. Keep the appliance away from hot gas, hot ovens or other heat-emitting appliances and heat sources. Do not use the appliance in rooms containing explosive or flammable, gasses or liquids. Do not use the appliance in rooms with high humidity, temperatures over 40 °C or in dusty rooms. 6. Never use the appliance on wet or hot surfaces. Keep the appliance away from damp, heat and naked flames. Keep the fan away from moving parts or appliances. 7. Never carry or pull the appliance by the cable and do not place anything on top of the power cable. 8. Do not spray anything into the appliance – i.e. bug spray. 9. Unplug the appliance when it is not in use or unattended, and before cleaning. We recommend the use of a residual current device (RCD safety switch) to ensure additional protection during the use of electrical appliances. It is advisable to use a safety switch with a rated residual operating current of 30 mA maximum. For professional advice consult an electrician. 45 10. Do not make any adjustments to the appliance, cable, AC adaptor or accessories. 11. Do not leave the fan unattended when in use. Incorrect use may cause injury! 12. Never take hold of an appliance that has fallen into water. Always take the AC adaptor out of the power socket before removing the appliance from the water. Do not use the appliance again until you have had it's ability to function safely checked by SOLIS or a SOLIS approved service centre. 13. Never place the appliance where it could fall into water (e.g. next to a swimming pool). 14. Place the appliance so that it is never exposed to direct sunlight. 15. Never stick sharp or pointed objects into the appliance openings. They could damage the appliance or cause danger of electric shock. Never put your fingers or other objects, into the fan while it is in operation. Take especially care that children don't touch the fan. 16. Do not shake or relocate the appliance while it is in operation. 17. Only use the appliance as described in this manual. Only use with the provided accessories, incorrect accessories can lead to damage of the appliance. 18. This appliance is only for domestic use and is not suitable for commercial use. Do not use in moving vehicles or boats. 19. Check your fan before each use. 20. In order to avoid electric shock, do not use the appliance if the cable or AC adaptor are damaged or the appliance is otherwise faulty, dropped or damaged. Never attempt repairs yourself, but take your appliance to SOLIS or a SOLIS approved service centre in order to get it inspected or mechanically and electrically repaired. 21. People with limited physical, sensory or mental capacities (including children) are not permitted to use the fan, except when supervised by a person responsible for their safety or are instructed by this person, exactly how to use the appliance. 22. Children must be supervised, so that they do not play with the appliance. 23. Always ensure the SOLIS fan is properly assembled before use. Refer to assembly and operation instructions. 24. Before moving, disassembling or cleaning the appliance, always wait until the fan has stopped. Remove the power connector from the appliance and unplug the AC adaptor from the power socket. This also applies when the appliance is not in use. 46 25. Before taking off the guard grilles, always first check that the AC adaptor is unplugged from the mains socket and the connector is removed from the input jack. 26. You should take particular caution when children, elderly persons or animals are nearby to the fan. 27. The air flow from the fan should not be directed on elderly or sick people, or on children. 47 s A ssemb ly o f t h e fan 1. Step: Instal l i n g the s ta n d e xte n sion t o t h e base (only necessary if you require the tall variation of the fan) Place the base on the ground. Insert the three male pins on the stand extension (12) into the base and press the extension down until it clicks in place. Caution: Please make sure you hear the click-sound, so that the stand has definitely connected to the base. 2. Step: Mou nt i ng the re a r g ua rd g r il l e (already pre-assembled) Move the rear guard grill (6) onto the motor shaft (7) and press it onto the three pins on the motor housing, as shown in the figure. Then also move the securing nut for the guard grille (5) over the motor shaft and screw it clockwise, securely into place. 3. Step: Mou nt i ng the fa n bla d e (already pre-assembled) Place the fan blade (4) onto the motor shaft. Slide the blade all the way to the back and turn it until the guide cross clicks into the small pins on the motor shaft. The tip of the motor shaft is just visible in the middle of the fan blade. Place the plastic nut (3) over the motor shaft and screw it anticlockwise into place. Caution: If the fan blade isn't installed correctly, you can't screw the plastic nut into place. 48 4. Step: Mounting the front guard grille (already pre-assembled) Insert the front guard grille (2) into the rear guard grille. Make sure that the grille bars do not cover the guide holes in the rear guard grille. Now place the grille fastening ring (1) over the edge so that it fits into the large guide holes of the rear guard grille and place it firmly into the holes. To attach the guard to ç the fastening ring securely, the three small screws provided must be screwed å Pin through the rear guard grille and into å ç Round hole for screw the fastening ring. Insert the screws into the built-in, round holes in the rear guard grille and screw them in securely, using a screwdriver. 5. Step: Mou nt i n g the mo to r ho us in g ont o t h e s ta n d e xte n s io n o r t h e base Insert the three male pins on the end of the motor housing into the top of the stand extension (12), if you will use the fan as a pedestal fan, or insert the pins directly into the base, if you wish to use the fan as a desktop fan. Press the end of the motor housing downwards until it clicks audibly into place. Caution: Please ensure that you hear the click-noise, so that the pins connect securely into the base or the stand extension. Note: If you press the release button, the two parts can be separated from each other again. 49 s C o n tr o l b u t t o n s o n th e m o t o r h o u si ng Using this button you can turn the appliance on and off, if the AC adaptor is plugged in and the connector is in the power jack on the appliance. Press the button once and the appliance starts on the lowest setting and in “Normal” mode. Press the button once more and the appliance switches off again. Speed button “Wind” Using this button you can control the rotation speed of the fan blade, if the appliance is switched on. You can choose between 9 different speeds – each press of the button increases the speed. On the lower left of the display you can see what level the speed is set to, from the number of lit points. At speed 9, pressing switches the speed back to level 1. “On / Off” button Oscillation button “Swing” Using this button, you can switch on the oscillation function of the fan. Press this button and the fan will swing evenly from side to side. Press the button once more to turn the oscillation function off again. 50 Horizontal oscillation “Timer” button Using this button you can set the operating time off the fan. You can set a duration of between 0.5 and 7.5 hours. Each press of the button increases the time. On the top right of the display, you can see how many hours have been set, by the sum of the green lit numbers. After the 7.5 hour setting, pressing the button again turns off all of the green lights – the timer is switched off again and the fan must be manually switched off. Note: You can tilt the motor housing up or down to set the direction of the air stream. Up and down To adjust the motor housing “Timer” button Oscillation button “Swing” Speed button “Wind” “On / Off” button 51 s Fa n d i s p l ay å Timer-setting çNumber of hours éTimer indicator lights å ç é è ê ë í for the selected hours è Indicator lights for speed setting Program-setting (only possible with the “Mode” button on the remote) ê Sleep-program ë Natural wind í Normal wind s T he r e m o t e In general: – The function buttons on the control correspond to the buttons on the fan. Some exceptions: The programs of the “Mode”-button can not be changed on the appliance itself. Also, the lights on the display can only be turned off using the remote. – Please insert a CR 2025 into the remote. Make sure the polarity is correct. If you are no longer using the remote, remove the battery and store it separately, to conserve battery life. – The operating distance of the remote is up to 3.5 metres. If the remote is not pointed directly at the receiver on the display, then the operating distance is lower. – Please ensure that there are no obstacles between the remote and the receiver on the display. – Please keep the remote safe, it must not fall or break. 52 T he function buttons of your remote control: Swing Horizontal oscillation Wind To reduce the fan speed Timer To set the duration of operation: Can be set between 0.5 and 7.5 hours. The green lights light up the selected setting on the display. The selected time is the sum of the green lit hours. Wind To increase the fan speed Mode To set the following programs: Light To turn the lights on the display on and off “Normal Wind” – the lowest indicator light on the lower right strip lights up. “Natural Wind” – the middle indicator light on the lower right strip lights up. “Wind for sleeping” – the upper indicator light on the lower right strip lights up. Note: These three programme-settings can only be changed using the remote! 53 s Cleaning and care Before you clean, move or store the appliance, please turn off the fan by pressing the “On/Off”-button ; , then unplugging the AC adaptor from the socket and from the power jack on the appliance. If you wish to dis-assemble the appliance, proceed as follows: 1. Remove the screws in the fastening ring and take the fastening ring and front guard grille off. (See step 4 in the “Assembly” section) 2. Remove the plastic nut and the fan blade from the motor shaft. (See step 3 in the “Assembly” section) 3. Unscrew the securing nut from the rear guard and remove the rear guard grille from the motor shaft. (See step 2 in the “Assembly” section) The outer parts of the fan should be wiped with a soft, damp cloth from time to time. Never submerge the appliance in water and do not spray water into the appliance! Do not use aggressive or chemical cleaning agents, sharp or abrasive sponges or other similar cleaning equipment. Store the appliance in a dark, dry place. 54 s P r o b l e m s a n d p o s s i bl e caus e s Problems and possible causes – Is the adaptor plugged in securely and is the connector in the power jack? – Please check that the guard grille is not touching the fan blade or is deformed. During operation, unusual noises can – Please check that the fan blade is sitbe heard from the appliance ting securely on the motor shaft. – Please check if something is touching the fan blade. The fan blade shakes – Please remove the fan blade from the motor shaft and flip it 180 °. s T ec hn i c a l i n f o r m at i on Model number FS-30ET1, type 753 Product description Table and pedestal fan Voltage / frequency AC power adaptor 220–240 V~ / 50 / 60 Hz Voltage Fan 12 V DC Power 20 Watt Dimensions Height:approx. 93,5 cm with middle part approx. 57,5 cm without middle part Base diameter: approx. 32 cm Fan housing diameter: approx. 33,5 cm Weight approx. 4,5 kg / 4,2 kg (with / without middle part) 55 Information for correct disposal of the product in accordance with the European Directive 2002/96/EC At the end of its working life this equipment must not be disposed of as an household waste. It must be taken to special local community waste collection centres or to a dealer providing this service. Disposing of electrical and electronic equipment separately avoids possible negative effects on the environment and human health deriving from an inappropriate disposal and enables its components to be recovered and recycled to obtain significant savings in energy and resources. In order to underline the duty to dispose of this equipment separately, the product is marked with a crossed-out dustbin. s D i spo s a l SOLIS reserves the right to carry out technical and visual changes and modifications to improve the product at any time. EU 2002 / 96 / EC Information for correct disposal of the product in accordance with the Euro pean Directive 2002 / 96 / EC At the end of its working life this equipment must not be disposed of as an household waste. It must be taken to special local community waste collection centres or to a dealer providing this service. Disposing of electrical and electronic equipment separately avoids possible negative effects on the environment and human health deriving from an inappropriate disposal and enables its components to be recovered and recycled to obtain significant savings in energy and resources. In order to underline the duty to dispose of this equipment separately, the product is marked with a crossed-out dustbin. SOLIS reserves the right to carry out technical and visual changes and modifications to improve the product at any time. SOLIS HELPLINE: 044 874 64 14 (Only for customers in Switzerland) This item stands out due to its long-life cycle and reliability. Despite this though, if a malfunction ever occurs, simply give us a call. Often a breakdown can be easily and quickly remedied with the right tip or technique without having to straight away send off the device for repair. We will give you all the advice and practical support you require. 32 Keep the original packaging in a safe place so that you may use it in the event that transportation or shipping of the product becomes necessary. Solis_PowerMixerPro_Betriebsanleitung.indd 32-33 SOLIS AG Solis-House • CH-8152 Glattbrugg-Zurich • Switzerland Phone +41 44 874 64 54 • Fax +41 44 874 64 99 [email protected] • www.solis.ch • www.solis.com 56 57 s pr o d u c t o m s c h r i j v i ng í ì î å ç é è ê ë ï ñ åring rond de kap çvoorkant beschermkap éplastic moer èrotorblad ê bevestigingsmoer ëachterkant beschermkap ímotoras ìmotorbehuizing ó ï met functietoetsen îweergave functies ïverbindingselement ñontgrendelknop verbindingselement óverlengstuk staander òvoet ôstekkerverbinding voor adapter östekker van de adapter �adapter 58 ò ñ ô ö � s B ela ng r i j k e veilig h e i d s v o o r s c h ri f t e n Leest u alstublieft voor het gebruik van uw SOLIS ventilator deze gebruiks aanwijzing aandachtig door, zodat u uw apparaat goed leert kennen en goed kunt bedienen. We raden u aan om deze gebruiksaanwijzing goed te bewaren en bij eventuele overdracht van het apparaat deze ook te overhan digen aan de nieuwe eigenaar. Voor uw eigen veiligheid, dient u bij het gebruik van elektrische apparatuur de volgende veiligheidsmaatregelen in acht te nemen: 1. Om een stroomstoot te vermijden, mogen noch de ventilator noch de kabel en de adapter met water, regen of andere vloeistoffen in aanraking komen. Water kan in het apparaat komen en deze beschadigen! Mocht het apparaat resp. het snoer of de adapter met een vloeistof in aanraking komen, trek dan met droge rubberen handschoenen direct de adapter uit het stopcontact. 2. Controleer voor ingebruikname of de spanning van het adapter overeenkomt met uw netspanning. 3. Tijdens het gebruik, moet het apparaat op een vaste, stabiele ondergrond staan. Zet het apparaat niet op een onstabiele of met textiel bedekte ondergrond. Let erop dat het apparaat stabiel staat, zodat deze door niemand omgestoten kan worden. 4. Zorg ervoor dat niemand over het snoer kan struikelen of het apparaat kan omstoten. Let erop dat het niet met hete oppervlakten in contact komt. Rol het snoer altijd volledig uit, voordat u deze in het stopcontact doet. 5. Houd het apparaat uit de buurt van hete lucht, hete ovens, apparaten die warmte afgeven of andere hittebronnen. Gebruik het apparaat niet in ruimtes met explosieven, brandbare stoffen of vloeistoffen. Gebruik de ventilator niet in ruimte met een hoge luchtvochtigheid, bij kamertemperaturen boven de 40 °C of in stoffige ruimtes. 6. Gebruik het apparaat niet op een nat of heet oppervlak. Gebruik het apparaat niet in de buurt van vochtigheid, hitte of open vuur. Houdt de ventilator uit de buurt van bewegende delen of apparaten. 7. Houd het apparaat nooit vast en trek niet aan de kabel en plaats niets op de kabel. 8. Spuit niets in de ventilator - ook geen spray tegen insecten. 59 9. Haal altijd het adapter uit het stopcontact, als het apparaat buiten bedrijf is, onbeheerd is of schoongemaakt moet worden. We raden het gebruik van een aardlekschakelaar aan, om een extra zekerheid van het gebruik van elektrische apparatuur te waarborgen. Het is raadzaam, een veiligheidsschakelaar van maximaal 30 mA te gebruiken. Vakkundig advies vindt u bij uw elektricien. 10. Voer geen wijzigen uit aan het apparaat, kabel, adapter of accessoires. 11. Laat de ventilator tijdens gebruik nooit onbeheerd achter! Bij onjuist gebruik bestaat letselgevaar! 12. Grijp nooit naar een apparaat dat in het water gevallen is. Haal de adapter uit het stopcontact, voordat u het uit het water haalt. Neem het niet eerder weer in gebruik, voordat u het apparaat bij SOLIS of bij een door SOLIS erkend servicepunt op zijn werking en gebruiksveiligheid heeft laten controleren. 13. Plaats het apparaat nooit zo, dat in het in water zou kunnen vallen (bijvoorbeeld in de buurt van een zwembad of bassin). 14. Plaats het apparaat zo, dat er geen direct zonlicht op gericht is. 15. Nooit scherpe of spitse objecten en gereedschap in de openingen van het apparaat doen. Het apparaat kan beschadigd worden, met (als gevolg) gevaar voor stroomstoten! Steek nooit tijdens gebruik een vinger of ander object in de ventilator. Let in het bijzonder op kinderen, en dat zij de ventilator niet aanraken. 16. Schud en verplaats het apparaat niet tijdens gebruik. 17. Gebruik het apparaat alleen, zoals in deze gebruiksaanwijzing is beschreven. Gebruik alleen meegeleverde toebehoren, verkeerd toebehoren kan tot de beschadiging van het apparaat leiden. 18. Het apparaat is alleen bedoeld voor huiselijk gebruik en niet voor commercieel gebruik. Niet gebruiken in voertuigen of boten. 19. Controleer uw ventilator voor ieder gebruik. 20. Gebruik, om een stroomstoot te vermijden, het apparaat niet als het adapter of de stekker beschadigd zijn of als het apparaat andere storingen vertoont, gevallen is of enigszins beschadigd is. Voer nooit zelf reparaties uit, maar geef het apparaat af bij SOLIS of een, van de door SOLIS erkende servicepunten, om het te laten controleren, repareren of mechanisch en elektrisch in orde te maken. 21. Personen met beperkte psychische, sensorische of intellectuele capaciteit (ook kinderen) of onwetende en onervaren personen mogen de ventilator niet gebruiken, tenzij door een bevoegd persoon toezicht wordt gehouden of diegene exact instrueert over hoe het apparaat gebruikt dient te worden. 22. Er moet op toegezien worden, dat kinderen niet met de ventilator spelen. 60 23. Controleer of de SOLIS ventilator goed is opgebouwd, voordat u deze gebruikt. Hoe u deze precies in elkaar zet, vindt u in deze gebruiksaanwijzing. 24. Wacht altijd tot de ventilator tot stilstand is gekomen, voordat u het apparaat verplaatst, uit elkaar haalt of schoon maakt. Haal de stekker uit het apparaat en de adapter uit het stopcontact. Doe dit ook als het apparaat niet in gebruik is. 25. Controleer altijd eerst of de adapter uit het stopcontact en de stekker uit de stekkerverbinding zijn gehaald, voordat u het beschermrooster verwijdert. 26. Let in het bijzonder op als er kinderen, oudere personen of dieren in de buurt van de ventilator zijn. 27. De luchtstroom van de ventilator moet niet direct gericht zijn op oudere of zieke personen resp. op kinderen. 61 s M o n ta g e va n d e v e nt i l at or Stap 1: Montage va n d e ve rle n g s tuk op de v oet (alleen nodig als u de lange variant van de staande ventilator opbouwen) Leg de voet op de grond. Steek het 3 pinnige verbindingselement van het verlengstuk (12) in de voet en druk deze naar beneden, totdat deze vast klikt. Let op: Zorg dat u inderdaad een klik hoort, zodat u zeker weet dat het verlengstuk goed vergrendeld is. Stap 2: De ac h t e rka n t va n d e be s ch ermk ap mont eren (reeds voorgemonteerd) Plaats de achterkant van de beschermkap (6) over de motoras (7) en druk deze tegen de achterzijde, zoals op de afbeelding staat aan gegeven. Schuif de bevestigingsmoer (5) ook over de motoras en draai deze aan de achterkant van de beschermkap met de wijzers van de klok mee vast. Stap 3: r otor B lad mo n te re n (reeds voorgemonteerd) Plaats het rotorblad (4) op de motoras. Schuif het rotorblad volledig naar achter en draai deze totdat deze vastklikt in de pinnen op de motoras. Het uiteinde van de motoras is in het midden van het rotorblad zichtbaar. Plaats nu de plastic moer (3) over de motoras en draai deze tegen de wijzers van de klok in vast. Let op: Als het rotorblad niet goed geplaatst wordt, dan kan de plastic moer niet vastgedraaid worden. 62 Stap 4: v oor k an t va n d e be s che rmkap mont eren (reeds voorgemonteerd) Plaats de voorkant van de beschermkap (2) op de achterkant van de beschermkap. Let er daarbij op, dat de staafjes niet de geleidegaten op de achterkant van de beschermkap bedekken. Plaats nu de ring van de kap (1) op de rand, zodat de staafjes aan de binnenkant van ç de ring precies in de grotere geleidegaten van de achterkant van de beschermkap passen en zet ze hierin vast. Om de ring å staafjes å stabiel op de beschermkap te bevestigen, ç Ronde opening voor de schroeven moeten alleen nog de drie meegeleverde kleine schroeven door de achterkant van de beschermkap op de ring worden geschroefd. Steek hiervoor de schroeven door de binnenste, ronde gaten op de achterkant van de beschermkap en draai deze met een schroevendraaier vast. Stap 5: de m ot orka p o p he t ve rle n gst u k of op de vo e t mo n te re n Steek het 3 pinnige verbindingselement aan het onderzijde van de motorkap in het verlengstuk (12), indien u de ventilator als staande ventilator wilt gebruiken of in de voet indien u deze als tafelventilator wilt gebruiken. Druk de onderzijde naar beneden, totdat u deze vast hoort klikken. Let op: Zorg dat u inderdaad een klikgeluid hoort, zodat u zeker weet dat de motorkap goed op het verlengstuk resp. de voet vergrendeld zit. Tip: Als u op de ontgrendelknop drukt, kunt u de onderdelen weer een voor een loshalen. 63 s d i e fu n c t i e t o e t s e n op de motorkap Als de adapter in het stopcontact zit en de stekker in de stekkerverbinding op de ventilator zit, dan kunt u met deze knop het apparaat aan- en uitzetten. Als u een keer op de knop drukt, dan start het apparaat in de laagste snelheid en in de „Normal“-Modus te werken. Drukt u nog een keer op de knop, dan schakelt het apparaat weer uit. Snelheidsknop „Wind“ Met deze knop kunt u, indien het apparaat aanstaat, de rotatiesnelheid van de waaier instellen. U kunt tussen 9 verschillende snelheden kiezen – met iedere druk op de knop wordt de snelheid verhoogd. Aan de onderzijde aan de linkerkant van de display ziet u aan de hand van de hoeveelheid lampjes die branden, in welke stand u staat. Als u de negende keer drukt, dan gaat het apparaat weer in de eerste stand. AAN / UIT-knop „On/Off“ Oscillatieknop „Swing“ Met deze knop kunt y de oscillatie van de ventilator inschakelen. Druk op deze knop en de ventilator zal gelijkmatig van links naar rechts bewegen en weer terug. Drukt u de knop nog een keer i, dan schakelt de oscillatie weer uit. 64 Horizontale oscillatie „Timer“-knop Met deze knop kunt u de timer op uw ventilator instellen. U kunt een tijdsduur instellen tussen 0,5 en 7,5 uur. Met iedere keer dat u drukt, wordt de tijd langer. Rechts boven op de display is het aantal uur dat ingesteld wordt te zien. Als er meerdere groene punten oplichten, dan is de som van de bijbehorende getallen de ingestelde tijdsduur. Nadat de hoogste tijdsduur van 7,5 uur is ingesteld, dan zullen alle lampjes bij uitgaan indien er nog een keer gedrukt wordt. De timer is dan weer uitgeschakeld en u moet de ventilator dan weer handmatig uitzetten. Tip: U kunt door het verstellen van de motorkap van de ventilator naar boven of naar beneden ook de ventilator naar boven en naar beneden laten bewegen en hiermee ook de richting van de luchtstroom bepalen. Heen en weer Op de motorkap in te stellen „Timer“-knop Oscillatieknop „Swing“ Snelheidsknop „Wind“ AAN/UIT-knop „On/Off“ 65 s d e d is p l ay va n u w ve nt i l at or åTimer-instelling çAantal uren éFunctieverlichting van de å ç è é ê ë í timer voor de gekozen uren èFunctieverlichting voor de ingestelde snelheid Programma instelling (alleen mogelijk via de "Mode“knop op de afstandsbediening) êSlaapprogramma ëNatuurlijke wind íNormale wind s d e a f s ta n d s b e d i e ni ng In het algemeen geldt: – De knoppen op de afstandsbediening komen qua functie overeen met de bedieningsknoppen op de ventilator. Enige uitzondering: Het programma van de „Mode“ knop op de afstandsbediening kan op het apparaat zelf niet ingesteld worden. Ook het licht van de dis play kan alleen met de afstandsbediening uitgezet worden. – Doe een CR 2025 batterij in de afstandsbediening. Let daarbij op de juiste polariteit. Mocht u de afstandbediening gedurende langere tijd niet gebruiken, verwijder dan de batterij en bewaar deze apart. Zo heeft de batterij een langere levensduur. – De afstandsbediening werkt tot een afstand van 3,5 meter. Als de afstandsbediening niet recht op de ontvanger is gericht, of wel in de richting van de display op de ventilator, dan is de afstand tot waar deze werkt kleiner. – Let erop, dat er geen opstakels zijn tussen de afstandsbediening en de display. – Bewaar de afstandsbediening op een goede plek, zodat deze niet kan vallen of breken. 66 D E F U N CT IE KNO PPEN O P UW AFSTAN D SBE D IE N IN G : Swing Horizontale oscillatie Wind Voor het verlagen van de snelheid Timer Voor het instellen van de timer: De timer is in te stellen tussen 0,5 en 7,5 uur. Het groene licht dat correspondeert aan de ingestelde tijd licht op. Branden er meerdere lichtjes, dan is de ingestelde tijd de som van de corresponderende uren. Wind Voor het verhogen van de snelheid Mode oor het instellen van de volgende programma's: „Normale wind“ – het onderste functielampje rechtsonder licht op. „Natuurlijker wind“ – het middelste functielampje rechtsonder licht op. „Wind om te slapen“ – het bovenste functielampje rechtsonder licht op. Tip: Deze drie programma instellingen kunnen alleen via de afstandsbediening gekozen worden! Light Voor het aan- en uitschakelen van de functieverlichting op de display 67 s Reiniging en verzorging Zet de ventilator altijd uit via ; -knop en haal de stekker uit het stopcontact en uit de ventilator, voordat u het apparaat gaat schoonmaken, verplaatsen of opbergen. Volg de onderstaande stappen indien u het apparaat gaat demonteren: 1. Verwijder de schroeven op de ring en verwijder de ring en de voorkant van de kap. (zie stap 4 in het hoofdstuk ”montage“) 2. Verwijder de plastic moer en het rotorblad van de achterkant van de kap. (zie stap 3 in het hoofdstuk ”montage“) 3. Verwijder de bevestigingsmoeren en haal de achterkant van de kap van de motoras af. (zie stap 2 in het hoofdstuk ”montage“) De buitenste delen van de ventilator moeten van tijd tot tijd met een iets vochtige doek schoongemaakt worden. Die het apparaat nooit in het water en zorg dat er geen water in het apparaat komt! Gebruik geen agressieve of chemische schoonmaakmiddelen resp. scherpe of ruwe sponzen of dergelijke. U kunt hierdoor het oppervlak van de ventilator beschadigen. Berg het apparaat op een droge, donkere plek op. 68 s P r o b l e m e n e n m o ge l i jke o o r zak e n De ventilator gaat niet aan. – Zit de adapter goed in het stop contact en de aansluitstekker goed in de ventilator? – Controller of de kap het rotorblad niet raakt of vervormt. Tijdens het gebruik is een onregel matige ruis te horen. – Controleer of het rotorblad goed op de motoras vast zit. – Controller of er ergens iets in aan raking komt met het rotorblad. Het rotorblad ratelt. – Haal het rotorblad van de motoras af en draai deze 180 °. s T ec hn i s c h e g e g e v e ns Model nr. FS-30ET1, type 753 Productbeschrijving staande- en tafelventilator Spanning / Frequentie adapter 220–240 V~ / 50/60 Hz Spanning ventilator 12 V DC Vermogen 20 Watt Afmetingen Hoogte: ca. 93,5 cm met middeldeel ca. 57,5 cm zonder middeldeel Doorsnede voet: ca. 32 cm Doorsnede rotorbehuizing: ca. 33,5 cm Gewicht ca. 4,5 kg / 4,2 kg (met / zonder middeldeel) 69 s V er w i j d e r i n g EU 2002 / 96 / EC Aanwijzingen voor het verwijderen van het product volgens EU-richtlijn 2002/96/EC Doe het toestel na afdanking niet bij het normale huisvuil, maar lever het in op een plaatselijk afvalinzamelpunt of bij een leverancier die ervoor zorgt dat het toestel op de juiste manier wordt verwerkt. Door de gescheiden inzameling van elektrische en elektronische apparaten worden mogelijke negatieve gevolgen voor het milieu en de gezondheid voorkomen en is het mogelijk dat de componenten worden hergebruikt resp. gerecycled, waardoor er veel energie en grondstoffen worden bespaard. Om de verplichting om het toestel volgens de voorschriften te verwijderen, duidelijk onder de aandacht te brengen, is hiernaast het symbool van een doorgekruiste afvalbak afgebeeld. SOLIS behoudt zich te allen tijde het recht voor van technische en optische wijzigingen en modificaties ter verbetering van haar producten. Bewaar de originele verpakking van dit product goed, zodat u deze voor een eventueel transport of verzending van het product gebruiken kan. SOLIS AG Solis-House • Glattbrugg-Zürich, Zwitserland Telefoon +41 44 874 64 54 • Fax +41 44 874 64 99 [email protected] • www.solis.ch • www.solis.com 70


