1
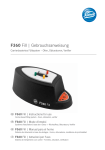
HEROfill ® Mode d’emploi Operation instructions Bedienungsanleitung 1 Notice d’utilisation pour les obturateurs HEROfill® et les HEROfill® Verifiers Classification L’obturateur HEROfill® est un dispositif médical, classe IIA, conformément à la directive sur les dispositifs médicaux 93/42/CE). L’usage des obturateurs HEROfill® est réservé aux praticiens de l’art dentaire. Avertissements généraux • Usage réservé aux praticiens de l’art dentaire. • Utiliser le produit uniquement pour les traitements canalaires des dents. • Ne jamais utiliser un produit déformé ou défectueux. • Le fabricant décline toute responsabilité pour les préjudices corporels et dommages matériels causés par une mauvaise utilisation et/ou un emploi inapproprié. Consulter la description de la méthode étape par étape (section 2) pour plus d’informations sur l’utilisation du produit. • Le produit doit être conservé dans son emballage d’origine. Avertissements – obturateurs HEROfill® • Après le cycle de chauffage, la gutta percha est très chaude. Eviter tout contact direct de l’obturateur HEROfill® avec la peau ou les muqueuses. L’obturateur HEROfill® doit être inséré directement dans le canal. • Il est toujours recommandé d’effectuer une radiographie de contrôle. Si la radiographie n’est pas satisfaisante, effectuer une nouvelle radiographie d’un angle différent. Si l’obturation n’est toujours pas documentée de manière satisfaisante, enlever l’obturateur HEROfill®. 1. Description Un obturateur HEROfill® est composé d’une âme en plastique recouverte de gutta percha thermoplastique. Il est disponible en différentes dimensions de 20 à 45 conformément à la norme ISO. L’obturateur HEROfill® correspond à la norme ISO pour les instruments canalaires. Un seul obturateur HEROfill® est suffisant pour l’obturation complète d’un canal. Le résultat doit toujours être une obturation canalaire parfaitement placée avec un scellement apical étanche. Le HEROfill® Verifier est composé d’une âme plastique non recouverte de gutta percha dont les dimensions sont identiques à celles de l’obturateur. Il permet de vérifier que le numéro de l’obturateur choisi convient. Il est possible de mesurer la longueur de travail grâce à des repères circulaires à 18, 19, 20, 21 et 22 mm. L’obturateur HEROfill® se compose de trois parties : 1. Un manche plastique dans lequel est insérée une tige métallique. Le manche plastique porte un code couleur en fonction du numéro de l’obturateur. La tige en acier inox de 9 mm de long est solidaire du manche plastique. La tige métallique est insérée à 6 mm dans l’âme plastique. Si la tige métallique est retirée de l’âme plastique, elle laisse un creux de 6 mm dans l’âme plastique. 2 2. Une couche extérieure de gutta percha thermoplastique naturelle La gutta percha est thermoplastique réversible. Cela signifie qu’elle devient molle et hautement adhésive lorsqu’elle est chauffée à des températures supérieures à environ 100°C. Inversement, elle se rigidifie en refroidissant. Un nouveau cycle de chauffe rendra la gutta percha de nouveau molle et hautement adhésive. 3. Une âme plastique avec une rondelle stop L’âme plastique conique permet de traiter les canaux courbes grâce à sa flexibilité. L’âme plastique de l’obturateur HEROfill® présente une légère conicité afin d’assurer le reflux adéquate de la gutta percha chaude. La longueur de l’âme plastique est de 24 mm. La partie coronaire de l’âme est creuse et reçoit la tige métallique. Une rondelle stop en caoutchouc permet le respect de la longueur de travail. L’âme plastique et la gutta percha sont radio-opaques. 2. La méthode HEROfill® étape par étape Après avoir idéalement utilisé One Shape® ou Revo-S™ pour la préparation canalaire et avant de réaliser une obturation selon la méthode HEROfill®, s’assurer que: • Le canal soit bien nettoyé et mis en forme, condition indispensable pour une obturation réussie. • Le canal soit sec. • La longueur de travail soit définie. A noter que l’âme plastique est suffisamment flexible pour passer dans les canaux courbes. Il est fortement recommandé d’utiliser des instruments rotatifs avec une conicité supérieure afin de créer un élargissement suffisant du tiers coronaire pour permettre le passage de l’obturateur. En cas d’utilisation de limes avec une conicité de 2%, il est conseillé de les combiner avec une méthode employant des forets de Gates, des limes de préparation de la cavité d’accès (ex. ENDOFLARE®) ou des limes similaires qui peuvent être utilisées pour améliorer les accès aux entrées canalaires dans la partie coronaire. L’emploi des HEROfill® Verifiers est recommandé. ETAPE 1 : Détermination de la longueur de travail et choix de l’obturateur HEROfill® La longueur de travail est mesurée jusqu’à l’apex (A1). Il est recommandé de mesurer la longueur de travail à partir du bord de l’entrée du canal. La longueur de travail peut être déterminée à l’aide de radiographies, d’une lime ou d’un localisateur d’apex. En général, il sera du même numéro que le dernier instrument utilisé à l’apex lors de la préparation. Astuce : Pour les canaux étroits et/ou calcifiés, sélectionner l’obturateur de diamètre juste inférieur au dernier instrument utilisé. Si vous n’utilisez pas d’instruments rotatifs avec une conicité de 4% ou plus, vous devez toujours vérifier les dimensions du canal à l’aide d’un HEROfill® Verifier après la préparation canalaire et avant d’insérer l’obturateur HEROfill®. Marquer la longueur de travail mesurée sur l’obturateur HEROfill®. Quand l’obturateur présente un ajustement légèrement libre dans le tiers apical, placer la rondelle stop en caoutchouc à la longueur de travail. La longueur de travail est ensuite transférée sur l’obturateur HEROfill®. 3 ETAPE 2 : Chauffage de l’obturateur HEROfill® Placer l’obturateur HEROfill® sélectionné dans le réchauffeur HEROfill® et démarrer l’appareil (A2, A3). Lire page 7 pour plus d’informations sur l’utilisation du réchauffeur HEROfill®. ETAPE 3 : Application d’un ciment de scellement Pendant que l’obturateur HEROfill® est en train de chauffer, mélanger un ciment de scellement résistant à la chaleur (généralement sans eugénol – par exemple MM-Seal™) avec un temps de prise élevé. S’assurer que le canal est complètement sec avant d’appliquer le ciment de scellement. Enduire les parois du canal d’une fine couche de ciment de scellement. Une couche trop épaisse n’est ni nécessaire ni souhaitable. Utiliser une pointe de papier (MM Paper Points recommandés) ou un HEROfill® Verifier afin d’appliquer une fine couche de ciment de scellement sur les parois du canal. Pour l’obturation de canaux multiples appliquer le ciment de scellement immédiatement dans tous les canaux. ETAPE 4 : Insertion de l’obturateur HEROfill® dans le canal Quand le réchauffeur indique que l’obturateur HEROfill® est prêt pour l’emploi, retirer l’obturateur HEROfill® du réchauffeur HEROfill®. Lire la notice d’utilisation correspondante pour plus d’informations sur le fonctionnement et l’utilisation du réchauffeur HEROfill®. Insérer l’obturateur HEROfill® immédiatement dans le canal jusqu’à la longueur de travail en exerçant une pression ferme et constante sur l’obturateur et sans tordre le manche (A4). ETAPE 5 : Radiographie de validation Valider le traitement canalaire à l’aide de radiographies. 4 ETAPE 6 : Elimination de l’âme centrale et de la gutta percha excédentaires Quand la gutta percha a pris (au bout de 2 - 3 minutes) retirer le manche en choisissant parmi deux méthodes (A5) : 1. Plier le manche et la tige métallique d’un côté afin de détacher l’excédent. 2. Stabiliser l’âme plastique avec un doigt et couper le manche et l’âme plastique excédentaire avec une petite fraise conique renversée. Veiller à éviter un mouvement vertical de l’âme afin de ne pas altérer le scellement apical. Couper l’excédent de gutta percha à l’aide d’un endo excavateur ou d’un instrument similaire. 3. Astuces techniques L’utilisation du système HEROfill® est très facile. Néanmoins, nous espérons que le retour d’utilisateurs expérimentés du système HEROfill® vous facilitera encore plus la première utilisation. Dents multi-radiculées Dans presque tous les cas, la quantité de gutta percha sur chaque obturateur HEROfill® sera suffisante. Lors de l’obturation du canal l’excédent de gutta percha remblayera jusqu’à la partie coronaire de la dent et risquera de recouvrir et bloquer l’entrée du canal adjacent. Pour éviter ce phénomène : • Obturer le canal le plus court en premier. • Placer des pointes de papier ou des HEROfill® Verifiers dans les autres canaux avant l’obturation afin de les empêcher d’être recouverts de gutta percha. Les retirer un à un pour réaliser les obturations. • Chaque obturateur possède la quantité nécessaire de gutta percha pour obturer même les canaux longs, larges ou avec résorption interne. Toutefois, cela peut être trop dans certains cas. Si un excès de gutta percha dans le canal paraît évident, utiliser une lame tranchante pour enlever de la gutta percha de l’extrémité coronaire de l’âme plastique avant de chauffer l’instrument. • Dans certains cas, notamment pour les dents multi-radiculées, il peut être utile de retirer le manche et la tige métallique de l’âme plastique afin de créer un espace qui facilitera l’insertion du prochain obturateur dans le second et le troisième canal. 5 Avant de réchauffer le ou les obturateurs et même avant de marquer la longueur de travail, s’assurer toujours que le manche/la tige métallique peut être séparé(e) de l’âme plastique. Pour cela, il faut tourner le manche/la tige métallique en le/la retirant de l’âme plastique. Réinsérer ensuite le manche/la tige métallique dans l’âme plastique. Marquer la longueur de travail et suivre le processus de l’étape 2 à l’étape 4 (section 2). Stabiliser l’âme plastique avec des précelles dentaires pendant que le manche/la tige métallique est retiré(e) par torsion. Tout matériel excédentaire sera enlevé suivant les méthodes décrites en ETAPE 5 (section 2). Emploi de ciment de scellement Comme pour toute autre technique d’obturation un ciment de scellement sera d’abord appliqué dans le canal lors de l’utilisation du système HEROfill®. Il y a toutefois une différence significative : l’utilisation du système HEROfill® exige l’application d’une très fine couche de ciment de scellement à l’aide d’un HEROfill® Verifier ou d’une pointe de papier. L’utilisation d’un condenseur n’est pas recommandée puisqu’elle a tendance à appliquer une quantité trop importante de ciment de scellement sur les parois canalaires. Penser à appliquer seulement une très fine couche de ciment de scellement. 4. Préparation d’un logement pour tenon radiculaire Un logement pour tenon radiculaire peut être créé en enlevant la partie coronaire de l’obturation. L’âme plastique percée sur 6 mm facilite grandement cette préparation comparée aux obturateurs avec une âme solide. Les fraises rondes lisses, de préférence un polissoir rond sans lames coupantes, sont à privilégier car ils ne coupent pas mais au contraire « ramollissent » la gutta percha et l’âme par friction. Il est possible d’utiliser des fraises coupantes. Dans ce cas, veiller à éviter toute perforation. Si vous utilisez un polissoir ou une fraise ronde: 1. Utiliser un contre-angle haute vitesse avec un système de refroidissement d’eau. 2. Commencer par le numéro de fraise ronde le plus élevé adapté à la taille de l’entrée canalaire, sans toucher les parois. 3. Placer la fraise au centre du creux de l’âme plastique en exerçant une légère pression. Appuyer sur la pédale du moteur par intermittence pour permettre à la fraise de retirer ou de ramollir l’âme plastique. 4. Lorsque le canal se rétrécit, passer à un diamètre de fraise inférieur afin de ne pas abîmer les parois. Continuer cette opération jusqu’à ce que la profondeur désirée soit atteinte. 5. Retraitement d’un canal obturé Il est relativement simple de retirer l’obturateur HEROfill® avant que la gutta percha ne refroidisse. Il suffit de saisir la partie plastique qui dépasse à l’aide de précelles et de la retirer. Une fois la gutta percha refroidie, ou pour une reprise de traitement lors du rendez-vous suivant, le retrait est à effectuer en utilisant de préférence un foret Peeso, Gates ou un instrument similaire: 6 1. Placer le foret entre la paroi canalaire et l’âme plastique de manière que le sens de rotation sera dans le sens inverse des aiguilles d’une montre. Utiliser l’instrument à vitesse basse (250-400 tr/mn) et tourner doucement autour de l’âme plastique jusqu’à ce qu’une résistance se fasse sentir. L’instrument s’implante entre la paroi canalaire et l’âme plastique. L’âme plastique sera ainsi extraite du canal. 2. Si nécessaire, une petite lime manuelle type H peut être insérée dans le canal le long de l’âme plastique en direction apicale. 3. Une fois l’âme plastique extraite du canal, la gutta percha peut être retirée à l’aide de méthodes conventionnelles. 6. Symboles Fabricant Lire la notice d’utilisation Usage unique Date de péremption Numéro de lot CE Classe I HEROfill® Verifiers CE 0459 Classe IIa Obturateurs HEROfill® 0459 Pour toute information complémentaire contacter votre distributeur local. 7 Réchauffeur HEROfill® Instructions d’utilisation Classification Le réchauffeur HEROfill® est un dispositif médical, classe I, conformément à la directive sur les dispositifs médicaux (93/42/CE). Le réchauffeur HEROfill® doit être utilisé uniquement pour actes dentaires d’obturation réalisés par des chirurgiens-dentistes et pour le réchauffage exclusif des obturateurs HEROfill®. Le réchauffeur HEROfill® comporte une chambre de réchauffage composée de 5 cartes de circuit imprimé avec des fils de cuivre. La chaleur est produite par l’alimentation des fils de cuivre. Le réchauffeur est alimenté par une arrivée électrique externe. Avertissement Eviter tout contact avec l’intérieur de la chambre de réchauffage avant que le réchauffeur n’ait complètement refroidi. Spécifications techniques ALIMENTATION ELECTRIQUE Alimentation d’entrée Alimentation de sortie SECURITE Arrêt automatique 100-240V AC, 50/60Hz 9V DC, 1,7A Le réchauffeur s’éteint automatiquement après 9 heures. Temps de chauffe Le temps de chauffe du réchauffeur HEROfill® est de 60 secondes. Le préchauffage est compris entre 3-4 minutes selon la température ambiante. 8 1. Démarrage du réchauffeur 1. Brancher le fil d’alimentation à la prise d’alimentation DC du réchauffeur et au secteur et mettre en marche l’appareil (B1). 2. Une lumière rouge s’allume A indiquant que le réchauffeur HEROfill® est en préchauffage (B2). La lumière devient verte avec un signal sonore lorsque le réchauffeur est prêt à être utilisé. A Note : Le réchauffeur HEROfill® peut rester allumé toute la journée. 2. Utilisation Quand le réchauffeur est prêt à être utilisé, placer jusqu’à 4 obturateurs HEROfill® dans les encoches marquées 1 à 4 sur le dessus de l’appareil (B3). Astuce : Placer l’obturateur HEROfill® qui sera utilisé en premier dans l’encoche #1, le second dans le #2 etc. – généralement, vous devriez commencer avec le plus petit obturateur HEROfill®. 9 1. Activer la minuterie en pressant sur le symbole ON (B4). 2. Une lumière rouge B s’allume pendant le cycle de chauffe. 3. Une fois prêt, l’indicateur devient vert et s’accompagne d’un signal sonore (B4). Laisser les obturateurs dans le réchauffeur jusqu’à ce que vous soyez prêt à les insérer (max. 15 min). 4. Il est possible d’éteindre le réchauffeur HEROfill® en maintenant appuyé le bouton ON pendant 2 secondes (B4). Le réchauffeur HEROfill® émet trois signaux sonores pour indiquer qu’il est éteint. Maintenir appuyé le bouton ON pendant 2 secondes afin de redémarrer l’appareil. ON B Astuce : Vous n’êtes pas obligé d’éteindre le réchauffeur après chaque traitement. L’appareil peut rester en veille toute la journée. Indication – lumière et son Temps Chauffe Son Préchauffage Prêt Signal sonore long Activation Signal sonore court Obturateur prêt Arrêt Signal sonore long 3 signaux sonores courts Démarrage Signal sonore long Arrêt automatique Signal sonore long 10 3. Nettoyage Débrancher le réchauffeur HEROfill®. Lorsque le réchauffeur a complètement refroidi, des résidus de gutta percha peuvent facilement être enlevés. Le haut du réchauffeur peut être enlevé pour le nettoyage en effectuant une rotation contre le sens des aiguilles d’une montre 1 jusqu’à ce que le haut soit défait et puisse être retiré 2 (B5). Le haut du réchauffeur peut être nettoyé en lave-vaisselle et/ou autoclave. Les résidus de gutta percha peuvent être enlevés du réchauffeur et des éléments céramiques en grattant délicatement le plastique à l’aide d’un instrument émoussé. Le corps du réchauffeur peut être nettoyé à l’aide d’un chiffon légèrement humide, d’une solution détergente standard et de produits de désinfection de surfaces. Emballage Contenu du Kit HEROfill® 1 réchauffeur HEROfill® 1 paquet de 6 obturateurs n° 25 2 paquets de 6 obturateurs n° 30 1 paquet de 6 Verifiers (n° 25 x 2 et n° 30 x 4) Kit HEROfill® – Références Connexion EU - REF. 20638001 N Connexion UK - REF. 20638002 N Obturateurs HEROfill® – Références Obturateur HEROfill® n° 20 - Réf. 20138501 N Obturateur HEROfill® n° 25 - Réf. 20138502 N Obturateur HEROfill® n° 30 - Réf. 20138503 N Obturateur HEROfill® n° 35 - Réf. 20138504 N Obturateur HEROfill® n° 40 - Réf. 20138505 N Obturateur HEROfill® n° 45 - Réf. 20138506 N Accessoires – Références HEROfill® Verifier n° 20 - Réf. 20139501 N HEROfill® Verifier n° 25 - Réf. 20139502 N HEROfill® Verifier n° 30 - Réf. 20139503 N HEROfill® Verifier n° 35 - Réf. 20139504 N HEROfill® Verifier n° 40 - Réf. 20139505 N HEROfill® Verifier n° 45 - Réf. 20139506 N 11 Garantie et suivi Pour toute révision ou réparation, renvoyer le réchauffeur soit chez le distributeur agréé soit directement chez MICRO-MEGA®. Votre produit MICRO-MEGA® est un dispositif médical de précision, fabriqué dans des conditions maxima de qualité et contrôle. Pour en assurer le suivi individualisé et la traçabilité due aux dispositifs médicaux, MICRO-MEGA® vous demande de lui retourner la carte de garantie dûment complétée, dans les 10 jours suivant votre achat. Ce retour conditionne la mise en place de la procédure de suivi de votre appareil qui permettra à MICRO-MEGA® de vous donner toute satisfaction dans le service que vous attendez et la prise en charge de la garantie. Vous pouvez aussi procéder à l’enregistrement de la garantie de votre appareil sur notre site internet : www.micro-mega.com. MICRO-MEGA® garantit pour une durée de 2 ans votre réchauffeur HEROfill® contre tout vice caché de production à l’exclusion des défauts dus : - à une mauvaise utilisation - à un entretien ou un emploi inappropriés, non conformes à nos recommandations et au mode d’emploi - à une détérioration accidentelle (chute, chocs, etc.) - à une tentative d’intervention ou de réparation par du personnel non agréé par MICROMEGA® - à une tentative de modification Gestion des déchets au sein de l’Union Européenne Selon la directive DEEE 2002/96/CE du 27 Janvier 2003. Gestion des déchets au sein de la CEE : 1. Les DEEE (Déchets d’équipements électriques et électroniques) ne doivent pas être jetés avec les déchets provenant des ménages. 2. Les DEEE doivent être collectés séparément. 3. L’équipement doit être retraité dans un centre de retraitement agréé. 4. L’équipement ne peut pas être réutilisé en fin de vie. 5. Les DEEE polluent l’environnement et sont nocifs pour la santé des êtres vivants. 12 Indications pour la stérilisation de la partie haute démontable AVERTISSEMENTS JETER TOUT PRODUIT ENDOMMAGE Limites de retraitement 250 cycles INSTRUCTIONS Retirer l’excès de salissure avec une lingette Lieu d’utilisation jetable/un tissu en papier. Préparation en vue de la décontamination Aucune exigence spécifique Nettoyage : automatisé Non recommandé Equipement : détergent, brosse, eau distillée ou déminéralisée 1. Rincer afin de retirer l’excès de salissure de la Nettoyage : manuel partie haute 2. Appliquer du détergent sur toutes les surfaces à l’aide de la brosse 3. Rincer à l’eau claire courante Désinfection Non recommandé Séchage Ne pas dépasser 134°C Maintenance, inspection et essais Jeter tout produit endommagé Emballage Emballer séparément seulement Autoclave à vide, 18 minutes minimum à 134°C, Stérilisation pression 2,2 bar. Ne pas dépasser 134°C. Stockage Aucune exigence particulière 4. Symboles Fabricant Lire la notice d’utilisation Numéro de série Directive relative aux dispositifs médicaux électriques, EN 60601-1:2006 Protection contre les chocs électriques, type B Directive sur les dispositifs médicaux 93/42/CEE Dispositif médical, classe I Directive sur les déchets d’équipements électriques et électroniques, Directive DEEE 2002/96/CE Veuillez retourner le produit dans un centre de recyclage approprié. 13 HEROfill® Obturator and Verifier Operation Instructions Classification The HEROfill® Obturator is a medical device; class IIA, in compliance with MDD (Medical Devices Directive 93/42 CE). The HEROfill® Obturator must only be used by dentists. General precautions • The product should only be used by dentists. • The product should only be used for root canal procedures in teeth. • A deformed or defective product should never be used, but should be discarded. • The manufacturer disclaims all responsibility and liability for injury or damage to persons or property caused by faulty and/or inappropriate use. For information on the correct use of the product, please see the step-by-step guide (section 2). • The product should be stored in the original packing. Warnings - HEROfill® Obturator • After heating, the Gutta Percha is hot. Avoid any direct contact between the HEROfill® Obturator and skin or mucous membranes. The HEROfill® Obturator should be inserted directly into the root canal. • It is always recommended to take a control x-ray. If the x-ray is not satisfactory, take another x-ray from a different angle. If the filling still can not be satisfactorily documented, remove the HEROfill® Obturator. 1. Description A HEROfill® Obturator is a carrier of plastic, which is coated with thermoplastic Gutta Percha. The sizes are 20 to 45 according to ISO standard. The HEROfill® Obturator sizes correspond to the ISO standards of root canal files. A single HEROfill® Obturator is all that is needed to obturate a root canal fully. The result should always be a perfectly placed root canal filling with a tight apical seal. The HEROfill® Verifier is an uncoated core that has exactly the same dimensions as the obturator core and is used to confirm that the size selected provides the proper fit. The shaft of the HEROfill® Verifier has working distance circular bands at 18, 19, 20, 21, and 22 mm. A HEROfill® Obturator consists of three parts: 1. Plastic handle with a metal insertion pin. The plastic handle is color-coded according to the size of the HEROfill® Obturator. The stainless steel insertion pin is 9 mm long, and is permanently attached to the plastic handle. The metal insertion pin is placed 6 mm down in the plastic carrier. When the metal insertion pin is removed it will leave a hollow part of 6 mm in the plastic carrier. 14 2. Outer layer of thermoplastic Natural Gutta Percha. The Gutta Percha is reversible thermoplastic. This means that it becomes soft and highly adhesive when heated to temperatures above approx. 100°C. When cooled, it returns to a firm, rigid state. Another heating will once again make the Gutta Percha soft and adhesive. 3. Plastic carrier with endo stop. The tapered plastic carrier is sufficiently flexible to negotiate curved canals. The HEROfill® Obturator plastic carrier is slightly tapered. This insures adequate back flow of the heated Gutta Percha. The length of the carrier is 24 mm. The coronal 6 mm of the carrier is hollow to accommodate the metal insertion pin. A rubber endo stop is provided to indicate the working distance measurement. The plastic carrier and Gutta Percha are radiopaque. 2. A step-by-step guide After having ideally used the One Shape® or Revo-S™ methods for the shaping and before using the HEROfill® Obturator, assure that you have achieved the following: • A properly cleaned and shaped canal – the key to any successful root canal filling. • A dry root canal. • An established working length. The plastic carrier is flexible enough to negotiate curved canals. It is highly advised that rotary files with a higher conicity are utilized to create a sufficient taper for the HEROfill® Obturator. When using files with a conicity of 2%, it is advised to combine them with a procedure using Gates Glidden Drills, orifice openers (ENDOFLARE® for example) or similar files which can be used to create a sufficient opening in the coronal part of the canal. The use of HEROfill® Verifiers is recommended. STEP 1: Determine the working length and choose the proper HEROfill® Obturator size The working length is measured all the way to the apex (A1). We recommend measuring the working length from the edge of the cusp. The working length may be determined by use of x-ray, file and electronic apex locator. Generally, the appropriate size HEROfill® Obturator will be the same size as the last file used at the apex of the canal. Tip: For very narrow and/or highly calcified canals, it may be useful to select one size smaller than the last file used at apex. If you do not use rotary files with a taper of 4% or more, you should always verify the size of the cleaned root canal with a HEROfill® Verifier before inserting the HEROfill® Obturator. Mark your working length on your HEROfill® Obturator. When the HEROfill® Verifier has a slightly loose fit in the apical third, the rubber stop is placed at the working length. Afterwards, the working length is transferred to the HEROfill® Obturator. 15 STEP 2: Heating of the HEROfill® Obturator Place the selected HEROfill® Obturator in the HEROfill® Oven and activate it (A2, A3). For more information on how to use the HEROfill® Oven, please consult page 19. STEP 3: Application of sealer While the HEROfill® Obturator is heating, mix any heat resistant sealer (usually a non-eugenol sealer – MM-Seal™ recommended) with long working time. Make sure that the root canal is completely dry before applying the sealer. Place a very thin coating of sealer on the wall of the canal. Too much the sealer is neither desirable nor necessary. Utilize a Paper Point (MM Paper Points recommended) or a HEROfill® Verifier to apply a thin layer of sealer on the canal walls. When obturating multiple canals, apply sealer in all canals at once. STEP 4: Insertion of the HEROfill® Obturator into the canal When the heater indicates that the HEROfill® Obturator is ready for use, the HEROfill® Obturator is removed from the HEROfill® Oven. For further information on how the HEROfill® Oven works, please consult the appropriate heater manual. Without twisting the handle, immediately insert the HEROfill® Obturator into the canal to the working distance using a firm and steady pressure (A4). STEP 5: Confirming radiograph Confirm your root canal treatment by taking radiographs. 16 STEP 6: Removal of excess central carrier and Gutta Percha When the Gutta Percha has hardened (after 2-3 min.) remove the handle in one of two ways (A5). 1. Lean the handle and metal insertion pin sharply to one side to break off the excess. 2. Stabilize the plastic carrier with a finger, and cut away the handle and excess plastic core with a small inverted cone bur. Be careful to prevent vertical movement of the carrier to minimize the chance of disturbing the apical seal. Trim away the extra Gutta Percha using an endo excavator or similar instrument. 3. Technique tips It is very easy to use the HEROfill® system. Feed-back from experienced HEROfill® system users, however, will hopefully make it even easier for you to get started. Obturating multi-rooted cases There will almost always be more than enough Gutta Percha on each HEROfill® Obturator. When obturating the canal, the excess Gutta Percha and sealer will backfill to the coronal part of the tooth, possibly blocking the adjacent opening. However, you can avoid this: • Obturate the shortest canal first. • Place Paper Points or HEROfill® Verifier in the other canals prior to obturation to prevent the following root canals in being blocked by Gutta Percha. Remove Paper Points or size HEROfill® Verifiers as each canal is obturated. • While there is sufficient Gutta Percha on each HEROfill® Obturator to fill even extremely long canals, wide canals or internally resorbed canals, it may be too much in some cases. If it is obvious that there will be an excess of Gutta Percha to fill the canal, use a sharp blade to trim some of the material from the coronal end of the central carrier prior to heating. • In some cases it can be beneficial to remove the handle/metal insertion pin from the actual plastic carrier, especially in multi-rooted teeth where the extra space will make it easier placing the following HEROfill® Obturators in the second and third canal. 17 Prior to heating of the HEROfill® Obturator(s) and prior to marking the working length, always assure that the handle/metal insertion pin can be separated from the plastic carrier. This is done by twisting the handle/metal insertion pin out of the plastic carrier. Re-insert the handle/metal insertion pin into the plastic carrier. Mark your working length and proceed to STEP 2 – STEP 4 (section 2). Stabilize the plastic carrier with a cotton plier while the handle/metal insertion pin is twisted out. Any excess material is removed as described in STEP 5 (section 2). Use of sealer As with any other root filling technique, when using the HEROfill® System, always apply sealer in the canal first. However, there is a significant difference when using HEROfill® System. Only apply a very small amount using a HEROfill® Verifier or a Paper Point. A root spiral should not be utilized when using HEROfill® Obturators as there is a tendency to add too much sealer to the canal. Remember; only apply a very thin layer of sealer on the canal walls. 4. Post space preparation Post space creation can be accomplished by removing the coronal portion of the obturation. Since 6 mm of the plastic core is hollow, this procedure should be easier compared to solid core obturators. Smooth round burs, preferably a ball burnisher with no cutting flutes, are the most effective since they do not cut, but instead “melt” the gutta percha and central core by friction. Cutting burs may be used, but care should be taken to prevent perforation. Using a round bur, or ball burnisher: 1. Use a high speed hand piece with water coolant. 2. Begin with the largest size round bur that will fit in the access opening of the canal without touching the walls. 3. Place the bur in the centre of the hollow core using a gentle, relaxed pressure. Intermittently pulse the foot controller to allow the bur to remove or melt the plastic core. 4. Change to smaller diameter burs as the canal tapers to prevent damage to the walls until the desired depth is reached. 5. Retreatment of an obturated root canal Removal of the HEROfill® Obturator is relatively simple prior to the Gutta Percha cooling. Simply grasp the excess carrier with cotton pliers and remove it. Once the Gutta Percha has cooled, or for retreatment at a later appointment, removal is easiest achieved by using a Peeso bur, Gates or similar: 1. Place the bur between the canal wall and the plastic carrier, so that the rotational direction will be counter clockwise. Use the instrument at very low speeds (250-400 rpm), and work slowly around the plastic carrier until you feel resistance. The instrument will grasp between the plastic carrier and the canal wall. The plastic carrier will be coiled out of the canal after a short time. 18 2. If necessary, a small Hedstrom hand file can be worked down apically along the plastic carrier. 3. When the plastic carrier has been pulled out of the canal, the Gutta Percha is removed by traditional means. 6. Labelling Manufacturer See instruction manual Single use Expiry date Lot number CE Class I HEROfill® Verifiers CE 0459 Class IIa HEROfill® Obturators 0459 Contact your local supplier for more information. 19 HEROfill® Oven Operation Instructions Classification The HEROfill® Oven is a medical device, class I, in compliance with MDD (Medical Devices Directive 93/42 CE). The heater must only be used in dental clinics by dental personnel, and only for heating of HEROfill® Obturator. The HEROfill® Oven has a heat chamber that consists of 5 printed circuit boards with cobber lanes. By applying power to the cobber lanes heat is generated. The oven is driven by an external power supply. Warning Do not touch the inside of the heat chamber before the oven is completely cooled off. Technical specifications POWER SUPPLY Input power Output power SAFETY Auto turn off 100-240V AC, 50/60Hz 9V DC, 1,7A The heater turns off automatically after 9 hours Heating times HEROfill® Obturator heating time is 60 seconds. Preheating of the heater takes 3-4 minutes depending of surrounding temperature. 20 1. Start using the heater 1. Connect the power supply to the DC inlet of the heater and the mains and switch on power (B1). 2. Indicator A emits a red light while the HEROfill® Oven preheats (B2). When the HEROfill® Oven is ready, the indicator emits a green light, and you will hear a beep. A Notice: The HEROfill® Oven can be left on the entire day. 2. Use When the heater is ready for use, up to four HEROfill® Obturators at a time may be placed in the appropriate slots. Place the HEROfill® Obturators in slots marked 1 to 4 (B3). Tip: Place the HEROfill® Obturator to be used first in slot #1, the second in #2 etc. - generally you should begin with the smallest size HEROfill® Obturator. 21 1. Activate the timer by pressing the ON icon (B4). 2. Indicator B lights red during the heating cycle. 3. When ready, the indicator changes to green and you will hear a beep (B4). Let the HEROfill® Obturator stay in the heater until you are ready to insert it (max. 15 min). 4. It is possible to turn off the HEROfill® Oven by holding down the ON button for 2 seconds (B4). The HEROfill® Oven beeps three times it indicate it is switched off. Hold down the ON button for 2 seconds to reactivate the heater. ON B Tip: You do not have to turn off the HEROfill® Oven after finished treatment, the HEROfill® Oven can be left on standby all day. Indication - light and sound 22 3. Cleaning Disconnect the HEROfill® Oven from the main. When the HEROfill® Oven has cooled completely, Gutta Percha residue may easily be removed. The top of the HEROfill® Oven may be removed for cleaning by rotating the top counter clockwise 1 until the top is loose and can be removed 2 (B5). The top may be washed in a dishwasher and/or autoclaved. Gutta Percha residue may be removed from the heat chamber and ceramic elements by the use of a blunt plastic instrument. The main part of the heater may be wiped with a slightly damp cloth, using standard cleaning solutions and surface disinfection products. Packaging Contents of the HEROfill® Kit 1 HEROfill® Oven 1 pack of 6 Obturators n° 25 2 packs of 6 Obturators n° 30 1 pack of 6 Verifiers (n° 25 x 2 and n° 30 x 4) HEROfill® Kit References EU Connection - REF. 20638001 N UK Connection - REF. 20638002 N HEROfill® Obturators References HEROfill® Obturator n°20 - Ref. 20138501 N HEROfill® Obturator n°25 - Ref. 20138502 N HEROfill® Obturator n°30 - Ref. 20138503 N HEROfill® Obturator n°35 - Ref. 20138504 N HEROfill® Obturator n°40 - Ref. 20138505 N HEROfill® Obturator n°45 - Ref. 20138506 N Accessories References HEROfill® Verifier n°20 - Ref. 20139501 N HEROfill® Verifier n°25 - Ref. 20139502 N HEROfill® Verifier n°30 - Ref. 20139503 N HEROfill® Verifier n°35 - Ref. 20139504 N HEROfill® Verifier n°40 - Ref. 20139505 N HEROfill® Verifier n°45 - Ref. 20139506 N 23 Service and repair Inspections and repairs may only be carried out by an approved dealer or by MICRO-MEGA®. Your MICRO-MEGA® product is an accurate medical device, produced under maximum quality and test conditions. To guarantee personal follow-up and traceability of its medical devices, MICROMEGA® would like you to return the guarantee card, duly filled in, within 10 days of your purchase. This return ensures that the procedure for after sales care of your instrument will be instigated so that MICRO-MEGA® can give you full satisfaction with the service your expect and manage your guarantee correctly. Your can also register the guarantee for your instrument on our website: www.micro-mega.com. MICRO-MEGA® guarantees your HEROfill® Oven for two years against any hidden manufacturing defect, excluding faults due to: - Improper use. - Inappropriate maintenance or application, not in accordance with our recommendations and instructions for use. - Accidental damage (fall, impact ….). - Attempted intervention or repair by personnel not approved by MICRO-MEGA®. - Attempted product modification. Waste handling within the EC In compliance with the WEEE directive/2002/96/EC, 27 January 2003. Waste disposal within the EEC: 6. WEEE (Waste of electrical and electronic equipment) cannot be disposed with normal household waste. 7. WEEE must be collected separately. 8. The 9. The equipment equipment has to cannot be be treated to reused an approved after its re-treatment lifetime has centre. ended. 10. WEEE pollutes the environment and thereby damages the health of living beings. 24 Sterilization guide for removable top part WARNINGS DISCHARGE DAMAGED PRODUCTS Limitations on reprocessing 250 cycles INSTRUCTIONS Remove excess soil with disposable cloth/paper Point of use tissue. Preparation for decontamination No specific requirements Cleaning: Automated Not recommended Equipment: Detergent, brush, distilled or demineralised water. 1. Rinse excess soil from cover Cleaning: Manual 2. Using brush, apply detergent solution to all surfaces 3. Rinse under clear running water Desinfection Not recommended Drying Do not exceed 134º C Maintenance, inspection and testing Discharge damaged products Packaging Only pack individually Vacuum autoclave, minimum 18 minutes at 134º C, Sterilization pressure 2.2 bar. Do not exceed 134º C. Storage No particular requirement 4. Labelling Manufacturer See instruction manual Serial number Medical Electrical Equipment Directive, EN 60601-1:2006 Electric shock protection, Type B Medical Devices Directive, MDD Directive93/42/EEC Medical device, class I Waste Electrical and Electronic Equipment Directive, WEEE Directive 2002/96/EC Please return the product for recycling 25 Bedienungsanleitung für HEROfill® Obturatoren und Verifiers Klassifizierung Der HEROfill® Obturator ist ein medizinisches Gerät der Klasse IIA und entspricht der Medizinproduktrichtlinie MDD (Medical Device Directive 93/42/EG). Der HEROfill® Obturator ist ausschließlich für den professionellen zahnmedizinischen Gebrauch bestimmt. Allgemeine Warnhinweise • Das Produkt ist ausschließlich für den professionellen zahnmedizinischen Gebrauch bestimmt. • Das Produkt sollte nur zur Behandlung von Wurzelkanälen in Zähnen verwendet werden. • Ein verformtes oder beschädigtes Produkt sollte niemals verwendet sondern umgehend entsorgt werden. • Der Hersteller lehnt jede Verantwortung und Haftung für Verletzungen oder Personen- und Sachschäden ab, die auf eine falsche und/oder unsachgemäße Benutzung zurückzuführen sind. Für Informationen zum korrekten Gebrauch des Produkts die Schritt-für-Schritt-Anleitung lesen (Abschnitt 2). • Das Produkt sollte originalverpackt gelagert werden. Warnhinweise - HEROfill® Obturator • Nach dem Erhitzen ist die Guttapercha heiß. Jeden direkten Kontakt des HEROfill® Obturators mit der Haut und den Schleimhäuten vermeiden. Der HEROfill® Obturator sollte direkt in den Wurzelkanal eingeführt werden. • Es wird stets empfohlen, ein Kontrollröntgenbild anzufertigen. Wenn die Röntgenaufnahme nicht zufriedenstellend ist, eine weitere Röntgenaufnahme aus einem anderen Winkel erstellen. Wenn die Füllung noch immer nicht zufriedenstellend belegt werden kann, den HEROfill® Obturator aus dem Kanal entfernen. 1. Beschreibung Ein HEROfill® Obturator ist ein mit thermoplastischer Guttapercha überzogener Kunststoffstift. Er ist in den Größen 20 bis 45 gemäß ISO-Standard erhältlich. Die Größen des HEROfill® Obturators entsprechen den ISO-Standards für Wurzelkanalfeilen. Zur kompletten Obturation eines Wurzelkanals ist nur ein einziger HEROfill® Obturator erforderlich. Das Ergebnis sollte immer eine perfekt platzierte Wurzelkanalfüllung mit einer dichten apikalen Versiegelung sein. Der HEROfill® Verifier ist ein unbeschichteter Stift mit denselben Abmessungen wie der Obturator. Er dient zur Überprüfung der ausgewählten Obturatorgröße. Der Schaft des Verifiers ist mit Markierungsringen für Arbeitstiefen von 18, 19, 20, 21 und 22 mm versehen. Ein HEROfill® Obturator besteht aus drei Teilen: 1. Kunststoffgriff mit einem Metallstift 26 Die Farbe des Kunststoffgriffs zeigt die Größe des HEROfill® Obturators an. Unlösbar mit dem Griff verbunden ist ein 9 mm langer Metallstift aus Edelstahl. Dieser Metallstift wird von einem 6 mm langen, teilweise hohlen Kunststoffstift umschlossen. Wenn der Metallstift entfernt wird, hinterlässt er einen 6 mm langen Hohlraum im Kunststoffstift. 2. Außenschicht aus thermoplastischer natürlicher Guttapercha Die Guttapercha ist reversibel thermoplastisch. Das bedeutet, dass sie bei einer Erhitzung auf über 100 °C weich und stark haftend wird. Bei Abkühlung wird sie wieder hart und fest. Eine weitere Erhitzung macht die Guttapercha erneut weich und stark haftend. 3. Kunststoffstift mit Stopper Der Kunststoffstift mit konischer Form ist biegsam genug, um sich gekrümmten Wurzelkanälen anzupassen. Der Kunststoffstift des HEROfill® Obturators hat eine geringe Konizität. Dies gewährleistet einen angemessenen Rückfluss der erhitzten Guttapercha. Der Stift ist 24 mm lang. Der koronale Teil misst 6 mm und ist hohl. Er enthält den Metallstift. Ein Gummistopper zeigt die Arbeitstiefe an. Der Kunststoffstift und die Guttapercha sind röntgendicht. 2. Schritt-für-Schritt-Anleitung Sich idealerweise nach Anwendung der One Shape®- oder Revo-S™-Methode zur Wurzelkanalaufbereitung und vor der Verwendung des HEROfill® Obturators vergewissern, dass folgende Voraussetzungen erfüllt sind: • Der Wurzelkanal ist korrekt gereinigt und geglättet – der Schlüssel zu jeder erfolgreichen Wurzelkanalfüllung. • Der Wurzelkanal ist trocken. • Die Arbeitslänge wurde festgestellt. Der Kunststoffstift ist biegsam genug, um sich gekrümmten Wurzelkanälen anzupassen. Es wird dringend empfohlen, rotierende Feilen mit einer größeren Konizität zu verwenden, um eine ausreichende Erweiterung für den HEROfill® Obturator zu erreichen. Wenn Feilen mit einer Konizität von 2 % benutzt werden, sollte dies in Kombination mit Gates-Glidden-Bohrern, Feilen zur Erweiterung des Kanaleingangs (z. B. ENDOFLARE®) oder ähnlichen Instrumenten erfolgen, um eine ausreichende Erweiterung des Kanaleingangs im Koronalbereich zu gewährleisten. Die Benutzung von HEROfill® Verifiers wird ebenfalls empfohlen. SCHRITT 1: Bestimmung der Arbeitslänge und Wahl der geeigneten HEROfill® Obturatorgröße Die Arbeitslänge wird bis zum Apex (A1) bestimmt. Wir empfehlen, die Arbeitslänge ab dem oberen Wurzelkanalrand zu messen. Die Arbeitslänge kann mithilfe einer Röntgenaufnahme, einer Feile oder eines elektronischen Apex-Lokalisators festgestellt werden. In der Regel entspricht die passende Größe des HEROfill® Obturators der Größe der letzten am Apex verwendeten Feile. Tipp: Bei sehr engen und/oder stark verkalkten Kanälen kann es angebracht sein, die Größe unter der zuletzt am Apex verwendeten Feilengröße zu wählen. Wenn keine rotierenden Feilen mit einer Konizität von 4 % oder mehr verwendet werden, sollte die Länge des gereinigten Wurzelkanals immer mit einem HEROfill® Verifier überprüft werden, bevor der HEROfill® Obturator eingeführt wird. 27 Die Arbeitslänge auf dem HEROfill® Obturator markieren. Wenn der HEROfill® Verifier im apikalen Drittel eine leicht lose Passform hat, wird der Gummistopper an der entsprechenden Arbeitslänge platziert. Anschließend wird die Arbeitslänge auf den HEROfill® Obturator übertragen. SCHRITT 2: Erhitzen des HEROfill® Obturators Den ausgewählten HEROfill® Obturator in den HEROfill® Ofen setzen und das Gerät starten (A2, A3). Nähere Informationen zum Gebrauch des HEROfill® Ofens auf Seite 31. SCHRITT 3: Füllpaste eingeben Die Erhitzungszeit des HEROfill® Obturators zum Mischen einer wärmebeständigen Füllpaste (in der Regel eugenolfrei – wir empfehlen MM-Seal™) mit langer Verarbeitungszeit nutzen. Sich vor dem Einbringen der Füllpaste vergewissern, dass der Wurzelkanal komplett trocken ist. Eine dünne Schicht der Füllpaste auf die Kanalwände auftragen. Zu viel Füllpaste ist weder notwendig noch wünschenswert. Eine Papierspitze (wir empfehlen MM Paper Points) oder einen HEROfill® Verifier benutzen, um eine dünne Schicht der Füllpaste auf die Kanalwände aufzutragen. Bei der Obturation mehrerer Kanäle die Füllpaste gleich in alle Kanäle einbringen. SCHRITT 4: Einführen des HEROfill® Obturators in den Wurzelkanal Wenn der Ofen anzeigt, dass der HEROfill® Obturator gebrauchsfertig ist, den HEROfill® Obturator aus dem HEROfill® Ofen nehmen. Für nähere Informationen zum Gebrauch des HEROfill® Ofens die entsprechende Bedienungsanleitung lesen. Den HEROfill® Obturator sofort unter kräftiger und gleichmäßiger Druckausübung bis zur Arbeitslänge in den Wurzelkanal einführen, ohne dabei den Griff zu drehen (A4). 28 SCHRITT 5: Kontrollröntgenaufnahme Durch Anfertigung von Röntgenaufnahmen das Ergebnis der Wurzelkanalbehandlung überprüfen. SCHRITT 6: Entfernen des überstehenden Metallstifts und der überschüssigen Guttapercha Wenn die Guttapercha hart ist (nach 2-3 Min.), den Griff unter Anwendung einer von zwei Methoden entfernen (A5): 1. Den Griff und den Metallstift scharf umbiegen und den überstehenden Teil abbrechen. 2. Den Kunststoffstift mit einem Finger festhalten und den Griff und den überstehenden Kunststoffstift mit einem kleinen umgekehrten Kegelbohrer abschneiden. Eine vertikale Bewegung des Kunststoffstifts vermeiden, um die apikale Versiegelung nicht zu beeinträchtigen. Überschüssige Guttapercha mit einem Endo-Exkavator oder einem ähnlichen Instrument entfernen. 3. Tipps zur Technik Die Verwendung des HEROfill®-Systems ist sehr einfach. Das Feedback erfahrener HEROfill®-Nutzer wird Ihnen den ersten Gebrauch hoffentlich noch leichter machen: Füllung mehrwurzeliger Zähne Jeder HEROfill® Obturator verfügt fast in jedem Fall über eine ausreichende Menge Guttapercha. Bei der Wurzelkanalfüllung können überschüssige Guttapercha und Füllpaste in den Koronalbereich des Zahns quellen und die angrenzende Wurzelkanalöffnung bedecken. Dies kann folgendermaßen vermieden werden: • Den kürzesten Kanal zuerst füllen. • Vor der Obturation Papierspitzen oder HEROfill® Verifier in die anderen Kanäle geben, damit die Kanaleingänge nicht von Guttapercha bedeckt werden. Die Papierspitzen und HEROfill® Verifiers unmittelbar vor der Füllung des betroffenen Kanals entfernen. • Jeder HEROfill® Obturator verfügt über eine ausreichende Menge Guttapercha, um lange, breite oder stark resorbierende Wurzelkanäle zu füllen. Die Guttapercha-Menge kann jedoch in einigen Fällen zu groß sein. Wenn schon im Voraus offensichtlich ist, dass die Guttapercha-Menge für den zu 29 obturierenden Kanal zu groß ist, am besten bereits vor dem Erhitzen am koronalen Ende des zentralen Kunststoffstifts mit einem scharfen Messer etwas Material abschneiden. • In gewissen Fällen und insbesondere bei mehrwurzeligen Zähnen kann es hilfreich sein, den Griff/Metallstift vom Kunststoffstift zu entfernen, um mehr Platz für die Einführung der folgenden HEROfill® Obturatoren in den zweiten und dritten Kanal zu schaffen. Sich vor dem Erhitzen des HEROfill® Obturators und der Markierung der Arbeitslänge immer vergewissern, dass der Griff/Metallstift durch Herausdrehen vom Kunststoffstift entfernt werden kann. Nach diesem Test den Griff/Metallstift wieder in den Kunststoffstift einführen. Die Arbeitslänge markieren und mit den SCHRITTEN 2 - 4 fortfahren (Abschnitt 2). Den Kunststoffstift mit einer Pinzette festhalten und den Griff/Metallstift herausdrehen. Überschüssiges Material wird, wie in SCHRITT 5 (Abschnitt 2) beschrieben, entfernt. Verwendung von Füllpaste Wie bei jeder anderen Wurzelkanalfüllmethode wird auch mit dem HEROfill®-System immer zuerst Füllpaste in den Wurzelkanal eingebracht. Jedoch besteht ein bedeutender Unterschied bei der Verwendung des HEROfill® Systems: Es darf nur eine kleine Menge Füllpaste mit einem HEROfill® Verifier oder einer Papierspitze in den Kanal gegeben werden. Es sollte kein Kondensor in Verbindung mit den HEROfill® Obturatoren verwendet werden, da diese dazu neigen, zu viel Füllpaste in den Kanal einzubringen. 4. Schaffung eines Einsetzplatzes für einen Wurzelstift Der Einsetzplatz für einen Wurzelstift kann durch Entfernen des koronalen Endes des Obturators geschaffen werden. Da 6 mm des Kunststoffstifts hohl sind, ist dies meist einfacher als bei Obturatoren mit festem Stift. Am effektivsten wird hierbei mit einem glatten, runden Bohrer gearbeitet, vorzugsweise einem Kugelpolierer ohne Schleifriffeln, da solche Werkzeuge die Guttapercha und den Kunststoffstift nicht abschleifen, sondern durch Reibungshitze „wegschmelzen”. Es können zwar auch schleifende Bohrer verwendet werden, dabei muss jedoch darauf geachtet werden, dass keine feinen Löcher im Material entstehen. Verwendung eines runden Bohrers oder Kugelpolierers: 1. Ein Handstück mit hoher Drehzahl und Wasserkühlung benutzen. 2. Mit dem größten runden Bohrer beginnen, der noch in die Öffnung des Kanals passt, ohne dessen Wand zu berühren. 3. Den Bohrer mit leichtem Druck in der Mitte des hohlen Kunststoffstifts platzieren. Den Fußschalter mehrfach in kurzen Abständen betätigen, damit der Bohrer den Kunststoffstift entfernen oder schmelzen kann. 4. Mit einem enger werdenden Kanal zu dünneren Bohrern wechseln, um eine Beschädigung der Wände zu vermeiden, und sich bis zur gewünschten Tiefe vorarbeiten. 5. Endodontische Revision eines gefüllten Wurzelkanals Der HEROfill® Obturator lässt sich vor der Abkühlung der Guttapercha relativ leicht entfernen. Dazu einfach den überstehenden Stift mit einer Pinzette ergreifen und entfernen. 30 Sobald die Guttapercha abgekühlt ist oder zwecks einer endodontischen Revision zu einem späteren Zeitpunkt, kann die Guttapercha am einfachsten mithilfe eines Peeso-Bohrers, eines Gates-GliddenBohrers oder einem ähnlichen Instrument entfernt werden: 1. Den Bohrer zwischen der Wurzelkanalwand und dem Kunststoffstift platzieren, sodass der Bohrer gegen den Uhrzeigersinn rotiert. Das Instrument bei sehr niedrigen Geschwindigkeiten (250-400 U/min) benutzen und langsam um den Kunststoffstift herumarbeiten, bis ein Widerstand zu spüren ist. Das Instrument greift zwischen den Kunststoffstift und die Kanalwand. Der Kunststoffstift wird schon nach kurzer Zeit aus dem Kanal gewunden. 2. Bei Bedarf kann eine kleine Hedström-Feile entlang des Kunststoffstifts in Richtung Apex eingeführt werden. 3. Sobald der Kunststoffstift aus dem Kanal gezogen wurde, kann die Guttapercha mit traditionellen Mitteln aus dem Wurzelkanal entfernt werden. 6. Symbole Hersteller Bedienungsanleitung lesen Einmalgebrauch Verfallsdatum Chargennummer CE Klasse I HEROfill® Verifiers CE 0459 Klasse IIa HEROfill® Obturatoren 0459 Für weitere Informationen kontaktieren Sie bitte Ihren Händler vor Ort. 31 HEROfill® Ofen Bedienungsanleitung Klassifizierung Der HEROfill® Ofen ist ein medizinisches Gerät der Klasse I gemäß der Medizinproduktrichtlinie MDD (Medical Device Directive 93/42/EG). Der Erhitzer darf nur von Fachkräften in Zahnkliniken zur Erhitzung von HEROfill® Obturatoren verwendet werden. Der HEROfill® Ofen verfügt über eine Heizkammer, die aus 5 gedruckten Leiterplatten mit Kupferdrähten besteht. Durch Spannungsversorgung der Kupferdrähte wird Wärme erzeugt. Der Ofen wird von einer externen Stromversorgung betrieben. Warnhinweis Nicht das Innere der Heizkammer berühren, bevor der Ofen nicht vollständig abgekühlt ist. Technische Daten STROMVERSORGUNG Eingangsleistung Ausgangsleistung SICHERHEIT Automatische Abschaltfunktion 100-240V AC, 50/60Hz 9V DC, 1,7A Der Erhitzer schaltet sich nach 9 Stunden automatisch ab. Erhitzungszeiten Die Erhitzungszeit für HEROfill® Obturatoren beträgt 60 Sekunden. Je nach Umgebungstemperatur dauert die Vorerhitzung 3 - 4 Minuten. 32 1. Vor Benutzung des Erhitzers 1. Schließen Sie das Netzteil an den DC-Eingang des Erhitzers und an das Stromnetz an und schalten Sie das Gerät ein (B1). 2. Die Anzeige A leuchtet während der Vorerhitzungszeit des HEROfill® Ofens rot auf (B2). Wenn der HEROfill® Ofen betriebsbereit ist, leuchtet die Anzeige grün auf, und der Ofen gibt ein akustisches Signal ab. A Anmerkung: Der HEROfill® Ofen kann den ganzen Tag lang eingeschaltet bleiben. 2. Verwendung Wenn der Ofen betriebsbereit ist, können bis zu vier HEROfill® Obturatoren gleichzeitig in die dafür vorgesehenen Schlitze gesteckt werden. Die HEROfill® Obturatoren in die mit den Zahlen 1 bis 4 gekennzeichneten Schlitze geben (B3). Tipp: Den Obturator, der als erster verwendet werden soll, im Schlitz Nr. 1 platzieren, den zweiten im Schlitz Nr. 2 usw. – Generell sollte mit dem kleinsten HEROfill® Obturator begonnen werden. 33 1. Den Timer durch einen Druck auf das ON-Icon aktivieren (B4). 2. Während des Erhitzungsprozesses leuchtet die Anzeige B rot auf. 3. Ist die Verarbeitungstemperatur erreicht, leuchtet die Anzeige grün auf, und ein akustisches Signal ertönt (B4). Den HEROfill® Obturator erst unmittelbar vor dem Einsetzen in den Wurzelkanal aus dem Erhitzer nehmen (maximal 15 Minuten nach Ende der Erhitzungszeit). 4. Durch eine 2 Sekunden lange Betätigung der ON-Taste kann der HEROfill® Ofen ausgeschaltet werden (B4). Ein dreimaliges akustisches Signal zeigt an, dass der HEROfill® Ofen ausgeschaltet ist. Zum erneuten Einschalten des Erhitzers die ON-Taste 2 Sekunden lang betätigen. ON B Tipp: Nach Beendigung der Behandlung muss der HEROfill® Ofen nicht ausgeschaltet werden. Das Gerät kann den ganzen Tag lang im Standby-Modus bleiben. 34 Ton- und Leuchtsignale Zeit Wärme Tonsignal Vorerhitzung Bereit Langes Tonsignal Aktivierung Kurzes Tonsignal Obturator bereit Langes Tonsignal Abschalten 3 x kurzes Tonsignal Einschalten Langes Tonsignal Automatisches Abschalten Langes Tonsignal 3. Reinigung Den HEROfill® Ofen vom Stromnetz trennen. Wenn der HEROfill® Ofen vollständig abgekühlt ist, können Guttapercha-Reste leicht entfernt werden. Die Abdeckung des HEROfill® Ofens kann zur Reinigung durch Drehen gegen den Uhrzeigersinn 1 abgenommen werden 2 (B5). Die Abdeckung kann in einer Spülmaschine und/oder in einem Autoklaven gereinigt werden. GuttaperchaReste mithilfe eines stumpfen Instruments aus Kunststoff aus der Heizkammer und von den Keramikelementen entfernen. Die Gehäuseoberfläche des Geräts mit einem leicht feuchten Tuch und einem Reinigungs- bzw. Oberflächendesinfektionsmittel säubern. Lieferumfang Inhalt des HEROfill® Kits 1 HEROfill® Ofen 1 Packung mit 6 Obturatoren Nr. 25 2 Packungen mit 6 Obturatoren Nr. 30 1 Packung mit 6 Verifiers (Nr. 25 x 2 und Nr. 30 x 4) 35 HEROfill® Kit – Referenzen EU-Stecker - REF. 20638001 N UK-Stecker - REF. 20638002 N HEROfill® Obturatoren – Referenzen HEROfill® Obturator Nr. 20 - Ref. 20138501 N HEROfill® Obturator Nr. 25 - Ref. 20138502 N HEROfill® Obturator Nr. 30 - Ref. 20138503 N HEROfill® Obturator Nr. 35 - Ref. 20138504 N HEROfill® Obturator Nr. 40 - Ref. 20138505 N HEROfill® Obturator Nr. 45 - Ref. 20138506 N Zubehör – Referenzen HEROfill® Verifier Nr. 20 - Ref. 20139501 N HEROfill® Verifier Nr. 25 - Ref. 20139502 N HEROfill® Verifier Nr. 30 - Ref. 20139503 N HEROfill® Verifier Nr. 35 - Ref. 20139504 N HEROfill® Verifier Nr. 40 - Ref. 20139505 N HEROfill® Verifier Nr. 45 - Ref. 20139506 N Garantie und Service nach dem Kauf Inspektionen und Reparaturen sollten ausschließlich bei einem autorisierten Händler oder vom Hersteller (MICRO-MEGA®) durchgeführt werden. Ihr MICRO-MEGA®-Produkt ist ein medizinisches Präzisionsgerät, das unter höchsten Qualitäts- und Testbedingungen hergestellt wurde. Um die persönliche Nacherfassung und die Rückführbarkeit seiner medizinischen Geräte zu gewährleisten, empfiehlt MICRO-MEGA® Ihnen, die Garantiekarte innerhalb von 10 Tagen nach Erwerb ausgefüllt zurückzusenden. Mit dieser Rücksendung sichern Sie sich Kundendienstleistungen für Ihr Produkt und ermöglichen es MICRO-MEGA®, Ihre Serviceansprüche zu Ihrer vollen Zufriedenheit zu erfüllen und Ihre Garantie korrekt zu verwalten. Sie können die Garantie für Ihr Produkt auch auf unserer Webseite anmelden unter: www.micromega.com. MICRO-MEGA® gewährt zwei Jahre Garantie auf Ihren HEROfill® Ofen auf versteckte Herstellungsfehler. Ausgeschlossen sind Fehler, die zurückzuführen sind auf: - Unsachgemäßen Gebrauch - Unsachgemäße Wartung oder Anwendung, die die Gebrauchsempfehlungen und anleitungen missachtet - Unfallschäden (durch Fallenlassen, Stöße usw.) - Eingriffs- bzw. Reparaturversuche durch Personen, die nicht von MICRO-MEGA® befugt sind - Versuchte Abänderungen des Produkts Entsorgung von Elektro- und Elektronik-Altgeräten innerhalb der EU Gemäß der WEEE-Richtlinie (Waste of Electrical and Electronic Equipment; deutsch: Elektro- und Elektronikgeräte-Abfall) 2002/96/EG vom 27. Januar 2003. 36 Entsorgung von Elektro- und Elektronik-Altgeräten innerhalb der EU: 11. Elektro- und Elektronik-Altgeräte dürfen nicht mit dem normalen Haushaltsmüll entsorgt werden. 12. Elektro- und Elektronik-Altgeräte müssen separat gesammelt werden. 13. Das Gerät muss einem anerkannten Entsorgungsbetrieb übergeben werden. 14. Das Gerät kann nach Ablauf seiner Lebensdauer nicht wiederverwendet werden. 15. Elektro- und Elektronik-Altgeräte verschmutzen die Umwelt und schädigen so die Gesundheit von Lebewesen. Leitfaden für die Sterilisation des abnehmbaren Oberteils WARNHINWEISE BESCHÄDIGTE PRODUKTE ENTSORGEN Einschränkungen der Wiederaufbereitung 250 Zyklen ANWEISUNGEN Übermäßigen Schmutz mit einem Verwendungsort Einmaltuch/Papiertuch entfernen. Vorbereitung für die Dekontamination Keine spezifischen Anforderungen Reinigung: automatisiert Nicht empfohlen Ausrüstung: Reinigungsmittel, Bürste, destilliertes oder demineralisiertes Wasser 1. Übermäßigen Schmutz von der Abdeckung Reinigung: manuell abspülen 2. Mit der Bürste Reinigungslösung auf alle Oberflächen auftragen 3. Unter klarem laufendem Wasser abspülen Desinfektion Nicht empfohlen Trocknung Eine Temperatur von 134 °C nicht überschreiten Wartung, Inspektion und Tests Beschädigte Produkte entsorgen Verpackung Nur einzeln verpacken Vakuum-Autoklav, mindestens 18 Minuten bei 134 Sterilisation °C, Druck 2,2 bar. Eine Temperatur von 134 °C nicht überschreiten. Lagerung Keine besonderen Anforderungen 37 4. Symbole Hersteller Bedienungsanleitung lesen Seriennummer Richtlinie für medizinische elektrische Geräte, EN 60601-1:2006 Schutz vor elektrischem Schlag, Typ B Medizinproduktrichtlinie, MDD-Richtlinie 93/42/EWG Medizinisches Gerät, Klasse I WEEE-Richtlinie (Waste of Electrical and Electronic Equipment; deutsch: Elektro- und Elektronikgeräte-Abfall) 2002/96/EG Bitte geben Sie das Produkt zwecks Recycling bei einer anerkannten Entsorgungsstelle ab. 38 39 www.micro-mega.com MICRO-MEGA® Instruments de chirurgie dentaire Dental instruments Zahnärztlichen Instrumenten 5-12, rue du Tunnel 25006 Besançon Cedex France Tel.: +33 (0)3 81 54 42 43 Fax: +33 (0)3 81 54 42 30 [email protected] Année apposition marquage CE : 2000 Year of CE-marking: 2000 CE-Kennzeichnung: 2000 Ref. 60300573-C 07/14 40