1
Zitruspresse orange
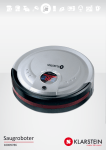
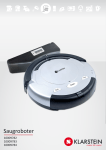
Saugroboter
10008166
10008167
10009785
10008168
Sehr geehrter Kunde,
zunächst möchten wir Ihnen zum Erwerb Ihres Gerätes gratulieren.
Bitte lesen Sie die folgenden Anschluss- und Anwendungshinweise sorgfältig durch und befolgen Sie
diese um möglichen technischen Schäden vorzubeugen.
Anwendungsbereiche:
Dieses Gerät ist zur Reinigung vom eigenen Zuhause, Hotelzimmern und kleinen Büros geeignet. Es
können kurzflorige Teppiche, Holzfußböden, Hartböden und Fliesen gereinigt werden.
Sicherheitshinweise
Bitte lesen und verstehen Sie alle Warnungen und Anweisungen, die in dieser Anleitung aufgeführt
sind. Bewahren Sie die Anleitung auf. Das Gerät wurde nach den aktuellen Sicherheitsstandards entwickelt und produziert.
Stromversorgung: Das Gerät darf
nur mit der passenden Netzspannung betrieben werden.
Halten Sie das Gerät und das
Netzkabel fern von Wasser.
Meiden Sie direktes Sonnenlicht und Hitze.
Öffnen Sie nie das Gehäuse. Es
dürfen keine metalernen Fremdkörper in das Gerät gelangen.
Schützen Sie das Netzkabel.
Vermeiden Sie hohen Druck und
treten Sie nicht darauf. Ziehen
oder knicken Sie es nicht.
Ziehen Sie bei längerer Nichtbenutzung den Netzstecker aus
der Steckdose.
Lieferumfang
Das Gerät verfügt über einen Ein/Aus-Schalter. Wenn Sie das Gerät
einschalten, befindet es sich im Standby-Modus und erwartet die
Befehle mittels Fernbedienung oder Bedienfeld.
2
Geräteübersicht
Oberteil des Hauptgerätes
Unterteil des Hauptgerätes
Ersetzen der Batterien/Hauptgerät
Ersetzen Sie die Batterien wie auf dem
Bild zu sehen. Beachten Sie dabei die
richtige Polung.
3
Ersetzen der Batterien/Wandabstandshalter
Ersetzen Sie die Batterien wie auf dem Bild zu
sehen. Beachten Sie dabei die richtige Polung.
Ersetzen der Batterien/Fernbedienung
Ersetzen Sie die Batterien wie auf dem Bild zu
sehen. Beachten Sie dabei die richtige Polung.
Bedienung
Das Gerät verfügt über einen Ein/Aus-Schalter. Wenn Sie das Gerät einschalten, befindet es sich im
Standby-Modus und erwartet die Befehle mittels Fernbedienung oder Bedienfeld.
1. AUTO-Taste (automatische Reinigung)
Drücken Sie diese Taste, um den automatischen Reinigungsmodus zu aktivieren/deaktivieren.
Sollten Sie diesen Modus gewählt haben, säubert der Roboter automatisch eine Fläche, wenn die
Leitung des Akkus stark nachgelassen hat, sucht das Gerät selbstständig die Ladestation auf.
2. SPOT-Taste (Punktreinigung)
In diesem Modus säubert das Gerät intensiv eine Fläche von ca. 1m² spiralförmig (90cm Durchmesser) 2-3 Minuten. Dieser Modus ist geeignet für starke Bodenverschmutzungen. Wenn die Leitung
des Akkus stark nachgelassen hat, sucht das Gerät selbstständig die Ladestation auf.
3. CHARGE-Taste
Drücken Sie diese Taste, damit der Roboter automatisch die Ladestation aufsucht.
Manuelle Aufladung
Sie können das Netzteil oder die Dockingstation zum Laden des Saugroboters verwenden. Verbinden
Sie das Gerät über den Netzanschluss mit dem Netzteil und einer geeigneten Steckdose.
Wenn Sie den Roboter über die Dockingstation aufladen möchten, schließen Sie zuerst die Station
an das Stromnetz an, platzieren Sie den Saugroboter auf der Ladestation und stellen Sie sicher, dass
der Kontakt der Elektroden hergestellt ist.
Während des Ladens blinkt die LED-Anzeige, sobald das Blinken aufhört, ist das Gerät geladen.
4
Automatische Aufladung
Ist der Batteriestand niedrig, vernehmen Sie ein Piepsen und der Roboter kehrt automatisch zur
Ladestation zurück.
Drücken Sie während des Betriebes die Taste „CHARGE“ auf dem Gerät selbst oder auf der Fernbedienung, kehrt der Roboter ebenfalls zur Ladestation zurück.
Fernbedienung
Anmerkung:
In einigen Fällen muss Fernbedienung mit dem Hauptgerät synchronisiert werden. Stellen Sie sicher
das Beide Geräte aufgeladen sind und befolgen Sie die nächsten Schritte:
A. Schalten Sie den Saugroboter ab.
B. Drücken und halten Sie die „OK“-Taste auf der Fernbedienung;
C. Schalten Sie den Saugroboter an.
D. Nachdem der Saugroboter zwei oder drei Mal gepiepst hat, lassen Sie die „OK“-Taste los.
E. Damit ist die Synchronisierung abgeschlossen.
F. Sollten Sie kein Piepsen hören, wiederholen Sie bitte den Vorgang.
Fernbedienung Funktionen
SPEED:
Mit Drücken dieser Taste wählen Sie zwischen zwei Geschwindigkeiten.
TIME:
Mit dieser Taste stellen Sie die aktuelle Uhrzeit und den aktuellen Wochentag ein. Nachdem Sie die
Taste gedrückt haben, stellen Sie mit Hilfe der Pfeiltasten die gewünschten Parameter und Werte ein.
Durch erneutes Drücken der „TIME“-Taste bestätigen Sie Ihre Eingaben. Drücken Sie die An/AusTaste , um die Eingabe abzubrechen.
5
SET:
Reinigungszeitpunkte erstellen Sie mit Hilfe dieser Taste. Nachdem Sie die Taste gedrückt haben,
stellen Sie mit Hilfe der Pfeiltasten die gewünschten Parameter und Werte ein. Zuerst die Wochentage und anschließend die Uhrzeit. Bei einem gewählten Wochentag(1-7) erscheint unter der Zahl ein
Strich
Durch erneutes Drücken der „SET“-Taste bestätigen Sie Ihre Eingaben. Drücken Sie die An/Aus-Taste ,
um die Eingabe abzubrechen.
Sie können während der Eingabe der Wochentage gleichzeitig alle Tage (1-7) auswählen/abbrechen
durch Drücken der „ALL“-Taste.
FULL GO:
Ist diese Funktion eingeschaltet beginnt der Roboter mit der Reinigung sobald seine Akkus aufgeladen sind.
Drücken Sie „SET“ und anschließend die Taste „STOP“, auf dem Display erschient
mit einem
blinkenden „F“. Drücken Sie die „SET“, damit das Blinken aufhört. Die „FULL GO“ Funktion ist damit
aktiviert.
Um diese Funktion abzuschalten drücken Sie „SET“ danach „STOP“ und anschließend wieder „SET“.
Anmerkung:
Ist die „FULL GO“ -Funktion aktiv sind die eingestellten Reinigungspunkte inaktiv.
Abstandhalter
Anmerkung:
Der Abstandhalter muss mit dem Hauptgerät synchronisiert werden. Stellen Sie sicher das Beide
Geräte aufgeladen sind und befolgen Sie die nächsten Schritte:
A. Schalten Sie den Saugroboter ab und den Abstandshalter an.
B. Drücken und halten Sie die „Synchronisation“-Taste auf dem Abstandshalter;
C. Schalten Sie den Saugroboter an.
D. Nachdem der Saugroboter zwei oder drei Mal gepiepst hat, lassen Sie die Taste los.
E. Damit ist die Synchronisierung abgeschlossen.
F. Sollten Sie kein Piepsen hören, wiederholen Sie bitte den Vorgang.
6
Ladestation
Anmerkung:
Die Ladestation muss mit dem Hauptgerät synchronisiert werden. Stellen Sie sicher das Beide Geräte
aufgeladen/angeschlossen sind und befolgen Sie die nächsten Schritte:
A. Schalten Sie den Saugroboter ab.
B. Drücken und halten Sie die „Synchronisation“-Taste auf der Ladestation;
C. Schalten Sie den Saugroboter an.
D. Nachdem der Saugroboter zwei oder drei Mal gepiepst hat, lassen Sie die Taste los.
E. Damit ist die Synchronisierung abgeschlossen.
F. Sollten Sie kein Piepsen hören, wiederholen Sie bitte den Vorgang.
Anschließen der Ladestation
1. Installieren Sie die Dockingstation auf dem flachen Boden und mit der
Rückseite der Station an einer Wand.
2. Bitte stellen Sie keine Hindernisse zu den Seiten im Abstand von 0,5 m
und nach vorn im Abstand vom 3 m auf.
3. Stellen Sie sicher, dass die Infrarotsensoren frei von Staub sind. Der
Saugroboter kann die Dockingstation nicht finden, wenn das Signal
versperrt wird.
4. Ist die Ladestation angeschlossen, leuchten die LEDs. Wenn Sie die
Beleuchtung abschalten wollen, drücken Sie dafür die Taste „ALL“ auf
der Fernbedienung.
Einsetzen und Entnehmen des Staubbehälters
Schematische Darstellung:
Drücken Sie den Knopf auf dem Staubbehälter und ziehen Sie diesen raus.
7
Säubern des Staubbehälters
Schematische Darstellung:
Öffnen Sie den Behälter (Abb.1) und befreien Sie ihn vom groben Schmutz. Reinigen ihn anschließend mit dem beiliegenden Pinsel (Abb. 2-3).
Ersetzten und Reinigen der Filter
Schematische Darstellung:
Drücken Sie den Knopf (Abb.1), um den Lüfter rauszunehmen. Öffnen Sie die Filterabdeckung und
entnehmen Sie den Filter. Reinigen Sie ihn und setzen Sie den Filter wieder ein.
Einsetzen und Entnehmen der Bürsten
Schieben Sie den Verschlussriegel nach vorn und öffnen Sie
die Abdeckung. Entnehmen Sie die Bürsten.
Setzen Sie nach der Reinigung alle Bürsten wieder ein und
schließen Sie dann die Abdeckung.
8
Fehlerbehebung
Der Saugroboter funktioniert nicht oder reinigt schlecht.
1. Schalten Sie das Gerät ein.
2. Kontrollieren Sie den Staubbehälter, Filter, die Seitenbürsten und die Schmutzaufnahme auf
Verschmutzungen.
3. Kontrollieren Sie den Ladezustand der Batterien.
Die Fernbedienung funktioniert nicht.
1. Kontrollieren Sie die Batterien der Fernbedienung.
2. Kontrollieren Sie die Batterien des Saugroboters.
3. Kontrollieren Sie den eingegebenen Code mit dem auf dem Hauptgerät.
4. Vergewissern Sie sich, dass Sie sich in der Sendereichweite der Fernbedienung befinden.
Der Saugroboter lädt nicht automatisch.
1. Kontrollieren Sie, ob das Netzteil angeschlossen ist und die LED der Ladestation leuchtet.
2. Kontrollieren Sie, ob die Batterien eventuell zu schwach sind. Wenn ja laden Sie das Geréit direkt.
3. Der Weg zur Ladestation muss frei sein.
4. Benutzen Sie die Fernbedienung. um den Saugroboter zur Ladestation zu führen.
Erhöhter Lärmpegel während der Reinigung
1. Reinigen Sie den Staubbehfilter und Filter.
2. Kontrollieren Sie Bürsten und Seitenbürsten auf Verschmutzungen.
3. Falls die Geräusche immer noch vorhanden sind, wenden Sie sich an den Verkäufer.
Das Gerät hält an und klingelt unregelmäßig.
1. Kontrollieren Sie, ob die eingestellte Reinigungszeit vorbei ist.
2. Kontrollieren Sie das Display, ob dort Fehlercodes angezeigt werden.(Erklärung siehe unten)
Das Gerät fährt nur rückwärts.
1. Vermeiden Sie den Gebrauch in direktem Sonnenlicht und auf dunklen Fußböden.
2. Kontrollieren Sie die Stoßleiste.
Das Gerät ist die Treppe heruntergefallen.
Reinigen Sie den Bodensensor an der Unterseite vorne.
Der Saugroboter lädt sich nach langer Betriebspause nicht automatisch.
Laden Sie das Gerét zuerst vollständig mit dem Netzteil.
Das Gerät hört auf zu Arbeiten und zeigt keinen Fehlercode an.
Nehmen Sie das Gerät nicht selber auseinander, wenden Sie sich an den Verkäufer.
Fehlercodes, die in Gebrauch angezeigt werden
Sollte der Fehler mit dieser Liste nicht zu beheben sein, wenden Sie sich an den Verkäufer
oder einen Fachbetrieb. Versuchen Sie nicht das Gerät selber zu reparieren.
9
SICHERHEITSHINWEISE UND GEWÄHRLEISTUNG
•
•
•
•
•
•
•
Diese Bedienungsanleitung dient dazu, Sie mit der Funktionsweise dieses Produktes vertraut zu machen.
Bewahren Sie diese Anleitung daher stets gut auf, damit Sie jederzeit darauf zugreifen können.
Sie erhalten bei Kauf dieses Produktes zwei Jahre Gewährleistung auf Defekt bei sachgemäßem
Gebrauch.
Bitte verwenden Sie das Produkt nur in seiner bestimmungsgemäßen Art und Weise. Eine anderweitige
Verwendung führt eventuell zu Beschädigungen am Produkt oder in der Umgebung des Produktes.
Ein Umbauen oder Verändern des Produktes beeinträchtigt die Produktsicherheit.
Achtung Verletzungsgefahr!
Öffnen Sie das Produkt niemals eigenmächtig und führen Sie Reparaturen nie selber aus!
Behandeln Sie das Produkt sorgfältig. Es kann durch Stöße, Schläge oder den Fall aus bereits
geringer Höhe beschädigt werden.
Halten Sie das Produkt fern von Feuchtigkeit und extremer Hitze.
ACHTUNG:
Es wird keine Haftung für Folgeschäden übernommen. Technische Änderungen und Irrtümer vorbehalten!
Wichtige Hinweise zur Entsorgung
Dieses Elektrogerät gehört NICHT in den Hausmüll. Für die fachgerechte Entsorgung wenden Sie sich
bitte an die öffentlichen Sammelstellen in Ihrer Gemeinde.
Einzelheiten zum Standort einer solchen Sammelstelle und über ggf. vorhandene Mengenbeschränkungen pro Tag/ Monat/ Jahr sowie über etwa anfallende Kosten bei Abholung entnehmen Sie bitte
den Informationen der jeweiligen Gemeinde.
Hinweise zur Batterieentsorgung
Batterien dürfen nicht in den Hausmüll gegeben werden. Als Endverbraucher sind Sie zur
Rückgabe gebrauchter Batterien gesetzlich verpflichtet. Sie können Batterien nach Gebrauch in der Verkaufsstelle oder deren unmittelbarer Nähe (z.B. in kommunalen Sammelstellen oder im Handel) unentgeltlich zurückgeben. Sie können Batterien auch per
Post an uns zurücksenden.
Batterien oder Akkus, die Schadstoffe enthalten, sind mit dem Symbol einer durchgekreuzten Mülltonne gekennzeichnet, wie das oben stehende Symbol.
In der Nähe zum Mülltonnensymbol befindet sich die chemische Bezeichnung des Schadstoffes. »Cd«
steht für Cadmium, »Pb« für Blei und »Hg« für Quecksilber.
Viel Spaß mit unserem Produkt.
Warnhinweise
• Reparaturen am Gerät sollten nur von einer autorisierten Fachwerkstatt durchgeführt werden.
• Öffnen Sie in keinem Fall das Gerät.
• Falscher Zusammenbau führt möglicherweise zu Fehlfunktionen oder dem Totalausfall.
• Das Gerät sollte vor jeglichen Feuchtigkeit und direkter Sonneneinstrahlung geschützt werden.
• Das Gerät bitte nicht mit Reinigungsmitteln reinigen.
• Verwenden Sie zur Reinigung nur ein trockenes (Mikrofaser) Tuch.
• Schließen Sie das Gerät nur an die dafür vorgesehene Netzspannung.
• Schließen Sie das Gerät in keinem Fall an andere Spannungen als vorgesehen an.
Die Gewährleistung verfällt bei Fremdeingriffen in das Gerät.
CHAL-TEC Vertriebs- + Handels GmbH; Wallstraße 16; 10179 Berlin, Germany
10
Applicability
The product, mainly applicable to home, hotel rooms and small office, is good for cleaning
various short-haired carpet, wood floor, ceramic tile, etc.
Function Introduction
It is the XR510 cleaner with rechargeable battery, controlled by advanced intelligent
program, with the following function: automatic vacuum cleaning, dust absorption,
mopping, timing cleaning, wireless remote control, speed selection, various identification protection functions, various automatic cleaning modes and automatic charging.
Components of the Robot
Main Body
Space Isolator
Docking Station
Remote Control
Adapter
Mob
Trailing Bar
with Mob
Side Brush (two)
Dust Brush
User Manual
Filter
Rechargeable
Battery
11
Introduction
Structure Introduction
AUTO/automatic cleaning
Power indicator
SPOT/spot cleaning
Handle
CHARGE / charge
Top cover
signal receiver
Auto-charging electrodes
Wall datection sensors
Floor brush
Left wheel
Ground detection sensor
Battery cover
Front wheel
Side brush
Ground detection sensor
Dust box
Main brush
Power switch
DC socket
Right wheel
Battery Replacement & Installment
1. Release the screw with a screwdriver,
open its base plate. (Refer to Figure 1)
2. Connect two terminals during battery installation. (Refer to Figure 2)
3. Place the positive and negative
poles correctly for fear of the damage
due to wrong poles.
4. Set the cleaner in charging status
to keep the best performance of the
battery while the cleaner is not in use.
5. Ensure using the original battery
of the manufacturer for replacement, otherwise there may be damage or accident.
12
1.
2.
3.
4.
5.
Take out battery in case of no more use of the machine.
Power off first, before taking out the battery of the machine.
Don’t put the battery at any enviroment over 45° C or inside water.
Don’t apply external load to the battery or fall them from height.
The battery must be recycled for safe treatment. No free disposal away or into fire
is allowed, otherwise there may be explosion.
6. In case of leakage, don’t let the liquid exposed to skin or clothes but immediately
wipe with dry clothes and then send to recycling station or appointed maintenance
outlet, rather than free disposal.
7. No chargeable battery that from different suppliers is allowed for the machine.
8. To extend battery life, make sure charging the battery 12 hours at first use of the
robot or if it is long time not in use, otherwise its working time would dramatically
lower down, far less than its normal working time.
Battery replacement of the Space lsolator
1. Open the cover as per figure 1.
2. Please the batteries (not inclued with correct
polarity (+/-) (Refer to Figure 2/3)
3. Please take out the battery if it was unused
for long.
Battery replacement of the remote control
1. Open the battery cover and then replace the
battery. (Refer to Figure 1)
2. Please place the positive and negative poles
correctly for fear of the damage due to
wrong poles! (Refer to Figure 2)
3. Please take out the battery if it was unused
for long.
1. Please don’t place the battery in the high-temperature environment above 45° C or
in the water.
2. Please don’t exert external force to the battery or drop them from high place.
3. The battery should be recycled with safe disposal. Please don’t discard it freely or
throw it into fire for fear of explosion!
13
Functions of Buttons
Power switch:
Switch on the cleaner to enter into a standby status, the indicator would light on;
Tips:
The power indicator lights on when the cleaner is working;
The power indicator blinks during charging;
When the cleaner is fully charged, the power indicator stops blinking;
AUTO (automatic cleaning):
Press AUTO button to let the cleaner automatically clean. When the battery power is at a low level,
it will automatically search for the docking station;
Press any button on the machine panel to stop cleaning.
Tips:
In case of low battery during cleaning,the cleaner would toot for 10 times and it automatically
searches for the docking station for charging with the CHARGE button light on.
Before cleaning, you should clear the clutter on the floor.
SPOT (spot cleaning):
Press SPOT button to automatically enter into an area of 1square meter and clean in a spiral mode
for about 2-3 minutes;
Press any button on the machine panel to stop cleaning.
Tip:
In case of low battery during cleaning,the cleaner would toot for 10 times and it automatically
searches for the docking station for charging with the CHARGE button light on.
CHARGE (charge):
Press CHARGE button, the machine automatically searches for the docking station.
Press any button on the machine panel to stop.
NOTE:
The default setting of the cleaner system is in fast mode , you can select fast or slow mode by remote
control.
Charging Method of Main Body:
Manual Charging:
1. You can use the adapter or docking station
to charge for the main body directly.
2. Turn on the cleaner and connect the out
put terminal of the adapter with DC socket
of the main boby while using the adapter
for charging.(Refer to Figure 1)
14
3. Before charging,turn on the cheaner and
connect the adapter with docking station
make sure the cleaner abut against the
docking station,and connect the autocharging electrode well with that of the
docking station.(Refer to Figure 2)
4. Press the CHARGE button on the remote
control or the machine panel and the
cleaner will search the docking station for
charging in a valid scope.(See Figure 3)
5. When the machine is searching for the
docking station, press the CHARGE key on
the machine’s panel or the STOP or
CHARGE key on the remote control, to
stop the cleaner searching for the docking
station immediately.
6. During charging, the indicator blinks.
When it stops blinking, it indicates the
battery is fully charged.
Automatic Charging:
In case of low battery during cleaning,the
cleaner would toot for 10 times and it automatically searches for the docking station for
charging with the CHARGE button light on.
Tip:
When finish cleaning, the temperature of
the battery is a little high, and its charging
time will be longer.
Remote Control:
Weekdays
Control Panel of Remote Control:
Emission signal
Current time
Pre-set time
Pre-set cleaning
Pre-set to select all or turn
off charging indicators
Setting of current time
Charge
Speed
Stop
Automatic cleaning
Power button
Confirm
Spot cleaning
Direction buttons
15
Tips:
Code check is required before you use the remote control, or it will fail to work.
Steps for code check: Please ensure the power of the remote control & cleaner are enough, and then
according to the following steps.
A: Turn off the cleaner;
B: Press and hold the “OK” button on the remote control;
C: Turn on the machine
D: After the cleaner toot twice or 3 times,release the “OK” button, then the code check set is
finished successfully.
Note:
If you fail to hear toot twice or 3 times,during the code check,just repeat the above process.
Functions Introduction of Remote Control:
•
SPEED selection:
press “SPEED” button on the remote control, you canchoose fast or slow speed.
fast speed
•
slow speed
TIME (Current Time Setting)
Press “TIME” button first and then press
buttons, you can see a shining spot on the screen
of the remote control switching among hour, minute & weekday (as shown on Pic 1)
Press
buttons to change the parameter and set the hour,
minute&weekday respectively.
Tip:
During the setting, press button
the current setting.
to quit; press “TIME” button to save
SET (pre-set cleaning):
A: Pre-set time
Press “SET” button first and then press
buttons, the shining spot on the screen of the
remote control will switch among hour, minute & weekday (as shown on Pic 2)
Press
buttons to change the parameter to a idea time that
you want the machine work.
B: Pre-set weekday:
During pre-setting, when the shining happens to
press
„OK“ button; the presently shining spot will have a “beam” shining
or extinguished; the weekday with the “beam”
shining is
the present pre-setting.
Press „ALL“ button to switch between selection of all
or no selection of all
•
Tip:
During the setting, press the
button to quit; press the “SET” button to save the present setting.
• FULL GO FUNCTION
1. Press the “SET” button, the screen shows a shinning spot
, then press the “STOP” button,
you can see “
”displaying with the first F flashing, press again the “SET” to stop flashing which
indicates FULL GO function is activated, so the machine can automatically clean when has been
fully charged.
16
2. To cancel the FULL GO function, first press the SET button to see “
” displaying on the
screen with the first “F” flashing,then press STOP and after you press the SET button again, the
FULL GO function is canceled.
Tip:
When the FULL GO function is set, the pre-setting function is unavailable.
Space Isolator:
Signal transmitting
Power indicator
Code check button
Power switch
Tip: You should check code before using the Space Isolator; otherwise it will fail to work.
Steps of code check:
A: Turn off the cleaner, and turn on the Space Isolator (with power indicator on);
B: Keep holding the code check button on the Space Isolator;(Tip: the code check button is inside
the hole, you need to use auxiliary tools when hold the button)
C: Turn on the cleaner;
D: After the cleaner toots 2 or 3 times, release the code check button, then the code check set is
finished successfully.
Note: If you fail to hear toot 2 or 3 times, twice during the code check, just repeat the above process.
Tip: Place the space isolator against the wall, or it might be easily moved by the cleaner from side or
back of the space isolator, which would cause the machine cleans the confined area.
Docking Station
Tips: Before you use the docking station, code check
is required; otherwise it will fail in self-charging.
Steps of code check:
A: Turn off the cleaner;
B: Keep holding the code check button of the
docking station; (Tip: the code check
button is inside the hole, you need to use
auxiliary tools when hold the button)
C: Turn on the cleaner;
D: After the cleaner toots 2 or 3 times , release the “OK” button, then the code check set is finished
successfully.
Note: If you fail to hear toot 2 or 3 times, during the code check, just repeat the above process.
Tip: Place the docking station against the wall, or it might be easily moved by the cleaner from side or
back of the station, which would make the cleaner take longer time to find the docking station for charging.
17
Automatic Charging:
1. Position the docking station on a hard, level surface against a wall.
(Refer to Figure 1)
2. No obstacle or hollow areas 3m away from the docking station in the
front and 0.5m on the right and left. (Refer to Figure 1)
3. The Robot cannot search the docking station for charging if the infrared
signal transmitting window of the docking station is covered.
4. Connect the output terminal of the adaptor with DC socket of the
docking station. (Refer to Figure 2)
5. Status of LED indicator:
A: During charging to the main body, the LED light will flash frequently
at every 1 second.
B: At standby status, the LED light will light from bright to dark.
Press the “ALL” button on the remote control to turn off the LED light
Maintenance of the Cleaner
Assembly & Disassembly of Dust Box:
A. Hold the machine bottom with your hand, press the button on the dust box (Refer to Figure 1)
B. Extract the dust box with the backward force.(Refer to Figure 2)
Note: push the dust box inside to reinstall.
Cleaning of Dust Box
01. Move the two side clips of the dust box, open the fencing plate and pour off dust (as shown on
Figure 1);
02. Clean it with the cleaning brush (as shown on Figure 2).
Filter Replacement & Cleaning
A. Press the two side clips over the dust box to open the fencing plate, If the rubber part which attached
the fencing plate was worn out, you need to take out it for replacement. (Refer to figue 1)
18
B. Press the button on the dust box, the fan assembly will automatically pop up (Refer to Figure 2);
Tip: water is not allowed to directly clean the fan assembly.
C. Pop up the blower, take out the filter, and then clean the dust box. (Refer to Figure 3)
D. Clean the filter by hair dryer with cold wind or using brush cleaner. (Refer to Figure 4 and Figure 5)
E. Reinstall the filter in the original position.
Tip: The rubber cleaning head sometimes might be dropped off when you clean the dustbin, please
follow the below instruction to reinstall it..
1. Position the dustbin and rubber cleaning head as picture 1.
2. Place one end of the cleaning head into the dustbin, make sure the cleaning head is upward and
connect well with the dustbin. (Refer to picture 2).
3. Make the cleaning head completely connect with dustbin by pressing with your hand.
Assembly & Disassembly of Main Brush and Floor Brush:
1. Force the locking bar forward and raise the cover by your
right thumb, then raise rod of the main brush by your left
hand. (Refer to Figure 1 and Figure 2)
2. Take out the main brush and floor brush.(Refer to Figure 3)
3. Insert the main brush and floor brush into the holes before
closing the cover in assembly.
Assembly & Disassembly of Side Brush:
1. Release the screw in the main shaft of the side brush before
you change a new one.
2. Press the side brush against the main shaft and then fasten
the screw. (Refer to the figure)
19
Cleaning of Main Brush and Floor Brush:
1. Clear the hair or big dust particles on the brushes regularly
to improve the cleaning performance. Clean the dust at the
air intake. Clean the paper scraps or small particles by
cleaning brush directly. Rotate the brush carefully and cut
the hair, yarn and other twisted objects by scissors or pull
them by hand.
2. The cleaning of the main brush and floor brush can be
done by reference to the assembly & disassembly.
Assembly & Disassembly and Cleaning of Front Wheel:
1. Clean the front wheel with a clean brush. (Refer to the
figure below)
Failure information which may appear during using:
Failure Code Failure Cause
How to solve
E001
Ground detection
sensors
Clean the sensors at the front bottom of the cleaner
E002
Middle brush
Clean the rubbish such as hair, thread wrapped on the brush
E003
Power off
Use the adaptor to charge, after full charged, then use again
E004
Left & right wheel
Check the left and right wheels, clean the rubbish on it
E005
Dustin poor contact
Check the dustbin and re-fix the dustbin after cleaning
If the failure still exist after the above check, please contact the after-sale service maintenance, professional maintenance staff or the technical center of the company, don’t disassemble and maintain
it by yourself.
20
Safety Precautions:
Safety Precautions
Caution
No one else can disassemble, maintain or
Don’t use other charger but the equipped
transform
one of the Robot, or it may cause product
the
product
except
the
maintenance technicians designated by
damage, electric shock or fire due to high
the company, or it may cause fire, electric
voltage.
shock or personal injury.
Don’t touch high-voltage power cord of
Don’t bend the power cord overly or
the electric appliance with your wet hand,
place weight on it, or it may cause power
or it may cause electric shock.
cord damage, fire or electric shock.
Don’t twist your clothes or any part of
Don’t approach cigarette, lighter, match
your body (head, finger, etc.) into the
and other heat objects or combustible
brush or wheel of the Robot, or it may
materials such as the gasoline cleaner.
cause personal injury.
Attention
Don’t forget to turn off the power while
Insert the power cord of the charger well
transporting or storing the Robot for long,
or it may cause electric shock, short
or the battery may be damaged.
circuit, smoking or fire.
Check whether the charger and socket is
If the machine is long time not in use,
connected well, or it may cause charging
remove the battery from the machine and
failure or even fire.
store it in a cool dry place after being fully
charged.
To extend the cleaner’s battery life; make
Remove all easily damaged objects
sure charging the battery at least 16
(including luminous objects, fabrics, glass
hours before you first use the machine or
bottles, etc.) before using, or it may
if it is long time not in use. Its cleaning
cause damage to these objects or affect
reaches peak performance after 2 or 3
the using of the Robot.
circles of using out the battery power.
Please use the Robot cautiously in the
Don’t stand or sit on the Robot, or it may
presence
cause damage to the Robot or personal
of
the
children
to
avoid
frightening or harming them.
injury.
Don’t make the Robot take in water and
Don’t use the Robot on small tables and
other liquors for fear of the product
chairs or other small space, or the Robot
damage.
may be damaged.
Don’t use the Robot outdoors, or it may
Don’t use the Robot in commercial
cause the product damage.
places, or the Robot may be damaged by
excessive use.
No cord , wire or other objects that longer than 150mm on the floor to avoid entangling with
cleaner’s brushes.
CHAL-TEC Vertriebs- + Handels GmbH; Wallstraße 16; 10179 Berlin, Germany
21