1
English
N
i
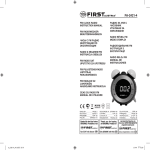
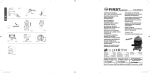
LOCATION OF CONTROLS (see fig. 1)
14.VOLUME CONTROL
1. MODE SET BUTTON
15.WAVE BAND
2.ALARM SET BUTTON
16.TUNING CONTROL
3.ALARM 1 RADIO/BUZZ BUTTON
17.RESET BUTTON
4.ALARM 2 RADIO/BUZZ BUTTON
18.TEMPERATURE SENSOR (IN
5. BATTERY COMPARTMENT
DOOR)
6.SPEAKER
19.AC POWER CORD
7.
7/MONTH – day/°C/°F BUTTON
20.FM ANTENNA WIRE
8. 8/YEAR/DST BUTTON
21.RATING LABEL
9.ON/OFF BUTTON
22.PROJECTION UNIT
10.SNOOZE/SLEEP BUTTON
23.PROJECTION TIME 180° FLIP
11.DISPLAY LIGHT AUTO OFF/LOW/
BUTTON
HIGH DIMMER
24.PROJECTION ON/OFF BUTTON
12.LCD DISPLAY
25.FOCUS ADJUSTMENT FOR
13.AUDIO IN JACK
PROJECTION UNIT
POWER CONNECTION
Plug the AC power cord to a household outlet AC source. This unit is equipped with
a battery back up system, it requires a 1 x 3V CR2032 Flat Lithium battery (Not
included). Insert the battery in the battery compartment, making certain that the
positive and negative (+ and -) battery terminals are attached to the corresponding
terminals on the plate in the battery compartment. If an AC power failure occurs,
the clock automatically switches to the battery power supply, the clock and timer
memory continue running. When the AC power resumes, the clock switches back
to AC again.
1. TIME AND CALENDAR SETTING
A. Setting Time and Calendar – Press Mode Set button (1) in normal mode and
keep depress over 2 seconds to enter Time Set mode, after enter the setting mode,
press Mode Set button (1) to change the mode cycle as follows:
Normal —> Year —> Month —> Day —> 12/24H —> RTC Hour —> RTC Min —>
Normal
Action (during data adjustment):
• Press 8/YEAR/DST button (8) to adjust data forward
• Press 7/MONTH – day/°C/°F button (7) to adjust data backward
• Keep depress 7 or 8 button for 2 seconds to enable auto forward
B. Setting Alarm 1 and Alarm 2 - Press Alarm set button (2) during normal mode
and keep depress over 2 seconds to enter alarm set mode, after enter the setting
mode, press Alarm set button (2) to change the mode cycle as follows:
Normal —> AL1 Hour —> AL1 Min —> AL1 Weekend Alarm —> AL2 Hour —> AL2
Min —> AL2 Weekend Alarm —> Normal
Select alarm weekday mode as follows
1-5 : Monday to Friday
1-7 : Whole week
6-7 : Saturday & Sunday
1-1:
One day of week
Action (during data adjustment):
• Press 8/YEAR/DST button (8) to adjust data forward
• Press 7/Month-DAY/°C/°F button (7) to adjust data backward
• Keep depress 7 or 8 button for 2 seconds to enable auto forward
2
M_2421-2_v02.indd 2-3
2. SETTING ALARM OUTPUT AND ALARM ON/OFF
A. Change the alarm Output
Press AL1 (3)/AL2 (4) button to Music
position to select wake up by Radio,
set to Buzzer
position to select wake up by Buzzer, set to Alarm Off position to
disable all alarm.
Select the Display Auto off/low/high dimmer (11) to the Auto off mode, alarm wake
up the display is auto turn on.
3. ALARM DURATION AND SNOOZE FUNCTION
Alarm Duration – Buzzer Alarm or Radio Alarm will continue output for 30 minutes
if no key press, then it will stop automatically and wait for same alarm time on next
day.
Action for Snooze:
•During alarming, press SNOOZE button (10) will enable snooze function,
Buzzer Alarm or Radio Alarm will stop.
• Snooze Interval is 9 minutes (not include second offset)
•Snooze will continue unless press On/Off (Alarm Off) button (9) to Alarm Off,
Buzzer Alarm or Radio Alarm stop automatically after 30min.
•Select the display Auto Off/Low/High dimmer (11) to the auto off mode, during
alarming display auto turn on, press snooze/sleep button (9) will enable snooze
function, buzzer alarm or radio/display will Stop & Off.
4. CHANGE DISPLAY CONTENT
A.Press 8/YEAR/DST button (8) during normal can switch to display year, after 5
seconds timeout and return back to display time.
B.Press 7/MONTH-DAY/°C/°F button (7) during normal can switch to display
Month and day, after 5 seconds timeout and return back to display time.
5. SLEEP FUNCTION
During Radio on mode, press Snooze/Sleep button (10) to turn on Sleep mode,
the Sleep time will keep flashing by 5 seconds, within 5 seconds and press Sleep
button can change the duration from 90-15min. Press ON/OFF button (9) to cancel
sleep function.
6. Auto Off mode
The radio OFF mode, select the display Auto Off/Low/High Dimmer (11) to the Auto
Off mode, the LCD display will automatically Off in 15 seconds.
• Press all key button to turn the display on.
DST – Daylight Saving Time
Press 8/YEAR/DST button (8) and hold for 3 seconds to toggle on and off DST
Function
7. THERMOMETER FUNCTION
Remark: Temperature Range for Indoor: 0 to + 50°C or 32 to 122°F
RADIO OPERATION
•
•
•
•
•
Press the on/off button (9) to turn radio on
Select AM or FM band using the wave band switch (15)
Select the Station using the tuning control (16)
Turn the volume control (14) to adjust volume as required
Press the on/off button (9) to turn radio off.
English
Instruction Manual
AM/FM Clock Radio With Temperature
1
3
12-10-16 下午5:59