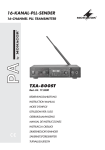
1
TRANSPORTABLES VERSTÄRKERSYSTEM PORTABLE AMPLIFIER SYSTEM TXA-800 Bestellnummer 17.2220 TXA-800CD TXA-802CD Bestellnummer 17.2230 Bestellnummer 17.2240 BEDIENUNGSANLEITUNG INSTRUCTION MANUAL MODE D’EMPLOI ISTRUZIONI PER L’USO GEBRUIKSAANWIJZING MANUAL DE INSTRUCCIONES INSTRUKCJA OBSŁUGI SIKKERHEDSOPLYSNINGER SÄKERHETSFÖRESKRIFTER TURVALLISUUDESTA D Bevor Sie einschalten ... A Wir wünschen Ihnen viel Spaß mit Ihrem neuen Gerät von MONACOR. Bitte lesen Sie diese Bedienungsanleitung vor dem Betrieb gründlich durch. Nur so lernen Sie alle Funktionsmöglichkeiten kennen, vermeiden Fehlbedienungen und schützen sich und Ihr Gerät vor eventuellen Schäden durch unsachgemäßen Gebrauch. Heben Sie die Anleitung für ein späteres Nachlesen auf. We wish you much pleasure with your new MONACOR unit. Please read these operating instructions carefully prior to operating the unit. Thus, you will get to know all functions of the unit, operating errors will be prevented, and yourself and the unit will be protected against any damage caused by improper use. Please keep the operating instructions for later use. Der deutsche Text beginnt auf der Seite 4. The English text starts on page 4. CH GB Before you switch on ... F Avant toute installation … B Nous vous souhaitons beaucoup de plaisir à utiliser cet appareil MONACOR. Lisez ce mode dʼemploi entièrement avant toute utilisation. Uniquement ainsi, vous pourrez apprendre lʼensemble des possibilités de fonctionnement de lʼappareil, éviter toute manipulation erronée et vous protéger, ainsi que lʼappareil, de dommages éventuels engendrés par une utilisation inadaptée. Conservez la notice pour pouvoir vous y reporter ultérieurement. Vi auguriamo buon divertimento con il vostro nuovo apparecchio di MONACOR. Leggete attentamente le istruzioni prima di mettere in funzione lʼapparecchio. Solo così potete conoscere tutte le funzionalità, evitare comandi sbagliati e proteggere voi stessi e lʼapparecchio da eventuali danni in seguito ad un uso improprio. Conservate le istruzioni per poterle consultare anche in futuro. La version française se trouve page 12. Il testo italiano inizia a pagina 12. CH I Prima di accendere … NL Voordat u inschakelt ... B Wij wensen u veel plezier met uw nieuwe apparaat van MONACOR. Lees deze gebruikershandleiding grondig door, alvorens het apparaat in gebruik te nemen. Alleen zo leert u alle functies kennen, vermijdt u foutieve bediening en behoedt u zichzelf en het apparaat voor eventuele schade door ondeskundig gebruik. Bewaar de handleiding voor latere raadpleging. Le deseamos una buena utilización para su nuevo aparato MONACOR. Por favor, lea estas instrucciones de uso atentamente antes de hacer funcionar el aparato. De esta manera conocerá todas las funciones de la unidad, se prevendrán errores de operación, usted y el aparato estarán protegidos en contra de todo daño causado por un uso inadecuado. Por favor, guarde las instrucciones para una futura utilización. De Nederlandstalige tekst vindt u op pagina 20. El texto en español empieza en la página 20. PL Przed Uruchomieniem … E DK Życzymy zadowolenia z nowego produktu MONACOR. Dzięki tej instrukcji obsługi będą państwo w stanie poznać wszystkie funkcje tego urządzenia. Stosując się do instrukcji unikną państwo błędów i ewentualnego uszkodzenia urządzenia na skutek nieprawidłowego użytkowania. Prosimy zachować instrukcję. Antes de la utilización … Før du tænder … God fornøjelse med dit nye MONACOR produkt. Læs venligst sikkerhedsanvisningen nøje, før du tager produktet i brug. Dette hjælper dig med at beskytte produktet mod ukorrekt ibrugtagning. Gem venligst denne betjeningsvejledning til senere brug. Du finder sikkerhedsanvisningen på side 32. Tekst polski zaczyna się na stronie 28. S 2 Innan du slår på enheten ... FIN Ennen kytkemistä … Vi önskar dig mycket glädje med din nya MONACOR produkt. Läs igenom säkerhetsföreskrifterna noga innan enheten tas i bruk. Detta kan förhindra att problem eller fara för dig eller enheten uppstår vid användning. Spara instruktionerna för framtida användning. Toivomme Sinulle paljon miellyttäviä hetkiä uuden MONACOR laitteen kanssa. Ennen laitteen käyttöä pyydämme Sinua huolellisesti tutustumaan turvallisuusohjeisiin. Näin vältyt vahingoilta, joita virheellinen laitteen käyttö saattaa aiheuttaa. Ole hyvä ja säilytä käyttöohjeet myöhempää tarvetta varten. Säkerhetsföreskrifterna återfinns på sidan 32. Turvallisuusohjeet löytyvät sivulta 32. 14 1 15 16 17 18 19 20 24 25 26 2 4 21 3 5 22 6 7 8 9 10 11 23 12 13 TXA-802CD 27 28 29 31 32 30 33 34 35 36 37 39 38 38 42 41 43 44 34 37 35 36 33 46 48 47 3 45 39 40 D A Auf der ausklappbaren Seite 3 finden Sie alle beschriebenen Bedienelemente und Anschlüsse. CH Inhalt 1 Übersicht der Bedienelemente und Anschlüsse . . . . . . . . . . . . . . . . . . . . . . . . 4 1.1 Multifrequenz-Empfangseinheit . . . . . . . . . . 4 1 Übersicht der Bedienelemente und Anschlüsse 1 Multifrequenz-Empfangseinheit → siehe Abbildung 2 und Kapitel 1.1 2 CD/MP3-Player → siehe Abbildung 4 und Kapitel 1.3 3 Multfrequenz-Sendeeinheit → siehe Abbildung 3 und Kapitel 1.2 1.2 Multifrequenz-Sendeeinheit . . . . . . . . . . . . 4 1.3 CD/MP3-Player mit Fernbedienung . . . . . . 5 2 Hinweise für den sicheren Gebrauch . . . 6 3 Einsatzmöglichkeiten und Zubehör . . . . 6 3.1 Konformität und Zulassung der Sendeeinheit des Modells TXA-802CD . . . . 6 5 Ein-/Ausschalter POWER der Aktivbox Der Schalter leuchtet im Betrieb. Blinkt er bei Akkubetrieb, sind die Akkus fast entladen und sollten aufgeladen werden. 4 Aufstellung . . . . . . . . . . . . . . . . . . . . . . . . 6 6 Regler MASTER für die Gesamtlautstärke der Aktivbox 5 Stromversorgung /Akkus aufladen . . . . . 6 6 Audioanschlüsse . . . . . . . . . . . . . . . . . . . 7 6.1 Eingänge . . . . . . . . . . . . . . . . . . . . . . . . . . . 7 6.2 Ausgang LINE OUT . . . . . . . . . . . . . . . . . . 7 6.3 Passive Lautsprecherbox . . . . . . . . . . . . . . 7 7 Inbetriebnahme . . . . . . . . . . . . . . . . . . . . . 7 8 Bedienung . . . . . . . . . . . . . . . . . . . . . . . . . 7 8.1 Multifrequenz-Empfangseinheit . . . . . . . . . . 8 8.2 CD/MP3-Player . . . . . . . . . . . . . . . . . . . . . . 8 8.3 Multifrequenz-Sendeeinheit . . . . . . . . . . . 10 9 Technische Daten . . . . . . . . . . . . . . . . . . 11 9.1 Funkübertragung . . . . . . . . . . . . . . . . . . . . 11 4 Ladeanzeige CHARGE rot: Akkus werden geladen, grün: Akkus sind voll geladen 7 Klangregler TREBLE (Höhen) (Bässe) für das Mischsignal und BASS 8 Lautstärkeregler für das Mikrofon am Eingang MIC IN (11) 9 Eingang LINE IN (Cinch-Buchsen) für eine Stereo-Tonquelle mit Line-Ausgangspegel, z. B. CDPlayer, Kassettenrecorder 10 Ausgang LINE OUT (Cinch-Buchsen) zum Weiterleiten des Mischsignals, z. B. an ein Aufnahmegerät oder an eine weitere Aktivbox All operating elements and connections described can be found on the fold-out page 3. 14 Display zur Anzeige des Übertragungskanals bzw. der Funkfrequenz 15 Diversity-Anzeige A/B: leuchtet rot oder grün und signalisiert damit, welche der zwei internen Empfangsantennen A oder B zurzeit aktiv ist. 16 Empfangsanzeige RX: leuchtet, wenn der Sender eingeschaltet und auf die Funkfrequenz des Empfängers eingestellt ist 17 Anzeige AF für das empfangene Audiosignal: leuchtet bei Empfang eines Audiosignals 18 Taste SET zum Aufrufen des Einstellmodus für den Übertragungskanal und zum Bestätigen der Kanalwahl 19 Pfeiltasten – um im Einstellmodus den Kanal einzustellen: Taste zur Kanalwahl „aufwärts“, Taste zur Kanalwahl „abwärts“ – um das Display (14) kurz auf Anzeige der Funkfrequenz umzuschalten: solange die Taste oder gedrückt gehalten wird, zeigt das Display statt des Kanals die Frequenz an. 20 Ein-/Ausschalter und Lautstärkeregler 1.2 Multifrequenz-Sendeeinheit nur bei Modell TXA-802CD 13 Netzbuchse zum Anschluss an eine Steckdose (230 V~/50 Hz) über das beiliegende Netzkabel 1 1.1 Multifrequency receiving unit Hinweis: Die Einstellungen der Klangregler (7) wirken sich auf das LINE-OUT-Signal aus, nicht jedoch die Einstellung des Reglers MASTER (6). 11 Eingang MIC IN (Kombibuchse 6,3-mm-Klinke/ XLR, sym.) zum Anschluss eines Mikrofons Operating Elements and Connections 1 Multifrequency receiving unit → see figure 2 and chapter 1.1 Contents 2 CD/MP3 player → see figure 4 and chapter 1.3 1 Operating Elements and Connections . . 4 1.1 Multifrequency receiving unit . . . . . . . . . . . . 4 3 Multifrequency transmitting unit → see figure 3 and chapter 1.2 1.2 Multifrequency transmitting unit . . . . . . . . . 4 1.3 CD/MP3 player with remote control . . . . . . 5 2 Safety Notes . . . . . . . . . . . . . . . . . . . . . . . 6 3 Applications and Accessories . . . . . . . . . 6 3.1 Conformity and approval of the transmitting unit of model TXA-802CD . . . . 6 4 Setting up . . . . . . . . . . . . . . . . . . . . . . . . . . 6 5 Power Supply / Recharging the Batteries 6 6 Audio connections . . . . . . . . . . . . . . . . . . 7 6.1 Inputs . . . . . . . . . . . . . . . . . . . . . . . . . . . . . 7 6.2 Output LINE OUT . . . . . . . . . . . . . . . . . . . . 7 6.3 Passive speaker system . . . . . . . . . . . . . . . 7 7 Setting the System into Operation . . . . . 7 8 Operation . . . . . . . . . . . . . . . . . . . . . . . . . . 7 8.1 Multifrequency receiving unit . . . . . . . . . . . . 8 8.2 CD/MP3 player . . . . . . . . . . . . . . . . . . . . . . 8 8.3 Multifrequency transmitting unit . . . . . . . . 10 9 Specifications . . . . . . . . . . . . . . . . . . . . . 11 9.1 Wireless transmission . . . . . . . . . . . . . . . . 11 4 LED CHARGE red: the batteries are being charged green: the batteries have been fully charged 5 POWER switch of the active speaker system The switch will light up during operation. If it starts flashing during rechargeable battery operation, the batteries are almost discharged and should be recharged. 6 Control MASTER for the master volume of the active speaker system 7 Tone controls TREBLE and BASS for the mixed signal 8 Volume control for the microphone at the input MIC IN (11) 9 Input LINE IN (phono jacks) for a stereo audio source with line output level, e. g. CD player, cassette recorder 10 Output LINE OUT (phono jacks) for passing on the mixed signal, e. g. to a recorder or another active speaker system Note: The adjustments of the tone controls (7) will affect the LINE OUT signal; the adjustment of the control MASTER (6), however, will not affect it. 11 Input MIC IN (combined 6.3 mm/XLR jack, bal.) for connecting a microphone 12 6.3 mm jack SPEAKER for connecting an additional passive speaker system (minimum impedance 8 Ω) 13 Mains jack for connection to a mains socket (230 V~/50 Hz) via the mains cable supplied 4 Modell TXA-800/-800CD: 1 Empfangseinheit Modell TXA-802CD: 2 Empfangseinheiten 21 Display zur Anzeige des Übertragungskanals bzw. der Funkfrequenz 22 Sendeanzeige TX: leuchtet, wenn die Sendeeinheit eingeschaltet ist 23 Pegelanzeigen AF LEVEL für das Eingangssignal der Sendeeinheit: gelb = Minimalpegel, rot = Maximalpegel (Siehe dazu auch Kapitel 8.3, Bedienschritt 4) 24 Taste SET zum Aufrufen des Einstellmodus für den Übertragungskanal und zum Bestätigen der Kanalwahl 12 6,3-mm-Klinkenbuchse SPEAKER für den Anschluss einer zusätzlichen passiven Lautsprecherbox (Impedanz min. 8 Ω) GB 1.1 Multifrequenz-Empfangseinheit model TXA-800 / -800CD: 1 receiving unit model TXA-802CD: 2 receiving units 14 Display to indicate the transmission channel or the radio frequency 15 Diversity LED A/B: will show red or green to indicate which of the two internal reception antennas A or B is presently active 16 Reception LED RX: will light up when the transmitter is switched on and set to the radio frequency of the receiver 17 LED AF for the audio signal received: will light up when an audio signal is received 18 Button SET to call the adjusting mode for the transmission channel and to confirm the channel selection 19 Arrow keys – to adjust the channel in the adjusting mode: key for channel selection “upward”; key for channel selection “downward” – to switch over the display (14) to shortly indicate the radio frequency: as long as the key or is kept pressed, the display will indicate the frequency instead of the channel 20 On-off switch and volume control 1.2 Multifrequency transmitting unit for model TXA-802CD only 21 Display to indicate the transmission channel or the radio frequency 22 Transmitting LED TX: will light up when the transmitting unit is switched on 23 Level LEDs AF LEVEL for the input signal of the transmitting unit: yellow = minimum level, red = maximum level (also see chapter 8.3, operating step 4) 25 Pfeiltasten – um im Einstellmodus den Kanal einzustellen: Taste zur Kanalwahl „aufwärts“, Taste zur Kanalwahl „abwärts“ – um das Display (21) kurz auf Anzeige der Funkfrequenz umzuschalten: solange die Taste oder gedrückt gehalten wird, zeigt das Display statt des Kanals die Frequenz an. 26 Ein-/Ausschalter und Lautstärkeregler 1.3 CD/MP3-Player mit Fernbedienung nur bei den Modellen TXA-800CD und TXA-802CD 27 CD-Einzugsschlitz: die CD so weit einschieben, bis sie automatisch eingezogen wird 28 USB-Buchse zum Anschluss eines USB-Massenspeichers, z. B. USB-Stick, USB-Festplatte mit eigener Stromversorgung 29 Ein-/Ausschalttaste POWER 30 IR-Sensor für die Fernbedienungssignale 31 Display, zeigt – bei Audio-CDs die Einblendung „CD“ und die Titelnummer, z. B. für Titel Nr. 10 (im Stoppmodus: Gesamtanzahl der Titel) bei MP3-Abspielmedien die Einblendung „MP3“, die Ordnernummer und die Titelnummer im Ordner, z. B. für den 8. Titel im 2. Ordner – Einblendung für die gewählte Wiederholfunktion („REPEAT 1“, „REPEAT FOLDER“ oder „REPEAT ALL“) → Taste REP (44) – Einblendung „SHUFFLE“ bei Wiedergabe der Titel in zufälliger Reihenfolge – Einblendung „PROGRAM“ während des Programmierens einer eigenen Titelfolge – Einblendung „MEMORY“ beim Abspielen einer programmierten Titelfolge – Einblendung „A © B“ beim Abspielen einer Schleife 32 Steckplatz für eine SD-Karte 33 Taste zum Umschalten zwischen CD, USB-Speicher und SD-Karte 34 Taste FOLDER zum Anwählen des nächsten Ordners (bei MP3-Betrieb) 35 Taste F.F/ für den schnellen Vorlauf und Taste FB/ für den schnellen Rücklauf: die jeweilige Taste antippen und wenn die gewünschte Stelle erreicht ist, die Wiedergabe/Pause-Taste (37) drücken. 36 Tasten zur Titelanwahl REV/ S = zurück, F.WD/ S = vorwärts 37 Wiedergabe/Pause-Taste 38 Taste zum Wechseln in den Stoppmodus (1. Tastendruck) und zum Auswerfen einer CD (2. Tastendruck) 42 Taste zum Programmieren einer eigenen Titelfolge → Kap. 8.2.11 43 Taste zur Titelwiedergabe in zufälliger Reihenfolge D A CH 44 Taste zum Umschalten zwischen – „REPEAT 1“: Wiederholung des Titels – „REPEAT FOLDER“ (nur bei MP3-Betrieb): Wiederholung aller Titel im Ordner – „REPEAT ALL“: Wiederholung aller Titel des Abspielmediums – keine „REPEAT“-Einblendung: keine Wiederholfunktion eingeschaltet 45 Taste zum Stoppen der Wiedergabe 46 Taste zum Abspielen einer Schleife (Wiederholung eines Abschnitts im Titel) erster Tastendruck Festlegen des Startpunkts des Abschnitts zweiter Tastendruck Festlegen des Endpunkts des Abschnitts: Wiedergabe der Schleife startet. dritter Tastendruck Wiedergabe der Schleife wird beendet. 47 Taste zum Bestätigen einer Eingabe, z. B. nach der Titelwahl über die Zifferntasten (41) 48 Taste zum Ein- und Ausschalten des Tons 39 Tasten zum Verändern des Abspieltempos in 10 Schritten: die Taste HI /HIGH (Tempo erhöhen) oder LO /LOW (Tempo reduzieren) so oft drücken, bis das gewünschte Tempo erreicht ist; zum Zurückkehren auf normales Tempo die Taste NOR drücken. 40 Lautstärkeregler (im Stoppmodus: Gesamtanzahl der Ordner und Gesamtanzahl der Titel) – die gespielte Zeit des Titels (Min. : Sek.) – für Wiedergabe, für Pause 41 Zifferntasten zur Titelanwahl durch Eingabe seiner Nummer (MP3-Betrieb: Nummer, die der Titel auf dem Abspielmedium hat, nicht im Ordner!); nach der Eingabe zur Bestätigung die Taste ENTER (47) drücken 24 Button SET to call the adjusting mode for the transmission channel and to confirm the channel selection 25 Arrow keys – to adjust the channel in the adjusting mode: key for channel selection “upward”; key for channel selection “downward” – to switch over the display (21) to shortly indicate the radio frequency: as long as the key or is kept pressed, the display will indicate the frequency instead of the channel 26 On-off switch and volume control – the time played of the track (min. : sec.) – for replay, for pause – insertion for the repeat function selected (“REPEAT 1”, “REPEAT FOLDER” or “REPEAT ALL”) → button REP (44) – insertion “SHUFFLE” for replay of the tracks in a random order – insertion “PROGRAM” when programming an individual track sequence – insertion “MEMORY” for replaying a programmed track sequence – insertion “A © B” when replaying a loop 1.3 CD/MP3 player with remote control for models TXA-800CD and TXA-802CD only 27 CD slot: insert the CD so that it is retracted automatically 28 USB port for connection of a USB mass storage device, e. g. USB flash drive, USB hard disk with separate power supply 29 POWER button 30 IR sensor for the signals of the remote control 31 Display, shows – For audio CDs The insertion “CD” and the track number, e. g. for track No. 10 32 Slot for an SD card 33 Button to select CD, USB storage device or SD card 34 Button FOLDER to select the next folder (for MP3 mode) 35 Button F.F/ for fast forward and button FB/ for fast reverse: Shortly press the respective button and when the desired spot is reached, press the replay/ pause button (37). 36 Buttons for track selection REV/ S = reverse, F.WD/ S = forward 42 Button to program an individual track sequence → chapter 8.2.11 GB 43 Button for track replay in a random order 44 Button to select – “REPEAT 1”: repeat of the track – “REPEAT FOLDER” (for MP3 mode only): repeat of all tracks in the folder – “REPEAT ALL”: repeat of all tracks of the playing medium – No “REPEAT” insertion: no repeat function activated 45 Button to stop the replay 46 Button to replay a loop (repeat of a section in the track) button is pressed for the first time to define the starting point of the section button is pressed for the second time to define the end point of the section: replay of the loop will start. Button is pressed for the third time to terminate the replay of the loop 47 Button to confirm an input, e. g. after track selection via the numerical keys (41) 48 Button to activate / deactivate the sound 37 Replay/ pause button 38 Button to change to the stop mode (button is pressed for the first time) and to eject a CD (button is pressed for the second time) (in the stop mode: total number of tracks) For MP3 playing media The insertion “MP3”, the folder number and the track number in the folder, e. g. for the 8th track in the 2nd folder 39 Buttons to change the playing speed in 10 steps: press the button HI / HIGH (to increase speed) or LO / LOW (to decrease speed) repeatedly until the desired speed is reached; to return to standard speed, press the button NOR. 40 Volume control (in the stop mode: total number of folders and total number of tracks) 41 Numerical keys for track selection by entering its number (MP3 mode: number of the track on the playing medium, not in the folder!); after the input press the button ENTER (47) to confirm 5 D 2 A Das Gerät entspricht allen relevanten Richtlinien der EU und ist deshalb mit gekennzeichnet. CH Hinweise für den sicheren Gebrauch WARNUNG Das Gerät wird mit lebensgefährlicher Netzspannung (230 V~) versorgt. Nehmen Sie deshalb nie selbst Eingriffe am Gerät vor. Durch unsachgemäßes Vorgehen besteht die Gefahr eines elektrischen Schlages. Beachten Sie auch unbedingt die folgenden Punkte: G Verwenden Sie das Gerät nur im Innenbereich. Schützen Sie es vor Tropf- und Spritzwasser, hoher Luftfeuchtigkeit und Hitze (zulässiger Einsatztemperaturbereich 0 – 40 °C). G Stellen Sie keine mit Flüssigkeit gefüllten Gefäße, z. B. Trinkgläser, auf das Gerät. G Nehmen Sie das Gerät nicht in Betrieb und ziehen Sie sofort den Netzstecker aus der Steckdose, wenn: 1. sichtbare Schäden am Gerät oder am Netzkabel vorhanden sind, 2. nach einem Sturz oder Ähnlichem der Verdacht auf einen Defekt besteht, 3. Funktionsstörungen auftreten. Geben Sie das Gerät in jedem Fall zur Reparatur in eine Fachwerkstatt. G Ziehen Sie den Netzstecker nie am Kabel aus der Steckdose, fassen Sie immer am Stecker an! G Verwenden Sie zum Reinigen nur ein trockenes weiches Tuch, niemals Chemikalien oder Wasser. G Wird das Gerät zweckentfremdet, nicht richtig angeschlossen, falsch bedient oder nicht fachgerecht repariert, kann keine Garantie für das Gerät und keine Haftung für daraus resultierende Sachoder Personenschäden übernommen werden. Soll das Gerät endgültig aus dem Betrieb genommen werden, übergeben Sie es zur umweltgerechten Entsorgung einem örtlichen Recyclingbetrieb. GB 2 Safety Notes This unit corresponds to all relevant directives of the EU and is therefore marked with . WARNUNG The unit is supplied with hazardous mains voltage (230 V~). Leave servicing to skilled personnel only. Inexpert handling of the unit may cause an electric shock hazard. Please observe the following items in any case: G The unit is suitable for indoor use only. Protect it against dripping water and splash water, high air humidity, and heat (admissible ambient temperature range 0 – 40 °C). G Do not place any vessel filled with liquid on the unit, e. g. a drinking glass. G Do not operate the unit and immediately disconnect the mains plug from the socket 1. in case of visible damage to the unit or to the mains cable, 2. if a defect might have occurred after the unit was dropped or suffered a similar accident, 3. if malfunctions occur. In any case the unit must be repaired by skilled personnel. G Never pull the mains cable for disconnecting the mains plug from the socket, always seize the plug! G For cleaning only use a dry, soft cloth; never use water or chemicals. G No guarantee claims for the unit and no liability for any resulting personal damage or material damage will be accepted if the unit is used for other purposes than originally intended, if it is not correctly connected, operated, or not repaired in an expert way. If the unit is to be put out of operation definitively, take it to a local recycling plant for a disposal which is not harmful to the environment. 6 3 Einsatzmöglichkeiten und Zubehör Diese Aktivbox (Modell TXA-800, TXA-800CD oder TXA-802CD) ist eine Kombination aus einem 2-Wege-Lautsprechersystem und einem Verstärker mit Anschlüssen für ein Mikrofon und ein Audiogerät mit Line-Ausgangspegel, wie z. B. CD-Player oder Kassettenrecorder. Die Modelle TXA-8..CD sind mit einem CD/MP3-Player ausgestattet. Das Gerät kann wahlweise mit 230-V-Netzspannung oder über die internen Blei-Gel-Akkus betrieben werden, die sich mit dem integrierten Ladeteil aufladen lassen. Die Box eignet sich damit optimal für den mobilen Einsatz, z. B. für Vorträge oder Verkaufsveranstaltungen. 3.1 Konformität und Zulassung der Sendeeinheit des Modells TXA-802CD Hiermit erklärt MONACOR INTERNATIONAL, dass sich die Sendeeinheit des Geräts TXA-802CD in Übereinstimmung mit den grundlegenden Anforderungen und den übrigen einschlägigen Bestimmungen der Richtlinie 1999/5/EG befindet. Die Konformitätserklärung kann bei MONACOR INTERNATIONAL angefordert werden. Die Sendeeinheit ist für den Betrieb in den EU- und EFTA-Staaten allgemein zugelassen und anmelde- und gebührenfrei. 4 Aufstellung Jedes Modell besitzt eine Multifrequenz-Empfangseinheit, die mit Diversity-Technik* im UHF-Bereich 863,1 – 864,9 MHz arbeitet. Der Frequenzbereich ist in 16 Kanäle aufgeteilt, die sich frei wählen lassen. Das Modell TXA-802CD verfügt zusätzlich über eine zweite Empfangseinheit und eine Sendeeinheit, die beide ebenfalls im Bereich 863,1 – 864,9 MHz arbeiten. Mit der Sendeeinheit lässt sich das Audiosignal der Box kabellos weiteren Aktivboxen der TXA-800Serie zuführen (Audio-Link-Betrieb). Das Gerät kann frei aufgestellt oder über die Stativhülse auf der Unterseite auf ein PA-BoxenStativ (z. B. PAST-Serie aus dem Sortiment von MONACOR) gesteckt werden. Als Zubehör ist die Schutzhülle TXA-800BAG aus schwarzem Kunstgewebe erhältlich (BestellNummer 17.2340). Sie kann auch während des Betriebs auf der Box verbleiben. Aus dem Sortiment von MONACOR eignen sich z. B. folgende Sender für den Betrieb mit den Aktivboxen der TXA-800-Serie: 5 TXA-800HSE (Bestell-Nr. 17.2250) Multifrequenz-Taschensender mit Krawatten- und Kopfbügelmikrofon TXA-800HT (Bestell-Nr. 17.2260) Handmikrofon mit Multifrequenz-Sender TXA-800ST (Bestell-Nr. 17.2600) netzbetriebener Multifrequenz-Sender * Diversity-Technik: Das Sendesignal wird von zwei Antennen empfangen und hinsichtlich der Qualität überprüft. Das jeweils bessere Signal wird verwendet. 3 Applications and Accessories This active system (model TXA-800, TXA-800CD, or TXA-802CD) is a combination of a 2-way speaker system and an amplifier with connections for a microphone and an audio unit with line output level, e. g. CD player or cassette recorder. Models TXA-8..CD are equipped with a CD/MP3 player. The unit can either be operated with a 230 V mains voltage or via the internal rechargeable lead gel batteries to be charged with the integrated charging part. Thus, the speaker system is ideally suited for mobile applications, e. g. for lectures or sales promotion. Each model has a multifrequency receiving unit operating with diversity technique* in the UHF range of 863.1 – 864.9 MHz. The frequency range is divided into 16 channels to be selected as desired. Model TXA-802CD is additionally equipped with a second receiving unit and a transmitting unit, both also operating in the range of 863.1 – 864.9 MHz. The transmitting unit allows to feed the audio signal of the speaker system to further active speaker systems of the TXA-800 series by wireless transmission (audio link mode). From the MONACOR product range, e. g. the following transmitters are suitable for operation with the active speaker systems of the TXA-800 series: TXA-800HSE (order No. 17.2250) Multifrequency pocket transmitter with tie-clip microphone and headband microphone TXA-800HT (order No. 17.2260) Hand-held microphone with multifrequency transmitter TXA-800ST (order No. 17.2600) mains-operated multifrequency transmitter * Diversity technique: The transmitting signal is received by two antennas and checked for its quality. The better signal is used in each case. Stromversorgung /Akkus aufladen Soll die Aktivbox über eine Netzsteckdose betrieben werden und/ oder sollen die internen Blei-Gel-Akkus aufgeladen werden, das beiliegende Netzkabel an die Netzbuchse (13) anschließen und mit einer Steckdose (230 V~/50 Hz) verbinden. Bei Netzanschluss der Aktivbox ist immer die Ladeautomatik für die Akkus aktiv und die Ladeanzeige CHARGE (4) leuchtet: rotes Leuchten: Akkus werden aufgeladen grünes Leuchten: Akkus sind voll geladen Die Box muss zum Laden nicht mit dem Schalter POWER (5) eingeschaltet sein, kann aber während des Ladevorgangs ganz normal benutzt werden. 3.1 Conformity and approval of the transmitting unit of model TXA-802CD Herewith, MONACOR INTERNATIONAL declare that the transmitting unit of TXA-802CD is in accordance with the basic requirements and the other relevant regulations of the directive 1999/5/EC. The declaration of conformity is available on request from MONACOR INTERNATIONAL. The transmitting unit is licence-free and generally approved for operation in EU and EFTA countries. 4 Setting up Place the unit as desired or put it onto a PA speaker stand (e. g. PAST series from the MONACOR product range) via the stand sleeve on its lower side. The protective bag TXA-800BAG made of black synthetic fibre is available as an accessory (order No. 17.2340). It may also remain on the speaker system during operation. 5 Power Supply/ Recharging the Batteries To operate the active speaker system via a mains socket and/or to recharge the internal lead gel batteries, connect the mains cable provided to the mains jack (13) and to a mains socket (230 V~/ 50 Hz). When the active speaker system is connected to the mains, the automatic charging for the rechargeable batteries will always be active. The LED CHARGE (4) will light up: red: the batteries are being charged green: the batteries have been fully charged For charging, it will not be necessary to switch on the speaker system with the POWER switch (5); however, it can be operated as usual during the charging process. The charge control circuit will prevent overcharge of the batteries; it is recommended, however, to dis- Durch die Lade-Schutzschaltung können die Akkus nicht überladen werden. Jedoch sollte der Netzstecker nach dem Aufladen aus der Steckdose gezogen werden, wenn das Gerät länger nicht betrieben wird. Wichtig: Um Beschädigungen der Akkus durch Tiefentladung zu vermeiden und eine Reduzierung ihrer Lebensdauer zu verhindern, beachten Sie bitte folgende Hinweise: 1. Vor der ersten Inbetriebnahme und nach längerer Lagerung die Akkus immer voll aufladen. 2. Blinkt der POWER-Schalter bei Akkubetrieb, sind die Akkus fast entladen und sollten möglichst bald aufgeladen werden. 3. Die Akkus vor jeder längeren Lagerung sowie mindestens alle 2 Monate während der Lagerzeit voll aufladen. 6 Audioanschlüsse 6.1 Eingänge Als Tonquellen können ein Mikrofon und ein StereoGerät mit Line-Ausgangspegel (z. B. CD-Player, DVD-Player, Kassetten- oder MD-Recorder) angeschlossen werden: – das Mikrofon wahlweise über einen XLR- oder einen 6,3-mm-Klinkenstecker an die symmetrisch beschaltete Buchse MIC IN (11) – das Stereo-Gerät mit Line-Ausgang an die CinchBuchsen LINE IN (9) Signal am Ausgang LINE OUT, wohl aber die Einstellungen der Klangregler (7). Hinweis: Die Aktivbox besitzt keinen Lautstärkeregler für das Gerät am Eingang LINE IN (9), d. h. das Signal des Geräts wird immer in seiner Eingangslautstärke auf den Ausgang LINE OUT gegeben. 6.3 Passive Lautsprecherbox Wird zur Beschallung zusätzlich eine Lautsprecherbox (ohne Verstärker) benötigt, kann diese an die Buchse SPEAKER (12) angeschlossen werden. Die Impedanz der Lautsprecherbox muss mindestens 8 Ω betragen. 7 Inbetriebnahme Vor dem Einschalten den Regler MASTER (6) für die Gesamtlautstärke erst ganz zurück auf MIN drehen, dann die Box mit dem Schalter POWER (5) einschalten (im eingeschalteten Zustand ist die Schalterposition wie in Abb. 1 dargestellt). Der Schalter leuchtet im Betrieb. Blinkt er bei Akkubetrieb, sind die Akkus fast entladen und sollten aufgeladen werden. Um bei Akku-Betrieb eine Beschädigung der Akkus durch Tiefentladung zu verhindern, sorgt ein Entladeschutz für eine rechtzeitige automatische Abschaltung des Geräts. Aufgrund der Selbstentladung der Akkus kann eine Tiefentladung jedoch auch auftreten, wenn das Gerät länger nicht betrieben wird. Beachten Sie daher unbedingt den Hinweiskasten in Kapitel 5. An die Cinch-Buchsen LINE OUT (10) kann z. B. ein Aufnahmegerät oder eine weitere Aktivbox zur Beschallung angeschlossen werden. An beiden Buchsen wird das Mono-Mischsignal der Box ausgegeben. Der Regler MASTER (6) für die Gesamtlautstärke der Aktivbox hat keinen Einfluss auf das Important: To prevent damage to the batteries by deep discharge and to prevent a reduction of their lives, please observe the following notes: 1. Always fully recharge the batteries prior to initial operation and after longer storage. 2. If the POWER switch starts flashing during battery operation, the batteries are almost discharged and should be recharged as soon as possible. 3. Fully recharge the batteries prior to longer storage and at least every 2 months during storage. 6 Audio Connections 6.1 Inputs A microphone and a stereo unit with line output level (e. g. CD player, DVD player, cassette recorder or MD recorder) may be connected as audio sources: – Connect the microphone either via an XLR plug or a 6.3 mm plug to the balanced jack MIC IN (11). – Connect the stereo unit with line output to the phono jacks LINE IN (9). 6.2 Output LINE OUT The phono jacks LINE OUT (10) allow e. g. connection of a recorder or another active speaker system for PA application. At both jacks the mixed mono signal of the speaker system is available. The control MASTER (6) for the master volume of the active speaker system will not affect the signal at the output LINE OUT; the adjustments of the tone controls (7), however, will affect it. Note: The active speaker system is not provided with a volume control for the unit at the input LINE IN (9); i. e. the Bedienung VORSICHT Stellen Sie die Lautstärke der Box nie sehr hoch ein. Hohe Lautstärken können auf Dauer das Gehör schädigen! Das Ohr gewöhnt sich an hohe Lautstärken und empfindet sie nach einiger Zeit als nicht mehr so hoch. Darum erhöhen Sie eine hohe Lautstärke nach der Gewöhnung nicht weiter. D A CH 1) Den Regler MASTER (6) für die Gesamtlautstärke so weit aufdrehen, dass die nachfolgenden Einstellungen gut über die Lautsprecher zu hören sind. 2) Die gewünschten Signalquellen einschalten und deren Signale mit den entsprechenden Lautstärkereglern mischen oder nach Bedarf ein- und ausblenden (die Regler nicht benutzter Signalquellen stets ganz zurückdrehen): – für die Empfangseinheit/en (1): Ein-/Ausschalter und Lautstärkeregler (20) → siehe auch Kap. 8.1 – nur bei den Modellen TXA-...CD: für den eingebauten CD/MP3-Player (2): Lautstärkeregler LEVEL (40) → siehe auch Kap. 8.2 – für das Mikrofon am Eingang MIC IN (11): Lautstärkeregler MIC (8) Für den Eingang LINE IN (9) ist kein eigener Lautstärkeregler vorhanden, die Lautstärke der an diesem Eingang angeschlossenen Signalquelle lässt sich nur über den Regler MASTER (6) für die Gesamtlautstärke regulieren. 3) Mit den Reglern (7) – BASS für die Bässe und TREBLE für die Höhen – den Klang des Mischsignals optimieren. 6.2 Ausgang LINE OUT connect the mains plug from the socket after charging if the unit is not used for a longer period. 8 4) Mit dem Regler MASTER (6) den endgültigen Pegel für die Gesamtlautstärke der Aktivbox einstellen und ggf. anschließend die Klangeinstellungen korrigieren. signal of the unit will always be fed to the output LINE OUT at its input volume. 8 Operation CAUTION 6.3 Passive speaker system If a speaker system (without amplifier) is additionally required for PA applications, it may be connected to the jack SPEAKER (12). The minimum impedance of the speaker system must be 8 Ω. 7 Setting the System into Operation Prior to switching on, turn back the control MASTER (6) for the master volume to MIN first, then switch on the speaker system with the switch POWER (5) [the corresponding switch position is shown in figure 1]. The switch will light up during operation. If it starts flashing during rechargeable battery operation, the batteries are almost discharged and should be recharged. To prevent damage to the rechargeable batteries by deep discharge during battery operation, a discharge protection will automatically switch off the unit at the right time. However, due to self-discharge of the batteries, a deep discharge may also occur when the unit is not operated for a longer period of time. Therefore, always observe the notes in the box in chapter 5. GB Never adjust the active speaker system to a very high volume. Permanent high volumes may damage your hearing! The human ear will get accustomed to high volumes which do not seem to be that high after some time. Therefore, do not further increase a high volume after getting used to it. 1) Advance the control MASTER (6) for the master volume to such an extent that the subsequent adjustments can be heard well via the speakers. 2) Switch on the desired signal sources and mix their signals with the corresponding volume controls or fade them in and out as required (always completely turn back the controls of the signal sources not used): – for the receiving unit/units (1): on-off switch and volume control (20) → also see chapter 8.1 – for models TXA-...CD only: for the integrated CD/MP3 player (2): volume control LEVEL (40) → also see chapter 8.2 – for the microphone at the input MIC IN (11): volume control MIC (8) The input LINE IN (9) is not provided with an individual volume control; the volume of the signal source connected to this input can only be adjusted via the control MASTER (6) for the master volume. 3) With the controls BASS and TREBLE (7) optimize the sound of the mixed signal. 4) With the control MASTER (6), adjust the final level for the master volume of the active speaker system, then readjust the sound adjustments, if required. 5) For model TXA-802CD only: Via the transmitting unit (3), the mixed signal 7 D A CH 5) nur bei Modell TXA-802CD: Über die Sendeeinheit (3) lässt sich das Mischsignal [unbeeinflusst von den Klangreglern (7) und dem Regler MASTER (6)] per Funkübertragung weiteren Aktivboxen der TXA-8..-Serie zuführen. Siehe dazu Kapitel 8.3. 6) Nach dem Betrieb den Schalter POWER (5) in die „Aus“-Position stellen. 4) Ist der Sender eingeschaltet und auf den gleichen Kanal wie die Empfangseinheit eingestellt, leuchtet die Anzeige RX (16) und signalisiert damit, dass ein Funksignal empfangen wird. Die Anzeige AF (17) leuchtet, wenn der Sender ein Audiosignal mit ausreichendem Pegel auf der eingestellten Funkfrequenz sendet. 5) Mit dem Regler (20) die gewünschte Lautstärke für das empfangene Audiosignal einstellen. 8.1 Multifrequenz-Empfangseinheit Modell TXA-800/-800CD: 1 Empfangseinheit Modell TXA-802CD: 2 Empfangseinheiten 1) Zum Einschalten der Empfangseinheit den Ein-/ Ausschalter und Lautstärkeregler (20) von der Position OFF („Aus“) aufdrehen. Die Anzeige A/B (15) leuchtet rot oder grün in Abhängigkeit, welche Empfangsantenne A oder B zurzeit aktiv ist. 2) Den Sender noch ausgeschaltet lassen. Erst die Empfangseinheit auf einen freien und störungsfreien Übertragungskanal einstellen: 1. Die Taste SET (18) drücken. Die Kanalanzeige im Display (14) blinkt. 2. Solange die Kanalanzeige blinkt (ca. 10 Sek. lang), kann mit den Tasten und (19) der Kanal gewählt werden: Taste zur Kanalwahl „aufwärts“, Taste zur Kanalwahl „abwärts“. 3. Die Kanalwahl mit der Taste SET bestätigen. (Wird die Wahl nicht innerhalb von 10 Sek. mit der Taste SET bestätigt, schaltet das Gerät zurück auf den vorher eingestellten Kanal.) Leuchtet nach der Kanalwahl bei ausgeschaltetem Sender die Anzeige RX (16), werden Störsignale bzw. Signale anderer Sender auf diesem Kanal empfangen. In diesem Fall die Empfangseinheit auf einen anderen Kanal einstellen. GB Auswechseln der Batterie: 1) Die Verriegelung des Batteriehalters nach rechts drücken (1. Pfeil in der Abbildung unten) und den Halter herausziehen (2. Pfeil). 8.2 CD / MP3-Player nur bei den Modellen TXA-800CD und TXA-802CD Über den Player lassen sich sowohl StandardAudio-CDs als auch CDs, USB-Massenspeicher und SD-Karten mit MP3-Dateien abspielen. Hinweis: Bei wiederbeschreibbaren CDs (CD-RW) können je nach CD-Typ, verwendetem CD-Brenner und Brennprogramm beim Abspielen Probleme auftreten. Der „Anti-Shock“-Speicher des Players kann kurzzeitige Störungen beim Abtasten einer CD durch Stöße oder Vibrationen ausgleichen. Er kann jedoch keine anhaltenden, heftigen Erschütterungen ausgleichen. Die Box muss daher bei CD-Betrieb immer stationär betrieben werden, d. h. auf festem, unbeweglichem Untergrund stehen. Hinweis zu Tonaussetzern und Lesefehlern Zigarettenrauch und Staub dringen leicht durch alle Öffnungen des Geräts und setzen sich auch auf der Optik des Laser-Abtastsystems ab. Sollte dieser Belag zu Lesefehlern und Tonaussetzern führen, muss das Gerät in einer Fachwerkstatt gereinigt werden. Diese Reinigung ist kostenpflichtig, auch während der Garantiezeit! 2) Die alte Batterie entfernen und die neue Batterie (3-V-Knopfzelle vom Typ CR 2025) mit dem Pluspol nach oben in den Halter legen. 3) Den Halter zurück in die Fernbedienung schieben. Verbrauchte Batterien dürfen nicht in den Hausmüll geworfen werden. Geben Sie sie zur umweltgerechten Entsorgung nur in den Sondermüll (z. B. Sammelbehälter im Einzelhandel). 8.2.2 Ein- und Ausschalten / Abspielmedium einsetzen und entfernen Der Player wird mit der Taste POWER (29) ein- und ausgeschaltet. 3) Es ist möglich, sich für den eingestellten Kanal kurz die Funkfrequenz anzeigen zu lassen: solange die Taste oder gedrückt gehalten wird, zeigt das Display statt des Kanals die Frequenz an. 8.2.1 Fernbedienung Die IR-Fernbedienung für den Player wird mit Batterie geliefert. Vor dem ersten Betrieb die Schutzfolie aus dem Batteriehalter ziehen. Beim Drücken einer Taste die Fernbedienung immer auf den IR-Sensor (30) des Players richten. Dabei muss Sichtverbin- Abspielmedium einsetzen: – Eine CD mit der Beschriftung nach oben so weit in den CD-Schlitz (27) schieben, bis sie automatisch eingezogen wird und/oder – einen USB-Speicher (z. B. USB-Stick, USB-Festplatte mit eigener Stromversorgung) mit der USBBuchse (28) verbinden und/oder – eine SD-Karte (abgeschrägte Ecke nach oben [unaffected by the tone controls (7) and the control MASTER (6)] can be fed to further active speaker systems of the TXA-8.. series by wireless transmission. Also see chapter 8.3. (16) will light up to indicate reception of a radio signal. The LED AF (17) will light up if the transmitter transmits an audio signal of sufficient level on the radio frequency adjusted. If the unit is not used for a longer time, remove the battery from the remote control as a precaution so that it will not be damaged in case the battery should leak. 6) After operation, set the switch POWER (5) to the off position. 5) Adjust the desired volume for the audio signal received with the control (20). 8.1 Multifrequency receiving unit 8.2 CD / MP3-player Replacing the battery: 1) Push the latch of the battery holder to the right (first arrow in the figure below) and remove the holder (second arrow). model TXA-800 / -800CD: 1 receiving unit model TXA-802CD: 2 receiving units 1) To switch on the receiving unit, advance the on-off switch and volume control (20) from the position OFF. The LED A/B (15) will show red or green depending on the receiving antenna A or B currently active. 2) Leave the transmitter switched off for the time being. First set the receiving unit to a transmission channel which is free and interference-free: 1. Press the button SET (18). The channel indication on the display (14) will start flashing. 2. As long as the channel indication keeps flashing (for approx. 10 seconds), the channel can be selected with the keys and (19): key for channel selection “upward”; key for channel selection “downward”. 3. Confirm the channel selection with the button SET. (If the selection is not confirmed within 10 seconds with the button SET, the unit will return to the channel previously adjusted.) If the LED RX (16) lights up after channel selection when the transmitter is switched off, interfering signals or signals of other transmitters are received on this channel. In this case, adjust the receiving unit to a different channel. 3) It is possible to shortly show the radio frequency for the channel adjusted: as long as the key or is kept pressed, the display will show the frequency instead of the channel. 4) If the transmitter is switched on and set to the same channel as the receiving unit, the LED RX 8 dung zwischen Sensor und Fernbedienung bestehen. Bei längerem Nichtgebrauch die Batterie sicherheitshalber aus der Fernbedienung nehmen, damit diese bei einem eventuellen Auslaufen der Batterie nicht beschädigt wird. for models TXA-800CD and TXA-802CD only The player allows to replay standard audio CDs and CDs, USB mass storage devices and SD cards with MP3 files. Note: With rewritable CDs (CD-RW), problems may occur when replaying according to the CD type, the CD burner and the burning programme used. 2) Remove the old battery and insert the new battery (3 V button cell, type CR 2025) into the holder with the positive pole pointing upwards. The anti-shock memory of the player will be able to compensate temporary shocks or vibrations occurring during the CD sampling; however, it will not be able to compensate continuous, severe vibrations. For CD operation, the system must therefore always be operated in a stationary way, i. e. it must be placed on a solid, immobile ground. 3) Push the holder back into the remote control. Note concerning sound interruptions and reading errors Cigarette smoke and dust will easily penetrate through all openings of the unit and also settle on the optics of the laser sampling system. This deposit may cause reading errors and sound interruptions. The unit must then be cleaned by skilled personnel. Please note that there will be a charge on cleaning, even during the warranty period! 8.2.2 Switching on and off / inserting and removing the playing medium The player is switched on and off with the POWER button (29). 8.2.1 Remote control The IR remote control for the player is supplied with a battery. Prior to initial operation, remove the foil from the battery holder. When pressing a button, always direct it to the infrared sensor (30) of the player. There must be no obstacles between the sensor and the remote control. Dead batteries do not belong in the household rubbish; always take them to a special waste disposal (e. g. collection container at your retailer) which is not harmful to the environment. Inserting a playing medium: – Insert a CD with the lettering showing upwards into the CD slot (27) until it is retracted automatically and / or – connect a USB storage device (e. g. USB flash drive, USB hard disk with separate power supply) to the USB port (28) and / or – insert an SD card (bevelled corner upward and contacts to the right) into the slot (32) until it will engage. und Kontakte nach rechts) so weit in den Kartenschlitz (32) schieben, bis sie einrastet. Abspielmedium entfernen: Zum Herausfahren der CD zweimal die Auswurftaste STOP/EJ oder EJECT (38) drücken (1. Mal: Schalten auf Stopp, 2. Mal: CD wird herausgefahren). Nach dem Herausfahren kann die CD durch Drücken der Auswurftaste wieder eingezogen werden. Den USB-Speicher von der USB-Buchse trennen und zum Entfernen der SD-Karte, diese erst durch Hineindrücken entriegeln, dann herausziehen. USBSpeicher und SD-Karte sollten nicht während ihrer Wiedergabe entfernt werden. 8.2.3 Abspielmedium auswählen Nach jeder Inbetriebnahme der Box ist automatisch das CD-Laufwerk angewählt. Mit der Taste CD/ USB/SD (33) lässt sich zwischen den Abspielmedien umschalten: Nach dem Drücken der Taste wird im Display das gewählte Medium angezeigt ( , oder ). Kurz danach startet seine Wiedergabe. Ist ein USB-Speicher oder eine SD-Karte angewählt und wird entfernt, schaltet der Player automatisch auf das CD-Laufwerk um. Ebenso wenn eine neue CD eingezogen wird. 8.2.4 Wiedergabe / Pause / Stopp Nach dem Einlesen des Abspielmediums startet die Wiedergabe (Einblendung ). Um die Wiedergabe zu unterbrechen (Einblendung ) und wieder fortzusetzen, die Taste PLAY/PAUSE oder (37) drücken. Das Display zeigt die bereits gespielte Zeit des Titels (Min. : Sek.). Um die Wiedergabe zu stoppen, können folgende Tasten gedrückt werden: – die Taste (45) – die Taste STOP/EJ oder EJECT (38) Im Stoppmodus schaltet das Display auf die Zeitanzeige „00 : 00“. Um die Wiedergabe mit dem ersten Titel wieder zu starten, die Taste PLAY/PAUSE oder drücken. 8.2.5 Lautstärke einstellen / Stummschaltung Die Lautstärke mit dem Regler VOLUME (40) einstellen. Zum Ausschalten und Wiedereinschalten des Tons die Taste (48) drücken. 8.2.6 Titelwahl Audio-CDs Bei Audio-CDs (Einblendung „CD“) zeigt das Display während Wiedergabe und Pause die Titelnummer und im Stoppmodus die Gesamtanzahl aller Titel. 1. Titel vor- oder zurückspringen: Die Tasten REV/F.WD oder S / S (36) verwenden (REV/ S = erst Sprung an den Titelanfang, dann mit jedem weiteren Drücken einen Titel zurück, F.WD/ S = einen Titel vorwärts). 2. Titelnummer eingeben: Über den Ziffernblock (41) die Titelnummer eingeben und mit der Taste ENTER (47) bestätigen. MP3-Abspielmedien Bei Abspielmedien mit MP3-Dateien (Einblendung „MP3“) zeigt das Display während Wiedergabe und Pause die Ordnernummer und die Titelnummer innerhalb des Ordners. Titel ohne Ordner im Hauptverzeichnis sind Ordner Nr. 1 zugewiesen. Im Stoppmodus werden die Gesamtanzahl der Ordner und die Gesamtanzahl der Titel auf dem Abspielmedium angezeigt. 1. Titel vor- oder zurückspringen: Mit jedem Drücken der Taste FOLDER (34) wird auf den nächsten Ordner gesprungen. Zur Titelwahl die Tasten REV/F.WD oder S / S (36) verwenden (REV/ S = erst Sprung an den Titel- In the stop mode the display is switched to the time indication “00 : 00”. To restart the replay with the first track, press the button PLAY/ PAUSE or . Removing a playing medium: To extract the CD, press the eject button STOP/ EJ or EJECT (38) twice (first time: switching to stop, second time: CD is ejected). After ejecting, the CD can be retracted again by pressing the eject button. Disconnect the USB storage device from the USB port and to remove the SD card, first unlock it by pushing it into the slot, then remove it. USB storage device and SD card should not be removed during their replay. 8.2.3 Selecting the playing medium Each time the speaker system is set into operation, the CD player mechanism is automatically selected. It is possible to select the playing media with the button CD / USB / SD (33): After pressing the button, the selected medium is shown on the display ( , or ). Shortly after that its replay will start. If a USB storage device or an SD card has been selected and is then removed, the player automatically switches over to the CD player mechanism. The same happens when a new CD is retracted. 8.2.4 Replay / pause / stop After reading in the playing medium, the replay starts (insertion ). To interrupt the replay (insertion ) and to continue it again, press the button PLAY/ PAUSE or (37). The display shows the time already played of the track (min.: sec.). To stop the replay, the following buttons may be pressed: – Button (45) – Button STOP/ EJ or EJECT (38) 8.2.5 Adjusting the volume / muting Adjust the volume with the control VOLUME (40). To deactivate and reactivate the sound, press the button (48). 8.2.6 Track selection Audio CDs For audio CDs (insertion “CD”) the display shows the track number during replay and pause and the total number of all tracks in the stop mode. 1. Advancing or reversing tracks: Use the buttons REV/ F.WD or S / S (36) [REV/ S = return to the track beginning first, then one more track is reversed each time the button is pressed, F.WD/ S = one track forward]. 2. Entering track number: Enter the track number via the numerical keys (41) and confirm with the button ENTER (47). MP3 playing media For playing media with MP3 files (insertion “MP3”) the display shows the folder number and the track number within the folder during replay and pause. Tracks without folder in the main directory are assigned to folder No. 1. In the stop mode the total number of the folders and the total number of the tracks of the playing medium are shown. 1. Advancing or reversing tracks: Each time the button FOLDER (34) is pressed, the player goes to the next folder. For track selection use the buttons REV/ F.WD or S / S (36) [REV/ S = return to the track beginning first, then one more track is reversed, each time the button is pressed, F.WD/ S = one track forward]. 2. Entering the track number: Via the numerical keys (41) enter the number of the track on the playing medium (not the number anfang, dann mit jedem weiteren Drücken einen Titel zurück, F.WD/ S = einen Titel vorwärts). 2. Titelnummer eingeben: Über den Ziffernblock (41) die Nummer eingeben, die der Titel auf dem Abspielmedium hat, (nicht die Nummer innerhalb des Ordners!) und mit der Taste ENTER (47) bestätigen. D A CH Hinweis: In einigen Fällen springt der Player beim Drücken der Rücksprungtaste nicht erst an den Titelanfang, sondern gleich zum vorherigen Titel (z. B. bei CD-Betrieb im Pausenmodus). 8.2.7 Schneller Vor- und Rücklauf Für den schnellen Vor-/Rücklauf die Tasten FB/ F.F oder / (35) verwenden: FB oder = zurück, F.F oder = vorwärts. Die jeweilige Taste kurz drücken. Ist die gewünschte Stelle erreicht, zur Wiedergabe die Taste PLAY/ PAUSE oder (37) drücken. 8.2.8 Wiederholfunktionen / Zufällige Titelfolge Es lassen sich drei Wiederholfunktionen anwählen. Die gewählte Funktion wird im Display angezeigt. Mit der Taste REP (44) wird umgeschaltet zwischen: – „REPEAT 1“: endlose Wiederholung des Titels – „REPEAT FOLDER“ (nur bei MP3-Betrieb): endlose Wiederholung aller Titel im Ordner – „REPEAT ALL“: endlose Wiederholung aller Titel auf dem Abspielmedium – keine REPEAT-Einblendung: keine Wiederholfunktion eingeschaltet; nach dem Abspielen aller Titel schaltet der Player auf Stopp Zum Abspielen der Titel in zufälliger Reihenfolge die Taste RAN (43) drücken. Im Display wird „SHUFFLE“ eingeblendet. Zum Ausschalten der ShuffleFunktion die Taste erneut drücken. Eine eingeschaltete Wiederholfunktion wird beim Einschalten der Shuffle-Funktion ausgeschaltet und umgekehrt. within the folder!) and confirm with the button ENTER (47). GB Note: In some cases the player does not go to the track beginning first when pressing the return button but immediately goes to the previous track (e. g. in case of CD operation in the pause mode). 8.2.7 Fast forward and reverse For fast forward and reverse use the buttons FB/ F.F or / (35): FB or = reverse, F.F or = forward. Press the respective button shortly. If the desired spot is reached, press the button PLAY/ PAUSE or (37) for replay. 8.2.8 Repeat functions / random track sequence Three repeat functions are available for selection. The selected function is shown on the display. Use the button REP (44) to select: – “REPEAT 1”: continuous repeat of the track – “REPEAT FOLDER” (for MP3 mode only): continuous repeat of all tracks in the folder – “REPEAT ALL”: continuous repeat of all tracks on the playing medium – No REPEAT insertion: no repeat function activated; after playing all tracks, the player is set to stop To replay the tracks in a random order, press the button RAN (43). “SHUFFLE” is inserted on the display. To switch off the shuffle function, press the button again. An activated repeat function is deactivated when activating the shuffle function and vice versa. 8.2.9 Playing a loop A section within a track can be continuously repeated as a loop. 1) If the starting point of the section is reached in the track currently playing, press the button A – B (46). The display shows “A ©”. 2) If the end point of the section to be repeated is reached, press the button again. The display 9 D A CH 8.2.9 Schleife abspielen Ein Abschnitt innerhalb eines Titels lässt sich als Schleife fortlaufend wiederholen. 1) Ist im laufenden Titel der Anfangspunkt des Abschnitts erreicht, die Taste A – B (46) drücken. Das Display zeigt „A © “. 2) Ist der Endpunkt des zu wiederholenden Abschnitts erreicht, die Taste erneut drücken. Das Display zeigt „A © B“. Der Abschnitt wird ständig wiederholt. 3) Zum Beenden der Schleife die Taste ein drittes Mal drücken. „A © B“ erlischt. 8.2.10 Abspieltempo und Tonhöhe ändern Mit den PITCH-Tasten (39) lässt sich das Abspieltempo und damit die Tonhöhe verändern. Taste HI oder HIGH Erhöhen des Tempos in 10 Schritten Taste LO oder LOW Reduzieren des Tempos in 10 Schritten Die jeweilige Taste so oft drücken, bis das gewünschte Tempo erreicht ist. Bei jedem Tastendruck zeigt das Display kurz die gewählte Einstellung an, z. B. wenn das Normaltempo um 5 Schritte erhöht wurde wenn das Normaltempo um 2 Schritte reduziert wurde Um zum normalen Abspieltempo zurückzukehren, einmal die Taste NOR drücken. 8.2.11 Titelfolge programmieren 1) Um in den Programmiermodus zu schalten, die Taste PROG (42) drücken. Im Display wird „PROGRAM“ eingeblendet. 2) Den ersten Titel der Titelfolge anwählen: entweder – mit den Tasten REV/F.WD oder S / S (36) auf den Titel springen; bei MP3-Betrieb ggf. GB shows “A © B”. The section is repeated permanently. 3) To finish the loop, press the button a third time. “A © B” will be extinguished. 8.2.10 Changing the replay speed and pitch The PITCH buttons (39) allow to change the replay speed and thus the pitch. button HI or HIGH: to increase the replay speed in 10 steps button LO or LOW: to decrease the replay speed in 10 steps Press the corresponding button repeatedly until the desired speed is reached. Each time the button is pressed, the display shortly shows the selected adjustment, e. g. Für alle weiteren Titel genauso verfahren, bis die gesamte Titelfolge (max. 10) programmiert ist. 3) Zum Starten der Titelfolge die Taste PLAY/ PAUSE oder (37) drücken, „PROGRAM“ erlischt und „MEMORY“ wird eingeblendet. Um wieder zum Abspielen in normaler Reihenfolge zurückzukehren, die Taste PROG drücken: „MEMORY“ erlischt und die Programmierung ist gelöscht. 4) Ist keine Wiederholfunktion eingeschaltet (verfügbar sind „REPEAT 1“ und „REPEAT ALL“ → Kap. 8.2.8), schaltet der Player nach dem Abspielen der Titelfolge auf Stopp, die Titelfolge ist damit gelöscht. 8.3 Multifrequenz-Sendeeinheit nur bei Modell TXA-802CD Werden für die Beschallung mehrere Aktivboxen benötigt, ist ein kabelloser Audio-Link-Betrieb möglich: Über die Sendeeinheit einer Aktivbox TXA-802CD (Hauptgerät) lässt sich das vom Regler MASTER (6) und von den Klangreglern (7) unbeeinflusste Mischsignal auf die Empfangseinheiten anderer Aktivboxen der TXA-8..-Serie (Nebengeräte) übertragen. 1) Zum Einschalten der Sendeeinheit den Ein-/Ausschalter und Lautstärkeregler (26) von der Position OFF („Aus“) aufdrehen. Die Anzeige TX (22) leuchtet und signalisiert damit, dass ein Funksignal gesendet wird. and press the button ENTER (47) to confirm. The display shows the memory location number instead of the time indication. For all further tracks proceed the same way until the complete track sequence (10 max.) has been programmed. 3) To start the track sequence, press the button PLAY/ PAUSE or (37), “PROGRAM” will be extinguished and “MEMORY” will be inserted. To return to replay in standard order, press the button PROG: “MEMORY” will be extinguished and the programming will be deleted. 4) If no repeat function is activated (“REPEAT 1” and “REPEAT ALL” are available → chapter 8.2.8), the player is set to stop after playing the track sequence, thus the track sequence is deleted. when the standard speed has been increased by 5 steps 8.3 Multifrequency transmitting unit when the standard speed has been decreased by 2 steps If several active speaker systems are required for PA application, a wireless audio link mode is possible: Via the transmitting unit of an active speaker system TXA-802CD (master unit), the mixed signal unaffected by the control MASTER (6) and by the tone controls (7) can be transmitted to the receiving units of other active speaker systems of the TXA-8.. series (slave units). 1) To switch on the transmitting unit, advance the on-off switch and volume control (26) from the position OFF. The LED TX (22) will light up to indicate transmission of a radio signal. To return to standard speed, press the button NOR once. 8.2.11 Programming a track sequence 1) To switch to the programming mode, press the button PROG (42). “PROGRAM” is inserted on the display. 2) Select the first track of the track sequence: either – go to the track with the buttons REV/ F.WD or S / S (36); for MP3 operation first select the folder with the button FOLDER (34), if required or – enter the track number directly via the numerical keys (41) [for MP3 operation: the number of the track on the playing medium, not in the folder!] 10 erst den Ordner mit der Taste FOLDER (34) anwählen oder – direkt über die Zifferntasten (41) die Titelnummer eingeben (bei MP3-Betrieb: die Nummer, die der Titel auf dem Abspielmedium hat, nicht im Ordner!) und zur Bestätigung die Taste ENTER (47) drücken. Das Display zeigt statt der Zeitanzeige die Speicherplatznummer an. for model TXA-802 only 2) At the receiving units of the slave units, adjust the transmission channel for the audio link mode and adjust the transmitting unit of the master unit to the same channel: 1. Press the button SET (24). The channel indication on the display (21) will start flashing. 2. As long as the channel indication keeps flashing (for approx. 10 seconds), the channel can 2) An den Empfangseinheiten der Nebengeräte den Übertragungskanal für den Audio-Link-Betrieb einstellen und die Sendeeinheit des Hauptgeräts auf den gleichen Kanal einstellen: 1. Die Taste SET (24) drücken. Die Kanalanzeige im Display (21) blinkt. 2. Solange die Kanalanzeige blinkt (ca. 10 Sek. lang), kann mit den Tasten und (25) der Kanal gewählt werden: Taste zur Kanalwahl „aufwärts“, Taste zur Kanalwahl „abwärts“. 3. Die Kanalwahl mit der Taste SET bestätigen. (Wird die Wahl nicht innerhalb von 10 Sek. mit der Taste SET bestätigt, schaltet das Gerät zurück auf den vorher eingestellten Kanal.) Wichtig! Bei der Kanalwahl darauf achten, dass die Sendeeinheit und die Empfangseinheiten des Hauptgeräts auf unterschiedliche Kanäle eingestellt sind. Anderenfalls treten Rückkopplungen auf. 3) Es ist möglich, sich für den eingestellten Kanal kurz die Funkfrequenz anzeigen zu lassen: solange die Taste oder gedrückt gehalten wird, zeigt das Display statt des Kanals die Frequenz an. 4) Die Anzeigen AF LEVEL (23) geben den Pegel des Audiosignals an, das auf die Sendeeinheit gegeben wird: Die gelbe LED leuchtet, wenn das Eingangssignal der Sendeeinheit einen bestimmten Mindestpegel erreicht hat. Die rote LED leuchtet, wenn das Eingangssignal der Sendeeinheit den Maximalpegel erreicht hat, bei dem es noch nicht übersteuert wird. Die LED sollte nicht oder nur bei Signalspitzen kurz aufleuchten; leuchtet sie permanent, ist das Signal übersteuert. Die Lautstärke der jeweiligen Signalquelle/n dann entsprechend reduzieren. 5) Mit dem Regler (26) die gewünschte Lautstärke für das gesendete Audiosignal einstellen. be selected with the keys and (25): key for channel selection “upward”; key for channel selection “downward”. 3. Confirm the channel selection with the button SET. (If the selection is not confirmed within 10 seconds with the button SET, the unit will return to the channel previously adjusted.) Important! When selecting the channel, make sure that the transmitting unit and the receiving units of the master unit are set to different channels; otherwise there will be feedback. 3) It is possible to shortly show the radio frequency for the channel adjusted: as long as the button or is kept pressed, the display will indicate the frequency instead of the channel. 4) The LEDs AF LEVEL (23) will indicate the level of the audio signal fed to the transmitting unit: The yellow LED will light up when the input signal of the transmitting unit has reached a certain minimum level. The red LED will light up when the input signal of the transmitting unit has reached the maximum level where it is close to overload. The LED should not light up or light up only shortly with signal peaks; if it lights permanently, the signal is overloaded. In this case, reduce the volume of the corresponding signal source/sources accordingly. 5) Adjust the desired volume for the audio signal transmitted with the control (26). 9 Technische Daten Verstärkerleistung: . . . 80 WMAX /50 WRMS Lautsprechersystem: . 20-cm-Tieftöner (8″) und 2,5-cm-Hochtöner (1″) Frequenzbereich: . . . . 70 – 16 000 Hz Eingang MIC IN Empfindlichkeit: . . . 6 mV Anschluss: . . . . . . . XLR/6,3-mm-Klinke, sym. Eingang LINE IN Empfindlichkeit: . . . 800 mV Anschluss: . . . . . . . Cinch Ausgang LINE OUT Pegel: . . . . . . . . . . . 1 V Anschluss: . . . . . . . Cinch 9.1 Funkübertragung Empfangseinheit/en 1: PLL-Multifrequenz-Empfänger in Diversity-Technik 9.1.1 Frequenzen der Kanäle CH 1 bis CH 16 D CH Frequenz CH Frequenz A 1 863,1 MHz 9 863,2 MHz CH 2 864,1 MHz 10 864,2 MHz 3 863,6 MHz 11 863,7 MHz Reichweite: . . . . . . . . ca. 30 m 4 864,6 MHz 12 864,7 MHz Funkfrequenzbereich: 863,1 – 864,9 MHz, aufgeteilt in 16 Kanäle 5 863,3 MHz 13 863,4 MHz 6 864,3 MHz 14 864,4 MHz 7 863,8 MHz 15 863,9 MHz 8 864,8 MHz 16 864,9 MHz Sendeeinheit 2: . . . . . . PLL-Multifrequenz-Sender mit einer Sendeleistung von 10 mW (EIRP) 1. Modelle TXA-800 und TXA-800CD: 1 Empfangseinheit, Modell TXA-802CD: 2 Empfangseinheiten 2. nur bei Modell TXA-802CD Ausgang SPEAKER: . 6,3-mm-Klinkenbuchse für ein passives Lautsprechersystem (Impedanz min. 8 Ω) Klangregler Tiefen: . . . . . . . . . . ±15 dB/100 Hz Höhen: . . . . . . . . . . ±10 dB/10 kHz Einsatztemperatur: . . 0 – 40 °C Stromversorgung: . . . über die Netzspannung (230 V~/50 Hz/150 VA) oder die internen Blei-GelAkkus (2 × 12 V /3 Ah) Akku-Betriebsdauer: . . bis zu ca. 3 – 4 Stunden Hinweis für den Betrieb mehrerer Funksysteme TXA-8.. Es lassen sich 5 bis max. 8 Übertragungssysteme, die unterschiedliche Kanäle in diesem Frequenzbereich belegen, gleichzeitig einsetzen. Die Anzahl der Kanäle, die sich parallel nutzen lassen, hängt dabei von dem Abstand zwischen den einzelnen Übertragungssystemen, von möglichen HF-Störquellen und anderen örtlichen Gegebenheiten ab. Bei Einsatz mehrerer Systeme sollten die Kanäle in aufsteigender Reihenfolge belegt (z. B. für 8 Systeme die Kanäle CH 1 – CH 8) und der räumliche Abstand zwischen den Systemen möglichst groß gehalten werden. Änderungen vorbehalten. Abmessungen: . . . . . . 300 × 470 ×× 230 mm (B × H × T) Gewicht Modell TXA-800: . . 11,2 kg Modell TXA-800CD: 11,9 kg Modell TXA-802CD: 12,3 kg Diese Bedienungsanleitung ist urheberrechtlich für MONACOR ® INTERNATIONAL GmbH & Co. KG geschützt. Eine Reproduktion für eigene kommerzielle Zwecke – auch auszugsweise – ist untersagt. 9 Specifications Amplifier power: . . . . . 80 WMAX /50 WRMS Speaker system: . . . . 20 cm (8″) bass speaker and 2.5 cm (1″) tweeter Frequency range: . . . 70 – 16 000 Hz Input MIC IN Sensitivity: . . . . . . . 6 mV Connection: . . . . . . XLR/6.3 mm jack, bal. Input LINE IN Sensitivity: . . . . . . . 800 mV Connection: . . . . . . phono jacks Output LINE OUT Level: . . . . . . . . . . . 1 V Connection: . . . . . . phono jacks Output SPEAKER: . . . 6.3 mm jack for a passive speaker system (minimum impedance 8 Ω) Tone controls Treble: . . . . . . . . . . ±15 dB/100 Hz Bass: . . . . . . . . . . . ±10 dB/10 kHz Ambient temperature: 0 – 40 °C Power supply: . . . . . . via the mains voltage (230 V~/50 Hz/150 VA) or the internal rechargeable lead gel batteries (2 × 12 V /3 Ah) 9.1 Wireless transmission Receiving unit/units 1: PLL multifrequency receiver in diversity technique 9.1.1 Frequencies of the channels CH 1 – CH 16 CH Frequency CH Frequency 1 863.1 MHz 9 863.2 MHz 2 864.1 MHz 10 864.2 MHz 3 863.6 MHz 11 863.7 MHz 4 864.6 MHz 12 864.7 MHz Range: . . . . . . . . . . . . approx. 30 m 5 863.3 MHz 13 863.4 MHz Radio frequency range: . . . . 863.1 – 864.9 MHz, divided into 16 channels 6 864.3 MHz 14 864.4 MHz 7 863.8 MHz 15 863.9 MHz 8 864.8 MHz 16 864.9 MHz Transmitting unit 2: . . . PLL multifrequency transmitter with a transmitting power of 10 mW (EIRP) 1. models TXA-800 and TXA-800CD: 1 receiving unit, model TXA-802CD: 2 receiving units 2. for model TXA-802CD only GB Note concerning operation of several wireless transmission systems TXA-8.. It is possible to simultaneously operate 5 to maximally 8 transmission systems using different channels in this frequency range. The number of channels to be used in parallel will depend on the distance between the individual transmission systems, on any RF interference sources, and other local conditions. When operating several systems, assign the channels in ascending order (e. g. for 8 systems, use the channels CH 1 – CH 8) and keep the systems as far apart as possible. Subject to technical modification. Operating time of rech. batteries: . . . . . . up to 3 – 4 hours approx. Dimensions: . . . . . . . . 300 × 470 × 230 mm (W × H × D) Weight Model TXA-800: . . . 11.2 kg Model TXA-800CD: 11.9 kg Model TXA-802CD: 12.3 kg All rights reserved by MONACOR ® INTERNATIONAL GmbH & Co. KG. No part of this instruction manual may be reproduced in any form or by any means for any commercial use. 11 F B Vous trouverez sur la page 3, dépliable, les éléments et branchements décrits. CH 1 Eléments et branchements 1 Unité récepteur multifréquences → schéma 2 et chapitre 1.1 Table des matières 2 Lecteur CD/MP3, → schéma 4 et chapitre 1.3 1 Eléments et branchements . . . . . . . . . . 12 3 Unité émetteur multifréquences → schéma 3 et chapitre 1.2 1.1 Unité récepteur multifréquences . . . . . . . . 12 1.2 Unité émetteur multifréquences . . . . . . . . 12 1.3 Lecteur CD/MP3 avec télécommande . . . 13 2 Conseils dʼutilisation et de sécurité . . . 14 3 Possibilités dʼutilisation et accessoires 14 3.1 Conformité et autorisation de lʼunité émetteur du modèle TXA-802CD . . 14 4 Positionnement . . . . . . . . . . . . . . . . . . . . 14 5 Alimentation / Charge des accumulateurs . . . . . . . . . . 14 6 Branchement audio . . . . . . . . . . . . . . . . . 15 6.1 Entrées . . . . . . . . . . . . . . . . . . . . . . . . . . . 15 6.2 Sortie LINE OUT . . . . . . . . . . . . . . . . . . . . 15 6.3 Enceinte passive . . . . . . . . . . . . . . . . . . . . 15 7 Fonctionnement . . . . . . . . . . . . . . . . . . . 15 8 Utilisation . . . . . . . . . . . . . . . . . . . . . . . . . 15 8.1 Unité de réception multifréquences . . . . . . 16 8.2 Lecteur CD/MP3 . . . . . . . . . . . . . . . . . . . . 16 8.3 Unité émetteur multifréquences . . . . . . . . 18 9 Caractéristiques . . . . . . . . . . . . . . . . . . . 19 9.1 Transmission sans fil . . . . . . . . . . . . . . . . . 19 4 Affichage de charge CHARGE rouge : les accumulateurs sont en charge, vert : les accumulateurs sont complètement chargés 5 Interrupteur POWER Marche/Arrêt de lʼenceinte active Lʼinterrupteur brille pendant le fonctionnement. Si lʼinterrupteur clignote en mode Fonctionnement sur accumulateurs, les accumulateurs sont presque déchargés et doivent être rechargés. 6 Potentiomètre de réglage MASTER pour le volume général de lʼenceinte active 7 Réglages de lʼégaliseur TREBLE (aigus) et BASS (graves) pour le signal mixé 8 Potentiomètre de réglage de volume pour le microphone relié à lʼentrée MIC IN (11) 9 Entrée LINE IN (prises RCA) pour une source audio stéréo avec niveau de sortie ligne, par exemple lecteur CD, magnétophone 10 Sortie LINE OUT (prises RCA) pour diriger le signal mixé par exemple vers un enregistreur ou une autre enceinte active A pagina 3, se aperta completamente, vedrete tutti gli elementi di comando e i collegamenti descritti. 1.2 Unité émetteur multifréquences uniquement sur le modèle TXA-802CD 1 1.1 Modulo ricevitore multifrequenza Elementi di comando e collegamenti 1 Modulo ricevitore multifrequenza → vedi fig. 2 e capitolo 1.1 3 Modulo trasmettitore multifrequenza → vedi fig. 3 e capitolo 1.2 1 Elementi di comando e collegamenti . . 12 1.1 Modulo ricevitore multifrequenza . . . . . . . 12 1.2 Modulo trasmettitore multifrequenza . . . . . 12 1.3 Lettore CD/MP3 con telecomando . . . . . . 13 2 Avvertenze di sicurezza . . . . . . . . . . . . . 14 3 Possibilità dʼimpiego e accessori . . . . . 14 3.1 Conformità e omologazione del modulo del trasmettitore TXA-802CD . 14 4 Collocazione . . . . . . . . . . . . . . . . . . . . . . 14 5 Alimentazione / caricare le batterie . . . . 14 6 Collegamenti audio . . . . . . . . . . . . . . . . . 15 6.1 Ingressi . . . . . . . . . . . . . . . . . . . . . . . . . . . 15 6.2 Uscita LINE OUT . . . . . . . . . . . . . . . . . . . . 15 6.3 Cassa acustica passiva . . . . . . . . . . . . . . . 15 7 Messa in funzione . . . . . . . . . . . . . . . . . . 15 8 Funzionamento . . . . . . . . . . . . . . . . . . . . 15 8.1 Modulo ricevitore multifrequenza . . . . . . . 16 8.2 Lettore CD/MP3 . . . . . . . . . . . . . . . . . . . . 16 8.3 Modulo trasmettitore multifrequenza . . . . . 18 11 Ingresso MIC IN (presa combi jack 6,3 mm/ XLR, simm.) per il collegamento di un microfono 9 Dati tecnici . . . . . . . . . . . . . . . . . . . . . . . . 19 9.1 Trasmissione wireless . . . . . . . . . . . . . . . . 19 12 Presa jack 6,3 mm SPEAKER per il collegamento di una cassa passiva supplementare (impedenza min. 8 Ω) 4 Spia di carica CHARGE rosso: le batterie vengono caricate, verde: le batterie sono completamente caricate 5 Interruttore on/off POWER della cassa attiva Lʼinterruttore è acceso durante il funzionamento. Se durante il funzionamento con batterie inizia a lampeggiare, significa che le batterie ricaricabili sono quasi scariche e che occorre caricarle. 6 Regolatore MASTER per il volume globale della cassa attiva 7 Regolatore toni TREBLE (acuti) e BASS (bassi) per il segnale miscelato 8 Regolatore volume per il microfono allʼingresso MIC IN (11) 9 Ingressi LINE IN (prese RCA) per una sorgente stereo con uscita di linea, p. es. lettore CD, registratore a cassette 10 Uscita LINE OUT (prese RCA) per inoltrare il segnale miscelato, p. es. ad un registratore o a unʼaltra cassa attiva Nota: Le impostazioni dei regolatori toni (7) hanno effetto sul segnale LINE-OUT, la posizione del regolatore MASTER (6) invece non influenza il segnale. 13 Presa per il collegamento con una presa di rete (230 V~/50 Hz) per mezzo del cavo in dotazione 12 14 Affichage du canal de transmission ou de la fréquence radio 15 Affichage A/B Diversity : brille en rouge ou vert et indique ainsi laquelle des deux antennes internes de réception A ou B est à cet instant-là active 16 Témoin de réception RX : brille si lʼémetteur est allumé et sur quelle fréquence du récepteur il est réglé 17 Affichage AF pour le signal audio de réception : brille lorsquʼun signal audio est reçu 18 Touche SET pour appeler le mode de réglage pour le canal de transmission et pour confirmer la sélection du canal 19 Touches flèche – pour régler le canal en mode réglage : touche pour la sélection du canal vers le haut, touche pour la sélection du canal vers le bas – pour commuter brièvement lʼaffichage (14) sur lʼaffichage de la fréquence radio : tant que la touche ou est maintenue enfoncée, lʼaffichage indique la fréquence au lieu du canal 20 Interrupteur marche/arrêt et réglage de volume 13 Prise secteur pour relier à une prise 230 V~/50 Hz via le cordon secteur relié 11 Entrée MIC IN (prise combinée jack 6,35/XLR, sym) pour brancher un microphone 2 Lettore CD CD/MP3 → vedi fig. 4 e capitolo 1.3 Indice modèle TXA-800 / TXA-800CD : 1 unité récepteur modèle TXA-802CD : 2 unités récepteur 21 Affichage du canal de transmission ou de la fréquence radio 22 Affichage dʼémission TX : brille lorsque lʼunité émetteur est allumée 23 LEDs AF LEVEL pour le signal dʼentrée de lʼunité émetteur : jaune : niveau minimal, rouge : niveau maximal (voir également chapitre 8.3, point 4) 24 Touche SET pour appeler le mode de réglage pour le canal de transmission et pour confirmer la sélection du canal Remarque : les réglages de lʼégaliseur (7) influent sur le signal LINE-OUT mais pas le réglage du MASTER (6) 12 Prise jack 6,35 SPEAKER pour brancher une enceinte passive supplémentaire (impédance minimale 8 Ω) I 1.1 Unité récepteur multifréquences modello TXA-800 / -800CD: modello TXA-802CD: 1 modulo ricevitore 2 moduli ricevitore 14 Display per indicare il canale di trasmissione o la frequenza radio 15 Spia Diversity A/B: è accesa rossa o verde e segnala in questo modo quale delle due antenne interne di ricezione A o B è attualmente attiva. 16 Spia di ricezione RX: è accesa se il trasmettitore è attivato e se è impostato sulla frequenza radio del ricevitore 17 Spia AF per il segnale audio ricevuto: è acceso se riceve un segnale audio 18 Tasto SET per chiamare la modalità di impostazione per il canale di trasmissione e per confermare la scelta del canale 19 Tasti freccia – nella modalità dʼimpostazione per impostare il canale: tasto per la scelta del canale “su”, tasto per la scelta del canale “giù” – per indicare brevemente sul display (14) la frequenza radio: mentre si tiene premuto il tasto o , il display indica la frequenza al posto del canale. 20 Interruttore on/off e regolatore del volume 1.2 Modulo trasmettitore multifrequenza solo con il modello TXA-802CD 21 Display per indicare il canale di trasmissione o la frequenza radio 22 Spia di trasmissione TX: è acceso quando il trasmettitore è attivato 23 Spia livello AF LEVEL per il segnale dʼingresso del trasmettitore: giallo = livello minimo, rosso = livello massimo (vedi anche capitolo 8.3, passo 4) 25 Touches flèche – pour régler le canal en mode réglage : touche pour la sélection du canal vers le haut, touche pour la sélection du canal vers le bas – pour commuter brièvement lʼaffichage (21) sur lʼaffichage de la fréquence radio : tant que la touche ou est maintenue enfoncée, lʼaffichage indique la fréquence au lieu du canal 26 Interrupteur marche/arrêt et réglage de volume 1.3 Lecteur CD / MP3 avec télécommande uniquement sur les modèles TXA-800CD et TXA-802CD 27 Fente pour CD : poussez le CD jusquʼà ce quʼil entre automatiquement 28 Port USB pour brancher un support de stockage de masse USB, p. ex. clé USB, disque dur USB avec alimentation propre 29 Interrupteur marche / arrêt POWER 30 Capteur infrarouge pour les signaux de la télécommande 31 Affichage, indique : – pour des CDs audio insertion “CD“ et le numéro du titre, par exemple pour le titre N°10 32 33 34 35 36 37 38 (en mode Stop : nombre total de titres) pour des supports MP3 insertion “MP3“, le numéro du dossier et le numéro du titre dans le dossier, par exemple pour le titre 8 dans le dossier 2 (en mode Stop : le nombre total de dossiers et le nombre total de titres) – la durée déjà lue du titres (minutes : secondes) 39 40 41 24 Tasto SET per chiamare la modalità di impostazione per il canale di trasmissione e per confermare la scelta del canale 25 Tasti freccia – nella modalità dʼimpostazione per impostare il canale: tasto per la scelta del canale “su”, tasto per la scelta del canale “giù” – per indicare brevemente sul display (21) la frequenza radio: mentre si tiene premuto il tasto o , il display indica la frequenza al posto del canale. 26 Interruttore on/off e regolatore del volume 1.3 Lettore CD / MP3 con telecomando solo con i modelli TXA-800CD e TXA-802CD 27 Slot per lʼinserimento del CD: spingere dentro il CD finché non viene ritirato automaticamente 28 Presa USB per il collegamento di una memoria USB, p. es. chiavetta USB, disco rigido USB con alimentazione propria 29 Tasto on / off POWER 30 Sensore IR per i segnali del telecomando 31 Display, visualizza – con CD audio la scritta “CD” e il numero del titolo, p. es. per il titolo numero 10 (nel modo di Stop: numero totale dei titoli) Con riproduzione di file MP3 la scritta “MP3”, il numero della cartella e il numero del titolo nella cartella, p. es. per lʼ8. titolo nella 2. cartella 32 33 34 35 36 37 38 39 40 41 (nel modo di Stop: numero totale delle cartelle e numero totale dei titoli) – pour lecture, pour pause – insertion pour la fonction répétition sélectionnée (“REPEAT 1”, “REPEAT FOLDER“ ou “REPEAT ALL”) → touche REP (44) – insertion “SHUFFLE” lors de la lecture des titres en ordre aléatoire – insertion “PROGRAM” pendant une programmation dʼune suite propre de titres – insertion “MEMORY” lors de la lecture dʼune suite de titres programmés – insertion “A © B” lors de la lecture dʼune boucle Insert pour une carte SD Touche pour commuter entre CD, support de stockage USB et carte SD Touche FOLDER pour sélectionner le dossier suivant (en mode MP3) Touche F.F/ pour une avance rapide et touche FB/ pour un retour rapide : appuyez brièvement sur la touche correspondante et lorsque vous avez atteint la position souhaitée, appuyez sur la touche lecture / pause (37). Touches pour la sélection de titre REV/ S = retour, F.WD/ S = avant Touche lecture / pause Touche pour passer en mode stop (première pression) et pour éjecter un CD (deuxième pression) Touches pour modifier la vitesse de lecture en 10 paliers : appuyez sur la touche HI / HIGH (augmenter la vitesse) ou LO / LOW (diminuer la vitesse) aussi souvent que souhaité pour atteindre la vitesse voulue : pour revenir à la vitesse normale, appuyez sur la touche NOR. Réglage de volume Touches numériques pour sélectionner un titre en saisissant son numéro (mode MP3 : numéro que le titre a sur le support de lecture, pas dans – il tempo trascorso del titolo (min. : sec.) – per riproduzione, per pausa – visualizzazione della funzione scelta per la ripetizione (“REPEAT 1”, “REPEAT FOLDER” o “REPEAT ALL”) → tasto REP (44) – visualizzazione “SHUFFLE” durante la riproduzione dei titoli in ordine casuale – visualizzazione “PROGRAM” durante la programmazione di una sequenza individuale – visualizzazione “MEMORY” durante la riproduzione di una sequenza programmata – visualizzazione “A © B” durante la riproduzione di un loop Slot per una scheda SD Tasto per cambiare fra CD, memoria USB e scheda SD Tasto FOLDER per scegliere la cartella successiva (con funzionamento MP3) Tasto F.F/ per lʼavanzamento veloce e tasto FB/ per il ritorno veloce: premere brevemente il relativo tasto, e premere il tasto Riproduzione / Pausa (37) quando è raggiunto il punto desiderato Tasti per la scelta dei titoli REV/ S = indietro, F.WD/ S = in avanti Tasto Riproduzione / Pausa Tasto per attivare il modo dʼarresto (1. pressione del tasto) e per espellere un CD (2. pressione del tasto) Tasti per modificare la velocità di riproduzione in 10 passi: premere tante volte il tasto HI / HIGH (aumento della velocità) o LO / LOW (riduzione della velocità) finché si raggiunge la velocità desiderata; per ritornare alla velocità normale, premere il tasto NOR. Regolatore volume Tasti numerici per selezionare un titolo digitando il suo numero (con MP3: numero del titolo sul mezzo di riproduzione, non nella cartella!); dopo le dossier !) : après la saisie, appuyez sur la touche ENTER (47) pour confirmer. 42 Touche pour programmer une suite propre de titres, → chapitre 8.2.11 F B CH 43 Touche pour lire des titres en ordre aléatoire 44 Touche pour commuter entre – “REPEAT 1” : répétition du titre – “REPEAT FOLDER“ (uniquement en mode MP3) : répétition de tous les titres dans le dossier – “REPEAT ALL” : répétition de tous les titres du support de lecture – aucun affichage “REPEAT” : aucune fonction répétition activée 45 Touche pour arrêter la lecture 46 Touche pour lire une boucle (répétition dʼun segment dʼun titre) première pression définition du point de départ du segment deuxième pression définition du point de fin du segment : la lecture de la boucle démarre troisième pression la lecture de la boucle est terminée 47 Touche pour confirmer une saisie, par exemple après la sélection dʼun titre via les touches numériques (41) 48 Touche pour activer et couper le son 42 43 44 45 46 47 48 lʼinput, premere il tasto ENTER (47) per confermare Tasto per programmare una sequenza individuale → Cap. 8.2.11 Tasto per la riproduzione dei titoli in ordine casuale Tasto per cambiare fra – “REPEAT 1”: Ripetizione del titolo – “REPEAT FOLDER” (solo con MP3): Ripetizione di tutti i titoli nella cartella – “REPEAT ALL”: Ripetizione di tutti i titoli del mezzo di riproduzione – nessuna visualizzazione “REPEAT”: nessuna funzione di riproduzione attivata Tasto per fermare la riproduzione Tasto per riprodurre un loop (ripetizione di una parte del titolo) Prima pressione del tasto fissare il punto dʼinizio Seconda pressione del tasto fissare la fine del loop: la riproduzione del loop si avvia. Terza pressione del tasto la riproduzione del loop termina. Tasto per confermare lʼinput, p. es. dopo la scelta di un titolo tramite i tasti numerici (41) Tasto per attivare e disattivare lʼaudio I 13 F 2 B Cet appareil répond à toutes les directives nécessaires de lʼUnion Européenne et porte donc le symbole . CH AVERTISSEMENT Lʼappareil est alimenté par une tension dangereuse 230 V~. Ne faites pas de modification sur lʼappareil car en cas de mauvaise manipulation, vous pourriez subir une décharge électrique. Respectez scrupuleusement les points suivants : G Cet appareil nʼest conçu que pour une utilisation en intérieur. Protégez-le de tout type de projections dʼeau, des éclaboussures, dʼune humidité de lʼair élevée et de la chaleur (plage de température de fonctionnement autorisée : 0 – 40 °C). G En aucun cas, vous ne devez poser dʼobjet contenant du liquide ou un verre sur lʼappareil. G Ne faites pas fonctionner lʼappareil et débranchez-le immédiatement du secteur lorsque : 1. des dommages visibles apparaissent sur lʼappareil ou sur le cordon secteur, 2. après une chute ou un cas similaire, vous avez un doute sur lʼétat de lʼappareil, 3. des défaillances apparaissent. Dans tous les cas, les dommages doivent être réparés par un technicien spécialisé. G Ne débranchez jamais lʼappareil en tirant sur le cordon secteur, tenez-le toujours par la fiche. G Pour le nettoyer, utilisez uniquement un chiffon sec et doux, en aucun cas, de produits chimiques ou dʼeau. G I 2 personne habilitée ; de même, la garantie deviendrait caduque. Conseils dʼutilisation et de sécurité Nous déclinons toute responsabilité en cas de dommages matériels ou corporels consécutifs si lʼappareil est utilisé dans un but autre que celui pour lequel il a été conçu, sʼil nʼest pas correctement branché, utilisé ou nʼest pas réparé par une Lorsque lʼappareil est définitivement retiré du service, vous devez le déposer dans une usine de recyclage adaptée pour contribuer à son élimination non polluante. 3 Le système actif (modèle TXA-800, TXA-800CD ou TXA-802CD) est la combinaison dʼune enceinte 2 voies et dʼun amplificateur avec connexions pour un microphone et un appareil audio avec niveau de sortie ligne, par exemple lecteur CD, magnétophone. Les modèles TXA-8..CD sont équipés dʼun lecteur CD/MP3. Lʼappareil peut fonctionner au choix avec une tension dʼalimentation 230 V~ ou via les accumulateurs internes plomb/gel rechargeables avec lʼélément de charge intégré. Le système est très bien adapté à une utilisation mobile par exemple pour des exposés ou manifestations commerciales. Chaque modèle possède une unité récepteur multifréquences en technologie Diversity*, émettant dans la plage UHF 863,1 – 864,9 MHz. La bande passante est divisée en 16 canaux, sélectionnables librement. Le modèle TXA-802CD dispose en plus dʼune seconde unité récepteur et dʼune unité émetteur, fonctionnant également dans la plage 863,1 – 864,9 MHz. Avec lʼunité émetteur, le signal audio de lʼenceinte peut être dirigé, pour une transmission sans fil, vers dʼautres enceintes actives de la série TXA-800 (fonctionnement Audio Link). Dans la gamme MONACOR, les émetteurs suivants par exemple sont bien adaptés pour un fonctionnement avec les enceintes actives de la série TXA-800 : * Technologie Diversity : le signal dʼémission est reçu par deux antennes et sa qualité est vérifiée. Le meilleur signal est utilisé. Avvertenze di sicurezza Se si desidera eliminare lʼapparecchio definitivamente, consegnarlo per lo smaltimento ad unʼistituzione locale per il riciclaggio. Questo apparecchio è conforme a tutte le direttive rilevanti dellʼUE e pertanto porta la sigla . AVVERTIMENTO Lʼapparecchio funziona con pericolosa tensione di rete (230 V~). Non intervenire mai personalmente al suo interno! La manipolazione scorretta può provocare una scarica elettrica pericolosa. Si devono osservare assolutamente anche i seguenti punti: G Usare lʼapparecchio solo allʼinterno di locali. Proteggerlo dallʼacqua gocciolante e dagli spruzzi dʼacqua, da alta umidità dellʼaria e dal calore (temperatura dʼimpiego ammessa fra 0 e 40 °C). G Non depositare sullʼapparecchio dei contenitori riempiti di liquidi, p. es. bicchieri. G Non mettere in funzione lʼapparecchio e staccare subito la spina rete se: 1. lʼapparecchio o il cavo rete presentano dei danni visibili; 2. dopo una caduta o dopo eventi simili sussiste il sospetto di un difetto; 3. lʼapparecchio non funziona correttamente. Per la riparazione rivolgersi sempre ad unʼofficina competente. 3 Possibilità dʼimpiego e accessori La cassa attiva (modello TXA-800, TXA-800CD o TXA-802CD) è una combinazione fra un sistema di altoparlanti a 2 vie e un amplificatore con contatti per un microfono e per un apparecchio audio con livello dʼuscita di linea, come p. es. lettori CD, registratori a cassette. I modelli TXA-8..CD sono equipaggiati con un lettore CD/MP3. Lʼapparecchio può funzionare, a scelta, con la tensione di rete di 230 V oppure con le batterie interne a gel di piombo che si possono caricare con il caricatore integrato. La cassa si adatta in modo ottimale allʼimpiego mobile, p. es. per conferenze o vendite. TXA-800HT (ref.num. 17.2260) microphone main avec émetteur multifréquences TXA-800ST (ref.num. 17.2600) émetteur multifréquences fonctionnant sur secteur 3.1 Conformité et autorisation de lʼunité émetteur du modèle TXA-802CD Par la présente, MONACOR INTERNATIONAL déclare que lʼunité émetteur TXA-802CD se trouve en conformité avec les exigences fondamentales et les règlementations inhérentes à la directive 1999 / 5 / CE. La déclaration de conformité peut être demandée auprès de MONACOR INTERNATIONAL. Lʼunité émetteur est autorisée pour un fonctionnement dans les pays de lʼUnion européenne et de lʼA.E.L.E. sans déclaration ni taxe. 4 Positionnement Lʼappareil peut être posé librement ou placé sur un pied dʼenceinte (p. ex. série PAST- de la gamme MONACOR) via lʼinsert pour pied sur la face inférieure. La sacoche de protection TXA-800BAG, en tissu plastifié noir, est disponible en option (ref.num. 17.2340), elle peut rester en place pendant le fonctionnement de lʼenceinte. 5 Alimentation/ Charge des accumulateurs Si lʼenceinte active doit fonctionner via une prise secteur et/ou si les accumulateurs internes plomb/ gel doivent être chargés, reliez le cordon secteur livré à la prise (13) et lʼautre extrémité à une prise secteur 230 V~/50 Hz. TXA-800HT (Codice 17.2260) Microfono a mano con trasmettitore multifrequenza TXA-800ST (Codice 17.2600) Trasmettitore multifrequenza gestito dalla rete 3.1 Conformità e omologazione del modulo trasmettitore TXA-802CD Con la presente, MONACOR INTERNATIONAL dichiara che il modulo trasmettitore dellʼapparecchio TXA-802CD è conforme ai requisiti di base e alle relative norme della direttiva 1999/ 5 / CE. La dichiarazione di conformità può essere richiesta alla MONACOR INTERNATIONAL. Il modulo di trasmissione è omologato per il funzionamento negli stati UE e EFTA e non richiede registrazione e tasse. 4 Collocazione Lʼapparecchio può essere collocato liberamente oppure può essere montato su uno stativo per casse PA (p. es. della serie PAST del programma di MONACOR) servendosi della boccola per stativo sul lato inferiore. Come accessorio è disponibile la copertura protettiva TXA-800BAG di tessuto artificiale nero (Codice 17.2340). Può rimanere sulla cassa anche durante il funzionamento. G Staccare il cavo rete afferrando la spina, senza tirare il cavo. Ogni modello è equipaggiato con un modulo ricevitore che funziona con la tecnica Diversity* nel campo UHF di 863,1 – 864,9 MHz. La gamma di frequenze è suddivisa in 16 canali a scelta libera. Il modello TXA802CD dispone in più di un secondo modulo ricevitore e di un modulo trasmettitore che funzionano entrambi nella gamma di 863,1 – 864,9 MHz. Con il modulo trasmettitore, il segnale audio della cassa può essere portato senza cavo ad altre casse attive della serie TXA-800 (funzionamento audio-link). G Per la pulizia usare solo un panno morbido, asciutto; non impiegare in nessun caso prodotti chimici o acqua. Dal programma di MONACOR, i seguenti trasmettitori sono adatti al funzionamento con le casse attive della serie TXA-800: Nel caso dʼuso improprio, di collegamenti sbagliati, dʼimpiego scorretto o di riparazione non a regola dʼarte dellʼapparecchio, non si assume nessuna responsabilità per eventuali danni consequenziali a persone o a cose e non si assume nessuna garanzia per lʼapparecchio. TXA-800HSE (Codice 17.2250) Trasmettitore multifrequenza tascabile con microfono a cravatta e headset Se la cassa deve essere alimentata tramite la rete e/ o se le batterie ricaricabili interne al piombo gel devono essere caricate, collegare il cavo rete in dotazione con lʼapposita presa (13) e inserirlo in una presa di rete (230 V~ / 50 Hz). * Tecnica Diversity: Il segnale trasmesso viene captato da due antenne e si controlla la relativa qualità. Quindi si utilizza il segnale che risulta migliore. In caso di collegamento della cassa con la rete, è sempre attivo il caricamento automatico delle batterie e la spia di carica CHARGE (4) è accesa: G 14 Possibilités dʼutilisation et accessoires TXA-800HSE (ref.num. 17.2250) émetteur de poche multifréquences avec microphone cravate et microphone serre-tête 5 Alimentazione /caricare le batterie Dans le cas dʼune connexion secteur de lʼenceinte active, le système automatique de charge des accumulateurs est toujours actif, la LED CHARGE (4) brille : elle brille en rouge : les accumulateurs sont en charge, elle brille en vert : les accumulateurs sont complètement chargés Pour charger, il nʼest pas nécessaire dʼallumer lʼenceinte avec lʼinterrupteur POWER (5), elle peut cependant être utilisée normalement pendant le processus de charge. Les accumulateurs ne peuvent pas être en surcharge grâce au circuit de protection de charge. Cependant, lorsque lʼappareil ne doit plus être utilisé, il convient de débrancher le cordon secteur une fois la charge terminée. Important : Pour éviter tout dommage des accumulateurs à cause dʼune décharge profonde, et une réduction de la durée de vie des accumulateurs, respectez les points suivants : 1. Avant la première mise en service, et après un long stockage, rechargez complètement les accumulateurs. 2. Si lʼinterrupteur POWER clignote en mode Accu, les accumulateurs sont presque déchargés et doivent être rechargés le plus vite possible. 3. Chargez entièrement les accumulateurs avant un stockage long et tous les 2 mois au moins pendant le stockage. – reliez le microphone au choix via une fiche XLR ou une fiche jack 6,35 à la prise MIC IN (11) branchée en symétrique – reliez lʼappareil stéréo avec sortie ligne aux prises RCA LINE IN (9) 6.2 Sortie LINE OUT Un enregistreur ou une autre enceinte active par exemple peuvent être reliés aux prises RCA LINE OUT (10). Le signal de mixage mono de lʼenceinte est disponible aux deux prises. Le réglage MASTER (6) pour le volume général de lʼenceinte active nʼa pas dʼinfluence sur le signal à la sortie LINE OUT mais les réglages de lʼégaliseur (7) oui. Remarque : Lʼenceinte active nʼa pas de réglage de volume pour lʼappareil à lʼentrée LINE IN (9), cʼest-à-dire que le signal de lʼappareil est toujours appliqué à la sortie LINE OUT, à son volume dʼentrée. 6.3 Enceinte passive Si une enceinte (sans amplificateur) est en plus nécessaire, elle peut être reliée à la prise SPEAKER (12). Lʼimpédance de lʼenceinte doit être de 8 Ω au moins. 7 Un microphone et un appareil audio avec niveau de sortie ligne (par exemple lecteur CD, lecteur DVD, magnétophone ou enregistreur MD) peuvent être reliés comme sources audio : di color rosso: di color verde: – collegare lʼapparecchio stereo con uscita di linea con le prese RCA LINE IN (9) Branchements audio 6.1 Entrées le batterie vengono caricate le batterie son completamente caricate Per la carica delle batterie, non è necessario che la cassa sia accesa con lʼinterruttore POWER (5); tuttavia, durante la carica può essere utilizzata normalmente. Grazie al circuito di protezione della carica è escluso che le batterie vengano sovraccaricate. Tuttavia è opportuno staccare il cavo dalla presa di rete dopo la carica se lʼapparecchio non serve per un certo periodo. Importante: Per non danneggiare le batterie a causa di una scarica profonda e per evitare una riduzione della loro durata, si deve osservare quanto segue: 1. Prima della prima messa in funzione e dopo uno stoccaggio prolungato occorre sempre caricare completamente le batterie. 2. Se lʼinterruttore POWER lampeggia durante il funzionamento con le batterie, significa che le batterie sono quasi scariche e che dovrebbero essere caricate il più presto possibile. 3. Prima di ogni stoccaggio prolungato e per lo meno ogni 2 mesi durante lo stoccaggio stesso, caricare completamente le batterie. 6 Collegamenti audio 6.1 Ingressi Come sorgenti audio si possono collegare un microfono e un apparecchio stereo con livello dʼuscita di linea (p. es. lettori CD, lettori DVD, registratori a cassette o MD): – collegare il microfono con la presa simmetrica MIC IN (11) servendosi a scelta di un connettore XLR o di un jack 6,3 mm 8 F B CH Utilisation ATTENTION Ne réglez pas le volume de lʼenceinte active trop fort. Un volume trop élevé peut, à long terme, générer des troubles de lʼaudition. Lʼoreille humaine sʼhabitue à des volumes élevés et ne les perçoit plus comme tels au bout dʼun certain temps. Nous vous conseillons donc de régler le volume et de ne plus lʼaugmenter. 1) Poussez le réglage MASTER (6) pour le volume général jusquʼà ce que les réglages suivants soient bien audibles via les haut-parleurs. 2) Allumez les sources de signal voulues et mixez leurs signaux avec les réglages de volume correspondants ou si besoin, faites-les entrer et sortir (tournez toujours au minimum les réglages des sources inutilisées) : – pour lʼunité (les unités) récepteur (1) : interrupteur marche/arrêt et réglage de volume (20) voir chapitre 8.1 Fonctionnement Avant dʼallumer lʼappareil, tournez le réglage MASTER (6) pour le volume général sur MIN, puis allumez lʼenceinte avec lʼinterrupteur POWER (5) [la position de lʼinterrupteur est présentée sur le schéma 1]. Lʼinterrupteur brille pendant le fonctionnement. Si lʼinterrupteur clignote en mode Fonctionnement sur accumulateurs, les accumulateurs sont presque déchargés et doivent être rechargés. Pour éviter tout dommage sur les accumulateurs, causé par une décharge importante, pendant le fonctionnement sur batterie, un circuit de décharge est prévu pour couper automatiquement et à temps lʼappareil. Cependant, à cause de lʼauto-décharge 6 des accumulateurs, une décharge importante peut survenir si lʼappareil ne fonctionne pas pendant un certain temps. Respectez impérativement les conseils figurant dans lʼencadré du chapitre 5. – uniquement sur les modèles TXA-...CD : pour le lecteur CD/MP3 intégré (2) : réglage de volume LEVEL (40) voir chapitre 8.2 – pour le microphone à lʼentrée MIC IN (11) : réglage de volume MIC (8) Pour lʼentrée LINE IN (9), il nʼy a pas de réglage propre, le volume de la source de signal reliée à cette entrée ne se règle que via le réglage MASTER (6) pour le volume général. lʼapparecchio non viene usato per parecchio tempo. Si prega di osservare assolutamente le note nel capitolo 5. I 6.2 Uscita LINE OUT Alle prese RCA LINE OUT (10) si può collegare p. es. un registratore o unʼulteriore cassa attiva per la sonorizzazione. Ad entrambe le prese viene emesso il segnale mono miscelato della cassa. Il regolatore MASTER (6) per il volume globale della cassa attiva non condiziona il segnale allʼuscita LINE OUT; le impostazioni del regolatori dei toni (7) influenzano invece il segnale. Nota: La cassa attiva non ha nessun regolatore volume per lʼapparecchio allʼingresso LINE IN (9); ciò significa che il segnale dellʼapparecchio arriva allʼuscita LINE OUT sempre con il suo volume dʼingresso. 6.3 Cassa acustica passiva Se per la sonorizzazione è richiesta in più una cassa acustica (senza amplificatore), è possibile collegarla con la presa SPEAKER (12). Lʼimpedenza della cassa acustica non deve essere inferiore a 8 Ω. 7 Messa in funzione Prima dellʼaccensione girare il regolatore MASTER (6) per il volume globale completamente su MIN, quindi accendere la cassa con lʼinterruttore POWER (5) [la fig. 1 fa vedere la posizione dellʼinterruttore acceso]. Durante il funzionamento, lʼinterruttore è illuminato. Se durante il funzionamento con batterie inizia a lampeggiare, significa che le batterie ricaricabili sono quasi scariche e che occorre caricarle. Per escludere, durante il funzionamento dellʼapparecchio con le batterie ricaricabili, che le stesse vengano danneggiate per scarica profonda, una protezione contro la scarica provvede tempestivamente alla disconnessione automatica dellʼapparecchio. Per via dellʼautoscarica delle batterie, una scarica profonda può presentarsi anche quando 8 Funzionamento ATTENZIONE Mai tenere molto alto il volume della cassa attiva. A lungo andare, il volume eccessivo può procurare danni allʼudito! Lʼorecchio si abitua agli alti volumi e dopo un certo tempo non se ne rende più conto. Non aumentare il volume successivamente. 1) Aprire il regolatore MASTER (6) per il volume globale al punto tale da poter sentire bene le impostazioni successive con gli altoparlanti. 2) Accendere le sorgenti desiderate e miscelare i loro segnali per mezzo dei relativi regolatori di volume oppure inserirle o chiuderle con dissolvenze (chiudere sempre completamente i regolatori delle sorgenti non usate): – per il/i modulo/i ricevitore (1): interruttore on/off e regolatore volume (20) → vedi anche cap. 8.1 – solo per i modelli TXA-...CD: per il lettore CD/MP3 integrato (2): regolatore volume LEVEL (40) → vedi anche cap. 8.2 – per il microfono allʼingresso MIC IN (11): regolatore volume MIC (8) Per lʼingresso LINE IN (9) non è presente nessun regolatore proprio del volume; il volume della sorgente collegata qui può essere regolato solo tramite il regolatore MASTER (6) per il volume globale. 3) Con i regolatori (7) – BASS per i bassi e TREBLE per gli acuti – ottimizzare il suono del segnale miscelato. 15 F B CH 3) Avec les réglages (7) – BASS pour les graves et TREBLE pour les aigus – optimisez la tonalité pour le signal mixé. bateurs ou des signaux dʼautres émetteurs sont reçus sur ce canal. Dans ce cas, réglez lʼunité de réception sur un autre canal. 4) Avec le réglage MASTER (6), réglez le niveau définitif pour le volume général de lʼenceinte active et le cas échéant corrigez la tonalité. 3) Il est possible, dʼafficher brièvement la fréquence radio pour le canal réglé : tant que la touche ou est maintenue enfoncée, lʼaffichage indique la fréquence au lieu du canal. 5) uniquement sur le modèle TXA-802CD : Par transmission sans fil, le signal mixé [non influencé par les réglages de lʼégaliseur (7) et le réglage MASTER (6)], peut être dirigé via lʼunité émetteur (3) vers dʼautres enceintes actives de la série TXA-8..., voir chapitre 8.3. 6) Après le fonctionnement, mettez lʼinterrupteur POWER (5) sur la position “Arrêt”. 5) Avec le réglage (20), réglez le volume souhaité pour le signal audio reçu. 8.1 Unité de réception multifréquences 8.2 Lecteur CD / MP3 modèle TXA-800 / 800CD : 1 unité modèle TXA-802CD : 2 unités 1) Pour allumer lʼunité de réception, avancez lʼinterrupteur marche/arrêt et le réglage de volume (20) depuis la position OFF (arrêt). La LED A/B (15) brille en rouge ou vert selon lʼantenne de réception A ou B actuellement active. 2) Laissez lʼémetteur encore éteint. Réglez tout dʼabord lʼunité de réception sur un canal de transmission libre et sans interférences : 1. Appuyez sur la touche SET (18). Lʼaffichage de canal (14) clignote. 2. Tant que lʼaffichage de canal clignote (pendant 10 secondes environ), le canal peut être sélectionné avec les touches et (19) : touche pour sélection vers le haut et touche pour sélection vers le bas. 3. Confirmez la sélection du canal avec la touche SET. (Si le choix nʼest pas confirmé avec la touche SET en lʼespace de 10 secondes, lʼappareil revient au canal précédemment sélectionné). Si après la sélection de canal avec émetteur éteint, la LED RX (16) brille, des signaux pertur- I 4) Con il regolatore MASTER (6) impostare il livello definitivo per il volume globale della cassa attiva ed eventualmente correggere successivamente le impostazione dei toni. 5) solo per il modello TXA-802CD: Tramite il modulo trasmettitore (3) è possibile inoltrare il segnale miscelato [non condizionato dai regolatori dei toni (7) e dal regolatore MASTER (6)] ad altre casse attive della serie TXA-8.. per mezzo di una trasmissione wireless. Vedi anche capitolo 8.3. 6) Dopo lʼuso portare lʼinterruttore POWER (5) in posizione “Off”. 8.1 Modulo ricevitore multifrequenza modello TXA-800 / -800CD: 1 modulo ricevitore modello TXA-802CD: 2 moduli ricevitore 1) Per accendere il modulo ricevitore aprire lʼinterruttore on/off e regolatore volume (20) dalla posizione OFF (“spento”). La spia A/B (15) si accende di color rosso o verde a seconda dellʼantenna di ricezione attualmente attiva. 2) Lasciare ancora spento il trasmettitore. Impostare dapprima il modulo ricevitore su un canale di trasmissione libero e esente di interferenze: 1. Premere il tasto SET (18). Lʼindicazione del canale nel display (14) lampeggia. 2. Mentre lʼindicazione del canale lampeggia (per 10 sec. ca.), con i tasti e (19) si può scegliere il canale: tasto per scelta ascendente, tasto per scelta discendente. 3. Confermare la scelta del canale con il tasto SET. (Se la scelta non viene confermata entro 10 secondi con il tasto SET, lʼapparecchio torna al canale impostato prima.) Se dopo la scelta del canale e con il trasmettitore spento, si accende la spia RX (16), significa che si ricevono delle interferenze o dei segnale di altri trasmettitori con questo canale. In questo caso impostare un altro canale per il modulo ricevitore. 16 4) Si lʼémetteur est allumé et réglé sur le même canal que lʼunité de réception, la LED RX (16) brille et indique quʼun signal est reçu. La LED AF (17) brille si lʼémetteur envoie un signal audio avec un niveau suffisant sur la fréquence radio réglée. 8.2.1 Télécommande La télécommande infrarouge du lecteur est livrée avec sa batterie. Avant la première utilisation, retirez la feuille de protection du support de batterie. Lorsque vous appuyez sur une touche, dirigez la télécommande toujours vers le capteur infrarouge (30) du lecteur. Il ne doit pas y avoir dʼobstacle entre le capteur et la télécommande. En cas de non utilisation prolongée, retirez la batterie de la télécommande par mesure de précaution car elle pourrait couler et endommager lʼappareil. Remplacement de la batterie : 1) Appuyez le verrouillage du support de batterie vers la droite (première flèche sur le schéma en bas) et retirez le support (seconde flèche). uniquement sur les modèles TXA-800CD et TXA-802CD Via le lecteur, on peut lire des CDs audio standards, des CDs, des supports de stockage de masse USB et des cartes SD avec fichiers MP3. Remarque : pour des CDs réinscriptibles (CD-RW), on peut, selon le type de CD, de graveur et de logiciel de gravure utilisés, rencontrer des problèmes lors de la lecture. La mémoire anti-chocs du lecteur permet de compenser des brefs chocs ou vibrations mais pas des vibrations continues et importantes. Il faut que lʼenceinte soit toujours fixe lors du fonctionnement CD, cʼest-à-dire placée sur un sol solide et immobile. 2) Retirez lʼancienne batterie, insérez la nouvelle batterie (pile bouton 3 V de type CR 2025) avec pôle plus vers le haut, dans le support. 3) Replacez le support dans la télécommande. Ne jetez pas les batteries usagées dans la poubelle domestiques, ramenez-les chez votre revendeur ou déposez-les dans un container spécifique pour contribuer à leur élimination non polluante. Remarques sur les coupures du son et les erreurs de lecture La fumée de cigarettes et la poussière sʼintroduisent facilement dans les ouvertures du lecteur et se déposent également sur lʼoptique du système de lecture laser. Cela peut générer des erreurs de lecture et des coupures de son. Dans ce cas, confiez impérativement le nettoyage de lʼappareil à un technicien spécialisé. Cette opération est à la charge de lʼutilisateur, même lorsque lʼappareil est sous garantie ! 8.2.2 Marche et arrêt / mise en place et retrait du support de lecture Le lecteur est allumé et éteint avec la touche POWER (29). 3) È possibile farsi indicare brevemente la frequenza radio del canale impostato: mentre si tiene premuto il tasto o , il display indica la frequenza al posto del canale. 8.2.1 Telecomando Il telecomando IR per il lettore viene fornito con batteria. Prima dellʼuso, sfilare la pellicola protettiva dal portabatteria. Premendo un tasto, orientare il telecomando sempre sverso il sensore IR (30) del lettore. Non ci devono essere ostacoli fra sensore e telecomando. In caso di mancato uso prolungato, conviene togliere la batteria dal telecomando per escludere dei danni nel caso che la batteria dovesse perdere. 4) Se il trasmettitore è acceso e impostato per lo stesso canale come il modulo ricevitore, si accende la spia RX (16) segnalando in questo modo che si riceve un segnale radio. La spia AF (17) è accesa se il trasmettitore invia un segnale audio con livello sufficiente alla frequenza impostata. 5) Con il regolatore (20) impostare il volume desiderato per il segnale audio ricevuto. Insérer un support de lecture : – poussez un CD, inscription vers le haut, dans la fente (27) jusquʼà ce quʼil entre automatiquement. et / ou – reliez un support USB (p. ex. clé USB, disque dur USB avec alimentation propre) au port USB (28). et / ou Sostituire la batteria: 1) Spingere a destra il blocco del portabatteria (1. freccia nellʼillustrazione in basso) e sfilare il portabatteria (2. freccia). 8.2 Lettore CD / MP3 solo con i modelli TXA-800CD e TXA-802CD Con il lettore è possibile riprodurre CD audio standard, ma anche CD, memorie USB e schede SD con file MP3. N. B.: Con CD riscrivibili (CD-RW) ci possono essere dei problemi durante la riproduzione, dipendenti dal tipo di CD, dal masterizzatore usato e dal programma di masterizzazione. La memoria anti-shock del lettore CD è in grado di compensare brevi disturbi durante la scansione del CD in seguito a urti o vibrazioni. Tuttavia non riesce a compensare delle scosse durature e violenti. Perciò, con funzionamento CD, la cassa deve essere usata sempre in modo stazionario, cioè su una base stabile, immobile. Note su possibili buchi nella riproduzione e su errori di lettura Il fumo di sigarette e polvere penetrano facilmente fra tutte le aperture dellʼapparecchio e si depositano sul sistema ottico della scansione ai raggi laser. Se ciò dovesse provocare errori di lettura e buchi nella riproduzione, lʼapparecchio deve essere pulito in un laboratorio specializzato. Una tale pulizia è a pagamento, anche durante il periodo di garanzia! 2) Togliere la vecchia batteria e inserire la nuova batteria (batteria bottone 3 V del tipo CR 2025) con il polo positivo rivolto in alto. 3) Rimettere il portabatteria nel telecomando. Non gettare le batterie scariche o difettose nelle immondizie di casa bensì negli appositi contenitori (p. es. presso il vostro rivenditore). 8.2.2 Accendere e spegnere / Inserire e togliere la memoria di riproduzione Il lettore si accende e si spegne con il tasto POWER (29). Inserire un mezzo di memoria: – un CD con la scritta rivolta verso lʼalto nello slot CD (27) finché non viene ritirato automaticamente e/o – collegare una memoria USB (p. es. chiavetta USB, disco rigido USB con alimentazione propria) con la presa USB (28) e/o – poussez une carte SD (coin oblique vers le haut, contacts vers la droite) dans la fente (32), jusquʼà ce quʼelle sʼenclenche. Retirer le support de lecture : Pour éjecter le CD, appuyez deux fois sur la touche dʼéjection STOP/EJ ou EJECT (38) (première fois : commutation sur arrêt, deuxième fois : le CD est éjecté). Une fois le CD éjecté, le CD peut être inséré à nouveau en appuyant sur la touche dʼéjection. Débranchez le support USB du port USB et pour retirer la carte SD, déverrouillez-la en lʼenfonçant, puis retirez-la. Le support USB et la carte SD ne devraient pas être retirés pendant la lecture. 8.2.3 Sélection du médium de lecture Après chaque mise en fonction de lʼappareil, le lecteur CD est automatiquement sélectionné. Avec la touche CD / USB / SD (33), on peut commuter entre les supports de lecture : après avoir appuyé sur la touche, le support sélectionné est indiqué sur lʼaffichage ( , ou ). Peu après, sa lecture démarre. Si un support USB ou une carte SD est sélectionné, et retiré, le lecteur commute automatiquement sur le lecteur CD. De même lorsquʼun nouveau CD est retiré. 8.2.4 Lecture / Pause / Arrêt Une fois le support de lecture reconnu, la lecture démarre (affichage ). Pour interrompre la lecture (affichage ) et la poursuivre, appuyez sur la touche PLAY/ PAUSE ou (37). Lʼaffichage indique la durée déjà lue du titre (minute : seconde). Pour arrêter la lecture, vous pouvez appuyer sur les touches suivantes : – inserire una scheda SD (angolo smussato verso lʼalto e contatti a destra) nello slot per schede (32) fino allo scatto. Togliere il mezzo di memoria: Per fare uscire il CD premere due volte il tasto Espella STOP/ EJ o EJECT (38) [1. volta: avviare lo stop, 2. volta: il CD esce]. Dopo lʼuscita, il CD può essere ritirato nuovamente premendo il tasto Espella. Staccare la memoria USB dalla presa USB, e per togliere la scheda SD sbloccarla spingendola prima indentro e quindi sfilarla. La memoria USB e la scheda SD non dovrebbero essere tolte durante la loro riproduzione. 8.2.3 Selezionare la memoria di riproduzione Dopo ogni messa in funzione della cassa è selezionato automaticamente il drive CD. Con il tasto CD / USB / SD (33) si può cambiare il mezzo di riproduzione: dopo la pressione del tasto, sul display è visualizzato il mezzo ( , o ). Poco dopo sʼavvia la riproduzione. Se è selezionata una memoria USB o una scheda SD e se la stessa viene tolta, il lettore passa automaticamente al drive CD, anche se si inserisce un nuovo CD. 8.2.4 Riproduzione / Pausa / Stop Dopo la scansione del mezzo di riproduzione sʼavvia la riproduzione (visualizzazione ). Per interrompere la riproduzione (visualizzazione ) e per riprenderla, premere il tasto PLAY/ PAUSE o (37). Il display indica il tempo già trascorso del titolo (min. : sec.). – touche (45) – touche STOP/ EJ ou EJECT (38) En mode arrêt, lʼaffichage commute sur la durée “00 : 00”. Pour démarrer la lecture avec le premier titre, appuyez sur la touche PLAY/ PAUSE ou . 8.2.5 Réglage du volume / coupure du son Réglez le volume avec le réglage VOLUME (40). Pour couper le son et le rallumer, appuyez sur la touche (48). 8.2.6 Sélection de titre CDs audio Pour des CDs audio (affichage “CD”), lʼaffichage indique pendant la lecture et en pause le numéro du titre et en mode arrêt, le nombre total de tous les titres. 1. avancer ou reculer dʼun titre : utilisez les touches REV/ F.WD ou S / S (36) [REV/ S = premier saut au début du titre, à chaque nouvelle pression recul dʼun titre, F.WD/ S : avance dʼun titre]. 2. Saisie dʼun numéro de titre : Saisissez le numéro du titre via le pavé numérique (41) et confirmez avec la touche ENTER (47). Supports de lecture MP3 Pour lire des supports avec fichiers MP3 (indication “MP3”), lʼaffichage indique pendant la lecture ou en pause, le numéro du dossier et le numéro du titre dans le dossier. Les titres sans dossier dans le répertoire principal sont attribués au dossier numéro 1. En mode arrêt, le nombre total des dossiers et le nombre total des titres sur le support de lecture sont affichés. 1. avancer et reculer dʼun titre : A chaque pression sur la touche FOLDER (34), vous allez au dossier suivant. Pour la sélection de titre, utilisez les touches REV/ F.WD ou S / S (36) [REV/ S : premier saut au début du titre puis à chaque pression, retour dʼun titre, F.WD/ S = avance dʼun titre]. Per fermare la riproduzione si possono premere i seguenti tasti: – il tasto (45) – il tasto STOP/ EJ o EJECT (38) Nel modo di stop, il display passa allʼindicazione del tempo “00 : 00”. Per riavviare la riproduzione con il primo titolo, premere il tasto PLAY/ PAUSE o . 8.2.5 Impostare il volume / Messa in muto Impostare il volume con il regolatore VOLUME (40). Per disattivare e attivare lʼaudio di nuovo, premere il tasto (48). 8.2.6 Scelta del titolo CD audio Con CD audio (visualizzazione “CD”), il display indica durante la riproduzione e in pausa il numero del titolo, e nel modo di stop il numero totale di tutti i titoli. 1. Saltare avanti o indietro di un titolo: Usare i tasti REV/ F.WD o S / S (36) (REV/ S = dapprima salto allʼinizio del titolo, poi con ogni pressione del tasto salto indietro di un titolo, F.WD/ S = avanti di un titolo). 2. Digitare il numero del titolo: Tramite il tastierino numerico (41) digitare il numero del titolo e confermare con il tasto ENTER (47). Mezzo MP3 Per mezzi con file MP3 (visualizzazione “MP3”), il display indica durante la riproduzione e in pausa il numero della cartella e il numero del titolo nella cartella. I titoli senza cartella nella directory principale sono assegnati alla cartella n° 1. Nel modo di stop, sono indicati il numero totale delle cartelle e il numero totale dei titoli sul mezzo di riproduzione. 1. Saltare avanti o indietro di un titolo: Con ogni pressione del tasto FOLDER (34) si salta alla cartella successiva. Per la scelta del titolo, usare i tasti REV/ F.WD o S / S (36) 2. saisie du numéro du titre : via le pavé numérique (41), saisissez le numéro du titre sur le support de lecture (pas le numéro dans le dossier !) et confirmez avec la touche ENTER (47). F B CH Note: dans certains cas, le lecteur ne va pas au début du titre lorsquʼon appuie sur la touche de retour mais au titre précédent (par exemple fonctionnement CD en mode pause). 8.2.7 Avance et retour rapides Pour une avance et retour rapides, utilisez les touches FB / F.F et / (35) : FB ou = retour, F.F ou = avance. Appuyez brièvement sur la touche correspondante. Lorsque la position souhaitée est atteinte, appuyez sur la touche PLAY/ PAUSE ou (37) pour la lecture. 8.2.8 Fonctions répétition / lecture aléatoire de titres Trois fonctions répétition sont disponibles. La fonction sélectionnée est indiquée sur lʼaffichage. Avec la touche REP (44), on peut commuter entre : – “REPEAT 1” : répétition continue du titre – “REPEAT FOLDER” (uniquement en mode MP3) : répétition continue de tous les titres dans le dossier – “REPEAT ALL” : répétition continue de tous les titres du support de lecture – aucun affichage “REPEAT” : aucune fonction répétition activée ; après la lecture de tous les titres, le lecteur passe sur arrêt. Pour lire les titres en ordre aléatoire, appuyez sur la touche RAN (43). Sur lʼaffichage, “SHUFFLE” est affiché. Pour désactiver la fonction, appuyez une nouvelle fois sur la touche. Toute fonction répétition activée est désactivée lorsque la fonction Shuffle est activée et inversement. (REV/ S = dapprima salto allʼinizio del titolo, poi con ogni pressione del tasto salto indietro di un titolo, F.WD/ S = avanti di un titolo). 2. Digitare il numero del titolo: Tramite il tastierino numerico (41) digitare il numero del titolo sul mezzo di riproduzione (non il numero nella cartella!) e confermare con il tasto ENTER (47). I N. B.: In alcuni casi, premendo il tasto di salto indietro, il lettore non salta solo allʼinizio del titolo ma subito sul titolo precedente (p. es. in caso di funzionamento CD nel modo di pausa). 8.2.7 Avanzamento e ritorno veloce Per lʼavanzamento / ritorno veloce usare i tasti FB/ F.F o / (35): FB o = indietro, F.F o = in avanti. Premere brevemente il relativo tasto. Se è stato raggiunto il punto desiderato, per la riproduzione premere il tasto PLAY/ PAUSE o (37). 8.2.8 Funzioni di ripetizione / Sequenza casuale Si possono scegliere tre funzioni di ripetizione. La funzione scelta viene indicata sul display. Con il tasto REP (44) si cambia fra: – “REPEAT 1”: ripetizione senza fine del titolo – “REPEAT FOLDER” (solo con MP3): ripetizione senza fine di tutti i titoli nella cartella – “REPEAT ALL”: ripetizione senza fine di tutti i titoli del mezzo di riproduzione – nessuna visualizzazione REPEAT: non è attivata nessuna funzione di ripetizione; dopo la riproduzione di tutti i titoli, il lettore va in stop Per riprodurre i titoli in ordine casuale, premere il tasto RAN (43). Sul display si vede “SHUFFLE”. Per disattivare la funzione shuffle, premere ancora il tasto. Una funzione di ripetizione attivata viene disattivata attivando la funzione shuffle e viceversa. 17 F B CH 8.2.9 Lecture dʼune boucle Un segment au sein dʼun titre peut être répété en continu sous forme de boucle. 1) Lorsque dans le titre en cours, le point de départ du segment est atteint, appuyez sur la touche A – B (46) , lʼaffichage indique “A ©”. 2) Lorsque le point de fin du segment à répéter est atteint, appuyez une nouvelle fois sur la touche. Lʼaffichage indique “A © B”. Le segment est répété en continu. 3) Pour arrêter la boucle, appuyez une troisième fois sur la touche, “A © B” sʼéteint. 8.2.10 Modification de la vitesse de lecture et de la hauteur tonale Avec les touches PITCH (39), on peut modifier la vitesse de lecture et donc la hauteur tonale. Touche HI ou HIGH augmentation de la vitesse en 10 paliers Touche LO ou LOW diminution de la vitesse en 10 paliers Appuyez sur la touche correspondante jusquʼà atteindre la vitesse voulue. A chaque pression sur la touche, lʼaffichage indique brièvement le réglage sélectionné, par exemple lorsque la vitesse normale a été augmentée de 5 paliers lorsque la vitesse normale a été diminuée de 2 paliers Pour revenir à la vitesse normale de lecture, appuyez une fois sur la touche NOR. 8.2.11 Programmation dʼune suite de titres 1) Pour aller au mode programmation, appuyez sur la touche PROG (42). Sur lʼaffichage “PROGRAM” sʼaffiche. 2) Sélectionnez le premier titre de la suite : soit : – avec les touches REV/ F.WD ou S / S (36), aller au titre : en mode MP3, si besoin sélec- I 8.2.9 Riprodurre un loop Una parte di un titolo può essere ripetuta continuamente come loop. 1) Se nel titolo attuale è stato raggiunto lʼinizio della parte da ripetere, premere il tasto A – B (46). Il display indica “A ©”. 2) Se è stato raggiunto la fine della parte da ripetere, premere nuovamente il tasto. Il display indica “A © B”. La parte viene ripetuta continuamente. 3) Per terminare il loop, premere il tasto per la terza volta. “A © B” si spegne. 8.2.10 Modificare la velocità di riproduzione e lʼaltezza del suono Con i tasti PITCH (39) si può modificare la velocità di riproduzione e quindi anche lʼaltezza del suono. Tasto HI o HIGH aumento della velocità in 10 passi Tasto LO o LOW riduzione della velocità in 10 passi Premere il relativo tasto tante volte finché si raggiunge la velocità richiesta. Con ogni pressione del tasto, il display visualizza brevemente lʼimpostazione selezionata, p. es. se la velocità normale è stata aumenta di 5 passi se la velocità normale è stata ridotta di 2 passi Per ritornare alla velocità normale di riproduzione, premere una volta il tasto NOR. 8.2.11 Programmare una sequenza di titoli 1) Per entrare nel modo di programmazione, premere il tasto PROG (42). Sul display si vede “PROGRAM”. 2) Scegliere il primo titolo della sequenza: – con i tasti REV/ F.WD o S / S (36) saltare sul titolo; con MP3 eventualmente scegliere prima la cartella con il tasto FOLDER (34) 18 tionnez le dossier avec la touche FOLDER (34) soit – directement avec les touches numériques (41), saisissez le numéro du titre (en mode MP3 : le numéro que le titre a sur le support de lecture, pas celui du dossier !) Et pour confirmer, appuyez sur la touche ENTER (47). Lʼaffichage indique le numéro de lʼemplacement de mémoire à la place de lʼaffichage de durée. Procédez de même pour tous les autres titres jusquʼà ce que la suite totale des titres (10 max.) soit programmée. 3) Pour démarrer la suite de titre, appuyez sur la touche PLAY/ PAUSE ou (37); “PROGRAM” sʼéteint et “MEMORY” sʼaffiche. Pour revenir à la lecture dans la suite normale, appuyez sur la touche PROG : “MEMORY” sʼéteint, la programmation est effacée. 4) Si aucune fonction répétition nʼest activée (“REPEAT 1“ et “REPEAT ALL” sont disponibles, → chapitre 8.2.8), le lecteur commute sur Arrêt après la lecture de la suite de titres, la suite est alors effacée. 8.3 Unité émetteur multifréquences uniquement sur le modèle TXA-802CD Lorsque plusieurs enceintes actives sont nécessaires pour une sonorisation, un fonctionnement audio Link sans câble est possible : via lʼunité émetteur dʼune enceinte active TXA-802CD (appareil principal), le signal mixé non influencé par le réglage MASTER (6) et les réglages de lʼégaliseur (7) est transmis aux unités de réception dʼautres enceintes actives de la série TXA-8... (appareils auxiliaires). 1) Pour allumer lʼunité émetteur, poussez lʼinterrupteur marche/arrêt et le réglage de volume (26) depuis la position OFF. oppure – digitare il numero del titolo direttamente con il tastierino numerico (41) [con MP3: il numero del titolo sul mezzo di riproduzione, non nella cartella!] e per confermare premere il tasto ENTER (47). Il display indica al posto del tempo il numero della locazione di memoria. Procedere nello stesso modo per gli altri titoli fino al termine della programmazione dellʼintera sequenza (max. 10). 3) Per avviare la sequenza premere il tasto PLAY/ PAUSE o (37), “PROGRAM” si spegne e si vede “MEMORY”. Per ritornare alla riproduzione in ordine normale, premere il tasto PROG: “MEMORY” si spegne e la programmazione è cancellata. 4) Se non è attivata nessuna funzione di ripetizione (sono disponibili “REPEAT 1” e “REPEAT ALL” → Cap. 8.2.8), dopo la riproduzione della sequenza, il lettore passa a stop e la sequenza è cancellata. 8.3 Modulo trasmettitore multifrequenza solo con il modello TXA-802CD Se per la sonorizzazione sono richieste più casse attive, è possibile il funzionamento wireless, audiolink: Per mezzo del modulo trasmettitore di una cassa attiva TXA-802CD (apparecchio principale) si può trasmettere il segnale miscelato, non condizionato dal regolatore MASTER (6) e dai regolatori toni (7), ai moduli ricevitore di altre casse attive della serie TXA-8.. (apparecchi secondari). 1) Per attivare il modulo trasmettitore aprire lʼinterruttore on/off e regolatore volume (26) dalla posizione OFF (“spento”). Si accende la spia TX (22) segnalando che viene trasmesso un segnale radio. 2) Sui moduli ricevitore degli apparecchi secondari impostare il canale di trasmissione per il funzio- Lʼaffichage TX (22) brille et indique quʼun signal est émis. 2) Sur les unités de réception des appareils auxiliaires, réglez le canal de transmission pour le mode audio link et réglez lʼunité émetteur de lʼappareil principal sur le même canal : 1. Appuyez sur la touche SET (24). Lʼaffichage du canal (21) clignote. 2. Tant que lʼaffichage du canal clignote (pendant 10 secondes environ), vous pouvez sélectionner le canal avec les touches et (25): touche pour la sélection de canaux vers le haut, touche vers le bas. 3. Confirmez la sélection de canal avec la touche SET. (Si la sélection nʼest pas confirmée avec la touche SET en lʼespace de 10 secondes, lʼappareil revient au canal précédemment réglé). Important ! Lors de la sélection des canaux, veillez à ce que lʼunité émetteur et les unités récepteur de lʼappareil principal soient réglées sur des canaux différents, sinon, il y a des effets de larsen. 3) Il est possible de faire afficher brièvement la fréquence radio pour le canal réglé : tant que la touche ou est maintenue enfoncée, lʼaffichage indique la fréquence au lieu du canal. 4) Les LEDs AF LEVEL (23) indiquent le niveau du signal audio appliqué à lʼunité émetteur : La LED jaune brille si le signal dʼentrée de lʼunité émetteur a atteint un niveau minimal donné. La LED rouge brille si le signal dʼentrée de lʼunité émetteur a atteint le niveau maximal pour lequel il nʼest pas encore en surcharge. La LED rouge ne devrait pas briller ou briller uniquement brièvement pour des pointes de signal. Si elle brille en permanence, le signal est en surcharge, diminuez en conséquence le volume de la source respective (des sources respectives). 5) Avec le réglage (26), réglez le volume souhaité pour le signal audio émis. namento audio-link e impostare lo stesso canale nel modulo trasmettitore dellʼapparecchio principale: 1. Premere il tasto SET (24). Lʼindicazione del canale sul display (21) lampeggia. 2. Mentre lʼindicazione del canale lampeggia (per 10 sec. ca.), con i tasti e (25) si può scegliere il canale: tasto per scelta ascendente, tasto per scelta discendente. 3. Confermare la scelta del canale con il tasto SET. (Se la scelta non viene confermata entro 10 sec. con il tasto SET, lʼapparecchio ritorna al canale impostato prima). Importante! Nella scelta del canale fare attenzione che il modulo trasmettitore e i moduli ricevitore dellʼapparecchio principale siano impostati per canali differenti. Altrimenti si ha il fenomeno di feedback. 3) È possibile farsi indicare brevemente la frequenza radio del canale impostato: mentre si tiene premuto il tasto o , il display indica la frequenza al posto del canale. 4) Le spie AF LEVEL (23) indicano il livello del segnale audio che arriva sul modulo trasmettitore: È acceso il LED giallo se il segnale dʼingresso del modulo trasmettitore ha raggiunto un determinato livello minimo. È acceso il LED rosso se il segnale dʼingresso del modulo trasmettitore ha raggiunto il livello massimo senza ancora essere sovrapilotato. Il LED non dovrebbe accendersi o solo brevemente nei picchi del segnale; se rimane acceso continuamente, il segnale è sovrapilotato. Allora occorre ridurre il volume della relativa sorgente. 5) Con il regolatore (26) impostare il volume desiderato per il segnale audio trasmesso. 9 Caractéristiques techniques Puissance amplificateur : . . . . . . . 80 WMAX /50 WRMS Système haut-parleur : grave 20 cm (8″) et aigu 2,5 cm (1″) Bande passante : . . . . 70 – 16 000 Hz Entrée MIC IN Sensibilité : . . . . . . . 6 mV Branchement : . . . . . XLR/jack 6,35, sym. Entrée LINE IN Sensibilité : . . . . . . . 800 mV Branchement : . . . . . RCA Sortie LINE OUT Niveau : . . . . . . . . . . 1 V Branchement : . . . . . RCA 9.1 Transmission sans fil Unité/unités réception 1 : . . . . . . . . . récepteur PLL multifréquences en technologie Diversity Unité émetteur 2 : . . . . . émetteur PLL multifréquences avec puissance émission de 10 mW (EIRP) Portée : . . . . . . . . . . . . 30 m env. Plage de fréquences radio : . . . . . . . . . . . . . 863,1 – 864,9 MHz, divisé en 16 canaux 1. modèles TXA-800 et TXA-800CD: 1 unité récepteur, modèle TXA-802CD: 2 unités récepteur 2. uniquement sur modèle TXA-802CD Sortie SPEAKER : . . . . prise jack 6,35 femelle pour un système haut-parleur passif (impédance minimale 8 Ω) Egaliseur Graves : . . . . . . . . . . ±15 dB/100 Hz Aigus : . . . . . . . . . . . ±10 dB/10 kHz Température fonc. : . . . 0 – 40 °C Alimentation : . . . . . . . via alimentation secteur (230 V~/50 Hz/150 VA) ou accumulateurs plomb/gel internes (2 × 12 V /3 Ah) 9.1.1 Fréquences des canaux CH 1 à CH 16 F CH Fréquence CH Fréquence B 1 863,1 MHz 9 863,2 MHz CH 2 864,1 MHz 10 864,2 MHz 3 863,6 MHz 11 863,7 MHz 4 864,6 MHz 12 864,7 MHz 5 863,3 MHz 13 863,4 MHz 6 864,3 MHz 14 864,4 MHz 7 863,8 MHz 15 863,9 MHz 8 864,8 MHz 16 864,9 MHz Conseil pour le fonctionnement de plusieurs systèmes sans fil TXA-8.. On peut utiliser simultanément 5 systèmes de transmission et jusquʼà un maximum de 8, configurés avec des canaux différents dans cette plage de fréquence. Le nombre de canaux pouvant être utilisés en parallèle dépend de la distance entre les systèmes de transmission individuels, des sources dʼinterférences HF possibles et de la configuration des lieux. Il convient que les canaux soient configurés en ordre croissant (par exemple pour 8 systèmes, les canaux CH 1 à CH 8) et que la distance entre les systèmes soit la plus grande possible si vous utilisez plusieurs systèmes. Tout droit de modification réservé. Durée fonctionnement accus : . . . . . . . . . . . . . jusquʼà 3 – 4 heures environ Dimensions : . . . . . . . . 300 × 470 × 230 mm (L × H × P) Poids Modèle TXA-800 : . . 11,2 kg Modèle TXA-800CD : 11,9 kg Modèle TXA-802CD : 12,3 kg Notice dʼutilisation protégée par le copyright de MONACOR ® INTERNATIONAL GmbH & Co. KG. Toute reproduction même partielle à des fins commerciales est interdite. 9 Dati tecnici 9.1 Trasmissione wireless 9.1.1 Frequenze dei canali CH 1 a CH 16 Potenza amplificazione: . . . . . . 80 WMAX /50 WRMS Modulo/i ricevitore 1: . . ricevitore PLL multifrequenza in tecnica diversity CH Frequenza CH Frequenza 863,1 MHz 9 863,2 MHz Altoparlanti: . . . . . . . . . woofer 20 cm (8″) e tweeter 2,5 cm (1″) Modulo trasmettitore 2: . trasmettitore PLL multifrequenza con potenza di 10 mW (EIRP) 1 2 864,1 MHz 10 864,2 MHz 3 863,6 MHz 11 863,7 MHz Portata: . . . . . . . . . . . . ca. 30 m 4 864,6 MHz 12 864,7 MHz Gamma frequenza radio: . . . . . . . . . . . . . . 863,1 – 864,9 MHz, suddivisa in 16 canali 5 863,3 MHz 13 863,4 MHz 6 864,3 MHz 14 864,4 MHz 7 863,8 MHz 15 863,9 MHz 8 864,8 MHz 16 864,9 MHz Gamma di frequenze: . 70 – 16 000 Hz Ingresso MIC IN Sensibilità: . . . . . . . . 6 mV Contatto: . . . . . . . . . XLR/jack 6,3 mm, simm. Ingresso LINE IN Sensibilità: . . . . . . . . 800 mV Contatto: . . . . . . . . . RCA Uscita LINE OUT Livello: . . . . . . . . . . . 1 V Contatto: . . . . . . . . . RCA Uscita SPEAKER: . . . . Presa jack 6,3 mm per altoparlanti passivi (impedenza min. 8 Ω) Regolatori toni Bassi: . . . . . . . . . . . . ±15 dB/100 Hz Acuti: . . . . . . . . . . . . ±10 dB/10 kHz Temperatura dʼesercizio: . . . . . . . . . 0 – 40 °C Alimentazione: . . . . . . tramite tensione di rete (230V~/50 Hz/150 VA) o batterie ricaricabili interne a gel di piombo (2 × 12 V /3 Ah) 1. modelli TXA-800 e TXA-800CD: 1 modulo ricevitore, modello TXA-802CD: 2 moduli ricevitore 2. solo con modello TXA-802CD I Nota per il funzionamento di più sistemi radio TXA-8.. Si possono impiegare contemporaneamente da 5 fino ad 8 sistemi di trasmissione che occupano differenti canali in questo settore di frequenze. Il numero dei canali utilizzabili in parallelo dipende dalla distanza fra i singoli sistemi di trasmissione, da eventuali interferenze HF e da altre condizioni ambientali. Utilizzando più sistemi, i canali dovrebbero essere impostati in ordine crescente (p. es. per 8 sistemi i canali CH 1 – CH 8), e la distanza fra i sistemi dovrebbe essere possibilmente grande. Con riserva di modifiche tecniche. Durata batterie: . . . . . . fino a 3 – 4 ore ca. Dimensioni: . . . . . . . . . 300 × 470 × 230 mm (l × h × p) Peso Modello TXA-800: . . 11,2 kg Modello TXA-800CD: 11,9 kg Modello TXA-802CD: 12,3 kg La MONACOR ® INTERNATIONAL GmbH & Co. KG si riserva ogni diritto di elaborazione in qualsiasi forma delle presenti istruzioni per lʼuso. La riproduzione – anche parziale – per propri scopi commerciali è vietata. 19 NL B Op de uitklapbare pagina 3 vindt u een overzicht van alle bedieningselementen en de aansluitingen. 1 Overzicht van de bedieningselementen en aansluitingen 1 Multifrequentieontvanger → zie figuur 2 en hoofdstuk 1.1 2 Cd- / mp3-speler → zie figuur 4 en hoofdstuk 1.3 1 Overzicht van de bedieningselementen en aansluitingen . . . . . . . . . . . . . . . . . . . 20 3 Multfrequentiezender → zie figuur 3 en hoofdstuk 1.2 1.1 Multifrequentieontvanger . . . . . . . . . . . . . . 20 14 Display voor de weergave van het transmissiekanaal resp. van de radiofrequentie 1.2 Multifrequentiezender . . . . . . . . . . . . . . . . 20 1.3 Cd- / mp3-speler met afstandsbediening . . 21 4 LED CHARGE voor aanduiding van de laadtoestand rood: accuʼs worden geladen, groen: accuʼs zijn volledig geladen 2 Veiligheidsvoorschriften . . . . . . . . . . . . 22 15 Diversity-LED A/B: licht rood of groen op, en geeft daarmee aan welke van de twee interne ontvangstantennes A of B momenteel actief is. 3 Toepassingen en toebehoren . . . . . . . . 22 3.1 Conformiteit en goedkeuring van de zender van het model TXA-802CD . . . . . . 22 5 POWER-schakelaar van de actieve luidspreker De schakelaar licht op tijdens het gebruik. Knippert hij bij accubedrijf, dan zijn de accuʼs bijna ontladen en moeten ze worden geladen. 16 Ontvangst-LED RX: licht op wanneer de zender ingeschakeld en op de radiofrequentie van de ontvanger afgestemd is 4 Opstelling . . . . . . . . . . . . . . . . . . . . . . . . . 22 5 Voedingsspanning/accuʼs opladen . . . . 22 6 Audio-aansluitingen . . . . . . . . . . . . . . . . 23 6.1 Ingangen . . . . . . . . . . . . . . . . . . . . . . . . . . 23 6.2 Uitgang LINE OUT . . . . . . . . . . . . . . . . . . 23 6.3 Passieve luidsprekerkast . . . . . . . . . . . . . 23 7 Ingebruikneming . . . . . . . . . . . . . . . . . . . 23 8 Bediening . . . . . . . . . . . . . . . . . . . . . . . . . 23 8.1 Multifrequentieontvanger . . . . . . . . . . . . . . 24 8.2 Cd- / mp3-speler . . . . . . . . . . . . . . . . . . . . . 24 8.3 Multifrequentiezender . . . . . . . . . . . . . . . . 26 9 Technische gegevens . . . . . . . . . . . . . . . 27 9.1 Radiotransmissie . . . . . . . . . . . . . . . . . . . . 27 6 Regelaar MASTER voor het totale geluidsvolume van de actieve luidspreker 7 Klankregelaar TREBLE (hoge tonen) en BASS (lage tonen) voor het mengsignaal 8 Volumeregelaar voor de microfoon op de MICingang (11) 9 Ingang LINE IN (Cinch-jacks) voor een stereogeluidsbron met lijnuitgangsniveau, b.v. cd-speler, cassetterecorder 10 Uitgang LINE OUT (Cinch-jacks) voor het doorsturen van het mengsignaal, b.v. naar een opnameapparaat of een andere actieve luidspreker Opmerking: De instellingen van de klankregelaars (7) hebben effect op het LINE OUT-signaal uit, maar niet de instelling van de regelaar MASTER (6). 11 Ingang MIC IN (combi-jack, 6,3 mm-jack/XLR, gebalanceerd) voor het aansluiten van een microfoon Por favor, abra la página 3. Así podrá ver siempre los elementos operativos y las conexiones descritas. 1 Elementos operativos y conexiones 1 Unidad de recepción multifrecuencia → vea la imagen 2 y el capítulo 1.1 Índice 2 Lector CD/MP3 → vea la imagen 4 y el capítulo 1.3 1 Elementos operativos y conexiones . . . 20 3 Unidad de transmisión multifrecuencia → vea la imagen 3 y capítulo 1.2 1.1 Unidad de recepción multifrecuencia . . . . 20 1.2 Unidad de transmisión multifrecuencia . . . 20 1.3 Lector CD/MP3 con control remoto . . . . . 21 2 Notas de seguridad . . . . . . . . . . . . . . . . . 22 3 Aplicaciones y accesorios . . . . . . . . . . . 22 3.1 Conformidad y aprobación de la unidad de transmisión del modelo TXA-802CD . . 22 4 Establecimiento del aparato . . . . . . . . . 22 5 Alimentación/Recarga de las baterías . 22 6 Conexiones audio . . . . . . . . . . . . . . . . . . 23 6.1 Entradas . . . . . . . . . . . . . . . . . . . . . . . . . . 23 6.2 Salida LINE OUT . . . . . . . . . . . . . . . . . . . . 23 6.3 Sistema de altavoz pasivo . . . . . . . . . . . . 23 7 Puesta en marcha del sistema . . . . . . . . 23 8 Funcionamiento . . . . . . . . . . . . . . . . . . . 23 8.1 Unidad de recepción multifrecuencia . . . . 24 8.2 Lector CD/MP3 . . . . . . . . . . . . . . . . . . . . . 24 8.3 Unidad de transmisión multifrecuencia . . . 26 9 Características técnicas . . . . . . . . . . . . . 27 9.1 Transmisión inalámbrica . . . . . . . . . . . . . . 27 4 LED de carga CHARGE Rojo: Las baterías se están cargando Verde: Las baterías se han cargado completamente 5 Interruptor POWER del sistema de altavoz activo El interruptor se iluminará durante el funcionamiento. Si empieza a parpadear durante el funcionamiento con baterías recargables, significa que las baterías están casi agotadas y tienen que recargarse. 6 Control MASTER para el volumen principal del sistema de altavoz activo 7 Controles de tono TREBLE (gama de agudos) y BASS (gama de bajos) para la señal mezclada 8 Control de volumen para el micrófono en la entrada MIC IN (11) 9 Entrada LINE IN (tomas RCA) para una fuente audio estéreo con nivel de salida de línea, p. ej. lector CD, grabador cassette 10 Salida LINE OUT (tomas RCA) para transmitir la señal mezclada, p. ej. a un grabador u otro sistema de altavoz activo Nota: Los ajustes de los controles de tono (7) afectarán la señal LINE OUT; el ajuste del control MASTER (6), sin embargo, no lo afectará. 11 Entrada MIC IN (toma combinada XLR / jack 6,3 mm, sim.) para conectar un micrófono 12 Jack 6,3 mm SPEAKER para conectar un sistema de altavoz pasivo adicional (impedancia mínima 8 Ω) 20 1.1 Multifrequentieontvanger Inhoudsopgave 12 6,3 mm-stekkerbus SPEAKER voor de aansluiting van een bijkomende passieve luidsprekerkast (impedantie min. 8 Ω) E 13 POWER-jack voor aansluiting op een stopcontact (230 V~/50 Hz) met behulp van het bijgeleverde netsnoer model TXA-800 / -800CD: 1 ontvanger model TXA-802CD: 2 ontvangers 17 Indicatie AF voor het ontvangen audiosignaal: licht op bij ontvangst van een audiosignaal 18 Toets SET voor het oproepen van de instelmodus voor het transmissiekanaal en voor het bevestigen van de kanaalkeuze 19 Pijltoetsen – om in de instelmodus het kanaal in te stellen: toets voor de kanaalkeuze “omhoog”, toets voor kanaalkeuze “omlaag” – om het display (14) kort naar weergave van de radiofrequentie om te schakelen: zolang de toets of ingedrukt blijft, geeft het display de frequentie weer in plaats van het kanaal. 20 POWER-schakelaar en volumeregelaar 1.2 Multifrequentiezender alleen bij model TXA-802CD 21 Display voor de weergave van het transmissiekanaal resp. van de radiofrequentie 22 Zender-LED TX: licht op, wanneer de zender is ingeschakeld 13 Toma de corriente para la conexión a un enchufe (230 V~/50 Hz) mediante el cable de corriente entregado 1.1 Unidad de recepción multifrecuencia modelo TXA-800 / -800CD: modelo TXA-802CD: 1 unidad de recepción 2 unidades de recepción 14 Visualizador para indicar el canal de transmisión o la frecuencia radio 15 LED Diversity A/B: se iluminará en rojo o verde para indicar cual de las dos antenas de recepción internas (A o B) está activa actualmente 16 LED RF de recepción: se iluminará cuando el emisor esté encendido y ajustado en la frecuencia radio del receptor 17 LED AF para la señal audio recibida: se iluminará cuando se reciba una señal audio 18 Botón SET para seleccionar el modo de ajuste para el canal de transmisión y para confirmar la selección de canal 19 Teclas de flecha – Para ajustar el canal en el modo de ajuste: tecla para la selección de canal “hacia arriba”; tecla para la selección de canal “hacia abajo” – Para cambiar el visualizador (14) para indicar brevemente la frecuencia radio: mientras la tecla o esté presionada, el visualizador indicará la frecuencia en vez del canal 20 Interruptor de encendido – apagado y control de volumen 1.2 Unidad de transmisión multifrecuencia sólo para el modelo TXA-802CD 21 Visualizador para indicar el canal de transmisión o la frecuencia radio 22 LED de transmisión LED TX: se iluminará cuando la unidad de transmisión esté encendida 23 Niveau-LEDʼs AF LEVEL voor het ingangssignaal van de zender: geel = minimumniveau , rood = maximumniveau (Zie hiervoor ook hoofdstuk 8.3, bedieningsstap 4) tracknummer in de map, bv. voor 8ste track in de 2de map 24 Toets SET voor het oproepen van de instelmodus voor het transmissiekanaal en voor het bevestigen van de kanaalkeuze 25 Pijltoetsen – om in de instelmodus het kanaal in te stellen: toets voor de kanaalkeuze “omhoog”, toets voor kanaalkeuze “omlaag” – om het display (21) kort naar weergave van de radiofrequentie om te schakelen: zolang de toets of ingedrukt blijft, geeft het display de frequentie weer in plaats van het kanaal. – 26 POWER-schakelaar en volumeregelaar – 1.3 Cd- / mp3-speler met afstandsbediening – – – – alleen bij de modellen TXA-800CD en TXA-802CD – 27 Cd-invoersleuf: schuif de cd in de sleuf tot ze automatisch wordt ingetrokken (in de stopmodus: totaal aantal mappen en totaal aantal tracks) de reeds verstreken speeltijd van de track (min : sec) voor weergave, voor pauze displaybericht voor de geselecteerde herhalingsfunctie (“REPEAT 1”, “REPEAT FOLDER” of “REPEAT ALL”) → toets REP (44) displaybericht “SHUFFLE” bij afspelen van de tracks in willekeurige volgorde displaybericht “PROGRAM” tijdens het programmeren van een eigen reeks tracks displaybericht “MEMORY” bij het afspelen van een geprogrammeerde reeks tracks displaybericht “A © B” bij het afspelen van een lus 28 USB-jack voor het aansluiten van een USB-massageheugen, bv. USB-stick, USB-schijf met autonome voeding 32 Slot voor een SD-kaart 29 POWER-schakelaar 34 Toets FOLDER om de volgende map te selecteren (bij mp3-bedrijf) 30 Infraroodsensor voor de afstandsbedieningssignalen 31 Display, geeft – bij audio-cdʼs het displaybericht “CD” en het tracknummer weer, bv. voor track nr. 10 33 Toets om te wisselen tussen cd, USB-geheugen en SD-kaart 35 Toets F.F/ voor snel vooruit zoeken en toets FB/ voor snel achteruit zoeken: tip de respectieve toets aan en als de gewenste positie is bereikt, drukt u op de toets Play / Pause (37). 36 Toetsen om een track te selecteren REV/ S = achteruit, F.WD/ S = vooruit 37 Toets Play/ Pause (in de stopmodus: totaal aantal tracks) bij mp3-afspeelmedia displaybericht “mp3”, het mapnummer en het 38 Toets om de stopmodus te starten (1ste keer drukken) en een cd uit te werpen (2de keer drukken) 23 LEDs de nivel AF LEVEL para la señal de entrada de la unidad de transmisión: amarillo = nivel mínimo, rojo = nivel máximo (vea también el capítulo 8.3, paso operativo 4) la 8ª pista de la 2ª carpeta 24 Botón SET para seleccionar el modo de ajuste para el canal de transmisión y para confirmar la selección de canal 25 Teclas de flecha – Para ajustar el canal en el modo de ajuste: tecla para selección de canal “hacia arriba”; tecla para selección de canal “hacia abajo” – Para cambiar el visualizador (21) para indicar brevemente la frecuencia radio: mientras la tecla o se mantenga presionada, el visualizador indicará la frecuencia en vez del canal 26 Interruptor de encendido – apagado y control de volumen 1.3 Lector CD/MP3 con control remoto sólo para modelos TXA-800CD y TXA-802CD 27 Ranura de CD: Inserte el CD hasta que repliegue automáticamente 28 Puerto USB para conectar un medio de almacenamiento masivo USB, p. ej. unidad flash USB o disco duro USB con alimentación separada 32 33 34 35 29 Botón POWER 30 Sensor IR para las señales del control remoto 31 Visualizador, muestra: – Para CDs de audio Indicación “CD” y número de pista, p. ej. pista nº 10 (en el modo paro: número total de pistas) Para medios de lectura MP3 Indicación “MP3”, número de carpeta y número de pista en la carpeta, por ejemplo para 39 Toetsen om het afspeeltempo in 10 stappen te wijzigen: druk enkele keren op de toets HI / HIGH (tempo verhogen) of LO / LOW (tempo verlagen) tot het gewenste tempo bereikt is; om terug te keren naar normaal afspeeltempo, drukt u eenmaal op de toets NOR. 40 Volumeregelaar 41 Cijfertoetsen voor het selecteren van een track door invoer van het nummer ervan (mp3-bedrijf: nummer van de track op het afspeelmedium, niet in de map!); druk na invoer ter bevestiging op de toets ENTER (47) 42 Toets om een eigen reeks tracks te programmeren (→ hoofdstuk 8.2.11) 43 Toets voor het afspelen van tracks in willekeurige volgorde 44 Toets om te wisselen tussen – “REPEAT 1”: herhalen van de track – “REPEAT FOLDER” (alleen bij mp3-bedrijf): herhaling van alle tracks in de map – “REPEAT ALL”: herhaling van alle tracks van het afspeelmedium – geen displaybericht “REPEAT”: geen herhalingsfunctie ingeschakeld 45 Toets om het afspelen te stoppen 46 Toets om een lus af te spelen (herhaling van een fragment uit de track) eerste keer drukken op de toets het beginpunt van het fragment wordt vastgelegd tweede keer drukken op de toets het eindpunt van het fragment wordt vastgelegd: de lus wordt afgespeeld. derde keer drukken op de toets het afspelen van de lus wordt beëindigd. 47 Toets om invoer te bevestigen, bv. na trackselectie via de cijfertoetsen (41) 48 Toets om het geluid in en uit te schakelen 36 37 38 39 (en el modo paro: número total de carpetas y número total de pistas) –- Tiempo reproducido de la pista (min. : seg.) – para reproducción, para pausa – Indicación para la función de repetición seleccionada (“REPEAT 1”, “REPEAT FOLDER” o “REPEAT ALL”) → botón REP (44) – Indicación “SHUFFLE” para reproducir las pistas en orden aleatorio – Indicación “PROGRAM” cuando se programa una secuencia de pistas individual – Indicación “MEMORY” para reproducir una secuencia de pistas programadas – Indicación “A © B” cuando se reproduce un bucle Ranura para una tarjeta SD Botón para seleccionar CD, medio de almacenamiento USB o tarjeta SD Botón FOLDER para seleccionar la siguiente carpeta (modo MP3) Botón F.F/ para avance rápido y botón FB/ para retroceso rápido: Pulse brevemente el botón respectivo y cuando llegue al punto deseado, pulse el botón de reproducción / pausa (37). Botones para la selección de pista REV/ S = retroceder, F.WD/ S = avanzar Botón de reproducción / pausa Botón para cambiar el modo de paro (botón pulsado una vez) y para expulsar un CD (botón pulsado dos veces) Botones para cambiar la velocidad de reproducción en 10 pasos: pulse el botón HI / HIGH (para aumentar la velocidad) o LO / LOW (para reducir la velocidad) repetidamente hasta que se 40 41 42 43 44 45 46 47 48 alcance la velocidad deseada; para volver a la velocidad estándar, pulse el botón NOR. Control de volumen Botones numéricos para seleccionar una pista introduciendo su número (modo MP3: ¡número de la pista en el medio de lectura, no en la carpeta!); después pulse el botón ENTER (47) para confirmar Botón para programar una secuencia de pistas individuales → apartado 8.2.11 Botón para reproducir las pistas en orden aleatorio Botón para seleccionar – “REPEAT 1”: repetición de la pista – “REPEAT FOLDER” (sólo para el modo MP3): repetición de todas las pistas de la carpeta – “REPEAT ALL”: repetir todas las pistas del medio de reproducción – Sin indicación “REPEAT”: no hay ninguna función de repetición activada Botón para parar la reproducción Botón para reproducir un bucle (repetición de una sección de la pista) Primera acción del botón Definir el punto de inicio de la sección Segunda acción del botón Definir el punto de finalización de la sección: empezará la reproducción del bucle Tercera acción del botón Terminar la reproducción del bucle Botón para confirmar una entrada, p. ej. después de una selección de pista mediante los botones numéricos (41) Botón para activar / desactivar el sonido NL B E 21 NL B 2 Veiligheidsvoorschriften Dit apparaat is in overeenstemming met alle relevante EU-Richtlijnen en is daarom met gekenmerkt. WAARSCHUWING De netspanning (230 V~) van het apparaat is levensgevaarlijk. Open het apparaat niet, want door onzorgvuldige ingrepen loopt u het risico van elektrische schokken. Let eveneens op het volgende: G Het apparaat is uitsluitend geschikt voor gebruik binnenshuis. Vermijd druip- en spatwater, uitzonderlijk warme plaatsen en plaatsen met een hoge vochtigheid (toegestaan omgevingstemperatuurbereik: 0 – 40 °C). G Plaats geen bekers met vloeistof zoals drinkglazen etc. op het apparaat. G Schakel het apparaat niet in en trek onmiddellijk de stekker uit het stopcontact, wanneer: 1. het apparaat of het netsnoer zichtbaar beschadigd is, 2. er een defect zou kunnen optreden nadat het apparaat bijvoorbeeld gevallen is, 3. het apparaat slecht functioneert. Het apparaat moet in elk geval worden hersteld door een gekwalificeerd vakman. G Trek de stekker nooit met het snoer uit het stopcontact, maar met de stekker zelf! G Verwijder het stof enkel met een droge doek. Gebruik zeker geen chemicaliën of water. G In geval van ongeoorloofd of verkeerd gebruik, verkeerde aansluiting, foutieve bediening of van herstelling door een nietgekwalificeerd persoon vervalt de garantie en de verantwoordelijkheid voor hieruit resulterende materiële of lichamelijke schade. Wanneer het apparaat definitief uit bedrijf wordt genomen, bezorg het dan voor milieuvriendelijke verwerking aan een plaatselijk recyclagebedrijf. E 2 3 Elk module beschikt over een multifrequentieontvanger die met Diversity-techniek* in het UHF-bereik 863,1 – 864,9 MHz werkt. Het frequentiebereik is ingedeeld in 16 kanalen die vrij kunnen worden geselecteerd. Het model TXA-802CD beschikt bovendien over een tweede ontvanger en een zender die beide eveneens in het bereik 863,1 – 864,9 MHz werken. Met de zender kan het audiosignaal van de luidspreker draadloos naar andere actieve luidsprekers van de TXA-800-serie worden gestuurd (audiolinkbedrijf). Uit het gamma van MONACOR zijn b.v. volgende zenders geschikt voor het gebruik met de actieve luidsprekers van de TXA-800-serie: TXA-800HSE (bestelnr. 17.2250) Multifrequentiezakzender met dasspeld- en hoofdmicrofoon TXA-800HT (bestelnr. 17.2260) Handmicrofoon met multifrequentiezender TXA-800ST (bestelnr. 17.2600) Multifrequentiezender op netstroom * Diversity-techniek: Het zendersignaal wordt door twee antennes ontvangen en op kwaliteit gecontroleerd. Telkens wordt het beste van beide signalen gebruikt. Notas de seguridad Preste atención a los siguientes puntos bajo cualquier circunstancia: G El aparato está adecuado sólo para utilizarlo en interiores. Proteja el aparato de goteos y salpicaduras, elevada humedad del aire y calor (temperatura ambiente admisible: 0 – 40 ºC). G No coloque ningún recipiente con líquido encima del aparato, p. ej. un vaso. G No utilice el aparato y desconecte inmediatamente la toma de corriente del enchufe si: 1. El aparato o el cable de corriente están visiblemente dañados. 2. El aparato ha sufrido daños después de una caída o accidente similar. 3. No funciona correctamente. Sólo el personal cualificado puede reparar el aparato bajo cualquier circunstancia. G No tire nunca del cable para desconectar el enchufe de la toma de corriente, tire siempre del enchufe. G Utilice sólo un paño suave y seco para la limpieza; no utilice nunca ni agua ni productos químicos. G 22 No podrá reclamarse garantía o responsabilidad alguna por cualquier daño personal o material producido si se utiliza el aparato para fines diferentes a los originalmente concebidos, si no se conecta o no se utiliza correctamente, o sino se repara por expertos. 3.1 Conformiteit en goedkeuring van de zender van het model TXA-802CD Hiermee verklaart MONACOR INTERNATIONAL dat de zender van het apparaat TXA-802CD in overeenstemming is met de basisvereisten en de overige geldende bepalingen van de richtlijn 1999/5/EG. De verklaring van overeenstemming kan bij MONACOR INTERNATIONAL worden aangevraagd. Het gebruik van de zender is algemeen toegelaten in de Lidstaten van de EU en de EFTA, en is vrij van registratie en van taksen. 4 Opstelling Het apparaat kan vrij worden opgesteld, of u kunt het via de statiefhuls aan de onderzijde op een PAluidsprekerstatief (b.v. PAST-serie uit het gamma van MONACOR) monteren. Als toebehoren is de beschermhoes TXA800BAG in zwarte kunststof verkrijgbaar (bestelnummer 17.2340). Deze kan ook tijdens het gebruik op de luidspreker blijven. 5 Voedingsspanning /accuʼs opladen Als u de actieve luidspreker via een stopcontact wilt gebruiken en/of wenst u de interne loodgelaccuʼs op te laden, sluit dan het bijgeleverde netsnoer aan op de voedingsaansluiting (13) en plug de stekker in een stopcontact (230 V~ / 50 Hz). Bij netaansluiting van de actieve luidspreker is steeds het automatische laadsysteem voor de accuʼs actief, en de laadtoestand CHARGE (4) licht op: rood oplichten: accuʼs worden geladen groen oplichten: accuʼs zijn volledig geladen De luidspreker moet om op te laden niet met de schakelaar POWER (5) zijn ingeschakeld, maar kan tijdens het laden volledig normaal worden gebruikt. Si va a poner el aparato definitivamente fuera de servicio, llévelo a la planta de reciclaje más cercana para que su eliminación no sea perjudicial para el medioambiente. El aparato cumple con todas las directivas relevantes de la UE y por lo tanto está marcado con el símbolo . ADVERTENCIA El aparato utiliza un voltaje peligroso (230 V~). Deje el mantenimiento sólo en manos de personal especializado. Una manipulación inexperta podría causar un peligro de descarga eléctrica. Toepassingen en toebehoren Deze actieve luidspreker (model TXA-800, TXA800CD of TXA-802CD) is een combinatie uit een tweewegsluidsprekersysteem en een versterker met aansluitingen voor een microfoon en een audioapparaat met lijnuitgangsniveau, b.v. een cd-speler of cassetterecorder. De modellen TXA-8..CD zijn met een cd -/ mp3-speler uitgerust. Het apparaat kan naar keuze gevoed worden met netspanning (230 V) of met de interne loodgelaccuʼs die u met de geïntegreerde laadmodule kunt opladen. De luidspreker is optimaal geschikt voor mobiel gebruik, b.v. voor voordrachten of verkoopdemonstraties. 3 Aplicaciones y accesorios Este sistema activo (modelo TXA-800, TXA-800CD, o TXA-802CD) es una combinación de un sistema de altavoz de 2 vías y un amplificador con conexiones para un micrófono y una unidad audio con nivel de salida de línea, p. ej. lector CD o grabador cassette. Los modelos TXA-8..CD están equipados con un lector CD/MP3. El aparato se puede utilizar o bien con un voltaje de red de 230 V o bien mediante las baterías gel de plomo recargables internas que se cargan con la parte cargadora integrada. De este modo, el sistema altavoz resulta ideal para aplicaciones móviles, p. ej. para conferencias o campañas de promoción de ventas. Cada modelo tiene una unidad de recepción multifrecuencia funcionando con técnica diversity* en la gama UHF de 863,1 – 864,9 MHz. La gama multifrecuencia se divide en 16 canales seleccionables como se desee. El modelo TXA-802CD está equipado adicionalmente con una segunda unidad de recepción y una unidad de transmisión, ambos también operativos en la gama de 863,1 – 864,9 MHz. La unidad de transmisión permite suministrar la señal audio del sistema altavoz a otros sistemas de altavoz activos de la serie TXA-800 mediante transmisión inalámbrica (modo de enlace audio). En la gama de productos de MONACOR son indicados, p. ej., los emisores siguientes para funcionar con los sistemas de altavoz activos de la serie TXA-800: * Técnica Diversity: La señal que se transmite la reciben dos antenas y se comprueba su calidad. Se utiliza siempre la mejor señal. Door de laadbeveiligingsschakeling kunnen de accuʼs niet worden overladen. De netstekker moet TXA-800HSE (núm. de pedido 17.2250) Emisor de petaca multifrecuencia con micrófono de solapa y micrófono de diadema TXA-800HT (núm. de pedido 17.2260) Micrófono de mano con emisor multifrecuencia TXA-800ST (núm. de pedido 17.2600) Emisor multifrecuencia por corriente 3.1 Conformidad y aprobación de la unidad de transmisión del modelo TXA-802CD Con la presente, MONACOR INTERNATIONAL declara que la unidad de transmisión del TXA-802CD es acorde a los requisitos básicos y a las demás regulaciones pertinentes de la Directiva 1999/5/EC. La declaración de conformidad está disponible bajo petición en MONACOR INTERNATIONAL. La unidad de transmisión está libre de licencia y está aprobada de manera general para el funcionamiento en la UE y en los países de la AELC. 4 Establecimiento del aparato Sitúe el aparato como desee o póngalo sobre un pie de altavoz para megafonía (p. ej. de la serie PAST de la gama de productos de MONACOR) mediante el vaso de pie en su lado inferior. La bolsa protectora TXA-800BAG hecha de fibra sintética negra está disponible como accesorio (núm. de pedido 17.2340). También se puede dejar puesta en el sistema altavoz durante el funcionamiento. 5 Alimentación / Recarga de las baterías Para utilizar el aparato mediante una toma de corriente y/o para cargar las baterías internas de plomo gel, conecte el cable de corriente entregado a la toma de corriente (13) y a un enchufe (230 V~/50 Hz). Cuando el aparato esté conectado a la corriente, siempre estará activa la carga automática de las baterías recargables. Se ilumina el LED CHARGE (4): na het laden echter uit het stopcontact worden getrokken, als het apparaat niet langer wordt gebruikt. Belangrijk: Om beschadiging van de accuʼs door volledige ontlading te vermijden en een verminderde levensduur ervan te verhinderen, neemt u de volgende aanwijzingen in acht: 1. Voor de eerste ingebruikname en na langere buitenbedrijfstelling moet u de accuʼs steeds volledig opladen. 2. Als de POWER-schakelaar bij accubedrijf knippert, dan zijn de accuʼs bijna ontladen en moeten ze zo snel mogelijk worden geladen. 3. Zorg dat de accuʼs volledig worden geladen, voordat u ze langdurig buiten bedrijf stelt en herhaal dit ten minste om de twee maanden tijdens buitenbedrijfstelling. 6 Audio-aansluitingen 6.1 Ingangen Als geluidsbronnen kunnen een microfoon en een stereoapparaat met lijnuitgangsniveau (b.v. cd-speler, dvd-speler, cassette- of minidiskrecorder) worden aangesloten: – de microfoon naar keuze via een XLR- of een 6,3 mm-stekker op de gebalanceerd bedrade jack MIC IN (11) – het stereoapparaat met lijnuitgang op de cinchjacks LINE IN (9) geluidsvolume van de actieve luidspreker heeft geen invloed op het signaal op de uitgang LINE OUT; de instellingen van de klankregelaars (7) echter wel. Opmerking: De actieve luidspreker heeft geen volumeregelaar voor het apparaat op de ingang LINE IN (9), d.w.z. het signaal van het apparaat wordt steeds met het ingangsvolume naar de uitgang LINE OUT gestuurd. 6.3 Passieve luidsprekerkast Indien voor het verzorgen van het geluid nog een luidsprekerkast (zonder versterker) nodig is, kunt u deze op de jack SPEAKER (12) aansluiten. De impedantie van de luidsprekerkast moet minstens 8 Ω bedragen. 7 Ingebruikneming Plaats de regelaar MASTER (6) voor het totale volume eerst helemaal in de stand MIN, alvorens het apparaat in te schakelen. Schakel dan de luidspreker in met de schakelaar POWER (5) [in figuur 1 ziet u de schakelaar in de ingeschakelde toestand]. De schakelaar licht op tijdens het gebruik. Knippert hij bij accubedrijf, dan zijn de accuʼs bijna ontladen en moeten ze worden geladen. Om tijdens accubedrijf een beschadiging van de accuʼs door volledige ontlading te vermijden, zorgt een ontladingsbeveiliging ervoor dat het apparaat tijdig uitschakelt. Door de zelfontlading van de accuʼs kan een volledige ontlading zich evenwel ook voordoen, als het apparaat gedurende een langere periode niet gebruikt wordt. Neem daarom absoluut het kader met aanwijzingen in hoofdstuk 5 in acht. Op de cinchjacks LINE OUT (10) kunt u b.v. een opnameapparaat of een extra actieve luidspreker voor PA-doeleinden aansluiten. Op beide jacks is het monomengsignaal van de luidspreker beschikbaar. De regelaar MASTER (6) voor het totale Para la carga, no es necesario conectar el aparato con el interruptor POWER (5); sin embargo, puede utilizarse con normalidad durante la carga. El circuito de control de carga previene la sobrecarga de las baterías; se recomienda, sin embargo, desconectar la toma de corriente del enchufe después de la carga si el aparato no se va a utilizar durante un largo periodo de tiempo. Importante: Para prevenir daños en las baterías por descarga total y para prevenir una reducción en su duración de vida, preste atención a las siguientes advertencias: 1. Recargue siempre las baterías antes del primer funcionamiento y después de un largo periodo sin utilizar el aparato. 2. Si el interruptor POWER empieza a parpadear durante el funcionamiento con baterías, significa que las baterías están casi agotadas y tienen que recargarse cuanto antes. 3. Recargue completamente las baterías antes de un largo periodo sin utilizar el aparato y por lo menos cada 2 meses durante ese periodo. 6 Conexiones audio 6.1 Entradas Como fuentes audio se puede conectar un micrófono y una unidad estéreo con nivel de salida de línea (p. ej. lector CD, lector DVD, grabador cassette o grabador MD): – Conecte el micrófono o bien mediante una toma XLR o bien mediante un jack 6,3 mm a la toma simétrica MIC IN (11). – Conecte la unidad estéreo con salida de línea a las tomas RCA LINE IN (9). Bediening OPGELET Stel het volume op de actieve luidspreker nooit zeer hoog in. Langdurige blootstelling aan hoge volumes kan het gehoor beschadigen! Het gehoor raakt aangepast aan hoge volumes die na een tijdje niet meer zo hoog lijken. Verhoog daarom het volume niet nog meer, nadat u er gewoon aan bent geraakt. NL B 1) Draai de regelaar MASTER (6) voor het totale geluidsvolume zo ver open tot de volgende instellingen goed via de luidspreker te horen zijn. 2) Schakel de gewenste signaalbronnen in en meng de signalen ervan met de overeenkomstige volumeregelaars of meng ze volgens behoefte in en uit (draai de regelaars van niet gebruikte signaalbronnen steeds helemaal dicht): – voor de ontvanger/s (1): POWER-schakelaar en volumeregelaar (20) → lees ook hoofdstuk 8.1 – alleen bij de modellen TXA-...CD: voor de ingebouwde cd- / mp3-speler (2): volumeregelaar LEVEL (40) → lees ook hoofdstuk 8.2 – voor de microfoon op de ingang MIC IN (11): volumeregelaar MIC (8) Voor de ingang LINE IN (9) is er geen eigen volumeregelaar voorzien. U kunt het geluidsvolume van de signaalbron die op deze ingang is aangesloten, alleen via de regelaar MASTER (6) voor het totale geluidsvolume instellen. 3) Stel met de regelaars (7) – BASS voor de lage en TREBLE voor de hoge tonen – de klank van het mengsignaal optimaal in. 6.2 Uitgang LINE OUT Rojo: Las baterías se están cargando Verde: Las baterías se han cargado completamente 8 4) Stel met de regelaar MASTER (6) het uiteindelijke niveau in voor het totale geluidsvolume van de actieve luidspreker en corrigeer vervolgens eventueel de klankinstellingen. 6.2 Salida LINE OUT Las tomas RCA LINE OUT (10) permiten p. ej. la conexión de un grabador u otro sistema de altavoz activo para aplicación en megafonía. En ambas tomas está disponible la señal mono mezclada del sistema altavoz. El control MASTER (6) para el volumen principal del sistema de altavoz activo no afectará a la señal en la salida LINE OUT; los ajustes de los controles de tono (7), sin embargo, si la afectarán. Nota: El sistema de altavoz activo no está provisto de un control de volumen para la unidad en la entrada LINE IN (9); es decir, la señal de la unidad siempre será suministrada a la salida LINE OUT en su volumen de entrada. 6.3 Sistema de altavoz pasivo Si, adicionalmente, se requiere un sistema de altavoz (sin amplificador) para aplicaciones de megafonía, se puede conectar al jack SPEAKER (12). La impedancia mínima del sistema altavoz debe ser de 8 Ω. 7 Puesta en marcha del sistema Antes del encendido, primero gire hacia atrás el control MASTER (6), para el volumen principal, hacia MIN, a continuación encienda el sistema altavoz con el interruptor POWER (5) [la posición de interruptor correspondiente aparece en la imagen 1]. El interruptor se iluminará durante el funcionamiento. Si empieza a parpadear durante el funcionamiento con baterías recargables, significa que las baterías están casi agotadas y tienen que recargarse. Para prevenir daños en las baterías recargables por una descarga profunda durante el funcionamiento de las baterías, la protección contra descargas desconectará automáticamente el aparato en el momento que corresponda. De todos modos, debido a la propia descarga de las baterías, una descarga profunda también puede suceder cuando el aparato no se utiliza durante un periodo de tiempo largo. Así pues, preste atención siempre a las notas del recuadro del apartado 5. 8 Funcionamiento E PRECAUCION No ajuste nunca un volumen muy alto en el sistema de altavoz activo. ¡Los volúmenes altos permanentes pueden dañar sus oídos! La oreja humana se acostumbra a los volúmenes altos que no parecerán tan altos al cabo de un tiempo. Por lo tanto, no aumente el volumen una vez se haya acostumbrado a él. 1) Avance el control MASTER (6) para el volumen principal hasta el punto que los ajustes subsiguientes puedan oírse bien mediante los altavoces. 2) Encienda las fuentes de señal deseadas y mezcle sus señales con los controles de volumen correspondientes o auméntelos o atenúelos lentamente como requiera (gire siempre completamente hacia atrás los controles de las fuentes de señal no usadas): – para la/s unidad/es de recepción (1): interruptor de encendido/apagado y control de volumen (20) → vea también el capítulo 8.1 – sólo para modelos TXA-...CD: para el lector CD/MP3 integrado (2): control de volumen LEVEL (40) → vea también el capítulo 8.2 – para el micrófono en la entrada MIC IN (11): control de volumen MIC (8) La entrada LINE IN (9) no está provista de un control de volumen individual; el volumen de la fuente de señal conectada a esta entrada sólo se puede ajustar mediante el control MASTER (6) para el volumen principal. 3) Con los controles (7) – BASS para la gama de bajos y TREBLE para la gama de agudos – optimice el sonido de la señal mezclada. 4) Con el control MASTER (6), ajuste el volumen final para el volumen principal del sistema de 23 NL B 5) alleen bij model TXA-802CD: Via de zender (3) kunt u het mengsignaal [niet beïnvloed door de klankregelaars (7) en de regelaar MASTER (6)] via radiotransmissie naar andere actieve luidsprekers van de TXA-8..-serie sturen. Zie hiervoor hoofdstuk 8.3. 6) Plaats de POWER-schakelaar (5) na gebruik in de stand “Uit”. 8.1 Multifrequentieontvanger geeft het display de frequentie weer in plaats van het kanaal. 4) Als de zender is ingeschakeld en op hetzelfde kanaal is ingesteld als de ontvanger, dan licht de LED RX (16) op en geeft hij daarmee aan dat er een radiosignaal wordt ontvangen. De LED AF (17) licht op, wanneer de zender een audiosignaal met voldoende niveau op de ingestelde radiofrequentie uitzendt. 5) Stel met de regelaar (20) het gewenste geluidsvolume in voor het ontvangen audiosignaal. model TXA-800 / -800CD: 1 ontvanger model TXA-802CD: 2 ontvangers 1) Voor het inschakelen van de ontvanger draait u de POWER-schakelaar en de volumeregelaar (20) open vanuit de stand OFF (“Uit”). De LED A/B (15) licht rood of groen op afhankelijk van welke ontvangstantenne – A of B – op dat moment actief is. 2) De zender nog uitgeschakeld laten. Stel de ontvanger in op een vrij en storingvrij transmissiekanaal: 1. Druk op de toets SET (18). De kanaalaanduiding op het display (14) knippert. 2. Zolang de kanaalaanduiding knippert (ca. 10 seconden) kan met de toetsen en (19) het kanaal worden geselecteerd: toets voor de kanaalkeuze “omhoog”, toets voor de kanaalkeuze “omlaag”. 3. Bevestig de kanaalkeuze met toets SET. (Als de selectie niet binnen de 10 seconden wordt bevestigd met de toets SET, schakelt het apparaat terug naar het vroeger ingestelde kanaal.) Als de LED RX (16) na de kanaalkeuze bij uitgeschakelde zender oplicht, worden de storingssignalen resp. signalen van andere zenders op dit kanaal ontvangen. Stel de ontvanger in dit geval in op een ander kanaal. 8.2 Cd- / mp3-speler alleen bij de modellen TXA-800CD en TXA-802CD Met de speler kunt u zowel gewone audio-cdʼs als cdʼs, USB-massageheugens en SD-kaarten met mp3-bestanden afspelen. Opmerking: Bij herbeschrijfbare cdʼs (cd-rw) kunnen tijdens het afspelen echter problemen optreden naargelang cd-type, gebruikte cd-brander en brandprogramma. Het antischokgeheugen van de speler kan kortstondige storingen – door schokken of trillingen – bij het scannen van een cd compenseren. Hij kan echter geen aanhoudende, heftige schokken compenseren. De luidspreker moet daarom bij het afspelen van een cd steeds stationair worden gebruikt, d.w.z. op een vaste, onbeweeglijke ondergrond. Opmerking in verband met klankstoringen en leesfouten Sigarettenrook en stof dringen makkelijk in alle openingen van de cd-speler en zet zich ook af op de optische onderdelen van het laseraftastsysteem. Mocht deze afzetting tot leesfouten en klankstoringen leiden, dan moet het apparaat door een gekwalificeerd vakman worden gereinigd. De kosten voor deze reiniging draagt de koper, ook tijdens de garantietermijn! 3) Het is mogelijk om voor het ingestelde kanaal kortstondig de radiofrequentie op het display op te vragen: zolang de toets of ingedrukt blijft, E altavoz activo, a continuación reajuste los ajustes de sonido, si es necesario. 5) Sólo para el modelo TXA-802CD: Mediante la unidad de transmisión (3), la señal mezclada [no afectada por los controles de tono (7) y el control MASTER (6)] pueden ser suministrados a otros sistemas de altavoz activos de la serie TXA-8.. mediante transmisión inalámbrica. Vea también el capítulo 8.3. 6) Tras el funcionamiento, ajuste el interruptor POWER (5) en la posición de apagado. 8.1 Unidad de recepción multifrecuencia modelo TXA-800 / -800CD: modelo TXA-802CD: 1 unidad de recepción 2 unidades de recepción 1) Para encender la unidad de recepción, avance el interruptor de encendido-apagado y el control de volumen (20) desde la posición OFF (“apagado”). El LED A/B (15) aparecerá rojo o verde dependiendo de la antena de recepción A o B activa actualmente. 2) Deje el emisor apagado por el momento. Primero ajuste la unidad de recepción a un canal de transmisión que esté libre y sin interferencias: 1. Presione el botón SET (18). La indicación de canal en el visualizador (14) empezará a parpadear. 2. Mientras la indicación de canal se mantenga parpadeando (durante aprox. 10 segundos), con las teclas y (19) se puede seleccionar el canal: tecla para la selección de canal “hacia arriba”, tecla para la selección de canal “hacia abajo”. 3. Confirme la selección de canal con el botón SET. (Si no se confirma la selección con el botón SET en el transcurso de 10 segundos, la unidad volverá al canal ajustado previamente.) Si el LED RX (16) se ilumina después de la selección de canal cuando el emisor está apagado, las señales de interferencia o señales de otros emi- 24 sores se reciben en este canal. En ese caso, ajuste la unidad de recepción a un canal diferente. 3) Es posible mostrar brevemente la frecuencia radio para el canal ajustado: mientras se mantenga presionada la tecla o , el visualizador mostrará la frecuencia en vez del canal. 4) Si el emisor está encendido y ajustado en el mismo canal que la unidad de recepción, el LED RX (16) se iluminará para indicar la recepción de una señal de radio. El LED AF (17) se iluminará si el emisor transmite una señal audio de suficiente nivel en la frecuencia radio ajustada. 5) Ajuste el volumen deseado para la señal audio recibida con el control (20). 8.2.1 Afstandsbediening De infraroodafstandsbediening voor de speler wordt inclusief batterij geleverd. Voor de eerste inbedrijfstelling trekt u de beschermfolie uit de batterijhouder. Richt de afstandsbediening steeds naar de infraroodsensor (30) van de speler als u op een toets drukt. Daarbij moet visueel contact zijn tussen sensor en afstandsbediening. Als de afstandsbediening langere tijd niet wordt gebruikt, neemt u de batterij er voor alle zekerheid uit; op deze manier raakt ze niet beschadigd bij eventueel uitlopen van de batterij. De batterij vervangen: 1) Duw de vergrendeling van de batterijhouder naar rechts (1ste pijl in de figuur hieronder) en trek de houder eruit (2de pijl). 2) Verwijder de oude batterij en plaats de nieuwe batterij 3-V-knoopcel van type CR 2025 met de positieve pool naar boven in de houder. 3) Schuif de houder terug in de afstandsbediening. Lege batterijen horen niet in het huisvuil. Verwijder ze voor een milieuvriendelijke verwerking uitsluitend als KGA (bv. de inzamelbox in de detailhandel). 8.2.2 In- en uitschakelen /Afspeelmedium aanbrengen en verwijderen De speler wordt met de toets POWER (29) in- en uitgeschakeld. Afspeelmedium aanbrengen: – Plaats een cd met het label naar boven in de cdsleuf (27) tot ze automatisch ingetrokken wordt en / of – verbind een USB-opslagmedium (bv. USB-stick, USB-schijf met autonome voeding) met de USBbus (28) 8.2.1 Control remoto El control remoto IR del lector se entrega con una batería. Antes de iniciar el funcionamiento, extraiga la lámina del soporte de la batería. Cuando pulse un botón, dirija siempre el control remoto hacia el sensor IR (30) del lector. No puede haber obstáculos entre el control remoto y el sensor. Si no va a utilizar el aparato durante un largo periodo de tiempo, extraiga la batería del control remoto como precaución para que no se dañe en caso de derrame. Cambiar la batería: 1) Apriete el cierre del soporte de la batería hacia la derecha (primera flecha de la figura a continuación) y extraiga el soporte (segunda flecha). 8.2 Lector CD/MP3 sólo para modelos TXA-800CD y TXA-802CD El lector permite reproducir CDs de audio estándar y CDs, medios de almacenamiento masivo USB y tarjetas SD con archivos MP3. Nota: Pueden aparecer problemas cuando se reproduce un CD reescribible (CD-RW), dependiendo del tipo de CD, del grabador de CDs y del programa de grabación utilizado. La memoria antichoque del lector podrá compensar los golpes o las vibraciones temporales que puedan suceder durante el muestreo del CD; sin embargo, no podrá compensar golpes severos y vibraciones continuas. Para el funcionamiento con CD, el sistema debe utilizarse sin moverlo, es decir, colocarlo en un lugar inmóvil. Nota referente a las interrupciones de sonido y los errores de lectura El humo del tabaco y el polvo pueden penetrar fácilmente a través de todas las aperturas del aparato y depositarse en las ópticas del sistema de muestreo láser. Estas impurezas pueden provocar errores de lectura o interrupciones en el sonido. El personal cualificado deberá limpiar el aparato. Tenga en cuenta que habrá un cargo por la limpieza, ¡incluso durante el periodo de garantía! 2) Extraiga la batería antigua y coloque la batería nueva (pila botón de 3 V tipo CR 2025) en el soporte con el polo positivo mirando hacia arriba. 3) Coloque el soporte de nuevo en el control remoto. No deposite las baterías gastadas en el contenedor normal; llévelas a un contenedor especial (p. ej. al contenedor de su vendedor) para que su eliminación no perjudique el medioambiente. 8.2.2 Conexión y desconexión / insertar y extraer el medio de lectura El lector se conecta y desconecta con el botón POWER (29). Insertar un medio de lectura: – Inserte un CD con la inscripción hacia arriba en la ranura de CD (27) hasta que se introduzca automáticamente. en / of – duw een SD-kaart (afgeschuinde zijde naar boven en contacten naar rechts) in de kaartsleuf (32) tot de kaart vastklikt. Afspeelmedium verwijderen: Om de cd uit te werpen, drukt u tweemaal op de uitwerptoets STOP/ EJ of EJECT (38) [1ste keer: in stop schakelen, 2de keer: cd wordt uitgeworpen]. Na het uitwerpen kan de cd opnieuw worden ingetrokken door op de uitwerptoets te drukken. Trek het USB-geheugen uit de USB-bus; om de SD-kaart te verwijderen, duwt u deze dieper in de slot om te ontgrendelen, en trekt u ze er vervolgens uit. USB-opslagmedium en SD-kaart mogen niet tijdens het afspelen ervan verwijderd worden. 8.2.3 Afspeelmedium selecteren Na elke ingebruikneming van de luidsprekerbox is de cd-drive automatisch geselecteerd. Met de toets CD / USB / SD (33) kunt u wisselen tussen de afspeelmedia: Als u op de toets drukt, wordt op het display het geselecteerde medium weergegeven ( , of ). Kort daarna start het afspelen ervan. Als er een USB-opslagmedium of SD-kaart geselecteerd is en wordt verwijderd, dan schakelt de speler automatisch naar de cd-drive. Dit gebeurt ook bij het intrekken van een nieuwe cd. 8.2.4 Afspelen / Pauze / Stop Na inlezen van het afspeelmedium start het afspelen (displaybericht ). Om het afspelen te onderbreken (displaybericht ) en opnieuw voor te zetten, drukt u op de toets PLAY/ PAUSE of (37). Op het display verschijnt de reeds verstreken speeltijd van de track (min : sec). y/o – Conecte un medio de almacenamiento USB (p. ej. unidad flash USB, disco duro USB con alimentación separada) al puerto USB (28) y/o – Inserte una tarjeta SD (esquina biselada hacia arriba y contactos a la derecha) en la ranura (32) hasta que encaje. Extraer un medio de lectura: Para extraer el CD, pulse el botón de expulsión STOP/ EJ o EJECT (38) dos veces (primera vez: cambio a paro, segunda vez: se expulsa el CD). Después de expulsarlo, el CD se puede retirar de nuevo pulsando el botón de expulsión. Desconecte el medio de almacenamiento USB del puerto USB y extraiga la tarjeta SD, primero desbloquéela apretándola hacia la ranura y luego extráigala. El medio de almacenamiento USB y la tarjeta SD no deberían extraerse durante su reproducción. 8.2.3 Selección del medio de lectura Cada vez que el recinto se pone en funcionamiento, el mecanismo de lectura del CD se selecciona automáticamente. Se puede seleccionar el medio de lectura con el botón CD / USB/ SD (33): después de pulsar el botón, el medio seleccionado se muestra en el visualizador ( , o ). Unos instantes después empezará su reproducción. Si se ha seleccionado un medio de almacenamiento USB o una tarjeta SD y luego se extrae, el lector cambia automáticamente al mecanismo de lectura CD. Sucede lo mismo cuando se retira un CD nuevo. Om het afspelen te stoppen, kunt u op volgende toetsen drukken – de toets (45) – de toets STOP/ EJ of EJECT (38) In de stopmodus schakelt het display naar de tijdsweergave “00 : 00”. Om het afspelen met de eerste track opnieuw te starten, drukt u op de toets PLAY/ PAUSE of . 8.2.5 Het volume instellen / Volledige demping Stel het geluidsvolume in met de regelaar VOLUME (40). Om het geluid uit en opnieuw in te schakelen, drukt u op de toets (48). 8.2.6 Trackselectie Audio-cdʼs Tijdens het afspelen van audio-cdʼs (displaybericht “CD”) en in pauzestand verschijnt het tracknummer op het display; in de stopmodus wordt het totale aantal tracks weergegeven. 1. Naar een volgende of vorige track gaan: Gebruik de toetsen REV/ F.WD of S / S (36) [REV/ S = eerst sprong naar het begin van de track, dan bij elke druk op de toets een track terug, F.WD/ S = een track vooruit]. 2. Tracknummer invoeren: Voer via de cijfertoetsen (41) het tracknummer in en bevestig met de toets ENTER (47). Mp3-afspeelmedia Bij het afspelen van afspeelmedia met mp3-bestanden (displaybericht “MP3”) en in pauze verschijnt het mapnummer en het tracknummer in de map op het display. Tracks zonder map in de hoofdindex krijgen mapnummer 1 toegewezen. In de stopmodus wordt het totaal aantal mappen en het totaal aantal tracks op het afspeelmedium weergegeven. 1. Naar een volgende of vorige track gaan: Telkens u op de toets FOLDER (34) drukt, springt u naar de volgende map. Gebruik de toet- sen REV/ F.WD of S / S (36) om de track te selecteren [REV/ S = eerst sprong naar het begin van de track, dan met elke druk op de toets een track terug, F.WD/ S = een track vooruit]. 2. Tracknummer invoeren: Voer via de cijfertoetsen (41) het nummer in van de track op het afspeelmedium, (niet nummer in de map!) en bevestig met de toets ENTER (47). 8.2.7 Versneld vooruit en achteruit zoeken Voor snel vooruit / achteruit zoeken gebruikt u de toetsen FB / F.F of / (35): FB of = terug, F.F of = vooruit. Druk kort op de gewenste toets. Als u de gewenste positie hebt bereikt, drukt u voor het afspelen op de toets PLAY/ PAUSE of (37). 8.2.8 Herhalingsfuncties / Willekeurige reeks tracks U kunt drie herhalingsfuncties selecteren. De geselecteerde functie wordt op het display weergegeven. Met de toets REP (44) wordt omgeschakeld tussen: – “REPEAT 1”: continu herhaling van de track – “REPEAT FOLDER” (alleen bij mp3-bedrijf): continu herhaling van alle tracks in de map – “REPEAT ALL”: continu herhaling van alle tracks op het afspeelmedium – geen displaybericht REPEAT: geen herhalingsfunctie ingeschakeld; na het afspelen van alle tracks schakelt de speler naar stop Om de tracks in willekeurige volgorde af te spelen, drukt u op de toets RAN (43). Op het display verschijnt “SHUFFLE”. Om de shuffle-functie uit te schakelen, drukt u opnieuw op de toets. Een ingeschakelde herhalingsfunctie wordt bij het inschakelen van de shuffle-functie uitgeschakeld en omgekeerd. directorio principal se les asigna la carpeta 1. En el modo paro se muestra el número total de carpetas y el número total de pistas del medio de lectura. 1. Avanzar o retroceder pistas: Cada vez que el botón FOLDER (34) se pulsa, el lector pasa a la carpeta siguiente. Para la selección de pista, utilice los botones REV/ F.WD o S / S (36) [REV/ S = primero vuelve al inicio de la pista, luego retrocede una pista más cada vez que se pulsa el botón, F.WD/ S = avanzar una pista]. 2. Introducir el número de pista: Introduzca el número de pista en el medio de lectura (no el número en la carpeta) con los botones numéricos (41) y confirme con el botón ENTER (47). 8.2.5 Ajustar el volumen / silenciarlo Ajuste el volumen deseado con el control VOLUME (40). Para desactivar y reactivar el sonido, pulse el botón (48). Nota: En algunos casos, el lector no va al inicio de la pista primero cuando se pulsa el botón de retorno y va inmediatamente a la pista anterior (p. ej. con un CD en el modo pausa). CDs de audio Para CDs de audio (indicación “CD”) el visualizador muestra el número de pista durante la reproducción y la pausa y el número total de pistas en el modo paro. 1. Avanzar o retroceder pistas: Utilice los botones REV/F.WD o S / S (36) [REV/ S = primero vuelve al inicio de la pista, luego retrocede una pista más cada vez que se pulsa el botón, F.WD/ S = avanzar una pista]. 2. Introducir el número de pista: Inserte el número de pista mediante los botones numéricos (41) y confirme con el botón ENTER (47). Medios de lectura MP3 Para reproducir medios con archivos MP3 (indicación “MP3”), el visualizador muestra el número de carpeta y el número de pista en la carpeta durante la reproducción y la pausa. A las pistas sin carpeta del B Opmerking: In sommige gevallen, als u op de terugkeertoets drukt, springt de speler niet eerst naar het begin van de huidige track, maar direct naar de vorige track (bv. bij gebruik van de cd-speler in de pauzemodus). 8.2.4 Reproducción / pausa / paro Después de leer el medio de lectura, se inicia la reproducción (indicación ). Para interrumpir la reproducción (indicación ) y para continuarla de nuevo, pulse el botón PLAY/ PAUSE o (37). El visualizador muestra el tiempo reproducido de la pista (min. : seg.). Para parar la reproducción se pueden pulsar los siguientes botones: – Botón (45) – Botón STOP/ EJ o EJECT (38) En el modo paro, el visualizador cambia la indicación temporal a “00 : 00”. Para reiniciar la reproducción con la primera pista, pulse el botón PLAY/ PAUSE o . 8.2.6 Selección de pista NL E 8.2.7 Avance rápido y retroceso Para el avance o retroceso rápido utilice los botones FB / F.F o / (35): FB o = retroceder, F.F o = avanzar. Pulse brevemente el botón respectivo. Si llega al punto deseado, pulse el botón PLAY/ PAUSE o (37) para la reproducción. 8.2.8 Funciones de repetición / secuencia de pistas aleatoria Hay 3 funciones de repetición disponibles para seleccionarse. La función seleccionada se muestra en el visualizador. Utilice el botón REP (44) para seleccionar: – “REPEAT 1”: repetición continua de la pista – “REPEAT FOLDER” (sólo para el modo MP3): repetición continua de todas las pistas de la carpeta – “REPEAT ALL”: repetición continua de todas las pistas del medio de lectura – Sin indicación REPEAT: sin función repetición activada; después de reproducir todas las pistas, el lector se pone en paro. 25 NL B 8.2.9 Lus afspelen Een fragment binnen een track kan als lus continu worden herhaald. 1) Als in de afgespeelde track het beginpunt van het fragment is bereikt, drukt u op de toets A – B (46). Op het display verschijnt “A ©”. 2) Als het eindpunt van het te herhalen fragment is bereikt, drukt u opnieuw op de toets. Op het display verschijnt “A © B”. Het fragment wordt continu herhaald. 3) Om de lus te beëindigen, drukt u een derde keer op de toets. Het displaybericht “A © B” verdwijnt. 8.2.10 Afspeeltempo en toonhoogte wijzigen Met de toetsen PITCH (39) kunt u het afspeeltempo en dus de toonhoogte wijzigen. Toets HI of HIGH Het tempo in 10 stappen verhogen Toets LO of LOW Het tempo verminderen in 10 stappen Druk verschillende keren op de betreffende toets tot het gewenste tempo bereikt is. Bij elke keer drukken op de toets geeft het display kort de geselecteerde instelling aan, b.v. als het normale tempo met 5 stappen werd verhoogd als het normale tempo met 2 stappen werd verlaagd Om naar het normale afspeeltempo terug te keren, drukt u een keer op de toets NOR. 8.2.11 Een reeks tracks programmeren 1) Om naar de programmeermodus te schakelen, drukt u op de toets PROG (42). Het displaybericht “PROGRAM” verschijnt. 2) Selecteer de eerste track van de reeks tracks: of – spring met de toetsen REV/ F.WD of S / S (36) naar de track; selecteer bij mp3-bedrijf E Para reproducir las pistas en orden aleatorio, pulse el botón RAN (43). Aparecerá la indicación “SHUFFLE” en el visualizador. Para desactivar la función shuffle, pulse de nuevo el botón. La función de repetición activada se desactiva cuando se activa la función shuffle y viceversa. 8.2.9 Reproducción de un bucle Una sección de una pista se puede reproducir continuamente como bucle. 1) Si llega al punto de inicio de la sección de la pista en reproducción, pulse el botón A – B (46). En el visualizador se muestra “A ©”. 2) Si se llega al punto de finalización de la sección que hay que repetir, pulse el botón de nuevo. En el visualizador se muestra “A © B”. La sección se repite permanentemente. 3) Para finalizar el bucle, pulse el botón una tercera vez. Se apagará “A © B”. 8.2.10 Cambiar velocidad de reproducción y pitch Los botones PITCH (39) permiten cambiar la velocidad de reproducción y por lo tanto, el pitch. Botón Hi o HIGH Para aumentar la velocidad de reproducción en 10 niveles Botón LO o LOW Para reducir la velocidad de reproducción en 10 niveles Pulse el botón correspondiente repetidamente hasta que se alcance la velocidad deseada. Cada vez que se pulsa el botón, en el visualizador se muestra brevemente el ajuste seleccionado, p. ej. Cuando se aumenta la velocidad estándar en 5 niveles eventueel eerste de map met de toets FOLDER (34) of – voer het tracknummer direct in via de cijfertoetsen (41) [bij mp3-bedrijf: het nummer dat de track op het afspeelmedium heeft, niet in de map!] Druk ter bevestiging op de toets ENTER (47). Op het display verschijnt het geheugenplaatsnummer in plaats van de tijdweergave. Ga identiek te werk voor alle andere tracks tot de volledige reeks tracks (max. 10) geprogrammeerd is. 3) Om de reeks tracks te starten, drukt u op de toets PLAY/ PAUSE of (37), en in de plaats van “PROGRAM” verschijnt het displaybericht “MEMORY”. Om terug te keren naar afspelen van de normale volgorde drukt u op de toets PROG: “MEMORY” verdwijnt van het display en de programmering is gewist. 4) Als er geen herhalingsfunctie ingeschakeld is, (beschikbaar zijn “REPEAT 1” en “REPEAT ALL” → hoofdstuk 8.2.8), schakelt de speler na het afspelen van de reeks tracks in de stopstand, de reeks tracks is hiermee gewist. 8.3 Multifrequentiezender alleen bij model TXA-802CD Als er voor de PA-toepassing meerdere actieve luidsprekers nodig zijn, is een draadloos audiolinkbedrijf mogelijk: Via de zender van een actieve luidspreker TXA-802CD (centraal apparaat) kunt u het van de regelaar MASTER (6) en van de klankregelaars (7) onbeïnvloede mengsignaal naar de ontvangers van andere actieve luidsprekers TXA-8..-serie (nevenapparaten) overdragen. 1) Voor het inschakelen van de ontvanger draait u de POWER-schakelaar en de volumeregelaar (26) open vanuit de stand OFF (“Uit”). De LED TX (22) licht op en geeft daarmee aan dat er een radiosignaal wordt verzonden. 8.2.11 Programar una secuencia de pistas 1) Para cambiar al modo de programación, pulse el botón PROG (42). Aparecerá “PROGRAM” en el visualizador. 2) Seleccione la primera pista de la secuencia de pistas: Puede: – Ir a la pista con los botones REV/ F.WD o S / S (36); para el funcionamiento MP3 seleccione primero la carpeta con el botón FOLDER (34), si es necesario o – Introducir el número de pista directamente mediante los botones numéricos (41) [para el funcionamiento MP3: el número de pista en el medio de lectura, no en la carpeta] y pulse el botón ENTER (47) para confirmar. El visualizador muestra el número de memoria en vez de la indicación temporal. Para el resto de pistas proceda del mismo modo hasta que la secuencia de pistas completa (máx. 10) se haya programado. 3) Para iniciar la secuencia de pistas, pulse el botón PLAY/ PAUSE o (37), desaparecerá “PROGRAM” y se indicará “MEMORY”. Para volver a la reproducción en orden estándar, pulse el botón PROG: se apagará “MEMORY” y se borrará la programación. 4) Si no hay función de repetición activada (“REPEAT 1” y “REPEAT ALL” están disponibles → apartado 8.2.8), el lector se pone en paro después de reproducir la secuencia de pistas, la secuencia de pistas se borrará. 8.3 Unidad de transmisión multifrecuencia sólo para el modelo TXA-802 Cuando se reduce la velocidad estándar en 2 niveles Para volver a la velocidad estándar, pulse el botón NOR una vez. 26 Si se necesitan varios sistemas de altavoz activos para aplicaciones de megafonía, es posible un modo de enlace audio inalámbrico: Mediante la unidad de transmisión de un sistema de altavoz activo 2) Stel op de ontvangers van de nevenapparaten het transmissiekanaal in voor het audiolinkbedrijf, en stel de zender van het centrale apparaat in op hetzelfde kanaal: 1. Druk op de toets SET (24). De kanaalaanduiding op het display (21) knippert. 2. Zolang de kanaalaanduiding knippert (ca. 10 seconden) kan met de toetsen en (25) het kanaal worden geselecteerd: toets voor de kanaalkeuze “omhoog”, toets voor de kanaalkeuze “omlaag”. 3. Bevestig de kanaalkeuze met toets SET. (Als de selectie niet binnen de 10 seconden wordt bevestigd met de toets SET, schakelt het apparaat terug naar het vroeger ingestelde kanaal.) Belangrijk! Let er bij de kanaalkeuze op dat de zender en de ontvangers van het centrale apparaat ingesteld op verschillende kanalen zijn ingesteld. Anders treden er signaalvervormingen op. 3) Het is mogelijk om voor het ingestelde kanaal kortstondig de radiofrequentie op het display op te vragen: zolang de toets of ingedrukt blijft, geeft het display de frequentie weer in plaats van het kanaal. 4) De LEDʼs AF LEVEL (23) duiden het niveau aan van het audiosignaal dat naar de zender wordt gestuurd: De gele LED licht op, wanneer het ingangssignaal van de zender een bepaald minimumniveau heeft bereikt. De rode LED licht op, wanneer het ingangssignaal van de zender het maximumniveau heeft bereikt, waarbij het nog niet is overstuurd. De LED mag niet of alleen bij signaalpieken kort oplichten; als ze permanent oplicht, is het signaal overstuurd. Reduceer het geluidsvolume van de betreffende signaalbron/nen overeenkomstig. 5) Stel met de regelaar (26) het gewenste geluidsvolume in voor het verzonden audiosignaal. TXA-802CD (aparato Master), la señal mezclada no afectada por el control MASTER (6) y por los controles de tono (7) se puede transmitir a las unidades de recepción de otros sistemas de altavoz activos de la serie TXA-8.. (aparatos Slave). 1) Para encender la unidad de transmisión, avance el interruptor de encendido-apagado y el control de volumen (26) desde la posición OFF (“apagado”). El LED TX (22) se iluminará para indicar la transmisión de una señal de radio. 2) En las unidades de recepción de los aparatos Slave, ajuste el canal de transmisión para el modo de enlace audio y ajuste la unidad de transmisión del aparato Master en el mismo canal: 1. Presione el botón SET (24). La indicación de canal en el visualizador (21) empezará a parpadear. 2. Mientras la indicación de canal se mantenga parpadeando (durante aprox. 10 segundos), el canal se podrá seleccionar con las teclas y (25): tecla para la selección de canal “hacia arriba”; tecla para la selección de canal “hacia abajo”. 3. Confirme la selección de canal con el botón SET. (Si la selección no se confirma en 10 segundos con el botón SET, la unidad volverá al canal ajustado previamente.) ¡Importante! Cuando seleccione el canal, asegúrese de que la unidad de transmisión y las unidades de recepción del aparato Master están ajustadas en canales diferentes; de otro modo se producirá un retorno. 3) Es posible mostrar brevemente la frecuencia radio para el canal ajustado: mientras el botón o se mantenga presionado, el visualizador indicará la frecuencia en vez del canal. 4) Los LEDs AF LEVEL (23) indicarán el nivel de la señal audio suministrada a la unidad de transmisión: 9 Technische gegevens Versterkervermogen: . . 80 WMAX /50 WRMS Luidsprekersysteem: . . 20 cm-woofer (8″) en 2,5 cm-tweeter (1″) Frequentiebereik: . . . . . 70 – 16 000 Hz Ingang MIC IN Gevoeligheid: . . . . . . 6 mV Aansluiting: . . . . . . . . XLR/6,3 mm-jack, gebal. Ingang LINE IN Gevoeligheid: . . . . . . 800 mV Aansluiting: . . . . . . . . Cinch Uitgang LINE OUT Niveau: . . . . . . . . . . . 1 V Aansluiting: . . . . . . . . Cinch Uitgang SPEAKER: . . . 6,3 mm-stekkerbus voor een passief luidsprekersysteem (impedantie min. 8 Ω) 9.1 Radiotransmissie Ontvanger/s 1: . . . . . . . PLL-multifrequentieontvanger met Diversity-techniek 9.1.1 Frequentie van de kanalen CH 1 – CH 16 CH Frequentie CH Frequentie 1 863,1 MHz 9 863,2 MHz Zender 2: . . . . . . . . . . . PLL-multifrequentiezender met een zendvermogen van 10 mW (EIRP) 2 864,1 MHz 10 864,2 MHz 3 863,6 MHz 11 863,7 MHz 4 864,6 MHz 12 864,7 MHz Reikwijdte: . . . . . . . . . . ca. 30 m 5 863,3 MHz 13 863,4 MHz Radiofrequentiebereik: . 863,1 – 864,9 MHz, ingedeeld in 16 kanalen 6 864,3 MHz 14 864,4 MHz 7 863,8 MHz 15 863,9 MHz 8 864,8 MHz 16 864,9 MHz 1. Model TXA-800 en TXA-800CD: 1 ontvanger, model TXA-802CD: 2 ontvangers 2. alleen bij model TXA-802CD Klankregelaars Lage tonen: . . . . . . . ±15 dB/100 Hz Hoge tonen: . . . . . . . ±10 dB/10 kHz Omgevingstemperatuurbereik: . . . 0 – 40 °C Voedingsspanning: . . . via de netspanning (230 V~/50 Hz/150 VA) of de interne loodgelaccuʼs (2 × 12 V /3 Ah) NL B Tip voor het gebruik van meerdere radiosystemen TXA-8.. U kun 5 tot maximaal 8 transmissiesystemen tegelijk bedienen die verschillende kanalen in dit frequentiebereik in beslag nemen. Het aantal kanalen dat u parallel kunt gebruiken, hangt daarbij af van de afstand tussen de afzonderlijke transmissiesystemen, van mogelijk HF-storingsbronnen en andere lokale omstandigheden. Bij gebruik van meerdere systemen, moeten de kanalen in oplopende volgorde in gebruik worden genomen (b.v. voor 8 systemen de kanalen CH 1 – CH 8), en moet de ruimtelijke afstand tussen de systemen zo groot mogelijk worden gehouden. Wijzigingen voorbehouden. Accugebruiksduur: . . . . tot ca. 3 – 4 uur Afmetingen: . . . . . . . . . 300 × 470 × 230 mm (B × H × D) Gewicht Model TXA-800: . . . . 11,2 kg Model TXA-800CD: . 11,9 kg Model TXA-802CD: . 12,3 kg Deze gebruiksaanwijzing is door de auteurswet beschermde eigendom van MONACOR ® INTERNATIONAL GmbH & Co. KG. Een reproductie – ook gedeeltelijk – voor eigen commerciële doeleinden is verboden. El LED amarillo se iluminará cuando la señal de entrada de la unidad de transmisión haya alcanzado un nivel mínimo determinado. El LED rojo se iluminará cuando la señal de entrada de la unidad de transmisión haya alcanzado el nivel máximo donde esté cercano a la sobrecarga. El LED no debería iluminarse o debería iluminarse sólo brevemente con picos de señal; si se ilumina permanentemente, la señal está sobrecargada. En ese caso, reduzca el volumen de la/s fuente/s de señal correspondiente/s en consecuencia. 5) Ajuste el volumen deseado para la señal audio transmitida con el control (26). 9 Características técnicas Potencia amplificador: . 80 WMAX /50 WRMS Sistema altavoz: . . . . . 20 cm (8″) altavoz de bajos y 2,5 cm (1″) tweeter Gama de frecuencia: . . 70 – 16 000 Hz Entrada MIC IN Sensibilidad: . . . . . . . 6 mV Conexión: . . . . . . . . . toma combinada XLR / jack 6,3 mm, simétrica Entrada LINE IN Sensibilidad: . . . . . . . 800 mV Conexión: . . . . . . . . . tomas RCA Controles de tono Gama de agudos: . . . ±15 dB/100 Hz Gama de bajos: . . . . ±10 dB/10 kHz Temperatura ambiente: 0 – 40 °C Alimentación: . . . . . . . . mediante el voltaje de red (230 V~/50 Hz/150 VA) o las baterías gel de plomo recargables internas (2 × 12 V /3 Ah) Tiempo de funcionamiento de las baterías : . . . . . . hasta 3 – 4 horas aprox. Dimensiones: . . . . . . . . 300 × 470 × 230 mm (B × H × P) Peso Modelo TXA-800: . . . 11,2 kg Modelo TXA-800CD: . 11,9 kg Modelo TXA-802CD: . 12,3 kg 9.1 Transmisión inalámbrica Unidad/es de recepción1: . . . . . . . Receptor PLL multifrecuencia en técnica diversity Unidad de transmisión2: Emisor PLL multifrecuencia con una potencia de transmisión de 10 mW (EIRP) 9.1.1 Frecuencias de los canales CH 1 – CH 16 CH Frecuencia CH Frecuencia 1 863,1 MHz 9 863,2 MHz 2 864,1 MHz 10 864,2 MHz 3 863,6 MHz 11 863,7 MHz 4 864,6 MHz 12 864,7 MHz 5 863,3 MHz 13 863,4 MHz 6 864,3 MHz 14 864,4 MHz 7 863,8 MHz 15 863,9 MHz 8 864,8 MHz 16 864,9 MHz E Nota referente al funcionamiento de varios sistemas de transmisión inalámibricos TXA-8.. Pueden funcionar simultáneamente 5 sistemas de transmisión hasta un máximo de 8 utilizando canales diferentes en este rango de frecuencia. El número de canales para utilizarse en paralelo dependerá de la distancia entre los sistemas de transmisión individuales, de cualquier fuente de interferencias RF y de las condiciones del lugar. Cuando se utilizan varios sistemas, asigne los canales en orden ascendente (p. ej. para 8 sistemas, utilice los canales CH 1 – CH 8) y mantenga los sistemas lo más apartados posible. Sujeto a modificaciones técnicas. Gama: . . . . . . . . . . . . . aprox. 30 m Salida LINE OUT Nivel: . . . . . . . . . . . . 1 V Conexión: . . . . . . . . . tomas RCA Gama frecuencia radio: 863,1 – 864,9 MHz, dividida en 16 canales Salida SPEAKER: . . . . jack 6,3 mm para sistema altavoz pasivo (impedancia mínima 8 Ω) 1. modelos TXA-800 y TXA-800CD: 1 unidad de recepción, modelo TXA-802CD: 2 unidades de recepción 2. sólo para modelo TXA-802CD Manual de instrucciones protegido por el copyright de MONACOR ® INTERNATIONAL GmbH & Co. KG. Toda reproducción mismo parcial para fines comerciales está prohibida. 27 PL Na stronie 3 znajdują się schematy elementów sterujących i gniazd połączeniowych. Spis treści 1 Elementy sterujące i gniazda połączeniowe . . . . . . . . . . . . . 28 1 13 Gniazdo zasilania: podłączenie do sieci (230 V~/ 50 Hz) za pomocą kabla sieciowego (w zestawie) Elementy sterujące i gniazda połączeniowe 1 Odbiornik wielozakresowy → zob. schemat 2 i rozdział 1.1 1.1 Odbiornik wielozakresowy model TXA-800 / -800CD: 1 odbiornik model TXA-802CD: 2 odbiorniki 2 Odtwarzacz CD/MP3 → zob. schemat 4 i rozdział 1.3 3 Nadajnik wielozakresowy → schemat 3 i rozdział 1.2 1.1 Odbiornik wielozakresowy . . . . . . . . . . . . . 28 1.2 Nadajnik wielozakresowy . . . . . . . . . . . . . 28 1.3 Odtwarzacz CD/MP3 z pilotem sterującym . . . . . . . . . . . . . . . . . 28 2 Bezpieczeństwo użytkowania . . . . . . . . 29 3 Zastosowanie i akcesoria . . . . . . . . . . . . 29 3.1 Normy i zezwolenia na użytkowanie nadajnika do modelu TXA-802CD . . . . . . . 29 4 Montaż zestawu . . . . . . . . . . . . . . . . . . . . 29 5 Zasilanie /ładowanie baterii . . . . . . . . . . 29 6 Regulator głośności zestawu głośnikowego 6 Złącza audio . . . . . . . . . . . . . . . . . . . . . . . 29 6.1 Wejścia . . . . . . . . . . . . . . . . . . . . . . . . . . . 29 7 Regulatory barwy TREBLE (tony wysokie) i BASS (tony niskie) dla połączonego sygnału 6.2 Wyjście LINE OUT . . . . . . . . . . . . . . . . . . 29 6.3 Pasywny zestaw głośnikowy . . . . . . . . . . . 29 7 Przygotowanie zestawu do pracy . . . . . 29 8 Obsługa . . . . . . . . . . . . . . . . . . . . . . . . . . 29 8.1 Odbiornik wielozakresowy . . . . . . . . . . . . . 30 8.2 Odtwarzacz CD/MP3 . . . . . . . . . . . . . . . . 30 8.3 Nadajnik wielozakresowy . . . . . . . . . . . . . 31 9 Dane techniczne . . . . . . . . . . . . . . . . . . . 31 9.1 Transmisja bezprzewodowa . . . . . . . . . . . 31 4 Dioda LED CHARGE czerwona: następuje ładowanie baterii akumulatorowych zielona: baterie zostały w pełni naładowane 5 Włącznik zasilania POWER aktywnego zestawu głośnikowego Włącznik świeci się podczas pracy. Jeżeli zaczyna migać podczas pracy na zasilaniu bateryjnym, oznacza to, że baterie są prawie rozładowane i należy je naładować. MASTER aktywnego 8 Regulator głośności dla mikrofonu na wejściu MIC IN (11) 9 Wejście LINE IN (gniazda chinch) dla źródła dźwięku stereo z wyjściem liniowym, np. odtwarzacza CD, magnetofonu 10 Wyjście LINE OUT (gniazda chinch): przesyłanie połączonego sygnału na. do rejestratora lub do kolejnego aktywnego zestawu głośnikowego Uwaga: Ustawienie regulatorów barwy (7) ma wpływ na sygnał LINE OUT; ustawienie regulatora MASTER (6) nie ma wpływu na sygnał LINE OUT. 11 Wejście MIC IN (6,3 mm/XLR, sym.): podłączenie mikrofonu 12 Gniazdo 6,3 mm SPEAKER: podłączenie dodatkowego pasywnego zestawu głośnikowego (min. impedancja 8 Ω) 24 Klawisz SET: przywołanie trybu ustawień kanału transmisyjnego i potwierdzenie wyboru kanału 25 Strzałki – ustawianie kanału w trybie regulacji: klawisz : wybór wyższego kanału; klawisz : wybór niższego kanału – przełączenie na krótkie wskazanie częstotliwości radiowej na wyświetlaczu (21): przy wciśniętym klawiszu lub na wyświetlaczu pojawi się wskazanie częstotliwości zamiast wskazania kanału 26 Włącznik zasilania i regulator głośności 1.3 Odtwarzacz CD / MP3 z pilotem sterującym tylko w modelach TXA-800CD i TXA-802CD 27 Wpust do płyty CD: wsunąć lekko płytę w szczelinę aż zostanie automatycznie wciągnięta 28 Port USB do podłączania nośnika USB, np. pamięci przenośnej USB, twardego dysku USB z własnym zasilaniem 29 Włącznik POWER 30 Czujnik IR dla sygnału z pilota sterującego 31 Wyświetlacz pokazujący – Dla płyt audio CD Wskazanie “CD” oraz numer utworu, np. dla utworu nr 10 – miniony czas odtwarzania bieżącego utworu (min. : sek.) – podczas odtwarzania, podczas pauzy – wskazanie wybranej funkcji powtarzania (“REPEAT 1”, “REPEAT FOLDER” lub “REPEAT ALL”) → przycisk REP (44) – wskazanie “SHUFFLE” podczas losowej kolejności odtwarzania utworów – wskazanie “PROGRAM” podczas programowania własnej kolejności utworów – wskazanie “MEMORY” podczas odtwarzania utworów w zaprogramowanej kolejności – wskazanie “A © B” podczas odtwarzania pętli 28 dotyczy tylko modelu TXA-802CD 21 Wyświetlacz: wskazanie kanału transmisyjnego lub częstotliwości radiowej 22 Dioda LED transmisji TX : świeci się przy włączonym nadajniku 23 Diody LED poziomu AF LEVEL sygnału wejściowego nadajnika: żółta = najniższy poziom, czerwony = najwyższy poziom (zob. też rozdział 8.3, punkt 4) 42 43 44 33 Przycisk do wyboru nośnika CD, USB lub SD 34 Przycisk FOLDER do wyboru kolejnego folderu (dla trybu MP3) 45 46 35 Przyciski F.F/ oraz FB/ szybkiego przewijania: Wcisnąć na krótko odpowiedni przycisk i po osiągnięciu żądanego punktu wcisnąć przycisk odtwarzania / pauzy (37). 36 Przyciski do wyboru utworów REV/ S = wybór poprzedniego, F.WD/ S = wybór następnego utworu 38 Przycisk do zatrzymywania odtwarzania (pierwsze wciśnięcie) oraz do wysuwania płyty CD (drugie wciśnięcie) 39 Przyciski do zmiany prędkości odtwarzania w 10 krokach: wcisnąć przycisk HI / HIGH (zwiększanie) lub LO / LOW (zmniejszanie) kilka razy do uzyskania żądanej prędkości odtwarzania; powrót do standardowej prędkości za pomocą przycisku NOR. 40 Regulator głośności (po zatrzymaniu odtwarzania: całkowita ilość folderów oraz utworów) 1.2 Nadajnik wielozakresowy 32 Czytnik kart SD 37 Przycisk odtwarzania / pauzy (po zatrzymaniu odtwarzania: całkowita ilość utworów) Dla nośnika z plikami MP3 Wskazanie “MP3”, numer folderu oraz numer utworu, np. dla ósmego utworu w drugim folderze 14 Wyświetlacz: wskazanie kanału transmisyjnego lub częstotliwości radiowej 15 Dioda LED A/B Diversity: świeci się na czerwono lub na zielono, w zależności od aktywnej anteny odbiorczej: A lub B. 16 Dioda LED RX odbioru: świeci się jeśli nadajnik jest włączony i ustawiony na częstotliwość radiową odbiornika 17 Dioda LED AF odbioru sygnału audio: świeci się podczas odbioru sygnału audio 18 Klawisz SET: przywołanie trybu ustawień kanału transmisyjnego i potwierdzenie wyboru kanału 19 Strzałki – ustawianie kanału w trybie regulacji: klawisz : wybór wyższego kanału; klawisz : wybór niższego kanału – przełączenie na krótkie wskazanie częstotliwości radiowej na wyświetlaczu (14): przy wciśniętym klawiszu lub na wyświetlaczu pojawi się wskazanie częstotliwości zamiast wskazania kanału 20 Włącznik zasilania i regulator głośności 41 Przyciski numeryczne do bezpośredniego wyboru utworów (tryb MP3: numer utworu na noś- 47 48 niku, nie w folderze!); po wprowadzeniu utworu zatwierdzić wybór przyciskiem ENTER (47) Przycisk do programowania własnej sekwencji odtwarzania → rozdz. 8.2.11 Przycisk do odtwarzania utworów w losowej kolejności Przycisk do wyboru funkcji powtarzania – “REPEAT 1”: powtarzanie bieżącego utworu – “REPEAT FOLDER” (w trybie MP3): powtarzanie wszystkich utworów z bieżącego folderu – “REPEAT ALL”: powtarzanie wszystkich utworów z nośnika – Bez wskazania “REPEAT”: funkcja powtarzania wyłączona Przycisk do zatrzymywania odtwarzania Przycisk do odtwarzania pętli (powtarzanie wybranego fragmentu utworu) pierwsze wciśnięcie przycisku definiowanie punktu startowego pętli drugie wciśnięcie przycisku definiowanie punktu końcowego pętli: odtwarzanie pętli zostaje rozpoczęte. trzecie wciśnięcie przycisku odtwarzanie pętli zostaje wstrzymane Przycisk do potwierdzania ustawień wprowadzonych przyciskami numerycznymi (41) Przycisk do for włączania / wyłączania wyciszenia 2 Bezpieczeństwo użytkowania Po całkowitym zakończeniu eksploatacji urządzenia należy przekazać je do punktu utylizacji odpadów, aby uniknąć zanieczyszczenia środowiska. Urządzenie spełnia wszystkie wymagania norm UE dlatego zostało oznaczone symbolem . UWAGA Urządzenie jest zasilane niebezpiecznym dla życia napięciem zmiennym 230 V~. Aby uniknąć ryzyka porażenia prądem, obsługę techniczna urządzenia należy zlecić osobom upoważnionym. Należy przestrzegać następujących zaleceń: G Urządzenie przeznaczone jest do użytku jedynie wewnątrz pomieszczeń. Należy chronić je przed bezpośrednim kontaktem z wodą, działaniem wilgoci oraz wysokiej temperatury (zakres dopuszczalnej temperatury otoczenia pracy: 0 – 40 °C). G Na obudowie urządzenia nie wolno stawiać pojemników z płynem (np. szklanek). G Należy przerwać obsługę urządzenia lub niezwłocznie wyjąć z wtyczkę z gniazda jeśli: 1. istnieje widoczne uszkodzenie urządzenia lub kabla zasilania, 2. mogło nastąpić uszkodzenie urządzenia w wyniku jego upuszczenia itp., 3. urządzenie działa nieprawidłowo. Urządzenie należy przekazać do punktu serwisowego. 3 Zastosowanie i akcesoria Każdy model posiada odbiornik wielozakresowy, pracujący w zakresie UHF 863,1 – 864,9 MHz w systemie diversity*. Zakres częstotliwości jest podzielony na 16 kanałów (do wyboru). Model TXA-802CD został dodatkowo wyposażony w drugi odbiornik oraz nadajnik, oba również pracują w zakresie 863,1 – 864,9 MHz. Nadajnik pozwala na podanie sygnału audio z zestawu głośnikowego do kolejnych aktywnych zestawów głośnikowych z serii TXA-800 przy użyciu transmisji bezprzewodowej (tryb audio link). Należy ustawić urządzenie w wybranym miejscu lub nałożyć je na statyw głośnikowy (np. statyw z serii PAST z oferty produkcyjnej firmy MONACOR), wykorzystując tuleję znajdującą się w dolnej części zestawu. Jako wyposażenie dodatkowe dostępny jest pokrowiec TXA-800BAG wykonany z włókna syntetycznego w kolorze czarnym (numer zamówienia 17.2340). Pokrowca nie trzeba zdejmować z zestawu głośnikowego podczas jego pracy. Aby system pracował na zasilaniu sieciowym, także w celu naładowania wewnętrznych akumulatorów żelowych, podłączyć kabel zasilający do gniazda (13), a następnie do gniazdka sieciowego (230 V~ / 50 Hz). G Do czyszczenia urządzenia należy używać suchej, miękkiej tkaniny. Nie wolno stosować wody ani chemicznych środków czyszczących. Aktywne zestawy głośnikowe serii TXA-800 współpracują z następującymi urządzeniami z oferty produkcyjnej firmy MONACOR: G Producent ani dostawca nie ponoszą odpowiedzialności za wynikłe szkody (uszkodzenie sprzętu lub obrażenia użytkownika), jeśli urządzenie używano niezgodnie z przeznaczeniem, nieprawidłowo podłączono, obsługiwano bądź poddano nieautoryzowanej naprawie. TXA-800HSE (nr zamówienia 17.2250) Wielozakresowy nadajnik kieszonkowy z mikrofonem krawatowym i mikrofonem nagłownym Specjalny układ sterujący ładowaniem zapobiega przeładowaniu baterii; zalecane jest jednak odłącznie zasilania sieciowego po naładowaniu baterii akumulatorowych, zwłaszcza jeżeli urządzenie nie będzie przez dłuższy czas wykorzystywane. 8 Istnieje możliwość podłączenia np. rejestratora lub innego aktywnego urządzenia do gniazd chinch LINE OUT (10). Na obu gniazdach dostępny jest zmiksowany sygnał mono. Regulator MASTER (6) odpowiedzialny za całkowitą głośność systemu nie wpływa na poziom sygnału na wyjściu LINE OUT; na poziom sygnału wpływa natomiast ustawienie regulatorów barwy (7). 6.3 Pasywny zestaw głośnikowy Złącza audio 6.1 Wejścia Jako źródła dźwięku można podłączyć mikrofon oraz urządzenie stereofoniczne z wyjściem liniowym (np. odtwarzacz CD, odtwarzacz DVD, magnetofon kasetowy lub nagrywarkę minidysków): – mikrofon należy połączyć za pomocą wtyku XLR lub 6,3 mm z gniazdem sym. MIC IN (11). – urządzenie stereofoniczne z wyjściem liniowym należy podłączyć do gniazd chinch LINE IN (9). Zasilanie/ładowanie baterii 6.2 Wyjście LINE OUT 1. Zawsze należy naładować całkowicie baterie przed pierwszym użyciem oraz po dłuższych przerwach w użytkowaniu. 6 5 Montaż zestawu * System diversity: transmitowany sygnał odbierają dwie anteny, rozmieszczone w pewnej odległości od siebie. System elektroniczny wybiera antenę z wyższą jakością sygnału. Uwaga: Aktywny system nie posiada regulacji głośności urządzenia podłączonego do wejścia LINE IN (9), co oznacza, że sygnał urządzeń jest zawsze podawany na wyjście LINE OUT z taką samą głośnością. 3. Należy ładować baterie co najmniej raz na 2 miesiące, nawet w przerwach między użytkowaniem. 4 Po podłączeniu zasilania sieciowego, zawsze włączana jest ładowarka wewnętrznych akumulatorów. Dioda LED CHARGE (4) zapala się: na czerwono: następuje ładowanie baterii na zielono: baterie zostały w pełni naładowane Ważne: Aby zapobiec uszkodzeniu baterii na skutek głębokiego rozładowania oraz skróceniu ich żywotności, należy przestrzegać następujących zasad: 2. Jeżeli włącznik POWER miga w czasie pracy z zasilaniem bateryjnym, oznacza to konieczność szybkiego naładowania baterii. 3.1 Normy i zezwolenia na użytkowanie nadajnika do modelu TXA-802CD Niniejszym firma MONACOR INTERNATIONAL oświadcza, że nadajnik do urządzenia TXA-802CD spełnia wymogi dyrektywy 1999/5/EC i jest zgodny z zawartymi w niej przepisami. Deklaracja zgodności jest dostępna na życzenie w firmie MONACOR INTERNATIONAL. Nadajnik nie wymaga zezwolenia i został dopuszczony do użytkowania w krajach należących do Unii Europejskiej oraz Europejskiego Stowarzyszenia Wolnego Handlu (EFTA). Nie wolno odłączać urządzenia z gniazda sieciowego ciągnąc za kabel zasilania, należy zawsze chwytać za wtyczkę. Jeżeli potrzebny jest dodatkowy system głośnikowy (bez wzmacniacza) można go podłączyć do gniazda SPEAKER (12). Impedancja głośnika musi wynosić co najmniej 8 Ω. 7 Przygotowanie zestawu do pracy Przed włączeniem należy ustawić regulator MASTER (6) w pozycji MIN, następnie włączyć zestaw głośnikowy za pomocą włącznika zasilania POWER (5) [odpowiednie ustawienie włącznika zostało przedstawione na schemacie nr 1]. Włącznik świeci się podczas pracy. Jeżeli zaczyna migać podczas pracy na zasilaniu bateryjnym, oznacza to, że baterie są prawie rozładowane i należy je naładować. Aby zapobiec uszkodzeniu akumulatora na skutek głębokiego rozładowania podczas pracy, układ zabezpieczający wyłącza urządzenie w odpowiednim momencie. Jednakże, na skutek samoczynnego rozładowywania się akumulatora, głębokie rozładowanie może nastąpić w przypadku, gdy urządzenie nie jest wykorzystywane przez dłuższy czas. Należy zawsze przestrzegać zaleceń podanych w ramce w rozdz. 5. PL TXA-800ST (nr zamówienia 17.2600) Wieloczęstotliwościowy nadajnik zasilany sieciowo Modele TXA-800, TXA-800CD oraz TXA-802CD to aktywne systemy, stanowiące połączenie dwudrożnego zestawu głośnikowego oraz wzmacniacza ze złączami na mikrofon i urządzenie z wyjściem liniowym, np. odtwarzacz CD lub magnetofon. Modele TXA-8..CD są wyposażone w odtwarzacz CD/MP3. Urządzenie może być zasilane sieciowo (230 V) lub akumulatorowo, z akumulatorów żelowych (ołowiowych), które są ładowane w zintegrowanej ładowarce. Zapewnia to mobilność urządzenia, dzięki czemu znajduje ono idealne zastosowanie np. podczas promocji lub wykładów. G W czasie ładowania, nie ma konieczności włączania systemu przełącznikiem POWER (5); jednakże, urządzenie może normalnie pracować w trakcie ładowania. TXA-800HT (nr zamówienia 17.2260) Mikrofon ręczny z wielozakresowym nadajnikiem Obsługa UWAGA Nigdy nie należy ustawiać urządzenia na maksymalną głośność. Zbyt duże natężenie dźwięku może uszkodzić słuch! Ucho ludzkie dostosowuje się do hałasu, który po pewnym czasie nie wydaje się uciążliwy. Nie wolno zwiększać poziomu głośności po przyzwyczajeniu się do poprzedniego ustawienia. 1) Należy zwiększyć położenie regulatora głośności MASTER (6) tak, aby ustawienia były słyszalne przez głośniki. 2) Należy włączyć wybrane źródła sygnału, następnie połączyć je przy pomocy odpowiednich regulatorów głośności lub odpowiednio wzmocnić bądź wyciszyć ich sygnał (należy pamiętać o ustawieniu regulatorów nieużywanych źródeł dźwięku w pozycji ”zero”): – odbiornik / odbiorniki (1): włącznik zasilania i regulator głośności (20) → zob. też rozdział 8.1 – dotyczy jedynie modeli TXA-...CD: zintegrowany odtwarzacz CD/MP3 (2): regulator głośności LEVEL (40) → zob. też rozdział 8.2 – mikrofon na wejściu MIC IN (11): regulator głośności MIC (8) Wejście LINE IN (9) nie posiada osobnej regulacji głośności; poziom głośności źródła sygnału podłączonego do tego wejścia można regulować jedynie przy pomocy regulatora MASTER (6). 3) Za pomocą regulatorów barwy (7) – BASS dla tonów niskich i TREBLE dla tonów wysokich – należy skorygować brzmienie sygnału. 4) Za pomocą regulatora MASTER (6) należy ustawić ostateczny poziom głośności sygnału master aktywnego zestawu głośnikowego, następnie w razie konieczności skorygować ustawienia barwy. 29 PL 5) Dotyczy tylko modelu TXA-802CD: Przy pomocy nadajnika (3) można podać połączony sygnał [niezależnie od ustawienia regulatorów barwy (7) oraz regulatora MASTER (6)] do kolejnych aktywnych zestawów głośnikowych z serii TXA-8.. przy użyciu transmisji bezprzewodowej. Zob. także rozdział 8.3. 6) Po zakończeniu użytkowania urządzenia należy ustawić włącznik zasilania POWER (5) w pozycji “off”. 8.1 Odbiornik wielozakresowy model TXA-800 / -800CD: 1 odbiornik model TXA-802CD: 2 odbiorniki 4) Jeśli nadajnik jest włączony i ustawiony na ten sam kanał co odbiornik, zaświeci się dioda LED RX (16), wskazująca odbiór sygnału radiowego. Dioda LED AF (17) zaświeci się, gdy nadajnik będzie transmitować sygnał akustyczny o odpowiednim poziomie na wybranej częstotliwości radiowej. 5) Należy ustawić poziom głośności odbieranego sygnału za pomocą regulatora (20). 1) Aby włączyć odbiornik, należy zwiększyć położenie włącznika zasilania oraz regulatora głośności (20). Dioda LED A/B (15) zaświeci się na czerwono lub na zielono, w zależności od anteny odbiorczej: A lub B. 8.2 Odtwarzacz CD / MP3 2) Przez najbliższy czas nadajnik ma być wyłączony. Najpierw należy ustawić odpowiedni kanał transmisyjny dla odbiornika, który będzie wolny i nie będzie na nim zakłóceń: 1. Należy nacisnąć klawisz SET (18). Zacznie migać numer kanału na wyświetlaczu (14). 2. Gdy wskazanie kanału miga (przez około 10 sekund), można wybrać numer kanału za pomocą klawiszy i (19): klawisz służy do wyboru kanału o wyższym numerze; klawisz – kanału o niższym numerze. 3. Należy potwierdzić wybór kanału klawiszem SET. (Jeśli w ciągu 10 sekund nie nastąpi potwierdzenie wyboru za pomocą klawisza SET, urządzenie powróci do poprzednio ustawionego kanału.) Uwaga: W przypadku płyt wielokrotnego zapisu (CDRW), mogą jednak wystąpić pewne problemy. Jeśli po wyborze kanału, przy wyłączonym nadajniku, świeci się dioda LED RX (16), na tym kanale pojawiły się zakłócenia lub sygnały z innych nadajników. Należy wówczas ustawić inny kanał dla odbiornika. – włożyć kartę (ściętym rogiem w górę i w prawo) do czytnika (32). Odłączanie nośnika: Aby wyjąć płytę CD, wcisnąć dwa razy przycisk STOP/ EJ lub przycisk EJECT (38) (pierwsze wciśnięcie: zatrzymanie odtwarzania, drugie: wysunięcie płyty CD). Możliwe jest jej ponowne wsunięcie za pomocą tego samego przycisku. Odłączyć nośnik USB od portu USB oraz wyjąć kartę SD z czytnika najpierw lekko ją wciskając. Przed odłączeniem nośnika USB oraz karty SD należy zatrzymać odtwarzanie. 8.2.3 Wybór nośnika Po włączeniu urządzenia, automatycznie jest wybieranie odtwarzanie płyty CD. Za pomocą przycisku CD / USB /SD (33) można wybrać inny nośnik: Wybrany nośnik pokazywany jest na wyświetlaczu ( , lub ). Po wczytaniu danych rozpocznie się odtwarzanie pierwszego utworu. W przypadku odłączenie wybranego nośnika USB lub karty SD, odtwarzacz przełączy się automatycznie na płytę CD. Tak samo stanie się po włożeniu nowej płyty CD. 8.2.4 Odtwarzanie / pauza / stop Po wczytaniu danych rozpocznie się odtwarzanie (wskazanie ). Aby wstrzymać odtwarzanie (wskazanie ) i ponownie je kontynuować, wcisnąć przycisk PLAY/ PAUSE lub (37). Wyświetlacz pokazuje miniony czas odtwarzania utworu (min. : sek.). 30 3) Można na krótko wyświetlić częstotliwość radiową dla wybranego kanału: należy przytrzymać klawisz lub , wówczas na wyświetlaczu zamiast kanału pojawi się częstotliwość. 8.2.1 Zdalne sterowanie odtwarzaczem Pilot zdalnego sterowania dostarczany jest razem z baterią. Przed przystąpieniem do pracy, należy usunąć folię z komory bateryjnej, znajdującej się na tylnej stronie pilota. Pilot należy kierować bezpośrednio w stronę czujnika podczerwieni (30). Podczas pracy, pomiędzy odtwarzaczem a pilotem, nie powinny znajdować się żadne przeszkody. Jeżeli pilot nie będzie przez dłuższy czas używany, należy wyjąć z niego baterię, aby uniknąć uszkodzenia na skutek wylania baterii. Wymiana baterii pilota: 1) Przesunąć blokadę uchwytu na baterię w prawo (pierwsza strzałka na rys. poniżej) i wysunąć go (druga strzałka). dotyczy jedynie modelu TXA-800CD oraz TXA-802CD Odtwarzacz CD pozwala na odtwarzanie standardowych płyt audio CD oraz płyt CD, nośników USB i kart SD z plikami MP3. Odtwarzacz wyposażony jest w pamięć antywstrząsową, zapobiegającą przerwom w odtwarzaniu w przypadku wystąpienia niewielkich drżeń lub wibracji; należy pamiętać że pamięć ta nie jest efektywna w przypadku ciągłych i dużych wstrząsów. W przypadku odtwarzania płyt CD, należy zapewnić stabilne ustawienie na solidnej i nieruchomej podstawie. Uwagi dotyczące zakłóceń i błędów w odczycie Wpływ dymu papierosowego oraz kurzu może spowodować błędy przy odczycie płyt CD. Niestety uniknięcie szkodliwych warunków nie zawsze jest możliwe (np. w dyskotekach). W takim przypadku należy zlecić okresowe czyszczenie urządzenia przez autoryzowany serwis. Czyszczenie jest odpłatne, także podczas trwania gwarancji! Aby zatrzymać odtwarzanie wcisnąć jeden z przycisków: – Przycisk (45) – Przycisk STOP/ EJ lub EJECT (38) Po zatrzymaniu odtwarzania, wyświetlacz pokazuje czas “00 : 00”. Aby ponownie odtworzyć pierwszy utwór, wcisnąć przycisk PLAY/PAUSE lub . 8.2.5 Regulacja głośności / wyciszanie Do ustawiania głośności służy regulator VOLUME (40). Aby wyciszyć odtwarzacz wcisnąć przycisk (48). 8.2.6 Wybór utworów Płyty audio CD W przypadku płyt audio CD (wskazanie “CD”) wyświetlacz pokazuje podczas odtwarzania i pauzy numer utworu, natomiast po zatrzymaniu liczbę wszystkich utworów. 1. Przełączanie utworów w przód lub w tył: Służą do tego przyciski REV/ F.WD oraz S / S (36) [REV/ S = powrót do początku bieżącego utworu, po każdym kolejnym wciśnięciu przejście do poprzedniego utworu, F.WD/ = przejście do następnego utworu]. 2. Bezpośredni wybór numeru utworu: Wpisać numer utworu przyciskami numerycznymi (41) i zatwierdzić przyciskiem ENTER (47). Pliki MP3 W przypadku plików MP3 (wskazanie “MP3”), podczas odtwarzania i pauzy, wyświetlacz pokazuje numer folderu i numer utworu w folderze. Utwory spoza folderów przypisywane są do folderu nr 1. Po zatrzymaniu odtwarzania, wyświetlacz pokazuje liczbę wszystkich folderów oraz utworów na nośniku. 2) Wymienić baterię na nową (3 V baterię pastylkową typu CR 2025). Dodatni biegun musi znajdować się na górze. 3) Wsunąć uchwyt z baterią ponownie do pilota. Zużytą baterię należy wyrzucać do specjalnie oznaczonych pojemników, nie do zwykłych koszy na śmieci. 8.2.2 Włączanie i wyłączanie / podłączanie i odłączanie nośnika danych Do włączania i włączania odtwarzacza służy przycisk POWER (29). Podłączanie nośnika: – wsunąć płytę CD we wpust (27) nadrukiem do góry, aż zostanie automatycznie wciągnięta i / lub – podłączyć nośnik USB (np. pamięć przenośną USB, twardy dysk USB z własnym zasilaniem) do portu USB (28) i / lub 1. Przełączanie utworów w przód lub w tył: Każde wciśnięcie przycisku FOLDER (34) powoduje przejście do kolejnego folderu. Do wyboru utworu z bieżącego folderu służą przyciski REV/ F.WD oraz S / S (36) [REV/ S = powrót do początku bieżącego utworu, po każdym kolejnym wciśnięciu przejście do poprzedniego utworu, F.WD/ S = przejście do następnego utworu]. 2. Bezpośredni wybór numeru utworu: Wpisać numer utworu (na nośniku, nie w folderze) przyciskami numerycznymi (41) i zatwierdzić przyciskiem ENTER (47). Uwaga: W niektórych przypadkach, nie następuje powrót do początku bieżącego utworu, ale od razu przejście do poprzedniego utworu (np. podczas przełączania utworów z płyty CD w trybie pauzy). 8.2.7 Szybkie przewijanie Do szybkiego przewijania wewnątrz utworu służą przyciski FB / F.F oraz / (35): FB lub = w tył, F.F lub = w przód. Wcisnąć na krótko odpowiedni przycisk i po osiągnięciu żądanego punktu wcisnąć przycisk PLAY/ PAUSE lub (37). 8.2.8 Funkcje powtarzania / losowa kolejność odtwarzania Odtwarzacz oferuje trzy funkcje powtarzania. Wybrana funkcja pokazywana jest na wyświetlaczu. Za pomocą przycisku REP (44) wybrać: – “REPEAT 1”: powtarzanie bieżącego utworu – “REPEAT FOLDER” (w trybie MP3): powtarzanie wszystkich utworów z bieżącego folderu – “REPEAT ALL”: powtarzanie wszystkich utworów z nośnika – Bez wskazania “REPEAT”: funkcja powtarzania wyłączona; po odtworzeniu wszystkich utworów odtwarzacz zatrzymuje się Wcisnąć przycisk RAN (43) aby uruchomić losowe odtwarzanie, na wyświetlaczu pojawi się wskazanie “SHUFFLE”. Aby wyłączyć odtwarzanie losowe, należy wcisnąć przycisk ponownie. Włączenie odtwarzania losowego wyłącza funkcje powtarzania i vice versa. 8.2.9 Odtwarzanie pętli Możliwe jest ciągle odtwarzanie fragmentu utworu. 1) Po osiągnięciu punktu startowego pętli, wcisnąć przycisk A – B (46). Na wyświetlaczu pojawi się symbol “A ©”. 2) Po osiągnięciu punktu końcowego pętli, wcisnąć przycisk A – B ponownie. Na wyświetlaczu pojawi się symbol “A © B”. Wybrany fragment będzie powtarzany ciągle. 8.2.11 Programowanie własnej sekwencji utworów 1) Wcisnąć przycisk PROG (42), aby uruchomić tryb programowania. Na wyświetlaczu pojawi się wskazanie “PROGRAM”. 2) Wybrać pierwszy utwór do listy: – przejść do wybranego utworu przyciskami REV/ F.WD lub S / S (36); w przypadku plików MP3 wybrać najpierw folder przyciskiem FOLDER (34) lub – wybrać bezpośrednio numer utworu przyciskami numerycznymi (41) [tryb MP3: numer utworu na nośniku, nie w folderze!] i zatwierdzić wybór przyciskiem ENTER (47). Na wyświetlaczu pokazany zostanie numer na liście zamiast wskaźnika czasu. 3) Aby zakończyć odtwarzanie pętli wcisnąć ponownie przycisk. Zniknie symbol “A © B”. Powtórzyć procedurę wyboru dla pozostałych utworów do listy. Możliwe jest zaprogramowanie max 10 utworów. 8.2.10 Zmiana prędkości odtwarzania i wysokości dźwięku (pitch) Przyciski PITCH (39) pozwalają na zmianę prędkości odtwarzania i jednocześnie wysokości dźwięku. 3) Wcisnąć przycisk PLAY/ PAUSE lub (37), aby uruchomić odtwarzanie sekwencji. Wskazanie “PROGRAM” zniknie. Podczas odtwarzania pojawia się na wyświetlaczu oznaczenie “MEMORY”. Aby powrócić do odtwarzania w normalnej kolejności, wcisnąć przycisk PROG: wskazanie “MEMORY” zniknie, a zaprogramowana sekwencja zostanie skasowana. przycisk HI lub HIGH zwiększanie prędkości odtwarzania w 10 krokach przycisk LO lub LOW zmniejszanie prędkości odtwarzania w 10 krokach Wcisnąć odpowiedni przycisk klika razy, aż do uzyskania żądanej prędkości odtwarzania. Po każdym wciśnięciu przycisku, na wyświetlaczu pokazana zostanie ustawiona prędkość, np. jeżeli standardowa prędkość zostanie zwiększona o 5 kroków 4) Jeżeli nie wybrano żadnej funkcji powtarza-nia (dostępne są funkcje “REPEAT 1” oraz “REPEAT ALL” → rozdz. 8.2.8), odtwarzacz zatrzyma się po odtworzeniu ostatniego utworu z sekwencji, a zaprogramowana sekwencja zostanie skasowana. 8.3 Nadajnik wielozakresowy jeżeli standardowa prędkość zostanie zmniejszona o 2 kroki Aby powrócić do normalnej prędkości, wcisnąć przycisk NOR. Czerwona dioda LED zaświeci się, gdy sygnał wejściowy osiągnie poziom maksymalny, bliski przeciążenia. Dioda ta nie powinna się w ogóle zapalać, lub zapalać jedynie przy wartościach szczytowych sygnału; jeśli dioda świeci się ciągle, oznacza to, że sygnał jest przeciążony. Należy wówczas odpowiednio zmniejszyć głośność źródła (źródeł) sygnału. 5) Należy ustawić poziom głośności nadawanego sygnału za pomocą regulatora (26). 9 Dane techniczne Moc wzmacniacza: . . 80 WMAX /50 WRMS Zestaw głośnikowy: . . głośnik niskotonowy 20 cm (8″) i głośnik wysokotonowy 2,5 cm (1″) dotyczy jedynie modelu TXA-802 Jeżeli potrzebnych jest kilka aktywnych zestawów głośnikowych do aplikacji PA, można zastosować bezprzewodowy tryb audio link. Przez nadajnik z Regulatory barwy Tony wysokie: . . . . ±15 dB/100 Hz Tony niskie: . . . . . . ±10 dB/10 kHz 2. Gdy wskazanie kanału miga (przez około 10 sekund), można wybrać numer kanału za pomocą klawiszy i (25): klawisz służy do wyboru kanału o wyższym numerze; klawisz do wyboru kanału o niższym numerze. 3. Należy potwierdzić wybór kanału klawiszem SET. (Jeśli w ciągu 10 sekund nie nastąpi potwierdzenie wyboru za pomocą klawisza SET, urządzenie powróci do poprzednio ustawionego kanału.) Ważne! Podczas wybierania kanału dla nadajnika i odbiornika urządzenia głównego muszą być ustawione inne kanały, w przeciwnym razie wystąpi sprzężenie. 3) Można na krótko wyświetlić częstotliwość radiową dla wybranego kanału: należy przytrzymać klawisz lub , wówczas na wyświetlaczu zamiast kanału pojawi się częstotliwość. 4) Diody LED AF LEVEL (23) wskazują poziom sygnału audio podawanego do nadajnika: Żółta dioda LED zaświeci się, gdy sygnał wejściowy osiągnie określony poziom minimalny. 9.1.1 Częstotliwości kanałów CH 1 – CH 16 CH częstotliwość Temperatura otoczenia pracy: . . . . 0 – 40 °C 863,1 MHz 9 863,2 MHz 2 864,1 MHz 10 864,2 MHz Zasilanie: . . . . . . . . . . sieciowe (230 V~/50 Hz/ 150 VA) lub z akumulatorów żelowych (2 × 12 V /3 Ah) 3 863,6 MHz 11 863,7 MHz 4 864,6 MHz 12 864,7 MHz 5 863,3 MHz 13 863,4 MHz 6 864,3 MHz 14 864,4 MHz 7 863,8 MHz 15 863,9 MHz 8 864,8 MHz 16 864,9 MHz Wymiary: . . . . . . . . . . 300 × 470 × 230 mm (szer. × wys. × głęb.) Waga Model TXA-800: . . . 11,2 kg Model TXA-800CD: 11,9 kg Model TXA-802CD: 12,3 kg Wejście MIC IN Czułość: . . . . . . . . . 6 mV Złącze: . . . . . . . . . . gniazdo XLR/6,3 mm, sym. Odbiornik/ odbiorniki 1: . . . . . . . . odbiornik wielozakresowy PLL w systemie diversity Wyjście SPEAKER: . . gniazdo 6,3 mm na pasywny zestaw głośnikowy (min. impedancja 8 Ω) 1. Należy nacisnąć klawisz SET (24). Na wyświetlaczu (21) zacznie migać numer kanału. częstotliwość 9.1 Transmisja bezprzewodowa Wyjście LINE OUT Poziom: . . . . . . . . . 1 V Złącze: . . . . . . . . . . gniazda chinch 2) W odbiornikach urządzeń podporządkowanych należy ustawić kanał transmisyjny dla trybu audio link oraz wybrać ten sam kanał dla nadajnika urządzenia głównego: 1 Czas pracy akumulatorów: . . . . . . około 3 – 4 godzin Nadajnik 2: . . . . . . . . . nadajnik wielozakresowy PLL o mocy 10 mW (EIRP) PL 1) Aby włączyć nadajnik, należy zwiększyć położenie przełącznika “on-off” oraz regulatora głośności (26). Zaświeci się dioda LED TX (22), wskazująca na transmisję sygnału radiowego. CH Pasmo przenoszenia: 70 – 16 000 Hz Wejście LINE IN Czułość: . . . . . . . . . 800 mV Złącze: . . . . . . . . . . gniazda chinch aktywnego zestawu głośnikowego TXA-802CD (urządzenie główne) połączony sygnał, niezależny od położenia regulatora MASTER (6) oraz regulatorów barwy (7), można transmitować do odbiorników innego aktywnego zestawu głośnikowego z serii TXA-8.. (urządzenia podporządkowane) Uwagi dotyczące pracy z kilkoma systemami bezprzewodowymi TXA-8.. Możliwa jest równoczesna praca maksymalnie 8 nadajników, ustawionych na różne kanały. Liczba kanałów wykorzystywanych równolegle, zależy od odległości pomiędzy poszczególnymi systemami, zakłóceń występujących na danych częstotliwościach oraz innych lokalnych warunków. Podczas używania kilku systemów, ustawiać kanały w kolejności rosnącej (np. dla 8 systemów, kanały CH 1 – CH 8) i zachować możliwie duży dystans pomiędzy nimi. Zasięg: . . . . . . . . . . . . około 30 m Zakres częstotliwości radiowej: . . . . . . . . . . 863,1 – 864,9 MHz, 16 kanałów Z zastrzeżeniem możliwości zmian. 1. modele TXA-800 i TXA-800CD: 1 odbiornik, model TXA-802CD: 2 odbiorniki 2. dotyczy jedynie modelu TXA-802CD Instrukcje obsługi są chronione prawem copyright for MONACOR ® INTERNATIONAL GmbH & Co. KG. Przetwarzanie całości lub części instrukcji dla osobistych korzyści finansowych jest zabronione. 31 DK Transportabelt aktivt højttalersystem Læs nedenstående sikkerhedsoplysninger opmærksomt igennem før ibrugtagning af enheden. Bortset fra sikkerhedsoplysningerne henvises til den engelske tekst. G Undgå at placere væskefyldte genstande, som f. eks. glas, ovenpå enheden. G Der bør aldrig skrues meget højt op for lydsystemets lydniveau. Et permanent højt lydniveau kan skade menneskers hørelse! Det menneskelige øre vænner sig til et højt lydniveau, og efter nogen tid opfattes dette lydniveau ikke som højt. Undlad derfor at øge volumen efter tilvænning. G Vigtige sikkerhedsoplysninger Denne enhed overholder alle relevante EU direktiver og er som følge deraf mærket . ADVARSEL Dette produkt benytter 230 V~. Overlad al servicering til autoriserede personer. Ukyndig håndtering kan føre til elektrisk stød. G Tag aldrig stikket ud af stikkontakten ved at trække i kablet, tag fat i selve stikket. G Til rengøring må kun benyttes en tør, blød klud; der må under ingen omstændigheder benyttes kemikalier eller vand. G Hvis enheden benyttes til andre formål, end den oprindeligt er beregnet til, hvis den ikke er korrekt G Placera inte föremål innehållande vätskor, t. ex. dricksglas, på enheten. Justera aldrig ljudsystemet till en väldigt hög ljudnivå. Permanent höga volymer kan ge upphov till hörselskador! Örat vänjer sig vid höga volymer vilken efter ett tag inte längre verkar så hög. Därför bör man ej ytterligare höja volymen efter att man vant sig. Använd inte enheten och ta omedelbart kontakten ur eluttaget om något av följande fel uppstår: 1. Enheten eller elsladden har synliga skador. 2. Enheten är skadad av fall e. d. 3. Enheten har andra felfunktioner. Enheten skall alltid lagas på verkstad av utbildad personal. Drag aldrig ut kontakten genom att dra i sladden utan ta tag i kontaktkroppen. Rengör endast med en mjuk och torr trasa, använd aldrig kemikalier eller vatten vid rengöring. Om enheten används på annat sätt än som avses, om den inte kopplas in ordentligt, om den används på fel sätt eller inte repareras av auktoriserad personal upphör alla garantier att gäll. I dessa fall tas Vær altid opmærksom på følgende: G S Enheden er kun beregnet til indendørs brug. Beskyt den mod vanddråber og stænk, høj luftfugtighed og varme (tilladt omgivelsestemperatur 0 – 40 °C). Bärbart förstärkarsystem G Ge akt på säkerhetsinformationen innan enheten tas i bruk. Skulle ytterliggare information behövas kan den återfinnas i Manualen för andra språk. G Säkerhetsföreskrifter Enheten uppfyller alla relevanta direktiv i EU och har därför försetts med symbolen . VARNING Enheten använder hög spänning internt (230 V~). Överlåt all service till auktoriserad personal. Egna ingrepp kan ge elektriska överslag med risk för skada på person och/eller materiel. Ge ovillkorligen även akt på följande: G FIN G G G Enheten är endast avsedd för inomhusbruk. Skydda enheten mot vätskor, hög luftfuktighet och hög värme (tillåten omgivningstemperatur 0 – 40 °C). Vahvistimella varustettu kannettava aktiivikaiutin Ole hyvä ja huomioi joka tapauksessa seuraavat turvallisuuteen liittyvät seikat ennen laitteen käyttöä. Laitteen toiminnasta saa lisätietoa tarvittaessa tämän laitteen muunkielisistä käyttöohjeista. G Älä sijoita laitteen päälle mitään nestettä sisältävää, kuten vesilasia tms. G Älä koskaan säädä laitteiston äänitasoa huippulukemille. Jatkuva kova äänenvoimakkuus vaurioittaa kuuloasi! Ihmiskorva tottuu koviin äänenvoimakkuuksiin, jotka eivät tunnu hetken kuluttua enää niin kovailta. Älä lisää äänenvoimakkuutta sen vuoksi, että olet jo tottunut siihen. G Turvallisuudesta Laite vastaa kaikkia vaadittuja EU direktiivejä, joten se on varustettu merkinnällä. VAROITUS Tämä laite toimii vaarallisella 230 V~ jännitteellä. Laiteen huolto tulee tehdä siihen valtuutetun huollon toimesta. Asiaa tuntematon käsittely voi aiheuttaa sähköiskun vaaran. Huomioi seuraavat seikat: G Tämä laite soveltuu vain sisätilakäyttöön. Suojele laitetta kosteudelta, vedeltä ja kuumuudelta (sallittu ympäröivä lämpötila 0 – 40 °C). 32 Tag ikke enheden i brug og tag straks stikket ud af stikkontakten i følgende tilfælde: 1. hvis der er synlig skade på enheden eller netkablet. 2. hvis der kan være opstået skade, efter at enheden er tabt eller lignende. 3. hvis der forekommer fejlfunktion. Enheden skal altid repareres af autoriseret personel. Irrota virtajohto pistorasiasta, äläkä käynnistä laitetta, jos: 1. laitteessa tai virtajohdossa on havaittava vaurio 2. putoaminen tai muu vastaava vahinko on saattanut aiheuttaa vaurion 3. laitteessa esiintyy toimintahäiriöitä Kaikissa näissä tapauksissa laite tulee huollattaa valtuutetussa huollossa. G Älä koskaan irrota virtajohtoa pistorasiasta johdosta vetämällä. G Käytä puhdistamiseen pelkästään kuivaa, pehmeää kangasta. Älä käytä kemikaaleja tai vettä. G Laitteen takuu raukeaa, eikä valmistaja, maahantuoja tai myyjä ota vastuuta mahdollisista välittömistä tai välillisistä vahingoista, jos laitetta on käy- tilsluttet, hvis den betjenes forkert, eller hvis den ikke repareres af autoriseret personel, omfattes eventuelle skader ikke af garantien. Brugte eller defekte batterier må aldrig smides ud sammen med den øvrige husholdningsaffald. Aflever dem altid i genbrugsstationens battericontainere. Hvis enheden skal tages ud af drift for bestandigt, skal den bringes til en lokal genbrugsstation for bortskaffelse. Note vedrørende læse fejl og afbrydelse af afspilning Cigaretrøg og støv kan nemt trænge ind gennem alle åbninger på CD-afspilleren, og kan sætte sig på laseren. Hvis dette skulle medfører læse fejl, skal denne renses af en uddannet reparatør. Rensning af laseren er ikke omfattet af garantien på CD-afspilleren. inget ansvar för uppkommen skada på person eller materiel. Förbrukade batterier och defekta uppladdningsbara batterier får inte slängas bland hushållssopor. Lämna alltid in dem hos uppsamlingsställen (som t. ex. batteriholkar eller hos er återförsäljare). Om enheten skall kasseras bör de lämnas in till återvinning. Notering ang ljud avbrott och läs problem Cigarett rök och damm kommer lätt in genom CDspelarens intag och kan då givetvis sätta sig på det optiska läshuvudet. Om detta sker och förorsakar ljudstörningar och avbrott så måste enheten rengöras av kvalificerad personal. Var vänlig att notera att detta kommer att fakturears även om artikeln befinner sig inom garantiperioden. tetty muuhun kuin alkuperäiseen käyttötarkoitukseen, laitetta on taitamattomasti käytetty tai kytketty tai jos laitetta on huollettu muussa kuin valtuutetussa huollossa. Käytöstä poistettavat patterit ja vaurioituneet ladattavat akut on vietävä niille tarkoitettuihin keräyspisteisiin, eikä niitä saa hävittää muun sekajätteen mukana. Kun laite poistetaan lopullisesti käytösta, vie se paikalliseen kierrätyskeskukseen jälkikäsittelyä varten. Tiedote koskien levyn lukuhäiriöitä sekä katkoksia äänessä Laitteeseen kertyvä pöly, tupakansavu yms aiheuttaa laitteeseen lukuvirheitä. Laitteen saa avata ja huoltaa vain av-huoltoliike tai sähköalan ammattilainen. Huomioi että kyseessä on normaalisti veloitettava huoltotyö myös takuuaikana. ® MONACOR INTERNATIONAL GmbH & Co. KG • Zum Falsch 36 • 28307 Bremen • Germany A-0717.99.03.06.2013 Copyright © by MONACOR INTERNATIONAL. All rights reserved.