1
Instruction Manual
FM Clock Radio
6-7: Saturday & Sunday
1-1: One day of week
English
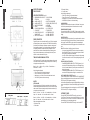
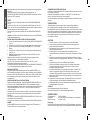
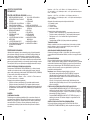
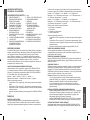
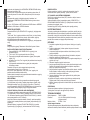
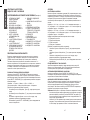
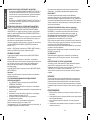
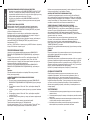
LOCATION OF CONTROLS (see fig. 1)
N
i
10.VOLUME DOWN
11.DISPLAY
12.BATTERY COMPARTMENT
13.RATING LABEL (REAR OF UNIT)
14.SPEAKER
15.FM ANTENNA
16.AC POWER CORD
17.PM Indicator
18.STANDBY Indicator
19.ALARM 1 Indicator
20.Alarm 2 Indicator
1. MEMORY/MEMORY+/NAP/AUTO
OFF DISPLAY
2.ALARM 1 ON/OFF SET
3.ALARM 2 ON/OFF SET
4. SNOOZE/SLEEP/DIMMER
5.CLK.ADJ.
6. <</TUNE-/YEAR/MONTH/DAY
7. >>/TUNE+/DST
8. VOLUME UP/DISPLAY AUTO
CHANGE ON/OFF
9. ON/OFF RADIO/ALARM OFF
POWER CONNECTION
Plug the AC power cord to a household outlet AC source. This unit is equipped
with a battery back up system, it requires a 1x3V CR2032 Flat Lithium battery
(Not included). Insert the battery in the battery compartment, making certain
that the positive and negative (+ and -) battery terminals are attached to the
corresponding terminals on the plate in the battery compartment. If an AC
power failure occurs, the clock automatically switches to the battery power
supply, the clock and timer memory continue running. When the AC power
resumes, the clock switches back to AC again.
TIME AND CALENDAR MANUAL SETTING
Press Time set button (5), in standby mode, and keep depress over 2 seconds
to enter time set mode, after enter the setting mode, press CLK.ADJ button (5)
to change the mode cycle as follows:
Normal —> Year —> Month —> Day —> 12/24H —> Real time Hour —>
Real time Min —> Normal
Action (during data adjustment):
• Press <</Tune- button (6) to adjust data backward.
• Press >>/Tune+ button (7) to adjust data forward.
• Keep depress << or >> button for 2 seconds to enable auto forward.
• Use CLK.ADJ (5) button to confirm each setting.
Alarm
Setting Alarm
Press the alarm set button (2/3) during normal mode to show the alarm time.
Afterwards keep depress the alarm set button (2/3) over 2 seconds to enter the
alarm set mode. After enter the setting mode, press the alarm set button (2/3)
to change the mode cycle as follows :
2
Normal —> AL 1 Hour —> AL 1 Min —> AL 1 weekday Alarm —> AL 1 wake
beep —> AL 1 wake radio —> AL 1 wake radio volume —> Normal
Normal —> AL 2 Hour —> AL 2 Min —> AL 2 weekday Alarm —> AL 2 wake
beep —> AL 2 wake radio —> AL 2 wake radio volume —> Normal
Select alarm weekday mode as follows
1-5: Monday to Friday
1-7: Whole week
2
Action (during data adjustment):
• Press <</Tune- button (6) to adjust data backward.
• Press >>/Tune+ button (7) to adjust data forward.
• Keep depress << or >> button for 2 seconds to enable auto forward.
• Use ALARM 1/2 (2/3) button to confirm each setting.
Alarm Duration
Beep alarm or radio alarm will continue output for 30 minutes if no key press,
then it will stop automatically and wait for same alarm time on next day.
Enable/disable the Alarm
Press and hold the “ALARM 1” (2)/“ALARM 2” (3) button to enable or disable
the alarm. Once the alarm is activated, the bell symbol will be appeared on the
display.
SNOOZE FUNCTION
When Alarm rings, press Snooze button (4) to suspend the alarm & to activate
the snooze function, Beep or Radio alarm will stop. 9 minutes later the alarm
will ring again. Press SNOOZE key again, alarm will be suspended again,
another 9 minutes later the alarm will ring again and so on until the next alarm
rings.
Note: The interval time of the Snooze function is 9 minutes.
- If you want to disable the SNOOZE function and stop alarm completely,
press Radio ON/OFF button (9). If you don‘t press any button, the alarm
will ring during 30 minutes & stop automatically.
- Icon of AL1 and AL2 will blink as long as Snooze function is still operating.
Once Snooze is turned off icon of AL1/AL2 stop blinking and lights on the
display.
Display light ON/OFF function:
• Press MEMORY/MEMORY+/NAP/AUTO OFF DISPLAY button (1) for 3
seconds, the LED display Indicator will light on, the LED display will turn
off after 15 seconds automatically. Press any button to maintain the LED
display for 15 seconds.
• Press MEMORY/MEMORY+/NAP/AUTO OFF DISPLAY button (1) for 3
seconds, the LED display indicator will light off to cancel this function.
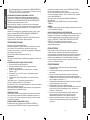
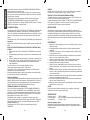
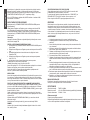
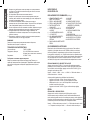
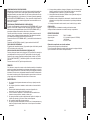
AUTO CHANGE DISPLAY CONTENT (see fig. 2)
In radio off mode, press the VOLUME UP/DISPLAY AUTO CHANGE ON/OFF
8) button and keep depressed over 2 seconds to enter time AUTO CHANGE
DISPLAY mode (“ON” will appear on the display).
the Year will be displayed and press again to display Month/Day, the display
returns to time display after 5 seconds, and will display again the same info in
cycle.
Press and keep depressed over 2 seconds again to turn off AUTO CHANGE
DISPLAY mode («OFF» will appear on the display).
Listening to Radio
Press the ON/OFF RADIO/ALARM OFF button (9) to turn the unit on.
Use the Tune+ or Tune- button to select the desired FM station. If you press
and hold the Tune+ or Tune- button for one second, the release, the unit will
automatically scan to the next broadcasting station.
Press the ON/OFF RADIO/ALARM OFF button (9) to turn the radio OFF.
3
English
1