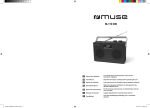
1
DR-05 BT
®
Retro Radio with Bluetooth and DAB+
User's Guide
w w w.lenco.com
Content
Warning ..................................................................................................1
Panels ....................................................................................................4
................................................................................................................6
Remote control
Basic operation ......................................................................................8
DAB operation .......................................................................................9
FM operation ........................................................................................11
Bluetooth operation ............................................................................. 12
Aux in /USB operation .........................................................................13
Trouble shooting /Specification ...........................................................14
Important safety instructions
Please read and understand all the warnings provided below, as well as and those marked
on the unit. This unit has been designed and manufactured to assure personal safety.
Only use power source that is specified
in the User Manual or on the system.
Keep the unit and power plug
away from water.
Avoid placing the unit in direct
or sunshine or near a heat source.
Never open the cover and avoid dropping
anything into the unit, such as coins,
hairpins and needles for example.
Do not bend or pull the power cable
Unplug the unit from the main power
outlet when you do not use it for a long
time.
excessively, and do not apply pressure
to it by standing on it.
1
Warnings
1. Read these Instructions - All the safety and operating instructions should be read
before this product is operated.
2. Keep these Instructions - The safety and operating instructions should be retained
for future reference.
3. Heed all Warnings-All warnings on the appliance and in the operating instructions
should be adhered to.
4. Follow all instructions - All operating and use instructions should be followed.
5. Do not use this apparatus near water- The appliance should not be used near water
or moisture - for example, in a wet basement or near a swimming pool, and the like.
6. Clean only with a damp cloth.
7. Do not block any of the ventilation openings.
Install in accordance with the manufacturer ’s instructions.
8. Do not install near any heat sources such as radiators, heat Registers, stoves, or
other apparatus (including amplifiers)that produce heat.
9. Do not defeat the safety purpose of the polarized or grounding -type plug. A polarized
plug has two blades with one wider than the other. A grounding prong. The wide blade
or the third prong are provided for your safety. When the provided plug does not fit into
your outlet, consult an electrician for replacement of the obsolete outlet.
10. Protect the power cord from being walked on or pinched particularly at plugs,
convenience receptacles, and the point where they exit from the apparatus.
11. Only use attachments/accessories specified by the manufacturer.
12. Use only with a cart, stand, tripod, bracket, or table specified by the manufacturer,
or sold with the apparatus. When a cart is used, use caution when moving the cart/
apparatus combination to avoid injury from tip-over.
13. Unplug the apparatus during lightning storms or when unused for long time.
14. Refer all serving to qualified service personnel. Servicing is required when the
apparatus has been damaged in any way, such as power-supply cord or plug is
damaged, liquid has been spilled or objects have fallen into the
apparatus, the apparatus has been exposed to rain or moisture.
15. Please keep the unit in a good ventilation environment.
16. These servicing instructions are for use by qualified service personnel only. To
reduce the risk of electric shock, do not perform any servicing other than that
contained in the operating instructions unless you are qualified to do so.
17. The MAINS PLUG is used as disconnect device, the disconnect device shall remain
readily operable.
18.
This equipment is a Class II or double insulated electrical appliance. It has been
designed in such a way that it does not require a safety connection to electrical
earth.
19.
-This lightning flash with arrowhead symbol within an equilateral
triangle is intended to alert the user to the presence of noninsulated dangerous voltage within the product’s enclosure that
may be of sufficient magnitude to constitute a risk of electric shock.
- To reduce the risk of electric shock, do not remove cover (or back) as there is no userserviceable parts inside. Refer servicing to qualified personnel.
- The exclamation point within an equilateral triangle is intended to alert the user
accompanying the appliance.
2
20.
Invisible laser radiation when open and interlocks defeated. Avoid exposure to
beam of laser.
21. The batteries in remote control shall not be exposed or excessive heat such as fire,
sunshine or the like.
22. The apparatus shall not be exposed to dripping or slashing and that no objects filled
with liquids, such as vases, shall be placed on the apparatus.
23. To reduce the risk of fire or electric shock, do not expose this apparatus to rain or
moisture.
24.
Correct disposal of this product. This marking indicates that this product should
not be disposed with other household wastes throughout the EU. To prevent
possible harm to the environment or human health from uncontrolled waste disposal,
recycle it responsibly to promote the sustainable reuse of material resources. To
return your used device, please use the return and collection systems or contact the
retailer where the product was purchased. They can take this product for
environmental safe recycling.
To achieve the utmost in enjoyment and performance, and in order to become
familiar with its features, please read this manual carefully before attempting to
operate this products, this will assure you years of trouble fress performance and
listening pleasure.
Caution:
To reduce the risk of electric shock, do not dismantle the product and do not expose
the apparatus to rain or moisture, No user-serviceable parts in side. Refer servicing
to qualified personnel only.
Explanation of Graphical Symbols:
The lightning flash within an equilateral triangle is intended to alert you to
the presence of uninsulated dangerous voltage with the product’s
enclosure that may be of sufficient magnitude to constitute an electric
shock to a person or persons.
The exclamation point within an equilateral triangle is intended to alert
you to the presence of important operating and maintenance (servicing)
instructions in the literature accompanying the product.
ERP II note
Energy related products-This product complies with the European Commission on the
Eco-design Directive and its implementing Regulations. 15 minutes (approx.) later
without any input (except in FM mode), the system will automatically enter standby
mode. Follow up the instruction manual to assume the function operation.
3
Description of parts
Front View
9 10
VOL
TUNER / ENTER/ BT PAIR
SOURCE
STANDBY
TREBLE
PRESET/
8
No.
Components
1
Standby
2
Treble
3
Bass
4
Volume knob
5
Display screen
Bluetooth indicator
6
7
/ BT Pair
9
Source
10
Menu/Information
Next
11
Previous
Scan
Preset
12
12
SCAN/
11
Description
Tap this button up or down to turn the unit on, or to
the standby mode.
Tap up or down to enter the treble setting interface and use
the volume knob within 3 seconds to adjust the treble level
to get a vivid sound effect.
Tap up or down to enter the bass setting interface and use
the volume knob within 3 seconds to adjust the bass level
to get a vivid sound effect.
Adjust the volume to a comfortable level.
Display source frequency, and playback information.
Indicates the mode status.
Remote control sensor Point the remote control to this sensor.
Tuner knob/ Enter
8
INFO/MENU/
BASS
Play/Pause
In DAB mode, rotate to skip to next or previous stations.
In FM mode, tune the frequency up or down by steps of 0.05MHz.
In menu status, press ENTER to confirm selection.
When the buzzer alarm goes on, press ENTER to stop the alarm.
or rotate the Tuner knob to enter the nap mode,the alarm will go
on 5 minutes later.
If you want to disconnect the paired devices, press BT PAIR
button to disconnect and the unit enters the BT pairing status.
Then use the phone device to make connection
.
Press repeatedly to select the source you want: FM, USB,
BLUETOOTH(BT), AUX IN, DAB.
In DAB or FM mode, long press to enter the setting menu.
In DAB mode, press briefly to cycle through the station information.
In BT mode, press Next button to skip to next track.
In standby mode, press to enter the time and alarm setting.
In FM mode, press repeatedly to cycle through the radio information.
In BT mode, press to skip to previous track.
In FM mode,press to scan the available stations.
In radio mode, use Preset button to store favorite stations.
In BT mode, press to pause the playback, press again
to resume playing.
4
Rear panel
DR-05 BT Black
Retro Radio Bluetooth® and DAB+
Channel Block:DAB+(band lll) 5A-13F
12
1.67A
Power Consumption: 20W
Production Date:
Made in China
S/N:
USB
AUX IN
DR-05 BT White
Retro Radio Bluetooth® and DAB+
Channel Block:DAB+(band lll) 5A-13F
12
1.67A
Power Consumption: 20W
Production Date:
Made in China
S/N:
USB
12
AUX IN
13 14
15
No.
Components
Description
13
FM antenna
Extend the FM antenna to get a good radio reception.
14
USB port
15
Aux in socket
16
Power supply socket
This port also charges the USB device if it’s in
low batteries level.
Use the AUX IN 3.5mm audio cable to connect with the
extra music devices (DVD player, computer, phones, etc).
In this AUX IN mode, the unit works as a loudspeaker, you
can only control the volume of the unit.
Insert the adaptor into the power socket and power on the unit.
5
Description of remote control
STANDBY
MUTE
10
SOURCE
MENU
INFO
11
12
13
PRESET
STOP
ID3
TREBLE
SNOOZE/DIM
BASS
SLEEP
BT PAIR
ALARM
14
15
16
17
18
8
9
1
2
3
4
5
6
7
8
9
0
MO/ST
RANDOM
19
20
DR-05 BT
No.
Buttons
1
Mute
2
Source
3
Menu
4
Play/Pause
When the buzzer alarm goes on, press to stop the alarm.
In BT mode, press to pause the playback, press again to resume.
In FM mode,press to scan the stations.
5
Preset
In FM or DAB mode, use Preset button to save favorite stations.
Description
Press to mute the sound.
Press repeatedly to select the source you want: FM, USB,
BLUETOOTH(BT), AUX IN, DAB.
Press to enter the setting menu.
6
Description
No.
Buttons
6
Treble
Press Treble button and use the Volume+/- button to adjust the treble.
7
Snooze
If the alarm is set to buzzer mode, when the alarm goes on, press Snooze to
Dim
Press to select 3 kinds of brightness of the display screen.
Press to set the sleep time: sleep off/10/15/30/45/60/90/120 minutes.
When the time out, the unit will enter sleep mode automatically.
8
9
enter the nap mode, the alarm will go on again 5 minutes later.
Sleep
Number buttons In DAB or FM mode, long press the number buttons 0-9 to save 10
stations directly. To save more, please refer to operations on Page 9.
10
Standby
11
Information
12
Volume+/-
Press to turn on the unit; or turn to standby mode.
In FM or DAB mode, press to check the information of the stations.
Press to adjust the volume to a comfortable level.
In BT mode, press to skip to next or previous track/song.
In FM mode, press to tune the frequency up or down by steps of
0.05MHz; long press to skip to the next or previous available frequency.
13
Next/Previous
14
Stop
Press to stop playback, press
15
Bass
Press Bass button and use Volume+/- buttons to adjust the bass.
16
ID3
While playing MP3 tracks, press to display information
of current track: album, artist, etc.
17
Alarm
18
BT Pair
19
Random
20
MO/ST
to re-start.
In standby status, press to enter time setting interface, it show Time Auto Update,
choose On to update the time automatically when it receives DAB station or FM
RDS signal.
In standby status, press to set the time and alarm 1, alarm 2.
Press once to enter Time setting status, press twice to enter Alarm 1
setting status. Press the third time to enter Alarm 2 setting status.
or
to select contents, then
In Time or Alarm setting status, use
press
to confirm, and the system automatically skip to the next setting status.
When in time setting interface, the screen display the YYYY/MM/DD.
Use the
and then
/ to select the digits of the date, then press
select the 24/12 hour, next to set the Hour/Minute, press
to finish.
When in alarm setting interface, the words “0:00" flash, press
or
to select the digits of the alarm time, press
to confirm. Then select
the alarm options: Daily, Weekdays, Weekends, Once. Next to select
the alarm mode: Buzzer mode, FM mode, USB mode,DAB mode. At last to set
Alarm volume level. When finish setting Alarm 1, you can set Alarm 2.
To cancel the alarm, press ALARM button, then select OFF to cancel.
Press to activate the BT function of the unit to pairing status if
unpaired. In paired status, press to disconnect the devices.
Press to play tracks in a random order, press again to
cancel.
In radio mode, press to switch stereo on if there’s strong reception.
If the reception is weak, you can not turn stereo on.
7
Basic operation
Before you start setting your unit, there are some steps must keep in mind to make setting
operations more smooth and correctly.
IMPORTANT OPERATION STEPS:
1. Press and hold the MENU/INFO button on the front panel or press the MENU
button on remote control to enter setting menu.
2. Rotate the TUNER KNOB on the front panel or press
or
button on remote
control to cycle though the menu contents.
3. Press ENTER (TUNER KNOB) on the front panel or press
button on the
remote control to confirm the selections.
4. If the selections is not the required one, press MENU/INFO button on the front
panel to go back to the previous menu contents (but it is not available in the
process of SETTING TIME).
To set the time
1. In standby mode, press Alarm button on remote control to set the time, the screen
displays: (Or press NEXT button on the front panel in standby mode.)
Time Auto Update
OFF / ON
2. Rotate the TUNER KNOB or press
or
on remote control to select contents:
OFF or ON.
<A> If you choose ON, then pres
on RC to update the time automatically when there
is DAB station reception or FM RDS signal.
<B> If you choose OFF, then press
to enters the interface of manual setting, the
screen displays:
2013-01-01
0:00
on RC to select the time numbers,then press
3. Rotate the TUNER KNOB or press
o
on RC to confirm.
Each time you finish one item setting, the unit will auto-skip to the next item setting.
4. When you have finished the time, press the ALARM button repeatedly to enter Alarm 1 or
Alarm 2 setting.
When you have finished setting the time/date, the words on screen stops flashing.
And now you can make other operations to get a more enjoyable entertainment.
8
DAB operation
Enter DAB mode
Press SOURCE button to switch to DAB mode. The unit starts scanning when turning on
DAB mode, the screen displays a slide bar indicating the progress of scanning, and the
amount of the stations it found. Once finished scanning, the unit plays the first station.
Select stations
1. Rotate the TUNER KNOB or press
or
on RC t o skip to next or previous stations.
2. Press ENTER or
on remote control to activate the station.
Station Scan
Press and hold the MENU/INFO button on the front panel or press MENU button on the
remote control to enter the setting menu, rotate the TUNER KNOB or press
/
on
remote control to select <Full Scan> or <Manual tune>, press ENTER to confirm.
1. If you choose <Full Scan>, it’ll start scanning and search all DAB channels.
2. If you choose <Manual tune>, press the ENTER to cycle through all the channels,
which are numbered from 5A to 13F.
3. Briefly press ENTER can activate the selected stations.
Store station presets
It is possible to store up to 20 of your favorite stations. This will enable you to access your
favorite stations quickly & easily.
1. To store a preset, you must first be listening to the station that you would like to save.
2. Long press PRESET button until the screen displays:
Preset Store
<1: (Empty)>
3. Rotate the TUNER KNOB or press
or
on remote control to
select the number you want to store.
4. To confirm preset, press ENTER on the front panel or
on remote control, the screen
displays: <Preset X stored>.
Note: If any stations have been preset before, the screen will show the station name,
e.g.<BBC Radio4 >.
5. Press the PRESET button to recall a preset, the screen displays:
Preset Recall
<1: (Empty)>
Example:
If you are listening to BBC World which you want to preset in NO.5 station.
a) Tune to the station BBC World you want to store as preset.
b) Long press the PRESET button until the <Preset Store> appears.
c) Rotate the TUNER KNOB to select 5, press ENTER button, now <Preset 5 stored>.
9
INFO mode
Each time you press the INFO button on remote control or MENU/INFO button on the
front panel, the screen will cycle through the following information:
1. RSSI reception
2. Music style— such as <Rock music>
3. Station name — such as <BBC National DAB>
4. Frequency — such as <5A 174.928MHz>
5. Signal error: 25
6. Bit rate — such as <128Kbps/DAB>
7. DLS information
Enter setting menu
Press and hold the MENU/INFO button on the front panel or MENU button on remote
control to enter setting menu, rotate TUNER KNOB to scroll down the menu contents:
<Full scan>→<Manual tune>→<DRC>→<Prune> →<System>
DRC (Dynamic range control)
This causes the radio to reduce the dynamic range of the audio signal. The purpose of
this is to adapt the dynamic range of the audio signal to listened in a noisy environment.
Note: This function is not always available in many DAB stations.
Steps as below:
1. Press and hold MENU/INFO button on the front panel or MENU button on remote
control, rotate TUNER KNOB to find <DRC> setting.
2. Press ENTER button to enter menu contents and choose DRC Off, DRC High or DRC
Low.
3. Press ENTER to confirm the setting.
Prune stations
When the radio has performed a scan in several locations you may find there are some
stored stations that you can no longer receive. This function automatically removes then
from the stored station list.
Steps as below:
1. Press and hold MENU/INFO button, rotate TUNER KNOB to find <Prune> setting.
2. Press ENTER button to enter menu contents and choose YES or NO.
3. Press ENTER to confirm the setting.
System settings
Press and hold MENU/INFO button, rotate TUNER KNOB to find <System> , press
ENTER button to enter setting menu. Rotate TUNER KNOB to scroll down the menu
contents: <Language> ,<Factory reset> and <SW version>.
Language
To select the languages of the unit in this section:
1. Press and hold MENU/INFO button, rotate TUNER KNOB to find <System> setting.
2. Press ENTER button to enter menu contents and find <Language> setting.
3. Press ENTER to choose from <English>, <French>, <Deutsch>, <Nederlands>
and <Espanol> .
4. Select one of the languages above, and press ENTER button to confirm.
10
Factory reset
To reset the unit in this section:
1. Press and hold MENU/INFO button, rotate TUNER KNOB to find <System> setting.
2. Press ENTER button to enter menu contents and find <Factory reset> setting.
3. Press ENTER to reset this unit.
SW Version
To check the SW version of the unit in this section:
1. Press and hold MENU/INFO button, rotate TUNER KNOB to find <System> setting.
2. Press ENTER button to enter menu contents and find <SW Version> setting.
3. Press ENTER to see the SW version of this unit.
FM operation
1. Enter FM mode
Press the SOURCE button to enter the FM mode. (Frequency: 87.5-108.0MHz) Press
MO/ST button on remote control to turn stereo on, if the reception is weak, it can not
turn stereo on.
2. Select stations
Briefly press rotate the TUNER KONB to tune the radio up or down by frequency step
0.05MHz.
Press
or
button on remote control to skip to the next or previous station.
Press NUMBER buttons on remote control to select the stations directly.
3.Store station presets
The steps are the same as in DAB mode, please refer to STORE STATION PRESETS of
DAB.
4. FM RDS information
Each time you press INFO button, the display will cycle through the follow contents:
<Program type>, <Station name>, <Stereo/mono>, <Radio text>, <Frequency>.
The display information is provided by the radio broadcasting stations. Some stations
may not provide.
5. Scan/Audio settings
a) Scan setting
(1) Press and hold MENU/INFO button, rotate TUNER KNOB to find <Scan setting>.
(2) Press ENTER to enter menu contents <Strong stations only>,<All stations>.
(3) Press ENTER button to confirm.
b) Audio setting
(1) Press and hold MENU/INFO button, rotate TUNER KNOB to find <Audio setting>.
(2) Press ENTER to enter menu contents <Forced mono>,<Stereo allowed>.
(3) Press ENTER button to confirm.
11
Bluetooth operation
This unit has included Bluetoth function. So we can enjoy the music with your bluetooth
device like mobile phone, etc.
Pair Operation
1. Press the SOURCE button to enter Bluetooth mode. The indicator light flashes blue.
2. Turn on the bluetooth function on your device (e.g. mobile phone).
3. Place your device in bluetooth search mode and enter the bluetooth searched list.
4. Select LENCO DR-05 BT from the list of found devices.
5. Select OK or YES to pair the unit with your bluetooth device.
6. If prompted, enter 0000 for passkey (for some devices).
7. When successfully paired with your device, the bluetooth indicator lights steadily.
Playback operation
1. Press
button to play or pause the playback.
2. Press
or
button to skip to the previous or next track/song.
3. Press VOL+/- buttons to control the volume level.
4. If you want to disconnect the paired devices, press BT PAIR button to disconnect and
the unit enters the BT pairing status. Then use the phone device to make connection.
To disconnect and pair with another device
a) Turn off the bluetooth function on your device to disconnect. Then the unit will enter
bluetooth pairing status automatically.
b) In this paired status, follow the steps 2-5 of PAIR OPERATION section to pair with the
other device.
Phone call while playing music
1. When playing music through a phone, and a call is coming, music stops automatically.
2. When the call ends, it depends on the setting of your phone whether the current track
will resume playback or not.
Important notice:
1. Some devices, such as an iphone, connect immediately after pairing, some may take
long to connect.
2. The unit can only be connected and playing content from one device at a time.
3. To connect to a different paired device, you have to turn off bluetooth or unpair from
the currently paired device and manually connect to the other device
4. When devices are paired, converting modes and turning again to Bluetooth mode, the
unit will auto-connect with the last paired device. (Bluetooth function on the other
device is always on.)
5. For certain smartphone not auto-connect, user need to go to BT inside smartphone and select
LENCO DR-05 BT to make connection.
12
Aux in operation
You can connect an external device with the unit to play music as a speaker.
1. Connect the external audio player’s audio output with AUX IN socket on the rear panel
of the unit.
2. Press SOURCE button to enter AUX IN mode.
3. Start playback on the external device.
4. Adjust the volume by the unit.
5. Turn off both devices before disconnecting them.
Note:
The unit cannot be controlled by buttons on it. You can just use the VOL+/- buttons to
adjust the volume level. If you cannot hear any sound from the speaker, check the volume
on the external device.
USB operation
USB port can be used to charge the phone/USB music devices. When insert an USB
device, the system will charge the device if the battery power is low in the phone/USB
device.
13
Specifications
Power source
Power consumption
Standby power consumption
FM frequency
FM/DAB presets
Bluetooth range
Bluetooth version
Input jacks
Operation condition
DC12V
20W
<1W
87.5-108.0MHz
20
33 ft. (10m)
CSR V2.1+EDR
USB/3.5mm Aux in
5°-35°/level status
Trouble shooting
For you convenience, we have list some methods to solve some common problems you
may encounter when you use the system. If the problem occurs repeatedly, contact the
nearest maintenance center.
Problems
Causes
Solutions
Power supply doesn’t work.
Power plug is not fully inserted
into the power socket.
Check the connection and
full insert the power plug
into the power socket.
No sound from the speaker.
Weak signal reception;
Volume is not turned up;
No pairing with Bluetooth
device.
Adjust the radio reception
position;
Turn up the volume;
Pair the Bluetooth device.
The screen is blank.
This may occur if the audio
broadcaster changes the label
of a service or remote a label
while tuning the stations.
The sound is weak or of
poor quality; I can hear a
burbling noise on some
stations.
Other devices such as TV may
interfere the radio reception;
The radio reception is too weak.
14
The radio will try to retune
performance a scan.
Move the unit away from
other device and try to reposition the unit to get a
strong radio signal.
Service and support
For information: www.lenco.com
For support: http://lencosupport.zendesk.com
Lenco helpdesk:
Germany
The Netherlands
Belgium
France
0900-1520530
0900-23553626
02-6200115
03-81484280
(Local charges)
(Local charges + 1ct p/min)
(Local charges)
(Local charges)
The helpdesk is accessible from Monday till Friday from 9 AM till 6 PM.
When contacting Lenco, you will always be asked for the model and serial number of your
product. The serial number can be found on the back of the device. Please write down the
serial number below:
Model: DR-05 BT
Serial number:
Lenco offers service and warranty in accordance to European law, which means that in
case of repairs (both during and after the warranty period) you should contact your local
dealer.
Important note: It is not possible to send products that need repairs to Lenco directly.
Important note: If this unit is opened or accessed by a non-official service center in any way,
the warranty expires.
This device is not suitable for professional use. In case of professional use, all warranty
obligations of the manufacturer will be voided.
Notice, statements and information
Lenco is not liable for printing errors in the manual.
The specifications and external appearance of the set are subject to change without prior
notice.
Declaration of Conformity
Products with the CE marking comply with the EMC Directive (2004/108/EC) and the
Low Voltage Directive (2006/95/EC) issued by the Commission of the European
Community.
Hereby, STL Group BV, Ankerkade 20 NL 5928 PL Venlo, declares that this product is in compliance
with the essential requirements and other relevant provisions of Directive 1999/5/EC.
The
declaration
of
conformity
may
be
consulted
at
https://lencosupport.zendesk.com/forums/22413161-CE-Documents
15
This product operates at 2400 - 2483.5 MHz and is designated only to be used inside a normal
household environment. This product is suited for this purpose within all EU counties.
This symbol indicates that the relevant electrical product or battery should not be
disposed of as general household waste in Europe. To ensure the correct waste
treatment of the product and battery, please dispose them in accordance to any
applicable local laws of requirement for disposal of electrical equipment or batteries. In
so doing, you will help to conserve natural resources and improve standards of
environmental protection in treatment and disposal of electrical waste (Waste Electrical
and Electronic Equipment Directive).
®All rights reserved
16
DR-05 BT
®
Retro-Radio mit Bluetooth und DAB+
Benutzerhandbuch
w w w.lenco.com
Inhalt
Warnhinweise ........................................................................................................................2
Bedienelemente .....................................................................................................................4
Fernbedienung........................................................................................................................6
Grundlegende Bedienung ......................................................................................................8
DAB-Betrieb ...........................................................................................................................9
UKW-Betrieb..........................................................................................................................12
Bluetooth-Betrieb ..................................................................................................................13
AUX/USB-Betrieb .................................................................................................................14
Fehlersuche / Technische Daten ..........................................................................................15
Wichtige Sicherheitshinweise
Bitte lesen und verstehen Sie alle weiter unten sowie auf dem Gerät angegebenen
Warnhinweise. Dieses Gerät wurde so konzipiert und gefertigt, dass die Sicherheit von
Personen gewährleistet werden kann.
Benutzen Sie nur eine Stromversorgung, die den Angaben in der Bedienungsanleitung oder
auf dem Gerät entspricht
Vermeiden Sie es, direkte Sonnenstrahlung oder die Nähe von Wärmequellen.
Biegen oder ziehen Sie nicht am Netzkabel übermäßig und treten Sie nicht darauf.
Halten Sie das Gerät und den Netzstecker fern von Wasser.
Öffnen Sie niemals das Gehäuse und achten Sie darauf, dass keine Fremdgegenstände,
wie z. B. Münzen, Nadeln etc., in das Gerät gelangen.
Ziehen Sie den Netzstecker aus der Steckdose heraus, wenn Sie das Gerät über einen
längeren Zeitraum nicht verwenden.
1
Um ein Höchstmaß an Freude und Leistung von dem Produkt zu erhalten, und um sich mit
allen Funktionen vertraut zu machen, lesen Sie sich bitte diese Anleitung sorgfältig durch,
bevor Sie das Gerät in Betrieb nehmen. Dadurch wird gewährleistet, dass Sie Jahre
störungsfreier Leistung und Hörgenuss genießen können.
ACHTUNG
STROMSCHLAGGEFAHR
NICHT ÖFFNEN!
Achtung:
Um das Risiko eines Stromschlags zu verringern, zerlegen das Produkt nicht und setzen Sie
es niemals Regen oder Feuchtigkeit aus. Im Inneren des Geräts sind keine Teile vorhanden
die vom Benutzer gewartet werden können. Überlassen Sie Wartungsarbeiten immer
qualifiziertem Fachpersonal.
Bedeutung der Symbole:
Das Dreieckszeichen mit Blitzsymbol verweist auf gefährliche Spannungen im Gerätegehäuse,
die so hoch sein können, dass sie für Personen eine Gefahr von Stromschlägen bilden.
Das Dreieckszeichen mit Ausrufungszeichen verweist auf wichtige Funktions- und
Wartungshinweise (Reparatur) in der dem Gerät beigelegten Bedienungsanleitung.
Warnhinweise
1. Alle Sicherheits- und Bedienungshinweise müssen vor der Inbetriebnahme des
Geräts durchgelesen werden.
2. Anleitung aufbewahren - Die Sicherheitshinweise und die Bedienungsanleitung
müssen für den späteren Gebrauch aufbewahrt werden.
3. Warnhinweise beachten - Alle Warnungen auf dem Gerät und in der
Bedienungsanleitung müssen beachtet werden.
4. Befolgen Sie die Anweisungen - Alle Bedienungsanweisungen müssen befolgt
werden.
5. Benutzen Sie dieses Gerät nicht in der Nähe von Wasser - Das Gerät darf nicht in
der Nähe von Wasser oder Feuchtigkeit verwendet werden - zum Beispiel, in einem
feuchten Keller oder in der Nähe eines Schwimmbeckens.
6. Nur mit einem leicht angefeuchteten Tuch reinigen.
7. Blockieren Sie keine der Lüftungsöffnungen.
Stellen Sie das Gerät entsprechend den Anweisungen des Herstellers auf.
8. Stellen Sie das Gerät nicht in der Nähe von Hitzequellen, wie z. B. Heizungen,
Herden oder anderen Geräten die Hitze produzieren (z. B. Verstärker) auf.
9. Wenn Ihr Gerät über einen polarisierten oder geerdeten Stecker verfügt, machen
Sie auf keinen Fall diese Sicherheitsfunktion unbrauchbar. Ein polarisierter Stecker
hat zwei Flügel, bei denen einer breiter als der andere ist. Ein Erdungsflügel. Der
breite und der Erdungsflügel sind eingebaute Sicherheitsvorrichtungen. Wenn der
Netzstecker Ihres Geräts nicht in Ihre Steckdose passt, wenden Sie sich bitte an einen
ausgebildeten Elektriker.
10. Schützen Sie das Netzkabel vor Druckeinwirkung, insbesondere am Stecker,
Steckdosen oder am Ausgangspunkts des Geräts.
11. Verwenden Sie lediglich vom Hersteller angegebenes Zubehör.
12. Das Gerät darf nur dann mit Wagen, Gestellen, Stativen, Halterungen oder
Tischen verwendet werden, wenn diese vom Hersteller entsprechend angegeben
wurden oder zusammen mit dem Gerät verkauft wurden. Wenn ein Wagen
benutzt wird, muss darauf geachtet werden, dass das Gerät nicht zusammen mit
dem Wagen umkippt und Verletzungen verursacht.
13. Ziehen Sie bei Gewittern oder bei längerer Nichtbenutzung den Netzstecker aus
der Steckdose.
14. Wenden Sie sich im Wartungsfall nur an ausgebildetes Wartungspersonal. Das
Gerät sollte in Wartung gegeben werden, nachdem es in irgendeiner Weise
2
beschädigt wurde, wie z.B. bei Beschädigung des Netzkabels, nachdem Flüssigkeit
über das Gerät gegossen wurde oder Gegenstände in das Gerät gelangt sind, oder
Regen bzw. Feuchtigkeit ausgesetzt wurde.
15. Bitte stellen Sie das Gerät an einem gut belüfteten Ort auf.
16. Die enthaltenen Wartungsanweisungen sind nur für ausgebildetes Fachpersonal
gedacht. Um das Risiko eines Stromschlags zu verringern, führen Sie keine
Reparaturen eigenhändig aus, es sei denn, sie sind in der Bedienungsanleitung
angegeben, und Sie sind dafür qualifiziert.
17. Der NETZSTECKER dient dazu das Gerät vom Strom zu trennen und muss
deshalb jederzeit leicht zugänglich bleiben.
18. Dieses Gerät ist ein Gerät der Klasse II bzw. ein doppelt isoliertes Elektrogerät.
Es wurde in einer solchen Weise konzipiert, dass eine Sicherheitsverbindung zur
elektrischen Erde nicht erforderlich ist.
19.-Das Dreieckszeichen mit Blitzsymbol verweist auf gefährliche Spannungen im
Gerätegehäuse, die so hoch sein können, dass sie eine Gefahr von Stromschlägen
bilden.
- Um das Risiko eines Stromschlags zu vermeiden, entfernen Sie nicht die
Abdeckung (oder Rückseite). Im Inneren des Geräts befinden sich keine vom
Anwender zu wartenden Teile. Wenden Sie sich bei Bedarf an entsprechend
ausgebildetes Wartungspersonal.
- Das Dreieckszeichen mit Ausrufungszeichen verweist auf wichtige Funktions- und
Wartungshinweise in der dem Gerät beigelegten Bedienungsanleitung.
20. Unsichtbare Laserstrahlung bei Öffnung des Geräts oder entsichertem
Gehäuseverschluss. Vermeiden Sie Kontakt mit dem Laserstrahl.
21. Die Batterien dürfen niemals starker Hitze, wie z. B. Sonnenlicht, Feuer o. ä.
ausgesetzt werden.
22. Dieses Gerät darf keinen Wassertropfen und -spritzern ausgesetzt werden.
Gegenstände, die mit Flüssigkeiten gefüllt sind, sollten nicht auf das Gerät gestellt
werden.
23. Um Feuer und elektrischen Schlägen vorzubeugen, vermeiden Sie es das Gerät
Regen oder Feuchtigkeit auszusetzen.
24. Sachgemäße Entsorgung dieses Produkts: Dieses Zeichen gibt an, dass
dieses Produkt in der gesamten EU nicht mit dem Hausmüll entsorgt werden darf.
Um mögliche Schäden für die Umwelt oder die menschliche Gesundheit durch
unkontrollierte Abfallentsorgung zu vermeiden, ist es wichtig verantwortungsbewusst
zu recyceln, um eine nachhaltige Wiederverwertung von Rohstoffressourcen zu
fördern . Geben Sie Altgeräte bei Sammelstellen ab oder wenden Sie sich an den
Händler bei dem das Gerät gekauft wurde. Dort wird das Gerät dann auf
umweltverträgliche Weise entsorgt..
ERP II-Hinweis
Energieverbrauch - Dieses Produkt entspricht der Richtlinie für ökologisches Design
der Europäischen Kommission und ihren Durchführungsverordnungen. Nach ca.15
Minuten ohne jegliche Eingabe (außer im Radiomodus), geht das System automatisch
in den Bereitschaftsmodus. Gehen Sie entsprechend den Angaben in der
Bedienungsanleitung vor, um den Betrieb wieder aufzunehmen.
3
Beschreibung der Bedienelemente
Vorderansicht
9 10
VOL
TUNER / ENTER/ BT PAIR
SOURCE
STANDBY
TREBLE
INFO/MENU/
BASS
PRESET/
8
Nr Bedienelement
1 Bereitschaft
2 Höhen
12
SCAN/
11
Beschreibung
Betätigen Sie diese Taste, Halten Sie die Taste gedrückt, um das
Gerät in den Bereitschaftsmodus zu versetzen.
Benutzen Sie die Tasten OBEN oder UNTEN, um die
Höheneinstellung aufzurufen und verwenden Sie den Lautstärkeregler
innerhalb von 3 Sekunden zum Einstellen der Höhen, um einen
lebendigen Klangeffekt zu erhalten.
3 Bässe
Benutzen Sie Tasten OBEN und UNTEN, um die Tiefeneinstellung
aufzurufen und verwenden Sie dann den Lautstärkeregler innerhalb
von 3 Sekunden, um die Bässe einzustellen und einen lebendigen
Klangeffekt zu erhalten.
4 Lautstärkeregler
Stellen Sie die Lautstärke auf ein angemessenes Maß.
5 Bildschirm
Anzeige der Eingangsfrequenz und Informationen
zur Wiedergabe.
Zeigt den Status an.
6 Bluetooth-Anzeige
7 Fernbedienungssensor
8
Frequenz / Eingabe /
Bluetooth-Verbindung
9 Eingangssignal
Menü/
10
Informationen
Vor
11
Zurück
Suchen
Senderspeicher
12
Wiedergabe / Pause
Richten Sie die Fernbedienun g auf diesen Sensor.
Betätigen Sie die Taste im DAB-Modus, um zum nächsten oder
vorigen Sender zu springen.
Betätigen Sie die Taste im UKW-Modus zum Einstellen der
Frequenz nach oben oder unten in 0,05-MHz-Schritten.
Betätigen Sie im Menü ENTER, um die Auswahl zu bestätigen.
Wenn der buzzer Alarm geht, drücken Sie ENTER, um den Alarm zu
stoppen oder drehen Sie den Regler, um den Tuner-Modus zu gelangen
Nickerchen, wird der Alarm auf 5 Minuten spater gehen.
Wenn Sie bereits verbundene Geräte trennen möchten, betätigen
Sie die BT PAIR-Taste. Benutzen Sie dann Ihr Mobilgerät, um die
Verbindung wiederherzustellen to stop playing, press to play from
beginning.
Benutzen Sie diese Taste, um das Eingangssignal zu wählen: UKW,
USB, Bluetooth (BT), AUX, DAB.
Halten Sie diese Taste im DAB- oder UKW-Modus gedrückt, um das
Menü aufzurufen.Betätigen Sie die Taste im DAB-Modus, um durch
Informationen zum Sender zu gehen.
Betätigen Sie diese Taste im UKW-Modus wiederholt, um durch die
Rundfunkinformationen zu blättern.
Im Standby-Modus, drücken Sie NEXT-Taste, um Uhrzeit und
Weckzeit Einstellung.
In BT Modus drücken, um zum n?chsten Titel zu springen.
In BT-Modus drücken, um zum vorherigen Titel zu springen.
Im UKW-Modus drücken, um die Stationen zu scannen.
Betätigen Sie diese Taste im Radiomodus als Senderspeichertaste,
um Ihre Lieblingssender zu speichern.
Betätigen Sie die Taste im Bluetooth-Modus, um die Wiedergabe
vorübergehend anzuhalten. Betätigen Sie die
Taste erneut, um die Wiedergabe fortzusetzen.
4
Rückseitenansicht
DR-05 BT Black
Retro Radio Bluetooth® and DAB+
Channel Block:DAB+(band lll) 5A-13F
12
1.67A
Power Consumption: 20W
Production Date:
Made in China
S/N:
USB
AUX IN
DR-05 BT White
Retro Radio Bluetooth® and DAB+
Channel Block:DAB+(band lll) 5A-13F
12
1.67A
Power Consumption: 20W
Production Date:
Made in China
S/N:
USB
12
AUX IN
15
13 14
Nr.
Bedienelemente
Beschreibung
13
UKW-Antenne
14
USB-Anschluss
15
Aux-Eingang
16
Stromanschluss
Ziehen Sie die UKW-Antenne für einen optimalen
Radioempfang vollständig heraus.
Dieser Anschluss lädt auch Ihr USB-Gerät auf, wenn es über
einen geringen Batteriestand verfügt.
Mit dem 3,5-mm-AUX-Audiokabel können Sie externe
Audiogeräte (DVD-Player, Computer, Telefone etc.)
anschließen.
Im AUX-Modus funktioniert das Gerät als Lautsprecher, und Sie
können nur die Lautstärke des Geräts verändern.
Stecken Sie den Netzadapter in eine Steckdose und schalten Sie das
Gerät ein.
5
Beschreibung der Fernbedienung
STANDBY
MUTE
10
SOURCE
MENU
INFO
11
12
13
PRESET
STOP
14
15
16
17
18
ID3
TREBLE
SNOOZE/DIM
BASS
SLEEP
BT PAIR
ALARM
8
9
1
2
3
4
5
6
7
8
9
0
MO/ST
RANDOM
19
20
DR-05 BT
Nr.
1
2
Tasten
Ton aus
Eingangssignal
3
Menü
4
Wiedergabe / Pause
5
Senderspeicher
6
Höhen
7
Schlummerfunktion
(nur in Summer-Modus)
8
Dimmer
Einschlafmodus
9
Zifferntasten
10
Bereitschaft
11
Informationen
12
Lautstärke +/-
13
Vor
Zurück
/
Beschreibung
Betätigen Sie diese Taste, um den Ton auszuschalten.
Benutzen Sie diese Taste, um das Eingangssignal zu wählen:
UKW, USB, Bluetooth (BT), AUX.
Benutzen Sie diese Taste, um das Einstellungsmenü aufzurufen.
Betätigen Sie die Taste im Bluetooth-Modus, um die Wiedergabe
vorübergehend anzuhalten. Betätigen Sie die Taste erneut, um
die Wiedergabe fortzusetzen.
In FM mode, press to scan the stations.
Wenn der Alarm geht, drücken, um den Alarm zu stoppen.
Benutzen Sie diese Taste im UKW- oder DAB-Modus, um Ihre
Lieblingssender zu speichern.
Betätigen Sie die TREBLE-Taste und verwenden Sie dann die
Tasten VOLUME +/-, um die Höhen einzustellen
Wenn der Alarm aktiviert wird, können Sie die SNOOZE-Taste
betätige, um den Alarm vorübergehend zu stoppen.
In allen Betriebsarten können Sie diese Taste benutzen, um die
Bildschirmhelligkeit auf eine von 3 Stufen einzustellen.
Benutzen Sie diese Taste, um den Einschlafmodus einzustellen:
Aus / 10 / 15 / 30 / 45 / 60 / 90 / 120 Minuten.
Wenn die Zeit abgelaufen ist, wird das Gerät automatisch
ausgeschaltet.
Verwenden Sie die Zifferntasten zur Auswahl von Titeln und Sendern.
Betätigen Sie diese Taste, um das Gerät einzuschalten bzw.
wieder in den Bereitschaftsmodus zu schalten.
Betätigen Sie diese Taste im UKW- oder DAB-Modus, um
Senderinformationen einzusehen.
Benutzen Sie diese Tasten, um die Lautstärke auf ein
angenehmes Niveau zu stellen.
Halten Sie die Tasten gedrückt, um den Schnellvorlauf bzw.
Schnellrücklauf durch den aktuellen Titel zu starten.
Betätigen Sie die Tasten im Bluetooth-Modus, um zum nächsten
bzw. vorigen Titel zu springen.
Betätigen Sie diese Tasten im UKW-Modus, um die Frequenz
Schritten von 0,05 MHz zu verändern. Halten Sie eine der
Tasten gedrückt, um zur nächsten bzw. vorigen verfügbaren
Frequenz zu springen.
6
14
Stopp
Benutzen Sie diese Taste um die Wiedergabe zu beenden. Betätigen
Sie die Taste
, um die Wiedergabe vom Anfang des aktuellen Titels
erneut zu starten.
15
Bässe
Betätigen Sie die BASS-Taste und verwenden Sie die Tasten VOLUME
+/-, um die Bässe einzustellen.
16
ID3
17
Alarm
18
Bluetooth-Verbindung
19
Zufallswiedergabe
Betätigen Sie diese Taste während der Wiedergabe von MP3-Titel, um
Informationen zum aktuellen Titel anzuzeigen: Album, Interpret etc.
Betätigen Sie diese Taste im Bereitschaftsmodus, um die Uhrzeit
einzustellen. Es erscheint dann "Time Auto Update" in der
DAB-Modus und FM RDS automatisch einzustellen.
Betätigen Sie diese Taste im Bereitschaftsmodus, um die Uhrzeit
und Alarm 1, Alarm 2 einzustellen.
Betätigen Sie die Taste einmal, um die Uhrzeit einzustellen.
Betätigen Sie die Taste ein zweites Mal, um Alarm 1
einzustellen. Betätigen Sie sie ein drittes Mal, um Alarm 2
einzustellen.
Sobald Sie sich im Einstellungmodus befinden können Sie die
und
benutzen, um Inhalte zu wählen und dann
Tasten
mit
bestätigen. Das System geht dann automatisch zur
nächsten Einstellung.
Im Einstellungsmodus wird das Datum im Format JJJJ/MM/TT
angezeigt.
Verwenden Sie die Tasten
, um das Datum einzustellen
. Sie können dann den
und betätigen Sie
24/12-Stundenmodus einstellen. Danach können Sie die
Stunden / Minuten einstellen. Betätigen Sie
, um Ihre
Einstellung zu bestätigen und zu beenden.
Zur Einstellung des Alarms erscheint "0:00" blinkend in der
Anzeige. Benutzen Sie die Tasten
und
, um die Weckzeit
| zur Bestätigung.Wählen Sie
einzustellen. Betätigen Sie
dann die Alarmoption: Täglich, Wochentage, Wochenenden,
einmalig. Danach können Sie den Alarmmodus wählen: Summer,
FM, USB,DAB. Zuletzt können Sie die Alarmlautstärke einstellen.
Wenn Sie mit der Einstellung des Weckalarms 1 fertig sind,
können Sie mit der Einstellung des Weckalarms 2 fortfahren. Um
den Einstellungsmodus zu beenden, betätigen Sie die
ALARM-Taste und wählen Sie OFF.
Betätigen Sie diese Taste, um die Bluetooth-Funktion des
Geräts zu aktivieren
Benutzen Sie die Taste im Verbindungsmodus, um die Geräte wieder
zu trennen.
Betätigen Sie diese Taste um die Titel in zufälliger Reihenfolge
abzuspielen. Betätigen Sie die Taste erneut, um die Zufallswiedergabe
abzubrechen.
20
MO/ST
Betätigen Sie diese Taste im Radiomodus, um Stereo einzuschalten,
wenn ein genügend starkes Signal vorhanden ist.
Wenn der Empfang zu schwach ist, können Sie nicht auf Stereo
schalten.
7
Grundlegende Bedienung
Bevor Sie mit der Einstellung Ihres Geräts beginnen, sind bestimmte Schritte erforderlich, um
den Vorgang so einfach und problemlos wie möglich zu halten.
WICHTIG BEDIENSCHRITTE:
1. Halten Sie die MENU/INFO-Taste auf der Gerätevorderseite gedrückt oder betätigen Sie die
MENU-Taste auf der Fernbedienung, um das Einstellungsmenü aufzurufen.
2. Drehen Sie am FREQUENZDREHKNOPF auf der Gerätevorderseite oder benutzen Sie die
und
Tasten
auf der Fernbedienung zur Menüauswahl.
3. Betätigen Sie ENTER (FREQUENZDREHKNOPF) auf der Gerätevorderseite oder betätigen
Sie die Taste
auf der Fernbedienung, um die Auswahl zu bestätigen.
4. Wenn die Auswahl inkorrekt ist, können Sie die MENU/INFO-Taste auf der
Gerätevorderseite betätigen, um zurück zum vorigen Menüinhalt zu gelangen (diese Funktion
ist nicht bei der Uhrzeiteinstellung verfügbar).
Einstellen der Uhrzeit
1. Betätigen Sie im Bereitschaftsmodus die ALARM-Taste auf der Fernbedienung, um die
Uhrzeit einzustellen. Es erscheint die folgende Bildschirmanzeige:
Time Auto Update
OFF / ON
2. Drehen Sie am FREQUENZDREHKNOPF oder benutzen Sie die Tasten
der Fernbedienung zur Auswahl von:
und
auf
OFF oder ON.
<A> Wenn Sie ON wählen, betätigen Sie
, um zu bestätigen, dass das Gerät überTIME AUTO
UPDATE eingestellt wird.
<B> Wenn Sie OFF wählen, betätigen Sie
und das Gerät geht zur manuellen Einstellung
über. In der Anzeige erscheint:
2013-01-01
0:00
3. Drehen Sie am FREQUENZDREHKNOPF oder benutzen Sie die Tasten
Uhrzeit einzugeben. Betätigen Sie die Taste
und
, um die
zur Bestätigung.
Mit jedem fertig eingestelltem Element, geht das Gerät zum nächsten.
4. Wenn Sie mit der Uhrzeiteinstellung fertig sind, drücken Sie auf ALARM, um den Alarm 1
und Alarm 2 über.
Wenn Sie mit der Einstellung von Uhrzeit / Datum fertig sind, hört die Anzeige auf zu
blinken.
Sie können dann weitere Einstellungen vornehmen, um das Gerät Ihren Wünschen
anzupassen.
8
DAB-Betrieb
Aufrufen des DAB-Modus
Betätigen Sie die SOURCE-Taste, um in den DAB-Modus zu wechseln. Das Gerät beginnt
damit eine Sendersuche zu starten, wenn Sie den DAB-Modus einschalten. In der Anzeige
erscheint ein Fortschrittsbalken und die Anzahl gefundener Sender. Sobald der Suchvorgang
abgeschlossen ist, startet das Gerät die Wiedergabe des ersten Senders.
Senderauswahl
1. Drehen Sie am FREQUENZDREHKNOPF oder benutzen Sie die Tasten
und
zum nächsten oder vorigen Sender zu springen.
2. Betätigen Sie ENTER oder
auf der Fernbedienung, um den Sender aufzurufen.
, um
Sendersuche
Halten Sie die MENU/INFO-Taste auf der Gerätevorderseite gedrückt oder betätigen Sie die
MENU-Taste auf der Fernbedienung, um das Einstellungsmenü aufzurufen. Drehen Sie dann
am FREQUENZDREHKNOPF oder benutzen Sie die Tasten
auf der Fernbedienung
zur Auswahl von <Full Scan> / <Manual tune>. Betätigen Sie ENTER zur Bestätigung.
1. Wenn Sie <Full Scan> wählen, startet das Gerät eine Sendersuche durch alle DAB-Kanäle.
2. Wenn Sie <Manual tune> wählen, betätigen Sie ENTER zur Auswahl eines Kanals 5A bis
13F.
3. Mit ENTER können dann den gewünschten Sender wählen.
Speichern von Sendern
Sie können bis zu 20 Ihrer Lieblingssender im Senderspeicher ablegen. Dies ermöglicht es
Ihnen auf Ihre Lieblingssender schnell und einfach zuzugreifen.
Lange drücken Sie die Zifferntasten 0-9 nur sparen 10 Stationen nur, mehr zu sparen,
entnehmen Sie bitte den unten Operationen.
1. Um einen Sender zu speichern, müssen Sie zuerst auf den Sender, den Sie speichern
möchten, zugreifen.
2. Halten Sie die PRESET-Taste solange gedrückt, bis folgende Anzeige erscheint:
Preset Store
<1: (Empty)>
3. Drehen Sie am FREQUENZDREHKNOPF oder benutzen Sie die Tasten
und
auf
der Fernbedienung zur Auswahl der Speicherplatznummer, unter der Sie den Sender
speichern möchten.
4. Zur Bestätigung des Senders betätigen Sie ENTER auf der Gerätevorderseite oder
auf
der Fernbedienung. Auf dem Bildschirm erscheint die Meldung: <Preset X stored>.
Hinweis: Senderspeicher, die bereits belegt sind, werden auf die folgende Weise angezeigt: z.
B. <BBC Radio4 3>.
5. Betätigen Sie die PRESET-Taste, um einen gespeicherten Sender aufzurufen. In der
Anzeige erscheint:
Preset Recall
<1: (Empty)>
9
Beispiel:
Sie hören BBC World und Sie wollen diesen Sender auf dem Senderspeicher 5 speichern.
a) Stellen Sie den Sender BBC World ein, den Sie speichern wollen.
b) Halten Sie die PRESET-Taste solange gedrückt, bis <Preset Store> erscheint.
c) Drehen Sie am FREQUENZDREHKNOPF, um 5 auszuwählen. Betätigen Sie die
ENTER-Taste und <PRESET 5 stored> erscheint.
INFO-Modus
Jedes Mal, wenn Sie die INFO-Taste auf der Fernbedienung oder die MENU/INFO-Taste auf
der Gerätevorderseite betätigen, zeigt der Bildschirm nacheinander die folgenden
Informationen an:
1. RSSI Signalstärke
2. Musikstil - wie z. B. <Rock>
3. Sendername - wie z. B. <BBC National DAB>
4. Frequenz - wie z. B. <5A 174.928MHz>
5. Signalfehler: 25
6. Bitrate - wie z. B. <128Kbps/DAB>
7. DLS
Aufrufen des Einstellungsmenüs
Halten Sie die MENU/INFO-Taste auf der Gerätevorderseite oder die MENU-Taste auf der
Fernbedienung
gedrückt,
um
das
Einstellungsmenü
aufzurufen.
Drehen
Sie
am
FREQUENZDREHKNOPF zur Menüauswahl: <Full Scan> → <Manual tune> → <DRC> →
<Prune> → <System>
Dynamikbereichsteuerung (DRC)
Mit dieser Funktion kann der Dynamikbereich des Audiosignals reduziert werden. Der Zweck
davon ist es, den Dynamischbereich des Audiosignals auf eine laute Umgebung anzupassen.
Hinweis: Diese Funktion steht nicht bei vielen DAB-Sendern zur Verfügung.
Gehen Sie wie folgt vor:
1. Halten Sie die MENU/INFO-Taste auf der Gerätevorderseite oder die MENU-Taste auf der
Fernbedienung gedrückt. Drehen Sie dann am FREQUENZDREHKNOPF zur Auswahl von
<DRC>.
2. Betätigen Sie die ENTER-Taste zur Anzeige des Menüinhalts und wählen Sie DRC Off,
DRC High oder DRC Low.
3. Betätigen Sie ENTER, um die Einstellung zu bestätigen.
Nichtaktive Sender
Wenn das Radio eine Sendersuche an verschiedenen Standorten durchgeführt hat, werden
Sie feststellen, dass bestimmte gespeicherte Sender nicht mehr empfangen werden können.
Diese Funktion entfernt diese Sender automatisch aus der Senderliste.
Gehen Sie wie folgt vor:
1. Halten Sie die MENU/INFO-Taste gedrückt und drehen Sie am FREQUENZDREHKNOPF
10
zur Auswahl von <Prune>.
2. Betätigen Sie die ENTER-Taste zur Anzeige des Menüinhalts und wählen Sie YES oder NO.
3. Betätigen Sie ENTER, um die Einstellung zu bestätigen.
Systemeinstellungen
Halten Sie die MENU/INFO-Taste gedrückt und drehen Sie am FREQUENZDREHKNOPF zur
Auswahl von <System> Betätigen Sie dann die ENTER-Taste, um das Einstellungsmenü
aufzurufen. Drehen Sie am FREQUENZDREHKNOPF zur Auswahl des Menüinhalts:
<Language>, <Factory Reset> und <SW version>.
Sprache
Auswahl der Sprache des Geräts:
1. Halten Sie die MENU/INFO-Taste gedrückt und drehen Sie am FREQUENZDREHKNOPF
zur Auswahl von <System>.
2. Betätigen Sie die ENTER-Taste zur Anzeige des Menüs und wählen Sie <Language>.
3. Betätigen SieENTER und wählen Sie <English>, <French>, <Deutsch>, <Nederlands>
oder <Espanol>.
4. Wählen Sie eine der oben genannten Sprachen und betätigen Sie die ENTER-Taste zur
Bestätigung.
Systemreset
Zurücksetzen des Geräts:
1. Halten Sie die MENU/INFO-Taste gedrückt und drehen Sie am FREQUENZDREHKNOPF
zur Auswahl von <System>.
2. Betätigen Sie die ENTER-Taste zur Anzeige des Menüs und wählen Sie <Factory reset>.
3. Betätigen Sie ENTER, um das Gerät zurückzusetzen.
SW-Version
Anzeigen der Software-Version des Geräts:
1. Halten Sie die MENU/INFO-Taste gedrückt und drehen Sie am FREQUENZDREHKNOPF
zur Auswahl von <System>.
2. Betätigen Sie die ENTER-Taste zur Anzeige des Menüs und wählen Sie <SW Version>.
3. Betätigen Sie ENTER, um die SW-Version dieses Geräts einzusehen.
11
UKW-Radiobetrieb
1. Aufrufen des UKW-Radiomodus
Betätigen Sie die SOURCE-Taste, um den UKW-Radiomodus aufzurufen. (Frequenzbereich:
87,5 - 108,0 MHz) Betätigen Sie die MO/ST-Taste auf der Fernbedienung, um den
Stereo-Modus einzuschalten. Wenn der Radioempfang schwach ist, kann der Stereo-Modus
nicht aktiviert werden.
2. Senderauswahl
Drehen Sie am FREQUENZDREHKNOPF, um die Radiofrequenz nach oben oder unten in
Schritten von 0,05 MHz zu verändern.
Benutzen Sie die Tasten
und
auf der Fernbedienung, um zum nächsten bzw. vorigen
Sender zu springen.
Betätigen Sie die ZIFFERNTASTEN auf der Fernbedienung, um einen Sender direkt
auszuwählen.
3. Speichern von Sendern
Sender werden auf die gleiche Weise, wie im DAB-Modus gespeichert. Siehe Abschnitt
Speichern von Sendern unter DAB.
4. UKW-RDS-Informationen
Jedes Mal, wenn Sie die INFO-Taste betätigen zeigt der Bildschirm nacheinander die
folgenden Inhalte an: <Program type>, <Station name>, <Stereo/mono>, <Radio text>,
<Frequency>.
Diese Informationsanzeige wird von den Rundfunkanstalten zur Verfügung gestellt. Bestimmte
Sender verfügen nicht über diese Dienste.
5. Such/Audio-Einstellungen
a) Such-Einstellung
(1) Halten Sie die MENU/INFO-Taste gedrückt und drehen Sie am FREQUENZDREHKNOPF
zur Auswahl von <Scan setting>.
(2) Betätigen Sie ENTER,um das Menü aufzurufen: <Strong stations only>,<All stations>.
(3) Betätigen Sie die ENTER-Taste zur Bestätigung.
b) Audio-Einstellung
(1) Halten Sie die MENU/INFO-Taste gedrückt und drehen Sie am FREQUENZDREHKNOPF
zur Auswahl von <Audio setting>.
(2) Betätigen Sie ENTER,um das Menü aufzurufen: <Forced mono>, <Stereo allowed>.
(3) Betätigen Sie die ENTER-Taste zur Bestätigung.
12
Bluetooth®-Betrieb
Dieses Gerät ist mit einer Bluetooth-Funktion ausgestattet. Damit können Sie Musik
von Ihrem Bluetooth-Gerät, wie z. B. einem Handy, über das System wiedergeben.
Verbindungsaufbau
1. Betätigen Sie die SOURCE-Taste, um den Bluetooth-Modus aufzurufen. Die
Kontrolllampe blinkt blau auf.
2. Schalten Sie die Bluetooth-Funktion Ihres Bluetooth-Geräts (z. B. Ihres
Mobiltelefons) ein.
3. Schalten Sie das Gerät in den Bluetooth-Suchmodus und gehen Sie auf die
Bluetooth-Suchliste.
4. Wählen Sie "LENCO DR-05 BT" aus der Liste der gefundenen Geräte heraus.
5. Wählen Sie OK bzw. JA, um das System mit dem Bluetooth-Gerät zu verbinden.
6. Wenn Sie dazu aufgefordert werden, geben Sie den Schlüssel 0000 (bei einigen
Geräten) ein.
7. Wenn der Verbindungsaufbau erfolgreich war, hört die Bluetooth-Anzeige auf zu
blinken, leuchtet aber weiter auf.
Wiedergabefunktionen
1. Betätigen Sie die
anzuhalten.
2. Benutzen Sie die
springen.
3. Benutzen Sie die
4. Wenn Sie bereits
PAIR-Taste.
Taste
Tasten
, um die Wiedergabe zu starten bzw. vorübergehend
und
, um zum vorigen bzw. nächsten Titel zu
Tasten VOL + / -, um die Lautstärke zu einzustellen.
verbundene Geräte trennen möchten, betätigen Sie die BT
Verbindung trennen und mit einem anderen Gerät herstellen
a) Schalten Sie die Bluetooth-Funktion auf Ihrem Gerät aus, um es zu trennen. Das
System geht dann automatisch in den Bluetooth-Verbindungsmodus.
b) Befolgen Sie in diesem Zustand die Schritte 2 - 5 im Abschnitt
"Verbindungsaufbau", um die Verbindung mit dem anderen Gerät herzustellen.
Anrufe während der Musikwiedergabe
1. Bei der Wiedergabe von Musik über ein Mobiltelefon wird die Wiedergabe
automatisch gestoppt, wenn ein Anruf eingeht.
2. Wenn das Gespräch beendet, hängt es von den Einstellungen Ihres Mobiltelefons
ab, ob die Wiedergabe des aktuellen Titels fortgesetzt wird oder nicht.
Wichtige Hinweise
1. Bestimmte Geräte, wie z. B. ein iPhone, stellen sofortige Verbindungen auf. Bei
anderen Geräten kann ein Verbindungsaufbau u. U. wesentlich länger dauern.
2. Das System kann zur gleichen Zeit nur an ein Gerät angeschlossen werden. Die
Wiedergabe von einem zweiten Gerät ist also nicht möglich.
3. Um das System mit einem anderen Gerät zu verbinden, müssen Sie die
Bluetooth-Funktion deaktivieren oder die Verbindung abbrechen und mit dem
anderen Gerät eine neue Verbindung herstellen.
4. Wenn die Geräte gekoppelt sind, Umwandlung Modi und wandte sich dann
wieder auf Bluetooth-Modus, wird das Gerät mit dem zuletzt gekoppelten
Gerät automatisch eine Verbindung. (Bluetooth-Funktion auf dem anderen Gerat
ä ist immer an.)
5. Für einige Smartphone nicht auto-connect, müssen Benutzer
nach innen zu gehen, um BT Smartphone und w?hlen LENCO DR-05 BT Verbindung herzustellen.
13
Aux-Betrieb
Sie können ein externes Gerät an dem System anschließen, um es als
Wiedergabelautsprecher zu benutzen.
1. Verbinden Sie das externe Audiogerät an dem AUX-Eingang auf der Rückseite des
Systems.
2. Betätigen Sie die SOURCE-Taste, um in den AUX-Modus zu gelangen.
3. Starten Sie die Wiedergabe auf dem externen Audiogerät.
4. Stellen Sie die Lautstärke des Geräts ein.
5. Schalten Sie beide Geräte aus, bevor Sie sie voneinander trennen.
Hinweis:
Das externe Audiogerät kann nicht durch Tasteneingaben gesteuert werden. Sie
können die Tasten VOL + / - benutzen, um die Lautstärke einzustellen. Wenn Sie
keinen Ton aus dem Lautsprecher hören können, überprüfen Sie bitte die Lautstärke
am externen Gerät.
USB-Betrieb
Über den USB-Anschluss lassen sich Mobiltelefone und USB-Geräte aufladen.
Wenn Sie ein USB-Gerät anschließen, wird es vom System aufgeladen, wenn der
Akku leer ist.
14
Technische Daten
Stromversorgung
DC12V
Stromverbrauch
20W
Stromverbrauch in Bereitschaft
UKW-Frequenz
<1W
87.5-108.0MHz
UKW/DAB-Senderspeicher
Bluetooth-Reichweite
Bluetooth-Version
20
33 ft. (10m)
CSR V2.1+EDR
Eingangsanschlüsse
USB / 3,5 mm Aux
Betriebszustand
5° - 35° / Level-Status
Fehlerbehebung
Um es einfacher für Sie zu machen, haben wir verschiedene Methoden zur
Behebung allgemeiner Probleme, aufgelistet. Wenn Ihr Problem wiederholt auftritt,
wenden Sie sich an den nächsten Kundendienst.
Probleme
Stromversorgung
funktioniert nicht.
Ursachen
Der Netzstecker wurde nicht
vollständig in die Steckdose
gesteckt.
Kein Tonausgabe über die Schwacher Empfang,
Lautsprecher
Lautstärke nicht aufgedreht
.Keine Verbindung mit
Bluetooth-Gerät.
Der Bildschirm ist leer.
Das
Tonsignal
ist
schwach
oder
von
schlechter Qualität. Es
können
Störgeräusche
bei bestimmten Sendern
vernommen werden.
Dies kann auftreten, wenn der
Radiosender die Bezeichnung
eines Dienstes ändert, während
Sie den Sender einstellen.
Andere Geräte, wie z. B. ein
Fernsehgerät,
können
den
Radioempfang
stören;
Der
Radioempfang ist zu schwach.
15
Behebung
Überprüfen Sie die
Steckerverbindung und
stecken Sie den Netzstecker
vollständig in die Steckdose
hinein.
Richten Sie die Antenne neu
aus;
Erhöhen Sie die Lautstärke;
Verbinden Sie das
Bluetooth-Gerät.
Das Radio wird versuchen
den Sender neu einzustellen.
Bewegen Sie das System
von dem anderen Gerät
weg und versuchen Sie,
das Gerät neu zu
positionieren, um eine
starkes Radiosignal zu
erhalten.
Kundendienst
Für Informationen: www.lenco.com
Für Kundenunterstützung: http://lencosupport.zendesk.com
Lenco-Helpdesk:
Deutschland
Niederlande
Belgien
Frankreich
0900-1520530
0900-23553626
02-6200115
03-81484280
(Ortstarif)
(Ortstarif + 1 ct / Min.)
(Ortstarif)
(Örtliche Gebühren)
Der Helpdesk ist von Montag bis Freitag von 9.00 Uhr bis 18.00 Uhr geöffnet.
Wenn Sie sich an Lenco wenden, werden Sie immer nach der Modell- und
Seriennummer Ihres Geräts gefragt. Die Seriennummer befindet sich auf der
Rückseite des Geräts. Bitte notieren Sie die Seriennummer an folgender Stelle:
Modell: DR-05 BT
Seriennummer: _________________________________
Lenco bietet Dienst- und Garantieleistungen im Einklang mit europäischem Recht,
sodass Sie im Falle einer Reparatur (sowohl während als auch nach der Garantiezeit)
Ihren Händler kontaktieren sollten.
Wichtiger Hinweis: Es ist nicht möglich Produkte für Reparaturen direkt an Lenco
zu schicken.
Wichtiger Hinweis:
Wenn das Gerät durch eine nicht-autorisierte Reparaturwerkstatt geöffnet oder darauf
zugegriffen wird, erlischt die Garantie umgehend.
Dieses Gerät ist nicht für kommerzielle Anwendungen geeignet. Im Fall eines
professionellen Einsatzes, werden alle Gewährleistungspflichten des Herstellers
nichtig.
Hinweise, Stellungnahmen und Informationen
Lenco haftet nicht für Druckfehler in der Bedienungsanleitung.
Die Spezifikationen und das äußere Erscheinungsbild des Geräts können sich ohne
vorherige Ankündigung ändern.
Konformitätserklärung
Produkte mit der CE Kennzeichnung entsprechen der EMC-Richtlinie
(2004/108/EC) und der Niederspannungsrichtlinie (2006/95/EC),
herausgegeben von der Kommission der Europäischen Gemeinschaft.
Hiermit erklärt, STL Group BV, Ankerkade 20 NL 5928 PL Venlo, dass sich das
Gerät in Übereinstimmung mit den grundlegenden Anforderungen
und den übrigen einschlägigen Bes
16
befindet.“.Die Konformitätserklärung kann unter folgender Adresse gefunden werden:
https://lencosupport.zendesk.com/forums/22413161-CE-Documents
Dieses Produkt arbeitet im Frequenzbereich von 2400 bis 2483,5 MHz und sollte nur
in einer normalen häuslichen Umgebung verwendet werden. Es eignet sich zur
Verwendung in allen EU Ländern.
Dieses Symbol zeigt an, dass das entsprechende Produkt oder dessen
Batterie in Europa nicht mit dem normalen Hausmüll entsorgt werden
darf. Um die ordnungsgemäße Abfallbehandlung des Produkts und
dessen Batterie zu gewährleisten, müssen diese im Einklang mit allen
anwendbaren örtlichen Vorschriften zur Entsorgung von Elektrogeräten
und Batterien entsorgt werden. Dabei helfen Sie natürliche Ressourcen
zu schonen und Umweltschutzstandards zur Verwertung und
Entsorgung von Altgeräten aufrecht zu halten (Waste Electrical and Electronic
Equipment Directive).
® Alle Rechte vorbehalten
17
und DAB+
DR-05 BT
®
Retro-radio met Bluetooth en DAB+
Handleiding
w w w.lenco.com
Inhoudsopgave
Waarschuwing ......................................................................................................................2
Panelen ................................................................................................................................4
Afstandsbediening................................................................................................................6
Basisbediening.....................................................................................................................8
Bediening DAB.....................................................................................................................9
Bediening FM......................................................................................................................12
Bediening Bluetooth............................................................................................................13
Bediening Aux in /USB........................................................................................................14
Problemen oplossen/Specificaties......................................................................................15
Belangrijke veiligheidsinstructies
Lees en begrijp alle waarschuwingen hieronder, evenals de gemarkeerde waarschuwingen op
het apparaat. Dit apparaat is ontworpen en geproduceerd om de persoonlijke veiligheid te
garanderen.
Gebruik alleen een stroombron zoals gespecificeerd in de handleiding of op het systeem.
Plaats het apparaat niet in direct zonlicht, in de zon of in de buurt van warmtebronnen.
Buig of trek niet met overdreven veel kracht aan het netsnoer en oefen geen druk uit door op
het netsnoer te staan.
Houd het apparaat en de stekker uit de buurt van water.
Open de behuizing niet en zorg ervoor dat er geen voorwerpen zoals munten, haarspelden of
naalden in het apparaat vallen.
Haal de stekker uit het stopcontact wanneer het apparaat voor een lange periode niet wordt
gebruikt.
1
Lees, voor maximaal genot en maximale prestaties en om bekend te raken met de
mogelijkheden van het apparaat, deze handleiding zorgvuldig vóór u het apparaat gebruikt. Wij
garanderen jarenlange trouwe, probleemvrije prestaties en luisterplezier.
LET OP
RISICO VAN ELEKTRISCHE SCHOKKEN
NIET OPENEN
LET OP:
Om het risico van elektrische schokken te verminderen, demonteer het product niet en stel het
niet bloot aan regen of vocht. Er zitten geen door de gebruiker te onderhouden onderdelen in
het apparaat. Laat onderhoud over aan gekwalificeerd personeel.
Uitleg van grafische symbolen:
- Het bliksemschicht met pijlpunt symbool in een gelijkzijdige driehoek is bedoeld om de
gebruiker attent te maken op de aanwezigheid van “gevaarlijke spanning” binnenin de
behuizing van het product die sterk genoeg kan zijn om te leiden tot een gevaar op elektrische
schokken.
- Het uitroepteken in een gelijkzijdige driehoek is bedoeld de gebruiker attent te maken op de
aanwezigheid van belangrijke bedienings- en onderhoudsinstructies in de literatuur die bij het
apparaat wordt geleverd.
Waarschuwingen
1. Lees deze instructies - Alle veiligheids- en bedieningsinstructies moeten gelezen
worden voor het product wordt gebruikt.
2. Bewaar deze instructies - De veiligheids- en bedieningsinstructies moeten
bewaard worden, zodat u deze op een later tijdstip kunt raadplegen.
3. Neem alle waarschuwingen in acht- Zorg ervoor dat u alle waarschuwing op het
product en in deze handleiding in acht neemt.
4. Volg alle instructies - Zorg ervoor dat u de gebruiksinstructies opvolgt.
5. Gebruik het apparaat niet in de buurt van water- Gebruik dit product niet in de
nabijheid van water - bijv. in een natte kelder in de buurt van een zwembad of
dergelijke.
6. Alleen reinigen met een vochtige doek.
7. Blokkeer de ventilatieopeningen niet. Installeer in overeenstemming met de
instructies van de fabrikant.
8. Niet installeren in de buurt van warmtebronnen, zoals radiatoren, kachels of
andere apparaten (inclusief versterkers) die warmte produceren.
9. Omzeil de veiligheidsdoeleinden van de gepolariseerde stekker niet. Een
gepolariseerde stekker heeft twee pinnen, één is breder dan de ander. Een geaarde
stekker heeft twee pinnen en een derde aardepin. De brede pin of derde pin is voor
uw veiligheid. Als de geleverde stekker niet in uw stopcontact past moet u een
elektricien raadplegen voor vervanging van het verouderde stopcontact.
10. Bescherm het netsnoer tegen stappen of pletten bij de stekker, het
stopcontact en het punt waar ze het apparaat verlaten.
11. Gebruik alleen accessoires/hulpstukken die door de fabrikant zijn
gespecificeerd.
12. Alleen gebruiken met het wagentje, standaard, driepoot, haak of tafel die
gespecificeerd is door de fabrikant of verkocht met het apparaat. Beweeg, als er een
wagentje wordt gebruikt, het wagentje voorzichtig om verwonding door omvallen te
voorkomen.
13. Haal de stekker van het apparaat uit het stopcontact tijdens onweer of als het
apparaat voor lange tijd niet wordt gebruikt.
14. Laat alle onderhoud over aan gekwalificeerd onderhoudspersoneel. Er is
onderhoud nodig wanneer het apparaat is beschadigd, bijvoorbeeld wanneer het
netsnoer is beschadigd, er vloeistof is gemorst op of voorwerpen zijn gevallen in
het apparaat, het apparaat is blootgesteld aan regen of vocht.
15. Plaats het apparaat in een goed geventileerde omgeving.
2
16. Deze onderhoudsinstructies zijn alleen bedoeld voor gebruik door gekwalificeerd
onderhoudspersoneel. Voer, om het risico van elektrische schokken te verminderen, zelf
alleen onderhoud uit volgens de instructies in de handleiding tenzij u hiervoor
gekwalificeerd bent.
17. De stekker wordt gebruikt om het apparaat los te koppelen van het lichtnet en
moet altijd bereikbaar blijven.
18. - Dit apparaat is een Klasse II of dubbel geïsoleerd elektrisch apparaat. Het is op
zodanige wijze ontworpen dat er geen veiligheidsverbinding met aarde benodigd is.
19. -Dit bliksemschicht met pijlpunt symbool in een gelijkzijdige driehoek is bedoeld
om de gebruiker attent te maken op de aanwezigheid van “gevaarlijke spanning”
binnenin de behuizing van het product die sterk genoeg kan zijn om te leiden tot een
gevaar op elektrische schokken.
- Verwijder, om het risico van elektrische schokken te verminderen, de behuizing (of achterkant)
niet, er zitten geen door de gebruiker te onderhouden onderdelen in het product. Laat onderhoud
over aan gekwalificeerd personeel.
- Het uitroepteken in een gelijkzijdige driehoek is bedoeld de gebruiker attent te
maken op de aanwezigheid van belangrijke bedienings- en
onderhoudsinstructies in de literatuur die bij het apparaat wordt geleverd.
20. Onzichtbare laserstraling wanneer geopend en beveiligingen worden omzeild. Vermijd
blootstelling aan de laserstraal.
21. De batterijen in de afstandsbediening mogen niet worden blootgesteld aan extreme
warmte zoals vuur, zonlicht en dergelijke.
22. Het apparaat mag niet worden blootgesteld aan druppend of spattend water en er mogen
geen voorwerpen gevuld met vloeistof, zoals vazen, op het apparaat worden geplaatst.
23. Stel het apparaat niet bloot aan regen of vocht om het risico van brand en elektrische
schokken te verminderen.
24. Correcte verwijdering van dit product. Deze markering geeft aan dat dit product
niet mag worden weggegooid met het overige huisvuil in de gehele EU. Om schade
aan het milieu en de menselijke gezondheid door ongecontroleerde afvalverwijdering
te voorkomen, moet u op een verantwoorde manier recyclen en zo duurzaam
hergebruik van grondstoffen te bevorderen. Breng uw gebruikte product terug naar
een inzamelpunt of neem contact op met de dealer waar u het product heeft gekocht.
Zij kunnen dit product aannemen voor milieuvriendelijke recycling.
Opmerking ERP II
Energiegerelateerde producten-Dit product voldoet aan de richtlijn inzake
ecologisch ontwerp van de Europese Commissie. Als de gebruiker de bediening
van het apparaat niet gebruikt, dan zal het na ongeveer 15 minuten automatisch
naar de standbymodus schakelen (behalve in FM-modus) Volg de instructies in de
handleiding om het gebruik van het apparaat te hervatten.
3
Beschrijving van onderdelen
Vooraanzicht
9 10
VOL
TUNER / ENTER/ BT PAIR
SOURCE
STANDBY
TREBLE
PRESET/
8
Nr.
INFO/MENU/
BASS
Onderdeel
1
Standby
2
Treble
12
SCAN/
11
Beschrijving
Tik op deze knop omhoog of omlaag om het apparaat aan te
zetten, of zet de stand-bymodus.
Druk deze knop omhoog of omlaag om het menu voor het instellen
van de treble te openen en gebruik de volumeknop binnen 3
seconden om het trebleniveau in te stellen en een levendig
geluidseffect te creëren.
3
Bass
Druk deze knop omhoog of omlaag om het menu voor het instellen
van de bass te openen en gebruik de volumeknop binnen 3
seconden om het bassniveau in te stellen en een levendig
4
Volume
5
6
Display
Bluetooth-indicator
7
Afstandsbedieningssensor
Tunerknop / Enter/
8
BT Pair
9
10
11
12
Source
Menu/Information
Next
Previous
Scan
Preset
Play/Pause
geluidseffect te creëren。
Gebruik deze knop om het volume naar wens in te stellen
Voor de weergave van bronfrequentie en afspeelinformatie.
Geeft de status van de Bluetooth-modus weer.
Richt de afstandsbediening op deze sensor.
In DAB-modus: Draai aan de knop om naar de volgende of vorige
zender te gaan.
In FM-modus: stem af op een hogere of lagere frequentie met stappen
van 0,05MHz.
In menu: druk op ENTER om selectie te bevestigen.
Wanneer het alarm afgaat, drukt u op ENTER om het alarm te stoppen.
of draai de tuner knop om dutje te gaan.(alleen in de zoemer)
Als u de verbinding tussen gekoppelde apparaten wilt verbreken, druk
dan op BT PAIR, de radio schakelt naar de BT-koppelmodus.
Gebruik daarna de smartphone om een verbinding te maken.
Druk herhaaldelijk om de gewenste bron te selecteren: FM, USB,
BLUETOOTH(BT), AUX IN, DAB.
In DAB- of FM-modus: druk lang om het instellingenmenu te openen.
In DAB-modus: druk kort om door de zenderinformatie te bladeren.
In FM-modus: druk herhaaldelijk om door de radio-informatie te
bladeren.
In de BT-modus, drukt u op om naar het volgende nummer.
In de standby-modus, drukt u op NEXT knop om de tijd en het
alarm in te stellen.
In de BT-modus, drukt u op om naar het vorige nummer.
In de FM-modus, druk op de stations SACN.
In radiomodus: gebruik Preset om uw favoriete zenders op te slaan.
In BT-modus: druk om het afspelen te pauzeren, druk
nogmaals om het afspelen te hervatten.
4
Achteraanzicht
DR-05 BT Black
Retro Radio Bluetooth® and DAB+
Channel Block:DAB+(band lll) 5A-13F
12
1.67A
Power Consumption: 20W
Production Date:
Made in China
S/N:
USB
AUX IN
DR-05 BT White
Retro Radio Bluetooth® and DAB+
Channel Block:DAB+(band lll) 5A-13F
12
1.67A
Power Consumption: 20W
Production Date:
Made in China
S/N:
USB
12
Nr.
13
14
Onderdeel
FM-antenne
USB-poort
15
Aux-ingang
16
Stroomaansluiting
AUX IN
15
13 14
Beschrijving
Strek de FM-antenne uit voor goede radio-ontvangst.
Deze poort kan ook worden gebruikt om de batterij van USB-apparaten op
te laden.
Gebruik de AUX IN 3,5mm audiokabel om andere muziekapparaten
(DVD-speler, computer, telefoon, etc.) aan te sluiten op de radio.
Het apparaat werkt in de AUX-modus als luidspreker en u kunt alleen het
volume regelen op de radio.
Steek de adapter in de stroomaansluiting en voorzie de radio van
stroom.
5
Beschrijving van de afstandsbediening
MUTE
STANDBY
10
SOURCE
MENU
INFO
11
12
13
PRESET
STOP
ID3
TREBLE
SNOOZE/DIM
BASS
SLEEP
ALARM
BT PAIR
14
15
16
17
18
8
9
1
2
3
4
5
6
7
8
9
0
MO/ST
RANDOM
19
20
DR-05 BT
Nr.
1
2
Toets
Mute
Source
Beschrijving
Druk om het geluid uit te schakelen (mute).
Druk herhaaldelijk om de gewenste bron te selecteren: FM, USB,
BLUETOOTH(BT), AUX IN, DAB.
3
Menu
Druk om het instellingenmenu te openen.
4
Play/Pause
In BT-modus: druk om het afspelen te pauzeren, druk nogmaals om
het afspelen te hervatten.
Wanneer het alarm afgaat, drukt u op om het alarm te stoppen.
In de FM-modus, druk op de stations te scannen.
5
Preset
6
7
Treble
Snooze Dim
8
Sleep
9
10
Numerieke
toetsen
Standby
11
Information
12
13
Volume +/Next
Previous
In FM- of DAB-modus: gebruik Preset om uw favoriete zenders op
te slaan.
Druk op Treble en gebruik Volume+/- om de treble in te stellen
Als het alarm is ingesteld en wordt geactiveerd, druk dan op Snooze
om het alarm te stoppen (alleen in de zoemer).
Druk in elke status om te schakelen tussen 3 verschillende
helderheidsniveaus voor het display.
Druk om de slaaptijd in te stellen: sleep off/10/15/30/45/60/90/120
minuten. Als de timer de 0 bereikt, dan zal het apparaat
automatisch in de slaapmodus gaan
Gebruik de numerieke toetsen om tracks/zenders te selecteren.
Druk om he apparaat in te schakelen of standby te zetten.
In FM- of DAB-modus: druk om de informatie van de zender te
bekijken.
Druk om het volume naar wens in te stellen.
In BT-modus: druk om naar volgende of vorige track/liedje te gaan.
In FM-modus: druk om de frequentie te verhogen of verlagen met
stappen van 0,05MHz; druk lang om naar de volgende of vorige
beschikbare frequentie te gaan
6
14
Stop
Druk om het afspelen te stoppen, druk op
om het afspelen te
starten van het begin van de huidige track.
15
Bass
Druk op Bass en gebruik Volume+/- om de bass in te stellen.
16
ID3
Druk tijdens het afspelen van MP 3-tracks om informatie over de
huidige track, album, artiest, etc. te tonen.
17
Alarm
In standbymodus: druk om de interface voor het instellen van de tijd
te openen, deze toont: Time Auto Update, kies Yes om de TIME AUTO
UPDATE in te stellen, wanneer de radio wordt ingeschakeld in de
FM RDS op DAB, dan zal de tijd automatisch worden bijgewerkt.
Druk in de standbymodus op deze toets om de tijd, alarm 1 en
alarm 2 in te stellen. Druk één keer om de tijd in te stellen, twee
keer om alarm 1 in te stellen of drie keer om alarm 2 in te stellen.
Gebruik tijdens het instellen van de tijd of de alarmen of om de
tijd in te voeren en druk daarna op om de tijd te bevestigen. Het
systeem gaat automatisch naar het instellen van het volgende item.
Tijdens het instellen van de tijd zal het scherm de datum weergeven
en om de gewenste
in het formaat JJJJ/MM/DD. Gebruik
cijfers in te stellen en druk daarna op en selecteer vervolgens het
12- of 24-uursformaat. Daarna moeten de uren/minuten worden
om te voltooien.
ingesteld, druk op
Tijdens het instellen van de alarmen zal de tijd “0:00” knipperen,
druk op
en
om de cijfers van de alarmtijd in te stellen en druk
daarna ter bevestiging op .Selecteer vervolgens de
alarmfrequentie: dagelijks, weekdagen, weekenden, eenmalig.
Daarna kan de alarmmodus worden ingesteld: zoemermodus,
FM-modus, USB-modus,DAB-modus. Tot slot moet het alarmvolume
worden ingesteld. Na het instellen van Alarm 1 kan Alarm 2 worden
ingesteld. Als u een alarm wilt annuleren, druk dan eerst op Alarm
18
BT Pair
19
Random
en selecteer daarna de optie OFF.
Druk om de BT-functie van het apparaat te activeren en te beginnen
met koppelen (indien er nog niet is gekoppeld). Als er wel is
gekoppeld, druk dan op de knop om de verbinding tussen de
apparaten te verbreken.
Druk om tracks in willekeurige volgorde af te spelen, druk nogmaals
om te annuleren.
20
MO/ST
In radio-modus: druk om stereo in te schakelen als de ontvangst
goed is.
Als de ontvangst slecht is, dan kunt u stereo niet inschakelen.
7
Basisbediening
Voordat u begint met het instellen van de radio, zijn er een aantal stappen die u in gedachte
moet houden om het instellen eenvoudig en juist uit te voeren.
BELANGRIJKE BEDIENINGSSTAPPEN:
1. Houd MENU/INFO op het voorpaneel ingedrukt of druk op MENU op de afstandsbediening
om het instellingenmenu te openen.
2. Draai aan de TUNERKNOP op het voorpaneel of druk op
of
op de afstandsbediening
om door de menu-opties te bladeren.
3. Druk op ENTER (TUNERKNOP) op het voorpaneel of
op de afstandsbediening om een
keuze te bevestigen.
4. Als er een verkeerde optie wordt geselecteerd, druk op MENU/INFO op het voorpaneel om
terug te gaan naar het vorige menu (dit kunt u niet gebruiken tijdens het INSTELLEN VAN DE
TIJD).
Instellen tijd
1. Druk in de standbymodus op Alarm op de afstandsbediening om de tijd in te stellen, het
scherm toont:
Time Auto Update
OFF / ON
2. Draai aan de TUNERKNOP of druk op
of
op de afstandsbediening om de optie OFF of
ON te selecteren.
<A> Als u ON kiest en daarna op
<B> Als u OFF, kiest en daarna op
drukt, dan zal de tijd worden ingesteld op TIME AUTO UPDATE.
drukt, dan moet u zelf de tijd instellen. Het scherm toont
nu:
2013-01-01
0:00
3. Draai aan de TUNERKNOP of druk op
bevestiging op
of
om de tijdnummers te selecteren en druk ter
.
Telkens wanneer u een item heeft ingesteld, dan zal de radio automatisch naar het instellen
van het volgende item schakelen.
4. Als u het instellen van de tijd voltooid heeft, Druk ALARM knop om ALARM 1 en ALARM 2.
Als u het instellen van de tijd/datum heeft voltooid, dan zal de tekst op het scherm
stoppen met knipperen.
U kunt nu andere gebruik maken van alle opties en genieten van uw radio.
8
Bediening DAB
Schakelen naar de DAB-modus
Druk op SOURCE om naar de DAB-modus te schakelen. De radio start met scannen wanneer
u naar de DAB-modus schakelt, het scherm toont een balk die de voortgang van het scannen
en het aantal gevonden zenders aangeeft. Zodra de scan is voltooid, zal de radio de eerste
zender afspelen.
Zenders selecteren
1. Draai aan de TUNERKNOP of druk op
of
om naar de volgende of vorige zender te
gaan.
2. Druk op ENTER of op de afstandsbediening om de zender te activeren.
Zenderscan
Houd MENU/INFO op het voorpaneel ingedrukt of druk op MENU op de afstandsbediening om
op de
het instellingenmenu te openen. Draai aan de TUNERKNOP of druk op
afstandsbediening om <Full Scan> of <Manual tune> te selecteren en druk ter bevestiging op
ENTER.
1. Als u <Full Scan> selecteert, dan begint de radio met het zoeken naar alle DAB-kanalen.
2. Als u <Manual tune> selecteert, druk dan op ENTER om door de kanalen, die zijn
genummerd van 5A tot 13F, te bladeren.
3. Druk kort op ENTER om de geselecteerde zender te activeren.
Voorkeurszenders opslaan
Het is mogelijk om tot 20 zenders op te slaan als voorkeurszender. Dit maakt het luisteren
naar uw favoriete zenders sneller & eenvoudiger.
Druk lang op de cijfertoetsen 0-9 kan slechts 10 stations alleen bespaart,
om meer te sparen, verwijzen wij u naar de onderstaande activiteiten.
1. Als u een voorkeurszender wilt opslaan, dan moet u eerst afstemmen op de zender die u
wilt opslaan.
2. Druk lang op PRESET tot het scherm de volgende boodschap toont:
Preset Store
<1: (Empty)>
3. Draai aan de TUNERKNOP of druk op
of
op de afstandsbediening om het nummer te
selecteren waaronder u de zender wilt opslaan.
4. Druk om het opslaan te bevestigen op ENTER op het voorpaneel of
op de
afstandsbediening, het scherm toont: <Preset X stored>.
Opmerking: Als er al eerder zenders zijn opgeslagen, dan zal het scherm de zendernaam
bijv.<BBC Radio4 3> tonen.
5. Druk op PRESET om een voorkeurszender op te roepen, het scherm toont:
Preset Recall
<1: (Empty)>
Voorbeeld:
Als u naar BBC World luistert en deze zender wilt opslaan als voorkeurszender nummer 5.
a) Stem af op BBC World, de zender die u wilt opslaan als voorkeurszender.
9
b) Druk lang op PRESET tot het scherm <Preset Store> verschijnt.
c) Draai aan de TUNERKNOP om 5 te selecteren, druk op ENTER. Het scherm toont <Preset
5 stored>.
INFO-modus
Elke keer als u op INFO op de afstandsbediening of MENU/INFO op het voorpaneel drukt zal
het scherm door de volgende informatie bladeren:
1. RSSI
2. Muziekstijl— zoals <Rock music>
3. Zendernaam — zoals <BBC National DAB>
4. Frequentie — zoals <5A 174.928MHz>
5. Signaalfout: 25
6. Bitrate — zoals <128Kbps/DAB>
7. DLS
Het instellingenmenu openen
Houd MENU/INFO op het voorpaneel ingedrukt of druk op MENU op de afstandsbediening om
het instellingenmenu te openen, draai aan de TUNERKNOP om door de menu-opties te
bladeren: <Full scan>→<Manual tune>→<DRC>→<Prune> →<System>
DRC (Dynamic range control)
Dit zorgt ervoor dat de radio het dynamisch bereik van het audiosignaal reduceert. Het doel
hiervan is om het dynamisch bereik van het audiosignaal aan te passen in een omgeving met
veel ruis.
Opmerking: Deze functie is niet altijd beschikbaar bij elke DAB-zender.
U gebruikt deze optie als volgt:
1. Houd MENU/INFO op het voorpaneel ingedrukt of druk op MENU op de afstandsbediening,
draai aan de TUNERKNOP en selecteer de instelling <DRC>.
2. Druk op ENTER om het menu te openen en selecteer DRC Off, DRC High of DRC Low.
3. Druk op ENTER om de instelling te bevestigen.
Niet-beschikbare zenders verwijderen
Als de radio een scan heeft uitgevoerd op verschillende locaties, dan is het mogelijk dat er
zenders zijn gevonden die u niet langer kunt ontvangen. Deze functie verwijdert deze zenders
uit de zenderlijst.
U gebruikt deze optie als volgt:
1. Houd MENU/INFO op het voorpaneel ingedrukt of druk op MENU op de afstandsbediening,
draai aan de TUNERKNOP en selecteer de instelling <Prune>.
2. Druk op ENTER om het menu te openen en selecteer YES of NO.
3. Druk ter bevestiging op ENTER.
Systeeminstellingen
Houd MENU/INFO ingedrukt, draai aan de TUNERKNOP en selecteer <System>. Druk op
10
ENTER om het menu te openen en draai aan de TUNERKNOP om door de opties in het menu
te bladeren: <Language> ,<Factory reset> en <SW version>.
Taal
U kunt de taal van het apparaat als volgt instellen:
1. Houd MENU/INFO op het voorpaneel ingedrukt of druk op MENU op de afstandsbediening,
draai aan de TUNERKNOP en selecteer de instelling <System>.
2. Druk op ENTER om het menu te openen en selecteer de instelling <Language>.
3. Druk op ENTER om te kiezen uit <English>, <French>, <Deutsch>, <Nederlands> en
<Espanol> .
4. Selecteer een van de bovenstaande talen en druk ter bevestiging op ENTER.
Fabrieksreset
U kunt als volgt een fabrieksreset uitvoeren:
1. Houd MENU/INFO op het voorpaneel ingedrukt of druk op MENU op de afstandsbediening,
draai aan de TUNERKNOP en selecteer de instelling <System>.
2. Druk op ENTER om het menu te openen en selecteer de instelling <Factory reset>.
3. Druk op ENTER om de radio te resetten.
Softwareversie
Als u de softwareversie van de radio wilt bekijken, voer dan de volgende stappen uit:
1. Houd MENU/INFO op het voorpaneel ingedrukt of druk op MENU op de afstandsbediening,
draai aan de TUNERKNOP en selecteer de instelling <System>.
2. Druk op ENTER om het menu te openen en selecteer de instelling <SW Version>.
3. Druk op ENTER om de softwareversie van de radio te bekijken.
11
Bediening FM
1. Schakelen naar de FM-modus
Druk op SOURCE om naar de FM-modus te schakelen. (Frequentie: 87,5-108,0MHz) Druk
op MO/ST op de afstandsbediening om stereo in te schakelen. Als de ontvangst slecht is, dan
kan stereo niet worden ingeschakeld.
2. Zenders selecteren
Druk en draai kort aan de TUNERKNOP om de frequentie te verhogen of verlagen met
stappen van 0,05MHz.
Druk op
of
op de afstandsbediening om naar de volgende of vorige zender te gaan.
Druk op de NUMERIEKE toetsen om rechtstreeks zenders te selecteren.
3.Voorkeurszenders opslaan
De stappen voor het opslaan van voorkeurszenders zijn hetzelfde als de stappen in de
DAB-modus, kijk daarom naar VOORKEURSZENDERS OPSLAAN bij DAB.
4. FM RDS-informatie
Elke keer als u op INFO drukt, dan zal het display door de volgende informatie bladeren:
<Programmatype>, <Zendernaam>, <Stereo/mono>, <Radiotekst>, <Frequentie>.
De getoonde informatie wordt verstrekt door de radiozenders. Het is mogelijk dat sommige
zenders deze informatie niet verstrekken.
5. Scan/Audio-instellingen
a) Scaninstelling
(1) Houd MENU/INFO ingedrukt en draai aan de TUNERKNOP om <Scan setting> te
selecteren.
(2) Druk op ENTER om instellingen in het menu te openen. Het menu heeft de instellingen
<Strong stations only>,<All stations>.
(3) Druk ter bevestiging op ENTER.
b) Audio-instelling
(1) Houd MENU/INFO ingedrukt en draai aan de TUNERKNOP om <Audio setting> te
selecteren.
(2) Druk op ENTER om instellingen in het menu te openen. Het menu heeft de instellingen
<Forced mono>,<Stereo allowed>.
(3) Druk ter bevestiging op ENTER.
12
Gebruik Bluetooth®
Deze radio beschikt over een Bluetooth-functie. We kunnen dus genieten van muziek die
vanaf een Bluetooth-apparaat, zoals een mobiele telefoon, wordt aangeleverd.
Het koppelen
1. Druk op SOURCE om naar de Bluetooth-modus te schakelen. Het indicator-lampje
knippert blauw.
2. Schakel de Bluetooth-functie in op uw apparaat (bijv. mobiele telefoon).
3. Plaats het apparaat in de Bluetooth-zoekmodus en open de lijst met gevonden
Bluetooth-apparaten.
4. Selecteer LENCO DR-05 BT uit de lijst met gevonden apparaten.
5. Selecteer OK of YES om de radio te koppelen met uw Bluetooth-apparaat.
6. Voer, wanneer gevraagd, het wachtwoord 0000 in (dit wordt op bepaalde apparaten
gevraagd).
7. Als er succesvol is gekoppeld, dan zal de Bluetooth-indicator continu branden.
Het afspelen
1. Druk op
om het afspelen te starten of te pauzeren
of
om naar de vorige of volgende track/song te gaan.
2. Druk op
3. Druk op VOL+/- om het volumeniveau in te stellen.
4. Als u de verbinding tussen de gekoppelde apparaten wilt verbreken, druk dan op BT PAIR
om de verbinding te verbreken.
De verbinding verbreken en koppelen met een ander apparaat
a) Schakel de Bluetoothfunctie op uw apparaat uit om de verbinding te verbreken. De radio
schakelt automatisch naar de Bluetooth-koppelmodus.
b) Volg in deze koppelmodus de stappen 2-5 onder Het koppelen om te koppelen met
een ander apparaat.
Telefoonoproep tijdens het afspelen van muziek
1. Als u muziek afspeelt via een telefoon en er komt een oproep binnen, dan zal het afspelen
van muziek automatisch stoppen.
2. Wanneer de oproep wordt beëindigd, dan is het afhankelijk van de instellingen op de
telefoon of het afspelen wordt hervat of niet.
Belangrijke opmerking
1. Sommige apparaten, zoals iPhone’s, maken onmiddellijk na het koppelen verbinding,
andere apparaten kunnen er langer over doen om de verbinding op te zetten.
2. De radio kan alleen met één apparaat tegelijkertijd verbinden en muziek afspelen van dat
apparaat.
3. Als u verbinding wilt maken met een ander apparaat, dan moet u Bluetooth uitschakelen of
de koppeling verbreken op het apparaat dat gekoppeld is en vervolgens handmatig verbinding
maken met het andere apparaat.
4. Wanneer de apparaten zijn gekoppeld, omzetten modi en vervolgens weer aan te zetten
om de Bluetooth-modus, zal het toestel automatisch verbinden met het laatst gekoppelde
apparaat. (Bluetooth-functie op het andere apparaat staat altijd aan.)
5. Voor sommige smartphone niet automatisch verbinden, gebruiker
nodig om binnen te BT smartphone en selecteer LENCO DR-05 BT om verbinding te maken.
13
Gebruik Aux in
U kunt een extern apparaat aansluiten op de radio en de radio bij het afspelen van muziek gebruiken
als luidspreker.
1. Sluit de audio-uitgang van het externe apparaat aan op de AUX-INGANG op het
achterpaneel van de radio.
2. Druk op SOURCE om naar de aux-modus te schakelen.
3. Start het afspelen op het extern apparaat.
4. Stel het volume in met het apparaat.
5. Schakel beide apparaten uit voordat u de verbinding tussen de apparaten verbreekt.
Opmerking:
Het afspelen kan niet worden bediend met de knoppen op de radio. U kunt alleen
VOL+/- gebruiken om het volume in te stellen. Als er geen geluid uit de luidspreker van
de radio komt, controleer dan het volume op het externe apparaat.
Gebruik USB
De USB-poort kan worden gebruikt om telefoons /USB-muziekapparaten op te laden.
Steek een USB-apparaat in de USB-poort en de radio zal de batterij opladen als de
batterij van het USB-apparaat niet vol is.
14
Specificaties
Voeding
DC12V
Stroomverbruik
20W
Stroomverbruik in standby
FM-frequentie
<1W
87.5-108.0MHz
Voorkeurszenders FM/DAB
Bluetooth-bereik
Bluetooth-versie
20
33 ft. (10m)
CSR V2.1+EDR
Ingangen
USB/3.5mm Aux in
Bedrijfsvoorwaarden
5°-35°/vlakke stand
Problemen oplossen
We hebben hieronder een aantal methoden opgesomd die veel voorkomende
problemen bij gebruik van de radio kunnen oplossen. Als een probleem zich herhaaldelijk
voordoet, neem dan contact op met het dichtstbijzijnde onderhoudscentrum.
Probleem
Voeding werkt niet.
Geen geluid uit
luidspreker
Het scherm is leeg.
Het geluid is zacht of
van slechte kwaliteit; U
kunt een kabbelend geluid
horen op bepaalde
zenders.
Oorzaak
Stekker is niet volledig in het
stopcontact gestoken.
Signaalontvangst slecht;
Volume te laag;
. Niet gekoppeld met
Bluetooth-apparaat.
Oplossing
Controleer de verbinding en
steek de stekker volledig in
het stopcontact.
Verplaats de radio voor
betere ontvangst;
Verhoog het volume;
Koppel het Bluetooth-apparaat.
Dit kan voorkomen wanneer de
zender het label van een dienst
verandert tijdens het afstemmen
op de zender.
De radio zal opnieuw
proberen af te stemmen en
een scan uitvoeren.
Andere apparaten zoals een TV
kunnen storen met de
radio-ontvangst; De radio-ontvangst
is te zwak.
Plaats de radio uit de buurt
van andere apparaten en
probeer de radio te
verplaatsen en een sterk
radiosignaal te ontvangen.
15
Service en ondersteuning
Voor informatie: www.lenco.com
Voor ondersteuning: http://lencosupport.zendesk.com
Lenco helpdesk:
Duitsland
Nederland
België
Frankrijk
0900-1520530
0900-23553626
02-6200115
03-81484280
(Lokaal tarief)
(Lokaal tarief + 1ct p/min)
(Lokaal tarief)
(Lokaal tarief)
De helpdesk is bereikbaar van maandag tot en met vrijdag van 9:00 tot 18:00.
Wanneer u contact opneemt met Lenco, dan zal er altijd naar het model en het
serienummer van uw product worden gevraagd. Het serienummer kan op de
achterkant van het apparaat worden gevonden. Schrijf het serienummer hieronder op:
Model: DR-05 BT
Serienummer:_________________________________
Lenco biedt service en garantie in overeenstemming met het Europese recht. Dit
betekent dat u in geval van reparatie(zowel tijdens als na de garantieperiode) contact
op moet nemen met uw lokale dealer. Belangrijke opmerking: Het is niet mogelijk
om het apparaat rechtstreeks naar Lenco te sturen voor reparatie.
Belangrijke opmerking:
Als het apparaat wordt geopend door een niet-officieel service center, dan vervalt de
garantie..
Dit apparaat is niet geschikt voor professioneel gebruik. In geval van professioneel
gebruik zullen alle garantieverplichtingen van de fabrikant worden geannuleerd.
Mededeling, verklaringen en informatie
Lenco is niet aansprakelijk voor drukfouten in de handleiding.
De specificaties en het extern uiterlijk van het apparaat kunnen zonder voorafgaande
kennisgeving worden gewijzigd.
Verklaring van conformiteit
Producten met een CE keurmerk houden zich aan de EMC richtlijn
(2004/108/EC) en de Richtlijn voor Lage Voltage (2006/95/EC)
uitgegeven door de Europese Commissie.
Hierbij verklaart de STL Group BV, Ankerkade 20 NL 5928 PL Venlo dat dit
audioproduct voldoet aan de essentiële eisen en andere relevante bepalingen van
Richtlijn 1999/5/EC. De verklaring van conformiteit kan worden geraadpleegd op
https://lencosupport.zendesk.com/forums/22413161-CE-Documents
16
Dit product werkt op 2400 - 2483,5 MHz en is aangewezen om alleen te worden
gebruikt in een normaal huishoudelijke omgeving. Dit product is geschikt voor dit
doel binnen alle EU-landen.
Dit symbool geeft aan dat het betreffende elektrische product of de
batterij niet moet worden verwijderd als algemeen huishoudelijk afval
in Europa. Zorg voor een juiste afvalverwerking door het product en de
batterij in overeenstemming met alle van toepassing zijnde lokale
wetten voor het verwijderen van elektrische apparatuur of batterijen te
verwijderen. Als u dit doet, helpt u de natuurlijke hulpbronnen te
behouden en de standaard van milieubescherming te verbeteren bij de
behandeling en verwijdering van elektrisch afval (Afgedankte Elektrische en
Elektronische Apparatuur).
® Alle rechten voorbehouden
17
und DAB+
DR-05 BT
®
é
Radio Retro
avec Bluetooth et DAB+
Guide de I'utilisateur
w w w.lenco.com
Contenu
Avertissement.........................................................................................................................2
Panneaux...............................................................................................................................5
Télécommande.......................................................................................................................7
Fonctionnement basique........................................................................................................9
Fonctionnement DAB............................................................................................................10
Fonctionnement FM..............................................................................................................13
Fonctionnement Bluetooth....................................................................................................14
Fonctionnement entrée auxiliaire /USB .............................................................................15
Résolution des problèmes / spécifications ...........................................................................16
Instructions importantes sur la sécurité
Veuillez lire et comprendre tous les avertissements présentés ci-dessous, ainsi que ceux
marqués sur l'unité Cette unité a été conçue et fabriquée pour garantir la sécurité des
personnes.
N'alimentez que sur la source spécifiée dans le manuel ou sur le système
Évitez de placer l'unité à la lumière directe du soleil ou près d'une source de chaleur.
Ne pliez pas ou ne tirez pas sur le câble d'alimentation excessivement, et n'appliquez pas de
pression en vous tenant dessus.
Tenez l'unité et la prise éloignées de l'eau.
N'ouvrez jamais le couvercle et évitez de faire tomber quoi que ce soit dans l'unité, comme
des pièces, des broches et des aiguilles par exemple.
Débranchez l'unité du secteur lorsque vous ne l'utilisez pas pendant longtemps.
1
Pour obtenir le plus de plaisir et la meilleure performance, et afin de vous familiariser avec ses
fonctionnalités, lisez attentivement ce manuel avant d'essayer de faire fonctionner ce produit,
cela vous garantira des années de fonctionnement sans problème et de plaisir d'écoute.
ATTENTION
RISQUE D’ELECTROCHOC
NE PAS OUVRIR
Attention:
Pour réduire le risque d'électrochoc, ne démontez pas le produit et ne l'exposez pas à la pluie
ou l'humidité. Aucune pièce utile à l’utilisateur à l'intérieur. Consultez du personnel de
maintenance qualifié uniquement.
Explication des symboles :
L’éclair avec le symbole de flèche en tête dans un triangle équilatéral a pour but d’alerter
l’utilisateur de la présence de « tension dangereuse » non isolée dans l’appareil qui pourrait
être d’ampleur suffisante pour constituer un risque de choc électrique aux personnes.
Le point d’exclamation dans un triangle équilatéral a pour but d’alerter l’utilisateur de la
présence d’instructions importantes sur le fonctionnement et la réparation (entretien) dans la
littérature accompagnant le produit.
Avertissements
1. Lisez ces instructions: toutes les instructions de sécurité et d'utilisation doivent être lues
avant d'utiliser ce produit.
2. Gardez ces instructions: les instructions de sécurité et d’utilisation doivent être conservées
pour références ultérieure.
3. Respectez tous les avertissements: tous les avertissements sur l'appareil et les instructions
d'utilisation doivent être respectés.
4. Suivez les instructions - Toutes les instructions d'utilisation et de fonctionnement doivent
être suivies.
5. N'utilisez pas cet appareil près de l'eau: l'appareil ne doit pas être utilisé près de l'eau ou de
l'humidité: par exemple dans une cave humide ou près d'une piscine; etc.
6. Ne nettoyez qu’à l’aide d’un linge sec.
7. N’obstruez aucune voie de ventilation. Installez conformément aux instructions du fabricant.
8. 8- N’installez pas à proximité de sources de chaleur telles que radiateurs, registre de
chaleur, poêle ou autres appareils (y compris les amplificateurs) qui produisent de la chaleur.
9. Ne sous-estimez pas l’objectif de sécurité des prise polarisées ou de type terre. Une prise
polarisée a deux fiches dont l’une est plus large que l’autre. Une prise de mise à la terre La
fiche large ou le raccord à la terre sont conçues pour votre sécurité. Si la prise fournie ne
s’adapte pas à votre installation, consultez un électricien pour le remplacement de votre
installation obsolète.
10. Protégez le cordon d’alimentation contre les piétinements ou les pincements,
particulièrement au niveau des branchements, prises de courant, et du point d’où il sort de
2
l’appareil.
11. N’utilisez que les extensions/accessoires spécifiés par le fabricant.
12. N’utilisez qu’avec un chariot, support, trépied, crochet ou table spécifié par le fabricant, ou
vendu avec l’appareil. Lorsque vous utilisez un chariot, soyez attentif lorsque vous déplacez la
combinaison chariot/appareil pour éviter les blessures dues au renversement.
13. Débranchez cet appareil lors des orages ou lorsqu’il est inutilisé pendant une longue
période.
14. Confiez toute réparation à du personnel de maintenance qualifié. La réparation est
nécessaire lorsque l’appareil a été endommagé de quelque sorte, par exemple si le cordon
d’alimentation ou la prise sont endommagés, si du liquide a été répandu ou si des objets sont
tombés dans l’appareil ou si ce dernier a été exposé aux moisissures ou à la pluie.
15. Veillez à maintenir l'unité dans un environnement bien ventilé.
16. Ces instructions concernant la réparation sont à utiliser par du personnel qualifié
uniquement. À
Pour réduire le risque de choc électrique, ne procédez à aucune réparation autre que celles
détaillées dans ces instructions d'utilisation à moins que vous ne disposiez des qualifications.
17. L'alimentation principale sert de sectionneur, le sectionneur doit toujours rester en état de
marche.
18. Cet équipement est un appareil électrique de classe II ou à double isolation. Il a été conçu
de telle manière qu'il ne nécessite pas de connexion sécurisée à une prise de terre.
19. L’éclair avec le symbole de flèche en tête dans un triangle équilatéral a pour but d’alerter
l’utilisateur de la présence de « tension dangereuse » non isolée dans l’appareil qui pourrait
être d’ampleur suffisante pour constituer un risque de choc électrique.
- Pour réduire le risque d'électrochoc, n'enlevez pas la plaque supérieure ou arrière car il n'y a
aucune pièce utilisable par l'utilisateur à l'intérieur. Consultez du personnel de maintenance
qualifié.
Le point d’exclamation dans un triangle équilatéral sert à alerter l’utilisateur de la présence
d’instructions importantes sur l’utilisation et l’entretien (réparation) dans le livret accompagnant
l’appareil.
20. Radiation laser invisible lorsqu'ouvert et le verrou est déclenche Évitez l'exposition au
rayon laser
21. Les piles de la télécommande ne doivent pas être exposée à une chaleur excessive telle
que la lumière du soleil, le feu ou autres.
22. L’appareil ne doit pas être exposé aux gouttes ou aux éclaboussements et les objets
remplis de liquides, tels que des vases, ne doivent pas être placés près de l'appareil.
23. Pour réduire le risque d'incendie ou de choc électrique, n'exposez pas cet appareil à la
pluie ou l'humidité.
24. Élimination appropriée de ce produit Cette marque indique que, au sein de l’UE, ce produit
ne doit pas être éliminé avec les autres produits ménagers. Pour prévenir les dangers
potentiels pour l'environnement ou la santé humaine causés par l'élimination incorrecte des
déchets, recyclez-les de manière responsable pour promouvoir la réutilisation des ressources
matérielles.
Pour rendre votre appareil usagé, veuillez utiliser le système de collecte et de récupération ou
contactez le détaillant où le produit a été acheté. Ils peuvent emmener ce produit dans un lieu
3
ou il sera recyclé de manière à protéger l’environnement.
Remarque ERP II
Produits liés à l'électricité - Ce produit est conforme à la directive de conception écologique de
la Commission Européenne et ses réglementations de mise en oeuvre. Après (environ) 15
minutes sans entrée (sauf en mode FM), le système passera automatiquement en mode veille.
Suivez les instructions du manuel pour relancer le fonctionnement.
4
Description des éléments
Vue frontale
9 10
VOL
TUNER / ENTER/ BT PAIR
SOURCE
STANDBY
TREBLE
INFO/MENU/
BASS
PRESET/
8
NonComposant
12
SCAN/
11
Description
1 Veille
Appuyez sur ce bouton vers le haut ou vers le bas pour allumer
l'appareil ou mettez en mode veille.
2 Aigus
Appuyez vers le haut ou vers le bas pour entrer dans l'interface
de réglage des aigus, puis utilisez la molette de volume sous 3
secondes pour régler le niveau de basses et obtenir un effet plus
aigu.
3 Basse
Appuyez vers le haut ou vers le bas pour entrer dans l'interface
de réglage des graves, puis utilisez la molette de volume sous 3
secondes pour régler le niveau de basses et obtenir un effet plus
graves.
4 Molette de volume
Réglez le volume sur le niveau desiré.
5 Écran
Affiche la source, la fréquence et les informations de lecture.
6 Indicateur Bluetooth
Indique le statut de mode
7 Capteur de la télécommande Pointez la télécommande vers ce capteur.
Molette
8 Entrer
réglage
/
couplage
Bluetooth
9 Source
10
/
Menu/Information
Suivant
11 Précédent
Scan
12 Présélection
Lecture/Pause
En mode DAB, tournez pour passer à la station précédente ou
suivante.
En mode FM, réglez la fréquence vers le haut ou vers le bas par
incréments de 0,05 MHz
En mode menu, appuyez sur ENTER pour confirmer la sélection.
ou tourner le bouton du tuner pour passer en mode sieste,
l'alarme sera en 5 minutes plus tard (uniquement en mode vibreur).
Lorsque l'alarme retentit, appuyez sur pour arrêter l'alarme.
Si vous souhaitez déconnecter les appareils couplés, appuyez su
la toucheBT PAIR pour déconnecter et l'unité passera en statut der
couplage BT. Puis utilisez le téléphone pour faire la connexion.
Appuyez plusieurs fois pour sélectionner la source de votre choix:
FM, USB, BLUETOOTH (BT), AUX IN, DAB.
En mode DAB ou FM, appuyez longuement pour entrer dans
menu de réglage.
En mode DAB, appuyez brièvement pour circuler entre les
informations sur la station.
En mode FM, appuyez brièvement pour circuler entre les
informations sur la station.
En mode BT, appuyez sur pour passer à la piste suivante.
En mode veille, appuyez sur pour entrer dans le temps et de
réglage de l'alarme.
En mode BT, appuyez sur pour passer à la piste précédente.
En mode FM, appuyez sur pour balayer les stations.
En mode radio, appuyez sur la touche Preset pour enregistrer
vos stations favorites.
En mode BT, appuyez pour mettre la lecture en pause, appuyez
de nouveau pour reprendre la lecture.
5
Panneau arrière
DR-05 BT Black
Retro Radio Bluetooth® and DAB+
Channel Block:DAB+(band lll) 5A-13F
12
1.67A
Power Consumption: 20W
Production Date:
Made in China
S/N:
USB
AUX IN
DR-05 BT White
Retro Radio Bluetooth® and DAB+
Channel Block:DAB+(band lll) 5A-13F
12
1.67A
Power Consumption: 20W
Production Date:
Made in China
S/N:
USB
12
AUX IN
15
13 14
No.
Composant
Description
13
Antenne FM
Allongez l'antenne FM pour obtenir une bonne réception.
14
Port USB
Ce port permet également de charger l'appareil USB si sa batterie est
faible.
15
Prise entrée auxiliaire
Utilisez le câble audio AUX IN 3,5mm pour connecter l'unité avec des
appareils de musique supplémentaire (lecteurs DVD, ordinateur,
téléphone, etc.)
En mode entrée auxiliaire, l'unité fonctionne comme un haut parleur,
vous ne pouvez que contrôler le volume de l'unité.
16
Fente d’alimentation
Insérez l'adaptateur dans la prise d'alimentation et allumez l'unité.
6
Description de la télécommande
MUTE
STANDBY
10
SOURCE
MENU
INFO
11
12
13
PRESET
STOP
ID3
TREBLE
SNOOZE/DIM
BASS
SLEEP
BT PAIR
ALARM
14
15
16
17
18
8
9
1
2
3
4
5
6
7
8
9
0
MO/ST
RANDOM
19
20
DR-05 BT
No.
Touches
Description
1
Muet
Appuyez sur cette touche pour couper le volume.
2
Source
Appuyez plusieurs fois pour sélectionner la source de votre choix: FM, USB,
BLUETOOTH (BT), AUX IN, DAB.
3
Menu
Appuyez pour entrer dans le menu des paramètres.
4
Lecture/Pause
En mode BT, appuyez pour mettre la lecture en pause, appuyez de nouveau
pour reprendre la lecture.
Lorsque l'alarme retentit, appuyez sur pour arrêter l'alarme.
En mode FM, appuyez sur pour balayer les stations.
5
Présélection
6
Aigus
7
Report d'alarme /
Variateur
8
Mise
en
veille
programmée
En mode DAB ou FM, appuyez sur la touche Preset pour enregistrer vos
stations favorites.
Appuyez sur la touche Treble et utilisez les touches Volume+/- pour régler les
aigus.
Si l'alarme est réglée, lorsque l'alarme s'éteint, appuyez sur la touche Snooze
pour l'arrêter. (uniquement en mode vibreur).
Sous n'importe quel statut, appuyez pour choisir entre les 3 niveaux de
luminosité de l'écran.
Appuyez pour régler le délai avant la mise en veille: sleep
off/10/15/30/45/60/90/120 minutes.
Lorsque le délai est écoulé, l'unité passera automatiquement en veille.
9
Pavé numérique
Utilisez les touches numériques pour sélectionner les pistes ou les stations.
10
Veille
Appuyez pour allumer l'unité, ou pour la passer en mode veille.
11
Information
En mode FM ou DAB, appuyez pour consulter les informations sur les stations.
12
Volume +/-
Appuyez pour régler le volume sur le niveau désiré.
13
Suivant
Appuyez brièvement sur ces touches pour passer à la piste / chanson
Précédent
suivante/précédente; appuyez longuement pour avancer ou reculer
rapidement dans la piste / chanson en cours.
7
En mode BT, appuyez pour passer à la piste / chanson précédente.
En mode FM, appuyez pour passer à la station suivante / précédente; appuyez
longuement pour passer à la fréquence disponible suivante / précédente.
14
Stop
Appuyez sur
pour arrêter la lecture, appuyez sur Play/Pause pour
recommencer depuis le début de la piste.
15
Basse
Appuyez sur la touche Bass et utilisez les touches Volume+/- pour régler les
graves.
16
ID3
Pendant la lecture de piste MP3, appuyez pour afficher des informations sur la
piste en cours : album, artiste, etc.
17
Alarme
En statut de veille, appuyez pour entrer dans l'interface de réglage de l'heure,
l'acran affiche « Time Auto Update » (mise à jour automatique de l'heure),
choisissez Yes pour régler l'heure TIME AUTO UPDATE, lorsque vous allumez
I'unite en mode radio RDS ou DAB, l'heure est mise à jour automatiquement.
En mode veille, appuyez pour régler l'heure et l'alarme 1 et 2.
Appuyez une fois pour entrer en mode de réglage de l'heure, appuyez deux
fois pour entrer dans le réglage de l'alarme 1. Appuyez une troisième fois pour
entrer dans le réglage de l'alarme 2.
En mode de réglage de l'heure ou de l'alarme, utilisez
choisir les contenus, puis appuyez sur
ou
pour
pour confirmer, et le système
passera automatiquement au statut de réglage suivant.
Lorsque vous êtes dans l'interface de réglage de l'heure, l'écran affiche
AAAA/MM/JJ.
Utilisez
pour choisir les chiffres de la date, puis appuyez et sélectionnez
12/24h, puis réglez les heures/minute, appuyez sur
pour terminer.
Lorsque vous êtes dans l'interface de réglage d'alarme, “0:00" clignote,
appuyez sur
ou
pour choisir les chiffres de l'alarme, appuyez sur
pour confirmer. Puis choisissez les options de l'alarme: Quotidienne, jours de
la semaine, weekends, une fois Choisissez ensuite le mode d'alarme : Mode
buzzer, mode FM, mode USB, mode DAB, réglez le niveau de volume de
l'alarme. Lorsque vous avez terminé de régler l'alarme 1, vous pouvez régler
l'alarme 2.
Pour annuler l'alarme, appuyez sur la touche ALARM, puis sélectionnez OFF
pour annuler
18
Couplage BT
Appuyez pour activer la fonction BT de l'unité en mode de couplage si
l'appareil n'est pas couplé. En mode couplé, appuyez pour déconnecter les
appareils.
19
Aléatoire
Appuyez pour lire les pistes dans un ordre aléatoire, appuyez de nouveau pour
annuler.
20
MO/ST
En mode radio, appuyez pour passer en stéréo s'il y a une bonne récéption.
Si la réception est faible, vous ne pouvez pas activer le mode stéréo.
8
Fonctionnement basique
Avant de commencer à configurer votre unité, vous devez garder à l'esprit certaines étapes
pour rendre les opérations de réglages plus correctes et plus fluide.
ÉTAPES IMPORTANTE DU FONCTIONNEMENT:
1. Tenez la touche MENU/INFO appuyée sur le panneau frontal ou appuyez sur la touche
MENU sur la télécommande pour entrer dans le menu de configuration.
2. Tournez la MOLETTE DE RÉGLAGE sur le panneau frontal
ou appuyez sur la touche
de la télécommande pour circuer entre les contenus du menu.
3. Appuyez sur ENTER (MOLETTE DE RÉGLAGE) sur le panneau frontal, ou appuyez sur la
sur la télécommande.
touche
4. Si la sélection n'est pas celle requisse, appuyez sur la touche MENU/INFO sur le panneau
frontal pour revenir au contenu de menu précédent (cela n'est pas possible durant le
RÉGLAGE DE L'HEURE).
Pour régler l'heure.
1. En mode veille, appuyez sur la touche Alarm sur la télécommande pour régler l'heure,
l'écran affiche:
Time Auto Update
OFF / ON
2. Tournez la MOLETTE DE RÉGLAGE ou appuyez sur
ou
sur la télécommande pour
sélectionner les contenus: OFF ou ON.
<A> Si vous choisissez ON, alors appuyez sur pour confirmer le réglage de l'unité TIME AUTO
UPDATE
.
<B> Si vous choisissez OFF, alors, appuyez sur pour entrer dans l'interface de réglage
manuel, l'écran affiche :
2013-01-01
0:00
3. Tournez la MOLETTE DE RÉGLAGE ou appuyez sur
sur
ou
pour régler l'heure, appuyez
pour confirmer.
Chaque fois que vous terminez une partie, l'unité passera automtatiquement à la partie
suivante du réglage.
4. Lorsque vous avez terminé, appuyez sur la touche ALARME Pour régler l'alarme 1 et l'alarme 2.
Lorsque vous avez terminé le réglage de l'heure / date, les inscriptions sur l'écran
arrêtent de clignoter.
Vous pouvez à présent effectuer d'autres opérations plus attrayantes.
9
Fonctionnement DAB
Passer en mode DAB
Appuyez sur la touche SOURCE et passez en mode DAB. L'unité commence à rechercher
lorsque vous activez le mode DAB, l'écran affiche une barre déroulante indiquant la
progression de la recherche, et le nombre des stations détectées. Une fois terminé, l'unité
jouera la première station.
Sélectionner des stations
1. Tournez la MOLETTE DE RÉGLAGE ou appuyez sur
ou pour passer aux stations
suivantes ou précédentes.
2. Appuyez sur ENTER ou sur la télécommande pour activer la station.
Recherche de stations
Tenez la touche MENU/INFO appuyée sur le panneau frontal ou appuyez sur la touche MENU
sur la télécommande pour entrer dans le menu de réglage, tournez la MOLETTE DE
RÉGLAGE ou appuyez sur
sur la télécommande pour choisisr <Recherche totale> ou
<Recherche manuelle>, appuyez sur ENTER pour confirmer.
1. Si vous choisissez <Recherche totale>, une recherche se lancera pour rechercher toutes
les chaines DAB.
2. Si vous choisissez <Réglage manuel>, appuyez sur ENTER pour circuler entre toutes les
canaux dont la fréquence est comprise entre 5A et 13F.
1.
Appuyez rapidement sur ENTER pour activer les stations sélectionnées.
Sauvegarder des stations en présélection
Il est possible d'enregistrer jusqu'à 20 de vos stations favorites. Cela vous permettra d'accéder
à vos stations favorites rapidement et facilement.
Un appui long sur les touches numériques 0-9 seulement peut sauver 10 stations
seulement, à épargner davantage, s'il vous pla?t se référer aux opérations ci-dessous.
1. Pour enregistrer une station, vous devez d'abord être en train d'écouter la station que vous
souhaitez sauvegarder.
2. Appuyez longuement sur la touche PRESET jusqu'à ce que l'écran affiche:
Preset Store
<1: (Empty)>
3. Tournez la MOLETTE DE RÉGLAGE ou appuyez sur
ou
sur la télécommande pour
choisir le numéro de présélection.
4. Pour confirmer, la présélection, appuyez sur ENTER sur le panneau frontal, ou
sur la
télécommande, l'écran affiche: <Présélection X enregistrée>.
Remarque: Si une station a été préselectionnée avant, l'écran affichera le nom de la station,
par exemple <BBC Radio4 3>.
5. Appuyez sur la touche PRESET pour rappeler une préselection, l'écran affiche:
Preset Recall
<1: (Empty)>
Exemple: Si vous écoutez BBC World et que vous souhaitez l'enregistrer sur la station No.5.
a) Réglez la station BBC World que vous souhaitez enregistrer en présélection.
10
b) Appuyez longuement sur la touche PRESET jusqu'à ce que <Preset Store> apparaisse.
c) Tournez la MOLETTE DE RÉGLAGE pour choisir 5, appuyez sur la touche ENTER, à
présent < présélection 5 sauvegardée>.
Mode Info
Chaque fois que vous appuyez sur la touche INFO sur la télécommande, ou sur la touche
MENU/INFO sur le panneau frontal, l'écran circulera entre les informations suivantes:
1. RSSI
2. Style de musique---- comme <Rock>
3. Nom de la station ---- comme <BBC National DAB>
4. Fréquence ---- comme <5A 174.928MHz>
5. Erreur de signal : 25
6. Débit binaire ---- comme <128Kbps/DAB>
7. DLS
Entre dans le menu des configurations
Tenez la touche MENU/INFO appuyée sur le panneau frontal ou appuyez sur la touche MENU
sur la télécommande pour entrer dans le menu de configuration, tournez la MOLETTE DE
RÉGLAGEpour défiler dans les contenus du menu: <Recherche totale>→<Réglage
manuel>→<DRC>→<Rafraichir> →<Système>
DRC (Dynamic range control)
Cela permet à la radio de réduire la portée dynamique du signal audio. L'objectif de ceci est
d'adapter la portée dynamique du signal audio pour l'écouter dans un environnement bruyant.
Remarque: Cette fonction n'est pas toujours disponible sur de nombreuses stations DAB.
Les étapes sont détaillées ici:
1. Tenez la touche MENU/INFO appuyée sur le panneau frontal ou sur la touche MENU sur la
télécommande, tournez la MOLETTE DE RÉGLAGE pour trouver les paramètres <DRC>.
2. Appuyez sur la touche ENTER pour entrer dans les contenus du menu et choisissez DRC
Off(désactivé), DRC High (fort) ou DRC Low(faible).
3. Appuyez sur ENTER pour confirmer le réglage.
Effacer des stations
Lorsque la radio aura procédé à une recherche dans plusieurs endroits, vous constaterez
que vous ne recevez peut-être plus de certaines des stations sauvegardées. Cette fonction
les supprime automatiquement de la liste des stations sauvegardées.
Les étapes sont détaillées ici:
1. Tenez la touche MENU/INFO appuyée, tournez la MOLETTE DE RÉGLAGE pour détecter
le paramètre <Rafraichir>.
2. Appuyez sur la touche ENTER pour entrer dans les contenus du menu et choisir OUI ou
NON.
3. Appuyez sur ENTER pour confirmer le réglage.
11
Paramétrage du système
Tenez la touche MENU/INFO appuyée, tournez la MOLETTE DE RÉGLAGE pour trouver
<Système>, appuyez sur la touche ENTER pour entrer dans le menu des paramètres.
Tournez la MOLETTE DE RÉGLAGE pour faire défiler les contenus du menu: <Langue>,
<Réinitialisation d'usine> et <Version SW version>.
Langue
Permet de sélectionner les langues de l'unité dans cette section:
1. Tenez la touche MENU/INFO appuyée, tournez la MOLETTE DE RÉGLAGE pour détecter
le paramètre <Système>.
2. Appuyez sur la touche ENTER pour entrer dans les contenus du menu et trouver le
paramètre <Langues>.
3. Appuyez sur ENTER pour choisir entre <Anglais>, <Français>, <Allemand>, <Flamand>
et <Espagnol>.
4. Choisissez l'une des langues ci-dessous, et appuyez sur la touche ENTER pour confirmer.
Réinitialisation de la configuration d’usine
Cette section présente comment réinitialiser l'unité:
1. Tenez la touche MENU/INFO appuyée, tournez la MOLETTE DE RÉGLAGE pour détecter
le paramètre <Système>.
2. Appuyez sur la touche ENTER pour entrer dans les contenus du menu et trouver le
paramètre <Réinitialisation d'usine>.
3. Appuyez sur ENTER pour réinitialiser l'unité.
Version SW
Cette section présente comment afficher la version du logiciel:
1. Tenez la touche MENU/INFO appuyée, tournez la MOLETTE DE RÉGLAGE pour détecter
le paramètre <Système>.
2. Appuyez sur la touche ENTER pour entrer dans les contenus du menu et trouver le
paramètre <Versions>.
3. Appuyez sur ENTER pour afficher la version du logiciel de cette unité.
12
Fonctionnement FM
1. Passer en mode FM
Appuyez sur la touche SOURCE pour passer en mode FM. (Fréquence : 87.5-108.0MHz)
Appuyez sur la touche MO/ST sur la télécommande pour activer la stéréo, si la réception est
faible, la stéréo ne peut pas s'activer.
2. Sélectionner des stations
Tournez brièvement la MOLETTE DE RÉGLAGE pour régler la radio vers le haut ou vers le
bas par incréments de 0.05MHz.
Appuyez sur la touche
ou
sur la télécommande pour passer à la piste suivante ou
précédente.
Appuyez sur les touches NUMÉRIQUE sur la télécommande pour choisir les stations
directement.
3. Sauvegarder des stations en présélection
Les étapes sont les même que pour le mode DAB;vous pouvez consulter la section
ENREGISTRER DES STATIONS DAB EN PRÉSÉLECTION.
4. Information FM RDS
Chaque fois que vous appuyez sur la touche INFO, l'écran circulera entre les contenus
suivants: <Type de programme>, <Nom de la station>, <Stéréo/mono>, <Texte Radio>,
<Fréquence>.
Les informations affichées sont fournies par les stations de radio diffusées. Certaines stations
ne fournissent pas ces informations.
5. Paramètres Recherche / Audio
a) réglage de la recherche
(1)Tenez la touche MENU/INFO appuyée, tournez la MOLETTE DE RÉGLAGE pour détecter
le paramètre <paramètres de recherche>.
(2) appuyez sur ENTER pour entrer dans les contenus des menus <Stations de signal fort
uniquement>, <Toutes les stations>.
(3) Appuyez sur la touche ENTER pour confirmer.
b) Paramètres audio
(1)Tenez la touche MENU/INFO appuyée, tournez la MOLETTE DE RÉGLAGE pour détecter
les <Paramètres audio>.
(2) Appuyez sur ENTER pour entrer dans les contenus du menu <Mono forcée>, <Stéréo
autorisée>.
(3) Appuyez sur la touche ENTER pour confirmer.
13
Fonctionnement Bluetooth®
Cette unité est équipée d'une fonction Bluetooth. Vous pouvez donc écouter de la musique par
Bluetooth depuis votre téléphone portable, etc.
Opération de couplage
1. Appuyez sur la touche Source pour passer en mode Bluetooth. L’indicateur lumineux
clignotera en bleu.
2. Activez la fonction Bluetooth de votre appareil (ex:téléphone mobile).
3. Placez l'appareil Bluetooth en mode recherche et entrez dans la liste des appareils
Bluetooth détectés.
4. Sélectionnez LENCO DR-05 BT dans la liste des appareils détectés.
5. Sélectionnez OK ou YES pour coupler l'unité avec votre appareil Bluetooth.
6. Si on vous le demande, saisissez 0000 comme mot de passe (sur certains appareils)
7. Lorsque vous avez correctement couplé votre appareil, l'indicateur lumineux Bluetooth
s'allume en continu.
Fonctionnement de la lecture
1. Appuyez sur la touche
pour lire ou mettre en pause la lecture.
2. Appuyez sur la touche
ou
pour passer à la piste/chanson suivante ou précédente.
3. Appuyez sur les touches VOL+/- pour régler le volume.
4. Si vous souhaitez déconnecter les appareils couplés, appuyez sur la touche BT PAIR pour
déconnecter.
Pour déconnecter et coupler un autre appareil
a) Éteignez la fonction Bluetooth de votre appareil pour déconnecter. L'unité passera
automatiquement en mode de couplage Bluetooth.
b) Dans le mode de couplage, suivez les étapes 2-5 de la section OPÉRATION DE COUPLAGE
Appel pendant la lecture de musique
1. Lorsque vous jouez de la musique depuis un téléphone, et qu'un appel arrive, la musique
s'arrête automatiquement.
2. Lorsque l'appel est terminé, cela dépend du réglage de votre téléphone, si la piste en cours
reprendra sa lecture ou non.
Remarque importante
1. Certains appareils, comme les iPhones, se connectent immédiatement après le couplage,
certains peuvent prendre plus longtemps pour se connecter.
2. L'unité ne peut être connectée et jouer des contenus que depuis un seul appareil à la fois.
3. Pour connecter à un autre appareil couplé, vous devez éteindre le Bluetooth ou découpler
de l'appareil actuellement connecté et connecter manuellement l'autre appareil.
4. Lorsque les appareils sont connectés, transformant les modes et puis, se tournant
à nouveau en mode Bluetooth, l'appareil se connecte automatiquement avec le
dernier appareil couplé. (Fonction Bluetooth sur l'autre appareil est toujours allumé.)
5. Pour certains smartphones pas de connexion automatique, l'utilisateur besoin
d'aller à l'intérieur de BT smartphone et sélectionner LENCO DR-05 BT pour établir
la connexion.
14
Fonction entrée auxiliaire
Vous pouvez connecter un appareil externe avec l'unité pour jouer de la musique sur le
haut-parleur.
1. Connectez la sortie audio du lecteur audio externe avec la fente AUX IN à l'arrière de l'unité.
2. Appuyez sur la touche SOURCE pour entrer dans le mode entrée auxiliaire.
3. Commencez la lecture sur l'appareil externe.
4. Réglez le volume par l'unité.
5. Éteignez les deux appareils avant de les déconnecter.
Remarque:
L'unité ne peut être contrôlée que sur les touches dessus. Vous ne pouvez utiliser que les
touches Vol +/- pour régler le volume. Si vous ne pouvez pas entendre de son du haut-parleur,
vérifiez le volume sur l'appareil externe.
Fonctionnement USB
Le port USB peut être utilisé pour recharger les appareils de musique USB / téléphones.
Lorsque vous insérez un appareil USB, le système chargera l'appareil si la batterie est faible
sur l'appareil USB / le téléphone.
15
Spécifications
Source d’alimentation
DC12V
Consommation énergétique
20W
Consommation énergétique en veille
<1W
Fréquence FM
87,5-108,0MHz
Présélections FM/DAB
20
Portée Bluetooth
33 ft±10m)
Version Bluetooth
CSR V2.1+EDR
Prise d'entrée
USB/3.5mm Aux in
Condition de fonctionnement
5°-35°/level status
Résolution des problèmes
Pour plus de commodité, nous avons listé les méthodes pour résoudre les problèmes
communs que vous rencontrerez lorsque vous utilisez le système. Si le problème persiste,
contactez votre centre de réparation le plus proche.
Problèmes
Causes
Solutions
L’alimentation électrique
La prise principale n’est pas
Vérifiez la connexion et
ne fonctionne pas
correctement insérée dans la
insérez complètement la
prise secteur.
prise d'alimentation dans la
prise secteur.
Pas
de
son
des
haut-parleurs
Réception de signal faible, le
Réglez la position de
volume n'est pas monté;
réception radio;
Pas de couplage avec un appareil
Augmentez le volume;
Bluetooth
Coupler
votre
appareil
Bluetooth
L'écran est blanc.
Cela peut se produire si le
La radio tentera de se
diffuseur audio change d'étiquette
connecter de nouveau.
de service ou d'étiquette distante
procédez à une recherche
lorsque vous réglez la station.
Le son est faible ou de
D'autres appareils comme un
Déplacez l'unité loin de
pauvre qualité, on
téléviseur peuvent interférer avec
l'appareil et placez là où vous
entend un grésillement
la réception radio.
trouvez un signal fort.
sur certaines stations.
Le signal est trop faible
16
Service et support
Pour plus d'informations : www.lenco.com
Pour de l'aide : http://lencosupport.zendesk.com
Service d’assistance Lenco :
Allemagne
0900-1520530
Pays-Bas
0900-23553626
Belgique
02-6200115
France
03-81484280
(Prix d’un appel local)
(Prix d’un appel local + 1ct P/min)
(Prix d’un appel local)
(Prix d’un appel local)
Le centre d’assistance est joignable du lundi au vendredi entre 9 heures et 18 heures.
Lorsque vous contactez Lenco, on vous demandera systématiquement le modèle et le
numéro de série de votre produit. Le numéro de série se trouve à l'arrière de l'appareil.
Écrivez le numéro de série ci-dessous:
Modèle : DR-05 BT
Numéro de série : _______________________________
Lenco propose un service et une garantie conformément aux lois européenne, ce qui
signifie qu’en besoin de réparation (aussi bien pendant et après la période de garantie),
vous pouvez contacter votre revendeur le plus proche.
Remarque importante : Il n’est pas possible de renvoyer l’appareil pour réparation
directement à Lenco.
Remarque importante : Si l’unité est ouverte ou modifiée de quelque manière par un
centre de service non agréé, cela mettra fin à la garantie.
Cet appareil ne convient pas pour une utilisation professionnelle. En cas d’utilisation
professionnelle, les obligations de garantie du fabricant seront annulées.
Remarque, déclarations et informations
Lenco n’est pas responsable pour toute erreur d’impression dans ce manuel de
l’utilisateur.
Les spécifications et l’apparence externe de cet appareil peuvent faire l’objet de
modifications sans notifications préalable.
Déclaration de conformité
Les produits avec la marque CE sont conformes à la directive CEM
(2004/108/CE) et à la directive basse tension (2006/95/EC) émises par
la commission de la communauté européenne.
Par la présente, STL Group BV, Ankerkade 20 NL 5928 PL Venlo déclare que le ce
produit audio est conforme aux exigences essentielles et autres
ions appropriées
17
de la Directive 1999/5/EC. La déclaration de conformité peut être consultée sur
https://lencosupport.zendesk.com/forums/22413161-CE-Documents
Ce produit fonctionne à 2400 à 2483,5 MHz et est destiné uniquement pour être
utilisé dans un environnement domestique normal. Ce produit convient à cet usage
pour tous les pays de l'UE.
Ce symbole indique que le produit électrique concerné ou la batterie ne
doit pas être jeté parmi les autres déchets ménagers en Europe. Pour
garantir un traitement correct du déchet de la batterie ou de l'appareil,
veuillez vous en débarrasser en vous conformant aux règlements en
vigueur dans votre secteur en ce qui concerne le des appareils électriques
et autres batteries. En agissant de la sorte, vous contribuerez à la préservation des
ressources naturelles et à l'amélioration des niveaux de protection environnementale
concernant le traitement et la destruction des déchets électriques. (Directive sur les
Déchets des Equipements Electriques et Electroniques).
®Tous droits réservés
18
und DAB+
DR-05 BT
®
Retro Radio con Bluetooth y DAB+
Guía del Usuario
w w w.lenco.com
Contenido
Advertencia............................................................................................................................2
Paneles .................................................................................................................................4
Mando a distancia..................................................................................................................6
Operación básica...................................................................................................................8
Operación DAB .....................................................................................................................9
Operación FM ......................................................................................................................12
Operación Bluetooth ............................................................................................................13
Operación Aux in /USB ........................................................................................................14
Solución de problemas/Especificaciones.............................................................................15
Importantes instrucciones de seguridad
Por favor, lea y entienda todas las advertencias presentadas a continuación, así como las que
figuran en la unidad. Esta unidad ha sido diseñada y fabricada para garantizar la seguridad
personal.
Use solo la fuente de alimentación especificada en el manual de instrucciones o en el sistema.
Evite colocar la unidad al sol o cerca de fuentes de calor.
No doble ni tire demasiado del cable. No lo someta tampoco a presión pisándolo, por ejemplo.
Mantenga la unidad y el enchufe alejados del agua.
No abra la cubierta y no deje caer nada sobre la unidad, como monedas, horquillas para
el pelo o agujas.
Desenchufe la unidad de la toma de corriente cuando no use la unidad por un periodo
prolongado.
1
Para conseguir el mejor rendimiento y el máximo disfrute, y para familiarizarse con sus
funciones, por favor, lea el manual del usuario de este producto antes de intentar usarlo, así
garantizará años de funcionamiento sin problemas y el placer de sus funcionalidades.
Precaución:
Para reducir el riesgo de descarga eléctrica, no desmonte el producto ni lo exponga a la lluvia
o la humedad. El interior del aparato no contiene partes que puedan ser reparadas por el
usuario. Para su reparación, acuda exclusivamente a personal cualificado.
Explicación de los símbolos gráficos:
El símbolo del rayo dentro de un triángulo equilátero pretende alertarle de la presencia de
voltaje peligroso no aislado en el interior del producto, que podría ser de la suficiente magnitud
como para constituir un riesgo de descarga eléctrica a las personas.
El signo de exclamación dentro de un triángulo equilátero pretende alertarle de la presencia
de importantes instrucciones de uso y mantenimiento (reparación) en los impresos que
acompañan a este producto.
Advertencias
1. Lea estas instrucciones - Lea todas las instrucciones de funcionamiento y seguridad
antes de usar este aparato.
2. Conserve estas instrucciones - Conserve las instrucciones de funcionamiento y
seguridad para futuras referencias.
3. Observe todas las advertencias-Deberá respetar todas las advertencias que
figuran en el aparato y en el manual de instrucciones.
4. Siga todas las instrucciones - Siga todas las instrucciones de uso y funcionamiento.
5. No use este aparato cerca del agua- No deberá usar el aparato cerca del agua o
la humedad - por ejemplo, en un sótano húmedo o cerca de una piscina, etc.
6. Limpie el aparato solo con un trapo húmedo.
7. No bloquee ninguna de las aberturas de ventilación.
Instale según las instrucciones del fabricante.
8. No instale cerca de fuentes de calor como radiadores, salidas de aire caliente
de la calefacción, fuegos de cocina u otros aparatos (incluyendo amplificadores)
que produzcan calor.
9. No eluda el propósito de seguridad del enchufe polarizado o del tipo de toma de
tierra. Un enchufe polarizado tiene dos hojas, siendo una más ancha que la otra. Un
enchufe del tipo de toma de tierra tiene dos hojas y una clavija de toma de tierra. La
hoja ancha o la tercera clavija se le proporcionan por su seguridad. Si el enchufe no
se ajustara a su toma de corriente, consulte a un electricista para que se encargue de
la sustitución de la toma obsoleta.
10. Evite pisar o pellizcar el cable de alimentación, especialmente en la parte
del enchufe, ladrones y el lugar en que este sale del aparato.
11. Utilice únicamente accesorios especificados por el fabricante.
12. Coloque el aparato sobre un carrito, soporte, pie de apoyo o mesa que haya sido
especificado por el fabricante o vendido con el televisor. Cuando use el televisor en
combinación con un carrito, tenga cuidado al desplazarlos juntos, para evitar las
lesiones que podría producir un vuelco de ambos
13. Desenchufe este aparato durante las tormentas o cuando no vaya a usarlo por un
periodo prolongado.
14. Para su reparación, acuda a personal cualificado. Será necesario reparar el
equipo cuando este haya resultado dañado en cualquier modo, como en el cable
de alimentación o el enchufe, cuando se haya derramado líquido o haya caído
algún objeto en la unidad, si el aparato ha sido expuesto a la lluvia o la
humedad.
15. Por favor, mantenga la unidad en un ambiente bien ventilado.
16. Las instrucciones de reparación están dirigidas únicamente a personal
cualificado. Para reducir el riesgo de descarga eléctrica, no realice ninguna
reparación que no haya sido descrita en el manual de instrucciones, a menos
que usted esté cualificado para ello.
2
17. El ENCHUFE se usa como elemento de desconexión y deberá permanecer
operativo en todo momento.
18. Este es un equipo de Clase II o aparato eléctrico de doble aislamiento. Ha sido
diseñado de modo que no sea necesaria una conexión de seguridad a tierra.
19. Este símbolo de un rayo en un triángulo equilátero pretende alertar al usuario de
la presencia de voltaje peligroso no aislado en el interior del aparato, que podría ser de
la suficiente magnitud como para constituir un riesgo de descarga eléctrica.
- Para reducir el riesgo de descarga eléctrica, no retire la cubierta (o tapa), ya que
el interior del aparato no contiene partes que puedan ser reparadas por el usuario.
Para su reparación, acuda exclusivamente a personal cualificado.
- El signo de exclamación dentro de un triángulo equilátero pretende alertar al usuario
de la presencia de importantes instrucciones de seguridad y funcionamiento en los
impresos que acompañan al aparato.
20. Radiación láser invisible al abrirlo y desactivar el bloqueo de seguridad. Evite la
exposición al rayo láser.
21. No someta las pilas del mando a distancia a un calor excesivo, como el causado
por un fuego, la luz solar, etc.
22. No someta el aparato a goteos ni salpicaduras. No coloque objetos que contengan
líquidos, como jarrones, sobre el aparato.
23. Para reducir el riesgo de descarga eléctrica, no someta este aparato a la lluvia
o la humedad.
24. Correcta eliminación de este producto. Esta marca indica que este producto no
deberá ser eliminado junto con los desechos del hogar en el ámbito de la UE. Para
evitar los posibles daños en el medio ambiente y a la salud humana causados por la
eliminación incontrolada de residuos, recicle de forma responsable para promover la
reutilización sostenible de recursos materiales. Si desea depositar su aparato usado,
por favor, utilice los sistemas de devolución y recolección o contacte con el
establecimiento en el que compró el producto. Ellos podrán hacerse cargo del
producto para su reciclaje respetuoso con el medio ambiente.
Nota de ERP II
Productos relacionados con la energía (ERP)-Este producto cumple con la directiva
de ecodiseño de la Comisión Europea y con sus regulaciones de implementación.
Pasados 15 minutos (aprox.) en los que se haya producido ninguna acción (excepto
en el modo FM), el sistema pasará automáticamente al modo de espera. Siga el
manual de instrucciones para conocer el modo de funcionamiento.
3
Descripción de las partes
Vista frontal
9 10
VOL
TUNER / ENTER/ BT PAIR
SOURCE
STANDBY
TREBLE
INFO/MENU/
BASS
PRESET/
8
No. Componentes
1. Standby
2 Treble
12
SCAN/
11
Descripción
Toque este botón UP o DOWN para activar el modo de reposo.
Toque UP o DOWN para entrar a la interfaz de configuración
de agudos y use la perilla de volumen dentro de tres segundos
para ajustar el nivel de agudos para obtener un efecto de
sonido vívido.
3 Bass
Toque UP o DOWN para entrar a la interfaz de configuración de
bajos y use la perilla de volumen dentro de tres segundos para
ajustar el nivel de bajos para obtener un efecto de sonido vívido.
4 Control Vol.
Ajuste el volumen a su gusto.
5 Pantalla de visualización
Muestra la frecuencia de fuente e información de
reproducción.
Indica el estado de modo.
6 Indicador de Bluetooth
7 Sensor del mando a
Perilla de sintonizador/
8 Entrar/ BT Pair
(Pareado BT)
Apunte a este sensor con el mando a distancia.
En el modo DAB, gire para saltar a la emisora siguiente o
anterior.
En el modo FM, sintonice la frecuencia aumentando o
disminuyendo por pasos de 0,05MHz.
En el menú Estado, presione ENTRAR para confirmar la
selección.
Cuando la alarma se enciende, pulse para detener la alarma.
o girar la perilla del sintonizador para entrar
en modo siesta, la alarma sonará en 5 minutos
(sólo en el modo de timbre).
Si desea desconectar los dispositivos pareados, presione BT
PAIR para desconectar y la unidad entra en el Estado de
pareado BT.
Luego use el dispositivo móvil para hacer la conexión.
9 Fuente
10 Menú/Información
Siguiente
Presione varias veces para seleccionar la fuente que desee:
FM, USB, BLUETOOTH(BT), AUX IN, DAB.
En el modo DAB o FM, presione y sostenga para entrar al
menú de configuración.
En el modo DAB, presione brevemente para avanzar
cíclicamente por la información de la emisora.
En el modo BT, presione el botón Siguiente para saltar a la
pista siguiente.
En el modo FM, presione varias veces para avanzar
cíclicamente por la información de radio.
En el modo de espera, presione para introducir la hora y la alarma.
11 Anterior
Escanear
12 Preselección
Reproducir/Pausar
En el modo BT, pulse para saltar a la pista siguiente.
En el modo FM, presione para cambiar de un canal.
En el modo radio, use el botón Preset para guardar
las emisoras favoritas.
En el modo BT, presione para pausar la reproducción, y
presione de nuevo para reanudar la reproducción.
4
Vista posterior
DR-05 BT Black
Retro Radio Bluetooth® and DAB+
Channel Block:DAB+(band lll) 5A-13F
12
1.67A
Power Consumption: 20W
Production Date:
Made in China
S/N:
USB
AUX IN
DR-05 BT White
Retro Radio Bluetooth® and DAB+
Channel Block:DAB+(band lll) 5A-13F
12
1.67A
Power Consumption: 20W
Production Date:
Made in China
S/N:
USB
12
No.
13
Componentes
Antena FM
14
Puerto USB
15
Aux in
16
Toma de suministro
de corriente
AUX IN
15
13 14
Descripción
Extienda la antena FM para conseguir una buena recepción
de radio.
En este puerto también podrá cargar el dispositivo USB si su
podrá controlar el volumen de la unidad
Use el cable de audio AUX IN de 3,5mm para conectarse con
dispositivos de música externos
(reproductor de DVD, ordenadores, teléfonos, etc.)
En el modo AUX IN, la unidad funciona como un altavoz y usted
podrá controlar el volumen de la unidad.
Inserte el adaptador en la toma de alimentación eléctrica y encienda
la unidad.
5
Descripción del mando a distancia
MUTE
STANDBY
10
SOURCE
MENU
INFO
11
12
13
PRESET
STOP
ID3
TREBLE
SNOOZE/DIM
BASS
SLEEP
ALARM
BT PAIR
14
15
16
17
18
8
9
1
2
3
4
5
6
7
8
9
0
MO/ST
RANDOM
19
20
DR-05 BT
No.
1
Botones
Mute
Descripción
Púlselo para suprimir el audio.
2
Source
Presione varias veces para seleccionar la fuente que desee: FM, USB,
BLUETOOTH(BT), AUX IN, DAB.
3
Menú
Presione para entrar al menú de configuración.
4
Reproducir/Pausar
5
Preselección
6
Treble
En el modo BT, presione para pausar la reproducción, y presione de
nuevo para reanudar la reproducción.
Cuando la alarma se enciende, pulse para detener la alarma.
En el modo FM, presione para cambiar de un canal.
En el modo FM o DAB, use el botón Preset para guardar las emisoras
favoritas.
Pulse el botón Treble y después use Volume+/- para ajustar los
agudos.
7
Atenuar suspensión
Si se ha programado la alarma, cuando esta suene, pulse
Snooze para detenerla. (sólo en el modo de timbre).
En cualquier estado, presione para seleccionar las tres clases de
brillo de la pantalla.
Púlselo para ajustar el temporizador de apagado automático:
desactivado/10/15/30/45/60/90/120 minutos.
Cuando se haya alcanzado el tiempo seleccionado, la unidad
entrará en el modo de suspensión automáticamente.
8
Sleep
9
Botones numéricos
10
Standby
Use las teclas numéricas para seleccionar pistas/emisoras
Púlselo para encender la unidad o para pasar al modo de espera.
11
Información
En el modo FM o DAB, presione para consultar la información de las
Volumen+/-
emisoras.
Púlselo para ajustar el volumen a su gusto.
12
6
13
Siguiente
Anterior
En el modo BT, presione para saltar a la pista o canción siguiente o
anterior.
En el modo FM, presione para sintonizar la frecuencia aumentando o
disminuyendo por pasos de 0,05MHz; presiones y sostenga para saltar
a la frecuencia disponible siguiente o anterior
14
Stop
Presione para detener la reproducción, presione
para iniciar la
reproducción desde el principio de la pista actual.
15
Bass (Bajo)
Presione el botón Bass y use Volume+/- para ajustar los bajos.
16
ID3
Mientras reproduzca MP3, presiona para mostrar información de la
17
Alarm
pista actual: álbum, artista, etc.
En el estado standby, presione para entrar a la interfaz de
configuración de la hora. Se muestra Actualización Automática de
la Hora (Time Auto Update).
Escoja SÍ para establecer la hora TIME AUTO UPDATE. Cuando encienda
18
BT Pair
19
Aleatorio
la unidad en el modo DAB o FM RDS, la hora se actualizará auto.
En el estado de espera, púlselo para ajustar la hora, la alarma 1 y
la alarma 2
Pulse una vez para entrar en el estado de ajuste de la hora. Pulse
dos veces para entrar en el estado de programación de la Alarma
1. Pulse una tercera vez para entrar en el estado de
programación de la Alarma 2.
En el estado de ajuste de la hora o de la alarma, use
para
seleccionar contenidos, después pulse
para confirmar,
entonces el sistema pasará automáticamente al siguiente estado
de ajuste.
Cuando se encuentre en la interfaz de ajuste de la hora, la
pantalla. Mostrará el AAAA/MM/DD.
Use
para seleccionar los dígitos del día, después pulse
y después seleccione 24/12 horas, después seleccione las
Hora/Minuta, pulse
para finalizar
Cuando se encuentre en la interfaz de programación de la alarma,
los dígitos “0:00" parpadearán, pulse
o
para
seleccionar los dígitos
de la hora de la alarma, pulse
para confirmar. Después
seleccione las opciones de alarma: Diaria, Laborables, Fines de
semana, Una vez. A continuación, seleccione el modo de alarma:
Modo zumbador, Modo FM, USB, DA B. Finalmente, seleccione el
volumen de la alarma. Cuando haya terminado la programación
de la Alarma 1, podrá programar la Alarma 2. Para cancelar,
pulse el botón ALARM, después seleccione OFF para cancelarla.
Púlselo para activar la función BT de la unidad para el emparejamiento,
en caso de no haberlo realizado todavía
En el estado de emparejado, púlselo para desconectar los dispositivos.
Presione para reproducir las pistas aleatoriamente. Presione de nuevo
para cancelar.
20
MO/ST
En el modo de radio, presione para cambiar a estéreo si hay una buena
recepción. Si la recepción es débil, no puede activar estéreo.
7
Operación básica
Antes de empezar la configuración de la unidad, hay algunos pasos que debe considerar para
hacer la configuración idónea y correctamente.
Pasos importantes de operación:
1. Presiones y sostenga el botón MENU/INFO de la parte frontal del panel o presione el botón
MENU del mando a distancia para entrar al menú de configuración.
o
2. Gire TUNER KNOB del panel frontal
presione el botón del mando a distancia para
avanzar cíclicamente por el contenido del menú.
3. Presione ENTER (TUNER KNOB) de la parte frontal del panel o presione el botón
del
mando a distancia para confirmar las selecciones.
4. Si no desea alguna de las elecciones, presione el botón MENU/INFO del panel frontal para
regresar al contenido del menú anterior (eso no está disponible en el proceso de SETTING
TIME (CONFIGURACIÓN DE LA HORA)).
Configuración de la hora
1. En el modo standby, presionar el botón de Alarma del mando a distancia para configurar la
hora. En la pantalla se muestra:
Time Auto Update
OFF / ON
2. Gire TUNER KNOB o presione
o
en el mando a distancia para seleccionar el
contenido: OFF o ON.
<A> Si escoge ON, presione
para confirmar la configuración de la unidad a TIME AUTO
UPDATE.
<B> Si escoge OFF, presione
para entrar en la interfaz de configuración manual.
Se muestra en la pantalla:
2013-01-01
0:00
3. Gire TUNER KNOB o presione
presione
o
para seleccionar los números de la hora y luego
para confirmar.
Cada vez que termine de configurar un elemento, la unidad avanzará automáticamente a la
configuración del siguiente elemento.
4. Cuando haya terminado de configurar la hora, pulse el botón ALARM para entrar a la
Alarma 1 y Alarma 2.
Cuando haya terminado de configurar la hora y la fecha, las palabras de la pantalla
dejarán de destellar.
Ahora puede hacer otras operaciones para obtener un mejor entretenimiento.
8
Operación DAB
Entrar al modo DAB
Presione el botón SOURCE para cambiar al modo DAB. La unidad empieza buscar cuando se
active el modo DAB. En la pantalla se muestra una barra de deslizamiento indicando el
progreso de la búsqueda y la cantidad de emisoras encontradas. Una vez terminada la
búsqueda, se reproduce la primera emisora.
Seleccionar emisoras
1. Gire TUNER KNOB o presione
o
para saltar a las emisoras anteriores o siguientes.
2. Presione ENTER o
en el mando a distancia para activar la emisora.
Búsqueda de emisoras
Presione y sostenga el botón MENU/INFO del panel frontal o presione el botón MENU del
mando a distancia para entrar al menú de configuración. Gire TUNER KNOB o presione
del mando a distancia para seleccionar <Búsqueda completa> o <Sontonización
manual>. Presione ENTER para confirmar.
1. Si escoge <Búsqueda completa>, se empezarán a buscar todos los canales DAB.
2. Si escoge <Sintonización manual>, presione ENTER para desplazarse cíclicamente por
todos los canales, los cuales están numerados de 5A a 13F.
1.
Presione brevemente ENTER para activar las emisoras seleccionadas.
Almacenar emisoras preseleccionadas
Es posible guardar máximo 20 emisoras favoritas. Esto le permitirá tener acceso a sus
emisoras favoritas de una forma rápida y fácil.
Largo pulse los botones de números 0-9 sólo puede ahorrar 10 estaciones sólo
para ahorrar más, por favor, consulte las operaciones siguientes.
1. Para almacenar una emisora preseleccionada, primero debe escuchar la emisora que le
gustaría guardar.
2. Presione y sostenga el botón PRESET hasta que se muestre en la pantalla:
Preset Store
<1: (Empty)>
3. Gire TUNER KNOB o presione
o
en el mando a distancia para seleccionar el
número que desee guardar.
4. Para confirmar la preselección, presione ENTER o del panel frontal o
del mando a
distancia y aparecerá en la pantalla: <Preselección X almacenada>.
Nota: si alguna de las veces cada emisora se han preseleccionado antes, aparecerá el
nombre de la emisora en la pantalla. Por ejemplo: <BBC Radio4 3>.
5. Presione el botón PRESET para llamar una preselección y aparecerá en pantalla:
Preset Recall
<1: (Empty)>
Ejemplo:
Si está escuchando BBC World la cual desea preseleccionar en la emisora # 5.
a) Sintonice la emisora BBC World que desee preseleccionar.
b) Presione y sostenga el botón PRESET hasta que aparezca <Preset Store> (Preselección
almacenada).
9
c) Gire TUNER KNOB para seleccionar 5, presione ENTER, ahora <Preselección 5
almacenada>.
Modo INFO
Cada vez que presione el botón INFO ben el mando a distancia o MENU/INFO en el panel
frontal, aparecerá en la pantalla cíclicamente la siguiente información:
1. RSSI
2. Estilo de música— como <Música Rock>
3. Nombre de la emisora — tal como <BBC National DAB>
4. Frecuencia— tal como <5A 174.928MHz>
5. Error de señal: 25
6. Tasa de bits — tala como <128Kbps/DAB>
7. DLS
Entrar al menú configuración
Presiones y sostenga el botón MENU/INFO de la parte frontal del panel o presione el botón
MENU del mando a distancia para entrar al menú de configuración. Gire TUNER KNOB para
desplazarse hacia abajo por el contenido del menú: <Búsqueda
completa>→<Sintonizacioón manual>→<DRC>→<Quitar> →<Sistema>
DRC (Control de Rango Dinámico)
Esto causa que el radio reduzca el rango dinámico de la señal de audio. El propósito de esto
es adaptar el rango dinámico de la señal de audio para que se pueda escuchar en un entorno
ruidoso.
Nota: esta función no siempre está disponible en muchas de las emisoras DAB.
Los pasos se describen a continuación:
1. Presione y sostenga el botón MENU/INFO en el panel frontal o MENU en el mando a
distancia. Gire TUNER KNOB para encontrar la configuración <DRC>.
2. Presione el botón ENTER para entrar al menú de contenido y escoja DRC Off, DRC High o
DRC Low.
3. Presione ENTER para confirmar la configuración.
Quitar emisoras
Cuando la radio haya realizado una búsqueda en varios lugares puede encontrar que algunas
emisoras almacenadas no funcionan. Esta función quita automáticamente las emisoras de la
lista de emisoras almacenadas.
Los pasos se describen a continuación:
1. Presione y sostenga MENU/INFO. Gire TUNER KNOB para encontrar la configuración
<Quitar>.
2. Presione el botón ENTER para entrar al menú de contenido y luego escoja SÍ o NO.
3. Presione ENTER para confirmar la configuración.
10
Configuración del sistema
Presione y sostenga MENU/INFO. Gire TUNER KNOB para encontrar <Sistema>. Presione
ENTER para entrar al menú de configuración. Gire TUNER KNOB para desplazarse hacia
abajo por el contenido del menú: <Idioma> ,<Restablecer los valores de fábrica> y
<Versión del software>.
Idioma
Para seleccionar el idioma de la unidad en esta sección:
1. Presione y sostenga MENU/INFO. Gire TUNER KNOB para encontrar la configuración
<Sistema>.
2. Presione el botón ENTER para entrar al menú de contenido y encontrar la configuración
<Idioma>.
3. Presione ENTER para escoger entre <Inglés>, <Francés>, <Alemán>, <Holandés> y
<Español> .
4. Seleccione uno de los idiomas anteriores y luego presione ENTER para confirmar.
Restablece los valores de fábrica
Para restablecer los valores de fábrica de la unidad en esta sección:
1. Presione y sostenga MENU/INFO. Gire TUNER KNOB para encontrar la configuración
<Sistema>.
2. Presione el botón ENTER para entrar al menú de contenido y encontrar la configuración
<Restablecer los valores de fábrica>.
3. Presione ENTER para restablecer los valores de fábrica de esta unidad.
Versión del software
Para buscar la versión del software de la unidad en esta sección:
1. Presione y sostenga MENU/INFO. Gire TUNER KNOB para encontrar la configuración
<Sistema>.
2. Presione el botón ENTER para entrar al menú de contenido y encontrar la configuración
<Versión del software>.
3. Presione ENTER para ver la versión del software de esta unidad.
11
Operación FM
1. Entrar al modo FM
Presione el botón SOURCE para entrar al modo FM. (Frecuencia: 87.5-108.0MHz) Presione
el botón MO/ST en el mando a distancia para activar la función estéreo. Si la recepción es
débil, no se puede activar la función estéreo.
2. Seleccionar emisoras
Presione brevemente y gire TUNER KONB para sintonizar la radio aumentando o
disminuyendo la frecuencia con intervalos de 0.05MHz.
Presione
o
en el mando a distancia para ir a la emisora siguiente o anterior.
Presione los botones de NÚMERO en el mando a distancia para seleccionar las emisoras
directamente.
3. Almacenar emisoras preseleccionadas
Los pasos son los mismos que en el modo DAB. Consulte la sección ALMACENAR
EMISORAS PRE SELECCIONADAS DE DAB.
4. Información FM RDS
Cada vez que usted presiona el botón INFO, se presentará cíclicamente el siguiente
contenido la pantalla: <Tipo de programa>, <Nombre de la emisora>, <Estéreo/mono>,
<Texto de radio>, <Frecuencia>.
Las emisoras de radio presentarán la información de la pantalla. Algunas emisoras pueden no
suministrar.
5. Configuración de Búsqueda/Audio
a) Configuración de búsquedas
(1) Presione y sostenga MENU/INFO. Gire TUNER KNOB para encontrar <Configuración de
búsquedas>.
(2) Presione ENTER tpara entrar al contenido del menú <Solamente emisoras con fuerza
de señal estable>,<Todas las emisoras>.
(3) Presione el botón ENTER para confirmar.
b) Configuración de Audio
(1) Presione y sostenga MENU/INFO. Gire TUNER KNOB para encontrar <Configuración de
Audio>.
(2) Presione ENTER para entrar el contenido del menudo <Mono forzado>,<Estéreo
permitido>.
(3) Presione el botón ENTER para confirmar.
12
Funcionamiento del Bluetooth®
Esta unidad incluye la función de Bluetooth, para poder disfrutar de la música con su
dispositivo Bluetooth como en un teléfono móvil, etc..
Operación de emparejamiento
1. Pulse el botón SOURCE para entrar en el modo Bluetooth. La luz indicadora
parpadeará en color azul.
2. Encienda la función de Bluetooth de su dispositivo (un teléfono móvil, por ejemplo).
3. Seleccione el modo de búsqueda de Bluetooth del dispositivo y entre en la lista de
dispositivos Bluetooth encontrados.
4. Seleccione LENCO DR-05 BT de la lista de dispositivos encontrados.
5. Seleccione Aceptar o Sí para emparejar la unidad con su dispositivo Bluetooth.
6. Si se le pidiera, introduzca la contraseña 0000 (para algunos dispositivos).
7. Cuando haya conseguido emparejarse con su dispositivo, el indicador de Bluetooth
se iluminará de forma continua.
Playback operation
1. Pulse el botón
para reproducir o dejar en pausa la reproducción.
en
para pasar a la pista/canción anterior o siguiente
2. Pulse el botón
3. Pulse los botones VOL+/- para ajustar el volumen.
4. Si quisiera desconectar los dispositivos emparejados, pulse el botón BT PAIR para
la desconexión.
Para desconectarse y emparejarse con otro dispositivo
a) Apague la función de Bluetooth de su dispositivo para la desconexión. A continuación, la
unidad entrará en el estado de emparejamiento de Bluetooth de forma automática.
b) En el estado de emparejado, siga los pasos 2-5 de la sección de OPERACIÓN DE
EMPAREJAMIENTO para emparejarse con otro dispositivo.
Llamada telefónica durante la reproducción de música
1. Cuando reproduzca música mediante un teléfono y reciba una llamada, la música se
detendrá automáticamente.
2. Cuando finalice la llamada, dependerá del ajuste que haya seleccionado en su teléfono
para que la pista que se encontraba en reproducción se reanude o no.
Aviso importante
1. Algunos dispositivos, como los iPhone, se conectan inmediatamente tras el
emparejamiento, otros necesitan algo más de tiempo.
2. La unidad solo podrá conectarse y reproducir contenido de un dispositivo a la vez.
3. Para conectarse a un dispositivo emparejado distinto, tendrá que apagar el
Bluetooth o desemparejar el dispositivo que se encuentre emparejado y conectarse
manualmente a otro dispositivo.
4. Cuando los dispositivos se asocian, la conversión de los modos y girando de nuevo
al modo de Bluetooth, la unidad de conexión automática con el último dispositivo
emparejado. (Función Bluetooth en el otro dispositivo está siempre encendido.)
5. Para algunos teléfonos inteligentes no auto-conexión, el usuario tiene que
ir a BT dentro smartphone y seleccione LENCO DR-05 BT para hacer la conexión.
13
Funcionamiento de Aux in
Podrá conectar un dispositivo externo a la unidad para reproducir música a modo de altavoz.
1. Conecte la salida de audio del reproductor de audio externo con la toma AUX IN del panel
posterior de la unidad.
2. Pulse el botón SOURCE para entrar en el modo AUX IN.
3. Comience la reproducción del dispositivo externo.
4. Ajustar el volumen de la unidad.
5. Apague ambos dispositivos antes de desconectarlos.
Nota:
La unidad no podrá ser controlada solo con los botones. Solo podrá usar los botones
VOL+/- para ajustar el volumen. Si no puede oír nada por el altavoz, por favor,
compruebe el volumen del dispositivo externo.
Funcionamiento de USB
El puerto USB se puede usar para cargar los teléfonos/dispositivos de música USB.
Cuando conecte un dispositivo USB, el sistema cargará la batería del teléfono/dispositivo
USB si esta estuviera baja.
14
Especificaciones
Fuente de alimentación
DC12V
Consumo
20W
Consumo en espera
Frecuencias de FM
<1W
87.5-108.0MHz
Preselecciones FM/DAB
Alcance de Bluetooth
Versión de Bluetooth
20
33 ft. (10m)
CSR V2.1+EDR
Tomas de entrada
USB/3.5mm Aux in
Temperatura operativa
5°-35°/estado de nivel
Localización y resolución de problemas
Para su comodidad, hemos elaborado una lista con algunos métodos para resolver algunos
de los problemas más comunes que usted podría encontrarse al usar este sistema. Si el
problema se diera repetidas veces, póngase en contacto con el centro de mantenimiento más
próximo.
Problemas
No hay suministro de
corriente
Causas
El enchufe no ha sido
introducido del todo en la toma
de corriente.
No hay sonido de los
altavoces
Recepción de señal débil; No
se ha subido el volumen;
No hay emparejamiento con
dispositivo Bluetooth.
La pantalla está en
blanco
Esto podría ocurrir si el
retransmisor de audio cambia
la etiqueta de un servicio o
controla una etiqueta durante
la sintonización de emisoras.
El sonido es débil o de
pobre calidad; Se
puede oír un sonido
inestable en algunas
emisoras.
Podría haber otros
dispositivos, como un TV,
interfiriendo con la recepción
de radio; la recepción de radio
es demasiado débil
15
Soluciones
Compruebe la conexión e
introduzca del todo el
enchufe en la toma de
corriente.
Ajuste la posición de
recepción de radio;
Suba el volumen;
Empareje el dispositivo
Bluetooth.
La radio volverá a
intentar la sintonización.
Aleje la unidad de otros
dispositivos e intente
reposicionarla para
conseguir una recepción
de radio más potente.
Servicio y asistencia
Para información: www.lenco.com
Para asistencia: http://lencosupport.zendesk.com
Teléfono de asistencia Lenco:
Alemania
0900-1520530
Países Bajos
0900-23553626
02-6200115
Bélgica
Francia
03-81484280
(Tarifa local)
(Tarifa local + 1ct P/min)
(Tarifa local)
(Tarifa local)
El teléfono de asistencia está disponible de lunes a viernes, de 9 de la mañana a 6 de
la tarde.
Cuando se ponga en contacto con Lenco, se le pedirá el modelo y el número de serie
de su producto. El número de serie se encuentra en la parte posterior del aparato. Por
favor, escriba debajo el número de serie:
Modelo: DR-05 BT
Número de serie:_________________________________
Lenco ofrece servicio y garantía en cumplimiento con la ley de la Unión Europea, lo
cual implica que, en caso de que su producto precise ser reparado (tanto durante como
después del periodo de garantía), deberá contactar directamente con su distribuidor.
Nota importante: No es posible enviar sus reparaciones directamente a Lenco.
Nota importante:
Si la unidad es abierta por un centro de servicio no oficial, la garantía quedará
anulada.
Este aparato no es adecuado para el uso profesional. En caso de darle un uso
profesional, todas las obligaciones de garantía del fabricante quedarán anuladas
Avisos, declaraciones e información
Lenco no se hace responsable de los errores que impresión presentes en el manual.
Las especificaciones y la apariencia externa del equipo están sujetas a cambios sin
notificación previa.
Declaración de Conformidad
Los productos con la marca CE cumplen con la Directiva EMC
(2004/108/EC) y con la Directiva de Bajas Tensiones (2006/95/EC)
emitida por la Comisión de la Unión Europea.
Por la presente, STL Group BV, Ankerkade 20 NL 5928 PL Venlo, declara que este
producto de audio cumple con los requisitos esenciales y otras provisiones
correspondientes de la Directiva 1999/5/EC. Podrá consultar la Declaración de
Conformidad en https://lencosupport.zendesk.com/forums/22413161-CE-Documents
Este producto funciona a 2400 a 2483,5 MHz y está diseñada únicamente
16
utilizado dentro de un entorno doméstico normal. Este producto es adecuado para este
propósito dentro de todo
Este símbolo indica que no deberá deshacerse del producto eléctrico o
batería en cuestión tratándolo como desecho del hogar en el ámbito de
la UE. Para garantizar un tratamiento residual correcto del producto y
su batería, por favor, elimínelos cumpliendo con las leyes locales
aplicables sobre requisitos para el desechado de equipos eléctricos y
baterías. De hacerlo, ayudará a conservar recursos naturales y mejorar
los estándares de protección medioambiental en el tratamiento y
eliminación de residuos eléctricos (Directiva sobre la Eliminación de Equipos
Eléctricos y Electrónicos).
®Reservados todos los derechos
17