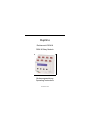
1
Doepke Dupline Relaismodul DRM 8 DRM 8 Relay Module Bedienungsanleitung Operating Instructions 3931286/2011.02/H Doepke Inhaltsverzeichnis 1. 2. 3. 4. 5. 6. 7. 8. 9. Allgemeines ......................................................................................................... 3 Wichtige Hinweise vorab .................................................................................... 3 Installation............................................................................................................ 4 Inbetriebnahme und Konfiguration.................................................................... 4 Anzeigen............................................................................................................. 11 Bedienung .......................................................................................................... 12 Garantie .............................................................................................................. 14 Technische Daten.............................................................................................. 14 Menüstruktur...................................................................................................... 16 Table of Contents 10. General Information .......................................................................................... 17 11. Important Notes in Advance............................................................................. 17 12. Installation.......................................................................................................... 18 13. Putting into Service and Configuration........................................................... 19 14. Displays.............................................................................................................. 25 15. Operation............................................................................................................ 26 16. Guarantee........................................................................................................... 28 17. Technical Data ................................................................................................... 28 18. Menu Structure .................................................................................................. 30 19. Zeitverhalten Step-Betrieb / Timing Step-Mode.............................................. 31 20. Anschlussschema / Connection Diagram....................................................... 32 Sollten Sie Fragen zu diesem Produkt oder zum Dupline-System haben, wenden Sie sich bitte an: In case of queries concerning this product or the Dupline system please contact: Doepke Schaltgeräte GmbH & Co. KG Stellmacherstraße 11 D-26506 Norden, Germany Tel.: +49 (0) 4931/1806-0 Fax: +49 (0) 4931/1806-101 2 E-mail: Internet: [email protected] http://www.doepke.de 3931286/2011.02/H - Technische Änderungen vorbehalten! Doepke 1- Inhaltsverzeichnis 1. Allgemeines Das Relaismodul DRM 8 ist eine Komponente des Dupline Bussystems für das Einund Ausschalten von bis zu acht elektrischen Verbrauchern oder das Auf- und Abfahren von bis zu vier Antriebsmotoren. Somit kennt das Gerät drei Betriebsarten: 1. Rollladensteuermodul ohne Step-Betrieb (ersetzt das DRO 4b); 2. Jalousiesteuermodul mit Step-Betrieb (ersetzt das DRO 4c); 3. Relaismodul (ersetzt das DSM 8). Die anwenderfreundliche Konfiguration und Bedienung des Gerätes findet über die frontseitigen Tasten und Klartextmeldungen im LC-Display statt. Unterstützt werden z.B. die Konfiguration der Dupline-Adressen, der Betriebsart (Relais-/Rollladensteuermodul) und der Hintergrund-Beleuchtung. Zudem erlaubt das DRM 8 eine manuelle Steuerung der Relais, z.B. für Inbetriebnahmezwecke. Die eingesetzten 16 A-Relais zeichnen sich durch Langlebigkeit und Belastbarkeit aus; bei der Verwendung des Moduls als Rollladensteuergerät bieten die Relais große Leistungsreserven. 2. Wichtige Hinweise vorab Zum Schutz von Leben und Komponenten, beachten Sie bitte folgende Sicherheitshinweise: • Die Installation darf nur von einer autorisierten Fachkraft vorgenommen werden. • Die 24 V DC-Spannungs- und Dupline-Signalversorgung muss aus Quellen erfolgen, die den Anforderungen für Schutzkleinspannung entsprechen, ebenso, wie die Installation diesen Anforderungen genügen muss (siehe hierzu die VDE 0100, Teil 410 sowie die EN 50090-1-1). Andere Spannungen an den Signaleingängen können, trotz umfangreicher Schutzmaßnahmen im Gerät, zur Zerstörung des Gerätes und Gefährdung von Menschen führen. Weitere Hinweise finden Sie in der Dupline Planungshilfe. • Ferngeschaltete Steckdosen können eine Gefahr darstellen. Für eine normenkonforme Installation müssen diese deshalb entsprechend gekennzeichnet werden. Die beiliegenden Aufkleber sollen Sie dabei unterstützen. • Achten Sie bitte bei der manuellen Bedienung der Relais darauf, dass sich weder Menschen noch Tiere im Bereich der geschalteten, elektrischen Verbraucher befinden. • Gesamtbelastbarkeit: • Um einer zu hohen Wärmeentwicklung im Inneren des Gerätes vorzubeugen, beachten Sie bitte folgende Obergrenzen: Bei Stromkreisabsicherung mit je 10 A dürfen 8 Einspeisungen verwendet werden. Bei Stromkreisabsicherung mit je 16 A dürfen maximal 4 Einspeisungen verwendet werden. • Das DRM 8 unterbricht die Verbindung zum Dupline-Bus, sobald Sie - über die Tasten 3931286/2011.02/H - Technische Änderungen vorbehalten! 3 Deutsch Bedienungsanleitung Relaismodul DRM 8 Doepke - in ein Untermenü „springen“. In diesem Zustand reagiert es nicht mehr auf Zustandsänderungen der konfigurierten Kanäle. Beim Rücksprung in das Hauptmenü, z.B. vom manuellen Bedienmodus heraus, synchronisiert das DRM 8 die Schaltzustände mit dem Dupline-Bus. Dieses kann zu Schaltvorgängen führen. Wählen Sie die richtige Betriebsart des Gerätes bitte vor dem Anschließen der Versorgungsleitungen aus. Nur so ist sicher gestellt, dass Antriebe (Rollläden, Dachfenster, etc.) bei Schaltvorgängen keinen Schaden nehmen können. Bei nachträglicher Änderung der Betriebsart wird die Adresszuordnung auf Werkseinstellung zurück gesetzt. Trennen Sie Spannungsversorgung zu den, über das DRM 8 geschalteten Verbrauchern unbedingt vor der Änderung der Betriebsart, um ungewollte Schaltvorgänge zu vermeiden. Beim Betrieb des DRM 8 als Rollosteuermodul ist es unbedingt notwendig, in der Konfiguration in ProLine das Objekt „Rollladensteuerung“ zu verwenden. Nicht jeder Antrieb eignet sich für den Step-Betrieb. Betreiben Sie das DRM 8 in der Betriebsart „4 Motoren-Step“ deshalb nur mit solchen Antrieben, die - laut Hersteller auch bei häufigem Pulsen mit 100 ms Dauer keinen Schaden nehmen. • • • Deutsch • • 3. Installation Die Montage erfolgt durch Aufschnappen des Gerätes auf die DIN-Schiene. Das patentierte Schnappsystem erlaubt ebenfalls ein einfaches Entfernen des Gerätes von der Hutschiene, indem das Gehäuse bis zum Ausrasten hochgeschoben wird. Bei der Installation ist das Anschlussschema zu beachten. Alle anzuschließenden Leitungen müssen spannungsfrei sein. Folgende Tabelle zeigt die Anschlussbelegung: Klemme 1.1 2.1 3.1 4.1 1.2 2.2 3.2 4.2 1.3 1.4 Beschreibung Phaseneingang Relais K1 Phaseneingang Relais K2 Phaseneingang Relais K3 Phaseneingang Relais K4 Phaseneingang Relais K5 Phaseneingang Relais K6 Phaseneingang Relais K7 Phaseneingang Relais K8 Dupline Signalleiter - (D-) Betriebsspannung 0 VDC Klemme 1.5 2.5 3.5 4.5 1.6 2.6 3.6 4.6 1.7 1.8 Beschreibung Ausgang Relais K1 / Motor 1 AUF Ausgang Relais K2 / Motor 1 AB Ausgang Relais K3 / Motor 2 AUF Ausgang Relais K4 / Motor 2 AB Ausgang Relais K5 / Motor 3 AUF Ausgang Relais K6 / Motor 3 AB Ausgang Relais K7 / Motor 4 AUF Ausgang Relais K8 / Motor 4 AB Dupline Signalleiter + (D+) Betriebsspannung +24 VDC Verbindungen zwischen dem Dupline-Signal und der 24 V-Versorgung oder Verbindungen zum Erdpotenzial führen zu Störungen und sind nicht zulässig. Auf die richtige Polarität der Versorgungsspannung und des Dupline-Signals ist zu achten. Bitte achten Sie beim Anschluss darauf, dass das maximale Drehmoment der Klemmen von 0,6 Nm nicht überschritten wird. 4 3931286/2011.02/H - Technische Änderungen vorbehalten! Doepke 4. Inbetriebnahme und Konfiguration Für eine erfolgreiche Inbetriebnahme gehen Sie bitte die unten stehende Schritte in ihrer Reihenfolge durch: Kapitel 4.1 auf Seite 5 Kapitel 4.3 auf Seite 6 Kapitel 4.4 auf Seite 8 Kapitel 4.5 auf Seite 10 Deutsch 1.Machen Sie sich mit der Bedienung vertraut: 2.Wahl der Betriebsart „Rollosteuermodul“: 3.Wahl der Betriebsart „Jalousiesteuermodul“: 4.Wahl der Betriebsart „Relaismodul“: Beachten Sie bitte auch die Gesamtübersicht der Menüstruktur auf Seite 16. 4.1. Die Bedienelemente Das DRM 8 hat folgende Bedienelemente: LC-Display Vorheriger Warnhinweis Relais: 12345678 Status: 00111011 Nächster Me- Menüpunkt { nüpunkt Anwahl des Menüpunktes oder Änderung der gezeigten Einstellung Die Bedienung des Gerätes erfolgt vollständig menügeführt über das LC-Display . Die Funktion der Tasten bis ist von dem augenblicklich dargestellten Menüpunkt abhängig. 4.2. Allgemeine Systemeinstellungen Bei der ersten Inbetriebnahme oder nach dem Zurücksetzen auf Werkseinstellungen führt Sie das DRM 8 automatisch in das Menü „Einstellung: System“. Sie können diesen Menüpunkt jedoch auch jederzeit manuell auswählen. Mit den außen liegenden Tasten können Sie nun durch das Menü navigieren und mit den innen liegenden Tasten folgende Auswahlen treffen (Werkseinstellungen sind fett gedruckt): Menüpunkt Sprache Auswahl Deutsch English Beschreibung Einstellung der Menüsprache. 3931286/2011.02/H - Technische Änderungen vorbehalten! 5 Doepke Menüpunkt Auswahl Deutsch Beschreibung Wahl der Geräte-Betriebsart. Betriebsart „Rollladensteuermodul“ ohne Hard4 Motoren ware-seitige Step-Funktion zur Lamellensteuerung. 4 Motoren- Betriebsart „Jalousiesteuermodul“ mit HardwareBetriebsart seitiger Step-Funktion zur Lamellensteuerung. Step 8 Relais Betrieb als Schaltmodul mit 8 Kontakten. Achtung: Bei Änderung der Betriebsart werden die zugewiesenen Dupline-Adressen auf Werkseinstellung (A1..A8) zurück gesetzt! Hintergrundbeleuchtung des Displays: Beleuchtung Auto Einschalten bei Tastenbedienung für ca. 60 s. Ein Immer eingeschaltet. Zurücksetzen auf Werkseinstellung: WerksSetzt das Gerät beim Verlassen der SystemeinstelJa lungen zurück.a einstellung Nein Keine Aktion. Systemversion Vx.yz Zeigt die aktuelle Firmware-Version des DRM 8 an. Legt fest, ob die neuen Daten zu speichern sind: Übernehmen? Ja Speichert die neuen Einstellungen. Nein Verwirft die neuen Einstellungen. a. Die Werkseinstellungen werden gesetzt, sobald Sie die Frage nach der Übernahme mit „Ja“ beantworten. Damit Sie jedoch wichtige Grundeinstellungen vornehmen können, ruft das DRM 8 das Systemmenü anschließend erneut auf. Verlassen Sie das Systemmenü mit „Nein“ im Übernahme-Dialog, wenn Sie diese Werkseinstellungen beibehalten wollen. 4.3. Konfiguration der Betriebsart Rollladensteuermodul („4 Motoren“) 4.3.1. Allgemein In den Betriebsarten „Rollladensteuer-“ und „Jalousiesteuermodul“, arbeiten immer zwei Relais für die Richtungen „Auf“ und „Ab“ zusammen. Hierbei ist die Adressierung auf dem Dupline-Bus zu beachten: Die „Auf-“ und „Ab-“Adressen müssen aufeinander folgen, wobei die „Auf-“Adresse immer einen ungeraden Wert haben muss. Hier ein Beispiel: Falsch Motor 1 (Relais K1/K2) Motor 4 (Relais K7/K8) 6 AUF G6 L5 Richtig AB G7 P1 AUF M3 H7 3931286/2011.02/H - Technische Änderungen vorbehalten! AB M4 H8 Doepke Dazu ist es notwendig, dass Sie zur Ansteuerung der Adressen in ProLine das Objekt „Rollladensteuerung“ wählen. Achten Sie bitte auch darauf, dass immer der Ausgang des ersten Relais (K1, K3, ...) mit der „Auf“-Leitung des Motors verbunden ist. In der Betriebsart „Rollladensteuermodul“ erreichen Sie eine Lamellensteuerung, indem Sie die entsprechende Option im Rollosteuerobjekt ProLines anwählen. Diese ermöglicht die Verstellung in einer Sekunden-Auflösung - für feinere Verstellmöglichkeiten wählen Sie bitte die Betriebsart „Jalousiesteuermodul“. 4.3.2. Einstellung der Betriebsart ↑ 1 2. ↑ 1 3. ↑ 1 Einstellung: System 2 3 Betriebsart: 4 Motoren 2 3 Übernehmen? Ja Nein 2 3 ↓ • Mit oder den nebenstehenden Menüpunkt wählen. • Mit oder in das Untermenü springen. Deutsch 1. 4 ↓ 4 ↓ 4 • Mit oder den nebenstehenden Menüpunkt wählen. • Wählen Sie mit oder die gewünschte Betriebsart aus. • Mit oder den nebenstehenden Menüpunkt wählen. • Mit speichern Sie die Änderungen. • Mit verwerfen Sie die Änderungen. 4.3.3. Adressierung Zur Vergabe der Adressen für die Antriebe, gehen Sie wie unten beschrieben vor. Das DRM 8 unterstützt Sie bei der Eingabe: • Sie müssen nur die Adresse für den ersten („Auf-)Kanal vergeben, da das DRM 8 dem „Ab-“Befehl automatisch die nächste (gerade) Adresse zuweist; • Es lässt (für den „Auf-“Befehl) nur ungerade Adressen zu (z.B. „A1“, „B5“, „P7“); 1. ↑ 1 2. Einstellung: Adressen ↓ 2 3 • Mit oder den nebenstehenden Menüpunkt wählen. • Mit oder in das Untermenü springen. 4 • Wählen Sie mit oder den Motor aus, Adr. Motor 1 Auf: dessen Adresse Sie verändern möchten. A1 ↓ • Mit können Sie jetzt die Adress-Gruppe ↑ 1 2 3 4 von „A“ bis „P“ ändern. • Mit können Sie jetzt die Adress-Ziffer von „1“, „3“, „5“ oder „7“ wählen. Hinweis: Um die Adressierung zu löschen, tasten Sie die Adress-Ziffer so lange, bis auf dem Display „--“ erscheint. • Fahren Sie solange mit Schritt (2) fort, bis alle vier Motoren kodiert sind. 3931286/2011.02/H - Technische Änderungen vorbehalten! 7 Doepke 3. ↑ 1 Übernehmen? Ja Nein 2 3 ↓ 4 • Mit oder den nebenstehenden Menüpunkt wählen. • Mit speichern Sie die Änderungen. • Mit verwerfen Sie die Änderungen. 4.3.4. Einstellung der Vorrangsteuerung Durch die Festlegung der Vorrangsteuerung bestimmen Sie, wie sich die Antriebe bei Busausfall verhalten sollen: Deutsch 1. ↑ 1 2. ↑ 1 Einstellung: Vorrang ↓ 2 3 Vorrang: Motor Auf 2 3 4 ↓ 4 Motor Auf Motor Ab Keine Aktion 3. ↑ 1 Übernehmen? Ja Nein 2 3 • Mit oder den nebenstehenden Menüpunkt wählen. • Mit oder in das Untermenü springen. ↓ 4 • Mit und bewegen Sie sich zwischen den Untermenüpunkten. • Mit oder können Sie jetzt die VorrangEinstellung (siehe unten) ändern. Alle Motoren fahren aufwärts. Alle Motoren fahren abwärts. Die Motoren werden nicht bewegt. • Mit oder gelangen Sie wieder in den vorherigen Menüpunkt. • Mit speichern Sie die Änderungen. • Mit verwerfen Sie die Änderungen. 4.4. Konfiguration der Betriebsart Jalousiesteuermodul („4 Motoren-Step“) Diese Betriebsart unterscheidet sich von der Rollladensteuerung nur durch den so genannten „Takt-Betrieb“, der eine extrem feine Verstellmöglichkeit von Lamellen bietet. Da der Takt-Puls frei wählbar von 100 ms bis 800 ms ist, können hier nur elektronisch gesteuerte Motoren verwendet werden. Zur Verstellung der Lamellenposition aktivieren Sie den Auf-Befehl für längstens 2 Sekunden und geben Sie unmittelbar darauf (innerhalb von max. 2,5 s) den Ab-Befehl. In diesem Fall beginnt das DRM 8 in Ab-Richtung mit dem eingestellten Puls-Pause-Verhältnis zu takten (siehe Kapitel 4.4.4 ”Einstellung der Step-Zeiten” auf Seite 9). Entsprechendes gilt natürlich auch für die Gegenrichtung. Ein ausführliches Zeitdiagramm finden Sie in Kapitel 19 auf Seite 31. Hinweis: Da in dieser Betriebsart die Lamellenverstellung im DRM 8 realisiert ist, sollten Sie die Option „Lamellensteuerung“ in ProLine abschalten. Zudem muss die dort eingetragene Umschaltzeit auf 500 ms herunter gesetzt werden. Bitte beachten Sie auch die allgemeinen Hinweise in Kapitel 4.3.1 auf Seite 6. 8 3931286/2011.02/H - Technische Änderungen vorbehalten! Doepke 4.4.1. Einstellung der Betriebsart 1. ↑ 1 2 3 ↓ • Mit oder den nebenstehenden Menüpunkt wählen. • Mit oder in das Untermenü springen. 4 • Mit oder den nebenstehenden MenüBetriebsart: punkt wählen. ↑ 4 Motoren-Step ↓ • Wählen Sie mit oder die gewünschte 1 3. ↑ 1 2 3 Übernehmen? Ja Nein 2 3 4 ↓ 4 Betriebsart aus. • Mit oder den nebenstehenden Menüpunkt wählen. • Mit speichern Sie die Änderungen. • Mit verwerfen Sie die Änderungen. Deutsch 2. Einstellung: System 4.4.2. Adressierung Wie in Kapitel 4.3.3 auf Seite 7 beschrieben. 4.4.3. Einstellung der Vorrangsteuerung Wie in Kapitel 4.3.4 auf Seite 8 beschrieben. 4.4.4. Einstellung der Step-Zeiten In der Betriebsart „Jalousiesteuermodul“ haben Sie die Möglichkeit, das standardmäßig eingestellte Puls-Pause-Verhältnis von 100 ms : 900 ms im Menüpunkt „Einstellung: Step-Zeiten“ zu verändern. Dieser Menüpunkt erscheint in den Betriebsarten „Rollladensteuer-“ und „Relaismodul“ nicht. Um die Zeiten zu verändern, gehen Sie wie folgt vor: 1. Einstellung: ↑ Step-Zeiten ↓ 1 2. 2 3 4 Step Puls:Pause: ↑ 100:900 ms ↓ 1 3. ↑ 1 2 3 Übernehmen? Ja Nein 2 3 • Mit oder den nebenstehenden Menüpunkt wählen. • Mit oder in das Untermenü springen. 4 ↓ 4 • Mit oder können Sie jetzt das PulsPause-Verhältnis ändern. Da die Summe aus Puls und Pause immer 1 Sekunde beträgt, ändert das DRM 8 stets beide Werte. • Betätigen Sie oder , um den Menüpunkt zu verlassen. • Mit oder den nebenstehenden Menüpunkt wählen. • Mit speichern Sie die Änderungen. • Mit verwerfen Sie die Änderungen. Ein ausführliches Zeitdiagramm finden Sie in Kapitel 19 auf Seite 31. 3931286/2011.02/H - Technische Änderungen vorbehalten! 9 Doepke 4.5. Konfiguration der Betriebsart Relaismodul („8 Relais“) In dieser Betriebsart können alle acht Relais unabhängig voneinander genutzt werden. Somit gibt es auch keine Einschränkungen bezüglich der Adressierung. Hinweis: Verwenden Sie diese Betriebsart niemals in Zusammenhang mit Antrieben mit Richtungswahl. 4.5.1. Einstellung der Betriebsart 1. Deutsch ↑ 1 Einstellung: System 2 3 ↓ • Mit oder den nebenstehenden Menüpunkt wählen. • Mit oder in das Untermenü springen. 4 4 • Mit oder den nebenstehenden Menüpunkt wählen. • Wählen Sie mit oder die gewünschte Betriebsart aus. • Mit oder den nebenstehenden Menüpunkt wählen. • Mit speichern Sie die Änderungen. • Mit verwerfen Sie die Änderungen. Einstellung: ↑ Adressen ↓ • Mit oder den nebenstehenden Menüpunkt wählen. • Mit oder in das Untermenü springen. 2. ↑ 1 3. ↑ 1 Betriebsart: 8 Relais 2 3 Übernehmen? Ja Nein 2 3 ↓ 4 ↓ 4.5.2. Adressierung 1. 1 2. 3 4 • Mit oder wählen Sie das Relais aus, Adr. Relais 1: dessen Adresse Sie verändern möchten. ↑ A1 ↓ • Mit können Sie jetzt die Adress-Gruppe 1 3. 2 2 3 4 von „A“ bis „P“ ändern. • Mit können Sie jetzt die Adress-Ziffer von „1“ bis „8“ wählen. Hinweis: Um die Adressierung zu löschen, tasten Sie die Adress-Ziffer so lange, bis auf dem Display „--“ erscheint. • Fahren Sie solange mit Schritt (2) fort, bis alle Relais kodiert sind. • Mit oder den nebenstehenden MenüÜbernehmen? punkt wählen. ↑ Ja Nein ↓ • Mit speichern Sie die Änderungen. 2 3 4 1 • Mit verwerfen Sie die Änderungen. 4.5.3. Einstellung der Vorrangsteuerung Durch die Festlegung der Vorrangsteuerung bestimmen Sie, wie sich die Relais bei 10 3931286/2011.02/H - Technische Änderungen vorbehalten! Doepke Busausfall verhalten sollen: ↑ 1 2. ↑ 1 • Mit oder den nebenstehenden Menüpunkt wählen. • Mit oder in das Untermenü springen. Einstellung: Vorrang ↓ 2 3 Vorrang: Relais Ein 2 3 4 ↓ 4 Relais Ein Relais Aus Keine Aktion 3. ↑ 1 Übernehmen? Ja Nein 2 3 ↓ 4 • Mit oder bewegen Sie sich zwischen den Untermenüpunkten. • Mit oder können Sie jetzt die VorrangEinstellung (siehe unten) ändern. Alle Relais schalten bei Busausfall ein. Alle Relais schalten bei Busausfall aus. Der Schaltzustand wird nicht verändert. • Mit oder den nebenstehenden Menüpunkt wählen. • Mit speichern Sie die Änderungen. • Mit verwerfen Sie die Änderungen. Deutsch 1. 5. Anzeigen 5.1. Anzeige während des Normalbetriebs Durch das LC-Display ist das DRM 8 in der Lage, Klartext-Meldungen anzuzeigen: Meldung Beschreibung Im Normalzustand zeigt das DRM 8 den Status der Relais an. Der Status befindet sich jeweils unter der Nummer des betroffenen Relais bzw. Motors. Die Betätigung einer der inneren Tasten führt zur Anzeige der aktuell eingestellten Betriebsart (siehe Kapitel 6.1 auf Seite 12). Betriebsart „Relaismodul“: 0 Das Relais ist ausgeschaltet. 1 Das Relais ist eingeschaltet. Relais: 12345678 Status: 001101x1 Das Relais hat keine Adresse und ist geöffx net. 2 3 4 1 Das Relais hat keine Adresse und ist geM schlossen. Betriebsart „Rollo-/Jalousiesteuermodul“: - Der Motor ist im Stillstand. Motor: 1 2 3 4 ↑ Der Motor fährt aufwärts. Status: ↑ ↓ - x ↓ Der Motor fährt abwärts. 2 3 4 1 Relais für „Auf“ und „Ab“ haben keine x Die Adressen. 3931286/2011.02/H - Technische Änderungen vorbehalten! 11 Doepke Meldung Beschreibung -Kein BussignalQuittieren Der Dupline-Bus ist nicht aktiv oder die DuplineSignalleiter sind nicht angeschlossen. Mit oder können Sie jetzt in das Untermenü zur manuellen Bedienung springen. 2 1 3 4 Deutsch 5.2. Warn-LED Die „Warn“-LED wird dann aktiviert, wenn ein besonderer Betriebszustand eingetreten ist: Meldung Dauer-An Blinken 1/s Beschreibung Das DRM 8 befindet sich im manuellen Bedienmodus und ist „offline“, reagiert also nicht auf Schaltbefehle vom Bus. Das Bussignal ist nicht vorhanden. Diese Störung wird auch im manuellen Bedienmodus angezeigt. 6. Bedienung 6.1. Anzeige der Betriebsart Zur Anzeige der aktuell eingestellten Betriebsart reicht die Betätigung einer der inneren Tasten im Normalzustand: 1. • Mit oder in die Betriebsartenanzeige wechseln. Relais: 12345678 Status: 001101x1 2 1 2. 3 4 Betriebsart: 8 Relais ↑ 2 1 3 ↓ 4 • Betätigen Sie eine beliebige Tasten, um zur normalen Anzeige zurück zu kehren. • Das DRM 8 springt nach 30 s automatisch in die Normalanzeige. 6.2. Manuelle Betätigung der Relais / Antriebe Das DRM 8 ermöglicht Ihnen die manuelle Betätigung der Relais bzw. Antriebe, z.B. zur Steuerung während der Inbetriebnahme oder bei Busausfall. Im letzteren Fall zeigt das Gerät die Störung. Nach der Quittierung können Sie das Menü „Manuelle Bedienung“ über die Navigationstasten auswählen. Jedoch auch während des regulären Betriebes können Sie jederzeit auf die Schaltstellung der Relais Einfluss nehmen, indem Sie wie folgt vorgehen: 1. ↑ 1 2. 12 Manuelle Bedienung 2 3 ↓ • Mit oder den nebenstehenden Menüpunkt wählen. • Mit oder in das Untermenü springen. 4 Bei den Betriebsarten „Rollladen-“ oder „Jalousiesteuermodul“ (monostabil, d.h., solange die Taste betätigt wird): 3931286/2011.02/H - Technische Änderungen vorbehalten! Doepke b. 3. a. b. c. 4. • Mit oder können Sie jetzt alle Motoren gleichzeitig auf- bzw. abfahren. Der aktuel↓ le Zustand wird durch das Sternchen (*) an2 3 4 1 gezeigt. • Mit verlassen Sie die manuelle Bedienung, mit gelangen Sie zur Einzelsteuerung. • Mit oder können Sie jetzt den gewählMotor 1: ten Motor einzeln auf- bzw. abfahren. ↑ Auf Ab * ↓ • Mit gelangen Sie in den vorherigen 2 3 4 1 Menüpunkt, mit zum nächsten Motor. ... ... Bei der Betriebsart „Relaismodul“ (bistabil, d.h., je Tastendruck ein- bzw. ausschalten): • Mit oder können Sie jetzt alle acht ReRelais 1-8: lais gleichzeitig (zentral) ein- oder aus↑ * Ein Aus ↓ schalten. Der aktuelle Zustand wird durch 2 3 4 1 das Sternchen (*) angezeigt. • Betätigen Sie , um die manuelle Steuerung zu verlassen oder , um zur Einzelsteuerung zu gelangen. • Mit oder können Sie jetzt das gewählRelais 1: te Relais einzeln ein- bzw. abschalten. ↑ Ein Aus * ↓ • Mit gelangen Sie in den vorherigen 2 3 4 1 Menüpunkt, mit zum nächsten Relais. ... ... Am Ende der Einzelsteuerung zeigt das Relais: 12345678 DRM 8 den Status jedes Relais auf einer SeiStatus: 00101111 te an. • Mit gelangen Sie wieder zur Einzelsteu2 3 4 1 erung, mit verlassen Sie die manuelle Steuerung. • Betätigen Sie , um wieder zur Statusseite Menü verlassen? oder , um in den Zentralbefehl unter 2a ↑ OK ↓ oder 3a zu gelangen. 2 3 4 1 • Betätigen Sie oder , um das Untermenü zu verlassen. Motor 1-4: ↑ * Auf Ab 3931286/2011.02/H - Technische Änderungen vorbehalten! 13 Deutsch a. Doepke Achtung: Relais, die mit einer Adresse kodiert sind, werden beim Verlassen des manuellen Bedienmodus mit dem Bus synchronisiert. Dieses kann zu Schaltvorgängen führen. 8. Technische Daten Min. Typ. Max. Dupline Stromaufnahme 0,8 mA 0,9 mA 1,0 mA Eingangskanäle keine Ausgangskanäle 8 Relaisausgänge (Kanäle 1..8) Anzeige DC ACa Art Displayformat Displaygröße Hintergrundbeleuchtung Bedienelemente Art Relaisausgänge Art Spannung Nennstrom (pro Ausgang) Spannung Nennstrom (pro Ausgang) Gesamtbelastbarkeit Glühlampen HV-Halogenlampen Leuchtstofflampen Leuchtstofflampen mit EVG Gasentladungslampen Kondensator zur Kompensation Energiesparleuchten mit KVG Energiesparleuchten mit EVGc Lampenlastena Deutsch 7. Garantie Für fachgerecht montierte, unveränderte Geräte gewähren wir ab Kauf durch den Endverbraucher die gesetzliche Gewährleistungsfrist. Die Garantie bezieht sich nicht auf Transportschäden sowie auf Schäden, die durch Kurzschluss oder Überlastung entstanden sind. Bei Fertigungs- und Materialfehlern, die innerhalb der Gewährleistungsfrist erkannt werden, leistet unser Werk kostenlosen Ersatz. Bei Öffnen des Gerätes erlischt der Garantieanspruch. 14 Alphanumerisches LC-Display 2 Zeilen mit je 16 Zeichen 43,9 x 10,0 (B x H in mm) LED (Einschaltzeitpunkt konfigurierbar) 4 Navigationstasten Schaltrelais 12 VAC 100 mA 12 VDC 100 mA 250 VAC 16 A 30 VDC 10 A 80 A 3000 W 2500 W 2400 W 600 W max. 1000 W (70 µF), 1250 W (100 µFb) max. 70 µF, (100 µFb) 1250 W 300 W 3931286/2011.02/H - Technische Änderungen vorbehalten! Min. Typ. Max. Betriebsspannung Nennbetriebsspannung 21,5 VDC 24 VDC 26,5 VDC Stromaufnahme 14 mA 166 mAd Erlaubte Brummspannung 100 mVpp Anschlüsse Art Zugbügelklemmen Klemmbereich 0,4 mm ∅ 2,5 mm² Drehmoment 0,6 Nm Gehäuse Art Verteilereinbaugehäuse für die Montage auf Tragschienen nach DIN EN 60715:2001-09 Maße 72 x 85 x 58 (B x H x T in mm) / 4 TE Material Polycarbonat (PC) Allg. technische Daten Betriebstemperatur -10°C +45°C Luftfeuchtigkeit max. 85% (Betauung nicht zulässig) Schutzart IP20 Bestellnummer, -bezeichnung 09 501 233, Relaismodul DRM 8 a. Die Angaben beziehen sich auf die Anschlussbedingungen nach EN 60669. Schaltwerte für nicht aufgeführte Lampenlasten erhalten Sie auf Anfrage. b. Mindestens 5.000 Schaltspiele. c. Diese Angaben sind stark herstellerabhängig - ggf. bitte anfragen. d. Alle Relais und Hintergrundbeleuchtung eingeschaltet. 3931286/2011.02/H - Technische Änderungen vorbehalten! 15 Deutsch Doepke Doepke 9. Menüstruktur Deutsch 16 3931286/2011.02/H - Technische Änderungen vorbehalten! Doepke 1- Table of Contents Operating Instructions DRM 8 Relay Module 11. Important Notes in Advance In order to protect both life and components, please observe the following safety instructions: • Installation may only be carried out by authorised, trained technicians. • The 24 V DC power and Dupline signal supply has to be delivered by sources, which have to be installed in accordance with the regulations governing protective low-voltage (see VDE 0100, Part 410, or EN 50090-9-1) as well as the installation has to comply with these requirements. Even if extensive protective measures have been implemented in the device, other voltages at the signal inputs could result not only in the destruction of the device, but also endanger people. For further information please refer to the Dupline Planning Aid. • Remotely-controlled sockets may represent a danger source. To ensure that they are installed according to Standard requirements, they must be suitably marked. The enclosed stickers are intended to assist you in this. • When manually operating the relays, please ensure that neither people nor animals are within the vicinity of the switched electrical loads. • Total loading capacity: • In order to prevent excessive heat developing inside the device please adhere to the following maximum limits: With circuits fuse-protected to 10 A each, up to 8 inputs may be used. With circuits fuse-protected to 16 A each, up to 4 inputs may be used. • As soon as you „jump“ - via the buttons - to a submenu, the DRM 8 will break the con- 3931286/2011.02/H - The right to make technical changes reserved! 17 English 10. General Information The DRM 8 relay module is a component of the Dupline bus system for switching up to eight electrical loads on and off, or driving up and down up to four drive motors. The device thus offers three operating modes: 1. Roller blind module without 'step-mode' (replaces DRO 4b); 2. Venetian blind module with 'step-mode' (replaces DRO 4c); 3. Relay module (replaces DSM 8). The user-friendly configuration and operation of this device is via the push-buttons on the front panel and the plain-text messages on the LC display. It supports e.g. configuration of the Dupline addresses, the operating mode (relay/roller blind module) and the background lighting. The DRM 8 also enables manual control of the relays, e.g. for commissioning purposes. The outstanding features of the fitted 16 A relays are their long service life and their loading capacity; when using the module as a roller blind control unit the relays offer large capacity reserves. Doepke • • • • • nection to the Dupline bus. In this state it will no longer react to status changes of the configured channels. When returning to the main menu, e.g. from manual operating mode, the DRM 8 will synchronize the switching states with the Dupline bus. This may initiate switching operations. Please select the correct operating mode for the device before connecting the supply leads. Only thus is it possible to ensure that drives (shutters, skylights etc.) will not be damaged during switching operations. When retrospectively changing the operating mode the address assignment will be set back to the default setting. It is essential to disconnect the power supply to loads switched via the DRM 8 before changing the operating mode in order to prevent unwanted switching operations. When operating the DRM 8 as roller blind control module, it is essential to use the „Roller blind“ object in the ProLine configuration. Not every drive is suitable for the step-mode. Operate the DRM 8 in the „4 motors step“ mode therefore only with those drives which - according to the manufacturer - will not be damaged by frequent pulsing of 100 ms duration. English 12. Installation The device is snap-fastened on to the DIN-rail. This patented quick-snap system also provides for the device's easy removal from the rail by pushing it upwards until it is released. Observe the connection diagram during installation. All leads to be connected must be dead. The following table shows the terminal configuration: Terminal 1.1 2.1 3.1 4.1 1.2 2.2 3.2 4.2 1.3 1.4 Description Terminal Description Phase input relay K1 Output relay K1 / motor 1 UP 1.5 Phase input relay K2 Output relay K2 / motor 1 DOWN 2.5 Phase input relay K3 Output relay K3 / motor 2 UP 3.5 Phase input relay K4 Output relay K4 / motor 2 DOWN 4.5 Phase input relay K5 Output relay K5 / motor 3 UP 1.6 Phase input relay K6 Output relay K6 / motor 3 DOWN 2.6 Phase input relay K7 Output relay K7 / motor 4 UP 3.6 Phase input relay K8 Output relay K8 / motor 4 DOWN 4.6 Dupline signal conductor - (D-) Dupline signal conductor + (D+) 1.7 0 VDC operating voltage +24 VDC operating voltage 1.8 Connections between the Dupline signal and the 24 V power supply, or connections to earth potential, will cause malfunctions and are not permissible. Check that the polarity of the supply voltage and the Dupline signal is correct. When connecting please ensure that the 0.6 Nm maximum tightening torque for the terminals is not exceeded. 18 3931286/2011.02/H - The right to make technical changes reserved! Doepke 13. Putting into Service and Configuration To ensure the successful commissioning of the unit please go through the steps below in the sequence given: 1.Familiarise yourself with the operation: 2.Selection of the „Roller blind module“ operating mode: 3.Selection of the „Venetian blind module“ operating mode: 4.Selection of the „Relay module“ operating mode: Chapter 13.1 on page 19 Chapter 13.3 on page 20 Chapter 13.4 on page 22 Chapter 13.5 on page 24 Please also observe the complete overview of the menu layout on page 30. 13.1. The Operating Controls The DRM 8 has the following controls: LC display Relay: 12345678 Status: 00111011 Next menu item { item Selection of menu item or change of setting displayed The device is operated exclusively with menu-guidance via the LC display . The function of push-buttons to is dependent upon the currently displayed menu item. 13.2. General System Set-up When first putting the device into service, or after resetting to the factory-installed default settings, the DRM 8 will automatically switch to the „Set-up: System“ menu. However, you can also manually select this menu item at any time. Using the outer buttons you can now navigate through the menu and make your selection with the two inner buttons (default settings are shown in bold): Menu Item Language Option Deutsch English Description Setting the menu language. 3931286/2011.02/H - The right to make technical changes reserved! 19 English Previous menu Warning Doepke Menu Item Option English Description Selection of device's operating mode. Roller blind module" mode without step-function of 4 Motors hardware to adjust slats. 4 Motors- „Venetian blind module“ mode with step-function of Mode hardware to adjust slats. Step 8 Relays Operation as switching module with 8 contacts. Note: When changing the operating mode the assigned Dupline addresses are reset to default settings (A1...A8)! Background lighting of the display: Switched on when buttons are pressed for approx. Lighting Auto 60 s. Always switched on. On Resetting to default set-up: Default Resets device when exiting the system set-up.a Yes Settings No action. No Displays the current DRM 8 firmware version. System Version Vx.yz Determines whether new data are to be saved: Stores the new settings. Save Settings? Yes Terminates the new settings. No a. The default settings are activated as soon as the question regarding saving data is answered with „Yes“. However, the DRM 8 subsequently invokes the system menu again so that important basic settings can be carried out. Exit the system menu by selecting „No“ in the implement dialogue if you want to retain these default settings. 13.3. Configuration of ’Roller Blind Module’ Operating Mode („4 Motors“) 13.3.1. General In the operating modes „Roller blind module“ and „Venetian blind module“ two relays each work together for the „Up“ and „Down“ directions. In this context attention has to be paid to the address assignment on the Dupline bus: the „Up“ and „Down“ addresses must follow one upon other, whereby the „Up“ address must always have an uneven figure. Here an example: Motor 1 (relay K1/K2) Motor 4 (relay K7/K8) UP G6 L5 Incorrect DOWN G7 P1 UP M3 H7 Correct DOWN M4 H8 For this purpose it is necessary to select the „Roller blind“ object in ProLine. Please ensure that the output of the first relay (K1, K3,...) is always connected to the „Up“ lead of 20 3931286/2011.02/H - The right to make technical changes reserved! Doepke the motor. In the „Roller blind module“ operating mode you can achieve slats adjustment by selecting the appropriate option in the ProLine roller blind object. This enables the movement in steps of seconds - for finer adjustments please select the operating mode „Venetian blind module“. 13.3.2. Setting the Operating Mode ↑ 1 2. ↑ 1 3. Set-up: System 2 3 Mode: 4 Motors 2 3 ↓ 4 ↓ 4 Save Settings? ↑ Yes No ↓ 1 2 3 • Using or select the menu item shown on left. • With or switch to the submenu. 4 • Using or select the menu item shown on left. • Using or select the desired operating mode. • Using or select the menu item shown on left. • Save the changes with . • Abandon the changes with . 13.3.3. Assigning the Addresses To allocate addresses for the drives please proceed as described below. The DRM 8 will support you with the assigning: • You need only to allocate the address for the first („Up“) channel, as the DRM 8 will automatically assign the „Down“ command to the next (even) address; • (For the Up command) it permits only uneven addresses (e.g. „A1“, „B5“, „P7“); 1. ↑ 1 2. Set-up: Address 2 3 ↓ • Using or select the menu item shown on left. • With or switch to the submenu. 4 Addr.Motor 1 Up: • Using or select the motor whose address you want to change. A1 ↓ • With you can now change the address ↑ 1 2 3 4 group from „A“ to „P“. • With you can now select the address number „1“, „3“, „5“ or „7“. Note: To delete address assignments, press the address number until „--“ appears in the display. • Continue with step (2) until all four motors have been coded. 3931286/2011.02/H - The right to make technical changes reserved! 21 English 1. Doepke 3. ↑ 1 • Using or select the menu item shown Save Settings? on left. Yes No ↓ • Save the changes with . 2 3 4 • Abandon the changes with . 13.3.4. Setting the Priority Control By setting the priority control you define how the drives are to react in the event of bus failure: 1. ↑ 1 2. ↑ 1 Set-up: Priority 2 3 Priority: Motors Up 2 3 ↓ 4 ↓ 4 Motors Up Motors Down No Action English 3. ↑ 1 Save Settings? Yes No ↓ 2 3 • Using or select the menu item shown on left. • With or switch to the submenu. 4 • Using and navigate between the submenu items. • Using or you can now change the priority setting (see below). All motors drive upwards. All motors drive downwards. The motors are not moved. • Using or you return to the previous menu item. • Save the changes with . • Abandon the changes with . 13.4. Configuring the ’Venetian blind Module’ Operating Mode („4 Motors-Step“) This operating mode differs from the roller blind control only in the so-called „pulse mode“ which offers an extremely fine adjustment of the slats. As the step pulse is freely selectable between 100 ms and 800 ms, only electronically controlled motors can be used here. To adjust the slat position, activate the Up command for no more than 2 seconds and then immediately (within max. 2.5 s.) give the Down command. In this case the DRM 8 starts to pulse with the set pulse/pause ratio in the Down direction (Chapter 13.4.4 “Setting the Step Times” on page 23). Naturally, likewise correspondingly for the opposite direction. A detailed time diagram can be found in Chapter 19 on page 31. Note: Because the slat adjustment is realised in the DRM 8 when using this operating mode, the „Tilting Blinds“ option in ProLine should be switched off. In addition, the specified „Reverse Delay“ should be decreased to the minimum of 500 ms. Please also observe the general notes in Chapter 13.3.1 on page 20. 22 3931286/2011.02/H - The right to make technical changes reserved! Doepke 13.4.1. Setting the Operating Mode 1. ↑ 1 2. ↑ 1 3. Set-up: System 2 3 ↓ • Using or select the menu item shown on left. • With or switch to the submenu. 4 • Using or select the menu item shown Mode: on left. 4 Motors-Step ↓ • Using or select the desired operating 2 3 4 mode. • Using or select the menu item shown Save Settings? on left. ↑ Yes No ↓ • Save the changes with . 2 3 4 1 • Abandon the changes with . 13.4.2. Assigning Addresses Proceed as described in Chapter 13.3.3 on page 21. 13.4.4. Setting the Step Times In the „Venetian blind module“ operating mode you have the option to change the standard pulse/pause ratio setting of 100 ms : 900 ms in the menu item „Set-up: Step Timing“. This menu item does not appear in the operating modes „Roller blind module“ and „Relay module“. In order to change the timing please proceed as follows: 1. ↑ 1 2. Set-up: Step-Timing 2 3 ↓ 4 Step Pulse:Pause ↑ 100:900 ms ↓ 1 3. ↑ 1 2 3 4 Save Settings? Yes No ↓ 2 3 • Using or select the menu item shown on left. • With or switch to the submenu. 4 • With or you can now change the pulse/pause ratio. As the sum total of pulse and pause is always 1 second, the DRM 8 invariably alters both figures. • To exit the menu item confirm or . • Using or select the menu item shown on left. • Save the changes with . • Abandon the changes with . A detailed time diagram can be found in Chapter 19 on page 31. 3931286/2011.02/H - The right to make technical changes reserved! 23 English 13.4.3. Setting the Priority Control Proceed as described in Chapter 13.3.4 on page 22. Doepke 13.5. Configuration of ’Relay Module’ Operating Mode („8 Relays“) In this operating mode all eight relays can be utilized independently of each other. Thus there are also no restrictions in respect of the address assignment. Note: Do not under any circumstances use this operating mode in conjunction with drives with directional selection. 13.5.1. Setting the Operating Mode 1. ↑ 1 2. ↑ 1 3. Set-up: System 2 3 ↓ 4 Mode: 8 Relays 2 3 ↓ 4 Save Settings? ↑ Yes No ↓ 1 2 3 • Using or select the menu item shown on left. • With or switch to the submenu. 4 • Using or select the menu item shown on left. • Using or select the desired operating mode. • Using or select the menu item shown on left. • Save the changes with . • Abandon the changes with . English 13.5.2. Assigning the Addresses 1. ↑ 1 2. 24 2 3 ↓ • Using or select the menu item shown on left. • With or switch to the submenu. 4 • Using or select the relay whose Addr.Relay 1: address you wish to change. ↑ A1 ↓ • With you can now change the address 1 3. Set-up: Address 2 3 4 group from „A“ to „P“. • With you can now select the address number between „1“ and „8“. Note: To delete address assignments, press the address number until „--“ appears in the display. • Continue with step (2) until all relays have been coded. • Using or select the menu item shown Save Settings? on left. ↑ Yes No ↓ • Save the changes with . 2 3 4 1 • Abandon the changes with . 3931286/2011.02/H - The right to make technical changes reserved! Doepke 13.5.3. Setting the Priority Control By setting the priority control you define how the relays are to react in the event of bus failure: Set-up: Priority ↑ 2 1 2. 3 Priority: Relays On ↑ 2 1 3 ↓ 4 ↓ 4 Relays On Relays Off No Action 3. ↑ Save Settings? Yes No ↓ 1 2 3 • Using or select the menu item shown on left. • With or switch to the submenu. 4 • Using or navigate between the submenu items. • With or you can now change the priority setting (see below). In the event of bus failure all relays switch on. In the event of bus failure all relays switch off. The switching state is not changed. • Using or select the menu item shown on left. • Save the changes with . • Abandon the changes with . English 1. 14. Displays 14.1. Display during Normal Operation The LC display enables the DRM 8 to show plain text messages: Message Description During normal operation the DRM 8 display indicates the status of the relays. The status is always shown under the number of the relevant relay or motor. By pressing one of the inner buttons the currently selected operating mode will be displayed (see Chapter 15.1 on page 26). Operating mode „Relay module“: 0 The relay is switched off. Relay: 12345678 Status: 001101x1 1 The relay is switched on. x The relay has no address and is open. 2 3 4 1 M The relay has no address and is closed. Operating mode „Roller / Venetian blind module“: - The motor is at rest. Motor: 1 2 3 4 ↑ The motor drives upwards. Status: ↑ ↓ - x ↓ The motor drives downwards. 2 3 4 1 The relays for „Up“ and „Down“ have no x address. 3931286/2011.02/H - The right to make technical changes reserved! 25 Doepke Message Description -No Bus SignalAcknowledge The Dupline bus is not active, or the Dupline signal conductor is disconnected With or you can now switch to the submenu for manual operation. 2 1 3 4 14.2. Warning LED The „warning“ LED will be activated whenever a special operating condition has arisen: Message Continuous On Flashing 1/s Description The DRM 8 is in manual operating mode and is „off-line“; it therefore does not react to switching commands There is no bus signal. This malfunction will also be indicated when in manual operating mode. 15. Operation 15.1. Display of Operating Mode To display the currently set operating mode simply press one of the inner buttons when in normal state: English 1. • Using or change to display of operating mode. Relay: 12345678 Status: 001101x1 2 1 2. 3 4 Mode: 8 Relays ↑ 2 1 3 ↓ 4 • Press any one of the buttons to return to the normal display. • After 30 s the DRM 8 will automatically return to the standard display. 15.2. Manual Activation of Relays / Drives With the DRM 8 you can manually activate the relays or drives, e.g. for control purposes during commissioning or in the event of bus failure. In the latter case the device will indicate the malfunction. After an acknowledgement the „Manual operation“ menu can be selected with the navigation buttons. However, it is also possible to affect the switching state of the relays at any time by proceeding as follows: 1. ↑ 1 2. 26 Manual Operation 2 3 ↓ • Using or select the menu item shown on left. • With or switch to the submenu. 4 With operating modes „Roller blind module“ or „Venetian blind module“ (monostable, i.e. as long as the button is pressed): 3931286/2011.02/H - The right to make technical changes reserved! Doepke • With or you can now drive all motors simultaneously up or down. The current status is indicated by an asterisk (*). 2 3 4 1 • Use to exit from manual operation; use to access individual control. • With or you can now drive the selected Motor 1: motor individually up or down. ↑ Up Down * ↓ • Use to return to the previous menu item; 2 3 4 1 use to switch to the next motor. ... ... With the operating mode „Relay module“ (bistable, i.e. switching on or off each time the button is pressed): • With or you can now switch all eight Relays 1-8: relays simultaneously (central) on or off. ↑ * On Off ↓ The current status is indicated by an aste2 3 4 1 risk (*). • Use to exit from manual control or to access individual control. • With or you can now switch the selecRelay 1: ted relay individually on or off. ↑ On Off * ↓ • Use to return to the previous menu item 2 3 4 1 and to switch to the next relay. ... ... At the end of the individual control the DRM 8 Relay: 12345678 shows the status of each relay on one page. Status: 00101111 • Use to return to individual control; use 2 3 4 1 to exit from manual control. • Use to return to the status page or to Exit Menu? access the central command under 2a or ↑ OK ↓ 3a. 2 3 4 1 • Press or to exit from the submenu. ↑ * b. 3. a. b. c. 4. Motors 1-4: Up Down ↓ Note: When leaving the manual operating mode, those relays that are encoded with an address will be synchronized with the bus. This may initiate switching actions. 3931286/2011.02/H - The right to make technical changes reserved! 27 English a. Doepke 16. Guarantee All professionally installed, unaltered devices are covered by a guarantee for the statutory period from the date of purchase by the end user. The guarantee is not applicable to damage incurred during transport. In the event of defects in workmanship or materials, which are discovered during the guarantee period, the company will provide a replacement free of charge. The guarantee will be rendered null and void if the device is opened. 17. Technical Data Min. Typ. Max. Dupline Current input 0.8 mA 0.9 mA 1.0 mA Input channels None Output channels 8 control channels (Switching relay outputs 1..8) Display Alphanumeric LC display max. 2 lines each with 16 characters 43.9 x 10.0 (B x H in mm) LED (switch-on time configurable) Controls Operating/navigation keys 4 DC ACa Outputs Lamp loadsa English Type Display format Display size Background lighting 28 Type All-or-nothing relay Voltage 12 VAC 250 VAC Load capacity (per output) 100 mA 16 A Voltage 12 VDC 30 VDC Load capacity (per output) 100 mA 10 A Total load 80 A Incandescent lamps 3000 W HV-halogen lamps 2500 W Fluorescent lamps 2400 W Fluorescent lamps with el. ballast 600 W Gas discharge lamps max. 1000 W (70 µF), 1250 W (100 µFb) Capacitor for compensation max. 70 µF (100 µFb) Energy-saving lamps, conv. 1250 W ballast 300 W Energy-saving lamps, el. ballastc 3931286/2011.02/H - The right to make technical changes reserved! Min. Typ. Max. Operating Voltage Rated operating voltage 21.5 VDC 24 VDC 26.5 VDC Current input 14 mA 166 mAd Ripple voltage 100 mVpp Terminals Type Strain-relief clamps Contact area 0.4 mm ∅ 2.5 mm² Torque 0.6 Nm Housing Type Distribution installation housing for mounting on rails according to DIN EN 60715:2001-09 Dimensions 72 x 85 x 58 (W x H x D in mm) / 4 modules Material Polycarbonate (PC) General technical data Ambient temperature -10°C +45°C Atm. humidity max. 85% (exposure to dew not permissible) Encl. protection type IP20 Order number, description 09 501 233, 8-way multi-function relay module DRM 8 a. b. c. d. The data relate to the connection requirements as per EN 60069. Min. 5,000 switching cycles. These data are largely dependent upon the manufacturer. In case of doubt, please refer! All relays and background lighting switched on. 3931286/2011.02/H - The right to make technical changes reserved! 29 English Doepke Doepke 18. Menu Structure English 30 3931286/2011.02/H - The right to make technical changes reserved! Doepke 19. Zeitverhalten Step-Betrieb / Timing Step-Mode Auf-Taster Push button „Up“ Ab-Taster Push button „Down“ Relais „Auf“ Relay „Up“ Relais „Ab“ Relay „Down“ Zeichnungen / Drawings Auf-Taster Push button „Up“ Ab-Taster Push button „Down“ Relais „Auf“ Relay „Up“ Relais „Ab“ Relay „Down“ 3931286/2011.02/H - The right to make technical changes reserved! 31 Doepke 20. Anschlussschema / Connection Diagram Zeichnungen / Drawings 32 3931286/2011.02/H - The right to make technical changes reserved!