1
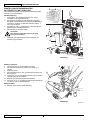
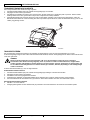
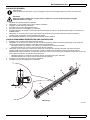
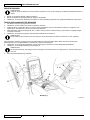
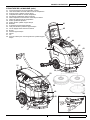
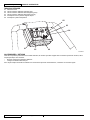
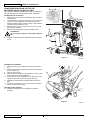
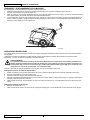
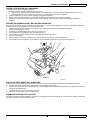
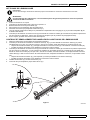
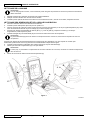
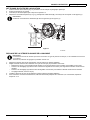
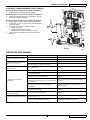
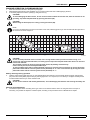
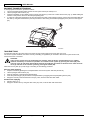
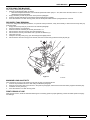
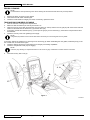
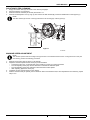
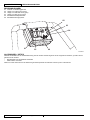
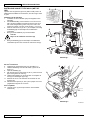
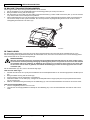
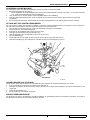
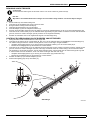
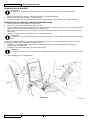
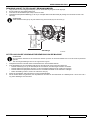
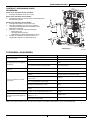
ENGLISH
USER MANUAL
BATTERY CHARGING
NOTE
Charge the batteries when the yellow or red warning light (63 or 64) turns on, or at the end of every working cycle.
Keeping the batteries charged make their life last longer.
CAUTION!
When the batteries are discharged, charge them as soon as possible, as that condition makes their life shorter.
Check for battery charge at least once a week.
WARNING!
When using lead (WET) batteries, battery charging produces highly explosive hydrogen gas. Charge the
batteries in well-ventilated areas and away from naked flames.
Do not smoke while charging the batteries.
Do not reinstall the recovery tank until the battery charging cycle is over.
WARNING!
Pay careful attention when charging WET batteries as there may be battery fluid leakages. The battery fluid is
corrosive. If it comes in contact with skin or eyes, rinse thoroughly with water and consult a physician.
1.
2.
3.
4.
Drive the machine on a level floor.
For WET batteries only:
• Remove the recovery tank as shown in Use chapter. Check the level of electrolyte inside the batteries; if necessary, top up
through the caps.
• Leave all the battery caps open for next charging.
• If necessary, clean the upper surface of the batteries.
Charge the batteries as shown below.
Connect the battery charger cable (21) to the electrical mains (the electrical mains voltage and frequency must be compatible
with the battery charger values shown on the relevant Manual).
NOTE
When the battery charger is connected to the electrical mains, all machine functions are automatically cut off.
The green warning light (27) flashes when the battery charger is charging the batteries.
5.
6.
7.
8.
When the green warning light (27) stays on, the battery charging cycle is over.
When the battery charging is completed, disconnect the battery charger cable (21) from the electrical mains and wind it round
its housing.
For WET batteries only:
• Install the recovery tank as shown in Use chapter.
• Check the level of electrolyte inside the batteries; if necessary, top up through the caps.
• Close all the battery caps.
• If necessary, clean the upper surface of the batteries.
Now the machine is ready to be used.
NOTE
For further information about the operation of the battery charger (26), see the relevant Manual.
22
909 5683 000(4)2009-11 A
BA 410