1
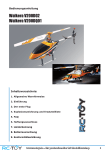
Starlet 50
Modellhubschrauber
Best.-Nr. 4445 Bausatz
Best.-Nr. 4446 Komplettbausatz mit Motor und Schalldämpfer
Warnung!
Der mit dieser Mechanik erstellte RC-Hubschrauber ist kein Spielzeug! Er ist ein kompliziertes Fluggerät, das durch unsachgemässen Umgang schwere Sach- und Personenschäden verursachen kann.
Sie allein sind für die korrekte Fertigstellung und einen gefahrlosen Betrieb verantwortlich! Bitte beachten Sie unbedingt die beiliegenden Blätter SHW3 und SHW7 mit Sicherheitshinweisen, sie sind Bestandteil dieser Anleitung.
GRAUPNER GmbH & Co. KG
D-73230 KIRCHHEIM/TECK
Änderungen, Irrtümer und Druckfehler vorbehalten
ID# 52067
GERMANY
5/04
Starlet 50
Vorwort
STARLET 50, ein Modellhubschrauber der 50er Klasse in offener Bauweise auf der Basis der
bewährten UNI-Expert-Mechanik, ist nicht nur für den Einsteiger interessant als robustes und
maximal aufrüstbares Trainermodell, sondern auch für den fortgeschrittenen Heliflieger mit
Kunstflugambitionen, der ein kompaktes Modell mit hohem Leistungsüberschuss anstrebt.
Der Motorstart erfolgt von oben durch den Kühllufteinlass. Die Schalldämpferausstattung kann
weitgehend den individuellen Ansprüchen angepasst werden: Neben einem Resonanzschalldämpfer für optimale Motorleistung sind auch preiswerte Serienschalldämpfer bzw. Superschalldämpfer einsetzbar, zumal auch damit eine mehr als ausreichende Leistung zur Verfügung steht.
Das Modell weist aufgrund des grossen Heckrotordurchmessers eine sehr gute Heckrotorwirkung auf; der Heckrotor läuft in Autorotation mit. Das hohe Chassis ergibt ausreichende Heckrotor-Bodenfreiheit in Verbindung mit dem gebogenen Heckausleger, durch welchen die Heckrotorwelle in einem Bogen läuft und somit nicht schlagen kann.
Für den Einsteiger ist STARLET 50 eine zukunftssichere Investition, da es direkt aufrüstbar ist
zur UNI-EXPERT-Mechanik bzw. UNI-Mechanik 2000; manche Rumpfbausätze können sogar
ohne Aufrüstung in die 60er Klasse mit dem vorhandenen Motor verwendet werden. STARLET
50 bildet daher den Anfangspunkt eines Hubschraubersystems, das vom Kleinhubschrauber für
Anfänger reicht bis zum Experten- oder Scale-Modell.
Die leichte, tiefgezogene Verkleidung der Mechanik mit eingesetztem Kühlluftkanal ist vibrationsfest auf Gummitüllen gelagert und kann mit wenigen Handgriffen aufgesetzt und abgenommen werden; dadurch sind Fernsteuerungskomponenten und Mechanik optimal zugänglich.
Der Tank ist gut sichtbar, auf Höhe des Vergasers, in der Kabine untergebracht, wodurch der
Kraftstoffvorrat leicht im Flug überprüft werden kann. Der lange, schwarz eloxierte Heckausleger wird über zwei Streben stabil abgestützt und kann bei eventuellen Beschädigungen
problemlos innerhalb kürzester Zeit ausgewechselt werden; seine Länge wurde so gewählt,
dass sowohl der Einsteiger mit preiswerten, kurzen Holzrotorblättern mit S-Schlag-Profil das
Fliegen erlernen, als auch der Experte mit längeren, symmetrisch profilierten GfK-Rotorblättern
uneingeschränkten „3-D"-Kunstflug ausführen kann.
Technische Daten
Länge ohne Rotor ca.
1310 mm
Breite ohne Rotor ca.
240 mm
Höhe ca.
430 mm
Mögliche Rotor- Ø
1160...1365 mm
Fluggewicht ab ca.
3300 g
2
Starlet 50
Warnhinweise
• Das aus diesem Bausatz betriebsfertig aufgebaute Modell ist kein harmloses Spielzeug! Es kann durch mangelhaften Aufbau und/oder unsachgemässe oder fahrlässige
Handhabung beim Betrieb zu schweren Sach- und Personenschäden führen.
• Ein Hubschrauber hat zwei im Betrieb schnell drehende Rotoren mit einer hohen
Drehenergie. Alles, was dabei in die Drehebene der Rotoren gelangt, wird zerstört
oder zumindest stark beschädigt - also auch Gliedmassen! Bitte extreme Vorsicht walten lassen!
• Gelangt ein Gegenstand in die Drehebene der laufenden Rotoren, so wird nicht nur
dieser, sondern auch die Rotorblätter beschädigt. Teile davon können sich lösen, was
zu einer extremen Unwucht führt, wodurch der gesamte Hubschrauber in Mitleidenschaft gezogen und unberechenbar wird.
• Störungen der Fernsteuerungsanlage, hervorgerufen beispielsweise durch Fremdstörungen, Ausfall eines Bauteils oder durch leere bzw. defekte Stromquellen, lassen einen Modellhubschrauber ebenfalls unberechenbar werden: Er kann sich ohne Vorwarnung in jede beliebige Richtung bewegen.
• Ein Hubschrauber besitzt eine grosse Anzahl von Teilen, die einem Verschleiss unterworfen sind, beispielsweise Getriebeteile, Motor, Kugelgelenke usw. Eine ständige
Wartung und Kontrolle des Modells ist daher unbedingt erforderlich. Wie bei den
„grossen“ Vorbildern üblich, muss auch am Modell vor jedem Start eine
"Vorflugkontrolle" durchgeführt werden, bei der evtl. entstandene Mängel erkannt und
rechtzeitig beseitigt werden können, bevor sie zu einem Absturz führen.
• Diesem Bausatz liegen zwei weitere Einlegeblätter - SHW3 und SHW7 - mit Sicherheitshinweisen und Warnungen bei: Bitte unbedingt lesen und beachten, sie sind Teil
dieser Anleitung!
• Dieser Modellhubschrauber darf nur von Erwachsenen oder Jugendlichen ab 16 Jahren unter Anleitung und Aufsicht von sachkundigen Erwachsenen gebaut und betrieben werden.
• Es besteht Verletzungsgefahr durch scharfe Spitzen und Kanten.
• Gesetzliche Auflagen, insbesondere bezüglich einer ggf. erforderlichen Aufstiegserlaubnis, sowie die fernmelderechtlichen Bestimmungen für den Betrieb der Fernsteuerungsanlage müssen unbedingt beachtet werden. Der Abschluss einer Haftpflichtversicherung für den Modellflug ist gesetzlich vorgeschrieben.
• Ein Hubschraubermodell muss so transportiert werden (z.B. zum Fluggelände), dass
daran keine Beschädigungen entstehen können. Besonders gefährdet sind dabei die
Steuergestänge am Hauptrotor und der gesamte Heckrotor.
• Einen Modellhubschrauber zu steuern ist nicht einfach; zum Erlernen dieser Fähigkeit
ist Ausdauer und ein gutes optisches Wahrnehmungsvermögen erforderlich.
• Vor der Inbetriebnahme des Modells ist es unerlässlich, sich intensiv mit der Materie
"Modellhubschrauber" auseinanderzusetzen. Dies sollte sowohl durch Fachliteratur
3
Starlet 50
erfolgen, als auch praktisch, z.B. durch Zuschauen auf Modellflugplätzen mit Helikopterbetrieb, in Gesprächen mit anderen Modellhelikopterpiloten oder durch den
Besuch einer Modellflugschule. Auch der Fachhandel hilft Ihnen gern weiter.
• Diese Anleitung unbedingt vor dem Zusammenbau vollständig lesen. Erst mit dem
Bau beginnen, wenn die einzelnen Baustufen und deren Reihenfolge klar verstanden
worden sind!
• Änderungen des Aufbaus bei Verwendung anderer als in der Anleitung empfohlener
Teile dürfen nicht vorgenommen werden, es sei denn, Sie haben sich von Qualität,
Funktionstüchtigkeit und Eignung dieser anderen Zubehörteile überzeugt.
• Da Hersteller und Verkäufer keinen Einfluss auf einen sachgerechten Aufbau und ordnungsgemässen Betrieb des Modells haben, wird ausdrücklich auf diese Gefahren
hingewiesen und jegliche Haftung abgelehnt.
Haftungsausschluss / Schadenersatz
Weder die Einhaltung der Montage- und Betriebsanleitung in Zusammenhang mit dem
Modell, noch die Bedienung und Methoden bei Installation, Betrieb, Verwendung und
Wartung der Fernsteuerungsanlagen können von der Firma Graupner überwacht werden.
Daher übernimmt die Fa. Graupner keinerlei Haftung für Verluste, Schäden oder Kosten,
die sich aus der fehlerhaften Verwendung und dem Betrieb ergeben oder in irgendeiner
Weise damit zusammenhängen.
Soweit vom Gesetzgeber nicht zwingend anders vorgeschrieben, ist die Verpflichtung
der Fa. Graupner zur Leistung von Schadenersatz, gleich aus welchem Rechtsgrund,
begrenzt auf den Rechnungswert der an dem schadenstiftenden Ereignis unmittelbar
beteiligten Warenmenge der Fa. Graupner. Dies gilt nicht, soweit die Fa. Graupner nach
zwingenden gesetzlichen Vorschriften wegen Vorsatz oder grober Fahrlässigkeit unbeschränkt haftet.
4
Starlet 50
Inhaltsübersicht
• Vorwort
..............................................
S.2
• Warnhinweise ..........................................
S.3
• Zubehör, zusätzlich benötigte Artikel
.........................
S.6
• 1. Montage der Hauptmechanik .............................
S.7
• 2. Einbau der Fernlenkanlage
..............................
S.21
• 3. Zusammenbau des Hauptrotorkopfes .......................
S.24
• 4. Zusammenbau des Heckrotorgetriebes
.....................
S.29
..............................
S.31
• 6. Montage des Heckrotorkopfes ............................
S.32
• 7. Heckausleger .........................................
S.33
• 8. Kufenlandegestell montieren
.............................
S.36
• 9. Schalldämpfermontage ..................................
S.36
• 10. Heckrotorsteuerung ...................................
S.36
• 11. Kabine
............................................
S.37
• 12. Hauptrotorblätter .....................................
S.38
• 13. Einstellarbeiten ......................................
S.39
• 14. Endkontrolle vor dem Erstflug ............................
S.43
• 15. Einstellungen beim Erstflug, Spurlauf-Einstellung ..............
S.44
Motor - Einstellhinweise ................................
S.45
• 16. Allgemeine Vorsichtsmassnahmen ........................
S.46
• 17. Einige Grundbegriffe des Hubschrauberfliegens
S.47
• 5. Montage der Steuerbrücke
•
..............
Hinweise zu dieser Anleitung
Damit das Helikoptermodell später einwandfrei und sicher geflogen werden kann, wurde diese
Anleitung mit hohem Aufwand erstellt. Es wird nicht nur vom Anfänger, sondern in gleichem
Masse vom Experten unbedingt erwartet, die Fertigstellung Schritt für Schritt exakt so vorzunehmen, wie es nachfolgend beschrieben wird.
• Die Fertigstellung der Mechanik erfolgt anhand von Abbildungen, die mit erklärenden Texten
versehen sind.
• Es liegt allein in der Verantwortung des Modellfliegers, für festen Sitz aller Schrauben und
sonstigen Verbindungen zu sorgen sowie die erforderlichen Einstell- und Justagearbeiten
gewissenhaft auszuführen; dies gilt auch für vormontiert gelieferte Baugruppen, die diesbezüglich überprüft werden müssen.
markierten Verbindungen sind mit Schraubensiche• Die mit diesem Symbol
rungslack, z.B. Best.-Nr. 952, bzw. Lagerbefestigung, Best.-Nr. 951, zu versehen; zuvor
müssen die betreffenden Stellen entfettet werden.
• Alle Lagerungen, gleichermassen Gleit- wie Kugel- oder Nadellager, sind sorgfältig zu
schmieren. Gleiches gilt für alle Kugelgelenke und Zahnräder, auch wenn darauf in der Anleitung nicht noch einmal hingewiesen wird.
• Stückliste, Ersatzteile und zugehörige Explosionszeichnungen sind am Ende der Anleitung
zu finden.
5
Starlet 50
Zubehör
Empfohlene Motoren und Zubehör für Starlet 50
Motor
OS MAX 46
FX-HG
OS MAX 50
SX-HG
Hubraum Best.ccm
Nr.
7,45
1893
8,17
1921
Glühkerzenbatterie, z.B.
Varta RSH 4
Varta RSH 7
Startakku 2 V
Startakku 2 V
Expansions- Schalldämpfer
1809.33
1871.72
1809.33
1871.72
Best.-Nr. 1353
Best.-Nr. 1352
Best.-Nr. 3694
Best.-Nr. 771
Auspuffkrümmer
2259
2259
(Resonanz)Schalldämpfer
1783A oder
2272
1783A oder
2272
( nur mit Schutzwiderstand, Best.-Nr.
1685 oder 1694 verwenden.)
Treibstoffe
TITAN S 12
Best.-Nr. 2612
AeroSynth COMPETITION SX-10 Best.-Nr. 2811
Starter
Elektrostarter, Best.-Nr. 1628 oder 1626.
Startbatterie 12 V, z.B. Best.-Nr. 2592 oder 2593.
Geeignete Hauptrotorblätter
Best.-Nr. 1291.1
Holz, S-Schlag, 500mm lang
Best.-Nr. 1296
GfK, S-Schlag, 552mm lang
Best.-Nr. 1269
GfK, symmetr., 552mm lang
Best.-Nr. 1271
GfK, symmetr., 602mm lang
Rotor-Ø 1157mm (im Lieferumfang)
Rotor-Ø 1261mm
Rotor-Ø 1261mm
Rotor-Ø 1361mm
Fernlenkanlage siehe Graupner-Hauptkatalog
Es wird empfohlen eine mit speziellen Hubschrauberoptionen ausgestattete Fernlenkanlage
oder eine Microcomputer-Fernlenkanlage wie z. B. mc-12, mc-14, mc-15, mc-19, mc-22 oder
mc-24 zu verwenden.
Zur Mindestausrüstung muss eine Fernlenkanlage mit einem 3-Punkt-Taumelscheibenmischer und fünf ansteuerbaren Servos für die Funktionen Nick, Roll, Pitch, Heck und
Gas zur Verfügung stehen.
An Servos sollten nur Leistungstypen wie z. B. C 4041, Best.-Nr 3916, oder mindestens
gleichwertig zur Anwendung kommen.
Gyrosystem:
Gyro-System PIEZO 5000, Best.-Nr. 5146 mit Super-Servo DS-8700G, Best.-Nr. 5156 oder
Gyro-System PIEZO 550, Best.-Nr. 5147 oder Gyro-System G490T, Best.-Nr. 5137
Elektronischer Drehzahlregler:
mc-HELI-CONTROL, Best.-Nr. 3286
Empfängerstromversorgung:
Aus Sicherheitsgründen sollen nur solche Typen mit mindestens 1800 mA Kapazität Verwendung finden, sowie ein Schalterkabel mit für die auftretenden Ströme ausreichenden Kabelquerschnitten.
Empfohlen wird das Power-Stromversorgungskabel mit Ladebuchse, Best.-Nr. 3050 in Verbindung mit dem Empfängerakku 4RC-3000 MH, Best.-Nr. 2568.
Keinesfalls darf ein Empfängerakku mit mehr als 4 Zellen verwendet werden.
Eine ständige Kontrolle der Akkuspannung wird durch die Verwendung des NC-Akku-Controllers, Best.-Nr 3138, ermöglicht.
6
Starlet 50
1. Montage der Hauptmechanik
Die Mechanik des STARLET 50 besteht zum grossen Teil aus glasfaserverstärktem Polyamid,
einem Material, das gegenüber beispielsweise Aluminium im Einsatzbereich Modellhubschrauber erhebliche Vorteile bietet, wie hohe Masskonstanz bei geringem Gewicht, Ermüdungsfreiheit, geräuscharmer Lauf und Absorbtionsfähigkeit von Vibrationen des Antriebs. Aufgrund der
konstruktiven Auslegung besitzen derartige Mechaniken die erforderliche Robustheit und Steifigkeit; bei "harten Landungen" ist es von Vorteil, dass die Teile entweder unbeschädigt (und
damit uneingeschränkt einsatzfähig) bleiben oder aber brechen und damit definitiv ausgewechselt werden müssen. Ein Verbiegen oder Verziehen des Chassis, das vielleicht nicht einmal
bemerkt wird, dennoch aber Lebensdauer der anderen Komponenten, Funktionsfähigkeit oder
gar die Sicherheit des gesamten Systems beeinträchtigt, ist, im Gegensatz zu Metallmechaniken, bei diesem Aufbau nicht möglich.
Den vielen Vorteilen der Bauart aus Polyamid stehen als Nachteile lediglich gegenüber der höhere (und kostenintensivere) Aufwand bei der Fertigung sowie die Erfordernis einer sorgfältigeren, gewissenhafteren Montage und Justage der Komponenten, wobei gelegentlich auch leichtes Nacharbeiten der Teile erforderlich sein kann. Belohnt wird die hier aufgewendete Sorgfalt
durch eine hohe Lebensdauer des Modells und geringen Verschleiss.
Wellen, Lager, Passungen
Nahezu alle rotierenden Teile der Mechanik sind kugelgelagert. Bei Kugellagerungen ist es sehr
wichtig, dass die Welle im Lagerinnenring so fest sitzt, dass sie sich nicht innerhalb des Ringes
drehen kann, was dazu führen würde, dass sich der Innenring erhitzt (er läuft dabei blau oder
gelb an) und das Lager beschädigt und unbrauchbar wird. Im Extremfall kann das Lager dabei
so heiss werden, dass auch die Polyamid-Lageraufnahme schmilzt und die Welle ihre Lage zu
anderen Komponenten verändert. Das ist dann natürlich nicht ein Fehler des Lagerträgermaterials, sondern eben die Folge einer falschen Lagerpassung.
Eine weitere möglich Folge einer zu weiten Lagerpassung mit dem damit verbundenen Durchrutschen der Welle im Innenring ist eine Verringerung des Wellendurchmessers im Bereich des
Lagers (das Lager "läuft ein"), wodurch auf der Welle montierte Zahnräder ihren korrekten Eingriff verlieren, also nicht mehr richtig aufeinander abrollen, was zu erhöhtem Verschleiss bis
zum Ausfall führt.
Die Passungen zwischen Wellen und Kugellagern sind beim Graupner/Heim-System eher eng
gehalten, um die oben beschriebenen Probleme zu vermeiden. Das kann, bei ungünstigem Zusammentreffen der Toleranzbereiche von Lager und Welle, gelegentlich zu einer zu engen
Passung führen, d.h., das Lager lässt sich nicht auf die Welle aufschieben. In diesem Fall muss
die Welle entsprechend mit feinem Schleifpapier (Körnung 600...1200) nachbearbeitet werden,
bis das Lager mit mässigem Kraftaufwand aufgeschoben werden kann.
Bei leichtgängigen und zu weiten Passungen, was ebenfalls aufgrund der Toleranzbereiche beider Teile vorkommen kann, werden die Lager mit LOCTITE Lagerbefestigung 603 auf die Wellen aufgeklebt, was einen festen Sitz gewährleistet. Dabei ist zu beachten, dass sich diese
flüssige Lagerbefestigung um so schneller verfestigt, je enger die Passung ist: Unter Umständen bleiben nur wenige Sekunden zum korrekten Platzieren des Lagers auf der Welle, bevor es
unverrückbar befestigt ist.
Wird eine Welle in mehreren Lagern geführt, so muss verhindert werden, dass die Lager in axialer Richtung gegeneinander verspannt werden. Man erreicht das entweder durch ganz exaktes
Justieren beider Lager auf der Welle oder durch eine Kombination von Fest- und Schiebesitz:
Ein Lager wird unverrückbar auf der Welle befestigt durch Aufpressen oder Verkleben (Festsitz), das andere Lager erhält einen Schiebesitz, d.h. es kann mit mässigem Kraftaufwand axial
auf der Welle verschoben werden, so dass sich die optimale Position nach Einbau von selbst
ergibt.
Generell kann davon ausgegangen werden, dass die Gefahr des Einlaufens von Lagern um so
grösser wird, je geringer der Wellendurchmesser und je höher die Drehzahl ist.
Die Gefahr des Verspannens der Lager gegeneinander wird um so grösser, je geringer der Unterschied zwischen Innen- und Aussendurchmesser der Lager ist.
All das muss in jedem Einzelfall berücksichtigt werden, um ein Höchstmass an Betriebssicherheit und Zuverlässigkeit zu erreichen. In der nachfolgenden Bauanleitung ist daher jeweils angegeben, welche Verbindungen unter Zugabe von flüssiger Schraubensicherung bzw. Lagerbefestigung erfolgen sollen.
7
Starlet 50
1.1 Zusammenbau des Heckrotorantriebs (Beutel UM-1A)
Die Welle der Schnellkupplung 4618.57 darf innerhalb der Lager 4618.6 keinerlei Axialspiel
aufweisen. Wenn der Sitz der Welle in den Lagern nicht straff genug ist, Welle mit Lagerbefestigung 603, Best.-Nr. 951, in die Lager einkleben. Dabei zunächst das hintere Lager unter Zugabe von Lagerbefestigung 603 auf die Welle aufschieben, bis es an der Kupplungsgabel anliegt. Warten, bis der Kleber abgebunden hat, was je nach Passung zwischen 20 Sekunden und
30 Minuten dauern kann. Diese Einheit in den Lagerhalter 4448.14 ganz eindrücken (bis zum
Anschlag), dann das vordere Lager unter Zugabe von Lagerbefestigung 603 in einem Zug auf
die Welle aufschieben und in den Lagerhalter bis zum Anschlag eindrücken. Jetzt unverzüglich
prüfen (vor dem Aushärten des Klebers), ob die Welle noch leichtgängig läuft, oder ob die Lager
durch axiales Verspannen schwergängig geworden sind. In diesem Fall klopft man leicht (z.B.
mit einem Schraubendrehergriff) axial auf das Ende der Welle oder (stärker) auf den Lagerträger, bis die Lager leicht laufen, dann Lagerbefestigungskleber aushärten lassen.
Vorn auf das Wellenende werden nun eine Passscheibe und das Ritzel 4450.41 aufgeschoben,
gegen das vordere Lager gedrückt und in dieser Position mit den beiden Stiftschrauben befestigt. Dazu zunächst in die Gewindebohrungen flüssige Schraubensicherung (Best.-Nr. 952)
geben und die erste Stiftschraube so eindrehen, dass sie auf der in die Welle eingeschliffenen
Fläche greift; dabei das Ritzel auf der Welle leicht hin und her drehen, damit die Stiftschraube
optimal sitzt, dann mässig festziehen. Jetzt die gegenüberliegende Stiftschraube eindrehen und
sehr fest anziehen, dann die erste Stiftschraube endgültig nachziehen. Bei dieser Vorgehensweise wird sichergestellt, dass das Ritzel auf der Welle wirklich rund läuft.
1.2 Montage des Vorgeleges (Beutel UM-1B)
Unteres Lager 4450.31 der Vorgelegewelle 4450.7 mit Lagerbefestigung 603, Best.-Nr. 951, so
auf die Welle aufkleben, dass es am Ritzel anliegt, dann Kleber aushärten lassen. Welle mit
dem Lager in den unteren Lagerträger 4448.11 eindrücken.
8
Starlet 50
Oberen Lagerträger zunächst lose auf die Welle auffädeln (Einbaurichtung beachten, die
Öffnung dieses Lagerträgers weist nach oben), dann das obere Lager 4450.31 aufschieben,
gefolgt von der einer Passscheibe und dem Zahnrad 4618.105 mit eingesteckter
Freilaufbauchse 4618.107. Die Querbohrungen von Welle und Freilaufbuchse zur Deckung
bringen und Rollstift 4618.65 vorsichtig eindrücken, jedoch nur so weit, dass er in die Welle
hineinreicht und ggf. wieder herausgezogen werden kann.
Oberes Lager 4450.31 jetzt in den Lagerträger 4448.11 eindrücken und diese Einheit nach oben
gegen die Passscheibe unter der Freilaufhülse schieben. Das auf diese Weise zusammengesetzte Vorgelege provisorisch zwischen die Mechanik-Seitenteile 4450.9 und 4450.10
montieren um zu überprüfen, ob in eingebautem Zustand das obere Lager über die Passscheibe an der Freilaufhülse anliegt oder ob ein Abstand entsteht, der mit weiteren Passscheiben
ausgeglichen werden muss. Lager nicht durch zu viele Passscheiben verspannen!
Wenn der Abstand korrekt eingestellt ist, wird auch hier die Welle mit Lagerbefestigung, Best.Nr. 951, in das Lager eingeklebt; zuvor den Rollstift endgültig und vollständig in die Freilaufhülse eindrücken. Bis zum Aushärten des Lagerbefestigungsklebers muss die Einheit zwischen
den Mechanikseitenteilen festgeschraubt bleiben, wobei die Leichtgängigkeit in den Lagern
überprüft und ggf. durch leichtes Klopfen auf die Enden der Welle hergestellt werden kann.
9
Starlet 50
1.3 Vorbereiten der Hauptrotorwelle mit Lagerung (Beutel UM-1C)
Taumelscheibenführung 4618.113 mit 2 Stck. Zylinderkopfschrauben M2x12 an den Domlagerhalter 4448.8 montieren. Je ein Kugellager 4450.24 in den Domlagerhalter und den Hauptrotorwellenlagerhalter 4448.12 eindrücken (Lager fetten).
Den Sicherungsring 4607.156 von oben auf die Hauptrotorwelle 4450.43 aufsschieben und in
die Nut einrasten lassen; dabei beachten:
• Der Sicherungsring darf nicht überdehnt werden, also keinesfalls weiter öffnen, als unbedingt zum Verschieben auf der Hauptrotorwelle erforderlich ist (möglichst Spezialzange
verwenden).
• Der innere Rand des Sicherungsringes besitzt eine abgerundete und eine scharfkantige
Seite; die scharfkantige Seite muss nach oben weisen.
• Der Sicherungsring muss auf der Welle fest sitzen und darf sich nicht mit der Hand drehen
lassen.
10
Starlet 50
1.4 Zusammenbau des Hauptgetriebes
Heckrotorantrieb, Vorgelege sowie Hauptrotorwellenlagerhalter mit Inbusschrauben M3x16 zwischen die Mechanikseitenteile 4450.9 und 4450.10 montieren. Schrauben noch nicht ganz festziehen. Von unten auf die Hauptrotorwelle eine Passscheibe 4450.40 und den Domlagerhalter
aufstecken. Hauptrotorwelle von oben durch das untere Rotorwellenlager und das Tellerzahnrad 4450.20A so weit durchschieben, dass den Zylinderstift 4450.37 durch die untere Bohrung
der Hauptrotorwelle gesteckt werden kann. Hauptrotorwelle dann ganz nach oben ziehen, wobei der Zylinderstift in die entsprechende Vertiefung im Tellerzahnrad einrasten muss. Den
Domlagerhalter nun ebenfalls mit Inbusschrauben M3x16 zwischen den Mechanik-Seitenteilen
festschrauben und prüfen, dass die Hauptrotorwelle keinerlei Axialspiel in den Lagern aufweist;
ggf. dieses Spiel durch Unterlegen weiterer Passscheiben unter den Sicherungsring beseitigen. Dabei jedoch nicht die Lager verspannen, indem zu viele und/oder zu dicke Scheiben unterlegt werden.
Zum Hinzufügen oder Entfernen der Passscheiben stets das Domlager lösen und die
Hauptrotorwelle in umgekehrter Reihenfolge wie beim Einbau ausbauen! Keinesfalls
dazu den Sicherungsring demontieren!
Zum Einstellen des Getriebes ist es erforderlich, dass das Zahnflankenspiel dieser Getriebestufe zunächst geringfügig zu eng ist, die Zahnräder also "hart" auf einander abrollen. Wenn
das nicht der Fall ist, also schon ein deutliches Zahnflankenspiel vorhanden ist, nachdem die
Mechanik zusammengeschraubt wurde, muss zunächst das untere Hauptrotorwellenlager
4448.12 um 180° horizontal gedreht eingebaut werden. Sollte das immer noch nicht ausreichen,
11
Starlet 50
so ist auch der untere Lagerbock der Vorgelegewelle um 180° horizontal zu drehen. Mit diesen
Massnahmen kann ein produktionsbedingter, nie völlig vermeidbarer geringer Versatz der
Messinginserts in den Lagerträgern ausgeglichen werden. Das Zahnflankenspiel zwischen dem
Stirnrad und dem Ritzel des Vorgeleges wird nun eingestellt, indem die Inbusschrauben M3x16
in den Lagerböcken etwas gelöst und wieder festgezogen werden, nachdem man einen Streifen
dickes Schreibpapier zwischen die Zahnräder geklemmt hat. Das Getriebe muss jetzt
leichtgängig laufen, ohne an irgendeiner Stelle zu klemmen oder zu haken; andernfalls muss
nachjustiert werden.
1.5 Motoreinbau (Beutel UM-2)
Für diese Mechanik vorgesehen ist ein Motor mit langgeschliffener Graupner / Heim-Kurbelwelle (8mmØ). Andere Motoren können jedoch nach eigenem Ermessen eingebaut werden
unter Verwendung der separat lieferbaren, gleitgelagerten Kupplung.
Nach Entfernen der Unterlegscheiben und der Mutter von der Kurbelwelle, in der Reihenfolge
Stufenscheibe 4450.38, zwei Kugellager 4618.78, Konus 4618.77, Kupplungsglocke 1239,
Kupplung 4618.79, Gebläserad 1291.2 und die mit dem Motor gelieferte Unterlegscheibe auf
die Kurbelwelle schieben, Kurbelwellenmutter aufschrauben und gut festziehen.
Sollte dabei der Konus ganz in die Kupplung gedrückt werden, ohne dass ein ausreichender
Druck auf die Kurbelwelle entsteht, so muss die Beilagscheibe 8/13x0,5 (aus 4450.58) unter
den Konus gelegt werden, damit die Kupplung später im Betrieb nicht auf der Kurbelwelle
durchrutscht. Eine Gelenkkugel mit Schraube M2x10 und Mutter in der äussersten Bohrung des
Vergaserhebels montieren.
12
Starlet 50
Hinweise:
Der Kraftschluss von Kurbelwelle und Kupplung erfolgt ausschliesslich über den Anpressdruck
des Spannkonus auf die geschliffene Kurbelwelle und in den Gegenkonus der Kupplung. Es hat
sich daher als vorteilhaft erwiesen, die Kupplung zunächst ohne Lüfterrad zu montieren und
kräftig festzuziehen; dabei Kupplung mit einem geeigneten Werkzeug gegenhalten.
Beim Aufschieben der Kupplungsglocke auf die Kurbelwelle unbedingt darauf achten, dass diese keinesfalls in ihren Lagern nach hinten geschoben wird!
Eine korrekt festgezogene Kupplung lässt sich auch nach Entfernen der Kurbelwellenmutter nur
noch mit einer Abziehvorrichtung (Best.-Nr. 1045) wieder lösen. Die Kurbelwellenmutter leistet
im Betrieb keinen nennenswerten Beitrag zur Kraftübertragung, sondern dient hauptsächlich der
Befestigung des Lüfterrades und ggf. des Sechskant-Anlasskonus (Optionsteil, Best.-Nr.
4448.103).
13
Starlet 50
An die Mechanik oben die Motorträger 1291.18 mit 2 Spezialschrauben M3x12 von der Innenseite her anschrauben. Den Motor mit vier Inbusschrauben M3x16 auf die Motorträger schrauben, wobei jeweils eine Unterlegscheibe 560.7 zwischen Motorflansch und Motorträger (siehe
Abbildung) eingefügt wird.
14
Starlet 50
1.6 Gebläsegehäuse montieren (Beutel UM-3)
Die Vergaseröffnung im Gebläsegehäuse muss unter Umständen, je nach eingesetztem Vergaser, erweitert werden, ebenso die Aussparung für den Zylinder.
Das Gebläsegehäuse über den Motor schieben; mit einer Gewindestange 4618.151, U-Scheiben und Muttern vorn sowie mit 2 Blechschrauben 2,9x16 hinten mit der Mechanik verschrauben.
15
Starlet 50
1.7 Zusammensetzen des Unterbaues (Beutel UM-4)
Unterbau aus den in der Abbildung gezeigten Einzelteilen Seitenteile 4448.34, Spant 4450.18,
Distanzstücke 4450.17, RC-Box 4445.101 und Kufenböcke 1291.21A zusammensetzen unter
Verwendung der jeweils angegebenen Schrauben.
16
Starlet 50
1.8 Montage der Mechanik auf dem Unterbau (Beutel UM-5)
Das Hauptgetriebe aus Bauabschnitt 1.6 hinten mit den runden Befestigungsansätzen zwischen
den Unterbau-Seitenteilen einrasten lassen und mit Inbusschrauben M3x16 und U-Scheiben
festschrauben.
In der Mitte werden zwei Inbusschrauben M3x30 verwendet, auf die zunächst je eine U-Scheibe
aufgefädelt wird, und welche dann durch die mit Messingbuchsen 4450.34A versehenen
Unterbau-Seitenteile und die beiden Distanzscheiben 4445.34 in die Mechanikseitenteile eingedreht und festgezogen werden. Innen ragen diese Schrauben aus den unteren MotorträgerBefestigungsbohrungen heraus, so dass hier je eine Stop-Mutter M3 aufgedreht werden kann
zur Befestigung der Motorträger.
Das Zahnflankenspiel der ersten Getriebestufe wird eingestellt, indem man die Schrauben
M3x16, mit denen der obere Lagerträger der Vorgelegewelle in den Seitenteilen befestigt ist,
ebenso wie die M3-Stopmuttern unten an den Motorträgern löst, jeweils einen Streifen dünnen
Zeichenkarton zwischen Kupplungsritzel und Zahnrad klemmt und in diesem Zustand alle
Schrauben wieder gut festzieht; die M3-Schrauben in den Motorträgern dabei mit reichlich
Schraubensicherungslack versehen. Nach dem Entfernen der Papierstreifen zwischen den
Zahnrädern muss das gesamte Getriebe jetzt leichtgängig laufen, das Kegelrad darf dabei kein
merkliches Zahnflankenspiel im Tellerrad aufweisen.
17
Starlet 50
1.9 Glühkerzenanschluss (Beutel UM-6)
Die Buchse des Glühkerzenanschlusses in die Bohrung des rechten Seitenteils 4448.34 einstecken und in der Reihenfolge Lötfahne, "U"-Scheibe und Mutter aufschieben bzw. festdrehen.
Mit der Zwillingslitze wird nun die Verbindung zum Motor hergestellt. Um einen schnellen Kerzenwechsel zu ermöglichen, wird an das Kabel vom Mittelkontakt der Anschlussbuchse die Krokodilklemme angelötet und auf die Kerze aufgeklemmt; das andere Kabel wird an einer Motorträgerverschraubung mittels einer "U"-Scheibe befestigt. Nach dem Verlegen der Kabel je eine
Litze am Plus- bzw. Minuspol der Buchse anlöten.
18
Starlet 50
1.10 Kraftstofftank
Der Zusammenbau des Tanks ist aus der Abbildung ersichtlich. Zunächst wird der Druckanschlussnippel an der höchsten Stelle des Tank, in der kleinen Beule, montiert: Bohrung 5mmØ
anbringen, Nippel von innen durchstecken und aussen mit U-Scheibe und Mutter befestigen.
Das Gummiteil besitzt (ausser dem Durchgang für die Schraube) zwei durchgehende Bohrungen für Messingröhrchen, die dritte Bohrung ist "blind" ausgebildet (für evtl. andere Zwecke),
lässt sich aber leicht durchstechen. Da hier nur eine einzige Durchführung (Zuleitung zum Vergaser / Füllen des Tanks) benötigt wird, verschliesst man die zweite Durchführung mit einem
Messingbolzen (aus 4618.15). Das Röhrchen wird gemäss Abbildung gebogen. Es muss darauf
geachtet werden, dass das Pendel voll beweglich ist und, wenn man den Tank von Hand dreht,
stets nach unten fällt. Der Messingring wird auf den Hals des Tanks aufgeschoben, er gewährleistet, dass dieser bei Verformung der Gummidurchführung nicht platzen kann. Nach dem Zusammenbau des Tanks muss die zentrale Schraube gründlich angezogen werden. Der Gummi
verformt sich dabei und dichtet alles ab.
Die Tankauflageflächen sind an den Seitenteilen, Best.-Nr. 4448.34 zu entgraten. Der Tank wird
dann mit darüber gespannten Gummiringen befestigt; der Verschlussstopfen muss hinten
liegen. Die Zuleitung zum Motor wird mit dem Kraftstoffschlauch und T-Kraftstoffilter hergestellt;
dabei muss auf eine möglichst kurze Verbindung zum Vergaser geachtet werden.
Das Betanken und Entleeren wird über die Verbindung zwischen Pendel und Vergaser vorgenommen, was der T- Kraftstoffilter erleichtert: Im Betrieb wird der seitlich aus dem Filter führende Betankungsanschluss mit dem Stopfen verschlossen, zum Tanken/Entleeren wird zunächst die Kraftstoffzufuhr zum Vergaser mit der Schlauchklemme verschlossen, dann kann der
Tank durch den Betankungsanschluss gefüllt oder entleert werden.
1.11 Montage des Gyrobodens (Beutel UM-7)
Gyrobodenhalter 4450.16 mit Blechschrauben 2,2x9,5 an die Seitenteile montieren. Der Gyroboden 1291.12 wird später, nach dem Servoeinbau, auf die Träger aufgesteckt und mit 4 Blechschrauben 2,2x6,5 festgeschraubt.
19
Starlet 50
1.12 Pitchkompensator und Taumelscheibe (Beutel UM-8)
Der Pitchkompensator 4618.47A wird entsprechend der Abbildung zusammengesetzt.
Dazu werden zunächst die mit einem Sicherungsring versehenen Messingbolzen mit Lagerbefestigungskleber in die Bohrungen des Pitchkompensator-Mittelstücks 4618.46 eingeklebt, so
dass die Enden mit den Sicherungsringen in den Ansenkungen liegen. Die Pitchkompensatorarme werden entgratet und auf die herausstehenden Bolzenenden gesteckt, wobei jeweils mindestens eine Passscheibe zwischen Mittelstück und Arm angeordnet wird; die Arme müssen sich
leichtgängig auf den Bolzen drehen lassen, ggf. Bohrungen entgraten. Nach dem Anbringen der
äusseren Sicherungsscheiben sollte kein Axialspiel der Arme auf den Bolzen vorhanden sein,
andernfalls müssen weitere Passscheiben unterlegt werden.
Aus drei Gewindestangen 4618.51 (2mmØ, 75mm lang) und sechs Kugelgelenken 4618.55
werden drei Gestänge hergestellt gemäss Abbildung; das angegebene Mass bezieht sich auf
den freien Abstand zwischen den Kugelgelenken.
Ein Gestänge für den hinteren Punkt der Taumelscheibenanlenkung über den Führungszapfen
an der Taumelscheibe 4682.45 auf die dahinterliegende Gelenkkugel aufdrücken, dann die
Messinghülse (aus 4618.113) auf den Führungszapfen aufstecken und gut fetten. Taumelscheibe auf die Hauptrotorwelle aufschieben und das eingehängte Gestänge durch den Durchbruch
hinten im Domlagerhalter nach unten durchstecken; dabei die Taumelscheibenführung
4618.113 vorsichtig zurückbiegen und den Führungszapfen der Taumelscheibe mit der Messinghülse in die Führungsnut einrasten lassen.
Den Pitchkompensator auf die Hauptrotorwelle aufstecken und die beiden Kugelgelenke gemäss Abbildung auf die bezeichneten Kugeln des Taumelscheiben-Innenringes aufdrücken.
20
Starlet 50
2. Einbau der Fernlenkanlage (Beutel UM-9)
2.1 Montage der Servos
Am Nickservohebel (1) und an die Servohebel der Rollservos (2) + (3) werden von innen je eine
Messingkugel mit einer Zylinderkopfschraube M2x10 festgeschraubt und mit einer M2-Mutter
von aussen gesichert, dabei sowohl zwischen Schraube und Kugel, als auch in die Mutter
Schraubensicherungslack geben. Der Abstand von Achse zu Kugelmitte beträgt ca. 18 mm.
Jetzt wird zuerst das Nickservo von innen in das rechte Seitenteil mit der Abtriebsachse nach
oben in den Servoausschnitt gesteckt und mit 4 Schrauben, Gummidurchführungen und Hohlniete befestigt (Material im Lieferumfang der Servos): Die Hohlniete werden von unten in die
Gummidurchführungen gesteckt, die Schrauben von oben eingedreht.
Die Servo-Befestigungsbohrungen in der Mechanik sind absichtlich geringfügig nach aussen
versetzt, so dass sich eine Vorspannung in der Gummiaufhängung ergibt, wodurch eine höhere
Steuerpräzision erreicht wird.
Die Rollservos werden jeweils in das rechte und linke Seitenteil von aussen gesteckt (siehe
Zeichnung, auch hier Achsabtrieb nach oben) und mit je 4 Schrauben befestigt. Servos gemäss
Anleitung der Fernsteuerung mit dem Empfänger verbinden, Fernsteuerung einschalten und
Taumelscheibenmixer im Sender aktivieren (Einstellung: Symmetrische Dreipunktanlenkung, 2
Rollservos, 1 Nickservo hinten). Pitch-, Nick- und Rollsteuerung in Neutralposition bringen und
die Servohebel jetzt so aufstecken und befestigen, dass sie rechtwinklig zur Rotorwelle stehen.
Das Heckrotorservo wird, mit seiner Abtriebswelle nach oben, von aussen in das linke Seitenteil
gesteckt und befestigt. Der Servohebel zeigt nach unten und steht bei Pitchmittelstellung parallel zur Hauptrotorwelle.
Am Gasservohebel wird von aussen eine Messingkugel mit einer Zylinderkopfschraube M2x 10
festgeschraubt und mit einer M2-Mutter von hinten gesichert, dabei sowohl zwischen Schraube
und Kugel, als auch in die Mutter Schraubensicherungslack geben. Der Abstand von Achse zu
Kugelmitte beträgt ca. 11 mm. Das Gasservo wird im linken Seitenteil mit Achsabtrieb und
Servohebel nach oben zeigend montiert.
Die Anschlusskabel der Servos werden durch den freibleibenden, vorderen Servoausschnitt im
rechten Seitenteil geführt und mit Spiralschlauch zusammengefasst an der rechten Mechanikseite entlang nach vorn zum Empfänger verlegt. Die Verlegung der Servokabel ist äusserst
sorgfältig vorzunehmen. Kabel dürfen auf keinen Fall Wellen oder Zahnräder berühren
(Absturzgefahr beim Durchscheuern der Kabel).
21
Starlet 50
Mit den zuvor angefertigten Gestängen werden die Taumelscheibenservos mit der Taumelscheibe verbunden, so dass sich eine 120° Anlenkung ergibt.
Eine Vierpunktanlenkung der Taumelscheibe ist ebenfalls möglich, muss aber nach eigenem
Ermessen durchgeführt werden. Dazu wird ein weiteres Servo in den noch freien Servoausschnitt der Mechanik montiert und über ein entsprechend gebogenes Gestänge von 2,5 mm Ø
mit dem vorderen Anlenkpunkt der Taumelscheibe verbunden. Die Gestänge der Servos 2 und
3 werden dann in die seitlichen (90°) Anlenkpunkte der Taumelscheibe eingehängt, und im
Sender ist der Taumelscheibenmixer für Vierpunktanlenkungen zu aktivieren.
Besondere Aufmerksamkeit ist bei der Vierpunktanlenkung darauf zu verwenden, dass die Anlenkgestänge exakt justiert sind, damit sich die Servos nicht gegenseitig belasten. Dazu wird bei
eingeschalteter Fernsteuerung der Pitchsteuerknüppel in Mittelstellung gebracht (Servohebel
stehen dann 90° zu den Gestängen) und zunächst ein Gestänge ausgehängt. Durch Verstellen
der verbliebenen drei Gestänge wird jetzt die Taumelscheibe genau waagerecht justiert. Ist das
erreicht, wird das vierte Gestänge so justiert, dass es sich ohne Druck gegen das Servo auf die
Kugel der Taumelscheibe aufdrücken lässt.
Aus einer Gewindestange 4445.84 (2mmØ, 45mm lang) und zwei Kugelgelenken 4618.55 wird
das Gasgestänge hergestellt gemäss Abbildung; das angegebene Mass bezieht sich auf den
freien Abstand zwischen den Kugelgelenken.
22
Starlet 50
Vergaserhebel und Servoarm werden über dieses Gestänge miteinander verbunden, wie in der
Abbildung gezeigt:
2.2 Montage der übrigen Fernsteuerungskomponenten
Zum Befestigen des Gyrosystems auf dem Gyroboden wird zweckmässigerweise doppelseitiges Klebeband, z. B. Best.-Nr. 742 verwendet. Die Zuleitungen werden zusammen mit den
Servokabeln seitlich an der Mechanik nach vorn zum Empfänger geführt.
Der Empfängerakku wird zusammen mit dem darüberliegenden Empfänger in Schaumgummi
gelagert in der RC-Box untergebracht und mit Gummiringen gesichert. Die Anschlussbuchsen
des Empfängers weisen dabeí nach rechts, so dass die Servokabel direkt, ohne Verwendung
von Verlängerungskabeln, eingesteckt werden können.
Die mit Spiralschlauch zusammengefassten Anschlusskabel werden mit Kabelbindern so an der
Mechanik befestigt, dass sie nicht gedehnt werden können, nirgends in Kontakt mit rotierenden
Teilen geraten und nicht durchgescheuert werden können.
Der Schalter für die Empfangsanlage wird auf der seitlich rechts am Unterbau angeschraubten
Schalterkonsole montiert und mit Akku und Empfänger verbunden.
23
Starlet 50
3. Zusammenbau des Hauptrotorkopfes (Beutel UM-10)
Der Hauptrotorkopf wird entsprechend den Abbildungen zusammengesetzt, alle Kugellager sind
zu fetten.
3.1 Vorbereiten der Blatthalter
Die Messingbuchsen aus 4618.32 werden zunächst mit Schraubensicherungslack auf die
Schrauben M3x16 aufgeklebt (trocknen lassen). Die Mischhebel 4618.32 müssen dann leichtgängig auf den Messinghülsen beweglich sein; ggf. Bohrungen in den Mischhebeln entgraten,
mit Silikonöl schmieren. Mischhebel dann unter Verwendung der M3 - Mutter 712 und unter Zugabe von Schraubensicherungslack an die Blatthalter 1252.11 schrauben.
In die Blatthalter 1252.11 werden das Radiallager 4607.31 und die Lagerschale des Kombilagers 1254.13 gemäss Abbildung bis zum Anschlag eingedrückt.
Nun wird überprüft, ob die vorbereiteten Blatthalter mit den Lagern 4607.31 leichtgängig auf die
Blattlagerwelle 4607.29 aufgeschoben werden können; ggf. muss die Blattlagerwelle mit feinem
Schleifpapier (Körnung >600) so lange nachgearbeitet werden, bis sich ein Schiebesitz für die
Lager ergibt.
24
Starlet 50
3.2 Montage der Blatthalter
In das Rotorkopfzentralstück 4682.26 werden links und rechts die beiden O-Ringe 4607.28 eingedrückt und die eingefettete Blattlagerwelle durchgesteckt, so dass sie an beiden Seiten gleich
weit heraussteht. Die O-Ringe dürfen dabei nicht wieder herausgedrückt werden.
Die Einheit wird nun so gehalten, dass die Blattlagerwelle senkrecht steht. Eine Passscheibe
0,2 mm aus 4450.56 wird von oben auf die Welle aufgesteckt, dann ein Blatthalter, wobei darauf
zu achten ist, den Blatthalter so auszurichten, dass der Blattverstellarm mit dem Mischhebel vor
dem Blatt läuft (siehe Abbildung). Die Blattlagerwelle muss nun oben in die Lagerschale des
Kombilagers 1254.13 hineinragen.
Jetzt wird die Lagerschale mit Fett gefüllt, so dass genau 14 Stahlkugeln eingelegt werden
können, ohne durcheinander zu rollen.
Die Blattlagerwelle muss während dieser Montage stets so weit in die Lagerschale hineinragen,
dass keine Kugeln nach innen, zwischen Blatthalter und Blattlagerwelle, fallen können.
Abschliessend die Druckscheibe des Kombilagers mit den Kugelbahnen nach innen aufsetzen
und die Inbusschraube M5x12 festziehen.
Jetzt die Einheit so umdrehen, dass der eben montierte Blatthalter unten liegt und den zweiten
Blatthalter mit unterlegter Passscheibe 0,2mm auf die Blattlagerwelle aufstecken.
Blattlagerwelle dabei keinesfalls mehr durch Zentralstück und Blatthalter zurückschieben, damit
keine Kugeln aus dem zuvor montierten Kombilager herausfallen können!
Das zweite Kombilager nun wie oben beschrieben zusammensetzen und Inbusschraube M5x12
festziehen.
Blatthalter auf Leichtgängigkeit prüfen, dazu ggf. mit dem Schraubendrehergriff auf Blatthalter
und Zentralstück klopfen, damit sich die Lager richtig, ohne Verspannung, setzen können.
Sollen die Blatthalter nicht leichtgängig sein, weil sie gegen das Zentralstück gedrückt werden,
so muss eine Distanzscheibe 4450.57 zwischen die Druckscheibe eines der beiden Kombilager
und die Blattlagerwelle eingefügt werden.
Vorsicht bei der Demontage des Kombilagers, damit keine Kugel herausfällt!
Wenn die Leichtgängigkeit der Blatthalter sicher gestellt ist, werden die Inbusschrauben M5x12
unter Zugabe von Schraubensicherungslack endgültig festgezogen. Wurde eine Distanzscheibe
4450.57 eingefügt so muss darauf geachtet werden, die Inbusscshraube hier mit Gefühl festzuziehen, damit die Messingscheibe nicht deformiert wird.
25
Starlet 50
3.3 Montage des Hilfsrotors
Wippe 4618.27 entsprechend der Abbildung montieren. Die Bohrung im Lagerbolzen 4618.28
muss mit der Längsöffnung der Wippe fluchten, damit später die Paddelstange durchgesteckt
werden kann, ohne zu klemmen oder zu schleifen. Die beiden Kugellager werden aussen mit
jeweils einer Schraube M2x4 im Zentralstück gesichert. Wippe auf Leichtgängigkeit prüfen.
In die Wippe beidseitig je ein Kugellager 4618.6 eindrücken. Paddelstange 4718.67 durch die
Wippe schieben und genau mittig ausrichten, so dass sie auf beiden Seiten gleich weit aus den
Lagern herausragt.
26
Starlet 50
Paddelstange dort, wo die Steuerbrücke 4618.37 aufgeklemmt wird, mit Sandpapier aufrauhen
und beim Verschrauben der Steuerbrücke Schraubensicherungslack zwischen Paddelstange
und Steuerrahmen geben, um ein Verdrehen der Paddelstange in der Steuerbrücke bei extremen Kunstflugfiguren zu verhindern.
Kugelstellringe 4607.36 beidseitig auf die Paddelstange aufschieben, bis sie an der Steuerbrükke anliegen. Vor dem Eindrehen der Stiftschrauben M3x3 Schraubensicherungslack in die Gewindebohrungen der Kugelstellringe geben. Doppelkugelgelenke 4607.35 aufdrücken.
Die Paddel 4682.34 unter Zugabe von Schraubensicherungslack genau 15mm weit auf die Enden der Paddelstange aufschrauben und exakt parallel zueinander und zur Steuerbrücke ausrichten.
Einseitig eine Mutter M3 in die Vertiefung des Rotorkopfzentralstücks eindrücken, ebenso die
beiden Führungsstifte 4450.44 für den Pitchkompensator unter Zugabe von Schraubensicherungslack.
Jeweils zwei gerade und zwei abgewinkelte Gestänge anfertigen gemäss Abbildung.
27
Starlet 50
3.4 Montage des Hauptrotorkopfes
Den Hauptrotorkopf auf die Hauptrotorwelle aufstecken.
Darauf achten, dass die Bohrung im Rotorkopf mit der oberen Querbohrung in der Hauptrotorwelle fluchtet, dann den Rotorkopf mit Spezialschraube 4618.87 festschrauben.
Die zuvor angefertigten Gestänge 4618.150 und 4618.51 gemäss Zeichnung montieren. Dabei
beachten, dass die Mischhebel 4618.32 unterschiedlich lange Hebelarme besitzen. Die Doppelkugelgelenke von der Paddelstange aus müssen auf die längeren Hebelarme aufgedrückt
werden, die geraden Gestänge führen von den kürzeren, inneren Hebeln zur Taumelscheibe.
Die abgewinkelten Gestänge 4618.150 müssen noch justiert werden, um den maximal möglichen Pitch-Verstellbereich zu erhalten, dabei folgendermassen vorgehen:
Taumelscheibe ganz nach oben schieben, dazu ggf. die Kugelgelenke am Aussenring aushängen.
Die Taumelscheibe soll genau dann gegen den Pitchkompensator stossen, wenn dieser selbst
gegen die Unterkante des Hauptrotorkopfes stösst.
Ist das nicht der Fall, so müssen die abgewinkelten Gestänge wie folgt justiert werden:
• Die Taumelscheibe stösst gegen den Pitchkompensator, aber zwischen Pitchkompensator
und Rotorkopf besteht noch eine Lücke:
Beide Gestänge verkürzen
• Der Pitchkompensator stösst gegen den Rotorkopf, aber zwischen Taumelscheibe und
Beide Gestänge verlängern
Pitchkompensator besteht noch eine Lücke:
Dabei unbedingt darauf achten, dass stets beide Gestänge gleichmässig verstellt werden, so
dass sie die gleiche Länge haben.
Abschliessend die Feineinstellung des Hilfsrotors vornehmen, so dass die Hillerpaddel parallel
zur Taumelscheibe stehen, wenn diese waagerecht ausgerichtet ist. Dabei die Gestänge
4618.150 um gleiche Beträge gegensinnig verdrehen, nicht ein Gestänge allein verstellen!
28
Starlet 50
4. Zusammenbau des Heckrotorgetriebes (Beutel UM-11, 11A)
Auf die Heckrotorwelle 1221 das Kegelrad 4618.38 gemäss Abbildung montieren. Schraubensicherungslack in die Gewindebohrungen im Kegelrad geben, dann Stiftschrauben M3x3 festziehen; dabei muss eine der beiden Stiftschrauben auf die Fläche an der Heckrotorwelle treffen.
Stiftschrauben dabei nicht so fest anziehen, dass sich das Kegelrad verspannt und später unrund läuft. Distanzbuchse 4450.28A sowie die Lager 4618.69 und 4450.22 aufstecken, dabei
ganz gegen einander schieben. Einheit ins Heckrotorgehäuse 4448.73 bis zum Anschlag einschieben, und mit Sicherungsschraube M2x4 fixieren. Prüfen, ob die Welle keinerlei Axialspiel
aufweist, ggf. Passscheiben 5/10x0,1 zwischenlegen.
Auf die Heckrotor-Eingangswelle 4448.40 die beiden Lager 4618.69 und das Distanzstück
4618.66 unter Zugabe von Lagerbefestigung, Best.-Nr. 951, aufstecken gemäss Abbildung.
Die Lager dürfen dabei nicht verspannt verden, ggf. durch daraufklopfen (z.B. mit einem
Schraubenziehergriff) erreichen, dass sie sich korrekt auf der Welle "setzen"; Lagekleber
aushärten lassen.
Eine Passscheibe 5/10x0,1 und Kegelrad 4618.38 zunächst ohne Zugabe von Lagerbefestigung, Best.-Nr. 951, aufstecken gemäss Abbildung. Die Stiftschrauben M3x3 so in das Kegelrad eindrehen, dass eine der beiden Stiftschrauben auf die Fläche an der Eingangswelle trifft.
29
Starlet 50
Die fertiggestellte Antriebswelleneinheit so in das Heckrotorgehäuse stecken, dass die Bohrung
im Distanzstück 4618.66 mit der Bohrung im Heckrotorgehäuse fluchtet, dann mit Senkkopfschraube M2x5 sichern.
Durch die Gewindebohrungen der Kupplung 4448.40 einen Stift (Schraubenzieher o.ä.) stekken. An diesem Knebel nun fest an der Kupplung ziehen (gegen die Verschraubung mit der
Senkkopfschraube), damit sich die Antriebseinheit so im Heckrotorgehäuse setzt, dass sich das
unter Last maximal mögliche Zahnflankenspiel der Kegelräder ergibt. Jetzt überprüfen, dass
das Heckrotorgetriebe leichtgängig läuft, mit gerade spürbarem Zahnflankenspiel der Kegelräder.
Falls das Zahnflankenspiel zu gering ist, die Zahnräder also schwergängig laufen, muss die
Antriebseinheit noch einmal ausgebaut, die Passscheibe entfernt und wieder eingebaut werden;
bei zu grossem Zahnflankenspiel hingegen werden weitere Passcheiben eingefügt. Nach entsprechendem Ziehen an der Antriebseinheit, wie oben beschrieben, sollte sich nun das erforderliche Zahnflankenspiel der Kegelräder ergeben.
Hinweis: Sollte sich das Zahnflankenspiel so nicht zufriedenstellend justieren lassen, kann das
daran liegen, dass das Kegelrad auf der Heckrotorwelle durch Fertigungstoleranzen zu weit aussen liegt und keinen korrekten Eingriff mit dem Kegelrad auf der Eingangswelle aufweist. Das
lässt sich feststellen, wenn das Kegelrad der Eingangswelle bereits merklich mit den Zahnspitzen an der langen Distanzbuchse kratzt, dennoch aber Zahnflankenspiel vorhanden ist. In
diesem Fall müssen die Passscheiben statt zwischen Distanzbuchse und Lager 4618.69
zwischen Kegelrad 4618.38 und Lager 4450.22 eingefügt werden, bis sich das gewünscht
geringe Zahnflankenspiel einstellt.
Beide Einheiten dann noch einmal ausbauen, die Lager auf der Heckrotorwelle sowie das Kegelrad auf der Eingangswelle unter Zugabe von Lagerbefestigung, Best.-Nr. 951, aufschieben
und alles wieder endgültig zusammenbauen; dabei auch die Stifschrauben unter Zugabe von
Schraubensicherungslack endgültig festziehen.
Auf die Inbusschraube M3x22 eine U-Scheibe 3mmØ sowie den Heckrotoranlenkhebel 4618.60
aufstecken.
Prüfen, ob der Umlenkhebel leichtgängig auf der Schraube beweglich ist; ggf. Bohrung im Hebel
entgraten und mit Silikonöl schmieren. Schraube mit aufgestecktem Hebel einige Umdrehungen
in den Ansatz des Heckrotorgehäuses eindrehen, aber noch nicht festschrauben, weil zunächst
die im nächsten Abschnitt beschriebene Steuerbrücke montiert werden muss.
30
Starlet 50
5. Montage der Steuerbrücke (Beutel UM-11B)
Kugellager 4607.137 bis zum Anschlag in den Steuerring 4618.62 eindrücken. Einheit unter
Zugabe von wenig Schraubensicherungslack (nicht zwischen Steuerring und Steuerhülse geraten lassen!) auf die Steuerhülse aus 4618.61 so aufschieben, dass der Lager-Innenring am
Bund der Steuerhülse anliegt.
Steuerbrücke aus 4618.61 mit den beiden Kugelgelenken 4618.55 versehen, auf die Steuerhülse aufschieben und gegen den Lager-Innenring des anderen Kugellagers drücken. Zackenring
1291.26 auf die Steuerhülse und gegen die Steuerbrücke drücken.
Jetzt überprüfen, dass sich der Steuerring leichtgängig auf der Steuerbrücke drehen kann, andererseits aber auch keinerlei Axialspiel vorhanden ist. Sollte der Ring schwergängig laufen, so
wurden wahrscheinlich die beiden Lager gegeneinader verspannt, was sich durch Daraufklopfen mit dem Schraubenziehergriff meist beheben lässt.
Steuerbrücke auf die Heckrotorwelle aufstecken, dann Anlenkhebel über die Kugel des Steuerringes greifen lassen und Schraube M3x22 so festziehen, dass sich Hebel und Steuerbrücke
leichtgängig, aber spielfrei, bewegen lassen; abschliessend mit Stopmutter M3 kontern.
31
Starlet 50
6. Montage des Heckrotorkopfes (Beutel UM-11C)
Heckrotorkopf gemäss Abbildung montieren, dabei alle Lager fetten.
Die beiden O-Ringe so in die Nabe 4448.22 einsetzen, dass sie in den beiden Nuten liegen. ORinge einölen, den Heckrotorkopf so auf die Heckrotorwelle aufstecken, dass die Querbohrung
in der Welle und die Bohrung in der Nabe mit einander fluchten und mit dem Stift 4448.22 fixieren, der seinerseits durch die Stiftschraube M3x3 gesichert wird.
Dabei die Ausrichtung der Nabe beachten (siehe Abbildung).
Heckrotorblätter mit den beiden Schrauben M3x20 in den Blatthaltern befestigen. Die Befestigungsschrauben der Heckrotorblätter nur so fest anziehen, dass sich die Blätter noch bewegen
lassen, damit sie sich bei Rotation optimal ausrichten können.
Ausrichtung der Heckrotorbkätter beachten: Der Heckrotor läuft, von der linken Seite aus betrachtet, im Uhrzeigersinn ("unten vorlaufend"), die Blattverstellarme der Blatthalter laufen vor
dem Blatt.
32
Starlet 50
7. Heckausleger (Beutel SR-0)
7.1 Heckausleger-Stützstreben zusammensetzen (Beutel SR-1)
Jeweils 2 Strebenaugen 1292.11 bis zum Anschlag in die beiden Alustreben 4445.8 einpressen
und dabei parallel zu einander ausrichten. Die Streben im Bereich der Strebenaugen mit Bohrer
1,5 mm Ø anbohren und Blechschrauben 2,2x6,5 eindrehen.
In die beiden Kabinen-Haltebolzen 4445.12 jeweils einen Gewindestift M3x25 unter Zugabe von
Lagerbefestigungskleber bis zum Anschlag eindrehen und aushärten lassen.
7.2 Mechanik für die Montage des Heckauslegers vorbereiten
Der Anschlussflansch 1292.5 wird mit 2 Inbusschrauben M3x16 an den Lagerhalter 4448.14 der
Mechanik geschraubt. Inbusschraube M3x12 mit Mutter M3 in die Klemmung eindrücken und
probeweise festziehen, dann wieder so weit lösen, dass das Heckauslegerrohr später eingeschoben werden kann.
7.3 Heckauslegerohr vorbereiten (Beutel SR-2)
Das Heckauslegerrohr weist im vorderen Bereich eine Biegung auf, so dass der Heckausleger
nach hinten ansteigt. Neben einer Erhöhung der Heckrotor-Bodenfreiheit sorgt diese Biegung
vor allem dafür, dass die Heckrotor-Antriebswelle in einem weiten Bogen verläuft und dadurch
nicht schlägt.
Die beiden Wellenlagerungen 1292.10A werden, z. B. mit einem Buchenrundstab, so in das
Heckauslegerrohr 4445.9 eingedrückt, dass die vordere Lagerung einen Abstand von 200 mm
zum vorderen Ende des Rohres erhält, die hintere Lagerung einen Abstand von 300 mm zum
hinteren Ende; die kugelförmigen Pfannen sollen jeweils nach vorn zeigen. Dann von vorn den
Führungsring 4451.7 mit der kegelförmigen Öffnung nach hinten genau 27 mm weit in das
Heckrohr eindrücken; durch diesen Ring wird später die Überwurfhülse exakt dem Gabelteil der
Kupplung zugeführt.
33
Starlet 50
Jetzt wird die vordere Wellenkupplung vorbereitet: Die Kupplung muss sich später innerhalb des
Heckrohres einwandfrei schliessen lassen, ohne dass man den Vorgang beobachten oder mit
Werkzeugen nachhelfen kann. Darum muss dafür gesorgt werden, dass sich die Ms - Kupplungshülse 4618.58 leicht über die Kupplungsgabel 4618.57 schieben lässt. Falls erforderlich,
muss die Gabel leicht entgratet bzw. mit feinem Schleifpapier abgezogen werden. Die Heckrotor-Antriebswelle Best.-Nr. 4451.19 ganz in die Kupplungshülse einstecken, so dass der abgekröpfte Teil in der Hülse liegt. Danach den Stellring 56.0 mit Gewindestift versehen und auf die
Heckwelle hinter die Hülse schieben. Heckwelle bis zum Anschlag in die Kupplungsgabel
schieben, dann gleichermassen die Hülse über die Gabel. Der Stellring wird jetzt ca. 1 mm hinter der Hülse auf der Welle festgezogen.
7.4 Heckauslegerrohr komplettieren
Auf das Heckauslegerrohr wird hinten der Heckrotorflansch 1292.7 montiert, von vorn wird ein
Abstützflansch 1292.6 gemäss Abbildung aufgeschoben. Beim Abstützflansch darauf achten,
dass der Klemmspalt oben und das angespritzte Auge auf der linken Seite liegt.
Falls ein Resonanzschalldämpfer verwendet werden soll, muss eine Abstützung dafür zusätzlich am Heckrohr, vor dem Abstützflansch, gemäss Abbildung montiert werden; die benötigten
Teile sind nicht im Lieferumfang des Bausatzes enthalten und müssen separat erworben werden.
7.5 Längenkontrolle der Heckrotorantriebswelle
Die Heckrotorantriebswelle wird von der Mechanik abgezogen, leicht eingeölt und unter Drehung durch die Wellenlagerungen des Heckauslegers geschoben, bis das hintere Ende so weit
aus dem Heckrohr herausragt, dass es in die Kupplung des Heckrotors eingeschoben werden
kann. Welle bis zum Anschlag einschieben, dann wieder 1mm weit zurückziehen und in dieser
Stellung vorläufig mit den Stiftschrauben der Kupplung fixieren. (Im Betrieb muss die Heckwelle
ca. 1 mm Spiel in der Kupplungsgabel vorn haben, was sich ergibt, wenn die Welle später bis
zum Anschlag in die Kupplung eingeschoben wird.) Das Heckauslegerrohr wird nun provisorisch in den Anschlussflansch 1292.5 gesteckt; Heckrohr dabei ganz auf den Lagerhalter
4448.14 aufschieben und durch den Flansch sichern. Heckrotor von hinten in den Heckausleger
einschieben und durch Drehen der Heckrotorwelle dafür sorgen, dass die Antriebswelle vorn in
die Schnellkupplung des Hauptgetriebes eingreift. Der Heckrotor sollte sich so weit in den Heckausleger einschieben lassen, dass er am Flansch anliegt, ohne dass die Antriebswelle vorn in
der Schnellkupplung anstösst. Ist dieses nicht der Fall, muss die Heckwelle entsprechend ge-
34
Starlet 50
kürzt werden; ggf. kann alternativ der Heckgetriebeflansch 1292.7 geringfügig nach hinten verschoben werden. Heckausleger nun wieder von der Mechanik abnehmen.
7.6 Heckausleger mit der Mechanik verbinden
Heckrotor so weit aus dem Heckrohr herausziehen, dass die Wellenkupplung zugänglich wird.
Die Stiftschrauben der Wellenkupplung lösen, damit die Heckwelle 4451.19 aus der Kupplung
gezogen werden kann. Welle nun sorgfältig entfetten, bis zum Anschlag in die Wellenkupplung
einschieben und in dieser Stellung mit den Stiftschrauben fixieren. Dazu zunächst die Stiftschrauben ganz aus der Kupplung herausdrehen, flüssige Schraubensicherung, Best.-Nr. 952,
oder Lagerbefestigung, Best.-Nr. 951, in die Gewindebohrungen geben, Stiftschrauben wieder
eindrehen und gut festziehen. Wenn möglich, sollte in die Welle an der Angriffsfläche der Stiftschrauben einseitig eine Fläche geschliffen werden, um die Festigkeit der Verbindung zu optimieren. Heckrotor mit drei 2,9x13 mm Blechschrauben am Heckgetriebeflansch 1292.7 festschrauben. In die Schnellkupplungshülse und an die Heckwelle vorn etwas Fett geben.
Je eine Strebe am linken und rechten Mechanikseitenteil mit den in Bauabschnitt 7.1 vorbereiteten Bolzen 4445.12 befestigen.
Die komplette Heckauslegereinheit wird jetzt in den Anschlussflansch 1292.5 bis zum Anschlag
eingeschoben; dabei ist darauf zu achten, dass sich die Schnellkupplung korrekt schliesst.
Heckausleger so drehen, dass die Biegung des Rohres nach oben und exakt in der
senkrechten Ebene erfolgt; Heckrotorflansch so drehen, dass die Heckrotorwelle, von hinten
gesehen, im rechten Winkel zur Hauptrotorwelle steht. Mit der Inbusschraube M3x12 im
Anschlussflansch wird das ausgerichtete Rohr festgeklemmt. Es ist zweckmässig, zum Festziehen der Klemmschraube das Heckrohr senkrecht nach oben zu halten.
Hinteren Flansch 1292.6 so verschieben, dass die Streben 4445.8 gemäss Abbildung mit einer
Inbusschraube M3x30 und einer M3 STOP-Mutter daran befestigt werden können.
Mechanik flach auf eine ebene Tischplatte stellen und den Abstützflansch so verschieben, dass
sich zwischen der Unterkante des Heckrotorflansches 1292.7 und der Tischplatte ein Abstand
von ca. 170 mm einstellt; Flansch in dieser Stellung gut festklemmen, dann Heckrotorflansch
1292.7, Abstützflansch 1292.6 und Anschlussflansch 1292.5 mit dem Heckrohr verbohren (Ø
1,5mm) und mit Blechschrauben 2,2x6,5 gegen Verdrehen/Verschieben sichern.
7.7 Leitwerke (Beutel SR-3)
Seitenleitwerk 1292.4 mit Blechschrauben 2,9x13 an den Heckrotorflansch anschrauben, Höhenleitwerk mit Schelle und Drahtführung mit Blechschrauben 2,9x19 auf dem Heckrohr befestigen. Höhenleitwerk rechtwinklig zum Seitenleitwerk ausrichten und den Abstand zwischen
der Höhenleitwerks-Klemmschelle und dem Heckrotorflansch auf 200 mm einstellen. Schrauben
festziehen.
35
Starlet 50
8. Kufenlandegestell montieren (Beutel SR-4)
Die Kufenrohre 4447.7 werden durch die Kufenbügel 4447.6 gesteckt und ein Befestigungslochabstand von 207 mm durch Verschieben der Bügel eingestellt.
Das Kufenlandegestell kann nun mit zwei M3x16 Inbusschrauben hinten und mit zwei M3x20
Inbusschrauben vorn befestigt werden; vorn wird jeweils eine Distanzbuchse 4451.5 eingefügt.
Kufenrohre parallel zueinander und so ausrichten, dass sie jeweils ca. 50mm über die hinteren
Kufenbügel überstehen. Von der Innenseite aus werden die Kufen mit Blechschrauben 2,2x6,5
fixiert; dazu zuvor Bohrungen 1,5mm durch Kufenbügel und Kufe anbringen. Endkappen unter
Zugabe von Zwei-Komponenten-Kleber in die Kufenrohre eindrücken.
9. Schalldämpfermontage
Expansionsschalldämpfer, wie z.B. Best.-Nr. 1809.33 oder 1871.72, müssen mit einem Druckanschlussnippel versehen sein und werden mit den dem Schalldämpfer beiliegenden Schrauben am Motor befestigt. Keine Dichtung am Flansch verwenden, sondern lediglich Schraubensicherungslack dünn auf die Kontaktflächen auftragen.
Bei Verwendung eines Resonanzschalldämpfers, beispielsweise Best.-Nr. 1783A, wird zunächst der Krümmer 2259 am Motor angeschraubt und durch die runde Öffnung im Mechanikunterbau geführt; auch hier keine Dichtung am Flansch verwenden, sondern dünn Schraubensicherungslack auftragen. Der mit einem Druckanschlussnippel versehene Resonanzschalldämpfer wird dann von hinten durch den Heckspant 4450.18 geführt und mittels Teflonschlauch
und Federbandschellen mit dem Krümmer verbunden; zwischen Krümmer und Einlassstutzen
des Schalldämpfers ca. 5 mm Abstand einhalten. Den vorderen, zusätzlich montierten Flansch
1292.6 mit dem Schalldämpferhalter so auf dem Heckausleger verschieben und drehen, dass
das Endrohr des Schalldämpfers mit dem Halter durch Anziehen der Inbusschraube M3x16
festgeklemmt werden kann; zuvor ein Stück Silikon-Abgasschlauch auf das Endrohr
aufschieben.
Bei allen Schalldämpfervarianten wird der Druckanschlussnippel des Schalldämpfers mit einem
Stück Silikonschlauch mit dem Belüftungsnippel oben aus dem Tank verbunden.
10. Heckrotorsteuerung (Beutel SR-5)
Zum Einhängen des Heckanlenkungsdrahtes 4451.3 wird die Schraube des Heckrotor-Umlenkhebels 4618.60 gelöst und der Heckanlenkungsdraht mit der nicht angewinkelten Seite nach
vorn durch die Führungsbohrungen von Heckgetriebeflansch und Höhenleitwerksschelle geschoben. Sollte der Anlenkungsdraht bereits im Heckgetriebeflansch schwergängig laufen, so
ist zuvor die Bohrung im Flansch mit einem Spiralbohrer 2...2,5mm Ø nachzubohren. Nach dem
Einhängen des Steuerdrahtes in die äusserste Bohrung des Umlenkhebels die Schraube wieder
anziehen.
Auf das CfK-Führungsrohr werden hinten zwei Gummitüllen ca. 20 mm weit aufgeschoben, mit
einem Abstand von ca. 3 mm zu einander. Das Führungsrohr wird dann von vorn so weit auf
den Steuerdraht aufgeschoben, dass es hinten auf dem Abstützflansch 1292.6 aufliegt und in
dieser Lage mit einem Kabelbinder (zwischen den Gummitüllen, um das Heckrohr herum) befestigt.
36
Starlet 50
Das vordere Ende des Führungsrohres wird nicht gegen den Heckausleger abgestützt, sondern
"schwimmt" frei auf dem Steuerdraht; daher soll es nicht weiter als unbedingt nötig gekürzt
werden, sondern so dicht wie möglich an das Servo heranreichen.
Vorn wird die Verbindung vom Steuerdraht zum Heckrotorservo über eine aufgelötete Gewindehülse mit aufgeschraubtem Gabelkopf hergestellt. Der Anlenkungsdraht ist vor dem Einlöten
in die Gewindehülse so zu kürzen, dass bei Pitchmittelstellung der Servohebel des Heckrotorservos senkrecht nach unten zeigt und der Umlenkhebel am Heckrotor rechtwinklig zum Heckauslegerrohr steht.
Alternativ kann der Steuerdraht vorn auch mit einer Abkröpfzange (Best.-Nr. 5732) Z-förmig abgewinkelt werden, wobei allerdings die Position zuvor besonders exakt ermittelt werden muss,
weil es bei dieser Anordnung keinerlei nachträgliche Einstellmöglichkeiten gibt. Diese Alternative ist daher dem geübten Modellflieger vorbehalten; der Vorteil liegt darin, dass so das Führungsrohr besonders dicht an das Servo herangeführt werden kann, weil der sonst durch Gabelkopf und Löthülse bedingte Abstand entfällt.
11. Kabine (Beutel SR-6)
11.1 Vordere Kabinenhalterung montieren
An den beiden Schellen vorn am Unterbau werden die vorderen Kabinenbolzen mit je einer von
hinten eingedrehten Inbusschraube M3x12 montiert.
37
Starlet 50
11.2 Anbringen der Kabine
In die entsprechendenden Bohrungen in Spant 4445.17 zwei Gummitüllen 3515.3 einsetzen
und ggf. mit einem Tropfen Sekundenkleber einseitig sichern. Spant dann mit der Wölbung
nach unten auf die vorn an der Mechanik montierten Bolzen aufstecken, so dass dieses ganz in
die Gummitüllen eingedrückt sind.
In die bereits angebrachten Bohrungen (Ø 7 mm) in der Kabine zwei Gummitüllen einsetzen.
Kabine von vorn auf die Mechanik aufschieben; sie wird dann durch die zwei Haltebolzen oben
seitlich gehalten, welche in diese Gummitüllen greifen.
Kabine vorn hochdrücken, so dass der auf der Mechanik aufgesteckte Spant unten in der
Kabine aufliegt. Auf der linken Seite die Seitenschale im Bereich des Auspuffkrümmers so weit
ausschneiden, dass ein Abstand von mindestens 5mm zwischen Kabine und Auspuffanlage
eingehalten wird, dann Spant und Kabine in dieser Position miteinander verkleben (Stabilit
express). Nach dem Aushärten des Klebstoffs muss sich die Kabine leicht demontieren lassen,
indem sie zunächst von den hinteren Befestigungsbolzen nach beiden Seiten abgezogen und
dann nach vorn geschoben wird; ebenso leicht muss sie sich in umgekehrter Reihenfolge
wieder montieren lassen.
Die transparente Kabinenhaube 4445.1 wird mit Klebeband am Rumpf fixiert und dann mit vier
Blechschrauben 2,2x6,5mm oder vorsichtig mit Sekundenkleber bzw. Stabilit express befestigt.
Die Empfangsantenne wird an der Mechanik entlang so bis hinter den vorderen Kufenbügel
geführt, dass die Kabine problemlos abgenommen werden kann, ohne mit der Antenne in
Konflikt zu geraten. Das Kunststoff-Antennenführungsrohr wird durch die beiden Ösen innen an
den Kufenbügeln gesteckt und mit kurzen, aufgeschobenen Stücken Kraftstoffschlauch gegen
Herausrutschen gesichert. Die Antennenlitze wird dann am Kufenbügel entlang geführt, von
vorn in das Führungsrohr eingeschoben und hinten aus dem Rohr heraushängen gelassen.
38
Starlet 50
12. Hauptrotorblätter
Die Rotorblattbuchsen 4607.164 werden in die Bohrungen der Rotorblätter mit Zweikomponentenkleber eingeklebt, soweit das nicht schon im Lieferumfang erfolgt ist.
Nach dem Aushärten des Klebers wird das gesamte Blatt mit feinem Schleifpapier, Best.-Nr.
700.1 oder 700.2 geglättet.
Im Idealfall ist nicht nur das Gewicht, sondern auch die Lage des Blattschwerpunktes bei beiden
Blättern gleich. Das kann man überprüfen, indem man, wie in der Zeichnung gezeigt, die Blätter
über einem Dreikant ausbalanciert. Lage jeweils anzeichnen. Der Schnittpunkt der Linien
entspricht dem Schwerpunkt.
In der Praxis wird sich dieser Idealfall allerdings nur selten ergeben oder mit vertretbarem Aufwand erreichen lassen, doch ist das bei bei den aktuellen Hubschraubermodellen auch nicht so
wichtig; entscheidend ist, dass die beiden Blätter, am Rotorkopf montiert, die gleichen Momente
besitzen. Daher können die Blätter durchaus unterschiedliche Gewichte aufweisen, wenn dafür
auch der Blattschwerpunkt unterschiedlich weit aussen liegt; das Auswiegen wird im nächsten
Abschnitt beschrieben
Die Rotorblätter mit SPANNFIX IMMUN, Best.-Nr. 1408 an den Anschlussstellen, im Aufleimerbereich (ca. 70 mm breit) und aussen farbig lackieren (ca. 20 mm breit). Die Folienbespannung
wird nach dem in der Zeichnung gezeigten Schema aufgebracht; erst Oberseite, dann Hinterkante, dann Unterseite. Die Folie muss faltenfrei anliegen!
12.1 Auswiegen der Rotorblätter
Hauptrotorblätter, wie abgebildet, miteinander verschrauben und an einem Faden aufhängen.
Zum Auswiegen Klebeband am Ende des leichteren Blattes anbringen.
Sorgfältig auswiegen, um einem vibrationsarmen Lauf des Hauptrotors zu erreichen!
39
Starlet 50
13. Einstellarbeiten
13.1 Einstellen der zyklischen Steuerung
Die Grundeinstellung von Roll-und Nicksteuerung sollte bereits korrekt sein, wenn die Gestänge
gemäss Anleitung montiert wurden. Da die Einhängepunkte der Gestänge an den Servohebeln
vorgegeben sind, werden die Einstellungen der Servowege später über die elektronischen
Einstelloptionen am Sender vorgenommen. Dabei darauf achten, dass der Servoweg nicht zu
gross eingestellt wird und auch bei Endstellung des Steuerknüppels für Roll- und Nicksteuerung
die Taumelscheibe nicht an der Hauptrotorwelle anschlägt, wodurch sie durch die Pitchsteuerung nicht mehr leichtgängig axial bewegt werden könnte.
13.2 Hauptrotor-Pitcheinstellung
Die Pitcheinstellwerte werden mit einer Einstellwinkellehre (Sonderzubehör, nicht im Bausatz
enthalten) gemessen. Die folgenden Tabelle enthält Anhaltswerte; die tatsächlich erforderlichen
Werte hängen von den verwendeten Rotorblättern und vom Modell ab.
Schwebeflug und Training
Kunstflug
Autorotation
Minimum
-2°
-4°
-4°
Schwebeflug
5,5°...6°
5°... 5,5°
5,5°
Maximum
12°
8°... 9°
13°
Die Pitcheinstellungen werden am besten im Sender vorgenommen wie folgt:
1. Schwebeflug-Pitch messen und korrekt einstellen
2. Pitch-Maximum und -Minimum messen und über die Pitchkurveneinstellung des Senders
justieren gemäss den nachfolgenden Diagrammen
13.3 Einstellen der Vergaserbetätigung
Die nachfolgenden Diagramme zeigen mögliche Vergaser-Steuerkurven:
• Die schwebeflugoptimierte Gaskurve ergibt weiche Steuerreaktionen im Schwebeflugbereich.
• Die oben angegebenen Werte hängen stark ab vom verwendeten Motor, Kraftstoff, Schalldämpfer usw.; sie müssen daher durch praktische Versuche angepasst werden.
40
Starlet 50
Wenn alle Gestängeverbindungen gemäss den vorausgegangenen Bauabschnitten hergestellt
worden sind, können die nachfolgenden Einstellungen am Sender vorgenommen werden:
1. Servolaufrichtungen
Den Drehsinn aller Servos entsprechend den Angaben in der Anleitung einstellen. Besondere Aufmerksamkeit dabei auf das Gasservo richten!
2. Dual-Rate
Für Roll-, Nick- und Heckrotorsteuerung können umschaltbare Ausschlaggrössen eingestellt
werden. Als Grundeinstellung hierfür wird die Umschaltung jeweils von 100% auf 75%
empfohlen.
3. Exponentialfunktion
In der Grundeinstellung auf linearer Steuerkennlinie belassen.
4. Servoweg-Mittenverstellung
Keine Einstellungen zu diesem Zeitpunkt vornehmen. Kleinere Korrekturen können damit
später durchgeführt werden.
5. Servoweg-Einstellung
Hiermit können die maximalen Servowege eingestellt werden, wobei darauf zu achten ist,
dass die Einstellungen nach beiden Richtungen auf die gleichen Werte eingestellt werden;
andernfalls ergibt sich eine unerwünschte Differenzierung der Ausschläge:
Bei Gas- und Taumelscheibenservos (Pitchfunktion) sollte darauf geachtet werden, dass die
Einstellung des Servoweges symmetrisch mit gleichen Werten für beide Richtungen erfolgt,
wobei das Gasservo den vollen Vergaserweg von der vollständig geschlossenen Stellung
(Motor aus) bis Vollgas steuern kann, ohne dass es durch mechanische Anschläge blockiert
wird. Die Pitchfunktion der Taumelscheibenservos sollte einen Blattteinstellwinkelbereich
von -5° bis +13° ansteuern, ebenfalls bei symmetrischen Ausschlägen; ggf. müssen die Servo-Steuerhebel gelöst und um einen Zahn versetzt wieder festgeschraubt werden.
Bei der jetzt durchgeführten Grundeinstellung ergibt sich für die Mittelstellung des Gas/Pitchsteuerknüppels (Schwebeflugpunkt) ein Pitchwert von ca. 5,5°, wobei der Vergaser
halb geöffnet ist.
Hinweis:
Pitch- und Gaskurven werden später entsprechend den praktischen Anforderungen eingestellt. Wenn jedoch schon in der Grundeinstellung differenzierte Ausschläge, wie in Abb.“B“
oben gezeigt, eingestellt werden, erschwert das diese späteren Abstimmungen!
6. Pitch- und Gaskurve
Diese Einstellungen sind von elementarer Wichtigkeit für die Flugleistung eines Hubschraubers. Ziel dieser Abstimmung ist es, dass sowohl im Steig- als auch im Sinkflug die Rotordrehzahl konstant bleibt, unabhängig von der Belastung. Das stellt dann eine stabile Basis
dar für die weiteren Abstimmungen, z.B. des Drehmomentausgleichs usw. (siehe auch weiter vorn, Pitch- und Gaskurven).
7. Statischer Drehmomentausgleich
Zum Ausgleich der Drehmomentänderungen bei Betätigung der Pitchsteuerung wird das
Heckrotorservo über einen Mischer im Sender mit der Pitchfunktion gekoppelt. Der Mischanteil kann bei den meisten Sendern für Steig- und Sinkflug separat eingestellt werden.
Empfohlenen Werte für die Grundeinstellung: Steigflug: 35%, Sinkflug: 15%
41
Starlet 50
8. Kreiseleinstellung
Kreiselsysteme dämpfen unerwünschte Drehungen um die senkrechte (Hoch-) Achse des
Hubschraubers, indem sie diese selbständig erkennen und entsprechend in die Heckrotorsteuerung eingreifen. Dazu wird die Kreiselelektronik zwischen Heckrotorservo und Empfänger geschaltet; manche Kreiselsysteme gestatten zudem ein Einstellen oder Umschalten
von zwei Werten der Kreiselwirkung vom Sender aus über einen zusätzlichen Kanal. Dieser
Kanal wird, je nach verwendetem Kreiselsystem, über einen Proportionalgeber (Schiebeoder Drehregler) oder einen Schalter betätigt.
Bei Kreiselsystemen, die eine Einstellbox mit zwei Einstellreglern besitzen für zwei feste
Einstellungen, zwischen denen vom Sender aus umgeschaltet werden kann, stellt man in
der Grundeinstellung den einen Regler ungefähr auf Mittelposition (50%), den anderen
Regler auf 25%. Ermöglicht es das Kreiselsystem, zwischen den beiden eingestellten Werten stufenlos mit einem Poportionalgeber umzublenden, so stellt man den einen Regler auf
"0“, den anderen auf ca.80%.
Bei Kreiselsystemen, die in ihrer Wirkung nicht vom Sender aus beeinflusst werden können,
sondern nur einen einzelnen Einstellregler an der Kreiselelektronik selbst besitzen, wird dieser Einstellregler zunächst auf 50% Wirkung eingestellt.
Darauf achten, dass die Wirkungsrichtung des Kreisels korrekt ist, er also auf eine Bewegung des Heckauslegers mit einem Heckrotor-Steuerausschlag in die entgegengesetzte
Richtung reagiert. Ist das nicht der Fall, so wird jede Drehung des Modells durch den Kreisel
noch verstärkt! Zur Einstellung der Wirkungsrichtung ist bei den meisten Kreiselsystemen ein
Umschalter vorhanden, der in die entsprechende Stellung gebracht werden muss; manche
Systeme besitzen keinen derartigen Schalter, sie sind ggf. auf dem Kopf stehend zu
montieren.
Bei allen Kreiselsystemen kann die optimale Einstellung erst im Flug ermittelt werden, da
hierauf unterschiedliche Faktoren einwirken.
Ziel der Einstellung ist es, eine möglichst hohe Stabilisierung durch den Kreisel zu erreichen,
ohne dass es durch eine zu hohe Einstellung der Kreiselwirkung zu einem Aufschwingen
(Pendelbewegungen des Heckauslegers) des Modells kommt.
Besondere Hinweise für den Einsatz der Piezo-Kreiselsysteme Graupner/JR „PIEZO
900...5000“ in Verbindung mit einer Computer-Fernsteuerung (z.B. mc-12...mc-24)
Die Konstruktion dieser Kreiselsysteme macht ein vom zuvor Beschriebenen abweichendes
Vorgehen exakt gemäss dem nachfolgenden Schema erforderlich:
1. Servoweg für den Heckrotorkanal im Sender auf +/- 100% einstellen.
2. Eventuell vorhandenen Kreiselmixer („Gyro-Control“), der die Kreiselwirkung bei Betätigen
der Heckrotorsteuerung reduziert, unbedingt dauerhaft deaktivieren.
3. Heckrotorgestänge am Heckrotorservo aushängen.
4. Heckrotorsteuerung am Sender betätigen: Ab ungefähr 2/3 des Steuerweges muss das
Servo beidseitig stehen bleiben, auch wenn der Steuerknüppel weiter bewegt wird
(Begrenzereinsatz).
5. Heckrotor-Steuergestänge so am Servo einhängen, dass der mechanische Endanschlag des
Heckrotors beidseitig mit dem Begrenzereinsatz übereinstimmt (Servo darf gerade nicht
durch die mechanische Endstellung blockiert werden).
Diese Einstellung unbedingt mechanisch, also durch Ändern des Einhängepunktes
und Verändern der Gestängelänge vornehmen, nicht elektronisch mit den Einstelloptionen im Sender!!!
6. Schwebeflugposition des Heckrotors bei Mittelstellung des Pitch-Steuerknüppels jetzt ggf.
korrigieren über die Servoweg-Mittenverstellung im Sender
7. Die Kreiselwirkung wird ausschliesslich über den Zusatzkanal mit einem Proportionalgeber
eingestellt zwischen „0“ und maximaler Wirkung; bei Bedarf kann die Maximalwirkung über
die Wegeinstellung des Zusatzkanals bzw. die Gebereinstellung bei Sender mc-22 u. mc-24
reduziert werden, um einen feinfühligen Einstellbereich für die Kreiselwirkung zu erhalten.
8. Falls die Heckrotorsteuerung „weicher“ eingestellt werden soll, dieses ausschliesslich über
die Exponential-Steuerfunktion vornehmen, keinesfalls den Servoweg (+/- 100%!) wieder
reduzieren!
42
Starlet 50
14. Endkontrolle vor dem Erstflug
Wenn der Zusammenbau des Modells abgeschlossen ist, sollten die folgenden Überprüfungen
vor dem Erstflug durchgeführt werden:
• Gehen Sie dieses Handbuch noch einmal durch und stellen Sie sicher, dass alle
Aufbauschritte korrekt durchgeführt wurden.
• Stellen Sie sicher, dass alle Schrauben in den Kugelgelenken und den Lagerböcken nach
Einstellen des Getriebe-Zahnflankenspiels richtig festgezogen sind.
• Können sich alle Servos frei bewegen, ohne mechanisch anzulaufen? Stimmen alle
Drehrichtungen? Sind die Befestigungsschrauben der Servo-Steuerhebel festgezogen?
• Überprüfen Sie die Wirkungsrichtung des Kreiselsystems
• Stellen Sie sicher, dass Sender- und Empfängerakkus voll geladen sind. Zur Kontrolle des
Empfängerakkus ist der Einsatz eines Spannungs-Überwachungsmoduls (z.B. Best.-Nr.
3138) empfehlenswert.
Erst wenn alles, wie oben beschrieben, überprüft wurde, kann der Motor angelassen und der
erste Startversuch durchgeführt werden.
Bedenken Sie, dass das Laufverhalten des Motor in hohem Masse abhängig ist vom
verwendeten Kraftstoff, von der Glühkerze, von der Höhe über dem Meeresspiegel und von den
Witterungsbedingungen.
Beachten Sie auch die Hinweise zur Motoreinstellung.
Wartung
Hubschrauber, ob gross oder klein, stellen hohe Ansprüche an die Wartung. Auftretende
Vibrationen schnellstmöglich beseitigen oder verringern! Rotierende Teile, wichtige
Schraubverbindungen, Gestänge, Anlenkungspunkte sind vor jedem Flug zu überprüfen. Falls
Reparaturen erforderlich werden, sind nur Original-Ersatzteile zu verwenden. Beschädigte
Rotorblätter keinesfalls reparieren, sondern durch neue ersetzen.
Montage des Starteradapters
Der mit der Mechanik gelieferte Starteradapter besteht aus drei Teilen und wird gemäss
Abbildung zusammengesetzt: Zunächst Stift 4450.5C durch die Verlängerung 4450.5B stecken,
dann Kunststoffadapter 4450.5A so aufschieben, dass der Stift in den Nut des Adapters
einrastet.
Zur Befestigung des Starteradapters auf dem Elektrostarter wird von diesem zunächst der
Halter für den Gummieinsatz abmontiert. Der Starteradapter wird dann soweit auf die
Starterwelle aufgeschoben, dass der Querstift in der Welle in den Nut des Adapters einrastet
und mit den beiden Stiftschrauben fixiert.
Sicherstellen, dass der Adapter „rund“ läuft, also keinen Schlag aufweist!
Zum Anlassen des Motor Rotorkopf so drehen, dass der Starteradapter senkrecht in das
Lüfterrad eingeführt werden kann. Dabei beachten:
• Elektrostarter erst dann einschalten, wenn sichergestellt ist, dass die Verzahnungen
von Lüfterrad und Adapter richtig ineinander greifen.
•
Vor dem Abziehen (nachdem der Motor angesprungen ist) Starter ausschalten.
43
Starlet 50
15. Einstellungen beim Erstflug
15.1 Spurlaufeinstellung
„Spurlaufeinstellung“ beschreibt einen Einstellvorgang, bei dem die Einstellwinkel der
Hauptrotorblätter auf genau die gleichen Werte gebracht werden, so dass die Blätter im Betrieb
exakt in der selben Ebene laufen.
Ein nicht korrekter Spurlauf, bei dem die Blätter in unterschiedlichen Ebenen laufen, hat
starke Vibrationen des Modells im Fluge zur Folge.
Bei der Spurlaufeinstellung mindestens 5 Meter Sicherheitsabstand zum Modell halten!
Bei der Spurlaufeinstellung muss erkannt werden, welches Blatt höher und welches tiefer läuft.
Dazu werden die Blätter mit farbigem Klebeband markiert:
Hierbei gibt es zwei Möglichkeiten. Abb.“A“ zeigt die Verwendung von unterschiedlichen Farben
an den beiden Blättern; in Abb.“B“ wird die gleiche Farbe verwendet, doch wird das Klebeband
in unterschiedlichem Abstand vom Blattende angebracht.
Vorgehensweise bei der Spurlaufeinstellung:
1. Wenn der Hubschrauber kurz vor dem Abheben ist, genau seitlich in die Rotorebene sehen.
2. Wenn die Rotorblätter in der selben Ebene laufen, ist keine Einstellung erforderlich; wenn
jedoch ein Blatt höher als das andere läuft, muss die Einstellung korrigiert werden.
3. Die Einstellung erfolgt durch Verdrehen der Kugelgelenke an beiden Enden der Gestänge
zwischen Taumelscheibe und Mischhebeln: Gelenke herausdrehen, um das Blatt höher
laufen zu lassen, hineindrehen, um es tiefer einzustellen.
44
Starlet 50
15.2 Motor - Einstellhinweise
Für die Motoreinstellung vor allem die dem Motor beiliegende Anleitung beachten!
Die korrekte Abstimmung von Pitch und Gas im Schwebeflug ist von entscheidender Bedeutung
für Flugverhalten und -leistung des Modells. Ein zu hoher Anstellwinkel der Rotorblätter
beispielsweise führt dazu, dass der Motor nicht die vorgesehene Drehzahl erreicht und
irrtümlich als zu schwach eingeschätzt wird, zumal er dabei sehr heiss wird und so zusätzlich
an Leistung verliert. Daher zunächst den Schwebeflugpitchwert, wie zuvor beschrieben, exakt
einstellen, dann die Motoreinstellung daran anpassen.
Obgleich bei Auslieferung die Vergaser der Motoren meist voreingestellt sind, kann die korrekte
Einstellung der Düsennadeln nur im praktischen Betrieb vorgenommen werden. Bei den meist
verwendeten Zweinadelvergasern ist als Ausgangseinstellung der Leerlauf- und Teillast-Düsennadel diese so weit hineinzudrehen, dass sie bei halb geschlossenem Vergaser gerade in
den gegenüberliegenden Düsenstock eintaucht
Beispiel eines typischen Zweinadelvergasers
Für den ersten Start die Düsennadel 1 ½ bis 2 Umdrehungen öffnen, die Glühkerze mit dem
Glühakku verbinden und den Motor anlassen, indem der Adapter des Elektrostarters in die Verzahnung des Lüfterrades eingeführt und der Starter eingeschaltet wird.
Achtung! Wenn der Motor angspringt, sofort den Elektrostarter aus der Verzahnung des
Lüfterrades ziehen. Andernfalls kann das Modell beschädigt werden!
Wenn der Motor läuft, langsam Gas/Pitch erhöhen. Sollte das Modell durch eine zu „fette“ Düsennadeleinstellung nicht abheben, Düsennadel in kleinen Schritten hineindrehen. Für die Motoreinstellung im Schwebeflug die Leerlaufnadel benutzen, die auch für die Teillasteinstellung
zuständig ist. Beachten, dass die hiermit vorgenommene Einstellung auch von der Düsennadeleinstellung beeinflusst wird. Leerlaufnadel vorsichtig in kleinen Schritten hineindrehen, bis der
Motor im Schwebeflug „rund“ läuft (ohne Aussetzer durch zu fettes Gemisch). Sollte die Drehzahl dann zu niedrig sein, Schwebeflug-Gaseinstellung im Sender erhöhen. Motor mit der
Leerlaufnadel keinesfalls zu „mager“ stellen, um die Schwebeflugdrehzahl zu erhöhen.
Die endgültige Düsennadeleinstellung kann nur im Kraftflug bei „Voll Pitch“ erfolgen, daher
muss man sich zunächst langsam an die Einstellung „herantasten“.
Im Zweifelsfall eher etwas zu „fett“ einstellen und zunächst auch in einer deutlich fetten
Einstellung die ersten Schwebeflüge durchführen.
45
Starlet 50
16. Allgemeine Vorsichtsmassnahmen
• Eine Haftpflichtversicherung abschliessen.
• Nach Möglichkeit Mitglied in einem Modellflugverein und -verband werden.
Auf dem Flugfeld:
•
•
•
•
Mit Modellen keine Zuschauer überfliegen.
Modelle nicht in der Nähe von Gebäuden oder Fahrzeugen betreiben.
Mit Modellen keine Landarbeiter im Gelände überfliegen.
Modelle nicht in der Nähe von Eisenbahnlinien, Hauptverkehrsstrassen oder Freileitungen
betreiben.
Vor- und während der Flüge:
• Vor Einschalten des Senders sicherstellen, dass nicht bereits ein anderer Modellflieger die
selbe Frequenz benutzt.
• Reichweitentest mit der Fernsteuerung durchführen.
• Prüfen, ob Sender- und Empfängerakku voll geladen sind.
• Bei laufendem Motor darauf achten, nicht mit der Kleidung am Gas-Steuerknüppel hängen
zu bleiben.
• Modell nicht ausser Sichtweite geraten lassen.
• Auf ausreichende Kraftstoffreserve im Tank achten: Der Tank darf nicht leergeflogen
werden.
Kontrollen nach dem Flugbetrieb
• Das Modell von Ölresten und Schmutz reinigen. Dabei auf festen Sitz aller Schrauben
achten, ggf. nachziehen.
• Verschlissene und beschädigte Teile rechtzeitig ersetzen.
• Sicherstellen, dass die Elektronikkomponenten wie Akku, Empfänger, Kreisel usw. noch
sicher befestigt sind (Befestigungsgummiringe altern und reissen dann!).
• Empfangsantenne überprüfen. Kabelbrüche im Inneren der Litze sind oft von aussen nicht
direkt sichtbar!
• Nach Bodenberührung des laufenden Hauptrotors Rotorblätter austauschen, da Brüche im
Inneren oft von aussen nicht erkennbar sind.
• Modell nicht am Heckausleger tragen: Beim festen Zugreifen wird leicht das HeckrotorSteuergestänge verbogen.
46
Starlet 50
17. Einige Grundbegriffe des Hubschrauberfliegens
Die Bezeichnung Drehflügler sagt bereits, dass die auftriebserzeugenden Tragflächen sich beim
Hubschrauber drehen; daraus ergibt sich unter anderem, dass beim Hubschrauber keine
Mindestgeschwindigkeit erforderlich ist, er also in der Luft stehen kann.
Zyklische Rotorblattverstellung
Die zyklische Blattverstellung dient der Richtungssteuerung um die Quer- und Längsachse. Ein
Steuerkommando bewirkt an jedem Umlaufkreispunkt eine andere Blatteinstellung. Die Neigung
der Taumelscheibe ergibt bei dem vorliegenden System die Flugrichtung.
Kollektive Rotorblattverstellung (Pitch)
Sie dient der Steuerung in Richtung der Hochachse, also zum Heben und Senken. Beide
Rotorblätter werden gleichzeitig um den gleichen Betrag in ihrer Anstellung verändert.
Drehmomentausgleich
Der drehende Rotor erzeugt ein Moment, das versucht, den ganzen Hubschrauber in
entgegengesetzter Richtung zu drehen. Dies muss genau ausgeglichen werden, was durch
Blattverstellung des Heckrotors geschieht. Mit dem Heckrotor wird gleichzeitig die Richtung um
die Hochachse gesteuert.
Schwebeflug
Dies ist der Zustand, in dem der Helikopter, ohne sich nach einer Richtung zu bewegen, an
einer Stelle verharrend fliegt.
Bodeneffekt
Dieser tritt vom Boden aus abnehmend bis in eine Höhe auf, die etwa 1 - 1 1/2
Rotordurchmesser entspricht. Er kommt dadurch zustande, dass der sich drehende,
normalerweise frei abfliessende Rotorluftstrahl auf ein Hindernis (dem Boden) auftrifft und ein
"Luftpolster" bildet. Im Bodeneffekt kann ein Hubschrauber mehr Gewicht hochheben, dagegen
nimmt die Lagestabilität ab, so dass er um so mehr nach irgendeiner Seite "ausbrechen"
möchte.
Steigflug
Die überschüssige Kraft, die nicht zum Schwebeflug benötigt wird, kann zum Steigflug
ausgenützt werden. Dabei benötigt der senkrechte Steigflug mehr Energie, als der schräge mit
Vorwärtsbewegung. Aus diesem Grund ist bei gleicher Motorleistung beim schrägen Steigflug
schnelleres Steigen möglich.
Horizontalflug
Beim Horizontalflug mit etwa halber Höchstgeschwindigkeit benötigt ein Hubschrauber seine
geringste Antriebsleistung. Wurde er beim Schwebeflug exakt ausgetrimmt, dann ergibt sich
beim Vorwärtsflug eine Kurve. Dies ergibt sich aus folgender Tatsache: Auf der nach vorn
drehenden Rotorseite ergibt sich durch die zusätzliche Windanströmgeschwindigkeit ein
höherer Auftrieb, als er auf der nach hinten drehenden Rotorseite, wo diese
Anströmgeschwindigkeit abgezogen werden muss. Somit ergibt sich eine Seitenneigung des
Hubschraubers.
Sinkflug
Ist die Rotordrehzahl des Hubschraubers relativ gering und erfolgt der senkrechte Abstieg eines
Hubschraubers zu schnell, dann strömt nicht mehr genügend Luft durch den Rotor, es bildet
sich das sogenannte "Wirbelringstadium" und die Strömung am Blattprofil reisst ab. Dieser
unkontrollierte Zustand kann zum Absturz führen. Ein schnelles Sinken ist deshalb nur mit
entsprechender Vorwärtsbewegung oder schnell drehendem Rotor möglich. Aus demselben
Grund ist beim Wenden des Hubschraubers vom Flug gegen den Wind zum Flug mit dem Wind
Vorsicht geboten.
Schlagbewegung der Rotorblätter
Damit sich die Rotorebene beim Vorwärtsflug nicht so stark neigt, baut man in den Rotorkopf
das sogenannte Schlaggelenk ein. Das schneller angeströmte Blatt kann nach oben, das
langsamer angeströmte geringfügig nach unten ausweichen, um so den Auftriebsunterschied zu
mindern. Bei Modellen hat sich das für beide Blätter gemeinsame Gelenk bewährt.
47
Starlet 50
Autorotation
Unter Autorotation versteht man den motorlosen Flugzustand, bei dem der Hauptrotor mit
negativer Blatteinstellung durch die beim Sinkflug anströmende Luft auf hoher Drehzahl
gehalten wird. Die so gespeicherte Drehenergie lässt sich beim Abfangen des Hubschraubers
durch Blattverstellung (positiv) in Auftrieb umsetzen. Dies ist natürlich nur einmal möglich.
Dadurch ist sowohl ein Original wie auch ein Modellhubschrauber fähig, beim Motorausfall
sicher zu landen.
Diese Autorotationslandung stellt jedoch an den Piloten sehr hohe Anforderungen in Bezug auf
Schätz- und Reaktionsvermögen; er kann nur einmal den Sinkflug abfangen, und dies darf
weder zu früh, noch zu spät erfolgen. Deshalb ist dazu viel Übung erforderlich.
48
Starlet 50
Model helicopter
Order No. 4445 Kit
Order No. 4446 Complete kit including motor and silencer
Warning!
The contents of this kit can be assembled to produce a working model which is by no
means a harmless plaything. It is a complex flying machine, and if built incorrectly or
handled incompetently or carelessly it can cause serious injury to persons and damage
to property.
You alone are responsible for completing the model correctly and operating it safely.
Please be sure to read the sheets SHW3 and SHW7 which are supplied in the kit. They
include much important safety information, and represent an essential part of these
instructions.
GRAUPNER GmbH & Co. KG
Liability for printing errors excluded.
We reserve the right to introduce modifications
D-73230 KIRCHHEIM/TECK
ID# 52068
GERMANY
5/04
Starlet 50
Foreword
The STARLET 50 is a model helicopter of open-frame construction for .50-size engines, based
on the proven UNI-Expert mechanics. The model is of considerable interest to the beginner as a
robust and affordable trainer with unlimited scope for upgrading, but at the same time it will also
suit the more advanced heli flyer with aerobatic ambitions, who is looking for a compact model
with plenty of power reserves. The motor is started from above through the air intake for the
cooling system. The silencer you use depends to a large extent on your individual requirements:
a tuned pipe silencer is one choice, but the model can also accommodate a low-cost standard
silencer and even a super-silencer, and since the recommended motor provides a generous
excess of power this is a perfectly valid option.
With its large-diameter tail rotor the helicopter boasts an excellent tail rotor response, and the
tail rotor continues to be driven in auto-rotations. The high chassis together with the curved tail
boom provides plenty of tail rotor ground clearance; the tail rotor shaft runs through the boom in
a curve and therefore cannot run out of true.
For the beginner the STARLET 50 represents a future-proof investment, as it can be upgraded
directly to UNI-EXPERT mechanics or UNI-mechanics 2000 status; the mechanics can even be
installed directly in many fuselage kits with the existing motor, i.e. without requiring an upgrade
to a .60 engine. The STARLET 50 therefore forms an ideal starting point for a helicopter system
which extends from a small beginner’s machine to a model suitable for the expert or scale
modeller.
The lightweight vacuum-moulded cabin fairing which surrounds the mechanics includes an integral cooling air duct, and is mounted on rubber grommets to provide insulation from vibration;
the fairing can also be fitted and removed very easily, providing complete access to the radio
control system components and mechanics. The fueltank is mounted in the cabin in a clearly
visible location, level with the carburettor, so you can easily check the fuel supply with the model
in the air. The long black eloxided tail boom is supported rigidly by two braces, and can easily
be replaced in just a few minutes if it should be damaged. It is long enough to provide real
flexibility: the beginner can learn to fly using short, low-cost wooden rotor blades with a reflex
section, while the expert can install longer symmetrical-section GRP blades for unlimited „3-D"
aerobatics.
Specification
Length excl. rotor approx.
1310 mm
Width excl. rotor approx.
240 mm
Height approx.
430 mm
Rotor Ø range
1160 ... 1365 mm
All-up weight min. approx.
3300 g
2
Starlet 50
Warnings
• The contents of this kit can be assembled to produce a working model helicopter, but
the model is by no means a harmless plaything. If built incorrectly or handled
incompetently or carelessly it can cause serious injury to persons and damage to
property.
• When the model helicopter’s engine is running, the two rotors are spinning at high
speed and contain an enormous quantity of rotational energy. Anything and
everything that gets into the rotational plane of the rotors is either damaged or
destroyed - and that includes parts of your body. Please take extreme care at all times
with this machine.
• If any object obstructs the rotational plane of the revolving rotors, the rotor blades will
probably be severely damaged as well as the object. Broken parts may fly off and
cause enormous imbalance; the whole helicopter then falls into sympathetic vibration,
you lose control and have no way of predicting what the model will do next.
• You may also lose control if a problem arises in the radio control system, perhaps as
a result of outside interference, component failure or flat or faulty batteries, but in any
case the result is the same: the model helicopter’s response is entirely unpredictable.
Without prior warning it may move off in any direction.
• Helicopters have many parts which are naturally subject to wear, including gearbox
components, motor, ball-links etc., and as a result it is absolutely essential to check
and maintain the model regularly. It is standard practice with full-size aircraft to give
the machine a thorough „pre-flight check" before every flight, and this is equally
important with your model helicopter. Constant checking gives you the opportunity to
detect and correct any faults which may develop before they are serious enough to
cause a crash.
• The kit also includes two further information sheets - SHW 3 and SHW 7 - which
include safety notes and warnings. Please be sure to read them and keep to our
recommendations. They are an essential part of these instructions.
• This helicopter is designed to be constructed and operated by adults, although young
people of 16 years or more may do so under the instruction and supervision of
competent adults.
• The model features sharp points and edges which may cause injury.
• Flying model aircraft is subject to certain legal restrictions, and these must be
observed at all times. For example, you must take out third part insurance, you must
obtain permission to use your intended flying site, and you may have to obtain a
licence to use your radio control system (varies from country to country).
• It is important to transport your model helicopter (e.g. to the flying site) in such a way
that there is no danger of damaging the machine. Particularly vulnerable areas are the
rotor head linkages and the tail rotor generally.
3
Starlet 50
• Controlling a model helicopter successfully is not easy; you will need persistence and
determination to learn the skills, and good hand-eye co-ordination is a pre-condition.
• Before you attempt to fly the model you should study the subject of helicopters in
depth, so that you have a basic understanding of how these machines work. Read
everything you can on the theory of helicopters, and spend as much time as you can
watching other model helicopter pilots flying. Talk to chopper pilots, ask their advice,
and enrol at a specialist model flying school if you need to. Many model shops will
also be prepared to help you.
• Please be sure to read right through these instructions before you start work on the
model. It is important that you clearly understand each individual stage of assembly
and the correct sequence of events before you begin construction.
• Don’t make modifications to the model’s construction by using parts other than those
specifically recommended, unless you are certain of the quality and suitability of
these other parts for the task.
• We have made every effort to point out to you the dangers inherent in operating this
model helicopter. Since neither we, the manufacturer, nor the model shop that sold
you the kit have any influence on the way you build and operate your model, we are
obliged to disclaim any liability in connection with it.
Liability exclusion / Compensation
As manufacturers, we at GRAUPNER are not in a position to influence the way you
assemble your model, nor how you install, operate and maintain the radio control system
components. For this reason we are obliged to deny all liability for loss, damage or costs
which are incurred due to the incompetent or incorrect use and operation of our
products, or which are connected with such operation in any way.
Unless otherwise prescribed by binding law, the obligation of the GRAUPNER company
to pay compensation, regardless of the legal argument employed, is limited to the
invoice value of that quantity of GRAUPNER products which was immediately and
directly involved in the event which caused the damage. This does not apply if
GRAUPNER is found to be subject to unlimited liability according to binding legal
regulation due to deliberate or gross negligence.
4
Starlet 50
Contents
• Foreword .........................................
P.2
• Warnings .........................................
P.3
• Accessories, additional items required ....................
P.6
• 1. Assembling the main mechanics ......................
P.7
• 2. Installing the radio control system .....................
P.21
• 3. Assembling the main rotor head
......................
P.24
.....................
P.29
• 5. Assembling the control bridge ........................
P.31
• 6. Assembling the tail rotor head ........................
P.32
• 7. Tail boom .......................................
P.33
• 8. Assembling the skid landing gear
.....................
P.36
..............................
P.36
• 4. Assembling the tail rotor gearbox
• 9. Installing the silencer
• 10. Tail rotor control system
...........................
P.36
• 11. Cabin .........................................
P.37
• 12. Main rotor blades ................................
P.38
• 13. The set-up procedure .............................
P.39
• 14. Final pre-flight checks .............................
P.43
• 15. Adjustments during the first flight, blade tracking ..........
P.44
Adjusting the motor ...............................
P.45
• 16. General safety measures ...........................
P.46
• 17. Some basic terms used in model helicopter flying .........
P.47
•
The instructions
We have invested considerable effort in producing these instructions, with the aim of ensuring
that your model helicopter will fly reliably and safely.
Please take the trouble to follow the instructions step by step, exactly as described, as this is
your guarantee of success. This applies to you whether you are a relative beginner or an
experienced expert.
• The mechanics have to be assembled as shown in the drawings. Explanatory texts are
provided.
need to be secured with thread-lock fluid,
• All the joints marked with this symbol
e.g. Order No. 952, or bearing retainer fluid, Order No. 951. Remove all traces of grease
from the joint surfaces before applying the fluid.
• All bearings, whether plain, ballrace or needle roller, must be lubricated thoroughly. The
same applies to all ball-links and gears, even if the instructions do not state this specifically.
• You will find parts lists, replacement parts lists and the associated exploded drawings at the
end of this instruction manual.
5
Starlet 50
Accessories
Recommended motors and accessories for the Starlet 50
Motor
OS MAX 46
FX-HG
OS MAX 50
SX-HG
Capacity
cc
7,45
Order
No.
1893
8,17
1921
Glowplug battery, e.g.
Varta RSH 4
Varta RSH 7
2 V glowplug battery
2 V glowplug battery
Expansion silencer
1809.33
1871.72
1809.33
1871.72
Exhaust
manifold
2259
2259
(Tuned pipe)
silencer
1783A or
2272
1783A or
2272
Order No. 1353
Order No. 1352
Order No. 3694 ( Use only with resistor,
Order No. 771
Order No.1685 or 1694. )
Fuel
TITAN S 12
Order No. 2612
AeroSynth COMPETITION SX-10 Order No. 2811
Starter
Electric starter, Order No. 1628 or 1626
12 V starter battery, Order No. 2592 or 2593.
Suitable main rotor blades
Order No. 1291.1
Wood, reflex,
Order No. 1296
GRP, reflex,
Order No. 1269
GRP, symm.,
Order No. 1271
GRP, symm.,
500 mm long
552 mm long
552 mm long
602 mm long
Rotor Ø 1157 mm (supplied)
Rotor Ø 1261 mm
Rotor Ø 1261 mm
Rotor Ø 1361 mm
Radio control equipment: see main Graupner catalogue
We recommend that you use a radio control system equipped with special helicopter functions,
or a micro-computer radio control system such as the mc-12, mc-14, mc-15, mc-19, mc-22, mc24.
As a minimum your RC system must include a 3-point swashplate mixer and the ability to
control five servos for the functions pitch-axis, roll, collective pitch, tail rotor and
throttle.
Servos:
Use only high-performance servos such as the C 4041, Order No. 3916, or other servos of
equal or better quality.
Gyrosystem:
Gyro-System PIEZO 5000, Order No. 5146 with Super-Servo DS-8700G, Order No. 5156 or
Gyro-System PIEZO 550, Order No. 5147 or Gyro-System G490T, Order No. 5137
Electronic speed governor:
mc-HELI-CONTROL, Order No. 3286
Receiver power supply:
For safety reasons we recommend that you install a battery with a capacity of at least 1800
mAh, and a switch harness designed to cope with heavy currents, i.e. with heavy-duty cables.
We recommend the “Power switch harness“ with charge socket, Order No. 3050, in conjunction
with the 4RC-3000 MH receiver battery, Order No. 2568
On no account use a receiver battery with more than four cells.
You can monitor the state of your battery voltage constantly by using the NC battery controller,
Order No. 3138.
6
Starlet 50
1. Assembling the main mechanics
The mechanical system of the STARLET 50 is based primarily on parts moulded in glass-fibre
reinforced nylon, a material which offers significant advantages for use in model helicopters
compared with aluminium, including high mass constancy combined with light weight, freedom
from fatigue effects, low noise, and the ability to absorb vibration generated by the motor. The
design of this type of mechanical system imparts a generous degree of robustness and rigidity;
in a „hard landing" the ideal situation is that the parts either survive undamaged (and can
therefore be re-used immediately) or alternatively fail completely, in which case there is no
doubt about whether they have to be replaced. Aluminium chassis components tend to bend or
become distorted, and this kind of subtle damage may not even be noticed; however, in the long
term it causes damage to other components, has a negative effect on the model’s flying
characteristics, and can even have a serious effect on the safety of the whole system. The type
of construction used in the Starlet 50 is simply not subject to this kind of damage.
Glass-filled nylon components therefore have many advantages, and the only drawbacks are
their greater complexity, and therefore higher cost of manufacture, and the requirement they
place on the builder to assemble and adjust the parts with greater care and a conscientious approach; you may also find that some parts need to be trimmed slightly in order to obtain a perfect fit. Provided that you invest a little extra care in constructing your machine, you will be rewarded by a model in which rates of wear are low, and which lasts much longer than conventional model helicopters.
Shafts, bearings, fits
Virtually all the rotating parts of the mechanics are ballraced. Wherever ballraces are used, it is
very important that the shaft is a tight fit in the inner ring of the bearing. This ensures that it
cannot rotate inside the ring; if this happens, the inner ring heats up (causing a blu-ish or yellowish discoloration), and the bearing is damaged and becomes unserviceable. In the worst case
the bearing can become so hot that it melts the nylon bearing seat, and this destroys the correct
location of the shaft relative to other components. Please note that this kind of damage is simply
a result of an incorrectly fitted bearing, and is not an indication that the bearing support material
is not up to the job.
A loosely fitted bearing can also cause another problem: the shaft starts to move axially inside
the inner bearing ring, and the shaft wears in that area and its diameter is reduced. If there are
gears mounted on that shaft, they now lose their correct meshing clearance, leading in turn to
increased rates of wear, and eventual failure of the parts.
In order to prevent the problems described above, the fits between shafts and ballraces in the
Graupner/Heim system are maintained on the „close" side of normal, and now and then this can
result in too tight a fit if manufacturing tolerances accumulate in the same direction. This
manifests itself in a bearing which cannot be fitted onto the corresponding shaft. If this should
happen, just reduce the diameter of the shaft slightly by rubbing it down using fine wet-and-dry
paper (600 - 1200 grit), until the bearing can be pushed into place using no more than moderate
force. If manufacturing tolerances accumulate in the other direction, i.e. the fit is uncomfortably
free or too loose, the solution is to fix the bearing to the shaft using LOCTITE 603 bearing
retainer fluid, which guarantees a firm seating. If you use this fluid, please note that its cure time
varies according to the fit; the closer the fit, the faster the cure. Under certain circumstances you
may have only a few seconds to locate the bearing correctly on the shaft before it is fixed
permanently.
If a shaft is supported in two or more bearings, it is important to ensure that the location of the
bearings does not place axial stress on them. There are two ways of achieving this: you can
either take the trouble to position the two bearings really accurately on the shaft, or use a combination of a fixed and sliding fit: one bearing is pressed or glued to the shaft to locate it permanently, the other is left as a sliding fit, i.e. it can be moved axially along the shaft using
moderate force; in this case the second bearing will find its own optimum position once the
system has been installed.
In general terms you can assume that the danger of bearings slipping on the shaft varies with
shaft diameter and rotational speed: the smaller the shaft, and the higher the speed, the greater
the danger.
The danger of stress in multiple bearings is greater when the difference between the internal
and external diameters of the bearings is small.
If you are aiming to achieve maximum possible operational security and reliability, all these
factors have to be considered in each individual case. The building instructions for the Starlet 50
state which connections should be made using thread-lock fluid and/or bearing retainer fluid.
7
Starlet 50
1.1 Assembling the tail rotor drive system (bag UM-1A)
Please note that there must be no axial play at all in the quick-release coupling shaft 4618.57
when fitted in the bearings 4618.6. If the shaft does not seat securely enough in the bearings, fix
it to the bearings using bearing retainer fluid 603, Order No. 951. This is the procedure: first fit
the rear bearing on the shaft and secure it with a drop of bearing retainer fluid 603, and position
it so that it rests against the coupling yoke. Wait until the adhesive has cured; this may take
anything from 20 seconds to 30 minutes, depending on the closeness of the fit. Press this
assembly into the bearing holder 4448.14 as far as it will go, then slide the front bearing onto
the shaft, together with a drop of bearing retainer fluid 603. Slide the bearing straight into the
correct position, and press it into the bearing holder as far as it will go. Now - before the adhesive sets - check that the shaft is still free-moving; it is important that the bearings should not be
stiff; this is usually due to excessive axial stress. If this happens, tap lightly on the end of the
shaft in the axial direction, using a screwdriver handle or similar, or tap harder on the bearing
support, until the bearings ease into the correct position and the shaft turns freely. Now allow
the bearing retainer fluid to cure fully.
Fit a shim washer and the pinion 4450.41 on the front end of the shaft, press it against the front
bearing and secure the pinion in this position using two grubscrews: first apply a drop of threadlock fluid (Order No. 952) to the threaded hole and fit the first grubscrew, taking care to position
the pinion so that the screw engages on the flat machined in the shaft. Rotate the pinion to and
fro on the shaft so that the grubscrew takes up the optimum position, then tighten it moderately.
Now screw in the opposed grubscrew and tighten it very firmly before finally tightening the first
grubscrew permanently. This procedure ensures that the pinion runs really true on the shaft.
1.2 Assembling the layshaft (bag UM-1B)
Fix the bottom bearing 4450.31 for the layshaft 4450.7 on the shaft, using bearing retainer fluid
603, Order No. 951. Position the bearing resting against the pinion, then leave the fluid to cure.
Press the shaft and bearing into the bottom bearing support 4448.11.
8
Starlet 50
Fit the top bearing support on the shaft loosely for the moment (note the correct orientation; the
opening in this bearing support should face up), then fit the top bearing 4450.31, followed by a
shim washer. Press the freewheel sleeve 4618.107 into the gear 4618.105, and fit this assembly
on the shaft. Line up the cross-holes in the shaft and the freewheel sleeve and carefully press
the roll-pin 4618.65 into the holes, but only to the point where it projects a little way into the
shaft; it must be possible to pull it out again at this stage.
Now press the top bearing 4450.31 into the bearing support 4448.11 and push this assembly up
against the shim washer under the freewheel sleeve. Take the layshaft assembly which you
have assembled to this stage, and place it between the mechanics side frames 4450.9 and
4450.10, so that you can check that the top bearing rests against the freewheel sleeve above
the shim washer when the parts are assembled. You may find that there is a gap, which has to
be corrected by fitting additional shim washers. Take care not to fit too many shim washers, as
this would place the bearings under stress.
Once you are confident that the spacing is set correctly, glue the shaft to the bearing in the
usual way using bearing retainer fluid, Order No. 951, but only after you have pressed the rollpin into the freewheel sleeve fully and permanently. Fit this assembly between the mechanics
side frames and tighten the screws fully before the bearing retainer fluid has cured, so that you
can check that the shaft spins freely in its bearings. If it is slightly stiff, tap on the ends of the
shaft to seat the bearings and eliminate the problem.
9
Starlet 50
1.3 Preparing the main rotor shaft and bearings (bag UM-1C)
Fix the swashplate guide 4618.113 to the dome bearing holder 4448.8 using two M2 x 12
cheesehead screws. Press one of the ballraces 4450.24 into the dome bearing holder, and one
into the main rotor shaft bearing holder 4448.12; grease both bearings.
The next step is to slide the circlip 4607.156 along the main rotor shaft 4450.43 from the top,
and allow it to engage in the channel. Please note the following points here:
• The circlip must not be over-stressed, i.e. take care not to open it further than absolutely
necessary in order to slide it onto the main rotor shaft. Special circlip pliers are the best tool
for this job.
• The inner face of the circlip features one rounded and one sharp edge; the sharp side must
face up.
• The circlip must be a really tight fit on the shaft; it should not be possible to rotate it by hand.
10
Starlet 50
1.4 Assembling the main gearbox
Fit the tail rotor drive unit, the layshaft assembly and the main rotor shaft bearing holders
between the mechanics side frames 4450.9 and 4450.10, and fix them in place using M3 x 16
socket-head cap screws; don’t tighten the screws fully at this stage. Fit a shim washer 4450.40
and the dome bearing holder on the main rotor shaft from the underside. Slide the main rotor
shaft through the bottom rotor shaft bearing and the crown gear 4450.20A, working from the top,
and position it in such a way that the dowel pin 4450.37 can be pushed through the bottom hole
in the main rotor shaft. Now pull the main rotor shaft up as far as it will go, and check that the
dowel pin engages fully in the recess in the underside of the crown gear. Now you can fix the
dome bearing holder between the mechanics side frames using further M3 x 16 socket-head
cap screws, and check that there is absolutely no axial play in the main rotor shaft between the
bearings; if there is, fit further shim washers under the circlip to eliminate it. Take care not to fit
too many or too thick washers, as this could place the bearings under stress.
To add or remove shim washers always loosen the dome bearing and remove the main
rotor shaft by reversing the order of operations required to install it (see above). On no
account remove the circlip to gain access to the washers!
The first step in establishing the correct gearbox clearance is to set the meshing clearance of
this gearbox stage slightly too tight, i.e. the gears should mesh „hard" against each other. If this
is not the case, i.e. if there is already significant clearance between the gears after you have
assembled the main mechanical system and screwed the parts together, then you will have to
turn the bottom main rotor shaft bearing 4448.12 through 180° and re-install it. If that is still not
11
Starlet 50
sufficient to eliminate the gear clearance, you will also have to turn the bottom layshaft bearing
bracket through 180° horizontally. Turning these parts round in this way compensates for any
slight offset of the brass inserts in the bearing supports; such offsets are an inevitable feature of
the production process and can never be completely eliminated. The meshing clearance
between the spur gear and the layshaft pinion can now be adjusted by slightly loosening the M3
x 16 socket-head cap screws in the bearing brackets, fitting a strip of stout writing paper
between the gears, and then tightening the screws again, holding the gears hard against each
other. Wind the strip of paper out, and the gearbox should now run smoothly, with no tendency
to jam or stiffen at any point; if you are not satisfied, repeat the adjustment process with a little
greater care.
1.5 Installing the motor (bag UM-2)
The mechanical assembly of this helicopter is designed for a motor with a long ground 8 mm Ø
crankshaft, as specified for all Graupner / Heim model helicopters. However, other types of
motor can also be installed at the modeller’s discretion; all you need is the optional plain bearing
clutch, which is available separately.
Remove the washers and nut from the crankshaft, then fit the following parts on the shaft in this
order: stepped washer 4450.38, two ballraces 4618.78, split taper collet 4618.77, clutch bell
4618.23, clutch 4618.79, cooling fan 4450.2, followed by the washer supplied with the motor. Fit
the crankshaft nut and tighten it securely.
If you find that tightening the crankshaft nut pushes the taper collet completely inside the clutch,
without the collet exerting adequate clamping pressure on the crankshaft, then you must fit an
8/13 x 0.5 mm washer (from 4450.58) under the taper collet, otherwise the clutch may slip on
the crankshaft when the motor is running. Fix a linkage ball to the outermost hole in the
carburettor arm using an M2 x 10 screw and nut.
12
Starlet 50
Notes:
Power transference between crankshaft and clutch is achieved exclusively by the clamping
pressure of the taper collet on the ground crankshaft nose, and on the tapered socket in the
clutch. To ensure that sufficient pressure is applied, it has proved good practice to start by
installing the clutch alone - without the cooling fan - and tightening it fully; the clutch should be
held firmly using a suitable tool while you do this.
When attaching the clutch bell to the crankshaft it is essential to ensure that the shaft is not
pushed out of position in its bearings!
Once you have fitted the clutch and tightened it correctly, the only way to remove it again is to
use a puller mechanism (Order No. 1045), after removing the crankshaft nut. Note that the
tightness of the crankshaft nut makes no significant contribution to power transmission when the
motor is running; the nut’s primary purpose is to secure the cooling fan and, if used, the
hexagon starter cone (optional part, Order No. 4448.103).
13
Starlet 50
Fix the motor mounts 1291.18 to the top part of the mechanics using the two special M3 x 12
screws, working from the inside of the assembly. Attach the motor to the motor mounts using
four M3 x 16 socket-head cap screws, fitting a washer 560.7 on each screw between the motor
lugs and the motor mounts (see drawing).
14
Starlet 50
1.6 Assembling the cooling fan housing (bag UM-3)
You may find that you have to open up the carburettor opening in the fan housing, depending on
the type of carburettor you are using; the same applies to the hole for the cylinder head.
Fit the fan housing over the motor and fix it to the mechanics using a threaded rod 4618.151,
washers and nuts at the front, and two 2.9 x 16 mm self-tapping screws at the rear.
15
Starlet 50
1.7 Assembling the sub-structure (bag UM-4)
Assemble the sub-structure as shown in the illustration, using the side frames 4448.34, the
bulkhead 4450.18, the spacers 4450.17, the RC box 4445.101 and the skid brackets 1291.21A,
using the appropriate self-tapping screws, as shown in the drawing.
16
Starlet 50
1.8 Mounting the mechanics on the sub-structure (bag UM-5)
Fit the circular projections on the main gearbox (assembled in Section 1.6) between the side
frames of the sub-structure, and allow them to engage in the moulded-in sockets. Fix the parts
together using M3 x 16 socket-head cap screws and washers as shown.
Note that two M3 x 30 socket-head cap screws are used in the middle; fit a washer under each
screw head, fit the brass sleeves 4450.34A in the sub-structure side frames, and fit the screws
through the two spacer washers 4445.34 and into the mechanics side frames. When you tighten
these screws, the ends will project through the bottom motor mount screw holes. Fit M3 selflocking nuts on the projecting shanks to secure the motor mounts.
The next step is to set the proper meshing clearance in the first gearbox stage: loosen the M3 x
16 screws which attach the top layshaft bearing support to the side frames, and also the M3
self-locking nuts at the bottom of the motor mounts, then cut a strip of thin card and wind it in
between the clutch pinion and the gear. Hold the gears firmly together, and tighten all the
screws again firmly in this condition. Apply plenty of thread-lock fluid to the M3 screws in the
motor mounts before you tighten them. Wind the strip of paper out from between the gears, and
the entire gearbox should now rotate freely; note that there should be no detectable play where
the bevel gear engages with the crown gear.
17
Starlet 50
1.9 Glowplug connector (bag UM-6)
Fit the socket of the glowplug connector in the hole in the right-hand side frame 4448.34, and fit
the solder tag, the washer and the nut on it on the inside to secure the socket. Tighten the nut.
Make up the connection to the motor using twin-core cable. A crocodile clip is used for the
centre contact, so that the glowplug can be replaced quickly and easily; solder the croc-clip to
the wire running from the centre contact of the socket, and attach the clip to the glowplug. Fix
the other wire to one of the motor mount screws with a washer to spread the load. Arrange the
cables neatly, and solder the two wires to the positive and negative terminals of the socket.
18
Starlet 50
1.10 Fueltank
The fueltank is assembled as shown in the drawing. First install the pressure nipple in the small
raised area at the highest point in the tank: cut a 5 mm Ø hole, slip the nipple through it from the
inside, and secure it with the washer and nut on the outside. The rubber bung features a central
hole for the retaining screw, two through-holes for brass tubes, and a third „blind" hole. The
latter can easily be continued through the bung and used for other purposes if you wish. For this
model only a single fuel line is required (carburettor feed / filler tube), so the second hole should
be plugged with a length of brass rod (4618.15). Bend the feed tube to the shape shown in the
drawing. Ensure that the clunk weight is free to move inside the tank, i.e. that it always falls to
the bottom when the tank is turned over by hand. Fit the brass collar over the neck of the
fueltank, as it guarantees that the neck cannot split when the rubber bung is compressed.
Tighten the central retaining screw firmly once the fueltank is completely assembled. This action
compresses the rubber bung and causes it to swell laterally, sealing the throat of the tank
effectively.
Carefully remove any rough edges from the fueltank support surfaces at the side-frames, Order
No. 4448.34. Install the tank, and secure it by stretching rubber bands over it as shown; note
that the bung must face the rear. Make up the fuel line to the motor using fuel tubing and the
fuel filter T-piece; keep the connection to the carburettor as short as possible.
The tank is filled and drained by means of the fuel line running between the clunk pick-up and
the carburettor, and this is made easier by the presence of the fuel filter T-piece. For flying the
helicopter, push the sealing plug into the filler connection projecting from the side of the filter.
For filling or draining the tank, first cut off the fuel flow to the carburettor by engaging the hose
clip, then fill or empty the tank through the filler connection.
1.11 Installing the gyro platform (bag UM-7)
Fix the gyro platform holders 4450.16 to the side frames using 2.2 x 9.5 mm self-tapping
screws. At a later stage the gyro platform 1291.12 can be fixed to the supports using four 2.2 x
6.5 mm self-tapping screws, but only after the servos have been installed.
19
Starlet 50
1.12 Collective pitch compensator and swashplate (bag UM-8)
The collective pitch compensator 4618.47A is assembled as shown in the drawing.
First fit a circlip on each of the brass rods, and glue them in the holes in the collective pitch
compensator hub 4618.46 using bearing retainer fluid, ensuring that the circlips engage fully in
the recesses. De-burr the collective pitch compensator arms and slip them on the projecting
ends of the brass rods, fitting at least one shim washer between the hub and the arm in each
case. Note that the arms must be free to rotate on the rods; de-burr the holes if necessary. Fit
the outer circlips, and check that there is no axial play in the arms on the rods; if there is
detectable play, extra shim washers must be fitted.
Make up three pushrods as shown in the drawing, using the threaded rods 4618.51 (2 mm Ø,
75 mm long) and six ball-links 4618.55. The stated dimension refers to the actual clearance
between the ball-links, as shown.
The first pushrod is fitted to the rear linkage point on the swashplate. Slip the ball-link over the
guide pin on the swashplate 4682.45 and snap it onto the linkage ball. Now fit the brass sleeve
(from 4618.113) onto the guide pin and grease it well. Slip the swashplate onto the main rotor
shaft, routing the attached pushrod down through the opening behind the dome bearing holder;
at the same time carefully ease the swashplate guide 4618.113 back, so that the brass sleeve
on the swashplate guide pin engages in the channel in the swashplate guide.
Fit the collective pitch compensator on the main rotor shaft, and press the two ball-links onto the
appropriate linkage balls on the swashplate inner ring, as shown in the drawing.
20
Starlet 50
2. Installing the radio control system (bag UM-9)
2.1 Mounting the servos
Attach brass linkage balls to the inside of the pitch-axis servo arm (1), and the output arms of
the roll servos (2) + (3), using M2 x 10 screws, and secure them with M2 nuts on the outside.
Apply thread-lock fluid between screw and ball and also in the nut. The distance from the servo
output shaft axis to the ball centre should be about 18 mm. The first servo to be installed is the
pitch-axis servo, which should be placed in the servo aperture in the right-hand side frame from
the inside, with the output shaft at the top. Secure it with four screws, rubber grommets and
tubular metal spacers (these parts supplied with the servos). Note that the tubular spacers
should be fitted in the rubber grommets from the underside, and the screws fitted from the top.
The servo mounting holes in the mechanics are intentionally offset slightly towards the outside;
this places the rubber grommets under slight tension when the screws are fitted, and this in turn
improves overall control precision.
Install the roll servos in the right and left side frames from the outside, with their output shafts
also at the top (see drawing). Secure each with four screws as already described. Connect the
servos to the receiver in the sequence explained in the RC system instructions, then switch on
the RC system and activate the swashplate mixer at the transmitter (setting: symmetrical threepoint linkage, two roll servos, 1 pitch-axis servo at the rear). Set the collective pitch, pitch-axis
and roll controls to neutral, and fit the output arms on the servos, at right-angles to the rotor
shaft. Fit and tighten the output arm retaining screws.
The tail rotor servo can now be installed in the left-hand side frame from the outside, with the
output shaft again at the top. Fit the retaining screws. The servo output arm should point straight
down, and should be parallel to the main rotor shaft when the collective pitch stick is at centre.
Fix a brass linkage ball to the outside of the throttle servo output arm, and secure it with an M2 x
10 screw, secured with an M2 nut from the rear. Remember to apply thread-lock fluid between
screw and ball and also in the nut. The distance from the output shaft axis to the ball centre
should be about 11 mm. Mount the throttle servo in the left-hand side frame with the output
shaft at the top and the servo output arm facing up.
The servo leads can now be routed through the remaining vacant servo aperture at the front of
the right-hand side frame, and routed forward along the right-hand side of the mechanics to the
receiver. Bundle the wires together in spiral tubing. Please take great care when deploying the
servo leads; eliminate any chance of wires contacting shafts or gears, as the model could easily
crash if the wires chafe and rub through.
21
Starlet 50
The next stage is to link the swashplate servos to the swashplate using the pushrods already
prepared, to form a 120° linkage.
A four-point swashplate linkage is also possible; details of this alternative installation are left up
to the builder. In this case one further servo is installed in the vacant servo aperture in the
mechanics, and connected to the appropriate linkage point on the swashplate by means of a 2.5
mm Ø pushrod, which has to be angled to suit. The pushrods from servos 2 and 3 are then
connected to the lateral (90°) linkage points on the swashplate. You will need to activate a fourpoint swashplate mixer at the transmitter.
If you decide to install a four-point linkage, it is very important to adjust the pushrods really
accurately, otherwise the opposed servos may be under constant strain. This is the procedure:
switch on the radio control system and set the collective pitch stick to centre (servo output arms
at 90° to the pushrods). Disconnect one swashplate pushrod. Adjust the three remaining
pushrods until the swashplate is exactly horizontal. The length of the fourth pushrod should now
be adjusted very carefully so that it can be pressed onto the swashplate linkage ball without
moving it, i.e. without straining any other servo.
Make up the throttle pushrod as shown in the drawing, using the threaded rod 4445.84 (2 mm
Ø, 45 mm long) and two ball-links 4618.55; the stated dimension refers to the actual clearance
between the ball-links.
22
Starlet 50
Connect the carburettor arm to the throttle servo output arm using this pushrod, as shown in the
drawings:
2.2 Installing the remaining radio control system components
To attach the gyro system to the gyro platform we recommend the use of double-sided foam
tape, e.g. Order No. 742. The cables should be grouped with the servo leads and routed
forward along the side of the mechanics to the receiver.
Pack the receiver battery in foam rubber, with the receiver above it, and stow these components
in the RC box, where they are secured with rubber bands. Note that the receiver sockets should
be on the right-hand side, so that the servo cables can be plugged in directly, without the need
for extension leads.
Bundle the cables together with spiral tubing, and attach them to the mechanics using cable
ties. It is important that the wires are not under stress, make no contact with rotating parts, and
do not rub or chafe against any sharp edges or corners.
Install the receiving system switch on the switch console, which is screwed to the right-hand
side of the sub-structure. Connect the switch to the battery and receiver in the usual way.
23
Starlet 50
3. Assembling the main rotor head (bag UM-10)
The main rotor head is assembled as shown in the illustrations. All ballraces must be greased.
3.1 Preparing the blade holders
The first step is to glue the brass sleeves from 4618.32 to the M3 x 16 screws using thread-lock
fluid. Allow the fluid to cure. Check that the mixer levers 4618.32 swivel freely on the brass
sleeves; if not, remove any rough edges from the mixer lever bores, and lubricate with silicone
oil. The mixer levers are screwed in place using the M3 nuts.
Press the radial bearings 4607.31 and the shell of the combination bearings 1254.13 into the
blade holders 1252.11 as shown in the drawing. Push them in as far as they will go.
Now check that the prepared blade holders, complete with the bearings 4607.31, can be slid
easily onto the blade pivot shaft 4607.29. If necessary, rub down the blade pivot shaft with fine
abrasive paper (600-grit or finer) until the bearings are a sliding fit on the shaft.
24
Starlet 50
3.2 Installing the blade holders
Press the two O-rings 4607.28 into both sides of the rotor head hub 4682.26, grease the blade
pivot shaft and slide it through the O-rings. Set it exactly central, i.e. projecting by an equal
amount on both sides. It is important that the shaft does not push the O-rings out of their
seatings. Now hold this assembly with the blade pivot shaft standing vertical. Fit a 0.2 mm shim
washer from 4450.56 on the shaft from the top, followed by a blade holder, noting that the
holder must be the correct way round: the mixer lever on the blade pitch arm must be located in
front of the blade (see drawing). The blade pivot shaft should now project into the shell of the
combination bearing 1254.13 at the top.
Fill the bearing shell with grease, and place exactly 14 steel balls in the shell, where the grease
will prevent them rolling about.
During this procedure the blade pivot shaft must always project far enough into the bearing shell
to prevent the balls falling inward, between the blade holder and the blade pivot shaft.
To complete the first end of the blade pivot shaft, fit the thrust washer of the combination
bearing on top, with the ball channel facing inward, and tighten the M5 x 12 socket-head cap
screw.
Turn this assembly over, so that the blade holder you have just installed is at the bottom, and fit
the second blade holder on the blade pivot shaft using the same procedure, not forgetting the
0.2 mm shim washer.
Take great care not to allow the blade pivot shaft to project too far through the hub and blade
holder, otherwise the balls may fall out of the combination bearing you first assembled!
The second combination bearing can now be completed following the procedure outlined above.
Tighten the M5 x 12 socket-head cap screw.
Check that both blade holders rotate freely, and if necessary tap the holders and hub with the
handle of a screwdriver so that the bearings seat themselves properly; this procedure helps to
remove any stress from the bearings.
If the blade holders are stiff to move because they are being pressed against the hub, fit a
spacer washer 4450.57 between the thrust washer of one of the combination bearings and the
blade pivot shaft.
If you have to dismantle the combination bearing, take care that no balls fall out!
Once you are confident that the blade holders swivel freely, apply thread-lock fluid to the M5 x
12 socket-head cap screws and tighten them fully. If it was necessary to fit a spacer washer
4450.57, be careful when tightening the socket-head cap screws, otherwise the brass washer
could be pushed out of shape.
25
Starlet 50
3.3 Assembling the Hiller rotor
Assemble the rocker 4618.27 as shown in the drawing. Note that the hole in the pivot bar
4618.28 must line up with the through-hole in the rocker, to ensure that the flybar can be slid
through later without jamming or binding. Fit an M2 x 4 screw on the outside on each side to fix
the two ballraces to the hub. Check that the rocker rotates freely.
Press the ballraces 4618.6 into both sides of the rocker 4618.27. Slide the flybar 4718.67
through the rocker and set it exactly central, i.e. projecting out of the bearings by an equal
distance on both sides.
26
Starlet 50
Roughen the surface of the flybar at the point where the control bridge 4618.37 is to be
clamped. Screw the control bridge to the flybar, applying thread-lock fluid between the bar and
the control frame to prevent any danger of the flybar rotating in the control bridge during violent
aerobatic manoeuvres.
Slip the ball-collets 4607.36 on both ends of the flybar, and position them resting against the
control bridge. Before fitting the M3 x 3 grubscrews apply a drop of thread-lock fluid to the
threaded holes in the ball-collets. Press the double ball-links 4607.35 into place as shown.
Apply thread-lock fluid to the sockets in the flybar paddles 4682.34, and screw them onto the
ends of the flybar to a depth of exactly 15 mm. Set them exactly parallel to each other and to the
control bridge.
Press an M3 nut into the recess in one side of the rotor head hub, and press the two guide pins
4450.44 for the collective pitch compensator into the holes, applying thread-lock fluid to the
sockets first.
Make up two straight and two angled pushrods as shown in the drawing.
27
Starlet 50
3.4 Installing the main rotor head
Fit the main rotor head on the main rotor shaft.
Align the hole in the rotor head with the top cross-hole in the main rotor shaft, then fit the special
screw 4618.87 to fix the parts together.
The next step is to install the pushrods 4618.150 and 4618.151 which you have just prepared;
their positions are shown in the drawing. Note that the arms of the mixer levers 4618.32 are of
different length: the double ball-links attached to the flybar must be pressed onto the longer
lever arms, whereas the straight pushrods run from the shorter, inner levers to the swashplate.
The angled pushrods 4618.150 now have to be adjusted in order to obtain maximum possible
collective pitch adjustment range. This is the procedure:
Disconnect the ball-links on the swashplate outer ring (if necessary), and slide the swashplate
up as far as it will go. The swashplate should now rest against the collective pitch compensator
when the compensator itself is resting against the bottom face of the main rotor head.
If this is not the case, the angled pushrods must be adjusted as follows:
• The swashplate rests against the collective pitch compensator, but there is a gap between
the collective pitch compensator and the rotor head:
shorten both pushrods.
• The swashplate rests against the rotor head, but there is a gap between the swashplate and
lengthen both pushrods.
the collective pitch compensator:
It is essential to adjust the length of both pushrods by the same amount, i.e. they must always
be exactly the same length.
Now carry out the fine adjustment of the auxiliary rotor, ensuring that the Hiller paddles run
parallel to the swashplate when the swashplate is exactly horizontal. If you need to adjust the
length of the pushrods 4618.150, always adjust them in opposite directions by the same
amount; never adjust only one of them!
28
Starlet 50
4. Assembling the tail rotor gearbox (bag UM-11, 11A)
Fit the bevel gear 4618.38 on the tail rotor shaft 1221 as shown in the drawing. Apply a drop of
thread-lock fluid to the threaded holes in the bevel gear, then fit the M3 x 3 grubscrews. One of
the two grubscrews must engage squarely on the machined flat in the tail rotor shaft. Take care
not to tighten the grubscrews so much that they force the bevel gear out of shape, as this will
prevent it running true. Fit the spacer sleeve 4450.28A and the bearings 4618.69 and 4450.22
on the tail rotor shaft, pushing them hard up against each other. Slide this assembly into the tail
rotor gearbox 4448.73 as far as it will go, and fit the M2 x 4 retaining screw. Check that there is
absolutely no axial play in the shaft; to take up any slack fit 5/10 x 0.1 mm shim washers in the
position shown.
Fit the ballraces 4618.69 and the spacer 4618.66 on the tail rotor input shaft 4448.40 as shown
in the illustration. Apply bearing retainer fluid, Order No. 951, before fitting the bearings.
The bearings must not be under stress; if necessary tap on them using a screwdriver handle or
similar, so that they automatically seat correctly on the shaft. Allow the bearing retainer fluid to
dry.
Fit a 5/10x0.1shim washer and a bevel gear 4618.38 on the tail rotor input shaft 4448.40 as
shown in the illustration without using bearing retainer fluid at this stage.
Fit and tighten the M3 x 3 grubscrews in the bevel gear. Note that one of the two grubscrews
must engage squarely on the machined flat in the tail rotor input shaft.
Now fit the prepared drive shaft assembly into the tail rotor housing, and line up the hole in the
spacer 4618.66 with the hole in the tail rotor housing, then secure it with an M2 x 5 countersunk
screw.
Fit a steel rod (screwdriver blade or similar) through the threaded holes in the coupling 4448.40.
Using the rod as a handle, pull hard on the coupling (against the countersunk screw joint), so
that the tail rotor drive assembly seats itself in the housing with maximum possible gear
29
Starlet 50
meshing clearance between the bevel gears, as if under maximum load. Now check that the tail
rotor gearbox runs smoothly, with just detectable meshing clearance in the bevel gears.
If the play in the gears is too slight, i.e. the gears are stiff to move, you will need to remove the
drive assembly again and remove the shim washer under the bevel gear. If, however, there is
too much play in the gear meshing insert additional shim washers. If you work carefully, making
small adjustments, it is possible to set up the bevel gears so that they work freely but without
backlash. Reinstall the unit, repeat the pulling procedure as described above, and you should
find that the gear meshing clearance is correct.
Note: if you still cannot set the gear meshing clearance to your satisfaction, the problem may be
that the bevel gear on the tail rotor shaft is located too far outward due to manufacturing
tolerances, and is not engaging correctly with the bevel gear on the input shaft. If this is the
case, you will find that the tips of the teeth of the bevel gear 4618.41 are already fouling the
spacer sleeve 4450.28A, and yet there is backlash in the meshing clearance. In this case you
must fit the shim washers between the bevel gear 4618.38 and the bearing 4450.22, instead of
between the spacer sleeve and the bearing 4618.69, until the desired slight meshing clearance
is present.
Now remove both assemblies again, apply bearing retainer fluid, Order No. 951, to the bearings,
the setscrews, and the bevel gear on the input shaft, re-fit them on the tail rotor shaft and the
input shaft, and assemble the parts permanently.
Fit a 3 mm Ø washer on the M3 x 22 socket-head cap screw, followed by the tail rotor bellcrank
4618.60.
Check that the bellcrank rotates freely on the screw. If necessary de-burr the bore of the bellcrank and lubricate it with silicone oil. With the bellcrank on the screw, fit the screw in the hole in
the shoulder of the tail rotor housing and tighten it by a few turns; do not secure it permanently
at this stage because the control bridge, which is described in the next section, must first be
installed.
30
Starlet 50
5. Assembling the control bridge (bag UM-11B)
Press the ballrace 4607.137 into the control ring 4618.62 as far as it will go. Apply a little threadlock fluid to the control sleeve 4618.61, taking care not to allow it to run between the control ring
and the control sleeve. Push this assembly onto the control sleeve, with the inner ring of the
ballrace resting against the flange of the control sleeve.
Fit the two ball-links 4618.55 on the control bridge 4618.61, slide it onto the control sleeve, and
press it against the inner ring of the other ballrace. Press the shakeproof washer 1291.26 on the
control sleeve and against the control bridge.
Check that the control ring can rotate easily on the control bridge, but without any axial play at
all. If the ring is stiff to turn, it is likely that the two bearings are stressed against each other, and
this can usually be corrected by tapping them with the handle of a screwdriver.
Fit the control bridge on the tail rotor shaft, then engage the actuator lever on the ball on the
control ring, and tighten the M3 x 22 screw so that the lever and control bridge move freely but
without slop; finally secure it using the M3 self-locking nut.
31
Starlet 50
6. Assembling the tail rotor head (bag UM-11C)
Assemble the tail rotor head as shown in the drawing, greasing all bearings as you install them.
Place the two O-rings in the hub 4448.22 and press them into the channels. Oil the O-rings, fit
the tail rotor head on the tail rotor shaft, and line up the cross-hole in the shaft accurately with
the hole in the hub, and press the pin 4448.22 into place to fix the parts together. The pin is
secured in turn by fitting the M3 x 3 grubscrew.
Note the correct orientation of the hub, as shown in the drawing.
Fix the tail rotor blades in the blade holders using the two M3 x 20 screws. The tail rotor blade
fixing screws must not be over-tightened; the blades should just be free to swivel, so that they
can align themselves in the optimum position when they spin up to speed.
Note the orientation of the tail rotor blades: when viewed from the left-hand side, the tail rotor
rotates clockwise („bottom blade forward“); and the blade pitch arms on the blade holders must
be located in front of the blades.
32
Starlet 50
7. Tail boom (bag SR-0)
7.1 Assembling the tail boom braces (bag SR-1)
Press the strut end-pieces 1292.11 into both ends of the aluminium tail boom braces 4445.8 as
far as they will go, and set the eyes parallel to each other. Drill a 1.5 mm Ø pilot-hole through
each brace and into each end-piece, and fit 2.2 x 6.5 mm self-tapping screws to secure them.
Apply bearing retainer fluid to the M3 x 25 grubscrews and screw them into the two canopy
stand-off pillars 4445.12 as far as they will go. Allow the fluid to cure completely.
7.2 Preparing the mechanics for mounting the tail boom
Screw the tail boom flange 1292.5 to the bearing holder 4448.14 on the mechanics using two
M3 x 16 socket-head cap screws. Press the M3 x 12 socket-head cap screw and M3 nut into
the tail boom clamp, and tighten the screw fully to cut the threads. Loosen the screw again to
the point where the tail boom can be pushed into place later.
7.3 Preparing the tail boom (bag SR-2)
Note that the tail boom is curved at the front end; the purpose of the curvature is to raise the tail
boom towards the tail. This increases tail rotor ground clearance, but - importantly - also
ensures that the tail rotor drive shaft runs in a gentle curve, and thereby runs smoothly, without
vibrating.
Push the two shaft bearings 1292.10A into the tail boom 4445.9 using a length of beech dowel
or similar. The front bearing should be located 200 mm from the front end of the boom, and the
rear bearing 300 mm from the rear end. The spherical recess in both bearings should face
forward. Now place the guide ring 4451.7 in the front end of the tail boom, with the conical
opening facing the rear, and set it at a depth of exactly 27 mm. When the tail drive system is
connected, the union sleeve is guided accurately onto the coupling yoke by means of the guide
ring.
33
Starlet 50
The front shaft coupling can now be prepared; you must work carefully here, as the coupling
must engage automatically inside the tail boom without you being able to see what is
happening, and without using tools. For this reason it is important that the brass coupling sleeve
4618.58 is an easy sliding fit over the coupling yoke 4618.57. If necessary, remove any rough
edges from the yoke, or reduce it in size slightly using fine abrasive paper. Slide the tail rotor
drive shaft, Order No. 4451.19, into the coupling sleeve, and push it fully forward so that the
pre-formed part engages inside the sleeve. Fit a grubscrew in the collet 56.0, slide it along the
tail rotor shaft and position it just aft of the sleeve. Push the tail rotor shaft into the coupling yoke
as far as it will go, then slide the sleeve over the yoke to the same extent. Position the collet on
the shaft with about 1 mm clearance to the sleeve, and tighten the grubscrew fully.
7.4 Completing the tail boom
Fit the tail rotor flange 1292.7 on the rear end of the tail boom, then slide a support flange
1292.6 along the boom as shown in the drawing. Note that the gap in the support flange must
be on top, and the moulded-in bored lug must be on the left-hand side.
If you intend to use a tuned pipe silencer, you will need to install an additional support for it on
the tail boom, forward of the tail boom brace flange, as shown in the drawing. The parts for this
are not included in the kit, and must be purchased separately.
7.5 Determining the correct length of the tail rotor drive shaft
Remove the tail rotor drive shaft from the mechanics, oil it lightly, and slide it through the shaft
bearings in the tail boom, rotating it all the while, until the rear end projects out of the tail boom
far enough to be inserted in the tail rotor coupling. Push the shaft in as far as it will go, then pull
it back again by 1 mm, and temporarily tighten the grubscrews in the coupling to secure it in this
position. When finally assembled, the tail rotor shaft must have about 1 mm axial play in the
front coupling yoke, and that is why you are temporarily setting up 1 mm clearance at the tail
end. Later you will push the shaft into the tail rotor coupling as far as it will go, and the clearance
will appear at the front end. Temporarily insert the tail boom in the tail boom flange 1292.5, at
the same time pushing the tail boom fully onto the bearing holder 4448.14. Secure the tail boom
by tightening the clamping screw in the flange. Slide the tail rotor into the tail boom from the
rear, and rotate the shaft to ensure that the front end engages in the quick-release coupling
which is part of the main gearbox. It should be possible to slide the tail rotor into the tail boom to
the point where it rests against the flange, without the drive shaft fouling the quick-release
coupling at the front. If this is not the case, the tail rotor shaft must be shortened slightly.
34
Starlet 50
Alternatively you could re-position the tail rotor gearbox flange 1292.7 slightly further aft on the
tail boom. Remove the tail boom from the mechanics again.
7.6 Connecting the tail boom to the mechanics
Withdraw the tail rotor assembly from the tail boom to the point where the shaft coupling
becomes accessible. Undo the grubscrews in the shaft coupling, so that the tail rotor shaft
4451.19 can be pulled out. Carefully de-grease the shaft, push it as far as it will go into the shaft
coupling, and secure it in this position with the grubscrews. This joint must be really firm. First
unscrew the grubscrews from the coupling entirely, apply thread-lock fluid, Order No. 952, or
bearing retainer fluid, Order No. 951, to the threaded holes, then re-fit the grubscrews and
tighten them fully. Even better, file or grind a flat in one side of the shaft where the grubscrews
engage, as this effectively prevents the shaft slipping in the joint. Fix the tail rotor to the tail rotor
gearbox flange 1292.7 securely using three 2.9 x 13 mm self-tapping screws. Lightly grease the
quick-release sleeve and the front end of the tail rotor shaft.
Attach the two tail boom braces to the left and right mechanics side frames using the stand-off
pillars 4445.12, which you prepared in Section 7.1.
The completed tail boom assembly can now be pushed into the tail boom flange 1292.5 as far
as it will go; check carefully that the quick-release coupling engages correctly. Rotate the tail
boom so that the curve of the boom runs upwards, and is exactly in the vertical plane, and
rotate the tail rotor flange so that the tail rotor shaft, when viewed from the tail, stands at rightangles to the main rotor shaft. With the tail boom correctly aligned, tighten the M3 x 12 sockethead cap screw in the tail boom flange to fix it in position. We recommend that you hold the tail
boom pointing vertically upwards while you tighten the clamping screw.
Adjust the position of the rear flange 1292.6 so that the tail boom braces 4445.8 can be
attached to it as shown in the drawing, using an M3 x 30 socket-head cap screw and an M3
self-locking nut.
Place the mechanical assembly on a perfectly flat table top, and adjust the position of the tail
boom brace flange until the bottom edge of the tail rotor flange 1292.7 is about 170 mm above
the surface of the table. In this position tighten the flange clamp securely, then drill 1.5 mm Ø
pilot-holes in the tail boom through the tail rotor flange 1292.7, the tail boom brace flange
1292.6 and the tail boom flange 1292.5. Fit the 2.2 x 6.5 mm self-tapping screws to prevent the
tail boom rotating or shifting position.
7.7 Stabiliser panels (bag SR-3)
Fix the vertical stabiliser 1292.4 to the tail rotor flange using 2.9 x 13 mm self-tapping screws.
Attach the horizontal stabiliser to the tail boom by means of the stabiliser mount and the rod
guide, using 2.9 x 19 mm self-tapping screws. Set the horizontal stabiliser exactly at rightangles to the vertical stabiliser; the distance between the horizontal stabiliser mount and the tail
rotor flange should be 200 mm. Tighten the retaining screws.
35
Starlet 50
8. Assembling the skid landing gear (bag SR-4)
Push the skid tubes 4447.7 through the skid bars 4447.6, and set the bars 207 mm apart
(distance between retaining screws) by adjusting the position of the bars on the tubes.
The skid landing gear can now be fixed to the mechanics using two M3 x 16 socket-head cap
screws at the rear and two M3 x 20 socket-head cap screws at the front; note that the spacer
sleeves 4451.5 must be fitted at the front. Position the skid tubes so that they project beyond
the rear skid bars by about 50 mm on both sides at the rear. Check that the skid tubes are
parallel to each other. Working from the inside, drill 1.5 mm Ø pilot-holes through the skid bars
and skids, and fit 2.2 x 6.5 mm self-tapping screws to fix the parts together. Apply a little twopack adhesive to the end-plugs and press them into the skid tubes.
9. Installing the silencer
If you are using an expansion silencer, such as Order No. 1809.33 or 1871.72, install a
pressure nipple in the expansion chamber and attach the silencer to the motor using the screws
supplied with the unit. Don’t use a gasket at the exhaust joint; it is better to apply a thin coating
of thread-lock fluid to the contact surfaces.
If you are using a tuned pipe silencer, for example Order No. 1783A, the first step is to screw
the exhaust manifold 2259 to the motor, and pass it through the circular opening in the
mechanics sub-structure; here again, a thin coating of thread-lock fluid is better than an exhaust
gasket. Install a pressure nipple on the tuned pipe, then route the pipe through the rear
bulkhead 4450.18, working from the rear, and connect it to the exhaust manifold with Teflon
hose and spring clips; there should be a gap of about 5 mm between the manifold and the inlet
stub of the tuned pipe. At an earlier stage you should have fitted the additional tail boom flange
1292.6, and this includes the tuned pipe support. Adjust the position of the support and rotate it
so that the tail pipe of the tuned pipe silencer can be clamped in the holder by tightening the M3
x 16 socket-head cap screw. Fit a piece of silicone exhaust hose on the tail pipe before you do
this.
Regardless of the type of silencer you are using, the pressure nipple on the silencer should be
connected to the vent nipple which is mounted in the top of the fuel tank, using a length of
silicone fuel tubing.
10. Tail rotor control system (bag SR-5)
The first step in connecting the tail rotor pushrod 4451.3 is to undo the screw in the tail rotor
bellcrank 4618.60, and fit the straight end of the pushrod through the guide holes in the tail rotor
gearbox flange and the horizontal stabiliser mount, working from the tail end. If the pushrod is a
slightly tight fit in the tail rotor gearbox flange, open up the hole in the flange using a 2 - 2.5 mm
Ø twist drill. Connect the pre-formed end of the pushrod to the outermost hole in the bellcrank,
then fit the crank again and tighten the retaining screw.
Slide two rubber grommets onto the CFRP guide tube at the rear end to a distance of about 20
mm, and space them about 3 mm apart. Slip the guide tube onto the pushrod from the front, and
position it so that it rests on the tail boom brace flange 1292.6 at the rear. Fix it in this position
by wrapping a cable tie round the tail boom between the rubber grommets.
36
Starlet 50
The front end of the guide tube must not be supported against the tail boom, but should be left
„floating“ freely on the wire pushrod; for this reason it must be left as long as possible, i.e. it
should extend forward as close to the servo as possible.
At the front end the standard method of connecting the wire pushrod to the tail rotor servo is to
solder a threaded coupler to the end, and screw a clevis on the coupler. Remember to cut the
pushrod to the correct length before soldering the threaded coupler to the wire: when the
collective pitch stick is at centre, the output arm of the tail rotor servo should point straight down,
and the tail rotor bellcrank should be exactly at right-angles to the tail boom.
Alternatively you can simply form a Z-bend in the front end of the wire pushrod using Z-bend
pliers (Order No. 5732). The advantage of this method is that the guide tube can be extended
very close to the servo, providing maximum support for the pushrod, whereas it would have to
be shortened further if a clevis and threaded coupler were used. The drawback is that you
would have to determine the position of the Z-bend with great accuracy, because there is no
means of adjusting the pushrod length with this arrangement. This solution is therefore only
recommended to the experienced modeller.
11. Cabin (bag SR-6)
11.1 Installing the front cabin supports
Install the two front canopy stand-off pillars in the clips at the front of the sub-structure, securing
each with an M3 x 12 socket-head cap screw fitted from the rear.
37
Starlet 50
11.2 Attaching the cabin
Press two rubber grommets 3515.3 into the appropriate holes in the bulkhead 4445.17; you may
like to apply a drop of cyano on one side to secure them. Fit the bulkhead, with the curved edge
facing down, onto the stand-off pillars which are located on the front of the mechanics. The
pillars should engage fully in the rubber grommets.
Fit two further rubber grommets in the 7 mm Ø holes in the top rear section of the cabin
moulding. Slide the cabin onto the mechanics from the front, and engage the two stand-off
pillars at top rear in the rubber grommets in the cabin moulding.
Swing the cabin up from the front until the bulkhead fitted to the front of the mechanics makes
contact with the bottom of the cabin. You will need to cut away the cabin shell on the left-hand
side to clear the exhaust manifold; there should be a gap at least 5 mm wide between cabin and
exhaust system. The bulkhead can now be glued to the cabin in this position using Stabilit
express. Allow the glue to cure fully before removing the cabin from the mechanics. It should
come off easily by first pulling it off the rear stand-off pillars at the sides, and then pulling it
forward. It should be equally easy to fit the cabin back on the model.
Tape the clear canopy screen 4445.1 to the cabin, then attach it using four 2.2 x 6.5 mm selftapping screws. Alternatively you can glue it in place using cyano or Stabilit express. Work
carefully if you use glue to avoid smearing the clear panel.
Run the receiver aerial along the mechanics to a point aft of the front skid bar, to ensure that the
cabin can be removed easily without snagging the wire aerial. Fit the plastic aerial guide tube
through the two holes on the inside of the skid bars, and fit short lengths of fuel tubing to
prevent it slipping out. Run the aerial wire down the skid bar and into the front end of the guide
tube, and allow it to dangle freely from the rear end of the tube.
38
Starlet 50
12. Main rotor blades
Epoxy the rotor blade bushes 4607.164 in the root holes in the rotor blades, unless your blades
are supplied with these parts factory-fitted.
Allow the epoxy to set hard, then sand the blades smooth overall using fine abrasive paper,
Order No. 700.1 or 700.2.
Ideally both the weight and the Centre of Gravity of both blades should be identical. You can
check this by balancing each blade over a triangular strip of wood, as shown in the drawing.
Mark the lines of balance as shown; the blade’s CG is located where the lines cross.
However, in practice it is unlikely that you will be able to achieve perfect balance and weight
distribution without a considerable amount of work, and in any case it is not that important with
modern model helicopters. The crucial factor is that the moments of both rotor blades should be
the same when they are mounted on the rotor head. This means that blades of different weights
can certainly be used, provided that the CG of the blades is also different, and compensates for
the weight discrepancy. The method of balancing the blades is described in the next section.
Apply SPANNFIX IMMUN (colour dope), Order No. 1408, over the joints, in the region of the
root doublers (approx. 70 mm from the root) and at the tip (approx. 20 mm from the tip). The film
covering should be applied in the sequence shown in the drawing: first the top surface, then the
trailing edge, then the underside. Take care with the covering; there should be no wrinkles or
bubbles!
12.1 Balancing the rotor blades
Screw the two rotor blades together as shown in the drawing, and hang this assembly from a
length of thread. Apply adhesive tape to the tip of the lighter blade until the blades hang level.
Properly balanced blades reduce vibration to a minimum, so take your time over balancing.
39
Starlet 50
13. The set-up procedure
13.1 Setting up the cyclic control system
The basic settings for the roll-axis and pitch-axis control systems should already be correct if
you have installed the linkages exactly as described in the instructions. Since the instructions
include the lever lengths (correct linkage holes), the final setting up is carried out using the
electronic facilities on your transmitter. Note that the servo travel should not be set too high, and
ensure that the swashplate does not strike its end-stops on the main rotor shaft at either endpoint of the transmitter stick travel for roll-axis and pitch-axis movements, as this would mean
that collective pitch control would not be linear, i.e. axial movements would be restricted.
13.2 Main rotor pitch settings
The main rotor pitch is measured using a pitch gauge (optional accessory, not included in the
kit). The following table shows the recommended basic settings, but the optimum values may
well vary from model to model according to the rotor blades you are using.
Hovering and practice
Aerobatics
Autorotation
Minimum
-2°
-4°
-4°
Hover
5,5°...6°
5°... 5,5°
5,5°
Maximum
12°
8°... 9°
13°
The best way of setting the correct blade pitch on the transmitter is as follows:
1. Measure the hovering pitch and set it to the correct value.
2. Measure collective pitch maximum and minimum and adjust the values according to the
following diagrams using your transmitter's collective pitch curve facility.
13.3 Setting up the carburettor control system
The following diagrams show two alternative carburettor control curves:
• The hover-optimised throttle curve produces gentle control response in the hover region.
• The values stated above can only be a guideline as they vary greatly according to the motor,
fuel, silencer etc. in use. There is no alternative but to fine-tune them during the test-flying
programme.
40
Starlet 50
If you have made up all the linkages exactly as described in the previous sections, no changes
to the mechanical arrangements will be necessary. The following adjustments can all be carried
out at the transmitter:
1. Servo direction
Set the „sense" (direction of rotation) of all servos as stated in the instructions. Check the
throttle servo in particular!
2. Dual-Rates
You can set switchable travels for roll-axis, pitch-axis and tail rotor. As a starting point we
recommend 100% and 75% as the two settings.
3. Exponential
For the basic set-up you should leave all control systems set to „linear".
4. Servo centre offset
Do not make any adjustments to this point. At a later stage you may wish to make minor
corrections here.
5. Servo travel
This is where you can adjust the maximum servo travel. Note that the travels should always
be the same on both sides of neutral, otherwise you will end up with unwanted differential
effects:
For the throttle and swashplate servos (collective pitch function) it is important to check that
servo travels are symmetrical, i.e. identical values for both directions, and that the throttle
servo can rotate the carburettor barrel from the completely closed position (motor stopped)
to full throttle, without being mechanically stalled at any point. The collective pitch function of
the swashplate servos should produce a range of blade pitch angles covering -5° to +13°,
also with symmetrical travels; you may find it necessary to remove the servo output arm,
move it round by one spline and fit the retaining screw again.
The mechanics should now be set up virtually perfectly. When the throttle/collective stick is
at centre (hover point), collective pitch should be about 5.5°, and the carburettor barrel
should be half-open.
Note:
The collective pitch and throttle curves can be adjusted later to meet your exact personal
requirements. However, if you have already set differential travels in the basic set-up
procedure, as shown in diagram „B" above, any fine adjustments required subsequently will
be more difficult!
6. Collective pitch and throttle curves
These adjustments are of fundamental importance to the flight performance of any model
helicopter. The aim of the procedure is to maintain a constant rotor speed when the model is
climbing and descending, i.e. regardless of load. This then represents a stable basis for
further fine-tuning, e.g. of the torque compensation system etc. (see also the earlier section
on collective pitch and throttle curves).
7. Static torque compensation
The tail rotor servo is coupled to the collective pitch function via a mixer in the transmitter in
order to compensate for torque changes when you operate the collective pitch control. On
most transmitters the mixer input can be set separately for climb and descent.
Recommended values for the basic settings are: climb: 35%, descent: 15%.
41
Starlet 50
8. Gyro adjustment
Gyro systems damp out unwanted rotational movements around the vertical (yaw) axis of the
model helicopter. They do this by detecting the unwanted motion and injecting a
compensatory signal into the tail rotor control system, and in order to achieve this effect the
gyro electronics are connected between the tail rotor servo and the receiver. Many gyro
systems also allow you to set two different values for gyro gain, and switch between them
from the transmitter via a supplementary channel. The extra channel is controlled by means
of a proportional slider or rotary knob, or a switch, depending on the gyro system.
If your gyro features an adjustor box with two rotary pots for two fixed settings, and you can
switch between them from the transmitter, it is best to set one adjustor approximately to
centre (50%), and the other to 25%. If the gyro system provides proportional control between
the two set values, then the one pot should be set to „0", the other to about 80%.
If you have a gyro system whose effect cannot be adjusted from the transmitter, i.e. there is
only a single adjustor on the gyro electronics itself, the pot should be set to 50% gain as a
starting point.
Check that the direction of the gyro’s compensatory action is correct, i.e. that it responds to a
movement of the tail boom with a tail rotor response in the opposite direction. If this is not the
case, any yaw movement of the model would be amplified by the gyro! Most gyro systems
are fitted with a change-over switch which reverses their direction, and this must then be
moved to the appropriate position. However, some systems have no such switch, and in this
case the solution is to mount the gyro inverted.
One factor which all gyro systems have in common is that flight testing is necessary in order
to establish the optimum values, as so many different factors influence the settings.
The aim of the gyro adjustment process is to achieve as high a level of gyro stabilisation as
possible, without the gyro causing the tail boom to oscillate.
Notes regarding the use of the Graupner/JR „PIEZO 900 ... 5000" piezo gyro system in
conjunction with a computer radio control system (e.g. mc-12 ... mc-24)
The design of these gyro systems necessitates a different set-up process to the one described
above. Please keep strictly to the following procedure:
1. Set the servo travel for the tail rotor channel to +/-100% at the transmitter.
2. If you have a gyro mixer („Gyro-Control") which suppresses the gyro when you operate the
tail rotor control, it is essential to disable it permanently.
3. Disconnect the tail rotor pushrod at the tail rotor servo.
4. Operate the tail rotor control at the transmitter; at about 2/3 of full travel in either direction the
servo should stop, even when the stick is moved further (travel limiter).
5. Connect the tail rotor pushrod to the servo in such a way that the mechanical end-stop of the
tail rotor coincides with the onset of the limiter on both sides (servo should not quite be
stalled by the mechanical end-stop).
It is essential to make these adjustments mechanically, i.e. by altering the linkage
points and pushrod length. Don’t try to do it electronically using the transmitter’s
adjustment facilities!
6. Now correct the tail rotor setting for hovering, i.e. when the collective pitch stick is at centre,
using the servo centre adjustment facility at the transmitter.
7. Gyro gain can now be adjusted between „0" and maximum via the auxiliary channel only,
using a proportional control on the transmitter. If required, you can reduce maximum gain by
adjusting the travel of the auxiliary channel or by adjusting the transmitter control (mc-22 and
mc-24 transmitter). This gives you a useful range of fine adjustment for gyro response.
8. If you find that the tail rotor control system is too responsive for your taste, adjust it using the
exponential control facility; on no account reduce servo travel, as it must be left at +/- 100%!
42
Starlet 50
14. Final pre-flight checks
When you have completed the model, run through the final checks listed below before the first
flight:
• Study the manual again and ensure that all the stages of assembly have been completed
correctly.
• Check that all the screws in the ball-links and brackets are tightened fully after you have
adjusted gear meshing clearance.
• Can all the servos move freely, without mechanical obstruction at any point? Do they all
rotate in the correct direction relative to the stick movements? Are the servo output arm
retaining screws fitted and properly tightened?
• Check the direction of effect of the gyro system.
• Ensure that the transmitter and receiver batteries are fully charged. We recommend using a
voltage monitor module (e.g. Order No. 3138) to check the state of charge of the receiver
battery on the flying field.
Don’t attempt to start the motor and fly the helicopter until you have successfully checked
everything as described above.
Bear in mind that the running qualities of your motor will vary greatly according to the fuel in
use, the glowplug, the height of your flying site above sea level and atmospheric conditions.
Please read the notes on motor set-up which you will find later in this manual.
Maintenance
Helicopters, whether large or small, place considerable demands on maintenance. Whenever
you notice vibration in your model, take immediate steps to reduce or eliminate it. Rotating
parts, important screwed joints, control linkages and linkage junctions should be checked before
every flight. If repairs become necessary, be sure to use original replacement parts exclusively.
Never attempt to repair damaged rotor blades; replace them with new ones.
Fitting the starter adaptor
The starter adaptor supplied with the mechanics consists of three parts which are assembled as
shown in the drawing: first push the pin 4450.5C through the extension 4450.5B, then fit the
plastic adaptor 4450.5A and check that the cross-pin engages in the channel in the moulding.
To mount the starter adaptor on the electric starter, first remove the rubber insert holder from
the starter output shaft. Slide the starter adaptor onto the starter shaft until the cross-pin in the
shaft engages with the channel in the adaptor. Tighten the two grubscrews to fix the adaptor in
place.
Ensure that the adaptor runs „true“, i.e. does not wobble when it is spinning.
To start the motor, rotate the rotor head until you can engage the starter adaptor vertically in the
motor’s cooling fan. Please note:
• Do not switch the starter on until you are sure that the teeth of the cooling fan are
correctly engaged with the matching teeth on the starter adaptor.
• When the motor has started, switch off the starter before withdrawing it.
43
Starlet 50
15. Adjustments during the first flight
15.1 Blade tracking
“Blade tracking" refers to the height of the two rotor blades when they are spinning. The
adjustment procedure aims at fine-tuning the pitch of the main rotor blades to exactly the same
value, so that the blades rotate at the same level.
Incorrectly set blade tracking, with the blades revolving at different heights, will cause
the helicopter to vibrate badly in flight.
When you are adjusting blade tracking you are exactly in the „firing line" of the blades,
so keep at least 5 metres away from the model in the interests of safety.
You can only check blade tracking if you are able to see clearly which blade is higher and which
is lower. The best method is to mark the blades with coloured tape as follows:
There are two alternative methods: figure „A" shows the use of different colours on the blade
tips; fig. „B" shows the use of the same colour, but applied at different distances from the blade
tip.
Procedure for adjusting blade tracking:
1. Set the helicopter to the point where it is almost lifting off, then sight directly along the rotor
plane.
2. If you can see that the rotor blades are running in the same plane, no adjustment is required;
however, if one blade is running higher than the other, the settings must be corrected.
3. Locate the pushrods between the swashplate and the mixer levers; the adjustment is made
at the ball-links on both ends of these pushrods: unscrew the links to raise the blade, screw
them in to lower it.
44
Starlet 50
15.2 Adjusting the motor
Please be sure to read the operating instructions supplied with your motor.
The correct matching of collective pitch and throttle when the helicopter is hovering is of crucial
importance to the model’s flying characteristics and performance. For example, if the pitch of
the main rotor blades is too high, the motor may not reach the intended rotational speed, and
this may cause you to think that the motor is not powerful enough for the job. The fact that the
motor will overheat and thereby lose more power tends to reinforce that idea. For this reason
first set the collective pitch value for the hover exactly as described earlier in these instructions,
then match the motor settings to that.
Although most motors nowadays are supplied with the carburettor adjusted to approximately the
right settings, final adjustment of the needle valves can only be made under practical test
conditions. Most motors now feature twin-needle carburettors, and in this case the starting point
for adjusting the idle / mid-range needle is to screw it in to the point where it just dips into the
needle valve on the opposite side when the carburettor is half-open.
Typical twin-needle carburettor
For your first attempt at starting the motor, open the needle valve 1½ to 2 full turns from closed,
connect the glowplug to the plug battery and start the motor by engaging the adaptor on the
electric starter in the teeth of the fan and switching the starter on.
Caution: when the motor starts, withdraw the electric starter from the fan socket
immediately, otherwise you could damage the model.
When the motor is running, slowly increase throttle/collective pitch. If the fuel mixture is too
„rich" and the model fails to lift off, close (screw in) the needle valve in small stages. In order to
set the motor correctly for hovering you will need to adjust the idle needle, which also governs
the mid-range settings. Note that any adjustment you make here is also influenced by the
primary needle valve setting. Carefully close (screw in) the idle needle until the motor runs
smoothly at hover, without any tendency to stop through too rich a mixture. If motor speed is
then too low, increase the hover throttle setting at the transmitter. Never attempt to increase the
motor speed for hovering by setting the idle needle too lean. The final needle valve setting can
only be established with the model flying under power with „full collective", and for this reason
you are bound to start by „feeling your way" slowly to the correct setting.
If in any doubt, always set the mixture on the „rich" side. Initial hovering flights should
always be carried out with the motor set distinctly rich.
45
Starlet 50
16. General safety measures
• Make sure you have adequate third-party insurance cover.
• Wherever possible join the local model flying club.
At the flying site:
•
•
•
•
Never fly your model above spectators.
Do not fly models close to buildings or vehicles.
Avoid flying over agricultural workers in neighbouring fields.
Do not fly your model in the vicinity of railway lines, major roads or overhead cables.
Pre-flight checks, flying safety:
• Before you switch on the transmitter check carefully that no other model flyer is using the
same frequency as you.
• Carry out a range check with your RC system.
• Check that the transmitter and receiver batteries are fully charged.
• Whenever the motor is running, take particular care that no item of clothing can get caught
on the throttle stick.
• Do not let the model fly out of safe visual range.
• There should always be a safe reserve of fuel in the tank. Never keep flying until the fuel
runs out.
Post-flight checks
• Clean oil residues and dirt from the model and check that all screws etc. are still tight.
• Look for wear and damage to the helicopter, and replace worn parts in good time.
• Ensure that the electronic components such as battery, receiver, gyro etc. are still securely
fixed. Remember that rubber bands deteriorate with age and may fail.
• Check the receiver aerial. Conductor fractures inside the flex are often not visible from the
outside.
• If the main rotor should touch the ground when spinning, replace the blades. Internal blade
damage may not be visible from the outside.
• Never carry the model by the tail boom: too firm a grip can easily deform the tail rotor
pushrod.
46
Starlet 50
17. Some basic terms used in model helicopter flying
The term „rotary wing machine" indicates that the helicopter’s lift is derived from rotating „wings"
which take the form of rotor blades. As a result, a helicopter does not require a minimum
forward speed in order to fly, i.e. it can hover.
Cyclic pitch
Cyclic pitch variation is used to steer the machine around the roll and pitch axes. Changing
cyclic pitch has the effect of altering blade pitch depending on its position in the circle. The
effect is caused by tilting the swashplate, which then effectively tilts the helicopter in the
required direction.
Collective pitch
Collective pitch provides control over vertical movement, i.e. for climb and descent. The pitch of
both rotor blades is altered simultaneously.
Torque compensation
The spinning rotor produces a moment which tends to turn the whole helicopter in the opposite
direction. This effect must be accurately neutralised, and this is the task of the tail rotor. Tail
rotor blade pitch is altered to vary torque compensation. The tail rotor is also used to control the
model around the vertical (yaw) axis.
Hovering
This is the state in which the helicopter flies in a fixed position in the air, without moving in any
direction.
Ground effect
This occurs only when the machine is close to the ground, and it falls off as altitude rises. At an
altitude of about 1 - 1.5 times the rotor diameter, ground effect is completely absent. Normally
the revolving airflow from the main rotor is able to flow away freely, but in ground effect the air
strikes an obstacle (the ground) and forms an „air cushion". In ground effect a helicopter can lift
a greater weight, but its positional stability is reduced, with the result that it tends to „break
away" in an unpredictable direction.
Climb
Any excess power above that required for hovering can be exploited to make the helicopter
climb. Note that a vertical climb requires more energy than an angled climb which includes
forward motion. For this reason a model with a given amount of motor power will climb more
rapidly at an angle than vertically.
Level flight
A helicopter absorbs least power when flying straight and level at about half-power. If you have
trimmed the machine carefully for a steady hover, it will tend to turn to one side when flown
forward. The reason for this phenomenon is that the rotor blade which is moving forward
encounters an increased airflow caused by the wind, and this increases its upthrust compared
with the blade which is moving downwind, where the same airflow has to be subtracted. The net
result is a lateral inclination of the helicopter.
Descent
If the helicopter’s rotor speed is relatively low and you place the helicopter in a fast vertical
descent, the result can be that insufficient air flows through the rotor. This can cause what is
known as a „turbulent ring", when the airflow over the blade airfoil breaks away. The helicopter
is then uncontrollable and will usually crash. A high-speed descent is therefore only possible if
the helicopter is moving forward, or if the rotor is spinning at high speed. For the same reason
care should be exercised when turning the model helicopter downwind after flying into wind.
Flapping motion of the rotor blades
As we have already seen, the forward-moving blade produces greater upthrust than the trailing
blade. This effect can be minimised by allowing the leading blade to rise and the trailing blade to
fall. The rotor head is fitted with what is known as a flapping hinge to allow this movement, and
this prevents the rotor plane tilting excessively in forward flight. In model helicopters a single
hinge shared by both blades has proved an effective solution to the problem.
47
Starlet 50
Auto-rotation
This term refers to the flight of a helicopter without motor power. The rotational speed of the
main rotor can be kept high by setting both blades to negative pitch, and the airflow through the
rotor as it descends then keeps the blades turning. The rotational energy stored in the rotor by
this means can be converted into upthrust when the helicopter is close to the ground, by the
pilot applying positive collective pitch. Of course, this can only be done once, and it has to be
done at the correct moment. Auto-rotation allows a model helicopter to land safely when the
motor fails, just like a full-size machine.
However, auto-rotation places considerable demands on the pilot’s judgement and reflexes; you
can only halt the machine’s descent once, and you must not „flare" too early or too late. Much
practice is required to get it right.
48
Starlet 50
Modèle d’hélicoptère
Réf. N°4445 : Kit de montage
Réf. N°4446 : Kit de montage complet avec moteur et silencieux
Avertissement !
Le modèle d’hélicoptère R/C réalisé avec ce kit de montage n’est pas un jouet ! C’est un
appareil volant complexe qui par suite d’une mauvaise manipulation peut causer de sérieux dégâts matériels et personnels.
Vous êtes seul responsable de son montage correct et de la sécurité de son utilisation.
Veuillez impérativement observer les conseils de sécurité donnés sur les feuilles additives jointes SHW3 et SHW7 qui font partie de ces instructions.
GRAUPNER GmbH & Co. KG
Sous réserve de modifications!
D-73230 KIRCHHEIM/TECK
ID# 52069
GERMANY
5/04
Starlet 50
Avant-propos
Le STARLET 50 est un modèle d’hélicoptère de la Classe 50 c.i. en structure ouverte, conçue
sur la base de la fameuse mécanique UNI-EXPERT, qui n’est pas uniquement intéressant pour
le débutant en tant que modèle d’entrainement robuste et économique, mais aussi pour le pilote
d’hélicoptère déjà expérimenté ayant des ambitions pour la voltige et qui recherche un modèle
compact avec une grande réserve de puissance.
Le démarrage du moteur se fait par le dessus, au travers de l’entrée d’air. L’équipement silencieux pourra être largement adapté aux préférences individuelles; en plus d’un silencieux résonateur pour une puissance optimale du moteur, un silencieux de série économique ainsi qu’un
super-silencieux assurant une puissance plus que suffisante sont également adaptables.
Le rotor de queue de grand diamètre assure une très bonne efficacité de l’anti-couple et il est
entrainé en autorotation. La hauteur du châssis donne une garde au sol suffisante au rotor de
queue, en liaison avec le cintrage de la poutre arrière au travers de laquelle passe l’arbre de
transmission qui tourne en formant un arc de cercle et ne peut pas ainsi se dégager.
Le STARLET 50 est un investissement d’avenir pour le débutant, car il peut être directement
équipé de la mécanique UNI-EXPERT ou de la mécanique UNI-2000; la plupart des kits de fuselage pourront même être utilisés avec le moteur d’origine sans une conversion dans la Classe
60 c.i. Le STARLET 50 constitue en outre le point de départ d’un système d’hélicoptères partant
du petit modèle pour le débutant jusqu’à celui pour les experts ou pour la maquette.
Le léger carénage moulé de la mécanique intégrant un canal de circulation d’air est isolé des
vibrations sur des passe-fils en caoutchouc et peut être facilement monté et démonté; les éléments de l’installation R/C et la mécanique sont ainsi optimalement accessibles. Le réservoir
monté dans la cabine à la hauteur du carburateur du moteur est bien visible, ce qui permet de
vérifier facilement le niveau de carburant en vol. La longue poutre arrière anodisée en noir est
soutenue par deux solides haubans et peut être échangée en peu de temps en cas
d’éventuelles détériorations; sa longueur a été choisie de façon à ce que le débutant puisse utiliser des pales de rotor courtes économiques en bois à profil S-Schlag pour l’entrainement au
pilotage et que l’expert puisse éxécuter une voltige en « 3-D » illimitée avec des pales de rotor
en fibre de verre à profil symétrique.
Caractéristiques techniques :
Longueur sans rotor, env.
1310mm
Largeur sans rotor, env.
240mm
Hauteur, env.
430mm
Diamètres de rotor possibles
1160 à 1365mm
Poids en ordre de vol, à partir d’env.
3300 g.
2
Starlet 50
Avertissements
• Le modèle réalisé avec ce kit de montage n’est pas un jouet inoffensif! Un mauvais
montage et/ou une utilisation incorrecte ou irresponsable peuvent causer de sérieux
dégâts matériels et personnels.
• Un hélicoptère possède deux rotors tournant à haut régime qui développent une forte
énergie centrifuge. Tout ce qui pénètre dans le champ de rotation des rotors sera détruit ou pour le moins fortement endommagé, de même que les membres du corps
humain! De grandes précautions doivent ainsi être prises!
• Tout objet entrant dans le champ de rotation des rotors sera non seulement détérioré,
mais aussi les pales du rotor. Des pièces peuvent ainsi se détacher et être projetées
avec une extrème violence en mettant l’hélicoptère en péril avec des conséquences
incalculables.
• Une perturbation de l’installation R/C, provenant par exemple d’un parasitage extérieur, la panne d’un élément R/C ou due à une source d’alimentation vide ou défectueuse peuvent aussi avoir de graves conséquences pour un hélicoptère; il peut partir
soudainement dans n’importe quelle direction sans prévenir!
• Un hélicoptère comprend un grand nombre de pièces soumises à l’usure, comme par
ex. la pignonnerie du réducteur, le moteur, les connexions à rotule, etc…Un entretien
permanent et un contrôle régulier du modèle sont ainsi absolument nécessaires.
Comme pour les véritables hélicoptères, une « Check-List » devra être effectuée avant
chaque vol pour détecter une éventuelle défectuosité et pouvoir y remédier à temps
avant qu’elle ne conduise à un crash!
• Ce kit de montage contient deux feuilles additives SHW3 et SHW7 donnant des conseils de sécurité et des avertissements; veuillez impérativement les lire et les observer, car elles font partie de ces instructions!
• Ce modèle d’hélicoptère devra être monté et utilisé uniquement par des adultes ou
par des adolescents à partir de 16 ans sous les instructions et la surveillance d’une
personne compétente.
• Les pièces métalliques pointues et les bords vifs présentent un danger de blessure.
• Comme pour un véritable aéronef, toutes les dispositions légales doivent être prises.
La possession d’une assurance est obligatoire.
• Un modèle d’hélicoptère doit être transporté (Par ex. vers le terrain de vol) de façon à
ce qu’il ne subisse aucune détérioration. Les tringleries de commande du rotor principal et l’ensemble du rotor de queue sont des parties particulièrement fragiles.
• Le pilotage d’un modèle d’hélicoptère n’est pas simple; son apprentissage nécessite
de l’entrainement et une bonne perception optique.
• Avant la mise en service du modèle, il sera indispensable de se familiariser en matière
de « Modèles d’hélicoptères ». Ceci pourra se faire aussi bien en consultant les
ouvrages spécialisés sur le sujet, que par la pratique en assistant à des démonstrations sur les terrains de vol, en parlant avec d’autres pilotes de modèles
3
Starlet 50
d’hélicoptères ou en s’inscrivant dans une école de pilotage. Votre revendeur vous
aidera aussi volontiers.
• Lire entièrement ces instructions avant de commencer les assemblages afin d’en assimiler parfaitement les différents stades et leur succession!
• Des modifications avec l’emploi d’autres pièces que celles conseillées dans ces instructions ne devront pas être effectuées, leur qualité de fabrication et leur sécurité de
fonctionnement ne pouvant être remplacées par d’autres pièces accessoires.
• Comme le fabricant et le revendeur n’ont aucune influence sur le respect des instructions de montage et d’utilisation du modèle, ils ne peuvent qu’avertir des dangers
présentés en déclinant toute responsabilité.
Exclusion de responsabilité/Dédomagements
Le respect des instructions de montage et d'utilisation ainsi que les conditions d'installation dans le modèle, de même que l'utilisation et l'entretien de l'installation de radiocommande ne peuvent pas être surveillés par la Firme Graupner.
En conséquence, nous déclinons toute responsabilité concernant la perte, les dommages et les frais résultants d'une utilisation incorrecte ainsi que notre participation aux
dédommagements d'une façon quelconque.
Tant qu'elle n'est pas impérativement contrainte par le législateur, la responsabilité de la
Firme Graupner pour le dédommagement, quelque soit la raison de droit, se limite à la
valeur marchande d'origine Graupner impliquée dans l'accident. Ceci n'est pas valable
dans la mesure ou la Firme Graupner serait contrainte par la législation en vigueur pour
une raison de grande négligence.
4
Starlet 50
Sommaire
• Avant-propos ......................................
P.2
• Avertissements .....................................
P.3
• Accessoires, articles supplémentaires nécessaires ...........
P.6
• 1. Montage de la mécanique principale ...................
P.7
• 2. Montage de l’installation R/C .........................
P.21
• 3. Assemblage de la tête du rotor principal .................
P.24
• 4. Assemblage du mécanisme du rotor de queue ............
P.29
• 5. Montage du pont de commande .......................
P.31
• 6. Montage de la tête du rotor de queue ...................
P.32
• 7. Poutre arrière ....................................
P.33
• 8. Montage du train d’atterrissage à patins .................
P.36
• 9. Montage du silencieux ..............................
P.36
• 10. Commande du rotor de queue .......................
P.36
• 11. Cabine ........................................
P.37
• 12. Pales du rotor principal ............................
P.38
• 13. Travaux de réglage ...............................
P.39
• 14. Contrôle final avant le premier vol ....................
P.43
• 15. Réglages au cours du premier vol, réglage du plan de rotation
P.44
• Moteur – Conseils de réglage ..........................
P.45
• 16. Mesures de précaution générales .....................
P.46
• 17. Quelques principes de base sur le vol d’un hélicoptère .....
P.47
Conseils pour ces instructions
Ces instructions ont été rédigées avec le plus grand soin afin que ce modèle d’hélicoptère
puisse voler impeccablement après son assemblage. Elles ne s’adressent pas uniquement au
débutant, mais dans la même mesure aux experts qui devront effectuer les montages Pas à
Pas, exactement comme il va être décrit à la suite.
• Le montage de la mécanique se fera conformément aux illustrations qui sont accompagnées
de textes explicatifs.
doit être bloquée avec du freine-filet, par ex.
• La visserie marquée par un symbole
Réf. N°952 ou avec de la colle pour paliers, Réf. N°951 ; dégraisser préalablement les
emplacements correspondants.
• Tous les paliers lisses, sur roulements à billes ou à aiguilles devront être soigneusement
lubrifiés. Ceci vaut également pour toutes les connexions à rotule et les pignons; même si
cela n’est pas répété dans les instructions qui vont suivre.
• La liste des pièces, les pièces détachées et les dessins en éclaté correspondants se trouvent à la fin de ces instructions.
5
Starlet 50
Accessoires
Moteurs et accessoires conseillés pour le Starlet 50
Moteur
OS MAX 46
FX-HG
OS MAX 50
SX-HG
Cylindré
e ccm
7,45
Réf. N°
Silencieux à expansion
1893
8,17
1921
1809.33
1871.72
1809.33
1871.72
Batterie de démarrage, par ex.
Varta RSH 4
Varta RSH 7
Accu de démarrage 2 V
Accu de démarrage 2 V
Coude
d’échappement
2259
2259
Réf. N°1353
Réf. N°1352
Réf. N°3694
Réf. N°771
Silencieux
(résonateur)
1783A ou
2272
1783A ou
2272
( A utiliser seulement avec une résistance
de protection Réf. N°1685 ou 1694. )
Carburant
TITAN S 12
Réf. N°2612
AeroSynth COMPETITION SX-10 Réf. N°2811
Starter
Starter électrique, Réf. N°1628 ou 1626
Batterie pour starter 12 V, par ex. Réf. N°2592 ou 2593
Pales de rotor principal adaptées
Réf. N°1291.1 Bois, Profil S, long. 500mm
Réf. N°1296 F. de V., Profil S, long. 552mm
Réf. N°1269 F. de V., symétrique, long. 552mm
Réf. N°1271 F. de V., symétrique, long. 602mm
φ Rotor 1157mm (Fournies dans le kit)
φ Rotor 1261mm
φ Rotor 1261mm
φ Rotor 1361mm
Ensemble R/C: Voir dans le catalogue général Graupner
Il est conseillé d’utiliser un ensemble R/C équipé des options spéciales pour hélicoptère, ou un
ensemble à micro-ordinateur tel que par ex. mc-12, mc-14, mc-15, mc-19, mc22 ou mc-24.
L’équipement R/C minimum doit comprendre un émetteur avec un mixeur de plateau cyclique sur 3 points et 5 servos pour commander les fonctions Nick, Roll, Pas et Gaz.
Servos: Utiliser uniquement des servos puissants, tels que par ex. C 4041, Réf. N°3916, ou de
caractéristiques similaires.
Systèmes de gyroscope:
Système de gyroscope PIEZO 5000, Réf. N°5146 avec le Super-servo DS-8700G, Réf. N°5156,
ou: systèmes de gyroscope PIEZO 550, Réf. N°5147, G490T, Réf. N°5137.
Régulateur de régime électronique:
mc-HELI-CONTROL, Réf. N°3286
Alimentation de la réception:
Pour des raisons de sécurité, utiliser uniquement un accu de réception d’une capacité d’au
moins 1800 mA, ainsi qu’un cordon interrupteur avec des fils d’une section suffisante.
L’utilisation du cordon d’alimentation Power avec prise de charge intégrée, Réf. N°3050 en liaison avec l’accu de réception 4RC-3000 MH, Réf. N° 2568, est particulièrement conseillée.
Un accu de réception composé de plus de 4 éléments ne devra en aucun cas être utilisé.
Un contrôle permanent de la tension de l’accu sera possible avec l’utilisation du Contrôleur
d’accu NC, Réf. N°3138.
6
Starlet 50
1. Montage de la mécanique principale
La mécanique du STARLET 50 est composée en grande partie de pièces en polyamide renforcé fibre de verre, un matériau qui, comparativement à l’aluminium par exemple, offre
d’importants avantages dans la construction d’un modèle d’hélicoptère, tels qu’une grande solidité pour un faible poids, une haute résistance à l’usure et la faculté d’absorber le bruit et les
vibrations de la propulsion. Les mécaniques ainsi réalisées possèdent la robustesse et la rigidité nécessaires et avantageuses en cas d’atterrissage « dur », car les pièces restent soit intactes (et ainsi d’une durée d’utilisation illimitée), ou elles cassent et doivent alors être définitivement remplacées. Une déformation du châssis, qui n’est pas toujours visible, mais qui limite
la durée de vie des autres éléments, influence la fonctionnalité ou même la sécurité de
l’ensemble du système n’est pas possible avec cette structure, comparativement aux mécaniques métalliques.
Les nombreux avantages de la construction en polyamide ont pour seul inconvénient la nécessité d’un montage consciencieux et soigné ainsi qu’un ajustage des composants, une légère
rectification des pièces pouvant aussi être occasionnellement nécessaire. Mais le soin apporté
ici garantira une longue durée de vie du modèle et une faible usure.
Arbres, paliers, ajustages
Presque toutes les pièces en rotation de la mécanique sont montées sur roulements à billes.
Dans ces montages, il est très important que l’arbre entre à force et ne puisse pas tourner dans
l’anneau intérieur du roulement, ce qui pourrait échauffer ce dernier (il prendrait alors une couleur bleue ou jaune…) et détériorer le palier en le rendant inutilisable. Dans un cas extrème, le
palier pourrait s’échauffer jusqu’à faire fondre le porte-palier en polyamide et l’arbre ne serait
plus maintenu. Cela ne proviendrait naturellement pas d’un défaut de la matière du porte-palier,
mais d’un mauvais ajustage du palier.
Une autre suite possible d’un ajustage trop libre entrainant le glissement de l’arbre dans
l’anneau intérieur du roulement est une diminution du diamètre de l’arbre au niveau du palier ; le
pignon monté sur l’arbre perdrait alors son engrènement correct en provoquant une usure
prématurée de la denture jusqu’à une rupture.
L’ajustage entre les arbres et les roulements à billes est très serré dans le système
Graupner/Heim pour éviter les problèmes décrits ci-dessus. Cependant, par suite des différences dans les tolérances d’ajustage entre le palier et l’arbre, il se peut qu’un ajustage soit trop
serré, c’est-à-dire que le palier ne puisse pas être glissé sur l’arbre. Dans ce cas, l’arbre devra
être rectifié en conséquence avec du papier abrasif fin (Grain 600 à 1200) jusqu’à ce que le
palier puisse être introduit dessus avec une pression modérée.
Avec un ajustage trop libre, également dû aux différences de tolérance, le palier sera collé sur
l’arbre avec de la colle pour palier LOCTITE 603 pour garantir une fixation ferme. Il faut noter
que plus l’ajustage est serré, plus cette colle liquide prend rapidement : dans certaines conditions, il ne reste que quelques secondes pour placer correctement le palier sur l’arbre avant qu’il
ne soit irrémédiablement fixé.
Lorsqu’un arbre est monté sur plusieurs paliers, il faut éviter que ces derniers soient contraints
l’un contre l’autre dans le sens axial. Ceci peut être obtenu soit par un ajustage totalement
exact des deux paliers sur l’arbre ou par une combinaison d’un ajustage serré et d’un ajustage
plus libre : un palier sera fermement fixé sur l’arbre par emmanchement à force ou par collage
et l’autre pourra encore être déplacé axialement sur l’arbre par une pression modérée, de sorte
que la position optimale sera obtenue d’elle-même après montage.
D’une façon générale, plus le diamètre de l’arbre est faible et plus le régime est élevé, plus
grand est le risque que le palier tourne dans le porte-palier. Plus faible est la différence entre les
diamètres intérieur et extérieur des paliers, plus grand est le risque de contrainte de ces
derniers l’un contre l’autre.
Tout celà devra être pris en considération dans chaque cas particulier pour obtenir une sécurité
de fonctionnement et une fiabilité maximum. Dans les instructions qui vont suivre, il sera en
outre indiqué à chaque fois quelle fixation doit se faire soit avec du freine-filet liquide, soit avec
de la colle pour palier.
7
Starlet 50
1.1 1 Assemblage du mécanisme du rotor de queue(Sachet UM1A)
L’arbre de l’accouplement rapide 4618.57 ne doit présenter aucun jeu axial dans le palier
4618.6. Si l’ajustage de l’arbre dans celui-ci n’est pas assez serré, coller l’arbre avec de la colle
pour palier 603, Réf. N°951. Pour cela, glisser d’abord le palier arrière sur l’arbre enduit de colle
603 jusqu’en butée contre la fourche de l’accouplement. Attendre la prise de la colle qui, selon
l’ajustage, peut demander entre 20 secondes et 30 minutes. Introduire entièrement cet
ensemble dans le porte-palier 4448.14 (jusqu’en butée) , puis glisser le palier avant avec une
application de colle 603 sur l’arbre et dans le porte-palier, jusqu’en butée. Vérifier immédiatement (avant la prise de la colle !) si l’arbre peut encore tourner librement ou si il n’est pas devenue dur par une contrainte axiale du palier. Dans ce dernier cas, frapper légèrement sur
l’extrémité de l’arbre (Par ex. avec la poignée d’un tournevis) ou (plus fortement) sur le portepalier jusqu’à ce que l’axe puisse tourner librement, puis laisser durcir la colle.
Placer maintenant une rondelle d’ajustage et le pignon 4450.41 sur l’extrémité avant de l’arbre,
contre le palier avant et le fixer dans cette position avec les deux vis pointeau. Pour cela, appliquer d’abord du freine-filet liquide (Réf. N°952) dans les taraudages du pignon et serrer la
première vis pointeau de façon à ce quelle repose sur le méplat de l’arbre ; pour cela, tourner
légèrement le pignon sur l’arbre pour faire correspondre la vis avec le méplat, puis la serrer
modérément. Serrer maintenant la vis pointeau opposée et la bloquer fermement, puis bloquer
définitivement la première vis pointeau. Cette façon de procéder assurera une rotation du pignon sans faux-rond sur l’arbre.
1.2 Montage de l’arbre primaire (Sachet UM-1B)
Coller le palier inférieur 4450.31 sur l’arbre primaire 4450.7 avec de la colle 603 (Réf. N°951) en
butée contre le pignon, puis laisser durcir la colle. Insérer l’arbre avec le palier dans le portepalier inférieur 4448.11.
8
Starlet 50
Enfiler le porte-palier supérieur d’abord librement sur l’arbre (Veiller au sens de montage,
l’ouverture de ce porte-palier doit être orientée vers le haut), puis introduire le palier supérieur
4450.31 suivi d’une rondelle d’ajustage et de la couronne 4618.105 avec la roue libre 4618.107.
Faire correspondre le perçage transversal de l’arbre avec celui de la roue libre et y insérer la
goupille tubulaire 4618.65, mais pas trop profondément de façon à ce qu’elle dépasse de l’arbre
et puisse être retirée le cas échéant.
Introduire maintenant le palier supérieur 4450.31 dans le porte-palier 4448.11 et glisser cet ensemble vers le haut contre la rondelle d’ajustage sous la roue-libre. Monter provisoirement
l’ensemble assemblé de cette façon entre les flancs de la mécanique 4450.9 et 4450.10 pour
vérifier si dans l’état actuel le palier supérieur s’aligne au-dessus de la rondelle d’ajustage sur la
roue libre, ou s’il subsiste un espace qui devra être compensé par d’autres rondelles d’ajustage.
Ne pas comprimer le palier en ajoutant trop de rondelles d’ajustage.
Lorsque l’espace excédentaire est correctement réglé, coller également l’arbre dans le palier
avec de la colle Réf. N°951; enfoncer d’abord entièrement et définitivement la goupille tubulaire
dans la roue libre. L’ensemble devra rester fixé entre les flancs de la mécanique jusqu’au
durcissement de la colle pour palier afin de vérifier la libre rotation de l’arbre et l’établir le cas
échéant en donnant de légers coups sur ses extrémités.
9
Starlet 50
1.3 Préparation de l’arbre du rotor principal / palier supérieur
(Sachet UM-1C)
Monter le guide de plateau cyclique 4618.113 sur le porte-palier supérieur 4448.8 avec deux vis
à tête cylindrique M2x12. Insérer un roulement à billes 4450.24 dans le porte-palier supérieur et
dans celui de l’arbre du rotor principal 4448.12 (Graisser les roulements).
Introduire le circlip 4607.156 par le haut sur l’arbre du rotor principal 4450.43 et le cranter dans
la gorge de ce dernier, en veillant aux points suivants:
• Le circlip ne devra pas être trop écarté et en aucun cas être ouvert plus que nécessaire pour
pouvoir le glisser sur l’arbre du rotor principal (utiliser si possible des pinces spéciales).
• Le bord intérieur du circlip comprend un côté arrondi et un côté vif ; ce dernier doit être
orienté vers le haut.
• Le circlip doit être ferment fixé dans la gorge de l’arbre et ne doit pas pouvoir être tourné à la
main.
10
Starlet 50
1.4 Assemblage du réducteur principal
Monter le mécanisme du rotor de queue, l’arbre primaire ainsi que le porte-palier de l’arbre du
rotor principal entre les flancs de la mécanique avec des vis BTR M3x16 . Ne pas encore bloquer totalement ces vis. Placer une rondelle d’ajustage 4450.40 et le porte-palier supérieur par
le dessous sur l’arbre du rotor principal. Introduire ce dernier par le dessus au travers de son
porte-palier inférieur et de la couronne 4450.20A de façon à pouvoir insérer la goupille cylindrique 4450.37 dans son perçage transversal inférieur. Tirer maintenant l’arbre totalement vers le
haut pour engager la goupille cylindrique dans la dépression correspondante de la couronne.
Monter alors le porte-palier supérieur entre les flancs de la mécanique de même avec des vis
BTR M3x16 et vérifier si l’arbre du rotor principal ne présente aucun jeu axial dans les paliers, le
cas échéant, compenser ce jeu en interposant d’autres rondelles d’ajustage sous le circlip.
Veiller cependant à ne pas comprimer le palier en interposant trop de rondelles, ou de trop forte
épaisseur.
Pour interposer ou retirer les rondelles d’ajustage, desserrer le porte-palier supérieur et
démonter l’arbre du rotor principal dans l’ordre inverse à celui du montage ! Ne démonter en aucun cas le circlip pour cela !
Pour régler le réducteur, il est nécessaire que le jeu d’engrènement de cet étage soit légèrement serré, la couronne devant ainsi être un peu « dure » à tourner. Si ce n’est pas le cas et
qu’un jeu d’engrènement perceptible soit présent, le porte-palier inférieur de l’arbre du rotor
principal devra être monté tourné horizontalement sur 180°. Si celà n’est pas encore suffisant,
le porte-palier inférieur de l’arbre primaire devra aussi être tourné sur 180°. De cette façon, les
11
Starlet 50
légers décalages des inserts en laiton dans les porte-paliers, jamais inévitables en fabrication,
pourront être compensés. Le jeu d’engrènement entre la couronne et le pignon de l’arbre primaire sera ensuite réglé en desserrant un peu les vis BTR 3x16 dans les porte-paliers et en les
rebloquant après avoir introduit une bande de papier à lettre épais entre les dentures. Le réducteur doit maintenant tourner librement, sans serrer ou accrocher à un endroit quelconque ;
autrement une rectification sera nécessaire.
1.5 Montage du moteur (Sachet UM-2)
Le moteur prévu pour cette mécanique est équipé d’un vilebrequin à décolletage long
Graupner/Heim (φ 8mm). D’autres moteurs pourront cependant être montés sur initiative personnelle avec l’utilisation de l’embrayage monté sur palier lisse, disponible séparément.
Après avoir retiré la rondelle plate et l’écrou du vilebrequin, placer dans l’ordre sur celui-ci : la
rondelle décolletée 4450.38, deux roulements à billes 4618.78, le cône de serrage 4618.77, la
cloche d’embrayage 4618.23, l’embrayage 4618.79, la turbine de refroidissement 4450.2 et
avec la rondelle plate fournies avec le moteur placée sur le vilebrequin, visser l’écrou et bien le
bloquer.
Si le cône de serrage pénètre totalement dans l’embrayage sans qu’une pression suffisante soit
exercée sur le vilebrequin, une rondelle de 8/13x0,5 (de 4450.58) sera interposée sous le cône
afin que l’embrayage ne glisse pas ultérieurement sur le vilebrequin. Monter une rotule avec
une vis M2x10 sur le trou extérieur du levier du carburateur.
12
Starlet 50
Note:
Le blocage de l’embrayage sur le vilebrequin se fait exclusivement par la pression du cône de
serrage sur le décolletage de ce dernier et dans la partie femelle du cône de l’embrayage. Il est
préférable de monter d’abord l’embrayage sans la turbine de refroidissement et de le bloquer
fermement : pour cela, maintenir l’embrayage avec un outil adapté.
En plaçant la cloche d’embrayage sur le vilebrequin, veiller absolument à ce que celle-ci ne soit
pas trop poussée vers l’arrière sur ses paliers.
Un embrayage correctement bloqué ne pourra être démonté qu’avec un extracteur (Réf.
N°1045) après avoir retiré l’écrou du vilebrequin. Ce dernier ne supporte aucun effort de
transmission en fonctionnement, il sert principalement à la fixation de la turbine de refroidissement et éventuellement du cône de démarrage six pans (Pièce en option, Réf. N°4448.103).
13
Starlet 50
Monter le bâti-moteur 1291.18 sur la mécanique avec deux vis spéciales M3x12 vissées par le
côté intérieur. Fixer le moteur sur le bâti avec quatre vis BTR M3x16 en interposant une rondelle plate 560.7 entre les pattes de fixation du moteur et le bâti (Voir l’illustration).
14
Starlet 50
1.6 Montage du carter de la soufflerie (Sachet UM-3)
L’ouverture pour le passage du carburateur dans le carter de la soufflerie doit être agrandie
dans certains cas, selon le type du carburateur monté sur le moteur, de même que l’ouverture
pour le passage du cylindre.
Placer le carter sur le moteur et le fixer sur la mécanique avec une tringlerie filetée 4618.151,
des rondelles plates et des écrous à l’avant et avec deux vis parker 2,9x16 à l’arrière.
15
Starlet 50
1.7 Assemblage de la sous-structure (Sachet UM-4)
Assembler la sous-structure avec les pièces représentées sur l’illustration; les flancs 4448.34, le
couple 4450.18, l’entretoise 4450.17, le coffret R/C 4445.101 et les attaches de patin 1291.21A
en utilisant les vis parker indiquées sur l’illustration.
16
Starlet 50
1.8 Montage de la mécanique sur la sous-structure (Sachet UM-5)
Encastrer le réducteur principal monté au stade 1.6 entre les flancs de la mécanique avec les
pièces de fixation rondes et le bloquer avec des vis BTR M3x16 et des rondelles plates.
Deux vis BTR M3x30 seront utilisées au milieu, sur lesquelles sera d’abord enfilée une rondelle
plate avant de les introduire au travers des bagues en laiton 4450.34A dont sont pourvus les
flancs de la sous-structure, puis vissées et bloquées dans les deux bagues d’écartement
4445.34 sur les flancs.
Ces vis dépassent à l’intérieur des trous de fixation inférieurs du bâti-moteur, de sorte qu’un
écrou nylstop M3 pourra être vissé sur chacune pour la fixation de ce dernier.
Le jeu d’engrènement du premier étage du réducteur sera réglé en desserrant les vis M3x16
avec lesquelles le porte-palier supérieur de l’arbre primaire est fixé dans les flancs, de même
que les écrous nylstop M3 sous le bâti-moteur. Introduire une fine bande de papier à lettre serrée entre la denture du pignon de l’embrayage et la couronne et bien rebloquer toutes les vis ;
faire une bonne application de freine-filet sur les vis M3 dans le bâti-moteur. Après avoir retiré la
bande de papier entre les pignons, l’ensemble du réducteur doit maintenant tourner librement,
le pignon cônique ne doit présenter aucun jeu d’engrènement perceptible dans la couronne.
17
Starlet 50
1.9 Raccordement de la bougie (Sachet UM-6)
Introduire la fiche femelle du raccordement de la bougie dans le perçage du flanc droit 4448.34
et placer dessus dans l’ordre ; la cosse, la rondelle plate et l’écrou, puis bloquer ce dernier.
Confectionner maintenant la liaison au moteur avec le fil double. Pour permettre un remplacement rapide de la bougie, souder la pince crocodile sur le fil du contact milieu de la fiche femelle
et la connecter sur la bougie ; fixer l’autre fil à la masse avec une vis de fixation du moteur en
interposant une rondelle plate. Après la disposition du câblage, souder un fil sur le pôle Plus et
sur le pôle Moins de la fiche femelle.
18
Starlet 50
1.10 Réservoir
L’assemblage du réservoir est clairement indiqué sur l’illustration. Monter d’abord la prise de
pressurisation dans le petit bossage supérieur du réservoir ; percer un trou de φ 5mm, introduire
la prise par l’intérieur et la fixer extérieurement avec la rondelle plate et l’écrou.
Le bouchon en caoutchouc comprend (en plus du passage pour la vis) deux autre passages
pour les tubes de laiton, le troisième est « borgne » (pour une autre utilisation éventuelle), mais
il peut être facilement débouché. Comme ici un seul passage est nécessaire (Prise de raccordement au carburateur/remplissage du réservoir), le deuxième passage sera obturé avec un
boulon en laiton (de 4618.15). Le tube de laiton sera formé conformément à l’illustration. Il
conviendra de veiller à ce que le plongeur soit entièrement mobile ; en tournant le réservoir à la
main, il doit toujours retomber vers le bas. Placer l’anneau en laiton sur le col du réservoir, il
empêchera celui-ci d’éclater par la déformation du bouchon en caoutchouc au serrage. Après
l’assemblage du réservoir, mettre en place la vis centrale dont le serrage écrase le bouchon en
caoutchouc en étanchéifiant le tout.
Les surfaces d’appui du réservoir sont à ébavurer sur le flanc 4448.34. Le réservoir sera alors
fixé sur celles-ci avec des bandes élastiques ; le bouchon doit se trouver en arrière. Le conduit
d’alimentation vers le moteur sera constitué d’une durit et d’un filtre à carburant en T ; veiller à
faire un raccordement au carburateur le plus court possible.
Le remplissage et la vidange se feront par le raccordement entre le plongeur et le carburateur,
ce qui est facilité par le filtre à carburant en T. En vol, la durit de remplissage venant latéralement du filtre sera fermée avec le bouchon, pour remplir/vidanger obturer d’abord la durit
d’alimentation vers le carburateur avec la pince pour durit, on pourra alors remplir ou vidanger
le réservoir par la durit de remplissage.
1.11 Montage du support du gyroscope (Sachet UM-7)
Monter l’attache 4450.16 du support du gyroscope sur le flanc de la mécanique avec des vis
parker 2,2x9,5. Le support 1291.12 sera placé ultérieurement sur l’attache, après le montage
des servos, et fixé avec 4 vis parker 2,2x6,5.
19
Starlet 50
1.12 Compensateur de Pas et plateau cyclique (Sachet UM-8)
Le compensateur de Pas 4618.47A sera assemblé conformément à l’illustration.
Pour cela, coller d’abord les axes en laiton muni d’un circlip dans les perçages de la pièce centrale du compensateur de Pas 4618.46 avec de la colle pour palier, de façon à ce que leur extrémité avec le circlip se trouve dans la dépression sur la pièce. Ebavurer les bras du compensateur de Pas et les placer sur la partie dépassante des axes, en interposant au moins une
rondelle d’ajustage entre la pièce centrale et le bras; chaque bras doit pouvoir pivoter librement
sur son axe, ébavurer les perçages le cas échéant. Après avoir posé le circlip extérieur, les
bras ne doivent présenter aucun jus axial sur leur axe, autrement d’autres rondelles d’ajustage
devront être interposées.
Confectionner trois tringleries conformément à l’illustration avec trois tringleries filetées 4618.51
(φ 2mm, longueur 75mm) et six chapes à rotule 4618.55 ; la cote indiquée correspond à la
distance libre entre les chapes.
Connecter une tringlerie pour le point de connexion arrière sur la rotule placée sur la cheville de
guidage du plateau cyclique 4682.45, placer ensuite la douille en laiton (de 4618.113) sur la
cheville et bien la graisser. Glisser le plateau cyclique sur l’arbre du rotor principal et introduire
la tringlerie connectée vers le bas au travers du passage arrière dans le porte-palier supérieur;
pour cela, courber avec précaution le guide du plateau cyclique 4618.113 pour engager la cheville de guidage avec la douille en laiton dans la fente de ce dernier.
Placer le compensateur de Pas sur l’arbre du rotor principal et connecter les deux chapes sur
les rotules de l’anneau intérieur du plateau cycliques indiquées sur l’illustration.
20
Starlet 50
2. Montage de l’installation R/C (Sachet UM-9)
2.1 Montage des servos
Monter sur le palonnier du servo Nick (1) et sur celui des servos Roll (2) + (3) par le dessous
une rotule en laiton fixée avec une vis à tête cylindrique M2x10 et un écrou M2 en appliquant du
freine-filet. La distance entre l’axe de sortie du servo et le centre de la rotule doit être d’environ
18mm. Fixer d’abord le servo Nick par l’intérieur dans son logement sur le flanc droit de la
mécanique, son axe de sortie étant orienté vers le haut, avec les 4 vis, les passe-fils en
caoutchouc et les œillets (fournis parmi ses accessoires): les œillets doivent être insérés dans
les passe-fils par le dessous et les vis filetées par le dessus.
Les trous de fixation des servos dans la mécanique sont intentionnellement légèrement décalés
vers l’extérieur de sorte qu’une tension des amortisseurs en caoutchouc assure une meilleure
précision de commande.
Les servos Roll seront montés par l’extérieur dans les flancs droit et gauche de la mécanique
(Voir le dessin, leur axe de sortie étant également orienté vers le haut) et fixés chacun avec 4
vis. Brancher les servos sur le récepteur conformément aux instructions fournies avec
l’ensemble R/C, mettre celui-ci en contact et activer le mixeur de plateau cyclique dans
l’émetteur (Réglage: Connexion symétrique sur trois points, 2 servos Roll, 1 servo Nick à
l’arrière. Placer les commandes Pas, Nick et Roll en position neutre et monter maintenant le
palonnier sur les servos, perpendiculairement à l’arbre du rotor.
Le servo du rotor de queue sera monté de l’extérieur et fixé dans le flanc gauche de la mécanique. Le palonnier du servo sera orienté vers le bas et devra être parallèle à l’arbre du rotor
principal sur la position milieu du Pas.
Fixer de l’extérieur une rotule en laiton avec une vis à tête cylindrique M3x10 et un écrou M2
sur le palonnier du servo de gaz, en appliquant du freine-filet. La distance entre l’axe de sortie
du servo et le centre de la rotule doit être d’environ 11mm. Monter ce servo dans le flanc gauche de la mécanique avec l’axe de sortie et le palonnier orientés vers le haut.
Les cordons de servo seront passés au travers de la découpe restée libre dans le flanc droit de
la mécanique et attachés ensemble sur celui-ci avec de la gaine en spirale, vers le récepteur.
La disposition des cordons de servo devra être effectuée avec le plus grand soin ; ils ne doivent
toucher en aucun cas les arbres ou la pignonnerie (Danger de crash par le frottement des fils !).
21
Starlet 50
Relier les servos au plateau cyclique avec les tringleries préalablement confectionnées pour
former une connexion sur 120°.
Une connexion du plateau cyclique sur quatre points est également possible, mais devra être
effectuée sur initiative personnelle. Pour cela, un autre servo devra être monté dans la découpe
encore libre dans le flanc de la mécanique et relié par une tringlerie de φ 2,5mm façonnée en
correspondance au point de connexion avant du plateau cyclique. La tringlerie des servos 2 et 3
sera reliée aux points de connexion latéraux (90°) du plateau cyclique et le mixeur pour une
connexion sur quatre points sera activé dans l’émetteur.
Pour utiliser une connexion sur quatre points, une attention particulière devra être apportée sur
le réglage exact des tringleries afin que les servos ne soient pas réciproquement chargés. Pour
cela, avec l’installation R/C en contact, mettre le manche de commande du Pas en position milieu (Le palonnier du servo étant alors à 90° des tringleries) et déconnecter d’abord une tringlerie. Mettre maintenant le plateau cyclique en position exactement horizontale par le réglage des
trois tringleries restantes. Lorsque cela est obtenu, régler la quatrième tringlerie de façon à ce
qu’elle puisse être connectée sans forcer sur la rotule correspondante du plateau cyclique.
Confectionner la tringlerie de gaz avec une tringlerie filetée 4445.84 (φ 2mm, longueur 45mm)
et deux chapes à rotule 4618.55, conformément à l’illustration ; la cote indiquée correspond à la
distance libre entre les deux chapes.
22
Starlet 50
Le palonnier du servo sera relié au levier du carburateur par cette tringlerie comme représenté
sur l’illustration:
2.2 Montage des éléments restants de l’installation R/C
Pour fixer le gyroscope sur son support, il est conseillé d’utiliser de la bande adhésive doubleface, par ex. Réf. N°742. Les fils seront réunis avec les cordons de servo latéralement sur la
mécanique et conduits au récepteur vers l’avant.
L’accu de réception sera enrobé dans du caoutchouc mousse en même temps que le récepteurt, le tout placé dans le coffret R/C et fixé par des bandes élastiques. Les sorties de voie du
récepteur seront orientées vers la droite, afin que les cordons de servo puissent être directement connectés, sans l’utilisation de cordons de rallonge.
Les cordons de raccordement réunis dans la gaine en spirale seront fixés sur la mécanique
avec un collier d’attache de façon à ce qu’ils ne puissent pas être étirés, ni entrer en contact
avec les pièces en rotation pour ne pas être frottés.
L’interrupteur de la réception sera monté sur la console fixée sur le flanc droit de la sousstructure, puis relié à l’accu et au récepteur.
23
Starlet 50
3. Assemblage de la tête du rotor principal (Sachet UM-10)
La tête du rotor principal sera assemblée conformément à l’illustration; tous les roulements à
billes devront être graissés.
3.1 Préparation des porte-pales
Les douilles en laiton 4618.32 seront d’abord collées sur les vis M3x16 avec du freine-filet
(Laisser bien sécher). Les leviers de mixage 4618.32 devront pouvoir pivoter librement sur les
douilles en laiton; ébavurer le cas échéant le perçage dans les leviers de mixage et les lubrifier
avec de l’huile silicone.
Les roulements radiaux 4607.31 et les protections de roulement 1254.13 doivent être introduits
dans les porte-pales 1252.11 en appuyant jusqu´ à l’emboitement suivant le schéma.
Vérifier maintenant si les porte-pales munis des paliers 4607.31 pourront être glissés facilement
sur l’arbre 4607.29; le cas échéant, celui-ci devra être rectifié avec du papier abrasif fin (Grain
>600) jusqu’à ce que les paliers puissent être facilement glissés dessus.
24
Starlet 50
3.2 Montage des porte-pales
Insérer de chaque côté dans la pièce centrale de la tête du rotor 4682.26 les deux joints torique
4607.28 et introduire l’arbre des porte-pales graissé, de façon à ce qu’il dépasse sur une longueur égale de chaque côté. Les joints torique ne devront plus maintenant être retirés. Tenir
alors l’ensemble avec l’axe des porte-pales en position verticale. Placer une rondelle d’ajustage
de 0,2mm de 4450.56 par le haut sur l’arbre, puis un porte-pale en veillant à ce qu’il soit aligné
de façon à ce que le bras portant le levier de mixage passe devant la pale (Voir l’illustration).
L’arbre du porte-pales doit alors dépasser de la cage du palier combiné 1254.13.
Remplir maintenant la cage de graisse et placer exactement 14 billes d’acier afin qu’elles ne
puissent pas se coincer entre-elles.
Durant ce montage, l’arbre des porte-pales doit dépasser suffisamment dans la cage afin
qu’aucune bille ne puisse tomber à l’intérieur, entre le porte-pale et l’arbre.
Mettre ensuite en place la rondelle de butée avec la cuvette du palier combiné et bloquer la vis
BTR M5x12.
Retourner maintenant l’ensemble de façon à ce que le porte-pale déjà monté se trouve vers le
bas et placer le deuxième porte-pale sur l’arbre en interposant une rondelle d’ajustage de
0,2mm.
L’arbre des porte-pales ne doit en aucun cas être repoussé dans la pièce centrale afin
qu’aucune billes du palier combiné déjà monté ne puisse s’échapper !
Monter le deuxième palier combiné comme décrit ci-dessus et bloquer la vis BTR M5x12.
S’assurer du libre pivotement des porte-pales, pour cela, taper éventuellement sur le porte-pale
et sur la pièce centrale avec le manche d’un tournevis afin que le palier puisse se mettre correctement en place, sans contrainte.
Si le porte-pale ne pivote pas librement, c’est parce qu’il bute contre la pièce centrale ; une
rondelle d’écartement 4450.57 devra alors être interposée entre la rondelle de butée de l’un des
deux paliers combinés et l’arbre des porte-pales.
Prendre toutes les précautions pour le démontage du palier combiné afin qu’aucune bille ne
s‘échappe !
Lorsque la liberté de pivotement des porte-pales est assurée, les vis BTR M5x12 seront définitivement bloquées avec une application de freine-filet. Lorsqu’une rondelle d’écartement a été
interposée, bloquer la vis BTR avec précaution afin la rondelle en laiton ne soit pas déformée.
25
Starlet 50
3.3 Montage du rotor auxilliaire
Monter le basculeur 4618.27 conformément à l’illustration. Le perçage dans l’axe 461828 doit
correspondre avec l’ouverture longitudinale du basculeur afin que la barre des palettes puisse y
être introduite ultérieurement, sans serrer ni glisser. Les deux roulements à billes extérieurs seront fixés dans la pièce centrale chacun avec une vis M2x4. Vérifier le libre pivotement du
basculeur.
Insérer un roulement à billes 4618.8 des deux côtés dans le basculeur. Introduire la barre des
palettes 4718.67 et la centrer exactement afin qu’elle dépasse des paliers sur la même longueur de caque côté.
26
Starlet 50
Dépolir la barre des palettes avec du papier abrasif à l’endroit où sera serré le pont de commande et en vissant celui-ci, appliquer du freine-filet entre la barre et le cadre de commande
pour empêcher la barre de tourner dans le pont de commande dans les figures de voltige extrêmes.
Glisser une bague d’arrêt à rotule 4607.36 de chaque côté sur la barre des palettes, contre le
pont de commande. Appliquer du freine-filet dans les taraudages des bagues d’arrêt à rotule
avant de fileter les vis pointeau M3x3. Connecter les double-chapes à rotule 4607.35.
Visser les palettes 4682.34 sur une longueur exacte de 15mm sur les extrémités filetées de la
barre en appliquant du freine-filet et les aligner exactement parallèlement entre-elles et avec le
pont de commande.
Insérer d’un côté un écrou M3 dans la dépression de la pièce centrale de la tête du rotor, ainsi
que les deux chevilles de guidage 4450.44 pour le compensateur de Pas, en appliquant du
freine-filet.
Confectionner deux tringleries de chaque droites et coudées conformément aux illustrations.
27
Starlet 50
3.4 Montage de la tête du rotor principal
Placer la tête du rotor principal sur son axe.
Veiller à ce que le perçage dans la tête du rotor corresponde avec le perçage transversal supérieur de l’arbre et fixer la tête avec la vis spéciale 4618.87.
Monter les tringleries 4618.150 et 4618.51 préalablement confectionnées conformément au
dessin. Noter que les leviers de mixage 4618.32 comprennent des bras de longueurs différentes.
Les double-chapes à rotule de la barre des palettes devront être connectées sur le bras le plus
long, les tringleries droites partent des bras les plus courts sur les leviers intérieurs du plateau
cyclique.
Les tringleries coudées 4618.150 devront encore être réglée pour obtenir la plage de réglage du
Pas maximum possible, en procédant comme suit :
Pousser le plateau cyclique totalement vers le haut, pour cela déconnecter le cas échéant les
chapes à rotule sur l’anneau extérieur.
Le plateau cyclique doit alors buter exactement contre le compensateur de Pas, lorsque luimême touche le bord inférieur de la tête du rotor.
Si ce n’est pas le cas, les tringleries coudées devront être réglées comme suit :
• Le plateau cyclique bute contre le compensateur de Pas, mais il subsiste encore un espace
entre celui-ci et la tête du rotor:
Raccourcir les deux tringleries
• Le compensateur de Pas bute contre la tête du rotor, mais il subsiste encore un espace entre le plateau cyclique et le compensateur de Pas:
Rallonger les deux tringleries
Veiller absolument à régler identiquement les deux tringleries afin qu’elles aient la même longueur.
Terminer par un réglage fin du rotor auxilliaire de façon à ce que les palettes Hiller soient parallèles au plateau cyclique lorsque celui-ci est aligné horizontalement. Pour cela, régler les
tringleries 4618.150 en sens contraire sur la même valeur, mais jamais une tringlerie seule!
28
Starlet 50
4. Assemblage du mécanisme du rotor de queue (Sachet UM-11, 11A)
Monter le pignon cônique 4618.38 sur l’arbre du rotor de queue conformément à l’illustration.
Appliquer du freine-filet dans les taraudages du pignon, puis bloquer les vis pointeau M3x3;
l’une des deux vis doit venir en appui sur le méplat de l’arbre. Ne pas bloquer exagérément ces
vis afin que le pignon ne tourne pas ultérieurement avec un faux-rond. Placer la bague
d’écartement 4450.28A ainsi que les paliers 4618.69 et 4450.22 totalement l’un contre l’autre.
Introduire l’ensemble dans le carter du rotor de queue 4618.73 jusqu’en butée et le fixer avec la
vis M2x4. Vérifier que l’arbre ne présente aucun jeu axial, le cas échéant interposer des rondelles d’ajustage 5/10x0,1.
Introduire sur l'arbre d'entrée du rotor de queue 4448.40 les deux paliers 4618.69 et la bague
d'écartement 4618.66 avec une application de colle pour palier, Réf. N°951, conformément à
l'illustration. Les paliers ne devront pas être comprimés, le cas échéant les tapoter (par ex. avec
le manche d'un tournevis) de façon à ce qu'ils se placent correctement sur l'arbre; laisse ensuite
durcir la colle pour palier.
Placer une rondelle d'ajustage 5/10x0,1 et le pignon conique 4618.38 d'abord sans application
de colle pour palier, Réf. N°951, conformément à l'illustration. Visser les vis pointeau M3x3
dans le pignon conique de façon à ce que l'une des deux vienne en appui sur le méplat de
l'arbre d'entrée.
Introduire l'ensemble de l'arbre de transmission terminé dans le carter du rotor de queue de
façon à ce que le perçage dans la bague d'écartement 4618.66 corresponde avec celui du
carter et serrer ensuite la vis M2x5.
Introduire une tige (un tournevis ou autre) au travers des taraudages de l'accouplement
4448.40. Tirer fermement sur l'accouplement avec cette poignée improvisée (contre le vissage
avec la vis à tête fraisée) afin que l'ensemble de la transmission se place dans le carter du rotor
29
Starlet 50
de queue de façon à ce que le jeu d'engrènement maximal possible des pignons coniques sous
charge soit obtenu. Vérifier maintenant que la transmission du rotor de queue tourne librement,
avec un jeu d'engrènement des pignons coniques juste perceptible.
Si le jeu d'engrènement est trop faible et que les pignons tournent ainsi difficilement, démonter
la transmission, retirer les rondelles d'ajustage et la remonter; avec au contraire un jeu
d'engrènement trop important, d'autres rondelles d'ajustage devront être interposées. En tirant
en correspondance sur la transmission comme décrit ci-dessus, le jeu d'engrènement
nécessaire des pignons coniques pourra être obtenu.
Note: Si le jeu d'engrènement ne peut pas être réglé de façon satisfaisante, cela peut provenir
que par suite des tolérances de fabrication le pignon conique se trouve trop éloigné
extérieurement sur l'arbre du rotor de queue et qu'il ne présente aucun engrènement correct
avec le pignon conique sur l'arbre d'entrée. Cela se remarque lorsque le pignon conique sur
l'arbre d'entrée frotte déjà visiblement de la pointe des dents sur la bague d'écartement longue,
bien qu'un jeu d'engrènement soit existant. Dans ce cas, des rondelles d'ajustage devront être
interposées entre la bague d'écartement et le palier 4618.69 et entre le pignon conique 4618.38
et le palier 4450.22, jusqu'à ce que le faible jeu d'engrènement soit réglé.
Démonter à nouveau les deux ensembles, glisser le palier sur l'arbre du rotor de queue ainsi
que le pignon conique sur l'arbre d'entrée avec une application de colle pour palier, Réf. N°951
et remonter définitivement le tout; bloquer aussi définitivement les vis pointeau avec du freinefilet.
Placer la vis BTR M3x22 une rondelle plate de φ 3mm ainsi que le palonnier de renvoi du rotor
de queue 4618.60.
Vérifier si le palonnier de renvoi pivote librement sur la vis, le cas échéant ébavurer le perçage
dans le palonnier et le lubrifier avec de l’huile silicone. Visser la vis portant le palonnier sur
quelques tours dans le carter du rotor de queue, mais ne pas encore la bloquer parce que le
pont de commande devra d’abord être monté comme il va être décrit dans le prochain paragraphe.
30
Starlet 50
5. Montage du pont de commande (Sachet UM-11B)
Insérer les roulements à billes 4607.137 jusqu’en butée dans la bague de commande 4618.62.
Glisser l’ensemble enduit d’un peu de freine-filet (ne pas le laisser pénétrer entre la bague et le
manchon de commande!) sur le manchon de commande 4618.61 de façon à ce que l’anneau
intérieur du palier vienne contre la collerette de celui-ci.
Munir le pont de commande des deux chapes à rotule 4518.55, le glisser sur le manchon contre
l’anneau intérieur de l’autre roulement à billes. Placer la rondelle éventail 1291.26 sur le
manchon et contre le pont de commande.
Vérifier maintenant si la bague peut tourner librement sur le pont de commande d’une part, mais
qu’il n ‘existe d’autre part aucun jeu axial. Si la bague se déplace difficilement, c’est que les
deux paliers ont probablement été contraints l’un contre l’autre, ce qui pourra être rectifié par
quelques petits coups de manche de tournevis.
Placer le pont de commande sur l’arbre du rotor de queue, puis connecter le palonnier de renvoi
sur la rotule de la bague de commande et serrer la vis M2x16 de façon à ce le palonnier et le
pont puissent se mouvoir librement, mais sans jeu.
31
Starlet 50
6. Montage de la tête du rotor de queue (Sachet UM-11C)
Monter la tête du rotor de queue conformément à l’illustration et graisser tous les paliers.
Insérer les deux joints torique dans les gorges du moyeu 4448.22. Huiler les joints torique, placer la tête sur l’arbre du rotor de queue de façon à ce que le perçage transversal de l’arbre corresponde avec celui du moyeu et la fixer avec la cheville 4448.22 bloquée avec la vis pointeau
M3x3.
Veiller pour cela à l’alignement du moyeu (Voir l’illustration).
Fixer les pales dans les porte-pales du rotor de queue avec les deux vis M3x20; serrer ces vis
de façon à ce que les pales puissent encore pivoter pour s’aligner correctement en rotation.
Alignement des pales du rotor de queue: Noter que le rotor de queue tourne dans le sens horaire, vu du côté gauche, le bras de réglage du porte-pale passant avant la pale.
32
Starlet 50
7. Poutre arrière (Sachet SR-0)
7.1 Assemblage des haubans de la poutre arrière (Sachet SR-1)
Insérer une attache 1292.11 jusqu’en butée dans chaque extrémité des haubans en aluminium
4445.8 et les aligner parallèlement entre-elles. Percer un trou de φ 1,5mm au travers des haubans et des attaches et fixer celles-ci avec une vis parker, 2x6,5.
Visser une cheville filetée M3x25 jusqu’en butée dans les deux boulons de fixation de cabine
4445.12 en appliquant de la colle pour palier et laisser sécher.
7.2 Préparation de la mécanique pour le montage de la poutre arrière
Fixer la bride de raccordement 1292.5 avec deux vis BTR M3x16 sur le porte-palier 4448.14 de
la mécanique. Introduire une vis BTR M3x12 avec un écrou M3 dans le serrage de la bride et la
bloquer provisoirement, puis la desserrer de façon à ce que la poutre arrière puisse être introduite ultérieurement dans la bride.
7.3 Préparation de la poutre arrière (Sachet SR-2)
La poutre arrière forme une courbure sur sa partie avant de sorte qu’elle se relève vers
l’arrière. En plus de d’une augmentation de la garde au sol du rotor de queue , cette courbure
assure une rotation en large arc de cercle à l’arbre de transmission qui l’empêche ainsi de débattre.
Les deux paliers 1292.10A de l’arbre de transmission seront introduits dans la poutre arrière
4445.9, par ex. avec un tourillon de hêtre, de façon à ce que le palier avant vienne à une distance de 200mm de son extrémité avant et le palier arrière à une distance de 300mm de son
extrémité arrière ; la face cônique de chaque palier devant être orientée vers l’avant. Introduire
ensuite par l’avant dans la poutre la bague de guidage 4451.7 avec son ouverture de forme
cônique orientée vers l’arrière, sur une profondeur exacte de 27mm ; grâce à cette bague, la
partie fourchue de l’accouplement sera exactement guidée ultérieurement.
33
Starlet 50
Préparer maintenant l’accouplement d’arbre avant : L’accouplement doit pouvoir être impeccablement introduit dans la poutre ultérieurement, sans pouvoir l’observer ni s’aider d’un outil
quelconque. Pour cela, il faudra s’assurer que la noix en laiton 4618.58 s’engage facilement sur
la fourche 4618.57 de l’accouplement. Si nécessaire, la fourche devra être légèrement ébavurée et rectifiée avec du papier abrasif fin. Introduire la partie coudée de l’arbre de transmission
du rotor de queue 4451 entièrement dans la noix d’accouplement. Munir ensuite la bague
d’arrêt 56.0 de ses vis pointeau et la glisser sur l’arbre de transmission, derrière la noix. Glisser
l’arbre de transmission jusqu’en butée dans la fourche de l’accouplement, puis pareillement la
noix sur la fourche. Bloquer maintenant la bague d’arrêt sur l’arbre à environ 1mm derrière la
noix.
7.4 Finition de la poutre arrière
Monter la bride de fixation du rotor de queue 1292.7 sur l’extrémité arrière de la poutre, puis
glisser sur celle-ci par l'avant la bride d’attache 1292.6 conformément à l’illustration; veiller ici à
ce que la fente de serrage soit orientée vers le haut et que le guide de la tringlerie de commande se trouve sur le côté gauche.
Dans le cas où un silencieux résonateur sera utilisé, un support supplémentaire pour celui-ci
devra être monté sur la poutre arrière, devant la bride d’attache, comme représenté sur
l’illustration; les pièces nécessaires ne sont pas fournies dans le kit de montage et devront être
acquises séparément.
7.5 Contrôle de la longueur de l’arbre de transmission du rotor de queue
L’arbre de transmission du rotor de queue sera retiré de la mécanique, légèrement huilé et introduit en le tournant au travers des paliers dans la poutre arrière jusqu’à ce que son extrémité
arrière dépasse suffisamment de la poutre pour pouvoir être introduite dans l’accouplement du
rotor de queue. Pousser l’arbre jusqu’en butée, puis le tirer en arrière sur 1mm et le fixer dans
cette position avec les vis pointeau de l’accouplement (En fonctionnement, l’arbre de transmission doit avoir un jeu d’environ 1mm dans la fourche de l’accouplement avant , ce qui doit être
obtenu lorsque l’arbre sera ultérieurement poussé jusqu’en butée dans l’accouplement). La
poutre arrière sera alors provisoirement mise en place dans la bride de raccordement 1292.5 ;
pour cela, l’introduire entièrement dans le porte-palier 4448.14 et la fixer par la bride. Introduire
le rotor de queue par l’arrière dans la poutre et en tournant l’arbre de celui-ci, s’assurer que
l’arbre de transmission s’engage à l’avant dans l’accouplement rapide du réducteur principal. Le
rotor de queue doit pouvoir être suffisamment introduit dans la poutre de façon à ce qu’il soit
maintenu par la bride sans que l’arbre de transmission bute à l’avant dans l’accouplement
rapide. Si ce n’est pas le cas, l’arbre devra être raccourci en correspondance ; ou en
34
Starlet 50
alternative, la bride de fixation du rotor de queue 1292.7 pourra être légèrement repoussée vers
l’arrière. Retirer maintenant la poutre arrière de la mécanique.
7.6 Liaison de la poutre arrière avec la mécanique
Tirer le rotor de queue hors de la poutre arrière afin que l’accouplement de l’arbre de transmission soit accessible. Desserrer les vis pointeau de l’accouplement pour dégager l’arbre 4451.19
de celui-ci. Dégraisser alors soigneusement l’arbre, l’introduire jusqu’en butée dans
l’accouplement et le fixer dans cette position avec les vis pointeau. Pour cela, retirer d’abord
entièrement des vis pointeau de l’accouplement , appliquer du freine-filet liquide, Réf. N°952 ou
de la colle pour palier, Réf. N°951, remonter les vis pointeau et bien les bloquer. Si possible,
pratiquer un méplat sur l’arbre à l’endroit d’appui de l’une des vis pointeau pour renforcer la
solidité de la liaison. Fixer le rotor de queue sur la bride 1292.7 avec trois vis parker 2,9x13.
Appliquer un peu de graisse dans la noix de l’accouplement rapide et sur l’arbre de transmission.
Fixer les haubans préparés au paragraphe 7.1 sur les flancs gauche et droit de la mécanique
avec les boulons 4445.12.
Introduire maintenant la poutre arrière complète jusqu’en butée dans la bride de raccordement
1292.5 ; veiller à ce que l’accouplement rapide s’engage correctement.
Tourner la poutre de façon à ce que sa courbure soit orientée vers le haut et en position exactement verticale ; tourner la bride de fixation du rotor de queue afin que son arbre vu de l’arrière
forme un angle droit par rapport à celui du rotor principal. Fixer la poutre ainsi alignée dans la
bride de raccordement avec une vis BTR M3x12 ; durant le blocage de cette vis, il est conseillé
de maintenir en même temps la poutre arrière verticalement vers le haut.
Déplacer la bride 1292.6 de façon à ce que les haubans 4445.8 puissent être fixés dessus
avec une vis BTR M3x30 et un écrou nylstop M3, comme représenté sur l’illustration.
Poser la mécanique à plat sur une table et déplacer la bride d’attache 1292.6 de façon à régler
une hauteur d’environ 170mm entre le bord inférieur de la bride de fixation du rotor de queue
1292.7 et la table ; bien bloquer la bride d’attache dans cette position, puis la bride du rotor de
queue 1292.7 et ensuite la bride de raccordement 1292.5. Percer un trou (φ 1,5mm) au travers
des brides 1292.5 et 1292.6 et de la poutre arrière et y fileter une vis parker 2,2x6,5 pour les
empêcher de tourner sur cette dernière.
7.7 Empennage (Sachet SR-3)
Fixer le plan fixe de dérive 1292.4 sur la bride de fixation du rotor de queue avec des vis parker
2,9x13. Fixer le plan fixe du stabilisateur avec le collier et le guide de tringlerie sur la poutre
arrière avec des vis parker 2,9x19. Aligner le stabilisateur perpendiculairement à la dérive et
régler une distance de 200mm entre le collier de fixation du stabilisateur et la bride du rotor de
queue. Bloquer ensuite toutes les vis.
35
Starlet 50
8. Montage du train d’atterrissage à patins (Sachet SR-4)
Introduire les patins 4447.7 au travers des étriers 4447.6 et en les déplaçant dans ces derniers
régler un entre-axe des trous de fixation de 207mm.
Le train d’atterrissage pourra alors être fixé avec deux vis BTR M3x16 à l’arrière et deux vis
BTR M3x20 à l’avant ; interposer sur chacune une bague d’écartement 4451.5. Aligner les patins parallèlement entre-eux de façon à ce qu’ils dépassent de l’étrier arrière sur environ 50mm.
Les patins seront fixés dans les étriers par l’intérieur avec des vis parker 2,2x6,5 ; pour cela,
percer d’abord des trous de 1,5mm au travers des étriers et des patins. Introduire dans leurs
extrémités les bouchons de fermeture fixés avec une colle à deux composants.
9. Montage du silencieux
Un silencieux tel que par ex. Réf. N°1809.33 ou 1871.72 sera muni d’une prise de pressurisation et fixé sur le moteur avec les vis jointes. Ne pas utiliser de joint entre le moteur et le silencieux, mais appliquer simplement une fine couche de freine-filet sur les surfaces en contact.
Avec l’utilisation d’un silencieux résonateur, comme par ex. la Réf. N°1783A, le coude
d’échappement 2259 sera d’abord fixé sur le moteur et passé au travers de l’ouverture ronde
dans la sous-structure de la mécanique ; ne pas utiliser ici non plus de joint entre le raccordement, mais appliquer une fine couche de freine-filet. Introduire alors le silencieux résonateur,
muni d’une prise de pressurisation, au travers du couple arrière 4450.18 et le relier au coude
d’échappement au moyen d’une durit en téflon et d’un collier métallique ; laisser une distance
d’environ 5mm entre le coude et l’entrée du silencieux. Déplacer et tourner sur la poutre arrière
la bride 1292.6 montée en supplément avec le support du silencieux de façon à ce que le tube
de sortie de ce dernier puisse être fixé avec la vis M3x16 ; glisser préalablement un morceau de
durit d’échappement en silicone sur le tube de sortie.
La prise de pressurisation de toutes les variantes de silencieux sera reliée à celle sur le dessus
du réservoir par une longueur de durit silicone.
10. Commande du rotor de queue (Sachet SR-5)
Pour connecter la tringlerie de commande du rotor de queue 4451.3, démonter la vis de pivotement du palonnier de renvoi 4618.60 et l’introduire de l’arrière par son extrémité non coudée
au travers du trou de guidage de la bride du rotor de queue et du collier de fixation du stabilisateur. Si la tringlerie force déjà dans la bride du rotor de queue, repercer le trou de guidage
avec un foret de φ 2 à ,5mm. Après avoir connecté la tringlerie de commande sur le trou extérieur du palonnier de renvoi, remonter la vis de pivotement de celui-ci.
Introduire sur l’arrière de la gaine de guidage en fibre de carbone deux passe-fils en caoutchouc
sur environ 20mm en les espaçant entre-eux d’environ 3mm. Introduire la gaine par l’avant sur
la tringlerie jusqu’au niveau de la bride 1292.6 et la fixer dans cette position avec un collier
d’attache (entre les passe-fils en caoutchouc et autour de la poutre arrière).
36
Starlet 50
L’extrémité avant de la gaine de guidage ne devra pas être plaquée contre la poutre arrière,
mais rester libre sur la tringlerie ; en outre, elle ne devra pas être raccourcie plus que nécessaire pour arriver au plus près possible du servo.
La connexion de la tringlerie sur le servo du rotor de queue sera constituée d’une douille filetée
soudée avec une chape vissée. La tringerie devra être raccourcie avant de souder la douille
filetée de façon à ce que sur la position milieu du Pas, le palonnier du servo du rotor de queue
soit orienté perpendiculairement vers le bas et que le palonnier de renvoi soit perpendiculaire à
la poutre arrière.
En alternative, on pourra aussi contre-couder l’extrémité avant de la tringlerie avec les pinces
spéciales (Réf. N°5732), cependant l’emplacement du contre-coudage devra être préalablement très exactement déterminé, car avec ce montage il n’y aura plus aucune possibilité de réglage ultérieur. Cette alternative est en outre réservée au modéliste expérimenté ; son avantage
est que la gaine de guidage pourra arriver au plus près du servo, car l’espace à interposer pour
la douille filetée avec la chape n’est plus nécessaire.
11. Cabine (Sachet SR-6)
11.1 Montage des supports avant de la cabine
Monter les boulons de fixation avant de la cabine chacun avec une vis BTR M3x12 filetées par
l’arrière dans les deux colliers à l’avant de la sous-structure.
37
Starlet 50
11.2 Montage de la cabine
Insérer deux passe-fils en caoutchouc 3515.3 dans les perçages correspondants du couple
4445.17 et les fixer le cas échéant avec une goutte de colle-seconde. Placer le couple avec sa
courbure vers la bas sur les deux boulons montés à l’avant de la mécanique de façon à ce que
ces derniers s’engagent totalement dans les passe-fils en caoutchouc.
Insérer deux autres passe-fils en caoutchouc dans les perçages (φ 7mm) déjà pratiqués dans la
cabine. Placer la cabine sur l’avant de la mécanique ; elle sera alors maintenue par les deux
boulons supérieurs latéraux qui s’engageront dans ces passe-fils.
Soulever l’avant de la cabine de façon à ce que le couple inséré sur le bas de la mécanique
s’engage dans celle-ci. Découper une ouverture au niveau du coude d’échappement dans la
paroi gauche de la cabine, suffisamment grande pour maintenir un écart d’au moins 5mm entre
la paroi et l’ensemble de l’échappement, puis coller le couple avec la cabine dans cette position
(Stabilit express). Après le durcissement du collage, la cabine pourra être facilement démontée
en la dégageant d’abord de chaque côté des deux boulons de fixation arrière et en la tirant
ensuite vers l’avant ; elle sera de même facilement remontée en procédant dans l’ordre inverse.
La verrière de cabine transparente 4445.1 sera d’abord maintenue en place avec du ruban
adhésif, puis fixée ensuite avec quatre vis parker 2,2x6,5 ou soigneusement collée avec de la
colle-seconde ou de la Stabilit express.
Le fil d’antenne de réception sera disposé le long de la mécanique jusque derrière l’étrier de
patin avant afin qu’il ne gêne pas le démontage de la cabine. Introduire la gaine d’antenne en
plastique au travers des deux œillets à l’intérieur des étriers de patin et insérer sur ses extrémités un petit morceau de durit à carburant pour l’empêcher de glisser. Le fil d’antenne sera
disposé le long de l’étrier de patin, introduit à l’avant dans la gaine en plastique et laissé pendre
librement à l’arrière de celle-ci.
38
Starlet 50
12. Pales du rotor principal
Les bagues 4607.164 seront collées dans le perçage des pales du rotor avec une colle à deux
composants, si cela n’a pas déjà été fait en fabrication.
Polir ensuite l’ensemble des pales avec du papier abrasif fin, Réf. N°700.1 ou 700.2.
Pour un équilibrage idéal, ce n’est pas seulement le poids mais aussi l’emplacement du centre
de gravité qui doit être égal pour les deux pales. Ceci peut être vérifié en plaçant chaque pale
en équilibre sur un triangle, comme représenté sur le dessin. Marquer chaque emplacement ; le
point d’intersection des deux lignes correspond au centre de gravité.
Mais dans la pratique, un équilibrage idéal est rarement obtenu sauf dans les fabrications plus
onéreuses, les pales peuvent présenter des différences de poids et de centrage et leur équilibrage sera décrit dans leur paragraphe suivant.
Enduire le pied des pales (sur une largeur d’environ 70mm) et leur extrémité (sur une largeur
d’environ 20mm) de SPANNFIX IMMUN, Réf. N°1408 et les peindre. Le recouvrement en film
plastique des pales sera posé comme représenté sur le dessin ; d’abord sur le dessus, ensuite
sur le bord arrière, puis sur le dessous. Le film devra être posé sans former de plis!
12.1 Equilibrage des pales du rotor
Visser ensemble les pales comme représenté et les suspendre par un fil.
Pour l'équilibrage, coller de la bande adhésive sur l'extrémité de la pale la plus légère.
Effectuer l'équilibrage avec soin pour obtenir une rotation du rotor sans vibrations!
39
Starlet 50
13. Travaux de réglage
13.1 Réglage de la commande cyclique
Le réglage de base des commandes Roll et Nick doit déjà être correct si les tringleries ont été
montées conformément aux instructions. Comme le point de connexion des tringleries sur le
palonnier des servos a été indiqué, le réglage de la course des servos sera effectué ultérieurement par les options de réglage électronique dans l’émetteur. Veiller à ce que la course ne
soit pas réglée trop grande afin que le plateau cyclique ne bute pas sur l’arbre du rotor principal
sur les fins de course du manche de commande des fonctions Roll et Nick et que la commande
du Pas ne puisse plus se déplacer librement axialement.
13.2 Réglage du Pas du rotor principal
La valeur de réglage du Pas sera mesurée avec un calibreur de pales (Accessoire spécial, non
fourni dans le kit de montage). Le tableau ci-dessous indique des valeurs de départ ; les valeurs
réellement nécessaires dépendront des pales de rotor utilisée et du modèle.
Vol stationnaire et entrainement
Voltige
Autorotation
Minimum
-2°
-4°
-4°
Vol stationnaire
5,5°...6°
5°... 5,5°
5,5°
Maximum
12°
8°... 9°
13°
Les réglages du Pas seront effectués de préférence dans l’émetteur, comme suit:
1. Mesurer le Pas pour le vol stationnaire et le régler correctement
2. 2. Mesurer les Pas maximum et Minimum et les régler par le réglage de la courbe de Pas
dans l’émetteur, conformément aux diagrammes suivants :
13.3 Réglage de la commande du carburateur
Les diagrammes ci-dessous indiquent les courbes de gaz possibles:
• La courbe de gaz optimisée pour le vol stationnaire donne des réactions aux commandes «
molles « dans la plage du vol stationnaire.
• Les valeurs indiquées ci-dessus dépendent fortement du moteur utilisé, du carburant, du silencieux, etc… et devront être adaptées par des essais pratiques.
40
Starlet 50
Lorsque toutes les liaisons de tringlerie ont été établies conformément aux paragraphes précédents, les réglages suivants pourront être effectués dans l’émetteur:
1. Sens de la course des servos
Régler le sens de la course de tous les servos conformément aux indications données dans
les instructions. Apporter une attention particulière pour le réglage du servo de gaz!
2. Dual-Rate
Des amplitudes de course commutables pourront être réglées pour les commandes Nick,
Roll et du rotor de queue.
3. Fonction exponentielle
Laisser le réglage de base sur la courbe de commande linéaire.
4. Réglage du neutre de la course des servos
N’effectuer aucun réglage pour le moment ; de petites corrections pourront être effectuées
ultérieurement.
5. Réglage de la course des servos
La course maximale des servos pourra être réglée en veillant toutefois à ce que la même
valeur de réglage soit établie dans les deux sens ; autrement, il se produira une différence
de débattement indésirable:
Pour le servo de commande des gaz et du plateau cyclique (Fonction du Pas), il faudra
veiller à ce que la course soit réglée symétriquement sur les mêmes valeurs dans les deux
sens afin qu’il puisse commander la course totale du carburateur de la position entièrement
fermée (Moteur coupé) jusqu’à la position plein gaz, sans qu’il soit bloqué mécaniquement.
La fonction du Pas du servo du plateau cyclique doit commander une plage de réglage de
l’incidence des pales de –5° à +13°, de même avec des débattements symétriques; le cas
échéant, le palonnier du servo sera démonté, puis remonté en le déplaçant d’une canelure
sur l’axe de sortie.
Avec les réglages de base maintenant effectués, la position milieu du manche de commande
Gaz/Pas (Point du vol stationnaire) donne une valeur de Pas d’environ 5,5°, avec le
carburateur à demi ouvert.
Note:
Les courbes de Pas et de gaz seront réglées ultérieurement en correspondance des exigences pratiques. Cependant, lorsque des débattements différenciés ont été déjà été réglés
dans le réglage de base, comme indiqué sur la figure B ci-dessus, ils compliquent ces synchronisations ultérieures !
6. Courbes de Pas et de gaz
Ces réglages sont d’une importance capitale pour les performances de vol d’un hélicoptère.
Le but de cette synchronisation est qu’aussi bien en vol ascendant qu’en vol descendant, le
régime du rotor reste constant, indépendamment de la charge. Ceci assure une base stable
pour les autres synchronisations, comme par ex. la compensation du couple, etc…
7. Compensation statique du couple
Pour compenser les variations du couple avec l’actionnement de la commande du Pas, le
servo du rotor de queue est couplé avec la fonction du Pas par un mixeur dans l’émetteur.
La proportion de mixage pour le vol ascendant et descendant pourra être réglée séparément
avec la plupart des émetteurs. Valeurs conseillées pour le réglage de base : Vol ascendant :
35%, vol descendant : 15%.
41
Starlet 50
8. Réglage du gyroscope
Le gyroscope amorti les pivotements indésirables de l’hélicoptère sur son axe vertical (Axe
de lacet) qu’il détecte lui-même et il intervient en correspondance sur la commande du rotor
de queue. Pour cela, l’électronique du gyroscope est commutée entre le servo du rotor de
queue et le récepteur ; la plupart des systèmes permettent en outre un réglage ou la commutation de deux valeurs de l’effet du gyroscope par une voie supplémentaire sur l’émetteur.
Selon le système de gyroscope utilisé, cette voie sera commandée par un organe
proportionnel (Curseur linéaire ou bouton de réglage), ou par un commutateur.
Pour les gyroscopes comprenant un boitier de réglage avec deux potentiomètres pour deux
réglages fixes, entre lesquels l’émetteur permettra de commuter, le réglage de base sera
effectué en plaçant l’un des potentiomètre sur la position milieu (50%) et l’autre sur 25%.
Avec les systèmes de gyroscope permettant de passer progressivement entre les deux valeurs réglées avec un organe de commande proportionnel, l’un des réglages sera placé sur
« 0 » et l’autre sur environ 80%.
Avec les systèmes de gyroscope dont l’effet ne pourra pas être influencé de l’émetteur et
comprenant un unique réglage sur le boitier de l’électronique, ce réglage sera d’abord placé
sur 50% d’effet.
Veiller à ce que le sens de l’effet du gyroscope soit correct ; sur un pivotement dans un sens
de la poutre arrière, il doit réagir par un débattement de la commande du rotor de queue
dans le sens opposé. Si ce n’est pas le cas, chaque pivotement du modèle sera encore amplifié par le gyroscope ! La plupart des systèmes de gyroscope comprennent un commutateur inverseur pour régler le sens de l’effet et qui devra être placé sur la position correspondante. Certains systèmes qui ne possèdent pas ce genre de commutateur devront être
montés en position inversée.
Avec tous les systèmes de gyroscope, le réglage optimal devra être effectué en vol, car
diffrents facteurs interviennent dans cette condition.
Le but du réglage est d’obtenir la plus grande stabilisation possible par le gyroscope sans
que le modèle entre en oscillations (Balancements de la poutre arrière) par un réglage trop
fort de l’effet.
Conseils particuliers pour l’utilisation des systèmes de gyroscope Graupner/JR « PIEZO
900…5000 » en liaison avec un ensemble R/C à micro-ordinateur (Par ex. mc-12 à mc-24)
La conception de ces systèmes de gyroscope fait qu’ils sont très différents de ceux
précédemment décrits et qu’il doivent être installés en procédant exactement comme suit:
1. Régler la course sur la voie du servo du rotor de queue dans l’émetteur sur +/- 100%.
2. Désactiver absolument un mixeur de gyroscope (« Gyro-Control ») éventuellement existant
qui réduit l’effet du gyroscope en actionnant la commande du rotor de queue.
3. Déconnecter la tringlerie du servo du rotor de queue.
4. Actionner la commande du rotor de queue sur l’émetteur: aux environs des 2/3 de la
course de commande, le servo doit rester immobilisé sur chaque sens, même lorsque le
manche est déplacé plus loin (Limitation de course).
5. Connecter la tringlerie de commande sur le servo de façon à ce que les fins de course
mécaniques du rotor de queue correspondent avec la limitation de course (Le servo ne
devra pas être bloqué par les fins de course mécaniques).
Effectuer ces réglages uniquement mécaniquement, par le déplacement du point de
connexion et la modification de la longueur de la tringlerie, et non électroniquement
avec les options de réglage dans l’émetteur ! ! !
6. Accorder maintenant le cas échéant la position du rotor de queue pour le vol stationnaire
avec la position milieu du manche de commande du Pas avec le réglage du neutre dans
l’émetteur.
7. L’effet du gyroscope sera réglé exclusivement par un organe de commande proportionnel
sur une voie supplémentaire entre « 0 » et l’effet maximal; en cas de besoin, l’effet
maximal pourra être réduit par le réglage de course sur la voie supplémentaire, ou par le
réglage des organes de commande avec l’émetteur mc22 ou mc-24, pour obtenir une fine
plage de réglages pour l’effet du gyroscope.
8. Si la commande du rotor que queue doit être réglée « molle », effectuer exclusivement ce
réglage par la fonction de commande exponentielle, mais ne réduire à nouveau en aucun
cas la course du servo (+/- 100%) !
42
Starlet 50
14. Contrôle final avant le premier vol
Lorsque l’assemblage du modèle est terminé, les vérifications suivantes devront être effectuées
avant le premier vol:
• Parcourir ce manuel encore une fois pour s’assurer que tous les stades de montage ont été
correctement exécutés.
• S’assurer que toutes les vis dans les connexions à rotule et dans les paliers ont été définitivement bloquées après le réglage de l’engrènement du réducteur.
• Tous les servos peuvent-ils se mouvoir librement, sans blocage mécanique ? Les sens de
course correspondent-ils ? Les vis de fixation des palonniers de servo sont-elles bien bloquées ?
• Vérifier le sens de l’effet du gyroscope.
• S’assurer que les batteries d’émission et de réception sont bien chargées. Pour contrôler la
tension de l’accu de réception, l’utilisation d’un module surveilleur de tension (Par ex. Réf.
N°3138) est conseillée.
Ce n’est qu’après avoir effectué toutes ces vérifications que le moteur pourra être démarré et
que le premier décollage pourra être tenté..
Noter que le comportement du moteur dépend dans une grande mesure du carburant utilisé, de
la bougie, de l’altitude au-dessus du niveau de la mer et des conditions climatiques.
Observer également les instructions jointes au moteur pour son réglage.
Entretien
Qu’il soit grandeur réelle ou modèle réduit, un hélicoptère exige un entretien permanent. Supprimer les vibrations qui se produisent le plus rapidement possible, ou les atténuer ! Les pièces
en rotation, la boulonnerie importante, les tringleries et les points de connexion sont à vérifier
avant chaque vol. Lorsque des réparations seront nécessaires, utiliser uniquement des pièces
d’origine. Ne tenter en aucun cas de réparer des pales de rotor détériorées, mais les remplacer
par des neuves.
Montage de l’adaptateur de starter
L’adaptateur de starter livré avec la mécanique est composé de trois pièces à assembler conformément à l’illustration : introduire d’abord la cheville 4450.5C au travers du perçage du prolongateur 4450.5B, puis glisser dessus l’adaptateur en plastique 4450.5A de façon à ce que la
cheville s’engage dans la rainure qu’il porte.
Pour fixer l’adaptateur sur le starter électrique, démonter d’abord sur ce dernier le support de la
garniture en caoutchouc. Introduire l’adaptateur sur l’arbre du starter de façon à ce que la cheville de l’arbre s’engage dans la rainure de l’adaptateur et le fixer avec les deux vis pointeau
M3x3.
S’assurer que l’adaptateur tourne « rond » , sans oscillations!
Pour démarrer le moteur, tourner la tête du rotor de façon à ce que l’adaptateur puisse être introduit verticalement dans la turbine de refroidissement et observer les points suivants:
• Mettre en contact le starter électrique qu’après s’être assuré que les dentures de la
turbine de refroidissement et de l’adaptateur sont correctement engagées l’une dans
l’autre.
• Couper le contact du starter avant de le dégager (après le démarrage du moteur).
43
Starlet 50
15. Réglages au cours du premier vol
15.1 Réglage du plan de rotation
Ce réglage consiste à régler l’angle d’incidence des pales du rotor précisément sur la même
valeur afin qu’elles tournent exactement sur le même niveau.
Un plan de rotation incorrectement réglé avec les pales tournant sur un niveau différent
à pour effet de provoquer de forte vibrations au modèle en vol.
Pour le réglage du plan de rotation, se tenir à une distance de sécurité d’au moins 5 mètres du modèle!
Pour effectuer le réglage, il faut déterminer quelle pale tourne le plus haut et quelle pale tourne
le plus bas. Pour cela, les pales seront repérées avec du ruban adhésif de couleur:
Il y a deux possibilités pour cela; la Fig. A montre l’utilisation de couleurs différentes sur les
deux pales, la Fig. B montre l’utilisation de la même couleur, mais les bandes adhésives sont
placées à une distance différente de l’extrémité de la pale..
Façon de procéder pour le réglage du plan de rotation:
1. Lorsque l’hélicoptère est juste prêt à décoller, observer le plan de rotation du rotor exactement latéralement.
2. Lorsque les pales tournent sur le même niveau, aucun réglage n’est nécessaire, mais
lorsqu’une pale tourne plus haut que l’autre, le réglage devra être corrigé.
3. Le réglage s’effectue en tournant la chape à rotule sur les deux extrémités de la tringlerie
entre le plateau cyclique et le levier de mixage : dévisser les chapes pour faire tourner la
pale plus haut, ou les visser pour la faire tourner plus bas.
44
Starlet 50
15.2 Moteur – Conseils de réglage
Pour le réglage du moteur, se référer avant tout aux instructions fournies avec celui-ci !
La synchronisation correcte du Pas et des gaz en vol stationnaire est d’une importance capitale
pour le comportement en vol et les performances du modèle. Une incidence trop forte des pales
du rotor, par ex. fait que le moteur n’atteint pas le régime prévu, il peine et s’échauffe en plus
fortement en perdant ainsi de la puissance. C’est pourquoi la valeur du Pas pour le vol
stationnaire devra d’abord être exactement réglée, comme précédemment décrit, pour adapter
ensuite le réglage du moteur.
Bien que le carburateur du moteur soit pré-réglé à la livraison, le réglage correct des pointeaux
ne pourra être effectué que par des essais en vol. Avec la plupart des carburateurs à deux
pointeaux utilisés, le réglage de départ s’obtient en fermant le pointeau de ralenti jusqu’à ce
qu’il plonge juste dans le gicleur en face, avec le carburateur à demi ouvert (Voir l’illustration).
Exemple d’un carburateur typique à deux pointeaux
Pour le premier démarrage, ouvrir le pointeau sur 1 ½ à 2 tours, relier la bougie à la batterie de
démarrage et démarrer le moteur en introduisant l’adaptateur du starter électrique dans la
denture de la turbine de refroidissement et contacter le starter.
Attention ! Dès que le moteur démarre, dégager immédiatement le starter électrique de la
denture de la turbine, autrement le modèle pourrait être détérioré !
Lorsque le moteur tourne, augmenter lentement la commande Gaz/Pas. Si le modèle ne décolle
pas par suite d’un réglage du pointeau trop « riche », refermer le pointeau par petits Pas.
Utiliser le pointeau de ralenti pour le réglage du moteur en vol stationnaire qui sert aussi pour le
réglage des régimes intermédiaires. Noter qu’avec le réglage qui vient d’être effectué, celui du
pointeau principal sera aussi influencé. Rouvrir le pointeau de ralenti avec précaution par petits
Pas, jusqu’à ce que le moteur tourne « rond » en vol stationnaire (sans ratés dûs à un mélange
trop riche). Si le régime est ensuite trop faible, augmenter le réglage des gaz en stationnaire
dans l’émetteur. Le pointeau du ralenti ne devra en aucun cas être réglé trop pauvre pour
augmenter le régime en vol stationnaire. Le réglage définitif du pointeau pourra se faire
seulement en vol sur « plein Pas », en modifiant d’abord le réglage lentement, par tâtonnements.
En cas de doute, régler toujours un peu trop « riche » et effectuer le premier vol stationnaire d’abord avec un réglage nettement riche.
45
Starlet 50
16. Mesures de précaution générales
• Contracter une assurance.
• Selon possibilité, s’inscrire dans un club d’aéromodélisme, ou une école de pilotage.
Sur le terrain de vol:
•
•
•
•
Ne survoler aucun spectateur avec le modèle.
Ne pas faire voler le modèle à proximité d’habitations ou de véhicules.
Ne pas survoler d’ouvriers agricoles dans les champs avec le modèle.
Ne pas faire voler le modèle à proximité des lignes de chemin de fer, des routes à grande
circulation ou des lignes électriques.
Avant et pendant le vol:
• Avant de mettre l’émetteur en contact, s’assurer que la même fréquence n’est pas déjà utilisée par un autre modéliste.
• Faire un essai de portée de l’installation R/C.
• Vérifier si las batteries d’émission et de réception sont entièrement chargées
• Avec le moteur en marche, veiller à ce qu’un vêtement ne reste pas accroché sur le manche
de commande des gaz.
• Ne pas laisser le modèle s’éloigner hors de vue.
• Veiller à ce qu’il reste une réserve suffisante de carburant; le réservoir ne devra jamais être
totalement vidé en vol.
Contrôle après chaque séance de vols
• Nettoyer entièrement le modèle pour éliminer les résidus d’huile et les salissures. En profiter
pour vérifier le serrage de toutes les vis ; les rebloquer si nécessaire.
• Remplacer à temps les pièces usées ou détériorées.
• S’assurer que les éléments de l’installation R/C tels que l’accu de réception, le récepteur, le
gyroscope, etc…sont encore solidement fixés (Les bandes élastiques vieillissent et deviennent cassantes !).
• Vérifier le fil d’antenne de réception ; une rupture intérieure du fil n’est pas toujours visible
extérieurement !
• Après un contact avec le sol des pales du rotor principal en rotation, une rupture n’est pas
souvent directement visible extérieurement !
• Ne pas transporter le modèle en le tenant par la poutre arrière ; une trop forte pression sur
celle-ci peut facilement déformer la tringlerie de commande du rotor de queue !
46
Starlet 50
17. Quelques principes de base sur le vol d’un hélicoptère
La désignation « Voilure tournante » signifie déjà que les surfaces portantes d’un hélicoptère
tournent et qu’il peut se sustenter dans l’air sans qu’une vitesse de déplacement soit nécessaire
et qu’il peut ainsi rester immobilisé sur place.
Réglage cyclique des pales du rotor
Le réglage cyclique des pales sert à orienter le vol sur les axes transversal (axe de roulis) et
longitudinal (axe de tangage). Un autre réglage de pale est commandé sur chaque point de leur
de rotation. L’inclinaison du plateau cyclique détermine la direction du vol.
Réglage collectif des pales (Pas) :
Il sert à la commande dans le sens de l’axe vertical (axe de lacet) pour la montée et le descente
de l’hélicoptère. Le réglage des deux pales du rotor est modifié simultanément sur la même
valeur.
Compensation du couple :
Le rotor en rotation engendre un couple qui à tendance à faire tourner l’hélicoptère dans le sens
opposé. Ceci doit être exactement compensé par un réglage des pales du rotor de queue.
Celui-ci commande en même temps la direction du vol sur l’axe vertical (axe de lacet).
Vol stationnaire :
C’est la condition de vol dans laquelle l’hélicoptère ne se déplace dans aucune direction et reste
immobilisé sur place.
Effet de sol :
Cet effet se produit après le décollage du sol jusqu’à une hauteur correspondant à 1 – 1 ½ fois
au diamètre du rotor de l’hélicoptère. Il est dû à ce que le souffle du rotor normalement libre
rencontre ici un obstacle (Le sol) et forme ainsi un coussin d’air. En effet de sol, un hélicoptère
peut soulever davantage de poids, mais au détriment de sa stabilité latérale, car il peut ainsi
basculer plus ou moins fortement d’un côté ou de l’autre.
Vol ascendant :
La puissance excédentaire qui n’est pas nécessaire pour le vol stationnaire pourra être utilisée
pour le vol ascendant. Un vol ascendant à la verticale nécessite plus d’énergie qu’une montée
en translation avant. Pour cette raison, une montée en translation avant est plus rapide avec la
même puissance moteur.
Vol horizontal :
Sur à peu près la moitié de sa vitesse maximum en vol horizontal, un hélicoptère nécessite la
plus faible puissance de sa propulsion. Lorsqu’il a été exactement trimmé en vol stationnaire,
l’hélicoptère décrit alors une courbe en translation avant. Ceci est dû à la cause suivante : sur le
côté du rotor où les pales tournent vers l’avant, il se produit une plus forte portance par la plus
grande vitesse d’écoulement des filets d’air que sur le côté où les pales tournent vers l’arrière et
il en résulte une inclinaison latérale de l’hélicoptère.
Vol descendant :
Si le régime du rotor de l’hélicoptère est relativement faible et qu’il descent ainsi à la verticale
trop rapidement, les pales du rotor ne brassent plus suffisamment d’air, il se forme alors ce qui
est appelé un état « tourbillonnaire » ou l’écoulement d’air décroche du profil des pales. Cet état
incontrôlé peut conduire à un crash. C’est pourquoi une descente rapide n’est possible qu’en
translation avant ou avec le rotor tournant à haut régime. Pour cette même raison, l’hélicoptère
sera tourné par prudence d’un vol contre le vent vers un vol dans le vent.
Battement des pales du rotor :
Afin que le plan de rotation du rotor ne s’incline pas trop fortement en vol en translation avant,
une articulation de battement est incluse dans la tête du rotor. La pale la plus rapidement soufflée peut se soulever et la plus faiblement soufflée peut s’abaisser pour atténuer ainsi une différence de portance. Sur les modèles réduits, l’articulation est commune pour les deux pales.
47
Starlet 50
Autorotation :
L’autorotation est une condition de vol avec le moteur coupé et dans laquelle le rotor principal
est maintenu à haut régime par la mise des pales en Pas négatif durant le vol descendant.
L’énergie ainsi emmagasinée permet de rétablir la portance au cours de la descente de
l’hélicoptère par la remise des pales en Pas positif. Cette manœuvre est naturellement possible
qu’une seule fois. Un hélicoptère réel aussi bien qu’un modèle réduit peuvent ainsi atterrir en
toute sécurité en cas de panne du moteur.
Cet atterrissage en autorotation exige cependant du pilote de grandes facultés d’estimation et
de réaction ; il peut l’entreprendre seulement une fois le vol descendant commencé, en intervenant ni trop, ni trop tard, c’est la raison pour laquelle cette manœuvre demande beaucoup
d’entrainement.
48