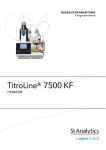
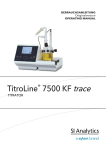
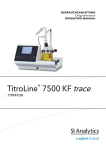
1
GEBRAUCHSANLEITUNG Originalversion OPERATING MANUAL MODE D’EMPLOI MANUAL DE INSTRUCCIONES TitroLine® 7500 KF TITRATOR | TITRATOR | TITRATEUR | TITULADOR Gebrauchsanleitung Originalversion .................................................................................. Seite 3 ...... 72 ® Wichtige Hinweise: Die Gebrauchsanleitung vor der ersten Inbetriebnahme des Titrators TitroLine 7500 KF ® bitte sorgfältig lesen und beachten. Aus Sicherheitsgründen darf der Titrator TitroLine 7500 KF ausschließlich nur für die in dieser Gebrauchsanleitung beschriebenen Zwecke eingesetzt werden. Bitte beachten Sie auch die Gebrauchsanleitungen für die anzuschließenden Geräte. Alle in dieser Gebrauchsanleitung enthaltenen Angaben sind zum Zeitpunkt der Drucklegung gültige Daten. Es können jedoch von SI Analytics sowohl aus technischen und kaufmännischen Gründen, als auch aus der Notwendigkeit heraus, gesetzliche Bestimmungen der verschiedenen Länder zu berücksichtigen, ® Ergänzungen am Titrator TitroLine 7500 KF vorgenommen werden, ohne dass die beschriebenen Eigenschaften beeinflusst werden. Operating Instructions ..................................................................................................... Page 73 .....142 ® Important notes: Before initial operation of the Titration Unit TitroLine 7500 KF, please read and observe ® carefully the operating instructions. For safety reasons the Titration Unit TitroLine 7500 KF may only be used for the purposes described in these present operating instructions. Please also observe the operating instructions for the units to be connected. All specifications in this instruction manual are guidance values which are valid at the time of printing. However, for technical or commercial reasons or in the necessity to comply with the statuary stipulations of ® various countries, SI Analytics may perform additions to the Titration Unit TitroLine 7500 KF without changing the described properties. Mode d’emploi ................................................................................................................ Page 143 .... 212 Instructions importantes: Prière de lire et d’observer attentivement le mode d'emploi avant la première mise ® ® en marche du Titrateur TitroLine 7500 KF. Pour des raisons de sécurité, le Titrateur TitroLine 7500 KF pourra être utilisé exclusivement pour les usages décrits dans ce présent mode d'emploi. Nous vous prions de respecter également les modes d'emploi pour les appareils à connecter. Toutes les indications comprises dans ce mode d’emploi sont données à titre indicatif au moment de l'impression. Pour des raisons techniques et/ou commerciales ainsi qu'en raison des dispositions légales existantes dans les différents pays, SI Analytics se réserve le droit d'effectuer des suppléments concernant le ® Titrateur TitroLine 7500 KF pour séries de dilution qui n’influencent pas les caractéristiques décrits. Copyright © 2013, SI Analytics GmbH Nachdruck - auch auszugsweise - nur mit schriftlicher Genehmigung der SI Analytics GmbH, Mainz. Printed in Germany. INHALTSVERZEICHNIS SEITE 1 .. Technische Eigenschaften des Titrators TitroLine® 7500 KF ................................ 5 1.1 1.2 1.3 Zusammenfassung .................................................................................................................... 5 ® Technische Daten des Titrators TitroLine 7500 KF ................................................................. 6 Warn- und Sicherheitshinweise ................................................................................................. 9 2 .. Aufstellen und Inbetriebnahme .............................................................................. 10 2.1 2.2 2.3 2.4 2.5 2.5.1 2.5.2 2.5.3 2.5.4 2.5.5 2.6 2.7 2.7.1 2.8 2.8.1 2.8.2 2.8.3 2.9 2.10 2.11 Auspacken und Aufstellen des Titrationsgerätes .................................................................... 10 Anschluss und Montage der Bürette und des Magnetrührers TM 235 ................................... 11 Montage und Anschluss des Magnetrührers TM 235 ............................................................. 11 Aufbau und Anschluss des TM 235 KF Titrierstands mit Titrationsgefäss ............................. 11 Anschlüsse des Titrators. Kombination mit Zubehör und weiteren Geräten ........................... 15 ® Rückwand des Titrators TitroLine 7500 KF ........................................................................... 15 ® Messeingänge des Titrators TitroLine 7500 KF .................................................................... 15 Anschluss eines Druckers ....................................................................................................... 15 Anschluss eines USB-Gerätes (Handtaster, Tastatur, Speichergerät, HUB) ......................... 15 Anschluss von Analysenwaagen ............................................................................................. 16 Einstellen der Landessprache ................................................................................................. 16 Wechselaufsatz WA ................................................................................................................ 17 Montage des Wechselaufsatzes ............................................................................................. 17 Aufsetzen und Austauschen eines Wechselaufsatzes ........................................................... 18 Aufsetzen eines Wechselaufsatzes ........................................................................................ 18 Abnahme eines Wechselaufsatzes ......................................................................................... 19 Programmierung der Titratoreinheit ........................................................................................ 19 Erstbefüllen bzw. Spülen des kompletten Wechselaufsatzes ................................................. 21 Lösungsmittel in das Titriergefäß füllen .................................................................................. 23 Austausch des Glaszylinders und des PTFE-Kolbens............................................................ 23 3 .. Das Arbeiten mit dem Titrator TitroLine® 7500 KF ................................................ 25 3.1 3.2 3.3 3.4 3.5 3.6 3.6.1 3.6.2 3.6.3 3.6.4 Fronttastatur ............................................................................................................................ 25 Anzeige ................................................................................................................................... 25 Handtaster ............................................................................................................................... 26 Externe PC Tastatur ................................................................................................................ 26 Menüstruktur ........................................................................................................................... 27 Hauptmenü .............................................................................................................................. 29 Standardmethoden KF Titration .............................................................................................. 29 Automatische KF Titration ....................................................................................................... 30 Dosierung ................................................................................................................................ 34 Lösungen ansetzen ................................................................................................................. 37 4 .. Methodenparameter ................................................................................................ 38 4.1 4.2 4.3 4.4 4.5 4.6 4.6.1 4.6.2 4.6.3 4.6.4 4.6.5 4.6.6 4.6.7 4.6.8 Methode editieren und neue Methode .................................................................................... 38 Standardmethoden .................................................................................................................. 38 Methoden kopieren.................................................................................................................. 39 Methode löschen ..................................................................................................................... 39 Methode drucken..................................................................................................................... 40 Methodenparameter ändern .................................................................................................... 40 Methodentyp ............................................................................................................................ 40 Automatischer Titrationsmodus ............................................................................................... 41 Ergebnis .................................................................................................................................. 41 Titrationsparameter ................................................................................................................. 49 Titrationsende .......................................................................................................................... 52 Dosierparameter...................................................................................................................... 54 Probenbezeichnung ................................................................................................................ 55 Dokumentation ........................................................................................................................ 56 5 .. Systemeinstellungen ............................................................................................... 57 5.1 5.2 Reagenzien - Wechselaufsatz ................................................................................................ 57 RS232 Einstellungen ............................................................................................................... 59 5.3 5.4 5.5 5.6 5.7 5.8 5.9 Datum und Uhrzeit .................................................................................................................. 61 Passwort .................................................................................................................................. 61 RESET .................................................................................................................................... 61 Drucker .................................................................................................................................... 62 Geräteinformationen................................................................................................................ 62 Systemtöne ............................................................................................................................. 62 Software Update...................................................................................................................... 63 6 .. Datenkommunikation über die RS232- und USB-B-Schnittstelle ........................ 65 6.1 6.2 6.3 Allgemeines ............................................................................................................................. 65 Verkettung mehrerer Geräte — „Daisy Chain Konzept“ ......................................................... 65 Befehlsliste für RS-Kommunikation ......................................................................................... 65 7 .. Anschluss von Analysenwaage und Drucker ....................................................... 67 7.1 7.2 7.3 Anschluss von Analysenwaagen ............................................................................................. 67 Waagedateneditor ................................................................................................................... 68 Anschluss von Drucker............................................................................................................ 69 8 .. Wartung und Pflege des Titrators TitroLine® 7500 KF.......................................... 70 9 .. Lagerung und Transport ......................................................................................... 71 10 Recycling und Entsorgung ..................................................................................... 71 11 Index ......................................................................................................................... 72 Konformitätserklärung letzte Seite des Dokuments Hinweise zur Gebrauchsanleitung Die vorliegende Gebrauchsanleitung soll Ihnen den bestimmungsgemäßen und sicheren Umgang mit den Titrationsgeräten ermöglichen. Das verwendete Piktogramm ! hat folgende Bedeutung: Aktualität bei Drucklegung Fortschrittliche Technik und das hohe Qualitätsniveau unserer Produkte werden durch eine ständige Weiterentwicklung gewährleistet. Daraus können sich evtl. Abweichungen zwischen dieser Betriebsanleitung und Ihrem Produkt ergeben. Irrtümer können wir nicht ganz ausschließen. Haben Sie deshalb bitte Verständnis, dass aus den Angaben, Abbildungen und Beschreibungen keine juristischen Ansprüche abgeleitet werden können. Hinweis Eine möglicherweise aktuellere Version dieser Gebrauchsanleitung finden Sie im Internet auf unserer Webseite unter www.si-analytics.com. Die deutsche Fassung ist die Originalversion und in allen technischen Daten bindend. Version 131126 D Für eine größtmögliche Sicherheit beachten Sie unbedingt die Sicherheits- und Warnhinweise in der Gebrauchsanleitung. Warnung vor einer allgemeinen Gefahr für Personal und Material. Bei Nichtbeachtung können Personen verletzt oder Material zerstört werden. 5 1 Technische Eigenschaften des Titrators TitroLine® 7500 KF 1.1 Zusammenfassung ® Der TitroLine 7500 KF ist ein potentiometrischer Titrator und ist für folgende Anwendungen geeignet: Es können volumetrische KF und Dead-stop-Titrationen mit bis zu 50 speicherbaren Methoden durchgeführt werden. ® Beispiele für die Einsatzmöglichkeiten des Titrators TitroLine 7500 KF sind: − KF-Titrationen mit 1-Komponentenreagenz − KF-Titrationen mit 2-Komponentenreagenz − Dead-stop-Titrationen wie z.B. die Bestimmung der Bromzahl oder der schwefeligen Säure. − Kompatibilität mit TitriSoft ab Version 3.0 Darüber hinaus enthält der TitroLine® 7500 KF auch folgende Funktionalitäten der Kolbenbürette ® TITRONIC 500: − Dosierungen − Lösungen herstellen Bei jeder Methode sind unterschiedliche Dosier- und Füllgeschwindigkeiten einstellbar. Einsetzbare Lösungen sind: Praktisch sind alle Flüssigkeiten und Lösungen mit einer Viskosität < = 10 mm² / s wie z.B.: konzentrierte Schwefelsäure zu verwenden. Jedoch Chemikalien die Glas, PTFE oder FEP angreifen oder explosiv sind wie z.B. Flusssäure, Natriumazid, Brom dürfen nicht eingesetzt werden! Suspensionen mit hohem Feststoffgehalt können das Dosiersystem verstopfen oder beschädigen. ! ! Allgemein gilt: Es sind die jeweiligen gültigen Sicherheitsrichtlinien im Umgang mit Chemikalien unbedingt zu beachten. Dies gilt insbesondere für brennbare und / oder ätzende Flüssigkeiten. Garantieerklärung Wir übernehmen für das bezeichnete Gerät eine Garantie auf Fabrikationsfehler, die sich innerhalb von zwei Jahren ab dem Kaufdatum herausstellen. Der Garantieanspruch erstreckt sich auf die Wiederherstellung der Funktionsbereitschaft, nicht jedoch auf die Geltendmachung weitergehender Schadensersatzansprüche. Bei unsachgemäßer Behandlung oder bei unzulässiger Öffnung des Geräts erlischt der Garantieanspruch. Von der Garantie ausgeschlossen sind Verschleißteile wie z.B. Kolben, Zylinder, Ventile, Schläuche inkl. der Verschraubungen und Titrierspitzen. Ebenso ist der Bruch bei Glasteilen von der Garantie ausgenommen. Zur Feststellung der Garantiepflicht bitten wir Sie, uns das Gerät und den Kaufbeleg mit Kaufdatum frachtfrei bzw. portofrei einzusenden. 6 1.2 Technische Daten des Titrators TitroLine® 7500 KF Stand 21.11.2013 CE-Zeichen: ETL Zeichen: EMV - Verträglichkeit nach der Richtlinie 2004/108/EG des Rates; angewandte harmonisierte Norm: EN 61326/1:2006. Niederspannungsrichtlinie nach der Richtlinie 2006/95/EG des Rates, angewandte harmonisierte Norm: EN 61 010, Teil 1. Conforms to ANSI/ UL Std. IEC 61010-1 Certified to CAN/ CSA Std. C22.2 No. 61010-1 Ursprungsland: Germany, Made in Germany Folgende Lösemittel/Titrierreagenzien dürfen eingesetzt werden: − Alle gebräuchlichen Titrierlösungen. − Als Lösemittel sind Wasser und alle nichtaggressiven anorganischen und organischen Flüssigkeiten möglich. Beim Umgang mit brennbaren Stoffen sind die Explosionsschutz - Richtlinien der Berufsgenossenschaft der chemischen Industrie zu beachten. 2 − Für Flüssigkeiten mit höherer Viskosität (≥ 5 mm /s), niedrigem Siedepunkt oder Neigung zum Ausgasen, kann die Füll- und Dosiergeschwindigkeit angepasst werden. 2 − Flüssigkeiten mit einer Viskosität über 20 mm /s können nicht dosiert werden. Messeingang: KF (Dead stopp) - Anschluss (µA) für Doppelplatinelektroden Polarisationsspannung variabel einstellbar von 40 ... 220 mV. Anschluss: 2 x 4 mm – Buchsen. I [µA] Messbereich Auflösung der Anzeige 0 ... 100 0,1 Genauigkeit* ohne Messfühler 0,2 ± 1 Digit *Zusätzlich ist die Messunsicherheit der Messfühler zu berücksichtigen. Anzeige: grafikfähiges 3,5 Zoll -1/4 VGA TFT Display mit 320x240 Bildpunkten. Anschlüsse: Messeingang μA: (Dead-Stopp-) Anschluss für Doppelplatinelektrode (Anschlussbuchsen: 2 x 4mm) Spannungsversorgung: durch externes Steckernetzteil von 100 – 240 V, 50/60 Hz Leistungsaufnahme 30 VA Nur das Netzteil TZ 1853, mit der Typbezeichnung: FW 7362M/12, verwenden. RS232-C-Schnittstellen: RS232-C-Schnittstelle galvanisch getrennt mittels Opto-Koppler Daisy Chain Funktion möglich. Datenbits: einstellbar, 7 oder 8 Bit (Default Wert 8 Bit) Stoppbit: einstellbar, 1 oder 2 Bit (Default Wert 1 Bit) Startbit: fest 1 Bit Parität: einstellbar: even / odd / none Baudrate: einstellbar: 1200, 2400, 4800, 9600, 19200 (Default 4800 Baud) Adresse: einstellbar, (0 bis 15; Default Wert 1) RS232-1 RS232-2 für Computer, Eingang Daisy Chain Geräte von SI Analytics, Titrator TitroLine® 7500 KF/TW alpha plus/TW 7400, - Kolbenbüretten TITRONIC 500, T 110 plus, T universal, - Waagen des Typs Mettler, Sartorius, Kern, Ohaus, weitere auf Anfrage - Ausgang Daisy-Chain 7 USB-Schnittstellen 2 x USB-Typ-A und 1 x USB-Typ-B USB –Typ B („Slave“) für Computeranschluss, USB –Typ A („Master“) für Anschluss von - USB-Tastatur - USB-Drucker - USB-Handtaster („Maus“), - USB-Speichermedien wie z.B. USB-Stick - USB-Hub Rührer/Pumpe TM235 KF: 12V DC out, 500 mA Spannungsversorgung für Rührer TM 235 und KF Titrationstand TM 235 KF Gehäuse-Werkstoff: Polypropylen Fronttastatur: Kunststoffbeschichtet Gehäuse-Abmessungen: 15,3 x 45 x 29,6 cm (B x H x T), Höhe mit Wechseleinheit Gewicht: ca. 2,3 kg für Grundgerät ca. 3,5 kg für komplettes Gerät mit Wechseleinheit (mit leerer Reagenzienflasche) Klima: Umgebungstemperatur: + 10 ... + 40 °C für Betrieb und Lagerung Luftfeuchtigkeit nach EN 61 010, Teil 1: 80 % für Temperaturen bis 31 °C linear abnehmend bis zu 50 % relativer Feuchte bei einer Temperatur von 40 °C Wechselaufsätze ® Aufsätze sind wechselseitig kompatibel mit den Titratoren TitroLine 6000, ® ® ® TitroLine 7000, TitroLine 7000 KF und der Kolbenbürette TITRONIC 500 Erkennung: automatisch durch RFID. Erkennung der Aufsatzgröße und Kenndaten der Titrier- bzw. Dosierlösung Ventil: volumenneutrales Kegelventil aus Fluorkohlenstoffpolymeren (PTFE), TZ 3000 ® Zylinder: aus Borosilikatglas 3.3 (DURAN ) Schläuche: FEP-Schlauchgarnitur, blau Halterung für Vorratsflasche: passend für Vierkantflasche aus Glas und diverser Reagenzienflaschen ® Werkstoffe: Borosilikatglas DURAN , Fluorkohlenstoffpolymere, Edelstahl, Polypropylen, Abmessungen: 15 x 34 x 22,8 cm (B x H x T) mit Reagenzienflasche Gewicht: ca. 1,2 kg für Wechselaufsatz WA mit leerer Reagenzienflasche Kompatibilität: Dosiergenauigkeit: nach DIN EN ISO 8655, Teil 3 Richtigkeit : 0,15 % Präzision: 0,05 - 0,07 % (in Abhängigkeit von dem verwendeten Wechselaufsatz) ® Dosiergenauigkeit des Titrators TitroLine 7500 KF mit WA Wechselaufsätzen: Wechselaufsatz Typ Nr. Volumen Dosierfehler* bezogen auf 100 % Volumen [%] [ml] Toleranzen der Øi der Glaszylinder [mm] WA 05 5,00 ± 0,005 ± 0,15 0,07 WA 10 10,00 ± 0,005 ± 0,15 0,05 WA 20 20,00 ± 0,005 ± 0,15 0,05 WA 50 50,00 ± 0,005 ± 0,15 0,05 Reproduzierbar keit [%] 8 EigenschaftenTitrationstand TM 235 KF Stand 21. November 2013 ® In Verbindung mit dem Titrator TitroLine 7500 KF CE-Zeichen: ETL Zeichen: EMV - Verträglichkeit nach der Richtlinie 2004/108/EG des Rates; angewandte harmonisierte Norm: EN 61326/1:2006. Niederspannungsrichtlinie nach der Richtlinie 2006/95/EG des Rates, angewandte harmonisierte Norm: EN 61 010, Teil 1. Conforms to ANSI/ UL Std. IEC 61010-1 Certified to CAN/ CSA Std. C22.2 No. 61010-1 Ursprungsland: Germany, Made in Germany Pumpe: Freier Volumenstrom - Luft-: Maximaler Druck Flussrate flüssiges Medium 50 ... 1000 U/min Rührgeschwindigkeit: Schläuche: Anschlüsse Netzteil: Gehäuse Material: Abmessungen: Gewicht: Flussrate 2.25 l / min 1.5 bar ca. 0,8 l / min PVC- Schlauch, Außendurchmesser 6 x 1 mm PTFE- Schlauch Außendurchmesser 4 x 0.5 mm Niederspannungaanschluss 12 V / − auf der Rückseite des Titratonsstandes Steckverbindung: Stecker für Niederspannungsverbindungen Positiver Pol am Pinnkontakt, Innenkontakt ∅ = 2,1 mm, USA/Japan, ® Stromversorgung durchTitrator TitroLine 7500 KF Nur das Netzteil TZ 1855, mit der Typbezeichnung: FW 7555O/12, verwenden. Polypropylen; 80 x 130 x 250 mm, H x B x T (Höhe ohne Stativ) 1.0 kg Umgebungsbedingungen: Nicht verwendbar bei explosiver Umgebungsbedingungen Klima: Umgebungstemperatur: + 10 ... + 40 °C für Betrieb und Lagerung Luftfeuchtigkeit nach EN 61 010, Teil 1: 80 % für Temperaturen bis 31 °C linear abnehmend bis zu 50 % relativer Feuchte bei einer Temperatur von 40 °C° 9 1.3 Warn- und Sicherheitshinweise ® Das Gerät TitroLine 7500 KF entspricht der Schutzklasse III. Es ist gemäß EN 61 010 - 1, Teil 1, Sicherheitsbestimmungen für elektrische Mess-, Steuer-, Regel- und Laborgeräte, gebaut und geprüft und hat das Werk in sicherheitstechnisch einwandfreiem Zustand verlassen. Um diesen Zustand zu erhalten und einen gefahrlosen Betrieb sicherzustellen, muss der Anwender die Hinweise und Warnvermerke beachten, die in dieser Gebrauchsanleitung enthalten sind. Die Entwicklung und Produktion erfolgt in einem System, das die Anforderungen der Norm DIN EN ISO 9001 erfüllt. Aus sicherheitstechnischen Gründen darf der Titrator TitroLine® 7500 KF grundsätzlich nur von autorisierten Personen geöffnet werden. So dürfen z.B. Arbeiten an der elektrischen Einrichtung nur von ausgebildeten Fachleuten durchgeführt werden. ! Bei Nichtbeachtung kann von dem Titrator Gefahr ausgehen: elektrische Unfälle von Personen und Brandgefahr. Bei unbefugtem Eingriff in den TitroLine® 7500 KF sowie bei fahrlässiger oder vorsätzlicher Beschädigung erlischt außerdem die Gewährleistung. ! ® Vor dem Einschalten ist sicherzustellen, dass die Betriebsspannung des Titrators TitroLine 7500 KF und die Netzspannung übereinstimmen. Die Betriebsspannung ist auf dem Typenschild auf der Unterseite des ® Titrators angegeben. Bei Nichtbeachtung kann der Titrator TitroLine 7500 KF geschädigt werden und es kann zu Personenschäden oder Sachschäden kommen. ® Wenn anzunehmen ist, dass ein gefahrloser Betrieb nicht möglich ist, ist der Titrator TitroLine 7500 KF außer ® Betrieb zu setzen und gegen ein unbeabsichtigtes Inbetriebnehmen zu sichern. Den Titrator TitroLine 7500 ® KF bitte ausschalten, das Steckernetzteil aus der Steckdose ziehen und den Titrator TitroLine 7500 KF vom Arbeitsplatz entfernen. Es ist z.B. zu vermuten, dass ein gefahrloser Betrieb nicht mehr möglich ist, wenn eine Beschädigung der Verpackung vorliegt, ® wenn der Titrator TitroLine 7500 KF sichtbare Beschädigungen aufweist, ® wenn der Titrator TitroLine 7500 KF nicht bestimmungsgemäß funktioniert, wenn Flüssigkeit in das Gehäuse eingedrungen ist. wenn die Kolbenbürette technisch verändert wurde oder wenn nicht autorisierte Personen mit Reparaturversuchen in das Gerät eingegriffen haben. Nimmt der Anwender das Gerät in diesen Fällen dennoch in Betrieb, gehen alle daraus resultierenden Risiken auf ihn über. ® Der Titrator TitroLine 7500 KF darf nicht in feuchten Räumen gelagert oder betrieben werden. ® Aus Sicherheitsgründen darf der Titrator TitroLine 7500 KF ausschließlich nur für das in der Gebrauchsanleitung beschriebene Einsatzgebiet verwendet werden. Die entstehenden Risiken muss der Anwender bei allen Abweichungen vom bestimmungsgemäßen Gebrauch selber beurteilen. ! Die einschlägigen Vorschriften im Umgang mit den verwendeten Stoffen müssen eingehalten werden: die Gefahrstoffverordnung, das Chemikaliengesetz und die Vorschriften und Hinweise des Chemikalienhandels. Es muss seitens des Anwenders sichergestellt sein, dass die mit dem Gebrauch der ® TitroLine 6000/7000 betrauten Personen Sachkundige im Umgang mit den im Umfeld des Titarors angewendeten Stoffen sind oder von sachkundigen Personen beaufsichtigt werden. ! Bei allen Arbeiten mit Chemikalien: Schutzbrille tragen! ! ® Der Titrator TitroLine 7500 KF ist mit integrierten Schaltkreisen (z.B. Flashspeicher) ausgerüstet. Röntgenoder andere energiereiche Strahlen können durch das Gerätegehäuse hindurch dringen und die Betriebssoftware löschen. Bei Arbeiten mit Flüssigkeiten, die nicht gebräuchlichen Titriermitteln entsprechen, ist insbesondere die ® chemische Beständigkeit der Materialien des TitroLine 7500 KF zu berücksichtigen (siehe Kapitel 1.1). Bei Einsatz von Flüssigkeiten mit hohem Dampfdruck und/oder Stoffen oder Stoffgemischen, die nicht unter Kapitel 1.1 als einsetzbar beschrieben sind, muss der gefahrlose und einwandfreie Betrieb des Titrators ® TitroLine 7500 KF seitens des Anwenders sichergestellt werden. Beim Hochfahren des Kolbens bleibt auf der Innenwand des Zylinders in allen Fällen ein Mikrofilm aus Dosierflüssigkeit haften, der auf die Dosiergenauigkeit keinen Einfluss hat. Dieser minimale Rest von Flüssigkeit kann jedoch verdunsten und dadurch in die Zone unterhalb des Kolbens geraten und dort die verwendeten Materialien korrodieren oder ® anlösen (siehe Kapitel 8 „Wartung und Pflege des Titrators TitroLine 7500 KF“). 10 2 Aufstellen und Inbetriebnahme 2.1 Auspacken und Aufstellen des Titrationsgerätes Der Titrator und alle Zubehörteile sowie die Peripheriegeräte sind werkseitig sorgfältig auf Funktion und Maßhaltigkeit geprüft. Die TitroLine® 7500 KF-Module bestehen aus folgenden Einzelteilen: ® • TitroLine 7500 Grundgerät • Ein Wechselaufsatz WA 05, WA 10 oder WA 20 • Der KF Titrierstand (Pumpe und Rührer) TM 235 KF mit Abfall- (1 L Klarglas), Solvent-(1 L Braunglas) und Trockenmittelflasche (100 ml) inklusive allen Schläuchen. • Titrationsgefäß TZ 1770 inkl. Titrierspitze • KF Starterkit TZ 1789 mit Trockenmittel Molekularsieb, Glaswolle und ein Set aus Spritzen mit Kanülen. • Elektrode KF 1100 Bitte achten Sie darauf, dass auch die kleinen Zusatzteile aus der Verpackung restlos entnommen werden. Den Lieferumfang entnehmen Sie bitte der beigefügten Packliste. Abb. 1 11 2.2 Anschluss und Montage der Bürette und des Magnetrührers TM 235 Das Niederspannungskabel des Netzteils TZ 1853 wird in die mittlere 12 V Buchse, Buchse „in“, (siehe auch Abb. 4 Rückwand, Kap. 2.4), auf der Rückseite der Bürette eingesteckt. Danach das Netzteil in die Netzsteckdose einstecken. Abb. 2a Das Netzteil ist leicht zugänglich zu platzieren, damit die Bürette jederzeit einfach vom Netz zu trennen ist. 2.3 Montage und Anschluss des Magnetrührers TM 235 Der Magnetrührer TM 235 wird in der Regel rechts von der Kolbenbürette aufgestellt. Der Magnetrührer wird mit dem Verbindungskabel TZ 1577 (Lieferumfang Grundgerät) an der Rückseite der Kolbenbürette an der 12 V Buchse „out“ angeschlossen. (siehe auch Abb. 4 Rückwand, Kap. 2.4). Die Stativstange (Lieferumfang Grundgerät) wird in das Gewinde eingeschraubt und die Titrationsklammer Z 305 (Lieferumfang Grundgerät) montiert (Abb. 3). Abb. 2b 2.4 Aufbau und Anschluss des TM 235 KF Titrierstands mit Titrationsgefäss ® Der Titrator TitroLine 7500 KF kann auf jeder beliebigen ebenen Unterlage aufgestellt werden. In der Regel wird der Titrierstand TM 235 KF rechts neben den Titrator gestellt. Der TM 235 KF wird mit dem Verbindungskabel TZ 1577 (im Lieferumgang des Grundgerätes enthalten) an die ® 12 V-Buchse out an der Rückseite des TitroLine 7500 KF angeschlossen. Die Stativstange (im Lieferumgang des Grundgerätes enthalten) wird in das Gewinde des TM 235 KF eingeschraubt. 12 Das Titrationsgefäß TZ 1770 wird an die Stativstange angeschraubt. Bitte darauf achten, dass die Metallklammer nur soweit wie abgebildet heruntergedrückt wird. Abb. 3a Montieren Sie alle drei inneren weißen Plastikadapter an die Abfall-, Solvent- und Trockenflasche. Füllen Sie die Trockenflasche mit dem Molekularsieb und verbinden Sie die flexiblen PVC- sowie die dünneren PTFE-Schläuche, wie in den folgenden Abbildungen dargestellt. Die PVC-Schläuche werden an die Anschlüsse an der Rückseite des TM 235 KF angeschlossen. Der lange PVC-Schlauch wird für die Verbindung zur Abfallflasche verwendet. Mit den zwei kürzeren PVC-Schläuchen werden die Trockenflasche und die Solventflasche miteinander verbunden. Abb. 3b 13 Die Trockenflasche wird an die rechte Olive (Sicht von oben) des TM 235 KF angeschlossen. Die Abfallflasche (Klarglas) wird an die linke Olive angeschlossen. Abb. 4 Der PTFE-Schlauch von der Abfallflasche („Tube 1“) sollte möglichst bis zum Boden des Titrationsgefäßes justiert werden. Der PTFE-Schlauch von der Solvent-Flasche („Tube 2“) wird, wie in den nächsten beiden Bildern sichtbar, justiert: Abb. 5 14 Abb. 6 Die Titrierspitze mit dem Titrierschlauch wird in die linke NS 14-Öffnung gesteckt und an das Ventil der Wechseleinheit angeschlossen. Füllen Sie zuerst etwas Glaswolle und das Molekularsieb in das Trockenröhrchen aus Plastik. Stecken Sie das Trockenröhrchen in die andere vorhandene NS 14-Öffnung, wie auch in der nächsten Abbildung zu sehen ist. Abb. 7 Die Elektrode KF 1100 stecken Sie in die dafür vorgesehene NS 7.5- Öffnung und schließen sie an den µA ® Anschluss des TitroLine 7500 KF an. Die Tastatur wird an einer der beiden USB-A Schnittstellen angeschlossen. Das Netzteil ist leicht zugänglich zu platzieren, damit der Titrator jederzeit einfach vom Netz zu trennen ist. 15 2.5 Anschlüsse des Titrators. Kombination mit Zubehör und weiteren Geräten ® 2.5.1 Rückwand des Titrators TitroLine 7500 KF 1 2 3 4 5 6 7 Fig. 8 ® 2.5.2 Messeingänge des Titrators TitroLine 7500 KF ® Der TitroLine 7500 KF verfügt über folgende Anschlüsse: 1) 2) 3) 4) µA-Messeingang für Anschluss Doppelplatinelektroden (KF 1100 oder Pt 1200, Pt 1400 USB-B Schnittstelle für den Anschluss an einen PC Netzschalter Zwei USB-A („Master“) Schnittstellen für den Anschluss von USB-Geräten wie Tastatur, Drucker, Handregler, USB-Speicherstick usw. 5) Buchse „in“: Anschluss des externen Netzteiles TZ 1853 6) Buchse „out“: Anschluss des Titrierstandes TM 235 KF oder Magnetrührers TM 235 7) Zwei RS232 Schnittstellen (Mini-DIN): RS1 für den Anschluss an den PC RS2 für den Anschluss einer Waage und weiterer Geräte von SI Analytics (Büretten usw.) 2.5.3 Anschluss eines Druckers Drucker mit USB-Schnittstelle werden an einer der beiden USB-A Schnittstellen angeschlossen. Die Drucker müssen eine HP PCL -Emulation (3, 3GUI, 3 enhanced, 5, 5e) enthalten. So genannte GDI Drucker können nicht verwendet werden! Als Alternative kann auch der Thermokompaktdrucker Seiko S445 angeschlossen werden. 2.5.4 Anschluss eines USB-Gerätes (Handtaster, Tastatur, Speichergerät, HUB) Folgende USB-Geräte können an die USB-A-Schnittstellen angeschlossen werden: • PC-Tastatur • Handtaster TZ 3880 („Maus“) • Drucker • USB-Speichergeräte wie USB-Stick • USB-Hub • USB-Barcodescanner 16 2.5.5 Anschluss von Analysenwaagen Analysenwaagen werden mit einem entsprechenden Kabel an die RS232-2 angeschlossen. 2.6 Einstellen der Landessprache Werkseitig ist Englisch als Sprache voreingestellt. Nach dem der Titrator eingeschaltet und sein Startvorgang beendet ist, erscheint das Hauptmenü: Abb. 8 Mit <SYS/<F7> wechselt man zu den Systemeinstellungen (Englisch = System settings). Das erste Menü ist gleich die Einstellung der Landessprache: Abb. 9 Mit <ENTER>/<OK> das Menü aufrufen. Mit den Pfeiltasten <↑↓> die gewünschte Landessprache auswählen und mit <ENTER>/<OK> bestätigen: Abb. 10 Die gewählte Sprache erscheint sofort. Mit zweimal betätigen der <ESC> Taste befindet man sich wieder im Hauptmenü. 17 2.7 Wechselaufsatz WA 1 6 2 7 3 8 9 4 11 5 Abb. 11 1) TZ 3871 - Ansaugschlauch 2) TZ 3872 - Verbindungsschlauch 3) TZ 3873 - Dosierschlauch ohne Dosierspitze und Halter; TZ 3874.- Dosierschlauch mit Dosierspitze und Halter 4) TZ 3801 - Ventilabdeckung 5) TZ 3000 - 3/2-Wege Ventil 6) TZ 2003 - Trockenrohr 7) TZ 3802 - Schraubkappe GL 45 mit Bohrung, inkl. Adapter mit 2 Öffnungen für Trockenrohr und Ansaugschlauch 8) TZ 3803 - 1 Liter Reagenzienflasche, braun 9) TZ 3900 – UV-Schutzmantel, blau transparent 10) TZ 3875 - Schaft für Titrierspitze und TZ 3656 – Titrierspitzenaufsatz, blau 11) TZ 1507 - Abtropfröhrchen aus Plastik 2.7.1 Montage des Wechselaufsatzes Abb. 11 zeigt eine komplett zusammengebaute Wechseleinheit. • • • • • Das Ventil mit dem angeschlossenen Schläuchen aus der Verpackung entnehmen und in die Ventilhalterung stecken bis es einrastet. Den Ventildeckel auf das Ventil, wie abgebildet, aufstecken. Verbindungsschlauch TZ 3872 in die dafür vorgesehene Gewindeöffnung des Bürettenzylinders stecken und mit der Hand festschrauben. Der Ansaugschlauch TZ 3871 in die Gewindeöffnung des GL 45 oder S 40 -Adapters stecken und mit der Hand festschrauben. Schrauben Sie den vormontierten Titrierschlauch ab und schließen Sie ihn am Titrationsgefäß TZ 1770 an. 18 2.8 Aufsetzen und Austauschen eines Wechselaufsatzes Die Titratoreinheit enthält ein RFID-Lesegerät und die Wechselaufsätze enthalten alle eine RFID-Transponder. In diesem Transponder können folgende Informationen gespeichert werden: • • • • • • • • • • Aufsatzgröße (nicht veränderbar) Aufsatz ID (nicht veränderbar) Reagenzname (default: Leerzeichen) Konzentration (default: 1.000000) Konzentration bestimmt am: (Datum) Haltbarkeit bis (Datum) Geöffnet/Hergestellt am: (Datum) Prüfung nach ISO 8655: (Datum) Chargenbezeichnung: (default no charge) Letzte Änderung (Datum) Jedes Mal wenn ein Wechselaufsatz auf die Titratoreinheit geschoben wird, werden automatisch die Daten aus dem Transponder ausgelesen. 2.8.1 Aufsetzen eines Wechselaufsatzes Der Wechselaufsatz wird so wie auf der Abb. 12 a-c abgebildet auf die Geräteeinheit aufgesetzt und nach unten geschoben bis der schwarzen Knopf auf der linken Seite einrastet. Abb. 12 a Abb. 12 b 19 Abb. 12 c 2.8.2 Abnahme eines Wechselaufsatzes Die Abnahme des Wechselaufsatzes geschieht in der umgekehrten Reihenfolge: • Links auf die schwarze Taste drücken und den Wechselaufsatz nach vorne ziehen wie in Abb. 12.c – 12 a abgebildet. ! Wichtig: Die Abnahme des Wechselaufsatzes ist nur möglich wenn sich der Kolben in der unteren Position befindet (Nullposition). Eventuell vorher die <FILL>-Taste betätigen. ! 2.8.3 Programmierung der Titratoreinheit Die Daten aus dem RFID-Transponder des Wechselaufsatzes werden sofort ausgelesen (Abb. 13). Abb. 13 Nach Beendigung des Lesevorgangs erscheint ca. 10 Sekunden lang das Eingabemenü für die Reagenzien (Abb. 14). Die Größe der Wechseleinheit wird unten links in der Anzeige angezeigt (hier 10 ml) Abb. 14 20 Bei der ersten Verwendung ist empfehlenswert, hier zumindest den Namen des verwendeten Reagenzes einzutragen. Dazu bestätigt man die Auswahl „Reagenz“ mit <ENTER> und tippt den Namen und eventuell die Konzentration ein (Abb. 15). Abb. 15 Mit <OK>/<ENTER> bestätigen (Abb. 15). Nach der optionalen Eingabe weiterer Parameter verlässt man das Reagenzienmenü mit <ESC> (Abb. 16). Man sollte aber unter Konzentration die ungefähre Konzentration des KF-Titranten (z.B. 5 oder 2) eingeben. Damit wird die Drift in µg/min sofort in der richtigen Größenordnung berechnet. Abb. 16 Es erscheint eine Abfrage, ob man die Werte übernehmen möchte (Abb. 17): Abb. 17 Wenn man <Ja> gewählt hat werden die Werte nun in die Wechseleinheit geschrieben. Das erkennt man unten an einer Meldung in roter Schrift. Am Ende steht unten links im Display der neue Name des Reagenzes (Abb. 18). In diesem Beispiel Titrant 5. 21 Abb. 18 2.9 Erstbefüllen bzw. Spülen des kompletten Wechselaufsatzes Das Erstbefüllen der Wechseleinheit erfolgt durch das Spülprogramm <Spülen>. Abb. 19 Vom Hauptmenü (Abb. 19) gelangt man mit <MODE> in das Methoden-/Systemmenü (Abb. 20) Abb. 20 22 Durch 2 x <↑> gelangt man sofort zur Auswahl <Spülen> (Abb. 21). Abb. 21 Die Auswahl mit <ENTER> bestätigen: Abb. 22 Nun kann man die Anzahl der Spülzyklen auswählen. Für eine Erstbefüllung muss man mindestens zweimal Spülen. Den Spülvorgang (Abb. 23) kann man jederzeit mit <STOP> abbrechen und anschließend mit <START> fortsetzen. Abb. 23 Beim Ablauf dieses Erstbefüll- bzw. Spülprogramms muss ein ausreichend dimensioniertes Abfallgefäß unter der Titrierspitze stehen. Am besten ist es natürlich wenn die Titrierspitze in das KF Titrationsgefäß montiert ist. 23 2.10 Lösungsmittel in das Titriergefäß füllen Durch Herunterdrücken des Titrierstandes TM 235 KF (den vorderen Teil der Wippe) wird Lösunsgmittel aus der Solventflasche in das Titriergerfäß gepumpt. Bitte soviel Lösungsmittel in das Titriergefäß pumpen bis die Titrierspitze und die Elektrode vollstandig eingetaucht sind. Das sind etwa 35- 40 ml Lösunsgmittel: 35-40 ml Befüllen Abb. 24 2.11 Austausch des Glaszylinders und des PTFE-Kolbens Der Austausch des Glaszylinders und des Kolbens gelingt ohne zusätzliches Werkzeug. In Einzelfällen ist die Verwendung des Kolbenziehers notwendig. • • • • • • Den Wechselaufsatz vom Titrator abnehmen. Den Schlauch zwischen Glaszylinder und Ventil vom Glaszylinder abschrauben. Der blaue UV-Schutz wird durch 5-6 Drehungen nach links gelöst. Der UV-Schutz kann nun abgenommen und der Glaszylinder mit dem darin befindlichen Kolben herausgezogen werden. Ein neuer Glaszylinder und Kolben (Abb. 25) wird in den UV-Schutz gesteckt und der blaue UV-Schutz wird durch 5-6 Drehungen nach rechts wieder festgeschraubt. Die Kolbenstange sollte ca. 0,5 cm der Wechseleinheit herausschauen (Abb. 26 a). Den Aufsatz nun nach vorne kippen bis die schräge Unterseite der Wechseleinheit flach auf dem Rand des Labortisches/Tisches liegt (Abb. 26 5). Dadurch wird der Kolben in die exakte Position gebracht. Falls ein Kolben einmal etwas zu weit in den Glaszylinder gedrückt wurde, einfach den Kolben ein wenig herausziehen und wie beschrieben wieder in die richtige Position bringen. Glaszylinder Kolbenstange Abb. 25 24 Kolbenstange Abb. 25 a Abb. 25 b Grundsätzlich ist darauf zu achten, dass in einen Wechselaufsatz nur die vorgesehene Zylindergröße montiert werden darf, weil sonst die im Wechselaufsatz gespeicherte Codierung nicht mehr mit der Zylindergröße übereinstimmt. Die Folge ist eine falsche Dosierung. Es wird aus Gründen der Dosier- und Analysengenauigkeit empfohlen, stets auch die PTFE-Kolben mit auszutauschen, wenn ein defekter Glaszylinder erneuert wird. Dies gilt vor allem bei Glasbruch, da die Dichtringe des PTFE-Kolbens durch Glassplitter verletzt werden können. ! Achtung ! Die Schläuche und Zylinder enthalten im Regelfall Chemikalien, die beim Demontieren auslaufen oder verspritzen können. Die einschlägigen Sicherheitsvorkehrungen im Umgang mit den Chemikalien müssen beachtet werden. 25 3 Das Arbeiten mit dem Titrator TitroLine® 7500 KF 3.1 Fronttastatur Mit Ausnahme von alphanumerischen Eingaben (a-z, A-Z, 0-9) und einigen wenigen Funktionen, können alle Funktionen auch über die Fronttastatur ausgeführt werden. <Mode>: <EDIT>: <ESC>: <START>: <FILL>: Auswahl der Methoden, Spülen, Systemeinstellungen Ändern der aktuellen Methode, neue Methode, Methode kopieren und löschen Mit <ESC> wird die vorherige Ebene im Menü erreicht. Start und Stopp einer aktuellen Methode Füllen des Aufsatzes Die einzelnen Funktionen werden in Kapitel 3.4 Externe PC Tastatur genau beschrieben. 3.2 Anzeige Die Anzeige besteht aus einer farbigen LCD-Anzeige mit 320 x 320 Bildpunkten Auflösung. Sie bietet auch die Möglichkeit von Grafikanzeigen, zum Beispiel der Messkurve während oder am Ende der Titration: 26 3.3 Handtaster Der Handtaster („Maus“, Abb. 26) kann für Dosierungen und zum Lösung ansetzen verwendet werden. Der Handtaster gehört nicht zum Lieferumfang des TL 7500 Grundgerätes. Abb. 26 Modus Dosieren über Dosiermethode Lösungen ansetzen Schwarze Taste Start der Dosierung Start der Dosierung Graue Taste Füllen Füllen 3.4 Externe PC Tastatur Tasten <ESC> <F1>/<START> <F2>/<STOP> <F3>/<EDIT> <F4>/<FILL> <F5>/ <F6>/<MODE> <F7>/<SYS> <F8/<CAL> <F9>/+ / <F10>/<DOS> Num/ Scroll Lock/ Lock Prt Sc Sys Rq <ESC> < ↑> < ↓ > <←> <→> 0...9 <ENTER> < ←Backspace > Buchstaben, ASCII-Zeichen alle anderen Tasten Funktion Mit <ESC> wird die vorherige Ebene im Menü erreicht. Start einer ausgewählten Methode Stopp der aktuellen Methode Ändern der aktuellen Methode, neue Methode, Methode kopieren Füllen des Aufsatzes Anzeige und Änderung der Waagedaten. Mit <Shift> + <F5>Anzeige und Änderung der Globalen Speicher Auswahl der Methoden, Spülen, Systemeinstellungen Systemeinstellungen (Sprachauswahl, Uhrzeit/Datum..) Keine Funktion Vorzeichenwechsel Aufruf Dosiermenü Keine Funktion Keine Funktion Anwahl des Methodenauswahlmenüs aus der Hauptmenü Sonst: Mit <ESC> wird die vorherige Ebene im Menü erreicht. Auswahl der Einzelmenüs und Zahlenwerte Eingabe von Zahlenwerten Bestätigung eingegebener Parameter Löschen einer eingegebenen Ziffer / eines eingegebenen Zeichens links neben dem blinkenden Cursor Alphanumerische Eingaben möglich. Groß- und Kleinschreibung ist möglich Haben keine Funktion. 27 3.5 Menüstruktur Es gibt 4 Hauptmenüs: • Start- oder Hauptmenü • Methodenparameter • Auswahl Methoden • Systemeinstellungen. Nach dem Einschalten erscheint immer das Hauptmenü. Es wird immer die zuletzt verwendete Methode angezeigt (Abb. 27). Abb. 27 Die angezeigte Methode kann nun mit <START> sofort ausgeführt werden. Mit <EDIT>/F3 gelangt man zu den Methodenparametern (Abb. 28). Abb. 28 Hier kann • die aktuelle Methode verändert • eine neue Methode erstellt • Standardmethoden aufgerufen und abgespeichert • eine bestehende Methode kopiert oder gelöscht werden Die Untermenüs werden mit <↓> und <↑>- Tasten angewählt und mit <OK>/<ENTER> die Auswahl bestätigt. Mit <ESC> gelangt man wieder zurück zum Hauptmenü. 28 Mit <MODE>/F6 gelangt man zu dem Methodenauswahlmenü (Abb. 26). Abb. 29 Die vorhandenen Methoden werden mit <↓> und <↑>- Tasten angewählt und mit <OK>/<ENTER> die Auswahl bestätigt. Nach der Auswahl kommt man sofort mit der neu ausgewählten Methode zurück zum Hauptmenü. Ohne Auswahl einer Methode gelangt man mit <ESC> ebenfalls wieder zurück zum Hauptmenü. In die Systemeinstellungen (Abb. 30 und Abb. 31) gelangt man direkt über die <SYS>/F7 Taste oder auch über das Methodenauswahlmenü. Abb. 30 Abb. 31 29 3.6 Hauptmenü Nach dem Einschalten erscheint immer das Hauptmenü. Es wird immer die zuletzt verwendete Methode angezeigt (Abb. 32). Abb. 32 3.6.1 Standardmethoden KF Titration Wenn noch keine Titration durchgeführt wurde empfiehlt es sich, eine der Standardmethoden zu laden. Sie sind vorparametriert und können in der Regel sofort ohne Änderung verwendet werden. Vom Grundmenü aus geht man mit F3/EDIT in das Methodenmenü: Abb. 33 Dort wählt man eine passende Standardmethode aus: Abb. 34 30 Standardmethoden KF Anwendung Titer 1-Component (liquid standard) Bestimmung der Konzentration der Titrierlösung. Verwendbar für 1-Komponentenreagenz. Standard ist flüssiger Standard in Ampullen mit einer Konzentration von ca. 10 mg/g. Titer 1-Component (solid standard) Bestimmung des Titers der Titrierlösung. Verwendbar für 1-Komponentenreagenz. Standard ist die fester Urtitersubstanz Natriumtartrat-Dihydrat mit einem Wassergehalt von 15.66 %. Titer 1-Component (water) Bestimmung des Titers der Titrierlösung. Verwendbar für 1-Komponentenreagenz. Standard ist reines Wasser. Titer 2-Component (liquid standard) Bestimmung des Titers der Titrierlösung. Verwendbar für 2-Komponentenreagenz. Standard ist flüssiger Standard in Ampullen mit einer Konzentration von ca. 10 mg/g. Titer 2-Component (solid standard) Bestimmung des Titers der Titrierlösung. Verwendbar für 2-Komponentenreagenz. Standard ist die fester Urtitersubstanz Natriumtartrat-Dihydrat mit einem Wassergehalt von 15.66 %. Titer 2-Component (water) Bestimmung des Titers der Titrierlösung. Verwendbar für 1-Komponentenreagenz. Standard ist reines Wasser. Sample 1-Component Methode für Probentitration mit 1-Komponentenreagenz Sample 2-Component Methode für Probentitration mit 2-Komponentenreagenz Die Statistik ist eingeschaltet. Der Mittelwert des Titers in mg/ml wird automatisch in den Aufsatz gespeichert. Er wird damit auch automatisch bei der Probentitration verwendet. Die Ergebnisse der Probentitration werden in % berechnet. Bei Bedarf kann die Einheit in andere Einheiten wie ppm umgestellt werden. 3.6.2 Automatische KF Titration Die angezeigte Methode kann nun mit <START> sofort ausgeführt werden. Zuerst wird die sogenannte Vorkonditionierung durchgeführt. Das Lösungsmittel und das Titriergefäß enthalten ja ebenfalls Feuchtigkeit (Wasser), was nicht in die Berechnung des Ergebnisses mit einfließen soll. Die Konditionierung wird automatisch nach dem Drücken der Start oder F1-Taste durchgeführt. Die Endbedingungen sind gleich mit den Bedingungen der eigentlichen Probentitration. 31 Abb. 35 Wenn die Endkriterien erfüllt sind, dann erfolgt ein Signalton und es erscheint ‚Konditionierung fertig‘ oben auf dem Display: Abb. 36 Die Konditionierung bleibt solange aktiv bis die eigentliche Titration mit <F1/Start> gestartet wird. Man wird sofort aufgefordert die Probe zuzugeben: Abb. 37 Nachdem die Probe oder der Standard zugegeben wurde, muss nochmals <F1/Start> gedrückt werden. Je nach Methodeneinstellung werden nacheinander die Probenbezeichnung (Abb. 38) und die Einwaage abgefragt (Abb. 39). Es kann eine 20-stellige alphanumerische Probenbezeichnung mit einer externen PC-Tastatur eingegeben werden. 32 Abb. 38 Abb. 39 Die Waagedaten können mit Hilfe der Fronttastatur oder der externen Tastatur eingegeben werden. Die Eingabe wird mit <OK>/<ENTER> bestätigt. Bei automatischer Waagedatenübernahme werden die Einwaagen aus einem Speicher ausgelesen. Falls keine Waagedaten im Speicher vorhanden sind, wird dies in einer Meldung angezeigt: Abb. 40 Durch Drücken der Print-Taste an der Waage können die Waagedaten transferiert werden. Die Titration beginnt direkt nach der Übergabe der Waagedaten ohne weitere Bestätigung. In der Anzeige wird entweder der Verbrauch in ml mit der Drift in µg/min oder die Drift mit dem Messwert in µA oder die Titrationskurve in ml/Zeit [s] angezeigt. Mit <F6/MODE> kann man zwischen den einzelnen Anzeigen umschalten: 33 Abb. 41 Abb. 42 Abb. 43 Die Skalierung der Grafik geschieht automatisch: Am Ende der Titration wird das Ergebnis angezeigt: Abb. 44 Mit <MODE>/<F6> kann man sich die Titrationskurve bzw. weitere Ergebnisse anzeigen lassen. 34 Abb. 45 Bei angeschlossenem Drucker werden die Ergebnisse, wie in der Methode eingestellt, ausgedruckt bzw. auf einem angeschlossenen USB-Stick als PDF-Datei und als CSV-Datei abgespeichert. Falls kein Drucker oder USB-Stick angeschlossen ist, erscheint unten links im Display die Meldung „Kein Drucker“ oder „Kein USB-Stick“. Durch <ESC> gelangt man wieder zurück ins Hauptmenü und kann sofort die nächste Titration starten. 3.6.3 Dosierung Eine Dosiermethode wird mit <START>/<F1> oder mit der schwarzen Taste des Handtasters („Maus“) gestartet. Abb. 46 Abb. 47 Das dosierte Volumen wird kurz angezeigt, bevor die Anzeige wieder zum Hauptmenü zurückspringt. 35 Abb. 48 Abb. 49 Die nächste Dosierung kann dann sofort gestartet werden. Der Aufsatz wird nach jeder Dosierung automatisch gefüllt. Diese Option kann auch abgeschaltet werden. Dann wird der Aufsatz erst gefüllt, wenn das Zylindervolumen erreicht ist. Man kann natürlich jederzeit den Aufsatz mit <FILL> füllen lassen. Eine Dosierung kann auch über die <DOS>/<F10> Taste der externen Tastatur ohne Dosiermethode ausgeführt werden: Abb. 50 Das Volumen wird eingegeben und nach der Bestätigung mit <ENTER>/<OK> dosiert: 36 Abb. 51 Die nächste Dosierung kann sofort wieder mit der <ENTER>/<OK> Taste ausgeführt werden: Abb. 52 Der Aufsatz wird hier nicht automatisch nach der Dosierung gefüllt, es sei denn das Zylindervolumen ist erreicht. Mit <FILL> kann der Aufsatz jederzeit gefüllt werden. Mit <ESC> gelangt man wieder zurück in das Hauptmenü. 37 3.6.4 Lösungen ansetzen Eine spezielle Dosiermethode ist das so genannte „Lösungen ansetzen“. Dabei wird ein Lösungsmittel solange zu einer Einwaage eines Stoffes zu dosiert, bis die gewünschte Zielkonzentration erreicht ist: Abb. 53 Abb. 54 Abb. 55 Ist das berechnete Volumen größer als das maximal eingestellte Volumen, erscheint eine Fehlermeldung und es wird aus Sicherheitsgründen nicht dosiert: Abb. 56 38 4 Methodenparameter Vom Hauptmenü aus (Abb. 53) gelangt man <EDIT>/<F3> in die Methodenparameter: Abb. 57 4.1 Methode editieren und neue Methode Bei Anwahl von <Methode editieren> und <neue Methode> gelangt man zur Änderung bzw. Neuerstellung einer Methode. Bei <neue Methode> wird immer nach der Eingabe der Methodennamens gefragt (Abb. 58). Das entfällt bei der Änderung einer bereits erstellten Methode. Abb. 58 Der Methodenname kann bis zu 21 Zeichen enthalten. Es sind auch Sonderzeichen möglich. Falls keine Tastatur angeschlossen ist muss der angezeigte Methodenname (hier „Methode 06“) übernommen werden. Die Methodennummern werden automatisch durchnummeriert. Die Eingabe wird mit <OK>/<ENTER> bestätigt. Der Methodenname kann jederzeit geändert werden. Weiter dann mit Kapitel 4.5 4.2 Standardmethoden In dem TitroLine® 7500 KF sind unter <Standardmethoden> eine Reihe von fertigen Standardmethoden abgespeichert, die man einfach auswählen kann (Abb. 59). Abb. 59 39 Nach der Auswahl wird man direkt nach der Eingabe des Methodennamens gefragt: Abb. 60 Man kann den Standardnamen übernehmen oder auch abändern. Danach kommt man zu <Methodenparameter ändern>. Weiter dann mit Kapitel 4.6. 4.3 Methoden kopieren Methoden können kopiert und unter einen neuen Namen abgespeichert werden. Bei Anwahl der Funktion wird die aktuelle Methode kopiert und ein neuer Name kann eingeben werden: Abb. 61 Es wird automatisch ein neuer Name mit dem Zusatz [1] vergeben, damit nicht 2 Methoden mit dem gleichen Namen existieren. Danach kommt man zu <Methodenparameter ändern>. Weiter dann mit Kapitel .4.6 4.4 Methode löschen Nach Auswahl der Funktion wird gefragt, ob die aktuelle Methode gelöscht werden kann. Man muss explizit <Ja> anwählen und dies dann mit <OK</<ENTER> bestätigen. Abb. 62 40 4.5 Methode drucken Die aktuell ausgewählte Methode kann auf einem angeschlossen Drucker ausgedruckt oder als PDF-Datei auf einem USB-Stick gespeichert werden. Abb. 63 4.6 Methodenparameter ändern Die Eingabe oder Änderung des Methodenamens wurde bereits in Kapitel 4.1 und 4.3. beschrieben. Abb. 64 4.6.1 Methodentyp Im Untermenü <Methodentyp> wählt man aus, ob man eine automatische Titration bzw. eine Dosierung durchführen oder eine Lösung ansetzen möchte: Abb. 65 Die Auswahl des Methodentyps beeinflusst die weitere Parametrierung der Methode. Wählt man z.B. den Dosiermodus aus, kann man nicht mehr den Titrationsmodus (KF und Dead stop) ändern oder keine Formel mehr auswählen. 41 4.6.2 Automatischer Titrationsmodus Bei einer automatischen Titration kann man zwischen folgenden Modi auswählen: • • KF Dead-Stop Titration (µA) 4.6.2.1 KF und Dead-stop Titration Die KF Titration ist eine besondere Form einer Dead-stop Titration. Bei einer normalen Dead-stop Titration wird einfach auf den vorgegebenen Wert in µA titriert, der eine definierte Zeit gehalten werden muss. Bei der KFTitration geschieht dies zwar auch, jedoch muss zusätzlich noch ein bestimmtes Driftkriterium in µg/min erfüllt sein. Zusätzlich ist bei der KF-Titration automatisch eine sogenannte Konditionierung vorgeschaltet, um die Feuchtigkeit in dem Titrationsgefäß und dem Solvent zu beseitigen. Bei der Dead-stop und der KF Titration wird in einer ersten Stufe kontinuierlich bis zu einem Deltawert vom eingestellten Endpunkt dosiert. Die Dosiergeschwindigkeit ist einstellbar. Zwischen dem Deltawert und dem Endpunkt wird dann mit einer linearen Schrittweite bis zum Endpunkt titriert. Folgende Titrationsparameter sind bei der Dead-stop- und KF Titration einstellbar: Titrationsparameter Dead-stop Titration KF Titration µA-Endpunkt X X Delta µA-Wert X X Lineare Schrittweite in ml X X Endpunktverzögerung in s X X Wartezeit (zwischen den linearen Schrittweiten) X X Startwartezeit/Extraktionszeit X X Konditionierung an/aus - X Vortitration in ml X X Polarisationsspannung in mV X X Minimale und maximale Titrationsdauer in s - Max. Titrationsvolumen X X Drift in µg/min X X Dosiergeschwindigkeit % X X 4.6.3 Ergebnis Es gibt folgende Einstellmöglichkeiten beim Ergebnis: Abb. 66 42 Der Ergebnistext kann bis zu 21 alphanumerische Zeichen inkl. Sonderzeichen enthalten: Abb. 67 Die Eingabe wird mit <OK</<ENTER> bestätigt. 4.6.3.1 Berechnungsformeln Die passende Berechnungsformel wird im Formelauswahl-Menü gewählt. Abb. 68 Folgende Berechnungsformeln stehen dem automatischen Titrationsmodes zur Verfügung: Formel EP (EP-B)*T*M*F1/(W*F2) (W*F2)/(EP-B)*M*F1) Zusätzliche Informationen Formel zur Berechnung des ml Verbrauches Formel zur Berechnung des Ergebnisses einer Probe in %, ppm usw. mit Berücksichtigung eines Blindwertes. Formel zur Berechnung des Titers (T) in mg/ml oder mmol/l. Dabei haben die Abkürzungen folgende Bedeutung: EP: B: T: M: F1-F5 W Verbrauch am Endpunkt in ml Blindwert in ml. Meist ermittelt durch Titration Titer der Titrationslösung (z.B. 0.09986 mol/l oder 5,234 mg/ml)) Mol; Mol- oder Äquivalenzgewicht der Probe Faktor 1-5 Umrechnungsfaktoren „Weight“, Einwaage in g oder Vorlage in ml. 43 Wenn man eine Formel ausgewählt hat, wird die Auswahl mit <OK>/<ENTER> bestätigt: Abb. 69 Die Werte für den Blindwert, und Faktoren F1-F5 können eingegeben oder aus einem globalen Speicher eingelesen werden. Die Werte aus dem globalen Speicher wurden durch eine Titration vorab bestimmt und abgespeichert oder manuell eingegeben: Abb. 70 Abb. 71 Der verwendete globale Speicher wird angezeigt. Hier in diesem Beispiel ist das M01: Abb. 72 44 Das Abspeichern von Ergebnissen in globale Speicher wird in Kapitel 4.6.3.7 beschrieben. Die Werte der einzelnen Parameter der ausgewählten Berechnungsformel können nun einzeln eingegeben werden: Abb. 73 4.6.3.2 Einwaage und Vorlage (Probenmenge) Abb. 74 Abb. 75 ä Bei der Probenmenge (W) wird ausgewählt, ob man eine Einwaage oder Vorlage bei der Titration oder dem Lösung ansetzen verwenden möchte. Es gibt folgende Optionen: • • • • • Einwaage manuell: Die Einwaage in g wird beim Start der Methode abgefragt und manuell eingeben. Einwaage automatisch: Die Einwaage wird automatisch durch eine angeschlossene Waage transferiert. Feste Einwaage: Eine feste Einwaage in g wird eingegeben. Diese wird bei jedem Versuch der Methode verwendet. Manuelle Vorlage: Die Vorlage in ml wird beim Start der Methode abgefragt und manuell eingeben. Feste Vorlage: Eine feste Vorlage in ml wird eingegeben. Diese wird bei jedem Versuch der Methode verwendet. 45 4.6.3.3 Formeleinheit Die Formeleinheit kann in dem Untermenü Einheit ausgewählt werden. Abb. 76 Nach der Auswahl (z.B. %) erscheint die Einheit auch als Information in der Anzeige: Abb. 77 46 4.6.3.4 Formeln für Lösungen ansetzen Für den Modus Lösungen ansetzen stehen besondere Berechnungsformeln zur Auswahl. In dem Untermenü Formelauswahl wählt man die passende Berechnungsformel aus: Abb. 78 Es stehen 3 verschiedene Berechnungsformeln zur Auswahl: W*(100-Fa-Fb)*Fc/Fd - W*(100-Fb)/(100*Fe) +Ff W*(100-Fa-Fb)*(Fd/Fg ) - W*(100-Fb)/(100*Fg) +Ff W*(100-Fa-Fb)*Fc/(100*Fd) Bedeutung der einzelnen Faktoren: W: Fa: Fb: Fc: Fd: Fe: Ff: Fg: Einwaage der Probe in g löslicher Fremdbestandanteil in % nichtlöslicher Fremdbestandanteil in % Umrechnungsfaktor für Einheit g/l = 10 mg/l und ppm = 10000 g/100 ml =1 % =1 Sollkonzentration der herzustellenden Lösung in g/l, mg/l (ppm), g/100 ml, oder % Dichte der eingewogenen Probe in g/cm³ Volumenkorrektur in ml. Diese Volumenkorrektur ist die erforderliche Mehr-Dosierung zum Ausgleich der Volumenkontraktion und der Dichtedifferenz zwischen eingewogener Probe und Lösungsmittel (siehe Hinweis zur Volumenkorrektur) Dichte des verwendeten Lösungsmittels in g/cm³ Hinweis zur Volumenkorrektur: Der Anwender muss von Fall zu Fall entscheiden, ob eine Volumenkorrektur erforderlich ist und nach welchen Verfahren korrigiert werden soll. Für Lösungen, deren Gehalte an gelöster Substanz sehr niedrig sind. Kann im Regelfall auf die Volumenkorrektur verzichtet werden. 47 4.6.3.5 Dezimalstellen Man kann die Anzahl der Dezimalstellen von 0 – 6 festlegen. Die Standardeinstellung ist 2. Abb. 79 4.6.3.6 Statistik Durch die Verwendung der Statistik kann der Mittelwert und die relative Standardabweichung automatisch berechnet und dokumentiert werden. Abb. 80 Die Berechnung des Mittelwertes ist schon aus 2 Einzelwerten möglich, die Berechnung der relativen Standardabweichung erst ab 3 Einzelwerten. Die maximale Anzahl ist 10. Abb. 81 Der Mittelwert und die relative Standardabweichung (rel. STABW) wird direkt im Display angezeigt. 48 4.6.3.7 Globale Speicher Ergebnisse von Titrationen können in einen der 50 globalen Speicher (M01 – M50) für weitere Berechnungen geschrieben werden. Abb. 82 Bei eingeschalteter Statistik wird der Mittelwert in den globalen Speicher geschrieben. Mit <Enter/OK> gelangt man in das Untermenü. Falls noch kein globaler Speicher angelegt wurde, kann man mit der Einfügen-Taste <Ins> einen Speicher anlegen. Der Titrator schlägt einen Speichernamen vor, z.B. M01 (M01- M50). Der Name des Speichers kann Anwendungsbezogen geändert werden. Hier in diesem Beispiel von „M01“ zu „Blindwert“ Abb. 83 Das erleichtert später die Zuweisung des globalen Speichers bei einer anderen Methode. Beispiel Titerstellung: Man bestimmt den Titer in mg/ml mit einer Titermethode. Das Ergebnis in mg/ml wird dabei automatisch in den globalen Speicher „Wechselaufsatz““ geschrieben. Abb. 84 Mit Shift+F5 oder über die Systemeinstellungen kann man jederzeit in das Menü für die globalen Speicher gelangen. Mit EDIT/F3 kann man die Bezeichnung oder die Werte ändern und sich anzeigen lassen in welchen Methoden die globalen Speicher verwendet werden. 49 Abb. 85 4.6.4 Titrationsparameter In dem Untermenü <Titrationsparameter> werden die eigentlichen Parameter der Methode festgelegt. Die Parameter wurden bereits im Kapitel 4.6.2.1 vorgestellt: Abb. 86 Abb. 87 Allgemein gültige Titrationsparameter Je nach Titrationsmodus (dynamische-, lineare-, Endpunkttitration und Dead-Stopp-Titration) kann man unterschiedliche Parameter eingeben. Folgende Parameter sind für die beiden automatischen Titrationsmodi KF und Dead-stop gültig: • • • • • • Startwartezeit/Extraktionszeit Feste Wartezei Lineare Schrittweite Vortitration Polarisationsspannung Titrationsende 50 Startwartezeit/Extraktionszeit (KF): Bei der Dead-stop-Titration wird die Startwartezeit am Anfang der Titration abgewartet. Bei der KF Titration heißt die Startwartezeit = Extraktionszeit. Die Extraktionszeit läuft nach der Zugabe der Probe ab. Die Startwarte/Extraktionszeit kann zwischen 0 und 999 Sekunden eingegeben werden: Abb. 88 Konditionierung Die Konditionierung (nur KF) ist bei jeder KF-Methode aktiviert. Für eine externe Steuerung über PC kann Sie abgestellt werden: Abb. 89 Feste Wartezet Die feste Wartezeit ist die Wartezeit zwischen den linearen Schrittweiten am Ende der Titration bis zum Endpunkt. Die feste Wartezeit kann zwischen 0 und 999 Sekunden eingestellt werden: Abb. 90 Schrittweite Die Schrittweite kann zwischen 0,001 und 5,000 ml eingestellt werden. Typische Werte für die KF Titration sind 0,002 – 0,01 ml. 51 Abb. 91 Die (lineare) Schrittweite wird bei dieser Titrationsart nach der kontinuierlichen Titrationsstufe verwendet. Titrationsrichtung (nur Dead-stop-Titration Die Titrationsrichtung kann auf „steigend“ oder „fallend“ eingestellt werden. Wenn man z.B. eine Titration von schwefeliger Säure mit Iodlösung durchführen möchte, muss man steigend einstellen. Bei einer iodometrischen Rücktitration mit Natriumthiosulfat muss man fallend einstellen. Abb. 92 Vortitration Ist der Titriermittelverbrauch ungefähr bekannt, kann man ein Vortitrationsvolumen im Menü <Vortitration> einstellen. Dabei wird nach der Startwartezeit ein definiertes Volumen zu dosiert (= vortitriert). Nach der Zugabe des Vortitrationsvolumens wird noch mal eine definierte Zeit abgewartet bevor der nächste Titrationschritt zugeben wird. Das Vortitrationsvolumen wird automatisch zum Titriermittelverbrauch dazugerechnet. Das Vortitriervolumen kann zwischen 0,000 und 99,999 ml eingegeben und die Wartezeit nach dem Vortitrieren kann zwischen 0 und 999 Sekunden eingestellt werden: Abb. 93 Polarisationspannung Die Polarisationsspannung in mV kann bei der KF und Dead-Stop Titration eingestellt werden. 52 Fig. 94 Die Werte lassen sich zwischen 40 und 220 mV einstellen. 100 mV ist voreingestellt. Niedrige Polarisationsspannung: unempfindlich Hohe Polarisationsspannung: empfindlich 4.6.5 Titrationsende Das Ende eine Titration ist erreicht und das Ergebnis wird berechnet wenn: • • • • • Der vorgegebene Endwert in µA-Wert erreicht ist Die Endpunktverzögerung in Sekunden eingehalten wurde Der Driftwert in µg/min erreicht ist Der vorgegebene ml-Wert erreicht ist (maximales Titrationsvolumen) Die Bedingungen für die minimale und maximale Titrationsdauer in Sekunden eingehalten wurden Abb. 95 Abb. 96 Maximale Titrationsdauer Die maximale Titrationsdauer kann von 0 – 9999 Sekunden eingestellt. Voreingestellt sind 600 Sekunden. Die maximale Titrationsdauer wird in der Regel bei KF Titrationen verwendet, die durch eine Nebenreaktion eine hohe kontinuierliche Drift erzeugen und damit kein stabiler Endpunkt erreicht werden kann. 53 Minimale Titrationsdauer Die minimale Titrationsdauer kann von 0 – 9999 Sekunden eingestellt werden. Voreingestellt sind 10 Sekunden. Die minimale Titrationsdauer verhindert ein zu frühes beenden der Titration bei verzögerter Wasserextraktion aus der Probe. Die minimale Titrationsdauer wird kombiniert mit der Extraktionszeit eingesetzt. Sie läuft schon ab wenn die Extraktionszeit noch aktiv ist. Maximale Titrationsvolumen Das maximale Titrationsvolumen sollte immer auf sinnvolle Werte eingestellt sein. Es dient auch als Sicherheitskriterium, damit nicht zu viel titriert wird und eventuell das Titrationsgefäß überläuft. Das maximale Titrationsvolumen kann zwischen 1,000 und 999,999 ml eingestellt werden: Abb. 97 50 ml sind voreingestellt. Das Volumen für die Konditionierung wird mitgezählt! Drift Die Drift in µg/min wird aus dem Titriermittelverbrauch/Zeit x Konzentration der Titrierlösung berechnet. Eine stabile Drift am Start und am Ende der Titration ist wichtig wenn man reproduzierbare Ergebnisse erhalten möchte. Dies gilt besonders bei Proben mit niedrigen Wassergehalten im unteren Prozentbereich (< 0,1 %). Der Driftwert sollte aber auch nicht zu niedrig eingestellt werden, da die Titrationsdauer sonst teilweise sehr erhöht wird. Eine dichtes und trockenes Titrationsgefäß hat eine Drift von < 50 µg/min. das entspricht einen Verbrauch von 10 µl (0,01 ml) eines Titranten mit der Konzentration 5 mg/ml. Für viele Anwendungen reicht aber auch schon ein Driftwert von 100 – 150 µg/min völlig aus. Voreingestellt ist deshalb bei der Probentitration ein Driftwert von 100 bzw. 150 µg/min. Bei den Titermethoden sind 50 µg/min voreingestellt. Endpunkt µA Der Endpunkt in µA kann zwischen 0,0 und 100,0 eingegeben werden. Sinnvolle Werte für die KF-Titration sind Werte zwischen 10 – 30 µA. Standardwert ist 20 µA. Delta Endpunkt µA Der Deltawert in µA ist einer der wichtigsten Parameter für die KF und Dead-stop Titration. Je kleiner der Deltawert ist, je länger wird mit einer kontinuierlichen Geschwindigkeit titriert (dosiert). Bei der Verwendung von 1-Komponentenreagenzien und reinem Methanol als Lösungsmittel sollte der Deltawert < 5 µA eingestellt werden. Sinnvolle Werte sind 2 oder 3 µA. Das hängt damit zusammen, dass die KF Reaktion in Methanol relativ träge abläuft. Bei der Verwendung von 2-Komponentenreagenzien oder auch bei der Verwendung von CombiSolventien muss der Deltawert auf > 10 eingestellt werden, sonst wird schnell übertitriert. Sinnvolle Werte sind 14 oder 15 µA. Endpunktverzögerung Die Endpunktverzögerung wird in Sekunden eingestellt. Sie kann von 0 – 100000 Sekunden eingestellt werden. Standardwert ist 10 Sekunden. Kürzere Endpunktverzögerungen (5 Sekunden) sind dann sinnvoll wenn man • • • sehr kleine Schrittweiten verwendet (z.B. 0.001 ml) einen Titer von 1 mg/ml verwendet eine Nebenreaktion eine hoher Driftwert erzeugt 54 4.6.6 Dosierparameter Abb. 98 Die Dosierparameter (Dosiergeschwindigkeit, Füllgeschwindigkeit und max. Dosier-/Titriervolumen) werden für jede einzelne Methode festgelegt. Das gilt für alle Typen von Methoden wie automatische Titration, Dosieren und Lösungen ansetzen: Abb. 99 Die Dosiergeschwindigkeit in % kann von 1 bis 100 % eingestellt werden. 100 % entspricht der maximal möglichen Dosiergeschwindigkeit: Wechseleinheit WA 05 WA 10 WA 20 WA 50 maximale Dosiergeschwindigkeit [ml/min] 10 20 40 100 Die Füllgeschwindigkeit in Sekunden kann von 20 bis 999 Sekunden eingestellt werden. Standardwert ist auf 30 Sekunden eingestellt. Für verdünnte wässrige Lösungen kann man die Füllgeschwindigkeit auch auf 20 Sekunden einstellen. Für nichtwässrige Lösungen sollte man die Füllgeschwindigkeit auf 30 Sekunden eingestellt lassen. Bei hochviskosen Lösungen wir konzentrierte Schwefelsäure sollte die Füllgeschwindigkeit noch weiter auf 40 -60 Sekunden reduziert werden. Das (maximale) Dosiervolumen oder Titriervolumen kann je nach Methodentyp auf 999,999 oder sogar auf 9999,999 eingestellt werden. Für den Dosiermodus können folgende Fülloptionen eingestellt werden: 55 Abb. 100 Bei Füllen „Aus“ wird nicht automatisch nach jedem Dosierschritt gefüllt. Bei Füllen „intelligent vorher“ wird immer vor dem nächsten Dosierschritt geprüft, ob der Dosierschritt noch ohne einen Füllvorgang ausgeführt werden kann. Falls das nicht möglich ist wird erst gefüllt und dann der Dosierschritt durchgeführt. Bei Füllen „intelligent nachher“ wird nach einem Dosierschritt jedes Mal geprüft, ob der nächste Dosierschritt ohne Füllvorgang durchgeführt werden kann. Bei Füllen „immer“ wird nach jedem Dosierschritt automatisch gefüllt. 4.6.7 Probenbezeichnung Bei der manuellen und automatischen Titration und bei dem Lösungen ansetzen kann eine Probenbezeichnung eingeben werden. Man kann eine manuelle, automatische und keine Probenbezeichnung einstellen: Abb. 101 Bei der manuellen Probenbezeichnung wird immer nach dem Start der Methode nach der Probenbezeichnung gefragt (Siehe dazu auch Kapitel 3.6, Hauptmenü). Bei der automatischen Probenbezeichnung wird eine Stammbezeichnung festgelegt (hier Wasser, siehe Abb. 102), die dann automatisch mit 01 beginnend durchnummeriert wird: Abb. 102 Nach einem erneuten Einschalten beginnt die Nummerierung von vorne mit 01. 56 4.6.8 Dokumentation Abb. 103 Die Dokumentation auf einem Drucker oder USB-Stick kann in 3 verschiedenen Formaten eingestellt werden: „kurz“, „Standard mit Kurve“ und „GLP“: Abb. 104 Methodentyp Automatische Titration Dosierung Lösungen ansetzen Kurzdokumentation Methodenname, Datum, Uhrzeit, Titrationsdauer, Probenbezeichnung, Einwaage/Vorlage, Start- und Endmesswerte (pH/ mV Temp), Steilheit und Nullpunkt der pHElektrode, Ergebnisse und Berechnungsformel Methodenname, Datum, Uhrzeit Standarddokumentation Wie Kurzdokumentation, + Titrationskurve GLP-Dokumentation Wie StandardDokumentation + Methodeninhalt Entfällt Methodenname, Datum, Uhrzeit, Probenbezeichnung, Einwaage/Vorlage, Ergebnisse und Berechnungsformel Entfällt Wie KurzDokumentation + Methodeninhalt Wie KurzDokumentation + Methodeninhalt 57 5 Systemeinstellungen Abb. 105 Vom Hauptmenü aus (Abb. 107) gelangt man <SYS>/<F7> in die Systemeinstellungen: Abb. 106 Die Einstellung der Landessprache wurde bereits im Kapitel 2.5 beschrieben. 5.1 Reagenzien - Wechselaufsatz Jeder Wechselaufsatz enthält ein RFID Transponder. In diesem Transponder können folgende Informationen gespeichert werden: • Aufsatzgröße (vorgegeben, nicht veränderbar) • Aufsatz ID (vorgegeben, nicht veränderbar) • Reagenzname (default: Leerzeichen) • Konzentration (default: 1.000000) • Konzentration bestimmt am: (Datum) • Haltbarkeit bis (Datum) • Geöffnet/Hergestellt am: (Datum) • Prüfung nach ISO 8655: (Datum) • Chargenbezeichnung: (default: no charge) • Letzte Änderung (Datum) 58 Abb. 107 Abb. 108 Abb. 109 Wenn man das Menü <Reagenzien WA> mit <ESC> verlässt wird man immer gefragt, ob man die Werte übernehmen möchte: Abb. 110 Bei der Antwort <Ja> werden die aktualisierten Werte in den RFID Transponder des Wechselaufsatzes geschrieben. 59 5.2 RS232 Einstellungen Unter dem Menü <RS232- Einstellungen> kann man die Geräteadresse des TitroLine® 7500 KF festlegen und die Parameter der beiden RS232-Schnittstellen unabhängig voneinander einstellen: Abb. 111 Die Geräteadresse kann von 0 – 15 eingestellt werden. Die Adresse 1 ist voreingestellt: Abb. 112 Die Baudrate ist auf 4800 voreingestellt. Sie kann von 1200 – 19200 eingestellt werden: Abb. 113 60 Abb. 114 Die Parität kann zwischen <No> (Keine), <Even> (Gerade) und <Odd> (Ungerade) eingestellt werden. <No> ist voreingestellt: Abb. 115 Die Datenbits können zwischen 7 und 8 Bit eingestellt werden. 8 Bit sind voreingestellt: Abb. 116 Die RS232-Parameter können auf die Werkseinstellung zurückgesetzt werden. 61 5.3 Datum und Uhrzeit Die Uhrzeit ist Werkseitig auf die MEZ eingestellt. Bei Bedarf kann Sie verändert werden: Abb. 117 5.4 Passwort Die Aktivierung des Passwortes ist in der aktuellen Version 12_18 noch nicht aktiviert. Bitte wenden Sie sich an die Firma SI Analytics für die Zusendung einer Updateversion. 5.5 RESET Durch ein RESET werden alle Einstellungen auf die Werkseinstellung zurückgestellt. Achtung: Es werden auch alle Methoden gelöscht. Bitte vorab die Methoden ausdrucken oder auf ein angeschlossenes USB-Speichermedium exportieren/kopieren (Möglich mit einem späteren Update!). Der RESET muss nochmals extra bestätigt werden: Abb. 118 62 5.6 Drucker Für den Anschluss von Druckern lesen Sie bitte Kapitel 7.3. Abb. 119 5.7 Geräteinformationen Die <Geräteinformationen> enthalten Informationen über die • Aktuelle Softwareversion • Seriennummer des Gerätes • Druckertreiberversion • Updateversion • Eingestellte Geräteadresse • Anzahl der Messungen (Starts einer Methode) • Und Anzahl der Hübe/Füllvorgänge Abb. 120 5.8 Systemtöne Hier kann man die Lautstärke der Systemtöne und der Fronttastatur des Gerätes einstellen. Die Systemtöne ertönen z.B. bei dem Ende einer Titration oder bei einer Fehleingabe. Die Tasten der Fronttastatur ertönen bei dem erfolgreichen Betätigen einer Taste: 63 Abb. 121 Bei Bedienen der externen Tastatur werden keine Töne ausgegeben. 5.9 Software Update Abb. 122 Für ein Update der Gerätesoftware wird ein USB-Stick benötigt auf der sich eine neue Version befindet. Die 2 benötigten Dateien müssen sich dazu einfach im Root- Verzeichnis des USB-Sticks befinden: Man steckt den USB-Stick in einem freien USB-A (Master) Port, wartet ein paar Sekunden und wählt dann die Funktion Software Update aus. Die gültigen Softwareupdates werden im Display angezeigt. In diesem Fall ist es die Version „16-11“ vom 19.04.2011. 64 Abb. 123 Nachdem man das Update mit <OK/ENTER> gestartet hat, erscheint erst diese Anzeige: Abb. 124 und wechselt dann nach wenigen Sekunden zu dieser Anzeige: Abb. 125 Nach erfolgtem Update (ca. 2-3 Minuten) fährt das Gerät die Software komplett herunter und startet neu. Wichtig: Die Methoden werden bei dem Update nicht gelöscht! Sie können weiter verwendet werden. Wenn sich keine gültige Datei auf dem USB-Stick befindet, erscheint diese Meldung: Abb. 126 65 6 Datenkommunikation über die RS232- und USB-B-Schnittstelle 6.1 Allgemeines ® Der TitroLine 7500 KF verfügt über zwei serielle RS232-C- Schnittstellen zur Datenkommunikation mit anderen Geräten. Mit diesen beiden Schnittstellen lassen sich mehrere Geräte an einer PC - Schnittstelle betreiben. ® Zusätzlich verfügt der TitroLine 7500 KF alternativ zur RS232-1 noch über eine USB-B Schnittstelle, die ausschließlich für die Anbindung an einem PC genutzt werden kann. RS232-C- 1 übernimmt die Verbindung zu einem angeschlossenen Rechner oder zum vorherigen Gerät der „Daisy Chain“ Kette. An der RS232-C- 2 können weitere Geräte angeschlossen werden (Daisy Chain Konzept). PIN-Belegung der RS232-C- Schnittstellen: PIN-Nr. 1 2 3 Bedeutung / Beschreibung T x D Datenausgang R x D Dateneingang Digitale Masse 6.2 Verkettung mehrerer Geräte — „Daisy Chain Konzept“ Damit Sie mehrere Geräte in einer Kette individuell ansprechen können, muss jedes Gerät eine eigene Geräteadresse aufweisen. Hierzu wird zunächst mit einem RS232-C-Datenkabel, z. B. Typ Nr. TZ 3097, eine Verbindung vom Rechner zur RS232-C-Schnittstelle 1 des ersten Gerätes der Kette hergestellt. Mit einem weiteren RS232-C-Datenkabel, Typ Nr. TZ 3094, wird die RS232-C- Schnittstelle 2 des ersten Gerätes mit der RS232-C-Schnittstelle 1 des zweiten Gerätes verbunden. An die Schnittstelle 2 des zweiten Gerätes kann ein ® weiteres Gerät angeschlossen werden. Alternativ kann der TitroLine 7500 KF auch mit einem USB- Kabel TZ 3840 (Typ A (M) --- USB Typ B (M), 1,8 m) an eine USB-Schnittstelle eines Rechners angeschlossen werden. Dazu muss einmalig ein Treiber auf dem PC installiert werden. Damit übernimmt die USB-B-Schnittstelle die Funktionalität der RS232-1 Schnittstelle. Die Adresse besteht immer aus zwei Zeichen: z. B. Adresse 1 aus den beiden ASCII- Zeichen <0> und <1>. Die Adressen können von 00 bis 15 eingestellt werden, also insgesamt 16 Möglichkeiten. Es ist darauf zu achten, dass die Geräte in der Kette unterschiedliche Adressen aufweisen. Wird ein Gerät mit seiner Adresse angesprochen, so arbeitet das Gerät diesen Befehl ab, ohne ihn an ein weiteres Gerät zusenden. Die Antwort an den Rechner wird auch mit der eigenen Adresse versehen. Die Adressen werden wie in Kap. 5.3 beschrieben eingestellt. ® Von einem Rechner empfängt der TitroLine 7500 KF an der Schnittstelle 1 (bzw. USB- B Schnittstelle) Befehle, wenn diese mit seiner Adresse versehen sind, und sendet auch über diese Schnittstelle seine Antwort. Stimmt die Adresse des ankommenden Befehls nicht mit seiner Geräteadresse überein, so wird der komplette Befehl an die Schnittstelle 2 weitergesendet. Diese Schnittstelle 2 ist mit der Schnittstelle 1 eines weiteren Gerätes ® verbunden. Dieses Gerät prüft nun seinerseits die Adresse und reagiert wie der erste TitroLine 7500 KF auf diesen Befehl. ® Alle Informationen (Datenstrings) die an der Schnittstelle 2 des TitroLine 7500 KF ankommen, werden unverzüglich auf der Schnittstelle 1 (bzw. USB-B-Schnittstelle) an den Rechner ausgegeben. Somit erhält der Rechner auf jeden Fall die Informationen aller Geräte. Es können in der Praxis bis zu 16 Geräte an einer PCSchnittstelle angeschlossen werden. 6.3 Befehlsliste für RS-Kommunikation Die Befehle bestehen aus drei Teilen: Adresse zweistellig aa, z.B.: 01 Befehl z.B.: DA Variable, falls erforderlich z.B.: 14 und Befehlsende <CR> <LF> Jeder Befehl muss mit den ASCII - Zeichen <CR> und <LF> (Carriage Return und Line Feed) abgeschlossen werden. Alle Antworten werden erst nach Beendigung der jeweiligen Aktion an den Rechner zurückgesandt. Beispiel: Es soll der Befehl an einem TitroLine® 7500 KF mit der Adresse 2 zum Dosieren von 12,5 ml, geschickt werden. Der Befehl setzt sich aus den Zeichen zusammen: 02DA12.5<CR LF> Hierbei gilt: 02 = Geräteadresse DA = Befehl für Dosieren ohne Füllen und Nullstellen der Anzeige 12.5 = zu dosierendes Volumen in ml <CR LF> = Steuerzeichen als Befehlsende 66 Befehl Beschreibung Antwort aaAA aaMC1...XX aaBF aaBV aaDA aaDB aaDO aaGDM aaGF aaES aaEX aaFD aaGDM aaGF aaGS aaLD aaLR aaM aaLI aaLO aaRH aaRC aaRS automatische Vergabe der Geräteadresse Auswahl einer Methode „Bürette füllen“. Aufsatz wird gefüllt. dosiertes Volumen in ml ausgeben dosiere Volumen ohne Füllen, mit Addition des Volumens dosiere Volumen ohne Füllen, Nullstellen des Volumens dosiere Volumen mit Füllen, ohne Addition des Volumens Geschwindigkeit für Dosieren in ml/min Füllzeit in Sekunden (min ist 20, Default 30) „ESC" Funktion einen Schritt zurück „EXIT“ Fkt. zurück zum Hauptmenü Funktion Messen µA „Dead Stopp“ Dosiergeschwindigkeit in ml/min (0.01 – 100 ml/min) Füllzeit in sec (einstellbar von20 – 999 Sekunden) Ausgabe Seriennummer des Gerätes Ausgabe Messdaten Ausgabe Report (Kurzreport) Ausgabe voreingestellter Messwert (pH/mV/ug) Ausgabe Methodeninhalt Ausgabe Dokumentation (wie eingestellt) Anforderung der Identifikation sende letzten Befehl Report Status Mögliche Statusantworten sind: titration, Füllen ready, Start ausgewählte Methode EEPROM auf Werksdaten zurücksetzen Stopp der laufenden Funktion Sprache der Anzeige auf Deutsch einstellen Sprache der Anzeige auf Englisch -English- einstellen Sprache der Anzeige auf Französisch -Francois- einstellen Sprache der Anzeige auf Spanisch -Español- einstellen Versionsnummer der Software aaY aaY aaY aa0.200 aaY aaY aaY aaY aaY aaY aaY aaY aaY aaY aaGS08154711 aaY aaY aaM7.000 aaSM aaSEEPROM aaSR aaSYS5 aaSYS1 aaSYS2 aaSYS3 aaVE aaIdent:TL7000KF aa“letzter Befehl“ aaStatus:“text aaY aaY aaY aaY aaY aaY aaY aaVersion: 67 7 Anschluss von Analysenwaage und Drucker 7.1 Anschluss von Analysenwaagen Da sehr häufig die Probe auf einer Analysenwaage eingewogen wird, ist es auch sinnvoll diese Waage an den ® ® TitroLine 7500 KF anzuschließen. Um die Waage an den einen TitroLine 7500 KF anschließen zu können, muss die Waage über eine RS232-C-Schnittstelle verfügen und es muss ein entsprechend konfiguriertes Verbindungskabel vorhanden sein. Für folgende Waagetypen gibt es bereits fertig konfektionierte Verbindungskabel: Waage Sartorius (alle Typen), teilweise Kern Mettler AT, PR, PM Mettler, AB-S, AG, PG Precisa XT-Serie Kern mit 9-poliger RS232 TZ-Nummer TZ 3092 TZ 3093 TZ 3099 TZ 3183 TZ 3180 Für andere Waagetypen kann auf Anfrage ebenfalls ein Verbindungskabel konfektioniert werden. Wir benötigen dazu detaillierte Informationen über die RS232-C-Schnittstelle der verwendeten Waage. Das Verbindungskabel wird an die RS232-C-Schnittstelle 2 des TitroLine® 7500 KF angeschlossen. Diese Seite des Verbindungskabels besteht immer aus einem 4-poligen Mini-Stecker. Die andere Seite des Kabels kann je nach Waagetyp ein 25-poliger Stecker (Sartorius), ein 9-poliger Stecker (Mettler AB-S) oder ein 15-poliger Spezialstecker (Mettler AT) usw. sein. ® 7500 KF gesendet werden können, müssen die Damit Waagedaten an den TitroLine ® Datenübertragungsparameter des TitroLine 7500 KF und der Waage übereinstimmen. Es müssen zusätzlich noch ein paar andere Grundeinstellungen an den Waagen vorgenommen werden: • Die Waage soll nur auf einen Print-Befehl die Waagedaten via RS232-C senden • Die Waage soll nur nach Stillstand der Anzeige die Waagedaten senden • Die Waage sollte niemals auf „send continuous“, „automatic sending“ bzw. „kontinuierlich senden“ eingestellt sein. • „Handshake“ an der Waage muss auf „aus“, „off“, eventuell auch auf „Software Handshake“ oder „Pause“ eingestellt sein. • Es sollten keine Sonderzeichen wie S oder St den Waagedaten im Waagedatenstring vorangestellt sein. Eventuell können dadurch die Waagedaten vom TitroLine® 7500 KF nicht richtig verarbeitet werden. Nachdem Sie die Waage mit dem richtigen Kabel an den TitroLine® 7500 KF angeschlossen und alle Einstellungen in der Software der Waage und gegebenenfalls im TitroLine® 7500 KF angepasst haben, kann man die Waagedatenübertragung sehr einfach überprüfen. Starten Sie die eine Methode. Bestätigen Sie die Probenbezeichnung. Auf der Anzeige erscheinen folgende Meldungen: a) „Keine Waagedaten vorhanden. Warten auf automatische Einwaage“. Parameter auf „automatische Einwaage“ b) Die Einwaage einzugeben dann sind die Parameter noch auf „manuelle Einwaage“ eingestellt Legen Sie einen Gegenstand auf die Waage und drücken Sie die Print-Taste. Nach dem Stillstand der Anzeige an der Waage ertönt ein Piepston am Titrator und a) die Anzeige wechselt danach automatisch zur Messanzeige. b) die Einwaage muss manuell eingegeben und mit <Enter><OK> bestätigt werden. 68 7.2 Waagedateneditor Mit dem Druck auf die Funktionstaste <F5/Waagesymbol> ruft man den so genannten Waagedateneditor auf. Es erscheint eine Liste mit den vorhandenen Waagedaten: Abb. 127 Die Waagedaten können einzeln editiert werden. Nach einer Änderung erscheint ein Kreuz vor der Einwaage: Abb. 128 Es können Einwaagen einzeln gelöscht werden und hinzugefügt werden. Es ist auch möglich alle Einwaagen auf einmal zu löschen: Abb. 129 Wenn keine Waagedaten vorhanden sind erscheint die Meldung keine Waagedaten: 69 Abb. 130 7.3 Anschluss von Drucker Ergebnisse, Kalibrierdaten und Methoden können auf folgenden Medien ausgedruckt werden: • • • HP PCL kompatiblen Drucker (A4) Farbe und Monochrom (z.B. Laserdrucker) Seiko DPU S445 (Thermopapier 112 mm Breite) Auf dem USB-Stick im PDF- und CSV-Format Zum Anschluss der Drucker sind die USB Anschlüsse des Geräts zu verwenden. Beim Ausdruck ist darauf zu achten, welcher Drucker angeschlossen ist. So ist es beispielsweise nicht möglich, Layouts eines HP Druckers auf einem Kassendrucker oder umgekehrt auszudrucken. Die Druckereinstellungen des Geräts sollten daher beim Wechsel des Druckers entsprechend geprüft und ggf. angepasst werden. Abb. 131 Es darf nur ein Drucker pro Gerät angeschlossen werden, da eine automatische Druckererkennung nicht unterstützt wird. PDF Druck“ ist voreingestellt. 70 8 Wartung und Pflege des Titrators TitroLine® 7500 KF Zur Erhaltung der Funktionsfähigkeit des Titriergerätes müssen regelmäßig Prüf- und Wartungsarbeiten durchgeführt werden. Voraussetzung für die Richtigkeit des Volumens und Funktionsfähigkeit des Titriergerätes sind regelmäßige Überprüfungen. Die Richtigkeit des Volumens wird bestimmt durch alle Chemikalien führenden Teile (Kolben, Zylinder, Ventil, Titrierspitze und Schläuche). Diese Teile sind von einem Verschleiß betroffen und daher Verschleißteile. Besonders beansprucht sind Kolben und Zylinder und bedürfen somit besonderer Aufmerksamkeit. Starke Beanspruchung: Einsatz von, zum Beispiel konzentrierten Lösungen, Reagenzien und Chemikalien (> 0,5 mol/L); Chemikalien, die Glas angreifen wie Fluoride, Phosphate, Alkalilösungen; Lösungen die zum Auskristallisieren neigen; Fe(III)Chlorid-Lösungen; Oxidierende und korrodierende Lösungen wie Iod, Kaliumpermanganat, Cer(III), Karl2 Fischer Titriermittel, HCl; Lösungen mit einer Viskosität > 5 mm /s; Einsatz häufig, täglich. Normale Beanspruchung: Einsatz von zum Beispiel nicht Glas angreifende, nicht kristallisierende oder nicht korrodierende Lösungen, Reagenzien und Chemikalien (bis 0,5 mol/L). Benutzungspausen: Wird das Dosiersystem länger als zwei Wochen nicht eingesetzt, empfehlen wir, den Dosieraufsatz zu leeren und zu reinigen [6]. Dies gilt insbesondere bei den unter „Starke Beanspruchung“ genannten Betriebsbedingungen. Wird dies unterlassen, kann der Kolben oder das Ventil undicht werden und das Titriergerät wird dadurch beschädigt. Wenn die Flüssigkeit im System belassen wird, muss außerdem damit gerechnet werden, dass Korrosionen eintreten, und dass sich die verwendeten Lösungen im Lauf der Zeit verändern, z. B. auch auskristallisieren. Da es nach dem derzeitigen Stand der Technik für die Verwendung an Titriergeräten keine Kunststoffschläuche gibt, die völlig frei von Diffusionserscheinungen sind, gilt diese Vorsicht insbesondere für den Bereich der Schlauchleitungen. Wir empfehlen folgende Prüf- und Wartungsarbeiten Einfache Reinigung: Äußerliches Abwischen von Chemikalienspritzer [1] Sichtprüfung: Auf Undichtigkeit im Bereich des Dosiersystems prüfen? [2] Ist der Kolben dicht? [3] Ist das Ventil dicht? [4] Titrierspitze frei? [5] Grundreinigung des Dosiersystems: Alle Teile des Dosiersystems einzeln reinigen. [6] Technische Prüfung: Prüfung auf Luftblasen im Dosiersystem. [7] Sichtprüfung Elektrische Anschlüsse überprüfen [8] Überprüfung des Volumens nach ISO 8655 Grundreinigung durchführen Prüfung nach ISO 8655 Teil 6 oder Teil 7 [9] Starke Beanspruchung Immer bei Gebrauch, wenn erforderlich Normale Beanspruchung Immer bei Gebrauch, wenn erforderlich Wöchentlich, bei Monatlich, bei Wiederinbetriebnahme Wiederinbetriebnahme Alle drei Monate Wenn erforderlich Halbjährlich, bei Halbjährlich, bei Wiederinbetriebnahme Wiederinbetriebnahme Halbjährlich Jährlich 71 Achtung: Alle Prüfungen und Wartungsarbeiten können applikationsabhängig auch anders festgelegt werden. Die einzelnen Intervalle können verlängert werden, wenn keine Beanstandung auftritt, Sie müssen wieder verkürzt werden, sobald eine Beanstandung aufgetreten ist. Die Prüfung der messtechnischen Zuverlässigkeit einschließlich Wartungsarbeiten wird als Serviceleistung (auf Bestellung mit Herstellerprüfzertifikat) von SI Analytics GmbH angeboten. Das Titriergerät muss hierzu an SI Analytics GmbH eingesandt werden. Detaillierte Beschreibung der Prüf- und Wartungsarbeiten: [1] Mit einem weichen Tuch (und ggf. etwas Wasser mit normalem Haushaltsreiniger) abwischen. [2] Eine undichte Verbindung ist an Feuchtigkeit oder Kristallen an den Verschraubungen der Schläuche, an den Dichtlippen des Kolbens im Dosierzylinder oder am Ventil sichtbar. [3] Wird Flüssigkeit unterhalb der ersten Dichtlippe beobachtet muss in kürzeren Zeitabständen überprüft werden, ob sich die Flüssigkeit auch unter der zweiten Dichtlippe ansammelt. In diesem Fall muss der Kolben und der Glaszylinder sofort getauscht werden. Es ist ohne weiteres möglich, dass sich im Betrieb unterhalb der ersten Dichtlippe kleine Tröpfchen ansammeln die allerdings auch wieder verschwinden können. Dies ist noch kein Grund zum Austausch. [4] Das Ventil muss zur Überprüfung aus der Halterung herausgezogen werden. Die Schläuche bleiben dabei mit dem Ventil verbunden. Prüfen Sie, ob sich Feuchtigkeit unterhalb des Ventils befindet. Beim Wiedereinsetzen muss darauf geachtet werden, dass die kleine Nase an der Drehachse wieder in die entsprechende Nut eingesetzt wird. [5] Es dürfen sich keine Niederschläge oder Kristalle an der Titrierspitze befinden, die das Dosieren behindern oder das Ergebnis verfälschen könnten. [6] Abnehmen des Zylinders, Ventil aus der Ventilaufnahme nehmen, Schläuche abschrauben und alle Teile sorgfältig mit destilliertem Wasser spülen. Demontage von Zylinder, Schläuchen und der anderen Teilen des Aufsatzes siehe Gebrauchsanleitung. [7] Dosierung von einem Bürettenvolumen und wieder füllen. Luftblasen sammeln sich an der Spitze des Zylinders und im Titrierschlauch und können dort leicht erkannt werden. Werden Luftblasen beobachtet, alle Verbindungen handfest nachziehen und den Dosiervorgang wiederholen. Bei weiteren Luftblasen im System Ventil [6] überprüfen und Schlauchverbindungen ersetzen. Die Luftblasen können auch an der Verbindung Dichtlippe des Kolbens zum Zylinder entstehen. Wenn ein Herabsetzen der Füllgeschwindigkeit nicht hilft, muss die Dosiereinheit ersetzt werden. [8] Prüfen der elektrischen Steckkontakte auf Korrosion und mechanische Beschädigung. Defekte Teile müssen repariert oder durch neue Teile ersetzt werden. [9] Siehe Applikation Bürettenprüfung nach ISO 8655 Teil 6 9 Lagerung und Transport Soll der Titrator TitroLine® 7500 KF zwischengelagert oder erneut transportiert werden, bietet die Verwendung der Originalverpackung die beste Voraussetzung für den Schutz der Geräte. In vielen Fällen ist diese Verpackung jedoch nicht mehr zur Hand, so dass ersatzweise eine gleichwertige Verpackung zusammengestellt werden muss. Das Einschweißen des Gerätes in eine Folie ist dabei vorteilhaft. Als Lagerort ist ein Raum zu wählen, in dem Temperaturen zwischen + 10 und + 40 °C herrschen und Luftfeuchtigkeitswerte bis zu 70 % (rel.) nicht überschritten werden. Sollen Dosieraufsätze zwischengelagert oder erneut transportiert werden, müssen die im System enthaltenen Flüssigkeiten, insbesondere aggressive Lösungen entfernt werden, siehe auch Kapitel 8.X „Wartung und Pflege des Bürettenteils". 10 Recycling und Entsorgung Dieser Titrator und seine Verpackung wurden weitestgehend aus Materialien hergestellt, die umweltschonend entsorgt und einem fachgerechtem Recycling zugeführt werden können. Achtung: Auf der Hauptleiterplatte befinden sich 2 Lithium-Batterien. Batterien gehören nicht in den Hausmüll. Sie werden vom Hersteller kostenlos zurückgenommen und einer fachgerechten Verwertung bzw. Entsorgung zugeführt. Wenn Sie Fragen zur Entsorgung haben, wenden Sie sich bitte an SI Analytics. 72 11 Index Anschluss von Analysenwaagen 16, 67 Anschluss von Drucker 69 Anzeige 25 Aufstellen 10 Austausch des Glaszylinders 23 Austauschen eines Wechselaufsatzes 18 Automatischer Titrationsmodus 41 Befehlsliste für RS-Kommunikation 65 Benutzungspausen 70 Berechnungsformeln 42 Betriebsspannung 9 Daisy Chain Konzept 65 Datum und Uhrzeit 61 Dead stopp - Anschluss 6 Dokumentation 56 Dosiergenauigkeit 7 Dosiergeschwindigkeit 54 Dosierparameter 54 Dosierung 34 Drift 53 Drucker 15 Einstellen der Landessprache 16 Einwaage und Vorlage (Probenmenge) 44 Entsorgung 71 Ergebnis 41 Erstbefüllen 21 Externe PC Tastatur 26 Formelauswahl 42, 46 Formeleinheit 45 Formeln für Lösungen ansetzen 46 Fronttastatur 25 Geräteadresse 59 Geräteinformationen 62 Globale Speicher 48 Handtaster 26 Handtaster TZ 3880 („Maus“) 15 Hauptmenü 29 Inbetriebnahme 10 Lagerung 71 Lösungen ansetzen 37 Magnetrührers TM 235 11 max. Dosier-/Titriervolumen 54 Maximale Titrationsdauer 52 Maximale Titrationsvolumen 53 Methode drucken 40 Methode editieren 38 Methode löschen 39 Methoden kopieren 39 Methodenname 38 Methodenparameter 38 Methodenparameter ändern 40 Minimale Titrationsdauer 53 Montage und Anschluss des Magnetrührers 11 Netzspannung 9 neue Methode 38 Passwort 61 Polarisationspannung 51 Probenbezeichnung 55 Reagenzien- Wechselaufsatz 57 Recycling 71 RESET 61 RS232 Einstellungen 59 Sicherheitshinweise 9 Software Update 63 Spülen 21 Standardmethoden 38 Statistik 47 Systemeinstellungen 57 Systemtöne 62 Technische Daten 6 Titrationsparameter 49 Transport 71 USB-Barcodescanner 15 USB-Hub 15 USB-Stick 15 Viskosität 6 Vortitration 51 Waagedateneditor 68 Warnhinweise 9 Wartung und Pflege 70 Wechselaufsätze 7 TABLE OF CONTENT PAGE 1 .. Technical Specifications of the Titrator TitroLine® 7500 KF ................................ 75 1.1 1.2 1.3 Summary ................................................................................................................................. 75 ® Technical Data Titrator TitroLine 7500 KF ............................................................................ 76 Warning and safety information .............................................................................................. 79 2 .. Unpacking and First Operation .............................................................................. 80 2.1 2.2 2.3 2.4 2.4.1 2.4.2 2.4.3 2.4.4 2.4.5 2.5 2.6 2.6.1 2.7 2.7.1 2.7.2 2.7.3 2.8 2.9 2.10 Unpacking ............................................................................................................................... 80 Connection and installation of titrator and magnetic stirrer TM 235 ....................................... 80 Installation and Connection of the TM 235 KF titration stand and titration vessel .................. 81 Connecting the Titrator - Combination with Accessories and Additional Devices .................. 85 ® Back panel of the titrator TitroLine 7500 KF .......................................................................... 85 ® Connection ports of the TitroLine 7500 KF............................................................................ 85 Connecting a printer ................................................................................................................ 85 Connecting a USB device (manual controller, keyboard, memory device, hub) .................... 85 Connection of analytical balances ........................................................................................... 86 Setting the Language of the Country ...................................................................................... 86 Interchangeable unit WA ......................................................................................................... 87 Installing the interchangeable unit ........................................................................................... 87 Positioning and Replacing an Interchangeable Unit ............................................................... 88 Placing an interchangeable unit .............................................................................................. 88 Removing an interchangeable unit.......................................................................................... 89 Programming the titration unit ................................................................................................. 89 Initial Filling or Rinsing of the Entire Interchangeable Unit ..................................................... 91 Filling the titration vessel with solvent ..................................................................................... 93 Replacing the Glass Cylinder and the PTFE Piston ............................................................... 93 3 .. Working with the Titrator TitroLine® 7500 KF ........................................................ 94 3.1 3.2 3.3 3.4 3.5 3.6 3.6.1 3.6.2 3.6.3 3.6.4 Front Keyboard ........................................................................................................................ 94 Display ..................................................................................................................................... 95 Manual controller “mouse“ ...................................................................................................... 96 External PC Keyboard ............................................................................................................. 96 Menu Structure ........................................................................................................................ 97 Main Menu ............................................................................................................................... 99 Standard methods of KF Titration ........................................................................................... 99 Automatic KF Titration ........................................................................................................... 100 Dosage .................................................................................................................................. 104 Preparing Solutions ............................................................................................................... 107 4 .. Method Parameters ............................................................................................... 108 4.1 4.2 4.3 4.4 4.5 4.6 4.6.1 4.6.2 4.6.3 4.6.4 4.6.5 4.6.6 4.6.7 Method editing and new method ........................................................................................... 108 Default methods .................................................................................................................... 108 Copy Methods ....................................................................................................................... 109 Delete Methods ..................................................................................................................... 109 Print method .......................................................................................................................... 110 Change Method Parameters ................................................................................................. 110 Method type ........................................................................................................................... 110 Result .................................................................................................................................... 111 Titration parameters .............................................................................................................. 119 Titration end .......................................................................................................................... 122 Dosing parameter .................................................................................................................. 124 Sample identification ............................................................................................................. 125 Documentation ...................................................................................................................... 126 5 .. System settings ..................................................................................................... 127 5.1 5.2 5.3 5.4 5.5 5.6 5.7 Interchangeable Unit - Reagents .......................................................................................... 127 RS232 Settings ..................................................................................................................... 129 Date and Time ....................................................................................................................... 131 Password ............................................................................................................................... 131 RESET .................................................................................................................................. 131 Printer .................................................................................................................................... 132 Device Information ................................................................................................................ 132 5.8 5.9 System Tone ......................................................................................................................... 132 Software Update.................................................................................................................... 133 6 .. Data Communication via RS232- and USB-B interface ...................................... 135 6.1 6.2 6.3 General Information............................................................................................................... 135 Chaining multiple devices —“Daisy Chain Concept“ ............................................................ 135 Instruction Set for RS-Communication .................................................................................. 135 7 .. Connection of Analytical Balances and Printers ................................................ 137 7.1 7.1.1 7.2 7.3 Connection of Analytical Balances ........................................................................................ 137 Balance TZ-Number .............................................................................................................. 137 Balance data editor ............................................................................................................... 138 Connection of Printers ........................................................................................................... 139 8 .. Maintenance and Care of the TitroLine® 7500 KF ............................................... 140 9 .. Storage and transportation ................................................................................... 141 10 Recycling and Disposal......................................................................................... 141 11 Index ....................................................................................................................... 142 Declaration of conformity last page of the document Notes to the Manual The provided manual will allow you the proper and safe handling of the titration instruments. The pictogram ! has the following meaning: Status at time of printing Advanced technology and the high quality of our products are guaranteed by a continuous development. This may result in differences between this operating manual and your product We can not exclude mistakes. We are sure you understand that no legal claims can be derived from the information, illustrations and descriptions. Note A potentially more recent version of this manual is available on our internet website at www.si-analytics.com . The German version is the original version and binding in all specifications . Version 131126 US For maximum security, observe the safety and warning instructions in the Instructions . Warning of a general danger to personnel and equipment Non-compliance may result in injury or material will be destroyed. 75 1 Technical Specifications of the Titrator TitroLine® 7500 KF 1.1 Summary ® The TitroLine 7500 KF is suitable for the following applications: The possible range of titrations includes volumetric KF and Dead stop titrations with a maximum of 50 memorisable methods. ® The examples of possible use of the TitroLine 7500 KF include: − KF titrations with 1-component KF reagents − KF titrations with 2-component KF reagents − Dead stop titrations such a bromine number and sulphur dioxide in − Compatible with TitriSoft 3.0. ® ® In addition, the TitroLine 7500 KF comes with following functionalities of the TITRONIC 500 piston burette: − Dosing − Preparation of solutions Each method allows for the setting of a variety of dosing and filling rates. Solutions to be used: Virtually, any liquids and solutions with a viscosity of < = 10 mm² / s such as concentrated sulphuric acid may be used. However, one has to avoid the use of chemicals that may attack glass, PTFE or FEP or that are explosive, such as hydrofluoric acid, sodium azide or bromine! Suspensions containing high solids percentages may clog or even damage the dosing system. ! General provisions: ! The safety guidelines that are applicable to the handling of chemicals have to be observed under all circumstances. This applies in particular to inflammable and/or etching liquids. Guarantee We provide guarantee for the device described for two years from the date of purchase. This guarantee covers manufacturing faults being discovered within the mentioned period of two years. Claim under guarantee covers only the restoration of functionality, not any further claim for damages or financial loss. Improper handling/use or illegitimate opening of the device results in loss of the guarantee rights. The guarantee does not cover wear parts, as lobes, cylinders, valves and pipes including the thread connections and the titration tips. The breach of glass parts is also excluded. To ascertain the guarantee liability, please return the instrument and proof of purchase together with the date of purchase freight paid or prepaid. 76 1.2 Technical Data Titrator TitroLine® 7500 KF Status Nov.21 CE sign: th 2013 EMC compatibility according to the Council Directive: 2004/108/EG; applied harmonized standards: EN 61326-1:2006 Low-voltage directive according to the Council Directive 2006/95/EG Testing basis EN 61 010, Part 1 ETL sign: Conforms to ANSI/ UL Std. IEC 61010-1 Certified to CAN/ CSA Std. C22.2 No. 61010-1 Testing basis EN 61 010, Part 1 Country of origin: Germany, Made in Germany The following solvents/titration reagents are allowed to be used: − All common titration solutions. − As reagent water and all non-aggressive non-organic and organic fluids are allowed. If using combustible fluids fire please adhere to the Guidelines for Explosion Protection and Prevention of the chemical industry. 2 − For fluids with higher viscosity (≥ 5 mm /s), lower boiling point or affinity to outgas, the filling and dosage speed can be adjusted. 2 − Fluids with viscosity over 20mm /s cannot be dosed. Measurement input: Karl-Fischer (Dead-stop) connector for double platinum electrode Polarisation voltage variably adjustable from 40 … 220 mV. Connector: 2 x 4 mm - sockets. I [µA] Measurement range Display resolution 0 ... 100 0,1 Measurement accuracy* without sensor probe 0,2 ± 1 Digit * The measurement uncertainty of the sensor probe has to be taken into account as well. Display: 3.5 inches -1/4 VGA TFT display with 320x240 pixels. Inputs: Measurement input µA: (Dead-Stop-) connector for double platinum electrode Connection sockets: 2 x 4 mm) Power supply: power supply 90-240 V; 50/60 Hz, power input: 30 VA Use the Power supply TZ 1853, Type No.: FW 7362M/12 only! RS232-C Interface: RS232-C interface separated galvanically through photocoupler Daisy Chain function available. adjustable, 7 or 8 Bit (default: 8 Bit) adjustable, 1 or 2 Bit (default: 1 Bit) static 1 Bit adjustable: even / odd / none adjustable: 1200, 2400, 4800, 9600, 19200 (Default 4800 baud) adjustable, (0 to 15, default: 01) for computer, input Daisy Chain devices of SI Analytics, titrator TitroLine 6000/7000/7500, - Burettes TITRONIC 500, TITRONIC 110 plus, TITRONIC universal, - Balances of the types Mettler, Sartorius, - Kern, Ohaus (for more, please contact SI Analytics) - Exit Daisy Chain 2 x USB-type A and 1 x USB-type B Data bits: Stop bit: Start bit: Parity: Baud rate: Address: RS232-1 RS232-2 USB Interface: 77 USB –Typ B (“slave“) for connecting a PC USB –Typ A (“master“) for connecting: - USB keyboard - USB printer - USB “mouse“ (“mouse“), - USB data media e.g. USB stick - USB Hub Stirrer/pump TMKF: 12V DC out, 500mA power supply for stirrer TM 235 and KF titration stand TM 235 KF Housing material: Front keyboard: Housing dimensions: Weight: Polypropylene polyester coated 15.3 x 45 x 29.6 cm (W x H x D), height incl. interchangeable unit ca. 2.3 kg for basic unit ca. 3.5 kg for complete device incl. interchangeable unit (with empty reagent bottle) Ambient temperature: + 10 ... + 40 °C for operation and storage Humidity according to EN 61 010, Part 1: Max. relative humidity 80 % for temperatures up to 31 °C, linear decrease down to 50 % relative humidity at a temperature of 40 ° Ambient conditions: Interchangeable units ® Compatibility: Recognition: Valve: Cylinder: Hoses: Bracket for supply bottle: Materials: Dimensions: Weight: Dosing accuracy: ® ® units are compatible to the titrators TitroLine 6000, TitroLine 7000, TitroLine ® 7500 KF and Piston Burette TITRONIC 500 automatically through RFID. Recognition of unit size and characteristics of the Titration- or dosing solution volume neutral cone valve made from fluorocarbon polymers (PTFE), TZ 3000 ® borosilicate glass 3.3 (DURAN ) FEP hose set, blue suitable for square glass bottle and misc. reagent bottles ® borosilicate glass DURAN , fluorocarbon polymers (PTFE), stainless steel, polypropylene, 15 x 34 x 22.8 cm (W x H x D) incl. reagent bottle approx. 1.2 kg for interchangeable unit WA incl. empty reagent bottle after DIN EN ISO 8655, part 3 Accuracy: 0.15 % Precision: 0.05 - 0.07 % (Depending on the used interchangeable unit) ® Dosing accuracy of the Titrator TitroLine 7500 KF with WA interchangeable units: Interchangeable. unit type No. Volume [ml] Tolerances of the Øi of the glass cylinder [mm] Dosage error* according to 100 % volume [%] Reproducibility [%] WA 05 5.00 ± 0.005 ± 0.15 0.07 WA 10 10.00 ± 0.005 ± 0.15 0.05 WA 20 20.00 ± 0.005 ± 0.15 0.05 WA 50 50.00 ± 0.005 ± 0.15 0.05 78 Specifications Titration Stand TM 235 KF Status Nov 21. 2013 In connection with the titrator TitroLine 7500 KF CE - Mark EMV – compatibility according to Council Directive 89/336/EWG; Transient emissions according to norm EN 50 081, part 1 Interference resistance according to norm EN 50 082, part 2 Low voltage directive according to Council Directive 73/23/EWG Last amended by directive 93/68/EWG; test criteria EN 61 010, part 1 ETL sign: Conforms to ANSI/ UL Std. IEC 61010-1 Certified to CAN/ CSA Std. C22.2 No. 61010-1 Country of origin: Germany / made in Germany Pump: Free volume flow - air-: Delivery pressure max. Flow rate liquid medium 50 ... 1000 U/min Stirring speed: Hoses: Connections Power supply (top);: Housing Material: Dimensions: Weight: Ambient conditions: Climate: flow rate 2.25 l / min 1.5 bar ca. 0,8 l / min PVC- hose, outer diameter 6 x 1 mm PTFE- hose, outer diameter 4 x 0.5 mm Low voltage input 12 V / − on the backside of titration stand Plug connection: plug for low voltage connection – phone jack-, Positive pole at pin contact, inside contact ∅ = 2,1 mm, USA/Japan, Power supply via titrator TitroLine 7500 KF Use the Power supply TZ 1855, Type No.: FW 7555O/12 only! Polypropylene; 80 x 130 x 250 mm, H x W x D (height without stand rod) 1.0 kg Not suitable for explosive environments! Ambient temperature: Humidity: + 10 °C ... + 40 °C for storage and transport. According to EN 61 010, part 1: Maximum relative humidity 80 % for temperatures up to 31 °C, Linearly decreasing up to 50 % relative humidity With a temperature of 40 °C 79 1.3 Warning and safety information The TitroLine 7500 KF corresponds to protection class III. It was manufactured and tested according to DIN EN 61 010, Part 1, Protective Measures for Electronic Measurement Devices and has left the factory in an impeccable condition as concerns safety technology. In order to maintain this condition and to ensure safe operation, the user should observe the notes and warning information contained in the present operating instructions. Development and production is done within a system which meets the requirements laid down in the DIN EN ISO 9001 standard. ® For reasons of safety, the titrator TitroLine 7500 KF must be opened by authorised persons only; this means, for instance, that work on electrical equipment must only be performed by qualified specialists. ® ® In the case of nonobservance of these provisions the titrator TitroLine 7500 KFmay constitute a danger: electrical accidents of persons or fire hazard. Moreover, in the case of unauthorised ® intervention in the titrator TitroLine 7500 KF as well as in the case of negligently or deliberately caused damage, the warranty will become void. ! ! Prior to switching the device on it has to be ensured that the operating voltage of the titrator TitroLine® 7500 KF matches the mains voltage. The operating voltage is indicated on the specification plate. Nonobservance of this provision may result in damage to the titrator TitroLine® 7500 KF or in personal injury or damage to property. If it has to be assumed that safe operation is impossible, the titrator TitroLine 7500 KF has to be put out of ® operation and secured against inadvertent putting to operation. In this case please switch the titrator TitroLine ® 7500 KF off, pull plug of the mains cable out of the mains socket, and remove the titrator TitroLine 7500 KF from the place of work. ® Examples for the assumption that a safe operation is no longer possible, the package is damaged, ® the titrator TitroLine 7500 KF shows visible damages, ® titrator TitroLine 7500 KF does not function properly, liquid has penetrated into the casing. If the titrator TitroLine® 7500 KF has been altered technologically or if unauthorized personnel tried or succeeded to open the instrument as attempt to repair it. In case that the user operates such a device, all thereof resulting risks are on the user. The titrator TitroLine 7500 KF must not be stored or operated in humid rooms. ® For reasons of safety, the titrator TitroLine 7500 KF must only be used for the range of application described in the present operating instructions. ® In the case of deviations from the intended proper use of the device, it is up to the user to evaluate the occurring risks. ! The relevant regulations regarding the handling of the substances used have to be observed: The Decree on Hazardous Matters, the Chemicals Act, and the rules and information of the chemicals trade. It ® has to be ensured on the side of the user that the persons entrusted with the use of the titrator TitroLine ® 7500 KF are experts in the handling of substances used in the environment and in titrator TitroLine 7500 KF or that they are supervised by specialised persons, respectively. During all work with titration solutions: ! Please wear protective glasses! ! The titrator TitroLine 7500 KF is equipped with integrated circuits (EPROMs). X rays or other high energy radiation may penetrate through the device’s casing and delete the program. For working with liquids, not beeing common titration solvents, especially the chemical resistance of the ® construction materials of the titrator TitroLine 7500 KF have to be considered (please also refer to chapter 1.1). ® For the use of liquids with high vapour pressure or (mixture of) substances not being mentioned in chapter 1.1 ® as allowed substances, the safe and proper operation of the titrator TitroLine 7500 KF has to be guaranteed by the user. When the piston moves upwards within the cylinder, a microfilm of dosing liquid or titration solution will always remain adhered to the inner wall of the cylinder, but this has no influence on the dosing accuracy. This small residue of liquid, however, may evaporate and thus penetrate into the zone underneath the piston, and if non® admitted liquids are being used, the materials of the titrator TitroLine 7500 KF may be dissolved or corroded ® (please refer also to chapter 8 “Maintenance and Care of the titrator TitroLine 7500 KF”). 80 2 Unpacking and First Operation 2.1 Unpacking The titrator itself as well as all related accessory and peripheral parts have been carefully checked at the factory ® to ensure their correct function and size. The TitroLine 7500 KF modules consists of: • TitroLine 7500 basic unit • An interchangeable dosing unit WA 05, WA 10 or WA 20 • The KF titration stand (pump and stirrer) TM 235 KF including waste (1 L clear bottle), solvent (1 L amber bottle) and moisture bottle (100 ml) with all tubes. • Titration vessel TZ 1770 including titration tip • KF starter kit TZ 1789 with molecular sieve, glass wool and a set of syringes with needles. • Electrode KF 1100 ® Please ensure that the small accessories are also removed in full from the packaging. For the scope of delivery, please refer to the enclosed parts lists. Fig. 1 2.2 Connection and installation of titrator and magnetic stirrer TM 235 The low voltage cable of the power supply TZ 1853 has to be plugged in to the 12 V socket „in“, (see Fig. 8 back panel, chapter. 2.4.1), on the back panel of the titrator. Then plug the power supply into the plug socket. 81 Fig. 2a Place the power supply easily accessable in order to be able to remove the titrator anytime easily from the power circuit. As a rule, the TM 235 magnetic stirrer is arranged to the right of the piston burette. The magnetic stirrer is connected to the 12V out-socket in the rear panel of the piston burette using the TZ 1577 connection cable (scope of delivery of the basic device) (cp. ‘Back panel’ illustration, chapter 2.4). The stand rod (scope of delivery of the basic device) is screwed into the thread; subsequently the Z 305 titration clamp (scope of delivery of the basic device) is installed (fig. 2b). Fig. 2b 2.3 Installation and Connection of the TM 235 KF titration stand and titration vessel ® The titrator TitroLine 7500 KF and the TM 235 KF may be placed on any flat surface. As a rule, the TM 235 KF titration stand is arranged to the right of the titrator. ® The pump/stirrer is connected to the 12V out-socket at the rear panel of the TitroLine 7500 KF using the TZ 1577 connection cable (scope of delivery of the basic device) (cp. ‘Back panel’ illustration, chapter 2.4). The stand rod (scope of delivery of the basic device) is screwed into the thread of the TM 235 KF. The titration vessel TZ 1770 is mounted at the stand rod. Please take care that the metal clamp is adjusted as shown in the attached photo: 82 Fig. 3a Put all three white inner plastic adapters at the waste, solvent and moisture bottle. Fill the moisture bottle with molecular sieve. Connect the PVC and PTFE plastic tubes as shown in the next pictures. The PVC tubes are connected to the connectors at the back side of the TM 235 KF. The long PVC tube is used for the connection of the waste bottle. The two shorter PVC ones are used to connect the moisture bottle and the solvent bottle. Fig. 3b 83 The moisture bottle is connected to the right connector (view from above) of the TM 235 KF. The waste (clear) bottle is connected to the left connector. Fig. 4 The PTFE tube from the clear waste bottle is adjusted to the ground (tube 1) of the titration vessel. The PTFE tube from the solvent bottle (tube 2) is adjusted as shown in the next two pictures: Fig. 5 84 Fig. 6 The burette tip is placed into the left NS 14 opening and connected to the valve of the interchangeable unit. Put first some glass wool and then molecular sieve in the plastic moisture tube. Place it to the other NS opening as shown in the next picture. Fig. 7 The electrode KF 1100 is connected to the µA input. The keyboard is connected to one of the USB –A ports. 85 2.4 Connecting the Titrator - Combination with Accessories and Additional Devices ® 2.4.1 Back panel of the titrator TitroLine 7500 KF 1 2 3 4 5 6 7 Fig. 8 2.4.2 ® Connection ports of the TitroLine 7500 KF The TitroLine® 7500 KF is equipped with the following connections: 1) 2) 3) 4) µA measurement input for the connection of double platinum electrodes (KF 1100 or Pt 1200, Pt 1400) USB-B interface for connection to a PC On/Off switch Two USB-A (“Master“) interfaces for connecting USB devices such as a keyboard, printer, manual control unit, USB memory device etc. 5) ”in“: Connection of the external power pack 6) “out“: Connection of the TM 235 KF titration stand or TM 235 magnetic stirrer 7) Two RS232 ports, 4-channel (Mini-DIN): RS1 for connection to the PC RS2 for connection of a weighing balance and other devices from SI Analytics (burettes a.s.o.) 2.4.3 Connecting a printer Printers with a USB interface are to be connected to one of the two USB-A interfaces. These printers have to feature HP PCL emulation (3, 3GUI, 3 enhanced, 5, 5e). So-called GDI printers cannot be used! Alternatively the thermo-compact printer Seiko S445 can be connected. 2.4.4 Connecting a USB device (manual controller, keyboard, memory device, hub) The following USB devices can be connected to the USB-A interfaces: • PC-keyboard • TZ 3880 manual controller (in the following: ”mouse“) • Printer • USB storage devices, e.g. USB sticks • USB hub • USB barcode scanners 86 2.4.5 Connection of analytical balances Analytical balances are to be connected to the RS232-2 using an appropriate cable 2.5 Setting the Language of the Country The ex-factory default language setting is English. When the piston burette is switched on, the main menu will appear once the boot sequence is completed: Fig. 8 Using <SYS/<F7> or <MODE>, followed by <System settings> you navigate to the system settings. The very first menu is to be used for setting the language of the country: Fig. 9 Use <ENTER>/<OK> to call the menu. Select the national language using the <↑↓> arrow keys, confirm it with <ENTER>/<OK>: Fig. 10 The selected language will appear immediately. Pressing the <ESC> key twice will return the user to the main menu. 87 2.6 Interchangeable unit WA 1 6 2 7 3 8 9 4 11 5 Fig. 11 1) TZ 3871 - suction hose 2) TZ 3872 - connection hose 3) TZ 3873 - dosing hose without dosing tip and holding bracket; TZ 3874 - dosing hose with dosing tip and holding bracket 4) TZ 3801 - valve cover lid 5) TZ 3000 - 3/2-way valve 6) TZ 2003 - drying tube 7) TZ 3802 - threaded cap with borehole GL 45, incl. adapter with 2 openings for drying tube and suction hose 8) TZ 3803 - 1 litre reagent bottle, brown 9) TZ 3900 - UV protection, blue transparent 10) TZ 3875 - shaft for titration tip and TZ 3356 - titration tip unit, blue or micro titration tip white TZ 3285, adapter TZ 1525 11) TZ 1507 - plastic drip-down tubule 2.6.1 Installing the interchangeable unit Fig. 11 shows a completely assembled interchangeable unit. • • • • • Remove the valve with the attached hoses from the pack, and then push it on the valve support until it snaps in position. Slip on the valve cover lid on the valve as is shown in the illustration. Insert the TZ 3872 connection hose in the threaded hole provided in the burette cylinder, and then tighten it by hand. Insert the TZ 3871 suction hose into the threaded opening of the GL 45 or S 40 adapters, and then tighten it manually. Remove the standard dosing hose TZ 3874 from the valve and connect the dosing hose including from the KF titration vessel TZ 1770 88 2.7 Positioning and Replacing an Interchangeable Unit The base unit comes with an RFID reader, and all the interchangeable units are equipped with an RFID transponder. This transponder can be used to store the following information: • • • • • • • • • • Unit size (cannot be changed) Unit ID (cannot be changed) Reagent name (default: blank) Concentration (default: 1.000000) Concentration determined on: (Date) To be used until: (Date) Opened/Produced on: (Date) Test according to ISO 8655: (Date) Charge description: (default: no charge) Last modification: (Date) Each time an interchangeable unit is pushed onto the base unit, the data is automatically read out of the transponder. 2.7.1 Placing an interchangeable unit The interchangeable unit is to be placed on the device unit as is shown in fig. 12 a-c; subsequently, it is to be pushed downwards until the black button latches on the left side. Fig. 12.a Fig. 12.b 89 Fig. 12.c 2.7.2 Removing an interchangeable unit Removing the interchangeable unit is done in reverse order: • Depress the black button on the left, and then pull the interchangeable unit forward as is shown in fig. 12 c – 12 a. ! Please note: Removing the interchangeable unit is only possible as long as the piston is in the lower position (zero position). Possibly, it may be necessary to press the <FILL> key first. ! 2.7.3 Programming the titration unit The data from the RFID transponder of the interchangeable unit will be read immediately (fig. 13). Fig. 13 Following the reading operation, the input menu for the input of the reagents will be shown for approx. 10 seconds (fig. 14). The size of the interchangeable unit is displayed on the left side of the display (here 10 ml). Fig. 14 90 When used for the first time, it is recommended to enter here at least the name of the reagent being used. To do so, confirm the “Reagent“selection with <ENTER>, then type the name and possibly the concentration (fig. 12). Fig. 15 Press <OK>/<ENTER> to confirm (fig. 15). Following the optional input of additional parameter, press <ESC> to leave the reagents menu (fig. 16). The approximate concentration of the KF titrant (e.g. 5 or 2) should be entered under concentration. Thereby the drift in µg/min can be calculated in the right dimensions. Fig. 16 You will be prompted for a confirmation of the values (fig. 17): Fig. 17 If you selected <Yes>, the values will be written into the interchangeable unit. You can see this from a message in red colour displayed at the bottom. Upon completion, the left bottom corner of the display will show the new name of the reagent (fig. 18). In the present case this is Titrant 5. 91 Fig. 18 2.8 Initial Filling or Rinsing of the Entire Interchangeable Unit Initial filling of the interchangeable unit is done using the <rinsing > rinsing programme. Fig. 19 On the main menu (fig. 19), press <MODE> key to navigate to the methods/system (fig. 20). Fig. 20 Pressing <↑> twice will take you to the <Rinsing> selection immediately (fig. 21). 92 Fig. 21 Confirm the selection by pressing <ENTER>: Fig. 22 At this point you can select the number of rinsing cycles (Fig. 19). Initial filling requires a minimum of two rinsing cycles. You can stop the rinsing operation (Fig. 20) at any time by pressing <STOP> and then resume rinsing with <START>. Fig. 23 While the initial filling or rinsing programme is being run, please place a sufficiently dimensioned waste vessel under the titration tip. The best is when the titration tip is mounted in the KF titration vessel. 93 2.9 Filling the titration vessel with solvent The solvent is pumped from the solvent bottle into the titration vessel by pushing down the front part of the rocker switch on the titration stand TM 235 KF. Pump solvent into the titration vessel until the titration tip and the electrode are completely immersed. This will be approx. 35-40 ml of solvent: 35-40 ml Filling Fig. 24 2.10 Replacing the Glass Cylinder and the PTFE Piston Replacing the glass cylinder and the piston does not require any additional tools. In certain cases the piston extractor has to be used. • • • • • • • Remove the interchangeable unit from the base unit. Unscrew the hose between the glass cylinder and the valve from the glass cylinder. Rotate the blue UV protection 5 to 6 times to the left to loosen it. You can remove the UV protection and pull out of the glass cylinder together with the piston inside it. Insert a new glass cylinder and piston (Fig. 25) into the interchangeable unit, and then slip on the blue UV protection again. Tighten the blue UV protection again by rotating it 5 to 6 times to the right. The piston rod should project 1-2 cm out of the interchangeable unit (Fig. 26 a). At this point, tilt the unit forward until the slanted bottom side is in flat contact with the lab table (Fig. 26 b). This forces the piston into its correct position. Should the piston be forced somewhat too far into the glass cylinder, simply pull it out and place it in the correct position according to the procedure described above. Glass cylinder Piston rod Fig. 24 94 Piston rod Fig. 25 a Fig. 25 b Basically, it should be noted that within one and the same interchangeable unit only the specified cylinder size may be installed, since otherwise the coding which is memorised within the interchangeable unit will no longer match the cylinder size. This will entail incorrect dosage. And for the sake of dosing and analytical accuracy, it is also recommended to replace the PTFE pistons each time a defective glass cylinder is replaced. This applies in particular to glass breakage, since broken glass may damage the sealing rings of the PTFE piston. Please note: As a rule, the hoses and cylinders will contain chemicals which may spill or be splashed around in the course of disassembly. The relevant safety precaution measures applicable to the handling of the chemicals concerned have to be observed. 3 Working with the Titrator TitroLine® 7500 KF 3.1 Front Keyboard 95 Apart from alphanumeric input (a-z, A-Z, 0-9) and a few other functions, almost all functions can be performed using the front keyboard. <Mode>: <EDIT>: <ESC>: <START>: <FILL>: Methods selection, rinsing, system settings Changing the current method, new method, copy and delete method <ESC> will take you back to the previous menu level. Start and Stop of a current method Filling the unit The individual functions are described in detail in Chapter 3.4, External PC Keyboard. 3.2 Display The display consists of a graphical LCD display with a resolution of 320 x 240 pixels. It also offers the possibility to display graphics, e.g. the measuring curve while or after the titration is/was running: 96 3.3 Manual controller “mouse“ The “mouse“ (Fig. 23) can be used dosing applications and sample preparation methods. The mouse is not included in the scope of delivery of the TL 7500 basic unit. Fig. 26 Mode Dosage through Dosage method Preparation of solutions Black key Start dosage Start dosage Grey Key Filling Filling 3.4 External PC Keyboard Keys <ESC> <F1>/<START> <F2>/<STOP> <F3>/<EDIT> <F4>/<FILL> <F5>/ <F6>/<MODE> <F7>/<SYS> <F8/<CAL> <F9>/+ / <F10>/<DOS> Num/ Scroll Lock/ Lock Prt Sc Sys Rq <ESC> < ↑> < ↓ > <←> <→> 0...9 <ENTER> < ←Backspace > Letters, ASCII-symbols All other keys Function <ESC> will take the user to the previous level on the menu. Start of a selected method Stop of the current method Change of the current method, new method, copy method Fill the interchangeable unit Display and modification of the balance data. With <Shift + F5> display and modification of the global memories Selection of method, rinsing, system settings System settings (language selection, time/date ...) Without function Change of sign Call dosing menu Without function Without function Selection of the method-selection menu from the main menu. Elders: <ESC> will take you back to the previous level in the menu. Selection of individual menus and numeric values Input of numeric values Confirmation of input parameters Deletion of one input digit / an input character to the left of the blinking cursor Alphanumeric input possible. Uppercase and lowercase possible. Do not have any function 97 3.5 Menu Structure There are 4 selection menus: • Start or main menu • Method parameters • Method selection • System settings After power-up, the main menu is always the first menu to appear. The method displayed will always be the last method that was used (Fig. 27). Fig. 27 Pressing <START> will result in the immediate execution of the method shown. <EDIT>/F3 will take you to the method parameters (Fig. 28). Fig. 28 At this point you can • modify the current method • create a new method • call and memorise standard methods • copy or delete an existing method Use the <↓> und <↑> keys to select the submenus, confirm your selection with <OK>/<ENTER>. <ESC> will take you back to the main menu. 98 <MODE>/F6 leads you to the “select method“ menu (Fig. 29). Fig. 29 Existing methods can be selected by pressing the <↓> und <↑> keys and confirming the selection with <OK>/<ENTER>. Once the selection made, you will return to the main menu with the newly selected method. If no method is selected, <ESC> will also take you back to the main menu. To navigate directly to the system settings (Fig. 30 and Fig. 31) you can use the <SYS>/F7 key; you can also navigate there through the method selection menu. Fig. 30 Fig. 31 99 3.6 Main Menu After power-up, the main menu is always the first menu to appear. The method displayed will always be the last method that was used (Fig. 32). Fig. 32 3.6.1 Standard methods of KF Titration If no titration has been performed yet, it is recommended to load one of the standard methods. These methods have default parameters and can generally be used immediately without changes. From the main menu, press F3/EDIT to access the methods menu: Fig. 33 From this menu, select the appropriate standard method: Fig. 34 100 Standard methods KF Application Titer 1-Component (liquid standard) Determination of the concentration of the titration agent. Suitable for 1-component reagents. Standard is a liquid standard in ampoules with a concentration of 10 mg/g. Titer 1-Component (solid standard) Determination of the concentration of the titration agent. Suitable for 1-component reagents Standard is the standard substance sodium tartrat dihydrate with a water amount of 15.66 %. Titer 1-Component (water) Determination of the concentration of the titration agent. Suitable for 1-component reagents Standard is pure water Titer 2-Component (liquid standard) Determination of the concentration of the titration agent. Suitable for 2-component reagents. Standard is a liquid standard in ampoules with a concentration of 10 mg/g. Titer 2-Component (solid standard) Determination of the concentration of the titration agent. Suitable for 2-component reagents Standard is the standard substance sodium tartrat dihydrate with a water amount of 15.66 %. Titer 2-Component (water) Determination of the concentration of the titration agent. Suitable for 1-component reagents Standard is pure water Sample 1-Component Method for sample titrations with 1-component reagents Sample 2-Component Method for sample titrations with 2-component reagents Statistics are switched on. The mean value of the titer in mg/ml is automatically saved in the attachment. It is then used automatically in the sample titration. The results of the sample titration are calculated in %. If needed, the unit can be converted into other units of measure, such as ppm. 3.6.2 Automatic KF Titration The method being displayed can now be carried out immediately with <START>. The preconditioning is run first. The solvent and the titration vessel contain moisture (water) that should not influence the calculation of the result. The conditioning is run automatically after the Start button or the F1 key are pressed. The final conditions are the same as the conditions of the actual sample titration. 101 Fig. 35 When the final criteria are met, then there is an audible signal and Conditioning ready is shown on the display: Fig. 36 The conditioning remains active until the actual titration is started by pressing <F1/START>. You are prompted immediately to add the sample: Fig. 37 After the sample or the standard is added, you must press <F1/START> again. Depending on the method settings, you will be prompted for the sample identification (Fig. 38) and the weighed-in quantity (Fig. 39). You can use an external PC keyboard for entering a 20-digit alphanumeric sample ID. 102 Fig. 38 Fig. 39 The balance data can be entered using the front keyboard or an external keyboard. The input is to be confirmed with <OK>/<ENTER>. In the case of an automatic acceptance of the balance data, the weighed-in quantities will be read in from a memory. If the memory does not contain any balance data, a message will appear to indicate that no balance data are present: Fig. 40 Pressing the Print key will transfer the balance data, too. Titration will then begin directly after the transfer of the balance data without any further confirmation being necessary. The display shows either the use in ml with the drift in µg/min or the drift with the measured value in µA or the titration curve in ml/time [s]. You can switch between the individual displays with the <F6/MODE> key: The graphics are scaled automatically: 103 Fig. 41 Fig. 42 Fig. 43 Scaling of the chart will be done automatically. The result will be displayed at the end of the titration (Fig. 44 and 45). Fig. 44 104 <MODE>/<F6> can be used to view the titration curve or further results: Fig. 45 If a printer is connected, the results will either be printed according to the settings made for the method, or else they will be memorised in the form of a PDF- and CSV-file file on a connected USB stick. If no printer or USB stick is connected, the bottom left corner of the display will show the message “no printer“ or “no USB stick”.<ESC> will take you back to the main menu where you can start the next titration immediately. 3.6.3 Dosage To start a dosage method, please use the <START>/<F1> or the black key of the “mouse“. Fig. 46 Fig. 47 The dosed volume will be briefly displayed before the display returns to the main menu. 105 Fig. 48 Fig. 49 The next dosage operation can be started immediately. Filling of the unit will occur automatically. This option can be switched off. Then the cylinder will be filled when the maximum cylinder volume is reached. The unit can be filled at any time using <FILL>. A dosing operation can also be performed without any dosing method with the <DOS>/<F10> key of the external keyboard: Fig. 50 This is the point to input the volume which will be dosed following the confirmation with <ENTER>/<OK>: 106 Fig. 51 Pressing the <ENTER>/<OK> key will cause the next dosing operation to be performed immediately: Fig. 52 In this case further dosages can be performed using <ENTER>/<OK>. Filling of the unit following dosage will not occur automatically here, unless the maximum cylinder volume has been reached. The unit can be filled at any time using <FILL>. <ESC> will take you back to the main menu. 107 3.6.4 Preparing Solutions The so-called “Preparing solutions“ method is a special dosing method. In this process, a solvent is dosed to a sample weight of a substance until the desired target concentration is reached: Fig. 53 Fig. 54 Fig. 55 If the calculated volume is greater than the maximum volume, an error message will be displayed and dosage will be suppressed for safety reasons: Fig. 56 108 4 Method Parameters From the main menu (Fig. 53), <EDIT>/<F3> will take you to the method parameters: Fig. 57 4.1 Method editing and new method If you select <edit method> or <new method> you will be taken to the modification or new creation of a method. Selecting <new method> will always lead to the prompt for the input of a method name (Fig. 58). This prompt will not appear in the case of the modification of an already created method. Fig. 58 The method name can contain up to 21 characters. Special characters are also possible. If no keyboard is connected, the method name being displayed has to be adopted (in the present case “Method 04“). Numbering of methods will occur automatically. Press <OK>/<ENTER> to confirm the input. The method name can be changed at any time. Please continue at this point with Chapter 4.5. 4.2 Default methods The <Default methods> item of the TitroLine® 7500 KF contains a series of ready-made standard methods which can be conveniently selected (Fig. 59). Fig. 59 Once the selection made, you are directly prompted for the input of the method name. 109 Fig. 60 The standard name may be adopted or modified. Subsequently, you will be taken to the <Change method parameters> item. Please continue at this point with Chapter 4.6 4.3 Copy Methods Methods can be copied or stored with a new name. If you select this function, the current method will be copied and you can include a new name Fig. 61 A new name with the suffix [1] is assigned automatically in order to avoid the existence of two methods having the same name. Subsequently, you will be taken to the <Change method parameters> item. Then you proceed with Chapter 4.6. 4.4 Delete Methods If this function is selected, you will be prompted to know whether the current method is actually to be deleted. You have to reply <Yes> in explicit terms and also confirm this reply with <OK>/<ENTER>. Fig. 62 110 4.5 Print method The currently selected method can be printed on a connected printer or stored on an USB drive as PDF file Fig. 63 4.6 Change Method Parameters The input or modification of the method name was already described in Chapters 4.1 and 4.3. Fig. 64 4.6.1 Method type On the <Method type> you can select whether you wish to perform a manual or automatic titration, a dosage or whether you wish to prepare a solution. Fig. 65 The selection of the Method type will have an influence on the further parameterisation of the method. For instance, if you select the dosing mode, neither a selection of a formula nor a change of the automatic titration mode (KF and dead stop) will be available. 111 For an automatic titration, you can select from the following modes: • • KF titration Dead Stop titration 4.6.1.1 KF and Dead stop titration KF titration is a specific form of dead-stop titration. In normal dead-stop titration, titration is to the specified value in µA, which must be maintained for a defined time. In KF titration, this still occurs, but a specified drift criterion in µg/min must also be met. With KF titration, a conditioning step is also is preset in order to eliminate any moisture in the titration vessel and the solvent. The first stage of the Dead stop and KF titration consists in the continuous dosing up to a delta value away from the set end point. The dosing speed can be adjusted. Subsequently, titration is performed with linear step sizes between the delta value and the end point. The following titration parameters can be set for the dead-stop and KF titration: Titration parameter Dead-stop titration KF titration µA-Endpoint X X Delta µA-value X X Linear steps in ml X X Endpoint delay in s X X Delay time (between linear steps) X X Start delay time /extraction time X X Conditioning on/off - X Pre - titration in ml X X Polarization voltage in mV X X Minimum und maximum titration time in s - Max. titration volume X X Drift in µg/min X X Dosing speed in % 4.6.2 Result Result offers the following settings: Fig. 71 d The Result text may contain up to 21 alphanumeric characters including special characters. 112 Fig. 72 Please confirm your input with <OK</<ENTER>. 4.6.2.1 Calculation Formula The appropriate calculation formula is selected on the Formula selection submenu: Fig. 73 a The following calculation formulae are available for automatic titration mode: Formula EP (EP-B)*T*M*F1/(W*F2) (W*F2)/(EP-B)*M*F1) Additional information Formula for calculating only the ml consumption Formula for calculating the concentration of a sample taking into account a blank value in terms of ml. Formula for calculating a titer (T) of a titration solution. The abbreviations used here have the following meaning: EP: B: T: M: F1-F5 W Consumption at the end point in ml Blank value in ml. Mostly determined by way of titration Titer of the titration solution (e.g. 5.012) Mol; mol- or equivalence weight of the sample Factor 1-5. conversion factors “Weight“, weighed-in quantity in g or volume in ml.” 113 After selecting a formula, please confirm your selection with <OK>/<ENTER>: Fig. 69 The values for the blank value and the factors can be entered manually or read from a global memory. The values from a global memory were defined in advance by a titration or were manually entered. Fig. 70 Fig. 71 The used global memory is displayed. Here in the example it is MO1 and MO2: Fig. 72 114 Storing results in global memories is described in Chapter 4.6.3.7 The values of the individual parameters of the selected calculation formula can now be input one by one. Fig. 73 4.6.2.2 Sample weight and volume (sample quantity) Fig. 74 Fig. 75 The Sample Quantity (W) item is used to select whether one is wishing to use a sample weight or a sample volume for titration or solution preparation. You have the following options: • • • • • Manual sample weight: The sample weight is enquired by a prompt at the start of the method/after conditioning (KF) Automatic sample weight: The sample weight is automatically transferred by a connected balance. Fixed sample weight: A fixed sample weight is input in g. This weight will then automatically be used for each start of the method. Manual sample volume: The sample volume in ml is prompted at the start of the method and manually input. Fixed sample volume: A fixed sample volume is input in ml. This volume will then automatically be used for each test of the method. 115 4.6.2.3 Formula unit The formula unit can be selected in the Unit submenu. Fig. 76 Once the selection made (e.g. %), the unit will also be displayed as piece of information on the display. Fig. 77 116 4.6.2.4 Formulae for the Preparation of Solutions A selection of special calculation formulae is available for the Prepare Solutions mode. The appropriate calculation formula is selected on the Formula Selection submenu: Fig. 78 A selection of 3 different calculation formulae is available: W*(100-Fa-Fb)*Fc/Fd - W*(100-Fb) / (100*Fe) +Ff W*(100-Fa-Fb)*(Fd/Fg ) - W*(100-Fb) / (100*Fg) +Ff W*(100-Fa-Fb)*Fc / (100*Fd) Meaning of the individual factors: W: Fa: Fb: Fc: Fd: Fe: Ff: Fg: Weight of the sample in g Soluble foreign-matters portion in % insoluble foreign-matter portion in % Conversion factor for it unit g/l = 10 mg/l und ppm = 10000 g/100 ml =1 % =1 Target concentration of the solution to be prepared in g/l, mg/l (ppm), g/100 ml, or % Specific weight of the weighed-in sample in g/cm³ Volume correction in ml. this volume correction is the required surplus dosage for compensating the volume contraction and the specific-weight difference between the sample weight and the solvent (please observe the note on volume correction) Specific weight of the solvent used in g/cm³ Note on volume correction: The user has to decide on a case-by-case basis whether a volume correction is necessary and according to which procedure this correction is to be performed. As a rule, this volume correction may be omitted in the case of solutions with very low percentages of diluted substance. 117 4.6.2.5 Decimal digits To conclude, it is possible to determine the number of decimal digits from 2-6. The standard setting is 2. Fig. 79 4.6.2.6 Statistics The mean value and relative standard deviation can be automatically calculated and documented by using statistics. Fig. 80 The calculation of the mean value is already possible from two individual values. The calculation of the relative standard deviation is only possible from 3 single values. The maximum quantity is 10. Fig. 81 The mean value and the relative standard deviation (RSD) are shown directly on the display. 118 4.6.2.7 Global Memories Results of titrations can be written into one of the 50 global memories (M01 - M50) for additional calculations. Fig. 82 The mean value is written into the global memory when the statistic is switched on. You enter the submenu with <Enter/OK>. If a global memory has not been created, a memory can be created by using the insert key <Ins>. The titrator proposes a memory name, such as M01 (M01- M50). The name of the memory can be changed in reference to the application. Here in this example of “M01” for “Blank value”. Fig. 83 This simplifies later the allocation of the global memory in another method. Example Titer determination: The titer in mg/ml is defined with an extra Titer method. The result in mg/ml is thereby automatically written into global memory “Exchangeable unit”. Fig. 84 The menu for the global memory can always be accessed by pressing Shift+F5 or via system settings. The name or values can be changed by using EDIT/F3 and have the methods shown that are used in the global memories. 119 Fig. 85 4.6.3 Titration parameters The <Titration parameter> submenu is used to determine the actual parameters of the method. The parameters were already introduced in chapter 4.6.2.1: Fig. 86 Fig. 87 Generally applicable titration parameters Depending on the titration mode (KF or dead stop titration) it is possible to enter a variety of parameters. The following parameters are valid for the KF and dead stop titration modes: • • • • • • Initial waiting time Fixed delay Step size Pretitration Polarization voltage End of titration 120 Start delay time/Extraction time (KF): With dead-stop titration, the start wait time passes at the beginning of titration. In KF titration, the start wait time = the extraction time. The extraction time ends after the sample is supplied. The start wait/extraction time can be specified between 0 and 999 seconds. Fig. 88 Conditioning Conditioning (only KF) is activated for every KF method. It can be shut off via a PC for external control: Fig. 89 Fixed delay time The fixed delay time is the waiting time between the linear titration steps at the end of the titration until the Endpoint. The fixed delay time can be set between 0 and 999 seconds: Fig. 90 Step size The step size can be set from 0.001 to 5.000 ml. typical value for the KF titration are 0.002 – 0.01 ml. 121 Fig. 91 In this type of titration, linear step width is used after the continuous titration stage. Titration direction (only dead stop titration mode) The titration direction can be set to “increase“ or “decrease“. For instance, if you wish to perform a sulfurous titration with iodine solution you have to select “increase“. For an iodometric back titrating with Sodium thiosulfate you have to select “decrease“. Fig. 92 Pretitration If the titration agent consumption is roughly known, you can set a pretitration volume on the <Pretitration> menu. In this process, a defined volume is dosed ( = pretitrated) following the initial waiting time. After the addition of the pretitration volume, another defined span of time is observed as the waiting time before the next titration step is added. The pretitration volume is automatically added to the titration agent consumption. The pretitration volume can be set from 0.000 and 99.999 ml, the possible range for setting the waiting time following pretitration is between 0 and 999 seconds. Fig. 93 Polarization voltage Polarisation voltage in mV can be set for KF and dead stop titration. 122 Fig. 94 The values can be set between 40 and 220 m. The pre-setting is 100 mV. Low polarisation voltage: High polarisation voltage: insensitive sensitive 4.6.4 Titration end The end of a titration is reached, and the result will be calculated as soon as, or if, respectively: • • • • • The defined End value in µA value has been reached The Endpoint delay in seconds has been adhered The drift value in µg/min has been reached The predefined value ml has been reached (Maximum titration volume) The conditions for minimum and maximum titration time are maintained Fig. 95 Fig. 96 Maximum titration time The maximum titration time can be set between 0 – 9999 seconds. The default setting is 600 seconds. The maximum titration time is generally used for KF titration, which can create a high continuous drift from a secondary reaction and thus cannot reach a stable endpoint. 123 Minimum titration time The minimum titration time can be set between 0 – 9999 seconds. The default setting is 10 seconds. The minimum titration time prevents premature termination of the titration if there is a delay in the extraction of water from the sample. The minimum titration time is used in combination with the extraction time. It expires while the extraction time is still active. Maximum titration volume Setting of the maximum titration volume should always make sense. It also serves as a safety criteria to prevent excessive titration, i.e. a possible overflow of the titration vessel. The maximum titration volume can be set between 1.000 und 999.999 ml: Fig. 97 The default setting is 50 ml. The volume for conditioning is included in the count! Drift The drift is calculated in µg/min from the titration mean consumption/time x concentration of the titration solution. A stable drift at the beginning and end of the titration is important if you want to obtain reproducible results. This applies in particular to samples with low water content in the bottom percentage range (<0,1%). The drift value should also not be set too low because the titration time will increase considerably. An airtight and dry titration vessel has a drift of < 50 µg/min. This corresponds to consumption of 10 µl (0,01 ml) of titrant at a concentration of 5 mg/ml. For many applications, a drift value of 100 – 150 µg/min is entirely sufficient. The default drift value setting is 100 or 150 µg/min for sample titration. 50 µg/min is the default setting for titer methods. Endpoint µA The range of the µA input can be selected between 0.0 and 100.0. For KF titration, values between 10 – 30 µA are practical. The standard value is 20 µA. Delta Endpoint µA The Delta value in µA is one of the most important parameters for KF and dead-stop titration. The lower the Delta value is, the longer the titration (dosing) is at a continuous speed. When using single-component reagents and pure methanol as a solvent, the Delta value should be set at < 5 µA. Values of 2 or 3 µA are practical. This is because the KF reaction in methanol runs relatively slowly. When using double-component reagents or also when using combination solvents, the Delta value must be set at > 10 to prevent rapid overtitration. Values of 14 or 15 µA are practical. Endpoint delay The endpoint delay is set in seconds. It can be set from 0 – 100000 seconds. The standard value is 10 seconds. Brief endpoint delays (5 seconds) are practical when • • • using very small increments (e.g., 0,001 ml) using a titer of 1 mg/ml creating a secondary reaction with a higher drift value 124 4.6.5 Dosing parameter Fig. 98 The dosing parameters (dosing speed, filling speed and max. dosing/titration volume) are determined for each method. This applies to all types of methods such as automatic titration, dosing and Solution Preparation. Fig. 99 The dosing speed can be set in % from 1 to 100 %. 100 % is the maximum dosing speed. Interchangeable unit WA 05 WA 10 WA 20 WA 50 Max. dosing speed [ml/min] 10 20 40 100 The filling speed can be set in terms of seconds from 20 to 999. The standard setting of this value is 30 seconds. For diluted aqueous solutions the filling speed can be six to 20 seconds. For non-aqueous solutions the filling speed should be set to the 30 seconds. In the case of highly viscous solutions such as concentrated sulphuric acid the filling speed should be further reduced down to 40 - 60 seconds. Depending on the method type, the (maximum) living volume or titration volume can be set to 999.999 or even 9999.999. The following filling options can be set for the dosing mode: 125 Fig. 100 If”off“is selected for filling, filling it will not occur automatically after each dosing step. If “intelligent before“ is selected for filling, a verification will be performed each time prior to the next dosing step in order to determine whether the dosing step can still be made without a filling operation. Should this prove to be impossible, the first thing to occur is filling, followed by the dosing step. If “intelligent after“ is selected for filling, a verification will be performed after the next dosing step to find out whether the next dosing step can still be made without filling. If „always“ is selected for filling, filling will occur automatically after each dosing step. 4.6.6 Sample identification In the manual titration and in the preparation of solutions it is possible to input a sample identification. The possible input includes manual, automatic or no sample description at all. Fig. 101 For a sample description of the ’manual’, a prompt for the sample description will always be displayed at the start of the method (Cp. also chapter 3.6, Main menu). For an ‘automatic’ sample description there will be selected a master description (in the current case this is water, cp. Fig. 102), which will then automatically be numbered starting on 01. Fig. 102 After a new power-up, numbering will resume with 01. 126 4.6.7 Documentation Fig. 103 Three different format settings are available for documentation on a printer or USB device: “short”, “standard (with curve)” and “GLP”: Fig. 104 Method type Short documentation Automatic titration Method name, date, time, duration of titration, sample description, weight/volume, starting and end measurement values, results and calculation formula Method name, date, time Dosing Prepare solutions Method name, date, time, sample designation, weight/sample, results and calculation formula Standard documentation Same as ‘Short documentation’ + titration curve GLP-Documentation N/A Same as ‘Short documentation’ + method contents Same as ‘Short documentation’ + method contents N/A Same as ‘Standard documentation’ + method contents 127 5 System settings Fig. 105 From the main menu (Fig. 107), <SYS>/<F7> will get you to the system settings: Fig. 106 Setting the national language was already described in Chapter 2.5. 5.1 Interchangeable Unit - Reagents Each interchangeable unit is equipped with an RFID transponder. This transponder can be used to store the following information: • • • • • • • • • • Unit size: (the default setting, cannot be changed) Unit ID: (default setting, cannot be changed) Reagent name: (default: blank) Concentration: (default: 1.000000) Concentration determined on: (Date) To be used until: (Date) Opened/Produced on: (Date) Test according to ISO 8655: (Date) Charge description: (default: no charge) Last modification: (Date) 128 Fig. 107 Fig. 108 Fig. 109 If you leave the <Reagents WA> menu using <ESC>, you will always be prompted to know whether you wish to adopt the values: Fig. 110 If <Yes> is selected, the updated values will be written into the RFID transponder of the interchangeable unit. 129 5.2 RS232 Settings ® The <RS232 settings> item can be used to determine the device address of the TitroLine 7500 KF and set the parameters of the two RS232 interfaces independent from each other: Fig. 111 The device address can be set from 0 – 15. Address 1 is the default setting: Fig. 112 The baud rate is preset to 4800. It may be set to 1200 – 19200: Fig. 113 130 Fig. 114 The parity can be selected amongst <No>, <Even> and <Odd>. <No> is the default setting. Fig. 115 You may select between 7 and 8 data bits. 8 bits is the default setting. Fig. 116 The RS232 parameters can be set to the factory settings. 131 5.3 Date and Time The factory time setting is Central European Time. This setting may be changed, where necessary: Fig. 117 5.4 Password The activation of the password has not yet been implemented for the current version 12_18. Please contact SI Analytics for sending you an update version. 5.5 RESET RESET will reset all settings to the factory setting. Please note: All methods will also be deleted. So please print the methods or export/copy them to a connected USB storage medium (this will be possible with a higher update!). The RESET has to be confirmed separately once again: Fig. 118 132 5.6 Printer For connecting printers please refer to chapter 7.3. Fig. 119 5.7 Device Information <Device Information> contains information about • the current software version • the serial number of the device • printer driver and update version • device address • number of measurements (Starts of a method) • a number of strokes/filling cycles Fig. 120 5.8 System Tone This is the point to set the volume of the system sounds and the front keyboard of the device. The system sounds become audible e.g. at the end of the titration or in case of an erroneous operation. The keys of the front keyboard produce a clicking sound if the key was used successfully. 133 Fig. 121 No sounds will occur when the external keyboard is used. 5.9 Software Update Fig. 122 An update of the device software requires a USB stick containing a new version. For this operation, the two files that are needed have to be located in the root directory of the USB device: Plug the USB device into a free USB-A port, wait for some seconds, and then select the Software Update function. The valid software updates will be shown on the display. In the present case this is Version “16_11“ of 19 April 2011. 134 Fig. 123 After starting the update using <OK/ENTER>, next thing to appear is the following graphic: Fig. 124 which will change after a few seconds to the following display: Fig. 125 Upon completion of the update (approx. 2-3 minutes), the device will shut down the software completely and proceed to a new start. Important: In the course of an update, the methods will not be deleted! You can continue to use them. If no valid update file is stored on the USB stick, the following message will appear: Fig. 126 135 6 Data Communication via RS232- and USB-B interface 6.1 General Information ® The burette TitroLine 7500 KF has two serial RS232-C interfaces to communicate data with other devices. By means of these two interfaces it is possible to operate several devices on one computer (PC) interface. ® In addition to that, the TitroLine 7500 KF also has an alternatively USB-B interface, which can only be used to connect a PC. RS232-C-1 establishes the connection to a connected computer or to the previous device of the “Daisy Chain“. At the RS232-C-2 it is possible to connect additional devices (Daisy Chain Concept). PIN assignment of the RS232-C interfaces: PIN-No. 1 2 3 Meaning / Description T x D Data output R x D Data input Digital mass 6.2 Chaining multiple devices —“Daisy Chain Concept“ In order to activate several devices in a chain individually, each device must have an own device address. For this it is at first necessary to establish a connection from the computer to the RS232-C interface 1 of the first devise in the chain by means of a RS232-C data cable, e.g. Type No. TZ 3097. With the additional RS232-C data cable, Type No. TZ 3094, the RS232-C- interface 2 of the first device is connected with the RS232-C-interface 1 of the second device. At interface 2 of the second device it is possible to connect an additional device. ® The TitroLine 7500 KF can also be connected via USB cable TZ 3840 (type A (M) – type B (M), 1.8m). It is also ® possible to connect the TitroLine 7500 KF via USB cable TZ 3840 (type A (M) --- USB type B (M), 1.8 m) to a USB interface of a PC. To accomplish this connection, a driver has to be installed on the PC. Then the USB-B interface takes over the function of the RS232-1 interface. The address always consists of two characters: e.g. address 1 of the two ASCII- characters <0> and <1>. The addresses can be set from 00 to 15, i.e. 16 possibilities. It must be ensured that the devices in a chain have different addresses. If a device is addressed with its address, this device will process this command without sending it to another device. The reply to the computer has also an own address. The addresses are allocated as described in Chapter 5.3. ® The burette TitroLine 7500 KF receives commands from a PC at the interface 1 (USB- B) if the computer knows the address. It also sends the answer via this interface. If the address of the incoming command does not match the device address, the complete command will be forwarded to interface 2. Interface 2 is connected to interface 1 of another device. This device checks the address as well and reacts to the command as the first ® TitroLine 7500 KF did before. ® All information (data strings) which arrive at interface 2 of the burette TitroLine 7500 KF will immediately be send to the computer via interface 1 (or USB-B interface). Thus, the computer receives the data of all devices. In practice it is possible to connect up to 16 devices to one computer- (PC-) interface. 6.3 Instruction Set for RS-Communication The commands consist of three parts: Address two-digit aa, e.g.: 01 Command e.g.: DA Variable, if necessary e.g.: 14 and end of command <CR> <LF> Every command must be completed with the ASCII - sign <CR> and <LF> (Carriage Return and Line Feed). Only if the respective action has ended the answers will be returned to the computer. Example: The command to dose 12.5 ml shall be sent to the burette TitroLine® 7500 KF with the address 2. The command consists of the characters: 02DA12.5<CR LF> In detail: 02 = Device address DA = Dosage command with filling and zero points of the display 12.5 = Volume in ml to be dosed <CR LF> = Control character as command end 136 Command Description Reply aaAA aaMC1...XX aaBF aaBV aaDA aaDB aaDO aaGDM aaGF aaES aaEX aafd aagdm aaGF aaGS aaLD aaLR aaM aaLI aaLO aaRH aaRC aaRS automatic allocation of device address choosing a method “filling burette“. Aufsatz wird gefüllt. output of dosed volume in ml dose volume without filling, with adding the volume dose volume without filling, reset of the volume dose volume with filling, without adding the volume dosing speed in ml/min filling time in seconds (min is 20, default 30) “ESC“ function one step backwards “exit“ function.back to main menu µa “dead stop“ measurement function dosing speed in ml/min (0.01 – 100 ml/min) filling time in sec (adjustable 20 – 999 seconds) output serial no. Of device output of the measurement data output report (short report) output the measurement value µA output method content output documentation (as configured) request of identification send last command report status possible answers are: ”STATUS:READY“ for ready ”STATUS:dosing“ dosing ”STATUS:filling“ filling ”ERROR:busy“ if no interchangeable unit has been attached start selected method EEPROM reset to factory defaults stop the actual function titration start with the transfer of the pH end value adjust language to “German“ adjust language to “English“ adjust language to “French” adjust language to “Spanish” Version number of the software aaY aaY aaY aa0.200 aaY aaY aaY aaY aaY aaY aay aay aaY aaY aaGS08154711 aaY aaY aaM0.1000 aaSM aaSEEPROM aaSR aaSS aaSYS5 aaSYS1 aaSYS2 aaSYS3 aaVE aaIdent:TL7500KF aa“last command“ aaStatus:“text aaY aaY aaY aaY aaY aaY aaY aaY aaVersion 137 7 Connection of Analytical Balances and Printers 7.1 Connection of Analytical Balances As it often happens that the sample is weighed in on an analytical balance, it makes sense to connect this ® ® balance to the TitroLine 7500 KF. To connect the balance to the TitroLine 7500 KF, the balance must have a RS232-C-interface and the connection cable must be configured accordingly. For the following types of balances there are already assembled connection cables: 7.1.1 Balance Sartorius (all types), partially Kern, Mettler AT, PR, PM Mettler, AB-S, AG, PG Precisa XT-Series Kern with 9-pole RS232 TZ-Number TZ 3092 TZ 3093 TZ 3099 TZ 3183 TZ 3180 For all other types of balances it is possible to obtain an already assembled connection cable (on demand). For this we need detailed information about the RS232-C-interface of the balance used. ® The connection cable is to be connected to the RS232-C-interface 2 of the TitroLine 7500 KF. This side of the connection cables always consists of a 4-pole mini-plug. The other side of the cable can, depending on the type of balance, be a 25-pole plug (Sartorius), a 9-pole plug (Mettler AB-S) or a 15-pole specialised plug (Mettler AT) etc. ® ® In order to allow the balance data to be sent to the TitroLine TitroLine 7500 KF, the data transmission parameters of the titrator and the balance must correspond to each other. Additionally, it is necessary to carry out some more standard settings on the side of the balances: The balance is to send the balance data via RS232-C only by means of a print command. The balance is to send the balance data only after the display standstill. The balance should never be set to ‘automatic sending’ and/or ‘send continuously’. ‘Handshake’ on the balance must be set to ‘off’, or even ‘Software Handshake’ or ‘Pause’. No special characters such as S or St are allowed to be used as prefix in the balance data of the balance data string. In such a case it might be possible that the TitroLine® 7500 KF cannot process the balance data correctly. After you have connected the balance with the appropriate cable to the TitroLine® 7500 KF and have adjusted all ® settings in the balance software, and possibly in the TitroLine 7500 KF, you can now test the data transfer of the balance very easily. Start the method. After conditioning, press Enter to start the sample titration. Confirm the sample ID. Then, the display asks you: a) To press the print-button at the balance Parameters to ‘weighted sample automatically’ b) To enter the weighted sample then the parameters are still set to ‘weighted sample manually’ Put an object onto the balance and press the print button. After the standstill of the balance display there will be beep at the TitroLine® 7500 KF and the transmitted balance data appear: a) After approx. 5 sec. in the display and the display changes automatically into the measuring display. b) The weighted sample must again be confirmed with <Enter> or <OK>. 138 7.2 Balance data editor Pressing the die <F5/balance symbol > function key will invoke the so-called balance data editor. A list with the existing balance data will appear: Fig. 127 The balance data can be edited one by one. Following a change, a cross will appear opposite the weighed-in quantity: Fig. 128 Weights may be deleted or added individually. It is also possible to delete all weights at one stroke. Fig. 129 If no balance data is available, the “No balance data found” message will appear: 139 Fig. 130 7.3 Connection of Printers The results, calibration data and methods can be printed on the following media: • • • HP PCL compatible printer (A4) chromatic and monochrome (e.g. laser printer) Seiko DPU S445 (Thermo paper 112 mm width) On the USB stick in PDF- and CSV-format To connect the printers to the burette please use the USB socket. When printing, please check whether the correct printer is connected. It is not possible to print „HP“printer layouts on another thermal printer or vice versa. The printer settings should always be checked and adjusted after changing the printer. Fig. 131 Only one printer should be connected for one Titrator because an automatic printer recognition is not activated. Print PDF is the default setting. If you select “Print PDF“, please make sure that a USB stick is connected to the device. 140 8 Maintenance and Care of the TitroLine® 7500 KF The preservation of the proper functioning of the piston burette requires testing and maintenance work to be performed on a regular basis. Regular inspections are essential prerequisites for the correctness of the volume and the proper functioning of the piston burette. The accuracy of the volume is determined by all chemicals-carrying components (piston, cylinder, valve, titration tip and hoses). These parts are subject to wear and tear, i.e. zthey are or wearing parts, respectively. The piston and cylinder are subject to particular strain, hence they require special attention. Heavy strain: Use of e.g. concentrated solutions, reagents and chemicals (> 0.5 mol/L); chemicals attacking glass, such as fluorides, phosphates, alkali solutions; solutions with a tendency to crystallising out; Fe (III) chloride solutions; oxidising and corroding solutions such as iodine, potassium permanganate, Cer (III), Karl-Fischer titration 2 agent, HCl; solutions with a viscosity of > 5 mm /s; frequent, or even daily use. Normal strain: Use of solutions, reagents and chemicals (up to 0.5 mol/l) which do not attack glass, crystalize out or corrode. Interrupted use : If the dosing system is not in use for more than two weeks, we recommend emptying and cleaning the dosing unit [6]. This applies in particular under the operating conditions referred to in the „Heavy strain” section. If this recommendation is not adhered to, the piston of the valve may become leaking, this may result in damage to the piston burette. If the liquid is left within the system, you will also have to reckon with corrosion and an alteration of the solutions used over time, which includes e.g. crystallisation. Considering that as of the state of the art there are no plastic hoses available for the use in titration equipment which would be perfectly free of diffusion phenomena, particular attention is to be paid to the range of the hose lines. We recommend the following inspection and maintenance work Simple cleaning: Wiping off splashed chemicals from the outer surface. [1] Heavy strain Whenever required in operation Normal strain Whenever required in operation Sight check: Check for leakage in the area of the dosing system. [2] Is the piston tight? [3] Is the valve tight? [4] Titration to clear? [5] Weekly, when putting back into operation Monthly, when putting back into operation Basic cleaning of the dosing system: All parts of the dosing system to be cleaned separately. [6] Every three months Whenever necessary Technical inspection: Check for air bubbles in the dosing system. [7] Visual inspection Check of the electrical connections. [8] Semi-annually when putting back into operation Semi-annually when putting back into operation Semi-annually Annually Verification of the volume according to ISO 8655: Perform basic cleaning Inspection according to ISO 8655 Part 6 or Part 7. [9] 141 Please note: Depending on the respective application, there may be different specifications for the entirety of the inspection and maintenance work to be performed. The individual intervals may be extended if no complaints occur, but they will have to be shortened again as soon as any problem has arisen. The inspection of the metrological reliability including maintenance work is offered as a service by SI Analytics GmbH (including a manufacturer’s certificate, if so ordered). For this purpose, the titration device is to be sent in to SI Analytics GmbH. Detailed description of the inspection and maintenance work: [1] Wipe off using a soft cloth (and some water with a normal household detergent). [2] Leaking connections can be identified by moisture or crystals at the threaded connections of the hoses, at the sealing lips of the piston inside the dosing cylinder or at the valve. [3] If any liquid becomes visible below the first sealing lip, it has to be checked at short timely intervals whether any liquid will build up under the second sealing lip, too. In this case both the piston and the glass cylinder have to be replaced immediately. It is easily possible that in operation small liquid droplets build up under the first sealing lip, but they may also disappear again. This phenomenon alone is no reason for replacement. [4] The valve has to be removed from its housing for inspection. In this process, the hoses remain connected to the valve. Please check for moisture underneath the valve. When reinserting the valve, please make sure that the small cam at the rotating axis is fitted into the corresponding groove again. [5] The titration tip must be free of sedimentation or crystals which might obstruct the dosing process or falsify the results. [6] Remove the cylinder, take the valve out of the valve housing, unscrew the hoses and then rinse all parts carefully with distilled water. For the assembly of the cylinder, hoses and other parts of the interchangeable unit, please refer to the operating instructions. [7] Dose one burette volume, then refill. Air bubbles will gather at the tip of the cylinder and in the titration hose where they can be detected easily. If bubbles become visible, please re-tighten all connections finger tight, and then repeat dosing. If air bubbles still remain within the system, [6] please check the valve and replace the hose connections. The air bubbles may also occur at the interface between the sealing lip of the piston and the cylinder. If a reduction of the filling speed will not do, the dosing unit has to be replaced. [8] Check the electrical plug contacts for corrosion and mechanical damage. Defective parts have to be repaired or replaced by new parts. [9] Please refer to the application „Burette inspection according to ISO 8655 Part 6”. 9 Storage and transportation If the titrator TitroLine® 7500 KF or the interchangeable units have to be stored over some time, or to be dislocated, the use of the original packing will be the best protection of the devices. However, in many cases this packing will not be available anymore, so that one will have to compose an equivalent packaging system. Sealing the lower section in a foil is hereby recommended. The devices should be stored in a room with a temperature between +10 and +40°C, and the (relative) humidity of the air should not exceed 70 %. If the interchangeable have to be stored over some time, or to be dislocated, the fluids inside the system, especially aggressive solution have to be removed (please refer also to chapter 8. „Maintenance and Care of the burette”). 10 Recycling and Disposal The present piston burette and its packaging are manufactured as far as possible from materials which can be disposed of environmental-friendly and recycled in a technically appropriate manner. Please note: The main printed board carries a lithium battery. Batteries should not to be disposed of with the normal domestic waste. They will be taken back and recycled or disposed of properly by the manufacturer at no cost. Should you have any questions regarding disposal, please contact SI Analytics. 142 11 Index analytical balance 86 Balance data editor 138 Calculation Formula 112 change method parameters 110 Connection of Analytical Balances 137 Connection of Printers 139 Connection ports 85 copy methods 109 Daisy Chain Concept 135 Date and Time 131 Default methods 108 delete methods 109 device address 129 Device Information 132 Display 95 Disposal 141 documentation 126 Dosage 104 Dosing accuracy 77 Dosing parameter 124 dosing speed 124 Drift 123 edit method 108 external PC Keyboard 96 Formula selection 112 Formula Selection 116 Formula unit 115 Formulae for the Preparation of Solutions 116 Front Keyboard 94 Global Memories 118 Initial Filling 91 Interchangeable Unit - Reagents 127 interchangeable units 141 Interchangeable units 77 Interrupted use 140 Magnetrührers TM 235 80 Main Menu 99 Maintenance and Care 140 manual controller 96 manual controller TZ 3880 („Mouse“) 85 max dosing/titration volume 124 Method name 108 method parameters 108 new method 108 Password 131 Polarization voltage 121 Positioning and Replacing an Interchangeable Unit 88 Preparing Solutions 107 Pretitration 121 Print method 110 printer 85 Recycling 141 Replacing the Glass Cylinder 93 RESET 131 Result 111 Rinsing 91 RS232 Settings 129 safety information 79 sample identification 125 Sample weight and volume (sample quantity) 114 Setting the Language of the Country 86 Software Update 133 Statistics 117 storage 141 System settings 127 System Tone 132 Technical Data 76 Titration parameters 119 transportation 141 Unpacking and First Operation 80 USB Barcode scanner 85 USB Hub 85 USB stick 85 Viscosity 76 Warning 79 TABLE DE MATIÈRES PAGE 1 .. Caractéristiques techniques du titrateur TitroLine® 7500 KF ............................ 145 1.1 1.2 1.3 Résumé ................................................................................................................................. 145 ® Caractéristiques techniques du titrateur TitroLine 7500 KF ................................................ 146 Notes d'avertissement et de sécurité et de sécurité ............................................................ 149 2 .. Mise en place et mise en service .......................................................................... 150 2.1 2.2 2.3 2.4 2.4.1 2.4.2 2.4.3 2.4.4 2.4.5 2.4.6 2.5 2.6 2.7 2.7.1 2.8 2.8.1 2.8.2 2.8.3 2.9 2.10 2.11 2.12 Déballage .............................................................................................................................. 150 Raccordement et installation du titreur et l’agitateur magnétique TM 235 ............................ 150 Installation et raccordement du support de titrage TM 235 KF et du récipient de titrage ..... 151 Connexions du titrateur. Combination avec accessoires et autres appareils ....................... 155 ® Dos du titrateur TitroLine 7500 KF ...................................................................................... 155 ® Connexions du titrateur TitroLine 7500 KF.......................................................................... 155 Connecting a printer .............................................................................................................. 155 Raccordement d’une imprimante .......................................................................................... 155 Raccordement d’un appareil USB ......................................................................................... 155 Raccordement de balances d’analyse .................................................................................. 156 Setting the Language of the Country .................................................................................... 156 Réglage de la langue du pays ............................................................................................... 156 Unité interchangeable WA .................................................................................................... 157 Installing the interchangeable unit ......................................................................................... 157 Montage et échange d’une unité interchangeable ................................................................ 158 Montage d’une unité interchangeable ................................................................................... 158 Dépose de l’unité interchangeable ........................................................................................ 159 Programmation de l’unité de titrage ...................................................................................... 159 Initial Filling or Rinsing of the Entire Interchangeable Unit ................................................... 161 Premier remplissage ou rinçage de l’unité interchangeable complète ................................. 161 Remplissage du récipient de titrage avec le solvant ............................................................. 163 Echange du cylindre en verre et du piston en PTFE ............................................................ 163 3 .. Travailler avec le titrateur TitroLine® 7500 KF..................................................... 165 3.1 3.2 3.3 3.4 3.5 3.6 3.6.1 3.6.2 3.6.3 3.6.4 Clavier frontal ........................................................................................................................ 165 Affichage ............................................................................................................................... 165 Dispositif de pointage ............................................................................................................ 166 Clavier PC externe ................................................................................................................ 166 Menu Structure ...................................................................................................................... 167 Menu principal ....................................................................................................................... 169 Méthodes standard de titrage KF .......................................................................................... 169 Titrage KF automatique ......................................................................................................... 170 Dosage .................................................................................................................................. 174 Préparation de solutions ....................................................................................................... 176 4 .. Paramètres de méthode ........................................................................................ 178 4.1 4.2 4.3 4.4 4.5 4.6 4.6.1 4.6.2 4.6.3 4.6.4 4.6.5 4.6.6 4.6.7 Edition d’une méthode et nouvelle méthode ......................................................................... 178 Méthodes standard................................................................................................................ 178 Copie de méthodes ............................................................................................................... 179 Supprimer de méthodes ........................................................................................................ 179 Impression de la méthode ..................................................................................................... 180 Modification des paramètres de méthode ............................................................................. 180 Type de méthode .................................................................................................................. 180 Résultat ................................................................................................................................. 181 Paramètres de titrage ............................................................................................................ 189 Fin du titrage ......................................................................................................................... 192 Paramètres de dosage .......................................................................................................... 194 Désignation de l’échantillon .................................................................................................. 195 Documentation ...................................................................................................................... 196 5 .. Configuration du système..................................................................................... 197 5.1 5.2 5.3 5.4 5.5 5.6 5.7 5.8 5.9 Unité interchangeable réactifs ............................................................................................... 197 Réglages RS232 ................................................................................................................... 199 Date et heure ......................................................................................................................... 201 Mot de passe ......................................................................................................................... 201 RESET .................................................................................................................................. 201 Imprimante ............................................................................................................................ 202 Informations sur l’appareil ..................................................................................................... 202 Tonalités du système ............................................................................................................ 202 Mise à jour du logiciel ............................................................................................................ 203 6 .. Communication de données via l’interface RS 232 et USB-B............................ 205 6.1 6.2 6.3 6.4 Généralités ............................................................................................................................ 205 Connexion en chaîne de plusieurs appareils— Concept « Daisy Chain » ........................... 205 Instruction Set for RS-Communication .................................................................................. 205 Liste d’ordres pour la communication RS ............................................................................. 205 7 .. Raccordement de balances d’analyse et d’imprimantes ................................... 207 7.1 7.2 7.3 Raccordement de balances d’analyse .................................................................................. 207 Editeur de balance ................................................................................................................ 208 Imprimante ............................................................................................................................ 209 8 .. Maintenance et entretien de le titrateur TitroLine® 7500 KF .............................. 210 9 .. Stockage et transport ............................................................................................ 211 10 Recyclage et élimination ....................................................................................... 211 11 Index ....................................................................................................................... 212 Déclaration de conformité………………………………….dernière page du document Notes sur le mode d'emploi Ce manuel a été conçu pour vous tenir informer sur la façon d’utiliser et de sécuriser votre titrateur. Le pictogramme vous indique les informations suivantes: Statut au moment de l'impression La technologie de pointe et la haute qualité de nos produits sont garanties par un développement continu. Cela peut entraîner des différences entre ce mode d’emploi et votre produit. Des modifications de produit ne sont donc pas à exclure. Nous vous rappelons également que toutes les informations, illustrations et descriptions fournies ne peuvent faire l’objet d’aucune réclamation légale. Référence Une version potentiellement plus récente de ce manuel est disponible sur notre site Internet www.sianalytics.com. La version allemande est la version originale et obligatoire quelles que soient les spécifications. Version 131126 FR Pour une sécurité maximale , respectez les consignes de sécurité et d'avertissement dans les Instructions Avertissement d'un danger général pour le personnel et l'équipement. Le non-respect des consignes peut entraîner des blessures ou une détérioration du matériel. 145 1 Caractéristiques techniques du titrateur TitroLine® 7500 KF 1.1 Résumé ® Le TitroLine 7500 KF est un titrateur appropriée pour les applications suivantes: La gamme des titrages possibles comprend les titrages KF volumétriques et à point final avec un maximum de 50 méthodes mémorisables. ® Les exemples des applications possibles du TitroLine 7500 KF comprennent : − Les titrages KF avec réactifs KF à 1 composant − Les titrages KF avec réactifs KF à 2 composants − Les titrages à point final comme la détermination de l'indice de brome et du dioxyde de soufre − Compatibilité avec le logiciel de titrage TitriSoft à partir de la version 3.0 ® ® En outre, le TitroLine 7500 KF intègre également les fonctionnalités de la burette à piston TITRONIC 500 : − Dosages − Préparation de solutions Each method allows for the setting of a variety of dosing and filling rates. Les solutions utilisables sont les suivantes : Il est possible d’utiliser pratiquement tous les fluides et solutions ayant une viscosité < = 10 mm²/s tels que, par exemple, de l’acide sulfurique concentré. Toutefois, ne pas utiliser de produits chimiques attaquant le verre, le PTFE ou le FEP ou présentant des propriétés explosives tels que, par exemple, l’acide fluorhydrique, l’azide de sodium ou le brome ! Les suspensions à teneur élevée en matières solides peuvent obstruer ou endommager le système de dosage. Règle générale : Respecter impérativement les directives de sécurité s’appliquant à la manipulation des produits chimiques respectifs. Ceci vaut tout particulièrement pour les liquides combustibles et / ou caustiques. Déclaration de garantie Nous assumons pour l'appareil désigné une garantie couvrant les vices de fabrication constatés dans les deux ans à compter de la date d'achat. Le recours en garantie porte sur le rétablissement du fonctionnement de l'appareil, à l'exclusion de toute revendication en dédommagement dépassant ce cadre. En cas de traitement incorrect ou d'ouverture illicite de l'appareil, toute revendication au titre de la garantie est exclu. La garantie ne couvre pas les pièces d’usure telles que pistons, cylindres, vannes, flexibles avec assemblages par vis et pointes de burette. De même, la garantie ne couvre pas le bris des pièces en verre. Pour justifier de l'obligation de garantie, veuillez retourner l'appareil et le justificatif d'achat dûment daté franco de port ou par envoi postal affranchi. 146 1.2 Caractéristiques techniques du titrateur TitroLine® 7500 KF Status July. 01th 2012 Signe CE : Compatibilité électromagnétique selon la directive 2004/108/CE du Conseil ; norme harmonisée appliquée : EN 61326/1:2006. Directive sur les basses tensions selon la directive 2006/95/CE du Conseil, norme harmonisée appliquée : EN 61 010, Partie 1. Signe ETL: Conforms to ANSI/ UL Std. IEC 61010-1 Certified to CAN/ CSA Std. C22.2 No. 61010-1 Testing basis EN 61 010, Part 1 Allemagne, Made in Germany Pays d’origine : Les solvants/réactifs de titrage suivant sont utilisables : − Toutes les solutions de titrage d’usage courant. − Comme solvants, il est possible d’utiliser de l’eau et tous les liquides non agressifs anorganiques et organiques. Pour la manipulation des substances combustibles, respecter les directives relatives à la protection contre les explosions de l’Association professionnelle de l’industrie chimique. 2 − Pour les liquides à viscosité relativement élevée (≥ 5 mm /s), à point d’ébullition basse ou tendance à la vaporisation, il est possible d’adapter la vitesse de remplissage et de dosage. 2 − Le dosage des liquides à viscosité supérieure à 20 mm /s n’est pas possible. Entrée de mesure : Karl-Fischer (Dead-stop) pour électrodes doubles de platine Tension de polarisation réglable de 40 à 220 mV. Raccordement : douilles 2 x 4 mm. Plage de mesure Résolution de l’affichage Précision* sans sonde de mesure 0 ... 100 0,1 I [µA] 0,2 ± 1 digit * *Il y a lieu de tenir compte également de l’incertitude de mesure des sondes de mesure. Affichage écran graphique 3,5 pouces -1/4 VGA TFT 320x240 pixels. Connexions :: entrée de mesure μA : raccordement (Dead stop) pour électrode double de platine (douilles de raccordement : 2 x 4 mm) Alimentation en tension adaptateur secteur externe de 90 – 230 V, 50/60 Hz puissance absorbée 30 VA Veillez bien à n’utiliser l’alimentation TZ 1853 qu’avec la désignation du type: FW 7362M/12 Interfaces RS 232 C Bits de données Bit d’arrêt Bit de départ Parité Débit en bauds Adresse interface RS 232 C galvaniquement séparée par optocoupleur fonction Daisy Chain possible. réglable, 7 ou 8 bits (valeur par défaut 8 bits) réglable, 1 ou 2 bits (valeur par défaut 1 bit) fixe 1 bit réglable : even / odd / none réglable : 1200, 2400, 4800, 9600, 19200 (par défaut 4800 bauds) réglable : (0 à 15, valeur par défaut :01) RS-232-1 RS-232-2 pour ordinateur personnel, entrée Daisy Chain appareils de SI Analytics, titreur TitroLine 6000/7000/7500, TW alpha plus/TW 7400 - burettes à piston TITRONIC 500, TITRONIC 110 plus, TITRONIC universal, - balances de type Mettler, Sartorius, Kern, Ohaus, autres sur demande - sortie Daisy-Chain Interfaces USB 2 USB type A et 1 USB type B 147 USB type B (« Slave ») pour raccordement ordinateur USB type A (« Master ») pour raccordement - clavier USB - imprimante USB - dispositif de pointage USB (« souris »), - supports d’enregistrement USB tels que, par exemple, clé USB - Hub USB Raccordement agitateur/ TM 235 KF : 12V DC out, 500mA alimentation en tension pour agitateur TM 235 et support de titrage KF TM 235 KF Boîtier en polypropylène Clavier frontal matière plastique à revêtement Dimensions du boîtier 15,3 x 45 x 29,6 cm (l x h x p), hauteur avec unité interchangeable Poids env. 2,3 kg pour l’appareil de base env. 3,5 kg pour l’appareil complet avec unité interchangeable (avec flacon à réactif vide) Climat température ambiante : + 10 ... + 40 °C pour le service et le stockage humidité atmosphérique selon EN 61 010, Partie 1 : 80 % pour des températures allant jusqu’à 31 °C linéairement décroissante jusqu’à 50 % d’humidité relative pour une température de 40 °C Unités interchangeables ® Compatibilité Les unités interchangeables sont compatibles avec les titrateurs TitroLine ® ® 6000/7000 et TitroLine 7000 et celles de la burette à piston TITRONIC 500 automatique par RFID. Reconnaissance de la taille de l’unité et des données caractéristiques de la solution de titrage ou de dosage vanne à pointeau indépendante du volume en polymères de fluorocarbure (PTFE), TZ 3000 ® en verre borosilicaté 3.3 (DURAN ) jeu de flexibles en FEP, bleu adapté pour bouteille carrée en verre et diverses bouteilles de réactifs ® verre borosilicaté DURAN , polymères de fluorocarbure, acier spécial, polypropylène, 15 x 34 x 22,8 cm (l x h x p) avec bouteille de réactif env. 1,2 kg pour unité interchangeable WA avec bouteille à réactif vide Reconnaissance Vanne Cylindre Tubulure Fixage pour bouteille d’alimentation Matières Dimensions Poids Justesse de dosage selon DIN EN ISO 8655, Partie 3 exactitude : 0,15 % précision : 0,05 - 0,07 % (en fonction de l’unité interchangeable utilisée) ® Précision de dosage du titrateur TitroLine 6000/7000 avec unités interchangeables WA : Erreur de dosage* Reproductibilité par rapport à un [%] volume de 100 % [%] Unité interchangeable o type n Volume [ml] Tolérances des Øi des cylindres en verre [mm] WA 05 5,00 ± 0,005 ± 0,15 0,07 WA 10 10,00 ± 0,005 ± 0,15 0,05 WA 20 20,00 ± 0,005 ± 0,15 0,05 WA 50 50,00 ± 0,005 ± 0,15 0,05 148 Specifications Titration Stand TM 235 KF Status Nov 21. 2013 In connection with the titrator TitroLine 7500 KF CE - Mark EMV – compatibility according to Council Directive 89/336/EWG; Transient emissions according to norm EN 50 081, part 1 Interference resistance according to norm EN 50 082, part 2 Low voltage directive according to Council Directive 73/23/EWG Last amended by directive 93/68/EWG; test criteria EN 61 010, part 1 ETL sign: Conforms to ANSI/ UL Std. IEC 61010-1 Certified to CAN/ CSA Std. C22.2 No. 61010-1 Country of origin: Germany / Aade in Germany Pump: Free volume flow - air-: Delivery pressure max. Flow rate liquid medium 50 ... 1000 U/min Stirring speed: Hoses: Connections Power supply (top);: Housing Material: Dimensions: Weight: Ambient conditions: Climate: flow rate 2.25 l / min 1.5 bar ca. 0,8 l / min PVC- hose, outer diameter 6 x 1 mm PTFE- hose, outer diameter 4 x 0.5 mm Low voltage input 12 V / − on the backside of titration stand Plug connection: plug for low voltage connection – phone jack-, Positive pole at pin contact, inside contact ∅ = 2,1 mm, USA/Japan, Power supply via titrator TitroLine 7500 KF trace Veillez bien à n’utiliser l’alimentation TZ 1855 qu’avec la désignation du type: FW 7555O/12 Polypropylene; 80 x 130 x 250 mm, H x W x D (height without stand rod) 1.0 kg Not suitable for explosive environments! Ambient temperature: Humidity: + 10 °C ... + 40 °C for storage and transport. According to EN 61 010, part 1: Maximum relative humidity 80 % for temperatures up to 31 °C, Linearly decreasing up to 50 % relative humidity With a temperature of 40 °C 149 1.3 Notes d'avertissement et de sécurité et de sécurité ® L’appareil TitroLine 7500 KF répond à la classe de protection III. Il a été construit et contrôlé conformément à la norme EN 61 010 - 1, partie 1, mesures de protection pour des appareils de mesure électroniques, et a quitté l'usine dans un état impeccable sur le plan de la sécurité technique. Pour conserver cet état et pour assurer un service sans danger, il appartiendra à l'utilisateur d'observer toutes les instructions ou directives qui sont contenues dans le présent Mode d'emploi. La conception et la production sont effectuées dans un système respectant les exigences de la norme DIN EN ISO 9001. ® Pour des raisons de sécurité technique et fonctionnelle, le titrateur TitroLine 7500 KF ne doit être ouvert, d'une manière générale, que par des personnes autorisées. Des travaux à entreprendre sur l'équipement électrique, par exemple, ne pourront être exécutés que par des personnes qualifiées ayant bénéficié de la formation technique prescrite. ® En cas de non-respect, le titrateur TitroLine 7500 KF eut générer des dangers: accidents électriques ® de personnes ou risque de feu. En cas d'intervention non autorisée dans le titrateur TitroLine 7500 KF ou en cas d'endommagement de l'appareil, que ce soit par négligence ou par intention, la garantie s'éteint. ! ! Avant de procéder à la mise sous tension, il appartiendra à l'utilisateur de faire le nécessaire pour que la ® tension de service réglée sur le titrateur TitroLine 7500 KF concorde avec la tension d'alimentation fournie par le réseau. La tension de service est indiquée sur la plaquette signalétique. En cas de non-respect, le ® titrateur TitroLine 7500 KF peut être endommagé et des dommages corporels ou matériels peuvent se produire. Lorsqu'une mise en service sans risque n'est pas possible, il sera indispensable de mettre le titrateur ® TitroLine 7500 KF hors service et de la protéger contre toute remise en service inopinée ou intempestive. ® Déconnecter le titrateur TitroLine 7500 KF, retirer le connecteur du câble d'alimentation de la prise de courant ® et isoler le titrateur TitroLine 7500 KF du lieu de travail. Il est à présumer qu'un service sans danger n'est plus possible: lorsque l'emballage est endommagé. ® lorsque le titrateur TitroLine 7500 KF présent des endommagements visibles. ® ® lorsque le titrateur TitroLine 7500 KF ne fonction pas normalement. lorsque du liquide a pénétré dans le carter. ® lorsqu'il a été apporté des modifications techniques aux titrateur TitroLine 7500 KF ou lorsque des personnes non autorisées sont intervenues dans l'appareil pour tenter de le réparer. ® Le titrateur TitroLine 7500 KF ne devra pas être stockée ou exploitée dans des locaux humides. ® Pour des raisons de sécurité, le titrateur TitroLine 7500 KF devra être utilisé exclusivement pour les usages décrits dans le présent Mode d'emploi. L'utilisateur doit apprécier lui-même les risques qui pourraient se produire dans le cas de tout éloignement de l'usage prévu. Les prescriptions spéciales régissant la manipulation des liquides dosés devront être respectées: Les directives sur les matières dangereuses, la loi sur les produits chimiques et les prescriptions et notes du commerce de produits chimiques. L'utilisateur devra faire le nécessaire pour que les personnes chargées de ® l'utilisation du titrateur TitroLine 7500 KF soient bien des personnes expertes dans le domaine des matières ® utilisées dans l'environnement et dans le titrateur TitroLine 7500 KF elle-même ou surveillées par des personnes compétentes. Pour tous les travaux avec des solutions de titrations: Porter des lunettes de protection ! ® Le titrateur TitroLine 7500 KF est équipé de circuits intégrés (EPROMs). Les rayons X ou d'autres radiations à forte énergie peuvent traverser le carter de l'appareil et effacer le programme. Dans ces cas-là, si l'utilisateur met l'appareil en service malgré tout, il assume la responsabilité de tous les risques en résultant. Lors de manipulations avec des liquides autres que les solutions de titrage d'usage ® courant, tenir tout particulièrement compte de la résistance des matières constituant le TitroLine 7500 KF (voir chapitre 1.1). En cas d'utilisation de liquides à pression de vapeur élevée et/ou de substances ou de mélanges de substances n'ayant pas été décrits au chapitre 1.1 comme étant utilisables, il revient à l'utilisateur ® d'assurer une utilisation du le titrateur TitroLine 7500 KF sans danger et sans défaillances. Lors de la montée du piston dans le cylindre, un microfilm de liquide de dosage (qui n'exerce aucune influence sur la précision de dosage) restera collé dans tous les cas sur la paroi intérieure du cylindre. Toutefois, ce reste minimal de liquide pourra s'évaporer et pénétrer ainsi dans la zone se trouvant en dessous du piston; là, il pourra corroder ® ou dissoudre les matériaux utilisés du le titrateur TitroLine 7500 KF dans le cas d'un emploi de solutions non autorisées (voir aussi chapitre 8. 150 2 Mise en place et mise en service 2.1 Déballage Le titrateur à proprement dit et tous ses accessoires ainsi que les pièces périphériques ont été minutieusement ® contrôlés à l'usine pour s'assurer de leur bon fonctionnement et taille. Les modules du TitroLine 7500 KF sont : • L'appareil de base TitroLine 7500 • L'unité interchangeable de dosage WA 05, WA 10 ou WA 20 • Le support de titrage KF (pompe et agitateur) TM 235 KF comprenant les bouteilles de décharge (bouteille transparente de 1 L), de solvant (bouteille marron de 1 L) et le flacon sécheur (100 ml) avec tous les tuyaux. • Le récipient de titrage TZ 1770 comprenant la pointe de titrage • Le kit de départ KF TZ 1789 avec un tamis moléculaire, de la laine de verre et un ensemble de seringues avec aiguilles. • Électrode KF 1100 ® Nous vous prions de veiller à ce que les petites pièces additionnelles soient également retirées intégralement de l’emballage. Les fournitures livrées sont listées sur le bordereau d’envoi joint à la livraison. Fig. 1 2.2 Raccordement et installation du titreur et l’agitateur magnétique TM 235 Raccorder le câble d’alimentation basse tension TZ 1853 à la prise 12 V, prise "in" (voir aussi la figure 8 panneau arrière, Section 2.4.1) au dos du titreur. Branchez ensuite l’alimentation dans la prise de courant. 151 Fig. 2a L'alimentation reste facile d’accès de sorte qu’il soit toujours aisé de pouvoir déconnecter le titrateur de sa prise. En règle générale, l’agitateur magnétique TM 235 est disposé à droite de la burette à piston. L’agitateur magnétique se raccorde à la douille 12 V « out » au dos de la burette à piston au moyen du câble de raccordement TZ 1577 (fourniture appareil de base) (voir également fig. Dos, chapitre. 2.4). Visser la tige de statif (fourniture appareil de base) dans le filetage et monter l’agrafe de titrage Z 305 (fourniture appareil de base) (Fig. 2b). Fig. 2b 2.3 Installation et raccordement du support de titrage TM 235 KF et du récipient de titrage ® Le titrateur TitroLine 7500 KF et TM 235 KF peut être disposé sur n’importe quelle surface plane. En règle générale, le support de titrage TM 235 KF est disposé à droite du titrateur. ® La pompe/l'agitateur sont raccordés à la fiche de sortie 12V située sur la face arrière du TitroLine 7500 KF au moyen du câble de raccordement TZ 1577 (livré avec l'appareil de base) (cf. vue de la ‘« face arrière », chapitre 2.4). La tige du support (livrée avec l'appareil de base) est vissée dans le filetage du TM 235 KF. Le récipient de titrage TZ 1770 est monté sur la tige du support. Veiller à ce que le collier métallique soit ajusté comme le montre la photo jointe : 152 Fig. 3a Placer les trois adaptateurs internes en plastique blanc sur les bouteilles de décharge, de solvant et le flacon sécheur. Remplir le flacon sécheur avec le tamis moléculaire. Raccorder les tuyaux plastiques en PVC et PTFE comme indiqué dans les illustrations suivantes. Les tuyaux en PVC sont raccordés aux connecteurs situés sur la face arrière du TM 235 KF. Le long tuyau en PVC sert au raccordement de la bouteille de décharge. Les deux tuyaux courts en PVC servent aux raccordements du flacon sécheur et de la bouteille de solvant. Fig. 3b 153 Le flacon sécheur est raccordé au connecteur droit (vue du dessus) du TM 235 KF. La bouteille de décharge (transparente) est raccordée au connecteur gauche. Fig. 4 Le tuyau en PTFE de la bouteille de décharge transparente est ajusté au fond (tuyau 1) du récipient de titrage. Le tuyau en PTFE de la bouteille de solvant (tuyau 2) est ajusté comme indiqué dans les deux illustrations suivantes : Fig. 5 154 Fig. 6 La pointe de la burette est placée dans l'ouverture NS 14 gauche et raccordée à la vanne de l'unité interchangeable. Introduire d'abord de la fibre de verre et ensuite le tamis moléculaire dans le tuyau sécheur en plastique. Le placer dans l'autre ouverture NS comme indiqué dans l'illustration suivante. Fig. 7 L'électrode KF 1100 est raccordée à l'entrée µA. Le clavier est raccordé à l'un des ports USB –A. 155 2.4 Connexions du titrateur. Combination avec accessoires et autres appareils ® 2.4.1 Dos du titrateur TitroLine 7500 KF 1 2 3 4 5 6 7 Fig. 8 2.4.2 ® Connexions du titrateur TitroLine 7500 KF The TitroLine® 7500 KF is equipped with the following connections: 1) Entrée de mesure µA pour le raccordement d’électrodes doubles de platine (KF 1100, Pt 1200, Pt 1400) 2) Interface USB-B pour le raccordement à un ordinateur personnel (PC) 3) Interrupteur du réseau 4) Deux interfaces USB-A (« Maître ») pour le raccordement d’appareils USB tels que clavier, imprimante, régulateur manuel, clé mémoire USB, etc. 5) « in » : raccordement du bloc d’alimentation secteur 6) « out » : Raccordement du support de titrage TM 235 KF ou de l'agitateur magnétique TM 235 7) Deux interfaces RS232 (Mini-DIN) : RS1 pour le raccordement au PC RS2 pour le raccordement d’une balance et d’autres appareils SI Analytics (burettes, etc.) 2.4.3 Connecting a printer Printers with a USB interface are to be connected to one of the two USB-A interfaces. These printers have to feature HP PCL emulation (3, 3GUI, 3 enhanced, 5, 5e). So-called GDI printers cannot be used! Alternatively the thermo-compact printer Seiko S445 can be connected. 2.4.4 Raccordement d’une imprimante Les imprimantes à interface USB se raccordent à l’une des deux interfaces USB A. Les imprimantes doivent contenir une émulation HP PCL (3, 3GUI, 3 enhanced, 5, 5e). Il n’est pas possible d’utiliser des imprimantes GDI. Il est également possible de raccorder l’imprimante thermique compacte Seiko S445. 2.4.5 Raccordement d’un appareil USB (dispositif de pointage, clavier, appareil d’enregistrement, HUB) Les appareils USB suivants peuvent être raccordés aux interfaces USB A : • Clavier de PC • Imprimante • Appareil d’enregistrement USB tel que clé USB • Hub USB • Scanner de codes-barres USB 156 2.4.6 Raccordement de balances d’analyse Les balances d’analyse se raccordent à l’interface RS232 2 avec un câble correspondant. 2.5 Setting the Language of the Country 2.6 Réglage de la langue du pays Au départ de l’usine, la langue est réglée sur l’anglais. Après la mise en circuit de le titrateur et achèvement du cycle de démarrage, le menu principal s’affiche : Fig. 8 Avec <SYS/<F7> ou bien via <MODE> puis <Configuration système>, commuter sur la configuration du système. Le premier menu est le menu de réglage de la langue du pays : Fig. 9 Appeler le menu en appuyant sur <ENTER>/<OK>. Avec les touches fléchées <↑↓>, sélectionner la langue désirée et confirmer avec <ENTER>/<OK> : Fig. 10 La langue sélectionnée s’affiche aussitôt. Actionner deux fois la touche <ESC> pour revenir au menu principal. 157 2.7 Unité interchangeable WA 1 6 2 7 3 8 9 4 11 5 Fig. 11 1) TZ 3871 – Tuyau d’aspiration 2) TZ 3872 – Tuyau de raccordement 3) TZ 3873 – Tuyau de dosage sans pointe de dosage ni support ; TZ 3874. – Tuyau de dosage avec pointe de dosage et support 4) TZ 3801 – Couvercle de vanne 5) TZ 3000 – Vanne 3/2 voies 6) TZ 2003 – Tube sécheur 7) TZ 3802 – Bouchon fileté GL 45 avec alésage, avec adaptateur à 2 ouvertures pour tube sécheur et tuyau d’aspiration 8) TZ 3803 – Bouteille à réactif de 1 litre, marron 9) TZ 3900 – Manteau de protection UV, bleu transparent 10) TZ 3875 – Tige pour pointe de titrage et TZ 3656 – chapeau de pointe de titrage, bleu 11) TZ 1507 – Tube de goutte-à-goutte en plastique 2.7.1 Installing the interchangeable unit Fig. 11 shows a completely assembled interchangeable unit. • • • • • Retirer de l’emballage la vanne avec le tuyau raccordé et l’enfoncer dans le support de vanne jusqu’à enclenchement. Poser le couvercle de vanne sur la vanne comme figuré. Engager le tuyau de raccordement TZ 3872 dans l’embouchure filetée du cylindre de burette prévue à cet effet et serrer à la main. Engager le tuyau d’aspiration TZ 3871 dans l’embouchure filetée du GL 45 ou de l’adaptateur S 40 et serrer à la main. Retirer le tuyau de dosage standard TZ 3874 de la vanne et raccorder le tuyau de dosage y compris dans le récipient de titrage KF TZ 1770. 158 2.8 Montage et échange d’une unité interchangeable L’unité de titrage intègre un lecteur RFID et les unités interchangeables intègrent toutes un transpondeur RFID. Les informations suivantes sont enregistrées dans ce transpondeur : • • • • • • • • • • Dimensions de l’unité interchangeable (non modifiable) ID de l’unité interchangeable (non modifiable) Nom du réactif (default : espaces vides) Concentration (default: 1 .000 000) Concentration déterminée le : (date) Durabilité jusqu’au (date) Ouvert/établi le : (date) Contrôle selon ISO 8655 : (date) Numéro de lot : (default no charge) Dernière modification (date) A chaque fois qu’une unité interchangeable est montée sur l’appareil, ces données sont automatiquement lues dans le transpondeur. 2.8.1 Montage d’une unité interchangeable Monter l’unité interchangeable sur l’appareil comme représenté à la Fig. 9 a-c et la pousser vers le bas jusqu’à ce que le bouton noir s’enclenche sur le côté gauche. Fig. 12.a Fig. 12.b 159 Fig. 12.c 2.8.2 Dépose de l’unité interchangeable La dépose de l’unité interchangeable s’effectue en inversant les opérations : • Appuyer sur le bouton noir à gauche et tirer l’unité interchangeable vers l’avant comme représenté à la Fig. 12.c – 12.a. ! Important : Il est possible d’enlever l’unité interchangeable uniquement lorsque le piston se trouve en position inférieure (position zéro). Si besoin, actionner auparavant la touche <FILL>. ! 2.8.3 Programmation de l’unité de titrage Les données sont aussitôt lues dans le transpondeur RFID de l’unité interchangeable (Fig. 13). Fig. 13 Après achèvement du processus de lecture, le menu d’entrée des réactifs (Fig. 14) s’affiche env. 10 secondes. La taille de l’unité interchangeable s’affiche en bas à gauche dans l’affichage. (ici : 10 ml). Fig. 14 160 Lors de la première utilisation, il est recommandé d’inscrire ici au moins le nom du réactif utilisé. A cet effet, confirmer la sélection « Réactif » avec <ENTER>, puis taper le nom et éventuellement la concentration (Fig. 15). Fig. 15 Confirmer avec <OK>/<ENTER> (Fig. 15). Après la saisie facultative de paramètres additionnels, appuyer sur <ESC> pour quitter le menu d'entrée des réactifs (Fig. 16). La concentration approximative du titrant KF (par exemple, 5 ou 2) doit être saisie dans concentration. La dérive en µg/min peut ainsi être calculée dans l'ordre de grandeur adéquate. Fig. 16 Une interrogation s’affiche, demandant si l’on désire reprendre ces valeurs (Fig. 17): Fig. 17 Si vous sélectionnez <OUI>, les valeurs s’inscrivent dans l’unité interchangeable. Cette inscription est confirmée en bas par un message en caractères rouges. Le processus achevé, le nouveau nom de réactif s’affiche en bas à gauche de l’écran (Fig. 18). Dans cet exemple : Titrant 5 161 Fig. 18 2.9 Initial Filling or Rinsing of the Entire Interchangeable Unit 2.10 Premier remplissage ou rinçage de l’unité interchangeable complète Effectuer le premier remplissage de l’unité interchangeable avec le programme de rinçage <Rinçage>. A partir du menu principal (fig 19), Fig. 19 appeler le menu de système/des méthodes en appuyant sur la touche <MODE> (Fig. 20). Fig. 20 Appuyer une fois sur <↑> pour accéder aussitôt à la sélection <Rinçage> (Fig. 21). 162 Fig. 21 Confirmer la sélection en appuyant sur <ENTER> : Fig. 22 Il est alors possible de sélectionner le nombre de cycles de rinçage (Fig. 23). Pour un premier remplissage, rincer au moins deux fois. Il est possible d’interrompre à tout moment le processus de rinçage (Fig. 23) en appuyant sur <STOP> et de le poursuivre ensuite en appuyant sur <START> Fig. 23 En cours d’exécution de ce programme de premier remplissage ou de rinçage, veiller à placer sous la pointe de titrage un collecteur de dimensions suffisantes. L'idéal est de monter la pointe de titrage dans le récipient de titrage KF. 163 2.11 Remplissage du récipient de titrage avec le solvant Le solvant est aspiré de la bouteille de solvant vers le récipient de titrage en enfonçant la partie frontale de l'interrupteur du support de titrage TM 235 KF. Aspirer le solvant dans le récipient de titrage jusqu'à ce que la pointe de titrage et l'électrode soient complètement immergées. Il faut environ 35 à 40 ml de solvant : 35-40 ml Remplissage Fig. 24 2.12 Echange du cylindre en verre et du piston en PTFE L’échange du cylindre en verre et du piston s’effectue sans outil. Dans certains cas, l’opération nécessite l’utilisation d’un extracteur de piston. • • • • • • • Retirer l’unité interchangeable de l’appareil. Dévisser le tuyau entre le cylindre en verre et la vanne du cylindre en verre. Tourner la protection UV bleue de 5-6 tours vers la gauche. Enlever la protection UV et retirer le cylindre en verre avec le piston qui se trouve à l’intérieur. Mettre en place dans l’unité interchangeable un nouveau cylindre en verre avec son piston (Fig. 21) et recouvrir de la protection UV bleue Revisser et serrer la protection UV bleue en le tournant de 5 à 6 tours vers la droite. La tige de piston doit dépasser de l’unité interchangeable de 1 à 2 cm (Fig. 22 a). Basculer l’unité interchangeable vers l’avant de sorte que la face inférieure inclinée vienne reposer à plat sur la paillasse de laboratoire (Fig. 22 b). De ce fait, le piston rejoint sa position exacte. S’il arrive qu’un piston soit trop enfoncé dans le cylindre en verre, il suffit de sortir un peu le piston et de l’amener à nouveau dans la bonne position comme décrit ci-dessus. 164 Cylindre en verre Tige de piston Fig. 25 Piston rod Fig. 25 a Fig. 25 b Veiller par principe à monter dans l’unité interchangeable uniquement le cylindre de dimensions appropriées car, sinon, le codage mémorisé dans l’unité interchangeable ne coïnciderait plus avec la taille du cylindre. Cela entraînerait des erreurs de dosage. Pour des raisons de précision du dosage et de l’analyse, il est recommandé de toujours remplacer également le piston en PTFE lors du remplacement d’un cylindre en verre défectueux. Cela vaut tout particulièrement en cas de bris de verre car les joints d’étanchéité du piston en PTFE risquent d’être endommagés par des éclats de verre. Attention : En règle générale, les tuyaux et cylindres contiennent des produits chimiques qui risquent de s’écouler ou d’éclabousser lors du démontage. Respecter les mesures de sécurité appropriées pour la manipulation des produits chimiques. 165 3 Travailler avec le titrateur TitroLine® 7500 KF 3.1 Clavier frontal A l’exception des entrées alphanumériques (a-z, A-Z, 0-9) et de quelques rares fonctions, l’exécution de toutes les fonctions peut être commandée via le clavier frontal. <Mode>: <EDIT>: <ESC>: <START>: <FILL>: Sélection des méthodes, rinçage, configuration du système Modification de la méthode actuelle, nouvelle méthode, copie et suppression d’une méthode La touche <ESC> permet de revenir au niveau de menu précédent.. Marche et arrêt d’une méthode actuelle Remplissage de l’unité interchangeable Les différentes fonctions sont décrites avec précision dans le chapitre 3.4 Clavier PC externe. 3.2 Affichage L’affichage s’effectue sur un écran graphique LCD de résolution 320 x 240 pixels. Il offre également la possibilité d'affichages graphiques, par exemple, la trace au cours ou à la fin de la titration: 166 3.3 Dispositif de pointage Le dispositif de pointage (« souris », Fig. 26) est nécessaire pour le dosage. La souris n'est pas comprise dans les fournitures livrées avec l'appareil de base TL 7500. Fig. 26 Mode Dosage via méthode de dosage Préparation des solutions Touche noire Lancement du dosage Lancement du dosage Touche grise Remplissage Remplissage 3.4 Clavier PC externe Touches <ESC> <F1>/<START> <F2>/<STOP> <F3>/<EDIT> <F4>/<FILL> <F5>/ <F6>/<MODE> <F7>/<SYS> <F8/<CAL> <F9>/+ / <F10>/<DOS> Num/ Scroll Lock/ Lock Prt Sc Sys Rq <ESC> < ↑> < ↓ > <←> <→> 0...9 <ENTER> < ←Backspace > Caractères, signes ASCII toutes les autres touches Fonction Avec <ESC>, retour au niveau de menu précédent. Lancement de la méthode sélectionnée Arrêt de la méthode actuelle Modification de la méthode actuelle, nouvelle méthode, copie de la méthode Remplissage de l’unité interchangeable Affichage et modification des données de balance Afficher et modifier la mémoire globale avec <Shift> + <F5> Sélection des méthodes, rinçage, configuration du système Configuration du système (sélection de la langue, heure/date…) Sans fonction Changement de signe Appel du menu de dosage Non disponible Non disponible Sélection du menu de sélection des méthodes dans le menu principal Sinon : Avec <ESC>, retour au niveau de menu précédent. Sélection des différents menus et valeurs chiffrées Entrée de valeurs chiffrées Confirmation de paramètres entrés Effacement d’un chiffre entré / d’un caractère entré à gauche près du curseur clignotant Entrées alphanumériques possibles. Majuscules et minuscules possibles Sans fonction. 167 3.5 Menu Structure Le système comporte 4 menus de sélection : • Menu de départ ou menu principal • Paramètres de méthode • Sélection des méthodes • Configuration du système Après la mise en circuit, l’écran affiche toujours le menu principal. La méthode utilisée en dernier lieu est toujours affichée (Fig. 27). Fig. 27 Il est alors possible d’exécuter aussitôt la méthode affichée en appuyant sur <START>. <EDIT>/F3 donne accès aux paramètres de méthode (Fig. 28). Fig. 28 Il est alors possible de • modifier la méthode actuelle • créer une nouvelle méthode • appeler et enregistrer des méthodes standard • copier ou effacer des méthodes existantes Les options de menu se sélectionnent avec les touches <↓> et <↑>. Ensuite, confirmer sa sélection avec <OK>/<ENTER>. Avec <ESC>, on revient au menu principal. 168 < Avec <MODE>/F6, on accède au menu de sélection des méthodes (Fig. 29). Fig. 29 Sélectionner les méthodes existantes avec <↓> undo <↑> et confirmer sa sélection avec <OK>/<ENTER>. Après la sélection, le système revient aussitôt au menu principal avec la méthode nouvellement sélectionnée. Si aucune méthode n’a été sélectionnées, <ESC> permet également de revenir au menu principal. L’accès à la configuration du système (Fig. 30 et Fig. 31) peut être direct, via la touche <SYS>/F7, ou indirect, via le menu de sélection des méthodes. Fig. 30 Fig. 31 169 3.6 Menu principal Après la mise en circuit, le menu principal s’affiche toujours. La méthode utilisée en dernier lieu est toujours affichée (Fig. 32). Fig. 32 3.6.1 Méthodes standard de titrage KF Si aucun titrage n'a encore été réalisé, il est recommandé de charger l'une des méthodes standard. Ces méthodes ont des paramètres par défaut et peuvent généralement être utilisées directement sans apporter de modifications. Dans le menu principal, appuyer sur F3/EDIT pour accéder aux méthodes du menu : Fig. 33 Dans ce menu, sélectionner la méthode standard appropriée : Fig. 34 170 Méthodes standard KF Application Titer 1-Component (liquid standard) Détermination de la concentration de l'agent de titrage. Convient aux réactifs à 1 composant. Le standard est un liquide de référence en ampoules ayant une concentration de 10 mg/g. Titer 1-Component (solid standard) Détermination de la concentration de l'agent de titrage. Convient aux réactifs à 1 composant. Le standard est une substance de référence de tartrate de sodium dihydrate ayant une teneur en eau de 15,66 %. Titer 1-Component (water) Détermination de la concentration de l'agent de titrage. Convient aux réactifs à 1 composant. Le standard est de l'eau pure Titer 2-Component (liquid standard) Détermination de la concentration de l'agent de titrage. Convient aux réactifs à 2 composants. Le standard est un liquide de référence en ampoules ayant une concentration de 10 mg/g. Titer 2-Component (solid standard) Détermination de la concentration de l'agent de titrage. Convient aux réactifs à 2 composants. Le standard est une substance de référence de tartrate de sodium dihydrate ayant une teneur en eau de 15,66 %. Titer 2-Component (water) Détermination de la concentration de l'agent de titrage. Convient aux réactifs à 1 composant. Le standard est de l'eau pure Sample 1-Component Méthode de titrage de l'échantillon avec réactifs à 1 composant Sample 2-Component Méthode de titrage de l'échantillon avec réactifs à 2 composants Les statistiques sont activées pour les méthodes de titrage. La valeur moyenne du titre en mg/ml est automatiquement sauvegardée dans la pièce jointe. Elle est ensuite automatiquement utilisée dans le titrage de l'échantillon. Les résultats du titrage de l'échantillon sont calculés en %. Si nécessaire, cette unité peut être convertie dans d'autres unités de mesure, comme les ppm. 3.6.2 Titrage KF automatique La méthode qui est affichée peut maintenant être directement effectuée avec <START>. Le préconditionnement est d'abord lancé. Le solvant et le récipient de titrage contiennent de l'humidité (eau) qui ne doit pas avoir d'incidence sur le résultat du calcul. Le conditionnement est lancé automatiquement après avoir appuyé sur le bouton Start ou la touche F1. Les conditions finales sont les mêmes que celles du du titrage de l'échantillon. 171 Fig. 35 Lorsque les critères définitifs sont remplies, il ya un signal sonore et <conditionnement fini> est affiché à l'écran: Fig. 36 Le conditionnement reste actif jusqu'à ce que le titrage à proprement dit ait débuté en appuyant sur <F1/START>. Il vous sera immédiatement demandé d'ajouter l'échantillon : Fig. 37 Après avoir ajouté l'échantillon ou la référence, vous devez appuyer de nouveau sur <F1/START>. Selon le paramétrage de la méthode, l'identification (Fig. 38) et la quantité pesée (Fig. 39) de l'échantillon vous seront demandées. Vous pouvez utiliser un clavier PC externe pour saisir un code d'identification de l'échantillon à 20 caractères alphanumériques. 172 Fig. 38 Fig. 39 Il est possible d’entrer les données de balance au moyen du clavier frontal ou du clavier externe. Pour valider les entrées appuyer sur <OK>/<ENTER>. En cas de reprise automatique des données de la balance, les quantités pesées sont lues dans une mémoire. Si la mémoire ne contient pas de données de balance, un message s’affiche indiquant qu’il n’existe pas de données de balance : Fig. 40 Il est encore possible de transférer les données de la balance en appuyant sur la touche Print de la balance. Le titrage commence alors directement après le transfert des données de la balance sans autre confirmation. L'écran affiche soit l'utilisation en ml avec la dérive en µg/min ou la dérive avec la valeur mesurée en µA ou la courbe de titrage en ml/temps [s]. Vous pouvez commuter entre les différents affichages à l'aide de la touche <F6/MODE> : Le graphes sont automatiquement mis à l'échelle : 173 Fig. 41 Fig. 42 Fig. 43 La mise à l'échelle du graphe sera effectuée automatiquement. Le résultat sera affiché à la fin du titrage (Fig. 44 et 45). 174 Fig. 44 <MODE>/<F6> peut être utilisé pour afficher la courbe de titrage ou d'autres résultats : Fig. 45 Si une imprimante est connectée, les résultats sont sortis sur imprimante selon la configuration de la méthode et/ou mémorisés sous forme de fichier PDF sur une clé USB raccordée. Si aucune imprimante ou aucune clé USB n’est raccordée, le message « Pas d’imprimante » ou « Pas de clé USB » s’affiche en bas à gauche de l’écran. En appuyant sur <ESC>, on revient au menu principal et il est possible de lancer aussitôt le titrage suivant. 3.6.3 Dosage Lancer la méthode de dosage avec <START>/<F1> ou avec la touche noire du dispositif de pointage (« souris »). Fig. 46 175 Fig. 47 Le volume dosé s’affiche brièvement avant que le menu principal s’affiche à nouveau. Fig. 48 Fig. 49 Il est possible de lancer aussitôt le dosage suivant. L’unité interchangeable n’est pas automatiquement remplie après le dosage, à moins que le volume de cylindre maximal ne soit atteint ou que l’option de remplissage automatique ne soit activée. Avec <FILL>, il est possible de remplir l’unité interchangeable à tout moment. Le dosage peut également être exécuté sans méthode de dosage via la touche <DOS>/<F10> du clavier externe : 176 Fig. 50 Le volume est entré et dosé après la confirmation avec <ENTER>/<OK> : Fig. 51 Pour exécuter d’autres dosages, appuyer sur <ENTER>/<OK>. L’unité Fig. 52 L’unité interchangeable n’est pas automatiquement remplie après le dosage, à moins que le volume de cylindre maximal ne soit atteint. Avec <FILL>, il est possible de remplir l’unité interchangeable à tout moment. Avec <ESC>, revenir au menu principal. 3.6.4 Préparation de solutions La « préparation de solutions » est une méthode de dosage spéciale. Un solvant (acide sulfurique, par exemple) est dosé par addition à la quantité pesée d’une substance jusqu’à ce que la concentration désirée soit atteinte : 177 Fig. 53 Fig. 54 Fig. 55 Si le volume calculé est supérieur au volume maximal réglé, un message d’erreur s’affiche et, pour des raisons de sécurité, le dosage n’est pas effectué : Fig. 56 178 4 Paramètres de méthode A partir du menu principal (Fig. 53), on accède aux paramètres de méthode avec <EDIT>/<F3> : Fig. 57 4.1 Edition d’une méthode et nouvelle méthode En sélectionnant <Editer une méthode> ou <Nouvelle méthode>, on accède au menu permettant de modifier une méthode ou de créer une nouvelle méthode. En cas de sélection de <Nouvelle méthode>, le système demande toujours l’entrée du nom de la méthode (Fig. 58). Cette interrogation n’apparaît pas lorsqu’il s’agit de la modification d’une méthode déjà créée. Fig. 58 Le nom de méthode peut contenir jusqu’à 21 caractères. Les signes spéciaux sont également possibles. Si aucun clavier n’est raccordé, il faut reprendre le nom de méthode affiché (ici : « Méthode 01 »). Les numéros de méthode sont affectés automatiquement. Confirmer l’entrée avec <OK>/<ENTER>. Il est possible de modifier le nom de méthode à tout moment. Continuer au chapitre 4.5 4.2 Méthodes standard L'élément <Méthodes standard> du TitroLine® 7500 KF comprend une série de méthodes standard prêtes à l'emploi qui peuvent être facilement sélectionnées (Fig. 59). Fig. 59 179 Une fois la méthode sélectionnée, le système demande aussitôt l’entrée du nom de méthode : Fig. 60 Il est possible de reprendre le nom standard tel quel ou de le modifier. Ensuite, le système commute sur <Modification des paramètres de méthode>. Continuer au chapitre 4.6. 4.3 Copie de méthodes Il est possible de copier des méthodes et de les enregistrer sous un nouveau nom. Après sélection de la fonction, la méthode actuelle est copiée et il est possible de lui donner un nouveau nom : Fig. 61 Un nouveau nom comportant l’extension [1] est automatiquement attribué afin qu’il ne puisse pas exister 2 méthodes portant le même nom. Ensuite, le système commute sur <Modification des paramètres de méthode>. Continuer au chapitre 4.6. 4.4 Supprimer de méthodes Après sélection de la fonction, le système demande si la méthode actuelle doit être vraiment supprimée. Il faut alors sélectionner <Oui> de manière explicite et confirmer cette sélection avec <OK>/<ENTER>. Fig. 62 180 4.5 Impression de la méthode Il est possible d’imprimer la méthode actuellement sélectionnée sur une imprimante raccordée ou de la mémoriser sous forme de fichier PDF sur une clé USB. Fig. 63 4.6 Modification des paramètres de méthode L’entrée et la modification du nom de méthode ont déjà été décrites aux chapitres 4.1 et 4.3. Fig. 64 4.6.1 Type de méthode L’option de menu <Type de méthode> permet de sélectionner si l’on désire effectuer un titrage automatique, un dosage ( distribution) ou bien préparer une solution. Fig. 65 La sélection du type de méthode influence le paramétrage de la méthode. En cas de sélection du mode dosage, par exemple, il n’est plus possible de sélectionner une formule ou de modifier un mode de titrage (titrage KF ou Dead stop etc). 181 Pour un titrage automatique, vous pouvez sélectionner les modes suivants : • • Titrage KF Titrage à point final 4.6.1.1 Titrages KF et à point final Le titrage KF est une forme particulière de titrage à point final. Dans le titrage à point final classique, le titrage est effectué à la valeur spécifiée en µA, qui doit être maintenue pendant un temps défini. Dans le titrage KF, ceci est toujours vrai, mais il doit également répondre à un critère spécifié de dérive en µg/min. Avec le titrage KF, une étape de conditionnement est également préréglée afin d'éliminer toute humidité dans le récipient de titrage et le solvant. La première phase du titrage KF et à point final est un dosage en continu jusqu'à une valeur delta éloignée du point final réglé. La vitesse de dosage peut être ajustée. Le titrage est ensuite réalisé avec différents pas de dosage linéaire entre la valeur delta et le point final. Les paramètres de titrage suivants peuvent être réglés pour le titrage KF et à point final : Paramètre de titrage Titrage à point final Titrage KF Point final µA X X Valeur delta µA X X Pas linéaire en ml X X Retard de point final en sec X X Temps d'attente (entre les pas de dosage linéaire) X X Temps d'attente de départ / temps d'extraction X X Réglage on/off du conditionnement - X Pré - titrage en ml X X Tension de polarisation en mV X X Maximum et minimum titration temps en sec - Volume de titrage maximal X X Dérive en µg/min X X Vitesse de dosage en % 4.6.2 Résultat On commence par déterminer les options de calcul: Fig. 66 182 Le texte du résultat peut contenir jusqu’à 21 signes alphanumériques, signes spéciaux compris : Fig. 67 Confirmer l’entrée avec <OK</<ENTER>. 4.6.2.1 Formules Dans l’option de menu Sélection de la formule, sélectionner la formule de calcul appropriée : Fig. 68 Les formules de calcul suivantes sont disponibles: Formule EP (EP-B)*T*M*F1/(W*F2) (W*F2)/(EP-B)*M*F1) Information complémentaire Formule pour calculer seulement la consommation en ml Formule pour le calcul de la concentration d'un échantillon en prenant en compte une valeur à blanc en termes de ml. Formule pour le calcul du titre (T) d'une solution de titrage. Les abréviations contenues dans ces formules ont la signification suivante EP: B: T: M: F1-F5 W Consommation totale Valeur à blanc en ml. La plupart du temps déterminée par titrage Titre de la solution de titrage (p.ex. 5.012) Mol ; poids moléculaire ou équivalent de l’échantillon Facteur 1-5 Facteur de conversion « weight », quantité pesée en g ou volume d’échantillon en ml. 183 Après sélection d’une formule, confirmer avec <OK>/<ENTER> : Fig. 69 Il est possible d’entrer les valeurs pour la valeur à blanc, les facteurs ou de les lire dans la mémoire globale. Les valeurs contenues dans la mémoire globale ont été préalablement déterminées par titrage puis mémorisées ou entrées manuellement. Fig. 70 Fig. 71 La mémoire globale utilisée est affichée. Dans l’exemple présent, c’est la mémoire M01 : Fig. 72 184 La mémorisation de résultats dans des mémoires globales est décrite au chapitre 4.6.3.7. Il est alors possible d’entrer séparément les différents paramètres des formules de calcul sélectionnées : Fig. 73 4.6.2.2 Quantité pesée et volume d’échantillon (quantité d’échantillon Fig. 74 Fig. 75 Pour la quantité d’échantillon (W), l’utilisateur choisit s’il désire utiliser une quantité pesée ou un volume d’échantillon pour le titrage ou la préparation de la solution. You have the following options: • • • • Quantité pesée manuelle : Au lancement de la méthode, le système demande la quantité pesée en g et l’utilisateur l’entre manuellement. Quantité pesée automatique : La quantité pesée est automatiquement transférée par une balance raccordée. Quantité pesée fixe : L’utilisateur entre une quantité pesée fixe en g. Celle-ci est ensuite automatiquement utilisée lors de chaque essai de la méthode sans interrogation de la quantité pesée. Volume d’échantillon manuel : Au lancement de la méthode, le système demande le volume d’échantillon en ml et l’utilisateur l’entre manuellement. 185 • Volume d’échantillon fixe : L’utilisateur entre un volume d’échantillon fixe en ml. Celui-ci est ensuite automatiquement utilisé lors de chaque essai de la méthode sans interrogation du volume d’échantillon. 4.6.2.3 Unité de formule L’unité de formule peut être sélectionnée dans l’option de menu Unité. Fig. 76 Après la sélection (p.ex. %), l’unité s’affiche également sur l’écran à titre d’information : Fig. 77 186 4.6.2.4 Ajout de formules pour solutions Le mode ajout de solutions propose à la sélection des formules de calcul particulières. Sélectionner la formule de calcul adéquate dans l’option de menu Sélection de formule : Fig. 78 Il est possible de sélectionner 3 formules de calcul différentes : W*(100-Fa-Fb)*Fc/Fd - W*(100-Fb)/(100*Fe) +Ff W*(100-Fa-Fb)*(Fd/Fg ) - W*(100-Fb)/(100*Fg) +Ff W*(100-Fa-Fb)*Fc/(100*Fd) Signification des différents facteurs : W: Fa : Fb : Fc : Fd : Fe : Ff : Fg : Quantité pesée d’échantillon en g Part de composants étrangers solubles en % Part de composants étrangers insolubles en % Facteur de conversion pour unité g/l = 10 mg/l et ppm = 10000 g/100 ml =1 % =1 Concentration de consigne de la solution à préparer en g/l, mg/l (ppm), g/100 ml ou % Densité de l’échantillon pesé en g/cm³ Correction du volume en ml. Cette correction du volume représente le dosage en sus nécessaire pour compenser la contraction du volume et la différence de densité entre l’échantillon pesé et le solvant (voir remarque relative à la correction du volume) Densité du solvant utilisé en g/cm³ Remarque relative à la correction du volume : L’utilisateur doit décider au cas par cas si une correction du volume est nécessaire et selon quel procédé celle-ci doit être effectuée. Pour les solutions à très faible contenu de substances dissoutes, il est généralement possible de renoncer à la correction du volume. 187 4.6.2.5 Décimales Enfin, il est également possible de fixer le nombre des décimales de 0 à 6. Le réglage standard est 2 ou 3 Fig. 79 4.6.2.6 Statistique L’utilisation de la statistique permet de calculer et de documenter automatiquement la moyenne et l’écart type relatif. Fig. 80 La moyenne peut déjà être calculée à partir de 2 valeurs, l’écart type relatif à partir de 3 valeurs seulement. Le nombre maximal de valeurs est de 10. Fig. 81 La moyenne et l’écart type relatif s’affichent directement à l’écran. 188 4.6.2.7 Mémoires globales Il est possible de mémoriser les résultats de titrages dans 50 mémoires globales (M01 – M50) en vue de calculs ultérieurs. Fig. 82 Lorsque la statistique est activée, la moyenne est mémorisée dans la mémoire globale. Avec <Enter/OK>, on accède au sous-menu. Si aucune mémoire globale n’a encore été créée, il est possible de créer une mémoire en appuyant sur la touche d’insertion <Ins>. Le titrateur propose un nom de mémoire, p. ex. M01 (M01- M50). Le nom de la mémoire peut être modifié selon les applications. Ici, dans l’exemple présent, de « M01 » à « valeur blanc ». Fig. 83 Cela facilite l’affectation ultérieure de la mémoire globale à une autre méthode. Exemple de détermination du titre : Le titre en mg/ml est défini à l'aide d'une méthode de titrage supplémentaire. Le résultat en mg/ml est ensuite automatiquement inscrit dans la mémoire globale de « unité interchangeable ». Fig. 84 The menu for the global memory can always be accessed by pressing Shift+F5 or via system settings. The name or values can be changed by using EDIT/F3 and have the methods shown that are used in the global memories. 189 Fig. 85 4.6.3 Paramètres de titrage L’option de menu <Paramètres de titrage> permet de déterminer les paramètres de la méthode à proprement dit : Les paramètres ont déjà été présentés dans le chapitre 4.6.2.1 : Fig. 86 Fig. 87 Paramètres de titrage généralement valables Il est possible d’entrer différents paramètres selon le mode de titrage (KF or dead stop titration) Les paramètres suivants sont valables pour tous les modes de titrage KF ou dead stop: • • • • • • Temps d'attente initial Temps d'attente fixe Pas de dosage Pré-titrage Tension de polarisation Fin du titrage 190 Temps d’attente de départ /Temps d´extraction (KF): Avec le titrage à point final, le temps d'attente de départ s'écoule au début du titrage. Dans le titrage KF, le temps d'attente de départ = le temps d´extraction. Le temps d´extraction s'achève après avoir fourni l'échantillon. Les temps d’attente de départ / temps d´extraction peuvent être réglés entre 0 et 999 secondes. Fig. 88 Conditionement Le conditionnement (seulement KF) est activé pour chaque méthode KF. Il peut être désactivé par l'intermédiaire d'un PC pour un contrôle externe : Fig. 89 Temps d’attente fixe Le temps d’attente fixe est le temps d’attente entre les pas de dosage linéaire à la fin du titrage jusqu'au point final. Le temps d’attente fixe peut être réglé entre 0 et 999 secondes : Fig. 90 Pas de dosage Le pas de dosage peut être réglé entre 0,001 et 5,000 ml. Les valeurs habituelles pour le titrage KF sont de 0,002 à 0,01 ml. 191 Fig. 91 Dans ce type de titrage, le pas de dosage linéaire est utilisé après la phase de titrage en continu. Sens de titrage (seulement dans le mode de titrage à point final) Le sens de titrage peut être réglé sur « croissant » ou « décroissant ». Par exemple, si vous souhaitez réaliser un titrage du soufre par une solution d'iode, vous devez sélectionner « croissant ». Pour un titrage en retour de l'iode par une solution de thiosulfate de sodium, vous devez sélectionner « décroissant ».. Fig. 92 Pré-titrage Si la consommation de titrant est à peu près connue, il est possible de régler un volume de pré-titrage dans le menu <Pré-titrage>. Dans ce cas, après le temps d’attente de démarrage, un volume au dosage défini est ajouté (= pré-titré). Après l’ajout du volume de pré-titrage, un temps d’attente défini s’écoule avant l’ajout du pas de dosage suivant. Le volume de pré-titrage est automatiquement ajouté à la consommation de titrant. Le volume de pré-titrage peut être réglé entre 0,000 et 99,999 ml et le temps d’attente après le pré-titrage entre 0 et 999 secondes : Fig. 93 Tension de polarisation La tension de polarisation en mV peut être réglée uniquement dans le cas du titrage KF ou dead stop. . 192 Fig. 94 Il est possible de régler les valeurs de 40 à 220 mV. la valeur est réglée par défaut sur 100 mV. Tension de polarisation basse : Tension de polarisation élevée : 4.6.4 insensible sensible Fin du titrage La fin d’un titrage est atteinte et le résultat est calculé lorsque : • • • • • Fig. 95 Fig. 96 La valeur finale prédéterminée µA est atteinte. Le retard de point final en secondes a été respecté La valeur de dérive en µg/min a été atteinte La valeur en ml est atteinte (volume de titrage maximal). Les conditions pour les minimum et maximum titration temps sont maintenues 193 Maximum titration temps Le maximum titration temps peut être réglé entre 0 et 9999 secondes. Le réglage par défaut est de 600 secondes. Le maximum titration temps est généralement utilisé pour le titrage KF, qui peut générer une dérive en continu élevée résultant d'une réaction secondaire et ne peut donc pas atteindre un point final stable. Minimum titration temps Le minimum titration temps peut être réglé entre 0 et 9999 secondes. Le réglage par défaut est de 10 secondes. Le minimum titration temps permet d'éviter l'arrêt prématuré du titrage en cas de retard dans l'extraction de l'eau de l'échantillon. Le minimum titration temps est utilisé en association avec le temps d'extraction. Il expire alors que le temps d'extraction est encore actif. Volume de titrage maximal Le volume de titrage maximal devrait toujours être réglé sur des valeurs raisonnables. Il sert également de critère de sécurité afin de ne pas trop titrer, ce qui pourrait entraîner le débordement du récipient de titrage. Le volume de titrage maximal peut être réglé entre 1,000 et 999,999 ml : Fig. 97 Le réglage par défaut est de 50 ml. Le volume pour le conditionnement est compris dans le volume ! Dérive La dérive est calculée en µg/min par la consommation moyenne/temps du titrage x concentration de la solution de titrage. Une dérive stable au début et à la fin du titrage est importante pour obtenir des résultats reproductibles. Cela s'applique particulièrement aux échantillons ayant une faible teneur en eau dans les valeurs extrêmes basses du pourcentage (<0,1 %). Le réglage de la valeur de la dérive ne doit pas non plus être trop bas car le titration temps augmentera considérablement. Un récipient de titrage hermétique et sec a une dérive < 50 µg/min. Cela correspond à une consommation de 10 µl (0,01 ml) de titrant à la concentration de 5 mg/ml. Pour de nombreuses applications, une valeur de dérive de 100 à 150 µg/min est largement suffisante. Le réglage par défaut de la valeur de dérive est de 100 ou 150 µg/min pour le titrage de l'échantillon. 50 µg/min est le réglage par défaut pour les méthodes de titrage. Point final µA La valeur de l'entrée µA peut être réglée entre 0,0 et 100,0. Pour le titrage KF, les valeurs comprises entre 10 et 30 µA conviennent. La valeur standard est de 20 µA. Pont final delta µA La valeur Delta en µA est l'un des paramètres les plus importants pour les titrages KF et à point final. Plus la valeur Delta est faible, plus le titrage (dosage) se maintient à une vitesse continue pendant longtemps. Lorsque l'on utilise des réactifs mono-composants et du méthanol pur comme solvant, la valeur Delta doit être réglée à < 5 µA. Les valeurs de 2 ou 3 µA conviennent. Cela est dû au fait que la réaction KF dans le méthanol se produit relativement lentement. Lorsque l'on utilise des réactifs bi-composants ou lorsque l'on utilise des combinaisons de solvants, la valeur Delta doit être réglée à > 10 pour éviter un surtitrage rapide. Les valeurs de 14 ou 15 µA conviennent. Retard de point final Le retard de point final est réglé en secondes. il peut être réglé entre 0 et 100000 secondes. La valeur standard est de 10 secondes. Les retards de point final de courte durée (5 secondes) conviennent lorsque 194 • • • l'on utilise un très petit pas de dosage (par exemple, 0,001 ml) l'on utilise un titre de 1 mg/ml l'on génère une réaction secondaire avec une valeur élevée de dérive 4.6.5 Paramètres de dosage Fig. 98 Les paramètres de dosage (vitesse de dosage, vitesse de remplissage et volume maximum de dosage/titrage) sont fixés pour chacune des différentes méthodes. Ceci vaut pour tous les types de méthodes tels que titrage automatigue, dosage et préparation de solutions : Fig. 99 Selon l’unité interchangeable, il est possible de régler la vitesse de dosage en % de 1 à 100 % : Interchangeable unit WA 05 WA 10 WA 20 WA 50 Max. dosing speed [ml/min] 10 20 40 100 Il est possible de régler la vitesse de remplissage en secondes de 20 à 999 secondes. Au départ usine, elle est réglée sur 30 secondes. Pour les solutions aqueuses diluées, il est possible de régler la vitesse de remplissage sur 20 secondes. Pour les solutions non aqueuses, laisser la vitesse de remplissage réglée sur 30 secondes. Pour les solutions à viscosité élevée telles que l’acide sulfurique concentré, réduire encore la vitesse de remplissage à 40 -60 secondes. Selon le type de méthode, il est possible de régler le volume de dosage ou volume de titrage (maximal) sur 999,999, voire 9999,999. Pour le mode de dosage, il est possible de régler les options de remplissage suivantes : 195 Fig. 100 L’option remplissage « Arrêt » signifie que le remplissage ne s’effectue pas automatiquement après chaque pas de dosage. Dans le cas de l’option remplissage « intelligent avant », le système contrôle toujours avant le pas de dosage suivant si le pas de dosage peut encore être exécuté sans procédure de remplissage. Si ce n’est pas possible, le remplissage est effectué avant l’exécution du pas de dosage. Dans le cas de l’option remplissage « intelligent après », le système contrôle après chaque pas de dosage si le pas de dosage suivant peut être effectué sans procédure de remplissage. Dans le cas de l’option remplissage « toujours », le système procède automatiquement au remplissage après chaque pas de dosage. 4.6.6 Désignation de l’échantillon Pour le titrage manuel et automatique et la préparation de solutions, il est possible d’entrer une désignation d’échantillon. Il est possible de régler la désignation d’échantillon sur manuelle, automatique ou sans : Fig. 101 En cas de désignation d’échantillon manuelle, après le lancement de la méthode, le système demande toujours la désignation d’échantillon (à ce sujet, voir également chapitre 3.6, menu principal). En cas de désignation d’échantillon automatique, fixer une désignation permanente (ici : eau, voir Fig. 107) qui sera ensuite automatiquement numérotée en commençant par 01 : Fig. 102 Après toute nouvelle mise sous tension, la numérotation recommence par 01. 196 4.6.7 Documentation Fig. 103 Sur l’imprimante ou la clé USB, 3 réglages différents sont disponibles pour le format de la documentation : « Abrégé » « Standard avec courbe » et « GLP » (GLP = BPL) : Fig. 104 Type de méthode Titrage automatique Dosage Préparation de solutions Documentation abrégée Nom de méthode, date, heure, durée de titrage, désignation de l’échantillon, quantité pesée/fiole jaugée, valeurs de démarrage et finales (µA), résultats et formule de calcul… Nom de méthode, date, heure Documentation standard Comme Documentation abrégée + courbe de titrage Documentation GLP Comme Documentation standard + contenu de la méthode Néant Nom de méthode, date, heure, désignation d’échantillon, quantité pesée/volume d’échantillon, résultats et formule de calcul Néant Comme documentation abrégée + contenu de la méthode Comme documentation abrégée + contenu de la méthode 197 5 Configuration du système Fig. 105 Pour accéder à la configuration du système à partir du menu principal (Fig. 105), actionner <SYS>/<F7> ou activer <MODE> par les touches du clavier frontal, puis <Configuration du système> : Fig. 106 Le réglage de la langue du pays a déjà été décrit au chapitre 2.5. 5.1 Unité interchangeable réactifs Each interchangeable unit is equipped with an RFID transponder. This transponder can be used to store the following information: Chaque unité interchangeable contient un transpondeur RFID. Les informations suivantes peuvent être émerisées dans ce transpondeur : • Taille de l’unité (prédéterminée, non modifiable) • Code d’identification de l’unité (prédéterminé, non modifiable) • Nom du réactif (default : caractères d’espacement) • Concentration (default : 1 000 000) • Concentration déterminée le : (date) • Date de préemption : (date) • Ouvert/préparé le : (date) • Contrôle selon ISO 8655 : (date) • Désignation du lot : (default : no charge) • Dernière modification (date) 198 Fig. 107 Fig. 108 Fig. 109 Lorsque l’on quitte le menu <Unité interchangeable réactifs > avec <ESC>, le système demande toujours si l’on désire reprendre les valeurs. Fig. 110 Si la réponse est <Oui>, les valeurs actualisées sont inscrites dans le transpondeur RFID de l’unité interchangeable. 199 5.2 Réglages RS232 ® Dans le menu <Réglages RS232>, il est possible de déterminer l’adresse de l’appareil de la TITRONIC 500 et de régler séparément les paramètres des deux interfaces RS232 : Fig. 111 L’adresse de l’appareil peut être réglée sur 0 à 15. L’adresse 1 est préréglée : Fig. 112 Le débit en bauds est préréglé sur 480. Il peut être réglé de 1200 à 19200 : Fig. 113 200 Fig. 114 La parité peut être réglée sur <No> (sans), <Even> (paire) et <Odd> (impaire). Elle est préréglée sur <No> : Fig. 115 Les bits de données peuvent être réglés entre 7 et 8 bits. Ils sont préréglés sur 8 bits: Fig. 116 Il est possible de rétablir le réglage usine des paramètre des interfaces RS232 en sélectionnant <Réinitialisation des paramètres RS>. 201 5.3 Date et heure Au départ de l’usine, l’heure est réglée sur l’heure de l’Europe centrale. Si besoin, le réglage peut être modifié: Fig. 117 5.4 Mot de passe La fonction ‘Mot de passe’ n’est actuellement pas encore validée. Veuillez demander un update à votre revendeur. 5.5 RESET La fonction RESET (remise à zéro) permet de rétablir tous les réglages usine. Attention : Cette fonction efface aussi toutes les méthodes. Auparavant, veuillez sortir les méthodes sur imprimante ou les exporter/copier sur un support de mémoire USB raccordé (possible avec update ultérieur !) Il faut actionner la touche RESET encore une fois de plus : Fig. 118 202 5.6 Imprimante Pour le raccordement d’imprimantes, veuillez vous reporter au chapitre 7.3. Fig. 119 5.7 Informations sur l’appareil Les <Informations sur l’appareil> contiennent les informations suivantes : • Version logiciel actuelle • Numéro de série de l’appareil • Pilote d’imprimante et version mise à jour • Adresse d’appareil réglée • Version actualisée • Nombre de mesures (démarrages d’une méthode) • Nombre des levées/processus de remplissage Fig. 120 5.8 Tonalités du système Ici, il est possible de régler le volume sonore des sons du système et du clavier frontal de l’appareil. Le système émet des sons p.ex. à la fin d’un titrage ou lors d’une erreur de service. Les touches du clavier frontal produisent un clic lorsqu’une touche a été actionnée avec succès : 203 Fig. 121 Remarque : L’actionnement du clavier externe ne produit aucun son. 5.9 Mise à jour du logiciel Fig. 122 Mise à jour du logiciel de l’appareil requiert une clé USB sur laquelle est enregistrée la nouvelle version. Les deux fichiers nécessaires doivent se trouver dans le répertoire root de la clé USB : Connecter la clé USB sur un port USB A inoccupé, attendre quelques secondes, puis sélectionner la fonction <mise à jour du logiciel>. Les mise à jour de logiciel valables s’affichent à l’écran. Dans ce cas, il s’agit de la version « 16-11 » du 19/04/2011. 204 Fig. 123 L’affichage suivant apparaît seulement après le lancement de mise à jour avec <OK/ENTER> : Fig. 124 Puis il commute quelques secondes après sur l’affichage suivant : Fig. 125 Après mise à jour (env. 2-3 minutes), l’appareil arrête complètement le logiciel et démarre à nouveau. Important : Lors de mise à jour, les méthodes ne sont pas effacées ! Ensuite, elles peuvent être utilisées à comme auparavant. Si aucun fichier mise à jour valable ne se trouve sur la clé USB, le message suivant s’affiche : Fig. 126 205 6 Communication de données via l’interface RS 232 et USB-B 6.1 Généralités ® Le TitroLine 7500 KF est dotée de deux interfaces sérielles RS 232 C pour la communication de données avec d’autres appareils. Ces deux interfaces permettent de faire fonctionner plusieurs appareils sur une interface de PC. ® De plus, au lieu de l’interface RS232-1, le TitroLine 7500 KF est également dotée d’une interface USB B pouvant être utilisée exclusivement pour le raccordement à un PC. L’interface RS-232-C- 1 assure la liaison avec un ordinateur raccordé ou avec l’appareil précédent de la « Daisy Chain ». L’interface RS-232-C- 2 permet le raccordement d’autres appareils (concept « Daisy Chain »). Occupation des broches des interfaces RS-232-C : No de broche 1 2 3 Signification / Description T x D sortie de données R x D entrée de données Masse numérique 6.2 Connexion en chaîne de plusieurs appareils— Concept « Daisy Chain » Pour pouvoir solliciter individuellement plusieurs appareils en chaîne, chaque appareil doit posséder sa propre adresse d’appareil. A cet effet, commencer par établir une liaison entre l’ordinateur et l’interface RS 232 C 1 du o premier appareil de la chaîne, avec un câble de données RS 232 C, p.ex. type n TZ 3097. Avec un autre câble o de données RS 232 C, type n TZ 3094, relier l’interface RS 232 C 2 du premier appareil avec l’interface RS 232 C 1 du deuxième appareil. L’interface 2 du deuxième appareil permet le raccordement d’un appareil supplémentaire. De manière alternative, il est également possible de raccorder le TitroLine® 7500 KF à l’interface USB d’un ordinateur au moyen d’un câble USB TZ 3840 (type A (M) --- USB Type B (M), 1,8 m). A cet effet, procéder à l’installation (opération unique) d’un driver de logiciel sur l’ordinateur. Ainsi, l’interface USB B assume la fonction de l’interface RS232 1. En ce qui concerne le driver de logiciel, veuillez vous mettre en contact avec la société SI Analytics. L’adresse est toujours composée de deux signes : p.ex. l’adresse 1 est composée des deux signes ASCII <0> et <1>. Il est possible de régler les adresses de 00 à 15, ce qui représente 16 possibilités au total. Veiller à ce que les appareils en chaîne possèdent des adresses différentes. Si un appareil est sollicité à son adresse, l’appareil exécute cet ordre sans l’envoyer à un autre appareil. La réponse envoyée à l’ordinateur est également munie de la propre adresse de l’appareil. Les adresses sont réglées comme décrit au chap. 5.2. Le TitroLine® 7500 KF reçoit les ordres d’un ordinateur sur l’interface 1 (ou interface USB B), à condition que ceux-ci soient munis de son adresse, et envoie sa réponse également via cette interface. Si l’adresse de l’ordre entrant ne correspond pas à son adresse d’appareil, l’ordre complet est redirigé sur l’interface 2. Cette interface 2 est reliée avec l’interface 1 d’un autre appareil. Cet appareil contrôle l’adresse à son tour et réagit à cet ordre comme le première TitroLine® 7500 KF. Toutes les informations (chaînes de données circonférentielles) arrivant à l’interface 2 de le TitroLine® 7500 KF sont immédiatement sorties sur l’ordinateur via l’interface 1 (ou l’interface USB B). Ainsi, l’ordinateur reçoit toujours les informations de tous les appareils. En pratique, il est possible de raccorder jusqu’à 16 appareils sur une interface d’ordinateur. 6.3 Instruction Set for RS-Communication 6.4 Liste d’ordres pour la communication RS Les ordres sont constitués de trois parties : adresse à 2 caractères aa, p.ex. : 01 ordre p.ex. : DA variable, si nécessaire p.ex. : 14 et fin de l’ordre <CR> <LF> Chaque ordre doit se terminer par les signes ASCII <CR> et <LF> (Carriage Return et Line Feed). Toutes les réponses sont renvoyées à l’ordinateur seulement après achèvement de l’action correspondante. ® Exemple : L’ordre de doser 12,5 ml doit être envoyé à un titrateur TitroLine 7500 KF dotée de l’adresse 2. L’ordre se compose des signes suivants : 02DA12.5<CR LF> Avec : 02 = adresse de l’appareil DA = ordre de dosage sans remplissage et mise à zéro de l’affichage 206 12.5 <CR> <LF> = = volume à doser en ml suffixe de fin de l’ordre Command Description aaAA aaMC1...XX aaBF aaBV aaDA aaDB aaDO aaGDM aaGF aaES aaEX aaGDM aaFD aaGF aaGS aaLD aaLR aaGF Affectation automatique de l’adresse de l’appareil aaY Sélection d’une méthode aaY « Remplir la burette ». L’unité interchangeable est remplie. aaY Sortir le volume dosé en ml aa0.200 Doser le volume sans remplissage, avec addition du volume aaY Doser le volume sans remplissage, mise à zéro du volume aaY Doser le volume sans remplissage, sans addition du volume aaY Vitesse de dosage en ml/min aaY Temps de remplissage en secondes (minimum 20, défaut 30) aaY Fonction « ESC » un pas en arrière aaY Fonction « EXIT » retour au menu principal aaY Vitesse de dosage en ml/min (0.01 – 100 ml/min) aaY Fonction de mesure µA « dead stop » aaY Temps de remplissage en secondes (réglable de 20 à 999 s) aaY Sortie du numéro de série de l’appareil aaGS08154711 Sortie des données de mesure aaY Sortie rapport (rapport abrégé) aaY Temps de remplissage en secondes (réglable de 20 à 999 secondes) aaY Sortie du numéro de série de l’appareil aaGS08154711 Sortie du rapport (rapport abrégé) aaY Sortie de la valeur de mesure préréglée (pH/mV/ug) aaM7.000 Sortie du contenu de la méthode Sortie de la documentation (comme réglé) Demande d’identification aaIdent:TL500 Envoyer dernier ordre aa“dernier ordre“ Rapport état aaétat:“texte" Les réponses possibles sont : „STATUS:READY“ pour prêt „STATUS:dosing“ pour dosage „STATUS:filling“ pour remplissage de la burette „ERROR:busy“ quand aucune unité interchangeable n’a été montée. Marche méthode sélectionnée aaY Rétablir le réglage usine de l’EEPROM aaY Arrêt de la fonction en cours aaY Régler la langue d’affichage sur allemand -deutschaaY Régler la langue d’affichage sur anglais -englishaaY Régler la langue d’affichage sur français aaY Régler la langue d’affichage sur espagnol -españolaaY Numéro de version du logiciel aaVersion: aaGS aaLR aaM aaLI aaLO aaRH aaRC aaRS aaSM aaSEEPROM aaSR aaSYS5 aaSYS1 aaSYS2 aaSYS3 aaVE Reply 207 7 Raccordement de balances d’analyse et d’imprimantes 7.1 Raccordement de balances d’analyse Les échantillons étant très fréquemment pesés sur une balance d’analyse, il est rationnel de raccorder cette balance à le TitroLine® 7500 KF. Pour pouvoir raccorder la balance à l’interface RS232 (2) de le TitroLine® 7500 KF la balance doit posséder une interface RS 232 C et il faut disposer d’un câble de raccordement de configuration correspondante. Pour les types de balance suivants, il existe des câbles de raccordement déjà confectionnés : Balance Sartorius (tous types), en partie Kern, Denver Mettler, AB-S, AG, PG Precisa Série XT Kern avec RS232 à 9 pôles Numéro TZ TZ 3092 TZ 3099 TZ 3183 TZ 3180 Pour les autres types de balance, nous pouvons confectionner des câbles de raccordement sur demande. A cet effet, nous avons besoin d’informations précises sur l’interface RS 232 C de la balance utilisée. Le câble de raccordement est branché sur l’interface RS 232 C 2 de le TitroLine® 7500 KF. Cette extrémité du câble de raccordement est toujours constituée d’un mini-connecteur à 4 pôles. L’autre extrémité du câble peut être constituée, selon le type de balance, par un connecteur à 25 pôles (Sartorius), un connecteur à 9 pôles (Mettler AB-S) ou un connecteur spécial à 15 pôles (Mettler AT), etc. Afin que les données de la balance puissent être envoyées à le TitroLine® 7500 KF, il faut que les paramètres de transmission des données de le TitroLine® 7500 KF coïncident avec celles de la balance. Il faut également effectuer encore quelques autres réglages de base sur les balances : • La balance ne doit envoyer les données de balance via RS 232 C que sur un ordre d’impression • La balance ne doit envoyer les données de balance qu’après immobilisation de l’affichage • La balance ne doit jamais être réglée sur « send continuous », « automatic sending » ou « envoi en continu ». • Le « Handshake » de la balance doit être réglé sur « arrêt », « off », éventuellement aussi sur « Software Handshake » ou « Pause ». • Dans la chaîne de données circonférentielle, les données de balance ne doivent pas être précédées de signes spéciaux tels que S ou St. Sinon, il se pourrait que les données de balance ne puissent pas être correctement traitées par le TitroLine® 7500 KF. Après raccordement de la balance au TitroLine® 7500 KF avec le câble approprié et adaptation de tous les réglages dans le logiciel de la balance et, éventuellement, du TitroLine ® 7500 KF, le contrôle de la transmission des données de balance s’avère très simple. Lancer une méthode. Confirmer la désignation de l’échantillon. A l’écran s’affichent les messages suivants : a) « Pas de données de balance présentes. Attendre la quantité pesée automatique ». Paramètre sur « quantité pesée automatique » b) « Entrer la quantité pesée » dans ce cas, les paramètres sont encore réglés sur « quantité pesée manuelle » Poser un objet sur la balance et appuyer sur la touche d’impression (Print). Après immobilisation de l’affichage sur la balance, un bip sonore est émis par le titreur et a) l’affichage commute ensuite automatiquement sur l’affichage de mesure/dosage. b) la quantité pesée doit être entrée manuellement et confirmée avec <Enter><OK> 208 7.2 Editeur de balance Une pression sur la touche de fonction <F5/Symbole de balance> permet d’appeler l’éditeur dit de données de balance. Une liste contenant les données de balance existantes s’affiche : Fig. 127 Il est possible d’éditer séparément les données de balance. Après une modification, une croix s’affiche devant la quantité pesée : Fig. 128 Il est possible d’effacer et d’ajouter des quantités pesées séparées. Il est également possible d’effacer toutes les quantités pesées d’un seul coup : Fig. 128 En l’absence de données de balance, le message « Pas de données de balance » s’affiche : 209 Fig. 129 7.3 Imprimante Il est possible d’imprimer les résultats, les données de calibration et les méthodes sur les supports suivants : • • • Imprimante compatible HP PCL (A4) monochrome et chromatique Seiko DPU S445 (papier thermique 112 mm de largeur) Clé USB en format PDF – et CSV Pour raccorder l’imprimante, utiliser les connexions USB de l’appareil. Lors de la sortie sur imprimante, il faut tenir compte de l’imprimante raccordée. ainsi, par exemple, il n’est pas possible d’imprimer des mises en pages d’une imprimante HP sur une imprimante de caisse ou inversement. Aussi faut-il contrôler et si besoin adapter les réglages imprimante de l’appareil lors des changements d’imprimante. Fig. 131 Le pré-réglage est sur PDF. Si l’option « Impression PDF » est sélectionnée, une clé USB doit être raccordée à l’appareil. 210 8 Maintenance et entretien de le titrateur TitroLine® 7500 KF Pour conserver sa capacité de fonctionnement au titratuer il faut qu’elle soit l’objet de contrôles et de travaux de maintenance réguliers. La justesse du volume et la capacité de fonctionnement de sysème de titration sont soumises à la condition de contrôles réguliers. La justesse du volume est déterminée par toutes les pièces conduisant les produits chimiques (piston, cylindre, vanne, pointe de titrage et tuyaux). Ces pièces sont soumises à une certaine usure et sont donc des pièces d’usure. Le piston et le cylindre sont particulièrement sollicités et exigent donc une attention particulière. Forte sollicitation : Utilisation, par exemple, de solutions, réactifs et produits chimiques concentrés (> 0,5 mol/L) ; produits chimiques attaquant le verre tels que les fluorures, phosphates, solutions alcalines ; solutions ayant tendance à former des cristaux ; solutions de chlorure de fer (III) ; solutions oxydantes et corrosives telles que l’iode, le permanganate de potassium, Cer(III), produits de titrage Karl Fischer, HCl ; 2 solutions à viscosité > 5 mm /s ; utilisation fréquente, quotidienne. Sollicitation normale : Utilisation, par exemple, de solutions, de réactifs et de produits chimiques n’attaquant pas le verre, ne formant pas de cristaux et non corrosifs (jusqu’à 0,5 mol/L). Pauses dans l’utilisation : Si le système de dosage n’est pas utilisé pendant plus de quinze jours. nous recommandons de vider et de nettoyer le cylindre en verre et tous les tuyaux [6]. Ceci vaut en particulier en cas de conditions d’utilisation mentionnées sous « Forte sollicitation ». Sinon, le piston et la vanne risquent de perdre leur étanchéité et cela porterait préjudice à l’état de la burette à piston. Si du liquide reste dans le système, il faut également s’attendre à des phénomènes de corrosion et à des modifications des solutions avec le temps, p. ex. également à la formation de cristaux. Etant donné que, selon l’état actuel de la technique, il n’existe pas pour l’utilisation sur les appareils de titrage de tuyaux en matière plastique totalement exempts de phénomènes de diffusion, cette précaution s’applique tout particulièrement à la zone des tuyaux Nous recommandons les contrôles et travaux de maintenance suivants Simple nettoyage : Essuyage extérieur des éclaboussures de produits chimiques [1] Forte sollicitation En cours d’utilisation, si nécessaire Sollicitation normale En cours d’utilisation, si nécessaire Contrôle visuel : Contrôle des fuites dans la zone du système de dosage ? [2] Le piston est-il étanche ? [3] La vanne est-elle étanche ? [4] La pointe de titrage est-elle libre ? [5] Chaque semaine, lors de la remise en service Chaque mois, lors de la remise en service Tous les trois mois Si nécessaire Tous les six mois, lors de la remise en service Tous les six mois, lors de la remise en service Tous les six mois Tous les six mois Nettoyage à fond du système de dosage : Nettoyer toutes les pièces du système de dosage une par une. [6] Contrôle technique : Présence de bulles d’air dans le système de dosage. [7] Contrôle visuel Contrôle des connexions électriques [8] Contrôle du volume selon ISO 8655 Effectuer un nettoyage à fond Contrôle selon ISO 8655 Partie 6 ou Partie 7 [9] Attention : Tous ces contrôles et travaux de maintenance peuvent également être définis de manière différente en fonction des applications. Les divers intervalles peuvent être allongés si le matériel ne donne pas lieu à critique. Ils peuvent également être raccourcis dès que le matériel donne lieu à une critique. Le contrôle de fiabilité en matière de technique de mesure, travaux de maintenance compris, Kapitel 8 Lagerung und Transport 211 est proposé par la société SI Analytics GmbH comme prestation de service (sur commande avec certificat de contrôle du fabricant). A cet effet, l’appareil de titrage doit être envoyé à la société SI Analytics GmbH. Description détaillée des travaux de contrôle et d’entretien : [1] Essuyer avec un chiffon doux (et si besoin avec un peu d’eau et de nettoyant ménager ordinaire). [2] Les fuites se reconnaissent à l’humidité ou aux cristaux au niveau des visages des tuyaux, des lèvres d’étanchéité du piston dans le cylindre de dosage ou de la vanne. [3] En cas d’observation de liquide au-dessous de la première lèvre d’étanchéité, contrôler à intervalles plus courts si du liquide s’accumule également sous la deuxième lèvre d’étanchéité. Dans ce cas, remplacer immédiatement le piston et le cylindre en verre. Il est fort possible que des gouttelettes s’accumulent pendant l’utilisation au-dessous de la première lèvre d’étanchéité et qu’elles puissent toutefois disparaître. Il n’y a pas là motif à remplacement. [4] Pour le contrôle, retirer la vanne de la fixation, les tuyaux restant reliés à la vanne. Contrôler s’il se trouve de l’humidité au-dessous de la vanne. Lors de la remise en place, veiller à ce que le petit nez se trouvant sur l’axe de rotation retrouve sa place dans la rainure correspondante. [5] Au niveau de la pointe de titrage, il ne doit se trouver ni précipitations ni cristaux susceptibles de faire obstacle au dosage ou de fausser le résultat. [6] Dépose du cylindre : retirer la vanne de son logement, dévisser les tuyaux et rincer toutes les pièces avec soin à l’eau distillée. Pour le démontage du cylindre, des tuyaux et des autres pièces de l’unité interchangeable, voir mode d’emploi. [7] Dosage d’un volume de burette et remplissage à nouveau. Des bulles d’air s’accumulent à la pointe du cylindre et dans le tuyau de titrage et y sont facilement reconnaissables. En cas d’observation de bulles d’air, resserrer tous les assemblages à la main et répéter le processus de dosage. En cas de formation d’autres bulles d’air dans le système, contrôler la vanne [6] et remplacer les raccords de tuyaux. Les bulles d’air peuvent également se former à la liaison entre la lèvre d’étanchéité située entre le piston et le cylindre. Si la réduction de la vitesse de remplissage ne suffit pas, remplacer l’unité de dosage. [8] Contrôle des contacts électriques pour vérifier l’absence de corrosion et de dommages mécaniques. Réparer les pièces défectueuses ou les remplacer par des pièces neuves. [9] Voir application contrôle de la burette selon ISO 8655 Partie 6. 9 Stockage et transport ® En cas de stockage provisoire ou de transport de le titrateur TitroLine 7500 KF, l’utilisation de l’emballage original offre les meilleures conditions de protection de l’appareil. Dans de nombreux cas, cet emballage n’étant plus disponible, il s’avère nécessaire de le remplacer par un emballage improvisé équivalent. Le scellement de l’appareil dans une feuille plastique présent alors des avantages. Comme lieu de stockage, choisir un local où les températures se situent entre + 10 et + 40 °C et l’humidité de l’air ne dépasse pas 70 % (rel.). En cas de stockage provisoire et de transport de modules de dosage, éliminer les liquides contenus dans le système, les solutions agressives en particulier, voir également chapitre 8 « Maintenance et entretien de la burette ». 10 Recyclage et élimination Cette burette à piston et son emballage ont été pour l’essentiel fabriqués dans des matériaux pouvant être éliminés dans le respect de l’environnement et amenés à un recyclage approprié. Attention : Sur la carte principale de circuit imprimé se trouve une pile au lithium. Ne pas éliminer les piles avec les ordures ménagères. Elles sont reprises gratuitement par le fabricant et amenées à une valorisation et élimination appropriées. Si vous avez des questions concernant l’élimination, veuillez contacter la société SI Analytics. Should you have any questions regarding disposal, please contact SI Analytics. 212 11 Index Affichage 165 Ajout de formules pour solutions 186 balances d’analyse 155 Caractéristiques techniques 146 Clavier frontal 165 Clavier PC externe 166 clé USB 154 Configuration du système 197 Copie de méthodes 179 Daisy Chain 205 Date et heure 201 Dérive 193 Désignation de l’échantillon 195 Dispositif de pointage 166 Documentation 196 Dosage 174 Echange du cylindre 162 Editer une méthode 178 et de sécurité 149 Formules 182 Hub USB 154 Impression de la méthode 180 imprimante 154 Imprimante 209 Informations sur l’appareil 202 Initial Filling 160 Maintenance et entretien 210 Mémoires globales 188 Menu principal 169 Méthodes standard 178 Mise à jour du logiciel 203 mise en place 150 mise en service 150 Modification des paramètres de méthode 180 Montage et échange d’une unité interchangeable 157 Mot de passe 201 notes d'avertissement 149 Nouvelle méthode 178 Paramètres de dosage 194 Paramètres de méthode 178 Paramètres de titrage 189 Pauses dans l’utilisation 210 Précision 146 Précision de dosage 148 Premier remplissage ou rinçage 160 Préparation de solutions 176 Pré-titrage 191 printer 154 Quantité pesée et volume d’échantillon (quantité d’échantillon 184 Raccordement de balances d’analyse 207 Recyclage 211 Réglages RS232 199 RESET 201 Résultat 181 Rinsing 160 Scanner de codes-barres USB 154 Sélection de formule 186 Sélection de la formule 182 Setting the Language of the Country 155 Statistik 187 Stockage 211 Supprimer de méthodes 179 tension d'alimentation 149 Tension de polarisation 191 tension de service 149 Tonalités du système 202 Transport 211 Unité de formule 185 Unité interchangeable réactifs 197 Unités interchangeables 148 viscosité 146 volume maximum de dosage/titrage 194 TitroLine® 7500 KF Typ / type / type / tipo Bescheinigung des Herstellers Wir bestätigen, dass das oben genannte Gerät gemäß DIN EN ISO 9001, Absatz 8.2.4 „Überwachung und Messung des Produkts“ geprüft wurde und dass die festgelegten Qualitätsanforderungen an das Produkt erfüllt werden. Supplier’s Certificate We certify that the above equipment has been tested in accordance with DIN EN ISO 9001, Part 8.2.4”Monitoring and measurement of product” and that the specified quality requirements for the product have been met. Certificat du fournisseur Nous certifions que le produit a été vérifié selon DIN EN ISO 9001, partie 8.2.4 ”Surveillance et mesure du produit” et que les exigences spécifiées pour le produit sont respectées. Certificado del fabricante Certificamos que el aparato arriba mencionado ha sido controlado de acuerdo con la norma DIN EN ISO 9001, sección 8.2.4 „Seguimiento y medición del producto“ y que cumple con los requisitos de calidad fijados para el mismo. SI Analytics GmbH Hattenbergstr. 10 Tel. +49.(0)6131.66.5111 Fax. +49.(0)6131.66.5001 55122 Mainz Deutschland, Germany, Allemagne, Alemania E-Mail: [email protected] www.si-analytics.com SI Analytics is a trademark of Xylem Inc. or one of its subsidiaries. © 2013 Xylem, Inc. Version 121126 D EDV 8272310