1
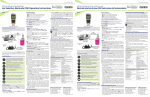
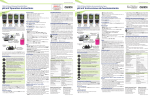
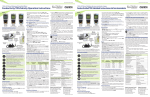
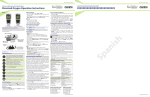
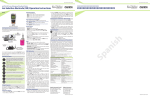
Part of Thermo Fisher Scientific 450 Series Waterproof Handheld Meter 450 Series Medidor de mano resistente al agua Dissolved Oxygen Operation Instructions Models: DO 450 DO/Temperature PD 450 pH/mV/DO/Temperature Getting Started/Connections After installing (2) AA batteries and/or connecting the optional 110/220 VAC power supply, connect the desired sensors to the corresponding ports. DO: 9-Pin RDO/ATC ATC: 6-Pin ATC (PD 450 only) BNC: pH, mV/ORP or Ion Selective (PD 450 only) A/C Power Adapter Output (USB or RS232 – PC or Printer Communication) The stand can be extended as shown above or used for wall-mounting. Keypad Functions Press once to power ON in the mode that was previously used. Press again to turn backlight on for one minute or off. Hold for 3 seconds to power OFF. Toggle between measurement and calibration modes. In SETUP mode, BACK serves to return to the previous menu option or setting. Confirm calibration values in CAL mode. Confirm selections in SETUP mode. Freeze or release the measured reading. Customize instrument settings and preferences. (See also Setup Programs) Toggle between available measurement types. Save measurement into memory. Increase value or scroll up in SETUP or manual calibration. Recall saved values from memory. Decrease value or scroll down in SETUP or manual calibration. Send output data to printer or computer. Setup Programs To access the settings below, press SETUP. Up/down arrows will display the available options. Press ENTER to accept the desired setting, or BACK to return to the previous option and/or exit. Configuration Options • Ready indicator ON / OFF / or Automatic HOLD when stable •Choose ºCelsius or ºFahrenheit RDO Setup Options • Choose units (% saturation, mg/L, or ppm) •Choose number of calibration points 1 (no zero) or 2 (includes zero) • Set compensation pressure in kPa (60.0 - 113.3), or mmHg, (450.0 - 850.0), salinity correction (0.0 - 45.0 ppt) RDO Info • Remaining Cap Life (# Days) • Probe Serial Number (####) • Year of Probe Manufacture (####) • Date of Probe Manufacture (DD.MM) Select Calibration Due Reminder • Set number of days from 0-60 View Calibration Data (for the parameter being measured) •Press ENTER to view each point that is calibrated. View Electrode Data (for the parameter being measured) •Press ENTER to view electrode data (Torr / % saturation). System Settings • Data Logging: MANUAL upon key press only TIMED interval. Choose (SEC / MIN / HOUR) interval. • Automatic shut off after 10 minutes. Choose ON or OFF. • Clock Settings: Date: Choose USA (MM/DD/YYYY) or Euro (DD/MM/YYYY). Time: Choose (24HR or 12HR). If 12HR, choose AM or PM. • Set Printer Type: CSV (Comma Separated Values) – best format for computer. Printer (Text) – best format for printer. Choose Manual (MAN) upon key press or TIMED interval. If timed, choose (SEC / MIN / HOUR). Reset • NO. Exits from reset menu options without action. • FACTORY RESET. Returns all settings except date/time and ATC calibration to factory default values after ENTER is pressed then restarts meter. • DATA RESET. Erases data stored in memory while retaining other settings after ENTER is pressed. • CALIBRATION RESET. Erases non-ATC calibration data while retaining other settings after ENTER is pressed. Dissolved Oxygen Calibration Perform daily calibration for best results. Dissolved oxygen levels vary with temperature, barometric pressure, and salinity, so calibration must be performed with consideration of these factors. It is necessary to adjust the barometric pressure and salinity values and calibrate the temperature prior to performing any DO calibration or measurement. For probe operation, refer to RDO Operation Instructions. The 450 series can accept one or two calibration values; typically 100 % using saturated air or air-saturated water, and 0 % using zero oxygen solution. If calibrating for 0 % oxygen, note that the meter will take several minutes to reach 0 % saturation value and constant stirring is not required. 100 % Saturation Automatic Calibration 1. Rinse the probe well with clean water. From % saturation mode, press CAL. 2. The primary display will show the calibration value, while the secondary display shows the unadjusted value and the lower display shows the measured temperature. 3. Place the probe in the optional calibration chamber or a saturated oxygen environment (air or air saturated water) & wait for the reading to stabilize. Press ENTER to accept. 0 % Saturation Automatic Calibration 1. Rinse the probe well with clean water. From % saturation mode, press CAL. 2. The primary display will show the calibration value, while the secondary display shows the unadjusted value and the lower display shows the measured temperature. 3.Submerse probe in zero oxygen calibration solution and stir. Wait for the reading to stabilize – this can often take more than 10 minutes. Wait for the reading to stabilize. Press ENTER to accept. Parte de Thermo Fisher Scientific Oxígeno disuelto Instrucciones de funcionamiento mg/L or ppm Manual Calibration 1. Rinse the probe well with clean water. From mg/L or ppm mode, press CAL. 2. The primary display will show the calibration value, while the secondary display shows the unadjusted value and the lower display shows the measured temperature. 3.Place the probe into a sample of known oxygen concentration (i.e. determined by titration or another instrument). Wait for the reading to stabilize. Press t/s to adjust the value and ENTER to accept. Modelos: Temperature Calibration/Manual ATC 1.Press CAL from any measurement, then press MODE. 2. Skip to step 3 for manual ATC, otherwise, dip the temperature sensor into a solution with a known accurate temperature. The upper display shows the active temperature while the lower display shows the factory default temperature without adjustment. 3.Use up/down arrows to adjust the upper display. Press ENTER to accept the calibration temperature. The maximum adjustable value is ±10 ºC (or ±18 ºF) from factory default. DO 450 DO/Temperatura PD 450 pH/mV/DO/Temperatura Primeros pasos/Conexiones Luego de insertar (2) baterías AA y/o conectar el suministro de energía opcional de 110/220 VAC conecte los sensores deseados a los puertos correspondientes. DO: 9-Pin RDO/ATC Error Messages “ERR” will appear when an error condition exists or the incorrect key is pressed. Common examples include: •Pressing ENTER during calibration before the “READY” indicator appears. Wait for the “READY” indicator before pressing ENTER. • UR (Under Range) • OR (Over Range) Intended Use, Maintenance & Precautions These handheld meters use sensors to detect various parameters for water-based measurements. For routine maintenance disconnect the power cord or battery, then dust or wipe the display using a damp cloth. If necessary, warm water or a mild water based detergent can be used. Immediately remove any spilled substance from contact with the meter using the proper cleaning procedure for the type of spill. • Do not use this equipment in potentially explosive atmospheres. • Refer to the electrode instructions for use, storage and cleaning. • Ensure that no liquid enters the instrument. • Do not use any aggressive cleaning chemicals (solvents or similar agents). •There are no user serviceable parts inside. Attempts to service internal parts may void the warranty. • WARNING: No modification of this equipment is allowed. Instrument Operating Conditions Operating Ambient Temp. 5 to 45 ºC Operating Relative Humidity 5 to 85 %, non-condensing Storage Temp. -20 to +60 ºC Storage Relative Humidity 5 to 85 %, non-condensing Pollution Degree 2 Overvoltage Category II Weight 500 g Size (L x W x H) 21.15 x 9.87 x 5.85 cm Regulatory & Safety CE, TUV 3-1, FCC Class A Power Rating DC Input: 9 VDC 1 A 2 x AA (LR6) 1.5 V batteries Battery Requirement (replace batteries when battery sign blinks) Vibration Shipping/handling per ISTA #1A Drop test in packaging per Shock ISTA #1A Enclosure (Designed To Meet) IP67 (using rubber covers) Universal Power Adapter Operating Conditions Operating Ambient Temp. 0 to 50 ºC Operating Relative Humidity 0 to 90 %, non-condensing Storage Temp. -20 to +75 ºC Storage Relative Humidity 0 to 90 %, non-condensing Pollution Degree 2 Overvoltage Category II I/P: 100 - 240 V, 50/60 Hz, 0.3A Power Rating O/P: 9 VDC 1 A Eutech Instruments Pte Ltd Blk 55, Ayer Rajah Crescent, #04-16/24, Singapore 139949 Tel: (65) 6778-6876 Fax: (65) 6778-0086 [email protected] www.eutechinst.com Oakton Instruments 625 East Bunker Court, Vernon Hills, IL, 60061, USA Tel: 1-888-462-5866 Fax: 1-847-247-2984 [email protected] www.4oakton.com 68X651903 08/14 Rev0 ATC: 6-Pin ATC (sólo PD 450) BNC: pH, mV/ORP o selectivo de iones (sólo PD 450) Transformador A/C Salida (USB o RS232 – Comunicación de PC o Impresora) El pie puede ser extendido como se muestra arriba o puede ser montado a la pared. Funciones del teclado Presione una vez, para encender en el modo usado previamente. Presione otra vez, para encender la retroiluminación por un minuto o apagar. Mantenga apretado por 3 segundos. Alterne ente los modos medición y calibración. En el modo CONFIGURACIÓN la tecla VOLVER sirve para volver a la opción previa del menú o ajuste. Confirmar los valores de calibración en el modo CAL. Confirmar selecciones en el modo CONFIGURACIÓN. Congelar o liberar el valor medido. Personalizar los ajustes del instrumento y las preferencias. (Vea también los programas de configuración) Alterne entre los tipos de medición disponibles. Guardar la medición en la memoria. Aumente el valor o desplace hacia arriba en CONFIGURACIÓN o calibración manual. Volver a mostrar valores guardados en la memoria. Reduzca el valor o desplace hacia abajo en CONFIGURACIÓN o calibración manual. Envíe los datos de salida a una impresora o computadora. Programas de configuración Para acceder a los ajustes abajo presione CONFIGURACIÓN, Las flechas arriba/abajo van a hacer aparecer las opciones disponibles. Presione ENTER para aceptar el ajuste deseado o BACK (Volver) para volver a la opción anterior y/o salir. Opciones de Configuración • Indicador listo ON / OFF / o HOLD (Mantenimiento) automático si estable •Elija ºCelsius o ºFahrenheit RDO Opciones de Configuración • Elija unidades (% saturación, mg/L o ppm) • Seleccione la cantidad de puntos de calibración 1 (no cero) o 2 (incluye cero) • Fije la presión de compensación en kPa (60.0 - 113.3), o mmHg, (450.0 - 850.0), corrección de salinidad (0.0 - 45.0 ppt) Info RDO • Vida útil restante de la Cápsula (# Días) • Número de serie de la sonda (####) • Año de fabricación de la sonda (####) • Fecha de fabcricación de la sonda (DD.MM) Seleccione Notificación de Calibración Pendiente • Fije la cantidad de días entre 0 y 60 Ver Datos de Calibración (para el parámetro que se está midiento) •Presione ENTER para ver cada punto que va a ser calibrado. Ver Datos de Electrodo (para el parámetro que se está midiento) •Presione ENTER para ver datos del electrodo (Torr / % saturación). Ajustes del Sistema • Registro de datos: MANUAL al apretar un botón sólo intervalo TIMED (Cronometrado). Elija (SEG / MIN / HORA) intervalo. • Apagado automático después de 10 minutos. Elija ON oder OFF. • Ajustes del reloj: Fecha: Elija USA (MM/DD/AAAA) o Euro (DD/MM/AAAA). Tiempo: Elija (24HR o 12HR). Si 12HR elija AM o PM. • Ajustar tipo de impresora: CSV (Valores Separados por Coma) – mejor formato para la computadora. Impresora (texto) – mejor formato para impresora. Elija Manual (MAN) al apretar un botón o intervalo TIMED (Cronometrado). Si cronometrado, elija (SEG / MIN / HORA). Resetear • NO (NRO). de salidas de las opciones del menú de reseteo sin acción. • FACTORY RESET (RESETEO DE FÁBRICA). Retorna todos los ajustes von excepción de fecha/tiempo y calibración ATC a los valores estándares de fábrica luego de oprimir ENTER el medidor es reseteado. • DATA RESET (RESETEO DE DATOS). Elimina datos guardados en la memoria mientras otros ajustes se conservan luego de oprimir ENTER. • CALIBRATION RESET (RESETEO DE CALIBRACIÓN). Elimina datos no pertenecientes a la calibración ATC mientras otros ajustes se conservan luego de oprimir ENTER. Oxígeno disuelto Calibración Para mejores resultados realize una calibración diaria. Las concentraciones de oxígeno disuelto varían conforme a temperatura, presión barométrica y salinidad por lo que la calibración debe ser llevada a cabo teniendo en cuenta estos factores. Es necesario ajustar los valores de presión barométrica y salinidad y calibrar la temperatura antes de llevar a cabo una calibración o medición DO. Para el funcionamiento de la sonda vea las instrucciones de funcionamiento RDO. La serie 450 puede aceptar uno o dos valores de calibración; normalmente 100 % utilizando aire saturado o agua saturada con aire, y 0 % utilizando solución sin oxígeno. Si está calibrando para 0 % oxígeno, tenga en cuenta que el medidor va a tardar varios minutos para alcanzar un valor de saturación de 0 % y que no es necesario revolver constantemente. 100 % Saturación Calibración automática 1. Lave bien la sonda con agua limpia. Desde el modo % saturación presione CAL. 2. La visualización primaria va a mostrar el valor de calibración mientras que la visualización secundaria muestra el valor no ajustado y la visualización inferior muestra la temperatura medida. 3. PColoque la sonda en la cámara de calibración opcional o un ambiente saturado de oxígeno (aire o agua saturada con aire) y espere a que se estabilice el valor medido. Presione ENTER para aceptar. 0 % Saturación Calibración automática 1. Lave bien la sonda con agua limpia. Desde el modo % saturación presione CAL. 2. La visualización primaria va a mostrar el valor de calibración mientras que la visualización secundaria muestra el valor no ajustado y la visualización inferior muestra la temperatura medida. 3. Sumerja la sonda en solución de calibración de cero oxígeno y revuelva. Espere a que se estabilice el valor medido – esto muchas veces puede tardar más de 10 minutos. Espere a que se estabilice el valor medido. Presione ENTER para aceptar. mg/L o ppm Calibración Manual 1. Lave bien la sonda con agua limpia. Desde el modo mg/L o ppm presione CAL. 2. La visualización primaria va a mostrar el valor de calibración mientras que la visualización secundaria muestra el valor no ajustado y la visualización inferior muestra la temperatura medida. 3. Coloque la sonda en una muestra de una concentración de oxígeno conocida (p. ej. determinada mediante tritación u otro instrumento). Espere a que se estabilice el valor medido. Presione t/s para ajustar el valor y ENTER para aceptar. Calibración de temperatura/ATC Manual 1.Oprima CAL de cualquier medición, luego oprima MODE (Modo). 2. Siga con el paso 3 por una ATC manual, de otra manera sumerja el sensor de temperatura en una solución con una temperatura determinada conocida. La pantalla superior muestra la temperatura activa mientras que la pantalla inferior muestra la temperatura estándar de fábrica sin ajuste. 3. Use las flechas arriba/abajo para ajustar el monitor superios. Oprima ENTER para aceptar la temperatura de calibración. El valor ajustable máximo es ±10 ºC (o ±18 ºF) desde el valor de fábrica. Mensajes de error “ERR” va a aparecer si existe una condición de error o si es presionada la tecla equivocada. Ejemplos comunes son entre otros: •Apretar ENTER durante la calibración antes de que aparezca la indicación “READY” (Listo). Espere a que aparezca la indicación “READY” (Listo) antes de apretar ENTER. • RI (Rango inferior) • RS (Rango superior) Uso intencionado, mantenimiento y precauciones Estos medidores portables utilizan sensores para detectar varios parámetros para mediciones basadas en agua. Para el mantenimiento de rutina disconecte el cable de alimentación o la batería y luego pase un trapo húmedo por la pantalla. Si es necesario puede utilizarse agua tibia o un detergente suave basado en agua. Remueve inmediatamente cualquier substancia derramada sobre el medidor con el procedimiento de limpieza correcto para el tipo de substancia derramada. • No utilice este equipo en atmósferas potencialmente peligrosas. • Vea las instrucciones del electrodo para su uso, almacenamiento y limpieza. • Asegúrese de que ningún liquido ingrese al instrumento. •No use químicos de limpieza agresivos (solventes o substancias similares). • No hay partes en el interior que pueden ser mantenidos por el usuario. El intento de mantener partes internas puede anular la garantía. • ADVERTENCIA: No está permitido ninguna modificación de este equipo. Condiciones de funcionamiento del instrumento Temperatura de ambiente de 5 a 45 ºC funcionamiento Humedad relativa de 5 a 85 %, no condensada funcionamiento Temperatura de almacenamiento -20 a +60 ºC Humedad relativa de 5 a 85 %, no condensada almacenamiento Contaminación Sobretensión Peso Tamaño (L x A x A) Ordenanzas y Seguridad Potencia Nominal Grado de 2 Categoría de II 500 g 21,15 x 9,87 x 5,85 cm CE, TUV 3-1, FCC Class A Entrada de CC: 9 VDC 1 A 2 x AA (LR6) 1,5 V batterías Requerimientos de batería (reemplazar batterías cuando parpadea el cartel de la batería) Vibración Envío/Manejo conforme a ISTA #1A Test de caída en envase conforme Shock a ISTA #1A Carcasa (diseñado para cumplir) IP67 (utilizando cubiertas de goma) Transformador universal Condiciones de funcionamiento Temperatura de Ambiente de 5 a 50 ºC funcionamiento Humedad relativa de 0 a 90 %, no condensada funcionamiento Temperatura de almacenamiento -20 a +75 ºC Humedad relativa de 0 a 90 %, no condensada almacenamiento Contaminación Grado de 2 Sobretensión Categoría de II I/P: 100 - 240 V, 50/60 Hz, 0.3A Potencia Nominal O/P: 9 VDC 1 A Eutech Instruments Pte Ltd Blk 55, Ayer Rajah Crescent, #04-16/24, Singapore 139949 Tel: (65) 6778-6876 Fax: (65) 6778-0086 [email protected] www.eutechinst.com Oakton Instruments 625 East Bunker Court, Vernon Hills, IL, 60061, USA Tel: 1-888-462-5866 Fax: 1-847-247-2984 [email protected] www.4oakton.com 68X651903 08/14 Rev0