1
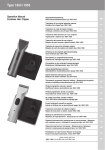
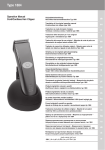
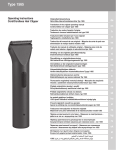
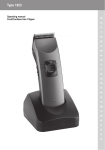
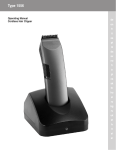
ENGLISH
de
en
fr
it
Operation
Keep the packaging material for safe storage or
transport later.
ff Check that the contents are complete.
ff Check all the parts for possible transport damage.
Safety
es
pt
nl
Before the appliance is used for the first time, it
should be charged for approx. 90 minutes!
1. Connect the appliance plug (P) on the plug-in transformer to
the charging stand socket (H) (Fig. 4ⓐ).
··
··
no
tr
··
··
cs
··
sk
sl
ro
The appliance can also be connected directly to
the plug-in transformer for charging (Fig. 2ⓐ/ⓑ).
Battery overcharging is prevented thanks to intelligent charge management.
2. Connect the plug-in transformer to the mains socket
(Fig. 4ⓑ).
3. Switch off the appliance using the on/off switch (Fig. 3ⓑ).
4. Place appliance in the charging stand (Fig. 4) or connect
directly to the plug-in transformer (Fig. 2ⓐ/ⓑ) to start the
charging process.
pl
hu
Handle with care! Damage due to incorrect power
supply.
ff Only operate the appliance with an alternating current and with the voltage stated on the nameplate.
Charging the battery
sv
fi
Mains operation
Preparation
During charging, the charging indicator (D) shines
green.
After the appliance has been removed from the
charging stand, the charging indicator will go out
(power saving mode).
It takes approx. 90 minutes for the appliance to
charge to full capacity.
5. Once the battery is fully charged, the charging indicator will
flash green.
Battery operation
1. Switch on the appliance using the on/off switch and switch
off after use (Fig. 3ⓐ/ⓑ).
··
bg
··
ru
··
uk
··
el
ar
12
When the battery is fully charged, the appliance
can be used for up to 120 minutes without mains
connection.
Once the red battery power indicator (D) has lit
up, the appliance still has around 10% residual
capacity. The appliance should now be charged.
Recommendation: To extend the battery operating
life, you should only recharge the battery when
the red battery power indicator (D) lights up during
battery operation.
Insufficient maintenance of the blade set can significantly reduce the operating time.
1. Connect the appliance plug (P) on the plug-in transformer to
the appliance socket (E) (Fig. 2ⓐ).
2. Connect the plug-in transformer to the mains socket (Fig.
2ⓑ).
3. Switch on the appliance using the on/off switch and switch
off after use (Fig. 3ⓐ/ⓑ).
Operation
Cutting with the attachment comb
The appliance can also be operated with attachment combs.
Depending on the model, the following attachment
combs are included as standard:
3 mm, 6 mm, 9 mm and 12 mm, 18 mm and 25 mm
cutting lengths.
Attaching/removing the attachment comb
1. Slide the attachment comb onto the blade set in the direction of the arrow until it reaches the limit stop (Fig. 5ⓐ).
2. The attachment comb can be removed by pushing it in the
direction of the arrow (Fig. 5ⓑ).
Maintenance
Warning! Injuries and material damage due to
incorrect handling.
ff Switch off the appliance before cleaning it or performing any maintenance and disconnect it from
the mains.
Cleaning and care
Danger! Electric shock due to penetration of
liquid.
ff Do not immerse the appliance in water!
ff Do not allow any liquid to get inside the appliance.
ff Only reconnect the appliance to the power supply
if it is completely dry.
Handle with care! Danger from aggressive
chemicals.
Aggressive chemicals could damage the appliance
and accessories.
ff Never use solvents or scouring agents.
ff Only use the cleaning agents and blade set oil
recommended by the manufacturer.
Accessories and spare parts are available from your
dealer or our service centre.
ff Remove the attachment comb (Fig. 5ⓑ) after every use
and lift the blade set out of the housing (Fig. 6ⓐ). Use the
cleaning brush to remove any cut hairs from the housing
opening and from the blade set (Fig. 7). The cleaning lever
can also be pressed. This allows the cut hairs that accumulate between the bottom blade and the top blade to be easily removed using the cleaning brush (EASY CLEANING).
ff Wipe the appliance with a soft, slightly damp cloth only.
ff Clean the blade set using the hygienic spray.
ff Oil the blade set with the blade set oil (Fig. 8).