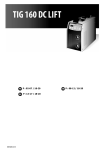
1
p. 3-7 / 28-32
p. 8-12 / 28-32
s. 13-17 / 28-32
p. 18-22 / 28-32
ct. 23-27 / 28-32
73502_V1_29/07/2013
FACE AVANT/FRONTAL SIDE/FRONTSEITE UND ANSCHLÜSSE/CARA DELANTERA/ПЕРЕДНЯЯ ПАНЕЛЬ
Afficheur
Voyant mode
« soudage à
l’électrode » (MMA)
Voyant mode
Sélecteur
« soudage à
valeur +
l’électrode réfractaire»
ou (TIG)
Bouton sélection/
validation
Voyant de protection
thermique
Bouton de mise en
marche / veille
Display
Mode indicator
Mode indicator « non
Select
« electrode welding » consumable electrode button « +
(MMA)
welding» (TIG)
or – »
Button selection/
validation
Thermal protection
indicator
Button on/stand by
Anzeige
Schweißmodusanzeige Schweißmodusanzeige
Wahl
MMA
«WIG
Drucktaster
Kontaktzündung»
+ oder (TIG)
Button-Auswahl /
Validierung
Gelbe
Übertemperaturanzeige
EIN/ AUS- Taste
Indicador
Indicador modo
Indicador modo
Selector
« soldadura con
« soldadura con
valor + o electrodo recubierto» electrodo refractario»
(MMA)
(TIG)
Botón selección /
validación
Indicador luminoso
amarillo de protección
térmica
Puesta en marcha /
stand by
Клавиша выбора/
подтверждения
Желтый индикатор
температурной
защиты
Кнопка включение /
вахтенный режим
Индикатор
Лампочка режима
MMA
Лампочка режима
TIG
Клавиши
выбора +
или –
200E FV CEL
9kg
12.2kg
2
DESCRIPTION
Merci de votre choix ! Afin de tirer le maximum de satisfaction de votre poste, veuillez lire avec attention ce qui suit :
Ces postes de soudure Inverter, portables, ventilés, sont conçus pour le soudage à l’électrode enrobée (MMA) et à
électrode réfractaire (TIG Lift) en courant continu (DC). En MMA, ils soudent tout type d’électrode : rutile, inox,
fonte, basique et cellulosique. En Tig, ils soudent la plupart des métaux sauf l’aluminium et ses alliages. Ils sont
protégés pour le fonctionnement sur groupes électrogènes (Alim 230 V +- 15%).
ALIMENTATION-MISE EN MARCHE
• Les postes sont livrés avec une prise 230V 16A de type CEE7/7. Le 200E FV CEL équipés d’un système « Flexible
Voltage » s’alimentent sur une installation électrique AVEC terre comprise entre 110V et 240V (50 - 60 Hz). Le
courant effectif absorbé (I1eff) est indiqué sur l'appareil pour les conditions d'utilisation maximales. Vérifier que
l'alimentation et ses protections (fusible et/ou disjoncteur) sont compatibles avec le courant nécessaire en
utilisation. Dans certains pays, il peut être nécessaire de changer la prise pour permettre une utilisation aux
conditions maximales. L'utilisateur doit s'assurer de l'accessibilité de la prise.
• La mise en marche s’effectue par une pression sur la touche (
)
• L’appareil se met en protection si la tension d'alimentation est supérieure à 265V pour les postes monophasés
). Le fonctionnement normal reprend dès que la tension d'alimentation revient dans sa
(l’afficheur indique
plage nominale.
• Ces appareils sont de Classe A. Ils sont conçus pour un emploi dans un environnement industriel ou
professionnel. Dans un environnement différent, il peut être difficile d’assurer la compatibilité électromagnétique,
à cause de perturbations conduites aussi bien que rayonnées.
• Ne pas utiliser dans un environnement comportant des poussières métalliques conductrices.
SOUDAGE A L'ÉLECTRODE ENROBEE (MODE MMA)
• Brancher les câbles porte électrode et pince de masse dans les connecteurs. Respecter les polarités indiquées sur
l'emballage des électrodes.
• Respecter les règles classiques du soudage.
• Votre appareil est muni de 3 fonctionnalités spécifiques aux Inverters :
Le HOT START (mode réglable selon modèle, cf ci-dessous) procure une surintensité en début de soudage.
L’ARC FORCE (mode réglable selon modèle, cf ci-dessous) délivre une surintensité qui évite le collage
lorsque l’électrode rentre dans le bain.
L'ANTI-STICKING vous permet de décoller facilement votre électrode sans la faire rougir en cas de collage.
Activation du mode MMA et réglage de l’intensité :
- Sélectionner la position MMA
avec le sélecteur
(presser 3 secondes)
- Régler l’intensité souhaitée (afficheur ) grâce aux touches
.
Hot Start et Arc Force réglable :
200E FV CEL
Hot Start
Arc Force
0
90%
Conseils :
Hot Start faible pour les tôles fines.
Hot Start élevé pour les métaux difficiles à souder (pièces sales ou oxydées).
Pour régler le Hot Start et Arc Force suivre les étapes page suivante.
3
Presser le sélecteur
Régler le pourcentage d’Hot Start souhaité (afficheur ) grâce aux touches
Valider la valeur souhaitée en pressant sur le sélecteur
Régler le pourcentage d’Arc Force souhaité (afficheur ) grâce aux touches .
Valider la valeur souhaitée en pressant sur le sélecteur
SOUDAGE TIG LIFT (MODE TIG)
Le soudage TIG DC requiert une protection gazeuse (Argon).
Pour souder en TIG, suivre les étapes suivantes :
1. Connecter la pince de masse sur la polarité positive (+).
2. Brancher une torche « à valve » sur la polarité négative (-).
3. Raccorder le tuyau de gaz au manodétendeur de la bouteille de gaz.
Il sera parfois nécessaire de le couper avant l’écrou si ce dernier n’est pas adapté au manodétendeur
4. Sélectionner la position TIG
avec le sélecteur . (presser 3 secondes)
5. Régler l’intensité souhaitée (afficheur ) grâce aux touches
, selon l’épaisseur à souder (30A/mm).
6. Régler le débit de gaz sur le manodétendeur de la bouteille de gaz, puis ouvrir la valve de la torche
7. Pour amorcer :
a- toucher l’électrode sur la
pièce à souder
b- relever l’électrode 2 à 5 mm
de la pièce à souder
8. En fin de soudure : Lever 2 fois l'arc (haut-bas-haut-bas) pour déclencher l'évanouissement automatique (cf
paragraphe ci-dessous). Ce mouvement doit être effectué en moins de 4 secondes, sur une hauteur de 5 à 10
mm. Puis fermer la valve de la torche pour arrêter le gaz après refroidissement de l'électrode.
Évanouissement automatique de l'arc à durée réglable
Activation de la fonction :
Cela correspond en fin de soudure au temps nécessaire pour la baisse progressive du courant de soudage jusqu’à
l’arrêt de l’arc. Cette fonction permet d’éviter les fissures et les cratères de fin de soudure.
Par défaut cette fonction n'est pas activée (OFF). Pour l'activer, procéder comme suit:
1- Presser sur le sélecteur
2- Régler le temps d'évanouissement souhaité de 1 à 10 sec (afficheur
touches
3- Valider la valeur souhaitée en pressant sur le sélecteur .
) grâce aux
Combinaisons conseillées / affutage électrode
Courant (A)
∅ Electrode (mm)
= ∅ fil (métal d’apport)
∅ Buse
(mm)
Débit
(Argon l/mn)
0,5-5
10-130
1,6
9,8
6-7
4-8
130-200
2,4
11
7-8
Pour un fonctionnement optimal vous devez utiliser une électrode affûtée de la manière suivante :
L = 2,5 x d.
d
lL
4
PROTECTION THERMIQUE ET FACTEURS DE MARCHE
• Protection thermique : le voyant
s’allume et la durée de refroidissement est de 1 à 5 mn en fonction de la
température ambiante.
• Laisser l’appareil branché après soudage pour permettre le refroidissement
• Les postes décrits ont une caractéristique de sortie de type "courant constant". Leurs facteurs de marche selon la
norme EN60974-1 sont indiqués dans le tableau suivant :
200E FV CEL (110Veff)
E200E FV CEL (230Veff)
X% @
I max
X% @
I max
X% @
I max
X% @
25%
120A
40%
140A
25%
200A
35%
I max
200A
60%
90A
60%
120A
60%
135A
60%
165A
100%
80A
100%
110A
100%
115A
100%
135A
ENTRETIEN
• L'entretien ne doit être effectué que par une personne qualifiée.
• Couper l'alimentation en débranchant la prise, et attendre l’arrêt du ventilateur avant de travailler sur
l'appareil. A l’intérieur, les tensions et intensités sont élevées et dangereuses.
• Deux à trois fois par an, enlever le capot et dépoussiérer à la soufflette. En profiter pour faire vérifier la tenue
des connexions électriques avec un outil isolé par un personnel qualifié.
• Contrôler régulièrement l'état du cordon d'alimentation. Si le câble d'alimentation est endommagé, il doit être
remplacé par le fabricant, son service après vente ou une personne de qualification similaire, afin d'éviter un
danger
CONSEILS
• Respecter les polarités (+/-) et intensités de soudage indiquées sur les boîtes d'électrodes
• Enlever l’électrode du porte-électrode lorsque le poste n'est pas utilisé.
• Laisser les ouïes de l'appareil libres pour l’entrée et la sortie d’air.
5
SÉCURITÉ
Le soudage à l'arc peut être dangereux et causer des blessures graves voire mortelles. Protégez vous
et protégez les autres.
Respecter les instructions de sécurité suivantes:
Rayonnements
de l’arc
Protégez-vous à l’aide d’un masque muni de filtres conformes EN 169 ou EN 379.
Pluie, vapeur
d’eau, humidité
Utilisez votre poste dans une atmosphère propre (degré de pollution ≤ 3), à plat et à plus
d’un mètre de la pièce à souder. Ne pas utiliser sous la pluie ou la neige.
Choc électrique
Veiller à bien respecter les règles d’alimentation des postes citées au préalable. Ne pas
toucher les pièces sous tension. Vérifier que le réseau d'alimentation est adapté au poste.
Chutes
Ne pas faire transiter le poste au-dessus de personnes ou d’objets.
Brûlures
Porter des vêtements de travail en tissu ignifugé (coton, bleu ou jeans).
Travailler avec des gants de protection et un tablier ignifugé.
Protéger les autres en installant des paravents ininflammables, ou les prévenir de ne pas
regarder l'arc et garder des distances suffisantes.
Risques de feu
Supprimer tous les produits inflammables de l'espace de travail. Ne pas travailler en présence
de gaz inflammable.
Fumées
Ne pas inhaler les gaz et fumées de soudage. Utiliser dans un environnement correctement
ventilé, avec extraction artificielle si soudage en intérieur.
Précautions
supplémentaires
Toute opération de soudage :
- dans des lieux comportant des risques accrus de choc électrique,
- dans des lieux fermés,
- en présence de matériau inflammable ou comportant des risques d'explosion, doit toujours
être soumise à l'approbation préalable d'un "responsable expert", et effectuée en présence
de personnes formées pour intervenir en cas d'urgence.
Les moyens techniques de protections décrits dans la Spécification Technique CEI/IEC 62081
doivent être appliqués.
Le soudage en position surélevée est interdit, sauf en cas d'utilisation de plates-formes de
sécurité.
Les porteurs de stimulateurs cardiaques doivent consulter un médecin avant d'utiliser ces appareils.
Nous déconseillons toutefois l’utilisation de ces appareils à ces personnes.
Ne pas utiliser le poste pour dégeler des canalisations.
En soudage TIG, manipuler la bouteille de gaz avec précaution, des risques existent si la bouteille ou
la soupape de la bouteille sont endommagées.
RECOMMANDATION POUR RÉDUIRE LES ÉMISSIONS ÉLECTRO-MAGNÉTIQUES
Généralité
L’utilisateur est responsable de l’installation et de l’utilisation de l’appareil suivant les instructions du fabricant. Si des
perturbations électromagnétiques sont détectées, il est de la responsabilité de l’utilisateur de résoudre la situation
suivant les recommandations données dans la notice ou avec l’assistance technique du fabricant.
Evaluation de la zone de soudage
Avant d’installer l’appareil, l’utilisateur devra évaluer les problèmes électro-magnétiques potentiels qui pourraient se
présenter dans la zone où est prévue l’installation, en particulier il devra tenir compte des indications suivantes :
a.
Autres câblages, câblages de contrôle, câbles téléphoniques et de communication : au dessus, au
dessous et à côté de l’appareil. ;
b.
récepteurs et transmetteurs radio et télévision ;
c.
ordinateurs et autres équipements de contrôle ;
d.
équipements critiques pour la sécurité tels que les commandes de sécurité des équipements industriels ;
la santé des personnes qui se trouvent à proximité de la machine, par exemple des personnes qui portent un
simulateur cardiaque, un appareil auditif, etc… ;
e.
équipements servant à calibrer et mesurer ;
f.
l’immunité des autres appareils installés dans le local d’utilisation de l’appareil. L’utilisateur devra
s’assurer que les appareils du local sont compatibles entre eux. Ceci pourra demander de prendre des
précautions supplémentaires ;
6
g.
h.
le temps de la journée au cours de laquelle l’appareil devra fonctionner ;
la surface de la zone à prendre en considération autour de l’appareil dépendra de la structure des
édifices et des autres activités qui se déroulent sur le lieu. La zone considérée peut s’étendre au-delà des
limites des entreprises.
Recommandation sur les méthodes de réduction des émissions électro-magnétiques
a.
Alimentation principale : Le poste de soudage devra être relié au réseau d’alimentation
conformément aux recommandations du fabricant. En cas d’interférences, il peut s’avérer utile de
prendre des précautions supplémentaires en filtrant la tension d’alimentation. Il peut s’avérer utile de
blinder le câble d’alimentation dans les installations fixes du poste de soudage, sous goulottes
métalliques ou dispositifs équivalents. Le blindage devrait être électriquement continu sur toute la
longueur du câble. Il devrait être relié au poste de soudage avec un bon contact électrique entre la
goulotte métallique et le boîtier du poste.
b.
Câbles de soudage : Les câbles doivent être les plus courts possibles. Les regrouper et, si possible, les
laisser au sol.
c.
Protection et blindage : La protection et le blindage sélectif d’autres câbles et matériels dans la zone
environnante peut limiter les problèmes de perturbation.
d.
Mise à la terre de la pièce à souder : La mise à la terre de la pièce à souder peut limiter les
problèmes de perturbation. Elle peut être fait directement ou via un condensateur approprié. Ce choix est
fait en fonction des réglementations nationales.
ANOMALIES, CAUSES, REMEDES
MMA-TIG
Anomalies
TIG
Causes
Remèdes
L’appareil ne délivre pas de courant et
le voyant jaune de défaut thermique
est allumé .
La protection thermique du poste s’est
enclenchée.
Attendre la fin de la période de
refroidissement, environ 2 min. Le voyant
s’éteint.
L’afficheur est allumé mais l’appareil
ne délivre pas de courant.
Le câble de pince de masse ou porte
électrode n’est pas connecté au poste.
Vérifier les branchements.
Le poste est alimenté, vous ressentez
des picotements en posant la main sur
la carrosserie.
La mise à la terre est défectueuse.
Contrôler la prise et la terre de votre
installation.
Le poste soude mal
Erreur de polarité
Vérifier la polarité conseillée sur la boîte
d'électrode.
Lors de la mise en route, l’afficheur
indique
La tension d’alimentation n’est pas
respectée (230V monophasé +/- 15%)
Vérifier votre installation électrique ou
votre groupe électrogène
Arc instable
Défaut provenant de l'électrode en
tungstène
L'électrode en tungstène s'oxyde et se
ternit en fin de soudage
L'électrode fond
Utiliser une électrode en tungstène de
taille appropriée
Utiliser une électrode
correctement préparée
en
tungstène
Débit de gaz trop important
Réduire le débit de gaz
Zone de soudage.
Protéger la zone de soudage contre les
courants d'air.
Problème de gaz,
prématurée du gaz
Erreur de polarité
ou
coupure
Contrôler et serrer tous les raccords de
gaz. Attendre que l'électrode refroidisse
avant de couper le gaz.
Vérifier que la pince de masse est bien
reliée au +
CONDITIONS DE GARANTIE FRANCE
• La garantie couvre tout défaut ou vice de fabrication pendant 1 an, à compter de la date d’achat (pièces et main
d’œuvre).
• La garantie ne couvre pas les erreurs de tension, incidents dus à un mauvais usage, chute, démontage ou toute
autre avarie due au transport.
• La garantie ne couvre pas l’usure normale des pièces (Ex. : câbles, pinces, etc.).
En cas de panne, retournez l’appareil à votre distributeur (port dû refusé), en y joignant :
- Le justificatif d’achat daté (facture, tickets de caisse…)
- Une note explicative de la panne.
Après la garantie, notre SAV assure les réparations après acceptation d’un devis.
7
DESCRIPTION
Thank you for choosing our product! In order to take the most of your welder, please read the following
instructions carefully:
These welding are, Inverter, portable welder, for covered electrode and TIG Lift in DC. It allows welding with rutiles,
basic, stainless steel and cast iron electrodes. In TIG, it allows to weld most of metals except aluminium and alloys.
It is protected for a use on electric generators (230V /+- 15%).
POWER SUPPLY – START UP
• These machine are delivered with a 230V socket /16A plug type EEC7/7. The 200E FV CEL integrates a « Flexible
Voltage » system. It has to be plugged on a power supply variable between 110V and 240V (50 – 60 Hz) WITH
earth. The absorbed effective current (I1eff) is shown on the machine, for maximal using conditions. Check that
the power supply and its protection (fuse and/or circuit-breaker) is compatible with the necessary current during
use. In some countries, the change of plug can be necessary to allow a use at maximal conditions. The welder
must be installed so that the main plug is accessible.
• The start-up is done by pressing (
)
The device turns into protection mode if the supply voltage is over 265V for the single-phase products
(the sсreen displays
). Normal operation will resume when the voltage has returned to its nominal
range.
• These are A-class devices. They are designed to be used in an industrial or professional environment. In a
different environment, it can be difficult to ensure electromagnetic compatibility, due to conducted
disturbances as well as radiation.
ELECTRODE WELDING (MMA Mode)
• Leave the machine connected to the supply after welding in order to let it cool down.
• Thermal protection: thermal protection indicator turns on and the cooling time is about 2 to 5 min
according to external temperature.
• Your machine is equipped with 3 specific functions to Inverters :
The Hot Start (adjustable mode depending on model, see below) increases the current at the beginning
of the welding.
The Arc Force (adjustable mode depending on model, see below) increases the current in order to avoid
the sticking when electrode enters in melted metal.
The Anti Sticking allows you to easily withdraw your electrode without damaging it in case of sticking.
Selection of MMA Mode and intensity setting:
- Select the MMA position
with the selector.
- Adjust the wished current (display ) using the key .
Hot Start & Arc Force adjustments:
200E FV CEL
Hot Start
Arc Force
0
90%
Advice:
Low Hot Start: for thin metal sheets
High Hot Start for metals that are difficult to weld (dirty or oxidized parts)
To adjust the Hot Start and Arc Force, go through the following steps.
Press the selector
during 3 seconds.
Set the required percentage ( display
) using keys
Valid the required figure by pressing the selector button
Set the required percentage (display
) using keys
.
Valid the required figure by pressing the selector button .
8
TIG LIFT
The DC TIG welding requires a protective gas (argon).
Follow the steps as below :
1. Connect the earth clamp on the positive pole (+).
2. Connect a torch "valve" negative polarity (-).
3. Connect the pipe gas torch on the gas cylinder
4. Select TIG mode
using the selector button
.
5. Adjust the wished current (display ) using the keys .
Advice : Take 30A/mm as a default setting and adjust according to the part to weld.
6. Set the gas flow on flewmeter of the gas cylinder, and then open the valve of the torch
7. To boot :
a- Touch the electrode on
b- Raise the electrode 2 to 5
the welding part
mm of the part to be welded
8. At end of welding:
Up 2 times the arc (up-down-up-down) to trigger the automatic fade (see paragraph below). This
movement must be performed in less than 4 sec, at a height of 5 to 10 mm. Then close the valve to
stop the torch gas after cooling of the electrode.
Automatic Arc slope with time adjustable
Function activation:
This corresponds to the end of welding time required for the gradual decline in the welding current until the
stop of the arc. This function helps to avoid cracks and craters at end of welding.
1- Press 3 seconds on the selector button
2. Set the automatic arc slope you wish from 1 to 10 sec (display ) using key .
3.
Validate the required figure by pressing the selector button
.
Recommended combinations / Electrode grinding
Current (A)
Ø Electrode (mm)
= Ø wire (filler metal)
Ø Nozzle
(mm)
Flow rate
(Argon L/mn)
0,5-5
10-130
1,6
9,8
6-7
4-8
130-200
2,4
11
7-8
To optimize the working, you have to use an electrode grinded as below:
L = 2,5 x d.
d
lL
9
THERMAL PROTECTION & DUTY CYCLE
• Thermal protection : thermal protection indicator turns on and the cooling time is about 2 to 5 min
according to external temperature.
• Leave the machine connected to the supply after welding in order to let it cool down
• The welding unit describes an output characteristic of "constant current" type. The duty cycles following
the norm EN60974-1 (at 40°C on a 10mn cycle) are indicated in the table here below :
200E FV CEL (110Veff)
200E FV CEL (230Veff)
X% @
I max
X% @
I max
X% @
I max
X% @
25%
120A
40%
140A
25%
200A
35%
I max
200A
60%
90A
60%
120A
60%
135A
60%
165A
100%
80A
100%
110A
100%
115A
100%
135A
MAINTENANCE
• Refer all servicing to qualified personnel.
• Disconnect the generator and wait until the ventilator stopped before working on the unit. Inside the
device, voltages and current are dangerous.
• 2 or 3 times a year, remove the steel cover and blow off the dust with compressed air. Let check the
electrical connections (with an insulated tool) and the insulations by qualified personnel.
• Regularly control the state of the cord. If this supply cable is damaged, it must be replaced by the
manufacturer, its after sales service or a similarly qualified technician to avoid any danger.
ADVICE
• Respect welding polarities and currents indicated on the electrode packaging
• Remove the electrode from the electrode holder when you do not use it.
• Leave the inlets free to allow in/out air circulation.
10
SECURITY
The arc welding can be dangerous and leads serious injury, may fatal. Protect yourself and
protect the others.
Respect the following warnings:
Arc rays
Protect yourself thanks to a welding helmet in compliance with EN175 equiped with filters
in compliance with EN 169 or EN 379. Inform and protect by the same means any people
in the welding environment.
Rain, steam,
humidity
The working environment must be clean (degree of pollution ≤ 3) and protected against
rain. Put the appliance on an even place and at least at one meter from the parts to be
welded. Do not use them under rain or snow.
Electric shocks
This appliance may only be used in accordance with the power supply requirements listed
before. Do not touch live parts. Check that the supply system is suitable for the post.
Moving
Do not underestimate the weight of the apparatus. Do not carry it over people or things.
Do not drop it. Do not set it brutally
Wear protective or fire-proof clothing (overalls, jeans).
Use some welder gloves and a fire-proof apron.
Protect the others by installing non flammable protection wall, or prevent the others
from looking at the arc and have them keep a sufficient distance
Suppress all flammable products from the working area. Do not works near flammable gas.
Burns
Fire risks
Smokes
Extraprecautions
Do not inhale gas or welding smokes. If indoors ventilate the area well and/or use local
extraction ventilation equipment to remove fumes and gases.
Any welding operation :
-in environments with increased risk of electric shock,
-in confined spaces,
-in the presence of flammable or explosive materials
must be evaluated in advance by an “Expert supervisor” and must always be carried
out in the presence of other people trained to intervene in case of emergency.
Technical protection measures MUST BE taken as described in the TECHNICAL
SPECIFICATION "IEC 62081".
Welding in raised positions is forbidden unless safety platforms are used.
People wearing Pacemakers are advised not to use this machine, however if necessary, please
seek medical advice prior to use.
Do not use the welding unit to unfreeze pipes.
Handle gas bottles with care - there is increased danger if the bottle or its valve are damaged.
RECOMMENDATION TO REDUCE ELECTRO-MAGNETIC EMISSIONS
General
The user is responsible for installing and using the arc welding equipment according to the manufacturer’s
instructions. If electromagnetic disturbances are detected, then it shall be the responsibility of the user of the arc
welding equipment to resolve the situation with the technical assistance of the manufacturer.
Evaluation of the welding area
Before installing arc welding equipment the user shall make an assessment of potential electromagnetic problems in
the surrounding area
a.
Other wiring, control cables, telephones and communication cables; above, below and adjacent to the
welding machine
b.
Radio and television transmitters and receivers;
c.
Computer and other control equipment;
d.
Equipment critical for safety purposes such as safety checks of industrial equipment;
e.
The health of persons in the vicinity, for example persons who wear pacemakers and hearing aids;
f.
Equipment used for calibration or measurements;
11
g.
h.
i.
The immunity of other equipment in which the equipment is to be used. The user must ensure that other
equipment used in the same place is compatible. This may require additional protection measures;
The time of day when welding or other activities are carried out
The size of the area to be considered will depend on the structure of the building and any other
processes in the area. The surrounding area may extend beyond the boundaries of the buildings.
Recommendation to reduce electro-magnetic emission
a.
Mains power supply: the equipment must be connected to the power mains as specified in the
Manufacturer’s instructions. If interference occurs, additional precautions such as filtering of the mains
supply may be required. The supply cable in the welding machine’s permanent installations may have to
be screened in metal conduits or similar. The screening should be electrically continuous for the entire
length of the cable. It should also be connected to the welding machine with a good electrical contact
between the metal conduit and the casing.
b.
Welding cables: The welding cables should be kept as short as possible and should be positioned close
together, running at or close to the floor level.
c.
Protection and reinforcement: Selective screening and shielding of other cables and equipment in the
surrounding area may alleviate problems of interference. Screening of the entire welding area may be
considered for special applications
d.
Connect the earth directly to the metal piece to be welded: Where necessary, the connection of
the workpiece to earth should be made by a direct connection to the workpiece, but in some countries
where direct connection is not permitted, the bonding should be achieved by suitable capacitance,
selected according to national regulations.
TROUBLESHOOTING
Anomalies
MMA-TIG
The device does not deliver any
current and the yellow indicator
lamp of thermal defect
lights
up.
The display is on but the device
does not deliver any current.
If, when the unit is on and you
put your hand on the welding
unit’s body, you feel tingling
sensation.
The display is on but the device
does not deliver any current.
When starting up, the display
indicates
Instable arc
.
Causes
Remedies
The welder thermal protection
has turned on.
Wait for the end of the cooling time,
around 2 minutes. The indicator
lamp
turns off.
The cable of the earth clamp or
electrode holder is not connected
to the welder.
The welding unit is not correctly
connected to the earth.
Check the connections.
The cable of the earth clamp or
electrode holder is not connected
to the welder.
Check the connections.
The voltage is not included in the
range 230V +/- 15%
Have the electrical installation
checked.
Default
coming
tungsten electrode
Use a tungsten electrode with the
adequate size
from
the
Check the plug and the earth of
your electrical network.
Use a well
electrode
TIG
Too important gas flow rate
Welding zone
The tungsten electrode gets
oxidised and tern at the end of
welding.
tungsten
Reduce gas flow rate
Protect welding zone against air
flows
Default coming from post-gas or
and
tighten
all
gas
the gas has been stopped Check
connections. Wait until the electrode
prematurely.
cools down before stopping the gas.
Polarity error
The electrode melts
prepared
Check that the earth clamp is really
connected to +
12
BEZEICHNUNG
Wir freuen uns, dass Sie sich für ein Markengerät unserer Firma entschieden haben und danken Ihnen für das
entgegengebrachte Vertrauen. Bitte lesen Sie sorgfältig vor dem Erstgebrauch diese Betriebsanleitung.
Diese Geräte sind tragbare, luftgekühlte Schweißinverter, konzipiert um Schweißarbeiten an ummantelten- (MMA)
und hitzebeständigen (WIG Lift) Elektroden bei Gleichstrom (DC) durchführen zu können. Im MMA Modus können
alle gängigen Rutil-, Edelstahl-, Guss-, basischen und zellulosehaltigen. Im WIG Modus ist es möglich die meisten
Metalle mit Ausnahme von Legierungen und Aluminium zu schweißen. Diese Geräte sind generatortauglich und
gegen Überspannung geschützt (230V +/- 15%).
ANSCHLUSS - INBETRIEBNAHME
• Dieses Gerät wird mit einem 16 A CEE7/7 Stecker geliefert [Anschluss: 230V (50-60 Hz) + Schutzleiter]. Das 200E
FV CEL verfügt über die «Flexible Voltage» Technologie, die den Anschluss der Geräte an jedes Stromnetz von
110V bis 240V (50-60Hz) ermöglicht. Der aufgenommene Strom (I1eff) ist am Gerät aufgedruckt. Überprüfen Sie,
ob die Stromversorgung und die Schutzeinrichtungen (Sicherungen und/oder Schutzschalter) mit dem Strom, den
Sie beim Schweißen benötigen, übereinstimmen. Achten Sie während des Schweißens auf einen sicheren Stand
des Gerätes und einen frei zugänglichen Netzanschluss.
• Zum Starten drücken Sie die (
)
• Steigt die Netzspannung über 265V bei einphasigen Geräten, schaltet sich das Gerät
selbständig aus
Überhitzungsschutz (
angezeigt). Wieder unter den maximalen Spannungswert, geht das Gerät automatisch
in Betriebsbereitschaft.
• Diese Geräte sind Klasse A und sind für den industriellen und/ oder professionellen Gebrauch geeignet. In einem
anderen Umfeld ist die elektromagnetische Verträglichkeit schwieriger zu gewährleisten. Verwenden Sie das Gerät
nicht in Räumen, in denen sich in der Luft metallische Staubpartikel befinden, die Elektrizität leiten können.
SCHWEISSEN MIT UMHÜLLTEN ELEKTRODEN (MMA MODUS)
• Schließen Sie Elektroden- und Massekabel an die entsprechenden Anschlüsse an. Beachten Sie die auf der
Elektrodenpackung beschriebenen Polaritätsangaben
• Beachten Sie die allgemeinen Regeln zur Unfallprävention beim Schweißen
• Ihr Schweißgerät ist mit drei spezifischen Funktionen zur Verbesserung der Schweißeigenschaften ausgerüstet:
Hot Start (Einstellbarer Modus, je nach Modell - s. unten): Erhöht den Schweißstrom beim Zünden der
Elektrode
Arc Force (Einstellbarer Modus, je nach Modell - s. unten): Erhöht kurzzeitig den Schweißstrom. Ein
mögliches Festbrennen (Sticking) der Elektrode am Werkstück während des Eintauchens ins
Schweißbad wird verhindert.
Anti Sticking: Verbessert den Einbrand und verhindert mögliches Festbrennen
Auswahl der Betriebsart und Stromstärke:
- Wählen Sie mit der Drucktaste
den MMA Modus aus
- Wählen Sie mit der Drucktaste
die gewünschte Stromstärke (Anzeige
) aus
Konfiguration Hot Start und Arc Force:
200E FV CEL
Hot Start
Arc Force
0
90%
Hinweis:
Niedriger Hot Start für dünne Metallbleche;
hoher Hot Start für schwer zu schweißende Metalle mit verschmutzen oder oxidierten Stellen.
Um Hot Start und Arc Force einzustellen, gehen Sie wie folgt vor:
13
Drücken Sie 3 Sek. lang die Taste
Stellen Sie den gewünschten Prozentsatz (Anzeige ) mithilfe der Taste
ein
Bestätigen Sie die gewünschte Einstellung mit der Taste
Stellen Sie den gewünschten Prozentsatz (Anzeige ) mit Taste
ein
Bestätigen Sie die gewünschte Einstellung mit der Taste
WIG KONTAKTZÜNDUNG
Verwenden Sie beim WIG DC- Schweißen Argon- Schutzgas.
Um im WIG Modus zu schweißen, gehen Sie bitte wie folgt vor:
1. Schließen Sie die Masseklemme an der (+) Schweißbuchse an
Schließen Sie einen Brenner mit Ventil an der (-) Buchse an
2. Verbinden Sie die Brennergasleitung über den Druckminderer direkt an der Gasflasche.
Trennen Sie Überwurfmutter und Flansch von der Brennergasleitung, wenn diese nicht auf den Druckminderer
passen und fixieren Sie die Gasleitung direkt am Gasnippel des Manometers
3. Wählen Sie mithilfe des Drucktasters
den WIG Modus
4. Stellen Sie den gewünschten Schweißstrom (Anzeige
5. Gehen Sie danach wie folgt vor:
a- Werkstück mit der
Elektrode berühren und
Brennertaster
an
) mithilfe des Drucktasters
ein
b- Brenner 2 bis 5mm über
dem Werkstück anheben
6. Zum Schweißende :
Heben Sie den Brenner zwei Mal (auf-ab-auf-ab), um die Funktion „Automatisches Stromabsenken“ (s.
nachfolgender Abschnitt) zu aktivieren. Führen Sie diese Bewegung innerhalb von 4 Sek. 5-10mm über dem
Werkstück aus und schließen Sie das Gasventil erst, wenn der Lichtbogen erloschen ist und die Elektrode sich
abgekühlt hat.
Automatische Stromabsenkfunktion mit Zeiteinstellung
Start der Funktion:
Am Ende des Schweißprozesses wird der Strom in definierter Zeit stufenlos heruntergefahren.
Diese Funktion hilft, Sprünge und Krater am Ende der Schweißnaht zu vermeiden.
Diese Funktion ist zunächst inaktiv (Zeit 0 Sek.). Um sie zu aktivieren, gehen Sie bitte wie
folgt vor:
1-
Drücken Sie 3 Sek. lang die Taste
2-
Stellen Sie die gewünschte Absenkzeit zwischen 1 und 10 Sek.
(Anzeige ) mit der Taste
ein
3-
Bestätigen Sie die Gewünschte Einstellung mit der Taste
14
Empfohlene Schweißeinstellungen/ Elektrode schleifen
Strom (A)
Ø Elektrode (mm)
= Ø Zusatzdraht
Ø Düse
(mm)
Gasströmung
(Argon l/min)
0,5-5
10-130
1,6
9,8
6-7
4-8
130-200
2,4
11
7-8
Um einen optimalen Schweißverlauf zu gewährleisten, nutzen Sie nur Elektroden, welche nach folgendem Vorbild
geschliffen wurden:
L = 2,5 x d.
d
lL
THERMISCHE ÜBERWACHUNG & EINSCHALTDAUER
• Thermischer Überlastschutz: Lassen Sie das Gerät sich- je nach Umgebungstemperatur- 1 bis 5 min abkühlen, bis
die Kontrollanzeige erlischt
• Lassen Sie das Gerät auch nach Schweißende einige Zeit am Stromnetz angeschlossen, damit sich es abkühlen
kann
Diese Schweißgeräte entsprechen in ihrer Charakteristik einer Konstantstromquelle. Die Einschaltdauer entspricht wie
unten beschrieben der Norm EN60974-1 (bei 40°C und einem 10min Zyklus):
200E FV CEL (110Veff)
200E FV CEL (230Veff)
X% @
I max
X% @
I max
X% @
I max
X% @
25%
120A
40%
140A
25%
200A
35%
I max
200A
60%
90A
60%
120A
60%
135A
60%
165A
100%
80A
100%
110A
100%
115A
100%
135A
INSTANDHALTUNG
• Die Instandhaltungsarbeiten dürfen nur von qualifiziertem Fachpersonal durchgeführt werden
• Nehmen Sie regelmäßig (mindestens 2 bis 3 Mal im Jahr) das Gehäuse ab und reinigen Sie das Innere des
Gerätes mit Pressluft. Lassen Sie regelmäßig Prüfungen des Geräts auf seine elektrische Betriebssicherheit von
qualifiziertem Fachpersonal durchführen
• Trennen Sie vor dem Öffnen des Gerätes die Stromversorgung zum Gerät und warten Sie, bis der Ventilator sich
nicht mehr dreht. Im Gerät sind die Spannungen sehr hoch und deshalb gefährlich
• Prüfen Sie regelmäßig den Zustand der Netzzuleitung. Wenn diese beschädigt ist, muss sie durch den Hersteller,
seinen Reparaturservice oder eine qualifizierte Person ausgetauscht werden, um Gefahren zu vermeiden
• Verdecken Sie nicht die Lüftungsschlitze
HINWEISE - EMPFEHLUNGEN
• Beachten Sie die Angaben auf der Elektrodenverpackung für Schweißstrom und Polarität.
• Entfernen Sie nach dem Schweißprozess die Elektrode aus ihrem Halter.
• Führen Sie regelmäßig die Wartungsarbeiten durch.
15
UNFALLPRÄVENTION
Lichtbogenschweißen kann gefährlich sein und zu schweren - unter Umständen auch tödlichen Verletzungen führen. Schützen Sie daher sich selbst und andere. Beachten Sie unbedingt die folgenden
Sicherheitshinweise:
Lichtbogenstrahlung
Gesichtshaut und Augen sind durch ausreichend dimensionierte EN 175 konforme
Schutzschirme mit Spezialschutzgläsern nach EN 169 / 379 vor der intensiven
Ultraviolettstrahlung zu schützen.
Auch in der Nähe des Lichtbogens befindliche Personen oder Helfer müssen auf
Gefahren hingewiesen und mit den nötigen Schutzmitteln ausgerüstet werden.
Umgebung
Benutzen Sie das Gerät nur in sauberer und gegen Nässeeinwirkung geschützter
Umgebung.
Achten Sie auf den Stromanschluss der jeweiligen Geräte. Keine
Spannungsführenden Teile berühren.
Feuchtigkeit
Stromversorgung
Transport
Verbrennungsgefahr
Brandgefahr
Schweißrauch
Weitere Hinweise
Unterschätzen Sie nicht das Gewicht der Anlage. Bewegen Sie das Gerät nicht
über Personen oder Sachen hinweg, und lassen Sie es nicht herunterfallen oder
hart aufsetzen.
Schützen Sie sich durch geeignete trockene Schweißerkleidung (Schürze, Handschuhe,
Kopfbedeckung sowie feste Schuhe). Tragen Sie auch die Schutzbrille, wenn Sie
Schlacke abklopfen. Schützen Sie andere durch nicht entzündbare Trennwände. Nicht
in den Lichtbogen schauen und ausreichende Distanz halten.
Entfernen Sie alle entflammbaren Produkte vom Schweißplatz und arbeiten Sie nicht in
der Nähe von brennbaren Stoffen und Gasen
Die beim Schweißen entstehenden Gase und der Rauch sind gesundheitsschädlich. Der
Arbeitsplatz sollte daher gut belüftet sein und der entstehende Rauch und die Gase
müssen abgesaugt werden.
Führen Sie Schweißarbeiten
-in Bereichen mit erhöhten elektrischen Risiken,
-in abgeschlossenen Räumen,
-in der Umgebung von entflammbaren oder explosiven Produkten
nur in Anwesenheit von qualifiziertem Rettungs- und/oder Fachpersonal durch. Treffen
Sie Vorsichtsmaßnahmen in Übereinstimmung mit "IEC 62081". Schweißarbeiten an
Gegenständen in erhöhter Position dürfen nur auf professionell aufgebauten Gerüsten
durchgeführt werden.
Halten Sie beim Arbeiten ausreichend Abstand zu Personen mit Herzschrittmacher! Personen mit
Herzschrittmacher dürfen mit dem Gerät nicht ohne ärztliche Zustimmung arbeiten!
Wir raten Personen mit einem Herzschrittmacher davon ab, diese Geräte zu benutzen.
Das Gerät ist nicht geeignet für das Auftauen von Leitungen! Achten Sie beim Umgang mit Gasflaschen auf
sicheren Stand und Schutz des Flaschenventils! Beschädigte Flaschen stellen ein Sicherheitsrisiko dar!
HINWEISE ZUR REDUZIERUNG VON ELEKTROMAGNETISCHEN STÖRUNGEN
Allgemein
Es liegt in der Verantwortung des Anwenders dafür Sorge zu tragen, dass die Schweißausrüstung nach den Vorgaben
des Herstellers angeschlossen und verwendet wird. Liegen elektromagnetische Störungen vor, ist der Anwender
dafür verantwortlich dieses Problem mithilfe des technischen Supports des Herstellers zu beheben.
Prüfung des Schweißbereiches
Prüfen Sie vor Anschluss der Schweißausrüstung die Arbeitsumgebung auf potentielle elektromagnetische Probleme.
a. Allgemeine Verkabelung, Steuerkabel, Fernmeldekabel und Datenleitungen über, unter und in direkter Nähe
des Schweißgerätes;
b. Radio/ TV Sende- und Empfangsgeräte;;
c. Computer und andere Kontrollgeräte;;
d. Empfindliche Anlagen für bspw. Sicherheitsüberprüfungen von industrieller Ausrüstung;
e. Gesundheitszustand (Herzschrittmacher, Hörgerät, usw.) der sich in der Umgebung des Gerätes befindlichen
Personen;
f. Geräte zum Kalibrieren und Messen;;
g. Unempfindlichkeit anderer externer Ausrüstung in der Nähe des Gerätes. Dies kann zusätzliche
Sicherheitsmaßnahmen erfordern;
h. Tageszeit, zu der Schweiß- und andere Arbeiten durchgeführt werden sollen;;
16
i. Berücksichtigung der Geräteumgebung, in Abhängigkeit der Gebäudestruktur und anderer Vorgänge am
Arbeitsplatz. Diese Umgebungsgrenze kann sich auch über die Grundstücksgrenzen erstrecken.
Hinweise zu den Methoden zur Reduzierung von elektromagnetischen Störungen
a.
Hauptstromversorgung: Die Schweißausrüstung muss nach Herstellerangeben angeschlossen werden.
Treten Störungen auf, sind eventuell weitere Sicherheitsmaßnahmen, wie die Filterung der
Versorgungsspannung, notwendig.
b.
Schweißkabel: Die Schweißkabel sollten so kurz wie möglich gehalten werden und gemeinsam auf bzw.
möglichst nahe am Bodenbereich verlaufen.
c.
Schutz und Verstärkung: Selektiver Schutz und Abschirmung von anderen Kabeln und Geräten in der
Umgebung kann Störungsprobleme verringern. Das Maschinennetzkabel muss eventuell. abgeschirmt werden.
Die Abschirmung muss der gesamten Kabellänge entsprechen. Achten Sie darauf, dass das
Schweißgerätegehäuse extra geerdet ist.
d.
Erdung des Werkstückes: Die Erdung des zu verschweißenden Werkstücks kann eventuelle
Störungsprobleme verringern. Sie sollte direkt bzw. über einen entsprechenden Kondensator erfolgen, je nach
landesspezifischen Vorgaben.
FEHLERSUCHE
Fehler
MMA-TIG
Das Gerät liefert keinen
Schweißstrom und die gelbe
Übertemperaturanzeige leuchtet.
Die Anzeige ist an, das Gerät liefert
jedoch keinen Schweißstrom.
Bei Berührung des Gerätes,
verspüren Sie ein leichtes Kribbeln.
Die Maschine schweißt nicht
korrekt.
Beim Start zeigt das Display für
Ursache
Der Übertemperaturschutz wurde
ausgelöst.
Masseklemme oder
Elektrodenhalter- Kabel sind nicht
korrekt mit dem Gerät verbunden.
Das Gerät ist nicht korrekt geerdet.
Polaritätsfehler.
eine Sek.
Die Spannung liegt außerhalb des
Spannungstoleranzbereiches:
230V +/- 15%
Unstabiler Lichtbogen.
Schlechte Wolfram-Elektrode.
Lösungen
Warten Sie ca. 2 min bis der
Kühlvorgang abgeschlossen ist. Die
Anzeige
erlischt danach.
Überprüfen Sie die Anschlüsse.
Überprüfen Sie den Netzanschluss und
die Erdverbindung.
Überprüfen Sie die vom Hersteller
angegebene Polarität der Elektroden.
Überprüfen Sie die Netzspannung.
Benutzen Sie eine Wolfram-Elektrode
von angemessener Länge.
TIG
Benutzen
Sie
eine
angeschliffene Elektrode.
Zu hohe Gasströmung.
Schweißumgebung.
Die Wolfram-Elektrode oxidiert und
verfärbt sich am Ende des
Schweißvorgangs dunkel.
Fehler wird durch Gasnachströmen
oder defektes Gasventil verursacht.
Die Elektrode glüht.
Polaritätsfehler.
sauber
Reduzieren Sie die Gasmenge.
Schützen Sie die Schweißumgebung
vor Wind oder Luftzug.
Überprüfen Sie die Gasanschlüsse.
Überprüfen Sie ob die Masseklemme
an der (+) Buchse angeschlossen ist.
GARANTIE
Die Garantieleistung des Herstellers erfolgt ausschließlich bei Fabrikations- oder Materialfehlern, die binnen 12
Monate nach Kauf angezeigt werden (Nachweis Kaufbeleg). Nach Anerkenntnis des Garantieanspruchs durch den
Hersteller bzw. seines Beauftragten erfolgen eine für den Käufer kostenlose Reparatur und ein kostenloser Ersatz
von Ersatzteilen. Der Garantiezeitraum bleibt aufgrund erfolgter Garantieleistungen unverändert.
Ausschluss:
Die Garantieleistung erfolgt nicht bei Defekten, die durch unsachgemäßen Gebrauch, Sturz oder harte Stöße sowie
durch nicht autorisierte Reparaturen oder durch Transportschäden, die in Folge des Einsendens zur Reparatur,
hervorgerufen worden sind. Keine Garantie wird für Verschleißteile (z.B. Kabel, Klemmen, Vorsatzscheiben etc.)
sowie bei Gebrauchsspuren übernommen.
Das betreffende Gerät bitte immer mit Kaufbeleg und kurzer Fehlerbeschreibung ausschließlich über den Fachhandel
einschicken. Die Reparatur erfolgt erst nach Erhalt einer schriftlichen Akzeptanz (Unterschrift) des zuvor vorgelegten
Kostenvoranschlags durch den Besteller. Im Fall einer Garantieleistung trägt unsere Firma ausschließlich die Kosten
für den Rückversand an den Fachhändler.
17
DESCRIPCION
Gracias por su elección! Para sacar la mayor satisfacción de su aparato, lea atentamente lo que sigue :
Los aparatos son de soldadura Inverter, portables, con ventilación, para la soldadura con electrodos recubiertos
(MMA) y con electrodos refractarios (TIG Lift) en corriente continua (DC). En modo MMA, permiten soldar todo tipo
de electrodos: rutile, inox, básico y hierro colado. En modo Tig, permiten soldar la mayor parte de los metales
excepto aluminio y sus aleaciones. Están protegidos para el funcionamiento con grupos electrógenos (230 V +15%).
ALIMENTACION-PUESTA EN MARCHA
• Los aparatos se venden con un enchufe 230V 16A de tipo CEEE7/7. El 200E FV CEL dispone de un sistema
« Flexible Voltage », funciona con una instalación eléctrica CON tierra comprendida entre 110V y 240V (50 - 60
Hz) con tierra. La corriente efectiva consumida (I1eff) está indicada sobre el aparato para asegurar condiciones
de uso máximas. Comprobar que la alimentación y sus protecciones (fusible y/o disyuntor) estén compatibles con
la corriente necesaria en uso. En algunos países, puede ser necesario cambiar el enchufe para permitir una
utilización con condiciones máximas. . El usuario debe asegurarse de la accesibilidad del enchufe.
• La puesta en marcha se efectúa apretando el botón (
)
El aparato se pone en protecciόn cuando la tensiόn de alimentaciόn supera los 265V, para los aparatos
monofásicos (la pantalla indica
)
• Estos aparatos son de Clase A. Son concebidos para un uso en un ambiente industrial o profesional. En un
entorno distinto, puede ser difícil asegurar la compatibilidad electromagnética, a causa de perturbaciones
conducidas tan bien como radiadas. No utilizar en un entorno con polvos metálicos conductores.
SOLDADURA CON ELECTRODO RECUBIERTO (modo MMA)
• Conectar los cables porta eléctrodo y pinza de masa a los conectadores. Respetar las polaridades indicadas sobre
el embalaje de los electrodos.
• Respetar las prácticas clásicas de la soldadura.
• Su aparato cuenta con 3 funcionalidades específicas a los Inverters :
El Hot Start procura una sobreintensidad a la cebadura (modo regulable según modelo, ver más abajo).
El Arc Force procura una sobreintensidad para evitar la pegadura cuando el electrodo entra en el baño.
((modo regulable según modelo, ver más abajo)
El Anti-Sticking le permite despegar fácilmente su electrodo sin que se ponga roja en caso de
pegadura.
Puesta en marcha del modo MMA y reglaje de la intensidad:
- Elegir la posición MMA
con la tecla de selección
- Elegir la intensidad deseada (indicador ) gracias a las teclas .
Hot start & Arc force regulables:
200E FV CEL
Hot Start
Arc Force
0
90%
Aconsejo:
Hot start bajo para las finas chapas
Hot start elevado para los metales difíciles a soldar (partes sucias u oxidadas).
Para regular el Hot Start & Arc Force, seguir las etapas siguientes:
Pulsar 3 segundos sobre la tecla de selección
Ajustar el porcentaje deseado (indicador
) gracias a las teclas
Validar el valor deseado pulsando la tecla de selección
Ajustar el porcentaje deseado (indicador
) gracias a las teclas
.
Validar el valor deseado pulsando la tecla de selección
18
SOLDADURA TIG Lift (modo TIG)
La soldadura TIG DC requiere una atmósfera gaseosa (Argon).
Para soldar con el TIG, seguir las etapas siguientes:
1. Conectar la pinza de masa sobre la polaridad positiva (+).
2. Conectar una entorcha « con válvula » sbre la polaridad negativa (-).
3. Conectar el tubo de gas de la entorcha sobre la bombona de gas
4. Elegir la posición TIG
con la tecla de selección .
5. Ajustar la intensidad deseada (indicador ) gracias a las teclas .
Consejo: Elegir como base 30A / mm y ajustar según el metal que soldar.
6. Regular el caudal de gas con el manómetro de la bombona de gas y abrir la válvula de la entorcha
7. Para cebar :
a. tocar con el electrodo el
b. levantar el electrodo de 2
metal que soldar
a 5mm del metal que soldar
8. Al final de la soldadura:
levantar el arco 2 veces (arriba-abajo-arriba-abajo) para iniciar el desvanecimiento automático (ver
el párrafo abajo). Este movimiento debe ser realizado en menos de 4 seg., con una altura de 5 a
10mm. Después, cerrar la válvula de la entorcha para cortar el gas después del enfriamiento del
electrodo.
Desvanecimiento del arco automático con duración regulable
Activación de la función:
Al final de la soldadura, corresponde al tiempo necesario para una baja progresiva de la
corriente de soldadura hasta el paro del arco. Esta función permite evitar las grietas y
cráteres de finales de soldadura.
Por defecto, esta función no está activada (tiempo a 0 segundos). Para activarla, seguir
las etapas siguientes:
1- Pulsar 3 segundos la tecla de selección
2- Ajustar el tiempo de desvanecimiento deseado de 1 a 10 seg (indicador
gracias a las teclas
4.
)
Validar el valor deseado pulsando la tecla de selección .
Combinaciones aconsejadas / afiladura electrodos
Corriente
(A)
∅ Electrodo (mm)
= ∅ Hilo (metal de
aportación)
∅
Boquilla
(mm)
Caudal
(Argon l/mn)
0,5-5
10-130
1,6
9,8
6-7
4-8
130-200
2,4
11
7-8
Para un funcionamiento optimo, debe utilizar un electrodo afilado de manera siguiente:
L = 2,5 x d.
d
lL
19
PROTECCION TERMICA ET FACTORES DE MARCHA
• Protección térmica: el indicador luminoso
se enciende y la duración del enfriamiento es de 1 a 5 mn según la
temperatura ambiente.
• Dejar el aparato conectado después de la soldadura para permitir su enfriamiento.
• Los aparatos descritos tienen una característica de salida de tipo « corriente constante ». Los factores de marcha
según la norma EN60974-1 están indicados en las tablas siguientes :
200E FV CEL (110Veff)
200E FV CEL (230Veff)
X% @
I max
X% @
I max
X% @
I max
X% @
25%
120A
40%
140A
25%
200A
35%
I max
200A
60%
90A
60%
120A
60%
135A
60%
165A
100%
80A
100%
110A
100%
115A
100%
135A
MANTENIMIENTO
• El mantenimiento deber ser realizado por una persona calificada.
• Cortar la alimentación desconectando el enchufe de la toma y esperar la parada del ventilador antes de
empezar las reparaciones sobre el aparato. Al interior, las tensiones e intensidades son elevadas y peligrosas.
• A menudo (2 o 3 veces por año), sacar la tapa y desempolvar con una pistola de aire comprimido. Aprovechar
la ocasión para comprobar por una persona calificada el estado de las conexiones eléctricas con una
herramienta aislada.
• Controlar regularmente el estado del cable de alimentación. Si éste está dañado, tiene que ser remplazado por
el fabricante, su servicio postventa o por una persona con calificación similar, para evitar cualquier peligro.
CONSEJOS
• Respetar las polaridades e intensidades de soldadura indicadas sobre los embalajes de electrodos
• Sacar el electrodo del porta electrodo cuando el aparato no está utilizado
• Dejar las aperturas del aparato libres para la aeración.
20
SEGURIDAD
La soldadura al arco puede ser peligrosa y causar heridas gravas aún mortales. Es
imprescindible protegerse y proteger a los demás.
Respetar las instrucciones de seguridad siguientes:
Radiación del
arco
Protegerse gracias a una mascara conforme a las normas EN 169 o EN 379.
Lluvia importante,
Vapor de agua,
Humeda
Utilizar su aparato en una atmósfera propia (grado de polución ≤ 3), de plano y no
más alto que 1 metro de la parte a soldar. No utilizar bajo lluvia o nieve.
Choque eléctrico
Velar por respetar las previas instrucciones de conecciόn a la alimentaciόn eléctrica. No
tocar las partes bajo tensión. Comprobar que la red de alimentación está adaptada al
aparato.
El aparato no debe pasar por encima de personas u objetos.
Caídas
Quemaduras
Riegos de fuego
Humos
Precauciones
suplementarias
Llevar ropa de obra en tejido ignifugado (cotón, mono de trabajo o vaqueros).
Trabajar con guantes de protección y un delantal
Proteger a los demás instalando biombos de protección inflamables, o informándoles
de no mirar el arco y quedarse a distancias suficientes.
Suprimir todos productos inflamables del área de trabajo. Las obras no pueden
realizarse en presencia de gas inflamable.
No inhalar los gases y humos de soldadura. Utilizar en un medio ambiente correctamente
ventilado, con extractores adaptados si se suelda en el interior.
Cualquiera operación de soldadura :
-en lugares en los cuales existen importantes riesgos de choques eléctricos,
-en lugares cerrados,
-en presencia de material inflamable o sujetos a riesgos de explosión
siempre tiene que ser sometida a la aprobación previa de un “responsable
experimentado” y ejecutarse en presencia de personas formadas para intervenir en
caso de urgencia.
Es imprescindible aplicar los medidos técnicos de protecciones descritos en la
Especificación Técnica CEI/IEC 62081.
Es prohibido soldar en posición realzada, salvo si se utiliza una plataforma de seguridad.
Las personas con marcapasos tienen que visitar al médico antes de utilizar estos aparatos.
Sin embargo, desaconsejamos a estas personas la utilización de estos equipos.
No utilizar el aparato para deshelar las cañerias
En modo TIG, manipular la bombona de gas con precauciones, existen riesgos si la bombona o
la válvula de la bombona están dañadas.
RECOMENDACIÓN PARA REDUCIR LAS EMISIONES ELECTRO-MAGNETICAS
Generalidad
El usuario es responsable de la instalación y del uso del equipo según las instrucciones del fabricante. Si se detectan
perturbaciones electromagnéticas, es de la responsabilidad del usuario de resolver la situación según las
recomendaciones dadas en el manual de uso o con la asistencia técnica del fabricante.
Evaluación del area de soldadura
Antes de instalar su equipo, el usuario tendrá que evaluar los problemas electromagnéticos potenciales que podrían
intervenir en el área donde está prevista la instalación, en particular tendrá que tener en cuenta las indicaciones
siguientes:
a.
Otros cableados, cableados de control, cableados telefónicos y de comunicación: arriba, abajo y al lado
del equipo ;
b.
Receptores y transmisores radio y televisión ;
c.
Ordenadores y otros equipos de control ;
d.
Equipamientos críticos para la seguridad tales como mando de seguridad de equipamientos industriales;
e.
La salud de las personas que se encuentran a proximidad de la máquina, por ejemplo personas que
llevan un marcapasos, un audífono, etc…;
f.
Equipamientos para calibrar y medir ;
g.
La inmunidad de otros equipos instalados en el lugar donde está el equipo. El usuario tendrá que
asegurarse que los demás equipos del lugar son compatibles entre ellos. Esto podrá requerir
precauciones suplementarias;
21
h.
i.
El tiempo del día durante el cual se tendrá que hacer funcionar el equipo;
La superficie del área que habrá que considerar en torno al equipo dependerá de la estructura de los
edificios y otras actividades que se desarrollan en el lugar. El área considerado puede extenderse más
allá de los límites de las empresas.
Recomendaciones sobre los metodos de reducción de las emisiones electromagneticas
a.
Alimentación principal: El aparato de soldadura tendrá que ser conectado a la red de alimentación
conforme a las recomendaciones del fabricante. En caso de interferencias, puede ser útil tomar
precauciones suplementarias filtrando la tensión de alimentación. Puede ser útil blindar el cable de
alimentación en las instalaciones fijas del aparato de soldadura, bajo bandejas metálicas o dispositivos
equivalentes. El blindaje tendrá que ser eléctricamente contenido en la longitud entera del cable. Tendrá
que ser directamente conectado al aparato de soldadura con un buen contacto eléctrico entre la bandeja
metálica y la caja del aparato.
b.
Cables de soldadura : Los cables deben ser los más cortos posibles. Agruparlos y, si posible, dejarlos
al suelo.
c.
Protección y blindaje: La protección y el blindaje selectivo de otros cables y materiales en la zona
cercana puede limitar problemas de perturbación.
d.
Puesta a tierra de la pieza que soldar: La puesta a tierra de la pieza que soldar puede limitar
problemas de perturbación. Puede realizarse directamente o vía un condensador apropiado. Esta elección
se hace según las reglamentaciones nacionales.
MMA-TIG
ANOMALIAS, CAUSAS, REMEDIOS
Anomalías
El aparato no libera ninguna
corriente y el indicador luminoso
amarillo de defecto térmico está
encendido .
El indicador está encendido pero
el aparato no libera ninguna
corriente.
El aparato está alimentado. Al
poner la mano sobre la tapa, se
sienten picores.
Causas
Remedios
La protección térmica del
aparato se ha puesto en marcha.
Esperar el final del enfriamiento
(más o menos 2 mn). El indicador
luminoso se apaga
El cable de pinza de masa o
porta electrodo no está
conectado al aparato
Comprobar los enchufes.
La conexión con la tierra está
mal hecha
Comprobar la toma de tierra de su
instalación
El aparato no suelda bien
Error de polaridad
Comprobar la polaridad aconsejada
sobre el embalaje del electrodo
Durante la puesta en marcha del
aparato, el indicador indica
.
La tensión de alimentación no
está entre 230 V +/- 15%
Comprobar su red eléctrica o su
grupo electrógeno
Defecto del electrodo tungsteno
Utilizar un electrodo tungsteno con
tamaño adecuado
Utilizar un electrodo tungsteno
correctamente preparado
Caudal de
importante
Disminuir el caudal de gas
TIG
Arco inestable
gas
demasiado
El electrodo tungsteno se oxida y
se empaña al final de la
soldadura
Proteger el área de soldadura contra
las corrientes de aire.
Comprobar y apretar todos los
Problema de gas, o interrupción empalmes de gas. Esperar que el
prematurada de gas
electrodo se enfríe antes de cortar
el gas.
El electrodo funde
Error de polaridad
Área de la soldadura.
Comprobar que la pinza de masa
está bien conectada al +
22
ОПИСАНИЕ
Благодарим вас за выбор аппарата нашей марки! Чтобы полностью использовать его возможности,
пожалуйста, изучите данную инструкцию :
являются малогабаритными сварочными инверторами со встроенным вентилятором для сварки электродом с
обмазкой (MMA) и тугоплавким электродом (TIG Lift) на постоянном токе (DC). При сварке МMA аппараты
позволяют варить любым видом электрода: с рутиловой обмазкой (электроды для сварки на переменном
токе), с основной обмазкой (электроды для сварки на постоянном токе), электродами для сварки чугуна,
электродами для сварки нержавеющей стали и др. В режиме Tig, они варят большую часть металлов за
исключением алюминия и его сплавов. Они могут работать от электрогенератора (230В +- 15%).
ПИТАНИЕ – ЗАПУСК В РАБОТУ
• Данные аппараты поставляются с 16A-ой вилкой на 230В типа CEE7/7. 200E FV CEL оснащен системой
плавающее напряжение Flexible Voltage, он подключаeтся к электрической установке С ЗАЗЕМЛЕНИЕМ с
питанием от 110В до 240В (50 - 60 Гц). Сила портебляемого из электрической сети тока (I1eff) при
интенсивном использовании указана на аппарате. Проверьте совместимость системы электрического
питания и его защиту (предохранитель и/или выключатель) с действительно потребляемым электрическим
током. В некоторых странах может быть необходимо заменить розетку для использования аппарата с
максимальной мощностью. Пользователю следует убедиться что штепсельная розетка доступна.
• Запуск в работу осуществляется нажатием на кнопку (
)
Защита срабатывает и останавливает аппарат, если напражнение питания превышает 265В для
однофазных аппаратов (экран афиширует
).
• Эти аппараты относятся к Классу A. Они созданы для использования в промышленной и
профессиональной среде. В любой другой среде ему будет сложно обеспечить электромагнитную
совместимость из-за кондуктивных и индуктивных помех. Не использовать в среде содержащей
металлическую пыль-проводник.
СВАРКА ЭЛЕКТРОДОМ С ОБМАЗКОЙ (режим МMA)
• Подключите кабель электорододержателя и зажима массы в коннекторы. Соблюдайте полярность
указанную на упаковке с электродами.
• Следуйте общепринятым правилам сварки.
• Ваш аппарат снабжен 3 функциями свойственными инвертору:
Hot Start (регулируемый режим в зависимости от модели, см. ниже) выдает импульс высокого тока (по
сравнению с током сварки) в момент пожига дуги
Arc Force (регулируемый режим в зависимости от модели, см. ниже) выдает сверхток препятствующий
привариванию электрода в момент его погружения в жидкий металл
Anti-Sticking позволяет легко отделить электрод не вызывая его приваривания в случае замыкания
электрода на землю
Активирование режима MMA и регулировка интенсивности:
- Выбрать позицию MMA
с помощью кнопки
- Отрегулировать желаемую интенсивность (индикатор ) с помощью кнопок .
Регулируемые Hot start и Arc force:
200E FV CEL
Hot Start
Arc Force
0
90%
Наш совет :
Слабый Hot start, для тонких листов металла – повышенный Hot start для трудно
свариваемых металлов (плохо очищенные или окисленные детали)
Для регулировки Hot Start иt Arc Force следуйте следующим этапам:
23
Нажать 3 секунды на кнопку
Укажите желаемое процентное соотношение (индикатор
) с помощью кнопок
Подтвердите выбранное значение нажатием кнопки
Укажите желаемое процентное соотношение (индикатор
) с помощью кнопок
Подтвердите выбранное значение нажатием кнопки
СВАРКА TIG Lift (режим TIG) (Аргонодуговая сварка)
Сварка TIG DC (при постоянном токе) требует использования защитного газа (Aргон).
Для сварки в режиме TIG, следуйте следующим этапам:
1. Подключите зажим массы на положительную полярность (+).
2. Подсоедините горелку с вентилем к отрицательной полярности (-).
3. Подсоедините газовую трубку горелки к газовому баллону
4. Выберите позицию TIG
с помощью кнопки .
5. Отрегулируйте желаемую силу тока (индикатор ) с помощью кнопок .
Отрегулируйте расход газа на редукторе газового баллона и отгоройте вентиль на горелке
7. Для пожига дуги:
a- коснитесь детали
b- поднимите электрод на 2электродом
5мм от свариваемой детали
Окончание сварки:
9. Поднять дугу 2 раза (вверх-вниз-вверх-вниз) чтобы спровоцировать автоматическое затухание (см
параграф ниже). Это действие должно занять минимум 4 секунды на высоте от 5 до 10мм. Затем
закройте вентиль горелки чтобы прекратить доступ газа после охлаждения электрода.
Автоматическое затухание дуги с регулируемой длительностью
Активация функции:
Данное действие соответствует времени необходимому для постепенного снижения сварочного тока при
окончании сварки для затухания дуги. Эта функция позволяет избежать образования трещин и кратеров при
окончании сварки. По умолчанию эта функция неактивна (= 0 сек). Для активации проделайте следующее:
1. Нажмите на кнопку
в течении 3 сек
2. Отрегулируйте желаемое время затухания от 1 до 10 сек (индикатор
3. Подтвердите выбранное значение нажатием кнопки
) с помощью кнопок
.
Советуемые комбинации / затачивание электрода
0,5-5
Ток (A)
∅ Электрод (мм)
= ∅ проволока
(присад. металл)
∅ Сопло
(мм)
Подача газа
(Аргон
л/мин)
10-130
1,6
9,8
6-7
4-8
130-200
2,4
11
7-8
Для оптимального функционирования вы должны использовать электрод, заточенный следующим образом:
L = 2,5 x d.
d
lL
24
ТЕРМОЗАЩИТА И ПРОДОЛЖИТЕЛЬНОСТЬ ВКЛЮЧЕНИЯ (ПВ%)
• Термозащита : лампочка
загорается и аппарат остывает от 1 до 5 минут в зависимости от температуры
окружающей среды.
• Оставьте аппарат включенным после сварки для того, чтобы он остыл.
• Описанные аппараты имеют "постоянный ток" на выходе. Их продолжительность включения по норме
EN60974-1 указаны в нижеследующих таблицах :
•
200E FV CEL (110Veff)
200E FV CEL (230Veff)
X% @
I max
X% @
I max
X% @
I max
X% @
25%
120A
40%
140A
25%
200A
35%
I max
200A
60%
90A
60%
120A
60%
135A
60%
165A
100%
80A
100%
110A
100%
115A
100%
135A
УХОД И ОБСЛУЖИВАНИЕ
• Обслуживание аппарата должно производится только квалифицированным персоналом.
• Всегда отключайте аппарат от сети, дождитесь остановки вентиляторов. Токи и напряжения внутри
аппарата значительны и представляют опасность.
• Регулярно снимайте крышку аппарата и очищайте его от пыли. Пользуясь случаем, обратитесь к
кварифицированному специалисту для проверки контактов соединений с помощью изолированного
инструмента.
• Необходимо проверять регулярно состояние электрического шнура. Если электрический кабель
повреждён, то он должен быть заменён изготовителем, его послепродажным отделом или
квалифицированным персоналом, во избежание всякой опасности.
НАШИ СОВЕТЫ
• Соблюдайте полярности и токи, указанные на коробках с электродами.
• Выньте электрод из электрододержателя, когда аппарат не используется.
• Оставьте щели аппарата открытыми для свободного прохождения воздуха.
25
ТЕХНИКА БЕЗОПАСНОСТИ
Электродуговая сварка может быть опасна для здоровья и жизни.
Защитите себя и окружающих, примите меры против:
Излучений дуги
Сильного дождя,
водяных паров,
влажности
Электроудара
Падений
Ожогов
Пожара
Дыма
Дополнительные
Меры
Предосторожности
защитите себя с помощью маски, снабженной фальтрами, соответствующими
нормам EN 169 или EN 379.
Используйте ваш аппарат в чистой атмосфере (уровень загрязнения ≤ 3), на
плоской поверхности и не ближе, чем в 1 м от свариваемой детали.
Не использовать аппарат под дождём и снегом
GYSMI 200E FV CEL должен быть подключен к однофазной сети с заземлением. Не
касайтесь деталей под напряжением. Убедитесь, что используемая вами сеть
подходит для данного аппарата.
Не переносите аппарат над людьми или объектами.
Надевайте рабочую одежду из огнеупорной ткани (хлопок, джинсовая ткань или
спецодежда).
Работайте в защитных перчатках и несгораемом фартуке.
Защитите окружающих, установив несгораемые ограждения или попросите их не
смотреть на дугу и придерживаться безопасного расстояния.
Удалите все воспламеняемые вещи из зоны сварки. Не работайте в среде горючих
газов.
Не вдыхайте газы и дым, производимые сваркой. Использовать аппарат в хорошо
проветриваемом помещении, с искуственной вентиляцией, при сварке внутри
закрытого помещения.
Любые сварочные работы :
-в помещениях с повышенным риском электрошока,
-в закрытых помещениях,
-около восламеняющихся или взрывчатых материалов,
должны быть всегда предварительно подтверждены ответственным специалистом и
реализованы в присутствии обученного персонала, для срочного вмешательства в
случае необходимости.
Технические меры безопасности, описанные в "Технических Характеристиках"
CEI/IEC 62081 должны быть соблюдены. Сварка в сверхвысоком положении
запрещена, кроме случаев с использованием защитных платформ.
Лица, использующие электрокардиостимуляторы, должны проконсультироваться у врача перед
работой с данными аппаратами.
Однако мы не советуем этим лицам использовать данные аппараты.
Не используйте аппарат для размораживания канализаций.
При сварке TIG осторожно обращайтесь с газовым баллоном, существует опасность в случае
повреждения баллона или его вентиля.
РЕКОМЕНДАЦИИ ДЛЯ СНИЖЕНИЯ ЭЛЕКТРОМАГНИТНОГО ИЗЛУЧЕНИЯ
Общие сведения
Пользователь несет ответственность за установку и использование аппарата в соответствие с указаниями
производителя. При обнаружении электромагнитных излучений пользователь должен разрешить проблему,
следуя рекомендациям, указанным в инструкции, или с помощью технической поддержки производителя.
Оценка сварочной зоны
Перед установкой аппарата пользователь должен оценить возможные электромагнитные проблемы, которые
могу возникнуть в зоне, где планируется установка, в частности, он должен учитывать следующие моменты:
a.
Не находятся ли другие кабели, контрольная проводка, телефонные и коммуникационные кабели
снизу, сверху или рядом с аппаратом;
b.
Приемники и передатчики радио и телевидения;
c.
Компьютеры и другое оборудование контроля;
d.
Оборудование
необходимое для
безопасности.
Например
управление
безопасностью
промышленного оборудования;
e.
Здоровье
людей,
находящихся
вблизи
аппарата,
например:
люди
пользующиюся
кардиостимуляторами, слуховыми аппаратами и т.п.;
f.
Оборудование для калибровки и замера;
26
g.
Устойчивость других аппаратов, находящихся в помещении, где используется аппарат.
Пользователь должен убедиться, что все аппараты в помещении совместимы между собой. Это
может потребовать принятия дополнительных мер предосторожности.
h.
Погода в течении дня, когда будет использован аппарат;
i.
Площадь рассматриваемой зоны вокруг аппарата зависит от структуры здания и других работ
производимых на этом месте. Рассматриваемая территория может простираться за пределы
предприятия.
Рекомендации по методике снижения электромагнитного излучения
a.
Основное электропитание: сварочный аппарат должен быть подключен к электросети в
соответствии с рекомендациями производителя. При наличии помех необходимо принять
дополнительные меры предосторожности путем фильтрации напряжения питания. Кроме того,
может потребоваться защитить кабель аппарата либо металлическим желобом (в случае если
аппарат постоянно находится на определенном рабочем месте), либо похожим приспособлением.
Бронь должна быть электрически постоянной на всей длине кабеля. Она должна быть прикреплена
к аппарату с хорошим электрическим контактом между металлическим желобом и корпусом
аппарата.
b.
Сварочные кабели: кабели должны быть максимально короткими. Объедините их и, если
возможно, оставьте лежать на полу.
c.
Защита и бронь: выборочная защита и бронь других кабелей и материалов, находящихся в
окружающей среде, поможет ограничить проблему, связанную с помехами.
d.
Заземление свариваемой детали: заземление свариваемой детали поможет ограничить
помехи. Оно может быть сделано напрямую или через подходящий конденсатор. Сделайте выбор в
соответствии с нормами вашей страны.
AНОМАЛИИ, ВОЗМОЖНЫЕ ПРИЧИНЫ, ВАРИАНТЫ РЕШЕНИЙ
MMA-TIG
Аномалии
Решения
Сработала тепловая защита
аппарата.
Ждите охлаждения в течение
приблизительно 2 минут, до
выключения лампы индикатора.
Лампочка
выкличится.
Дисплей горит, но аппарат не
подает ток.
Кабель зажима массы или
держателя электрода не
соединены с аппаратом.
Проверьте подключение сварочных
кабелей.
Аппарат включен. Вы ощущаете
покалывание при прикосновении
к корпусу.
Аппарат не заземлен.
Проверьте розетку и заземление
вашего аппарата.
Аппарат варит с трудом
Ошибка полярности
Сверьте полярность с
рекомендациями на коробке с
электродами
высвечивается
Напряжение питания больше или
меньше 230 В +/- 15%
Проверьте электрическую проводку
или генераторную установку
Нестабильная дуга
Дефект
электрода
Используйте
вольфрамовый
электрод подходящего размера
Используйте правильно подготовленный вольфрамовый электрод
При
TIG
Возможные причины
Аппарат не выдает сварочный
ток, при этом горит желтая
лампа индикатора термозащиты
.
включении
на
дисплеи
вольфрамового
Слишком сильная подача газа
Зона сварки.
Вольфрамовый электрод окисляется и тускнеет в конце сварки
Электрод плавится
Проблема подачи газа, или газ
был отключен слишком рано
Ошибка полярности
Уменьшить подачу газа
Защитить зону сварки от сквозняков.
Проверить и затянуть все газовые
соединения.
Подождать
когда
электрод остынет и после этого
выключить газ.
Проверить,
что
подсоединен к +
зажим
массы
27
DECLARATION DE CONFORMITE :
JBDC atteste que les postes de soudure sont fabriqués conformément aux exigences des directives Basse tension
2006/95/CE du 12/12/2006, et aux directives CEM 2004/108/CE du 15/12/2004.
Cette conformité est établie par le respect des normes harmonisées EN 60974-1 de 2005, EN 60974-10 de 2007 et
EN 50445 de 2008.
Le marquage CE a été apposé en 2012.
DECLARATION OF CONFORMITY :
The equipment described on this manual complies with the instructions of low voltage 2006/95/CE of 12/12/2006,
and the instructions of CEM 2004/108/CE of the 15/12/2004.
This conformity respects the standards EN60974-1 of 2005, EN 60974-10 of 2007 and EN50445 of 2008.
CE marking was added in 2012.
KONFORMITÄTSERKLÄRUNG
JBDC erklärt, dass die beschriebene Geräte in Übereinstimmung mit den Anforderungen der folgenden europäischen
Bestimmungen: Niederspannungsrichtlinie 2006/95/CE –12.12.2006 und EMV- Richtlinien 2004/108/CE – 15.12.2004
elektromagnetische Verträglichkeit- hergestellt wurden. Diese Geräte stimmen mit den harmonisierten Normen
EN60974-1 von 2005, EN 60974-10 von 2007 und EN 50445 von 2008 überein.
CE Kennzeichnung: 2012
DECLARACION DE CONFORMIDAD :
JBDC certifica que los aparatos de soldadura 200E FV CEL son fabricados en conformidad con las directivas baja
tensión 2006/95/CE del 12/12/2006, y las directivas compatibilidad electromecánica 2004/108/CE del 15/12/2004.
Esta conformidad está establecida por el respeto a las normas EN 60974-1 de 2005, EN 60974-10 de 2007 y EN
50445 de 2008.
El marcado CE fue fijado en 2012.
ДЕКЛАРАЦИЯ О СООТВЕТСТВИИ:
JBDC заявляет, что сварочные аппараты 200E FV CEL произведены в соответствии с директивами Евросоюза
2006/95/CE о низком напряжении от 12/12/2006, а также с директивами CEМ 2004/108/CE от 15/12/2004.
Данное соответствие установлено в соответствии с согласованными нормами EN 60974-1 2005 г, EN 60974-10
2007 г и EN 50445 2008 г.
Маркировка ЕС нанесенна в 2012 г.
20/07/12
Sas JBDC
134 BD des Loges
53941 Saint Berthevin
Nicolas BOUYGUES
Président Directeur Général
28
SCHÉMA ÉLECTRIQUE / CIRCUIT DIAGRAM / SCHALTPLAN
200E FV CEL
29
PIÈCES DE RECHANGE/ SPARE PARTS / ERSATZTEILE/ RECAMBIOS / ЗАПЧАСТИ
200E FV CEL
N°
Désignation
200E FV CEL
1
Douilles / Connectors / Schweißbuchsen / Conectores / Коннекторы
51468
2
Clavier/ Display / Anzeige / Teclado / Дисплей / Οθόνη
3
Carte électronique / Electronic card / Elektronikplatine / Tarjeta electrónica / Электронная плата
4
Cordon secteur / Power cord / Netzkabel / Cable de conexión / Сетевой шнур
21480
5
Ventillateur / Fan / Ventilator / ventilador / Вентилятор
51021
6
Grille / Protective screen / Ventilator- Grill / rejilla / Решетка
51010
7
Pieds / Feets / Füsse / Pies / Ножки
71140
8
Self de sortie / Output inductor / Ausgangdrossel / Inductor de salida / выходной дроссель
96071
9
Self torique PFC / Induction coil PFC / / Inductor tόrico PFC / торический дроссель PFC
63679
10
Carte électronique CEM / EMC board / EMV Platine / Tarjeta electrόnica CEM / Электронная плата ЭМС
63950
51924
97187C
30
ICÔNES/ SYMBOLS/ ZEICHENERKLÄRUNG / ICONOS/ ПЕРЕДНЯЯ ПАНЕЛЬ
A
Ampère
V
Volt
Hz
Hertz
Amp
Volt
Hertz
Ampere
Volt
Amperio
Voltios
Hertz
Hertz
Ампер
Вольт
Герц
Soudage à l’électrode enrobée (MMA – Manual Metal Arc
Schweißen mit umhüllter Elektrode (MMA)
Schweißen mit umhüllter Elektrode (E-Handschweißen)
Soldadura con electrodos refractarios (TIG – Tungsten
Inert Gas)
Ручная дуговая сварка (MMA – Manual Metal Arc)
Soudage TIG (Tungsten Inert Gaz)
TIG welding (Tungsten Inert Gas)
Schweißen mit Wolfram Elektrode
(Wolfram Edelgas) Soldadura TIG (Tungsten Inert Gaz)
Сварка TIG (Tungsten Inert Gaz)
Convient au soudage dans un environnement avec risque accru de choc électrique. La source de courant ellemême ne doit toutefois pas être placée dans de tels locaux.
Adapted for welding in environment with increased
risks of electrical shock. However, the welding source must not be placed in such places.
Schutz gegen Risiko von
elektrischen Schlag. Das Schweißgerät darf nicht direkt auf dem Schweißwerkstück gestellt warden.
Adaptado a la
soldadura en un entorno que comprende riesgos de choque eléctrico. La fuente de corriente ella misma no debe estar
situada dentro de tal locales.
Подходит для сварки в среде с повышенной опасностью удара электрическим
током. Тем не менее не следует ставить источник тока в такие помещения.
IP21
Protégé contre l’accès aux parties dangereuses avec un doigt, et contre les chutes verticales de gouttes d'eau
Protected against rain and against fingers access to dangerous parts
Geschützt gegen Berührung mit gefährlichen
Teilen und gegen senkrechten Wassertropfenfall
protegido contra el acceso a las partes peligrosas con los dedos, y
contra las caídas verticales de gotas de agua
Аппарат защищен от доступа рук в опасные зоны и от
вертикального падения капель воды Сварка на постоянном токе
Courant de soudage continu
Welding direct current
continua
Сварка на постоянном токе
Gleichschweißstrom
La corriente de soldadura es
Alimentation électrique monophasée 50 ou 60Hz
Single phase power supply 50 or 60Hz
Einphasiege
Netzspannungsversorgung 50 oder 60 Hz
Alimentación eléctrica monofásica 50 o 60 Hz
Однофазное
напряжение 50 или 60Гц
Tension assignée à vide
Rated no-load voltage
Напряжение холостого хода
Uo
Tension assignée d’alimentation
la red
Напряжение сети
U1
Leerlaufversorgungspannung
rated supply voltage
Tensión asignada de vacío
Versorgungsspannung unter Belastung.
Tensión de
I1max
Courant d’alimentation assigné maximal (valeur efficace)
Rated maximum supply current (effective value)
Maximaler Versorgungsstrom (Effektivwert)
Corriente maxima de alimentacion de la red
Максимальный
сетевой ток (эффективная мощность)
I1eff
Courant d’alimentation effectif maximal
Maximum effective supply current
Maximaller tatsächlicher
Versorgungsstrom
Corriente de alimentación efectiva maxima
Максимальный эффективный сетевой ток
L’appareil respecte la norme EN60974-1
The device complies with EN60974-1 standard relative to welding
Die Normen EN60974-1 für Schweißanlagen
El aparato está conforme a la norma EN60974-1 referente a
los aparatos de soldadura
Аппарат соответствует европейской норме EN60974-1
EN 60974-1 units
Convertisseur monophasé transformateur-redresseur
Single phase inverter, converter-rectifier
Schweißinverter
Convertidor monofásico transformador-rectificador
Однофазный инвертор, с
трансформацией и выпрямлением.
X
/10min
…%
@40°C
X : Facteur de marche à …%
X : duty factor at …%
X : Einschaltdauer Faktor ...%
funcionamiento de …%
X : Продолжительность включения …%
Einphasige
X : Factor de
31
Nombre d'électrodes normalisées soudables en 1 heure en continu, avec 20 secondes entre chacune, divisé par le
nombre d'électrodes soudables dans les mêmes conditions sans disjonction thermique.
Number of standardized
electrodes weldable over 1 hour of continuous work, divided by the number of electrodes weldable in the same
conditions without thermal shutdown
Elektroden Anzahl die inerhalb einer Arbeitsstunde verschweißt werden
können, geteilt durch Elektroden- Anzahl die tatsächlich verschweißt sind (Abkühlphasen des Geräts)
Cantidad de
electrodos normalizados soldables en 1 hora de manera continua, a 20°C, dividida por la quantidad de electrodos
soldables en condiciones identicas sin disyunción térmica. .
Количество стандартных электродов,
использованных за 1 час в непрерывном режиме с 20-ти секундными перерывами между электродами,
поделенное на количество электродов, которые можно сварить при тех же условиях, но без перегрева.
I2
…
%
I2 : courant de soudage conventionnnel correspondant
I2 : corresponding conventional welding current
Sekundär Strom
I2 : Corrientes correspondientes
Соответствующий условный сварочный ток
I2:
U2
…
%
U2 : Tensions conventionnelles en charges correspondantes
U2 : conventional voltages in corresponding load
U2 : Sekundär Spannung
U2 : Tensiones convencionales en carga
U2 : Соответствующие условные
напряжения под нагрузкой
Circuit de correction du facteur de puissance
Power factor corector circuit included
PFC
Netzoberwellenfilter. Circuito de correción de factor de potencia integrado
Цепь коррекции коэффициэнта
мощности
Ventillé
Ventilated
Ventilator
Ventilado
Содержит встроенный вентилятор
Appareil conforme aux directives européennes
The device complies with European Directive
Das Gerät ist
kompatibel mit Europäischen Normen
El aparato está conforme a las normas europeas.
Устройство
соответствует европейским нормам
Conforme aux normes GOST (Russie)
Conform to standards GOST / PCT (Russia)
Das Gerät ist conform mit GOST/PCT(Rußland) Normen
Conforme a la normas GOST (PCT) (Rusia)
Продукт соответствует стандарту России (РСТ)
L’arc électrique produit des rayons dangereux pour les yeux et la peau (protégez-vous !)
The electric arc
produces dangerous rays for eyes and skin (protect yourself !)
Der Lichtbogen erzeugt, gefährliche für die Augen
und Haut, Strahlen (Schützen Sie sich!)
El arco produce rayos peligrosos para los ojos y la piel (¡ Protegase !)
Электрическая дуга производит опасные лучи для глаз и кожи (защитите себя!)
Attention, souder peut déclencher un feu ou une explosion.
Caution, welding can produce fire or explosion.
Achtung. Schweißen kann Feuer oder Explosion verursachen.
Cuidado, soldar puede iniciar un fuego o una
explosión.
Внимание! Сварка может вызвать пожар или взрыв.
Le dispositif de déconnexion de sécurité est constitué par la prise secteur en coordination avec l'installation
électrique domestique. L'utilisateur doit s'assurer de l'accessibilité de la prise. . The mains disconnection mean is
the mains plug in combination with the house installation. Accessibility of the plug must be guaranteed by user.
Die Stromunterbrechung erfolgt durch Trennen des Netzsteckers vom häuslichen Stromnetz. Der Gerätanwender
sollte den freien Zugang zum Netzstecker immer gewährleisten
El dispositivo de desconección de seguridad se
constituye de la toma de la red electrica en coordinación con la instalación eléctrica doméstica. El usuario debe
asegurarse de la accesibilidad del enchufe. Система отключения безопасности включается через сетевую
штепсельную розетку соответствующую домашней электрической установке. Пользователь должен убедиться,
что розетка доступна
Mise en veille/mise en marche
Включить/Режим ожидания
standby/On
Schalter Bereit/ Ein
standby/ puesta en marcha
Attention ! Lire le manuel d’instruction avant utilisation
Caution ! Read the user manual
Achtung ! Lesen
Sie die Betriebsanleitung.
Cuidado, leer las instrucciones de utilización.
Внимание ! Читайте инструкцию по
использованию
Produit faisant l'objet d'une collecte sélective- Ne pas jeter dans une poubelle domestique !
Separate collection
required – Do not throw in a domestic dustbin
Getrennt entsorgen.Nicht mit Hausmüll entsorgen.
Este aparato
es objeto de una recolección selectiva. No debe ser tirado en en cubo doméstico.
Продукт требует специальной
утилизации. Не выбрасывать с бытовыми отходами.
32