1
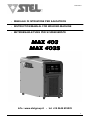
6932300010
- MANUALE DI ISTRUZIONE PER SALDATRICE
- INSTRUCTION MANUAL FOR WELDING MACHINE
- BETRIEBSANLEITUNG FÜR SCHWEIßERÄTE
MAX 403
MAX 403S
Info : www.stelgroup.it - tel. +39 0444 639525
1
6932300010
DECLARATION OF CONFORMITY
According to
The Low Voltage Directive 2006/95/EC
The EMC Directive 2004/108/EC
The RoHS Directive 2011/65/EU
Type of equipment
MMA Welding Equipment
Type of designation
600242000L - Max 403
601281000L - Max 403S
Brand name or trade mark
STEL
Manufacturer or his authorized representatives established within the EEA:
Name, address, phone, website:
STEL s.r.l
Via Del Progresso 59; 36020 Castegnero – Vicenza
Italy
Tel +39-0444-639525 Fax +39-0444-639682 www.stelgroup.it
The following harmonized standard in force within the EEA has been used in the design:
EN 60974-1, Arc welding equipment – Part 1: Welding power sources
EN 60974-10, Arc welding equipment – Part 10: Electromagnetic compatibility (EMC) requirements
*EN 61000-3-12, Arc welding equipment – Part 10: Electromagnetic compatibility (EMC) requirements
* Only For Max 403S
Additional information: Restrictive use, Class A equipment, intended for use in locations other than
residential.
By signing this document, the undersigned declares as manufacturer, or the manufacturer’s authorized
representative established within EEA, that the equipment in question complies with the safety requirements
stated above.
Date
Signature
Position
01-01-2014
Andrea Barocco
General Manager
2
6932300010
SICUREZZE
LO SHOCK ELETTRICO PUÒ UCCIDERE
- Disconnettere la macchina dalla rete di
alimentazione prima di intervenire sul generatore.
- Non lavorare con i rivestimenti dei cavi deteriorati.
- Non toccare le parti elettriche scoperte.
- Assicurarsi che tutti i pannelli di copertura del
generatore di corrente siano ben fissati al loro posto
quando la macchina è collegata alla rete di
alimentazione.
- Isolate Voi stessi dal banco di lavoro e dal pavimento
(Ground): usate scarpe e guanti isolanti.
- Tenete guanti, scarpe, vestiti, area di lavoro, e
questa apparecchiatura puliti ed asciutti.
WARNING
I CONTENITORI SOTTO PRESSIONE POSSONO
ESPLODERE SE SALDATI.
Quando si lavora con un generatore di corrente:
- non saldare contenitori sotto pressione.
- non saldare in ambienti contenenti polveri o vapori
esplosivi.
LE RADIAZIONI GENERATE DALL’ARCO Dl
SALDATURA POSSONO DANNEGGIARE GLI
OCCHI E PROVOCARE BRUCIATURE ALLA
PELLE.
- Proteggere gli occhi ed il corpo adeguatamente.
- È indispensabile per i portatori di lenti a contatto
proteggersi con apposite lenti e maschere.
PREVENZIONE USTIONI
Per proteggere gli occhi e la pelle dalle bruciature e
dai raggi ultravioletti:
- portare occhiali scuri. Indossare vestiti, guanti e
scarpe adeguate.
- usare maschere con i lati chiusi, aventi lenti e vetri di
protezione a norme (grado di protezione DIN 10).
- avvisare le persone circostanti di non guardare
direttamente l’arco.
IL RUMORE PUÒ’ DANNEGGIARE L’UDITO.
- Proteggersi adeguatamente per evitare danni.
I FUMI ED I GAS POSSONO DANNEGGIARE LA
VOSTRA SALUTE.
- Tenere il capo fuori dalla portata dei fumi.
- Provvedere per una ventilazione adeguata dell’area
di lavoro.
- Se la ventilazione non è sufficiente, usare un
aspiratore che aspiri dal basso.
IL CALORE, GLI SCHIZZI DEL METALLO FUSO E
LE SCINTILLE POSSONO PROVOCARE INCENDI.
- Non saldare vicino a materiali infiammabili.
- Evitare di portare con sé qualsiasi tipo di
combustibile come accendini o fiammiferi.
- L’arco di saldatura può provocare bruciature. Tenere
la punta dell’elettrodo lontano dal proprio corpo e da
quello degli altri.
PREVENZIONE INCENDI
La saldatura produce schizzi di metallo fuso.
Prendere le seguenti precauzioni per evitare incendi:
- assicurarsi un estintore nell’area di saldatura.
- allontanare il materiale infiammabile dalla zona
immediatamente vicina all’area di saldatura.
- raffreddare il materiale saldato o lasciarlo raffreddare
prima di toccarlo o di metterlo a contatto con materiale
combustibile
- non usare mai la macchina per saldare contenitori di
materiale potenzialmente infiammabile. Questi
contenitori devono essere puliti completamente prima
di procedere alla saldatura.
- ventilare l’area potenzialmente infiammabile prima di
usare la macchina.
- non usare la macchina in atmosfere che contengano
concentrazioni elevate di polveri, gas infiammabili o
vapori combustibili.
PREVENZIONE CONTRO SHOCK ELETTRICI
Prendere le seguenti precauzioni quando si opera con
un generatore di corrente:
- tenere puliti se stessi ed i propri vestiti.
- non essere a contatto con parti umide e bagnate
quando si opera con il generatore.
- mantenere un isolamento adeguato contro gli shock
elettrici. Se l’operatore deve lavorare in ambiente
umido, dovrà usare estrema cautela, vestire scarpe e
guanti isolanti.
3
6932300010
- controllare spesso il cavo di alimentazione della
macchina: dovrà essere privo di danni all’isolante. I
CAVI SCOPERTI SONO PERICOLOSI
Non usare la macchina con un cavo di alimentazione
danneggiato;
è
necessario
sostituirlo
immediatamente.
- se c’è la necessità di aprire la macchina, prima
staccare l’alimentazione. Aspettare 5 minuti per
permettere ai condensatori di scaricarsi. Non
rispettare questa procedura può esporre l’operatore a
pericolosi rischi di shock elettrico.
- non operare mai con il generatore, se la copertura di
protezione non è al suo posto.
- assicurarsi che la connessione di terra del cavo di
alimentazione, sia perfettamente efficiente.
Questo generatore è stato progettato per essere
utilizzato in ambiente professionale ed industriale. Per
altri tipi di applicazione contattare il costruttore. Nel
caso in cui disturbi elettromagnetici siano
individuati è responsabilità dell’utilizzatore della
macchina risolvere la situazione con l’assistenza
tecnica del costruttore. È vietato l’utilizzo e
l’avvicinamento alla macchina da parte di persone
portatori di stimolatori elettrici (PACE MAKERS).
RICEVIMENTO
L’imballo contiene:
- N. 1 generatore
- N. 1 manuale istruzione
Verificare che siano compresi nell’imballo tutti i
materiali sopra elencati. Avvisare il Vs. distributore se
manca qualcosa. Verificare che il generatore non sia
stato danneggiato durante il trasporto. Se vi è un
danno evidente, vedere la sezione RECLAMI per
istruzioni. Prima di operare con il generatore leggere
attentamente questo manuale di istruzioni.
RECLAMI
Reclami per danneggiamento durante il trasporto:
Se la Vs. apparecchiatura viene danneggiata durante
la spedizione, dovete inoltrare un reclamo al Vs.
spedizioniere.
Reclami
per
merce difettosa:
Tutte le
apparecchiature spedite da STEL sono state
sottoposte ad un rigoroso controllo di qualità. Tuttavia
se la Vs. apparecchiatura non dovesse funzionare
correttamente, rivolgetevi al Vs. concessionario
autorizzato.
DATI TECNICI
DESCRIZIONE GENERALE
Questa nuova serie di generatori a regolazione
elettronica
governata
da
microprocessore
,consente di raggiungere una eccellente qualità di
saldatura per tutti i seguenti tipi di elettrodi:
RUTILE, BASICO, INOX, CELLULOSICO,
SCRICCATURA,
ALLUMINIO,
grazie
alle
avanzate tecnologie applicate.
Il
circuito
microprocessore controlla ed ottimizza il
trasferimento dell’arco indipendentemente dalla
variazione del carico e dell’impedenza dei cavi di
saldatura.
I comandi sul pannello frontale consentono una
facile programmazione delle sequenze di saldatura
in funzione delle esigenze operative.
La tecnologia inverter usata ha permesso di
ottenere:
- generatori con peso e dimensioni estremamente
contenuti;
- ridotto consumo energetico;
- eccellente risposta dinamica;
- fattore di potenza e rendimenti molto alti;
- caratteristiche di saldatura migliori;
- visualizzazione su display dei dati e delle funzioni
impostate.
I componenti elettronici sono racchiusi in una
robusta carpenteria facilmente trasportabile e
raffreddati ad aria forzata con ventilatori a basso
livello di rumorosità.
A
B
C
D
A
B
N.B. Il generatore non è adatto per sgelare tubi.
C
D
4
6932300010
A) IDENTIFICAZIONE
Nome, indirizzo del costruttore
Tipo generatore
Identificazione riferita al numero di serie
Simbolo del tipo di generatore
Riferimento alla normativa di costruzione
B) DATI DISALDATURA
Simbolo del processo di lavoro
Simbolo per generatori idonei ad operare in ambiente
a rischio accresciuto di scossa elettrica.
Simbolo della corrente
Tensione assegnata a vuoto (tensione media)
Gamma della corrente
Valori del ciclo di intermittenza (su 10 minuti)
Valori della corrente assegnata
Valori della tensione convenzionale a carico
C) ALIMENTAZIONE
Simbolo per l’alimentazione (numero fasi e
frequenza)
Tensione assegnata di alimentazione
Massima corrente di alimentazione
Massima corrente efficace di alimentazione
(identifica il fusibile di linea)
D) ALTRE CARATTERISTICHE
Grado di protezione.
INSTALLAZIONE
ATTENZIONE:
Questa apparecchiatura in CLASSE A non e’
destinata all’uso in ambienti residenziali dove la
potenza elettrica e’ fornita dal sistema pubblico di
alimentazione a bassa tensione. Ci possono
essere potenziali difficoltà a garantire la
compatibilità elettromagnetica di questi ambienti a
causa di disturbi condotti e irradiati.
Il generatore MAX 403 NON rispetta i limiti della
IEC 61000-3-12. Se collegato alla rete BT
industriale
pubblica
è
responsabilità
dell'installatore o dell'utilizzatore assicurarsi, previa
consultazione dell'Ente distributore, se lo stesso è
collegabile. Il generatore MAX 403S rispetta i limiti
della IEC 61000-3-12 e puo’ essere collegato alla
rete BT industriale pubblica e privata.
Il buon funzionamento del generatore è assicurato da
un’ adeguata installazione; è necessario quindi:
- Sistemare la macchina in modo che non sia
compromessa la circolazione d’ aria assicurata dal
ventilatore interno .
- Evitare che i ventilatori immettano nella macchina
depositi o polveri.
- E’ bene evitare urti, sfregamenti, ed in maniera
assoluta l’ esposizione a stillicidi, fonti di calore
eccessive, o comunque situazioni anomale.
TENSIONE DI RETE
Il generatore funziona con queste tensione di
alimentazione:
MAX 403S
190V-575V 3P
MAX 403
400V 3P +/- 10%
e Fuse rating di
MAX 403S
40 A Fuse
MAX 403
32 A Fuse
COLLEGAMENTO
- Prima di effettuare connessioni elettriche tra il
generatore di corrente e l’ interruttore di linea,
accertarsi che quest’ ultimo sia aperto.
- Il quadro di distribuzione deve essere conforme alle
normative vigenti nel paese di utilizzo.
-L’ impianto di rete deve essere di tipo industriale.
-Predisporre una apposita presa che preveda
l’alloggiamento dei conduttori del cavo di
alimentazione.
-Per i cavi più lunghi maggiorare opportunamente la
sezione del conduttore.
-A monte, l’apposita presa di rete dovrà avere un
adeguato interruttore munito di fusibili ritardati.
MESSA A TERRA
- Per la protezione degli utenti il generatore dovrà
essere assolutamente collegato correttamente
all’impianto di terra (NORMATIVE INTERNAZIONALI
DI SICUREZZA).
- E’ indispensabile predisporre una buona messa a
terra tramite il conduttore giallo-verde del cavo di
alimentazione, onde evitare scariche dovute a contatti
accidentali con oggetti messi a terra.
Lo chassis (che è conduttivo) è connesso
elettricamente con il conduttore di terra; non collegare
correttamente a terra l’ apparecchiatura può provocare
shock elettrici pericolosi per l’utente, e un non corretto
funzionamento del generatore.
SOLLEVAMENTO
ATTENZIONE:
Il generatore pesa 35 kg / 77 lb (MAX 403)
Il generatore pesa 40 kg / 88 lb (MAX 403S)
Sollevamento manuale
Per sollevare manualmente il generatore servirsi
delle due apposite maniglie.
Sollevamento tramite gancio e cinghia
Per il sollevamento con gancio e cinghia usare
esclusivamente i le maniglie come indicato nel
5
6932300010
disegno.
Durante il sollevamento tenere il generatore in
posizione orizzontale.
AVVERTENZA
POSIZIONAMENTO
PRECARIO
Se il generatore cade può causare infortuni.
Non mettere in funzione o spostare il generatore
nel caso si trovi in posizione precaria.
Non posizionare il generatore su piani inclinati
superiori a 10°.
DESCRIZIONE PANNELLO
FRONTALE
1
2
3
4
5
6
7
8
9
10
11
12
Led macchina sotto tensione
Led abilitazione saldatura
Led sovratemperatura
Pulsante Sub Menu/Visualizza Tensione
Led visualizzazione Tensione
Encoder Regolazione Arc Force /
Slope Down / Induttanza
Encoder Regolazione Corrente
Pulsante Regolazione Modalità di
Saldatura
Led modalità saldatura Mig CV
Led modalità saldatura Mig CC
Led modalità saldatura Tig Lift
Led modalità saldatura Elettrodo
SUB MENU
- HOT START
REGOLAZIONE HOT START
1) Accendere il generatore,
2) Tener premuto il pulsante “SELECT MODE”
sul pannello frontale della macchina per circa 2
secondi, rilasciare poi il pulsante; il led della
modalità selezionata lampeggerà e il display
mostrerà la scritta HS. Tramite l’encoder di
regolazione 6 si puo’ variare il valore di
sovracorrente temporanea da 0 al 50% rispetto alla
corrente di saldatura impostata (max 400A)
- V.R.D. (ATTIVO SOLO IN ELETTRODO)
GESTIONE V.R.D.
La sigla V.R.D. sta per VOLTAGE REDUCTION
DEVICE che non è altro che un sistema per la
riduzione della tensione a vuoto. Quando si installa
il V.R.D. in una saldatrice esso riduce la tensione a
vuoto massima ad una tensione di sicurezza che
normalmente è al di sotto dei 18V.
- Il V.R.D. è usato come aiuto ulteriore per la
ATTIVAZIONE DEL V.R.D.
1) Accendere il generatore,
2) Tener premuto il pulsante 4 sul panello frontale
della macchina per circa 4 secondi, rilasciare poi
il pulsante; il led abilitazione saldatura 2
lampeggia, (FUNZIONE V.R.D. INSERITA V out
18V). La modalità VRD rimane inserita anche
dopo lo spegnimento e la riaccensione della
macchina
ESCLUSIONE DEL V.R.D.
1) Accendere il generatore,
2) Tener premuto il pulsante 4 sul panello frontale
della macchina per circa 4 secondi, rilasciare poi
il pulsante; il led abilitazione saldatura 2 rimane
fisso, (FUNZIONE V.R.D. esclusa). La modalità
VRD rimane sempre esclusa anche dopo lo
spegnimento e la riaccensione della macchina.
- CC/CV (SUITCASE FEEDER)
Questa funzione permette di collegare una
qualsiasi suitcase feeder. Si consiglia di
posizionarsi su posizione CV.
6
6932300010
POSSIBILI GUASTI
- PF0
DUTY CYCLE E
SOVRATEMPERATURA
1) In normali condizioni di funzionamento il display
del generatore MAX 403S mostra all’avvio la scritta
PF0. Il sistema PFC sta’ controllando la tensione di
alimentazione. Questo processo richiede circa 3 / 4
Secondi all’avvio.
Se il LED n.3 e’ accesso e sul display appare la la
dicitura HT(1,3,5,7) fissa:
2) Nel caso in cui il messaggio PF0 rimanga fisso
nel display o continua a lampeggiare significa che
il sistema PFC e’ bloccato.
Contattare un centro di assistenza specializzato
per un controllo.
1. Il generatore ha superato il ciclo di
intermittenza dichiarato.
Il ciclo di intermittenza è la percentuale di utilizzo
della saldatrice su 10 minuti che l’ operatore deve
rispettare per evitare che scatti il blocco di
erogazione per sovratemperatura.
- COn
1) Se il display mostra la scritta COn:
La comunicazione tra il generatore e gli accessori
esterni e’ interrotta.
- Se la scritta COn rimane fissa sul display
Contattare un centro di assistenza specializzato
per un controllo.
- Se la scritta COn appare casualmente sul display
verificare la connessione con gli accessori esterni,
il sistema di messa a terra e la configurazione
dell’area di lavoro.
2. E’ necessario attendere circa 10 minuti per
riprendere a saldare.
3. Verificare I dati di targa applicata sulla macchina
o aprire il manuale alla sezione DATI TECNICI.
4. Nel caso in cui il ciclo di lavoro sia rispettato ma
il display continua a mostrare la scritta HT (1,3,5,7)
probabilmente una scheda potrebbe essere
guasta. Contattare un centro di assistenza
specializzato per un controllo.
7
6932300010
SMALTIMENTO
APPARECCHIATURE
ELETTRICHE ED
ELETTRONICHE
Non smaltire le apparecchiature
elettriche assieme ai rifiuti normali!
In ottemperanza alla Direttiva
Europea 2002/96/CE sui rifiuti da
apparecchiature
elettriche
ed
elettroniche e relativa attuazione
nell'ambito della legislazione nazionale, le
apparecchiature elettriche giunte a fine vita devono
essere raccolte separatamente e conferite ad un
impianto di riciclo ecocompatibile. In qualità di
proprietario delle apparecchiature dovrà informarsi
presso il nostro rappresentante in loco sui sistemi
IN CASO DI CATTIVO FUNZIONAMENTO
RICHIEDETE L’ASSISTENZA DI PERSONALE
QUALIFICATO.
8
6932300010
SAFETY
ELECTRIC SHOCK CAN KILL
- Disconnect the power supply before working on
the welding machine.
- Do not work with deteriorated cable sheaths.
- Do not touch bare electrical parts.
- Ensure that all the panels covering the welding
machine are firmly secured in place when the
machine is connected to the mains supply.
- Insulate yourself from the work bench and from
the floor (ground): use insulating footwear and
gloves.
- Keep gloves, footwear, clothes, the work area
and this equipment clean and dry.
PRESSURISED CONTAINERS CAN EXPLODE IF
WELDED.
When working with a welding machine:
- do not weld pressurised containers .
- do not weld in environments containing explosive
powders or vapours.
THE RADIATIONS GENERATED BY THE
WELDING ARC CAN DAMAGE THE EYES AND
CAUSE BURNING OF THE SKIN.
- Provide suitable protection for the eyes and body.
- It is indispensable for contact lens wearers to
protect themselves with suitable lenses and
masks.
must be free from damage to the insulation. BARE
CABLES ARE DANGEROUS. Do not use the
machine if the power cable is damaged; it must be
replaced immediately.
- if it is necessary to open the machine, first
disconnect the power supply. Wait 5 minutes to
allow the capacitors to discharge. Failure to take
this precaution may expose the operator to
dangerous risks of electric shock.
- never work with the welding machine if the
protective cover is not in place.
- ensure that the earth connection of the power
supply cable is perfectly efficient.
This machine has been designed for use in a
professional and industrial environment. For other
types of application contact the manufacturer. If
electromagnetic disturbances are found it is the
responsibility of the machine user to solve the
problem with the technical assistance of the
manufacturer.
It is forbidden for people with PACEMAKERS to
use or come near the machine.
WARNING
NOISE CAN DAMAGE YOUR HEARING.
- Protect yourself suitably to avoid hearing
damage.
FUMES AND GASES CAN DAMAGE YOUR
HEALTH.
- Keep your head out of the reach of fumes.
- Provide suitable ventilation of the work area.
- If the ventilation is not sufficient, use an exhaust
system that sucks from the bottom.
HEAT, SPLASHES OF MOLTEN METAL AND
SPARKS CAN CAUSE FIRES.
- Do not weld near inflammable materials.
- Avoid having any type of fuel with you such as
cigarette lighters or matches.
- The welding arc can cause burns. Keep the tip of
the electrode far from your body and from other
persons.
PREVENTION OF ELECTRIC SHOCKS
Take the following precautions when working with a
welding machine:
- keep yourself and your clothes clean.
- do not be in contact with damp or wet parts when
working with the welding machine.
- maintain suitable insulation against electric shock.
If the operator has to work in a damp environment,
he must take extreme care and wear insulating
footwear and gloves.
- check the machine power cable frequently: it
PREVENTION OF BURNS
To protect your eyes and skin from burns and
ultraviolet rays:
- wear dark glasses. Wear suitable clothing, gloves
and footwear.
- use masks with closed sides, having lenses and
9
6932300010
protective glass according to standards (degree of
protection DIN 10).
- warn people in the vicinity not to look directly at
the arc.
PREVENTION OF FIRE
Welding produces splashes of molten metal.
Take the following precautions to prevent fire:
- ensure that there is a fire extinguisher in the
welding area.
- remove all inflammable material from the
immediate vicinity of the welding area.
- cool the welded material or let it cool before
touching it or putting it in contact with combustible
material
- never use the machine for welding containers of
potentially inflammable material. These containers
must be completely cleaned before they are
welded.
- ventilate the potentially inflammable area before
using the machine.
- do not use the machine in atmospheres
containing high concentrations of powders,
inflammable gases or combustible vapours.
GENERAL
CHARACTERISTICS
This new series of welding machines with
electronic
regulation
controlled
by
a
microprocessor ,allows you to achieve excellent
welding quality, thanks to the advanced
technologies applied. The microprocessor circuit
controls and optimises the transfer of the arc
irrespective of the load variation and of the
impedance of the welding cables.
The controls on the front panel allow easy
programming of the welding sequences depending
on the operating requirements.
The inverter technology used has allowed the
following to be obtained:
- machines with extremely low weight and compact
dimensions;
- reduced energy consumption ;
- excellent dynamic response;
- very high power factor and yields;
- better welding characteristics;
- viewing of the data and of the set functions on the
display.
DELIVERY OF THE MATERIAL
The package contains:
- N. 1 welding machine
- N. 1 instruction manual
Check that all the material listed above is included
in the package. Inform your distributor if anything is
missing. Check that all the material listed above is
included in the package. Inform your distributor if
anything is missing. Check that the machine has
not been damaged in transport. If you see any sign
of damage, consult the COMPLAINTS section for
instructions. Before working with the machine, read
the SAFETY and USE section of this manual.
COMPLAINTS
Complaints for damage during transport: If your
equipment is damaged during transit you must
present a claim to the carrier.
Complaints for faulty goods: All the equipment
shipped by STEL is subjected to strict quality
control. However, if your equipment does not work
properly, consult your authorised dealer.
TECHNICAL DATA
A
B
C
D
A
B
The electronic components are enclosed in a
sturdy structure that is easy to carry and cooled
with forced air by fans with low noise production.
N.B. This welding machine
thawing pipes.
is not suitable for
C
D
10
6932300010
a) IDENTIFICATION
Name, address of the manufacturer
Type of welding machine
Identification with reference to serial number
Symbol of the type of welding machine
Reference to the construction standards
b) WELDING OUTPUT
Symbol of the work process
Symbol for welding machines suitable for working in
an environment with a high risk of electric shock.
Symbol of the welding current
Assigned no-load voltage (operating voltage)
Range of the welding current
Values of the intermittence cycle (in 10 minutes)
Values of the assigned welding current
Values of the conventional loaded voltage
c) POWER SUPPLY
Power supply symbol (number of phases and
frequency)
Assigned power supply voltage
Maximum power supply current
Maximum effective power supply current (identifies
the line fuse)
d) OTHER CHARACTERISTICS
Degree of protection .
INSTALLATION
INSTALLATION
WARNING: This Class A equipment is not
intended for use in residential locations where the
electrical power is provided by the public lowvoltage supply system. There may be potential
difficulties in ensuring electromagnetic compatibility
in those locations, due to conducted as well as
radiated disturbances. The MAX 403 equipment is
NOT in compliance with IEC 61000-3-12
In the event the equipment is connected to a
municiple low voltage network, it is the
responsibility of the operator or electrical
technician, that they may want to consult first with
the local Municipality prior to connecting the
equipment. The MAX 403S is in compliance with
IEC 61000-3-12. Therefore the equipment can be
connected to a municiple low voltage network
without issue. Correct installation is important for
the good operation and performance of the
machine, you must therefore proceed as follows:
- Position the machine in such a way that there is
no obstacle to the air circulation ensured by the
internal fan since the internal components require
suitable cooling.
- Ensure that the fan does not send deposits or
dust into the machine.
- Avoid impacts, rubbing, and – absolutely no
exposure to dripping water, excessive heat
sources, or any abnormal situations.
MAINS VOLTAGE
The machine operates from the following mains
supply voltage(s):
MAX 403S
190V-575V 3Phase
MAX 403
400V 3Phase +/- 10%
with a Fuse rating of
MAX 403S
40 A Fuse
MAX 403
32 A Fuse
CONNECTION
- Before making the electrical connections between
the welding machine and the line switch, ensure
that the switch is turned off .
- The distribution panel must comply with the
regulations in force in the country of use.
- The mains system must be of the industrial type.
- For longer connecting cables, increase the lead
section as required.
- When using long extension cables, the cable core
diameter size is relevant to the machine
requirements for achieving optimum performance.- The power input supply socket from the mains
voltage supply, must have a suitable switch
provided together with a 'slow-burning' type
fuse(s).
- In the event of damage to the power cable,
replacement or repair must be performed by a
qualified person at an approved service centre.
EARTHING
- To ensure user protection the welding machine
must absolutely be correctly connected to the earth
system
(INTERNATIONAL
SAFETY
REGULATIONS).
- It is indispensable to provide good earthing by
means of the yellow-green lead in the power cable,
in order to avoid discharges due to accidental
contacts with earthed objects .
- The chassis (which is conductive) is electrically
connected with the earth lead; if the equipment is
not suitably connected to earth it may cause
electric shocks which are dangerous for the user.
LIFTING
WARNING:
The machine weighs 35 kg / 77 lb (MAX 403).
The machine weighs 40 kg / 88 lb (MAX 403S)
Lifting by hand:
Lift the machine using the two handles provided.
11
6932300010
Lifting with hoist and strap
Lift the machine by using ONLY both handles as
shown on the picture.
Keep the machine as horizontal as possible
INSTRUCTION FOR
INSECURE POSITIONING
Failure to properly secure the machine can cause
personal injury.
If machine is in an insecure position do not attempt
to switch on.
Do not put the machine on an unlevelled surface
greater than 10°.
FRONT PANEL DESCRIPTION
SUB MENU
- HOT START
HOT START ADJUSTMENT
1) Switch on the welding machine.
2) Hold down the button “SELECT MODE” on the
front panel of the machine for about 2 seconds,
then release the button; the warning led of the
selected mode will blink and the display will show
HS. Now you can adjust the hot start from 0 to
50% of the selected welding current with encoder 6
(max 400A).
- V.R.D. (AVAILABLE ONLY IN MMA MODE)
V.R.D. MANAGEMENT
The initials V.R.D. stand for VOLTAGE
REDUCTION DEVICE, which is a system for
reducing the no-load voltage (OCV). When the
V.R.D. is installed in a welding machine it reduces
the maximum no-load voltage to a safety voltage
which is normally less than 18V.
- The V.R.D. is used as an additional aid for
operator safety.
- The procedures for safety at work must always be
carried out with attention.
ACTIVATE V.R.D.
1) Switch on the welding machine.
2) Hold down button 4 on the front panel of the
machine for about 4 seconds, then release the
button; the welding enable led 2 blinks (V.R.D.
FUNCTION ON) ( V out 18V).VRD mode remains
activated when switching the machine off and on
again.
1
2
3
4
5
6
7
8
9
10
11
12
Machine live led
Welding enabled
Over temperature led
Button Voltage View
Voltage Led
Encoder for regulating Arc Force /
Slope Down / Inductance
Encoder for regulating welding current
Button for Welding Mode Selection
Mig CV Mode Warning Led
Mig CC Mode Warning Led
Tig Lift Mode Warning Led
Electrode Mode Warning Led
DEACTIVATE V.R.D.
1) Switch on the welding machine.
2) Hold down button 4 on the front panel of the
machine for about 4 seconds, then release the
button; the welding enable led 2 remains lit with a
fixed light (V.R.D. FUNCTION deactivated). VRD
mode remains deactivated when switching the
machine off and on again.
- CC/CV (SUITCASE FEEDER)
With this function the MAX 403/403S is able to
connect and then operate together with any
suitcase feeder. Please select CV Mode on the
front panel.
12
6932300010
FAULTY
- PF0
DUTY CYCLE AND
EXCESSIVE TEMPERATURE
1) Under normal conditions the MAX 403S displays
PF0 at start up on the ‘A’ LED. The PFC system is
now recognizing the input voltage. This process
takes approximately 3/4 sec. from start up.
The Led indicator light 3 is ON, and the ‘A’ LED
displays HT(1,3,5,7)
2) In the event PF0 remains permantly on or is
flashing PF0, this is a result of the PFC system
being blocked..
Return for repair or have a qualified service
technician repair as per service manual.
1. This is indicating the unit has exceeded
the Duty Cycle.
- COn
The duty cycle is the percentage of use of the
welding machine in 10 minutes which the operator
must respect to avoid the power supply output
blocking due to exceeding working temperature. If
the machine goes into excessive temperature
protection mode:
1) The ‘A’ LED displays COn:
The communication between the power source and
the accessory being used is interrupted.
- If the ‘A’ LED continues to display COn return for
repair or have a qualified service technician repair
as per service manual.
.
2. It is necessary to wait about 10 minutes before
resuming welding.
- If in the ‘A’ LED continues to display Con, then
please check all connections to the power source
are securely connected and are not damaged.
Check tha all accessories to the work piece from
the power source, especially including earthing,
are secure and not damaged.
3. Check the data plate on the unit or on see
section TECHNICAL DATA in the Operating
Manual..
4. In the event the working condition are
conforming to the specification on the Technical
Data Plate, but still the display shows HT (1,3,5,7)
this is an indication that one of the PC Boards is
possibly faulty. Return for repair or have qualified
service technician repair as per service manual.
13
6932300010
DISPOSAL OF ELECTRICAL
AND ELECTRONIC
EQUIPMENT
Do not dispose of electrical
equipment together with normal
waste! In observance of European
Directive 2002/96/EC on Waste
Electrical and Electronic Equipment
and
its
implementation
in
accordance with national law,
electrical equipment that has reached the end of its
life must be collected separately and returned to an
environmentally compatible recycling facility. As the
owner of the equipment, you should get
information on approved collection systems from
our local representative. By applying this European
Directive you will improve the environment and
human health!
IN CASE OF MALFUNCTIONS, REQUEST
ASSISTANCE FROM QUALIFIED PERSONNEL.
14
6932300010
SICHERHEITSVORSCHRIFTEN
EIN ELEKTROSCHOCK KANN TÖDLICH SEIN
- Vor Arbeiten am Gerät, Netzstecker ziehen
- Verwenden Sie keine beschädigten Kabel und
Leitungen
- Berühren Sie keine unter Spannung stehenden
elektrischen Bauteile
- Stellen Sie sicher, dass alle Abdeckungen fest
geschlossen sind, bevor das Gerät an das
Stromnetz angeschlossen wird.
- Sorgen Sie für einen ausreichenden Selbstschutz
gegenüber dem Erd- bzw. Massepotential, durch
die Verwendung von isolierendem Schuhwerk und
Handschuhen.
- Halten Sie Handschuhe, Schuhwerk, Kleidung,
ihren Arbeitsplatz, sowie das Gerät samt
Ausrüstung, trocken und sauber.
UNTER
DRUCK
STEHENDE
BEHÄLTER
KÖNNEN BEIM SCHWEISSEN EXPLODIEREN
Wenn Sie mit einem Schweißgerät arbeiten:
- Schweißen Sie keine unter Druck stehenden
Behälter
- Schweißen Sie nicht in Umgebungen mit
explosiven Stäuben oder Dämpfen
DIE DURCH DEN LICHTBOGEN ERZEUGTE
STRAHLUNG
KANN
IHR
AUGENLICHT
SCHÄDIGEN
- Sorgen Sie für ausreichende Schutzkleidung für
Augen und Körper
- Für Kontaktlinsenträger ist es absolut
notwendig, sich mit geeigneten Linsen und
Schutzmasken zu schützen.
LÄRM KANN IHR GEHÖR SCHÄDIGEN
- Schützen Sie sich durch ausreichenden
Gehörschutz vor Gehörschäden
DÄMPFE
UND
GASE
KÖNNEN
IHRE
GESUNDHEIT SCHÄDIGEN
- Kopf von schädlichem Dämpfen und Gasen
fernhalten
- Sorgen Sie für eine ausreichende Belüftung des
Arbeitsbereichs
- Sollte die Belüftung nicht ausreichend sein,
benutzen Sie ein geeignetes Absauggerät,
welches von Unten absaugt.
VORSICHTSMASSNAHMEN UM EINEN
ELEKTROSCHOCK ZU VERHINDERN
Treffen Sie folgende Vorkehrungen, wenn Sie mit
einem Schweißgerät arbeiten:
- Halten Sie sich und Ihre Kleidung sauber.
- Berühren Sie keine feuchten oder nassen Teile,
wenn Sie mit dem Schweißgerät arbeiten.
- Halten Sie eine ausreichende Isolation gegen
einen Elektroschock aufrecht. Sollte der Anwender
in einer feuchten Umgebung arbeiten müssen, ist
für größte Vorsicht zu sorgen und geeignetes,
isolierendes Schuhwerk und Handschuhe zu
tragen.
- Überprüfen Sie das Netzkabel regelmäßig: Es
darf keine Beschädigungen an der Isolation
aufweisen. BLANKE KABEL SIND GEFÄHRLICH.
Benutzen Sie das Gerät nicht, wenn das Netzkabel
beschädigt ist; es muss sofort ausgetauscht
werden.
- Sollte es notwendig sein, das Gerät zu öffnen,
ziehen Sie zuerst den Netzstecker. Warten Sie 5
Minuten, damit sich die Kondensatoren entladen
können.
Die
Missachtung
dieser
Vorsichtsmaßnahme setzt den Anwender einem
hohen Risiko aus, einen Elektroschock zu erleiden.
- Arbeiten Sie nie mit dem Schweißgerät, wenn die
Schutzabdeckung geschlossen ist.
- Stellen Sie sicher, dass Erdung des
Stromversorgungskabels
ausreichend
leistungsfähig ist. Dieses Gerät wurde für den
Einsatz in Beruf und Industrie entwickelt. Für
andere Arten der Anwendung kontaktieren Sie bitte
den Hersteller. Werden elektromagnetische
Störungen festgestellt, liegt
es in der
Verantwortung des Gerätebetreibers das Problem
mit Hilfe des technischen Kundendiensts des
Herstellers zu lösen. Für Personen, die einen
Herzschrittmacher tragen, ist es verboten das
Gerät zu bedienen, bzw. sich im Bereich des
Geräts aufzuhalten.
WARNING
HITZE, FLÜSSIGE METALLSPRITZER UND
FUNKEN KÖNNEN FEUER VERURSACHEN
- Schweißen Sie nicht in der Nähe von
entflammbaren Materialien
- Tragen Sie keine entflammbaren Dinge mit sich,
wie Feuerzeuge oder Streichhölzer
- Der Lichtbogen kann Brände verursachen. Halten
Sie die Spitze der Elektrode von Ihrem Körper,
sowie von Personen in Ihrer Nähe, fern.
15
6932300010
VORSICHTSMASSNAHMEN UM
VERBRENNUNGEN ZU VERHINDERN
Maßnahmen, um Ihre Augen und Ihre Haut vor
Verbrennungen und ultravioletter Strahlung zu
schützen:
-Tragen Sie eine dunkle Schutzbrille. Tragen Sie
angemessene
Kleidung,
Handschuhe
und
Schuhwerk.
Benutzen
Sie
Kopfschutzhauben
mit
geschlossenen Seiten, sowie Linsen und
Schutzgläser gemäß Standard (Schutzstufe DIN
10).
- Weisen Sie Personen, die sich in unmittelbarer
Nähe aufhalten, darauf hin, nicht direkt in den
Lichtbogen zu schauen.
VORSICHTSMASSNAHMEN UM BRÄNDE ZU
VERHINDERN
Schweißen verursacht flüssige Metallspritzer.
Treffen Sie folgende Vorkehrungen, um einen
Brand zu vermeiden.
- Stellen Sie sicher, dass ein Feuerlöscher im
Schweißbereich bereit steht.
- Entfernen Sie alle entflammbaren Materialien aus
der direkten Umgebung des Schweißbereichs.
- Kühlen sie das geschweißte Material oder lassen
Sie es abkühlen, bevor Sie es mit brennbaren
Materialien in Kontakt bringen.
- Benutzen Sie nie das Gerät um Behälter zu
schweißen, welche möglicherweise brennbares
Material enthielten. Diese Behälter müssen vor
dem Schweißen komplett gereinigt werden.
- Durchlüften Sie den feuergefährdeten Bereich,
bevor Sie das Gerät benutzen.
- Verwenden Sie nicht das Gerät in Bereichen mit
hoher Konzentration an Stäuben, entflammbaren
Gasen und brennbaren Dämpfen.
ALLGEMEINE
EIGENSCHAFTEN
Diese neue Reihe von Schweißgeräten ist mit
einer elektronischen Stabilisierung ausgestattet,
welche von einem Mikroprozessor gesteuert wird.
Dank
dem
Einsatz
dieser
ausgereiften
Technologie, ist es möglich, ein ausgezeichnetes
Schweißergebnis
zu
erzielen.
Die
Mikroprozessorschaltung steuert und optimiert den
Transfer des Lichtbogens, ungeachtet der
Lastschwankung
und
des
Schweißkabelwiderstands.
Die Steuerung an der Frontplatte ermöglicht ein
einfaches Programmieren der Schweißfolge in
Abhängigkeit der Arbeitsanforderungen.
Die eingesetzte Inverter Technologie ermöglicht
folgende Punkte:
- Maschinen mit extrem geringem Gewicht und
kompakten Abmessungen;
- geringerer Energieverbrauch;
- ausgezeichnetes, dynamisches Ansprechen;
- sehr hoher Leistungsfaktor und Wirkungsgrad;
- bessere Schweißeigenschaften;
- Anzeigen der Daten und eingestellten Funktionen
im Display;
Die elektronischen Bauteile sind in eine solide
Konstruktion eingefügt, leicht zu transportieren und
werden geräuscharm durch den Lüfter gekühlt.
N.B. Das Schweißgerät ist nicht dazu geeignet,
Rohre aufzutauen.
LIEFERUMFANG
Das Paket enthält:
- Nr. 1 Schweißgerät
- Nr. 1 Betriebsanleitung
Überprüfen Sie, ob alle oben genannten Dinge im
Paket enthalten sind. Sollte etwas fehlen,
informieren Sie bitte Ihren Händler. Überprüfen Sie
das Gerät auf etwaige Transportschäden. Sollten
Sie Transportschäden feststellen, setzten Sie sich
bitte mit der Abteilung für REKLAMATIONEN in
Verbindung, um weiterführende Anweisungen zu
erhalten. Bevor Sie das Gerät in Betrieb nehmen,
lesen Sie bitte die SICHERHEITS- und
GEBRAUCHSHINWEISE
in
dieser
Betriebsanleitung.
REKLAMATION
Reklamation von Transportschäden: Im Falle
einer Beschädigung während des Transports
müssen Sie Ihren Anspruch gegenüber dem
Spediteur geltend machen.
Reklamation fehlerhafter Ware: Sämtliche
Geräte, welche von STEL versendet werden,
unterliegen einer strengen Qualitätskontrolle. Sollte
jedoch Ihr Gerät nicht einwandfrei funktionieren,
nehmen Sie bitte Kontakt zu Ihrem autorisierten
Händler auf.
ELEKTRISCHE MERKMALE
A
B
C
D
16
6932300010
A
B
C
D
a) IDENTIFIKATION
Name, Adresse des Herstellers
Schweißgerätetyp
Identifikation mit Verweis auf die Seriennummer
Symbol des Typs des Schweißgeräts
Verweis auf Bau Norm
b) SCHWEISSLEISTUNG
Symbol für den Arbeitsprozess
Symbol für Schweißgeräte, die für den Einsatz in
Umgebungen mit hohem Elektroschockrisiko,
geeignet sind.
Symbol für den Schweißstrombereich
Zugeteilte Leerlaufspannung (Betriebsspannung)
Schweißstrombereich
Wert des Unterbrechungszykluses (in 10 Minuten)
Wert des zugeteilten Schweißstrombereichs
Wert der genormten Lastspannung
c) STROMZUFÜHRUNG
Symbol der Stromzuführung (Anzahl der Phasen
und Frequenz)
Zugewiesene Netzspannung
Bemessungswert der maximalen Netzspannung
Bemessungswert der effektiven Netzspannung
(gibt die Netzabsicherung an)
d) WEITERE EIGENSCHAFTEN
Schutzart.
MONTAGE
INSTALLATION
Dieses Klasse A Gerät ist nicht zum Betrieb in
häuslicher Umgebung vorgesehen, in der der
Strom vom öffentlichen Niederspannungsnetz zur
Verfügung gestellt wird. Dort können mögliche
Schwierigkeiten auftreten, die elektromagnetische
Verträglichkeit auf Grund von leistungsgeführten
und gestrahlten Störgrößen zu gewährleisten. ie
MAX-403, Schweißgerät ist nicht im Einklang mit
IEC 61000-3-12.Wenn es zu einer Gemeinschaft
Niedervolt-System
verbunden,
ist
es die
Verantwortung des Benutzers oder der Installateur,
dass vielleicht ist es ratsam mit der Strom-NetzGemeinde vor dem Anschluss der Schweißgerat
zu konsultieren.
Die MAX 403S ist mit der IEC 61000-3-12
entsprechen und kann an eine Gemeinschaft und
private
Netzwerk-Niedervolt-System
angeschlossen werden. Die gute Bedienung der
Maschine wird durch fachgerechte Montage
gewährleistet. deshalb müssen Sie wie folgt
vorgehen:
- Stellen Sie das Gerät so auf, dass nichts die
Luftzirkulation, die durch den eingebauten Lüfter
gesichert wird, behindert. Die inneren Bauteile
benötigen eine ausreichende Kühlung.
- Stellen Sie sicher, dass der Lüfter keine
Ablagerungen oder Staub in das Gerät einsaugt.
- Vermeiden Sie Stöße und Scheuern und setzen
sie das Gerät niemals Spritzwasser, exzessiven
Hitzequellen oder anderen bnormalen Situationen
aus.
NETZSPANNUNG
Die Schweißgerate funktioniert von der folgenden
Netzspannung:
MAX 403S
190V-575V 3-Phasen
MAX 403
400V 3-Phasen +/-10 %
mit einer Netz Absicherung von
MAX 403S
40 A Fuse
MAX 403
32 A Fuse
ANSCHLUSS
- Bevor Sie den elektrischen Anschluss zwischen
dem Schweißgerät und dem Leitungsschalter
herstellen, stellen Sie sicher, dass der Schalter auf
Aus steht.
- Die Verteilertafel muss mit den Vorschriften im
Bestimmungsland
des
Gerätegebrauchs
übereinstimmen.
- Die Netzversorgung muss für die industriellen
Anforderungen geeignet sein.
Bei
der
Verwendung
von
langen
Verlängerungskabel,
ist
das
Kabel
Kerndurchmesser Größe relevant zu den SchweißMaschine für eine optimale Leistung- Die
Leistungsaufnahme
Steckdose
von
der
Netzspannung, muss ein Schalter mit 'langsam
brennende' Sicherung (en) zur Verfügung gestellt.
- Im Falle einer Beschädigung der Netzkabel,
Ersatz oder Reparatur kann nur von einer
qualifizierten Person in einer zugelassenen
Service-Center vorgenommen werden.
ERDUNG
- Um den Anwenderschutz sicher zu stellen, muss
das Gerät korrekt an die Erdungsanlage
angeschlossen werden.
(INTERNATIONALE SICHERHEITSVORSCHRIFTEN)
17
6932300010
- Um Entladungen bei versehentlichem Kontakt mit
geerdeten Objekten zu vermeiden, ist es
unentbehrlich für eine gute Erdung, unter
Verwendung der grün-gelben Leitung im Netzkabel
zu sorgen.
- Das Gehäuse (welches leitfähig ist), ist elektrisch
mit der Erdungsleitung verbunden; ist das Gerät
nicht entsprechend geerdet, kann dies zu einem,
für den Anwender sehr gefährlichen, Elektroschock
führen.
BESCHREIBUNG DER
FRONTBLENDE
ANHEBEN DES GERÄTS
WARNUNG:
Das Gerät wiegt MAX 403 35kg / 77lb.
Das Gerät wiegt MAX 403S 40 kg / 88 lb
Anheben von Hand:
Heben Sie das Gerät an, indem Sie beide Griffe
benutzen.
1
2
3
4
5
6
7
Anheben mit dem Flaschenzug und Gurten:
Das Gerät NUR anheben, indem Sie beide Griffe
benutzen, wie im Bild dargestellt.Halten sie das
Gerät so waagerecht wie möglich.
8
9
10
11
12
Led Anzeige Gerät steht unter Spannung
Led Anzeige Schweißen aktiv
Led Anzeige Übertemperatur
Knopf Spannungsanzeige
Led Anzeige Spannung
Encoder zur Regulierung der
Lichtbogenstärke /
Slope down / Induktivität
Encoder zur Regulierung des
Schweißstroms
Knopf zur Wahl des Schweißmodus
Led Anzeige Mig CV Modus
Led Anzeige Mig CC Modus
Led Anzeige Tig Lift Modus
Led Anzeige Elektroden Modus
UNTERMENÜ
- HOT START
WARNHINWEISE BEI
UNSICHERER
POSITIONIERUNG
Die nicht fachgerechte Sicherung des Geräts kann
Personen verletzen.
Wenn das Gerät unsicher aufgestellt ist, schalten
Sie das Gerät nicht ein. Stellen Sie das Gerät nicht
auf Untergründe mit mehr als 10° Neigungswinkel.
HOT START EINSTELLUNGEN
1) Schalten Sie das Gerät ein.
2) Halten Sie den Knopf "SELECT MODE" an der
Frontblende für etwa 2 Sekunden gedrückt, dann
lassen Sie den Knopf los. Die Led Anzeige des
gewählten Modus wird dann blinken und HS
anzeigen. Nun können Sie den hot start von 0 bis
50% des gewählten Schweißstroms mit Encoder 6
(max 400A) einstellen.
- V.R.D. (nur erhältlich im MMA Modus)
V.R.D. MANAGEMENT
Die Buchstaben V.R.D. stehen für VOLTAGE
REDUCTION DEVICE, welches ein System zur
Absenkung der Leerlaufspannung (OCV) ist.
Wenn V.R.D. im Schweißgerät installiert ist,
reduziert es die maximale Leerlaufspannung auf
eine Schutzspannung, die normalerweise weniger
als 18V beträgt.
- Das V.R.D. wird als zusätzliche Hilfe zur
Anwendersicherheit genutzt.
- Die Anweisungen zur Sicherheit am Arbeitsplatz
müssen immer mit großer Sorgfalt ausgeführt
werden.
18
6932300010
AKTIVIEREN DES V.R.D
1) Schalten Sie das Gerät ein.
2) Halten Sie den Knopf 4 an der Frontblende des
Geräts für etwa 4 Sekunden gedrückt, dann lassen
Sie ihn los; die Schweißen aktiv Led Anzeige 2
blinkt (V.R.D. FUNCTION ON out 18V).
Der VRD Modus bleibt aktiviert, auch wenn das
Gerät aus- und wieder angeschaltet wird.
DEAKTIVIEREN DES V.R.D.
1) Schalten Sie das Gerät ein.
2) Halten Sie den Knopf 4 an der Frontblende des
Geräts für etwa 4 Sekunden gedrückt,
dann lassen Sie ihn los; die Schweißen aktiv Led
Anzeige 2 leuchtet ständig (V.R.D. FUNCTION
deaktiviert).
Der VRD Modus bleibt deaktiviert, auch wenn das
Gerät aus- und wieder angeschaltet wird.
- COn
1) Die 'A' LED zeigt COn:
Die Kommunikation zwischen der Stromquelle und
das verwendete Zubehör wird unterbrochen.
- CC/CV (SUITCASEDrahtvorschubgerät)
Mit Funktion CC/CV, die MAX-403/403SStromquelle kann zusammenarbeiten mit jeder
Suitcase-Drahtvorschubgerate..Wählen Sie den
CV-Modus von der Frontbplatte für MIG
Schweißen.
- Wenn die 'A' LED weiterhin anzeigen Con..
Rückgabe der Maschine zur Reparatur, oder
Reparatur durch einen qualifizierten ServiceTechniker, Laut Betriebsanleitung
FEHLERHAFTE
- PF0
1) Unter normalen Bedingungen zeigt MAX 403S
PF0 in 'A' LED nach dem Einschalten.
Das
PFC-System
erkennt
nun
die
Eingangsspannung. Dieser Prozess benötigt ca.
3/4 sec. nach dem Einschalten
- Wenn in der 'A' LED weiterhin Con anzuzeigen
ist, dann überprüfen Sie alle Verbindungen an
die Stromquelle und dass diese sind fest
angeschlossen und sind nicht beschädigt.
Überprüfen Sie, ob alle Zubehör zum Werkstück
von
der
Stromquelle,
insbesondere
einschließlich Erdung, sind fest angeschlossen
und sind nicht beschädigt..
2) Wenn PF0 bleibt oder blinkt PF0, dies ist ein
Ergebnis des PFC-Systems blockiert werden.
Rückgabe der Maschine zur Reparatur, oder
Reparatur durch einen qualifizierten ServiceTechniker, Laut Betriebsanleitung
19
6932300010
der Maschine zur Reparatur, oder Reparatur durch
einen qualifizierten Service-Techniker,
Laut Betriebsanleitung
EINSCHALTDAUER UND
ÜBERTEMPERATUR
Leuchtet die Led-Anzeige 3 und die 'A' LED zeigt
HT(1,3,5,7)
1. Dies ist ein Hinweis das Gerat die
Einhaltsdauer überschritten hat
Die Einschaltdauer wird auf einem 10 MinutenCycle berechnet. Überschreiten der angegebenen
Einschaltdauer der Maschine geht auf TemperaturSchutz-Modus.
ENTSORGUNG VON
ELEKTRISCHEN
UND
ELEKTRONISCHEN
GERÄTEN
Entsorgen Sie keine elektrischen Geräte
zusammen
mit
normalem
Müll.
Gemäß
Europäischer Richtlinie 2002/96/EG über Elektround Elektronik- Altgeräte und Umsetzung in
nationales Recht, müssen verbrauchte Elektround Elektronikgeräte getrennt gesammelt und
einer
umweltgerechten
Wiederverwertung
zugeführt werden. Als Eigentümer des Geräts
sollten Sie bei
Ihrem
lokalen Händler,
Informationen über ein lokales, autorisiertes
Sammel- bzw. Entsorgungssystem einholen.
Indem Sie diese Europäische Richtlinie befolgen,
helfen Sie mit bei der Verbesserung der
Umweltbedingungen und der Gesundheit der
Menschen.
IM FALLE VON FEHLFUNKTIONEN, HOLEN SIE
SICH HILFE VON QUALIFIZIERTEM PERSONAL
2.Wartezeit beträgt etwa 10 Minuten bevor
weißen kann wieder beginnen
Sch
3.Überprüfen Sie das Typenschild auf dem Gerät
oder finden Sie die technischen Daten in der
Bedienungsanleitung.
.
4. Im Falle der Betriebszustand Zustand
entsprechen der Spezifikation auf die technischen
Daten-Platte, aber, immer noch auf dem Display
HT (1,3,5,7) dies ist ein Hinweis, dass einer der
PC-Karten möglicherweise fehlerhaft ist. Rückgabe
20
6932300010
WIRING DIAGRAM MAX 403
WIRING DIAGRAM MAX 403S
21
6932300010
EXPLODED VIEW MAX 403
EXPLODED VIEW MAX 403S
22
6932300010
SPARE PARTS LIST
N°
DESCRIPTION
MAX 403
N°
DESCRIPTION
MAX 403S
1
2
3
4
5
6
7
8
9
10
11
12
13
14
15
16
17
18
19
20
21
22
23
24
25
26
27
28
29
30
31
32
33
34
35
36
37
38
39
40
41
42
43
44
45
46
47
48
49
50
51
52
53
54
55
56
57
58
Knob
Grid
Front Label
Front Panel
Encoder
Remote Female Conn.
Socket
Socket
Front Fan
Lem probe
Foot
Insulation
Insulation
Output inductance
Base
Flyback PCB
Output filter PCB
Primary inverter PCB
Power switch
Awc connector (optional)
Power switch Knob
Fuse holder
Fuse
Input Power Cable
Cable relief
Rear Fan
Line Filter PCB
Power transformer
Bus inductance
Secondary power diode
Auxiliary transformer
Primary rectifier PCB
Programming connector
Front Panel PCB
Front Panel Frame
Cover
Handle
Driver PCB
Left Side Label
Right Side Label
Stel Side Label
66106200
6610930L
66111900
6205870K
61190200
64527000
64274000
64274000
61225300
65094000
63588000
66058200
1
2
3
4
5
6
7
8
9
10
11
12
13
14
15
16
17
18
19
20
21
22
23
24
25
26
27
28
29
30
31
32
33
34
35
36
37
38
39
40
41
42
43
44
45
46
47
48
49
50
51
52
53
54
55
56
57
58
59
60
61
62
63
64
65
Front Panel Frame
Knob
Grid
Front Label
Front Panel
Socket
Remote Female Conn.
Socket
Foot
Front Fan
Lem probe
Primary rectifier PCB
Insulation
Output inductance
Insulation
Flyback PCB
Output filter PCB
Electronic transformer PCB
Primary inverter PCB
Base
Driver PCB
Power switch
Power switch Knob
Cable relief
Input Power Cable
Line Filter+lem PCB
Rear Fan
Cork
Pfc driver PCB
Isolator
Pfc Logic control PCB
Pfc Power PCB
Stel Side Label
Pfc inductance PCB
Secondary power diode
Power transformer
Programming connector
Front Panel PCB
Encoder
Left Side Label
Right Side Label
Cover
Handle
6611570L
66106200
6610930L
66125300
6205870K
64274000
64527000
64274000
63588000
61225300
65094000
61315800
66058200
61307600
61282900
61168900
61323900
61274700
6205880K
61307300
64701000
66231000
66078500
64096000
61315900
64746000
66037800
61318800
66125400
61289600
61315600
66116200
613155/613298
65030200
61321600
65077500
61336600
61190200
66118200
66118100
620586CG
66103400
61307600
6205880K
61282900
61168900
61274700
64701000
64554000
66231000
64776000
64250000
64062000
66078500
64746000
61168800
61283100
61162300
65030200
64781000
61282800
65077500
61282700
6611570L
620586CG
66103400
61307300
66118200
66118100
66116200
23
6932300010
CONNECTIONS
FRONT CONNECTIONS
TYPE
MMA
CONNECTION
EARTH CLAMP
ELECTRODE
POSSIBLE REMOTE
PIN
A
B
C
DECSRIPTION
NEGATIVE
POSITIVE
PIN
C
TYPE
TIG
LIFT
CONNECTION
TIG TORCH
EARTH CLAMP
PIN
A
B
DECSRIPTION
NEGATIVE
POSITIVE
A
B
14 PIN CONNECTOR
14 PIN CONNECTOR
REMOTE CONTROL
GND
PIN
K
L
M
N
G
A
B
C
D
E
H
I
DECSRIPTION
+42Vac Output remote control
+42Vac Output remote control
0Vac Output remote control
0Vac Output remote control
Chassis common
Data Reception Serial Gate
Common Communication Serial Gate
Data Transmissions Serial Gate
Data Transmissions Serial Gate Speed Motor
Data Reception Serial Gate Speed Motor
Positive connection Welding Voltage
Negative connection Welding Voltage
24
6932300010
INFO
- ARC FORCE (ONLY IN MMA MODE):
Avoids overheating of electrodes between a shot of current which prevents the electrode from sticking to
piece that is being welded. The arc force is adjustable.
ARC-FORCE
10
9
8
7
Current
6
5
4
3
2
1
0
0
1
2
3
4
5
6
7
8
9
10
11
12
13
14
15
16
17
18
19
20
time
- HOT START (ONLY IN MMA MODE):
The Hot-start supplies a extra current upon starting which allows the electrode to be immediately removed
and promptly begin welding. The Hot-Start is adjustable.
HOT-START
10
9
8
7
extra energy
Current
6
5
4
3
2
1
0
0
1
2
3
4
5
6
7
8
9
10
11
12
13
14
15
16
17
18
19
20
time
IDEAL SETTING:
ELECTRODE
TYPE
DIAMETER
CURRENT
HOT START
RUTILE
6013
6013
2,5
3,25
80
115
10
10
ARC
FORCE
0
0
BASIC
7018
7018
7018
7018
2,5
3,25
4
5
90
125
160
200
10
10
15
20
15
10
10
20
CELLULOSIC
FLEETWELD 5P+
( Lincoln )
6010
6010
2,5
3,25
50
70
20
20
250
250
25
6932300010
Info : www.stelgroup.it
- tel. +39 0444 639525
26