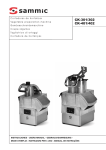
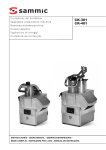
1
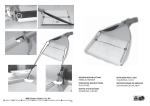
To do so:
- Release the lock (H), and open the hinged lid
(I).
- In the case of the CA-401 machine, while holding the disc without touching the blades, use
the Allen key supplied with the machine to
remove the bit (P) or mixer (R), unscrewing it
anti-clockwise.
- Remove the disc (A) by rotating it clockwise
and pulling it upwards carefully. Remove the
grid (B) and ejector (C).
- In the CA-301 machine the pusher plate (L)
and hinged lid (I) can be removed for cleaning.
To do so, remove the pins (N and O).
CLEANING CA-601
WARNING: Disconnect the machine from
the mains before handing any internal components.
Handle the discs (A) and grids (B) very carefully because they have very sharp blades.
Any components in contact with the food must
be cleaned immediately after use, using hot
water and a food-safe detergent. Then rinse
with plenty of hot water and disinfect using an
ethyl alcohol-soaked cloth (90 º).
To do so:
- Remove the hopper (U). Rotate the safety pin
and pull the hopper (U) upwards.
- Release the lock (H), pull the pin (N) to remove the hinged lid (I).
- Holding the disc (A) with your hand without
touching the blades, use the key (S) supplied
with the machine to remove the mixer (R),
unscrewing it anti-clockwise.
- Remove the disc (A) by rotating it clockwise
and pulling it upwards carefully.
- Remove the grid (B) and ejector (C).
GENERAL CLEANING
- NEVER power clean. Use a damp cloth and
mild detergent for cleaning. DO NOT use
abrasive detergents (nitric acid, neat
bleach, etc.) or stainless steel scourers or
scrubbers as they could cause rusting.
- Do not wash the parts, such as the discs (A),
grids (B), hinged lid (I) and pusher plate (L), in
a dishwasher.
WARNING: To remove food stuck in the
grids (B) you can knock them through
using an elongated potato or whole carrot
in the cutting direction. This avoids damaging the grid (B). Take care with the edge of
the grid (B). Never use hard objects to hit
the grid (B).
8 EN
Disc (A) and grid (B) functions.
Discs (A):
- Discs (A) FC-1 and FC-2 to cut chips or fine
slices measuring 1-2 mm.
- Discs (A) FC-3 to FC-25 to cut 3-25 mm slices
of potato, carrot, beetroot, cabbage, cucumber, courgette, onion, radish, etc.
- Discs (A) with curved blade for soft food, FCC2, FCC-3 and FCC-5 to cut slices of tomato,
orange, lemon, banana, apple, etc.
- Shredding discs (A) FR, 2-7 mm, to shred vegetables and grate cheese, bread, nuts,
almonds, etc.
- Discs FCE-2, FCE-4 and FCE-8 to cut potato
“matchsticks”, carrot, celery, beetroot strips,
etc.
- Discs (A) FR-1 and FR-8 to grate bread,
cheese, chocolate, etc.
Discs (A) and grids (B). Possible combinations:
- Discs (A) FC-6, FC-8, FC-10 combined with
grids (B), FFC-8 and FFC-10, give chip-style
potatoes.
- Discs (A) FC-3, FC-6, FC-8, FC-10 and FC-14
combined with grids (B) FMC-8 and FMC-10
make 3-14 mm cubed potatoes for omelettes,
vegetables and fruit for salads and Russian
salad, etc.
- Discs (A) FC-20 and FC-25 combined with
grids FMC-20 and FMC-25 give 20x20 and
25x25 cubes.
Bit (P) and Mixer (R). Only CA-401
- Bit (P): It is only used when working with cabbage
and similar vegetables. Whole pieces can be cut.
- Mixer (R): It must be used with any food
except cabbage and similar vegetables.
High and normal ejector (C). Only in the CA401.
- High ejector: For cutting large products such as
cabbage, cauliflower, celery and for grating products such as cheese, carrots...
- Normal ejector: All other cutting.
MAINTENANCE
IMPORTANT PRECAUTIONS
- Before undertaking any cleaning, inspection
or repair work on vegetable preparation
machines the machine must be unplugged
from the mains.
- NEVER insert your hand or any other utensil
through the outlets or hoppers (J and K) that
feed the machine, to avoid accidents or damages to the blades.
- Regularly check that the machine safety
devices are working. If you detect any anomaly, call the SAMMIC authorised technical
service.
- Regularly inspect the trailing axle seal to
ensure that this area is properly sealed. Each
time the trailing axle is released for maintenance it is recommendable to fit a new seal.
- Clean the machine after every use, as
described above.
- Only a SAMMIC authorised technical service
can replace the power cable if this is damaged.
- Machine noise level, while running, at a height
of 1.6 m and a distance of 1 m, less than 70
dB(A). Background noise: 32 dB(A).
BLADE SHARPENING
WARNING: Handle the discs (A) and grates
(B) very carefully because they have very
sharp blades.
The disc blades (A) can be removed easily for
sharpening. Always use soft stone to keep the
blade’s cutting angle intact.
TROUBLESHOOTING
The hinged lid (I) is closed and the pusher plate
(L) down but the machine does not start when
the “Start” button is pressed:
- The machine is connected and the “Machine
connected to mains” (1) warning light is on. No
power reaches the plate or the plate is broken.
- In the CA-301 and CA-401 if the “Safety”
warning light (2) flashes slowly with the pusher plate (L) down there is a problem with the
pusher plate (L) safety microswitch. This
warning could also be triggered in the CA-601
and header. In the 2-speed machines the flashing occurs in the “Speed 1” (5) or “Speed 2”
indicators (6).
- If the “Safety” warning light (2) flashes quickly
with the hinged lid (I) closed, there is a problem with the hinged lid (I) safety microswitch.
In the 2-speed machines the flashing occurs in
the “Speed 1” (5) or “Speed 2” indicators (6).
- If the “Machine connected to mains” (1) and
“Safety” (2) warning lights flash alternately, the
motor thermal protection device has tripped.
Wait for it to reset and investigate what the
problem could have been (overload, parts
seized up, problems with starter relay or
capacitors in single-phase models etc...). In
the 2-speed models the flashing occurs
between the pilot lights “Machine connected to
the mains” (1) and “Speed 1” (5) if the speed
selected was slow. Or, the pilot light “Machine
connected to the mains” (1) and “Speed 2” (6)
if the speed selected was fast.
- To check that the keypad works properly, if
you keep one of the keys pressed down the