1
Instruction Manual / Betriebsanleitung
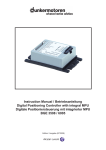
Digital Positioning Controller with integral MPU
Digitale Positioniersteuerung mit integrierter MPU
BGE 3515 / 6010
Edition / Ausgabe (05/2009)
1 Content
1 Inhalt
1 Content
1 Inhalt
Page
Seite
12.5 Inputs for Encoders
12.6 Auxiliary power supplies
25
25
12.5 Eingänge für Encoder
12.6 Hilfsspannungen
25
25
1 Content
2
1 Inhalt
2
2 About this document
5
2 Über dieses Dokument
5
13 Installation
26
13 Installation
26
3 Brief description
6
3 Kurzbeschreibung
6
14 Commissioning
28
14 Inbetriebnahme
28
15 Stand-alone operation, software Drive Assistant
29
15 Stand-alone Betrieb, Software Drive Assistant
29
3.1 BGE 3515 / 6010
3.2 Explanations of terms used
3.3 Proper use
6
7
9
3.1 BGE 3515 / 6010
3.2 Begriffserklärungen
3.3 Bestimmungsmäßige Verwendung
6
7
9
4 Safety instructions
10
4 Sicherheitshinweise
10
5 Types of operation
11
5 Betriebsarten
11
5.1 Operatin modes
11
5.1 Betriebsmodi
11
6 General performance data
13
6 Allgemeine Leistungsdaten
13
7 General features
14
7 Allgemeine Eigenschaften
14
8 Dimension
14
8 Abmessung
14
9 Terminal assignment
15
9 Anschlussbelegung
15
9.1 Power supply and motor connections
BLDC
9.2 Power supply and motor connections
PMDC
9.3 Hall Sensors/ Encoders 9.4 Analog and digital inputs and outputs; CAN
10 Connection schematic
9.1 Versorgungsspannung und Motoranschluss bürstenlose DC-Motoren
9.2 Versorgungsspannung und Motoranschluss bürstenbehaftete
DC-Motoren
9.3 Hallsensor/ Encoder 9.4 Analoge und Digitale Ein- und Ausgänge; CAN
16
16
17
18
16
16
17
18
19
10 Anschlussschema
19
21
21
21
22
11 Block diagram
23
11 Blockschaltbild
23
12 Technical Data
23
12 Technische Daten
23
10.1 Connection brushless motor
10.2 Connection brush-type motor
10.3 Connection Hall sensors
10.4 Connection encoder
10.5 Connection power supply motor
10.6 Connection power supply controller
10.7 Connection CAN interface
12.1 Digital inputs
12.2 Digital output
12.3 Analog inputs
12.4 Inputs for hall sensors
19
19
20
20
23
24
24
24
10.1 Anschluss bürstenloser Motor
10.2 Anschluss bürstenbehafteter Motor
10.3 Anschluss Hallsensoren
10.4 Anschluss Encoder
10.5 Anschluss Spannungsversorgung Motor
10.6 Anschluss Spannungsversorgung Regler
10.7 Anschluss CAN-Schnittstelle
12.1 Digitale Eingänge
12.2 Digitale Ausgänge
12.3 Analoge Eingänge
12.4 Eingänge für Hallsensoren
19
19
20
20
21
22
23
24
24
24
Instruction Manual/Betriebsanleitung BGE 3515 / 6010, Version: 1.1 en_de
© 2009 Alcatel-Lucent; Dunkermotoren; D-79848 Bonndorf; Germany
15.1 Hardware controller
29
15.2 StarterKit
29
15.3 Introduction30
15.4 System Requirements30
15.5 Installation of the Software Drive Assistant30
15.6 Description of the Main Window31
15.6.1 Description of the General Parameter Groups - Main Window31
15.6.2 Description of the Menu Bar - Main Window31
15.6.1 Beschreibung der allgemeinen Parametergruppen - Hauptfenster31
15.6.2 Beschreibung der Menüleiste - Hauptfenster31
15.7 Description of the Project Window32
15.7 Beschreibung des Projektfensters32
15.8 Description of the Operating Modes39
15.8 Beschreibung der Betriebsarten39
15.7.1 Description of the General Paramter Groups - Project Window33
15.7.2 Description of the file cards 35
15.7.3 Description of the Menu Bar - Project Window38
15.1 Hardware Regler
29
15.2 StarterKit
29
15.3 Einführung30
15.4 Systemvoraussetzungen30
15.5 Installation der Software Drive Assistant30
15.6 Beschreibung des Hauptfensters31
15.8.1 „Standard“ Positioning Mode39
15.8.2 „Complete Positioning Command“ Positioning Mode
45
15.8.3 „Stepper“ Positioning Mode
52
15.8.4 „Left-Right“ Positioning Mode
58
15.8.5 „Modulo“ Positioning Mode
64
15.8.6 „Positioning by Event“ Positioning Mode
72
15.8.7 „Velocity Standard“ Velocity Mode
77
15.8.8 „Velocity Multi“ Velocity Mode
80
15.8.9 „Current Standard“
Torque Mode
84
15.8.10 Drehmomentmodus
„Current Multi“
87
16 Slave in CANopen network, software „mPLC“
91
16.1 Hardware controller
16.2 Motion Starter Kit
16.3 Requirements
16.4 Introduction
16.5 Samples
16.6 Documentations
16.7 Control software mPLC
91
95
96
96
96
97
98
15.7.1 Beschreibung der allgemeinen Parametergruppen - Projektfenster33
15.7.2 Beschreibung der Karteikarten 35
15.7.3 Beschreibung der Menüleiste - Projektfenster38
15.8.1 Positioniermodus „Standard“39
15.8.2 Positioniermodus „Complete Positioning Command“ 45
15.8.3 Positioniermodus „Stepper“
52
15.8.4 Positioniermodus „Left-Right“
58
15.8.5 Positioniermodus „Modulo“
64
15.8.6 Positioniermodus
„Positioning by Event“
72
15.8.7 Geschwindigkeitsmodus „Velocity Standard“
77
15.8.8 Geschwindigkeitsmodus
„Velocity Multi“
80
15.8.9 Drehmomentmodus
„Current Standard“
84
15.8.10 „Current Multi“
Torque Mode
87
16 Slave in CANopen Netzwerk, Software „mPLC“
16.1 Hardware Regler
16.2 Motion Starter Kit
16.3 Vorraussetzungen
16.4 Einführung
16.5 Samples
16.6 Documentations
16.7 Steuerungssoftware mPLC
Instruction Manual/Betriebsanleitung BGE 3515 / 6010, Version: 1.1 en_de
© 2009 Alcatel-Lucent; Dunkermotoren; D-79848 Bonndorf; Germany
91
91
95
96
96
96
97
98
1 Content
1 Inhalt
2 About this document
2 Über dieses Dokument
16.7.1 Introduction
98
16.7.2 System requirements
98
16.7.3 Installation of the Software mPLC 98
16.7.4 Installation CAN-USB adapter
98
16.7.5 mPLC Control Center
99
16.7.6 Python Script
100
16.7.7 CAN monitor
103
16.7.8 Terminal
105
16.7.9 Configuration
106
16.8 Objects
108
98
98
98
98
99
100
103
105
106
16.8 Objekte
108
16.9 CAN master of other manufacturer 116
16.10 Communication settings
117
16.9 CAN-Master anderer Hersteller
16.10 Kommunikationseinstellungen
116
117
16.11 Test programs and other assistance
120
16.11 Testprogramme und weitere
Hilfsmittel
120
16.8.1 Object- / SDO-variable
16.8.2 Setup CAN objects
16.8.3 Setup CAN variables
16.8.4 Transmit / Receive
16.8.5 Recording
108
110
111
113
113
16.10.1 Standard variant – LMT services117
16.10.2 Manufacturer-specific variant
118
16.7.1 Einführung
16.7.2 Systemvoruassetzungen
16.7.3 Installation der Software mPLC
16.7.4 Installation CAN-USB Adapter
16.7.5 mPLC Control Center
16.7.6 Python Script
16.7.7 CAN-Monitor
16.7.8 Terminal
16.7.9 Konfiguration
17 Maintenance & Service
17.1 Maintenance, decommisioning and disposal
17.2 Service & support
17.3 Scope of supply and accessories
17.4 Download PDF-Data
121
121
121
122
122
16.8.1 Objekt- / SDO-Variable
16.8.2 Anlegen von CAN-Objekte
16.8.3 Anlegen von CAN-Variablen
16.8.4 Senden, Empfangen
16.8.5 Aufzeichnen
108
110
111
113
113
16.10.1 Standardvariante - LMT Dienste 117
16.10.2 Herstellerspezifische Variante 118
17 Wartung & Service
17.1 Wartung, Ausserbetriebsetzung und Entsorgung
17.2 Service & Support
17.3 Lieferumfang und Zubehör
17.4 Download PDF-Daten
2 About this document
2 Über dieses Dokument
These operating instructions introduce you to the Positioning Controller BGE 3515 / 6010 and inform you
about all necessary steps for installation and carry-ing
out initial functional tests. Further information about
field bus operation is provided by the parameterisation
list, and from the various publications of the CIA (Can
in Automation Organisation) available at:
www.can-cia.de.
Die vorliegende Betriebsanleitung stellt Ihnen die Positioniersteuerung BGE 3515 / 6010 vor und informiert
Sie über alle Schritte zur Installation und zur Durchführung erster Funktionstests. Weitere Informationen
zum Feldbusbetrieb erhalten Sie aus der Parametrierliste und diversen Unterlagen der CIA (Can in Automation Organisation): www.can-cia.de.
Warning!
Read these
instructions carefully
and follow them!
Warnings are there to protect you from danger, and to
help you to avoid damage to the device.
Warnhinweise sollen Sie vor Gefahr schützen oder
helfen Ihnen, eine Beschädigung des Gerätes zu vermeiden.
121
121
121
122
122
Warning!
Danger of
electrocution!
When you see this sign, always check that the unit is
disconnected from the electrical power supply, and
take precautions to prevent unintentional switching
on.
Warnhinweise!
Lesen und befolgen
Sie diese sorgfältig!
Instruction Manual/Betriebsanleitung BGE 3515 / 6010, Version: 1.1 en_de
© 2009 Alcatel-Lucent; Dunkermotoren; D-79848 Bonndorf; Germany
Achtung!
Lebensgefahr durch
Stromschlag!
Wenn Sie dieses Zeichen sehen, dann prüfen Sie
stets ob das Gerät spannungsfrei und gegen versehentliches Einschaflten gesichert ist.
Instruction Manual/Betriebsanleitung BGE 3515 / 6010, Version: 1.1 en_de
© 2009 Alcatel-Lucent; Dunkermotoren; D-79848 Bonndorf; Germany
3 Brief description
3 Kurzbeschreibung
3 Brief description
3 Kurzbeschreibung
3 Brief description
3 Kurzbeschreibung
3.1 BGE 3515 / 6010
3.1 BGE 3515 / 6010
The electronic controllers BGE 3515 / 6010 are 4-quadrant positioning controllers with integral output stage
and an interface for stand-alone operation controlled
by digital / analog inputs / outputs or for operation as
Slave in CANopen networks (CANopen Drives Profile
DSP 402, Protocol DS 301).
Bei der Steuerungselektronik BGE 3515 / 6010 handelt
es sich um eine 4-Quadranten-Positioniersteuerung
mit integrierter Endstufe und Schnittstellen für den
Stand-alone Betrieb gesteuert über digitale oder
analoge Ein- oder Ausgänge oder für den Betrieb als
Slave in CANopen Netzwerken (CANopen Drives Profil
DSP 402, Protokoll DS 301).
These electronic controllers are suitable for use with
brushless or conventional DC motors (e.g. our BG and
GR/G ranges). They incorporate protection against
over-voltage, low voltage and excessive temperature,
and have a status indicator which shows „Ready“,
„Status“ or „Error“. The most important parameters
can be changed „on the fly“ via the CAN interface. Die Steuerungselektronik ist zur Ansteurung bürstenloser oder bürstenbehafteter DC-Motoren (z.B. unsere
Baureihen BG und GR/G) geeignet. Sie verfügt über
Überspannungs-, Unterspannungs- und Übertemperaturabschaltung sowie eine Statusanzeige „Ready“,
„Status“ und „Error“. Die wesentlichen Parameter können über die Schnittstelle auch „in fly“ verändert werden.
Information about the rotor position can be supplied
to the positioning controller either by the voltage or by
an encoder in the case of commutator motors, or, for
brushless motors, by Hall sensors or an incremental
encoder.
Informationen zur Motorlage können der Positioniersteuerung bei bürstenbehafteten Motoren über die
Spannung oder per Encoder zugeführt werden, bei
bürstenlosen Motoren per Hallsensoren oder per Inkrementalgeber (Encoder).
Instruction Manual/Betriebsanleitung BGE 3515 / 6010, Version: 1.1 en_de
© 2009 Alcatel-Lucent; Dunkermotoren; D-79848 Bonndorf; Germany
3.2 Explanations of terms used
3.2 Begriffserklärungen
Baud rate
Speed of transmission or
communication
Baud rate
Übertragungs-/ Kommunikationsgeschwindigkeit
Bridge rectifier
Component for the transformation from AC voltage to DC
voltage
Brückengleichrichter
Bauteil zur Umwandlung von
Wechselspannung in Gleichspannung
Bus
A communication network
in which all nodes can be
reached via passive links, and
communication is possible in
both directions
Bus
Kommunikationsnetzwerk bei
dem alle Knoten über passive
Links erreicht werden können
und Kommunikation in beide
Richtungen möglich ist
CAN master
“Command centre” of a bus
CAN Master
“Kommandozentrale” im Bus
CAN adapter
Gateway for the conversion
of TCP/IP to CANopen
CAN-Adapter
Gateway zur Umsetzung von
TCP/IP in CANopen
CAN monitor
Graphic interface for the support of commissioning the
drive
CAN-Monitor
Graphische Oberfläche zur Unterstützung der Inbetriebnahme
des Antriebs
Drive Assistant
Graphic interface for commissioning and parameterisation
Drive Assistant
Grafische Oberfläche zur Inbetriebnahme und Parametrierung
CANopen
A group of profiles for networks in the following fields
of application: industrial automation, medical equipment,
building automation, railway
vehicles, ships, trucks, …
CANopen
Eine Gruppe von Profilen für
Netzwerke in folgenden Anwendungen: IndustrielleAutomation,
Medizintechnik, Gehäuseautomation, Schienenfahrzeuge,
Seefahrt, Trucks, …
Default settings
Preset values
Defaultwerte
Voreingestellte Werte
DSP 402
CANopen device profile for
drives and controllers
DSP 402
CANopen Geräteprofil Antriebe und Regler
Smoothing capacitor
Component to smooth the
fluctuation voltage
Glättungskondensator
Bauteil zur Glättung von
Spannungsschwankungen
Hall sensors
Sensors for determining the
position of a rotor
Hallsensoren
Sensor zur Positionsbestimmung des Rotors
Homing
Reference procedure for the
initial regulation of the drive
position in the system
Homing
Reverenzierverfahren zur initialen Bestimmung der Position des Antriebs in einem
System
Impulse flanks
Signals given form the encoder in the drive
Impulsflanken
Signale erzeugt von dem im
Antrieb integrierten Geber
In fly
Programming- / Parametrization possibility in attached
condition
In fly
Programmier- / Parametriermöglichkeit im eingebauten
Zustand
Index impulse
Reference mark of the integrated encoder panel
Indeximpuls
Referenzmarke der
grierten Geberscheibe
Instruction Manual/Betriebsanleitung BGE 3515 / 6010, Version: 1.1 en_de
© 2009 Alcatel-Lucent; Dunkermotoren; D-79848 Bonndorf; Germany
inte-
3 Brief description
3 Kurzbeschreibung
3 Brief description
3 Kurzbeschreibung
Digitaler Lagegeber. Eine interne Logik erzeugt aus dem
Signal von Fotodioden zwei
um 90° verschobene Rechtecksignale.
Incremental
encoder
Digital position indicator. An internal logic processes a signal
from photodiodes to produce
two square-wave signals with
a phase difference of 90°.
Inkrementalgeber
Commutation
The motor voltage is distributed in blocks by an electronic
controller
Kommutierung
Die Motorspannung wird
durch eine Elektronik blockweise weitergeschaltet
Motion controller
Motor control
Motion controller
Motorsteuerung
mPLC
Interface for commissioning
and for controlling CANopen
slaves
mPLC
Oberfläche zur Inbetriebnahme und zur Steuerung von
CANopen Slaves
Node ID
Device number/address –
must be assigned to every
device in a bus system
Node-ID
Gerätenummer/ -adresse, die
jedem Gerät in einem Bussystem zugeordnet werden
muss
Phyton script
Programming language used
in the Dunkermotoren Motion
Starter Kit software
Phyton Skript
Programmiersprache
der
Dunkermotoren Motion Starter Kit Software
Position mode
Regulation of position
Position Mode
Lageregelung
Ramps
Settings to accelerate and
brake the drive
Rampen
Einstellungen zum Beschleunigen und Bremsen des Antriebs
SVEL Mode
Fast speed regulation as a
subordinate speed controller
for a higher-level positioning
system
(e.g. a CNC-control system).
SVEL Mode
Schnelle Drehzahlregelung
als untergelagerter Drehzahlregler für übergeordnete Positioniersysteme
(z.B. CNC-Steuerungen).
Terminator
Terminal resistance, which is
to be used after the last participant in the communication
network
Terminator
Abschlußwiderstand,
der
nach dem letzten Teilnehmer
innerhalb des Kommunikationsnetzwerks zu verwenden
ist
Torque mode
Torque regulation, also referred
to as “Current Mode”
Torque Mode
Auch “Current Mode”, Drehmomentregelung
Trajectory
Sequence of motions
Trajektorie
Bewegungsablauf
T-connector
Component for the branching
in the communication network
T-Stück
Bauteil zur Verzweigung des
Kommunikationsnetzwerks
Velocity mode
Speed regulation
Velocity Mode
Drehzahlregelung
Instruction Manual/Betriebsanleitung BGE 3515 / 6010, Version: 1.1 en_de
© 2009 Alcatel-Lucent; Dunkermotoren; D-79848 Bonndorf; Germany
3.3 Proper use
3.3 Bestimmungsmäßige Verwendung
- The positioning controller is a vendor part and
may be used in the configuration described in
machines and plant (industrial sector).
- The positioning controller must be securely mounted and must only be used with the cables and
accessories specified by Dunkermotoren.
- The positioning controller may only be put into
service after the complete system has been installed
in conformity with EMC requirements.
- Die Positioniersteuerung ist ein Zulieferteil und darf in der beschriebenen Konfiguration in
Maschinen und Anlagen eingesetzt werden
(industrieller Bereich).
- Die Positioniersteuerung muss fest montiert werden und darf nur mit den von Dunkermotoren
spezifizierten Kabeln und Zubehörteilen eingesetzt werden.
- Die Positioniersteuerung darf erst nach
EMV-gerechter Montage des Gesamtsystems in Betrieb genommen werden.
Instruction Manual/Betriebsanleitung BGE 3515 / 6010, Version: 1.1 en_de
© 2009 Alcatel-Lucent; Dunkermotoren; D-79848 Bonndorf; Germany
4 Safety instructions
4 Sicherheitshinweise
5 Types of operation
5 Betriebsarten
4 Safety instructions
4 Sicherheitshinweise
Warning!
Achtung!
Before commissioning,
the following safety instructions must, without
fail, be read, understood
and observed! Failure
to follow them can result
in danger to persons or
damage to the machine.
To ensure trouble-free operation, appropriate methods
of transport and conditions of storage must be employed.
Please store the module so that it is protected from dust,
dirt, and moisture. Take care that storage conditions are
within the specified limits for storage temperature and
humidity. Please transport the module under storage
conditions with additional protection against shocks
and jolts.
Vor der Inbetriebnahme sind unbedingt die
nachfolgen Sicherheitshinweise zu lesen
und zu beachten! Eine
Nichtbeachtung kann zu
Gefahren bei Personen
oder Beschädigungen
an der Maschine führen!
Der störungsfreie Betrieb setzt entsprechenden Transport und Lagerung nach den entsprechenden Vorgaben voraus: Lagern Sie bitte das Modul geschützt vor
Staub, Schmutz und Feuchtigkeit. Achten Sie darauf,
dass die Lagerungsbedingungen nicht außerhalb der
Lagerungstemperatur bzw. Luftfeuchtigkeit liegt. Transportieren Sie die Module bitte unter Lagerungsbedingungen, zusätzlich noch stoßgeschützt.
Follow the instructions for installation and adjustment
precisely. Installation and dismounting must only
be carried out with the unit disconnected from the
electrical power supply. The module must only be
installed and adjusted by qualified persons in accordance with the relevant standards. Qualified persons
are those who:
• on the basis of their experience, can recognise and avoid potential dangers;
• are familiar with the accident-prevention regulations for the equipment employed;
and
• are able to connect circuits and install equipment in accordance with the standards and regulations.
Befolgen Sie die Anleitung für den Aufbau und die Einrichtung genau. Die Montage/Demontage darf nur im
spannungslosen Zustand erfolgen. Die Module dürfen nur von qualifiziertem Personal nach den entsprechenden Normen eingebaut und eingerichtet werden.
Als qualifiziert gilt eine Person dann,
• wenn sie aufgrund ihrer Erfahrung mögliche
Gefahren erkennen und vermeiden kann,
• wenn ihr die Unfallverhütungsvorschriften für die ein
gesetzten Geräte bekannt sind
und
• wenn sie gemäß den Normen Stromkreise und Ge
räte in Betrieb setzen und installieren darf.
Please observe any regional standards and regulations
that apply in the area where the components are used.
Please also observe the safety instructions that apply
to the equipment or machinery that is to be controlled.
So as to be able to avert hazards, make sure that there
is an EMERGENCY-STOP switch in immediate reach
and with unrestricted access.
Bitte beachten Sie die regionalen Normen im Einsatzgebiet der Komponenten. Beachten Sie bitte auch
die Sicherheitshinweise der zu steuernden Geräte
und Maschinen. Um Gefahren abwenden zu können,
vergewissern Sie sich, dass ein funktionstüchtiger
NOTAUS-Schalter in direkter Reichweite mit unbehindertem Zugang liegt.
10
Instruction Manual/Betriebsanleitung BGE 3515 / 6010, Version: 1.1 en_de
© 2009 Alcatel-Lucent; Dunkermotoren; D-79848 Bonndorf; Germany
5 Types of operation
5 Betriebsarten
With the controller BGE 3515 / 6010, 2 different types
of operation can be operated.
Mit der Steuerung BGE 3515 / 6010 können 2 verschiedene Betriebsarten in Betrieb genommen werden.
The stand-alone operation offers the possibility to
parameterize the motors over the external controller
via the software „Drive Assistant“, which is contained
in the „StarterKit“ (for details, see „Commissioning“).
Der Stand-alone Betrieb ermöglicht das parametrieren von Motoren über den externen Regler via der
Software „Drive Assistant“, die im „StarterKit“ enthalten ist (näheres dazu, siehe „Inbetriebnahme“).
The slave in CANopen network offers the
possibility to control the motors over the external
controller via the software „mPLC“, which is contained
in the „Motion Starter Kit“ (for details, see „Commissioning“).
Der Slave in CANopen Netzwerk ermöglicht das ansteuern von Motoren über den externen Regler via der
Software „mPLC“, die im „Motion Starter Kit“ enthalten
ist (näheres dazu, siehe „Inbetriebnahme“).
5.1 Operatin modes
5.1 Betriebsmodi
Both types of operation provides different operation
modes to configure the motor exactly:
Beide Betriebsarten unterstützen verschiedene Metriebsmodi, mit denen der Motor genau konfiguriert
werden kann:
SVEL mode
SVEL Mode
Fast speed regulation as a subordinate speed controller for a higher-level positioning system (e.g. a CNCcontrol system).
Schnelle Drehzahlregelung als untergelagerter Drehzahlregler für übergeordnete Positioniersysteme (z.B.
CNC-Steuerungen).
Positioning mode using Hall sensors
Position Mode per Hallsensoren
Three Hall sensors spaced at 120° (included in all BG
drives) provide information about rotation of the motor.
When very precise positioning is required, an encoder
with higher resolution should be employed.
Drei um 120° versetzte Hallsensoren (Bestandteil aller
BG-Antriebe) geben Aufschluss über die Weiterbewegung des Motors. Bei sehr hohen Anforderungen an
die Positioniergenauigkeit sollte ein Encoder mit hoher
Auflösung verwendet werden.
Positioning mode using an encoder
Position Mode per Encoder
By selecting a drive with an encoder with higher resolution, a control circuit can be set up which permits very
precise positioning.
Durch den Einsatz eines Antriebs mit Encoder mit einer hohen Auflösung wird ein Regelkreis aufgebaut der
eine exakte Positionierung ermöglicht.
Torque mode
Torque Mode
The current draw of the motor (which is proportional to
the torque) is monitored and adjusted according to the
setting.
Die Stromaufnahme des Motors (entspricht dem Drehmoment) wird überwacht und entsprechend der Vorgabe eingestellt.
Instruction Manual/Betriebsanleitung BGE 3515 / 6010, Version: 1.1 en_de
© 2009 Alcatel-Lucent; Dunkermotoren; D-79848 Bonndorf; Germany
11
5 Types of operation
5 Betriebsarten
6 General performance data
6 Allgemeine Leistungsdaten
Velocity mode using Hall sensors
Velocity Mode per Hallsensoren
When regulating using Hall sensors (included in all BG
drives), rotation will be irregular at low speeds. This
control system is used mainly in combination with motors with gear reducers. It is important that the speed
can be set in a closed, digital control loop, and that the
temperature remains stable over time.
Bei Regelung über Hallsensoren (Bestandteil aller
BG-Antriebe) ist mit unsanftem Rundlauf bei kleinen
Drehzahlen zu rechnen. Dieses Regelungssystem wird
vor allem bei Einsatz von Getriebemotoren verwendet.
Wichtig ist, dass die Geschwindigkeitsregelung im geschlossenen digitalen Regelungskreislauf eingestellt
werden kann und über die Zeit und die Temperatur stabil ist.
Velocity mode using an encoder
Velocity Mode per Encoder
By selecting a drive with an encoder with higher resolution, a control circuit can be set up which permits
smooth rotation at low speeds. It is important that the
speed can be set in a closed, digital control loop, and
that the temperature remains stable over time.
Durch den Einsatz eines Antriebs mit Encoder mit einer hohen Auflösung wird ein Regelkreis aufgebaut der
sanften Rundlauf bei niedrigen Geschwindigkeiten erlaubt. Wichtig ist, dass die Geschwindigkeitsregelung
im geschlossenen digitalen Regelungskreislauf eingestellt werden kann und über die Zeit und die Temperatur stabil ist.
Voltage regulation
Spannungsregelung
(Only for commutator motors)
(nur bürstenbehaftete Motoren)
The actual motor voltage (measured at the appropriate
output terminals of the controller) is compared with the
required voltage and regulated accordingly. The motor
voltage (speed of rotation) is thus independent of variations in the supply voltage.
Die wirkliche Motorspannung (gemessen an den entsprechenden Ausgangsklemmen des Controllers) wird
mit der erforderlichen verglichen und entsprechend
nachgeregelt. Dadurch ist die Motorspannung (Drehzahl) unabhängig von Schwankungen der Versorgungsspannung
IxR-compensation
IxR-Kompensation
A motor consists, in principle, of a resistance and a coil.
When the motor has to produce torque the appropriate current flows in it. The resistance causes a voltage
drop, which increases as the current rises. A lower voltage supply to the motor means that the speed is lower. With IxR-compensation, to make up for this drop in
speed and achieve the specified speed, the voltage at
the output terminals to the motor is increased by the
amount of the voltage drop.
Ein Motor besteht aus einem Widerstand und einer
Spule. Wird am Motor ein Drehmoment abgenommen,
fliesst ein entsprechender Strom durch den Motor.
Über den Widerstand entsteht ein Spannungsabfall,
der mit steigendem Stromfluss größer wird. Eine geringere Spannung am Motor bedeutet eine geringere
Drehzahl. Um diesen Drehzahlabfall zu kompensieren
und die vorgegebene Drehzahl zu erreichen, wird die
Spannung bei einer IxR-Kompensation an der ausgehenden Motorklemme entsprechend dem Spannungsverlust erhöht.
(Only for commutator motors)
(nur bürstenbehaftete Motoren)
6 General performance data
Description
BGE 3515 / 6010
Performance data
Supply voltage,
electronics Ue
Supply voltage,
power Up
Current draw (no load
at all outputs)
10 ... 30 V DC
10 ... 30 V
DC
10 ... 60 V
DC
typ. 40 mA @ 24 V
Maximum output
current
Permissible continuous
output current
Instruction Manual/Betriebsanleitung BGE 3515 / 6010, Version: 1.1 en_de
© 2009 Alcatel-Lucent; Dunkermotoren; D-79848 Bonndorf; Germany
Beschreibung
BGE 3515 / 6010
Leistungsdaten
14 A
Versorgungsspannung
Elektronik Ue
Versorgungsspannung
Leistung Up
Stromaufnahme (alle
Ausgänge unbelastet)
10 ... 30 V DC
10 ... 30 V
DC
9A
Protective devices
zulässiger Dauerausgangsstrom
10 ... 60 V
DC
typ. 40 mA @ 24 V
Maximaler
Ausgangsstrom
15 A
15 A
14 A
9A
Schutzeinrichtungen
Over-voltage
cut-off
yes
Überspannungsabschaltung
ja
Low-voltage
cut-off
yes
Unterspannungsabschaltung
ja
Over-temperature
cut-off
yes
Übertemperaturabschaltung
ja
Inputs & outputs
Ein- & Ausgänge
Digital inputs
5
Digitale Eingänge
5
Digital outputs
1
Digitale Ausgänge
1
Analog inputs
1 (+/- 10 V)
Analoge Eingänge
1 (+/- 10 V)
CAN interface
Baud rate
Protocol
Device profile
CAN-Schnittstelle
Up to 1 Mbit/s
Baudrate
bis 1 Mbit/s
DS301 V3.0
Protokoll
DS301 V3.0
DSP402 V2.0
Ambient conditions
12
6 Allgemeine Leistungsdaten
Geräteprofil
DSP402 V2.0
Umgebungsbedingungen
Temperature
0 ... +70 °C
Temperatur
0 ... +70 °C
Humidity
(non-condensing)
20 ... 80 %
Feuchtigkeit
(nicht kondensierend)
20 ... 80 %
Instruction Manual/Betriebsanleitung BGE 3515 / 6010, Version: 1.1 en_de
© 2009 Alcatel-Lucent; Dunkermotoren; D-79848 Bonndorf; Germany
13
7 General features
7 Allgemeine Eigenschaften
9 Terminal assignment
9 Anschlussbelegung
7 General features
7 Allgemeine Eigenschaften
Description
Data
Beschreibung
Wert
Degree of protection to
DIN 40050 / IEC 144
IP20
Schutzart nach
DIN 40050 / IEC 144
IP20
CAN – CPU electrically
connected
Yes
CAN – CPU elektrisch
verbunden
Ja
CPU - GND and I/O - GND
electrically connected
Yes
CPU - GND und I/O - GND
elektrisch verbunden
Ja
Mounting
Fixing clips
Befestigung
Bohrlöcher
Display
Anzeige
Ready LED
Green
Ready-LED
Grün
Status LED
Yellow
Status-LED
Gelb
Error LED
Red
Error-LED
Rot
Cable cross-section of push-in terminals
Kabelquerschnitte der Steckkontakte
Motor plug
Up to 1.5 mm
Motorstecker
bis 1,5 mm2
Dual plug
Up to 1 mm2
Doppelstecker
bis 1 mm2
8 Dimension
14
2
9 Terminal assignment
9 Anschlussbelegung
Warning!
Terminal X3.1 (electronic supply) is internal not connected
with terminal X1.2 (power
supply) .
Terminal X2.2 (Earth for power supply) is internal connected with terminal X2.14
(Earth for Hall/encoder).
Warning!
By assembling the cables
consider the skinning length
of the particular connectors.
At the double-row connectors
(X2,X3) it averages 7 mm at
the single-row connector (X1)
it average 10 mm.
Achtung!
Klemme X3.1 (Spannungsversorgung Elektronik) ist
intern nicht mit Klemme X1.2
(Spannungsversorgung Leistung) verbunden.
Klemme X1.3 (Masse Leistung) ist intern mit Klemme
X2.14 (Masse für Hall/Encoder) verbunden.
Achtung!
Beachten Sie bei der Konfektionierung aller Leitungen
auf die Abisolierlänge für die
jeweiligen Stecker.
Bei den doppelreihigen Steckern (X2,X3) beträgt sie 7
mm, bei dem einreihigen Stecker (X1) beträgt sie 10 mm.
8 Abmessung
Instruction Manual/Betriebsanleitung BGE 3515 / 6010, Version: 1.1 en_de
© 2009 Alcatel-Lucent; Dunkermotoren; D-79848 Bonndorf; Germany
Instruction Manual/Betriebsanleitung BGE 3515 / 6010, Version: 1.1 en_de
© 2009 Alcatel-Lucent; Dunkermotoren; D-79848 Bonndorf; Germany
15
9 Terminal assignment
9 Anschlussbelegung
9 Terminal assignment
9 Anschlussbelegung
9.1 Power supply and motor
connections BLDC
9.1 Designation
Description
X1.1
PE
Protective
earth
-
X1.2
+Up
Supply
voltage, power
Input
X1.3
GND
Earth for
power supply
X1.4
Ma
X1.5
X1.6
Terminal
Signal
direction
9.3 Hall Sensors/ Encoders
9.3 Hallsensor/ Encoder
Terminal
Designation
Description
Signal
direction
Klemme
Bezeichnung
Beschreibung
Signalrichtung
X2.1
H1
Hall sensor signal 1
Input
X2.1
H1
Hallsensorsignal 1
Eingang
X2.2
H2
Hall sensor signal 2
Input
X2.2
H2
Hallsensorsignal 2
Eingang
X2.3
H3
Hall sensor signal 3
Input
X2.3
H3
Hallsensorsignal 3
Eingang
Klemme
Bezeichnung
Beschreibung
Signalrichtung
X1.1
PE
Schutzerde
-
X1.2
+Up
Spannungsversorgung
Leistung
Eingang
X2.4
A
Incr. encoder track A
Input
X2.4
A
Inc. Encoder Spur A
Eingang
-
X1.3
GND
Masse
Leistung
-
X2.5
B
Incr. encoder track B
Input
X2.5
B
Inc. Encoder Spur B
Eingang
Motor
connection A
Output
X1.4
Ma
Motoranschluss A
Ausgang
X2.6
INX
Incr. encoder index
Input
X2.6
INX
Inc. Encoder Index
Eingang
Mb
Motor
connection B
Output
X1.5
Mb
Motoranschluss B
Ausgang
X2.7
+U5V
Output
X2.7
+U5V
Mc
Output
X1.6
Mc
Motoranschluss C
Spannungsversorgung für
Hall/Enc + 5V
Ausgang
Motor
connection C
Supply voltage
for
Hall/encoder + 5V
Ausgang
X2.8
/H1
Negated Hallsensor signal 1
Input
X2.8
/H1
Negiertes
Hallsensorsignal 1
Eingang
X2.9
/H2
Negated Hallsensor signal 2
Input
X2.9
/H2
Negiertes
Hallsensorsignal 2
Eingang
X2.10
/H3
Negated Hallsensor signal 3
Input
X2.10
/H3
Negiertes
Hallsensorsignal 3
Eingang
X2.11
/A
Incr. encoder negated track A
Input
X2.11
/A
Inc. Encoder Negierte Spur A
Eingang
X2.12
/B
Incr. encoder negated track B
Input
X2.12
/B
Inc. Encoder Negierte Spur B
Eingang
X2.13
/INX
Incr. encoder negated index
Input
X2.13
/INX
Inc. Encoder Negierter Index
Eingang
X2.14
GND
Earth for
Hall/encoder
-
X2.14
GND
Masse für
Hall/Encoder
-
9.2 Power supply and motor
connections PMDC
9.2 Terminal
Designation
Description
Signal
direction
X1.1
PE
Protective
earth
-
X1.2
+Up
Supply
voltage, power
Input
X1.3
GND
Earth for
power supply
X1.4
Ma
X1.5
X1.6
16
Versorgungsspannung und
Motoranschluss bürstenlose
DC-Motoren
Versorgungsspannung und
Motoranschluss bürstenbehaftete
DC-Motoren
Klemme
Bezeichnung
Beschreibung
Signalrichtung
X1.1
PE
Schutzerde
-
X1.2
+Up
Spannungsversorgung
Leistung
Eingang
-
X1.3
GND
Masse
Leistung
-
Motor +
Output
X1.4
Ma
Motor +
Ausgang
Mb
Motor -
Output
X1.5
Mb
Motor -
Ausgang
Mc
n.c.
Output
X1.6
Mc
n.c.
Ausgang
Instruction Manual/Betriebsanleitung BGE 3515 / 6010, Version: 1.1 en_de
© 2009 Alcatel-Lucent; Dunkermotoren; D-79848 Bonndorf; Germany
Instruction Manual/Betriebsanleitung BGE 3515 / 6010, Version: 1.1 en_de
© 2009 Alcatel-Lucent; Dunkermotoren; D-79848 Bonndorf; Germany
17
9 Terminal assignment
9 Anschlussbelegung
10 Connection schematic
10 Anschlussschema
9.4 Analog and digital inputs and
outputs; CAN
Terminal
Designation
X3.1
+Ue
X3.2
10 Connection schematic
9.4 Analoge und Digitale Ein- und
Ausgänge; CAN
Description
Signal
direction
Klemme
Bezeichnung
Beschreibung
Signalrichtung
Supply voltage,
electronics
-
X3.1
+Ue 24V
Spannungsversorgung Elektronik
-
+AIN 0 /
DIN4
+ analog input /
Digital input 4
Input
X3.2
+AIN 0 /
DIN 4
+ analoger Eingang/
digitaler Eingang 4
Eingang
X3.3
DIN 0
Digital input 0
Input
X3.3
DIN 0
digitaler Eingang 0
Eingang
X3.4
DIN 1
Digital input 1
Input
X3.4
DIN 1
digitaler Eingang 1
Eingang
X3.5
DIN 2
Digital input 2
Input
X3.5
DIN 2
digitaler Eingang 2
Eingang
X3.6
DIN 3
Digital input 3
Input
X3.6
DIN 3
digitaler Eingang 3
Eingang
X3.7
GND
Earth for
electronics
-
X3.7
GND
Masse Elektronik
-
X3.8
-AIN 0
- analog input
Input
X3.8
-AIN 0
- analoger Eingang
Eingang
X3.9
DOUT 0
Digital output 0
Output
X3.9
DOUT 0
digitaler Ausgang 0
Ausgang
X3.10
CAN_HI
CAN high
Bus
X3.10
CAN_HI
CAN High
Bus
X3.11
CAN_LO
CAN low
Bus
X3.11
CAN_LO
CAN Low
Bus
X3.12
CAN_
GND
CAN earth
-
X3.12
CAN_
GND
CAN Masse
-
18
24V
Instruction Manual/Betriebsanleitung BGE 3515 / 6010, Version: 1.1 en_de
© 2009 Alcatel-Lucent; Dunkermotoren; D-79848 Bonndorf; Germany
10 Anschlussschema
Warning!
Achtung!
Before installation, the safety
instructions must, without fail,
be read, understood and observed!
Disconnect the unit from the
electrical power supply.
Vor der Installation sind unbedingt die Sicherheitshinweise
zu lesen und zu beachten!
Gerät spannungsfrei schalten!
Failure to follow them can result in danger to persons
or damage to the machine.
Eine Nichtbeachtung kann zu Gefahren an Personen
oder Beschädigungen and der Maschine führen.
10.1 Connection brushless motor
10.1 Anschluss bürstenloser Motor
10.2 Connection brush-type motor
10.2 Anschluss bürstenbehafteter Motor
Instruction Manual/Betriebsanleitung BGE 3515 / 6010, Version: 1.1 en_de
© 2009 Alcatel-Lucent; Dunkermotoren; D-79848 Bonndorf; Germany
19
10 Connection schematic
10 Anschlussschema
10 Connection schematic
10 Anschlussschema
10.3 Connection Hall sensors
Warning!
10.3 Anschluss Hallsensoren
Only with burshless DC motors!
10.4 Connection encoder
20
10.5 Connection power supply
motor
10.5 Anschluss Spannungsversorgung Motor
10.6 Connection power supply
controller
10.6 Anschluss Spannungsversorgung Regler
Achtung!
Nur bei bürstenlosen Gleichstromotoren!
10.4 Anschluss Encoder
Instruction Manual/Betriebsanleitung BGE 3515 / 6010, Version: 1.1 en_de
© 2009 Alcatel-Lucent; Dunkermotoren; D-79848 Bonndorf; Germany
Instruction Manual/Betriebsanleitung BGE 3515 / 6010, Version: 1.1 en_de
© 2009 Alcatel-Lucent; Dunkermotoren; D-79848 Bonndorf; Germany
21
10 Connection schematic
10 Anschlussschema
10.7 Connection CAN interface
22
11 Block diagram
11 Blockschaltbild
10.7 Anschluss CAN-Schnittstelle
Instruction Manual/Betriebsanleitung BGE 3515 / 6010, Version: 1.1 en_de
© 2009 Alcatel-Lucent; Dunkermotoren; D-79848 Bonndorf; Germany
11 Block diagram
11 Blockschaltbild
12 Technical Data
12 Technische Daten
12.1 Digital inputs
12.1 Digitale Eingänge
Description
Data
Beschreibung
Wert
Number of inputs
5
Anzahl
5
Input voltage, low
(UIN low)
-30 V ... 5 V
Eingangsspannung Low
(UIN low)
-30 V ... 5 V
Input voltage, high
(UIN high)
15 V ... 30 V
Eingangsspannung High
(UIN high)
15 V ... 30 V
Input current, high max.
( @ UIN = 30 V )
typ. 5.3 mA
Eingangsstrom High max.
( @ UIN = 30 V )
typ. 5.3 mA
Conducted emission limits
CE conform
Störspannungsfestigkeit
CE-Konform
Maximum frequency
Ca. 500 Hz
Maximale Frequenz
Ca. 500 Hz
Instruction Manual/Betriebsanleitung BGE 3515 / 6010, Version: 1.1 en_de
© 2009 Alcatel-Lucent; Dunkermotoren; D-79848 Bonndorf; Germany
23
12 Technical Data
12 Technische Daten
12 Technical Data
12 Technische Daten
12.2 Digital output
12.2 Digitale Ausgänge
12.5 Inputs for Encoders
Description
Data
Beschreibung
Wert
Number of outputs
1
Anzahl
1
Type
Positive switching
Typ
Plus schaltend
Max. output current
0.5 A
max. Ausgangsstrom
0.5 A
Short-circuit resistant
Yes
Kurzschlussfest
Ja
Potential-free
No
Potentialfrei
Nein
12.3 Analog inputs
Description
Data
Beschreibung
Wert
Number of inputs
3
Anzahl
3
Type
Differential or
single-ended
Typ
Differentiell od.
Single ended
Inputs
A, /A, B, /B, I, /I
Eingänge
A, /A, B, /B, I, /I
Input voltage
5V
Eingangsspannung
5 V
Max. cycle frequency
500 kHz
max. Taktfrequenz
500 kHz
Conducted emission limits
CE conform
Störspannungsfestigkeit
CE-Konform
12.6 Auxiliary power supplies
Description
Data
12.6 Hilfsspannungen
Beschreibung
Wert
Power supplies for Hall sensors and encoders
Versorgungsspannung für Hallsensoren und Encoder
Output voltage
5 V ± 5%
Ausgangsspannung
5 V ± 5%
Maximum load
200 mA
Maximale Belastung
200 mA
12.3 Analoge Eingänge
Description
Data
Beschreibung
Wert
Number of inputs
1
Anzahl
1
Type
Differential
Typ
Differentiell
Measurement range
±10 V
Messbereich
±10 V
Resolution
10 bit
Auflösung
10 Bit
Input impedance
(differential)
Ca. 150 kOhm
Eingangsimpedanz
(differentiell)
ca. 150 kOhm
Conducted emission limits
CE conform
Störspannungsfestigkeit
CE-Konform
12.4 Inputs for hall sensors
12.4 Eingänge für Hallsensoren
Description
Data
Beschreibung
Wert
Number of inputs
3
Anzahl
3
Type
Differential or
single-ended
Typ
Differentiell od.
Single ended
Inputs
H1, /H1, H2, /H2,
H3, /H3
Eingänge
H1, /H1, H2, /H2,
H3, /H3
Input voltage
5V
Eingangsspannung
5V
Max. cycle frequency
3 kHz
max. Taktfrequenz
3 kHz
Conducted emission limits
CE-Konform
Störspannungsfestigkeit
CE-Konform
24
12.5 Eingänge für Encoder
Instruction Manual/Betriebsanleitung BGE 3515 / 6010, Version: 1.1 en_de
© 2009 Alcatel-Lucent; Dunkermotoren; D-79848 Bonndorf; Germany
Instruction Manual/Betriebsanleitung BGE 3515 / 6010, Version: 1.1 en_de
© 2009 Alcatel-Lucent; Dunkermotoren; D-79848 Bonndorf; Germany
25
13 Installation
13 Installation
13 Installation
13 Installation
13 Installation
13 Installation
Warning!
Before installation, the safety instructions must, without fail, be
read, understood and observed!
Disconnect the unit from the
electrical power supply.
Vor der Installation sind unbedingt die Sicherheitshinweise zu
lesen und zu beachten! Gerät
spannungsfrei schalten!
Vorsicht!
Take care!
During installation, ensure that
connectors are not damaged.
Bent pins can cause a short circuit and destroy the controller.
Achten Sie bei der Installation
darauf, dass die Steckverbinder
nicht beschädigt werden. Umgebogene Pins können den Regler
durch Kurzschluss zerstören.
Warning!
Achtung!
Warning!
Achtung!
Do not confuse the power supply
lines!
The entire circuitry is designed for
a correctly-poled direct-current
supply. If you reverse the plus
and minus poles, the electronics
will be severely damaged.
First connect only the control circuit to the power supply. Do not
connect the motor yet! Set the
desired parameters and operating modes, and check whether
the LEDs indicate normal operation. Only connect the motor
when that is the case.
26
Achtung!
Vertauschen Sie nicht die Spannungsversorgungsleitungen!
Die gesamte Schaltung ist auf
gepolte Gleichspannung ausgelegt. Wenn Sie den Plus- und Minuspol vertauschen, nimmt die
Elektronik schweren Schaden.
Schliessen Sie zuerst nur die
Steuerung an die Stromversorgung an. Schliessen Sie den
Motor noch nicht an! Stellen Sie
die gewünschten Parameter und
Arbeitsmodi ein und überprüfen
Sie, ob die LEDs einen normalen Betrieb anzeigen. Erst dann
darf der Motor angeschlossen
werden.
Instruction Manual/Betriebsanleitung BGE 3515 / 6010, Version: 1.1 en_de
© 2009 Alcatel-Lucent; Dunkermotoren; D-79848 Bonndorf; Germany
Smoothing capacitor: during braking operations, kinetic energy is stored as electrical energy in an intermediate circuit of the regulation circuit. This can cause excessive voltage in the intermediate circuit, which, in an
extreme case, could cause damage to electrical components. To prevent this, a DC-power supply should
be used which has a bridge rectifier and a smoothing
capacitor of at least 1000 µF per 1 A nominal motor
current. In addition, we recommend that a discharge
resistor (e.g. 1 kΩ, power loss > U2/1000Ω) is used.
Glättungskondensator: Bei Bremsvorgängen wird
die kinetische Energie als elektrische Energie in den
Zwischenkreis des Regelkreises zurückgeführt. Dabei
kann es im Zwischenkreis zu Spannungsüberhöhungen
kommen, die im Extremfall Schäden an elektrischen
Bauteilen verursachen können. Um dies zu verhindern sollten DC-Netzteile mit Brückengleichrichter und
einem Glättungskondensator von mindestens 1000 µF
pro 1 A Motornennstrom verwendet werden. Zusätzlich wird die Verwendung eines Entladewiderstands
(z. B. 1 kΩ, Verlustleistung > U2/1000Ω) empfohlen.
Warning!
Achtung!
If there is frequent heavy braking, the ballast resistor, and
in consequence other circuit
components, may be overloaded and damaged unless
appropriate measures are
taken to prevent excessive
voltage (see „Smoothing capacitor“, above).
Bei häufigem starken Bremsen kann der Ballastwiderstand und als Folge auch
weitere Schaltungsteile überlastet und zerstört werden,
falls nicht geeignete Maßnahmen zur Vermeidung von
zu starken Spannungsüberhöhungen ergriffen werden
(s.o. Glättungskondensator)
The electrical supplies for power and logic (electronics)
may only be switched in parallel when there is no possibility of voltage spikes exceeding 30 V.
Die Spannungsversorgungen für Leistung und Logik
(Elektronik) dürfen nur dann parallel geschalten werden, wenn Spannungsspitzen von über 30 V ausgeschlossen werden können.
When connecting, please remember that there is no reverse-pole protection for the supply voltage. All outputs
have short-circuit protection.
Beachten Sie beim Anschließen, dass für die Versorgungsspannungen kein Verpolungsschutz besteht.
Sämtliche Ausgänge sind kurzschlusssicher ausgeführt.
Instruction Manual/Betriebsanleitung BGE 3515 / 6010, Version: 1.1 en_de
© 2009 Alcatel-Lucent; Dunkermotoren; D-79848 Bonndorf; Germany
27
14 Commissioning
14 Inbetriebnahme
15 Stand-alone operation
15 Stand-alone Betrieb
14 Commissioning
14 Inbetriebnahme
When the power supply has been connected, the unit
can be switched on. The module is then open to access
from the software side.
For the connection between the Positioning Controller
and a PC, you need the appropriate Starter Kit with
adapter cable and software.
The stand-alone operation requires the „Starter Kit“
with the software „Drive Assistant“.
(not included in the scope of supply of the positioning
controller)
The slave in CANopen network requires the „Motion
Starter Kit“ with the software „mPLC“.
(not included in the scope of supply of the positioning
controller)
Further inforamtion you can find under chapter 15
respectively 16.
Ist die Spannungsversorgung hergestellt kann das Gerät eingeschaltet werden. Nun kann der softwareseitige
Zugriff auf das Modul erfolgen.
Für die Verbindung zwischen Positioniersteuerung und
PC benötigen Sie das passende StarterKit mit Adapterkabel und Software.
Der Stand-alone Betrieb benötigt das „Starter Kit“ mit
der Software „Drive Assistant“.
(Nicht im Lieferumfang der Positioniersteuerung enthalten)
Das Slave in CANopen Netzwerk benötigt das „Motion Starter Kit“ mit der Software „mPLC“.
(Nicht im Lieferumfang der Positioniersteuerung enthalten)
Weitere Informationen finden Sie unter Kapitel 15
bzw. 16.
If the controller should be parameterized in the
stand-alone operation, continue with chapter 15.
Soll der Regler im Stand-alone Betrieb parametriert
werden, fahren Sie mit Kapitel 15 fort.
If the controller should be conntected to a CANopen network (slave in CANopen), continue with
chapter 16.
Soll der Regler an ein CANopen Netzwerk (Slave in
CANopen) angeschlossen werden, fahren Sie mit
Kapitel 16 fort.
15 Stand-alone operation, software
Drive Assistant
15 Stand-alone Betrieb, Software
Drive Assistant
15.1 Hardware controller
15.1 Hardware Regler
Examine with connecting the conntroller that the decode switches at the controller are correctly adjusted!
Dunkermotoren allege the following delivery status:
Prüfen Sie bei anschließen des Reglers ob die Codierschalter am Regler richtig eingestellt sind!
Dunkermotoren gibt folgenden Auslieferungszustand vor:
Decode switch CAN_HI:
Decode switch CAN_LO:
7
F
Instruction Manual/Betriebsanleitung BGE 3515 / 6010, Version: 1.1 en_de
© 2009 Alcatel-Lucent; Dunkermotoren; D-79848 Bonndorf; Germany
7
F
Thus its ensured that the controller can be identified
from the software „Drive Assistant“.
Somit ist gewährleistet, dass der Regler von der Software „Drive Assistant“ erkannt wird.
The address cannot be changed within the software!
Die Adresse kann innerhalb der Software nicht geändert werden!
15.2 StarterKit
15.2 StarterKit
To use the software „Drive Assistant“, the user have to
order the StarterKit for the stand-alone operation separately.
The StarterKit contains:
Um die Software „Drive Assistant“ nutzen zu können,
muss der Anwender das StarterKit für den Stand-alone
Betrieb seperat bestellen.
Im StartkerKit enthalten sind:
- USB adapter with connecting cable
- USB-Adapter mit Verbindungskabel
- Connection adapter (from Controller to connecting cable)
- Anschlussadapter (von Regler zu Verbindugskabel)
- the software „Drive Assistant“
- die Software „Drive Assistant“
SNR StarterKit: 28
Codierschalter CAN_HI: Codierschalter CAN_LO: 27573 35617
SNR StarterKit: Instruction Manual/Betriebsanleitung BGE 3515 / 6010, Version: 1.1 en_de
© 2009 Alcatel-Lucent; Dunkermotoren; D-79848 Bonndorf; Germany
27573 35617
29
15 Stand-alone operation
15 Stand-alone Betrieb
15 Stand-alone operation
15 Stand-alone Betrieb
15.3 Introduction
15.3 Einführung
15.6 Description of the Main Window
15.6 Beschreibung des Hauptfensters
With the Drive Assistant control program, Dunkermotoren provides a comprehensive software tool with
which it is possible to extensively configure the various types of BG and GR motors. Via a parameterising
interface, the software establishes a connection with
the controller and the motor and programs it with the
individual configuration. By means of prepared masks
within the software, you can program various modes
individually with extensive parameter selection.
Mit dem Steuerungsprogramm Drive Assistant bietet
Dunkermotoren ein umfangreiches Softwaretool, mit
dem es möglich ist verschiedene Typen von BG- und
GR Motoren umfangreich zu konfigurieren. Über eine
Parametrierschnittstelle stellt die Software die Verbindung mit dem Regler und Motor her und programmiert
diesen mit der individuellen Konfiguration. Innerhalb
der Software kann über vorgefertigte Masken eine
individuelle Programmierung in verschiedenen Modi
mit umfangreicher Parameterauswahl vorgenommen
werden.
15.6.1 Description of the General
Parameter Groups - Main Window
15.6.1 Beschreibung der allgemeinen
Parametergruppen - Hauptfenster
15.4 System Requirements
15.4 Systemvoraussetzungen
Operating system: Windows 2000, Windows XP
Home, Windows XP Pro, Windows Vista. The installation files for the “Drive Assistant” can either be loaded
from the CD-ROM provided or downloaded from the
Dunkermotoren homepage.
Betriebssystem: Windows 2000, Windows XP Home,
Windows XP Pro, Windows Vista. Sie können die Installations-Dateien für den „Drive Assistant“ entweder
von der mitgelieferten CD-ROM oder von der Dunkermotoren Homepage herunterladen.
The following parameter groups are common to all modes:
Allen Modi gemeinsam sind folgende Parametergruppen:
Group Field „Projects“
Gruppenfeld „Projects“
15.5 Installation of the Software Drive
Assistant
15.5 Installation der Software Drive
Assistant
In the „Project“ group field, the configurablemo modis
are shown. By double click on an elected modi, the
elected project submission appears in a new window.
Administrator privileges are necessary for the installa-tion. The installation menu will start automatically
when you insert the CD-ROM. Alternatively you can
open the file install.htm to open the installation menu.
The programm will guide you through the installation routine. Go ahead with the installation in case a
warning notice concerning the USB driver will pop up.
After successful installation the Drive Assistant can be
startet by the desktop link.
Zur Installation des Programms benötigen Sie Admin-Rechte. Nach dem Einlegen der CD-Rom öffnet
sich das Installationsmenü automatisch. Sollte sich
das Menü nicht automatisch öffnen, so öffnen Sie im
Windows-Explorer die sich auf der CD-Rom befindende Datei install.htm. Sie werden nun durch das
Installationsmenü geführt. Klicken Sie auf „Installation
fortsetzen“, falls während der Installation ein Warnhinweis bezüglich dem USB-Controller erscheint. Nach
erfolgreicher Installation kann der Drive Assistant über
die Desktop-Verknüpfung geöffnet werden.
Im Gruppenfeld „Projects“ werden die konfigurierbaren Modis angezeigt. Durch Doppelklicken auf
ein gewähltes Modi, erscheint in neuem Fenster die
gewählte Projektvorlage.
15.6.2 Description of the Menu Bar
- Main Window
15.6.2 Beschreibung der Menüleiste
- Hauptfenster
„Program“ Menu
„Program“-Menü
With „Options“ the user can change the language of
the help text. With „Exit“ the user leaves the program.
Mit „Options“ kann die Sprache der Hilfetexte geändert werden. Mit „Exit“ verlässt der Anwender das
Programm.
30
Instruction Manual/Betriebsanleitung BGE 3515 / 6010, Version: 1.1 en_de
© 2009 Alcatel-Lucent; Dunkermotoren; D-79848 Bonndorf; Germany
Instruction Manual/Betriebsanleitung BGE 3515 / 6010, Version: 1.1 en_de
© 2009 Alcatel-Lucent; Dunkermotoren; D-79848 Bonndorf; Germany
31
15 Stand-alone operation
15 Stand-alone Betrieb
15 Stand-alone operation
15 Stand-alone Betrieb
„Projects“ Menu
„Projects“-Menü
In the „Projects“ menu, the user can copy a current
project („Copy project“) or delete it („Delete project“).
In addition the possibility exists to import an project
(„Import project“).
Im „Projects“-Menü kann der Anwender ein aktuelles
Projekt kopieren („Copy project“) oder löschen
(„Delete project“). Zusätzlich besteht die Möglichkeit,
ein Projekt zu importieren („Import project“).
„View“ Menu
„View“-Menü
In the „View“ menu, the user has the possibility of
displaying or hidint the status bar („Status Bar“).
Im „View“-Menü hat der Anwender die Möglichkeit, die
Anzeige der Statusleiste („Status Bar“) wahlweise einbzw. ausblenden zu lassen.
„Help“ Menu
„Help“-Menü
In the “Help” menu, the user has the possibility of registering his version of the Drive Assistant.
In addition, the possibility exists for displaying with
“About…” the detailed version data.
Im „Help“-Menü hat der Anwender die Möglichkeit,
seine Version des Drive Assistant zu registrieren.
Zusätzlich besteht die Möglichkeit, sich über „About…“
die ausführliche Versionsdaten anzeigen zu lassen.
15.7 Description of the Project Window
15.7 Beschreibung des Projektfensters
15.7.1 Description of the General Paramter Groups - Project Window
15.7.1 Beschreibung der allgemeinen
Parametergruppen - Projektfenster
„Connected“ Group Field
Gruppenfeld „Connected“
In the “Connected” group field, information can be
found about the hardware and software versions.
Additionally the attached motor is termed.
As long as the controller is not connected to the PC
via the interface cable and the motor is not connected
with the controller and not with the supply voltage, no
version data are shown.
Im Gruppenfeld „Connected“ finden sie Informationen
über die Hardware- und Softwareversionen. Zusätzlich wird der angeschlossene Motor benannt.
Solange der Regler nicht über das Interfacekabel zum
PC verbunden ist und der Motor nicht mit dem Regler
und nicht mit der Versorgungsspannung angeschlossen ist, erscheinen keine Versionsangaben.
„Connection“ Group Field
Gruppenfeld „Connection“
The “MOTOR STOP” button is a safety function that
serves to bring the connected motor to an immediate
standstill.
Die Schaltfläche „MOTOR STOP“ ist eine Sicherheitsfunktion, die dazu dient, bei angeschlossenem Motor
einen sofortigen Stillstand herbeizuführen.
„Selected“ Group Field
Gruppenfeld „Selected“
In the “Selected” group field, the outputs are the current project number and the setting designation.
The default settings cannot be loadod on the controller. To save proper adjusted settings, you go in the
menu bar of file --> „Safe as...“. Here the modi can be
designated and it is directly loaded.
Im Gruppenfeld „Selected“ wird sowohl die aktuelle
Modinummer sowie die spezifische Einstellungsbezeichnung ausgegeben. Die voreingestellten Defaultwerte können nicht auf den Regler geladen werden.
Um selbst erstellte Einstellungen abzuspeichern
gehen Sie in der Menüleiste auf File --> „Save as...“.
Hier kann dar Modi benannt und direkt geladen
werden.
Zusätzlich kann hier der angeschlossene Motor ausgewählt werden.
Mit „Load to Motor“ kann der aktuell ausgewählte
Modi auf den Regler übertragen werden.
Nach der Übertragung muss die Spannung kurz vom
Regler getrennt werden. Erst dann ist der Regler
betriebsbereit.
Additionally the attached motor can be selected here.
With “Load to Motor”, the currently selected modi can
be transmitted to the controller.
After transmission, the voltage must be briefly disconnected from the controller. Only then is the controller
ready for operation.
32
Instruction Manual/Betriebsanleitung BGE 3515 / 6010, Version: 1.1 en_de
© 2009 Alcatel-Lucent; Dunkermotoren; D-79848 Bonndorf; Germany
Instruction Manual/Betriebsanleitung BGE 3515 / 6010, Version: 1.1 en_de
© 2009 Alcatel-Lucent; Dunkermotoren; D-79848 Bonndorf; Germany
33
15 Stand-alone operation
15 Stand-alone Betrieb
15 Stand-alone operation
15 Stand-alone Betrieb
„Device“ Group Field
Gruppenfeld „Device“
„Error code“ Group Field
Gruppenfeld „Error code“
Additionally it exists the possibility to start and designate new modis under the Group Field „Device“.
Under „Create new Settings“, new modis can be started and termed.
You can find the setting designation under the
„Settings“ Group Field.
Zusätzlich besteht im Feld „Device“ die Möglichkeit
Modis neu zu starten und zu benennen.
Unter „Create new Settings“ können neue Modis gestartet und benannt werden.
Die Settingbezeichnung findet man unter dem Gruppenfeld „Settings“.
In the “Error code” group field, a specific Error Code
is output for the possible occurrence of an error. This
error code makes possible the effective support by
Dunkermotoren.
Im Gruppenfeld „Error Code“ wird bei einem eventuellen Auftreten eines Fehlers ein spezifischer Error
code ausgegeben. Dieser Error code ermöglicht einen
effektiven Support durch Dunkermotoren.
„Actual“ Group Field
Gruppenfeld „Actual“
15.7.2 Description of the file cards
15.7.2 Beschreibung der Karteikarten
In the “Actual” group field, information with regard to
the motor and its supply is displayed. For this, the
operational values are given in real time and permit
optimum control.
Im Gruppenfeld „Actual“ werden Informationen bezüglich des Motors und dessen Versorgung dargestellt.
Die Betriebswerte werden dabei in Echtzeit ausgegeben und ermöglichen so eine optimale Kontrolle.
Within the project window, there are further
sub-categories, the file cards. With this file cards it is
possible to configure exactly the individual operating
modes with further set ups and support of the commissioning.
Innerhalb des Projektfensters gibt es weitere Unterkategorien, die Karteikarten. Diese Karteikarten lassen,
bezüglich einzelner Betriebsarten, weitere Einstellmöglichkeiten und Unterstützung bei der
Inbetriebnahme zu.
Description of the file card „Setting“
Beschreibung der Karteikarte „Setting“
Here the individual parameter groups of the operating
modes are specified.
The specific description of these operating modes are
carried out under chapter 12.
Hier sind die einzelnen Parametergruppen der Betriebsarten aufgeführt.
Die genaue Beschreibung dieser Betriebsarten erfolgt
unter Kapitel 12.
Gruppenfeld „I/O“
“I/O” Group Field
In the “I/0” group field, the number of the actual
availlable analogue or digital inputs and outputs of the
controller are displayed.
The exact values of the analogue control are given in
mV. When they are set to active, the digital inputs are
shown in green and the digital outputs in red.
Im Gruppenfeld „I/0“ werden die tatsächlich an dem
Regler verfügbare Anzahl der analogen bzw. digitalen
Ein- und Ausgänge dargestellt.
Die exakten Werte der Analogkontrolle werden dabei
in mV angegeben. Die digitalen Eingänge werden,
wenn sie auf aktiv gesetzt sind, grün angezeigt und
die digitalen Ausgänge werden rot angezeigt.
The example below shows the indicator states for the
“I/O” screen.
Im Folgenden wird beispielhaft ein Zustand des Anzeige-Panels „I/O“ gezeigt.
34
Instruction Manual/Betriebsanleitung BGE 3515 / 6010, Version: 1.1 en_de
© 2009 Alcatel-Lucent; Dunkermotoren; D-79848 Bonndorf; Germany
Instruction Manual/Betriebsanleitung BGE 3515 / 6010, Version: 1.1 en_de
© 2009 Alcatel-Lucent; Dunkermotoren; D-79848 Bonndorf; Germany
35
15 Stand-alone operation
15 Stand-alone Betrieb
15 Stand-alone operation
15 Stand-alone Betrieb
Description of the file card „Drive Parameters“
Beschreibung der Karteikarte „Drive Parameters“
Within the file card „Drive Parameters“, the motor
specific adjustments of control parameters are shown.
The default values are so selected, that the drive
works at standard requirements on dynamics
and inertia stable.
Over the roll bar the proportional factor of the PID
controller (velocity- or positioning controller) can be
given to the addapted requirements to dynamic and
inertia.
If you need to change it, you can find out empirically
the best value by analysing the step response.
This happens in the file card „Tuning“.
Innerhalb der Karteikarte „Drive Parameters“ werden
motorspezifische Einstellungen von Regelparametern
angezeigt. Die Defaultwerte wurden so gewählt, dass
der Antrieb bei Standardanforderungen an Dynamik
und Massenträgheit stabil arbeitet.
Über den Schieberegler lässt sich der Proportionalfaktor des PID-Reglers (Drehzahl- oder Positionsregler)
an die gegebenen Anforderungen an Dynamik und
Massenträgheit anpassen.
Falls eine Notwendigkeit besteht diesen Parameter
einzustellen, kann der optimale Wert durch die Auswertung der Sprungantwort empirisch ermittelt werden. Dies geschieht in der Karteikarte „Tuning“.
In Filter it will be adjusted how the graphic should be
recorded.
The following filters can be selected:
Im Filter wird eingestellt wie die Grafik ausgegeben
werden soll.
Folgende Filter stehen zur Auswahl:
None shows the measuring points in a line diagram.
None veraunschaulicht die Messpunkte in einem
Liniendiagramm.
Bezier veranschaulicht die Messpunkte in einer parametrisch modellierten Kurve, die die gewünschten
Werte in einem geschwungenem Liniendiagramm
zeigt.
Bezier shows the measuring points in a parametric
modelled curve, which shows the desired values in a
swung line diagram.
Actual position shows, the actual position of the
motor (in Counts).
Commanded position shows, in which position the
motor should be, onto parameter settings (in Counts).
Pos. following error shows the position contouring
error between the actual position and the commanded
position of the motor.
Actual velocity shows the actual rotation speed. The
speed is given in “[rpm]” = “revolutions per minute”.
Description of the file card „Tuning“
Beschreibung der Karteikarte „Tuning“
In the „Tuning“ field exists the possibility to view the
exact graphical data, which are recorded during the
operation.
Im Feld „Tuning“ besteht die Möglichkeit Motordaten,
welche während des Betriebes aufgenommen werden, graphisch aufzuzeichnen
The following adjustments can be transacted:
Folgende Einstellungen können getätigt werden:
Under Recording file, the user can designate the
Tuning. This file is stored as a text file.
Unter Recording file, kann der Anwender das Tuning
benennen. Dieses wird als Textdatei abgespeichert.
Time offers the adjustment possibility of the recording
duration in [ms].
In Sample Time, the user has the possibility to determine the time intervals [ms] between the individual
recording points. The recording frequency during the
recording time.
Time bietet die Einstellmöglichkeit der Aufnahmedauer in [ms].
Sample Time bietet dem Anwender die Möglichkeit,
die Zeitabstände [ms] zwischen den einzelnen Aufnahmepunkten zu bestimmen, d.h. die Aufnahmehäufigkeit während der Aufnahmedauer.
36
Instruction Manual/Betriebsanleitung BGE 3515 / 6010, Version: 1.1 en_de
© 2009 Alcatel-Lucent; Dunkermotoren; D-79848 Bonndorf; Germany
Commanded velocity shows, which rotation speed
the motor should have, onto paramter settings (in
[rpm]).
Motor current shows the actual motor current
in [mA].
Analogue Input, shows the value of the current in
[mV] of the analogue Input 0.
Actual position veranschaulicht, in welcher Position
der Motor sich tatsächlich befindet (in Counts).
Commanded postion veranschaulicht, die
Sollposition des Motors, nach Parametereinstellungen
(in Counts).
Pos. following error zeigt den Positionsschleppfehler
zwischen der aktuellen Position und der Sollposition
(Commanded Position) des Motors.
Actual velocity veranschaulicht, die aktuelle Drehgeschwindigkeit. Die Geschwindigkeit wird dabei
in „[rpm]“ = „rounds per minute“ (Umdrehungen pro
Minute) angegeben.
Commanded velocity zeigt die Sollposition des Motors, nach Parametereinstellungen, in [rpm].
Motor current, zeigt den aktuellen Motorstrom in [mA]
an.
Analogue Input, liefert den Wert der Spannung in
[mV] des analogen Eingangs 0.
Description of the file card „Device Info“
Beschreibung der Karteikarte „Device Info“
This field serves for the identification of software
specific data. This data makes possible the effective
support by Dunkermotoren.
Dieses Feld dient zur Identifikation Softwarespezifischer Daten. Diese Angaben ermöglichen einen
effektiven Support durch Dunkermotoren.
Instruction Manual/Betriebsanleitung BGE 3515 / 6010, Version: 1.1 en_de
© 2009 Alcatel-Lucent; Dunkermotoren; D-79848 Bonndorf; Germany
37
15 Stand-alone operation
15 Stand-alone Betrieb
15 Stand-alone operation
15 Stand-alone Betrieb
15.7.3 Description of the Menu Bar
- Project Window
15.7.3 Beschreibung der Menüleiste
- Projektfenster
„File“ Menu
„File“-Menü
In the “File” menu, the user has the possibility of storing or deleting his configuration parameter set under
a default name. With “Save as…”, an entered parameter set can be stored and given a new name.
Im „File“-Menü hat der Anwender die Möglichkeit, seine konfigurierten Parametersätze abzuspeichern. Mit
„Save as…“ kann ein erstellter Parametersatz gespeichert und unter neuem Namen eingefügt werden. Default settings sind Voreinstellungen die nicht geändert
und abgespeichert werden können.
Zusätzlich besteht die Möglichkeit das Projektfenster
durch “Exit“ zu beenden.
In addition, the possibility exists to close the project
window with “Exit”.
With „Option“ the user can change the language of the
help text.
Mit „Option“ kann die Sprache der Hilfstexte geändert
werden.
15.8 Description of the Operating Modes
15.8 Beschreibung der Betriebsarten
Functional Description of the Operating Modes
Funktionsbeschreibung Betriebsmodi
With the operating modes, for example, various positions in the transducer increments can be defined. The
zero position is previously determined by a reference
run. For speed and torque modes, a reference run is
not necessary. By controlling using the digital inputs, it
is possible to address every mode.
Bei den Betriebsmodi können beispielsweise verschiedene Positionen in Geberinkrementen definiert
werden. Die Nullposition wird zuvor durch eine Referenzfahrt festgelegt. Bei den Geschwindigkeits- und
Drehmomentmodi ist die Referenzfahrt nicht erforderlich. Durch Steuerung mit Hilfe der digitalen Eingänge
ist es möglich jeden Modus anzusteuern.
The motion curve for a positioning movement is predefined as a trapezoidal curve. The curve is determined by three parameters:
Die Bewegungskurve, mit der eine Positionierfahrt
ausgeführt wird, ist als Trapezkurve vorgegeben. Die
Kurve wird also durch die 3 Parameter
- Acceleration ramp
- Deceleration ramp
- Velocity
-Beschleunigungsrampe (Acceleration)
-Bremsrampe (Deceleration)
-Geschwindigkeit (Velocity)
Pos. 06
Pos. 05
Pos. 04
Pos. 03
Pos. 02
C
- AC
Pos. 01
Acc
e
lera
tion
Instruction Manual/Betriebsanleitung BGE 3515 / 6010, Version: 1.1 en_de
© 2009 Alcatel-Lucent; Dunkermotoren; D-79848 Bonndorf; Germany
Position [counts]
15.8.1 „Standard“ Positioning Mode
15.8.1 Positioniermodus „Standard“
The “Standard” positioning mode is an easily
confi- gurable operating mode that is extremely wellsuited for positioning tasks with up to six positions.
Bei dem Positioniermodus „Standard“ handelt es sich
um einen leicht konfigurierbaren Betriebsmodus, der
sich für Positionieraufgaben von bis zu sechs Positionen hervorragend eignet.
Dem Anwender wird ermöglicht, über Veränderungen
an verschiedenen Parametergruppen, auf einfache
Weise bis zu sechs Positionen auf gewünschte Weise
anzufahren.
By means of changes to various parameter groups, it
is a simple matter to program approach motions to up
to six positions.
38
C
- DE
Im „Help“-Menü hat der Anwender die Möglichkeit,
die Pinbelegung („Pin Assignment“), sowie die Eingangsbelegung („I/C Interface description“)
einzusehen. Nur für die BG - Reihe!
Unter „User level registration“ kann der Anwender den
Drive Assistant registrieren.
Zusätzlich besteht die Möglichkeit, sich über „About…“
die ausführliche Kontaktadresse von Dunkermotoren
anzeigen zu lassen.
tion
In the “Help” menu, the user has the possibility to look
after the pin assignemt („Pin Assignment“) as well as
the Interface description („I/C Interface description“).
Only for tishe BG series!
Under „User level registration“ the user can register
the Drive Assistant.
In addition, the possibility exists for displaying with
“About…” the detailed contact address of Dunkermotoren.
elera
„Help“-Menü
Dec
„Help“ Menu
Velocity
C
- DE
Im „Motor“-Menü kann der Anweder ein aktuell auf
dem Regler befindliches Parametereinstellungen von
diesem löschen („Clear Project in the motor“).
tion
In the „motor“ menu, the user can delete the current
existing parameter adjustments on the controller
(„Clear Project in the motor“).
elera
„Motor“-Menü
Dec
„Motor“ Menu
Geschwindikeit [rpm]
speed
bestimmt.
Instruction Manual/Betriebsanleitung BGE 3515 / 6010, Version: 1.1 en_de
© 2009 Alcatel-Lucent; Dunkermotoren; D-79848 Bonndorf; Germany
39
15 Stand-alone operation
15 Stand-alone Betrieb
15 Stand-alone operation
15 Stand-alone Betrieb
To facilitate the binary entries, the fifth digital input is
used to confirm the binary settings. Only when the
enable is given by IN 4 is the parameterised run command performed.
IN 4
Function
IN 4
Funktion
0
Motor movement disabled
0
Keine Freigabe der Motorbewegung
1
Motor movement enabled
1
Freigabe der Motorbewegung
The digital outputs give you information on the status
of the drive.
With the „Load to motor“ button, the user has the possiblity of loading mode-specific parameter adjustments
to the controller with the aid of the parameterising
interface.
Mit der „Load to motor“-Schaltfläche hat der Anwender
die Möglichkeit, modispezifische Parametereinstellungen auf den Regler zu laden.
Warning!
Achtung
Loading the currently selected project will reset all controller settings.
The motor will be freely rotatable.
For this, position control takes place via digital inputs
that use the following binary codes:
Durch die Übertragung des aktuellen
Projektes auf den Regler werden alle
bisherigen Einstellungen gelöscht.
Der Motor ist nun frei bewegbar.
Die Ansteuerung der Positionierungen erfolgt hierbei
über digitale Eingänge, die wie folgt binär aufgeschlüsselt sind:
IN 0
Function
IN 0
Funktion
0
Limit switch OFF
0
Limit Schalter AUS
1
Limit switch ON
1
Limit Schalter EIN
IN 1
IN 2
IN 3
Function
IN 1
IN 2
IN 3
Funktion
0
0
0
Clear error and
STOP
0
0
0
Error beseitigen und
STOP
1
0
0
Begin homing
1
0
0
Homing beginnen
0
1
0
Position 1
0
1
0
Position 1
1
1
0
Position 2
1
1
0
Position 2
0
0
1
Position 3
0
0
1
Position 3
1
0
1
Position 4
1
0
1
Position 4
0
1
1
Position 5
0
1
1
Position 5
1
1
1
Position 6
1
1
1
Position 6
40
Instruction Manual/Betriebsanleitung BGE 3515 / 6010, Version: 1.1 en_de
© 2009 Alcatel-Lucent; Dunkermotoren; D-79848 Bonndorf; Germany
Um die binäre Eingabe zu erleichtern wird der fünfte
digitale Eingang zur Bestätigung der Binäreinstellung
benutzt. Erst wenn durch IN 4 die Freigabe gegeben
ist, wird der parametrierte Fahrbefehl ausgeführt.
Über die digitalen Ausgänge sind Informationen über
den Zustand des Antriebs erhältlich.
OUT0
Status
OUT0
Status
0
Motor disabled or Error or
no Homing
0
Keine Freigabe oder Fehler oder
kein Homing
1
Stopped, Ready, No Error,
Homing done
1
Gestoppt, fertig,
kein Fehler
0/1 *)
Moving
0/1 *)
Bewegung
*) If the motor is in movement, a changing signal with
a clock frequency of 5 Hz is displayed at the output 0.
*) Befindet sich der Motor in Bewegung, wird am
Ausgang 0 ein wechselndes Signal mit Taktfrequenz
5Hz ausgegeben.
In the following, detailed descriptions of all configurable parameter groups can be found:
Im Folgenden finden sie alle konfigurierbaren Parametergruppen ausführlich beschrieben:
„Moving“ Parameter Group
Parametergruppe „Moving“
In the “Moving” parameter group, the user has the
possibility of making basic settings of the type of
movement.
In der Parametergruppe „Moving“, wird dem Anwender ermöglicht, grundlegende Einstellungen der
Bewegungsart zu tätigen.
Direction gives the direction of rotation of the motor;
“CW” stands for “clockwise” or “CCW” for “counter clockwise”. This is especially significant for the reference
run (Homing).
Direction gibt die Drehrichtung des Motors an. Dabei
steht „CW“ für „clockwise“ (im Uhrzeigersinn) bzw.
„CCW“ für „counter clockwise“ (gegen den Uhrzeigersinn). Dies ist besonders für die Referenzfahrt (Homing) von Bedeutung.
Velocity [rpm] / Speed / bietet die Möglichkeit zur
Bestimmung einer exakten Drehgeschwindigkeit. Die
Geschwindigkeit wird dabei in „[rpm]“ = „rounds per
minute“ (Umdrehungen pro Minute) angegeben.
Velocity [rpm] / Speed / provides the possibility of
specifying an exact rotational speed. The speed is given
in “[rpm]” = “revolutions per minute”.
In this example, the motor runs at a speed of 2000
rpm in the clockwise direction.
In diesem Beispiel läuft der Motor mit der Geschwindigkeit von 2000 rpm im Uhrzeigersinn.
Instruction Manual/Betriebsanleitung BGE 3515 / 6010, Version: 1.1 en_de
© 2009 Alcatel-Lucent; Dunkermotoren; D-79848 Bonndorf; Germany
41
15 Stand-alone operation
15 Stand-alone Betrieb
15 Stand-alone operation
15 Stand-alone Betrieb
„Current [mA]“ Parameter Group
Parametergruppe „Current [mA]“
„Motor Power“ Parameter Group
Parametergruppe „Motor power“
In the “Current [mA]” parameter group, the user has
the possibility of making basic settings of the current
strength.
In der Parametergruppe „Current [mA]“ wird dem
Anwender ermöglicht, grundlegende Einstellungen der
Stromstärke vorzunehmen.
Contin.Current gives the maximum value in milliampere [mA] that is continuously made available to
the motor in phase current.
Contin.Current gibt den maximalen Wert in Miliampere [mA] an, der dem Motor im Phasenstrom dauerhaft zur Verfügung gestellt wird.
Peak Current allows the entry of the maximum permissible phase crest current in milliampere [mA] that
can be applied to the motor for short periods.
Peak Current erlaubt die Eingabe des maximal zulässigen Phasenspitzenstroms, der kurzfristig auf den
Motor einwirken darf, in Milliampere [mA].
After a configured motor has reached a position (by a
drive to or stop command), there are two possibilities
with which this position can be handled by the
controller.
This setting can now be configured exactly with the
aid of the “Motor Power” parameter group.
One possibility is that the motor holds the position reached with by the applying torque (Power Enable). The
other is that the motor is free to move after reaching a
position (Power Disable).
Nachdem ein konfigurierter Motor eine Position erreicht (durch Anfahren oder einen Stop-Befehl), gibt
es zwei Möglichkeiten, wie mit dieser Position von
Seiten des Reglers umgegangen werden soll.
Diese Einstellung kann nun mit Hilfe der Parametergruppe „Motor power“ genau konfiguriert werden.
Es besteht zum einen die Möglichkeit, dass der Motor
die erreichte Position mit Hilfe von Drehmoment-Aufwendung hält (Power Enable).
Zum anderen, kann die Bewegungsfreiheit nach dem
Erreichen einer Position ermöglicht werden (Power
Disable).
After STOP regulates the behaviour after a stop command.
After MOVE regulates the behaviour after moving to a
position.
After STOP regelt das Verhalten nach einem Stop-Befehl.
After MOVE regelt das Verhalten nach dem Anfahren
einer Position.
In this example, the position after a STOP will be held,
however, after MOVE the motor is given freedom of
movement.
In diesem Beispiel wird die Position nach einem STOP
gehalten, nach MOVE behält der Motor jedoch seine
Bewegungsfreiheit.
„Homing“ Parameter Group
Parametergruppe „Homing“
For the exact configuration of position movements, a
homing procedure must first be initiated for a motor.
In this homing procedure, a reference point must be
determined from which all further positioning operations are oriented.
When homing with the reference switch, the motor
traverses the switch. This results in a reversal of the
direction of rotation and another slow approach to the
reference switch on the falling flank.
Zur exakten Konfiguration von Positionsfahrten, muss
bei einem Motor zunächst ein Homing-Verfahren
eingeleitet werden. In diesem Homing-Verfahren wird
ein Referenzpunkt erfasst, an dem sich alle weiteren
Positionierungen orientieren.
Beim Homing mit Referenzschalter überfährt der
Motor diesen Schalter. Danach erfolgt eine Drehrichtungsumkehr und ein erneutes, langsames Anfahren
des Referenzschalters auf die fallende Flanke.
In this example, a continuous permissible phase current of 8 A and a peak current of 25 A are defined.
In diesem Beispiel wurde ein dauerhaft zulässiger
Phasenstrom von 8 A und ein Spitzenstrom von 25 A
festgelegt.
“Ramps [ms / 1000rpm]” Parameter Group
Parametergruppe „Ramps [ms / 1000rpm]“
In positioning mode, all achievable positions are
approached with the aid of accelerating and braking
ramps. The ramps are given in [ms / 1000rpm] (milliseconds per 1000 revolutions per minute). In the
“Ramps [ms / 1000rpm]” parameter group, the user
can now adapt these ramps to his needs.
Alle ansteuerbaren Positionen im Positioniermodus
werden mit Hilfe von Rampen (beschleunigende und
abbremsende) exakt angefahren.
Die Rampen werden in [ms / 1000rpm] (Millisekunden
pro 1000 Umdrehungen pro Minute) angegeben.
In der Parametergruppe „Ramps [ms / 1000rpm]“
kann der Anwender nun diese Rampen nach seinen
Bedürfnissen anpassen.
Acceleration erlaubt die Einstellung der Beschleunigungsrampe.
Deceleration erlaubt die Einstellung der Bremsrampe.
Quick Stop erlaubt die Einstellung einer Rampe mit
hohem negativem Beschleunigungswert.
Acceleration allows setting of the acceleration ramp.
Deceleration allows setting of the brake ramp.
Quick Stop allows a ramp to be set with a high negative acceleration.
Warning!
In this example, an acceleration ramp with 200
ms/1000rpm and a brake ramp with 200 ms/1000rpm
were configured. For the Quick Stop, 20 ms/1000rpm
was defined.
42
In diesem Beispiel wurde eine Beschleunigungsrampe
mit 200 ms/1000rpm und eine Bremsrampe mit 200
ms/1000rpm konfiguriert.
Für den Quick Stop wurden 20 ms/1000rpm festgelegt.
Instruction Manual/Betriebsanleitung BGE 3515 / 6010, Version: 1.1 en_de
© 2009 Alcatel-Lucent; Dunkermotoren; D-79848 Bonndorf; Germany
If, after referencing, the motor is pushed
to a position outside the operating
zone with the power supply cut off,
it will not be possible to return the
motor to standard operation. Before
returning it to service, the motor must
be manually moved back to the defined operating zone with the power
supply switched off.
Instruction Manual/Betriebsanleitung BGE 3515 / 6010, Version: 1.1 en_de
© 2009 Alcatel-Lucent; Dunkermotoren; D-79848 Bonndorf; Germany
Achtung
Wird der Motor nach der Referenzierung in stromlosen Zustand in eine
Position außerhalb des Betriebsbereichs verschoben ist es nicht
möglich den Motor wieder in den
Standardbetrieb zu nehmen. Der
Motor muss vor Inbetriebnahme im
stromlosen Zustand manuell in den
definierten Betriebsbereich zurückgeführt werden
43
15 Stand-alone operation
15 Stand-alone Betrieb
15 Stand-alone operation
15 Stand-alone Betrieb
Home Offset [Counts] gives which count value (measuring unit for movement: 2000 counts is a revolution
of the motor drive shaft, i.e., a count corresponds to
a movement of the motor drive shaft of 0.18° ) should
be assigned to the acquired reference point.
Home offset [counts] gibt an, welcher Count-Wert
(Maßeinheit für Bewegung dabei sind 2000 Counts
eine Umdrehung an der Motorabtriebswelle und Count
entspricht einer Drehung um 0,18° an der Motorabtriebswelle beim BG65) dem erfassten Referenzpunkt
zugewiesen werden soll.
Die Methode Searching Ref. Switch in Positive
direction veranlasst den Motor dazu, mit der Drehrichtung nach einem Schalter (charakterisiert durch
Steigende/Fallende Flanke) zu suchen und sich bei
Erreichen den Referenzpunkt zu setzten.
„Positions“ Parameter Group
Parametergruppe „Positions“
In the “Positions” parameter group, the user can store
various positions in the controller. These can then be
optionally driven to via the motor control.
The Searching Limit Switch in Negative direction
method allows the motor to search opposite to the
direction of rotation for a limit switch (characterised by
a raising/falling edge) and to set the reference point
when it is reached.
In operation the Limit Switch limits the available operating range.
Die Methode Searching Limit Switch in Negativ
direction veranlasst den Motor dazu, entgegen der
Drehrichtung nach einem Limitschalter (charakterisiert
durch Steigende/Fallende Flanke) zu suchen und sich
bei Erreichen den Referenzpunkt zu setzen.
Im Betrieb begrenzt der Limitschalter den verfügbaren
Fahrbereich.
Positions are given in “Count” units (whereby a revolution of the motor drive shaft is divided into 2000
counts) to ensure optimal positioning accuracy.
The Searching Limit Switch in Positive direction
method allows the motor to search in the direction of
rotation for a limit switch (characterised by a raising/
falling edge) and to set the reference point when it is
reached.In operation the Limit Switch limits the available operating range.
Die Methode Searching Limit Switch in Positive direction veranlasst den Motor dazu, mit der Drehrichtung nach einem Limitschalter (charakterisiert durch
Steigende/Fallende Flanke) zu suchen und sich bei
Erreichen den Referenzpunkt zu setzten.
Im Betrieb begrenzt der Limitschalter den verfügbaren
Fahrbereich.
01. – 06. are the identification numbers of the positions that can be entered in any field. Positions are
given in the “Counts” unit.
In der Parametergruppe „Positions“ wird dem Anwender ermöglicht, verschiedene Positionierungen auf
dem Regler zu speichern. Diese können dann über
die Motorsteuerung beliebig angesteuert werden.
Positionen werden in der Einheit „Counts“ angegeben (wobei beim BG65 eine Umdrehung an der
Motorabtriebswelle in 2000 Counts eingeteilt ist), um
eine optimale Genauigkeit bei der Positionierung zu
gewährleisten.
01. – 06. sind die Kennnummern der Positionen, die
in jedes Feld eingegeben werden können. Positionen
werden in der Einheit „Counts“ angegeben.
There are further configuration options for what we
call Home Methods:
Es besteht des Weiteren die Möglichkeit, die genannten Home Methods zu konfigurieren:
In this example, a positioning with 500 counts is
entered with the identification number 01.
In diesem Beispiel ist an Kennnummer 01. eine Positionierung mit 500 Counts angegeben.
Homing Current [mA] gives the current strength that
should be used for the homing procedure.
Homing Current [mA] gibt die Stromstärke an, die für
das Homing-Verfahren verwendet werden soll.
15.8.2 „Complete Positioning Command“ Positioning Mode
15.8.2 Positioniermodus
„Complete Positioning Command“
Homing Velocity [rpm] gives the speed (revolutions
per minute) with which the homing procedure should
be performed.
Homing Velocity [rpm] gibt die Geschwindigkeit
(Umdrehungen pro Minute) an, mit der das HomingVerfahren durchgeführt werden soll.
The „Complete Positioning Command“ positioning
mode is an easily configurable operating mode that
is extremly well-suited for absolute and for relative
positionings.
Ref. Switch signal, here is to specify if the motor
should react on a rising edge („High active“) or on a
falling edge („Low active“) during the homing.
Ref. Switch signal gibt an ob der Motor bei der Referenzfahrt auf eine steigende Flanke („High active“)
oder auf eine fallende Flanke („Low active“) reagieren
soll.
Bei dem Positioniermodus „Complete Positioning
Command“ handelt es sich um einen leicht konfigurierbaren Betriebsmodus, der sich für absolute,
als auch für relative Positionierungen hervorragend
eignet.
Dem Anwender wird ermöglicht komplette Fahrsätze
mit Sollposition, Beschleunigungsrampe, Drehzahl
und Bremsrampe zu parametrieren.
Home Vel. Zero [rpm] gives the speed with which,
after overrunning the raising edge of the switch, the
exact positioning should be performed by driving to
the falling edge.
Home vel. zero [rpm] gibt an, mit welcher Geschwindigkeit nach Überfahren der steigenden Flanke des
Schalters, die genaue Positionierung, durch Anfahren
der fallenden Flanke vorgenommen werden soll.
For the determing this reference point, the user initially has a choice of methods (Home Methods).
Zur Feststellung dieses Referenzpunktes stehen dem
Anwender zunächst verschiedene Methoden zur Verfügung (Home Methods).
The Hard Stop method allows the motor to set its
reference point as soon as it meets a resistance (e.g.,
a stop).
Die Methode Hard Stop veranlasst den Motor dazu,
seinen Referenzpunkt zu setzen, sobald er bei der
Referenzfahrt auf einen Widerstand trifft (z.B. einen
Anschlag).
The Searching Ref. Switch in Negative Direction
method allows the motor to search opposite to the
direction of rotation for a switch (characterised by a
raising/falling edge) and to set the reference point
when it is reached.
Die Methode Searching Ref. Switch in Negativ
direction veranlasst den Motor dazu, entgegen der
Drehrichtung nach einem Schalter (charakterisiert
durch Steigende/Fallende Flanke) zu suchen und sich
bei Erreichen den Referenzpunkt zu setzen.
The Searching Ref. Switch in Positive Direction
method allows the motor to search in the direction of
rotation for a switch (characterised by a raising/falling
edge) and to set the reference point when it is reached.
44
Instruction Manual/Betriebsanleitung BGE 3515 / 6010, Version: 1.1 en_de
© 2009 Alcatel-Lucent; Dunkermotoren; D-79848 Bonndorf; Germany
The user has the possibility to parameterize complete drive settings with nominal position, acceleration
ramp, speed and deceleration ramp.
Instruction Manual/Betriebsanleitung BGE 3515 / 6010, Version: 1.1 en_de
© 2009 Alcatel-Lucent; Dunkermotoren; D-79848 Bonndorf; Germany
45
15 Stand-alone operation
15 Stand-alone Betrieb
15 Stand-alone operation
15 Stand-alone Betrieb
With the „Load to motor“ button, the user has the possiblity of loading mode-specific parameter adjustments
to the controller with the aid of the parameterising
interface.
Mit der „Load to motor“-Schaltfläche hat der Anwender
die Möglichkeit, modispezifische Parametereinstellungen auf den Regler zu laden.
Warning!
Achtung
Loading the currently selected project will reset all controller settings.
The motor will be freely rotatable.
Positioning control takes place via digital inputs which
are coded as follows:
Durch die Übertragung des aktuellen
Projektes auf den Regler werden alle
bisherigen Einstellungen gelöscht.
Der Motor ist nun frei bewegbar.
Die Ansteuerung der Positionierungen erfolgt hierbei
über digitale Eingänge, die wie folgt aufgeschlüsselt
sind:
IN 0
Function
IN 0
Funktion
0
Limit switch OFF
0
Limit Schalter AUS
1
Limit switch ON
1
Limit Schalter EIN
46
Instruction Manual/Betriebsanleitung BGE 3515 / 6010, Version: 1.1 en_de
© 2009 Alcatel-Lucent; Dunkermotoren; D-79848 Bonndorf; Germany
IN 1
IN 2
IN 3
IN 4
Function
IN 1
IN 2
IN 3
IN 4
Funktion
0
0
0
0
Clear error and
STOP
0
0
0
0
Error beseitigen und
STOP
1
0
0
0
Begin Homing
1
0
0
0
Homing beginnen
0
1
0
0
Position 1
0
1
0
0
Position 1
1
1
0
0
Position 2
1
1
0
0
Position 2
0
0
1
0
Position 3
0
0
1
0
Position 3
1
0
1
0
Position 4
1
0
1
0
Position 4
0
1
1
0
Position 5
0
1
1
0
Position 5
1
1
1
0
Position 6
1
1
1
0
Position 6
0
0
0
1
Position 7
0
0
0
1
Position 7
1
0
0
1
Position 8
1
0
0
1
Position 8
0
1
0
1
Position 9
0
1
0
1
Position 9
1
1
0
1
Position 10
1
1
0
1
Position 10
0
0
1
1
Position 11
0
0
1
1
Position 11
1
0
1
1
Position 12
1
0
1
1
Position 12
0
1
1
1
Position 13
0
1
1
1
Position 13
1
1
1
1
Position 14
1
1
1
1
Position 14
The digital outputs give you information on the status
of the drive.
Über die digitalen Ausgänge sind Informationen über
den Zustand des Antriebs erhältlich.
OUT0
Status
OUT0
Status
0
Motor disabled or Error or
no Homing
0
Keine Freigabe oder Fehler oder
kein Homing
1
Stopped, Ready, No Error,
Homing done
1
Gestoppt, fertig,
kein Fehler
0/1 *)
Moving
0/1 *)
Bewegung
*) If the motor is in movement, a changing signal with
a clock frequency of 5 Hz is displayed at the output 0.
*) Befindet sich der Motor in Bewegung, wird am
Ausgang 0 ein wechselndes Signal mit Taktfrequenz
5Hz ausgegeben.
In the following, detailed descriptions of all configurable parameter groups can be found:
Im Folgenden finden sie alle konfigurierbaren Parametergruppen ausführlich beschrieben:
„Moving“ Parameter Group
Parametergruppe „Moving“
In the “Moving” parameter group, the user has the
possibility of making basic settings of the type of
movement.
In der Parametergruppe „Moving“, wird dem Anwender ermöglicht, grundlegende
Einstellungen der Bewegungsart zu tätigen.
Direction gives the direction of rotation of the motor;
“CW” stands for “clockwise” or “CCW” for “counter
clockwise”. This is especially significant for the reference run (Homing).
Direction gibt die Drehrichtung des Motors an. Dabei
steht „CW“ für „clockwise“ (im Uhrzeigersinn) bzw.
„CCW“ für „counter clockwise“ (gegen den Uhrzeigersinn). Dies ist besonders für die Referenzfahrt (Homing) von Bedeutung.
Instruction Manual/Betriebsanleitung BGE 3515 / 6010, Version: 1.1 en_de
© 2009 Alcatel-Lucent; Dunkermotoren; D-79848 Bonndorf; Germany
47
15 Stand-alone operation
15 Stand-alone Betrieb
15 Stand-alone operation
15 Stand-alone Betrieb
Move allege the positions (Counts) how they have to
start. There are two possibilities, in order to start the
particular positions (Positions):
Move gibt vor wie die Positionen (Counts) angefahren
werden. Um die einzelnen Positionen (Positions) anzufahren, gibt es zwei Möglichkeiten:
With Absolute the user has the possibility to start
defined prescripted commanded positions within the
operating range.
With Relative the new given commanded position can
be started from the respectively actual position of the
drive.
Mit Absolute hat der Anwender die Möglichkeit vorgegebene Sollpositionen innerhalb eines festgelegten
Fahrbereichs definiert anzufahren.
Mit Relative werden die neu vorgegebenen Sollpositionen von der jeweils aktuellen Position des Antriebs
angefahren.
„Homing“ Parameter Group
Parametergruppe „Homing“
For the exact configuration of position movements, a
homing procedure must first be initiated for a motor.
In this homing procedure, a reference point must be
determined from which all further positioning operations are oriented.
When homing with the reference switch, the motor
traverses the switch. This results in a reversal of the
direction of rotation and another slow approach to the
reference switch on the falling flank.
Zur exakten Konfiguration von Positionsfahrten, muss
bei einem Motor zunächst ein Homing-Verfahren
eingeleitet werden. In diesem Homing-Verfahren wird
ein Referenzpunkt erfasst, an dem sich alle weiteren
Positionierungen orientieren.
Beim Homing mit Referenzschalter überfährt der
Motor diesen Schalter. Danach erfolgt eine Drehrichtungsumkehr und ein erneutes, langsames Anfahren
des Referenzschalters auf die fallende Flanke.
Warning!
Achtung
If, after referencing, the motor is pushed
to a position outside the operating
zone with the power supply cut off,
it will not be possible to return the
motor to standard operation. Before
returning it to service, the motor must
be manually moved back to the defined operating zone with the power
supply switched off.
Wird der Motor nach der Referenzierung in stromlosen Zustand in eine
Position außerhalb des Betriebsbereichs verschoben ist es nicht
möglich den Motor wieder in den
Standardbetrieb zu nehmen. Der
Motor muss vor Inbetriebnahme im
stromlosen Zustand manuell in den
definierten Betriebsbereich zurückgeführt werden
For the determing this reference point, the user initially has a choice of methods (Home Methods).
Zur Feststellung dieses Referenzpunktes stehen dem
Anwender zunächst verschiedene Methoden zur Verfügung (Home Methods).
The Hard Stop method allows the motor to set its
reference point as soon as it meets a resistance (e.g.,
a stop).
Die Methode Hard Stop veranlasst den Motor dazu,
seinen Referenzpunkt zu setzen, sobald er bei der
Referenzfahrt auf einen Widerstand trifft (z.B. einen
Anschlag).
The Searching Ref. Switch in Negative Direction
method allows the motor to search opposite to the
direction of rotation for a switch (characterised by a
raising/falling edge) and to set the reference point
when it is reached.
Die Methode Searching Ref. Switch in Negativ
direction veranlasst den Motor dazu, entgegen der
Drehrichtung nach einem Schalter (charakterisiert
durch Steigende/Fallende Flanke) zu suchen und sich
bei Erreichen den Referenzpunkt zu setzen.
48
Instruction Manual/Betriebsanleitung BGE 3515 / 6010, Version: 1.1 en_de
© 2009 Alcatel-Lucent; Dunkermotoren; D-79848 Bonndorf; Germany
The Searching Ref. Switch in Positive Direction
method allows the motor to search in the direction of
rotation for a switch (characterised by a raising/falling
edge) and to set the reference point when it is reached.
Die Methode Searching Ref. Switch in Positive
direction veranlasst den Motor dazu, mit der Drehrichtung nach einem Schalter (charakterisiert durch
Steigende/Fallende Flanke) zu suchen und sich bei
Erreichen den Referenzpunkt zu setzten.
The Searching Limit Switch in Negative direction
method allows the motor to search opposite to the
direction of rotation for a limit switch (characterised by
a raising/falling edge) and to set the reference point
when it is reached.
In operation the Limit Switch limits the available operating range.
Die Methode Searching Limit Switch in Negativ
direction veranlasst den Motor dazu, entgegen der
Drehrichtung nach einem Limitschalter (charakterisiert
durch Steigende/Fallende Flanke) zu suchen und sich
bei Erreichen den Referenzpunkt zu setzen.
Im Betrieb begrenzt der Limitschalter den verfügbaren
Fahrbereich.
The Searching Limit Switch in Positive direction
method allows the motor to search in the direction of
rotation for a limit switch (characterised by a raising/
falling edge) and to set the reference point when it is
reached.In operation the Limit Switch limits the available operating range.
Die Methode Searching Limit Switch in Positive direction veranlasst den Motor dazu, mit der Drehrichtung nach einem Limitschalter (charakterisiert durch
Steigende/Fallende Flanke) zu suchen und sich bei
Erreichen den Referenzpunkt zu setzten.
Im Betrieb begrenzt der Limitschalter den verfügbaren
Fahrbereich.
There are further configuration options for what we
call Home Methods:
Es besteht des Weiteren die Möglichkeit, die genannten Home Methods zu konfigurieren:
Homing Current [mA] gives the current strength that
should be used for the homing procedure.
Homing Current [mA] gibt die Stromstärke an, die für
das Homing-Verfahren verwendet werden soll.
Homing Velocity [rpm] gives the speed (revolutions
per minute) with which the homing procedure should
be performed.
Homing Velocity [rpm] gibt die Geschwindigkeit
(Umdrehungen pro Minute) an, mit der das HomingVerfahren durchgeführt werden soll.
Ref. Switch signal, here is to specify if the motor
should react on a rising edge („High active“) or on a
falling edge („Low active“) during the homing.
Ref. Switch signal gibt an ob der Motor bei der Referenzfahrt auf eine steigende Flanke („High active“)
oder auf eine fallende Flanke („Low active“) reagieren
soll.
Home Vel. Zero [rpm] gives the speed with which,
after overrunning the raising edge of the switch, the
exact positioning should be performed by driving to
the falling edge.
Home vel. zero [rpm] gibt an, mit welcher Geschwindigkeit nach Überfahren der steigenden Flanke des
Schalters, die genaue Positionierung, durch Anfahren
der fallenden Flanke vorgenommen werden soll.
Home Offset [Counts] gives which count value (measuring unit for movement: 2000 counts is a revolution
of the motor drive shaft, i.e., a count corresponds to
a movement of the motor drive shaft of 0.18° ) should
be assigned to the acquired reference point.
Home offset [counts] gibt an, welcher Count-Wert
(Maßeinheit für Bewegung dabei sind 2000 Counts
eine Umdrehung an der Motorabtriebswelle und Count
entspricht einer Drehung um 0,18° an der Motorabtriebswelle beim BG65) dem erfassten Referenzpunkt
zugewiesen werden soll.
Instruction Manual/Betriebsanleitung BGE 3515 / 6010, Version: 1.1 en_de
© 2009 Alcatel-Lucent; Dunkermotoren; D-79848 Bonndorf; Germany
49
15 Stand-alone operation
15 Stand-alone Betrieb
15 Stand-alone operation
15 Stand-alone Betrieb
„Motor Power“ Parameter Group
Parametergruppe „Motor Power“
„Ramp [ms/1000rpm]“ Parameter Group
Parametergruppe „Ramp [ms/1000rpm]“
After a configured motor has reached a position (by a
drive to or stop command), there are two possibilities
with which this position can be handled by the
controller.
This setting can now be configured exactly with the
aid of the “Motor Power” parameter group.
One possibility is that the motor holds the position reached with by the applying torque (Power Enable). The
other is that the motor is free to move after reaching a
position (Power Disable).
Nachdem ein konfigurierter Motor eine Position erreicht (durch Anfahren oder einen Stop-Befehl), gibt
es zwei Möglichkeiten, wie mit dieser Position von
Seiten des Reglers umgegangen werden soll.
Diese Einstellung kann nun mit Hilfe der Parametergruppe „Motor power“ genau konfiguriert werden.
Es besteht zum einen die Möglichkeit, dass der Motor
die erreichte Position mit Hilfe von Drehmoment-Aufwendung hält (Power Enable).
Zum anderen, kann die Bewegungsfreiheit nach dem
Erreichen einer Position ermöglicht werden (Power
Disable).
In positioning mode, all achievable positions are
approached with ramps. The ramps are given in [ms
/ 1000rpm] (milliseconds per 1000 revolutions per
minute).
Alle ansteuerbaren Positionen im Positioniermodus
werden mit Hilfe von Rampen angefahren.
Die Rampen werden in [ms / 1000rpm] (Millisekunden
pro 1000 Umdrehungen pro Minute) angegeben.
Quick Stop allows a ramp to be set with a high negative acceleration.
Quick Stop erlaubt die Einstellung einer Rampe mit
hohem negativem Beschleunigungswert.
After STOP regulates the behaviour after a stop command.
After MOVE regulates the behaviour after moving to a
position.
After STOP regelt das Verhalten nach einem Stop-Befehl.
After MOVE regelt das Verhalten nach dem Anfahren
einer Position.
In this example, the Quick Stop was defined with 20
ms/1000rpm.
In diesem Beispiel wurde für den Quick Stop
20 ms/1000rpm festgelegt.
„Positions“ Parameter Group
Parametergruppe „Positions“
In the “Positions” parameter group, the user has the
possibility of storing 14 drive sets in the controller. These
can then be optionally driven via a subordinate motor
control (combination of inputs IN1 - IN4).
In der Parametergruppe „Positions“ wird dem Anwender ermöglicht, 14 verschiedene Fahrsätze auf dem
Regler abzuspeichern. Diese können dann über eine
übergeordnete Motorsteuerung angesteuert werden
(Kombination aus Eingängen IN1 – IN4).
Positions are given in the “Counts” unit (whereby at
the BG65 a revolution of the motor drive shaft is divided into 2000 counts, BG75 - 4096, BG45 - 1024) to
ensure optimal accuracy of the positioning.
Positionen werden in der Einheit „Counts“ angegeben
(wobei beim BG65 eine Umdrehung an der Motorabtriebswelle in 2000 Counts eingeteilt ist, BG75 – 4096,
BG45 – 1024), um eine optimale Genauigkeit bei der
Positionierung zu gewährleisten.
In addition each position can be started with a speed
(„Vel.“), with a acceleration ramp („Acc.“) and a deceleration ramp („Dec.“). „Acc.“ and „Dec.“ in ms/ 1000
rpm, Vel in rpm.
Zudem kann jede Position die angefahren werden soll,
mit einer Geschwindigkeit („Vel.“), einer Beschleunigungsrampe („Acc.“) und einer Bremsrampe („Dec.“)
versehen werden (Acc. Und Dec. In ms/ 1000rpm, Vel
in rpm).
01.– 14. are the identification numbers of the positions
that can be entered in any field. Positions are given in
the “Counts” unit.
01. – 14. sind die Kennnummern der Fahrsätze, die in
jedes Feld eingegeben werden können.
In this example, the position after a STOP will be held,
however, after MOVE the motor is given freedom of
movement.
In diesem Beispiel wird die Position nach einem STOP
gehalten, nach MOVE behält der Motor jedoch seine
Bewegungsfreiheit.
„Current [mA]“ Parameter Group
Parametergruppe „Current [mA]“
In the “Current [mA]” parameter group, the user has
the possibility of making basic settings of the current
strength.
In der Parametergruppe „Current [mA]“ wird dem
Anwender ermöglicht, grundlegende Einstellungen der
Stromstärke vorzunehmen.
Contin.Current gives the maximum value in milliampere [mA] that is continuously made available to
the motor in phase current.
Contin.Current gibt den maximalen Wert in Miliampere [mA] an, der dem Motor im Phasenstrom dauerhaft zur Verfügung gestellt wird.
Peak Current allows the entry of the maximum permissible phase crest current in milliampere [mA] that
can be applied to the motor for short periods.
Peak Current erlaubt die Eingabe des maximal zulässigen Phasenspitzenstroms, der kurzfristig auf den
Motor einwirken darf, in Milliampere [mA].
In this example, a continuous permissible phase current of 8 A and a peak current of 25 A are defined.
In diesem Beispiel wurde ein dauerhaft zulässiger
Phasenstrom von 8 A und ein Spitzenstrom von 25 A
festgelegt.
50
Instruction Manual/Betriebsanleitung BGE 3515 / 6010, Version: 1.1 en_de
© 2009 Alcatel-Lucent; Dunkermotoren; D-79848 Bonndorf; Germany
Instruction Manual/Betriebsanleitung BGE 3515 / 6010, Version: 1.1 en_de
© 2009 Alcatel-Lucent; Dunkermotoren; D-79848 Bonndorf; Germany
51
15 Stand-alone operation
15 Stand-alone Betrieb
15 Stand-alone operation
15 Stand-alone Betrieb
15.8.3 „Stepper“ Positioning Mode
15.8.3 Positioniermodus „Stepper“
The “Stepper” positioning mode is an easily configured operating mode that is extremely well-suited to
simple positioning operations. In “Stepper” mode, the
motor operates as a stepping motor. By setting digital
inputs, the position of the drive shaft always changes
by the same amount in either the positive or negative
direction.
Bei dem Positioniermodus „Stepper“ handelt es sich
um einen leicht zu konfigurierenden Betriebsmodus,
der sich für einfache Positionierungen hervorragend
eignet. Unter dem Modus „Stepper“ versteht man den
Schrittmotorbetrieb. Durch Setzen digitaler Eingänge
verändert sich die Position der Abtriebswelle immer um
den selben Betrag in positiver oder negativer Richtung.
To facilitate binary entries, the fifth digital input is used
to confirm the binary settings. Only when the enable is
given by IN 4 is the pending command performed.
IN 4
Function
IN 4
Funktion
0
Motor movement disabled
0
Keine Freigabe der Motorbewegung
1
Motor movement enabled
1
Freigabe der Motorbewegung
The digital outputs give you information on the status
of the drive.
With the „Load to motor“ button, the user has the possiblity of loading mode-specific parameter adjustments
to the controller with the aid of the parameterising
interface.
Mit der „Load to motor“-Schaltfläche hat der Anwender
die Möglichkeit, modispezifische Parametereinstellungen auf den Regler zu laden.
Warning!
Achtung
Loading the currently selected project will reset all controller settings.
The motor will be freely rotatable.
Positioning control takes place via digital inputs which
are coded as follows:
Durch die Übertragung des aktuellen
Projektes auf den Regler werden alle
bisherigen Einstellungen gelöscht.
Der Motor ist nun frei bewegbar.
Die Ansteuerung der Positionierungen erfolgt hierbei
über digitale Eingänge, die wie folgt aufgeschlüsselt
sind:
IN 0
Function
IN 0
Funktion
0
Limit switch OFF
0
Limit Schalter AUS
1
Limit switch ON
1
Limit Schalter EIN
IN 1
IN 2
IN 3
Function
IN 1
IN 2
IN 3
Funktion
0
0
0
Clear error and
STOP
0
0
0
Error beseitigen und
STOP
1
0
0
Begin homing
1
0
0
Homing beginnen
0
1
0
Position 1 (positive)
0
1
0
Position 1 (positiv)
0
0
1
Position -1 (negative)
0
0
1
Position -1 (negativ)
52
Instruction Manual/Betriebsanleitung BGE 3515 / 6010, Version: 1.1 en_de
© 2009 Alcatel-Lucent; Dunkermotoren; D-79848 Bonndorf; Germany
Um die binäre Eingabe zu erleichtern wird der fünfte
digitale Eingang zur Bestätigung der Binäreinstellung
benutzt. Erst wenn durch IN 4 die Freigabe gegeben
ist, wird der angesteuerte Befehl ausgeführt.
Über die digitalen Ausgänge sind Informationen über
den Zustand des Antriebs erhältlich.
OUT0
Status
OUT0
Status
0
Motor disabled or Error or
no Homing
0
Keine Freigabe oder Fehler oder
kein Homing
1
Stopped, Ready, No Error,
Homing done
1
Gestoppt, fertig,
kein Fehler
0/1 *)
Moving
0/1 *)
Bewegung
*) If the motor is in movement, a changing signal with
a clock frequency of 5 Hz is displayed at the output 0.
*) Befindet sich der Motor in Bewegung, wird am
Ausgang 0 ein wechselndes Signal mit Taktfrequenz
5Hz ausgegeben.
In the following, detailed descriptions of all configurable parameter groups can be found:
Im Folgenden finden sie alle konfigurierbaren Parametergruppen ausführlich beschrieben:
“Moving” Parameter Group
Parametergruppe „Moving“
In the “Moving” parameter group, the user has the
possibility of making basic settings of the type of
movement.
In der Parametergruppe „Moving“, wird dem Anwender ermöglicht, grundlegende
Einstellungen der Bewegungsart zu tätigen.
Direction gives the direction of rotation of the motor;
“CW” stands for “clockwise” or “CCW” for “counter
clockwise”. This is especially significant for the reference run (Homing).
Direction gibt die Drehrichtung des Motors an. Dabei
steht „CW“ für „clockwise“ (im Uhrzeigersinn) bzw.
„CCW“ für „counter clockwise“ (gegen den Uhrzeigersinn). Dies ist besonders für die Referenzfahrt (Homing) von Bedeutung.
Velocity [rpm] / Speed / provides the possibility of
specifying an exact rotational speed. The speed is
given in “[rpm]” = “revolutions per minute”.
Velocity [rpm] / Speed / bietet die Möglichkeit zur
Bestimmung einer exakten Drehgeschwindigkeit. Die
Geschwindigkeit wird dabei in „[rpm]“ = „rounds per
minute“(Umdrehungen pro Minute) angegeben.
In this example, the motor runs with the speed of 500
rpm in the clockwise direction.
In diesem Beispiel läuft der Motor mit der Geschwindigkeit von 500 rpm im Uhrzeigersinn.
Instruction Manual/Betriebsanleitung BGE 3515 / 6010, Version: 1.1 en_de
© 2009 Alcatel-Lucent; Dunkermotoren; D-79848 Bonndorf; Germany
53
15 Stand-alone operation
15 Stand-alone Betrieb
15 Stand-alone operation
15 Stand-alone Betrieb
“Current [mA]” Parameter Group
Parametergruppe „Current [mA]“
“Motor Power” Parameter Group
Parametergruppe „Motor power“
In the “Current [mA]” parameter group, the user has
the possibility of making basic settings of the current
strength.
In der Parametergruppe „Current [mA]“ wird dem
Anwender ermöglicht, grundlegende Einstellungen der
Stromstärke vorzunehmen.
Contin.Current gives the maximum value in milliampere [mA] that is continuously made available to
the motor in phase current.
Contin.Current gibt den maximalen Wert in Miliampere [mA] an, der dem Motor im Phasenstrom dauerhaft zur Verfügung gestellt wird.
After a configured motor has reached a position (by a
drive to or stop command), there are two possibilities
with which this position can be handled by the
controller.
Nachdem ein konfigurierter Motor eine Position erreicht (durch Anfahren oder einen Stop-Befehl), gibt
es zwei Möglichkeiten, wie mit dieser Position von
Seiten des Reglers umgegangen werden soll.
This setting can now be configured exactly with the
aid of the “Motor Power” parameter group.
Diese Einstellung kann nun mit Hilfe der Parametergruppe „Motor power“ genau konfiguriert werden.
Peak Current allows the entry of the maximum permissible phase crest current in milliampere [mA] that
can be applied to the motor for short periods.
Peak Current erlaubt die Eingabe des maximal zulässigen Phasenspitzenstroms, der kurzfristig auf den
Motor einwirken darf, in Milliampere [mA].
One possibility is that the motor holds the position
reached with the aid of torque application (Power Enable). The other is that freedom of movement is made
possible after reaching a position (Power Disable).
Es besteht zum einen die Möglichkeit, dass der Motor
die erreichte Position mit Hilfe von Drehmoment-Aufwendung hält (Power Enable).
Zum anderen, kann die Bewegungsfreiheit nach dem
Erreichen einer Position ermöglicht werden (Power
Disable).
After STOP regulates the behaviour after a stop command.
After MOVE regulates the behaviour after being driven to a position.
After STOP regelt das Verhalten nach einem Stop-Befehl.
After MOVE regelt das Verhalten nach dem Anfahren
einer Position.
„Homing“ Parameter Group
Parametergruppe „Homing“
For the exact configuration of position movements, a
homing procedure must first be initiated for a motor.
In this homing procedure, a reference point must be
determined from which all further positioning operations are oriented.
When homing with the reference switch, the motor
traverses the switch. This results in a reversal of the
direction of rotation and another slow approach to the
reference switch on the falling flank.
Zur exakten Konfiguration von Positionsfahrten, muss
bei einem Motor zunächst ein Homing-Verfahren
eingeleitet werden. In diesem Homing-Verfahren wird
ein Referenzpunkt erfasst, an dem sich alle weiteren
Positionierungen orientieren.
Beim Homing mit Referenzschalter überfährt der
Motor diesen Schalter. Danach erfolgt eine Drehrichtungsumkehr und ein erneutes, langsames Anfahren
des Referenzschalters auf die fallende Flanke.
In this example, a continuous permissible phase current of 8 A and a peak current of 25 A are defined.
In diesem Beispiel wurde ein dauerhaft zulässiger
Phasenstrom von 8 A und ein Spitzenstrom von 25 A
festgelegt.
“Ramps [ms / 1000rpm]” Parameter Group
Parametergruppe „Ramps [ms / 1000rpm]“
In the positioning mode, all positions are approached
with the aid of acceleration and braking ramps. The
ramps are given in [ms / 1000rpm] (milliseconds per
1000 revolutions per minute). In the “Ramps [ms /
1000rpm]” parameter group, the user can now adapt
these ramps to his needs.
Alle ansteuerbaren Positionen im Positioniermodus
werden mit Hilfe von Rampen (beschleunigende und
abbremsende) exakt angefahren.
Die Rampen werden in [ms / 1000rpm] (Millisekunden
pro 1000 Umdrehungen pro Minute) angegeben.
In der Parametergruppe „Ramps [ms / 1000rpm]“
kann der Anwender nun diese Rampen nach seinen
Bedürfnissen anpassen.
Acceleration allows the setting of the acceleration
ramp.
Deceleration allows the setting of the brake ramp.
Quick Stop allows the setting of a ramp with high
negative acceleration value.
Acceleration erlaubt die Einstellung der Beschleunigungsrampe.
Deceleration erlaubt die Einstellung der Bremsrampe.
Quick Stop erlaubt die Einstellung einer Rampe mit
hohem negativem Beschleunigungswert.
In this example, an acceleration ramp with 200
ms/1000rpm and a brake ramp with 200 ms/1000rpm
were configured. For the Quick Stop, 20 ms/1000rpm
was defined.
54
In diesem Beispiel wurde eine Beschleunigungsrampe
mit 200 ms/1000rpm und eine Bremsrampe mit 200
ms/1000rpm konfiguriert.
Für den Quick Stop wurden 20 ms/1000rpm festgelegt.
Instruction Manual/Betriebsanleitung BGE 3515 / 6010, Version: 1.1 en_de
© 2009 Alcatel-Lucent; Dunkermotoren; D-79848 Bonndorf; Germany
Warning!
If, after referencing, the motor is pushed
to a position outside the operating
zone with the power supply cut off,
it will not be possible to return the
motor to standard operation. Before
returning it to service, the motor must
be manually moved back to the defined operating zone with the power
supply switched off.
Instruction Manual/Betriebsanleitung BGE 3515 / 6010, Version: 1.1 en_de
© 2009 Alcatel-Lucent; Dunkermotoren; D-79848 Bonndorf; Germany
Achtung
Wird der Motor nach der Referenzierung in stromlosen Zustand in eine
Position außerhalb des Betriebsbereichs verschoben ist es nicht
möglich den Motor wieder in den
Standardbetrieb zu nehmen. Der
Motor muss vor Inbetriebnahme im
stromlosen Zustand manuell in den
definierten Betriebsbereich zurückgeführt werden
55
15 Stand-alone operation
15 Stand-alone Betrieb
15 Stand-alone operation
15 Stand-alone Betrieb
For the determing this reference point, the user initially has a choice of methods (Home Methods).
Zur Feststellung dieses Referenzpunktes stehen dem
Anwender zunächst verschiedene Methoden zur Verfügung (Home Methods).
The Hard Stop method allows the motor to set its
reference point as soon as it meets a resistance (e.g.,
a stop).
Die Methode Hard Stop veranlasst den Motor dazu,
seinen Referenzpunkt zu setzen, sobald er bei der
Referenzfahrt auf einen Widerstand trifft (z.B. einen
Anschlag).
The Searching Ref. Switch in Negative Direction
method allows the motor to search opposite to the
direction of rotation for a switch (characterised by a
raising/falling edge) and to set the reference point
when it is reached.
Die Methode Searching Ref. Switch in Negativ
direction veranlasst den Motor dazu, entgegen der
Drehrichtung nach einem Schalter (charakterisiert
durch Steigende/Fallende Flanke) zu suchen und sich
bei Erreichen den Referenzpunkt zu setzen.
The Searching Ref. Switch in Positive Direction
method allows the motor to search in the direction of
rotation for a switch (characterised by a raising/falling
edge) and to set the reference point when it is reached.
Die Methode Searching Ref. Switch in Positive
direction veranlasst den Motor dazu, mit der Drehrichtung nach einem Schalter (charakterisiert durch
Steigende/Fallende Flanke) zu suchen und sich bei
Erreichen den Referenzpunkt zu setzten.
The Searching Limit Switch in Negative direction
method allows the motor to search opposite to the
direction of rotation for a limit switch (characterised by
a raising/falling edge) and to set the reference point
when it is reached.
In operation the Limit Switch limits the available operating range.
Die Methode Searching Limit Switch in Negativ
direction veranlasst den Motor dazu, entgegen der
Drehrichtung nach einem Limitschalter (charakterisiert
durch Steigende/Fallende Flanke) zu suchen und sich
bei Erreichen den Referenzpunkt zu setzen.
Im Betrieb begrenzt der Limitschalter den verfügbaren
Fahrbereich.
The Searching Limit Switch in Positive direction
method allows the motor to search in the direction of
rotation for a limit switch (characterised by a raising/
falling edge) and to set the reference point when it is
reached.In operation the Limit Switch limits the available operating range.
Die Methode Searching Limit Switch in Positive direction veranlasst den Motor dazu, mit der Drehrichtung nach einem Limitschalter (charakterisiert durch
Steigende/Fallende Flanke) zu suchen und sich bei
Erreichen den Referenzpunkt zu setzten.
Im Betrieb begrenzt der Limitschalter den verfügbaren
Fahrbereich.
There are further configuration options for what we
call Home Methods:
Es besteht des Weiteren die Möglichkeit, die genannten Home Methods zu konfigurieren:
Homing Current [mA] gives the current strength that
should be used for the homing procedure.
Homing Current [mA] gibt die Stromstärke an, die für
das Homing-Verfahren verwendet werden soll.
Homing Velocity [rpm] gives the speed (revolutions
per minute) with which the homing procedure should
be performed.
Homing Velocity [rpm] gibt die Geschwindigkeit
(Umdrehungen pro Minute) an, mit der das HomingVerfahren durchgeführt werden soll.
Ref. Switch signal, here is to specify if the motor
should react on a rising edge („High active“) or on a
falling edge („Low active“) during the homing.
Ref. Switch signal gibt an ob der Motor bei der Referenzfahrt auf eine steigende Flanke („High active“)
oder auf eine fallende Flanke („Low active“) reagieren
soll.
Home Vel. Zero [rpm] gives the speed with which,
after overrunning the raising edge of the switch, the
exact positioning should be performed by driving to
the falling edge.
Home vel. zero [rpm] gibt an, mit welcher Geschwindigkeit nach Überfahren der steigenden Flanke des
Schalters, die genaue Positionierung, durch Anfahren
der fallenden Flanke vorgenommen werden soll.
56
Instruction Manual/Betriebsanleitung BGE 3515 / 6010, Version: 1.1 en_de
© 2009 Alcatel-Lucent; Dunkermotoren; D-79848 Bonndorf; Germany
Home Offset [Counts] gives which count value (measuring unit for movement: 2000 counts is a revolution
of the motor drive shaft, i.e., a count corresponds to
a movement of the motor drive shaft of 0.18° ) should
be assigned to the acquired reference point.
Home offset [counts] gibt an, welcher Count-Wert
(Maßeinheit für Bewegung dabei sind 2000 Counts
eine Umdrehung an der Motorabtriebswelle und Count
entspricht einer Drehung um 0,18° an der Motorabtriebswelle beim BG65) dem erfassten Referenzpunkt
zugewiesen werden soll.
„Positions“ Parameter Group
Parametergruppe „Positions“
In the “Positions” parameter group, the user has the
possibility of storing a position in the controller. This
can then be optionally driven to via the motor control.
Positions are given in the “Counts” unit (whereby a
revolu-tion of the motor drive shaft is divided into 2000
counts) to ensure optimal accuracy of the positioning.
In der Parametergruppe „Positions“ wird dem Anwender ermöglicht, eine Positionierung auf dem Regler zu
speichern. Diese kann dann über die Motorsteuerung
beliebig angesteuert werden.
Positionen werden in der Einheit „Counts“ angegeben (wobei beim BG65 eine Umdrehung an der
Motorabtriebswelle in 2000 Counts eingeteilt ist), um
eine optimale Genauigkeit bei der Positionierung zu
gewährleisten.
01. is the identification number of the position that
can be entered in any field. Positions are given in the
“Counts” unit.
01. ist die Kennnummern der Position, die in das Feld
eingegeben werden kann. Positionen werden in der
Einheit „Counts“ angegeben.
In this example, a positioning with 14000 counts is
entered with the identification number 01.
In diesem Beispiel ist an Kennnummer 01. eine Positionierung mit 14000 Counts angegeben.
Instruction Manual/Betriebsanleitung BGE 3515 / 6010, Version: 1.1 en_de
© 2009 Alcatel-Lucent; Dunkermotoren; D-79848 Bonndorf; Germany
57
15 Stand-alone operation
15 Stand-alone Betrieb
15 Stand-alone operation
15 Stand-alone Betrieb
15.8.4 „Left-Right“ Positioning Mode
15.8.4 Positioniermodus „Left-Right“
The “Left-Right” positioning mode is a versatile
configurable operating mode that makes possible for
the user to drive back and forth between two different
positions in a simple manner.
Bei dem Positioniermodus „Left-Right“ handelt es sich
um einen vielfältig konfigurierbarer Betriebsmodus
der es dem Anwender auf einfache Weise ermöglicht
zwischen zwei Positionen hin und her zu fahren.
To facilitate the binary entries, the fifth digital input is
used to confirm the binary settings. Only when the
enable is given by IN 4 is the pending command performed.
IN 4
Function
IN 4
Funktion
0
Motor movement disabled
0
Keine Freigabe der Motorbewegung
1
Motor movement enabled
1
Freigabe der Motorbewegung
The digital outputs give you information on the status
of the drive.
With the „Load to motor“ button, the user has the possiblity of loading mode-specific parameter adjustments
to the controller with the aid of the parameterising
interface.
Mit der „Load to motor“-Schaltfläche hat der Anwender
die Möglichkeit, modispezifische Parametereinstellungen auf den Regler zu laden.
Warning!
Achtung
Loading the currently selected project will reset all controller settings.
The motor will be freely rotatable.
The controlling of the positionings takes place via the
digital inputs that are coded as follows:
Durch die Übertragung des aktuellen
Projektes auf den Regler werden alle
bisherigen Einstellungen gelöscht.
Der Motor ist nun frei bewegbar.
Die Ansteuerung der Positionierungen erfolgt hierbei
über digitale Eingänge, die wie folgt aufgeschlüsselt
sind:
IN 0
Function
IN 0
Funktion
0
Limit switch OFF
0
Limit Schalter AUS
1
Limit switch ON
1
Limit Schalter EIN
IN 1
IN 2
IN 3
Function
IN 1
IN 2
IN 3
Funktion
0
0
0
Clear error and
STOP
0
0
0
Error beseitigen und
STOP
1
0
0
Begin homing
1
0
0
Homing beginnen
0
1
0
Position 1
0
1
0
Position 1
0
0
1
Position 2
0
0
1
Position 2
58
Instruction Manual/Betriebsanleitung BGE 3515 / 6010, Version: 1.1 en_de
© 2009 Alcatel-Lucent; Dunkermotoren; D-79848 Bonndorf; Germany
Um die binäre Eingabe zu erleichtern wird der fünfte
digitale Eingang zur Bestätigung der Binäreinstellung
benutzt. Erst wenn durch IN 4 die Freigabe gegeben
ist, wird der angesteuerte Befehl ausgeführt.
Über die digitalen Ausgänge sind Informationen über
den Zustand des Antriebs erhältlich.
OUT0
Status
OUT0
Status
0
Motor disabled or Error or
no Homing
0
Keine Freigabe oder Fehler oder
kein Homing
1
Stopped, Ready, No Error,
Homing done
1
Gestoppt, fertig,
kein Fehler
0/1 *)
Moving
0/1 *)
Bewegung
*) If the motor is in movement, a changing signal with
a clock frequency of 5 Hz is displayed at the output 0.
*) Befindet sich der Motor in Bewegung, wird am
Ausgang 0 ein wechselndes Signal mit Taktfrequenz
5Hz ausgegeben.
In the following, detailed descriptions of all configurable parameter groups can be found:
Im Folgenden finden sie alle konfigurierbaren Parametergruppen ausführlich beschrieben:
“Moving” Parameter Group
Parametergruppe „Moving“
In the “Moving” parameter group, the user has the
possibility of making basic settings of the type of
movement.
In der Parametergruppe „Moving“, wird dem Anwender ermöglicht, grundlegende Einstellungen der
Bewegungsart zu tätigen.
Direction gives the direction of rotation of the motor;
“CW” stands for “clockwise” or “CCW” for “counter
clockwise”. This is especially significant for the reference run (Homing).
Direction gibt die Drehrichtung des Motors an. Dabei
steht „CW“ für „clockwise“ (im Uhrzeigersinn) bzw.
„CCW“ für „counter clockwise“ (gegen den Uhrzeigersinn). Dies ist besonders für die Referenzfahrt (Homing) von Bedeutung.
Velocity [rpm] / Speed / provides the possibility of
specifying an exact rotational speed. The speed is
given in “[rpm]” = “revolutions per minute”.
Velocity [rpm] / Speed / bietet die Möglichkeit zur
Bestimmung einer exakten Drehgeschwindigkeit. Die
Geschwindigkeit wird dabei in „[rpm]“ = „rounds per
minute“(Umdrehungen pro Minute) angegeben.
In this example, the motor runs with the speed of 500
rpm in the clockwise direction.
In diesem Beispiel läuft der Motor mit der Geschwindigkeit 500 rpm im Uhrzeigersinn.
Instruction Manual/Betriebsanleitung BGE 3515 / 6010, Version: 1.1 en_de
© 2009 Alcatel-Lucent; Dunkermotoren; D-79848 Bonndorf; Germany
59
15 Stand-alone operation
15 Stand-alone Betrieb
15 Stand-alone operation
15 Stand-alone Betrieb
“Current [mA]” Parameter Group
Parametergruppe „Current [mA]“
“Motor Power” Parameter Group
Parametergruppe „Motor power“
In the “Current [mA]” parameter group, the user has
the possibility of making basic settings of the current
strength.
In der Parametergruppe „Current [mA]“ wird dem
Anwender ermöglicht, grundlegende Einstellungen der
Stromstärke vorzunehmen.
Contin.Current gives the maximum value in milliampere [mA] that is continuously made available to
the motor in phase current.
Contin.Current gibt den maximalen Wert in Miliampere [mA] an, der dem Motor im Phasenstrom dauerhaft zur Verfügung gestellt wird.
Peak Current allows the entry of the maximum permissible phase crest current in milliampere [mA] that
can be applied to the motor for short periods.
Peak Current erlaubt die Eingabe des maximal zulässigen Phasenspitzenstroms, der kurzfristig auf den
Motor einwirken darf, in Milliampere [mA].
After a configured motor has reached a position (by a
drive to or stop command), there are two possibilities
with which this position can be handled by the
controller.
This setting can now be configured exactly with the
aid of the “Motor Power” parameter group.
One possibility is that the motor holds the reached position with the aid of torque application (Power Enable). The other is that freedom of movement is made
possible after reaching a position (Power Disable).
Nachdem ein konfigurierter Motor eine Position erreicht (durch Anfahren oder einen Stop-Befehl), gibt
es zwei Möglichkeiten, wie mit dieser Position von
Seiten des Reglers umgegangen werden soll.
Diese Einstellung kann nun mit Hilfe der Parametergruppe „Motor power“ genau konfiguriert werden.
Es besteht zum einen die Möglichkeit, dass der Motor
die erreichte Position mit Hilfe von Drehmoment-Aufwendung hält (Power Enable).
Zum anderen, kann die Bewegungsfreiheit nach dem
Erreichen einer Position ermöglicht werden (Power
Disable).
After STOP regulates the behaviour after a stop
command.
After MOVE regulates the behaviour after being driven to a position.
After STOP regelt das Verhalten nach einem StopBefehl.
After MOVE regelt das Verhalten nach dem Anfahren
einer Position.
In this example, the position after a STOP will be held,
however, after MOVE the motor is given freedom of
movement.
In diesem Beispiel wird die Position nach einem STOP
gehalten, nach MOVE behält der Motor jedoch seine
Bewegungsfreiheit.
„Homing“ Parameter Group
Parametergruppe „Homing“
For the exact configuration of position movements, a
homing procedure must first be initiated for a motor.
In this homing procedure, a reference point must be
determined from which all further positioning operations are oriented.
When homing with the reference switch, the motor
traverses the switch. This results in a reversal of the
direction of rotation and another slow approach to the
reference switch on the falling flank.
Zur exakten Konfiguration von Positionsfahrten, muss
bei einem Motor zunächst ein Homing-Verfahren
eingeleitet werden. In diesem Homing-Verfahren wird
ein Referenzpunkt erfasst, an dem sich alle weiteren
Positionierungen orientieren.
Beim Homing mit Referenzschalter überfährt der
Motor diesen Schalter. Danach erfolgt eine Drehrichtungsumkehr und ein erneutes, langsames Anfahren
des Referenzschalters auf die fallende Flanke.
In this example, a continuous permissible phase current of 8 A and a peak current of 25 A are defined.
In diesem Beispiel wurde ein dauerhaft zulässiger
Phasenstrom von 8 A und ein Spitzenstrom von 25 A
festgelegt.
“Ramps [ms / 1000rpm]” Parameter Group
Parametergruppe „Ramps [ms / 1000rpm]“
In the positioning mode, all positions are approached
with the aid of acceleration and braking ramps. The
ramps are given in [ms / 1000rpm] (milliseconds per
1000 revolutions per minute). In the “Ramps [ms /
1000rpm]” parameter group, the user can now adapt
these ramps to his needs.
Alle ansteuerbaren Positionen im Positioniermodus
werden mit Hilfe von Rampen (beschleunigende und
abbremsende) exakt angefahren.
Die Rampen werden in [ms / 1000rpm] (Millisekunden
pro 1000 Umdrehungen pro Minute) angegeben.
In der Parametergruppe „Ramps [ms / 1000rpm]“
kann der Anwender nun diese Rampen nach seinen
Bedürfnissen anpassen.
Acceleration erlaubt die Einstellung der Beschleunigungsrampe.
Deceleration erlaubt die Einstellung der Bremsrampe.
Quick Stop erlaubt die Einstellung einer Rampe mit
hohem negativem Beschleunigungswert.
Acceleration allows the setting of the acceleration
ramp.
Deceleration allows the setting of the brake ramp.
Quick Stop allows the setting of a ramp with high
negative acceleration value.
Warning!
In this example, an acceleration ramp with 200
ms/1000rpm and a brake ramp with 200 ms/1000rpm
were configured. For the Quick Stop, 20 ms/1000rpm
was defined.
60
In diesem Beispiel wurde eine Beschleunigungsrampe
mit 200 ms/1000rpm und eine Bremsrampe mit 200
ms/1000rpm konfiguriert.
Für den Quick Stop wurden 20 ms/1000rpm festgelegt.
Instruction Manual/Betriebsanleitung BGE 3515 / 6010, Version: 1.1 en_de
© 2009 Alcatel-Lucent; Dunkermotoren; D-79848 Bonndorf; Germany
If, after referencing, the motor is pushed
to a position outside the operating
zone with the power supply cut off,
it will not be possible to return the
motor to standard operation. Before
returning it to service, the motor must
be manually moved back to the defined operating zone with the power
supply switched off.
Instruction Manual/Betriebsanleitung BGE 3515 / 6010, Version: 1.1 en_de
© 2009 Alcatel-Lucent; Dunkermotoren; D-79848 Bonndorf; Germany
Achtung
Wird der Motor nach der Referenzierung in stromlosen Zustand in eine
Position außerhalb des Betriebsbereichs verschoben ist es nicht
möglich den Motor wieder in den
Standardbetrieb zu nehmen. Der
Motor muss vor Inbetriebnahme im
stromlosen Zustand manuell in den
definierten Betriebsbereich zurückgeführt werden
61
15 Stand-alone operation
15 Stand-alone Betrieb
15 Stand-alone operation
15 Stand-alone Betrieb
For the determing this reference point, the user initially has a choice of methods (Home Methods).
Zur Feststellung dieses Referenzpunktes stehen dem
Anwender zunächst verschiedene Methoden zur Verfügung (Home Methods).
The Hard Stop method allows the motor to set its
reference point as soon as it meets a resistance (e.g.,
a stop).
Die Methode Hard Stop veranlasst den Motor dazu,
seinen Referenzpunkt zu setzen, sobald er bei der
Referenzfahrt auf einen Widerstand trifft (z.B. einen
Anschlag).
The Searching Ref. Switch in Negative Direction
method allows the motor to search opposite to the
direction of rotation for a switch (characterised by a
raising/falling edge) and to set the reference point
when it is reached.
Die Methode Searching Ref. Switch in Negativ
direction veranlasst den Motor dazu, entgegen der
Drehrichtung nach einem Schalter (charakterisiert
durch Steigende/Fallende Flanke) zu suchen und sich
bei Erreichen den Referenzpunkt zu setzen.
The Searching Ref. Switch in Positive Direction
method allows the motor to search in the direction of
rotation for a switch (characterised by a raising/falling
edge) and to set the reference point when it is reached.
Die Methode Searching Ref. Switch in Positive
direction veranlasst den Motor dazu, mit der Drehrichtung nach einem Schalter (charakterisiert durch
Steigende/Fallende Flanke) zu suchen und sich bei
Erreichen den Referenzpunkt zu setzten.
The Searching Limit Switch in Negative direction
method allows the motor to search opposite to the
direction of rotation for a limit switch (characterised by
a raising/falling edge) and to set the reference point
when it is reached.
In operation the Limit Switch limits the available operating range.
Die Methode Searching Limit Switch in Negativ
direction veranlasst den Motor dazu, entgegen der
Drehrichtung nach einem Limitschalter (charakterisiert
durch Steigende/Fallende Flanke) zu suchen und sich
bei Erreichen den Referenzpunkt zu setzen.
Im Betrieb begrenzt der Limitschalter den verfügbaren
Fahrbereich.
The Searching Limit Switch in Positive direction
method allows the motor to search in the direction of
rotation for a limit switch (characterised by a raising/
falling edge) and to set the reference point when it is
reached.In operation the Limit Switch limits the available operating range.
Die Methode Searching Limit Switch in Positive direction veranlasst den Motor dazu, mit der Drehrichtung nach einem Limitschalter (charakterisiert durch
Steigende/Fallende Flanke) zu suchen und sich bei
Erreichen den Referenzpunkt zu setzten.
Im Betrieb begrenzt der Limitschalter den verfügbaren
Fahrbereich.
There are further configuration options for what we
call Home Methods:
Es besteht des Weiteren die Möglichkeit, die genannten Home Methods zu konfigurieren:
Homing Current [mA] gives the current strength that
should be used for the homing procedure.
Homing Current [mA] gibt die Stromstärke an, die für
das Homing-Verfahren verwendet werden soll.
Homing Velocity [rpm] gives the speed (revolutions
per minute) with which the homing procedure should
be performed.
Homing Velocity [rpm] gibt die Geschwindigkeit
(Umdrehungen pro Minute) an, mit der das HomingVerfahren durchgeführt werden soll.
Ref. Switch signal, here is to specify if the motor
should react on a rising edge („High active“) or on a
falling edge („Low active“) during the homing.
Ref. Switch signal gibt an ob der Motor bei der Referenzfahrt auf eine steigende Flanke („High active“)
oder auf eine fallende Flanke („Low active“) reagieren
soll.
Home Vel. Zero [rpm] gives the speed with which,
after overrunning the raising edge of the switch, the
exact positioning should be performed by driving to
the falling edge.
Home vel. zero [rpm] gibt an, mit welcher Geschwindigkeit nach Überfahren der steigenden Flanke des
Schalters, die genaue Positionierung, durch Anfahren
der fallenden Flanke vorgenommen werden soll.
62
Instruction Manual/Betriebsanleitung BGE 3515 / 6010, Version: 1.1 en_de
© 2009 Alcatel-Lucent; Dunkermotoren; D-79848 Bonndorf; Germany
Home Offset [Counts] gives which count value (measuring unit for movement: 2000 counts is a revolution
of the motor drive shaft, i.e., a count corresponds to
a movement of the motor drive shaft of 0.18° ) should
be assigned to the acquired reference point.
Home offset [counts] gibt an, welcher Count-Wert
(Maßeinheit für Bewegung dabei sind 2000 Counts
eine Umdrehung an der Motorabtriebswelle und Count
entspricht einer Drehung um 0,18° an der Motorabtriebswelle beim BG65) dem erfassten Referenzpunkt
zugewiesen werden soll.
“Positions” Parameter Group
Parametergruppe „Positions“
In the “Positions” parameter group, the user has the
possibility of storing two different positions in the
controller. These can then be optionally driven to
via the motor control. Positions are given in “Count”
units (whereby a revolution of the motor drive shaft is
divided into 2000 counts) to ensure optimal accuracy
of the positioning.
In der Parametergruppe „Positions“ wird dem Anwender ermöglicht, zwei verschiedene Positionierungen
auf dem Regler zu speichern. Diese können dann
über die Motorsteuerung beliebig angesteuert werden.
Positionen werden in der Einheit „Counts“ angegeben (wobei beim BG65 eine Umdrehung an der
Motorabtriebswelle in 2000 Counts eingeteilt ist), um
eine optimale Genauigkeit bei der Positionierung zu
gewährleisten.
01./ 02. are the identification numbers of the positions
that can be entered in any field. Positions are given in
the “Counts” unit.
01. / 02. sind die Kennnummern der Positionen, die
in jedes Feld eingegeben werden können. Positionen
werden in der Einheit „Counts“ angegeben.
In this example, a positioning with 0 counts is entered with the identification number 01.
In diesem Beispiel ist an Kennnummer 01. eine Positionierung mit 0 Counts angegeben.
Instruction Manual/Betriebsanleitung BGE 3515 / 6010, Version: 1.1 en_de
© 2009 Alcatel-Lucent; Dunkermotoren; D-79848 Bonndorf; Germany
63
15 Stand-alone operation
15 Stand-alone Betrieb
15 Stand-alone operation
15 Stand-alone Betrieb
15.8.5 „Modulo“ Positioning Mode
15.8.5 Positioniermodus „Modulo“
The “Modulo” positioning mode is an easily configured
operating mode that makes possible for the user to
parameterise positionings adapted to the situation and
drive to them in the required manner. A typical application for the “Modulo” mode is the tool changer.
Bei dem Positioniermodus „Modulo“ handelt es sich
um einen leicht zu konfigurierenden Betriebsmodus
der es dem Anwender ermöglicht situationsangepasste Positionierungen zu parametrieren und diese
auf gewünschtem Wege ansteuern zu lassen.
Eine typische Anwendung für den Modus „Modulo“ ist
der Werkzeugwechsler.
IN 1
IN 2
IN 3
IN 4
Function
IN 1
IN 2
IN 3
IN 4
Funktion
0
0
0
0
Clear error and
STOP
0
0
0
0
Error beseitigen und
STOP
1
0
0
0
Begin homing
1
0
0
0
Homing beginnen
0
1
0
0
Position 1
0
1
0
0
Position 1
1
1
0
0
Position 2
1
1
0
0
Position 2
0
0
1
0
Position 3
0
0
1
0
Position 3
1
0
1
0
Position 4
1
0
1
0
Position 4
0
1
1
0
Position 5
0
1
1
0
Position 5
1
1
1
0
Position 6
1
1
1
0
Position 6
0
0
0
1
Position 7
0
0
0
1
Position 7
1
0
0
1
Position 8
1
0
0
1
Position 8
0
1
0
1
Position 9
0
1
0
1
Position 9
1
1
0
1
Position 10
1
1
0
1
Position 10
0
0
1
1
Position 11
0
0
1
1
Position 11
1
0
1
1
Position 12
1
0
1
1
Position 12
0
1
1
1
Position 13
0
1
1
1
Position 13
1
1
1
1
Position 14
1
1
1
1
Position 14
The digital outputs give you information on the status
of the drive.
With the „Load to motor“ button, the user has the possiblity of loading mode-specific parameter adjustments
to the controller with the aid of the parameterising
interface.
Mit der „Load to motor“-Schaltfläche hat der Anwender
die Möglichkeit, modispezifische Parametereinstellungen auf den Regler zu laden.
Warning!
Achtung
Loading the currently selected project will reset all controller settings.
The motor will be freely rotatable.
The controlling of the positionings takes place via the
digital inputs that are coded as follows:
Durch die Übertragung des aktuellen
Projektes auf den Regler werden alle
bisherigen Einstellungen gelöscht.
Der Motor ist nun frei bewegbar.
OUT0
Status
OUT0
Status
0
Motor disabled or Error or
no Homing
0
Keine Freigabe oder Fehler oder
kein Homing
1
Stopped, Ready, No Error,
Homing done
1
Gestoppt, fertig,
kein Fehler
0/1 *)
Moving
0/1 *)
Bewegung
*) If the motor is in movement, a changing signal with
a clock frequency of 5 Hz is displayed at the output 0.
*) Befindet sich der Motor in Bewegung, wird am
Ausgang 0 ein wechselndes Signal mit Taktfrequenz
5Hz ausgegeben.
The “Modulo” positioning mode is a versatile function
that will be explained with the following example of a
tool changer.
Hinter dem Positioniermodus „Modulo“ steht eine vielseitige Funktionsweise, welche am folgenden Beispiel
eines Werkzeugwechslers erläutert wird.
Die Ansteuerung der Positionierungen erfolgt hierbei
über digitale Eingänge, die wie folgt aufgeschlüsselt
sind:
IN 0
Function
IN 0
Funktion
0
Limit switch OFF
0
Limit Schalter AUS
1
Limit switch ON
1
Limit Schalter EIN
64
Über die digitalen Ausgänge sind Informationen über
den Zustand des Antriebs erhältlich.
Instruction Manual/Betriebsanleitung BGE 3515 / 6010, Version: 1.1 en_de
© 2009 Alcatel-Lucent; Dunkermotoren; D-79848 Bonndorf; Germany
Instruction Manual/Betriebsanleitung BGE 3515 / 6010, Version: 1.1 en_de
© 2009 Alcatel-Lucent; Dunkermotoren; D-79848 Bonndorf; Germany
65
15 Stand-alone operation
15 Stand-alone Betrieb
15 Stand-alone operation
15 Stand-alone Betrieb
MODULO
MODE OF OPERATION
MODULO
FUNKTIONSWEISE
Rotation is configured with the aid of positions
Umdrehung wird mit Hilfe von Positionen konfiguriert
First, the user divides the movement range of the motor in any number of parts. The user can then assign
a number to certain positions in the revolution (in this
case, Pos01, Pos02, Pos03).
The positions are stored in the controller and, after a
reference point is acquired, can always be driven to
exactly and in the required sequence.
Zunächst wird vom Anwender der Bewegungsbereich des Motors in beliebig viele Teile unterteilt.
Bestimmten Positionen in der Umdrehung kann der
Anwender nun eine Nummer zuweisen (in diesem
Fall Pos01, Pos02, Pos03).Diese Positionen werden
im Regler gespeichert und sind nach Erfassen eines
Referenzpunktes immer exakt und in gewünschter
Reihenfolge ansteuerbar.
The procedure for the driving to the position can then
be defined by the user in a parameter mask.
Der Vorgang des Ansteuerns der Positionen kann nun
von Seiten des Anwenders in einer Parametervorlage
bestimmt werden.
Various possibilities are available:
Es stehen verschiedene Möglichkeiten zur Verfügung:
One is the definition of a negative or positive direction
of rotation (indicated by “+” and “-”). Another is that a
position is always driven to by the shortest path.
Zum einen in negativer oder positiver Drehrichtung
(durch „+“ und „-“ verdeutlicht) – zum anderen kann
eine Position immer auf dem kürzesten Weg angesteuert werden.
A motor with the “drive with the shortest path” setting
must therefore rotate less than a quarter of a revolution in the positive direction of rotation to get from “POS
1” to “POS 3”.
However, a motor with the “drive only in the negative
direction of rotation (“-”)” setting requires more than
three-quarters of a revolution.
So muss der Motor mit der Einstellung „auf kürzestem
Weg ansteuern“ weniger als eine viertel Umdrehung
in positiver Drehrichtung fahren um von „POS 1“ zu „POS
3“ zu gelangen.
Ein Motor mit der Einstellung „nur in negativer Drehrichtung („-“) ansteuern“ benötigt jedoch mehr als eine
dreiviertel Umdrehung.
66
Instruction Manual/Betriebsanleitung BGE 3515 / 6010, Version: 1.1 en_de
© 2009 Alcatel-Lucent; Dunkermotoren; D-79848 Bonndorf; Germany
All configurable parameter groups are described in
detail in the following:
Im Folgenden finden sie alle konfigurierbaren Parametergruppen ausführlich beschrieben:
“Moving” Parameter Group
Parametergruppe „Moving“
In the “Moving” parameter group, the user has the possibility of making basic settings of the type of movement.
In this manner, the direction of rotation for the Homing
Mode is also defined.
In der Parametergruppe „Moving“, wird dem Anwender
ermöglicht, grundlegende Einstellungen der Bewegungsart zu tätigen. Hiermit wird auch die Drehrichtung für den
Homing mode definiert.
Direction gives the direction of rotation of the motor.
“CW” stands for “clockwise” or “CCW” for “counter clockwise”. This is especially of significance for the reference
run (Homing).
Direction gibt die Drehrichtung des Motors an. Dabei
steht „CW“ für „clockwise“ (im Uhrzeigersinn) bzw.
„CCW“ für „counter clockwise“ (gegen den Uhrzeigersinn).
Dies ist besonders für die Referenzfahrt (Homing) von
Bedeutung.
Velocity [rpm] / Speed / provides the possibility of specifying an exact rotational speed. The speed is given in
“[rpm]” = “revolutions per minute”.
Velocity [rpm] / Speed / bietet die Möglichkeit zur
Bestimmung einer exakten Drehgeschwindigkeit. Die
Geschwindigkeit wird dabei in „[rpm]“ = „rounds per
minute“(Umdrehungen pro Minute) angegeben.
In this example, the motor runs with the speed of 500
rpm in the clockwise direction.
In diesem Beispiel läuft der Motor mit der Geschwindigkeit von 500 rpm im Uhrzeigersinn.
“Current [mA]” Parameter Group
Parametergruppe „Current [mA]“
In the “Current [mA]” parameter group, the user has
the possibility of making basic settings of the current
strength.
In der Parametergruppe „Current [mA]“ wird dem
Anwender ermöglicht, grundlegende Einstellungen der
Stromstärke vorzunehmen.
Contin.Current gives the maximum value in milliampere [mA] that is continuously made available to the
motor in operation.
Contin.Current gibt den maximalen Wert in Miliampere [mA] an, der dem Motor im Phasenstrom dauerhaft zur Verfügung gestellt wird.
Peak Current allows the entry of the maximum permissible peak current value in milliampere [mA] that
can be applied to the motor for short periods.
Peak Current erlaubt die Eingabe des maximal zulässigen Phasenspitzenstroms, der kurzfristig auf den
Motor einwirken darf, in Milliampere [mA].
In this example, a continuous permissible phase current of 8 A and a peak current of 25 A are defined.
In diesem Beispiel wurde ein dauerhaft zulässiger
Phasenstrom von 8 A und ein Spitzenstrom von 25 A
festgelegt.
Instruction Manual/Betriebsanleitung BGE 3515 / 6010, Version: 1.1 en_de
© 2009 Alcatel-Lucent; Dunkermotoren; D-79848 Bonndorf; Germany
67
15 Stand-alone operation
15 Stand-alone Betrieb
15 Stand-alone operation
15 Stand-alone Betrieb
“Ramps [ms / 1000rpm]” Parameter Group
Parametergruppe „Ramps [ms / 1000rpm]“
In the positioning mode, all positions are approached
with the aid of acceleration and braking ramps. The
ramps are given in [ms / 1000rpm] (milliseconds per
1000 revolutions per minute). In the “Ramps [ms /
1000rpm]” parameter group, the user can now adapt
these ramps to his needs.
Alle ansteuerbaren Positionen im Positioniermodus
werden mit Hilfe von Rampen (beschleunigende und
abbremsende) exakt angefahren.
Die Rampen werden in [ms / 1000rpm] (Millisekunden
pro 1000 Umdrehungen pro Minute) angegeben.
In der Parametergruppe „Ramps [ms / 1000rpm]“
kann der Anwender nun diese Rampen nach seinen
Bedürfnissen anpassen.
Acceleration allows the setting of the acceleration
ramp.
Deceleration allows the setting of the brake ramp.
Quick Stop allows the setting of a ramp with high
negative acceleration value.
Acceleration erlaubt die Einstellung der Beschleunigungsrampe.
Deceleration erlaubt die Einstellung der Bremsrampe.
Quick Stop erlaubt die Einstellung einer Rampe mit
hohem negativem Beschleunigungswert.
In this example, an acceleration ramp with 200
ms/1000rpm and a brake ramp with 200 ms/1000rpm
were configured. For the Quick Stop, 20 ms/1000rpm
was defined.
In diesem Beispiel wurde eine Beschleunigungsrampe
mit 200 ms/1000rpm und eine Bremsrampe mit 200
ms/1000rpm konfiguriert.
Für den Quick Stop wurden 20 ms/1000rpm festgelegt.
“Motor Power” Parameter Group
Parametergruppe „Motor power“
After a configured motor has reached a position (by a
drive to or stop command), there are two possibilities
with which this position can be handled by the
controller.
Nachdem ein konfigurierter Motor eine Position erreicht (durch Anfahren oder einen Stop-Befehl), gibt
es zwei Möglichkeiten, wie mit dieser Position von
Seiten des Reglers umgegangen werden soll.
This setting can now be configured exactly with the
aid of the “Motor Power” parameter group.
Diese Einstellung kann nun mit Hilfe der Parametergruppe „Motor power“ genau konfiguriert werden.
One possibility is that the motor holds the reached position with the aid of torque application (Power Enable). The other is that freedom of movement is made
possible after reaching a position (Power Disable).
Es besteht zum einen die Möglichkeit, dass der Motor
die erreichte Position mit Hilfe von Drehmoment-Aufwendung hält (Power Enable).
Zum anderen, kann die Bewegungsfreiheit nach dem
Erreichen einer Position ermöglicht werden (Power
Disable).
After STOP regulates the behaviour after a stop
command.
After STOP regelt das Verhalten nach einem StopBefehl.
After MOVE regulates the behaviour after being driven to a position.
After MOVE regelt das Verhalten nach dem Anfahren
einer Position.
68
Instruction Manual/Betriebsanleitung BGE 3515 / 6010, Version: 1.1 en_de
© 2009 Alcatel-Lucent; Dunkermotoren; D-79848 Bonndorf; Germany
In this example, the position after a STOP will be held,
however, after MOVE the motor is given freedom of
movement.
In diesem Beispiel wird die Position nach einem STOP
gehalten, nach MOVE behält der Motor jedoch seine
Bewegungsfreiheit.
„Homing“ Parameter Group
Parametergruppe „Homing“
For the exact configuration of position movements, a
homing procedure must first be initiated for a motor.
In this homing procedure, a reference point must be
determined from which all further positioning operations are oriented.
When homing with the reference switch, the motor
traverses the switch. This results in a reversal of the
direction of rotation and another slow approach to the
reference switch on the falling flank.
Zur exakten Konfiguration von Positionsfahrten, muss
bei einem Motor zunächst ein Homing-Verfahren
eingeleitet werden. In diesem Homing-Verfahren wird
ein Referenzpunkt erfasst, an dem sich alle weiteren
Positionierungen orientieren.
Beim Homing mit Referenzschalter überfährt der
Motor diesen Schalter. Danach erfolgt eine Drehrichtungsumkehr und ein erneutes, langsames Anfahren
des Referenzschalters auf die fallende Flanke.
Warning!
Achtung
If, after referencing, the motor is pushed
to a position outside the operating
zone with the power supply cut off,
it will not be possible to return the
motor to standard operation. Before
returning it to service, the motor must
be manually moved back to the defined operating zone with the power
supply switched off.
Wird der Motor nach der Referenzierung in stromlosen Zustand in eine
Position außerhalb des Betriebsbereichs verschoben ist es nicht
möglich den Motor wieder in den
Standardbetrieb zu nehmen. Der
Motor muss vor Inbetriebnahme im
stromlosen Zustand manuell in den
definierten Betriebsbereich zurückgeführt werden
For the determing this reference point, the user initially has a choice of methods (Home Methods).
Zur Feststellung dieses Referenzpunktes stehen dem
Anwender zunächst verschiedene Methoden zur Verfügung (Home Methods).
The Hard Stop method allows the motor to set its
reference point as soon as it meets a resistance (e.g.,
a stop).
Die Methode Hard Stop veranlasst den Motor dazu,
seinen Referenzpunkt zu setzen, sobald er bei der
Referenzfahrt auf einen Widerstand trifft (z.B. einen
Anschlag).
The Searching Ref. Switch in Negative Direction
method allows the motor to search opposite to the
direction of rotation for a switch (characterised by a
raising/falling edge) and to set the reference point
when it is reached.
Die Methode Searching Ref. Switch in Negativ
direction veranlasst den Motor dazu, entgegen der
Drehrichtung nach einem Schalter (charakterisiert
durch Steigende/Fallende Flanke) zu suchen und sich
bei Erreichen den Referenzpunkt zu setzen.
The Searching Ref. Switch in Positive Direction
method allows the motor to search in the direction of
rotation for a switch (characterised by a raising/falling
edge) and to set the reference point when it is reached.
Die Methode Searching Ref. Switch in Positive
direction veranlasst den Motor dazu, mit der Drehrichtung nach einem Schalter (charakterisiert durch
Steigende/Fallende Flanke) zu suchen und sich bei
Erreichen den Referenzpunkt zu setzten.
Instruction Manual/Betriebsanleitung BGE 3515 / 6010, Version: 1.1 en_de
© 2009 Alcatel-Lucent; Dunkermotoren; D-79848 Bonndorf; Germany
69
15 Stand-alone operation
15 Stand-alone Betrieb
15 Stand-alone operation
15 Stand-alone Betrieb
The Searching Limit Switch in Negative direction
method allows the motor to search opposite to the
direction of rotation for a limit switch (characterised by
a raising/falling edge) and to set the reference point
when it is reached.
In operation the Limit Switch limits the available operating range.
Die Methode Searching Limit Switch in Negativ
direction veranlasst den Motor dazu, entgegen der
Drehrichtung nach einem Limitschalter (charakterisiert
durch Steigende/Fallende Flanke) zu suchen und sich
bei Erreichen den Referenzpunkt zu setzen.
Im Betrieb begrenzt der Limitschalter den verfügbaren
Fahrbereich.
“Modulo” Parameter Group
Parametergruppe „Modulo“
In the “Modulo” parameter group, the user can adapt
the method by which a motor performs a positioning to
his needs. At the same time, a personalised dividing
of the full movement range is possible.
In der Parametergruppe „Modulo“ kann der Anwender
die Art, wie ein Motor eine Positionierung vornimmt,
seinen Bedürfnissen anpassen.
Gleichzeitig wird eine personalisierte Einteilung des
vollen Bewegungsbereiches ermöglicht.
The Searching Limit Switch in Positive direction
method allows the motor to search in the direction of
rotation for a limit switch (characterised by a raising/
falling edge) and to set the reference point when it is
reached.In operation the Limit Switch limits the available operating range.
Die Methode Searching Limit Switch in Positive direction veranlasst den Motor dazu, mit der Drehrichtung nach einem Limitschalter (charakterisiert durch
Steigende/Fallende Flanke) zu suchen und sich bei
Erreichen den Referenzpunkt zu setzten.
Im Betrieb begrenzt der Limitschalter den verfügbaren
Fahrbereich.
With the “Short Path” Modulo Method setting, the
motor will take the shortest path to every pending
positioning.
Mit der Einstellung Modulo Method „Short Path“ wird
der Motor jede anstehende Positionierung auf dem
kürzesten Weg anfahren.
With the “Only Positive” Modulo Method setting, the
motor will rotate in the positive direction to every pending positioning.
Mit der Einstellung Modulo Method „Only positive“
wird der Motor jede anstehende Positionierung in
positiver Laufrichtung anfahren.
There are further configuration options for what we
call Home Methods:
Es besteht des Weiteren die Möglichkeit, die genannten Home Methods zu konfigurieren:
Homing Current [mA] gives the current strength that
should be used for the homing procedure.
Homing Current [mA] gibt die Stromstärke an, die für
das Homing-Verfahren verwendet werden soll.
With the “Only Negative” Modulo Method setting,
the motor will rotate in the negative direction to every
pending positioning.
Mit der Einstellung Modulo Method „Only negative“
wird der Motor jede anstehende Positionierung in
negativer Laufrichtung anfahren.
Homing Velocity [rpm] gives the speed (revolutions
per minute) with which the homing procedure should
be performed.
Homing Velocity [rpm] gibt die Geschwindigkeit
(Umdrehungen pro Minute) an, mit der das HomingVerfahren durchgeführt werden soll.
With the “Modulo Value”, the user can define the
division steps of the movement range.
Mit der Angabe „Modulo Value“ kann der Anwender
die Aufteilungsabschnitte des Bewegungsbereiches
festlegen. Untersetzungen sind mit einem Faktor zu
berücksichtigten.
Ref. Switch signal, here is to specify if the motor
should react on a rising edge („High active“) or on a
falling edge („Low active“) during the homing.
Ref. Switch signal gibt an ob der Motor bei der Referenzfahrt auf eine steigende Flanke („High active“)
oder auf eine fallende Flanke („Low active“) reagieren
soll.
Home Vel. Zero [rpm] gives the speed with which,
after overrunning the raising edge of the switch, the
exact positioning should be performed by driving to
the falling edge.
Home vel. zero [rpm] gibt an, mit welcher Geschwindigkeit nach Überfahren der steigenden Flanke des
Schalters, die genaue Positionierung, durch Anfahren
der fallenden Flanke vorgenommen werden soll.
In this example, the motor will drive to the pending
positioning by the shortest path. A full rotation was
divided in 14000 steps.
In diesem Beispiel wird der Motor eine anstehende
Positionierung auf dem kürzesten Weg anfahren.
Eine volle Drehbewegung wurde in 14000 Abschnitte
aufgeteilt.
Home Offset [Counts] gives which count value (measuring unit for movement: 2000 counts is a revolution
of the motor drive shaft, i.e., a count corresponds to
a movement of the motor drive shaft of 0.18° ) should
be assigned to the acquired reference point.
Home offset [counts] gibt an, welcher Count-Wert
(Maßeinheit für Bewegung dabei sind 2000 Counts
eine Umdrehung an der Motorabtriebswelle und Count
entspricht einer Drehung um 0,18° an der Motorabtriebswelle beim BG65) dem erfassten Referenzpunkt
zugewiesen werden soll.
“Positions” Parameter Group
Parametergruppe „Positions“
In the “Positions” parameter group, the user has the
possibility of storing various positions in the controller.
These can then be optionally driven to via the motor control. Positions are given in the “Counts” unit
(whereby a revolution of the motor drive shaft is
divided into 2000 counts) to ensure optimal accuracy
of the positioning.
In der Parametergruppe „Positions“ wird dem Anwender ermöglicht, verschiedene Positionen auf dem
Regler zu speichern. Diese können dann über die
Motorsteuerung beliebig angesteuert werden.
Positionen werden in der Einheit „Counts“ angegeben (wobei beim BG65 eine Umdrehung an der
Motorabtriebswelle in 2000 Counts eingeteilt ist), um
eine optimale Genauigkeit bei der Positionierung zu
gewährleisten.
01.– 14. are the identification numbers of the positions
that can be entered in any field. Positions are given in
the “Counts” unit.
01.– 14. sind die Kennnummern der Positionen, die
in jedes Feld eingegeben werden können. Positionen
werden in der Einheit „Counts“ angegeben.
70
Instruction Manual/Betriebsanleitung BGE 3515 / 6010, Version: 1.1 en_de
© 2009 Alcatel-Lucent; Dunkermotoren; D-79848 Bonndorf; Germany
Instruction Manual/Betriebsanleitung BGE 3515 / 6010, Version: 1.1 en_de
© 2009 Alcatel-Lucent; Dunkermotoren; D-79848 Bonndorf; Germany
71
15 Stand-alone operation
15 Stand-alone Betrieb
15 Stand-alone operation
15 Stand-alone Betrieb
The activation of the settings takes place via an analogue or a digital input that is coded as follows:
In this example, the identification number 01 is given a
positioning with 0 counts.
In diesem Beispiel ist an Kennnummer 01. eine Positio-nierung mit 0 Counts angegeben.
Die Ansteuerung der Einstellungen erfolgt hierbei über
einen analogen Eingang oder digitale Eingänge, die
wie folgt aufgeschlüsselt sind:
IN 0
IN 1
Function
IN 0
IN 1
Funktion
0
0
Not used
0
0
Nicht belegt
Rising edge: Start CCW
- counter clockwise
0 -> 1
-
-
0 -> 1
Steigende Flanke: Start CW
- mit dem Uhrzeigersinn
0 -> 1
-
-
0 -> 1
Rising edge: Start CW
- clockwise
Steigende Flanke: Start CCW
- gegen den Uhrzeigersinn
15.8.6 „Positioning by Event“ Positioning Mode
15.8.6 Positioniermodus „Positioning by Event“
0 -> 1
0 -> 1
Rising edges: Stop
0 -> 1
0 -> 1
Steigende Flanken: Stop
The „Positioning by Event“ mode is an easily configurable operating mode that makes it possible for the
user to stop (positioning) an application in motion via
an event.
Bei dem Positioniermodus „Positioning by Event“
handelt es sich um einen leicht konfigurierbaren
Betriebsmodus der es dem Anwender ermöglicht, eine
in Bewegung befindliche Anwendung mittels eines
Ereignisses definiert anzuhalten (Positionieren).
1
1
Fault Reset,
if exist
1
1
Fehler beseitigen,
wenn vorhanden
IN 2
Function
IN 2
Funktion
Rising/Falling
edge
Sensor CCW (adjustable edge).
The edge starts moving to Position 02
Steigende/Fallende Flanke
Sensor CCW (einstellbare Flankeerkennung). Die Flanke startet
eine Motorbewegung nach Position 02
IN 2
Function
IN 3
Funktion
Rising/Falling
edge
Sensor CW (adjustable edge).
The edge starts moving to Position 01
Steigende/Fallende Flanke
Sensor CW (einstellbare Flankeerkennung). Die Flanke startet eine
Motorbewegung nach Position 01
To facilitate the binary entries, the fifth digital input is
used to confirm the binary settings. Only when the
enable is given by IN 4 is the pending command performed.
IN 4
Function
IN 4
Funktion
0
Motor movement disabled
0
Keine Freigabe der Motorbewegung
1
Motor movement enabled
1
Freigabe der Motorbewegung
The digital outputs give you information on the status
of the drive.
With the „Load to motor“ button, the user has the possiblity of loading mode-specific parameter adjustments
to the controller with the aid of the parameterising
interface.
Warning!
Loading the currently selected project will reset all controller settings.
The motor will be freely rotatable.
72
Mit der „Load to motor“-Schaltfläche hat der Anwender
die Möglichkeit, modispezifische Parametereinstellungen auf den Regler zu laden.
Achtung
Durch die Übertragung des aktuellen
Projektes auf den Regler werden alle
bisherigen Einstellungen gelöscht.
Der Motor ist nun frei bewegbar.
Instruction Manual/Betriebsanleitung BGE 3515 / 6010, Version: 1.1 en_de
© 2009 Alcatel-Lucent; Dunkermotoren; D-79848 Bonndorf; Germany
Um die binäre Eingabe zu erleichtern wird der fünfte
digitale Eingang zur Bestätigung der Binäreinstellung
benutzt. Erst wenn durch IN 4 die Freigabe gegeben
ist, wird der angesteuerte Befehl ausgeführt.
Über die digitalen Ausgänge sind Informationen über
den Zustand des Antriebs erhältlich.
OUT0
Status
OUT0
Status
0
Motor disabled or Error or
no Homing
0
Keine Freigabe oder Fehler oder
kein Homing
1
Stopped, Ready, No Error,
Homing done
1
Gestoppt, fertig,
kein Fehler
0/1 *)
Moving
0/1 *)
Bewegung
*) If the motor is in movement, a changing signal with
a clock frequency of 5 Hz is displayed at the output 0.
*) Befindet sich der Motor in Bewegung, wird am
Ausgang 0 ein wechselndes Signal mit Taktfrequenz
5Hz ausgegeben.
Instruction Manual/Betriebsanleitung BGE 3515 / 6010, Version: 1.1 en_de
© 2009 Alcatel-Lucent; Dunkermotoren; D-79848 Bonndorf; Germany
73
15 Stand-alone operation
15 Stand-alone Betrieb
15 Stand-alone operation
15 Stand-alone Betrieb
In the following, detailed descriptions of all configurable parameter groups can be found:
Im Folgenden finden sie alle konfigurierbaren Parametergruppen ausführlich beschrieben:
„Moving“ Parameter Group
Parametergruppe „Moving“
In the “Moving” parameter group, the user has the possibility of making basic settings of the type of movement.
In this manner, the direction of rotation for the Homing
Mode is also defined.
In der Parametergruppe „Moving“, wird dem Anwender
ermöglicht, grundlegende Einstellungen der Bewegungsart zu tätigen. Hiermit wird auch die Drehrichtung für den
Homing mode definiert.
Direction gives the direction of rotation of the motor.
“CW” stands for “clockwise” or “CCW” for “counter clockwise”
Direction gibt die Drehrichtung des Motors an. Dabei
steht „CW“ für „clockwise“ (im Uhrzeigersinn) bzw.
„CCW“ für „counter clockwise“ (gegen den Uhrzeigersinn).
„Motor Power“ Parameter Group
Parametergruppe „Motor Power“
After a configured motor has reached a position (by a
drive to or stop command), there are two possibilities
with which this position can be handled by the
controller.
Nachdem ein konfigurierter Motor eine Position erreicht (durch Anfahren oder einen Stop-Befehl), gibt
es zwei Möglichkeiten, wie mit dieser Position von
Seiten des Reglers umgegangen werden soll.
This setting can now be configured exactly with the
aid of the “Motor Power” parameter group.
Diese Einstellung kann nun mit Hilfe der Parametergruppe „Motor power“ genau konfiguriert werden.
One possibility is that the motor holds the reached position with the aid of torque application (Power Enable). The other is that freedom of movement is made
possible after reaching a position (Power Disable).
Es besteht zum einen die Möglichkeit, dass der Motor
die erreichte Position mit Hilfe von Drehmoment-Aufwendung hält (Power Enable).
Zum anderen, kann die Bewegungsfreiheit nach dem
Erreichen einer Position ermöglicht werden (Power
Disable).
After STOP regulates the behaviour after a stop
command.
After STOP regelt das Verhalten nach einem StopBefehl.
After MOVE regulates the behaviour after being driven to a position.
After MOVE regelt das Verhalten nach dem Anfahren
einer Position.
In this example, the position after a STOP will be held,
however, after MOVE the motor is given freedom of
movement.
In diesem Beispiel wird die Position nach einem STOP
gehalten, nach MOVE behält der Motor jedoch seine
Bewegungsfreiheit.
74
Instruction Manual/Betriebsanleitung BGE 3515 / 6010, Version: 1.1 en_de
© 2009 Alcatel-Lucent; Dunkermotoren; D-79848 Bonndorf; Germany
“Current [mA]” Parameter Group
Parametergruppe „Current [mA]“
In the “Current [mA]” parameter group, the user has
the possibility of making basic settings of the current
strength.
In der Parametergruppe „Current [mA]“ wird dem
Anwender ermöglicht, grundlegende Einstellungen der
Stromstärke vorzunehmen.
Contin.Current gives the maximum value in milliampere [mA] that is continuously made available to the
motor in operation.
Contin.Current gibt den maximalen Wert in Miliampere [mA] an, der dem Motor im Phasenstrom dauerhaft zur Verfügung gestellt wird.
Peak Current allows the entry of the maximum permissible peak current value in milliampere [mA] that
can be applied to the motor for short periods.
Peak Current erlaubt die Eingabe des maximal zulässigen Phasenspitzenstroms, der kurzfristig auf den
Motor einwirken darf, in Milliampere [mA].
In this example, a continuous permissible phase current of 8 A and a peak current of 25 A are defined.
In diesem Beispiel wurde ein dauerhaft zulässiger
Phasenstrom von 8 A und ein Spitzenstrom von 25 A
festgelegt.
„Ramp [ms/1000rpm]“ Parameter Group
Parametergruppe „Ramp [ms/1000rpm]“
In positioning mode, all achievable positions are
approached with ramps. The ramps are given in [ms /
1000rpm] (milliseconds per 1000 revolutions per minute). In the “Ramps [ms / 1000rpm]” parameter group,
the user can now adapt these ramps to his needs.
Alle ansteuerbaren Positionen im Positioniermodus
werden mit Hilfe von Rampen angefahren.
Die Rampen werden in [ms / 1000rpm] (Millisekunden
pro 1000 Umdrehungen pro Minute) angegeben.
In der Parametergruppe „Ramps [ms / 1000rpm]“
kann der Anwender nun diese Rampen nach seinen
Bedürfnissen anpassen.
Quick Stop allows a ramp to be set with a high negative acceleration.
Quick Stop erlaubt die Einstellung einer Rampe mit
hohem negativem Beschleunigungswert.
In this example, the Quick Stop was defined with 50
ms/1000rpm.
In diesem Beispiel wurde für den Quick Stop
50 ms/1000rpm festgelegt.
Instruction Manual/Betriebsanleitung BGE 3515 / 6010, Version: 1.1 en_de
© 2009 Alcatel-Lucent; Dunkermotoren; D-79848 Bonndorf; Germany
75
15 Stand-alone operation
15 Stand-alone Betrieb
15 Stand-alone operation
15 Stand-alone Betrieb
„Move“ Parameter Group
Parametergruppe „Move“
In the Parameter Group „Move“ the user has the possibility to to parameterize the drive command and the
defined position after an event (IN2, IN3).
In der Parametergruppe „Move“ hat der Anwender
die Möglichkeit einen Fahrbefehl und das definierte
Positionieren nach einem Ereignis (IN2, IN3) zu parametrieren.
The parameter set divides itself into two driving sets.
The first drive set is started by IN1 (CW), IN0 (CCW),
and runs at defined speed for the defined time.
This movement can be interrupted with the inputs IN2
(CCW), IN3 (CW) and can be looked with the movement defined under „Position“ (Positioning by Event).
Der Parametersatz teilt sich in 2 Fahrsätze auf. Der
erste Fahrsatz wird durch IN1 (CW), IN0 (CCW)
gestartet, mit definierter Geschwindigkeit auf die unter
„Time“ definierte Zeit ausgeführt.
Diese Bewegung kann mit den Eingängen IN2 (CCW),
IN3 (CW) unterbrochen werden und mit der unter
„Position“ definierten Bewegung abgeschlossen werden (Positioning by Event).
Velocity provides the possibility of specifying an
exact rotational speed. The speed is given in „[rpm]“ =
„rounds per minute“.
Velocity bietet die Möglichkeit zur Bestimmung einer
exakten Drehgeschwindigkeit. Die Geschwindigkeit
wird dabei in „[rpm]“ = „rounds per minute“ (Umdrehung pro Minute) angegeben.
With Time the user has the possibility to implement
the input of a space of time within the application
without its actual position. After the end of the time the
dirve brakes with the parametered ramp.
Time ermöglicht dem Anwender die Eingabe eines
Zeitraums innerhalb dem die Anwendung ohne seines
aktuellen Zustandes ausgeführt werden kann. Nach
Ende der Zeit wird der Antrieb mit der parametrierten
Rampe abgebremst.
Edge offers the possibility for the user to adjust a
edge. Adjustable are the rising edge and the falling
edge.
Edge bietet dem Anwender die Möglichkeit, eine Flanke einzustellen. Steigende Flanke (Rising edge) oder
die Fallende Flanke (Falling edge) sind einstellbar.
Position [counts], the user has the possibility to define the positioning after the event (IN2, IN3).
The value for this position movement are given in
„Counts“ (BG45 - 1024/u, BG65 - 2000/u, BG75 - 4096/
u).
Position [Counts] hier wird dem Anwender ermöglicht die Positionierung nach dem Ereignis (IN2, IN3) zu
definieren. Der Wert für diese Positionsbewegung wird
in Counts angegeben (BG45 – 1024/u, BG65 – 2000/
u, BG75 – 4096/u).
Acceleration („Acc.“) allows the setting of the
acceleratio ramp
Acceleration („Acc.“) erlaubt die Einstellung der
Beschleunigungsrampe.
Deceleration („Dec.“) allows the setting of the brake
ramp.
Deceleration („Dec.“) erlaubt die Einstellung der
Bremsrampe.
15.8.7 „Velocity Standard“
Velocity Mode
15.8.7 Geschwindigkeitsmodus
„Velocity Standard“
The “Velocity Standard” mode is an easily configured
operating mode that makes it possible for the user to
configure three motor velocities in a simple manner by
setting various parameters and adapting them to his
needs.
Bei dem Geschwindigkeitsmodus „Velocity Standard“
handelt es sich um einen leicht konfigurierbaren
Betriebsmodus der es dem Anwender ermöglicht,
über das Setzen von verschiedenen Parametern, auf
einfache Weise drei Motorgeschwindigkeiten zu konfigurieren und diese seinen Bedürfnissen anzupassen.
With the „Load to motor“ button, the user has the possiblity of loading mode-specific parameter adjustments
to the controller with the aid of the parameterising
interface.
Mit der „Load to motor“-Schaltfläche hat der Anwender
die Möglichkeit, modispezifische Parametereinstellungen auf den Regler zu laden.
Warning!
The activation of the settings takes place via an analogue or a digital input that is coded as follows:
76
Instruction Manual/Betriebsanleitung BGE 3515 / 6010, Version: 1.1 en_de
© 2009 Alcatel-Lucent; Dunkermotoren; D-79848 Bonndorf; Germany
Achtung
Loading the currently selected project will reset all controller settings.
The motor will be freely rotatable.
Durch die Übertragung des aktuellen
Projektes auf den Regler werden alle
bisherigen Einstellungen gelöscht.
Der Motor ist nun frei bewegbar.
Die Ansteuerung der Einstellungen erfolgt hierbei über
einen analogen Eingang oder digitale Eingänge, die
wie folgt aufgeschlüsselt sind:
IN 0
IN 1
Function
IN 0
IN 1
Funktion
0
0
Quick stop, deactivate and
eliminate error
0
0
Quickstop, deaktivieren und Error
beseitigen
1
0
CCW – counter clockwise
1
0
CCW – gegen den Uhrzeigersinn
0
1
CW – clockwise
0
1
CW – mit dem Uhrzeigersinn
1
1
Stop, activate and eliminate
Error
1
1
Halten, aktivieren und Error beseitigen
Instruction Manual/Betriebsanleitung BGE 3515 / 6010, Version: 1.1 en_de
© 2009 Alcatel-Lucent; Dunkermotoren; D-79848 Bonndorf; Germany
77
15 Stand-alone operation
15 Stand-alone Betrieb
15 Stand-alone operation
15 Stand-alone Betrieb
IN 2
IN 3
IN 4
Function
IN 2
IN 3
IN 4
Funktion
1
0
0
Velocity 1
1
0
0
Geschwindigkeit 1
0
1
0
Velocity 2
0
1
0
Geschwindigkeit 2
0
0
1
Velocity 3
0
0
1
Geschwindigkeit 3
Alternatively you may activate the settings by analogue inputs:
IN3/AI+
IN4/AI-
0V ... -10V DC
Alternativ kann die Ansteuerung über analoge Eingänge geschehen:
Function
IN3/AI+
Adjustable velocity:
0(rpm)...-Max(rpm)
0V ... -10V DC
The digital outputs give you information on the status
of the drive.
IN4/AI-
Funktion
Adjustable velocity:
0(rpm)...-Max(rpm)
Über die digitalen Ausgänge sind Informationen über
den Zustand des Antriebs erhältlich.
OUT0
Status
OUT0
Status
0
Motor disabled or Error or
no Homing
0
Keine Freigabe oder Fehler oder
kein Homing
1
Stopped, Ready, No Error,
Homing done
1
Gestoppt, fertig,
kein Fehler
0/1 *)
Target velocity is not reached
0/1 *)
Geschwindigkeit nicht erreicht
*) As long as the target velocity is not reached
(drive is in the phase of acceleration or deceleration)
the signal “Output 0” is changing with a
clock frequency of 5Hz.
*) Solange die Zielgeschwindigkeit nicht erreicht ist
(Antrieb in Beschleunigungs- oder Bremsphase) wird
am Ausgang 0 ein wechselndes Signal mit
Taktfrequenz 5Hz ausgegeben.
In the following, all configurable parameter groups are
described in detail:
Im Folgenden finden sie alle konfigurierbaren Parametergruppen ausführlich beschrieben:
„Velocity source“ Parameter Group
Parametergruppe „Velocity source“
With the “Velocity Source” parameter group, the user
is given the possibility of deciding which control variant to use for the velocity mode.
In der Parametergruppe „Velocity source“ wird dem
Anwender die Möglichkeit gegeben, über die Steuerungsvariante des Geschwindigkeitsmodus zu entscheiden.
The Analog setting makes it possible to control the
motor velocity manually via an analogue input. For
this purpose, the maximum voltage value is assigned
a maximum rotational speed. In this manner, the velocity can be set using a specified analogue value that
is in a fixed relationship to the velocity.
Die Einstellung Analog bietet die Möglichkeit, die
Motorgeschwindigkeit über einen Analogeingang
manuell zu steuern. Dabei wird dem maximalen Spannungswert der eine maximale Drehzahl zugewiesen,
so kann über die analoge Sollwertvorgabe in einem
festen Verhältnis die Geschwindigkeit eingestellt.
The analogue operating mode excludes the use of the
digital operating mode and conversely!
Ein analoger Betriebsmodus schließt die Verwendung
des digitalen Betriebsmodus aus und umgekehrt !
The Intern setting makes it possible to predefine the
motor velocity via a digital input. For this purpose,
three velocities are first set which can then be activated or changed via assigned inputs.
Die Einstellung Intern bietet die Möglichkeit, die
Motorengeschwindigkeit über digitale Eingänge
vorzugeben. Zu diesem Zweck werden zunächst drei
Geschwindigkeiten eingestellt, welche dann über
zugewiesene Eingänge angesteuert bzw. gewechselt
werden.
78
Instruction Manual/Betriebsanleitung BGE 3515 / 6010, Version: 1.1 en_de
© 2009 Alcatel-Lucent; Dunkermotoren; D-79848 Bonndorf; Germany
In this example, the velocity is regulated in an digital
manner.
In diesem Beispiel würde die Drehzahl digital geregelt.
„Current [mA]“ Parameter Group
Parametergruppe „Current [mA]“
In the “Current [mA]” parameter group, the user has
the possibility of making basic settings of the current
strength.
In der Parametergruppe „Current [mA]“ wird dem
Anwender ermöglicht, grundlegende Einstellungen der
Stromstärke vorzunehmen.
Contin.Current gives the maximum value in milliampere [mA] that is continuously made available to the
motor in operation.
Contin.Current gibt den maximalen Wert in Miliampere [mA] an, der dem Motor im Phasenstrom dauerhaft zur Verfügung gestellt wird.
Peak Current allows the entry of the maximum permissible peak current value in milliampere [mA] that
can be applied to the motor for short periods.
Peak Current erlaubt die Eingabe des maximal zulässigen Phasenspitzenstroms, der kurzfristig auf den
Motor einwirken darf, in Milliampere [mA].
In this example, a continuous permissible phase current of 8 A and a peak current of 25 A are defined.
In diesem Beispiel wurde ein dauerhaft zulässiger
Phasenstrom von 8 A und ein Spitzenstrom von 25 A
festgelegt.
“Ramps [ms / 1000rpm]” Parameter Group
Parametergruppe „Ramps [ms / 1000rpm]“
All approachable velocities in the velocity mode are
driven to exactly with the aid of ramps (acceleration
and braking). The ramps are given in [ms / 1000rpm]
(milliseconds per 1000 revolutions per minute). In the
“Ramps [ms / 1000rpm]” parameter group, the user
can now adapt these ramps according to his needs.
Alle ansteuerbaren Geschwindigkeiten im Geschwindigkeitsmodus werden mit Hilfe von Rampen (beschleunigende und abbremsende) exakt angefahren.
Die Rampen werden in [ms / 1000rpm] (Millisekunden
pro 1000 Umdrehungen pro Minute) angegeben.
In der Parametergruppe „Ramps [ms / 1000rpm]“
kann der Anwender nun diese Rampen nach seinen
Bedürfnissen anpassen.
Instruction Manual/Betriebsanleitung BGE 3515 / 6010, Version: 1.1 en_de
© 2009 Alcatel-Lucent; Dunkermotoren; D-79848 Bonndorf; Germany
79
15 Stand-alone operation
15 Stand-alone Betrieb
15 Stand-alone operation
15 Stand-alone Betrieb
Acceleration allows the setting of the acceleration
ramp.
Deceleration allows the setting of the brake ramp.
Quick Stop allows the setting of a ramp with high
negative acceleration value.
Acceleration erlaubt die Einstellung der Beschleunigungsrampe.
Deceleration erlaubt die Einstellung der Bremsrampe.
Quick Stop erlaubt die Einstellung einer Rampe mit
hohem negativem Beschleunigungswert.
Warning!
The activation of settings takes place via an analogue
or a digital input that is coded as follows:
In this example, an acceleration ramp with 200
ms/1000rpm and a brake ramp with 200 ms/1000rpm
were configured. For the Quick Stop, 20 ms/1000rpm
was defined.
In diesem Beispiel wurde eine Beschleunigungsrampe
mit 200 ms/1000rpm und eine Bremsrampe mit 200
ms/1000rpm konfiguriert.
Für den Quick Stop wurden 20 ms/1000rpm festgelegt.
15.8.8 „Velocity Multi“ Velocity Mode
15.8.8 Geschwindigkeitsmodus „Velocity Multi“
The “Velocity Multi” velocity mode is a versatile
configurable operating mode which allows the user to
configure up to eight motor velocities by setting parameters and adapt them to his needs.
Bei dem Geschwindigkeitsmodus „Velocity Multi“ handelt es sich um ein vielseitig konfigurierbarer Betriebsmodus der es dem Anwender ermöglicht, über Setzen
von Parametern, bis zu acht Motorgeschwindigkeiten
zu konfigurieren und diese seinen Bedürfnissen anzupassen.
Function
IN 0
IN 1
Funktion
0
0
Quick stop, deactivate and eliminate error
0
0
Quickstop, deaktivieren und Error
beseitigen
1
0
CCW – counter clockwise
1
0
CCW – gegen den Uhrzeigersinn
0
1
CW – clockwise
0
1
CW – mit dem Uhrzeigersinn
1
1
Stop, activate and eliminate
error
1
1
Halten, aktivieren und Error
beseitigen
IN 2
IN 3
IN 4
Function
IN 2
IN 3
IN 4
Funktion
0
0
0
Velocity 1
0
0
0
Geschwindigkeit 1
1
0
0
Velocity 2
1
0
0
Geschwindigkeit 2
0
1
0
Velocity 3
0
1
0
Geschwindigkeit 3
1
1
0
Velocity 4
1
1
0
Geschwindigkeit 4
0
0
1
Velocity 5
0
0
1
Geschwindigkeit 5
1
0
1
Velocity 6
1
0
1
Geschwindigkeit 6
0
1
1
Velocity 7
0
1
1
Geschwindigkeit 7
1
1
1
Velocity 8
1
1
1
Geschwindigkeit 8
IN4/AI-
0V ... -10V DC
Instruction Manual/Betriebsanleitung BGE 3515 / 6010, Version: 1.1 en_de
© 2009 Alcatel-Lucent; Dunkermotoren; D-79848 Bonndorf; Germany
Alternativ kann die Ansteuerung über analoge Eingänge geschehen:
Function
IN3/AI+
Adjustable velocity:
0(rpm)...-Max(rpm)
0V ... -10V DC
The digital outputs give you information on the status
of the drive.
80
Die Ansteuerung der Einstellungen erfolgt hierbei über
einen analogen Eingang oder digitale Eingänge, die
wie folgt aufgeschlüsselt sind:
IN 1
IN3/AI+
Mit der „Load to motor“-Schaltfläche hat der Anwender
die Möglichkeit, modispezifische Parametereinstellungen auf den Regler zu laden.
Durch die Übertragung des aktuellen
Projektes auf den Motor werden alle
bisherigen Einstellungen gelöscht.
Der Regler ist nun frei bewegbar.
IN 0
Alternatively you may activate the settings by analogue inputs:
With the „Load to motor“ button, the user has the possiblity of loading mode-specific parameter adjustments
to the controller with the aid of the parameterising
interface.
Achtung
Loading the currently selected project will reset all motor‘s settings. The
controller will be freely rotatable.
IN4/AI-
Funktion
Adjustable velocity:
0(rpm)...-Max(rpm)
Über die digitalen Ausgänge sind Informationen über
den Zustand des Antriebs erhältlich
OUT0
Status
OUT0
Status
0
Motor disabled or Error or
no Homing
0
Keine Freigabe oder Fehler oder
kein Homing
1
Stopped, Ready, No Error,
Homing done
1
Gestoppt, fertig,
kein Fehler
0/1 *)
Target velocity is not reached
0/1 *)
Geschwindigkeit nicht erreicht
*) As long as the target velocity is not reached
(drive is in the phase of acceleration or deceleration)
the signal “Output 0” is changing with a
clock frequency of 5Hz.
*) Solange die Zielgeschwindigkeit nicht erreicht ist
(Antrieb in Beschleunigungs- oder Bremsphase) wird
am Ausgang 0 ein wechselndes Signal mit
Taktfrequenz 5Hz ausgegeben.
Instruction Manual/Betriebsanleitung BGE 3515 / 6010, Version: 1.1 en_de
© 2009 Alcatel-Lucent; Dunkermotoren; D-79848 Bonndorf; Germany
81
15 Stand-alone operation
15 Stand-alone Betrieb
15 Stand-alone operation
15 Stand-alone Betrieb
In the following, all configurable parameter groups are
described in detail:
Im Folgenden finden sie alle konfigurierbaren Parametergruppen ausführlich beschrieben:
“Velocity source” Parameter Group
Parametergruppe „Velocity source“
In “Velocity Source” parameter group, the user is
given the possibility of deciding which control variant
to use for the velocity mode.
In der Parametergruppe „Velocity source“ wird dem
Anwender die Möglichkeit gegeben, über die Steuerungsvariante des Geschwindigkeitsmodus zu entscheiden.
The Analog setting makes it possible to control the
motor velocity manually via an analogue input. For
this purpose, the maximum voltage value is assigned
a maximum rotational speed. In this manner, the velocity can be set via a specified analogue value that is in
a fixed relationship to the velocity.
Die Einstellung Analog bietet die Möglichkeit, die
Motorgeschwindigkeit über einen Analogeingang
manuell zu steuern. Dabei wird dem maximalen Spannungswert der eine maximale Drehzahl zugewiesen,
so kann über die analoge Sollwertvorgabe in einem
festen Verhältnis die Geschwindigkeit eingestellt.
The analogue operating mode excludes the use of the
digital operating mode and conversely!
Ein analoger Betriebsmodus schließt die Verwendung
des digitalen Betriebsmodus aus und umgekehrt !
The Intern setting makes possible the predefining of
the motor velocity via a digital input. For this purpose,
eight velocities are first set which then can be driven
to or changed via assigned inputs.
Die Einstellung Intern bietet die Möglichkeit, die Motorengeschwindigkeit über digitale Eingänge vorzugeben zu regeln. Zu diesem Zweck werden zunächst bis
zu acht Geschwindigkeiten eingestellt, welche dann
über zugewiesene Eingänge angesteuert bzw. gewechselt werden können.
In this example, the velocities are activated via digital
inputs.
82
“Current [mA]” Parameter Group
Parametergruppe „Current [mA]“
In the “Current [mA]” parameter group, the user has
the possibility of making basic settings of the current
strength.
In der Parametergruppe „Current [mA]“ wird dem
Anwender ermöglicht, grundlegende Einstellungen der
Stromstärke vorzunehmen.
Contin.Current gives the maximum value in milliampere [mA] that is continuously made available to the
motor in operation.
Contin.Current gibt den maximalen Wert in Miliampere [mA] an, der dem Motor im Phasenstrom dauerhaft zur Verfügung gestellt wird.
Peak Current allows the entry of the maximum permissible peak current value in milliampere [mA] that
can be applied to the motor for short periods.
Peak Current erlaubt die Eingabe des maximal zulässigen Phasenspitzenstroms, der kurzfristig auf den
Motor einwirken darf, in Milliampere [mA].
In this example, a continuous permissible phase current of 8 A and a peak current of 25 A are defined.
In diesem Beispiel wurde ein dauerhaft zulässiger
Phasenstrom von 8 A und ein Spitzenstrom von 25 A
festgelegt.
“Ramps [ms / 1000rpm]” Parameter Group
Parametergruppe „Ramps [ms / 1000rpm]“
In the velocity mode, all possible speeds are approached
with the aid of acceleration and braking ramps. The
ramps are given in [ms / 1000rpm] (milliseconds per
1000 revolutions per minute). In the “Ramps [ms /
1000rpm]” parameter group, the user can now adapt
these ramps to his needs.
Alle ansteuerbaren Geschwindigkeiten im Geschwindigkeitsmodus werden mit Hilfe von Rampen (beschleunigende und abbremsende) exakt angefahren.
Die Rampen werden in [ms / 1000rpm] (Millisekunden
pro 1000 Umdrehungen pro Minute) angegeben.
In der Parametergruppe „Ramps [ms / 1000rpm]“
kann der Anwender nun diese Rampen nach seinen
Bedürfnissen anpassen.
Acceleration allows the setting of the acceleration
ramp.
Deceleration allows the setting of the brake ramp.
Quick Stop allows the setting of a ramp with high
negative acceleration value.
Acceleration erlaubt die Einstellung der Beschleunigungsrampe.
Deceleration erlaubt die Einstellung der Bremsrampe.
Quick Stop erlaubt die Einstellung einer Rampe mit
hohem negativem Beschleunigungswert.
In this example, an acceleration ramp with 200
ms/1000rpm and a brake ramp with 200 ms/1000rpm
were configured. For the Quick Stop, 20 ms/1000rpm
was defined.
In diesem Beispiel wurde eine Beschleunigungsrampe
mit 200 ms/1000rpm und eine Bremsrampe mit 200
ms/1000rpm konfiguriert.
Für den Quick Stop wurden 20 ms/1000rpm festgelegt.
In diesem Beispiel werden die Geschwindigkeiten
über digitale Eingänge angesteuert.
Instruction Manual/Betriebsanleitung BGE 3515 / 6010, Version: 1.1 en_de
© 2009 Alcatel-Lucent; Dunkermotoren; D-79848 Bonndorf; Germany
Instruction Manual/Betriebsanleitung BGE 3515 / 6010, Version: 1.1 en_de
© 2009 Alcatel-Lucent; Dunkermotoren; D-79848 Bonndorf; Germany
83
15 Stand-alone operation
15 Stand-alone Betrieb
15 Stand-alone operation
15 Stand-alone Betrieb
15.8.9 „Current Standard“ Torque Mode
15.8.9 Drehmomentmodus „Current Standard“
IN 0
IN 1
Function
IN 0
IN 1
Funktion
The “Current Standard” torque mode is an easily
configurable operating mode with which the user can
readily set parameters to configure three torques,
and vary them to suit his needs, by setting the current
strength.
Bei dem Drehmomentmodus „Current Standard“ handelt es sich um einen leicht konfigurierbaren Betriebsmodus der es dem Anwender ermöglicht, über Setzen
von Parametern Veränderung, auf einfache Weise,
über die Einstellung der Stromstärke, drei Drehmomente zu konfigurieren und diese seinen Bedürfnissen anzupassen.
0
0
Stop, deactivate and eliminate
error
0
0
Quickstop, deaktivieren und Error
beseitigen
1
0
CCW – counter clockwise
1
0
CCW – gegen den Uhrzeigersinn
0
1
CW – clockwise
0
1
CW – mit dem Uhrzeigersinn
1
1
Quick stop, activate and
eliminate error
1
1
Halten, aktivieren und Error
beseitigen
IN 2
IN 3
IN 4
Function
IN 2
IN 3
IN 4
Funktion
1
0
0
Torque 1
1
0
0
Drehmoment 1
0
1
0
Torque 2
0
1
0
Drehmoment 2
0
0
1
Torque 3
0
0
1
Drehmoment 3
Alternatively you may activate the settings by analogue inputs:
IN3/AI+
IN4/AI-
0V ... -10V DC
Function
IN3/AI+
Adjustable current:
0(mA)...-Max(mA) Torque
0V ... -10V DC
The digital outputs give you information on the status
of the drive.
With the „Load to motor“ button, the user has the possiblity of loading mode-specific parameter adjustments
to the controller with the aid of the parameterising
interface.
Warning!
Loading the currently selected project will reset all motor‘s settings. The
controller will be freely rotatable.
The activation of the setting takes place via an analogue or a digital input that is coded as follows:
84
Mit der „Load to motor“-Schaltfläche hat der Anwender
die Möglichkeit, modispezifische Parametereinstellungen auf den Regler zu laden.
Achtung
Durch die Übertragung des aktuellen
Projektes auf den Regler werden alle
bisherigen Einstellungen gelöscht.
Der Motor ist nun frei bewegbar.
Die Ansteuerung der Einstellungen erfolgt hierbei über
einen anlogen Eingang oder digitale Eingänge, die
wie folgt aufgeschlüsselt sind:
Instruction Manual/Betriebsanleitung BGE 3515 / 6010, Version: 1.1 en_de
© 2009 Alcatel-Lucent; Dunkermotoren; D-79848 Bonndorf; Germany
Alternativ kann die Ansteuerung über analoge Eingänge geschehen:
IN4/AI-
Funktion
Adjustable current:
0(mA)...-Max(mA) Torque
Über die digitalen Ausgänge sind Informationen über
den Zustand des Antriebs erhältlich
OUT0
Status
OUT0
Status
0
Motor disabled or Error or
no Homing
0
Keine Freigabe oder Fehler oder
kein Homing
1
Stopped, Ready, No Error,
Homing done
1
Gestoppt, fertig,
kein Fehler
0/1 *)
Torque is not reached
*) As long as the target torque is not reached
(drive is in the phase of acceleration or deceleration)
the signal “Output 0” is changing with a
clock frequency of 5Hz.
0/1 *)
Drehmoment nicht erreicht
*) Solange das Zieldrehmoment nicht erreicht ist (Antrieb in Beschleunigungs- oder Bremsphase) wird am
Ausgang 0 ein wechselndes Signal mit
Taktfrequenz 5Hz ausgegeben.
In the following, all configurable parameter groups are
described in detail:
Im Folgenden finden sie alle konfigurierbaren Parametergruppen ausführlich beschrieben:
“Current Source” Parameter Group
Parametergruppe „Current source“
With the “Current source” parameter group, the user is
given the possibility of deciding which control variant
to use for the torque mode.
In der Parametergruppe „Current source“ wird dem
Anwender die Möglichkeit gegeben, über die Steuerungsvariante des Drehmomentmodus zu entscheiden.
The Analog setting makes it possible to control the
motor torque manually via an analogue input. For this
purpose, the maximum voltage value is assigned a
maximum torque. In this manner, the torque can be
set using a specified analogue value that is in a fixed
relationship to the torque.
Die Einstellung Analog bietet die Möglichkeit, das Motordrehmoment über einen Analogeingang manuell zu
steuern. Dabei wird dem maximalen Spannungswert
ein maximales Drehmoment zugewiesen, so kann
über die analoge Sollwertvorgabe in einem festen
Verhältnis das Drehmoment eingestellt werden.
The analogue operating mode excludes the use of the
digital operating mode and conversely!
Ein analoger Betriebsmodus schließt die Verwendung
des digitalen Betriebsmodus aus und umgekehrt!
Instruction Manual/Betriebsanleitung BGE 3515 / 6010, Version: 1.1 en_de
© 2009 Alcatel-Lucent; Dunkermotoren; D-79848 Bonndorf; Germany
85
15 Stand-alone operation
15 Stand-alone Betrieb
15 Stand-alone operation
15 Stand-alone Betrieb
The Intern setting makes possible the predefining of
the motor torque via a digital input. For this purpose,
three torques are first set which can then be activated
or changed via assigned inputs.
Die Einstellung Intern bietet die Möglichkeit, das den
Motordrehmoment über digitale Eingänge vorzugeben
und zu regeln. Zu diesem Zweck werden zunächst
drei Drehmomente eingestellt, welche dann über
zugewiesene Eingänge angesteuert bzw. gewechselt
werden.
In this example, the torque is regulated via digital
inputs.
In diesem Beispiel wird das Drehmoment über digitale
Eingänge geregelt.
“Velocity [rpm]” Parameter Group
Parametergruppe „Velocity [rpm]“
With the “Velocity [rpm]” parameter group, it is possible for the user to make basic settings for the velocity.
In der Parametergruppe „Velocity [rpm]“ wird dem
Anwender ermöglicht, grundlegende Einstellungen der
Geschwindigkeit vorzunehmen.
Maximale Velocity defines the maximum velocity
that is to be delivered for the torque set.
Maximale Velocity bestimmt die maximale Geschwindigkeit, bei der das eingestellte Drehmoment
geliefert werden soll.
In this example, the maximum velocity of 3000 rpm is
set.
In diesem Beispiel ist die Maximalgeschwindigkeit
3000 rpm eingestellt.
“Ramps [ms / 1000rpm]” Parameter Group
Parametergruppe „Ramps [ms / 1000rpm]“
In the velocity mode, all possible velocities are approached
with the aid of acceleration and braking ramps. The
ramps are given in [ms / 1000rpm] (milliseconds per
1000 revolutions per minute). In the “Ramps [ms /
1000rpm]” parameter group, the user can adapt these
ramps to his needs.
Alle ansteuerbaren Geschwindigkeiten im Geschwindigkeitsmodus werden mit Hilfe von Rampen (beschleunigende und abbremsende) exakt angefahren.
Die Rampen werden in [ms / 1000rpm] (Millisekunden
pro 1000 Umdrehungen pro Minute) angegeben.
In der Parametergruppe „Ramps [ms / 1000rpm]“
kann der Anwender nun diese Rampen nach seinen
Bedürfnissen anpassen.
86
Instruction Manual/Betriebsanleitung BGE 3515 / 6010, Version: 1.1 en_de
© 2009 Alcatel-Lucent; Dunkermotoren; D-79848 Bonndorf; Germany
Acceleration allows the setting of the acceleration
ramp.
Deceleration allows the setting of the brake ramp.
Quick Stop allows the setting of a ramp with high
negative acceleration value.
Acceleration erlaubt die Einstellung der Beschleunigungsrampe.
Deceleration erlaubt die Einstellung der Bremsrampe.
Quick Stop erlaubt die Einstellung einer Rampe mit
hohem negativem Beschleunigungswert.
In this example, an acceleration ramp with 200
ms/1000rpm and a brake ramp with 200 ms/1000rpm
were configured. For the Quick Stop, 20 ms/1000rpm
was defined.
In diesem Beispiel wurde eine Beschleunigungsrampe
mit 200 ms/1000rpm und eine Bremsrampe mit 200
ms/1000rpm konfiguriert.
Für den Quick Stop wurden 20 ms/1000rpm festgelegt.
15.8.10 „Current Multi“ Torque Mode
15.8.10 Drehmomentmodus „Current Multi“
The “Current Multi” torque mode is a versatile configurable operating mode that gives the user a simple
way of configuring eight torques by setting the current
strength and of adapting them to his needs by changing parameters.
Bei dem Drehmomentmodus „Current Multi“ handelt
es sich um einen vielseitig konfigurierbaren Betriebsmodus der es dem Anwender ermöglicht, über Setzen
von Parametern, auf einfache Weise, über die Einstellung der Stromstärke, bis zu acht Drehmomente zu
konfigurieren und diese seinen Bedürfnissen anzupassen.
With the „Load to motor“ button, the user has the possiblity of loading mode-specific parameter adjustments
to the controller with the aid of the parameterising
interface.
Mit der „Load to motor“-Schaltfläche hat der Anwender
die Möglichkeit, modispezifische Parametereinstellungen auf den Regler zu laden.
Instruction Manual/Betriebsanleitung BGE 3515 / 6010, Version: 1.1 en_de
© 2009 Alcatel-Lucent; Dunkermotoren; D-79848 Bonndorf; Germany
87
15 Stand-alone operation
15 Stand-alone Betrieb
15 Stand-alone operation
15 Stand-alone Betrieb
Warning!
Achtung
Loading the currently selected project will reset all controller settings.
The motor will be freely rotatable.
The activation of the settings takes place via an analogue or a digital input that is coded as follows:
Durch die Übertragung des aktuellen
Projektes auf den Regler werden alle
bisherigen Einstellungen gelöscht.
Der Motor ist nun frei bewegbar.
Die Ansteuerung der Einstellungen erfolgt hierbei über
einen analogen Eingang oder digitale Eingänge, die
wie folgt aufgeschlüsselt sind:
IN 0
IN 1
Function
IN 0
IN 1
Funktion
0
0
Stop, deactivate and eliminate
error
0
0
Quickstop, deaktivieren und Error
beseitigen
1
0
CCW – counter clockwise
1
0
CCW – gegen den Uhrzeigersinn
0
1
CW – clockwise
0
1
CW – mit dem Uhrzeigersinn
1
1
Quick stop, activate and eliminate
error
1
1
Halten, aktivieren und Error beseitigen
IN 2
IN 3
IN 4
Function
IN 2
IN 3
IN 4
Funktion
0
0
0
Torque 1
0
0
0
Drehmoment 1
1
0
0
Torque 2
1
0
0
Drehmoment 2
0
1
0
Torque 3
0
1
0
Drehmoment 3
1
1
0
Torque 4
1
1
0
Drehmoment 4
0
0
1
Torque 5
0
0
1
Drehmoment 5
1
0
1
Torque 6
1
0
1
Drehmoment 6
0
1
1
Torque 7
0
1
1
Drehmoment 7
1
1
1
Torque 8
1
1
1
Drehmoment 8
Alternatively you may activate the settings by analogue inputs:
IN3/AI+
IN4/AI-
0V ... -10V DC
IN3/AI+
Adjustable current:
0(mA)...-Max(mA) Torque
0V ... -10V DC
IN4/AI-
Parametergruppe „Current source“
With the “Current source” parameter group, the user is
given the possibility of deciding which control variant
to use for the torque mode.
In der Parametergruppe „Current source“ wird dem
Anwender die Möglichkeit gegeben, über die Steuerungsvariante des Drehmomentmodus zu entscheiden.
The Analog setting makes possible the controlling of
the motor torque manually via an analogue input. For
this purpose, the maximum voltage value is assigned
a maximum torque. In this manner, the torque can be
set via a specified analogue value that is in a fixed
rela-tionship to the torque.
Die Einstellung Analog bietet die Möglichkeit, das Motordrehmoment über einen Analogeingang manuell zu
steuern. Dabei wird dem maximalen Spannungswert
ein maximales Drehmoment zugewiesen, so kann
über die analoge Sollwertvorgabe in einem festen
Verhältnis das Drehmoment eingestellt werden.
The analogue operating mode excludes the use of the
digital operating mode and conversely!
Ein analoger Betriebsmodus schließt die Verwendung
des digitalen Betriebsmodus aus und umgekehrt !
The Intern setting makes possible the predefining of
the motor torque via a digital input. For this purpose,
eight torques are first set which can then be activated
or changed via assigned inputs.
Die Einstellung Intern bietet die Möglichkeit, das Motordrehmoment über digitale Eingänge vorzugeben.
Zu diesem Zweck werden zunächst bis zu acht Drehmomente eingestellt, welche dann über zugewiesene
Eingänge angesteuert bzw. gewechselt werden.
In this example, the torque is regulated via digital
inputs.
In diesem Beispiel ist wird das Moment über digitale
Eingänge geregelt.
Adjustable current:
0(mA)...-Max(mA) Torque
Über die digitalen Ausgänge sind Informationen über
den Zustand des Antriebs erhältlich
Status
OUT0
Status
0
Motor disabled or Error or
no Homing
0
Keine Freigabe oder Fehler oder
kein Homing
1
Stopped, Ready, No Error,
Homing done
1
Gestoppt, fertig,
kein Fehler
0/1 *)
Torque is not reached
0/1 *)
Drehmoment nicht erreicht
88
“Current Source” Parameter Group
Funktion
OUT0
*) As long as the target torque is not reached
(drive is in the phase of acceleration or deceleration)
the signal “Output 0” is changing with a
clock frequency of 5Hz.
Im Folgenden finden sie alle konfigurierbaren Parametergruppen ausführlich beschrieben:
Alternativ kann die Ansteuerung über analoge Eingänge geschehen:
Function
The digital outputs give you information on the status
of the drive.
In the following, all configurable parameter groups are
described in detail:
*) Solange das Zieldrehmoment nicht erreicht ist (Antrieb in Beschleunigungs- oder Bremsphase) wird am
Ausgang 0 ein wechselndes Signal mit
Taktfrequenz 5Hz ausgegeben.
Instruction Manual/Betriebsanleitung BGE 3515 / 6010, Version: 1.1 en_de
© 2009 Alcatel-Lucent; Dunkermotoren; D-79848 Bonndorf; Germany
Instruction Manual/Betriebsanleitung BGE 3515 / 6010, Version: 1.1 en_de
© 2009 Alcatel-Lucent; Dunkermotoren; D-79848 Bonndorf; Germany
89
15 Stand-alone operation
15 Stand-alone Betrieb
16 Slave in CANopen network
16 Slave in CANopen Netzwerk
„Velocity [rpm]” Parameter Group
Parametergruppe „Velocity [rpm]“
With the “Velocity [rpm]” parameter group, it is possible for the user to make basic settings for the velocity.
In der Parametergruppe „Velocity [rpm]“ wird dem
Anwender ermöglicht, grundlegende Einstellungen der
Geschwindigkeit vorzunehmen.
Maximum Velocity defines the maximum velocity that
is to be delivered for the torque set.
Maximale Velocity bestimmt die maximale Geschwindigkeit, bei der das eingestellte Drehmoment
geliefert werden soll.
In this example, the maximum velocity of 2000 rpm is
set.
In diesem Beispiel ist die Maximalgeschwindigkeit
2000 rpm eingestellt.
“Ramps [ms / 1000rpm]” Parameter Group
Parametergruppe „Ramps [ms / 1000rpm]“
In the velocity mode, all possible velocities are approached
with the aid of acceleration and braking ramps. The
ramps are given in [ms / 1000rpm] (milliseconds per
1000 revolutions per minute). In the “Ramps [ms /
1000rpm]” parameter group, the user can adapt these
ramps to his needs.
Alle ansteuerbaren Geschwindigkeiten im Geschwindigkeitsmodus werden mit Hilfe von Rampen (beschleunigende und abbremsende) exakt angefahren.
Die Rampen werden in [ms / 1000rpm] (Millisekunden
pro 1000 Umdrehungen pro Minute) angegeben.
In der Parametergruppe „Ramps [ms / 1000rpm]“
kann der Anwender nun diese Rampen nach seinen
Bedürfnissen anpassen.
Acceleration allows the setting of the acceleration
ramp.
Deceleration allows the setting of the brake ramp.
Quick Stop allows the setting of a ramp with high
negative acceleration value.
Acceleration erlaubt die Einstellung der Beschleunigungsrampe.
Deceleration erlaubt die Einstellung der Bremsrampe.
Quick Stop erlaubt die Einstellung einer Rampe mit
hohem negativem Beschleunigungswert.
In this example, an acceleration ramp with 200
ms/1000rpm and a brake ramp with 300 ms/1000rpm
were configured. For the Quick Stop, 20 ms/1000rpm
was defined.
In diesem Beispiel wurde eine Beschleunigungsrampe
mit 200 ms/1000rpm und eine Bremsrampe mit 300
ms/1000rpm konfiguriert.
Für den Quick Stop wurden 20 ms/1000rpm festgelegt.
90
Instruction Manual/Betriebsanleitung BGE 3515 / 6010, Version: 1.1 en_de
© 2009 Alcatel-Lucent; Dunkermotoren; D-79848 Bonndorf; Germany
16 Slave in CANopen network, software „mPLC“
16 Slave in CANopen Netzwerk,
Software „mPLC“
16.1 Hardware controller
16.1 Hardware Regler
Three CAN cables must never be connected at an
intermediate connector, because this would result in
branching of the bus, which is forbidden.
An einem Zwischenstecker dürfen nicht 3 CAN-Kabel
angeschlossen werden, da so der Bus unerlaubterweise verzweigt werden würde.
Screen earthing: To prevent interference with data
transmission, the screening of the cables must be
earthed. To do this, you must connect it to the ground
terminal (CAN-GND) of the module. If you earth both
ends of the screening of a cable, you must ensure
that there is a conducting connection between the two
earthing points to equalise the potential between them.
Without such a conducting connection, it is best to
earth only one end of the screening.
Schirmerdung: Um Störungen der Datenübertragung
zu vermeiden, muss der Kabelschirm geerdet werden.
Dazu verbinden Sie ihn mit der Masseklemme (CANGND) des Moduls. Wenn Sie beide Seiten eines Kabelschirms erden, müssen Sie einen Potentialausgleich
durch eine leitende Verbindung zwischen den beiden
Erdungspunkten eines Schirmes durchführen. Ohne
diesen Ausgleich empfiehlt sich nur die einseitige Erdung des Kabelschirms.
CAN connection: the modules can be addressed on
the CAN bus.
When connecting CAN subscribers, leads that comply
with the standard ISO 11898 must be employed. Such
leads must have the following features:
- twisted pairs
- with screening
- an impedance of 120 Ohm
CAN-Anschluss: Die Module können über CAN-Bus
angesprochen werden.
Für die Verbindung der CAN-Teilnehmer muss eine
Leitung, die der Norm ISO 11898 entspricht, eingesetzt
werden. Die Leitung muss folgende Hauptmerkmale
aufweisen:
- paarweise verdrillt
- mit Schirmgeflecht
- Wellenwiderstand von 120 Ohm
Node address: a node address is set using 2 HEX
switches (these are on the backside of the Positioning
Controller). Apart from the node address (node ID, preset to Node 1), they are also used to set the transmission rate (preset to 125 kBit/s). The motor type is preset
to „brushless DC“.
Knotenadresse: Die Einstellung der Knotenadresse
erfolgt über 2 HEX-Schalter (diese befinden sich an
der hinteren Seite der Positioniersteuerung. Mit ihnen
wird neben der Knotenadresse (Node-ID, voreingestellt Knoten 1) auch die Übertragungsrate eingestellt
(voreingestellt 125 kBit/s). Als Motortyp ist „bürstenlos
DC“ voreingestellt.
Instruction Manual/Betriebsanleitung BGE 3515 / 6010, Version: 1.1 en_de
© 2009 Alcatel-Lucent; Dunkermotoren; D-79848 Bonndorf; Germany
91
16 Slave in CANopen network
16 Slave in CANopen Netzwerk
16 Slave in CANopen network
16 Slave in CANopen Netzwerk
Setting the node address (Node-ID)
Einstellen der Knotenadresse (Node-ID)
The node address is given in hexadecimal form, not as
a decimal. The difference lies in the range of values for
individual positions; for hex numbers these are from 0 to
15 (see conversion calculation below). For the number of
nodes in a CAN network, there are physical limitations,
so a two-digit hex number is sufficient for the CAN control system. FFh is the highest number that can be represented with a two-digit hex number. In the same way, it is
evident that 7Fh and 80h are consecutive numbers.
Die Knotenadresse wird nicht dezimal angegeben, sondern in ihrer hexadezimalen Form: Der Unterschied liegt
im Wertebereich der einzelnen Stellen, der bei Hex-Zahlen von 0 bis 15 geht (siehe Umrechnung unten). Für
die Anzahl von Knoten in einem CAN-Netzwerk gibt es
physikalische Beschränkungen, so dass eine zweistellige Hex-Zahl für die CAN-Steuerung ausreicht. FFh ist
die höchste Zahl, die mit einer zweistelligen Hexadezimalzahl dargestellt werden kann. Genauso erkennt man
dass 7Fh und 80h benachbarte Zahlen sind.
Hexadecimal
Decimal
value
Switch H
Dezimaler
Wert
Schalter H
00h
0
0
0
00h
0
0
0
01h
1
0
1
01h
1
0
1
7Fh
127
7
F
7Fh
127
7
F
80h
128
8
0
80h
128
8
0
FFh
255
F
F
FFh
255
F
F
Switch L
hexadezimal
To calculate the decimal value of a hexadecimal number, multiply the decimal value of that character by the
decimal value of that place for each place, then add the
results together.
Um aus einer vorgegebenen Hexadezimalzahl den
Dezimalen Wert zu berechnen, multiplizieren Sie die
Wertigkeit der Stelle mit dem dezimalen Wert der zugehörigen Hex-Zahl und addieren Sie alle Stellen.
„Units“ switch L
„Tens“ switch H
Stelle
„Einer“, Schalter L
Zehner“, Schalter H
Value
1
16
Wertigkeit
1
16
Hexadezimaler Wert
Hexadecimal value
0
1
2
3
4
5
6
7
8
9
A
B
C
D
E
F
Dezimaler Wert
Decimal value
0
1
2
3
4
5
6
7
8
9
10
11
12
13
14
15
Example: 7Fh
Decimal number = 7*16 + F*1 = 7*16 + 15*1 =127.
Beispiel 7Fh:
Dezimalzahl = 7*16 + F*1 = 7*16 + 15*1 =127.
The node addresses are set using two HEX switches on
the module. The address coding is hexadecimal.
Example:
for node IF = 12 decimal
= 0c hexadecimal
Die Knotenadresse wird durch zwei HEX-Schalter auf dem
Modul eingestellt. Die Adresse ist hexadezimal kodiert.
Beispiel:
für Node-IF = 12 dezimal
= 0c hexadezimal
Switch H Switch L Schalter H --> 0 (die vier oberen Bits)
Schalter L --> C (die vier unteren Bits)
Warning!
An address must not be present more than once in a
network. A change to a node address using the HEX
switches is only effective when the module is switched
on again.
92
Einstellen der CAN-Bus
Übertragungsgeschwindigkeit (Baudrate)
High transmission speed is important, above all, when
many modules must be addressed. On the other hand,
the probability of transmission errors increases the higher the baud rate, especially where there are long transmission paths. The preset default transmission speed is
125 kbit/s.
Eine hohe Übertragungsgeschwindigkeit ist vor allem
dann erforderlich, wenn viele Module angesprochen
werden müssen. Andererseits nimmt die Wahrscheinlichkeit von Übertragungsfehler zu, je höher die Baudrate wird, vor allem für lange Übertragungswege. Die
voreingestellte Default-Übertragungsgeschwindigkeit ist
125 kBit/s.
Setting the transmission speed:
Einstellung der Übertragungsgeschwindigkeit:
Aktion/ Action
Schalter L
Place
--> 0 (the four upper bits)
--> C (the four lower bits)
Setting the CAN bus
Transmission speed (baud rate)
Achtung!
Jede Adresse darf nur einmal im Netzwerk vorkommen!
Eine Änderung der Knotenadresse per HEX-Schalter ist
erst nach erneutem Einschalten des Moduls wirksam.
Instruction Manual/Betriebsanleitung BGE 3515 / 6010, Version: 1.1 en_de
© 2009 Alcatel-Lucent; Dunkermotoren; D-79848 Bonndorf; Germany
Modul-Anzeige/ Module display
1.
Steuerung ausschalten
Switch off controller
2.
Node-ID auf 00h einstellen
Set node ID to 00h
3.
Steuerung einschalten
Switch on controller
die grüne LED blinkt um 500 ms Takt
The green LED blinks every 500 ms
die grüne LED blinkt um 200 ms Takt
The green LED blinks every 200 ms
4.
Innerhalb von 10 sec muss die Node-ID auf den
Wert F0h gesetzt werden.
Die Drehrichtung des HEX-Schalters H ist dabei
nicht wichtig
The node ID must be set to the value F0h within 10
seconds.
It does not matter in which direction HEX switch H
is turned
Innerhalb von 10 sec muss mit dem niederwertigen
HEX-Schalter L ein Index (s.u) der Übertragungsgeschwindigkeit eingestellt werden.
Modul bestätigt Übernahme oder zeigt Fehler an:
die gelbe LED blinkt „Index“ mal; anschließend blinken
die grüne und gelbe LED (im 100 ms Takt)
Den Wert für Index entnehmen Sie bitte der Tabelle
auf S. 27
Falls ein ungültiger oder nicht unterstützter Index eingestellt wird, wird es durch schnelles Blinken der roten
und grünen LED signalisiert.
5.
An index for the transmission speed (see below)
must be set within 10 seconds using the lower-value
HEX switch L.
Please see the table on page 27 for the index
values.
6.
The module confirms acceptance or displays an error.
The yellow LED blinks as many times as the index
setting; then the green and yellow LEDs blink every
100 ms
If an invalid or unsupported index is entered, this is
indicated by rapid blinking of the red and green LEDs
Anschließend, während die grüne und gelbe LED
blinken, muss die Node-ID auf die korrekte Adresse
eingestellt werden, damit sie jetzt noch wirksam
wird. Alternativ können Sie auch abwarten, das
Modul ausschalten und in Ruhe einstellen
Then, while the green and yellow LEDs are blinking,
the node ID must be set to the correct address, so
that it now becomes effective. Alternatively, you can
wait, switch the module off and carry out the setting
in your own time.
Instruction Manual/Betriebsanleitung BGE 3515 / 6010, Version: 1.1 en_de
© 2009 Alcatel-Lucent; Dunkermotoren; D-79848 Bonndorf; Germany
93
16 Slave in CANopen network
16 Slave in CANopen Netzwerk
16 Slave in CANopen network
16 Slave in CANopen Netzwerk
Index
0
1
2
3
4
5
6
7
8
Baudrate [kBits/s]
1000
-
500
250
125
100
50
20
10
Rücksetzen auf die Defaultübertragungsgeschwindigkeit:
Resetting the default transmission speed
Aktion/ Action
1.
Steuerung ausschalten
Switch off controller
2.
Node-ID auf 00h einstellen
Set node ID to 00h
3.
4.
5.
Modul-Anzeige/ Module display
Steuerung einschalten
Switch on controller
die grüne LED blinkt um 500 ms Takt
The green LED blinks every 500 ms
nach 10 sec wird die Baudrate auf 125 kBits/s gesetzt.
Die gelbe LED blinkt 4 mal, anschließend blinken
die grüne und gelbe LED im 100 ms Takt.
After 10 seconds the baud rate will be set to 125
kbits/s.
The yellow LED blinks four times; then the green
and yellow LEDs blink every 100 ms
16.2 Motion Starter Kit
To use the software „mPLC“, the user have to order the
Motion Starter Kit of the slave in CANopen operation
seperately.
The Motion Starter Kit contains:
Um die Software „mPLC“ nutzen zu können, muss der
Anwender das Motion Starter Kit für den Slave in
CANopen Betrieb seperat bestellen.
Im Motion Starter Kit enthalten sind:
- the software „mPLC“
- die Software „mPLC“
- CAN-USB adapter with connecting cable
- CAN-USB Adapter mit Verbindungskabel
- Connection adapter (from controller to connecting cable)
- Anschlussadapter (von Regler zu Verbindugskabel)
- T-piece 0906 UTP 101
- Terminator (männlich) 0939 CTX 101
- Terminator (male) 0930 CTX 101
SNR Motion Starter Kit: - T-Stück 0906 UTP 101
27573 35615
SNR Motion Starter Kit:
27573 35615
Add-on Kit
Starterkiterweiterung
Anschließed, während die grüne und gelbe LED
blinken, muss die Node-ID auf die korrekte Adresse
eingestellt werden, damit sie jetzt noch wirksam
wird.
Alternativ können Sie auch abwarten, das Modul
ausschalten und die Node-ID in Ruhe einstellen.
To create a network containing several motors, the
CAN bus must be extended from one motor to the next.
This is carried out by using a T-connector. The motors
are connected by a bus cable, and a termination resitor
must be connected at the end of the bus.
Um mehrere Motoren miteinander zu vernetzen, muss
man den CAN Bus von einem Motor zum nächsten
weiterschleifen. Dies kann mit einem T-Stück realisiert
werden. Zwischen den Motoren befindet sich ein Buskabel und am Ende des Bus sollte mit einem Terminator abgeschlossen werden.
Then, while the green and yellow LEDs are blinking,
the node ID must be set to the correct address, so
that it now becomes effective.
Alternatively, you can wait, switch the module on
and off, and set the node ID in your own time.
The add-on Kit contains:
In der Erweiterung erhalten sind:
- T-piece 0906 UTP 101
- T-Stück 0906 UTP 101
- Drop cable 0935 253 103/1 (Fa. Lumberg)
- Dropkabel 0935 253 103/1 (Fa. Lumberg)
SNR Add-on Kit:
SNR Starterkiterweiterung:
Warning!
During this operation, it is not just the transmission rate
that is set to the default value, but also all the internal parameters of the module, including all CANopen objects.
94
16.2 Motion Starter Kit
Achtung!
Bei dem Vorgang wird nicht nur die Übertragungsrate
auf den Defaultwert gesetzt, sondern auch alle internen
Parameter des Moduls, einschließlich aller CANopen
Objekte!
Instruction Manual/Betriebsanleitung BGE 3515 / 6010, Version: 1.1 en_de
© 2009 Alcatel-Lucent; Dunkermotoren; D-79848 Bonndorf; Germany
27573 35616
Instruction Manual/Betriebsanleitung BGE 3515 / 6010, Version: 1.1 en_de
© 2009 Alcatel-Lucent; Dunkermotoren; D-79848 Bonndorf; Germany
27573 35616
95
16 Slave in CANopen network
16 Slave in CANopen Netzwerk
16 Slave in CANopen network
16 Slave in CANopen Netzwerk
16.3 Requirements
16.3 Vorraussetzungen
16.6 Documentations
16.6 Documentations
For the commissioning of the controller a CAN-master
is necessary. For this the following options
are available:
Zur Inbetriebnahme des Reglers ist ein CAN-Master
erforderlich. Hierzu stehen die folgenden Varianten
zur Verfügung:
„BGE 3508/6005, BGE 3515/6010, BGE 6050“
The particular manuals for the controllers in PDF format are shown here.
„BGE 3508/6005, BGE 3515/6010, BGE 6050“
Hier befinden sich die jeweiligen Betriebsanleitungen
zu den Reglern in PDF-Format.
-
A PC / laptop and the miCAN USB Adapter are needed.
-
Ein PC / Laptop und der miCAN-USB Adapter werden benötigt.
-
mPLC is provided in the Starter Kit and can be installed from the CD
(see further details during the installation).
-
mPLC wird im Starterkit mitgeliefert und kann von der CD installiert werden
(s. weitere Hinweise während der Installation)
„DSA Parameters Help“
Object register of the manufacturer, in which are
descripted the user specific objects.
„DSA Parameters Help“
Objektverzeichnis des Herstellers, in dem die anwenderspezifischen Objekte beschrieben sind.
-
CAN master of other manufacturer
-
CAN-Master anderer Hersteller
„CANopen DSP 301“
Here you will find the link to the homepage „www.
can-cia.org! „Organization manufacturer spanning
general CAN objects“. On these homepage the user
can download the current version of the object register
„CiA 301 DS“ for CANopen.
„CANopen DSP 301“
Hier finden Sie einen Link zur Homepage „www.cancia.org“ „Organsiation Herstellerübergreifende allgemeiner CAN Objekte“. Auf dieser Homepage kann der
Anwender die aktuellste Version des Objektverzeichnisses „CiA 301 DS“ für CANopen downloaden.
16.4 Introduction
16.4 Einführung
With the mPLC control program, Dunkermotoren
provides a comprehensive software tool with which it
is possible to extensively configure the controller. Via
the CAN interface, the software establishes a connection with the controller and control it with the individual
configuration.
Mit dem Steuerungsprogramm mPLC bietet Dunkermotoren ein umfangreiches Softwaretool, mit dem es
möglich ist verschiedene Regler umfangreich zu konfigurieren. Über die CAN-Schnittstelle stellt die Software die Verbindung mit dem Regler her und steuert
diesen mit der individuellen Konfiguration.
16.5 Samples
16.5 Samples
„Python Scripts“ are example scripts, which can be
loaded and used from the program mPLC.
„Python Scripts“ sind Beispielskripte, die aus dem
Programm mPLC geladen und verwendet werden
können.
„CAN monitor“ is a program to observe and send
CAN messages. Thus a CAN transmission can be
controlled, supervised, displayed and interpreted.
For CAN objects could be used both CAN-Open
PDO- (Process Data Object) and SDO- (Service Data
Object), which can be noted then.
On the CD you can find some example files for the
CAN monitor.
„CAN Monitor“ ist ein Programm, um CAN-Nachrichten zu beobachten und zu senden. Damit lässt sich
eine CAN-Übertragung steuern, überwachen, darstellen und interpretieren.
Als CAN-Objekte können sowohl CAN-Open PDO(Process Data Object) als auch SDO- (Service Data
Object) Objekte verwendet werden, die dann aufgezeichnet werden können.
Auf der CD finden Sie einige Beispiel-Dateien zum
CAN Monitor.
96
Instruction Manual/Betriebsanleitung BGE 3515 / 6010, Version: 1.1 en_de
© 2009 Alcatel-Lucent; Dunkermotoren; D-79848 Bonndorf; Germany
Instruction Manual/Betriebsanleitung BGE 3515 / 6010, Version: 1.1 en_de
© 2009 Alcatel-Lucent; Dunkermotoren; D-79848 Bonndorf; Germany
97
16 Slave in CANopen network
16 Slave in CANopen Netzwerk
16 Slave in CANopen network
16 Slave in CANopen Netzwerk
16.7 Control software mPLC
16.7 Steuerungssoftware mPLC
16.7.1 Introduction
16.7.1 Einführung
The software mPLC offers the possibility to the programming, operation and observation of CANopen
units from the company Dunkermotoren.
Additionally the software offers several service functions.
Die Software mPLC bietet die Möglichkeit der Programmierung, Bedienung und Beobachtung von
CANopen Geräten der Firma Dunkermotoren.
Zusätzlich bietet die Software verschiedene Servicefunktionen.
16.7.2 System requirements
16.7.2 Systemvoruassetzungen
Operating system: Windows 2000, Windows XP
Home, Windows XP Pro, Windows Vista. The installation files for mPLC can be loaded from the CD-ROM
provided.
Betriebssystem: Windows 2000, Windows XP Home,
Windows XP Pro, Windows Vista. Sie können die
Installations-Dateien für mPLC von der mitgelieferten
CD-ROM installieren.
16.7.3 Installation of the Software mPLC
16.7.3 Installation der Software mPLC
Administrator privileges are necessary for the installation. The installation menu will start automatically
when you insert the CD-ROM.
Alternatively you can open the file install.htm in the
Windows-Explorer to open the installation menu.
The program will guide you through the installation
menu.
Go ahead the installation in case a warning notice
concerning the USB device driver will pop up. After
successful installation the mPLC can be started by the
desktop link.
Zur Installation des Programms benötigen Sie AdminRechte. Nach dem Einlegen der CD-Rom öffnet sich
das Installationsmenü automatisch. Sollte sich das
Menü nicht automatisch öffnen, so öffnen Sie im
Windows- Explorer die sich auf der CD-Rom befindende Datei install.htm. Sie werden nun durch das
Installationsmenü geführt. Klicken Sie auf „Installation
fortsetzen“, falls während der Installation ein
Warnhinweis bezüglich Treiber für den USB-Controller
erscheint. Nach erfolgreicher Installation kann mPLC
über die Desktop-Verknüpfung geöffnet werden.
16.7.4 Installation CAN-USB adapter
16.7.4 Installation CAN-USB Adapter
After mPLC was installed accordingly, the program
can be started. When starting, the program searches
automatically for a CAN interface. mPLC supports
the CAN-USB adapter from Dunkermotoren. When
opening the „Control Center“ the following message
should be indicated in the status field:
OK: CAN-BUS was initialized.
Nachdem mPLC ordnungsgemäß installiert wurde,
kann das Programm gestartet werden. Beim Starten
wird nach einer CAN-Schnittstelle gesucht. Standardmäßig unterstützt mPLC den CAN-USB Adapter von
Dunkermotoren. Beim Öffnen des „Control Centers“
sollte im Statusfeld folgende Meldung angezeigt werden:
OK: CAN-BUS was initialized.
This message appears if the settings are correct and
the CAN-USB adapter was indentified accurately.
Diese Meldung erscheint, wenn alle Einstellungen korrekt vorgenommen und der CAN-USB Adapter richtig
erkannt wurde.
98
Instruction Manual/Betriebsanleitung BGE 3515 / 6010, Version: 1.1 en_de
© 2009 Alcatel-Lucent; Dunkermotoren; D-79848 Bonndorf; Germany
If the message „INFO: CAN-USB - not found“ is
indicated in the status field, no CAN-USB adapter was
identified.
In this case, it must be examined if the CAN-USB
adapter is connected to the correct PC interface and if
the Power-Led flashes.
Sollte wie in der unteren Abbildung im Status die Meldung „INFO: CAN-USB - not found“ stehen, wurde
kein CAN-USB Adapter erkannt. Hier muss überprüft
werden, ob der CAN-USB Adapter mit der entsprechenden Schnittstelle am PC verbunden ist und ob die
Power-Led leuchtet.
If the CAN-USB adapter is still not identified despite
repeated examination, check chapter „11.8 Configuration“ to adjust the settings for the CAN adapter (see
side 106).
Sollte der CAN-USB Adapter trotz nochmaliger Überprüfung weiter nicht erkannt werden, können unter
dem Kapitel „11.8 Configuration“ die Einstellungen für
die jeweilige Adapterart verändert werden (siehe Seite
106).
16.7.5 mPLC Control Center
16.7.5 mPLC Control Center
The „Control Center“ represents the main menu of the
program mPLC.
Here i.e. Python Script and CAN monitor can be
selected.
In addition under “Configurate” it is possible to configure the hardware.
Das “Control Center” stellt das Hauptmenü des Programms mPLC dar.
Hier kann u.a. das Python Script und der CAN Monitor
ausgewählt werden. Zudem ist hier unter „Configuration“ die Hardwarekonfiguration möglich.
Instruction Manual/Betriebsanleitung BGE 3515 / 6010, Version: 1.1 en_de
© 2009 Alcatel-Lucent; Dunkermotoren; D-79848 Bonndorf; Germany
99
16 Slave in CANopen network
16 Slave in CANopen Netzwerk
16 Slave in CANopen network
16 Slave in CANopen Netzwerk
16.7.6 Python Script
16.7.6 Python Script
The start of mPLC opens the “Control center” in which
you can admit “Python Script” (among other things).
Beim Starten von mPLC öffnet das „Control Center“ in
welchem man u.A. „Python Srcipt“ anwählen kann.
Python is a programming language, which enfold
several programming paradigms. Thus the objectoriented, aspect-oriented and functional programming
is supported.
Python ist eine Programmiersprache, die mehrere
Programmierparadigmen umfasst. So wird die objektorientierte, aspektorientierte und funktionale Programmierung unterstützt.
In the menu “Script” the Syntax can be controlled and
the Script can be started.
In addition it exists the possibility to pause and to continue the Script, as well as to stop the Script.
Im Menü “Script” kann der Syntax überprüft und das
Script gestartet werden.
Des Weiteren besteht die Möglichkeit das Script anzuhalten und fortzufahren, sowie es zu beenden.
Checking the Syntax
Syntax überprüfen
Run the Script
Starten des Scripts
Pause the Script
Script pausieren
Continue the Script
Script fortsetzen
Stop the Script
In the menu „Python“ the handbook and the documentation of the modules are intended (among other
things).
Script stoppen
Im Menü “Python” befinden sich unter anderem das
Handbuch und die Dokumentation der Module.
Opens Python promt
Öffnet „Python promt“
Opens the console
Öffnet die Konsole
Opens the handbook
Öffnet das Handbuch
Opens the handbook in HTML version
Menu bar
Menüleiste
All settings (CAN-objects, - variables) can be stored in
form of Python file type (*py):
Alle Einstellungen (CAN-Objekte, -Variable) können in
Form des Dateityps Python (*.py) gespeichert werden:
Generate an new emty file
Opens an existing file
Safe the current file
Safe the current file under a new name
Terminates the CAN monitor
Erzeugt eine neue leere Date
Opens the Python documentation
Undo step
Redo step
100
Öffnet Python Dokumentation
Opens the BOA program
Öffnet das Programm BOA
Opens the wxPython documentation
Beyond the menu can also be switched to the other
components of mPLC :
Öffnet wxPython Dokumentation
Über das Menü kann auch zu den anderen Bestandteilen von mPLC gesprungen werden:
Öffnet eine bestehende Datei
Speichert die aktuelle Datei
Speichert die aktuelle Datei unter einem neuen Namen
Beendet den Python Script Monitor
Subordinated control center
To operate and to observe the CAN monitor
Interface program for CAN adapter
„Edit“ offers the possibility to undo steps or to redo
steps.
Öffnet das Handbuch in HTML-Version
Unter „Edit“ besteht die Möglichkeit Arbeitsgänge
rückgängig zu machen oder Arbeitsgänge vorwärts zu
schalten.
In the menu “About…” you can find general
information about the program.
The most important functions are additionally accessible in the symbol bar.
Übergeordnetes Control Center
CAN Monitor bedienen und beobachten
Schnittstellenprogramm
Im Menü „About …“ finden Sie allgemeine Informationen über das Programm.
Die wichtigsten Funktionen sind in der Symbolleiste
zusätzlich erreichbar.
Arbeitsschritt rückgängig
Arbeitsschritt vorwärts
Instruction Manual/Betriebsanleitung BGE 3515 / 6010, Version: 1.1 en_de
© 2009 Alcatel-Lucent; Dunkermotoren; D-79848 Bonndorf; Germany
Instruction Manual/Betriebsanleitung BGE 3515 / 6010, Version: 1.1 en_de
© 2009 Alcatel-Lucent; Dunkermotoren; D-79848 Bonndorf; Germany
101
16 Slave in CANopen network
16 Slave in CANopen Netzwerk
16 Slave in CANopen network
16 Slave in CANopen Netzwerk
„Read-Write-Sdo“ Function
Funktion „Read-Write-Sdo“
After selecting a profile it’s possible to read and write
SDOs.
In addition you can set a node address or an object
(index and sub-index).
In generally the Parameter will be read automatically
(„Auto read“ active) and manually („Auto write“ inactive) wrote („Write“). The decimal setpoint can be put
in „Tx-Value“. The profile can be saved by using „File /
Save oder Save as…“.
Nach dem Auswählen eines Profils können nun SDOs
gelesen und geschrieben werden. Dazu kann eine
Knotenadresse, ein Objekt (Index und Sub-Index)
eingestellt werden. Im allgemeinen wird man Parameter automatisch lesen („Auto read“ aktiv) und
manuell („Auto write“ nicht aktiv) schreiben („Write“).
Den dezimalen Sollwert trägt man unter „Tx-Value“
ein. Das Profil kann über „File / Save oder Save as…“
gespeichert werden.
16.7.7 CAN monitor
16.7.7 CAN-Monitor
„Firmware“
The CAN monitor is a program to observe and send
CAN messages. Thus a CAN transmission can be
controlled, supervised, displayed and
interpreted.
For CAN objects could be used both CAN-Open
PDO- (Process Data Object) and SDO- (Service Data
Object), which can be noted then.
Bitte wenden Sie sich für ein Firmware-Update an den
Hersteller!
On the CD you can find some example files for the
CAN monitor.
Der CAN Monitor ist ein Programm, um CAN-Nachrichten zu beobachten und zu senden. Damit lässt
sich eine CAN-Übertragung steuern, überwachen,
darstellen und interpretieren.
Als CAN-Objekte können sowohl CAN-Open PDO(Process Data Object) als auch SDO- (Service Data
Object) Objekte verwendet werden, die dann aufgezeichnet werden können.
Auf der CD finden Sie einige Beispiel-Dateien zum
CAN Monitor.
Menu bar
Menüleiste
All settings (CAN-Objekte, -Variable) can be stored in
form of a parameter file (*.cm):
Alle Einstellungen (CAN-Objekte, -Variable) können in
Form einer Parameterdatei (*.cm) gespeichert
werden:
In the lower area you find the output window for
the output (e.g. print “Dunker”) and error massages
(“Messages”).
In this way, sample files can be loaded, which are
needed (among other things) to search and change
the Node_ID and to appoint the Baud_rate.
Im unteren Bereich befindet sich das Ausgabefenster
z.B. für Ausgaben (z.B. print „Dunker“) und Fehlermeldungen („Messages“).
Auf diese Weise können Sampledateien geladen
werden, die u.a. zum suchen und ändern der Node_ID
und zum bestimmen der Baud_rate benötigt werden.
Assistance
Hilfsmittel
„Baud_rate“
„Baud_rate“
It appears a new field in which the baud rate can be
selected (20k, 50k, 100k, 125k, 500k, 800k, 1000k)
and set (“SET Baud rate”).
This change is only effective after switching off and
switching on the motor.
Es erscheint ein neues Feld, in dem die Baudrate gewählt (20k, 50k, 100k, 125k, 500k, 800k, 1000k) und
gesetzt werden kann („SET Baudrate“). Die Änderung
wird erst mit dem Aus- und Einschalten des Motors
wirksam.
„Firmware“
For a Firmware update please contact the manufacturer!
Each motor type has its own Firmware, which must fit to the appropriate motor!
DANGER !
Jeder Motortyp hat seine eigene
Firmware, die zu dem entsprechenden Motor passen muss!
VORSICHT !
„Node_ID“
„Node_ID“
It appears a new field, where the node address can be
modified in the range of 1 to 127 (“SET Nodeld”).
The modification would be effective only after switching-off and switching-on the motor.
Es erscheint ein neues Feld, in dem die Knotenadresse im Bereich von 1 … 127 geändert werden kann
(„SET NodeId“). Die Änderung wird erst mit dem Ausund Einschalten des Motors wirksam.
Please refresh the connection accordingly (see “Connection”)
NOTICE
Bitte danach die Verbindung erneut
herstellen (siehe „Connection“)
Generate a new empty file
Opens an existing file
Safe the current file
Safe the current file under a new name
Terminates the CAN monitor
Received massages can be indicated in a separate
window:
Speichert die aktuelle Datei
Speichert die aktuelle Datei unter einem
neuen Name
Beendet den CAN-Monitor
Empfangene Nachrichten können in einem separaten
Fenster dargestellt werden:
HINWEIS
Display of received CAN objects
Display of received CAN variables
102
Erzeugt eine neue leere Datei
Öffnet eine bestehende Datei
Instruction Manual/Betriebsanleitung BGE 3515 / 6010, Version: 1.1 en_de
© 2009 Alcatel-Lucent; Dunkermotoren; D-79848 Bonndorf; Germany
Anzeige der empfangenen CAN-Objekte
Anzeige der empfangenen CAN-Variablen
Instruction Manual/Betriebsanleitung BGE 3515 / 6010, Version: 1.1 en_de
© 2009 Alcatel-Lucent; Dunkermotoren; D-79848 Bonndorf; Germany
103
16 Slave in CANopen network
16 Slave in CANopen Netzwerk
16 Slave in CANopen network
16 Slave in CANopen Netzwerk
CAN objects can be handled as follows:
Prepare a new CAN object
Handle with the selected CAN object
Beyond the menu can also be switched to the other
components of mPLC:
Anlegen eines neuen CAN-Objektes
Supordinated control center
To handle and implement with Python Script
Interface program for CAN adapter
Bearbeiten des ausgewählten CAN-Objekts
Copy the selected CAN object
Kopieren des ausgewählten CAN-Objekts
Delete the selected CAN object
Löschen des ausgewählten CAN-Objekts
CAN-Variable können folgendermaßen bearbeitet
werden:
CAN variables can be handled
as follows:
Prepare a new CAN object
Handle with the selected CAN object
Copy the selected CAN object
Delete the selected CAN object
The order of CAN objects and variables can be
changed with this functions:
To scroll down the element of a line
To scroll up a element of a line
Sending or receiving CAN messages
happens either here or with the indicated
abbreviations:
Receiving CAN message, or with (“CTRL + R”)
Transmit CAN message, or with (“CTRL + T”)
This menu configures the Hardware, the
appropriate CAN adapter:
104
CAN-Objekte können folgendermaßen bearbeitet
werden:
Anlegen einer neuen CAN-Variablen
Bearbeiten der ausgewählten CAN-Variable
Kopieren der ausgewählten CAN-Variable
Löschen der ausgewählten CAN-Variable
Die Reihenfolge von CAN-Objekte und -Variable kann
mit diesen Funktionen verändert werden:
Element eine Zeile nach oben schieben
Element eine Zeile nach unten schieben
Senden und Empfangen von CAN-Nachrichten
geschieht entweder hier oder mit den angegebenen
Kürzeln:
Über das Menü kann auch zu den anderen Bestandteilen von mPLC gesprungen werden:
Übergeordnetes Control Center
Python Scripte bearbeiten und ausführen
Schnittstellenprogramm für serielle CAN-Adapter
In the menu “About…” you can find general
information about the program.
The most important functions are additionally accessible in the symbol bar.
Im Menü „About …“ finden Sie allgemeine Informationen über das Programm.
Die wichtigsten Funktionen sind in der Symbolleiste
zusätzlich erreichbar.
Main Window
Hauptfenster
The Main window is divided in three categories:
•
The CAN objects are located in the top
of the screen.
•
The CAN variables, of the particular
objects appear in the middle.
•
The status field is located in the lower part.
Das Hauptfenster ist in drei Bereiche aufgeteilt:
•
Im oberen Teil des Bildschirms befinden sich die CAN-Objekte.
•
Im mittleren Teil erscheinen die
CAN Variable des jeweiligen Objekts.
•
Im unteren Teil befindet sich das Statusfeld.
16.7.8 Terminal
16.7.8 Terminal
„Terminal“ is an interface program for RS232 adapter.
„Terminal“ ist ein Schnittstellenprogramm für serielle
RS232 Adapter.
With the Terminal programings respectively program
texts of older CAN devices can be visualized.
The Terminal offers therefore an assistance for programing to represent compatible older versions (CAN
devices).
For the controllers from Dunkermotoren the Terminal
is not relevant.
Mit dem Terminal können Programmierungen bzw.
Programmtexte älterer CAN Geräte visualisiert werden. Der Terminal bietet somit eine Hilfestellung um
Programmierungen älterer Versionen (CAN Geräte)
kompatibel darzustellen.
Für die Regler der Firma Dunkermotoren ist das Teminal nicht von Bedeutung.
CAN-Nachricht empfangen, oder mit „CTRL+R
CAN-Nachricht senden, oder mit „CTRL+T“
Dieses Menü konfiguriert die Hardware, den entsprechenden CAN-Adapter:
Instruction Manual/Betriebsanleitung BGE 3515 / 6010, Version: 1.1 en_de
© 2009 Alcatel-Lucent; Dunkermotoren; D-79848 Bonndorf; Germany
Instruction Manual/Betriebsanleitung BGE 3515 / 6010, Version: 1.1 en_de
© 2009 Alcatel-Lucent; Dunkermotoren; D-79848 Bonndorf; Germany
105
16 Slave in CANopen network
16 Slave in CANopen Netzwerk
16 Slave in CANopen network
16 Slave in CANopen Netzwerk
16.7.9 Configuration
16.7.9 Konfiguration
The CAN-USB adapter can be configured under
“hardware”. Normally the configuration is set automatically. If the baud rate of the controller should be
changed, also the mPLC settings have to be adapted.
If the CAN-USB adapter is attached, its status is indicated green.
Hier kann unter „Hardware“ der CAN-USB Adapter
konfiguriert werden. Im allgemeinen geschieht dieses
automatisch. Sollte jedoch die Baudrate des Reglers
geändert werden, so muss sie auch für mPLC angepasst werden. Ist der CAN-USB-Adapter angeschlossen, so wird sein Status mit grün angezeigt.
106
Instruction Manual/Betriebsanleitung BGE 3515 / 6010, Version: 1.1 en_de
© 2009 Alcatel-Lucent; Dunkermotoren; D-79848 Bonndorf; Germany
Reference to the serial adapter, alternatively the serial
interface:
If your PC/Laptop has a serial interface, it is advisable
to deactivate it here.
Hinweis zum seriellen Adapter bzw. zu seriellen
Schnittstelle:
Sollte Ihr PC / Laptop über keine serielle Schnittstelle
verfügen, ist es ratsam sie in dieser Stelle zu
deaktivieren!
Instruction Manual/Betriebsanleitung BGE 3515 / 6010, Version: 1.1 en_de
© 2009 Alcatel-Lucent; Dunkermotoren; D-79848 Bonndorf; Germany
107
16 Slave in CANopen network
16 Slave in CANopen Netzwerk
16 Slave in CANopen network
16 Slave in CANopen Netzwerk
16.8 Objects
16.8 Objekte
In the division “CAN objects”, all applied CAN objects
are listed.
The following parameters are shown:
In dem Bereich „CAN Objects“ werden alle angelegten
CAN Objekte aufgelistet. Es werden folgende Parameter der Objekte spaltenweise angezeigt:
•Name Free-defineable name of the object
•ID
CAN identification number of the object
•Type Kind of the object
•Name freibestimmbarer Name des Objektes
•ID CAN Identifikationsnummer des Objektes
•Typ Art des Objektes:
•RX
receive object
•TX
send object
•RX PDO CANopen PDO
receive object
•TX PDO CANopen PDO
send object
•SDO
CANopen PDO
service data object
•Len
Data length of the object,
0..8 data bytes (only at TX and TX PDO)
•Data Data of the TX – object,
0..8 data bytes (only at TX and TX PDO)
•RX
Empfangsobjekt
•TX Sendeobjekt
•RX PDO CANopen PDO
Empfangsobjekt
•TX PDO CANopen PDO
Sendeobjekt
•SDO CANopen PDO CANopen
Service Data Object
•Len Datenlänge des Objektes,
0..8 Datenbytes (nur bei TX und TX PDO)
•Daten Daten des TX – Objektes,
0..8 Datenbytes (nur bei TX und TX PDO)
16.8.1 Object- / SDO-variable
16.8.1 Objekt- / SDO-Variable
Depending on to the type of the CAN object, the following variables are in the middle of the main window
displayed:
In Abhängigkeit vom Typ des CAN-Objekts werden im
mittleren Bereich des Hauptfensters folgende Variable
dargestellt:
CAN object types RX and RX PDO
CAN Objekt Typen RX und RX PDO
Additionally the PDO can be analysed here.
According to the PDO-Mappings in the motor all
objects can be selected here and assigned to different
variables.
Zusätzlich kann hier das PDO ausgewertet werden.
Entsprechend des PDO-Mappings im Motor können
hier alle Objekte selektiert und verschiedenen Variablen zugeordnet werden.
Then the following parameters have to be used:
Folgende Parameter sind dann zu verwenden:
•VarName Free-defineable name of the object
•Type Data type of the variable
•VarName freibestimmbarer Name des Objektes
•Type
Datentyp der Variable
•bool
•int8
•int16
•int32
•uint8
•uint16
•bool boolean - „0“ oder „1“
•int8 integer 8 bit - 8 bit ganze Zahl mit Vorzeichen
•int16 integer 16 bit
- 16 bit ganze Zahl mit Vorzeichen
•int32 integer 32 bit
- 32 bit ganze Zahl mit Vorzeichen
•uint8 unsigned integer 8 bit
- 8 bit ganze Zahl ohne Vorzeichen
•uint16 unsigned integer 16 bit
- 16 bit ganze Zahl ohne Vorzeichen
108
Boolean – “0” or “1”
integer 8 bit
- 8 bit whole number with signs
integer 16 bit
- 16 bit whole number with signs
integer 32 bit
- 32 bit whole number with signs
unsigned integer 8 bit
- 8 bit whole number without signs
unsigned integer 16 bit
- 16 bit whole number without signs
Instruction Manual/Betriebsanleitung BGE 3515 / 6010, Version: 1.1 en_de
© 2009 Alcatel-Lucent; Dunkermotoren; D-79848 Bonndorf; Germany
•uint32 unsigned integer 32 bit
- 32 bit whole number without signs
•float floating point number
•
uint32 unsigned integer 32 bit
- 32 bit ganze Zahl ohne Vorzeichen
•float Fließkomma-Zahl
•Byte(s) byte assignment of the variable inside
the CAN message
•Factor (a) multiplier
•Offset (b) constant, which is added to a result (a*x)
•Filter MIN minimum value of the filter
•Filter MAXmaximum value of the filter
•Status transmission status of the variable:
OK or an error message
•Byte(s) Bytebelegung der Variable innerhalb der CAN Nachricht
•Factor (a) Multiplikator
•Offset (b) Konstante, die zu dem Ergebnis (a * x) addiert wird
•Filter MIN Minimumwert des Filters
•Filter MAXMaximumwert des Filters
•Status
Übertragungsstatus der Variable:
OK oder eine Fehlermeldung
CAN object type SDO
CAN Objekt Typen SDO
If a CAN object is selected as a SDO, the particular
SDOs are defined here.
Wird als CAN Objekt ein SDO gewählt, werden hier
die einzelnen SDO definiert:
•VarName Free-assignable name of the object
•Index The index of the variable in the CANopen register
•Sub indexThe sub index of the variable in the
CANopen register
•Type Data type of the variable
•bool Boolean - “0” or “1”
•int8 integer 8 bit
- 8 bit whole number with signs
•int16 integer 16 bit
- 16 bit whole number with signs
•int32 integer 32 bit
- 32 bit whole number with signs
•uint8 unsigned integer 8 bit
- 8 bit whole number without signs
•uint16unsigned integer 16 bit
- 16 bit whole number without signs
•uint32unsigned integer 32 bit
- 32 bit whole number without signs
•float floating point number
•VarName freibestimmbarer Name der Variable
•Index Index der Variable im CANopen Verzeichnis
•Subindex Subindex der Variable im CANopen Verzeichnis
•Type Datentyp der Variable
•bool boolean - „0“ oder „1“
•int8
integer 8 bit - 8 bit ganze Zahl mit Vorzeichen
•int16 integer 16 bit
- 16 bit ganze Zahl mit Vorzeichen
•int32 integer 32 bit
- 32 bit ganze Zahl mit Vorzeichen
•uint8 unsigned integer 8 bit
- 8 bit ganze Zahl ohne Vorzeichen
•uint16 unsigned integer 16 bit
- 16 bit ganze Zahl ohne Vorzeichen
•uint32 unsigned integer 32 bit
- 32 bit ganze Zahl ohne Vorzeichen
•float Fließkomma-Zahl
•TxValue
•RxValue
•Status
•TxValue
•RXValue
•Status
Value of the variable, which can be
sent
Value of the variable, which can be
received
Transmission status of the variable:
OK or an error message
Wert der Variable, die gesendet werden kann
Wert der Variable, die empfanden werden
kann
Übertragungsstatus der Variable:
OK oder eine Fehlermeldung
CAN object types TX and TX PDO SDO
CAN Objekt Typen TX und TX PDO SDO
Here are no separate variables, because the data are
sent directly from the PC to the controller.
Da hier Daten direkt vom PC an den Regler geschickt
werden, gibt es keiner gesonderten Variablen.
Instruction Manual/Betriebsanleitung BGE 3515 / 6010, Version: 1.1 en_de
© 2009 Alcatel-Lucent; Dunkermotoren; D-79848 Bonndorf; Germany
109
16 Slave in CANopen network
16 Slave in CANopen Netzwerk
16 Slave in CANopen network
16 Slave in CANopen Netzwerk
16.8.2 Setup CAN objects
16.8.2 Anlegen von CAN-Objekte
Advice for PDOs:
Hinweis für PDOs:
The yellow symbols can be used to setup CAN objects (see above).
Zum Anlegen von CAN-Objekten können die gelben
Symbole verwendet werden (s.o.).
With the first “New CAN object” you generate a new
object, with the next “Edit CAN object” you can modify,
the third “Copy CAN object” duplicates and the last
deletes an object.
Mit dem ersten „New CAN-Objekt“ erzeugen Sie ein
neues Objekt, mit dem nächsten „Edit CAN-Object“
nehmen Sie Änderungen vor, das dritte „Copy CANObject“ dupliziert und das letzte löscht ein Objekt.
Only the definitions for the CAN monitor are adjusted
here. The appropriate PDO-Mappings for the controller are to be adjusted separately.
Hier werden lediglich die Festlegungen für den CAN
Monitor getroffen. Die entsprechenden PDO-Mappings für den Regler sind noch separat zu treffen.
16.8.3 Setup CAN variables
16.8.3 Anlegen von CAN-Variablen
For generating a service data object select under
“CANopen” at first “SDO”, assign then a
name (“Obj. Name”) and lastly a
node address “Node-ID” The rest of the fields are not
required.
Zum Anlegen eines SDOs wählen Sie unter „CANopen“ zunächst „SDO“ an, vergeben dann einen
Namen („Obj. Name“) und zuletzt die Knotenadresse
„Node-ID“. Die restlichen Felder werden nicht
benötigt.
CAN object type PDO
CAN Objekt Type PDO
With this variable single bytes of a PDO can be selected, filtered and scaled. The following parameters
can be adjusted:
Mit dieser Variable lassen sich aus einem PDO einzelne Bytes selektieren, filtern und skalieren. Folgende
Parameter können eingestellt werden:
There are 2 possibilities for disposing PDOs: After
“New CAN object” the COB ID can be registered
immediately (without choosing SDO or PDO). The second possibility is to select “PDO” in connection with
the indication of the node address and the PDO type.
The COB ID will be calculated. The following pre-defined offsets are available:
Zum Anlegen eines PDOs gibt es zwei Wege: Nach
„New CAN-Object“ kann sofort die COB-ID eingetragen werden (ohne SDO oder PDO auszuwählen). Die
zweite Variante ist das Auswählen von „PDO“ in Verbindung mit der Angabe der Knotenadresse und des
PDO-Typs. Dabei wird die Cob-Id berechnet. Hierbei
stehen folgende vordefinierten Offsets zur Verfügung:
•VarName Free-assignable name of the object
•Data type Data type of the variable
•VarName freibestimmbarer Name der Variable
•Datentyp Datentyp der Variable
Boolean – “0” or “1”
•“digital IN”
=> COB-ID 181h (Node-ID1)… 1FFh (Node-ID 127)
•„digital OUT“
=> COB-ID 201h (Node-ID1)… 27Fh (Node-ID 127)
•„analog IN“
=> COB-ID 281h (Node-ID1)… 2FFh (Node-ID 127)
•„analog OUT“
=> COB-ID 301h (Node-ID1)… 37Fh (Node-ID 127)
•“Emergency”
=> COB-ID 81h (Node-ID1) … FFh (Node-ID 127)
•“Guard”
=> COB-ID 701h (Node-ID1)… 37Fh (Node-ID 127)
(NMT Error Control)
•„NMTO“
=> COB-ID 0h
•„SYNC“
=> COB-ID 80h
•„Time Stamp“
=> COB-ID 100h
•„digital IN“
=> COB-ID 181h (Node-ID1) … 1FFh (Node-ID 127)
•„digital OUT“
=> COB-ID 201h (Node-ID1) … 27Fh (Node-ID 127)
•„analog IN“
=> COB-ID 281h (Node-ID1) … 2FFh (Node-ID 127)
•„analog OUT“
=> COB-ID 301h (Node-ID1) … 37Fh (Node-ID 127)
•„Emergency“
=> COB-ID 81h (Node-ID1) … FFh (Node-ID 127)
•„Guard“
=> COB-ID 701h (Node-ID1) … 37Fh (Node-ID 127) (NMT Error Control)
•„NMT0“ => COB-ID 0h
•„SYNC“ => COB-ID 80h
•„Time Stamp“
=> COB-ID 100h
integer 8 bit
- 8 bit whole number with signs
integer 16 bit
-16 bit whole number with signs
integer 32 bit
- 32 bit whole number with signs
unsigned integer 8 bit
- 8 bit whole number without signs
unsigned integer 16 bit
- 16 bit whole number without signs
•int8 integer 8 bit - 8 bit ganze Zahl mit Vorzeichen
•int16 integer 16 bit
- 16 bit ganze Zahl mit Vorzeichen
•int32 integer 32 bit
- 32 bit ganze Zahl mit Vorzeichen
•uint8 unsigned integer 8 bit
- 8 bit ganze Zahl ohne Vorzeichen
•uint16 unsigned integer 16 bit
- 16 bit ganze Zahl ohne Vorzeichen
By selecting “TX PDO” it is specified that the PDO is
sent by the PC (TX PDO).
In this case the length of the data and the data itself
can be supplied.
The datas can be supplied either in hexadecimal form
(0x20) or decimal form (32).
If „TX PDO“ is not selected, then it is a PDO (RX
PDO). The input of further data is not applicable.
Durch Anwählen von „TX PDO“ wird festgelegt, dass
das PDO vom PC gesendet wird (TX PDO). In dem
Fall kann die Länge der Daten und Daten an sich
eingegeben werden. Die Daten können dabei entweder in hexadezimaler (0x20) oder dezimaler Form (32)
eingetragen werden. Ist „TX PDO“ nicht angewählt,
handelt es sich um ein Empfangs-PDO (RX PDO), so
dass die Eingabe von weiteren Daten entfällt.
110
Instruction Manual/Betriebsanleitung BGE 3515 / 6010, Version: 1.1 en_de
© 2009 Alcatel-Lucent; Dunkermotoren; D-79848 Bonndorf; Germany
•bool
•int8
•int16
•int32
•uint8
•uint16
•uint32 unsigned integer 32 bit
- 32 bit whole number without signs
•float floating point number
•Bytes
•Byte assignment of the variable in the
CAN message
•E.g. a 32 bit value have 4 bytes,
which could assign in PDO Byte 0…3
(MSB = 3, LSB = 0)
•Also an exchange of Low and High bytes
is possible: e.g. a 16 bit value
have 2 bytes, which allocate in PDO
Byte 0…1 (MSB = 03, LSB = 1)
•Representation format
•Determinate the representation format
for the expended value
(float, exponent, integer or hex).
•Precision
•Depending on the representation format
this field determinates either the number of
spent values (exponent, integer, hex) or
the number of right-of-comma
positions (float).
•bool
boolean - „0“ oder „1“
•uint32 unsigned integer 32 bit
- 32 bit ganze Zahl ohne Vorzeichen
•float Fließkomma-Zahl
•Byte(s)
•Bytebelegung der Variable in der
CAN Nachricht
•z. B. eine 32 Bit Wert hat 4 Bytes,
die im PDO Byte 0…3 belegen könnte
(MSB = 3, LSB = 0)
•Auch ein vertauschen von Low und High
Byte ist damit möglich: z.B. ein 16 Bit Wert
hat 2 Byte, die im PDO Byte 0 … 1 belegen
(MSB = 03, LSB = 1)
•Darstellungsformat (Representation)
•Legt das Darstellungsformat der
ausgegebenen Werte fest
(float, exponent, integer oder hex).
•Präzision (Precision)
•Je nach Darstellungsformat bestimmt dieses Feld entweder die Anzahl der
ausgegebenen Stellen
(exponent, integer, hex) oder Anzahl der
Nachkommastellen (float).
Instruction Manual/Betriebsanleitung BGE 3515 / 6010, Version: 1.1 en_de
© 2009 Alcatel-Lucent; Dunkermotoren; D-79848 Bonndorf; Germany
111
16 Slave in CANopen network
16 Slave in CANopen Netzwerk
16 Slave in CANopen network
16 Slave in CANopen Netzwerk
•Filter active
•Switching on or switching off the value filter
•Kind of the filter (Prohibitive)
•Not activated: Only values are collected/ recorded, which are inside of the
boundary. Min <= Y <= max
•Activated: Only values are collected/ recorded, which are outside of the boundary. Y < min or > max
•min
Minimal value of the filter
•max
Maximal value of the filter
•a scaling factor
•b constant, which would
be added to an result (a*X)
•Y = a * x + b wheras:
• Y – result
• X – value of the CAN message
• a – scaling factor
• b – offset
•Filter (Filter Active)
•Einschalten oder Ausschalten des Wertfilters
•Art des Filters (Prohibitive)
Nicht aktiviert: Es werden nur Werte
erfasst / protokolliert, die innerhalb der
Grenzen liegen. min <= Y <= max
•Aktiviert: Es werden nur Werte
erfasst / protokolliert, die außerhalb der
Grenzen liegen. Y < min oder Y > max
•min
min. Wert des Filters
•max
max. Wert des Filters
•a
Skalierungsfaktor
•b
Konstante, die zu dem Ergebnis (a * X)
addiert wird.
•Y = a * x + b wobei:
• Y – Ergebnis
• x - Wert von der CAN Nachricht
• a – Skalierungsfaktor
• b - Offset
CAN object type SDO
CAN Objekt Type SDO
With this variable SDOs can be read and written. The
following parameters can be adjusted:
Mit dieser Variable lassen sich SDOs lesen und
schreiben. Folgende Parameter können eingestellt
werden:
•VarName Free-assignable name of the variable
•Index The index of the variable in the
CANopen register
•Subindex The sub index of the variable in the CANopen register
•Data type Data type of the variable
•VarName freibestimmbarer Name der Variable
•Index Index der Variable im CANopen Verzeichnis
•Subindex Subindex der Variable im CANopen Verzeichnis
•Type Datentyp der Variable
•bool
Boolean – “0” or “1”
•bool
•int8 integer 8 bit - 8 bit ganze Zahl mit Vorzeichen
•int16 integer 16 bit
- 16 bit ganze Zahl mit Vorzeichen
•int32 integer 32 bit
- 32 bit ganze Zahl mit Vorzeichen
•uint8 unsigned integer 8 bit
- 8 bit ganze Zahl ohne Vorzeichen
•uint16 unsigned integer 16 bit
- 16 bit ganze Zahl ohne Vorzeichen
•uint32 unsigned integer 32 bit
- 32 bit ganze Zahl ohne Vorzeichen
•float Fließkomma-Zahl
•TxValue
•RxValue
•Status
•TxValue
•RXValue
•Status
112
16.8.4 Senden, Empfangen
With the CAN monitor CAN messages can be transmitted (PC => controller) and
received (PC <= controller). In addition the desired
object or the desired variable must be selected:
Mit dem CAN Monitor können CAN-Nachrichten
gesendet (PC => Regler) und empfangen (PC <=
Regler) werden. Dazu muss das gewünschte Objekt
oder die gewünschte Variable angewählt werden:
• Receive: With “CTRL + R” (Receive) or
• Empfangen: Mit „CTRL + R“ (Receive) oder
•Transmit: With “CTRL + T” (Transmit) or
• Senden: Mit „CTRL + T“ (Transmit) oder
16.8.5 Recording
16.8.5 Aufzeichnen
Received messages can be displayed and recorded
in a separate window (see menu “View”).
Empfangene Nachrichten können in einem separaten Fenster dargestellt und aufgezeichnet werden (s.
Menü „View“).
Display of the received CAN objects
Display of the received CAN variables
Recording CAN objects
Anzeige der empfangenen CAN-Objekte
Anzeige der empfangenen CAN-Variablen
Aufzeichnen von CAN-Objekten
boolean - „0“ oder „1“
•int8 integer 8 bit
- 8 bit whole number with signs
•int16 integer 16 bit
- 16 bit whole number with signs
•int32 integer 32 bit
- 32 bit whole number with signs
•uint8 unsigned integer 8 bit
- 8 bit whole number without signs
•uint16 unsigned integer 16 bit - 16 bit whole number without signs
•uint32 unsigned integer 32 bit
- 32 bit whole number without signs
•float floating point number
Value of the variable, which can
be sent
Value of the variable, which can
be received
Transmission status of the variable:
OK or an error message
16.8.4 Transmit / Receive
Wert der Variable, die gesendet werden kann
Wert der Variable, die empfanden werden
kann
Übertragungsstatus der Variable:
OK oder eine Fehlermeldung
Instruction Manual/Betriebsanleitung BGE 3515 / 6010, Version: 1.1 en_de
© 2009 Alcatel-Lucent; Dunkermotoren; D-79848 Bonndorf; Germany
•Name •Cob-ID
•Time Stamp
•Counter
•Data HEX
name of the variable
Cob-ID of the received objects
(decimal and hexadecimal)
Time stamp in ssss.mmm,uuu
(s: seconds, m: ms, u: μs)
There is a separate counter for
each variable
Byte by byte in hexadecimal
form ( the structure is addicted
from the PDO-Mapping in the motor)
•Name
•Cob-ID
•Time Stamp
•Counter •Data HEX
Name der Variable
Cob-Id der empfangenen Objekte
(dezimal und hexadezimal)
Zeitstempel in ssss.mmm,uuu
(s: Sekunden, m: ms, u: μs)
Für jede Variable gibt es einen
separaten Zähler
Byteweise Daten in hexadezimaler Form (der Aufbau ist abhängig vom PDO-Mapping im Motor)
Instruction Manual/Betriebsanleitung BGE 3515 / 6010, Version: 1.1 en_de
© 2009 Alcatel-Lucent; Dunkermotoren; D-79848 Bonndorf; Germany
113
16 Slave in CANopen network
16 Slave in CANopen Netzwerk
16 Slave in CANopen network
16 Slave in CANopen Netzwerk
The received objects can be stored as
“Log_RX-objects”(e.g. save as ...)
These files are in ASCII format (*.Igo). Therefore that
files can be opened and further executed in every
other text editor.
Die empfangenen Objekte lassen sich als
„Log – RX-Objects“-Datei speichern (bzw. speichern
unter). Diese Dateien (*.lgo) haben ASCII-Format und
daher nicht nur mit mPLC sondern auch mit jedem
anderen Text-Editor öffnen und weiterbearbeiten.
•“Safe List”
Stores the list
•“Safe List as…”
Stores the list under an
other name
•“Delete List”
Deletes the complete list
•“Set Time Origin” Sets the current value of the
time stamp to zero and
“older” time stamps to relative, negative values.
•“Delete Time Origin”Putting back above
mentioned zero point
•“1234 = 0”
Sets a counter to zero
•“Record All”
If this Button is activated
(see picture) all data are
recorded and can be stored.
If this function is not
activated, only the last value is recorded alternatively
stored.
•„Save List“
Speichert die Liste
•„Save List as …“ Speichert die Liste unter
anderem Namen
•„Delete List“
Löscht die gesamte Liste
•„Set Time Origin“ Setzt den aktuellen Wert des
Zeitstempels auf Null und
damit „ältere“ Zeitstempel auf
relative, negative Werte
•„Delete Time Origin“Setzt o.g. Nullpunkt wieder
zurück
•„1234=0“
Setzt einen Zähler auf Null
•„Record all“
Ist dieser Button aktiviert
(s. Bild) werden alle Daten
aufgezeichnet und können
gespeichert werden. Ist diese
Funktion nicht aktiviert, wird
nur der letzte Wert
aufgezeichnet, bzw.
gespeichert.
•„Scroll“
Ist dieser Button aktiviert
(s. Bild) wird automatisch das
Ende der Liste, die aktuelle
Zeile, angezeigt.
•“Scroll”
If this button is activated (see picture) the end of the list, the current line, are automatically indicated.
Recording CAN variable
Aufzeichnen von CAN-Variable
•Name
•Value
name of the variable
value of the variable
(including a possible scaling)
•Time Stamp
•Counter
Time stamp in ssss.mmm,uuu
(s: seconds, m: ms, u: μs)
There is a separate counter for each variable
•Name
•Value
•Time Stamp
•Counter 114
The received objects can be stored as “Log_RX-Variables”.
These files are in ASCII format (*.Igo). Therefore that
files can be opened and further executed in every
other text editor.
Die empfangenen Objekte lassen sich als „Log – RXObjects“-Datei speichern (bzw. speichern unter).
Diese Dateien (*.lgo) haben ASCII-Format und daher
nicht nur mit mPLC sondern auch mit jedem anderen
Text-Editor öffnen und weiterbearbeiten.
•“Safe List”
Stores the list
•“Safe List as…”
Stores the list under an other
name
•“Delete List”
Deletes the complete list
•“Set Time Origin” Sets the current value of the time stamp to zero and “older” time stamps to relative, negative values.
•“Delete Time Origin”Putting back above mentioned zero point
•“1234 = 0”
Sets a counter to zero
•“Record All”
If this Button is activated (see picture) all data are recorded and can be stored. If this function is not activated, only the last value is recorded, alternatively stored.
•„Save List“
Speichert die Liste
•„Save List as …“ Speichert die Liste unter
anderem Namen
•„Delete List“
Löscht die gesamte Liste
•„Set Time Origin“ Setzt den aktuellen Wert des
Zeitstempels auf Null und
damit „ältere“ Zeitstempel auf
relative, negative Werte
•„Delete Time Origin“Setzt o.g. Nullpunkt wieder
zurück
•„1234=0“
Setzt einen Zähler auf Null
•„Record all“
Ist dieser Button aktiviert
(s. Bild) werden alle Daten
aufgezeichnet und können
gespeichert werden. Ist diese
Funktion nicht aktiviert, wird
nur der letzte Wert
aufgezeichnet, bzw.
gespeichert.
•„Scroll“
Ist dieser Button aktiviert
(s. Bild) wird automatisch das
Ende der Liste, die aktuelle
Zeile, angezeigt.
•“Scroll”
If this button is activated (see picture) the end of the list, the
current line, are automatically indicated.
Name der Variable
Wert der Variable
(inklusive einer möglichen
Skalierung)
Zeitstempel in ssss.mmm,uuu
(s: Sekunden, m: ms, u: μs)
Für jede Variable gibt es einen
separaten Zähler
Instruction Manual/Betriebsanleitung BGE 3515 / 6010, Version: 1.1 en_de
© 2009 Alcatel-Lucent; Dunkermotoren; D-79848 Bonndorf; Germany
Instruction Manual/Betriebsanleitung BGE 3515 / 6010, Version: 1.1 en_de
© 2009 Alcatel-Lucent; Dunkermotoren; D-79848 Bonndorf; Germany
115
16 Slave in CANopen network
16 Slave in CANopen Netzwerk
16 Slave in CANopen network
16 Slave in CANopen Netzwerk
16.9 CAN master of other manufacturer
16.9 CAN-Master anderer Hersteller
Also CAN masters of other manufacturers can be
used, as long as they conform to the CANopen standard of the CIA.
For the first commissioning of the controller the
following base settings have to be carried out:
Alle anderen CAN-Master anderer Hersteller können ebenfalls verwendet werden, solange sie dem
CANopen-Standard der CIA entsprechen. Für die
Erstinbetriebnahme des Reglers sind dort lediglich die
folgenden Grundeinstellungen vorzunehmen:
Node ID: Baudrate:
Knotenadresse: 127
Baudrate:
125 kBaud
116
127
125 kBaud
Instruction Manual/Betriebsanleitung BGE 3515 / 6010, Version: 1.1 en_de
© 2009 Alcatel-Lucent; Dunkermotoren; D-79848 Bonndorf; Germany
16.10 Communication settings
16.10 Kommunikationseinstellungen
The controller have to be connected separately
(not in the CAN network) to a master (PC).
For the first communication, the parameters at the
master must be adjusted to the factory settings of the
controller in order to enable the first communication.
The use of the provided CAN monitor or the mPLC is
recommended.
The following factory settings are available
on delivery:
Der Regler ist einzeln (nicht im CAN- Netzwerk) an
einen Master (PC) anzuschließen. Die Kommunikationsparameter am Master müssen auf die Werkseinstellungen des Reglers eingestellt werden, damit die
erste Kommunikation aufgebaut werden kann. Es wird
die Verwendung des zur Verfügung stehenden CANMonitors oder das mPLC empfohlen.
Im Auslieferungszustand sind folgende Werkseinstellungen vorhanden:
Baudrate: 125 kBaud
Node ID: 127
Baudrate : 125 kBaud
Node-Id : 127
After the communication with the controller is assembled, there are two possibilities to change Node ID
and Baudrate, which are described below.
In the case of use the Starter-Kit Tools (mPLC and
USB-CAN-Adapter) are available, which support this
adjustment.
Nachdem die Kommunikation mit dem Regler hergestellt ist, stehen zum Ändern der Node-Id und der
Baudrate zwei prinzipielle Möglichkeiten zur Verfügung, die unten beschrieben werden. Bei Verwendung
des Starter-Kits (mOLC und USB-CAN-Adapter)
stehen Tools zur Verfügung, die diese Anpassung
erleichtern.
16.10.1 Standard variant – LMT services
16.10.1 Standardvariante - LMT Dienste
These services are accorded to CIA in the LMT Service Specification DS205/1 implement and require an
LMT able master. Only the mode “Switch mode Global” is available, wherefore only one controller should
be connected at CAN master.
In this mode the communication parameters of all
participants are changed (global).
The service „Switch mode Selective“ is not implemented.
Diese Dienste sind entsprechend CIA in der LMT
Service Specification DS205/1 implementiert und
erfordern einen LMT-fähigen Master. Es steht nur die
Funktion „Switch mode Global“ zur Verfügung, weshalb nur ein Regler am CAN- Master angeschlossen
sein sollte. In diesem Modus werden die Kommunikationsparameter aller Teilnehmer geändert (Global).
Der Dienst „Switch Mode Selective“ ist nicht implementiert.
Instruction Manual/Betriebsanleitung BGE 3515 / 6010, Version: 1.1 en_de
© 2009 Alcatel-Lucent; Dunkermotoren; D-79848 Bonndorf; Germany
117
16 Slave in CANopen network
16 Slave in CANopen Netzwerk
16 Slave in CANopen network
16 Slave in CANopen Netzwerk
16.10.2 Manufacturer-specific variant
16.10.2 Herstellerspezifische Variante
This variant is more convenient for the first
commisssioning.
Diese Variante ist für die Erstinbetriebnahme besser
geeignet.
Schritt
Index
Subindex
Wert
Bemerkung
1
2000
1
0x6E657277
Schreiben aktivieren
Utilisation of mPLC
Verwendung von mPLC
2
2000
2
Neue Baudrate setzen
•Open and starting the example Script
“Nodeld_Scan.py”,
in order to find the node address of the controller
•Öffnen und Starten des Beispiels Scripts
„Node-Id_Scan.py“,
um die Knotenadresse des Reglers zu finden
Index der
Baudrate
•Open the example Script
“Nodeld_Change.py”,
there enter the desired node address and start this Script.
•Öffnen des Beispiels Scripts
„Node-Id_Change.py“,
dort die gewünschte Knotenadresse eintragen
und dieses Script starten.
•Open the example Script
“Baudrate_Change.py”,
there enter the desired index of the Baudrate (see documentation in the Script) and start this Script.
•Öffnen des Beispiels Scripts
„Baudrate_Change. py“,
dort die gewünschten Index der Baudrate
(s. Dokumentation im Script) eintragen
und dieses Script starten.
•Changing Baudrate
Baudrate 1M
Index
1
500k 250k
2
3
125k
100k
50k
20k
10k
4
5
6
7
8
When changing the Baudrate the
master has also to be configured
accordingly!
Die Änderungen werden erst nach
Aus- und Einschalten des Reglers
wirksam!
HINWEIS
Beim Ändern der Baudrate ist der
Master ebenfalls entsprechend zu
konfigurieren!
Danach ist die Baudrate von mPLC
ebenfalls zu ändern!
Afterwards the Baudrate has also to
be changed in the Drive Assistant!
NOTICE
HINWEIS
The changes become only effective
after switching off and switching on
the controller!
HINWEIS
Die Änderungen werden erst nach
Aus- und Einschalten des Reglers
wirksam!
Utilisation of other CAN masters
Verwendung eines anderen CAN-Masters
In order to change the node address and the
Baudrate, the SDO (Service-Data-Object) 0x2000 is
available, which is to be described as follows:
Um die Knotenadresse und die Baudrate zu ändern,
steht das SDO (Service-Daten-Objekt) 0x2000 zur
Verfügung, das folgendermaßen zu beschreiben ist:
•Changing the node address
•Ändern der Knotenadresse:
118
0
800k
Changes become only effective after
switching off and switching on the
controller!
NOTICE
NOTICE
•Ändern der Baudrate:
Schritt
Index
Subindex
Wert
Bemerkung
1
2000
1
0x6E657277
Schreiben aktivieren
2
2000
2
Node-Id
Neue Knotenadresse
setzen
Instruction Manual/Betriebsanleitung BGE 3515 / 6010, Version: 1.1 en_de
© 2009 Alcatel-Lucent; Dunkermotoren; D-79848 Bonndorf; Germany
Instruction Manual/Betriebsanleitung BGE 3515 / 6010, Version: 1.1 en_de
© 2009 Alcatel-Lucent; Dunkermotoren; D-79848 Bonndorf; Germany
119
16 Slave in CANopen network
16 Slave in CANopen Netzwerk
17 Maintenance & Service
17 Wartung & Service
16.11 Test programs and other assistance
16.11 Testprogramme und weitere
Hilfsmittel
The StarterKit CD provides further examples, e.g.
motor configuring, position control, speed- or current
control, PDO Mapping.
That can be implemented directly under mPLC. In
addition you find also appropriate CAN monitor files in
order to control the CAN bus.
All manufacturer-specific objects are documented in
the Help data file of the object list.
Auf der Startkit-CD finden Sie weitere Beispiele, z.B.
Motorkonfigurierung, Positionssteuerung, Geschwindigkeits- oder Stromregelung, PDO-Mapping. Diese
können unter mPLC direkt ausgeführt werden. Dazu
finden Sie auch entsprechende CAN-Monitor-Dateien,
um den CAN-Bus zu kontrollieren.
Alle herstellerspezifischen Objekte sind in der HilfeDatei des Objektverzeichnisses dokumentiert.
120
Instruction Manual/Betriebsanleitung BGE 3515 / 6010, Version: 1.1 en_de
© 2009 Alcatel-Lucent; Dunkermotoren; D-79848 Bonndorf; Germany
17 Maintenance & Service
17 Wartung & Service
17.1 Maintenance, decommisioning
and disposal
17.1 Wartung, Ausserbetriebsetzung
und Entsorgung
Maintenance: the Positioning Controller requires no
maintenance.
Wartung: Die Positioniersteuerung benötigt keine Wartung.
Decommissioning:
Ausserbetriebsetzung:
Attention!
The safety instructions MUST
be read and observed prior to
taking the unit out of service!
Achtung!
Vor der Ausserbetriebnahme
sind unbedingt die Sicherheitshinweise zu lesen und zu beachten!
Disposal: taking the controller out of service (see above).
When disposing of scrap electrical equipment, the specific disposal regulations and environmental directives
of the country or region you are in must be observed.
Entsorgung: Setzen Sie die Steuerung ausser Betrieb
(s.o.). Bei der Entsorgung von Elektroschrott sind die
spezifischen Entsorgungsvorschriften und Umweltrichtlinien des jeweiligen Landes zu beachten.
17.2 Service & support
17.2 Service & Support
If questions or problems arise, the following contacts
are available to help:
Bei Fragen und Problemen stehen Ihnen folgende Ansprechpartner zur Verfügung:
- Your representative
- Your Dunkermotoren Key Account Manager
- Our support department for hardware
- Our support department for software
- Ihre zuständige Vertretung
- Ihr zuständiger Dunkermotoren
Key Account Manager
- Unsere Supportabteilung für Hardware
- Unsere Supportabteilung für Software
Or visit our Support-Online portal at
www.dunkermotoren.com/support.
Besuchen Sie auch unser Support-Onlineportal unter
www.dunkermotoren.de/support.
A PDF-file containing these operating instructions and
further information is available to you at
Die PDF-Datei dieser Betriebsanleitung und weitere
Informationen stehen für Sie im Internet unter
www.dunkermotoren.de/downloads.
www.dunkermotoren.de/downloads bereit.
Alcatel-Lucent Deutschland AG
Components Division
Dunkermotoren
Allmendstrasse 11
D-79848 Bonndorf
Tel.: +49 7703 930-0
Fax: +49 7703 930-210
[email protected]
Alcatel-Lucent Deutschland AG
Components Division
Dunkermotoren
Allmendstrasse 11
D-79848 Bonndorf
Tel.: +49 7703 930-0
Fax: +49 7703 930-210
[email protected]
Instruction Manual/Betriebsanleitung BGE 3515 / 6010, Version: 1.1 en_de
© 2009 Alcatel-Lucent; Dunkermotoren; D-79848 Bonndorf; Germany
121
17 Maintenance & Service
17 Wartung & Service
17.3 Scope of supply and accessories
17.3 Lieferumfang und Zubehör
As quoted
Wie angegeben
17.4 Download PDF-Data
17.4 Download PDF-Daten
www.dunkermotoren.de
122
Notes
Notizen
www.dunkermotoren.de
Instruction Manual/Betriebsanleitung BGE 3515 / 6010, Version: 1.1 en_de
© 2009 Alcatel-Lucent; Dunkermotoren; D-79848 Bonndorf; Germany
Instruction Manual/Betriebsanleitung BGE 3515 / 6010, Version: 1.1 en_de
© 2009 Alcatel-Lucent; Dunkermotoren; D-79848 Bonndorf; Germany
123