1
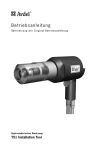
Betriebsanleitung
Üb e r s e t z u n g d e r O r i g i n a l - B e t r i e b s a n l e i t u n g
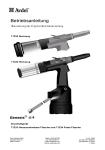
Hydroelektrisches Werkzeug
T40 Installation Tool
Inhalt
Sicherheit
4
Technische Daten
Arbeitsbereich
Technische Gerätedaten
Geräteabmessungen
5
5
5
Inbetriebnahme
Funktionsprinzip
Einsatzvorbereitung
Hydraulikschlauch-Kits
Betriebsanleitung
6
6
6
7
Wartung
Demontageanleitung
Gerätemontage
8
9
Um das Gerät zu entlüften
9
Übersichtszeichnung des Istallationsgerates
73414-02000
10
Ersatzteilliste für Istallationsgerates
73414-02000
11
Geräteinstandhaltung
Täglich
Wöchentlich
Alle 1,200 Betriebsstunden (mindestens einmal pro Jahr)
Werkzeugsatz
Allgemeine Sicherheitsdaten für Hydrauliköl
12
12
12
12
12
Beseitigen von Störungen
Symptom, mögliche Ursache und Abhilfe
13 - 14
Garantie
Die hiermit gewährte Garantie von 6 Monaten gilt ausschließlich für die vom Verkäufer gefertigten
Teile und tritt anstelle jeder anderen ausdrücklichen oder stillschweigenden Garantie auf
handelsübliche Qualität und Eignung für einen bestimmten Zeck, ohne darauf beschränkt zu sein.
Der Verkäufer haftet nicht für Verluste oder Schäden, die aus Verzögerungen oder Nichterfüllung
von Bestellungen aufgrund von Streiks, Bränden, Unfällen, Transportgesellschaften oder anderen
Gründen entstehen, die sich der Kontrolle des Verkäufers oder dessen Lieferanten entziehen.
Sämtliche Garantieansprüche sind beim Verkäufer schriftlich binnen 6 Monaten ab Versanddatum
geltend zu machen. Ungeachtet weiterer diesbezüglicher Bestimmungen haftet der Verkäufer nicht
für irgendwelche Gewinnverluste oder direkte Folgeschäden, die dem Verkäufer oder irgendwelchen
Dritten im Zusammenhang mit den Artikeln oder deren Verwendung entstehen, wobei die Ursache
unerheblich ist.
Aggregatgarantie
Der Verkäufer lehnt jede ausdrückliche oder stillschweigende Garantie bezüglich des Zustandes, der
Konstruktion, der handelsüblichen Qualität oder Zweckeignung eines Aggregats oder dessen Teilen
ab, das bzw. die nicht vom Verkäufer gefertigt und/oder geliefert werden. Die einzigen Garantien für
solche Aggregate oder deren Teile sind die vom Hersteller gewährten und der Verkäufer wird mit
dem Käufer bei der Durchsetzung dieser Garantien kooperieren, falls das notwendig ist. Der
Verkäufer wird jedes Aggregat oder dessen Teile frei ab Werk des Verkäufers reparieren oder
ersetzen, wenn es von ihm gefertigt wurde und wenn ihm der Nachweis erbracht wird, dass Materialoder Verarbeitungsfehler vorliegen.
Avdel verfolgt eine Politik der kontinuierlichen Weiterentwicklung und Verbesserung seiner Produkte und wir behalten uns das Recht vor, die Spezifikationen eines Produktes jederzeit zu ändern.
3
Sicherheit
Diese Betriebsanleitung muss von den mit der Installation, dem Betrieb und der Wartung des Gerätes
beauftragten Personen gelesen werden. Hierbei sind besonders die folgenden Sicherheitsvorschriften zu
beachten.
1
Nicht zweckentfremdet verwenden.
2
Mit diesem Gerät/dieser Maschine keine anderen als die von Avdel® empfohlenen Gerätschaften verwenden.
3
Vom Kunden vorgenommene Modifikationen an dem Gerät/der Maschine unterliegen der alleinigen Verantwortung des Kunden.
4
Bevor Einstellungen vorgenommen werden oder die Mundstückbaugruppe demontiert oder montiert wird, ist das Gerät
grundsätzlich vom HydraPac zu trennen.
5
Kein Gerät/keine Maschine betätigen, das/die auf Personen gerichtet ist.
6
Vor dem Betreiben des Gerätes/der Maschine immer einen festen Stand oder eine standfeste Position einnehmen.
7
Wenn mit dem Gerät Arbeitszyklen ohne Mundstückbaugruppe durchgeführt werden, muss darauf geachtet werden, dass der
Kontakt mit dem Greifteilauswurfstift vermieden wird und dass die Finger nicht zwischen der Ambossfassung (T304) und dem
Führungshülsenadapter (T307) eingeklemmt werden.
8
Der Bediener und andere Personen, die sich während des Betriebes im Arbeitsbereich aufhalten, müssen einen Gehörschutz
tragen.
9
Keine flexiblen Schläuche anschließen, die für einen Druck von weniger als 69,0 bar ausgelegt sind.
10 Der Betriebsdruck darf 55,2 bar nicht überschreiten.
11 Es muss dafür Sorge getragen werden, dass verbrauchte Greifteile keine Gefahrenquelle darstellen.
12 Beim Betreiben des Gerätes wird dem Bediener und anderen im Arbeitsbereich befindlichen Personen empfohlen, eine Schutzbrille
zu tragen.
13 Darauf achten, dass sich keine losen Kleidungsstücke, Krawatten, Reinigungstücher usw. in den beweglichen Teilen des Gerätes
verfangen.
14 Für bestmögliche Greifwirkung muss das Gerät sauber und trocken gehalten werden.
15 Beim Tragen des Gerätes von einem Ort zum anderen sind die Hände vom Auslöser fernzuhalten, um ein ungewolltes Starten
auszuschließen.
16 Wartungsarbeiten sind grundsätzlich nur von entsprechend geschultem Fachpersonal unter Berücksichtigung der
Wartungsanleitung durchzuführen. Die erforderlichen Schulungen werden ausschließlich durch Avdel® erteilt.
17 Die Maschine muss jederzeit den geltenden Unfallverhütungs- und Sicherheitsbestimmungen entsprechen. Anfragen betreffend
dem ordnungsgemäßen Zustand und Betrieb der Maschine sind an Avdel® zu richten.
VORSICHTSMASSNAHMEN
AVDEL EMPFIEHLT, AUSSCHLIESSLICH HYDRAPAC-AGGREGATE ZUM ANTREIBEN DER GERÄTE ZU VERWENDEN, DA ES
SEIN KANN, DASS HYDRAULIKAGGREGATE ANDERER HERSTELLER MIT DEN SICHER AUSGELEGTEN ARBEITSDRÜCKEN
NICHT KOMPATIBEL SIND.
SICHERSTELLEN, DASS AUSREICHEND ABSTAND FÜR DIE HÄNDE DES GERÄTEBEDIENERS GEWÄHRLEISTET IST,
BEVOR FORTGEFAHREN WIRD.
DASS GERÄT NICHT UNSACHGEMÄSS BEHANDELN, INDEM ES FALLEN GELASSEN ODER ALS HAMMER BENUTZT WIRD.
SCHMUTZ UND FREMDSTOFFE SIND AUS DEN HYDRAULIKSYSTEMEN DES GERÄTES FERNZUHALTEN, DA ES SONST ZU
FEHLFUNKTIONEN DES GERÄTES ODER DES HYDRAPACS KOMMEN KANN.
4
Te c h n i s c h e D a t e n
Arbeitsbereich
Das T40 ist im Grundaufbau eine Kolben- und Zylinderbaugruppe. Bei hydraulischem und elektrischem Anschluss an eine kompatible
Hydraulikenergiequelle und bei Anbringen des jeweiligen Aufsatzes verwendet für die Installation von 1/2” bis 3/4” Avdelok® und von
5/ ” Avbolt® in industriellen umgebungen.
8
Vgl. die nachfolgende Tabelle für eine Liste der verwendbaren Nieten und zugehöriger Aufsätze.
In den in der Tabelle aufgeführten Datenblättern finden Sie die jeweiligen Anleitungen für die Aufsatzmontage.
NIET
TYP
Avdelok ®
LD
Avbolt
®
D AT E N B L AT T
A U F S AT Z
AUSRÜSTUNG
SIZE
ART-NR
HAT REF.
DIM. ‘A’
ART-NR
1/ ”
2
73412-03100
N32
110mm
07900-00919
5/ ”
8
3/ ”
4
73412-03200
N31
113mm
07900-00919
73412-03300
N30
131mm
07900-00919
5/ ”
8
73412-03400
N37
113mm
07900-00905
Te c h n i s c h e G e r ät e d a t e n
Länge
250 mm
9,8 in
Körperdurchmesser
76 mm
2,9 in
Höhe
190 mm
7,50 in
Gewicht
7 kg
15,5 lbs
Hub
41 mm
1,6 in
Zugkraft
175 kN
39340 lbf
Ziehdruck
552 bar
8000 PSI
Rückstelldruck
207 bar
3000 PSI
Hydrauliköl
ISO VG 46
Nietsortiment
1/ ’’ bis 3/ ” Avdelok® und von 5/ ” Avbolt®
2
4
8
Geräuschpegel
126,2 dB(A)
Schalldruckpegel
100,9 dB(A)
Vibration
8,6 m/s3
G e r ät e a b m e s s u n g e n
250 mm
190 mm
A
76 mm
5
Inbetriebnahme
Funktionsprinzip
WICHTIG
Die Sicherheitsvorschriften auf Seite 4 sorgfältig lesen.
Wenn die Schläuche und das Steuerkabel am HydraPac angeschlossen sind, werden die Zieh- und Rückstellzyklen durch Drücken und
Loslassen des Auslösers am Handgriff gesteuert.
Durch Drücken des Schalters wird das im HydraPac befindliche Steuermagnetventil erregt und es leitet den unter Druck stehenden
Ölstrom zur Ziehseite des Kolbens im Gerät. Gleichzeitig wird dem Öl in der Rückstellseite des Gerätes das Zurückströmen in den Tank
ermöglicht. Die Kolben/Führungshülse-Baugruppe bewegt sich jetzt am Gerät nach hinten, was dem Puffer ermöglicht, den Stößelring
und die Spannbacken nach vorne zu drücken. Wenn das Gerätemundstück für den Installationsvorgang an den Avdelok® angesetzt
wurde, klemmt der Spannbackensatz das Greifteil fest und der Installationsvorgang beginnt.
Der Installationszyklus spannt zuerst die Verbindungsfuge zusammen und anschließend, wenn sich der Amboss weiter nach vorne
bewegt, wird der Schließring in die Klemmnuten des Bolzens gepresst. Am Ende des Einsenkzyklus fährt der Amboss hart gegen die
Verbindungsfuge und bei fortschreitender Bewegung wird das Greifteil abgebrochen.
Der Auslöser muss sofort nach dem Bruch des Bolzens losgelassen werden.
Unter Druck stehendes Öl fließt jetzt in die Rückstellseite des Installationsgerätes und das Öl in der Ziehseite wird in den Tank
zurückgeleitet.
Die Vorwärtsbewegung der Kolben/Führungshülsen-Baugruppe gibt zuerst den installierten Niet vom Amboss frei und bei
fortschreitender Vorwärtsbewegung bewirkt der Spannbackenlösemechanismus das Öffnen der Spannbacken und die Freigabe des
abgebrochenen Greifteils, das dann ausgestoßen wird.
Wenn der Kolben zur äußersten Vorwärtsposition zurückkehrt, bewirkt der im System aufgebaute Druck, dass das HydraPac in den
Leerlaufmodus übergeht. In dem Modus wird das Installationsgerät in Vorwärtsstellung gehalten. Nachdem das Greifteil aus dem
Mundstück entfernt wurde, ist dass Gerät für den nächsten Installationsvorgang bereit.
Bitte beachten, dass an allen elektrischen HydraPacs ein eingebauter “Stand by“-Modus vorgesehen ist, der durch automatische
Abschaltung des Elektromotors in Kraft tritt, wenn der Auslöserschalter ca. 25 Sekunden lang nicht betätigt wurde. Das HydraPac fährt
automatisch neu an, wenn der Auslöserschalter am Gerät erneut betätigt wird. (Die HydraPac-Dieselversion hat keinen “Stand by“Modus.)
Einsatzvorbereitung
• Befestigen Sie den richtigen Aufsatz an dem Gerät. Folgen Sie dabei den Anleitungen in dem jeweiligen Aufsatz-Datenblatt.
• Sicherstellen, dass das HydraPac nicht läuft.
• Verbinden Sie die Schläuche und das Steuerband mit dem HydraPac; das Werkzeug verfügt über einen Schlauch von 0,7 m Länge.
Weitere Schlauchlängen sind erhältlich und können nach Bedarf separat bestellt werden. In der nachfolgenden Tabelle finden Sie die
erhältlichen Längen und die zugehörigen Teilenummern.
• Das HydraPac starten. Den Auslöserschalter einige Male bis fast zum Vollhub des Gerätes drücken und loslassen, um die
Hydraulikflüssigkeit im System zirkulieren zu lassen. Die Reaktion des Gerätes beobachten. Auf Flüssigkeitslecks kontrollieren und
sicherstellen, dass sich der Kolben im Leerlaufmodus in der äußersten Vorwärtsposition befindet.
HYDRAULIKSCHLAUCH-KITS
6
ART-NR
SCHLAUCHLÄNGE
07005-10014
07005-10034
07005-10035
6 METRE
10 METRE
15 METRE
Inbetriebnahme
Betriebsanleitung
Installieren eines Avdelok® niet
• Die Werkstücke kontrollieren und übermäßigen Spalt beseitigen. (Spalt ist der Abstand zwischen den Werkstücken an der
Verbindungsstelle. Übermäßiger Spalt liegt vor, wenn zum Greifen der Mundstückspannbacken nicht genügend Greifteil über den
Schließring hinausragt.)
• Den Avdelok® in die Bohrung stecken.
• Den Avdelok®schließring auf den Bolzen stecken. (Die abgeschrägte Seite des Schließrings muss zur Mundstückbaugruppe und
zum Gerät hin weisen.)
• Die Mundstückbaugruppe auf den Bolzen stecken, bis der Mundstückamboss gegen den Schließring anliegt. Gerät und
Mundstückbaugruppe müssen im rechten Winkel (90°) zum Werkstück gehalten werden.
• Den Auslöserschalter am Gerät drücken, um den Installationszyklus zu starten.
• Den Auslöserschalter loslassen, wenn die Vorwärtsbewegung des Mundstückamboss stoppt und das Greifteil abbricht. Das Gerät
geht in den Rückstellhub über und stößt den installierten Niet ab. Am Ende des Rückstellhubs geben die Spannbacken das
verbrauchte Greifteil frei, das durch Halten des Gerätes nach unten entfernt werden kann.
• Nachdem das verbrauchte Greifteil entfernt wurde, ist das Gerät und die Mundstückbaugruppe für den nächsten Installationszyklus
bereit.
VORSICHT
NICHT VERSUCHEN, EIN GREIFTEIL ABZUBRECHEN, OHNE VORHER EINEN SCHLIESSRING AUFGESTECKT ZU HABEN,
DA SONST DER UNGESICHERTE TEIL DES AVDELOK® MIT HOHER GESCHWINDIGKEIT UND KRAFT AUS DEM
MUNDSTÜCK GESTOSSEN WIRD.
7
Wa r t u n g
Demontageanleitung
WICHTIG
Vergewissern, dass das HydraPac ausgeschaltet ist, bevor das Gerät oder das Mundstück entfernt wird.
• Die beiden Hydraulikschläuche 23 abkoppeln und das Steuerkabel 26 abklemmen.
• Amboss abschrauben und entfernen.
• Führungshülse abschrauben und die innenliegenden Bauteile entfernen: Spannbackensatz, Stößelring etc.
• Gewindestift 7 und Unterlage 1 mit einem 4 mm Innensechskantschlüssel lösen.
• Ambossfassung 1 abschrauben.
• Gewindestift 7 an Endkappe 19 mit einem 4 mm-Inbusschlüssel lösen.
• Endkappe 19 losschrauben.
• Zum Auffangen des Öls einen geeigneten Behälter unter das Gerät stellen.
• Wenn eine Handpumpe (73010-00001) verfügbar ist, diese an die Innengewindekupplun anschließen und den Kolben 10 langsam
aus dem Zylinder 13 pumpen.
• Als Alternative kann der Kolben 10 in einen Weichbackenschraubstock gespannt und der Zylinder 13 mit einem Gummihammer
nach hinten geklopft werden.
• Hinteren Stopfen 17 entfernen, gefolgt von Sicherungsring 16.
• Wenn Sicherungsring 16 entfernt ist, Kolben 10 nach vorn klopfen, bis der Kolben herauskommt.
• Vorderen Stopfen 4 von Kolben 10 entfernen.
• Hinteren Kolben 15 vom Zylinder 13 entfernen.
• Versiegelungen prüfen und falls nötig mit Service Kit SK40 austauschen.
Die fettgedruckten Positionsnummern verweisen auf die Übersichtszeichnung und die Ersatzteilliste auf den Seiten 10-11.
8
Wa r t u n g
G e r ät e m o n t a g e
Alle Teile inspizieren und verschlissene Teile erneuern. Neue O-Ringe und Stützringe montieren (Wartungssatz SK40).
• Alle O-Ringe, Stützringe und Kontaktflächen vor der Montage mit Hydrauliköl schmieren.
• Neuen ‘O’-Ring 3 und Back-Up-Ring 2 extern befestigen, neuen Back-Up-Ring 5 und ‘O’-Ring 6 intern an vorderem Stopfen 4 befestigen.
• Neuen 'O'-Ring 18 intern an hinterem Stopfen 17 befestigen.
• 'O'-Ring 8 und Back-Up-Ring 9 an Kolben 10 befestigen.
• Neuen ‘O'-Ring 8 und Back-Up-Ring 9 extern befestigen, neuen Back-Up-Ring 5 und ‘O’-Ring 6 intern an hinterem Kolben 15 befestigen.
• Die neuen Back-Up-Ringe 11 und den 'O'-Ring 12 im Zylinder 13 befestigen.
• Kolben 10 in den Zylinder 13 schieben.
• Vorderen Stopfen 4 installieren.
• Ambossfassung 1 anschrauben.
• Gewindestift 14 mit einem 4 mm Innensechskantschlüssel festziehen.
• Feder 14 hinten in Kolben 10 einführen.
• Hinteren Kolben 15 installieren, gefolgt von Sicherungsring 16.
• Hinteren Stopfen 17 installieren.
• Endkappe 19 wieder aufsetzen.
Um das Gerät zu entlüften
• Die kurzen Geräteschläuche direkt an ein HydraPac oder kompatibles Hydraulikaggregat anschließen.
Anmerkung: Keine langen Verlängerungsschläuche verwenden, da diese das entweichen der luft in das HydraPac verhindern.
• Einen HydraPac-Prüfauslöser anschließen.
• Das gerät so halten, dass die kolbenstangenseite vertikal nach oben gerichtet ist.
• Einige Zyklen abarbeiten.
• Die vertikale Position umkehren und erneut einige Zyklen abarbeiten.
Die fettgedruckten Positionsnummern verweisen auf die Übersichtszeichnung und die Ersatzteilliste auf den Seiten 10-11.
9
Ubersichtszeichnung des T40 Installationsgerates
73414-02000
5
6
4
1
2
14
3
13
12*
11*
11*
20
10
19
7
8*
18*
9*
24
17
15
8*
5*
6*
16
7
9*
22
23
21
25
26
10
E r s a t z t e i l l i s t e f ür T 4 0 I n s t a l l a t i o n s g e r a t
73414-02000
T40 ERSATZTEILLISTE
POS.
ART.-Nr.
1
2
3
4
5
T404
E221
R222
T403
E123
6
7
8
9
10
11
12
13
14
15
16
17
18
19
20
21
22
23
24
25
26
R123
GS11
R226
I226
T402
E219
R219
T401
T409
T405
T406
T407
R217
T408
NG059
MS19
C084
HS02
HS01
C325
C106
BENENNUNG
AMBOSSFASSUNG
STÜTZRING
O-RING
VORDEREN STOPFEN
STÜTZRING
O-RING
GEWINDESTIFT
O-RING
STÜTZRING
KOLBEN
STÜTZRING
O-RING
ZYLINDER
FEDER
HINTEREN KOLBEN
SICHERUNGSRING
HINTEREN STOPFEN
O-RING
ENDKAPPE
90o SCHLAUCHADAPTER
AUSLÖSERSCHALTER
GRIFF
HYDRAULIKSCHLAUCH
SCHNELLKUPPLUNGSSATZ
STECKER
STEUERKABEL
ANZ.
1
1
1
1
2
2
2
2
2
1
2
1
1
1
1
1
1
1
1
1
1
1
2
1
1
1
WARTUNGSSATZ
*
*
*
*
*
*
*
*
*
* O-Ringe und Stützringe werden nur als Wartungssatz SK40 geliefert.
11
G e r ät e i n s t a n d h a l t u n g
T äg l i c h
•
Auf Undichtigkeiten prüfen.
•
Den Hub des Gerätes kontrollieren.
•
Amboss auf Verschleißerscheinungen kontrollieren, die anhand von Furchen am installierten Schließring zu erkennen sind. Das
kann auch durch Bezugnahme auf die Installationsdaten im Nietkatalog bestätigt werden. Starker Verschleiß kann das Brechen des
Ambosses verursachen.
•
Die Funktion des Ziehdruck-Sicherheitsventils überprüfen.
W öc h e n t l i c h
•
Die Mundstückbaugruppe demontieren und reinigen, insbesondere die Spannbacken.
•
Auf Öllecks kontrollieren.
A l l e 1 2 0 0 B e t r i e b s s t u n d e n ( m i n d e s t e n s e i n m a l p ro j a h r )
Das Gerät muss komplett zerlegt und verschlissene Teile, einschließlich aller O-Ringe und Stützringe, müssen erneuert werden.
Werkzeugsatz
•
Maulschlüssel - 17, 19, 24 mm
•
Innensechskantschlüssel - 4 mm, 6 mm
A l l g e m e i n e S i c h e r h e i t s d a t e n f ür H y d r a u l i k öl
Erste Hilfe
HAUT:
Unter Normalbedingungen tritt keine Hautreizung auf, jedoch sollte benetzte Haut gründlich mit Seife und Wasser gewaschen werden.
Verunreinigte Kleidung ist normal zu waschen.
EINNAHME:
Wenn Person nach Verschlucken bei Bewusstsein ist, Wasser oder Milch reichen. Keinen Brechreiz hervorrufen, nur auf Anweisung vom
medizinischen Personal. Betroffene Person zum nächsten Arzt bringen.
AUGEN:
Sofort mehrere Minuten lang mit Wasser ausspülen.
ENTSORGUNG:
Verschüttungen mit nichtreagierendem, absorbierendem Material aufsaugen. Den Verschüttungsbereich gut belüften. Die verunreinigten
Materialien in einen Entsorgungsbehälter geben und entsprechend den örtlich geltenden Bestimmungen entsorgen.
Brand
FLAMMPUNKT: 200 °C.
Entweder mit Trockenchemikalie, Schaum oder CO2 löschen. Keine beengten Räume ohne unabhängigem Atemschutzgerät betreten.
Handhabung
Schutzcreme verwenden oder öldichte Handschuhe tragen.
Lagerung
Überdacht und gemäß den örtlich geltenden Bestimmungen für nicht entflammbare Materialien.
12
S t ör u n g s b e s e i t i g u n g
SEITENVERWEIS
SYMPTOM
MÖGLICHE URSACHE
ABHILFE
Gerät funktioniert nicht
HydraPac außer Betrieb
Stromversorgung zum HydraPac überprüfen
Loses oder abgeklemmtes Steuerkabel
Auf lose oder gebrochene Drähte inspizieren
Defekte Schalterbaugruppe
Schalterbaugruppe erneuern
Defekte Hydraulikschlauchkupplungen
Defekte Kupplungen erneuern
Gerät hat
Beschädigte oder verschlissene O-Ringe, lose
O-Ringe und Stützringe kontrollieren und
Hydraulikölleck
Hydraulikschlauchanschlüsse am Gerät
erneuern oder Hydraulikschlauch festziehen
Übererwärmung des
Blockierte Hydraulikleitung
Kupplungen kontrollieren und ggf. erneuern
Gerät arbeitet
Niedrige oder unregelmäßige
Siehe Betriebsanleitung des HydraPac
unregelmäßig und
Hydraulikdruckversorgung
installiert Niet nicht
Beschädigte(r) oder stark verschlissene(r)
ordnungsgemäß
Kolben, O-Ringe und Stützringe im Gerät
Hydrauliköls
1
O-Ringe und Stützringe erneuern
Starker Verschleiß oder zerkratzte Gleitflächen
Auf defekte Teile kontrollieren und ggf.
an Gerätebauteilen
erneuern
Beim Ziehhub werden
Bediener drückt das Mundstück nicht
Bediener in korrekten Installationsmethoden
Ziehkerben am Greifteil
vollständig auf das Greifteil des Niets, bevor
unterweisen
des Niets abgeschält
das Gerät betätigt wird
2
Falsche Nietlänge
Niet richtiger Länge verwenden
Verschlissene oder beschädigte
Spannbackensatz kontrollieren und erneuern
Spannbackensegmente
Ansammlung von Metallspänen in den
Spannbackensegmente reinigen
Ziehkerben der Spannbackensegmente
Zu breiter Blechspalt
Breiten Spalt abstellen
Schließring des
Falsche Gerätebedienung
Siehe 2
Hydraloc-Niets nicht
Verschlissener Amboss im Mundstück
Amboss kontrollieren und erneuern
Gerät „hängt“ am
Falsche Gerätebedienung
Siehe 1
gepresstem Schließring
HydraPac im Leerlaufmodus
HydraPac aus- und wieder einschalten und neu
vollständig angepresst
starten, indem der Auslöserschalter gedrückt
wird
Greifteil des Niets bricht
Ziehkerben am Niet abgeschält
Siehe 2
nicht ab
Falsche Gerätebedienung
Bediener in korrekten Installationsmethoden
unterweisen
Fortsetzung auf der nächsten Seite.
13
S t ör u n g s b e s e i t i g u n g
SYMPTOM
Spannbacken-
MÖGLICHE URSACHE
Falsche Funktion des Spannbackenstößelrings
ABHILFE
Die in der Führungshülse befindlichen Teile auf
segmente bleiben
Verschleiß untersuchen, d. h. Spannbacken,
nicht in richtiger
Stößelring, Puffer und Abschlusskappe. Vor der
Einbaulage in der
Wiedermontage reinigen
Führungshülse
Beschädigter oder verschlissener O-Ring im
Ölleck an
O-Ring und Stützring erneuern
Kupplungskörper
Hydraulikkupplungen
Falsche Montage des Mundstücks
Greifteil wird nicht
freigegeben
14
Vgl. die Aufsatz-Tabelle auf Seite 5.
SEITENVERWEIS
Konformitätserklärung
Wir, Avdel UK Limited; Watchmead Industrial Estate, Welwyn Garden City, Hertfordshire, AL7 1LY
erklären unter unserer alleinigen Verantwortung, dass das Produkt:
Modell: 73414-02000
Serien-Nr:
.............................
auf das sich diese Erklärung bezieht, den nachstehend aufgeführten Normen entspricht:
EN ISO 12100 - Teile 1 & 2
BS EN ISO 8662 - Teil 6
BS EN ISO 11202
BS EN ISO 3744
BS EN 982
ISO EN 792 - Teil 13-2000
BS EN 983
gemäß den Maßgaben der Maschinenrichtlinie 2006/42/EC.
A. Seewraj - Leiter für Produkttechnik - Automatisierungswerkzeuge
Ausgabedatum
Diese Verpackung enthalt ein Gerät, das der
Maschinenrichtlinie 2006/42/EC entspricht.
Die „Konformitätserklärung“ liegt bei.
15
Since 1922
Since 1 936
2010
AUSTRALIEN
Infastech (Australia) Pty Ltd.
891 Wellington Road
Rowville
Victoria 3178
Tel:
+61 3 9765 6400
Fax: +61 3 9765 6445
[email protected]
CHINA
Infastech (China) Ltd.
RM 1708, 17/F., Nanyang Plaza,
57 Hung To Rd., Kwun Tong
Hong Kong
Tel:
+852 2950 0631
Fax: +852 2950 0022
[email protected]
DEUTSCHLAND
Avdel Deutschland GmbH
Klusriede 24
30851 Langenhagen
Tel:
+49 (0) 511 7288 0
Fax: +49 (0) 511 7288 133
[email protected]
07900-00909
JAPAN
Infastech Kabushiki Kaisha
Center Minami SKY,
3-1 Chigasaki-Chuo, Tsuzuki-ku,
Yokohama-city,
Kanagawa Prefecture
Japan 224-0032
Tel:
+81 45 947 1200
Fax: +81 45 947 1205
[email protected]
INDIEN
Infastech Fastening Technologies
India Private Limited
Plot No OZ-14, Hi Tech SEZ,
SIPCOT Industrial Growth Center,
Oragadam, Sriperumbudur Taluk,
Kanchipuram District,
602105 Tamilnadu
Tel:
+91 44 4711 8001
Fax: +91 44 4711 8009
[email protected]
KANADA
Avdel Canada Limited
1030 Lorimar Drive
Mississauga
Ontario L5S 1R8
Tel:
+1 905 364 0664
Fax: +1 905 364 0678
[email protected]
ITALIEN
Avdel Italia S.r.l.
Viale Lombardia 51/53
20047 Brugherio (MI)
Tel:
+39 039 289911
Fax: +39 039 2873079
[email protected]
FRANKREICH
Avdel France S.A.S.
33 bis, rue des Ardennes
BP4
75921 Paris Cedex 19
Tel:
+33 (0) 1 4040 8000
Fax: +33 (0) 1 4208 2450
[email protected]
Manual No.
GROSSBRITANNIEN
Avdel UK Limited
Pacific House
2 Swiftfields
Watchmead Industrial Estate
Welwyn Garden City
Hertfordshire AL7 1LY
Tel:
+44 (0) 1707 292000
Fax: +44 (0) 1707 292199
[email protected]
MALAYSIA
Infastech (Malaysia) Sdn Bhd
Lot 63, Persiaran Bunga Tanjung 1,
Senawang Industrial Park
70400 Seremban
Negeri Sembilan
+606 676 7168
Tel:
Fax: +606 676 7101
[email protected]
SINGAPUR
Infastech (Singapore) Pte Ltd.
31 Kaki Bukit Road 3
#05-03/06 Techlink
Singapore, 417818
Tel:
+65 6372 5653
Fax: +65 6744 5643
[email protected]
Issue
Change Note No.
SPANIEN
Avdel Spain S.A.
C/ Puerto de la Morcuera, 14
Poligono Industrial Prado Overa
Ctra. de Toledo, km 7,8
28919 Leganés (Madrid)
Tel:
+34 91 3416767
Fax: +34 91 3416740
[email protected]
SÜDKOREA
Infastech (Korea) Ltd.
212-4, Suyang-Ri,
Silchon-Eup, Kwangju-City,
Kyunggi-Do, Korea, 464-874
Tel:
+82 31 798 6340
Fax: +82 31 798 6342
[email protected]
TAIWAN
Infastech/Tri-Star Limited
No 269-7, Baodong Rd,
Guanmiao Township,
71841 Tainan County,
Taiwan, R.O.C
+886 6 596 5798 (ext 201)
Tel:
Fax: +886 6 596 5758
[email protected]
USA
Avdel USA LLC
614 NC Highway 200 South
Stanfield, North Carolina 28163
Tel:
+1 704 888 7100
Fax: +1 704 888 0258
[email protected]
Date
A
08/083
05/08
B
08/131
06/08
B2
11/061
03/11
Autosert® (equipment), Avbolt ®, Avdel®, Avdelmate ®, Avdel TX2000®, Avdelok®, Avex®, Avibulb ®, Avinox®, Avinut™, Avlug®, Avmatic®, Avplas®,
Avseal ®, Avsert®, Avtainer ®, Avtronic®, Briv®, Bulbex®, Chobert®, Eurosert®, Fastriv®, Finsert®, Genesis®, Grovit®, Hemlok®, Hexsert®, Holding
your world together®, Hydra®, Interlock®, Klamp-Tite ®, Klamptite KTR ®, Kvex®, Maxlok ®, Monobolt ®, Monobulb ®, Neobolt®, Nutsert®, Nutsert
SQ®, Portariv®, Rivmatic ®, Rivscrew®, Speed Fastening®, Squaresert®, Stavex®, Supersert®, Thin Sheet Nutsert ®, Titan®, T-Lok®, TLR®, TSN®,
TX2000®, Versa-Nut ®, Viking® und Viking 360 ® sind Warenzeichen von Avdel UK Limited. Infastech™ und Our Technology, Your Success™
sind Warenzeichen von Infastech Intellectual Properties Pte Ltd. Die Namen und Logos anderer erwähnter Firmen können Warenzeichen
ihrer jeweiligen Besitzer sein. Alle Angaben dieser Unterlage sind unverbindlich und dienen nur zur Information. Unsere Produkte werden
ständig weiterentwickelt und verbessert. Daher unterliegen die hier angegebenen Informationen grundsätzlich dem Ausschluss jeglicher
Gewähr und dem Vorbehalt der jederzeit unbeschränkten Änderung ohne vorherige Ankündigung. Ihr lokaler Avdel Repräsentant steht Ihnen
für neueste Informationen zur Verfügung.
02.2011 • © 2010 Infastech
www.avdel-global.com
www.infastech.com
Instruction Manual
Original Instruction
T 4 0 I n s t a l l a t i o n To o l
H y d ro - E l e c t r i c P o w e r To o l
Contents
Safety
4
Specifications
Intent of Use
Tool Specification
Tool Dimensions
5
5
5
Putting into Service
Principle of Operation
Preparation for Use
Hydraulic Hose Kits
Operating Instructions
6
6
6
7
Maintenance
Dismantling Instructions
Assembling the Tool
To Bleed the Tool
8
8
9
General Assembly for T40 Installation Tool
73414-02000
10
Parts List for T40 Installation Tool
73414-02000
11
Servicing the Tool
Daily
Weekly
Every 1200 Working Hours (at least once a year)
Service Tools
Hydraulic Oil General Safety Data
12
12
12
12
12
Fault Diagnosis
Symptom, Possible Cause and Remedy
13-14
Warranty
The ninety day warranty herein expressed shall be the exclusive warranty on items
manufactured by seller and shall be in the place and stead of any other warranty, expressed or
implied, including but not limited to the implied warranties of merchantability and fitness for a
particular purpose.
Seller shall not be liable for any loss or damage resulting from delays or non-fulfilment or
orders owing to strikes, fires, accidents, transportation companies or for any reason or
reasons beyond the control of seller or its suppliers.
All warranty claims must be submitted to the seller in writing, within 90 days from date of
shipment, and no returns will be accepted without written permission.
Other provisions hereof notwithstanding, seller shall not be liable for any loss of business
profits or any incidental or consequential damages incurred by Buyer or any third person in
connection with the items or use thereof, however caused.
Tool Warranty
Seller expressly disclaims any warranty express or implied, as to the condition, design,
operation, merchantability or fitness for use of any tool, or part(s) thereof not manufactured by
seller. The only warranties made with respect to such tool or part(s) thereof are those made
by the manufacturer thereof and seller agrees to cooperate with buyer in enforcing such
warranties when such action is necessary. Seller agrees to repair or replace F.O.B. seller's
plant, any tool or part(s) thereof manufactured by it and proved to seller to be defective due to
faulty workmanship or material.
Avdel UK Limited policy is one of continuous product development and improvement and we reserve the right to change the specification of any product without prior notice.
3
Safety
This instruction manual must be read with particular attention to the following safety rules, by any person
installing, operating, or servicing this tool.
1
Do not use outside the design intent.
2
Do not use equipment with this tool/machine other than that recommended by Avdel UK Limited.
3
Any modification undertaken by the customer to the tool/machine shall be the customer’s entire responsibility.
4
Always disconnect the tool from the HydraPac before attempting to adjust, remove or fit the nose assembly.
5
Do not operate a tool/machine that is directed towards any person(s).
6
Always adopt a firm footing or a stable position before operating the tool/machine.
7
If cycling the tool without the nose assembly, care must be taken to avoid contact with the moving piston.
8
Ear protection must be worn by the operator and others in the vicinity as noise levels exceed the permitted maximum. For values
see Tool Specification on page 5.
9
Do not fit flexible hoses rated at less than 10,000 psi (69 mPa) working pressure.
10 The operating pressure shall not exceed 8,000 psi (55.2 mPa).
11 Care shall be taken to ensure that spent pintails are not allowed to create a hazard.
12 When using the tool, the operator and others in the vicinity are recommended to wear safety glasses.
13 Take care to avoid entanglement of loose clothes, ties, long hair, cleaning rags etc. in the moving parts of the tool.
14 The tool should be kept clean and dry for the best possible grip.
15 When carrying the tool from place to place keep hands away from the trigger to avoid inadvertent start up.
16 The machine must be maintained in a safe working condition at all times and examined at regular intervals for damage and function
by trained competent personnel. Any dismantling procedure shall be undertaken only by personnel trained in Avdel® procedures.
Do not dismantle the machine without prior reference to the maintenance instructions. Contact Avdel® with your training
requirements.
17 The machine shall at all times be operated in accordance with relevant Health and Safety legislation. In the UK the "Health & Safety
at Work Act 1974" applies. Any question regarding the correct operation of the machine must be directed to Avdel®.
CAUTIONS
AVDEL RECOMMENDS THAT ONLY HYDRAPAC UNITS BE USED TO DRIVE INSTALLATION TOOLS, AS OTHER MAKES OF
HYDRAULIC POWER UNITS MAY NOT OPERATE AT THE SAFE DESIGNED WORKING PRESSURES.
ENSURE THAT THERE IS ADEQUATE CLEARANCE FOR THE TOOL OPERATOR'S HANDS BEFORE PROCEEDING.
DO NOT ABUSE THE TOOL BY DROPPING OR USING IT AS A HAMMER.
KEEP DIRT AND FOREIGN MATTER OUT OF THE HYDRAULIC SYSTEMS OF THE TOOLS AS THIS WILL CAUSE THE TOOL AND
HYDRAPAC TO MALFUNCTION
4
Specifications
Intent of Use
The T40 Installation Tool is basically a Piston and Cylinder Assembly. When coupled Hydraulically and Electrically to a compatible
Hydraulic Power Source and the relevant Nose Assembly is attached, it is then used to install 1/2’’ to 3/4” Avdelok® and 5/8” Avbolt®
in industrial environments.
Refer to the table below for the list of applicable fasteners and associated nose equipment.
Refer to the datasheets listed in the table for the relevant nose assembly instructions.
FA S T E N E R
TYPE
N O S E A S S E M B LY
D ATA S H E E T
N O S E A S S E M B LY
SIZE
PART Nº
DIM. ‘A’
PART Nº
1/ ”
2
73412-03100
H AT REF.
N32
110mm
07900-00919
LD Avdelok ®
5/ ”
8
3/ ”
4
73412-03200
N31
113mm
07900-00919
73412-03300
N30
131mm
07900-00919
Avbolt ®
5/ ”
8
73412-03400
N37
113mm
07900-00905
To o l S p e c i f i c a t i o n
Length
250 mm
9.8 in
Body Diameter
76 mm
2.9 in
Height
190 mm
7.50 in
Weight
7 kg
15.5 lbs
Stroke
41 mm
1.6 in
Pull Force
175kN
39340lbf
Pull pressure
55.2 mPa
8000 PSI
Return Pressure
20.7 mPa
3000 PSI
Hydraulic Oil
ISO VG 46 OR EQUIVALENT
Fastener Range
1/ ’’ to 3/ ” Avdelok® and 5/ ” Avbolt®
2
4
8
Noise Level
126.2 dB(A)
Sound Power
100.9 dB(A)
Vibration
8.6 m/sec3
To o l D i m e n s i o n s
250 mm
190 mm
A
76 mm
5
Putting into Service
Principle of Operation
IMPORTANT
Read the safety rules on page 4 carefully
When both hoses and control cord are connected to the HydraPac, the pull and return cycles of the tool are controlled by depressing
and releasing the trigger switch located in the handle respectively.
When the switch is depressed the solenoid valve located in the HydraPac is energised and directs the pressurised oil flow to the pull
side of the piston in the tool. This also allows the oil in the return side of the tool to return to the tank. The piston/collet assembly now
moves towards the rear of the tool allowing the cushion to push the follower and jaws forward. If a Avdelok® pin has been inserted in
the nose for assembly, the jaw set will clamp onto the pintail and assembly will commence.
The cycle of installation will first clamp the joint to be fastened and then as the anvil continues to move forward the collar will be
swaged into the locking grooves of the pin. At the end of the swaging cycle the anvil will come hard up against the joint and as
movement continues the pintail will be broken off.
The trigger switch must be released immediately after pin break occurs. Releasing the trigger switch will cause the solenoid to deenergise and reverse the flow of pressurised oil.
Pressurised oil will now flow into the return side of the installation tool with the oil in the pull side returning to the tank.
The forward movement of the piston/collet assembly firstly ejects the installed fastener from the anvil and as the forward movement
continues, the jaw release mechanism will cause the jaws to open and release the broken off pintail, which will then be ejected.
When the piston returns to the fully forward position the pressure build up in the system will cause the Hydrapac to go into idle mode.
This keeps the installation tool in the forward position. Once the pintail has been ejected from the nose, the tool is ready for the next
installation.
Please note that with all electric HydraPacs there is a built in "Sleep Mode" which in effect means that the electric motor will
automatically switch off if the trigger switch is not operated for approximately 25 seconds. The HydraPac will automatically start up on
depression of the tool trigger switch. However the diesel HydraPac does not have a "Sleep Mode" and the diesel engine needs to be
switched off manually.
Preparation for Use
• Attach the correct nose assembly to the tool as per instructions in the relevant nose assembly data sheet.
• Ensure the HydraPac is not running.
• Connect hoses and the control cord to the HydraPac, the tool is supplied with a 0.7m hose length.
Additional hydraulic hose lengths are available to order separately as required. Refer to the table below for the available lengths and
associated part numbers.
• Start the HydraPac. Depress and release the trigger switch a few times to almost the full stroke of the tool to circulate hydraulic
fluid. Observe action of tool. Check for fluid leaks and ensure that in the idler mode the piston is in the fully forward position.
HYDRAULIC HOSE KITS
PART NUMBER
07005-10014
07005-10034
07005-10035
6
HOSE LENGTH
6 METRE
10 METRE
15 METRE
Putting into Service
Operating Instructions
To install a Avdelok® Fastener
• Check work and remove excessive gap. (Gap is the space between components of the Joint. Gap is excessive if not enough pintail
sticks through the collar for the nose assembly jaws to grab onto.)
• Put Avdelok® pin into hole.
• Slide Avdelok® collar over pin. (The bevelled end of the collar must be towards the nose assembly and tool.)
• Push nose assembly onto pin until the nose assembly anvil stops against the collar. Tool and nose assembly must be held at right
angles (90°) to the work.
• Depress tool trigger switch to start installation cycle.
• When the forward motion of the nose assembly anvil stops and the pintail breaks off, release the switch. The tool will go into its
return stroke and push off the installed fastener. At the end of the return stroke the jaws will release the expended pintail which can
be removed by tilting the tool down.
• Once the expended pintail has been ejected, the tool and nose assembly is ready for the next installation cycle.
CAUTION
DO NOT ATTEMPT TO BREAK OFF A PINTAIL WITHOUT THE INSTALLATION OF A COLLAR AS THIS WILL CAUSE THE
UNSECURED PORTION OF THE AVDELOK® PIN TO EJECT FROM THE NOSE AT A HIGH SPEED AND FORCE.
7
Maintenance
Dismantling Instructions
IMPORTANT
Be sure the HydraPac is turned off before removing tool or nose.
•
•
•
•
•
Uncouple the two Hydraulic Hoses 23 and disconnect Control Cord 26.
Unscrew and remove the anvil by hand.
Unscrew the collet and remove the inner assembly by hand.
Loosen Grub Screw 7 on Anvil Retainer 1 using a 4 mm Allen Key.
Unscrew Anvil Retainer 1.
• Loosen Grub Screw 7 on End Cap 19 using a 4 mm Allen Key.
• Unscrew End Cap 19.
•
•
•
•
•
•
Place a tray under the tool to catch the oil.
If a hand pump (73010-00001) is available, connect to female coupling and slowly pump Piston 10 out of Cylinder 13.
Otherwise clamp Piston 10 in a soft jawed vice and tap Cylinder 13 backwards with a soft mallet.
Remove Rear Gland 17 followed by removing Securing Ring 16.
When Securing Ring 16 is removed, tap Piston 10 forward until the piston is out.
Remove the Front Gland 4 from Piston 10.
• Remove Rear Piston 15 from Cylinder 13.
• Inspect and replace seals if necessary with Service Kit SK40.
A s s e m b l i n g t h e To o l
Examine and replace all worn parts. Fit new 'O' Rings and Back-up Rings (Service Kit SK40).
• Apply hydraulic oil to all 'O' rings, back-up rings and contact surfaces before fitting.
• Fit externally new ‘O' Ring 3 and Back-up Ring 2, fit internally new Back-up Ring 5 and ‘O’ Ring 6 to Front Gland 4.
• Fit internally new'O' Ring 18 to Rear Gland 17.
• Fit 'O' Ring 8 and Back-up Ring 9 to Piston 10.
• Fit externally new ‘O' Ring 8 and Back-up Ring 9, fit internally new Back-up Ring 5 and ‘O’ Ring 6 to Rear Piston 15.
• Fit internally new Back-up Rings 11 and ‘O’ Ring 12 into Cylinder 13.
• Install Piston 10 into Cylinder 13.
• Install Front Gland 4.
• Install Anvil Retainer 1.
• Re-clamp Grubscrew 7 using a 4 mm Allen Key.
• Insert Spring 14 onto rear of Piston 10.
• Install Rear Piston 15 followed by Securing Ring 16.
• Install Rear Gland 17.
• Refit End Cap 19.
• Re-clamp the Grubscrew 7 using a 4 mm Allen Key.
• Bleed the Tool.
Item numbers in bold refer to the general assembly drawing and parts list on pages 10-11.
8
Maintenance
To B l e e d t h e To o l
To Bleed the Tool:
• Couple the short tool hoses directly onto a HydraPac or compatible hydraulic power source.
Note:
Do not use long extension hoses as these will prevent the air from escaping into the HydraPac.
• Plug in a HydraPac Test Trigger.
• Position the tool so that the piston rod side faces vertically up.
• Cycle a few times.
• Reverse the vertical position and cycle again.
9
G e n e r a l A s s e m b l y f o r T 4 0 I n s t a l l a t i o n To o l
73414-02000
5
6
4
1
2
14
3
13
12*
11*
11*
20
10
19
7
8*
18*
9*
24
17
15
8*
5*
6*
16
7
9*
22
23
21
25
26
10
P a r t s L i s t f o r T 4 0 I n s t a l l a t i o n To o l
73414-02000
T40 INSTALLATION TOOL PARTS LIST
ITEM
PART Nº
1
2
3
4
5
T404
E222
R222
T403
E123
6
7
8
9
10
11
12
13
14
15
16
17
18
19
20
21
22
23
24
25
26
R123
GS11
R226
I226
T402
E219
R219
T401
T409
T405
T406
T407
R217
T408
NG059
MS19
CO84
HS02
HS01
C325
C106
DESCRIPTION
QTY SERVICE KIT
ANVIL RETAINER
BACK-UP RING
'O' RING
FRONT GLAND
BACK-UP RING
1
1
1
1
2
ëO ’ RING
GRUB SCREW
'O' RING
BACK-UP RING
PISTON
BACK-UP RING
'O' RING
CYLINDER
SPRING
REAR PISTON
SECURING RING
REAR GLAND
'O' RING
END CAP
90 HOSE ADAPTOR
TRIGGER SWITCH
HANDLE
HYDRAULIC HOSE
QUICK COUPLER SET
MALE PLUG
CONTROL CORD
2
2
2
2
1
2
1
1
1
1
1
1
1
1
1
1
1
2
1
1
1
*
*
*
*
*
*
*
*
*
*'O' Rings and Back-up Rings only supplied in Service Kit SK40.
11
S e r v i c i n g t h e To o l
Daily
•
Check for oil leaks.
•
Check the stroke of tool.
•
Check for worn anvil indicated by score marks on the installed collar. This can also be confirmed by referring to the installed data
in the fastener catalogue. Excessive wear can cause the anvil to rupture.
•
Check function of pull pressure safety valve.
We e k l y
•
Dismantle and clean the nose assembly especially the jaws.
•
Check for oil leaks.
Every 1200 working hours (at least once a year)
The tool should be completely dismantled and worn components replaced including 'O' rings and back-up rings.
S e r v i c e To o l s
•
Open Ended Flat Spanners - 17, 19, 24 mm
•
Allen Keys - 4 mm, 6 mm
Hydraulic Oil General Safety Data
First Aid
SKIN:
Under normal conditions skin irritation will not occur, contaminated skin should however be washed thoroughly with soap and water.
Launder contaminated clothing.
ORAL:
If swallowed and person is conscious give water or milk. Do not induce vomiting unless on advice of medical personnel. Take person
to nearest medical centre.
EYES:
Flush immediately with water for several minutes
DISPOSAL:
Remove all spills with inert absorbent material. Ventilate spill area. Place contaminated materials in a disposable container and
dispose in a manner consistent with local regulations.
Fire
FLASH POINT: 200°C.
Extinguish with either dry chemical, foam or carbon dioxide. Do not enter confined space without self contained breathing apparatus.
Handling
Use barrier cream or oil resistant gloves.
Storage
Undercover and consistent with local regulations for inflammable material.
12
Fault Diagnosis
Symptom
Tool fails to operate
Possible Cause
Remedy
Inoperative HydraPac
Check power supply to HydraPac
Loose or disconnected control cord
Check for loose or broken wires
Defective switch assembly
Replace switch assembly
Faulty hydraulic hose couplings
Replace faulty couplings
Tool leaks hydraulic
Depending on what leaks occur,
Check and replace 'O' rings
oil
defective or worn 'O' rings, loose
and back-up rings, or
hydraulic hose connections at tool
tighten hydraulic hose
Restriction in hydraulic line
Check couplings and replace
Hydraulic oil
overheats
Page Ref
if necessary
1
Tool operates
Low or erratic hydraulic
See HydraPac instruction
erratically and fails
pressure supply
manual
to install fastener
Defective or excessively worn
Replace 'O' ring and back-up
piston, 'O' ring and back-up rings
rings
properly
and back-up rings in tool
Excessive wear or scoring of
Check and replace defective
sliding surface of tool parts
parts
2
Pull grooves on
Operator not pushing nose
Instruct operator in proper
fastener pintail
completely onto fastener pintail
installation methods
stripped during pull
before operating tool
stroke
Incorrect fastener length
Use correct length fastener
Worn or damaged jaw segments
Check and replace jaw set
Metal chips accumulated in pull
Clean jaw segments
grooves of jaw segments
Excessive sheet gap
Eliminate excessive gap
Collar of Hydraloc
Improper tool operation
See 2
fastener not
Worn anvil in nose
Check and replace anvil
Tool "hang up" on
Improper tool operation
See 1
swaged collar
Hydrapac in idler mode
completely swaged
Switch HydraPac off and
on and restart by
depressing trigger switch
Pintail of fastener
Pull grooves on fastener stripped
fails to break
Improper tool operation
See 2
Instruct operator in correct
tool operation
continued overleaf
13
Fault Diagnosis
Symptom
Possible Cause
Remedy
Jaw segments do not Improper operation of jaw
Check internal parts of the
maintain proper
collet for wear i.e. jaws,
follower
position in collet
follower, cushion and end cap.
Clean before reassembling
14
Hydraulic couplers
Defective or worn 'O' ring in
leak oil
coupler body
Pintail fails to release
Incorrect assembly of Nose
Replace 'O' ring and back-up ring
Refer to nose assembly table on page 5
Page Ref
Declaration of Conformity
We, Avdel UK Limited, Watchmead Industrial Estate, Welwyn Garden City, Herts, AL7 1LY
declare under our sole responsibility that the product:
Model: 73414-02000
Serial No.
................................................
to which this declaration relates is in conformity with the following standards:
EN ISO 12100 - parts 1 & 2
BS EN ISO 8662 - part 6
BS EN ISO 11202
BS EN ISO 3744
BS EN 982
ISO EN 792 part 13 - 2000
BS EN 983
following the provisions of the Machine Directive 2006/42/EC
A. Seewraj - Product Engineering Manager - Automation Tools
Date of issue
This box contains a power tool which is in
conformity with Machines Directive
2006/42/EC. The ‘Declaration of Conformity’
is contained within.
15
Since 1922
Since 1 936
2010
AUSTRALIA
Infastech (Australia) Pty Ltd.
891 Wellington Road
Rowville
Victoria 3178
Tel:
+61 3 9765 6400
Fax: +61 3 9765 6445
[email protected]
GERMANY
Avdel Deutschland GmbH
Klusriede 24
30851 Langenhagen
Tel:
+49 (0) 511 7288 0
Fax: +49 (0) 511 7288 133
[email protected]
INDIA
Infastech Fastening Technologies
India Private Limited
Plot No OZ-14, Hi Tech SEZ,
SIPCOT Industrial Growth Center,
Oragadam, Sriperumbudur Taluk,
Kanchipuram District,
602105 Tamilnadu
Tel:
+91 44 4711 8001
Fax: +91 44 4711 8009
[email protected]
CANADA
Avdel Canada Limited
1030 Lorimar Drive
Mississauga
Ontario L5S 1R8
Tel:
+1 905 364 0664
Fax: +1 905 364 0678
[email protected]
CHINA
Infastech (China) Ltd.
RM 1708, 17/F., Nanyang Plaza,
57 Hung To Rd., Kwun Tong
Hong Kong
Tel:
+852 2950 0631
Fax: +852 2950 0022
[email protected]
ITALY
Avdel Italia S.r.l.
Viale Lombardia 51/53
20047 Brugherio (MI)
Tel:
+39 039 289911
Fax: +39 039 2873079
[email protected]
FRANCE
Avdel France S.A.S.
33 bis, rue des Ardennes
BP4
75921 Paris Cedex 19
Tel:
+33 (0) 1 4040 8000
Fax: +33 (0) 1 4208 2450
[email protected]
Manual No.
07900-00909
JAPAN
Infastech Kabushiki Kaisha
Center Minami SKY,
3-1 Chigasaki-Chuo, Tsuzuki-ku,
Yokohama-city,
Kanagawa Prefecture
Japan 224-0032
Tel:
+81 45 947 1200
Fax: +81 45 947 1205
[email protected]
Issue
Change Note No.
MALAYSIA
Infastech (Malaysia) Sdn Bhd
Lot 63, Persiaran Bunga Tanjung 1,
Senawang Industrial Park
70400 Seremban
Negeri Sembilan
+606 676 7168
Tel:
Fax: +606 676 7101
[email protected]
TAIWAN
Infastech/Tri-Star Limited
No 269-7, Baodong Rd,
Guanmiao Township,
71841 Tainan County,
Taiwan, R.O.C
+886 6 596 5798 (ext 201)
Tel:
Fax: +886 6 596 5758
[email protected]
SINGAPORE
Infastech (Singapore) Pte Ltd.
31 Kaki Bukit Road 3
#05-03/06 Techlink
Singapore, 417818
Tel:
+65 6372 5653
Fax: +65 6744 5643
[email protected]
UNITED KINGDOM
Avdel UK Limited
Pacific House
2 Swiftfields
Watchmead Industrial Estate
Welwyn Garden City
Hertfordshire AL7 1LY
Tel:
+44 (0) 1707 292000
Fax: +44 (0) 1707 292199
[email protected]
SOUTH KOREA
Infastech (Korea) Ltd.
212-4, Suyang-Ri,
Silchon-Eup, Kwangju-City,
Kyunggi-Do, Korea, 464-874
Tel:
+82 31 798 6340
Fax: +82 31 798 6342
[email protected]
USA
Avdel USA LLC
614 NC Highway 200 South
Stanfield, North Carolina 28163
Tel:
+1 704 888 7100
Fax: +1 704 888 0258
[email protected]
SPAIN
Avdel Spain S.A.
C/ Puerto de la Morcuera, 14
Poligono Industrial Prado Overa
Ctra. de Toledo, km 7,8
28919 Leganés (Madrid)
Tel:
+34 91 3416767
Fax: +34 91 3416740
[email protected]
Date
A
08/083
05/08
B
08/131
06/08
B2
11/061
03/11
Autosert® (equipment), Avbolt ®, Avdel®, Avdelmate ®, Avdel TX2000®, Avdelok®, Avex®, Avibulb ®, Avinox®, Avinut™, Avlug®, Avmatic®, Avplas®,
Avseal ®, Avsert®, Avtainer ®, Avtronic®, Briv®, Bulbex®, Chobert®, Eurosert®, Fastriv®, Finsert®, Genesis®, Grovit®, Hemlok®, Hexsert®, Holding
your world together®, Hydra®, Interlock®, Klamp-Tite ®, Klamptite KTR ®, Kvex®, Maxlok ®, Monobolt ®, Monobulb ®, Neobolt®, Nutsert®, Nutsert
SQ®, Portariv®, Rivmatic ®, Rivscrew®, Speed Fastening®, Squaresert®, Stavex®, Supersert®, Thin Sheet Nutsert ®, Titan®, T-Lok®, TLR®, TSN®,
TX2000®, Versa-Nut ®, Viking® and Viking 360 ® are trademarks of Avdel UK Limited. Infastech™ and Our Technology, Your Success™ are
trademarks of Infastech Intellectual Properties Pte Ltd. The names and logos of other companies mentioned herein may be trademarks
of their respective owners. This document is for informational purposes only. Infastech makes no warranties, expressed or implied, in this
document. Data shown is subject to change without prior notice as a result of continuous product development and improvement policy.
Your local Avdel representative is at your disposal should you need to confirm latest information.
02.2011 • © 2010 Infastech
www.avdel-global.com
www.infastech.com